

Page 1
UN60ES7500FXZA Fast Track Troubleshooting Manual Rev – 6/6/12
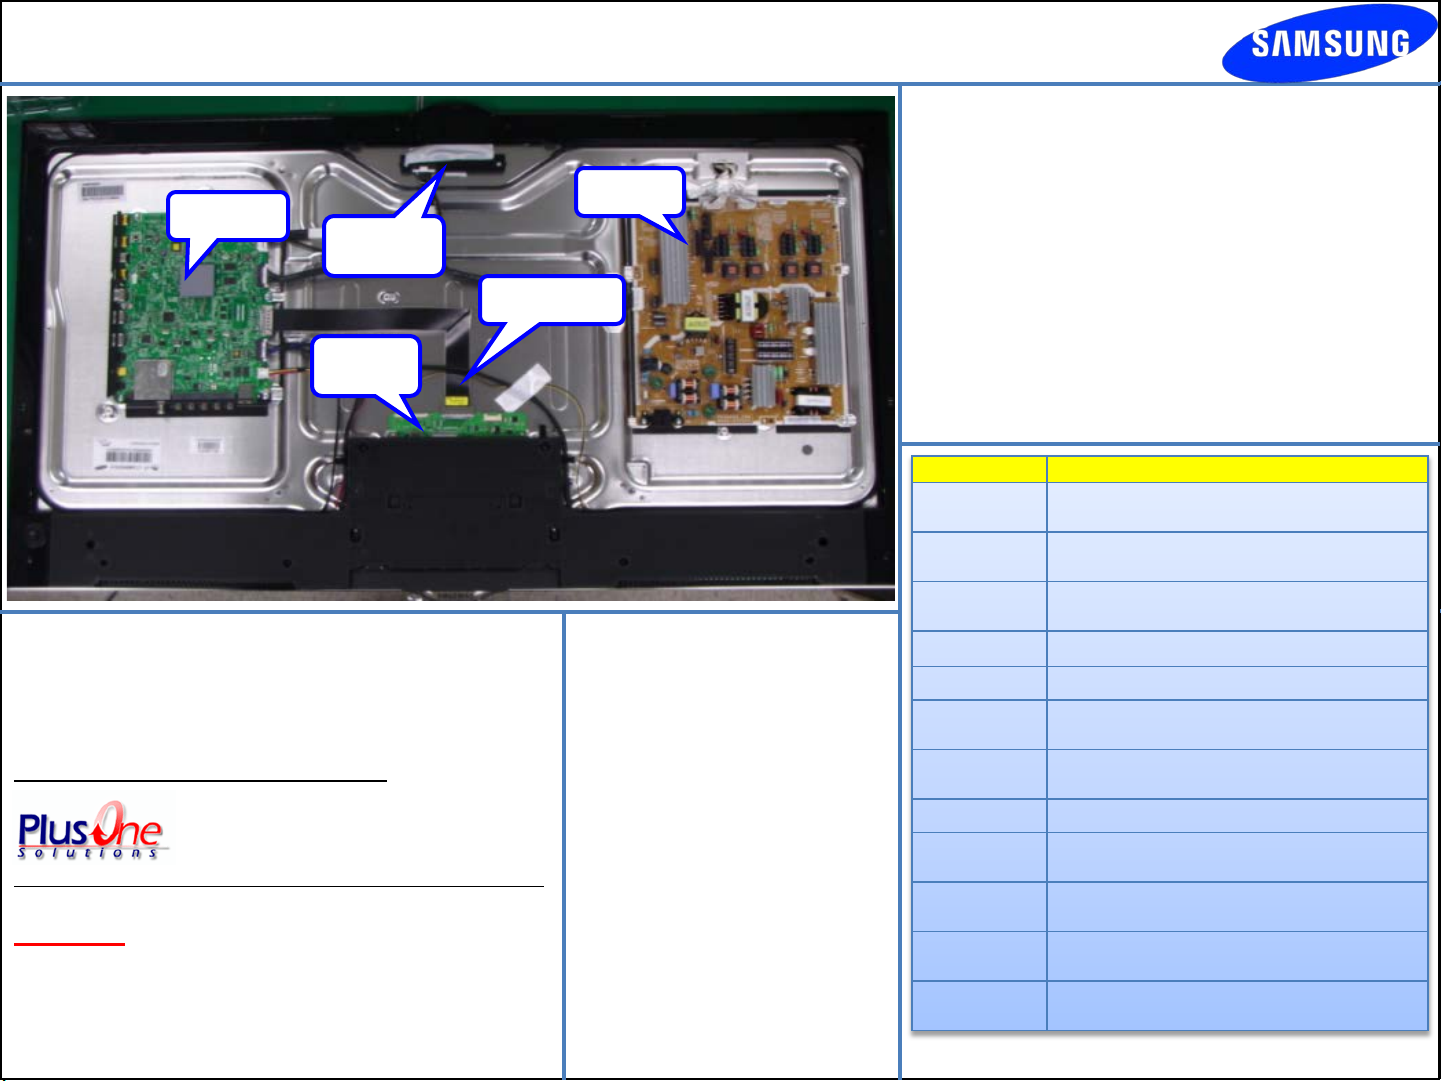
Part No.
BN44
BN59
BN81
BN94
BN95
BN95
BN96
BN96
BN96
BN96
BN96
BN96
Main PCB
MoiP(IR)
LVDS Cable
T-CON
Board
Support Information
HELP: (888)751-4086 (Tech Support)
GSPN
http://gspn3.samsungcsportal.com/
http://my.plus1solutions.net/clientPortals/samsung
HOT TIPS
Power On Problems: (see page 2)
Video Problems: (see page 3)
SMPS
FIRMWARE
5/25/2012
(1018.2)
Description:
-Supports Samsung wireless
Audio Dock
-Enhances Voice Recognition
feature
-Change the TV Power On
command from ''Hi TV'' to ''Hi
TV Power On'' or ''Smart TV'' to
''Smart TV Power On.‘’
Service Bu lletins
ASC20120402001
SUBJECT: Issue with the Wake on Voice (WoV)
Command for 2012 Smart Interaction TVs.
SYMPTOM: TV turns on by itself or doesn’t turn on
by voice command.
REPAIR: Please check the firmware version. If the
version is lower than 1012.0, have the customer
upgrade to version 1012.0 or higher.
-00526A
-01148C
-07135A
-05566E ASSY PCB MAIN;UE7X,E7000
-00630A ASSY T CON;217*150*1.2T,SHARP 240HZ
-00633A
-17116T
-18153A ASSY HOLDER P-RING;11 LED-TV
-21431B
-22665A
-22726A
-22876A
Description
DC VSS-LED TV PD
BD;PD60B2Q_CSM,PSLF161Q
NETWORK;WIDT-20R,INTERNAL
WIFI,USB,34X36
A/S-CAMERA & IR;12Y LED 7K,W/O BOARD PC
PRODUCT LCD;3D,7K, LE600DSSV1,1920*1080
ASSY CABLE P-FFC;UD7K~8K
60",FFC,449MM,5
ASSY BOARD P-RF-MODULE;BLUETOOTH
MODULE,
ASSY MISC P-CAMERA MODULE;KITE-LED
7000,
ASSY BOARD P-5WAY SWITCH
FUNCTION;E7000/
ASSY BLU P;UN46ES7000FXZA,M128000,WHITE
Page 2

UN60ES7500FXZA Fast Track Troubleshooting Manual Rev – 6/6/12
CN201
Power-Up Sequence (CN201):
1. Standby Voltage: Pin 4 (5Vdc)
2. Power-ON: Pin 2 (Low-Hi voltage transition)
3. Low Voltages: Pin 1, 3, 7, 9, 11, 12, 13
4. Backlight On: Pin 10 (5Vdc)
Forced Backlight-On Mode:
1. Disconnect Power Cord
2. Disconnect wire harness from CN201
3. Re-Connect Power Cord
4. LED Backlight should immediately turn on
NOTE: If LED backlight fails to come on, pl ace a jumper
wire between Pin 2 and Pin 4 and try again
Page 3

UN60ES7500FXZA Fast Track Troubleshooting Manual Rev – 6/6/12
TROUBLESHOOTING VIDEO PROBLEMS
1. V erify Video Operation
a) Customer Picture Test (models available)
b) “On Screen Display” (If OSD ok, source is
suspected)
c) Substitute w i th known good Source (external DVD
or Signal Generator)
2. Use Test Patterns in Service Mode
a) Select an active source signal (HDMI preferred).
Test Pattern may rely on signal source to appear.
b) Using customer remote: Mute+1+8+2+Power
c) Using factory remote: Info+Test
ON SCREEN FAILURE EXAMPLES:
If Picture & Display errors, its likely a defective
Main Board, LVDS, or T-CON
Main Board Patterns Test
Select: EchoP Pattern Sel
T-CON Patterns Test
Select: T-CON Test Pattern
2011 LED TV Test Patterns
Green lines or a green screen likely caused
by a defective main board, LVDS, or T-CON
Vertical or Horizontal Lines are likely a
defective panel, but also T-CON, LVDS, or
Main Board. Use Test Patterns in Factory
Service Mode to determine error location
Pixelization can be caused by the
main board, but is more
commonly a source error
1. Select an active source signal (HDMI preferred).
Test Pattern may rely on signal source to appear.
2. Access Service Mode
3. Access SVC
4. Access Test Patterns
5. Access Echo-P (located on Main PCB)
6. Check Test Patterns
7. If OK, suspect input Source
8. Access SOC T-CON (located on T-CON Board)
9. Check Test Patterns
10. If OK and Echo-P was not good, suspect Main
Board or LVDS Cable
3
Page 4

UN560ES7500FXZA Fast Track Troubleshooting Manual Rev – 6/6/12
ALIGNMENTS:
1. Check/Set Opti on Bytes
2. Check/Perfor m Firmwar e upgrade for all
repairs
3. Perform r es et i n Serv i ce M ode
4. Inform cus tomer all settings w i l l reset if
Main PCB is replaced
To enter Factory Mode:
Software Upgrade:
Software Upgrade can be performed by network connection or downloading the latest firmware
from “www.samsung.com” to a USB memory device.
- By USB
Insert a USB drive containing the firmware upgrade file. DO NOT disconnect the power or
remove the USB drive until upgrades are complete. The TV will be turned off and on
automatically after completing the firmware upgrade. When software is upgraded, video and
audio settings you have made will return to their default settings.
NOTE: The displayed menu may differ depending on the model.
- By Online
Upgrades the software using the Internet.
First, configure your network. If The internet connection doesn’t operate properly, connection
can be broken, please retry downloading. If the problem still happens, download by USB and
upgrade.
- Standby mode upgrade(Off/On)
A manual upgrade will be automatically performed at selected time. Since the power of the unit
is turned on internally, the screen may be turned on slightly for the LED product. This
phenomenon may continue for more than 1 hour until the software upgrade is complete.
Testing Bluetooth Operation (3D glasses and Smart Remote):
Bluetooth communication will automatically activate when the TV is turned on. To test,
use a cell phone with Bluetooth capabilities, and “SCAN for devices”. If Bluetooth
communication is working properly, “DTVBluetooth” will appear on the phone. If not,
suspect Main PCB, or Bluetooth module is defective.
Option Bytes
Message on Cell Phone
4
Page 5

UN60ES7500FXZA Fast Track Troubleshooting Manual Rev – 6/6/12
Camera/Microphone Troubleshooting
1. Enter Test Mode:
- TV Power On
- Using Standard
Remote Control
- Press:
Mute+5+6+9+Exit
2. Speak into (Left) Mic
Verify its OK with sound
from speakers
3. Press Enter
4. Speak into (Right) Mic
Verify its OK with sound
from speakers.
5. Press Exit
“Preview Test OK” only
Indicates test completed.
Not that no error exists
Camera & Left Mic
Activated
Camera & Right Mic
Activated
 Loading...