

Samsung Electronics
11. Operating Instructions
11-1 Name of Each Part
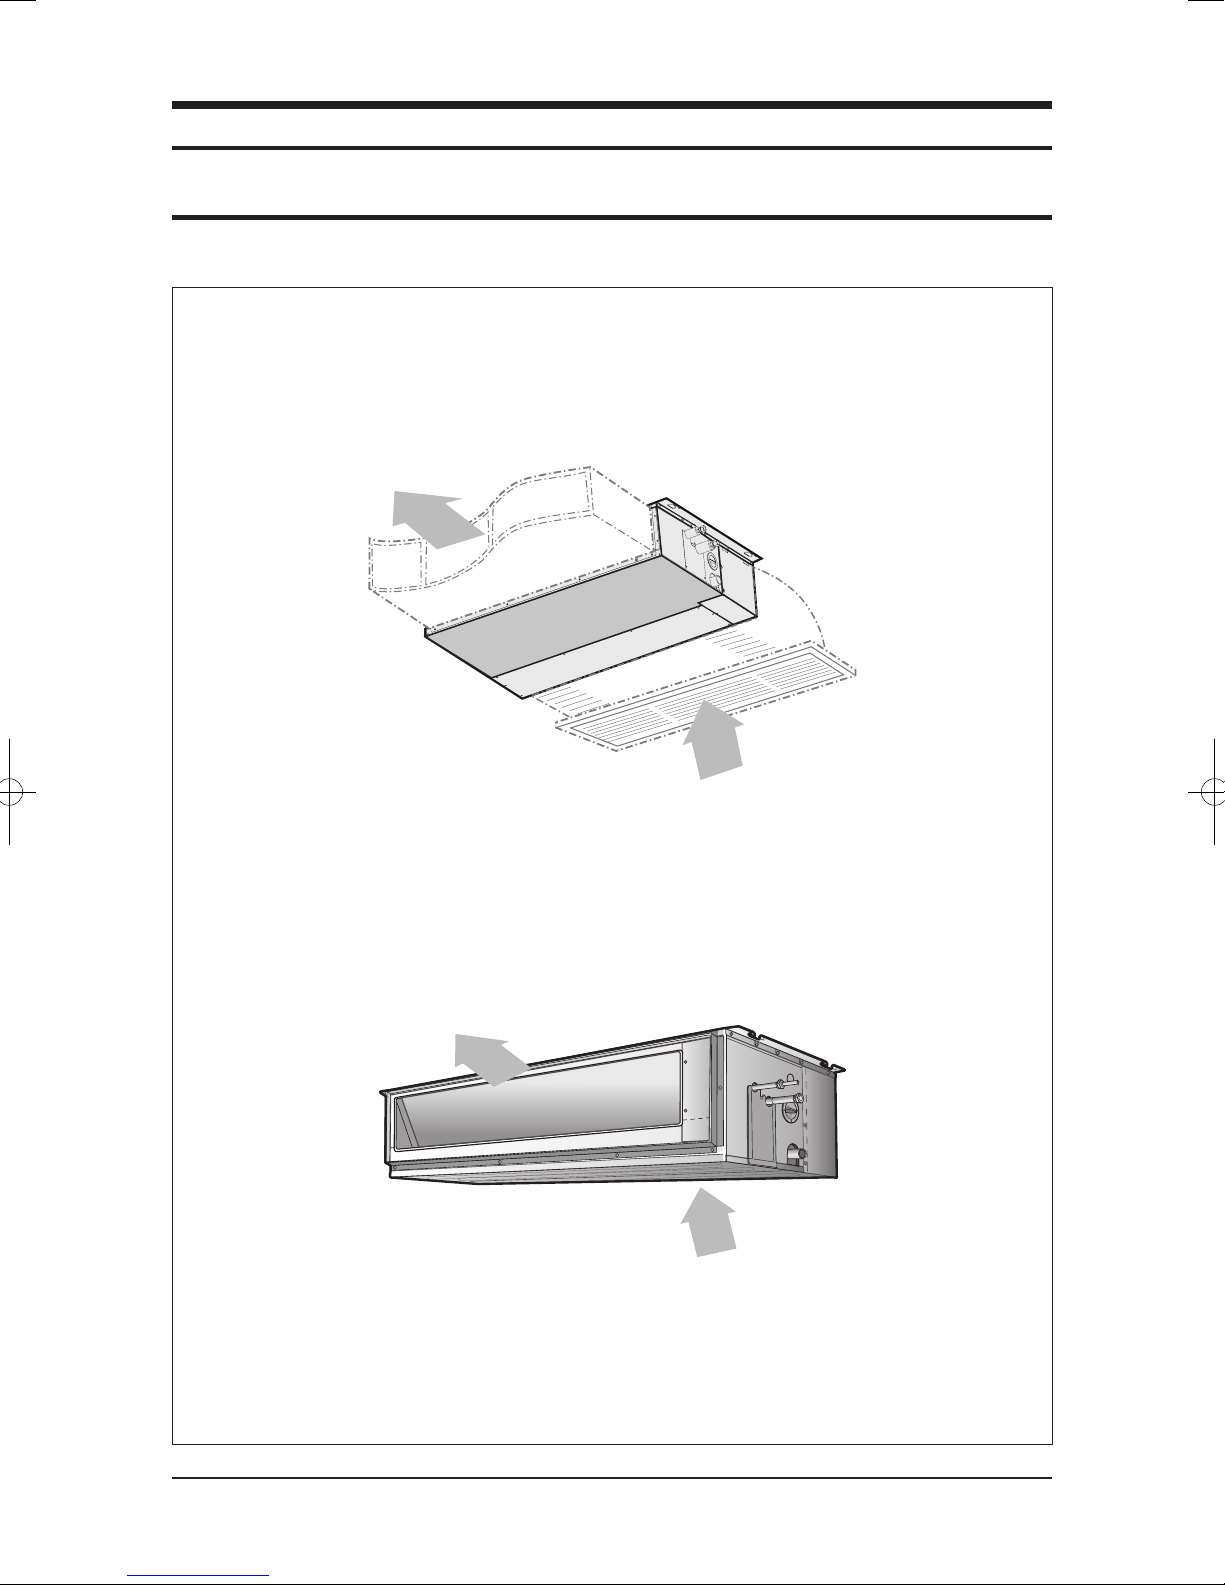
11-1-1 Indoor Unit
The figures are shwon in this instruction may differ from yours depending on the model.
■ EH035EAV
■ EH052EAV/EH070EAV
Air
Inlet
Air
outlet
Air
Inlet
Air
outlet
11-1
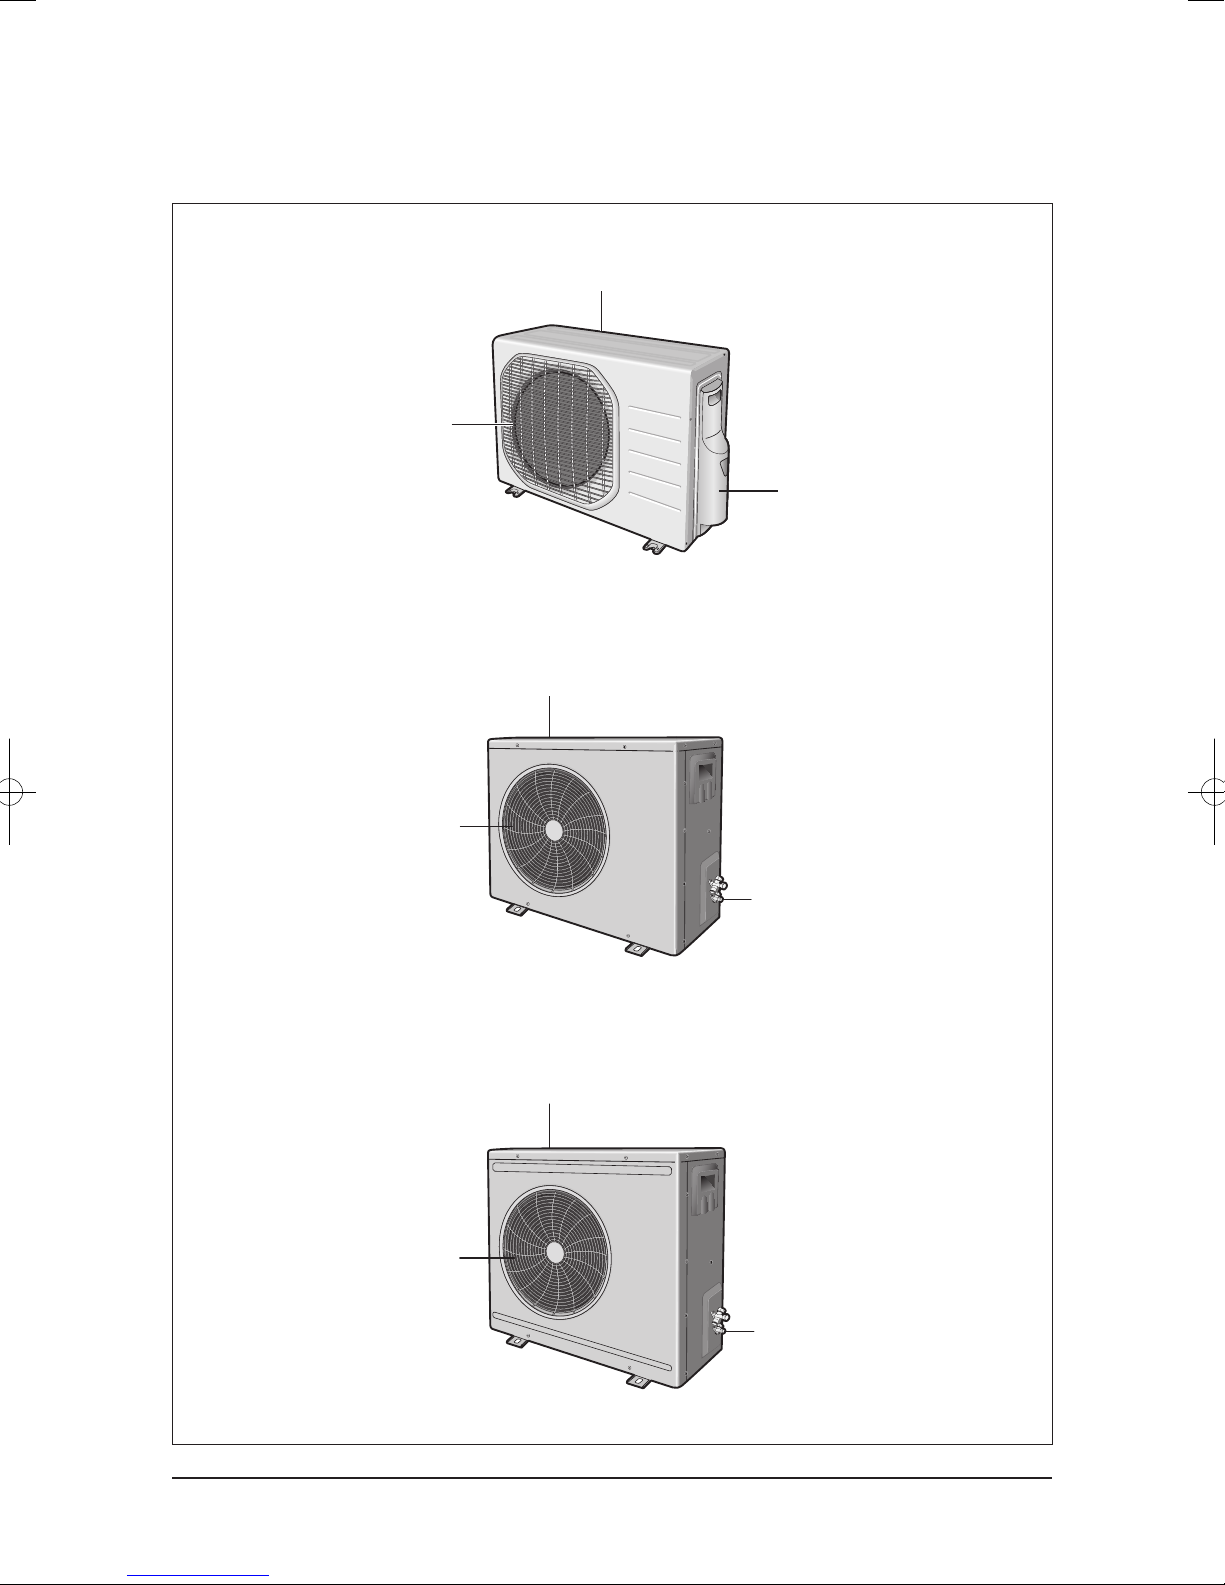
11-1-2 Outdoor Unit
■ UH035EAV
■ UH052EAV
Air Outlet
Air Inlet(Rear)
Connection Valve
(inside)
Air Outlet
Air Inlet(Rear)
Connection Valve
Air Outlet
Air Inlet(Rear)
Connection Valve
■ UH070EAV
11-2
Operating Instructions
Samsung Electronics

Samsung Electronics
11-2 Main Function
11-2-1 Basic Function
Mode Explanation Remark
Selecting the
Automatic
Operating Mode
1. If necessary, press (On/Off) button.
2. To select the AUTO mode, press the button until is
displayed at the top of the wireless remote controller.
3. To adjust the temperature, press the buttons one or
more times until the required temperature is displayed.
Possible temperatures are between 18˚C and 30˚C inclusive.
Cooling Your Room
1. If necessary, press (On/Off) button.
2. To select the COOL mode, press the button until
is displayed at the top of the wireless remote controller.
3. To adjust the temperature, press the buttons one or more
times until the required temperature is displayed.
Possible temperatures are between 18˚C and 30˚C inclusive.
11-3

Mode Explanation Remark
4. Select the fan speed by pressing the button one or
more times until the intended value is displayed :
Heating Your Room
(Except cooling only models)
1. If necessary, press (On/Off) button.
2. To select the HEAT mode, press the button until
is displayed at the top of the wireless remote controller.
3. To adjust the temperature, press the buttons
one or more times until the required temperature is displayed.
Possible temperatures are between 16˚C and 30˚C inclusive.
4. Select the fan speed by pressing the button one or
more times until the intended value is displayed :
Basic Function(cont.)
Automatic(rotated : ➔ ➔ )
Low
Medium
High
Automatic(rotated : ➔ ➔ )
Low
Medium
High
Operating Instructions
Samsung Electronics 11-4

Samsung Electronics
Mode Explanation Remark
Removing Excess
Humidity
1. If necessary, press (On/Off) button.
2. To select the DRY mode, press the button until
is displayed at the top of the wireless remote controller.
3. To adjust the temperature, press the buttons one or
more times until the required temperature is displayed.
Possible temperatures are between 18˚C and 30˚C inclusive.
Airing Room
1. If necessary, press (On/Off) button.
2. To select the FAN mode, press the button until
is displayed at the top of the wireless remote controller.
3. Select the fan speed by pressing the button one or
more times until the intended value is displayed:
Low
Medium
High
Operating Instructions
Basic Function(cont.)
11-5

Samsung Electronics
11-2-2 Wired Remote Controller
Mode Explanation Remark
Selecting the
Automatic
Operating Mode
1. If necessary, press (ON/OFF) button.
2. To select the AUTO mode, press the button until
is displayed at the top of the wired remote controller.
3. To adjust the temperature, press the buttons one
or more times until the required temperature is displayed.
Possible temperatures are between 18˚C and 30˚C inclusive.
Cooling Your Room
1. If necessary, press (ON/OFF) button.
2. To select the COOL mode, press the button until
is displayed at the top of the wired remote controller.
3. To adjust the temperature, press the buttons one
or more times until the required temperature is displayed.
Possible temperatures are between 18˚C and 30˚C inclusive.
Operating Instructions
11-6

Samsung Electronics
Mode Explanation Remark
Cooling Your Room
4. Select the fan speed by pressing the button one or
more times until the intended value is displayed :
Heating Your Room
(Except cooling only models)
1. If necessary, press (On/Off) button.
2. To select the HEAT mode, press the button until
is displayed at the top of the wireless remote controller.
3. To adjust the temperature, press the buttons
one or more times until the required temperature is displayed.
Possible temperatures are between 16˚C and 30˚C inclusive.
4. Select the fan speed by pressing the button one or
more times until the intended value is displayed :
Automatic(rotated : ➔ ➔ )
Low
Medium
High
Automatic(rotated : ➔ ➔ )
Low
Medium
High
Operating Instructions
11-7

Samsung Electronics
Mode Explanation Remark
Removing Excess
Humidity
1. If necessary, press (ON/OFF) button.
2. To select the DRY mode, press the button until
is displayed at the top of the wired remote controller.
3. To adjust the temperature, press the buttons one
or more times until the required temperature is displayed.
Possible temperatures are between 18˚C and 30˚C inclusive.
Airing Your Room
1. If necessary, press (ON/OFF) button.
2. To select the FAN mode, press the button until
is displayed at the top of the wired remote controller.
3. Select the fan speed by pressing the button one or more times
until the intended value is displayed:
Low
Medium
High
Operating Instructions
11-8

Samsung Electronics
Operating mode
Mode selection button
Filter Reset button
Swing button
On Timer button
Off Timer button
On/Off & Timer Set/
Cancel button
Fan speed adjustment
button
Temperature adjustment
buttons
Temperature setting
Fan speed
Air flow direction
On Timer setting
Off Timer setting
Battery discharge indicator
11-3 Wireless Remote Control-Buttons and Display
Note : • After cleaning the air filter, press the button.
11-9

Operating Instructions and Installation
Samsung Electronics
11-4 Wired Remote Controller-Buttons and Display
Mode selection button
Communication error indicator
On Timer setting
Off Timer setting
Test indicator
Timer button
Timer
Set/Cancel button
Test button
Filter Reset button
Temperature adjustment buttons
Removing frost indicator
Temperature setting
Fan speed
Air flow direction
Filter Sign indicator
On/Off button
Fan speed adjustment button
Swing button(Except Duct type)
On/Off indicator
Operating mode
Centralized controller indicator
(In case of installing the Centralized controller)
Note : • The button is for your installation specialist. You must not press it.
• After cleaning the air filter, press the button. Then the wired remote controller will display the
Filter Sign indicator when the time to clean the air filter.
11-10
 Loading...