


E-MANUAL
imagine the possibilities
Thank you for purchasing this Samsung product.
To receive more complete service, please register
your product at
www.samsung.com/register
Model _____________ Serial No. _____________

Contents
Channel Menu
•
Using the INFO button (Now & Next guide) 1
• Using Channel menu (Watch TV) 2
• Schedule Manager 5
• Channel List 7
• Channel Manager 11
• Retuning Channels 17
Basic Features
•
Picture Menu 23
• Sound Menu 40
Preference Features
• Network Menu
• System Menu 80
• Support Menu 98
Advanced Features
• My Downloads
• Anynet+ 132
• AllShare™
for LED 5 series 32-46 inches
105
for LED 5 series 32-46 inches
146
52
Other Information
•
Analogue Channel Teletext Feature 150
• Anti-theft Kensington Lock 154
• Troubleshooting 156
• Licence 174
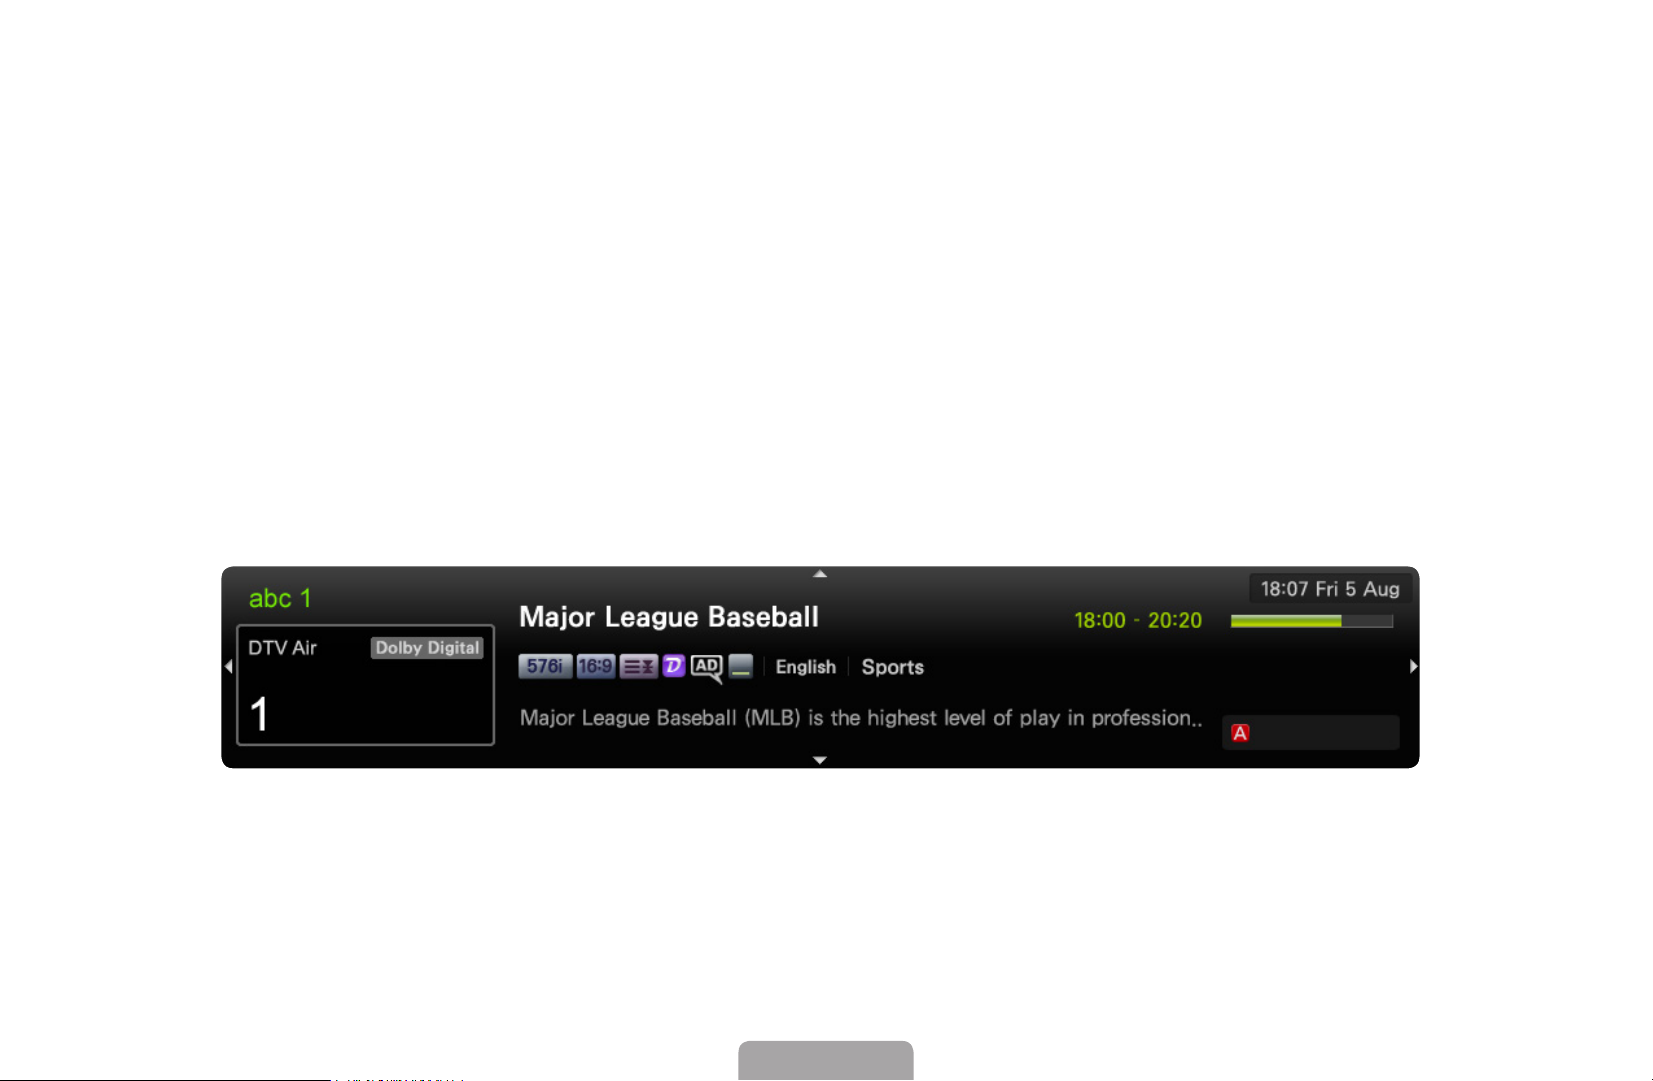
❑❑ Using❑the❑INFO❑button❑(Now❑&❑Next❑guide)
The display identifies the current channel and the status of certain audio-video
settings.
The Now & Next guide shows daily TV programme information for each channel
according to the broadcasting time.
●
Scroll ◄, ► to view information for a desired programme while watching the
current channel.
●
Scroll ▲, ▼ to view information for other channels. If you want to move to the
currently selected channel, press the ENTER
All
It may differ depending on the model.
*
English
button.
▶
Information
◀
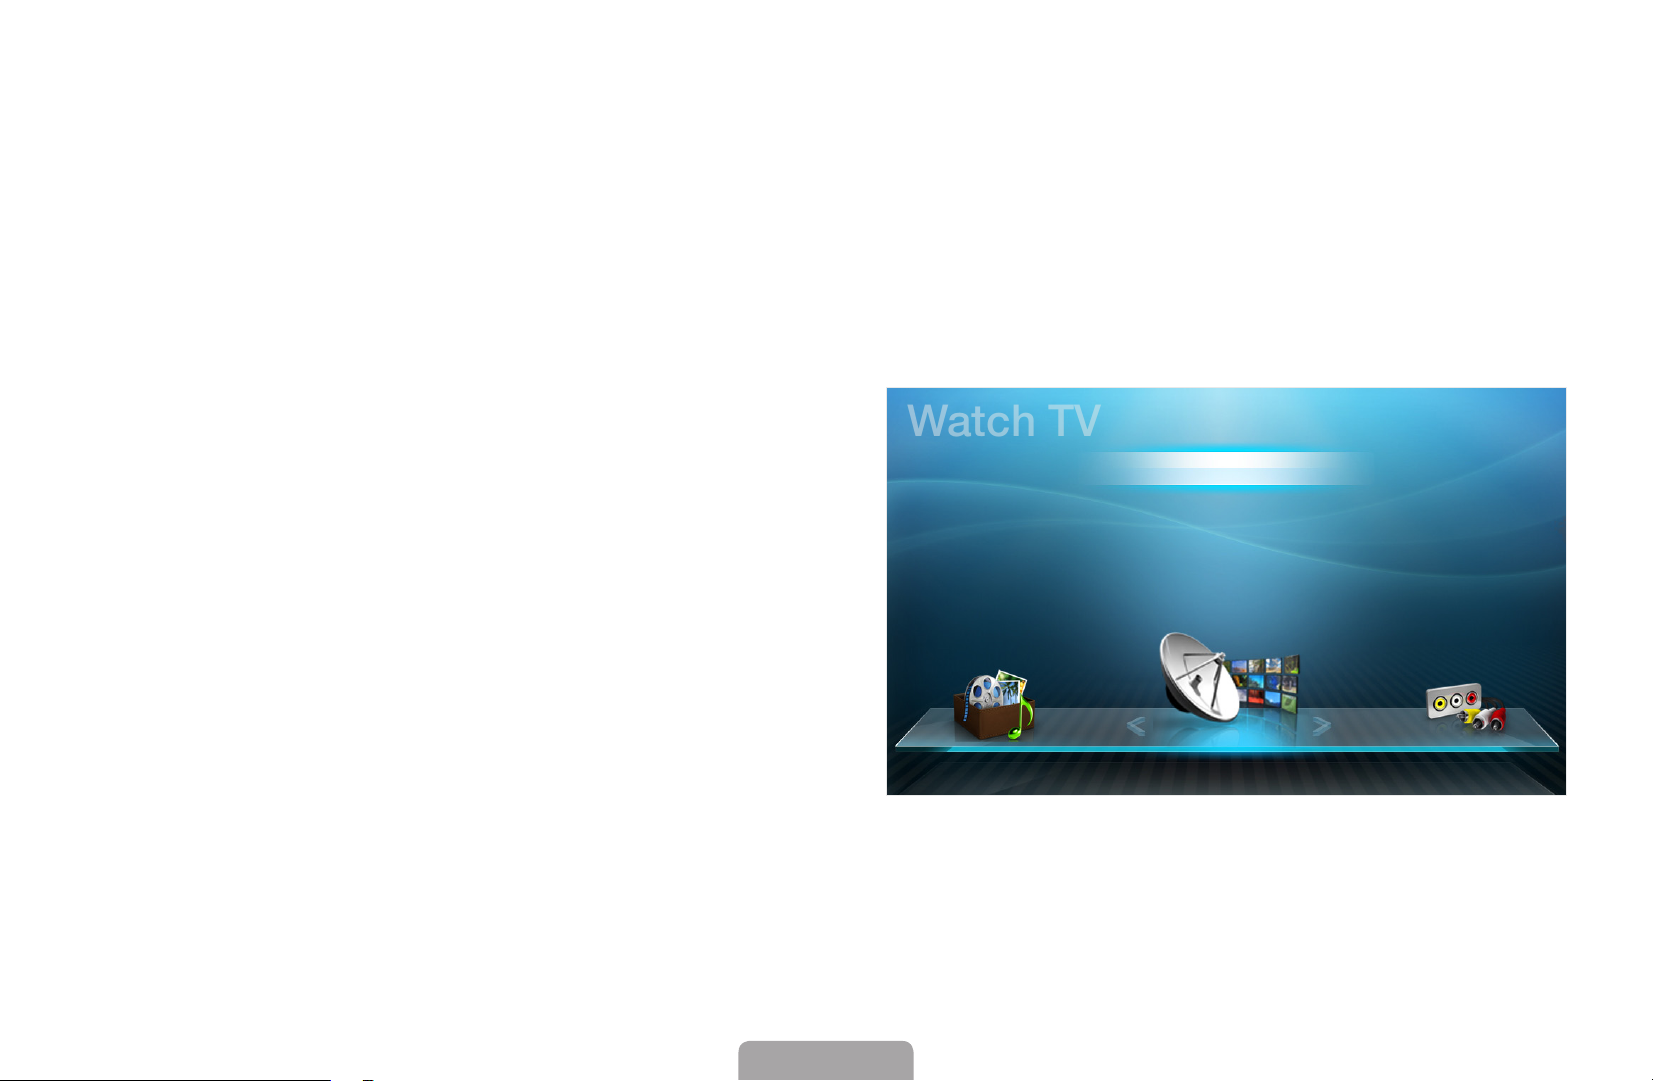
❑❑ Using❑Channel❑menu❑(Watch❑TV)❑
Watch TV
English
O
MENU
❑
❑
❑Support❑
→
❑Contents❑Home❑
→
❑ENTER
→
Press the CONTENT button to select Watch❑TV, then select the desired menu.
Each screen will be displayed.
❑■Guide
The EPG (Electronic Programme
Guide) information is provided by
broadcasters. Using programme
◀ ▶
schedules provided by broadcasters,
you can specify programmes you want
to watch in advance so that the channel
My❑Downloads
automatically changes to the selected
Guide
Schedule❑Manager
Channel❑List
Channel❑Manager
Source
programme channel at the specified
time. Programme entries may appear
blank or out of date depending on a channel status.
English
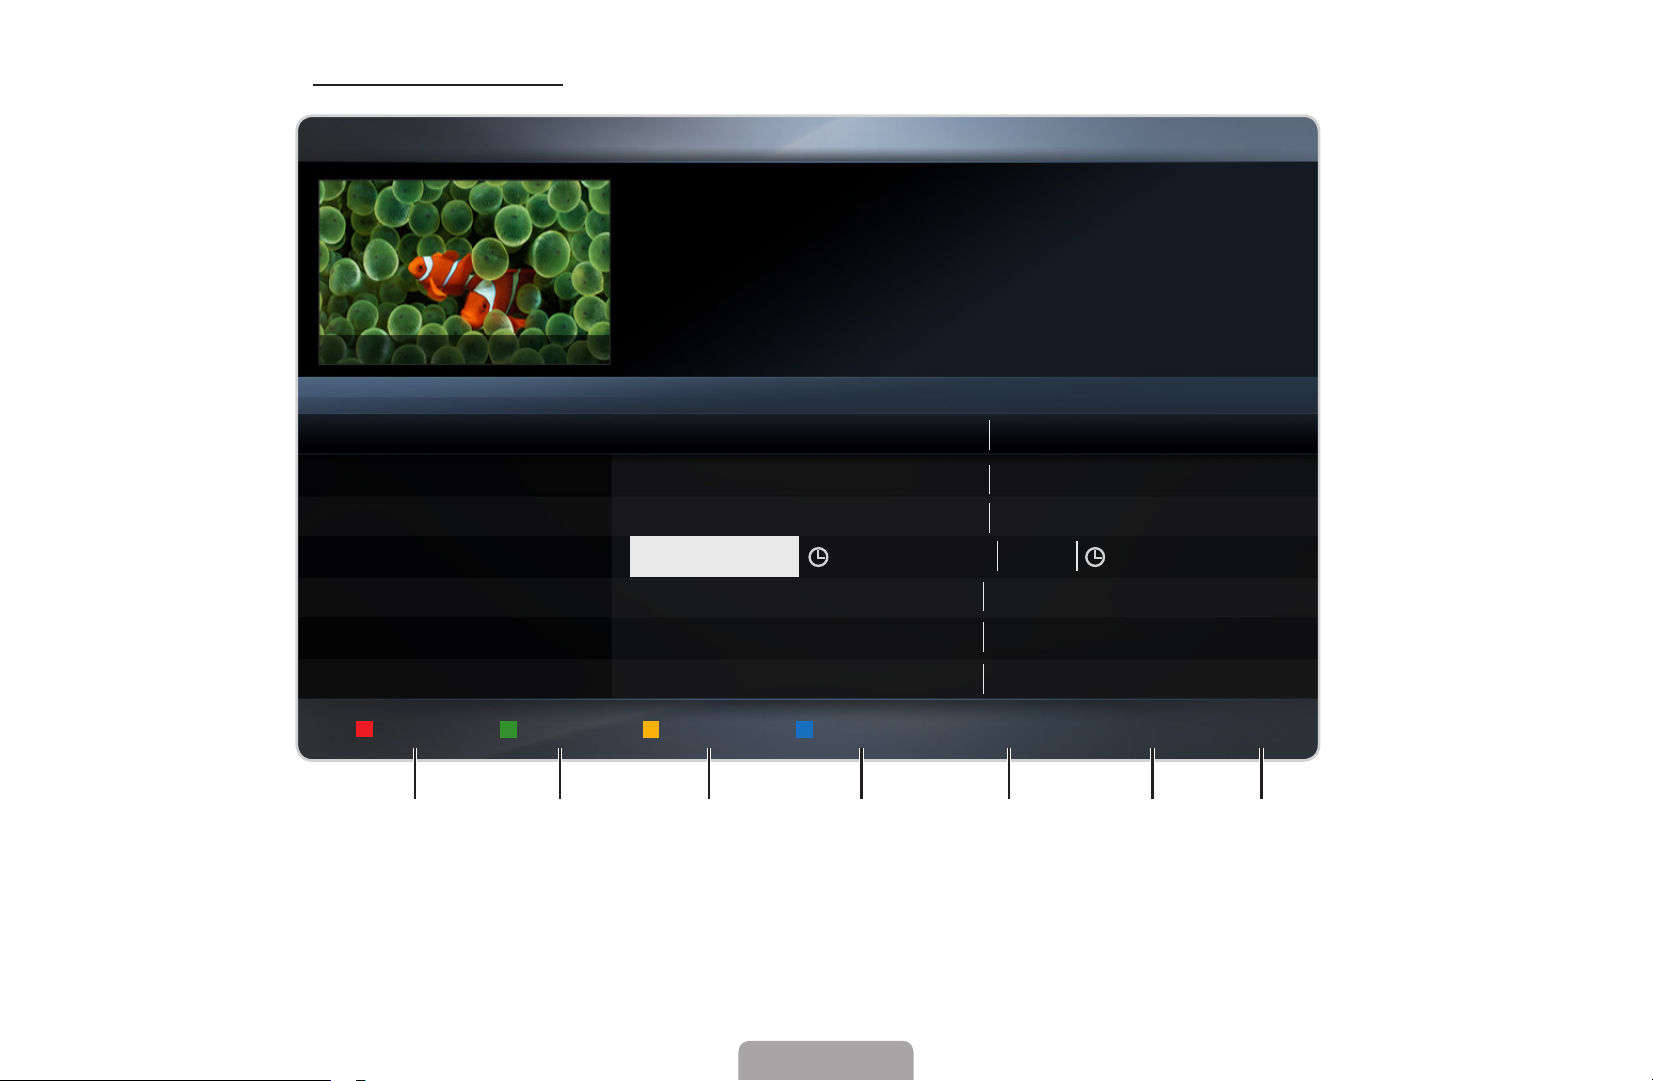
Using❑Guide
AC B D
AC B D
Guide
❑19:10❑Tue❑1❑Jun
DTV❑Air❑800❑five
Home❑and❑Away❑
19:00❑-❑19:30
Drama
Dani❑is❑devastated❑when❑scott❑makes❑clear❑his❑views❑on❑marriage...
❑❑800❑five
Channel❑View❑-❑All
Today
27❑❑❑❑❑❑❑Discovery
28❑❑❑❑❑❑❑DiscoveryH&L
◀ ▶
800❑❑❑❑❑five
24❑❑❑❑❑❑❑price-drop.tv
16❑❑❑❑❑❑❑QVC
6❑❑❑❑❑❑❑❑❑R4DTT
▼
American❑Chopper
Programmes❑resume❑at❑06:00
Home❑and...
No❑Information
QVC❑Selection
No❑Information
18:00❑-❑19:00 19:00❑-❑20:00
Tine❑Team
Fiv...❑No❑Information Dark❑Angel
Sche.Mgr
-24 Hours
+24 Hours
Ch. Mode
1 32 4 5 6 7
* It may differ depending on the model.
English
Information
Page
Schedule

◀
1
D
ACB D
English
2
A
Red (Sche.Mgr): Moves to the reserved programmes in Schedule❑Manager.
B
Green (-24❑Hours): Viewing the list of programmes to be broadcasted before
24 hours.
3
Yellow (+24❑Hours): Viewing the list of programmes to be broadcasted after 24
hours.
4
Blue (Ch.❑Mode): Select the type of channels you want to display on the
D
Channel❑List window. (All,❑TV,❑Radio,❑Data/Other,❑Favourites❑1-5)
5
◀ ▶
6
7
(Information): Displays details of the selected programme.
(Page): Move to previous or next page.
(Watch❑/❑Schedule)
●
When selecting the current programme, you can watch the selected
programme.
●
When selecting the future programme, you can reserve to watch the selected
programme. To cancel the schedule, press the ENTER
select Cancel❑Schedules.
English
button again and

❑■Schedule❑Manager
Cancel or set the Timer❑Viewing to display the channel you want at the intended
time.
Using❑Timer❑Viewing
You can set a desired channel to be displayed automatically at the intended time.
Set the current time first to use this function.
1. Press the ENTER
2. Press the
◀ ▶
Start❑Time.
●
Antenna: DTV❑Air or Air will be displayed depending on the Antenna
setting.
●
Channel: Select the desired channel.
◄/►/▲/▼
button to add programme to schedule manually.
button to set the Antenna, Channel, Repeat, Date,
English

◀
English
●
Repeat: Select Once, Manual, Sat~Sun,❑Mon~Fri or Everyday to set at
your convenience. If you select Manual, you can set the day you want.
The (
N
●
Date: You can set the desired date.
It is available when you select Once in Repeat.
N
●
Start❑Time: You can set the start time you want.
If you want to edit or cancel the schedule, select the reserved schedule on
N
the Reserved❑programmes, and select the Edit or Cancel❑Schedules.
◀ ▶
) mark indicates the day you’ve selected.
English

❑■Channel❑List
AC B D
You can view channel information, All,❑
TV,❑Radio,❑Data/Other,❑Analogue or
Favourites❑1-5.
When you press the CH❑LIST
N
button on the remote control,
Channel❑List screen will be
displayed at once.
●
All: Shows all currently available
◀ ▶
channels.
●
TV: Shows all currently available TV channels.
●
Radio: Shows all currently radio channels.
Channel❑List
All
1 TV#6
2
BBC❑ONE❑glogal❑News
3 Pardon...
4 Real❑Sp...
6 The❑Daily
7 Pros❑vs.
8 Today
9 Pardon...
❑
The❑Spo...
❑Programme❑View❑❑❑❑❑L❑Ch.Mode❑❑❑❑❑❑Watch❑❑❑❑❑❑Page
●
Data/Other: Shows all currently available MHP or other channels.
●
Analogue: Shows all currently available analogue channels.
●
Favourites❑1-5: Shows all favourite channels.
English

◀
N
AC B D
ACB D
English
N
Favourites❑1-5 will be displayed when you set Add❑to❑Favourites.
If you want to view favourite channels you added, press the CH❑LIST
button and use
Using the remote control buttons with the Channel❑List.
N
●
●
◀ ▶
Yellow (Programme❑View❑/❑Channel❑View): Displays the programme
when digital channel is selected. Returns to the channel view.
(Ch.Mode❑/❑Channel): Move to the All,❑TV,❑Radio,❑Data/Other or
Favourites❑1-5.
When you press the
N
other channels using
(Ch.Mode) button to move Favourites❑1-5.
(Programme❑View) button, you can move to
(Channel) button.
English
●
●
(Watch❑/❑Information): Watches the channel you select. / Displays
details of the selected programme.
(Page): Move to next or previous page.
k
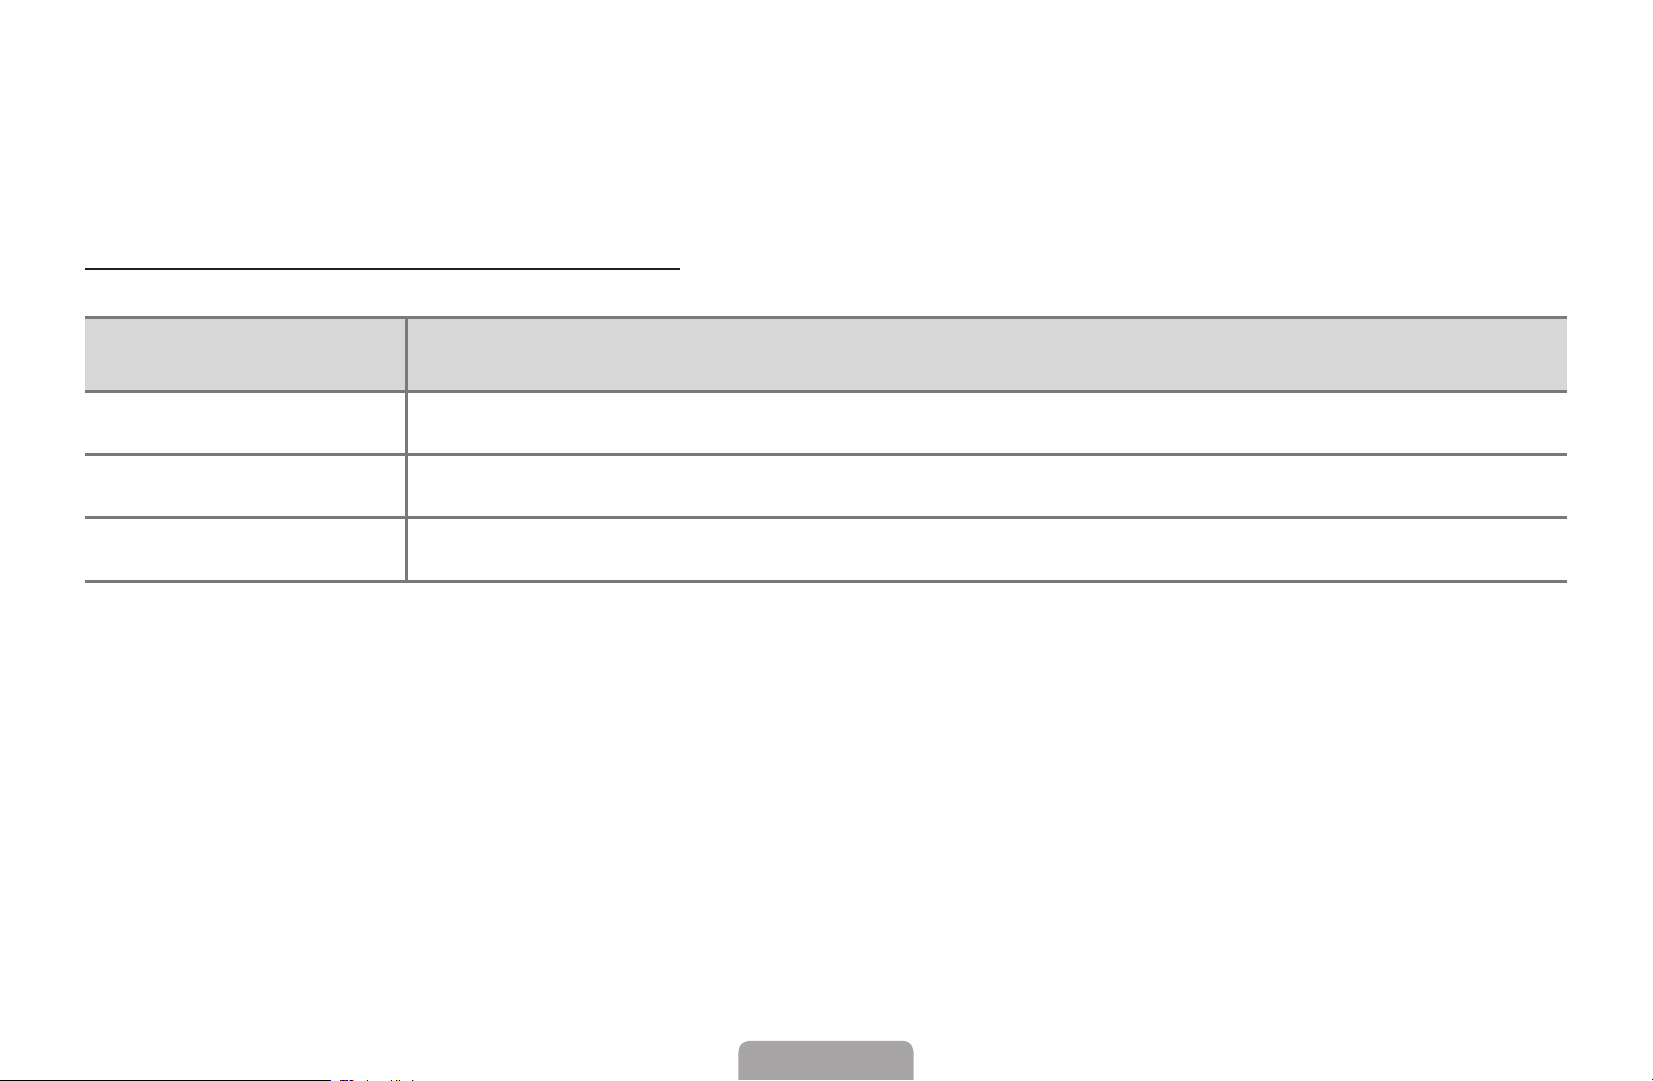
Channel❑Status❑Display❑Icons
Icon Operations
◀ ▶
An analogue channel.
A reserved programme.
A locked channel.
English

◀
How❑to❑use❑Timer❑Viewing❑in❑Channel❑List❑(digital❑channels❑only)❑
ACB D
English
When you set the Timer❑Viewing in Channel❑List, you can only set the programme in
Programme❑View.
1. Press the CH❑LIST button, then select a desired digital channel.
2. Press the
3. Press the
ENTER
4. Select Timer❑Viewing, then press the ENTER
◀ ▶
If you want to cancel Timer❑Viewing, follow steps 1 through 3. Select Cancel❑
N
(Programme❑View) button.
▲ / ▼
buttons to select the desired programme, then press the
or INFO button.
button when done.
E
Schedules.
English
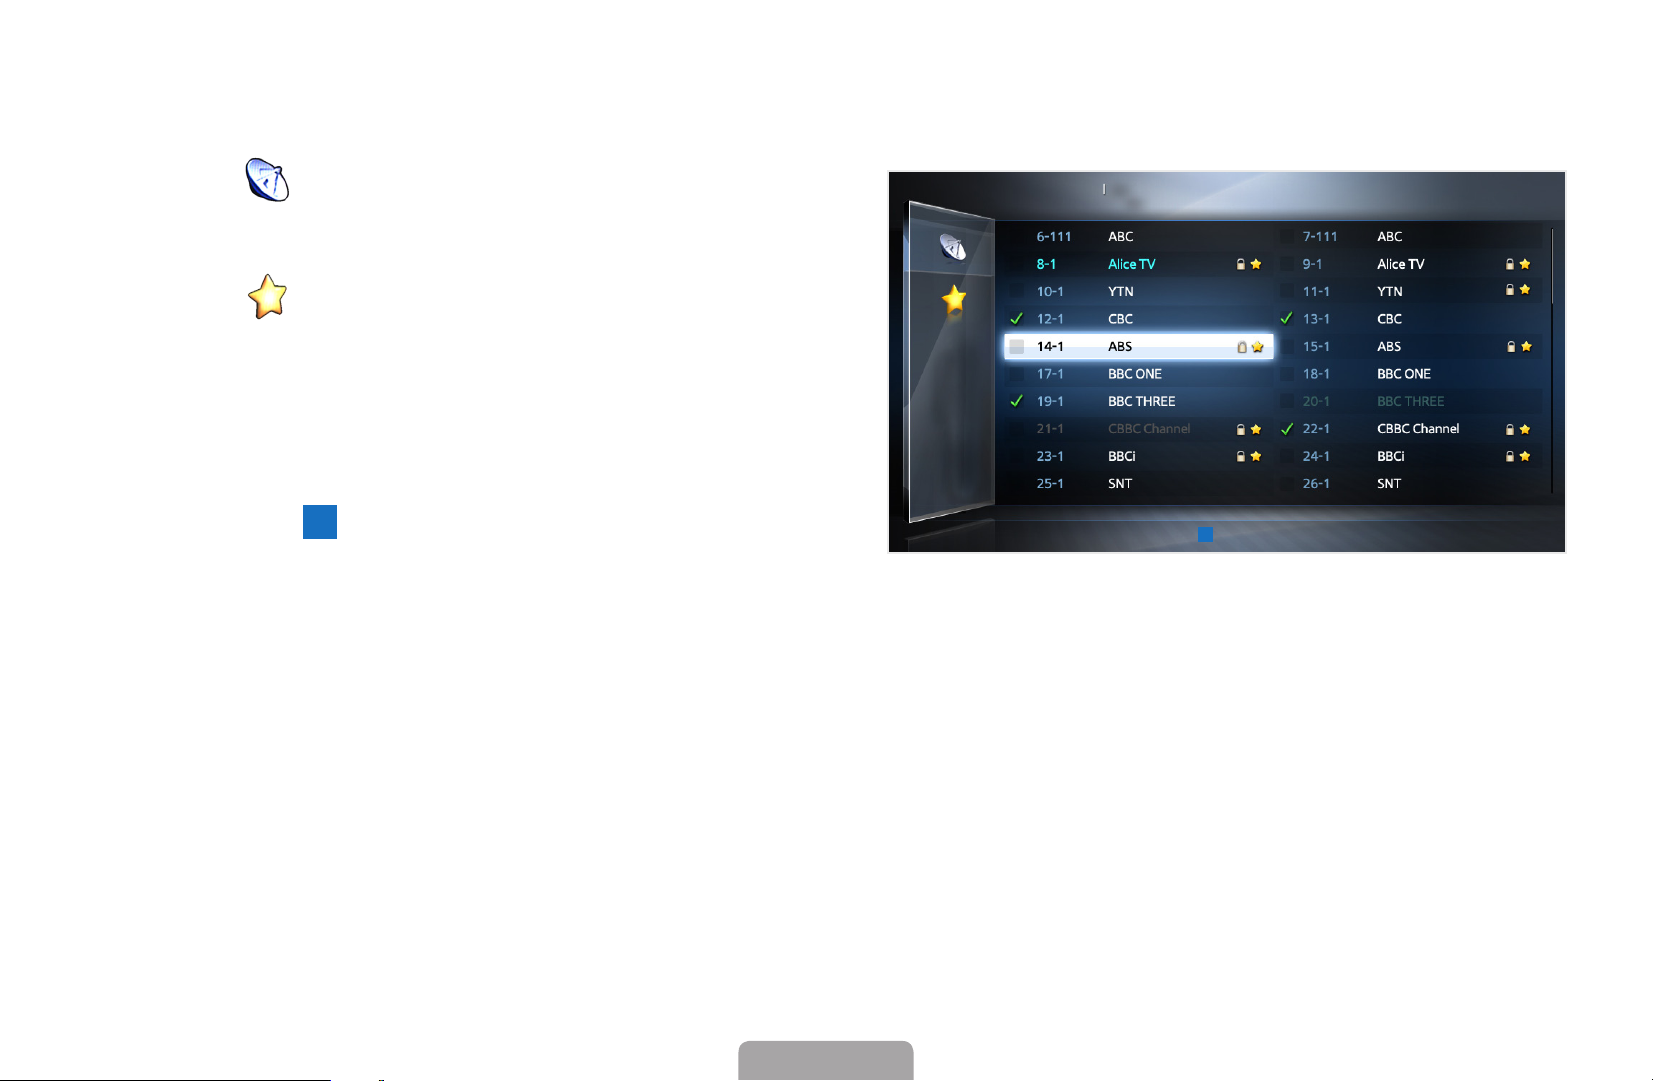
❑■Channel❑Manager
You can edit the channel to your preference.
●
( ) Channels: Shows the channel
Channel❑Manager
All
Selected❑items:❑4❑ Channel❑number
1/2❑page❑
list according to the channel type.
●
( ) Favourites❑1-5: Shows
favourite channels.
Using the colour buttons with the
N
Channel❑Manager.
D
●
Blue (Sorting): Changes the
❑ ❑
❑Sorting❑❑❑❑Page❑❑❑❑Select❑❑❑❑Tools❑❑❑❑Return
◀ ▶
list ordered by channel number,
channel name.
* It may differ depending on the model.
N
It is not available in analogue channel.
English
◀
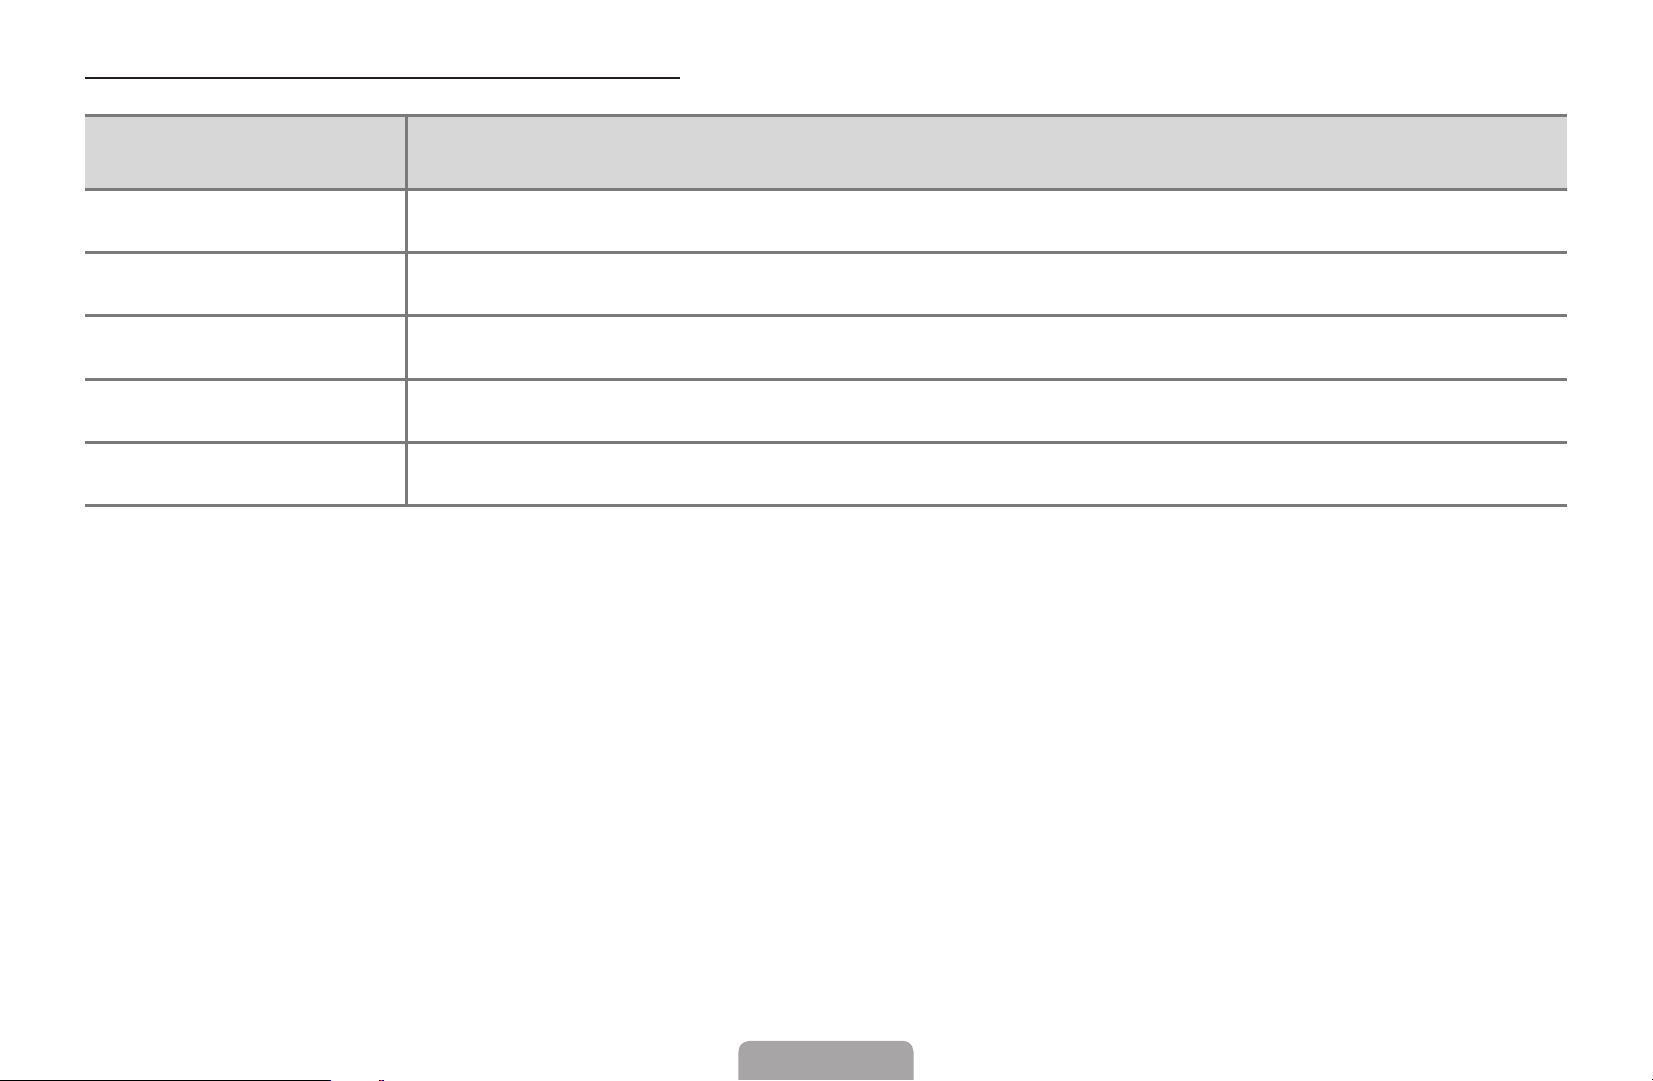
Channel❑Status❑Display❑Icons
English
Icon Operations
◀ ▶
An analogue channel.
A channel selected.
A channel set as a favourite.
A locked channel.
Displays the Channel❑Manager option menu.
English

Channel❑Manager❑Option❑Menu❑
Set each channel using the Channel❑Manager menu options (Watch,❑Add❑to❑
Favourites/Edit❑Favourites,❑Lock/Unlock,❑Edit❑Channel❑Name/Edit❑Channel❑
Number,❑Delete,❑Select❑All/Deselect❑All). Option menu items may differ depending
on the channel status.
1. Select a channel and press the TOOLS button.
2. Select a function and change its settings.
◀ ▶
English

◀
English
●
Watch: Watch the selected channel.
●
Add❑to❑Favourites/Edit❑Favourites: Set channels you watch frequently as
favourites. Add or Delete the selected channel in Favourites❑1-5.
1. Select the Add❑to❑Favourites/Edit❑Favourites, then press the ENTER
button. Add or Delete the selected channel in Favourites❑1-5.
If the channel is already added to favourite channel, Edit❑Favourites will
N
be shown.
2. Press the ENTER
◀ ▶
button.
One favourite channel can be added in several of Favourites among
N
Favourites❑1-5.
button to select Favourites❑1-5, then press the OK
English

●
Lock/Unlock: Lock a channel so that the channel cannot be selected and viewed.
NOTE
N
●
This function is available only when the Channel❑Lock is set to On.
●
The PIN input screen appears. Enter your 4-digit PIN, the default of which
is “0-0-0-0”. Change the PIN using the Change❑PIN option.
●
Edit❑Channel❑Name (analogue channels only): Assign your own channel name.
●
Edit❑Channel❑Number (digital channels only): Edit the number by pressing the
number buttons desired.
◀ ▶
Some area may not be able to support Edit❑Channel❑Name and Edit❑
N
Channel❑Number function.
English

◀
English
●
Delete: You can delete a channel to display the channels you want.
●
Deselect❑All: Deselect all the selected channels.
You can only select Deselect❑All when one or more channels are selected.
N
●
Select❑All: Select all the channels in the channel list.
◀ ▶
English

❑❑ Retuning❑Channels
O
MENU
❑
m
❑
❑Channel❑
→
❑ENTER
→
E
❑■Country
(depending on the country)
Select your country so that the TV can correctly auto-tune the broadcasting
channels.
The PIN input screen appears. Enter your 4 digit PIN number. The default PIN
N
number is “0-0-0-0.”
◀ ▶
English

◀
❑■Auto❑Tuning
English
(depending on the country)
Scans for a channel automatically and stores in the TV.
Automatically allocated programme numbers may not correspond to actual
N
or desired programme numbers. If a channel is locked, the PIN input window
appears.
●
Digital❑&❑Analogue❑/❑Digital❑/❑Analogue : Select the channel source to
memorise.
◀ ▶
English

❑■Manual❑Tuning
Scans for a channel manually and stores in the TV.
If a channel is locked, the PIN input window appears.
N
According to channel source, Manual❑Tuning may be supported.
N
●
Digital❑Channel❑Tuning❑(Channel, Frequency, Bandwidth): When scanning
has finished, channels are updated in the channel list.
●
Analogue❑Channel❑Tuning (Programme,❑Colour❑System,❑Sound❑System,❑
Channel,❑Search,❑Store): Press the A (New) button. If there is abnormal
◀ ▶
sound or no sound, reselect the sound standard required.
English

◀
Channel mode
English
N
●
C (aerial channel mode) / S (cable channel mode): These two modes allow
you to select a channel by entering the assigned number for each aerial
broadcasting station or cable channel.
❑■Edit❑Channel❑Number❑(Disable❑/❑Enable)
When this option is enabled, you can edit channel number. But you cannot
update channel information.
◀ ▶
English

❑■Fine❑Tune❑
(analogue channels only)
If the signal is weak or distorted, fine tune the channel manually.
Fine tuned channels are marked with an asterisk “*”.
N
To reset the fine-tuning, select Reset.
N
◀ ▶
English

◀
❑■Transfer❑Channel❑List
English
Imports or exports the channel map. You should connect a USB storage to use
this function.
The PIN number input screen appears. Enter your 4 digit PIN number.
N
The default PIN number of a new TV set is ‘0-0-0-0’.
N
●
Import❑from❑USB: Import channel list from USB.
●
Export❑to❑USB: Export channel list to USB.
◀ ▶
English

❑❑ Changing❑the❑Preset❑Picture❑Mode
O
MENU
❑
❑
❑Picture❑
→
❑Picture❑Mode❑
→
❑ENTER
→
❑■Picture❑Mode
Select your preferred picture type.
When connecting a PC, you can only make changes to the Entertain and
N
Standard.
●
Dynamic: Suitable for a bright room.
●
Standard: Suitable for a normal environment.
◀ ▶
●
Natural❑
●
Movie: Suitable for watching movies in a dark room.
for LED 5 series 32-46 inches
: Suitable for reducing eye strain.
●
Entertain: Suitable for watching movies and games.
It is only available when connecting a PC.
N
English

◀
❑❑ Adjusting❑Picture❑Settings
English
❑■Samsung❑MagicAngle❑
MENU
❑
O
Adjust screen viewing Angle to optimize screen quality according to your viewing
position.
●
Samsung❑MagicAngle: When viewing the screen at an angle from below or
above by setting the appropriate mode for each position you can obtain a
similar picture quality as viewing the screen directly from the front.
◀ ▶
Off: Select when viewing from the front position.
Lean❑Back❑Mode: Select when viewing from a slightly lower position.
Standing❑Mode: Select when viewing from the upper position.
❑
❑Picture❑
→
for LED 4 series 19 inches, 5 series 22-27 inches
❑Samsung❑MagicAngle❑
→
❑ENTER
→
●
N
Mode: Adjust screen viewing angle.
When Samsung MagicAngle is set to Lean❑Back❑Mode or Standing❑Mode,
Gamma is not available.
English

❑■Backlight❑/❑Contrast❑/❑Brightness❑/❑Sharpness❑/❑Colour❑/❑Tint❑(G/
R)
MENU
❑
O
Your television has several setting options for picture quality control.
NOTE
N
●
In analogue TV, AV modes of the PAL system, the Tint❑(G/R) function is
not available.
●
When connecting a PC, you can only make changes to Backlight,❑
◀ ▶
Contrast,❑Brightness and Sharpness.
●
Settings can be adjusted and stored for each external device connected
to the TV.
m
❑
❑Picture❑
→
❑Backlight❑
→
❑ENTER
→
E
English

◀
❑■Screen❑Adjustment
English
MENU
❑
O
Set the various picture options such as picture size and aspect ratio.
●
Picture❑Size: Your cable box/satellite receiver may have its own set of screen
sizes as well. However, we highly recommend you use 16:9 mode most of the
time.
Auto❑Wide: Automatically adjusts the picture size to the 16:9 aspect ratio.
16:9: Sets the picture to 16:9 wide mode.
◀ ▶
Wide❑Zoom: Magnifies the picture size more than 4:3.
Adjusts the Position by using ▲, ▼ buttons.
N
Zoom: Magnifies the 16:9 wide pictures vertically to fit the screen size.
❑
❑Picture❑
→
❑Screen❑Adjustment❑
→
❑ENTER
→
N
Adjusts the Zoom or Position by using ▲, ▼ button.
English

4:3: Sets the picture to basic (4:3) mode.
Do not watch in 4:3 format for a long time. Traces of borders displayed
N
on the left, right and centre of the screen may cause image retention
(screen burn) which are not covered by the warranty.
Screen❑Fit: Displays the full image without any cut-off when HDMI (720p /
1080i / 1080p) or Component (1080i / 1080p) signals are inputted.
Smart❑View1❑
Smart❑View2❑
NOTE
◀ ▶
N
●
Smart❑View1 is enabled only in HDMI mode.
●
Smart❑View2 is enabled only in DTV and HDMI modes.
●
The picture size can vary depending on the input resolution when
content is played using Videos under My❑Downloads.
for LED 5 series 32-46 inches
for LED 5 series 32-46 inches
: Reduces original screen by 50%.
: Reduces original screen by 25%.
English

◀
English
●
●
N
Position: Adjust the picture position. It is only available in Screen❑Fit or Wide❑
Zoom.
Zoom/Position : Adjust the picture position. It is only available in Zoom.
NOTE
●
After selecting Screen❑Fit in HDMI (1080i / 1080p) or Component (1080i
/ 1080p) mode, you may need to centre the picture:
1. Press the ▲ or
2. Press the ENTER
◀ ▶
3. Press the
●
Depending on the input source, the picture size options may vary.
●
If you want to reset the position you adjusted, select Reset in the
Position screen. The picture will be set to its default position.
▲, ▼, ◄, ►
button to select Position.
▼
button.
button to move the picture.
English
 Loading...