

Samsung TX-20P5DF, TX-20P1DF, TX-20P1, TX-14P1DF, TX-14P1F User Manual
...
COMBI VISION
COMBINED COLOUR
TELEVISION
and VIDEO CASSETTE
RECORDER
Owner’s Instructions
Before operating the unit,
please read this manual thoroughly,
and retain it for future reference.
CRYSTAL PLAYBACK
(depending on the model)
TM
Safety Instructions
2
☛
Displaying any stationary images that exceed the long time, it can cause uneven aging of
picture tubes (CRTs) that leave subtle, but permanent burned-in ghost images in the television
picture. To avoid this, vary the programming and images, and primarily display full screen
moving images, not stationary patterns or dark bars.
NEVER OPEN THE TELEVISION
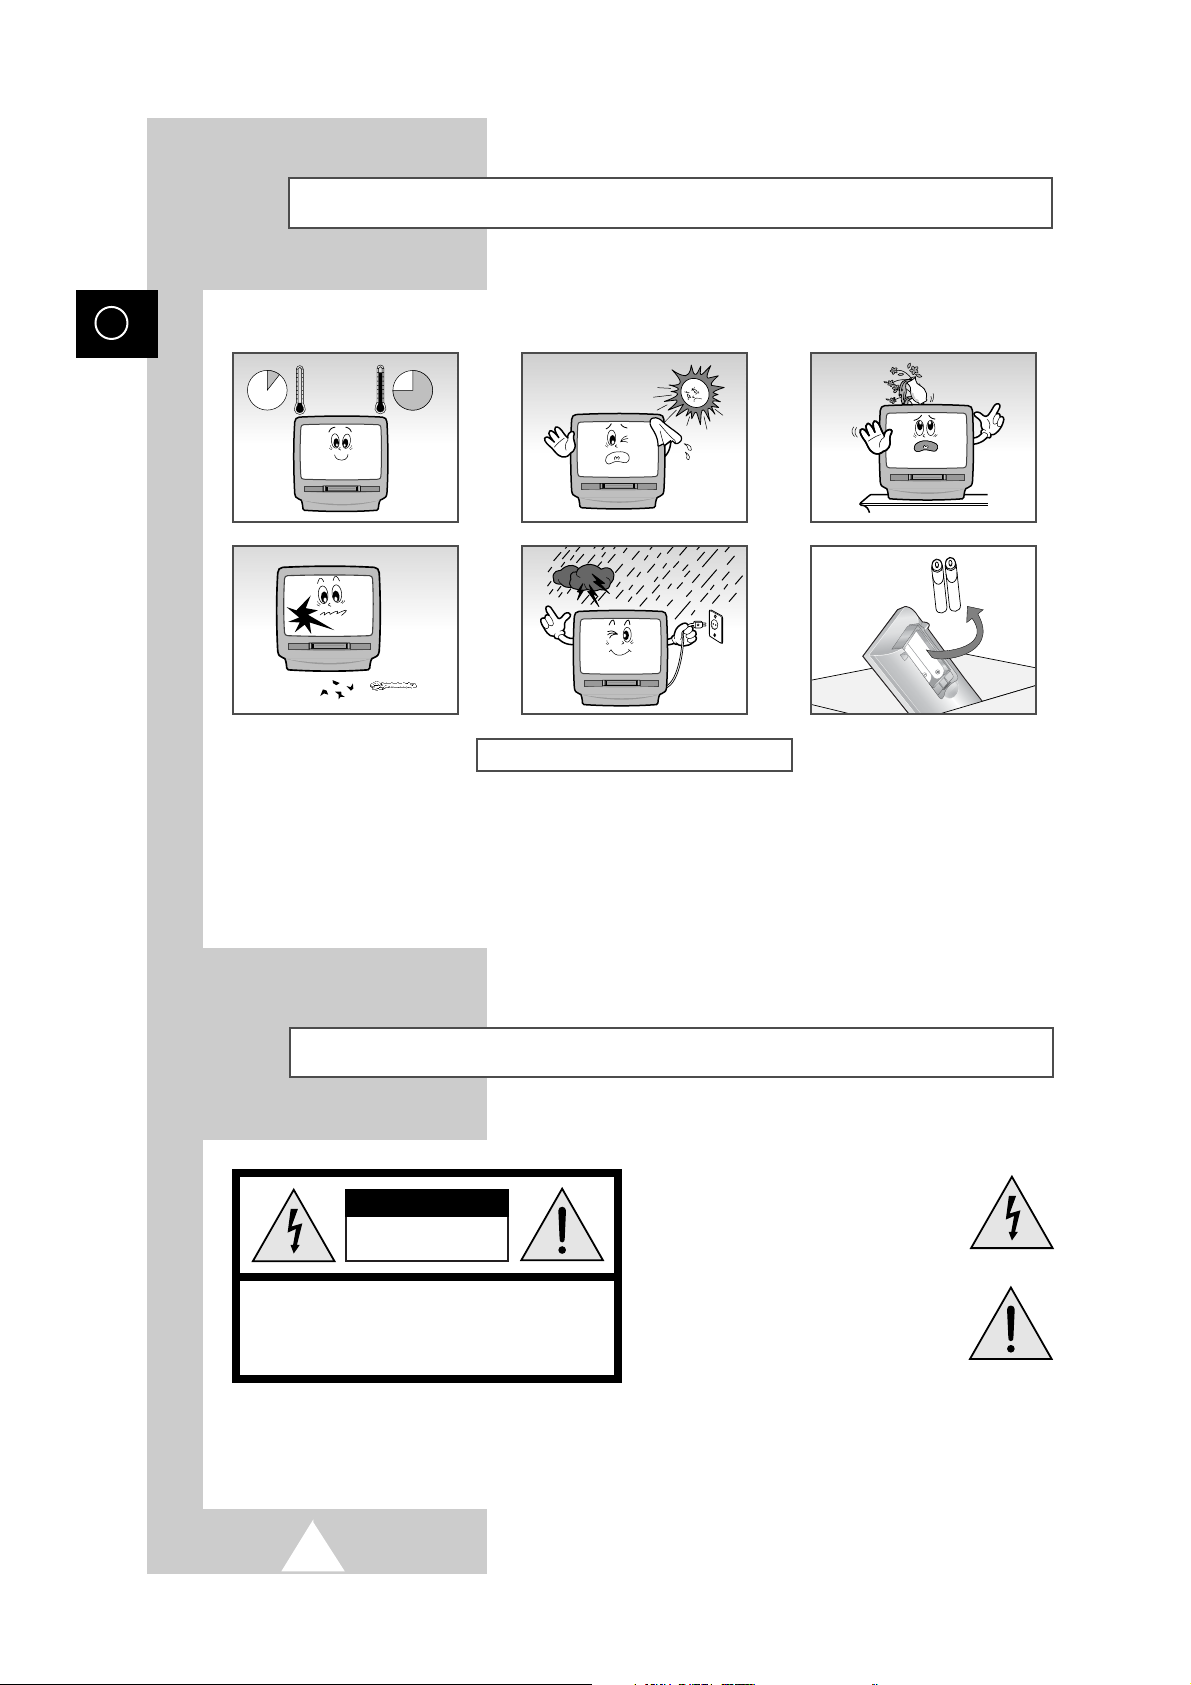
The following illustrations represent the precautions to be taken when using and moving your COMBI VISION.
Caution
☛
Main voltage : 220V-240V~, 50Hz
(or Indicated on the rear of the TV set).
The lightning flash with arrowhead
in the triangle is a warning sign
alerting you to dangerous voltage
inside the product.
The exclamation point within the
triangle is a warning sign alerting
you to important instructions
accompanying the product.
WARNING: TO PREVENT DAMAGE WHICH MAY
RESULT IN FIRE OR SHOCK HAZARD. DO NOT EXPOSE
THIS APPLIANCE TO RAIN OR MOISTURE.
GB
CAUTION: TO PREVENT ELECTRICAL SHOCK,
DO NOT REMOVE REAR COVER, NO USER SERVICEABLE
PARTS INSIDE. REFER SERVICING TO QUALIFIED
SERVICE PERSONNEL.
RISK OF ELECTRIC SHOCK
DO NOT OPEN
CAUTION
10%
H
5°
35°
75%
H

Contents
FOREWORD
■
Safety Instructions......................................................................................... 2
■
Caution.......................................................................................................... 2
CONNECTING AND PREPARING YOUR COMBI VISION
■
Connecting the Aerial or Cable Television Network...................................... 5
■
Connecting a Decoder................................................................................... 5
■
Connecting Other Video Equipment.............................................................. 6
■
Inserting the Batteries in the Remote Control................................................ 7
■
Switching Your Combi Vision On and Off...................................................... 7
■
Automatic Degaussing to Remove Colour Patches....................................... 8
■
Becoming Familiar with the Remote Control................................................. 8
■
Becoming Familiar with the Menu System .................................................... 9
■
Selecting a Menu Option............................................................................... 10
■
Choosing Your Language.............................................................................. 11
■
Setting the Date and Time............................................................................. 12
SETTING THE CHANNELS
■
Storing the Stations Automatically (depending on the model)....................... 13
■
Sorting and/or Clearing the Stored Channels................................................ 14
■
Changing Stations......................................................................................... 15
■
Selecting a Station Numbered Ten or Over................................................... 15
■
Storing the Stations Manually........................................................................ 16
■
Activating the 3DB LNA (Low Noise Amplifier) Feature
(depending on the model).............................................................................. 17
USING THE TELEVISION FUNCTION
■
Adjusting the Picture and Storing Your Preferences..................................... 18
■
Adjusting the Picture Setting ......................................................................... 18
■
Adjusting the Volume..................................................................................... 19
■
Switching the Sound Off Temporarily (MUTE) .............................................. 19
■
Setting the Combi Vision to Switch On Automatically ................................... 20
■
Setting the Sleep Timer................................................................................. 21
■
Viewing Pictures from External Sources ....................................................... 21
■
Displaying Information on the Screen............................................................ 22
USING THE VCR FUNCTION
■
Cassette Types and Recording Speeds (Option).......................................... 23
■
Protecting a Recorded Cassette.................................................................... 23
■
Selecting the Video Standard (depending on the model).............................. 24
■
Playing a Cassette......................................................................................... 24
3
You have just purchased a
SAMSUNG COMBI VISION combined
colour television and video cassette recorder.
Please take the time to read these instructions,
as they will enable you to set up your
COMBI VISION easily.
P 02

4
Contents
(cont.)
USING THE VCR FUNCTION (cont.)
■ Using the Crystal Playback.............................................................................. 25
■ Adjusting the Picture Quality during Playback................................................. 25
■ Adjusting the Picture Contours........................................................................ 25
■ Selecting the Type of Cassette Tape............................................................... 26
■ Rewinding and Fast-forwarding a Cassette..................................................... 26
■ Playing a sequence Frame by Frame.............................................................. 27
■ Recording a Programme Directly..................................................................... 28
■ Recording a Programme with Automatic Stop................................................. 29
■ Using the Feature (depending on the model)............................... 30
■ Setting the VCR Unit to Record a Programme Automatically.......................... 32
■ Checking a Preset Recording.......................................................................... 34
■ Cancelling a Preset Recording........................................................................ 34
SEARCHING FOR A SEQUENCE
■ Using the Tape Counter to Search for a Sequence......................................... 35
■ Using the Indexes to Search for a Sequence.................................................. 36
■ Scanning the Index Markings .......................................................................... 36
■ Repeating Playback of a Sequence or Cassette............................................. 37
USING THE TELETEXT FEATURE (DEPENDING ON THE MODEL)
■ Teletext Feature............................................................................................... 38
■ Displaying the Teletext Screen........................................................................ 39
■ Selecting Display Options................................................................................ 39
■ Selecting a Teletext Page................................................................................ 40
■ Storing Teletext Pages .................................................................................... 41
■ Recalling a Stored Teletext Page.................................................................... 41
RECOMMENDATIONS FOR USE
■ Using the Buttons on the Front Panel.............................................................. 42
■ Locking the Front Panel................................................................................... 42
■ Connecting Earphones.................................................................................... 43
■ Cleaning the Video Heads............................................................................... 43
■ Before Contacting the After-sales Service....................................................... 44
■ Technical Specifications.................................................................................. 45
■ Wiring the Mains Power Supply Plug (UK Only).............................................. 46
■ SCART Connector Wiring................................................................................ 47
■ Using Your Combi Vision Abroad.................................................................... 48
■ Glossary........................................................................................................... 49
■ Front View of Your Combi Vision (depending on the model)........................... 50
■ Rear View of Your Combi Vision (depending on the model) ........................... 51
■ Teletext Control Buttons (Teletext Option Only).............................................. 52
■ Infrared Remote Control (All Functions Except Teletext) ................................ 53
?
01:28
Press Hold down Important Note
☛
➢
Symbols
GB
TM

5
To view television channels correctly, a signal must be received by
the set from one of the following sources:
◆ An outdoor aerial
◆ A cable television network
Plug the aerial or cable network input cable into the socket at the bottom of the
television’s rear panel.
➢ If you wish to subscribe to a cable network, contact your
local dealer.
This COMBI VISION is fully equipped to receive scrambled Pay TV
broadcasts.
Example
: Premiere broadcasts.
➢ If you wish to connect both a decoder and an external
VCR to the SCART connector, you must plug:
◆ The decoder into the VCR
◆ The VCR into the COMBI VISION (refer to
“Connecting Other Video Equipment” on the
following page for further details)
1 Plug the SCART cable supplied with the decoder into the SCART
connector on the rear of the set.
2 Plug the other end into the decoder.
Connecting the Aerial or Cable Television Network
Connecting a Decoder
Cable
Television
Network
REAR OF THE
TELEVISION
REAR OF THE TELEVISION
or
SCART
Decoder

Connecting Other Video Equipment
6
➢ The RCA connectors are used for equipment, such as VCRs or camcorders.
FRONT (or SIDE) OF THE TELEVISION
(depending on the model)
➢ The A/V connector is used for equipment with an RGB output, such as VCRs,
video games, video disc players, camcorders and personal computers.
➢ Some A/V devices shown on the right panel are option.
➀ This end can be fitted with a SCART connector.
REAR OF THE TELEVISION
➀
Camcorder
VCR
SCART cable
or
☛
It is an infringement of copyright laws to copy pre-recorded cassettes or to re-record them in
any form without the permission of the owners of the corresponding copyright.
➢ When external equipment is plugged into both the front (or side) and rear connectors, the front (or side)
connector has priority. To use the equipment connected to the rear connector, you must first unplug the
equipment connected to the front (or side) RCA connectors.
GB
Video game
Video disc player
Camcorder
VCR

7
The mains lead is attached to the right side of your COMBI VISION.
☛ If you have purchased this set in the United Kingdom,
refer to page 46 for further instructions on plug wiring.
1 Plug the mains lead into an appropriate wall socket and press the Master
Switch ( I ) on the front panel.
Result
: The set is placed in Standby mode and the Standby indicator
lights up on the front panel.
2 To switch your set on, press POWER ( ).
Result
: If stations have already been stored, the station (or AV input)
that you were watching prior to switching off the unit is
selected automatically. You can now use the remote control,
as required.
3 To switch the set off, press POWER ( ) again.
➢
If you wish to switch the COMBI VISION off completely,
disconnect it from the wall socket or press the Master
Switch. This is particularly recommended when you will
not be using the set for a long period of time and you
have not set the VCR unit to record a programme
automatically.
Switching Your Combi Vision On and Off
You must insert or replace the batteries in the remote control when
you:
◆ Purchase the television
◆ Find that the remote control is no longer operating
correctly
1 Remove the cover on the rear of the remote control by pressing the symbol
downwards and then pulling firmly to remove it.
2 Insert two R03, UM4, “AAA” 1.5V or equivalent batteries taking care to
respect the polarities:
◆ + on the battery against + on the remote control
◆ - on the battery against - on the remote control
3 Replace the cover by aligning it with the base of the remote control and
pressing it back into place.
➢
Do not mix battery types, i.e. alkaline and monganese.
Inserting the Batteries in the Remote Control
INPUT
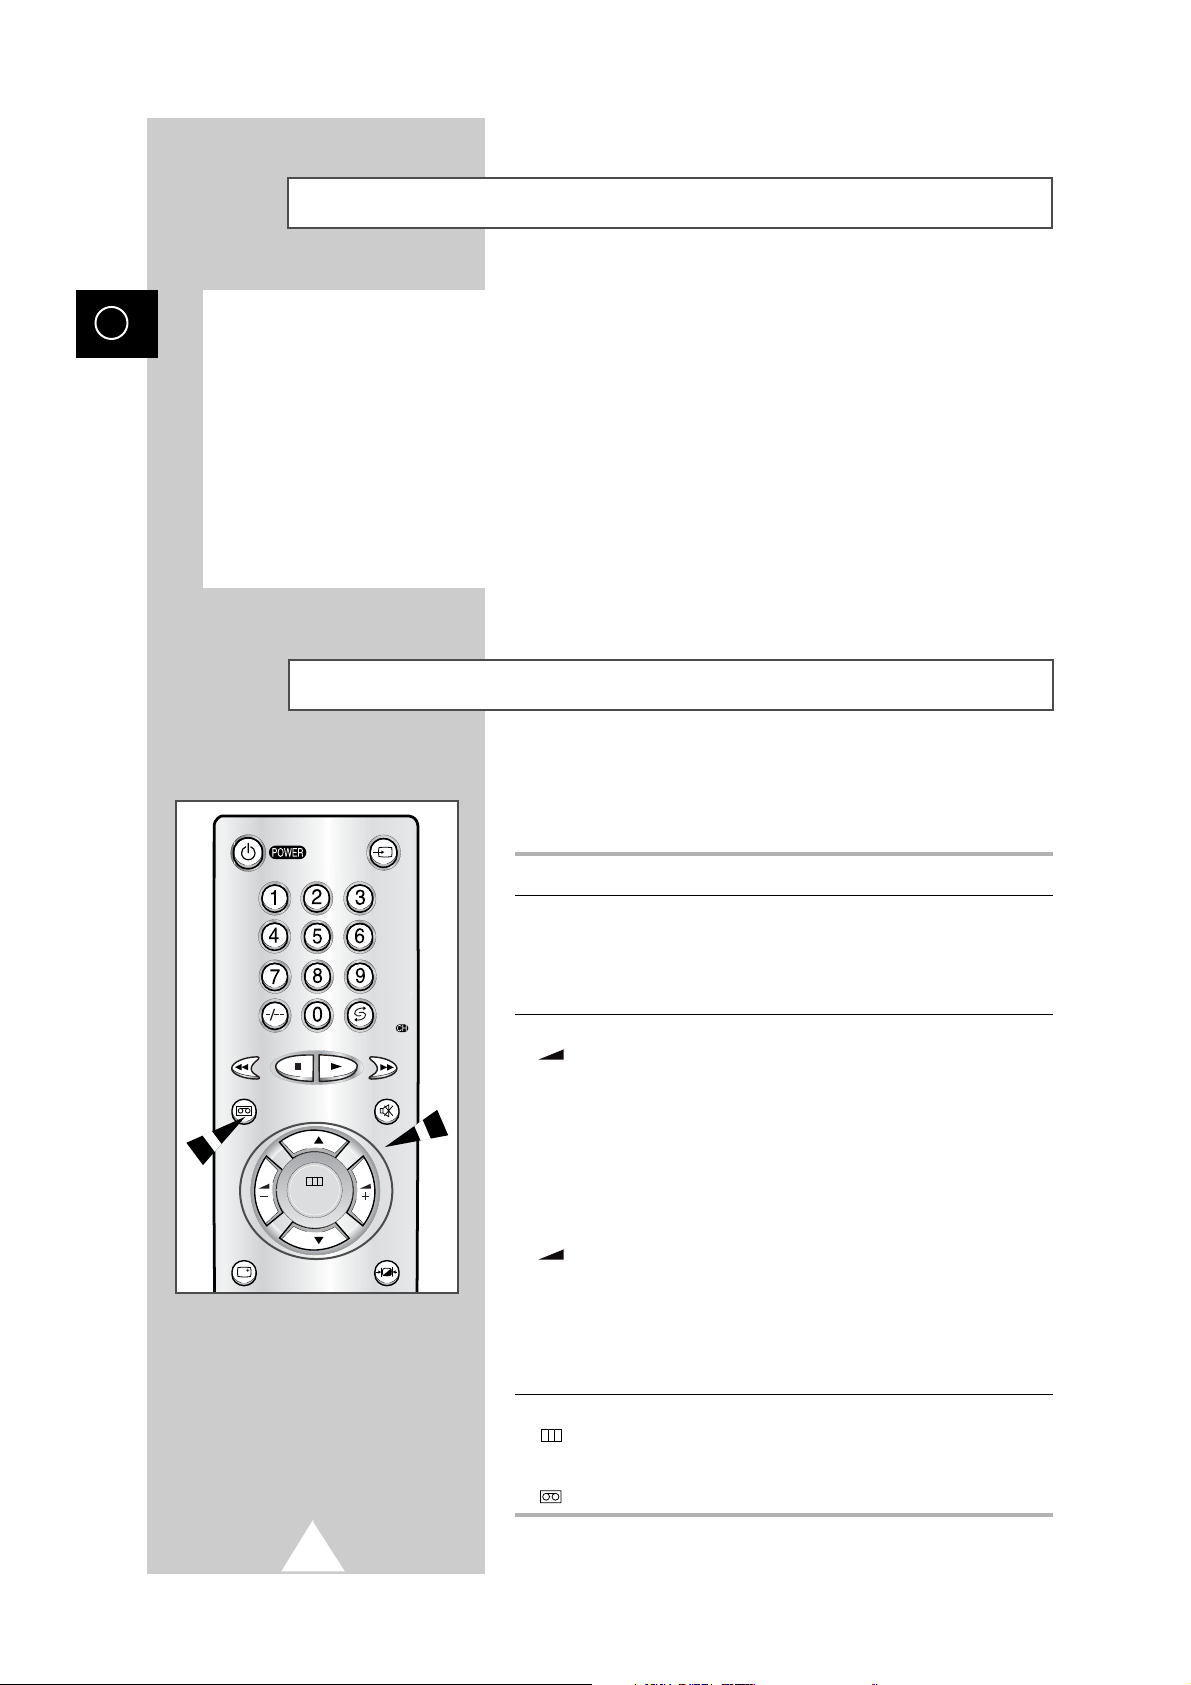
Becoming Familiar with the Remote Control
Some buttons on the remote control are used for several common
functions. The following table presents the most frequently used
buttons and their functions.
Button Viewing Function Menu Function
P ▲ Used to display the next Used to select the previous menu
stored channel. option.
P ▼ Used to display the Used to select the next menu
previous stored channel. option.
+ Used to increase the Used to:
volume. ◆ Display a submenu
containing selections that
you can make for the current
menu option
◆ Search forwards manually
for channels
◆ Increase the value of a menu
option
-
Used to reduce the Used to:
volume. ◆ Display a submenu containing
selections that you can make
for the current menu option
◆ Search backwards manually
for channels
◆ Reduce the value of a menu
option
MENU Used to display the Used to exit the television menu
() television menu. and return to normal viewing.
V.MENU Used to display the Used to exit the VCR menu and
() VCR menu. return to normal viewing.
8
GB
A degaussing coil is mounted around the picture tube so that external degaussing after moving the
receiver is normally unnecessary. If the receiver is moved or placed in a different direction, or, a
coloured patch appears on the screen, the main power switch must be switched to the off position for
120minutes or the power cord must be unplugged for the same interval to allow the automatic degauss
circuits to operate properly.
For safety, the receiver should be switched off from the main power switch when it is unattended.
➢
Magnetic fields can cause your television to malfunction. Degaussing is a process that neutralises
magnetic fields.
Automatic Degaussing to Remove Colour Patches
INPUT
V.MENU MUTE
P
MENU
P
DISPLAY P.STD
Pre.
9
The most common functions are assigned a specific button on the
remote control. To avoid having too many buttons on the remote
control however, the other functions can be selected by displaying
one of two menus:
◆ Television menu
◆ VCR menu
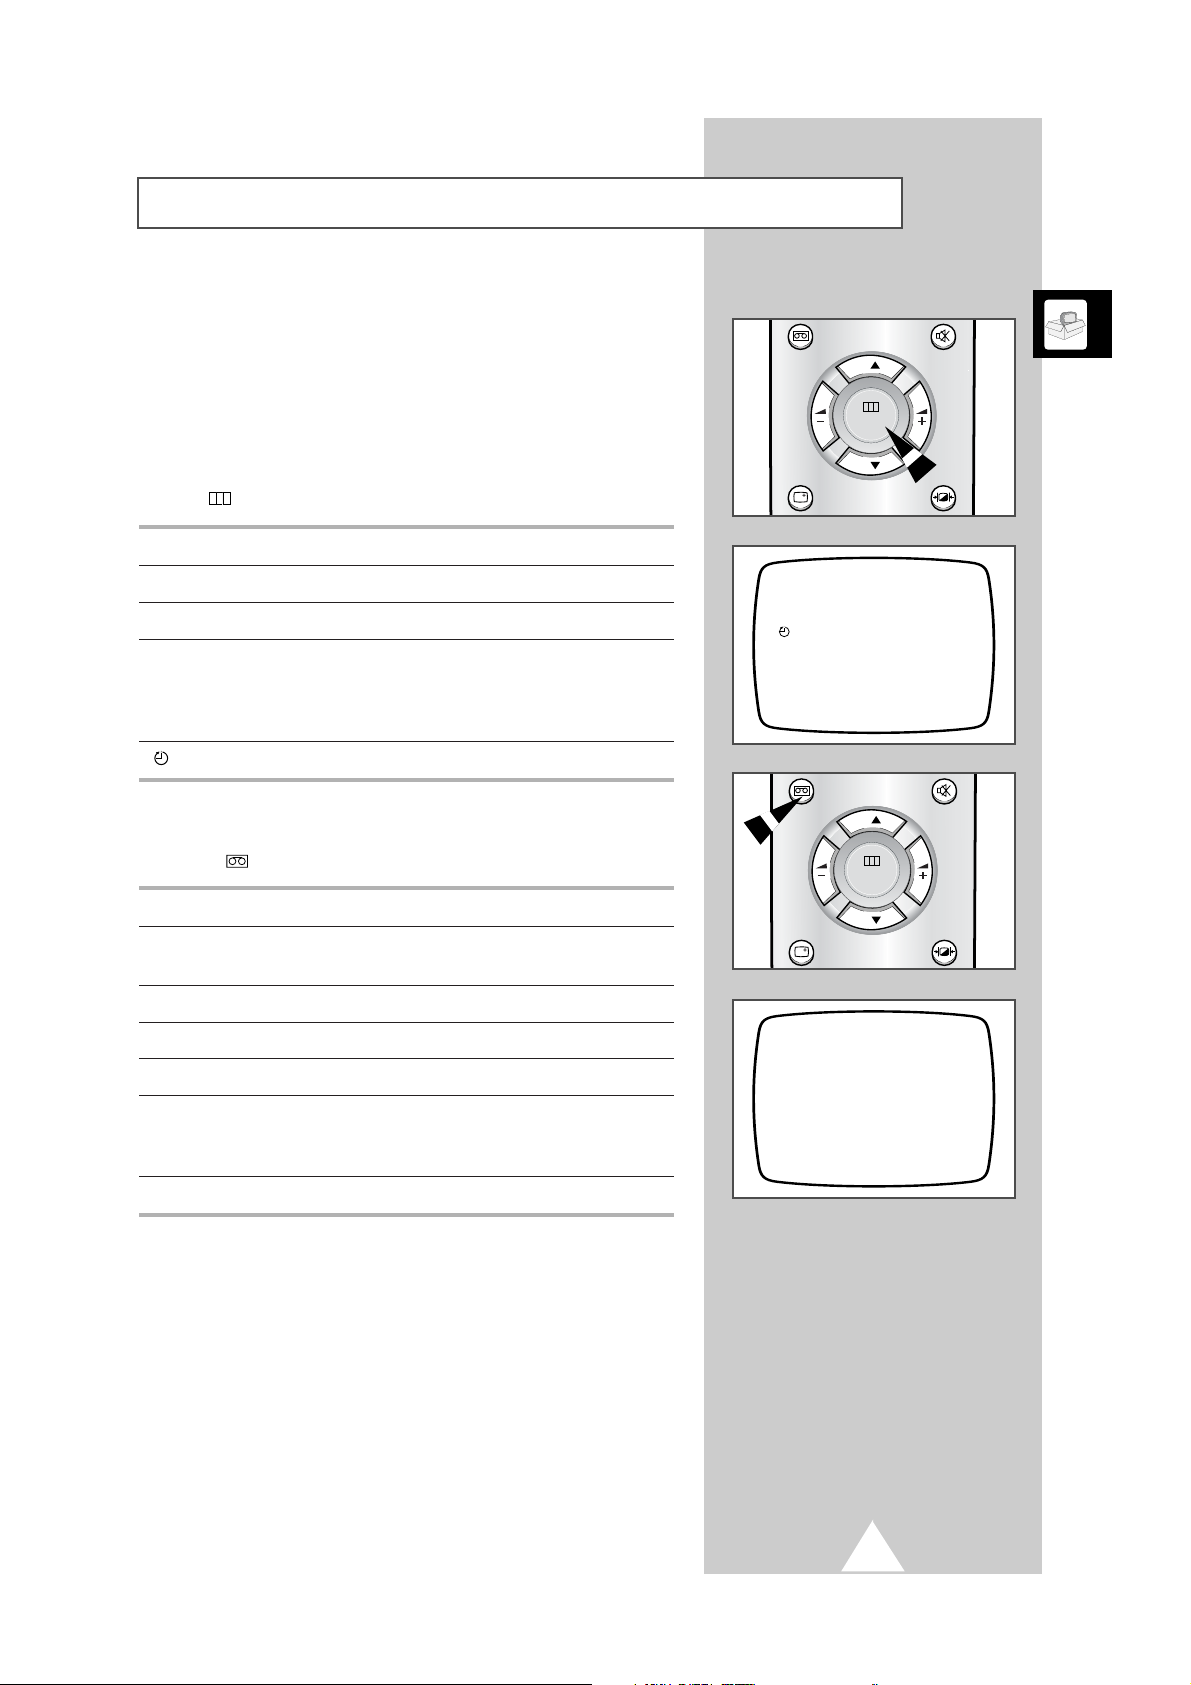
The television menu contains options and is displayed by pressing
MENU ( ).
Option Function
PICTURE Used to adjust the contrast, bright, sharpness and color.
TUNE Used to store channels, either manually or automatically.
SETUP Used to:
◆ Lock the front panel on the set
◆ Set the COMBI VISION to switch on automatically
◆ Activate the 3DB LNA feature (Option)
--:-- Used to set the date and time.
The VCR menu contains options and is displayed by pressing
V.MENU ( ).
Option Function
RECORD PROGRAMME Used to set the VCR to record a programme
automatically.
REPEAT Used to repeat playback of all or part of a cassette.
PICTURE Used to adjust the picture contours.
TAPE SELECT Used to select the length of cassette.
V.SYSTEM Used to select the video standard.
➢
Only PAL System is available on UK model
and so the V.SYSTEM doesn’t need.
SPEED (Option) Used to select the recording speed.
Becoming Familiar with the Menu System
MENU
PICTURE
TUNE
SETUP
--:--
VCR MENU
RECORD PROGRAMME
REPEAT : OFF
PICTURE : NORMAL
TAPE SELECT : E180/T120
V.SYSTEM : AUTO
SPEED : SP
V.MENU MUTE
P
MENU
P
DISPLAY P.STD
V.MENU MUTE
P
MENU
P
DISPLAY P.STD

Selecting a Menu Option
To select a menu or sub-menu option, follow the procedure below.
1 Press MENU ( ) or V.MENU ( ).
Result
: The corresponding menu is displayed.
2 Press P ▲ or ▼ one or more times until the required option is displayed.
3 To display the possible values of an option or its sub-menu, press + or -.
➢ To move around a sub-menu and select the required function,
press P ▲ or ▼.
4 Follow the detailed instructions for each function (channel storage,
adjustments, etc.) in the rest of this booklet.
5 When you are satisfied with your settings, press MENU ( ) or V.MENU
() one or more times to return to normal viewing.
➢
Step 5 is optional as the menu disappears automatically
after about 30 seconds.
10
GB
V.MENU MUTE
P
MENU
P
DISPLAY P.STD
11
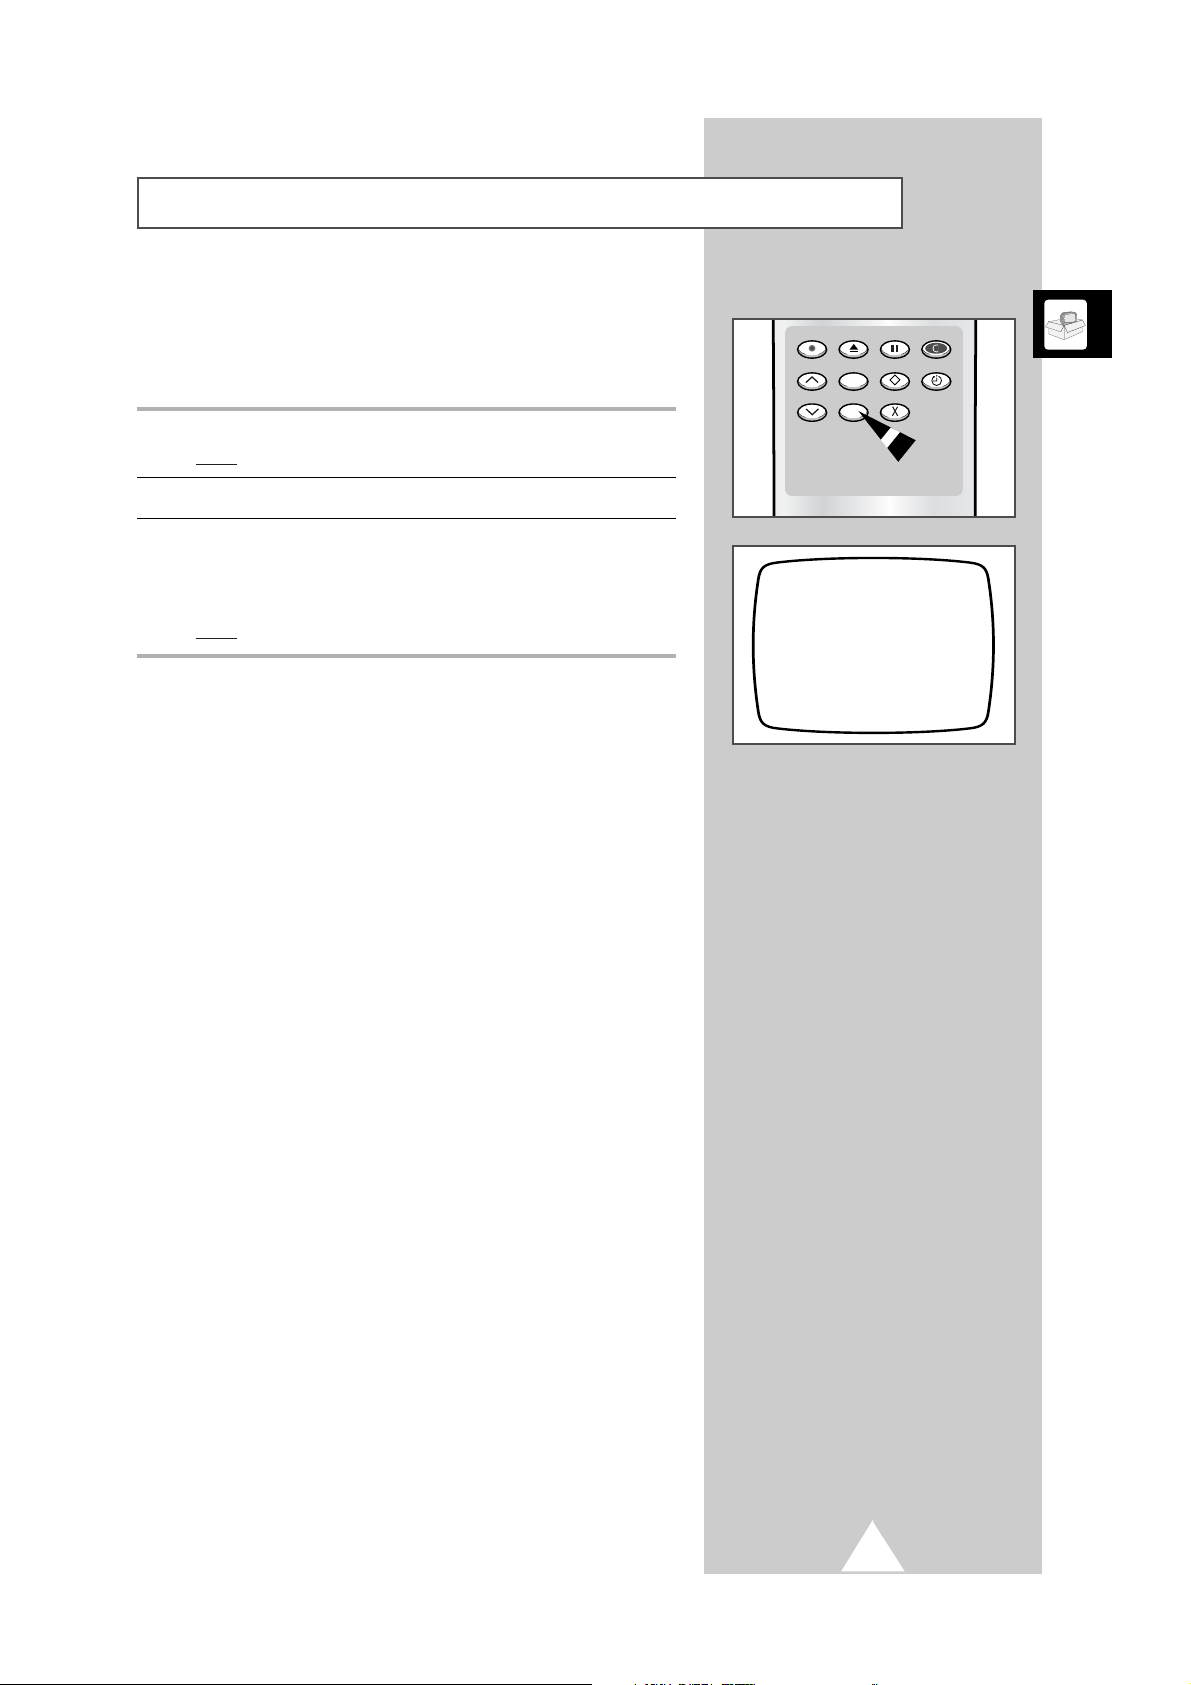
When you start using your television for the first time, you must
select the language in which the various menus and indications are
displayed.
1 Press the LANG.SEL button.
Result
: The list of available languages is displayed.
2 Press P ▲ or ▼ one or more times until the required language is selected.
3 When you are satisfied with your choice, press LANG.SEL to return to
normal viewing.
➢ If you do not press this button, the list disappears automatically
after a few seconds.
Result
: The menus are then displayed in the language of your choice.
➢
The list of languages displayed may change without notice.
Choosing Your Language
LANGUAGE
ENGLISH
DEUTSCH
FRANÇAIS
NEDERLANDS
ESPAÑOL
ITALIANO
SVENSKA
REC
EJECT
INDEX SLEEPMEMORY
TRK CLEARLANG.SEL
P/S
CRYSTAL PB

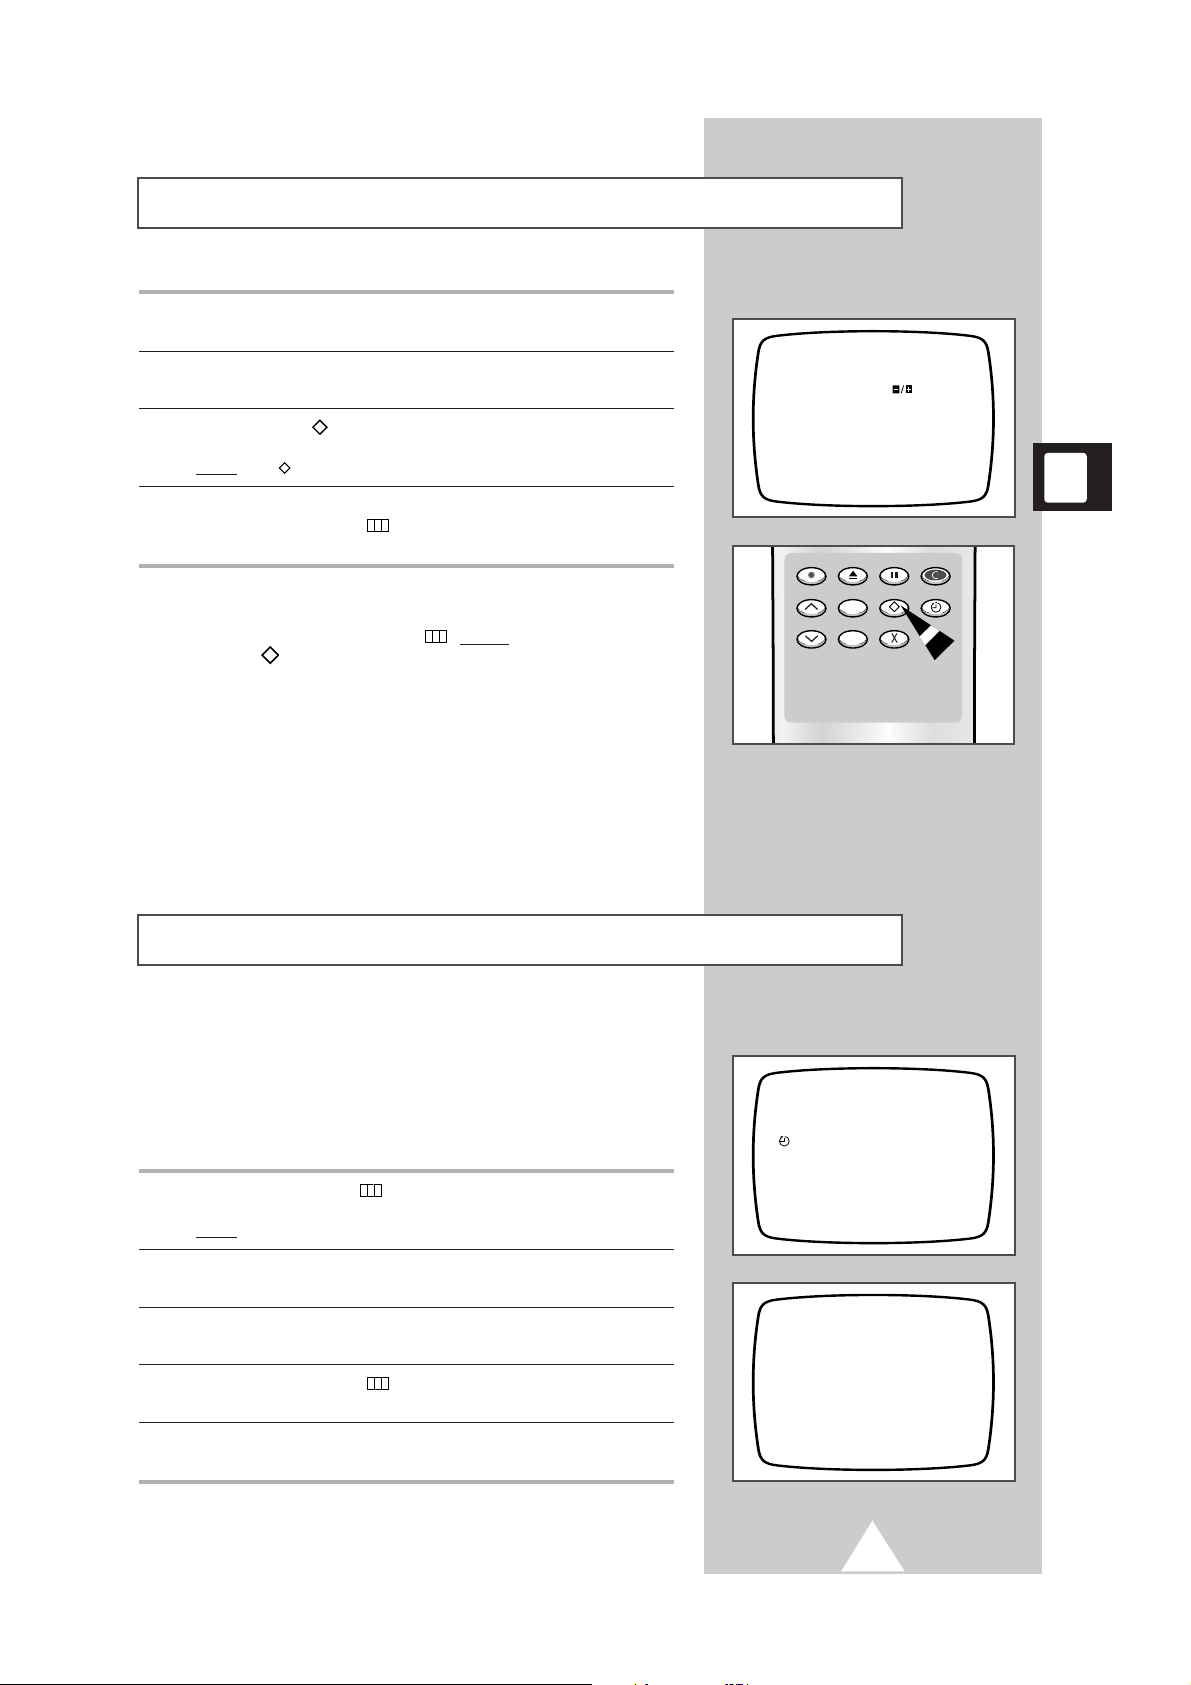
Setting the Date and Time
Your COMBI VISION contains a 24-hour clock and calendar used
to:
◆ Preset the VCR to record up to six programmes
automatically over a period of one month
◆ Switch the set on or off automatically at a specific time
You must set the date and time when:
◆ You purchase the COMBI VISION
◆ The power supply is switched or cut off
1 Press MENU ( ) on the remote control.
Result
: The television menu is displayed.
2 Select the option by pressing P ▲ or ▼ the appropriate number of
times, followed by the + button.
Result
: The current date and time are displayed.
3 Enter the hour and then the minutes by pressing the numeric buttons.
➢ When a time is entered, all single digits must be preceded by a
zero.
Example
:3:07 p.m.
Enter 15:0
7
4 To select the date, press P ▼.
5 Press the numeric, + or - buttons to enter the:
◆ Day
◆ Month
◆ Year
Result
: The day of the week is displayed automatically next to the date.
➢ When a date is entered, all single digits must be preceded by a
zero.
Example: 6th April 2000
Enter 06/0
4/00
6 When you are satisfied with your settings, press MENU ( ) twice to
return to normal viewing.
➢ If you do not press a button for more than 30 seconds, the
display disappears automatically.
If you make a mistake when entering the date or time,
press the -button one or more times to return to the
incorrect figure and enter the correct one.
You cannot set the date and time during a programmed
recording.
12
MENU
PICTURE
TUNE
SETUP
--:--
TIME : 15:07
DATE : 06/04/00 THU
GB
V.MENU MUTE
P
DISPLAY P.STD
MENU
P
Pre.
13
You can scan the frequency ranges available on your television and
in your country and store all the stations found automatically. If
you have a dual tuner model, the stations are stored for both tuners
at the same time (television and VCR).
The stations are stored in the order in which they appear in the
frequency bands. It is possible that the automatically allocated
programme numbers may not correspond to those by which you
wish to identify the stations. If this is the case, you can then sort
them manually and clear any stations that you do not wish to watch
(see page 14 for further details).
➢
If you wish to receive a scrambled television station,
check that the decoder is switched off
. Switch it back on
once you have finished storing the stations.
1 Press MENU ( ).
Result
: The television menu, illustrated opposite, is displayed.
2 Select the TUNE option by pressing P ▼, followed by the + button.
Result
: The tuning menu is displayed.
➢ The TUNE option is not available if:
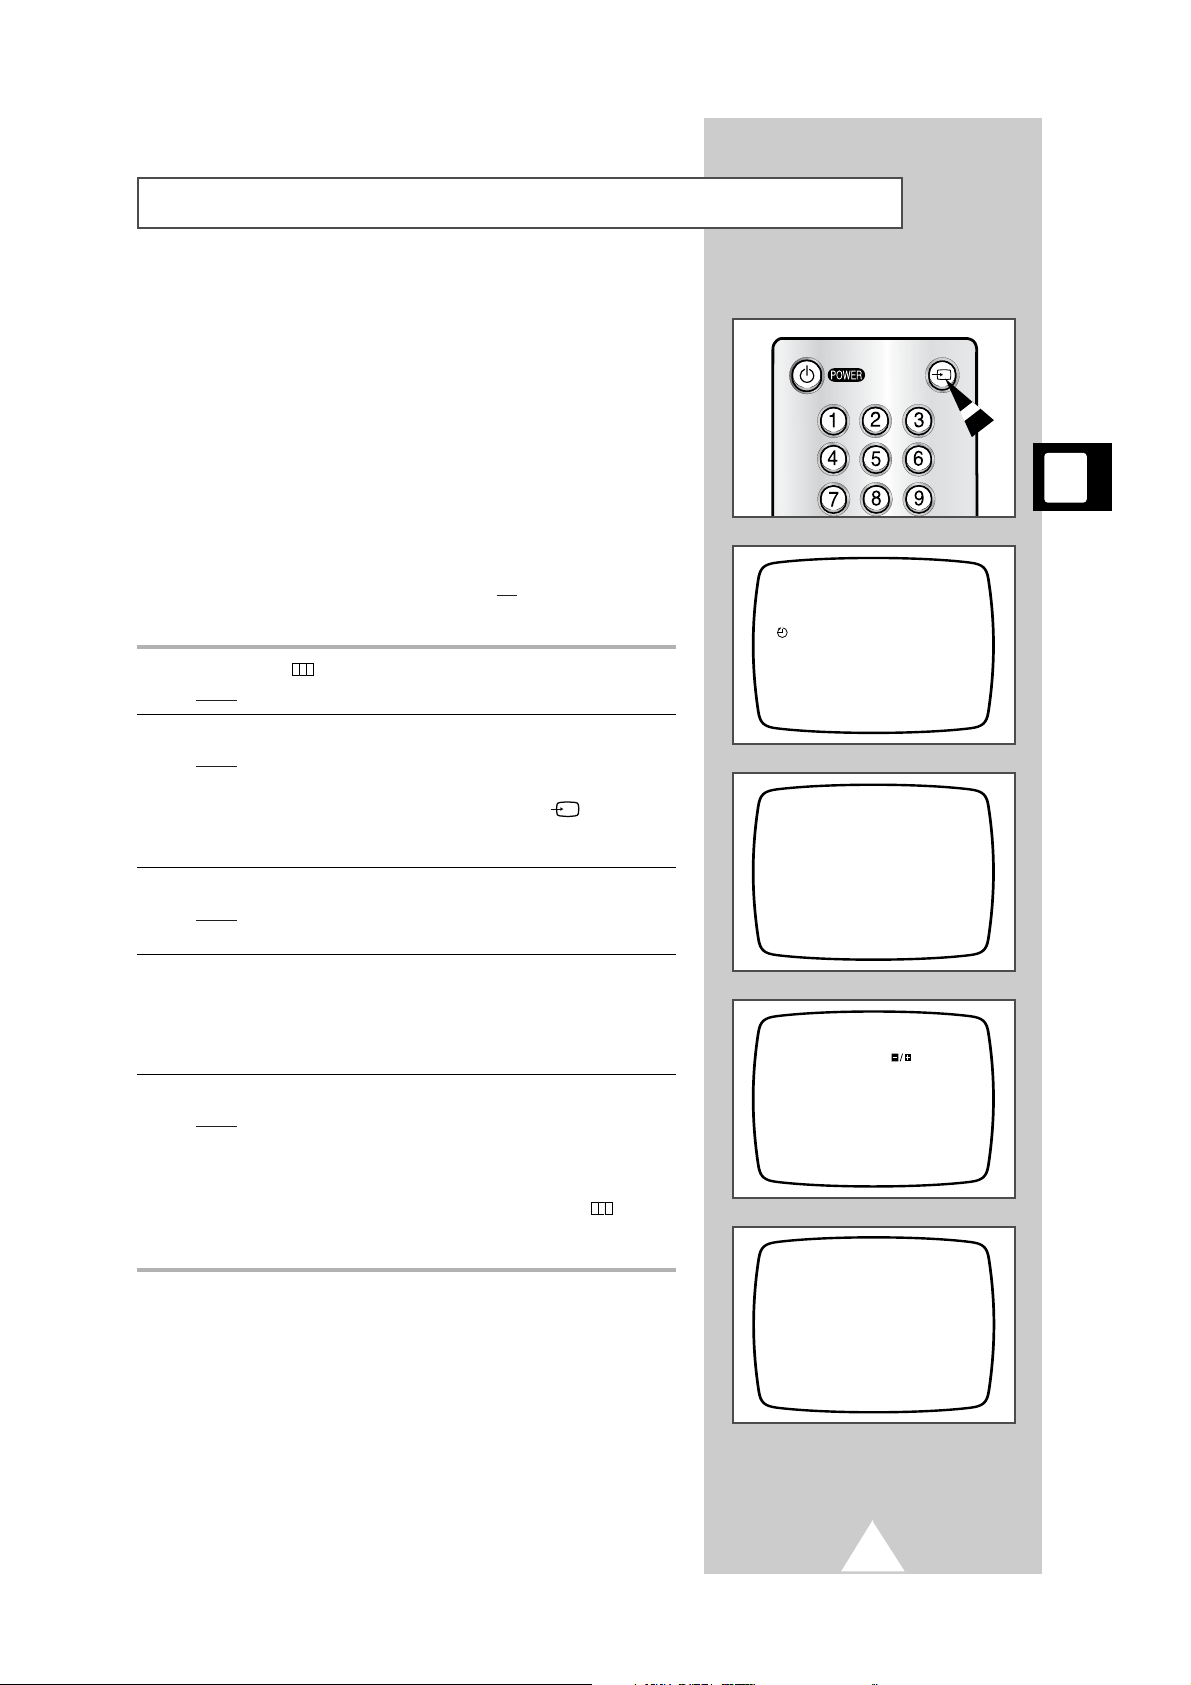
◆ The AV input is selected; press INPUT ( ) to select an
ordinary station
◆ A video cassette is playing; stop the cassette
3 Select the AUTO TUNE option by pressing P ▼, followed by the + button.
Result
: The AUTO TUNE menu is displayed with the COUNTRY is
selected.
4 Select your country by pressing the +, The following countries are
available: AUSTRIA - BELGIUM - CROATIA - DENMARK - FINLAND
- FRANCE - GERMANY - ICELAND - IRELAND - ITALY NETHERLANDS - NORWAY - POLAND - SPAIN - SWEDEN SWITZERLAND - TURKEY - UK.
5 Select the AUTO TUNE option by pressing P ▼, followed by the + button.
Result
: The scan starts and the stations are stored in the order in
which they are found, starting with programme 00. The scan
stops automatically once all the frequency bands have been
scanned.
➢ You can stop the scan at any time by pressing MENU ( ).
When the scan stops before more than two stations are stored,
many of the stored stations before the scan is done remain “stored”.
Storing the Stations Automatically
(depending on the model)
P 02
MENU
PICTURE
TUNE
SETUP
--:--
TUNE
MANUAL TUNE
AUTO TUNE
AUTO TUNE
COUNTRY : UK
AUTO TUNE :
P 1
FREQUENCY : 225.00 MHz
INPUT

Sorting and/or Clearing the Stored Channels
The Sort operation enables you to reassign programme numbers to
previously stored stations or to clear stations that you will never
watch. This operation is often required after you have stored the
stations automatically. You need only keep the stations that you
wish to watch.
1 Select the station to be assigned a new programme number, using the
numeric buttons or the P ▲ or ▼ buttons.
2 Press MENU ( ).
Result
: The television menu is displayed.
3 Select the TUNE option by pressing P ▼, followed by the + button.
Result
: The tuning menu is displayed with the
MANUAL TUNE is
selected.
➢ The TUNE option is not available if:
◆ The AV input is selected; press INPUT ( ) to select an
ordinary station
◆ A video cassette is playing; stop the cassette
4 Press the + button.
5 If you wish to... Then...
Assign a new number 1 Select the NEW PR. option and enter the
to a preset station new programme number to be assigned to
the station.
Example: To move the station from
programme 21 to 02, enter 02.
2 Press MEMORY ( ) to store the change.
Result
:
:STORE is displayed briefly in
red.
Clear a preset 1 Select CURRENT PR..
channel 2 Press CLEAR ( X ).
Result: X:CLEAR is displayed briefly in
red and the station is cleared.
The programme number can be
reused for another station. To
assign a new station, store a
new station manually (refer to
page 16 for further details on this
function).
6 Repeat Step 5 if you wish to reassign or clear other programmes;
otherwise, press MENU ( ) the required number of times to return to
normal viewing.
➢ If you wish to cancel the operation without taking into
account your changes, press MENU ( ) before
you
press MEMORY ( ).
14
MENU
PICTURE
TUNE
SETUP
--:--
CURRENT PR. : P O
NEW PR. : P 0
NAME : - - - - SEARCH :
FREQUENCY : 192.00MHz
AFT : ON
GB
TUNE
MANUAL TUNE
AUTO TUNE
V.MENU MUTE
P
MENU
P
DISPLAY P.STD
REC
EJECT
INDEX SLEEPMEMORY
TRK CLEARLANG.SEL
P/S
CRYSTAL PB

15
Once you have stored the channels on your COMBI VISION,
you can select them easily via your remote control.
To switch... Press...
To the next station P ▲.
To the previous station P ▼.
To the station of your choice The appropriate numeric button(s);
see the section below for further details.
Repeatedly between the last PRE-CH ( ) as many times as you require.
two stations displayed
When selecting a station stored at programme position ten or
higher, follow the instructions below.
1 Press the
-/--
button on the remote control.
Result: P-- is displayed in the top left-hand corner of the screen.
2 Enter the two-digit station number.
Example
: To select station 42, press 4 followed by 2.
3 To enter one-digit station numbers:
◆ Precede the number with a zero (0)
or
◆ Press the -/-- button again
Result: P- is displayed; you can now enter the required one-digit
number without a zero.
Changing Stations
Selecting a Station Numbered Ten or Over
P 02
P--
V.MENU MUTE
P
MENU
P
DISPLAY P.STD
Pre.
Pre.

Storing the Stations Manually
You can store up to 100 television stations, including those received
via the cable network. If you have a dual tuner model, the stations
are stored for both tuners at the same time (television and VCR).
When storing stations manually, you can choose:
◆ Whether or not to store each of the stations found
◆ The programme number by which you wish to identify
each stored station
◆ To enter the frequency of the station to be stored
directly, if you know it
You have about 30 seconds to make each selection described
below. If you do not make a selection within this period of time,
the menu disappears.
➢
If you wish to receive a scrambled television station,
check that the decoder is switched off. Switch it back on
once you have finished storing the stations.
1 Press MENU ( ).
Result: The television menu is displayed.
2 Select the TUNE option by pressing P ▼, followed by the + button.
Result: The tuning menu is displayed with the MANUAL TUNE is
selected.
➢ The TUNE option is not available if:
◆ The AV input is selected; press INPUT ( ) to select an
ordinary station
◆ A video cassette is playing; stop the cassette
3 Press the + button.
Result
: The list of options is displayed.
4 If you... Then...
Know the frequency of ◆ Select the FREQUENCY option by
the station to be stored pressing P ▼ the required number of
times.
◆ Enter the required frequency by
pressing the numeric buttons or the +
and - buttons.
Result: The station is displayed.
◆ Go to Step 5 on the following page.
Do not know the frequency ◆ Select the SEARCH option by pressing
of the station to be stored P ▼ the required number of times.
◆ Press:
-
to search backwards through the
frequencies
+
to search forwards through the
frequencies
Result: When a station is found,
the searching stops and
the channel is displayed
on the screen. You can then:
- Continue the search by
pressing + or - again
- Store the station; go to step
5 on the following page
16
MENU
PICTURE
TUNE
SETUP
--:--
CURRENT PR. : P O
NEW PR. : P 0
NAME : - - - - SEARCH :
FREQUENCY : 192.00MHz
AFT : ON
GB
CURRENT PR. : P O
NEW PR. : P 0
NAME : - - - - -
SEARCH :
FREQUENCY : 192.00MHz
AFT : ON
TUNE
MANUAL TUNE
AUTO TUNE
V.MENU MUTE
P
MENU
P
DISPLAY P.STD
17
5 When the station to be stored appears on the screen, select the NEW PR.
option by pressing P ▲ or P ▼ the required number of times.
6 Enter the programme number to be assigned to the channel using the
numeric, + or - buttons.
7 Press MEMORY ( ) to store the station.
Result: :STORE is displayed briefly in red.
8 To store other stations, return to Step 4.
Otherwise, press MENU ( ) the appropriate number of times to return
to normal viewing.
➢
◆ If you wish to cancel the operation without storing the
station, press MENU ( ) before
you press MEMORY
().
◆ If you have already stored the station, you can clear it
and replace it with a different station.
To clear a station, refer to the section entitled “Storing
and/or Clearing the Stored Stations” on page 14.
Storing the Stations Manually
(cont.)
P 02
CURRENT PR. : P O
NEW PR. : P 1
NAME : - - - - SEARCH :
FREQUENCY : 192.00MHz
AFT : ON
This function is very useful in the situation that the TV is used in
weak signal. LNA amplifies the TV signal in the weak signal area,
but not noise.
This feature is working only weak signal condition, and that is
memorized on current channel, additional.
1 Press the MENU button ( ).
Result
: The television menu is displayed.
2 Select the SETUP option by pressing P ▲ or ▼ buttons one or more times,
followed by the + button.
3 To activate this feature, press the + button to set the 3DB LNA option to
ON.
4 Press the MENU button ( ) the required number of times to return to
normal viewing.
5 If you wish to deactivate this feature, repeat the procedure and set the
3DB LNA option to OFF.
Activating the 3DB LNA (Low Noise Amplifier) Feature
(depending on the model)
MENU
PICTURE
TUNE
SETUP
--:--
SETUP
PANEL LOCK : OFF
ON TIMER : OFF
3DB LNA : ON
REC
EJECT
INDEX SLEEPMEMORY
TRK CLEARLANG.SEL
P/S
CRYSTAL PB
 Loading...