

SAMSUNG SPR6100 Service Manual

SERVICE
Cordless Telephone
SP-R6100
Manual
Cordless Telephone CONTENTS
1. Product Specification
2. Operations & Installation
3. Exploded View & Parts List
4. Electrical Parts List
5. Block Diagrams
6. PCB Diagrams
7. Schematic Diagrams
8. Usage of Jig Program

CONTENTS
1. Product Specification
2. Operations & Installation
2-1 Getting Started
2-1-1 Checking Parts
2-1-2 Control Locations
2-1-3 Connecting Lines
2-1-4 Installing Handset Batteries
2-1-5 Charging the Handset
2-1-6 Turning the Handset On/Off
2-1-7 LCD Window Icon Descriptions
2-1-8 Choosing Dial Mode
2-1-9 Using Headset
2-2 General Functions
2-2-1 Making a Call
2-2-2 Camp On Busy
2-2-3 Receiving a Call
2-2-4 Caller ID Display
2-2-5 Last Number Redial
2-2-6 Battery Level Indicator
2-2-7 Out of Range Indicator
2-2-8 Adjusting Ring Volume
2-2-9 Adjusting Key Volume
2-2-10 Quick Switching to Vibration Mode
2-2-11 Registered Recall
2-2-12 Tone Dial Switchover
2-2-13 Paging
2-3 Using the Menus
2-3-1 Using the Soft Keys
2-3-2 Using the Index System
2-4 PhoneBook
2-4-1 Storing a Phone Number with a Name
2-4-2 Entering a Name
2-4-3 Dialling a Number in Phonebook
2-4-4 Searching for Numbers in Memory
2-4-5 Erasing All Numbers
2-4-6 Phonebook Options
2-5 Received Calls (Caller ID)
2-5-1 Viewing and Dialling a Number
2-5-2 Received Calls Options
2-6 Greeting Message
2-6-1 Greeting Message
2-7 Ring
2-7-1 Choosing Ring Tone
2-7-2 Adjusting Ring Volume
2-7-3 Choosing Alert Type
2-7-4 Unique Ring Tones for selected calls
2-7-5 Ring Delay Time
2-8 Settings
2-8-1 Tone/Pulse
2-8-2 Call Time Display
2-8-3 Base Number Display
2-8-4 Active Flip
2-8-5 Language Selection
2-9 System
2-9-1 Call Barring
2-9-2 Registering a New Handset
2-9-3 Intercom Between Handsets
2-9-4 Call Transfer Between Handsets
2-9-5 Removing a Handset
2-9-6 Changing PIN (Personal Identification
Number)
2-9-7 Reset Handset
2-10 Base
2-10-1 Selecting Base Manually
2-10-2 Finding Base Automatically
2-10-3 Troubleshooting
3. Exploded View & Parts List
3-1 SP-R5200 HANDSET P/L
3-2 SP-R5200 HANDSET Exploded View
3-3 SP-R5200 BASE P/L
3-4 SP-R5200 BASE Exploded View
3-5 SP-R5200 PACKING P/L
3-6 SP-R5200 PACKING Exploded View
4. Electrical Parts List
4-1 SP-R6100 Hand Logic Parts List
4-2 SP-R6100 Base Logic Parts List
4-3 SP-R6100 KEY Parts List
4-4 SP-R6100 Charger Part List
4-5 PCB Array
5. Block Diagrams
5-1 SP-R6100 Base Logic Block Diagram
5-2 SP-R6100 RF Block Diagram
5-3 SP-R6100 Hand Block Diagram
6. PCB Diagrams
6-1 SP-R6100 Base PCB (I)
6-2 SP-R6100 Base PCB (II)
6-3 SP-R6100 Handy PCB (I)
6-4 SP-R6100 Handy PCB (II)
6-5 SP-R6100 Key PCB (I)
6-6 SP-R6100 Key PCB (II)
6-7 SP-R6100 Charger PCB (I)
6-8 SP-R6100 Charger PCB (II)
7. Schematic Diagrams
7-1 SP-R6100 Hand Logic
7-2 SP-R6100 Hand RF
7-3 SP-R6100 BASE LOGIC
7-4 SP-R6100 Base CLIP
7-5 SP-R6100 BASE RF
7-6 SP-R6100 HAND KEY
7-7 SP-R6100 CHARGER
8. Usage of Jig Program

1. Product Specification
Product Specification 1-1
Item Description
Standard DECT/GAP
Frequency Range 1.88~1.90 GHz
Channels 120 Duplex Channels
Carrier Power ² 250 mW (24dBm)
Modulation GFSK
Frequency Stability ² ± 50kHz
Ni-MH:Standby Mode : 70hours
Operation Time Talk Mode : 7hours
Charging time : 10hours
Ambient Temperature
Normal : 15ûC~35ûC
Extreme : -10ûC~40ûC
Humidity 5%~90%
Weight
Baseset : 120g
Handset : 100g
Dimensions
Baseset : 64✕160✕73 mm (HWD)
Handset : 115✕22✕46 mm (HWD)
Power Supply Baseset Input : DC 5V 400mA
Battery Ni-MH: 2.4V, 600 mAh
CTR 06
CTR 10
Compliance CTR 22
EMC
NET4 (PSTN)
Operations & Installation
2. Operations & Installstion
2-1 Getting Started
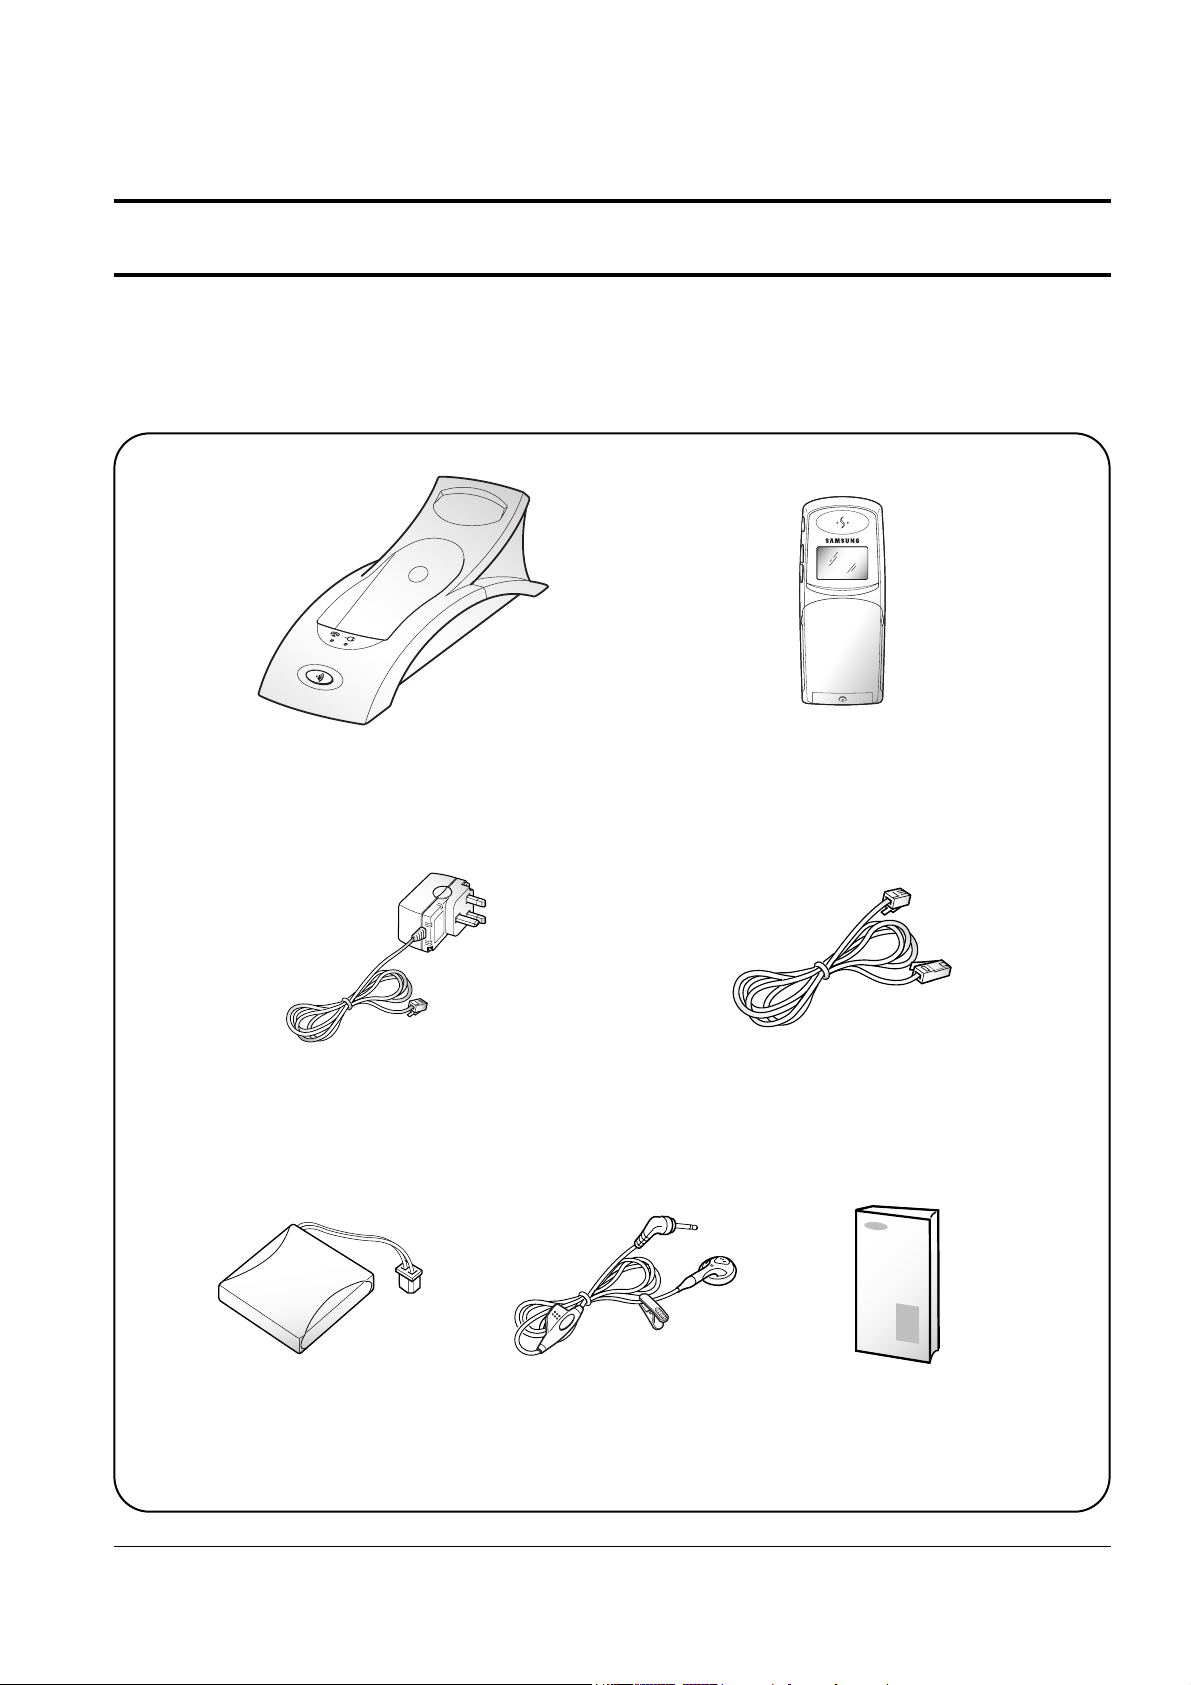
2-1-1 Checking Parts
Once you have unpacked your phone, check to make sure that you have all the parts shown below. If any piece
is missing or broken, please call your dealer.
2-1
Base
Adapter
User’s Manual
Battery Handset
Line Cord
Handset
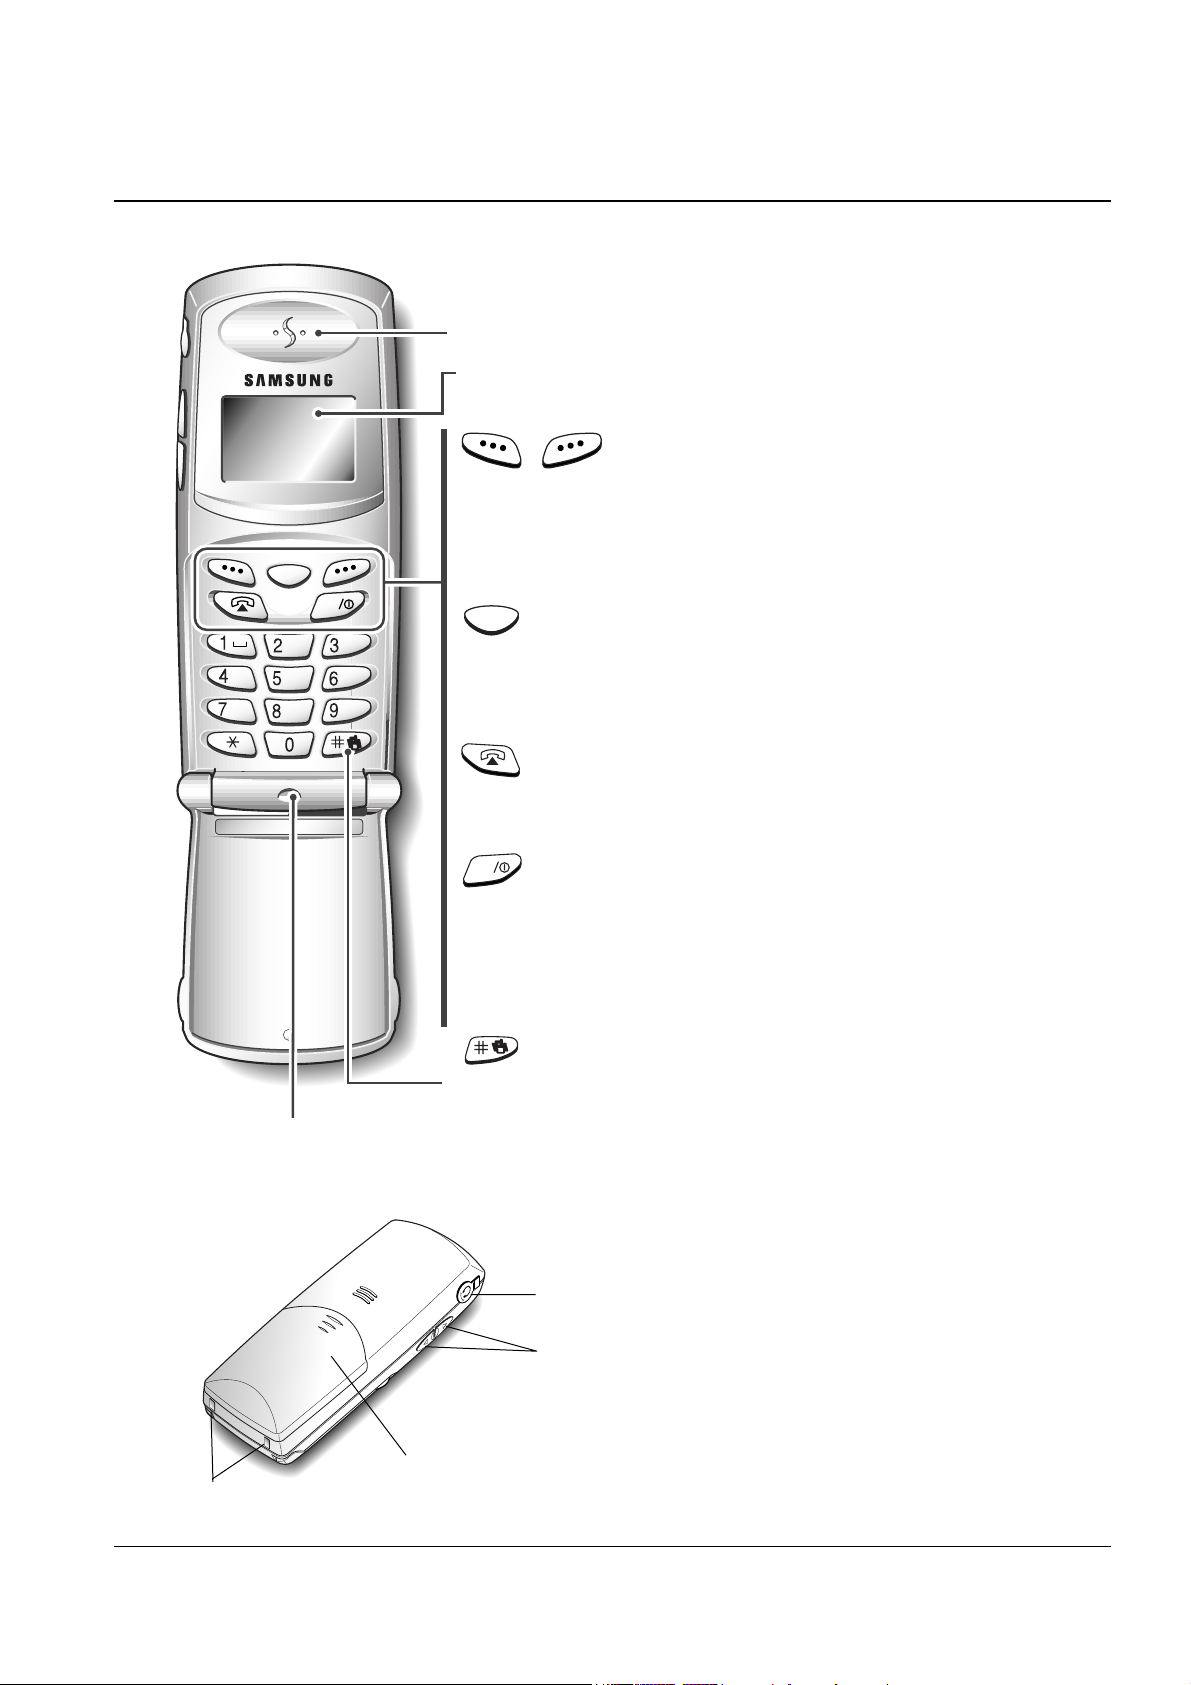
2-1-2 Control Locations
Handset
Operations & Installation
GHI
JKL
DEF
ABC
WXYZ
TUV
PQRS
MNO
INT
C
Rear
2-2
Ear piece
LCD window
Microphone
Each of the two soft keys performs the function
indicated by the text above it (the bottom line in the
display).
Deletes characters from display. When using the menu
system, returns to the previous menu level.
Makes, answers, or ends a call.
Activates intercom communications. Also switches the
phone on and off.
Quickly switches to the vibration mode.
soft keys
C
key
key
INT
key
key
Charging points
Battery cover
Headset jack
Volume keys
Adjusts the volume.When you press and hold the up key in
standby mode with the flip cover closed, you can quickly
switch to the vibration mode. When using the menu system,
scrolls through the menu options and the phonebook memory.
Operations & Installation
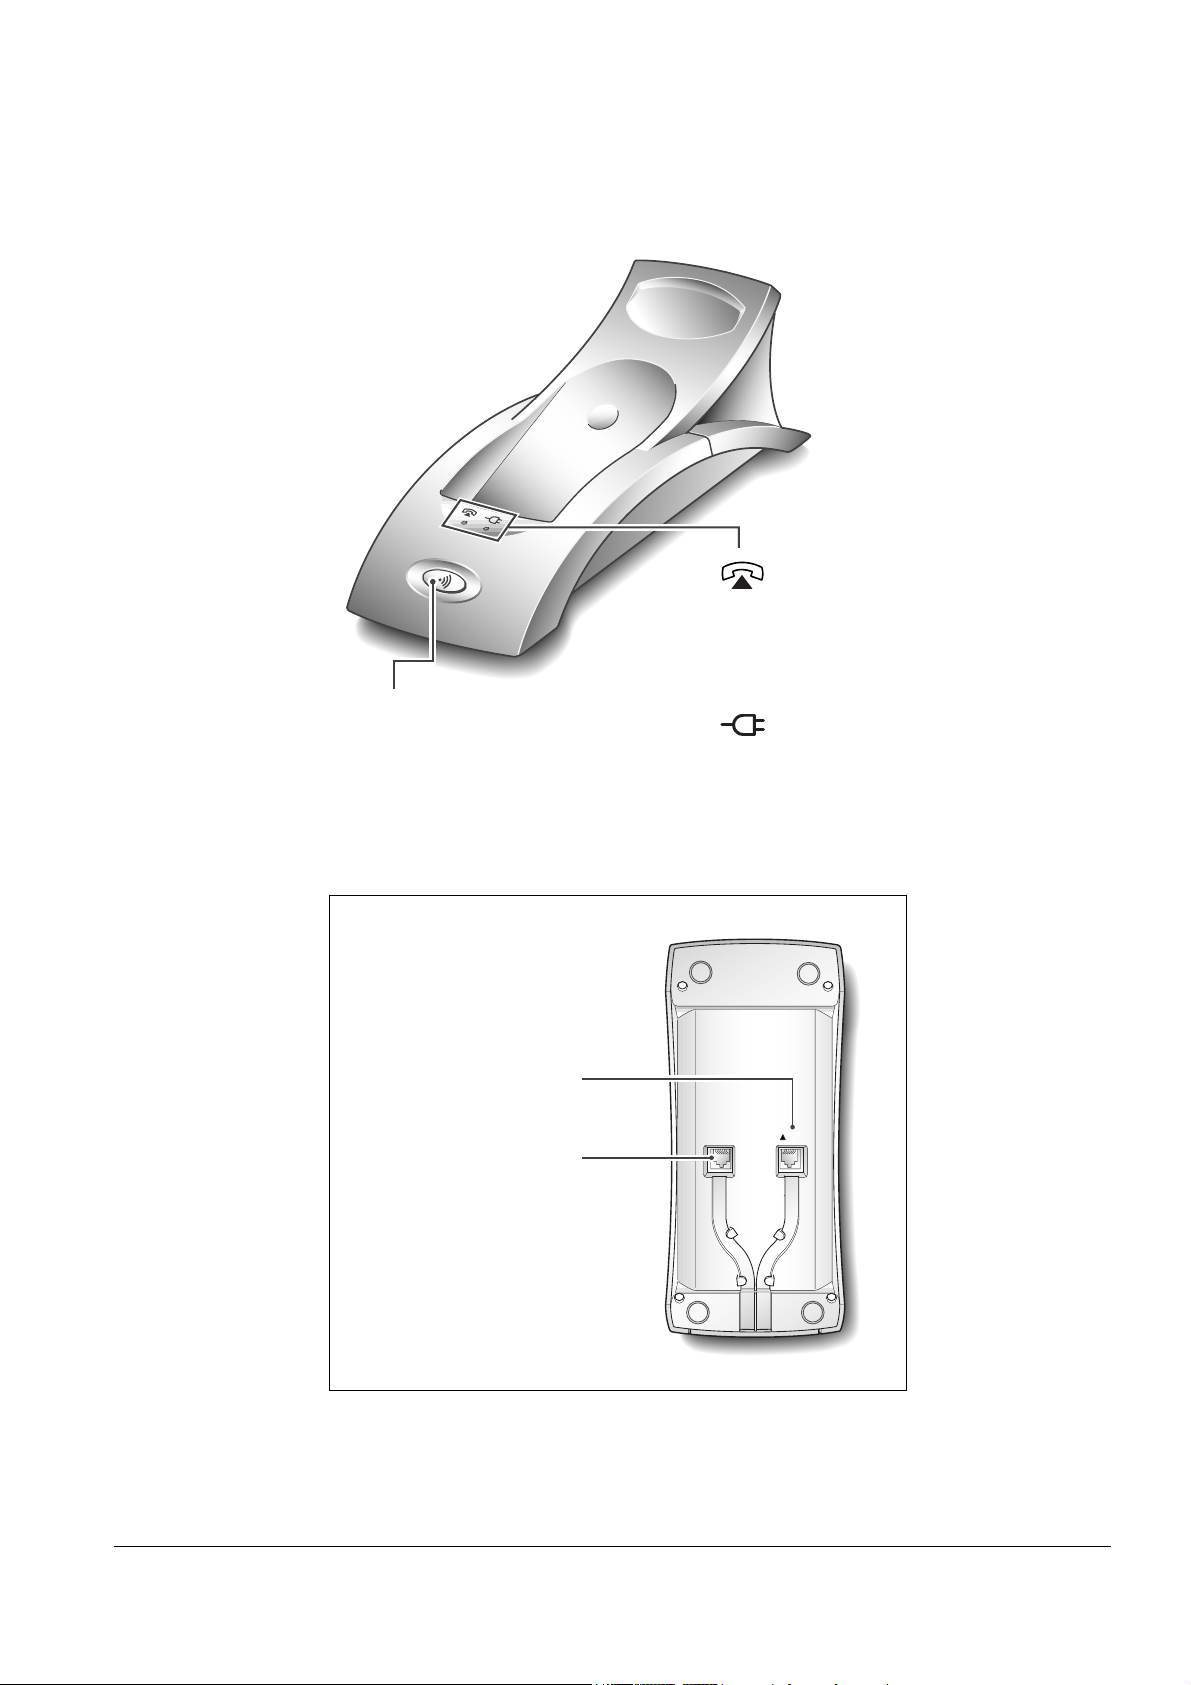
Base
2-3
lamp
Blinks when a call comes in
and lights steadily when a call
is in progress.
lamp
Lights steadily while the base
is connected to the power supply.
Paging key
Allows you to page the handset.
Also used to register a new
handset with the base.
DC5V
LINE
Base Bottom
Phone Line socket
Power socket
Operations & Installation
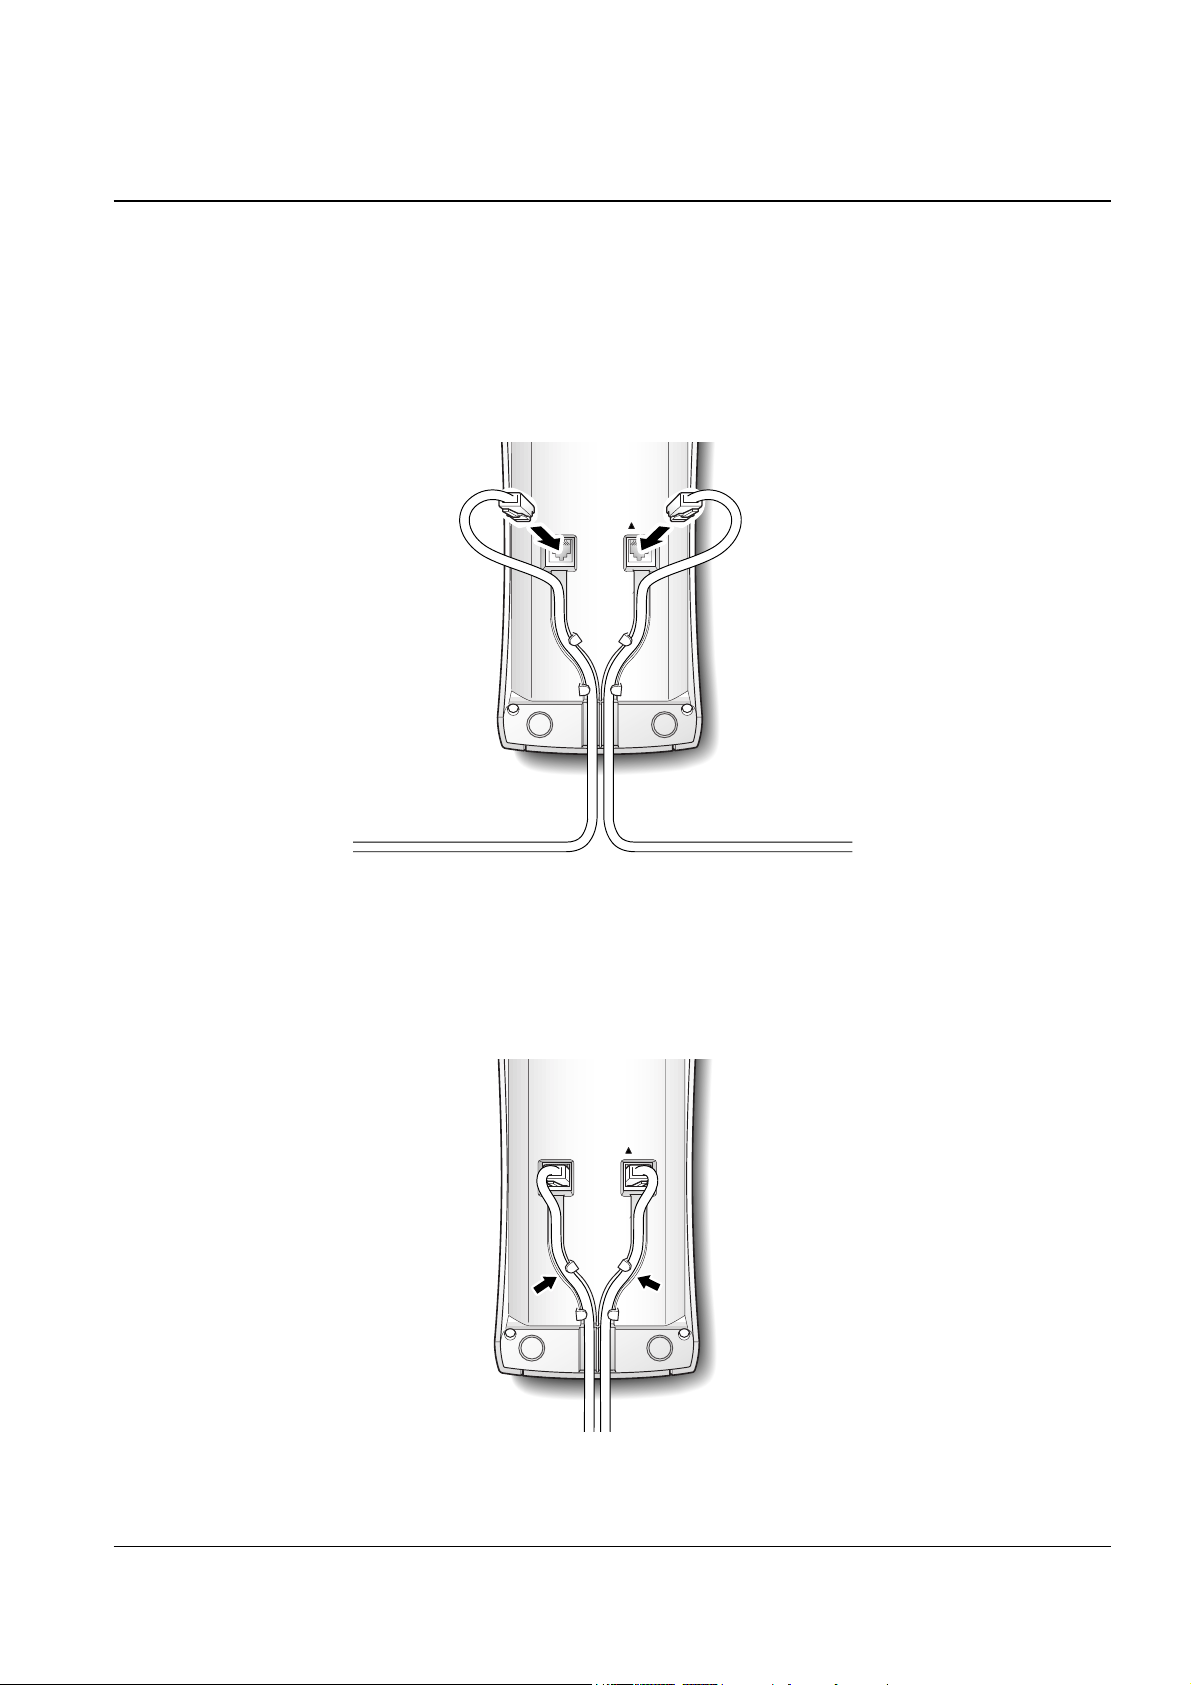
2-1-3 Connecting Lines
1. Connect one end of the telephone line cord to the phone line socket on the bottom of the base unit, and the
other end to a standard phone wall jack.
2. Connect the modular end of the power adapter to the power socket on the bottom of the base unit, and the
other end to a standard AC wall outlet.
2-4
3. Route the cords through the recessed channel as shown.
DC5V
LINE
DC5V
LINE
To AC wall outlet To phone wall jack

Operations & Installation
2-1-4 Installing Handset Batteries
The handset uses the rechargeable Ni-MH battery supplied.
1. Slide the battery cover in the direction of the arrow, then lift it off.
2-5
2. Remove old battery (if any), then plug the battery connector into the socket shown below, and insert the
battery.
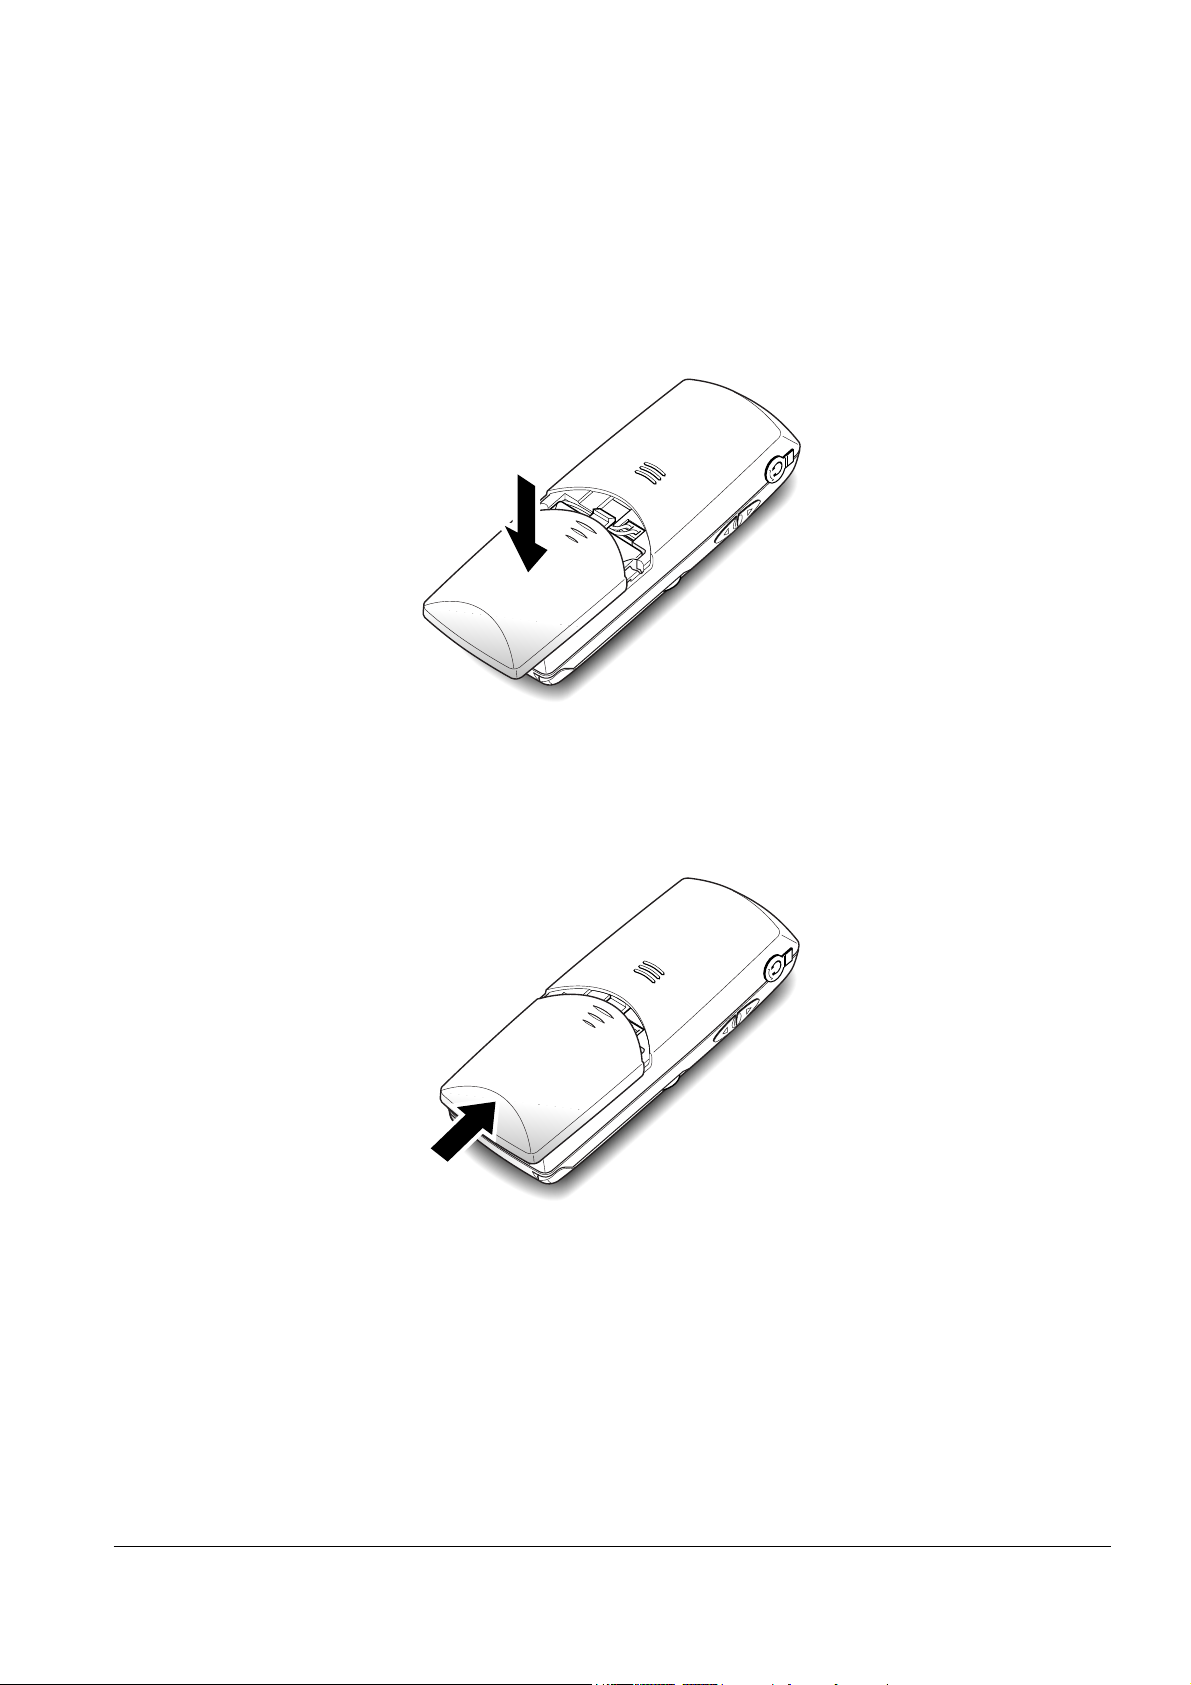
Operations & Installation 2-6
3. Replace the battery cover. Make sure that the cover is properly aligned.
4. Slide the cover up until it snaps shut.
Notes:
¥ The battery needs to be replaced if it does not recover its full storage capacity after recharging.
¥ When replacing battery, only use SAMSUNG-approved battery. For details, see ÔSpecificationsÕ on page 65 or
ask your nearest service center.
Operations & Installation
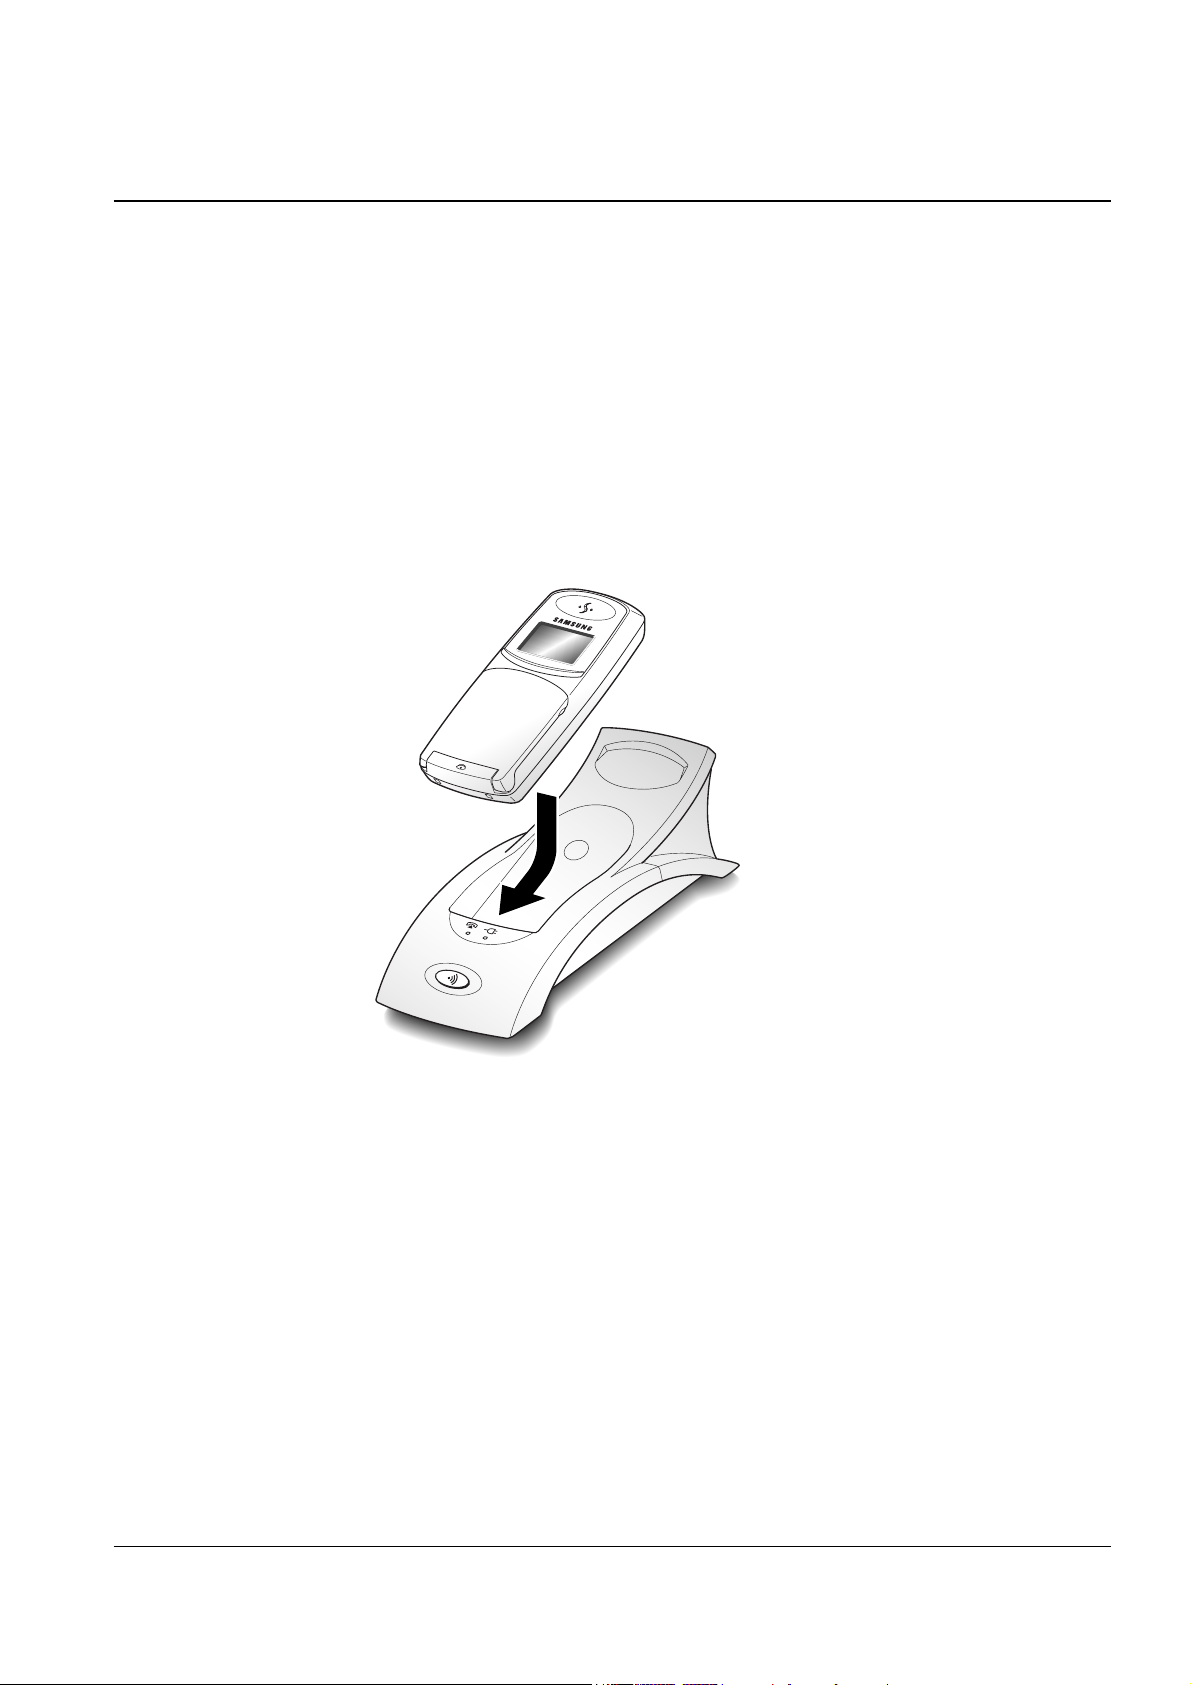
2-1-5 Charging the Handset
Before initial operation, you should fully charge the handset for more than 10 hours.
To charge the handset, simply place it in the base unit.
The handset can be charged facing up.
When the handset battery is charging, the handset automatically turns on and the battery icon in the right
corner of the display scrolls.
2-7

Operations & Installation 2-8
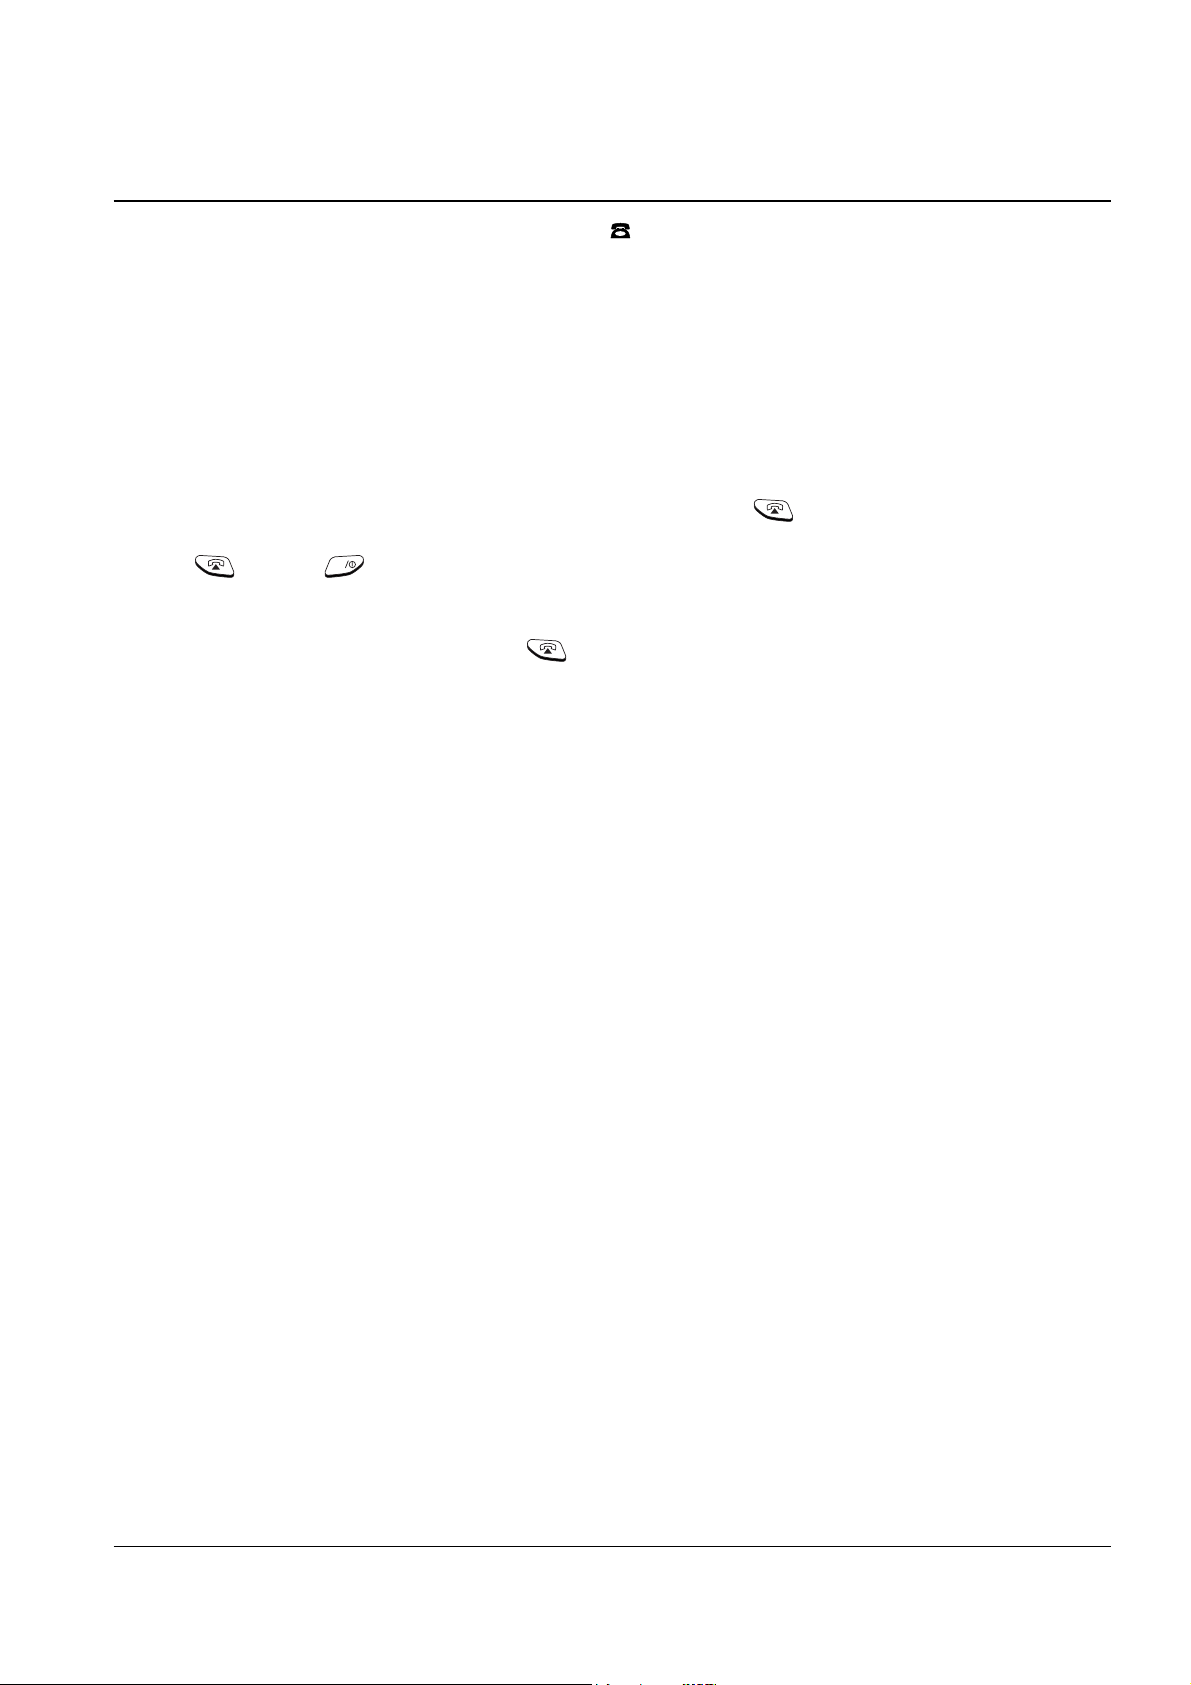
2-1-6 Turning the Handset On/Off
When you place the handset in the base unit to charge it, the handset automatically turns on. To turn the
handset on or off in Standby mode, follow these steps:
1. To turn on the handset when the display is off, press key.
The display shows the handset and base number, and the greeting message SAMSUNG as shown below.
(To change the greeting, see page 42) The phone is now ready for use.
2. To turn the handset off, press and hold key for about three seconds until the power-off message
appears in the display. The display turns off.
Notes:
¥ If you purchase an additional handset, you must register the handset to a base. If not, the display shows Fail
to Register when you turn it on and only two soft keys work to allow you to register the handset. Refer to
ÔRegistering a New HandsetÕ on page 54.
¥ Nothing will appear in the LCD window when battery power is very low. You should fully charge the
handset before operation.
INT
INT
HS(1 ) BS(1)
SAMSUNG
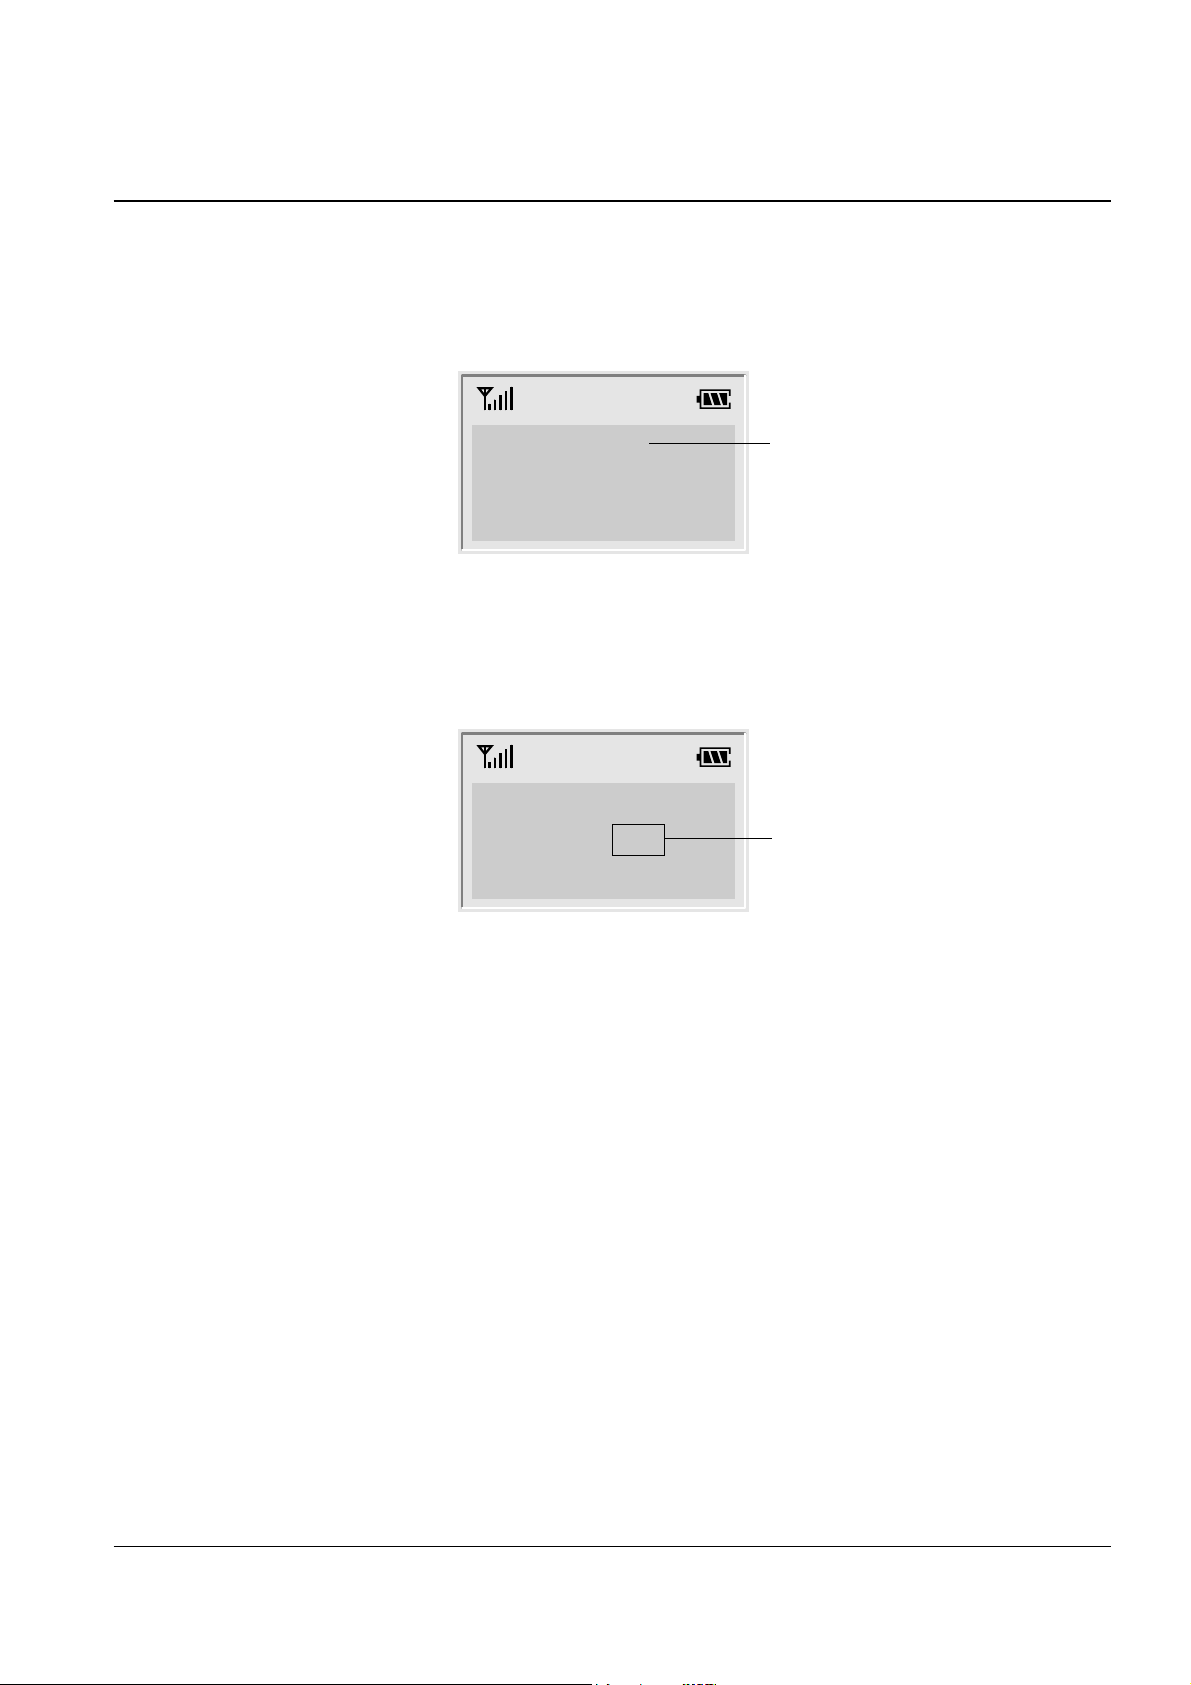
2-1-7 LCD Window Icon Descriptions
Signal Strength icon
Line icon
Vibration icon
Battery status icon
HS(1 ) BS(1)
SAMSUNG

2-9 Operations & Installation
2-1-8 Choosing Dial Mode
In order to provide compatibility with most telephone systems, your phone can be set to either pulse-dialling
(same as rotary), or tone dialling (DTMF). Your phone is preset to tone mode.
1. In the Standby mode, press the Menu soft key to access the menu mode.
2. Press the soft key repeatedly until Settings appears, then press the Select soft key.
3. Tone/Pulse is displayed. Press the Select soft key.
4. The options are displayed; Pulse and Tone. Press the soft key to change the setting.
5. Press the OK soft key to save the setting.
2-1-9 Using Headset
With the headset, you can talk without using your hands. When you connect the headset to the headset jack on
the left side of the phone, the headset operates in the same way as the phoneÕs speaker and microphone.
Pressing the button on the headset for more than one second allows you to answer or end a call(without
opening the flip cover or pressing a key on the phone).
Speaker
Microphone
Button
To the geadset jack
( ) on the left side
of the phone.
Clip
Allows you to attach the headset to
your clothes, for example.
Operations & Installation 2-10
2-2-1 Making a Call
1. Open the flip cover, and press key. You hear a dial tone.
Note: If you turn the Active Flip feature on, you do not need to press the key. For details, see page 50.
2. Dial the desired phone number by using the number keypad.
Note: You can store telephone numbers in Phonebook memory and dial the numbers using the assigned
memory address. Refer to ÔPhonebookÕ on page 32.
3. When the other person answers, speak.
4. To end the call, either close the flip cover or press key.
Notes:
¥ If you turn the ÔCall Time DisplayÕ feature on, the LCD
window displays the call time. For details, see ÔCall Time DisplayÕ on page 49.
¥ To make a call to the last number you dialled, use the ÔRedial Ô feature. For details, refer to ÔLast Number
RedialÕ on page 23.
You can enter the desired phone number in the Standby mode, and then dial the number. This way of dialling
allows you to make corrections to the number before dialling. Follow these steps:
1. Enter a telephone number. Check the number in the LCD window.
Notes:
¥ If you make a mistake while entering a number, press the key to clear the last digit and correct the
number.
¥ If you press and hold the key for more than one
second, all digits you have entered are cleared and the phone returns to the Standby mode.
2. When the number appears correctly, press key to dial the number.
C
C
2-2 General Functions

2-11 Operations & Installation
2-2-2 Camp On Busy
(Available only when you have more than one handset)
This feature allows your handset to wait for connection to the telephone line currently engaged by another
handset. Your handset rings when the telephone line becomes free.
1. You hear a short busy tone if you open the flip cover or press key while another handset engages the
telephone line.
The display shows the handset number currently engaging the line. Your handset is automatically camped
on the line.
Note: To cancel this feature, press key any time before the line is free. The handset returns to Standby
mode.
2. Your handset rings and the window displays FREE when the line becomes free.
3. Press key to engage the line while the handset rings.
Notes:
¥ If an incoming call arrives while your handset rings to tell you the line is free, the ÔCamp On BusyÕ feature is
automatically cancelled and an incoming ring sounds.
¥ Several handsets can be camped on the busy line in
chronological order. When the line becomes available to you, the LCD window displays FREE, and other
handsets will display your handset number following the word BUSY.
¥ When your handset rings and the window displays FREE, press the key within 10 seconds. Otherwise, the
handset returns to the Standby mode.
Operations & Installation 2-12
2-2-3 Receiving a Call
When somebody calls you, the phone rings. Also, the (( )) icon in the middle of your handsetÕs display and
the telephone lamp on the left of the base will start to blink.
The callerÕs phone number will be displayed if the telephone network has transmitted the necessary
information.
1. If the handset is on the base, pick up the handset and speak. Or
If the handset is out of the base, open the flip cover and speak. Or
If the handset is in the Standby mode with the flip cover open, press key.
Note: key and key will not work for three seconds after the flip has been opened to receive a call
in order to prevent the phone from being disengaged.
2. To end the call, close the flip cover or press key.
Note: If you set the ÔRing Delay TimeÕ feature, you can turn the handset ringer off for the specified time when a
call comes in and other handsets are ringing. Refer to ÔRing Delay TimeÕ on page 48.
INT
2-13 Operations & Installation
2-2-4 Caller ID Display
Caller ID displays the callerÕs name and number, as well as the date and time that the call was received. This
feature is available on your phone if the callerÕs network transmits the necessary information. You can use this
feature only when the callerÕs service network transmits the callerÕs information.
Notes:
¥ The number of unanswered missed calls (if any) will be displayed.
Your phone keeps track of the last 20 calls received. Refer to ÔReceived CallsÕ on page 40 to check and dial the
numbers.
¥ If a caller has chosen to withhold their number, you will see ID NOT RECEIVED in the display.
¥ If a callerÕs number is not available, you will see ID NOT RECEIVED in the display.
The caller’s number
and name
12345678
ELIZABETH
There is one missed call.
Call(1)
Operations & Installation 2-14
2-2-5 Last Number Redial
Your phone allows you to call the most recently dialled numbers again. The phone stores the last 10 numbers
you called.
To Dial the Last Number
1. Press the Redials soft key in the Standby mode. The last number you dialled is displayed.
2. Press key to dial the last number.
To View and Dial Any of Last 10 Numbers
1. Press the Redials soft key in the Standby mode.
2. Press the soft key to scroll through the redial memory.
Each time you press the key, the numbers you dialled are displayed with the memory cell number. Cell 01
stores the last number and cell 10 stores the oldest number.
3. Press key to dial the selected number.
Notes:
¥ If there is no number dialled, Redials Empty is displayed.
¥ You can modify the number displayed by using key before pressing key .
To Erase All Numbers In Redial Memory
1. Press the Redials soft key in the Standby mode.
2. Press the All Erase soft key. The display prompts you to confirm the setting.
3. Press the Yes soft key. You hear a beep and the phone returns to the Standby mode after clearing the redial
memory.
C

2-15 Operations & Installation
2-2-6 Battery Level Indicator
A icon is continuously displayed in the upper line of the LCD window. The icon shows the level of
your battery. The more bars you see, the more power you have left.
When the battery is weak and a few minutes of talk time remain, you will hear a warning tone and the
icon blinks.
When the battery becomes too weak for the phone to operate, the handset will automatically turn off. Place the
handset on the base unit to charge the handset battery.
Flat Full
HS(1) BS(1)
SAMSUNG
2-2-7 Out of Range Indicator
Your phone indicates the received signal strength through the strength icon. The more bars you see, the
stronger the signal is. If the handset is too far from the base unit and the handset cannot properly engage the
telephone line, the icon blinks in the LCD window.
If you move out of range during a call, the telephone line might be disconnected and the handset returns to the
Standby mode. Check if the icon blinks in the LCD window. If so, move the handset closer to the base unit.
Signal
Strength Icon
HS(1) BS(1)
SAMSUNG
Operations & Installation 2-16
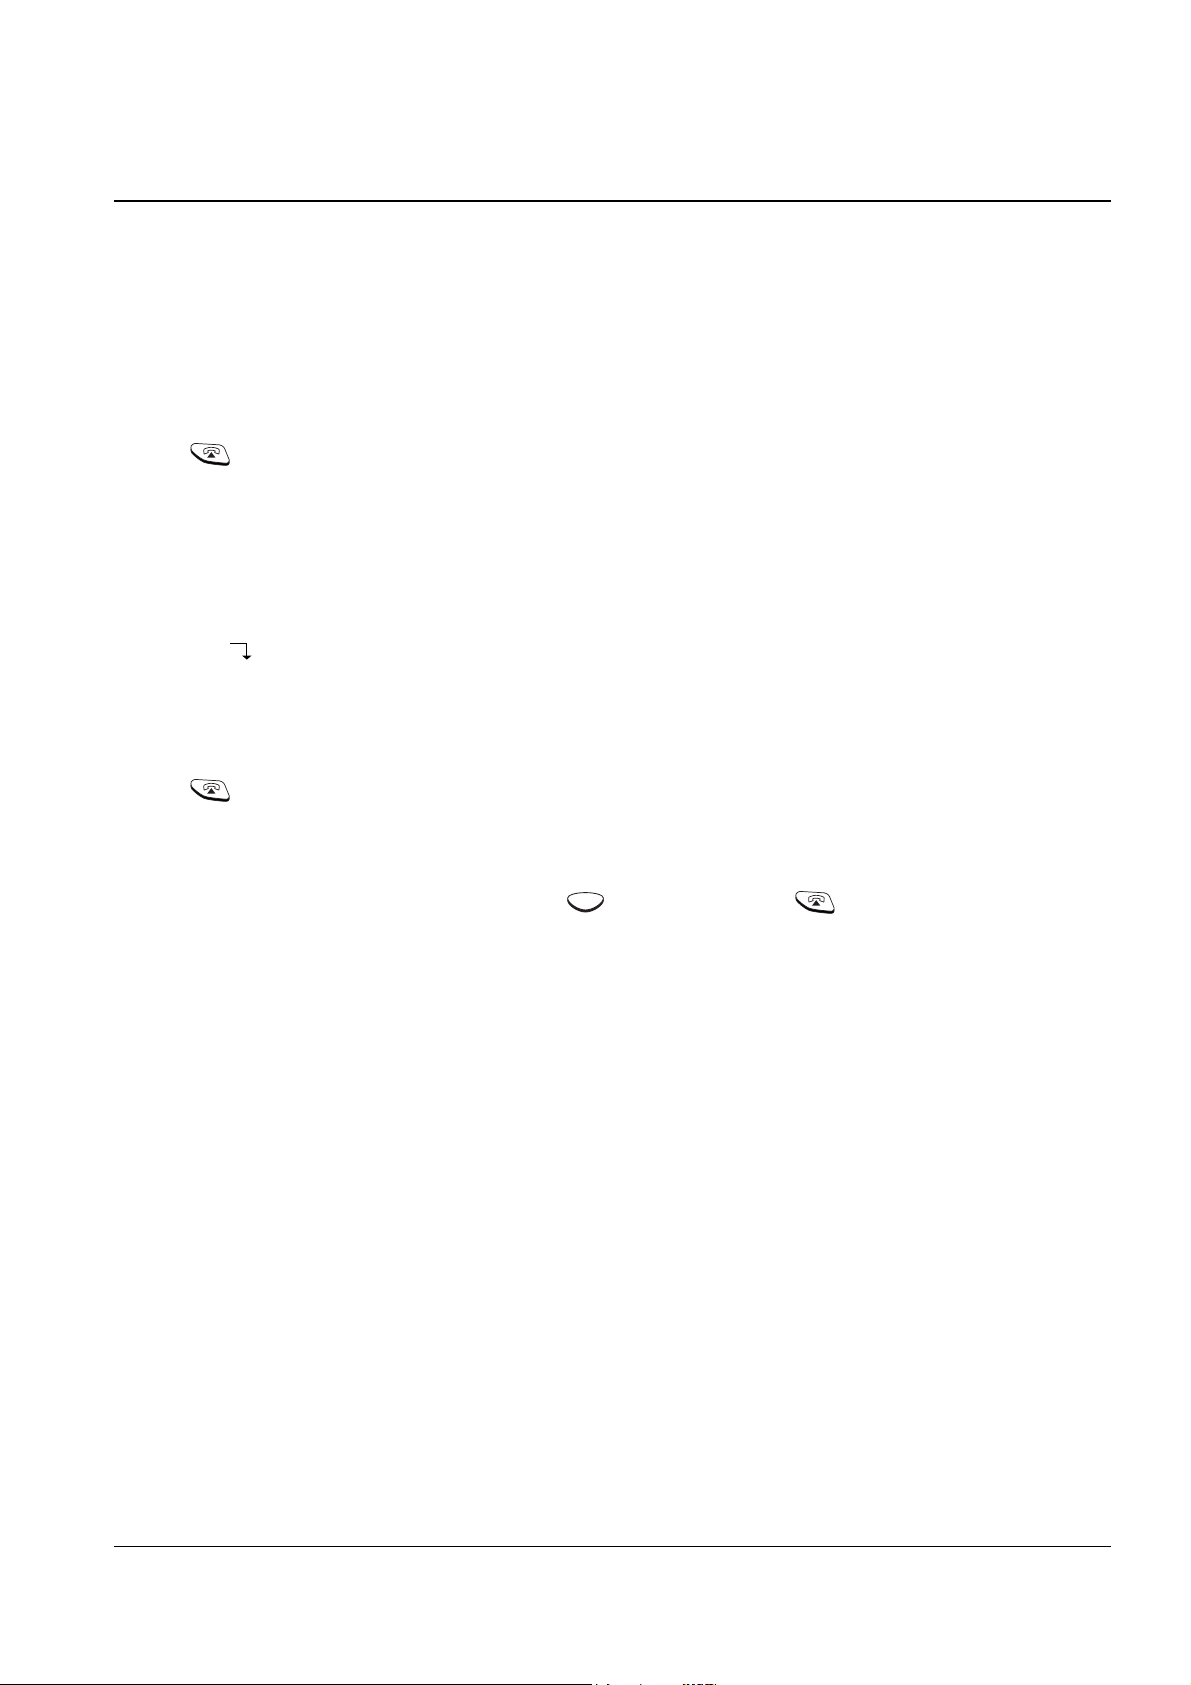
2-2-8 Adjusting Ring Volume
During calls, pressing the or keys on the side of the phone affects the ear piece volume.
You can adjust the volume from level 1 to 5, and it is preset to level 3. The voice volume is displayed as bars in
the LCD window. The more bars you see, the louder the volume is.
2-2-9 Adjusting Key Volume
In the Standby mode with the flip cover open, press or key on the side of the phone .
You can adjust the volume from level 0 to level 5, and it is preset to level 3. The key volume is displayed as
bars in the LCD window. The more bars you see, the louder the volume is. No bar, no key beep.
2-2-10 Quick Switching to Vibration Mode
You can quickly switch your phone to vibration mode with a touch of the key or on the left side of the
phone. This feature provides a convenient way to mute your phoneÕs ringer quickly.
Press and hold the key or on the left side of the phone (with the flip cover closed) in the Standby
mode. Alert Type Vibration is displayed for a second. Also, the icon appears. Your phone switches to the
vibration mode immediately.
Press and hold the key or on the left side of the phone (with the flip cover closed) again to resume the
phoneÕs alert type which was previously set through the Ring Tone option under Ring menu; see page 43 for
further details.
Ear piece volume indicator
Voice Volume
[
_
]
Flash Redials

2-17 Operations & Installation
2-2-11 Registered Recall
You can place a new call directly after a call or transfer a call to another extension under PABX, using this
feature.
To send a flash, simply press the Flash soft key while the line is engaged. The display shows F.
2-2-12 Tone Dial Switchover
To access certain services such as voice mail or interactive telephone system features, it is necessary to use tone
dialling. When your phone is set to the pulse mode, DTMF dialling is available.
1. Press the asterisk key ( ) while on the phone in the pulse dial mode. Your phone is converted to the tone
dial mode temporarily.
2. When you press the Flash soft key or end the call, the phone automatically returns to the pulse mode.
2-2-13 Paging
You can page your handset from the base unit. Using this feature, you can find where the handset located.
Press the Paging key on the base unit. The left lamp marked on the base blinks and all handsets
registered with the base will ring for about 10 seconds .
Note: If an incoming call comes in while the handset is being paged, the handset stops paging and sounds the
ringer.
Operations & Installation 2-18
2-3 Using the Menus
A two-level menu structure is available to set the various options available on your phone. You can set the
menu options in two different ways, via the soft keys or by using the index system.
2-3-1 Using the Soft Keys
The two soft keys are used in the following ways.
Key Purpose
Enters the menu structure.
Left soft key Selects the option displayed.
Moves to the next option on the same
Right soft key level that is being displayed.
You can also use the or key on the left side of the phone to move to the next or previous option on the
same level as the one displayed.
To go back to the previous menu level, use the key.
Example: Accessing the Ring Delay option
1. Press the Menu soft key to access the menu mode.
2. Press the soft key repeatedly until Ring appears.
C
3. Press the Select soft key to access the Ring menu.
4. Press the soft key repeatedly until Ring Delay appears.
5. Press the Select soft key to access the Ring Delay option. Now you are connected to the Ring Delay option.
Ring
Select 4
Ring Delay
OFF
Select 4.5

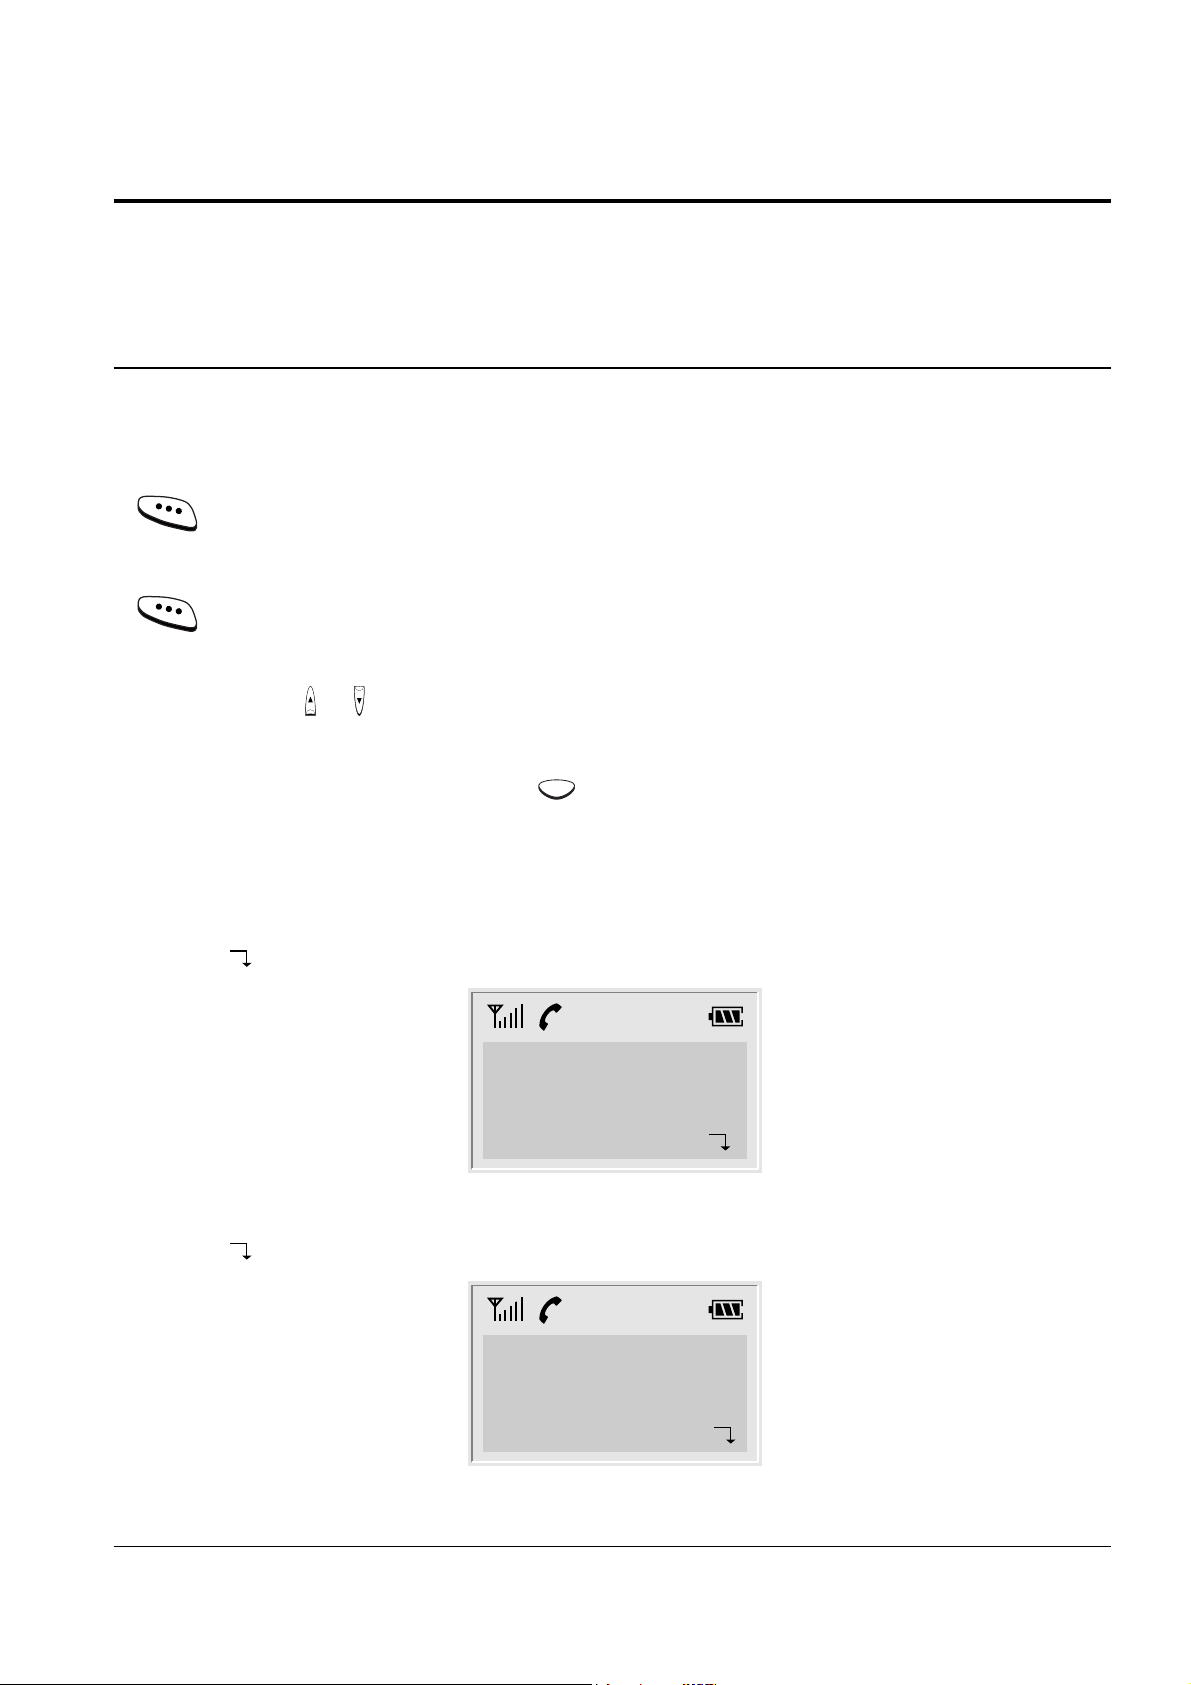
2-19 Operations & Installation
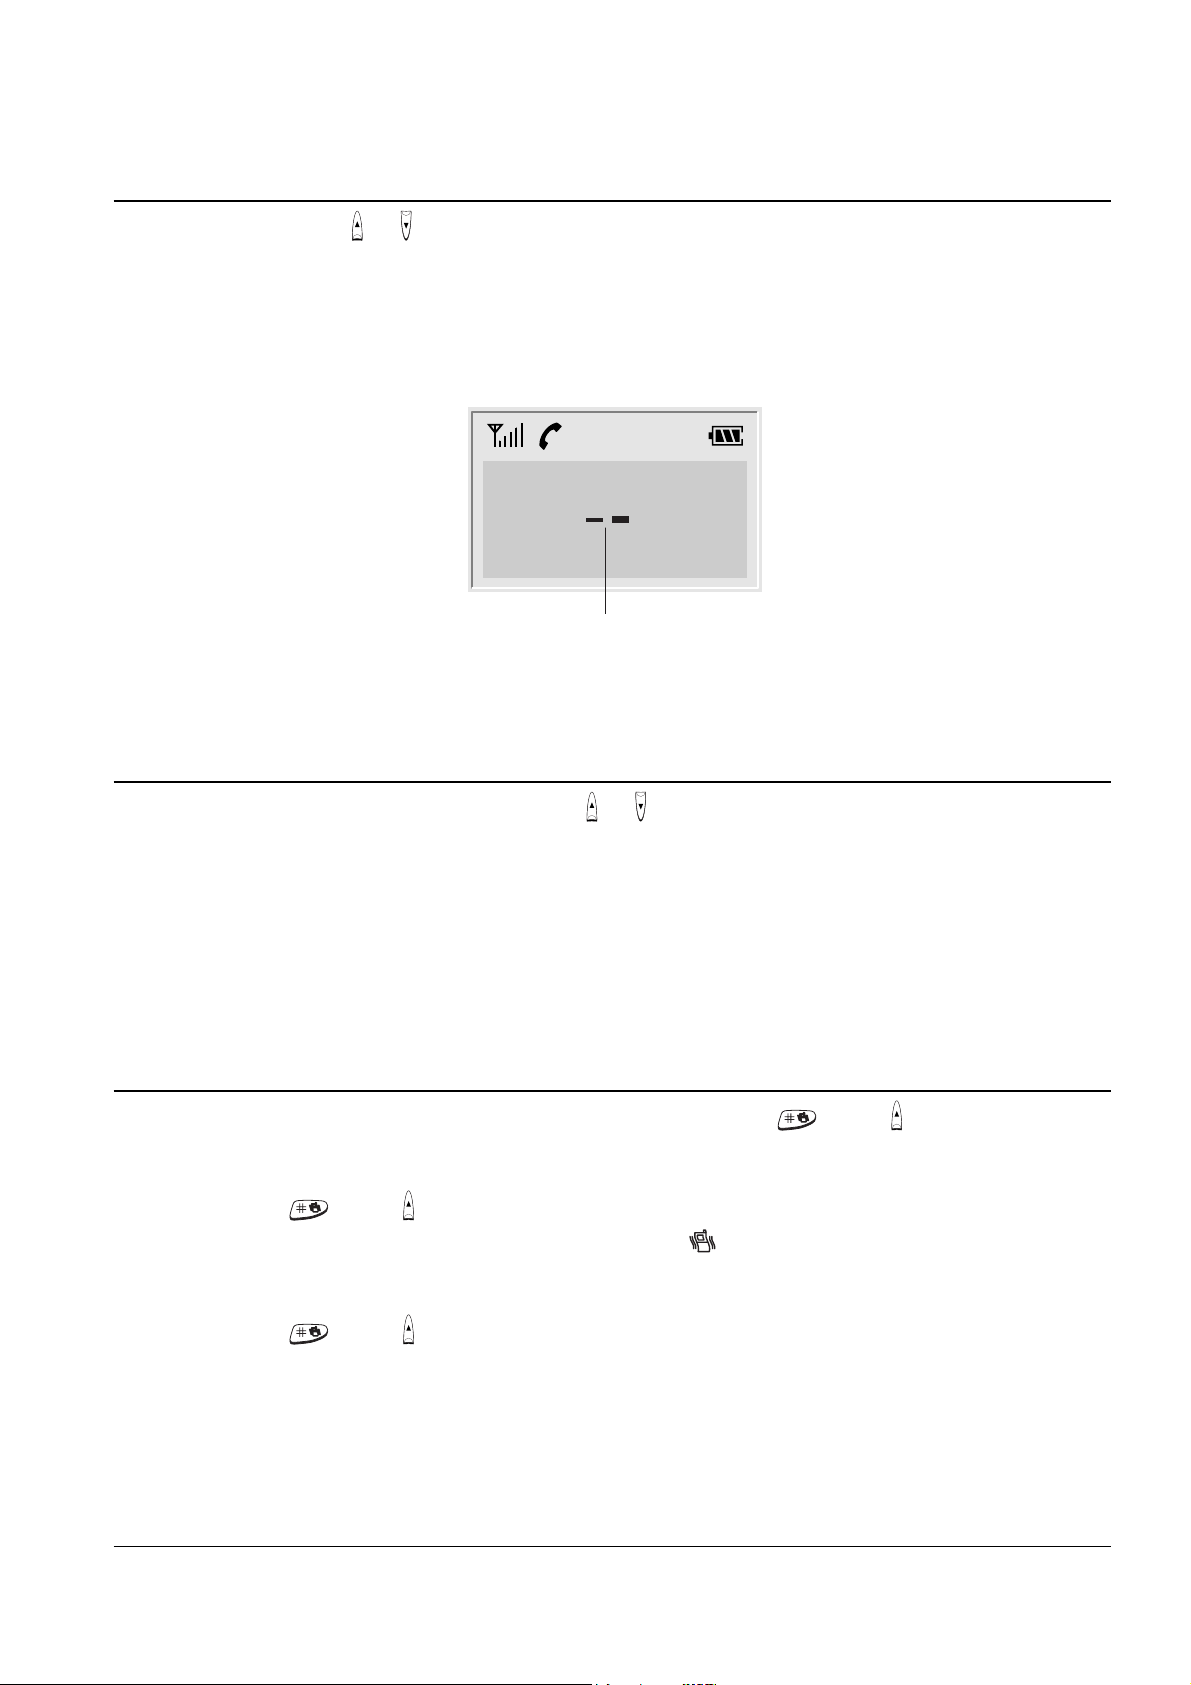
2-3-2 Using the Index System
Each menu option is assigned a hierarchical number. You will find the number in the lower right corner of the
display, next to (refer to the display diagram above). You can use this number to access the corresponding
option directly. Simply press the Menu soft key to access the menu mode and key in the required number.
Example: Accessing the Ring Delay option
1. Press the Menu soft key to access the menu mode.
2. Press to access the Ring menu.
3. Press to access the Ring Delay option. Now you are connected to the Ring Delay option.
JKL
GHI

Operations & Installation 2-20
2-4 PhoneBook
The Phonebook allows you to store frequently used phone numbers and their associated names in your
personal directory so that you can easily make a call without having to remember or enter the phone number.
You can store up to 70 numbers.
2-4-1 Storing a Phone Number with a Name
1. In the Standby mode, enter the desired number (up to 24 digits).
2. Press the Save soft key. Enter Name ? appears and the cursor blinks.
3. Enter the name (up to 10 digits) for the number, then press the OK soft key. Refer to ÔEntering a NameÕ on
opposite page.
Note: If you make a mistake while entering a name/number or if you want to edit a name/number, press
the key. Each time you press the key, the last letter/digit is cleared. To clear all letters/digits,
press and hold the key. Then enter the correct name/number.
4. The first available memory address that the number can be saved to will blink.. If you want to find another
memory address, enter the desired address number or scroll the memory addresses by using the soft
key.
5. Press the Select soft key to save the setting.
Note: If you select an address that already has a number stored under it, you are asked if you want to
overwrite the address with the newly entered number. If you are, press the Yes soft key. If not, press
the No soft key or the key.
CCC

2-21 Operations & Installation
2-4-2 Entering a Name
1. Press the key labeled with the required letter:
¥ Once for the first letter
¥ Twice for the selected letter
¥ And so on
The following characters are available:
2. To switch between upper case and lower case characters, press the Case soft key. All subsequent letters will
appear in the selected case until the Case soft key is pressed again.
3. Select the other letters in the same way. The cursor moves to the right when you press a different key.
Note: When entering the same letter twice (or a different letter on the same key), just wait for a few seconds
for the cursor to move automatically, and then select the next letter. You can move the cursor to the left
by using the key on the side of the phone. To delete letters, use the key.
Using a Pause
A pause is useful when you access an interactive voice response system, such as an automated banking system.
A pause delays dialling for 3 seconds.
If you want to insert a dialling pause between numbers, press the Pause soft key. P appears at the pause entry.
C
Key
.1!?&iÀ¤
ABC2€•®‚G
DEF3ƒDF
GH I 4 QY
JKL5L
MNO6„¯…
PQRS7PSX
TUV8†
WX Y Z 9 W
0, :;ÔÒ/=
Characters in the Order Displayed
Upper Case
Lower Case
Space Space
1
2
3
4
5
6
7
8
9
0
%@ _ £$´
Û
abc2ˆŠŒ¾
def 3•Ž
ghi4“
jkl5
mno6–¿˜š
pqr s 7 §
tuv8•Ÿ
wxyz9
0-+( )* #<>

Operations & Installation 2-22
2-4-3 Dialling a Number in Phonebook
Once you have stored phone numbers in the phonebook memory, you can dial them easily whenever you
want.
One-Touch Dialling
Memory addresses 01 through 09 are special one-touch addresses. You can dial the phone numbers stored in
the Phonebook memory from 01 through 09 simply by pressing one key.
In the Standby mode, press and hold the second digit of the memory address containing the number to be
dialled.
For example: Address no. 09
Press and hold. The number stored is
displayed, then dialled.
Two-Touch Dialling
In the Standby mode, press the first digit briefly, then hold down the second digit of the memory address.
For example: Address no. 23
Press briefly and hold down .
The number stored is displayed, then dialled.
DEF
ABC
WXYZ

2-23 Operations & Installation
2-4-4 Searching for Numbers in Memory
If you do not remember which telephone numbers have been stored in the various memory addresses, you can
scan through the memory until you find the one you are looking for.
By Name
1. Press the Menu soft key. Phonebook appears.
2. Press the Select soft key to access the Phonebook menu. The phonebook options are displayed. The option
in bold type will be selected when you press the Select soft key.
3. Press the Select soft key to access the Find Name option. Enter Name ? is displayed.
4. Enter all or part of the name by using the number key marked with the desired letter.
Example: Enter A to find all names beginning with the letter A.
5. Press the View soft key. The first name is displayed with the memory address number and the telephone
number
Note: If the message Data is not found is displayed, the name matching the request is not in the memory.
6. If the name shown is not the desired one, use the soft key to scroll through the stored names.
7. If you want to call the selected number, press the key.
By Address Number
1. Press the Menu key. Phonebook appears.
2. Press the Select soft key to access the Phonebook menu. The phonebook options are displayed.
3. Press the soft key until the Find Address option is selected, then press the Select soft key. Enter Address ?
is displayed.
4. Enter the desired address number, then press the View soft key. The phone number and associated name
(if any) are displayed.
Note: If the address is empty, Data is not found is displayed. Then the display shows the first available
address in which a phone number is stored.
5. Use the soft key to display the next or the previous memory address.
6. If you want to call the number, press the key.
 Loading...