

Samsung SPHN345 Users Manual
ELECTRONIC
S
SPH-N345
User’s Manual
Please read this manual before operating your phone, and
keep it for future reference.

Contents
Contents................................................................ 3
Important Safety Precautions................................ 7
Unpacking ............................................................. 9
Your Phone.......................................................... 10
Phone Layout.......................................................... 10
Display................................................................... 13
Getting Started.................................................... 16
Installing the Battery ............................................... 16
Charging the Ba t tery................................................ 17
Switching the Pho n e On/Off ...................................... 20
Your Phone’s Mod e................ .......... ......................... 21
Call Functions ...................................................... 23
Making a Call..................................................... ..... 23
Answering a Call...................................................... 30
Options During a C all ............................................... 31
Using the Caller ID................ ................................... 32
Viewing Missed C alls ................................................ 32
Quickly Switching to S ilent M o de................................ 33
Call Forwarding....................................................... 33
Call Waiting ............................................................ 34
Three-way Callin g.................................................... 35
Entering Text....................................................... 36
Changing the T e x t In put Mode................................... 37
T9 Mode................................................................. 38
ABC Mode............................................................... 40
Symbol Mod e.......................................................... 42
123 Mode ............................................................... 42
Using the Menus .................................................. 43
Accessing a Menu F u nction by Scrolling ...................... 43
Using Shortcu ts....................................................... 44
List of Menu Functio n s.............................................. 45
3

Calls .................................................................... 48
Outgoing
Incoming
Missed
Erase History
Air Time
(Menu 1-1)
(Menu 1-2)
(Menu 1-3)
(Menu 1-4)
(Menu 1-5)
................................................. 48
................................................ 49
.................................................... 49
........................................... 50
.................................................. 50
Contacts .............................................................. 51
Find By Name
Add New Entry
Find By Entr y
Find By Group
Add E-mail
My Phone #
Memory
(Menu 2-1)
(Menu 2-2)
(Menu 2-3)
(Menu 2-4)
(Menu 2-5)
(Menu 2-6)
(Menu 2-7)
.......................................... 51
......................................... 52
........................................... 55
......................................... 55
.............................................. 56
............................................. 56
.................................................. 56
Messages............................................................. 57
New Message
Voice
(Menu 3-2)
Inbox
(Menu 3-4)
Sent
Draft
(Menu 3-5)
Erase Msg
Msg Setting
(Menu 3-1)
(Menu 3-3)
(Menu 3-6)
(Menu 3-7)
.......................................... 58
...................................................... 59
..................................................... 60
....................................................... 61
...................................................... 62
............................................... 63
............................................. 63
Planner................................................................ 66
Today
(Menu 4-1)
Scheduler
Task List
Memo Pad
(Menu 4-5)
Alarm
Calculator
World Time
Count Down
Set Time
..................................................... 66
(Menu 4-2)
(Menu 4-3)
(Menu 4-4)
................................................ 67
................................................. 69
............................................... 70
..................................................... 71
(Menu 4-6)
(Menu 4-7)
(Menu 4-8)
(Menu 4-9)
............................................... 72
............................................. 72
............................................ 73
................................................. 74
Sounds ................................................................ 75
Ringer Volume
Ringer Type
Key Tone
(Menu 5-4)
Alerts
Voice Volume
Roam Ringer
Tone Length
Power On/Off
(Menu 5-1)
(Menu 5-2)
(Menu 5-3)
......................................... 75
............................................. 76
................................................ 76
..................................................... 77
(Menu 5-5)
(Menu 5-6)
(Menu 5-7)
(Menu 5-8)
.......................................... 78
........................................... 78
............................................ 78
........................................... 79
Display ................................................................ 80
Menu Style
Wallpaper
Backlight
Banner
Contrast
(Menu 6-1)
(Menu 6-2)
(Menu 6-3)
(Menu 6-4)
(Menu 6-5)
.............................................. 80
............................................... 80
................................................ 81
................................................... 81
................................................. 82
Setup................................................................... 83
Auto Key Lock
Auto Answer
Call Answer
Auto Retry
Language
Select NAM
Set System
Version
(Menu 7-1)
(Menu 7-2)
(Menu 7-3)
(Menu 7-4)
(Menu 7-5)
(Menu 7-6)
(Menu 7-7)
(Menu 7-8)
......................................... 83
............................................ 83
............................................. 84
.............................................. 84
................................................ 84
............................................. 85
............................................. 85
................................................... 86
Security ............................................................... 87
Lock Phone
Change Lock
Restriction
Emergency #
Erase Contacts
Reset Phone
Voice Privacy
(Menu 8-1)
(Menu 8-2)
(Menu 8-3)
(Menu 8-4)
(Menu 8-5)
(Menu 8-6)
(Menu 8-7)
............................................. 87
........................................... 88
.............................................. 88
........................................... 88
......................................... 89
............................................ 89
............................................ 90
4
5

Health and Safety Information ............................ 92
Exposure to radio frequency (RF) signals .................... 92
Precautions When Using the Batteries......................... 9
Road Safety............................................................ 9
Operating Environment............................................. 97
Electronic Devices.................................................... 98
Potentially Explosive Atmospheres ...........................
Emergency C a lls.................................................... 100
Other Important Safety Information......................... 101
Care and Maintenance............................................ 102
99
5
6
6

Important Safety Precautions
Read these guidelines before using your wireless
phone. Failure to comply with them may be
dangerous or illegal. For more detailed safety
information, see “Health and Safety Information” on
page 91.
Road Safety at All Times
Do not use a hand-held phone while driving; park
the vehicle first.
Switching Off When Refueling
Do not use the ph one at a refuelin g point (servi ce
station) or near fuels or chemicals.
Switching Off in Aircr a ft
Wireless phone s can cause interference . Using the m
in aircraft is both illegal and dangerous.
Switching Off in Hospitals
Switch off your phone near medical equipment.
Follow any re gu la ti ons or rules in force.
Interference
All wireless phones may be subject to interference,
which could af f e ct t heir performan ce .
Special Regulations
Meet any special regulations in force in any area
and always switch off your phone whenever it is
forbidden to use it , or w hen it may cause
interference or danger (in a hospital for example).
7

Important Safety Precautions
Appropriate Use
Use only in the normal position (held to the ear).
Avoid unnecessary contact with the antenna when
the phone is switched on.
Accessories and Batteries
Use only Samsung-approved accessories and
batteries.
Qualified Servi c e
Only qualified s e rvice personnel m a y install or
repair your phone.
Unpacking
Your package contains the following items:
Handset
Battery
CAUTION
RISK OF EXPLOSION IF BATTERY IS REPLACED
BY AN INCORRECT TYPE DISPOSE OF
USED BATTERIES ACCORDING TO
THE INSTRUCTIONS
8
Travel Adapter
User’s Manual
In addition, you can buy the following accessories
for your phone from your local Samsung dealer:
• Standard battery
• Travel adapter
• PC data cable
•Car charger
•PC link CD
• Headset
9
Your Phone
Phone Layout
Key
Key
(s)
Your Phone
Functions
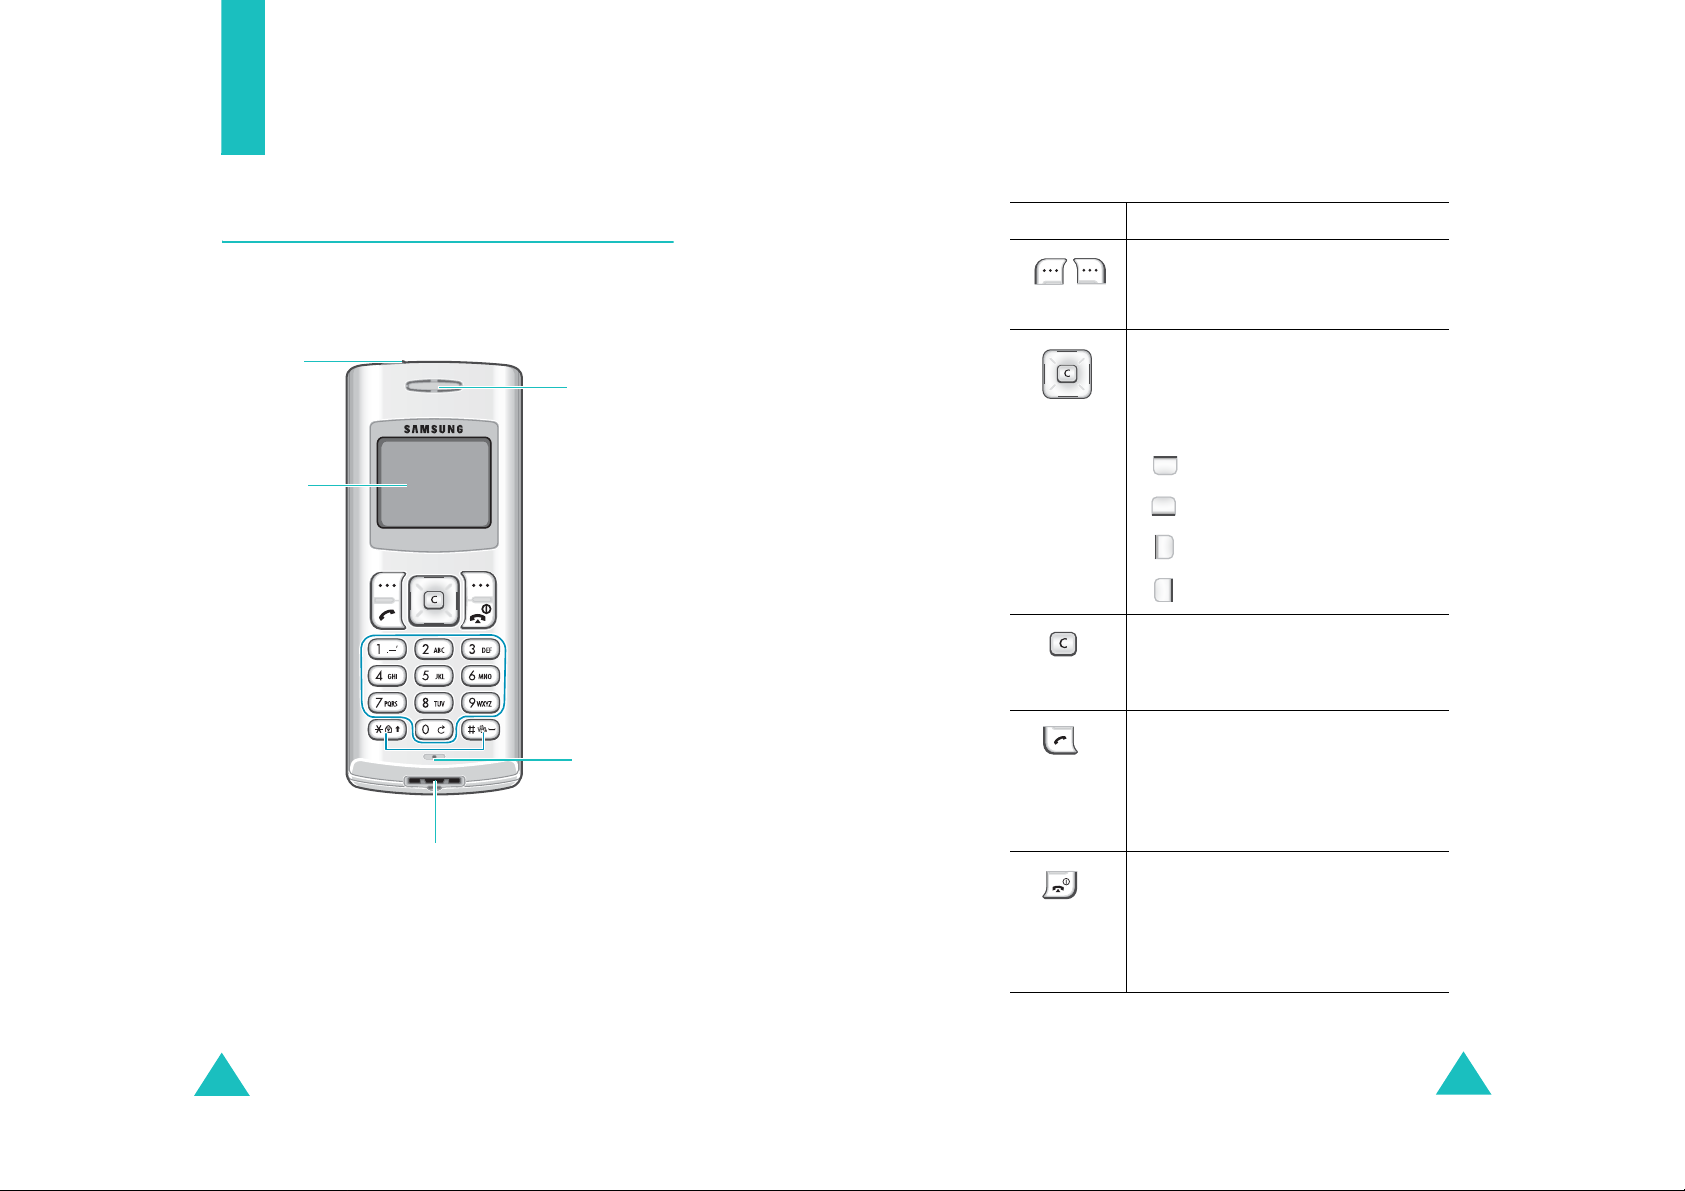
The followin g illustrations show the main elements
of your phone.
Headset
jack
Display
Adapter jack
Earpiece
Microphone
Performs the functions indicated by
the text above them, on the bottom
line of the display.
In Menu mode, scro lls through
menu options.
In Standby mode, quickly enters the
following menus respectively:
• :
• :
• :
• :
Messages
Ringer Type
Scheduler
Calculator
Deletes ch aracters f r om the display.
In Menu mode, returns to th e
previous menu level.
Makes or answers a call.
In Standby mode, retrieves the
most recent num bers dialed,
received, or missed. Redials the last
number when pressed and held.
Ends a call. Als o switch es on and of f
the phone when pressed and held.
In Menu mode, cancels your input
and returns the phone to Standby
mode.
10
11
Your Phone
Key
(s)
Functions
Your Phone
Display
(Continued)
Enters numbers, letters, and some
~
special cha racters.
In Standby mode, activates Key
Lock mode when pressed and held.
In the text entry mode, changes the
case of letters.
In Standby mode, enters or exits
Silent mode on and off when held
down.
It can also be used when dialing
special serv ices, such as
teleservices.
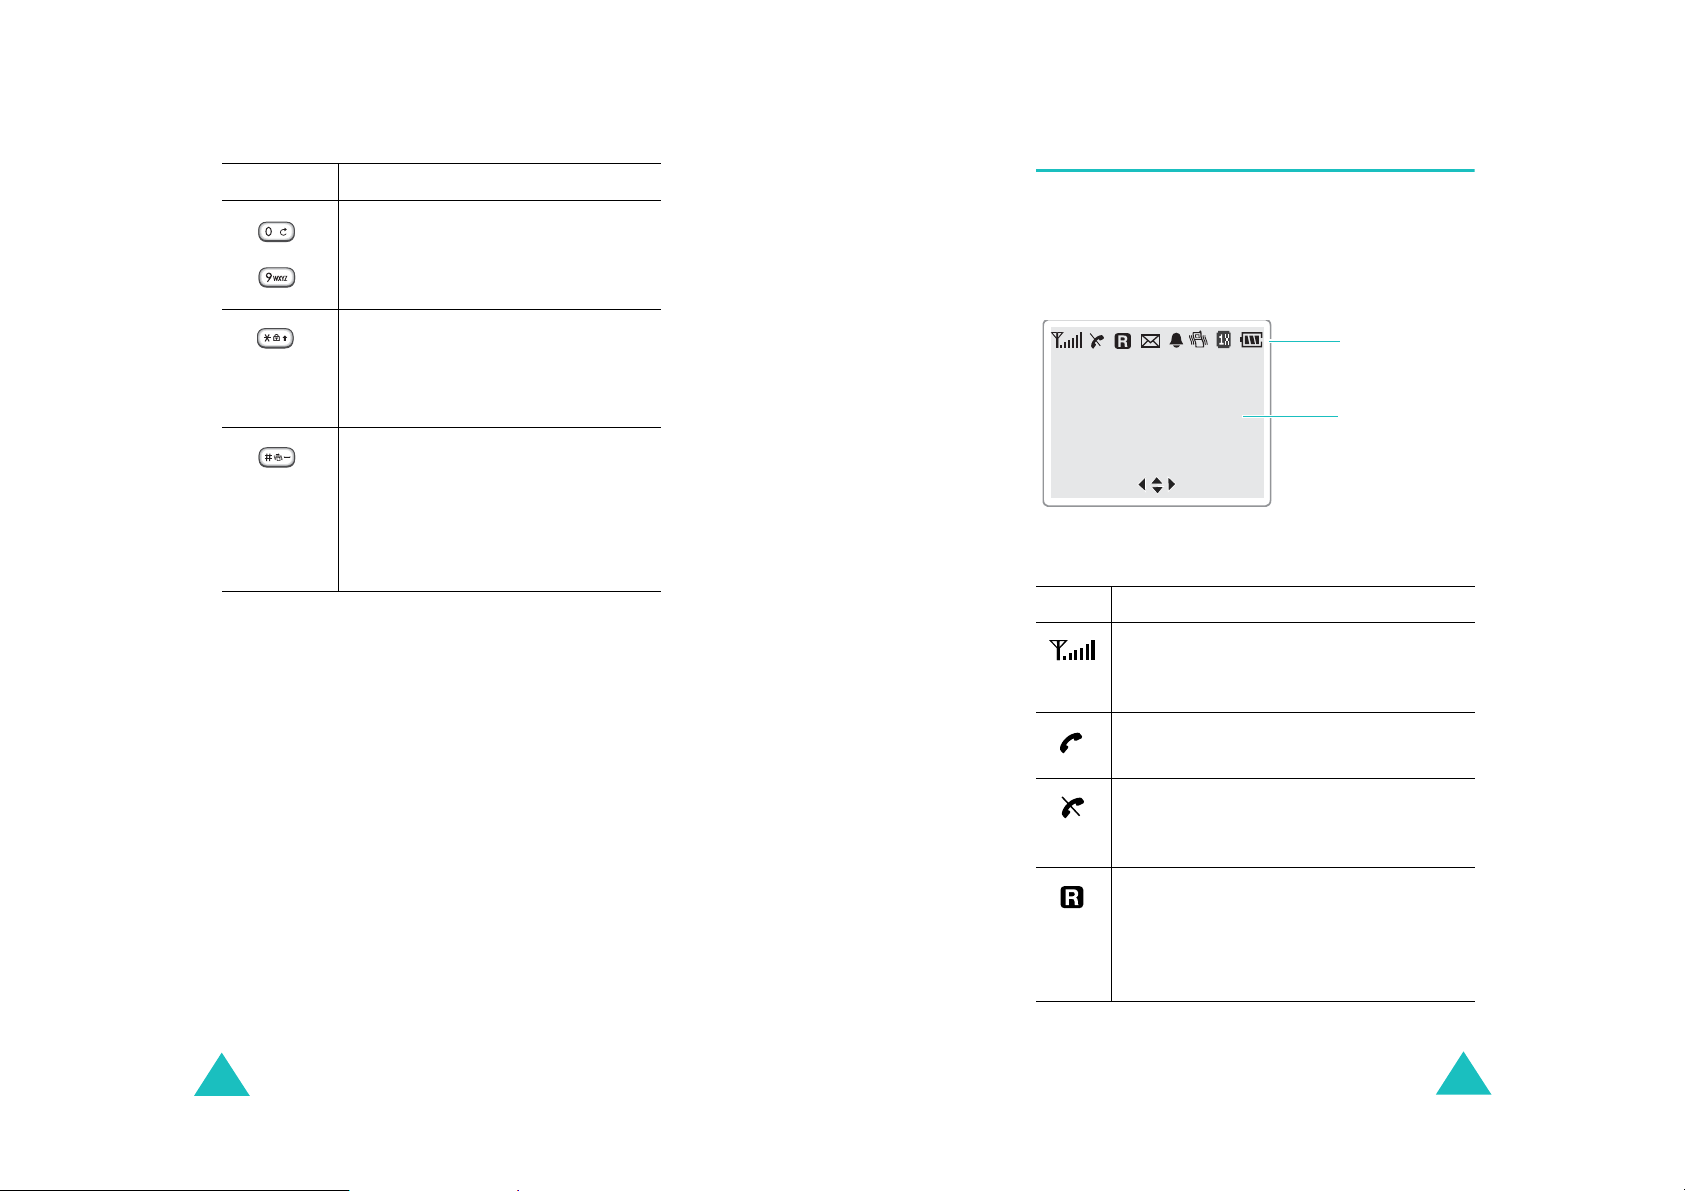
Layout
The displa y comprises tw o areas; an upper line of
fixed icons, and the lower text and graphic area.
Icons
Text and
graphics area
Menu Find
Icons
Icon Description
Signal Strength
signal strength. The greater the number
of bars, the better the signal strength.
Service
progress.
No Service
outside a service area. When it appears,
you canno t m a ke or receive calls.
: Shows the received
: Appears when a call is in
: Appears when you are
12
Roaming
your registered cov erage area and have
registered onto a different network,
when trav el ing in other countries, f or
example.
: Appears w hen you are out of
13
Your Phone
Your Phone
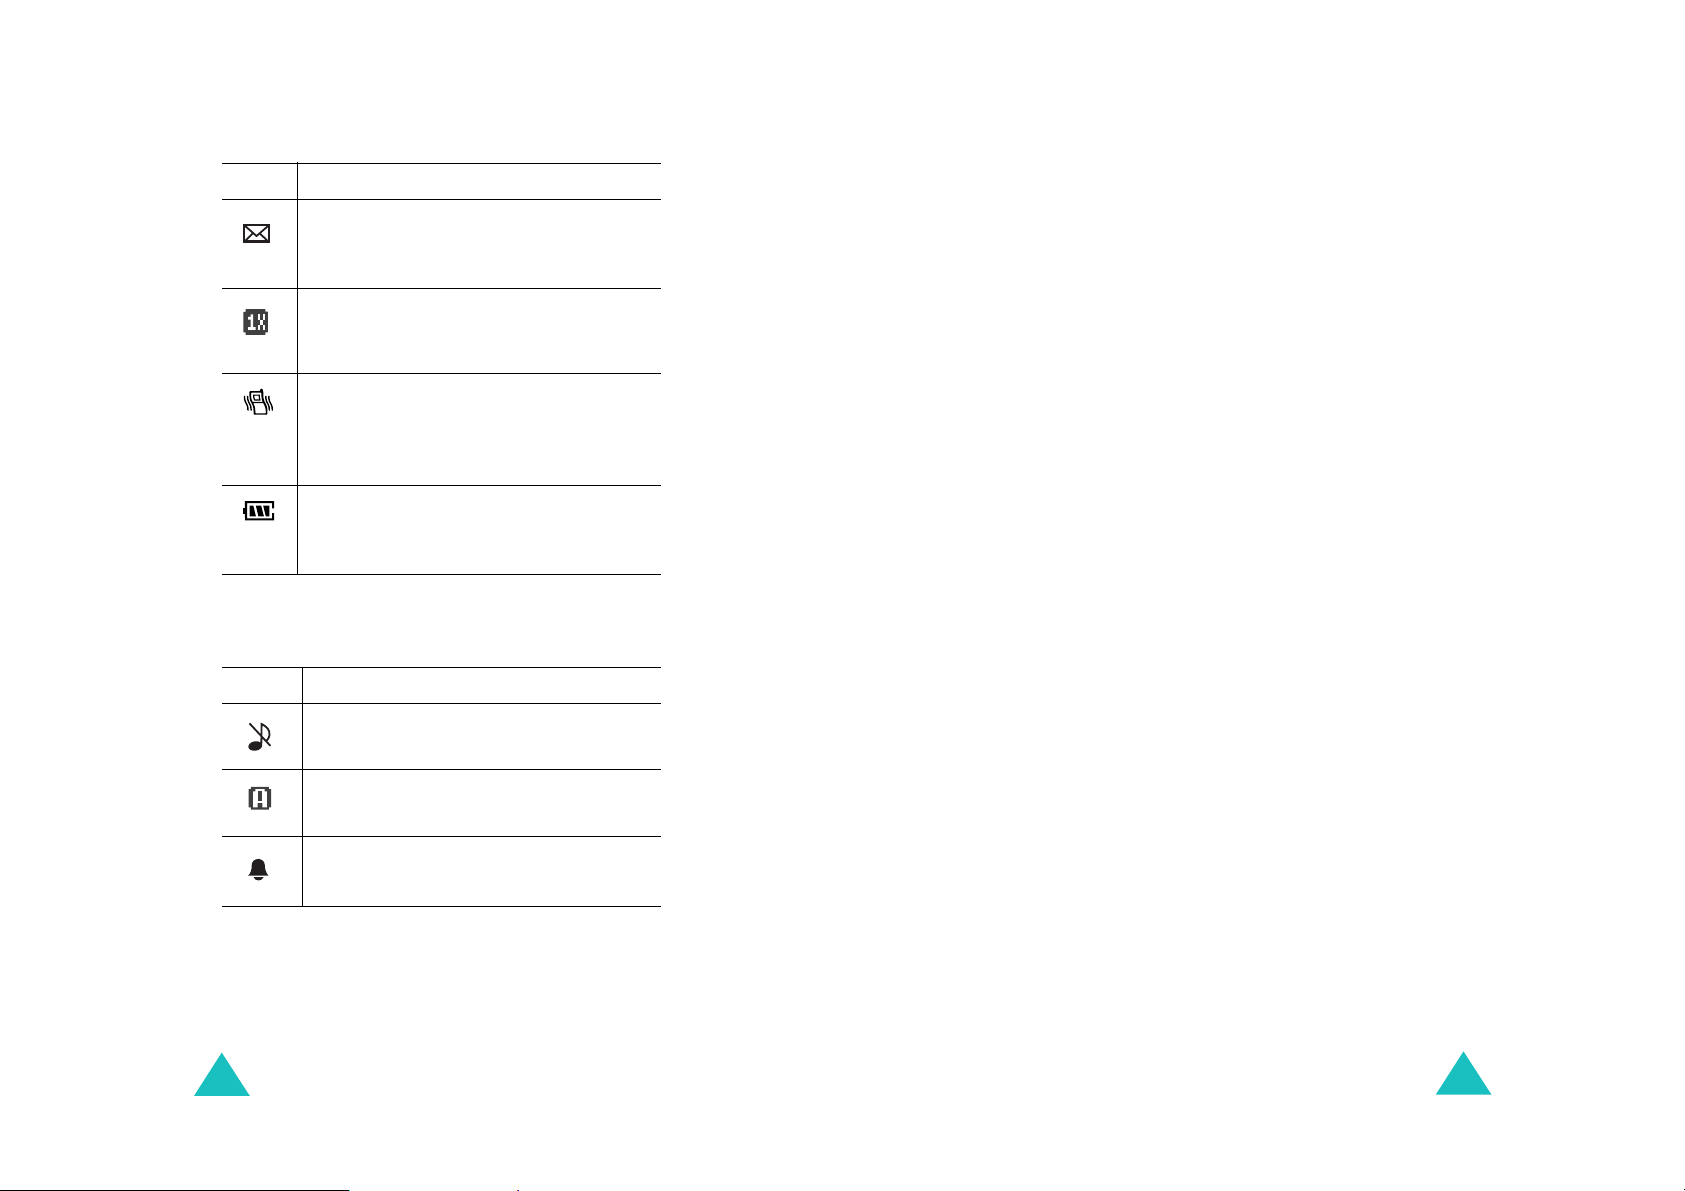
Icon Description
New Message
text message or voice mail message are
received.
1X Mode
engaged.
Vibrator
volume for calls set to
High+Vib
activated.
Battery Status
your battery. The more bars you see,
the more power you have left.
Another Icons
Icons Description
Ringer Off
ringer volume fo r ca lls to
(Continued)
: Appears when a new
: Appears when 1X system is
: Appears when the ringer
Vibrate
,
, or when Silent m ode is
: Shows the level of
: Appears when you set the
Off
.
Backlight
The display is illuminated by a backlight. When you
press any k ey, the backlig ht com es on. It goe s off if
no keys are pressed within a given period of time,
depending on the setting in the
Menu 6-3
(
).
Backlight
T o specify the length of time for which the backlight
is active, set the
Backlight
menu; see page 81 for
further details.
menu
14
Auto Answer Mode
: Appears when
auto answer feature is activated.
Alarm
: Appears when you set an
alarm to ring at a specified time.
15
Getting Started
Installing the Battery
Your pho ne is powered by a rechargeable Li-ion
battery. Use only approved batteries and chargers.
Ask your local S a m sung dealer for further details.
Note
: You must fully charge the ba ttery before using
your phone for the firs t time. A discharged
battery is fully recharged in approximat ely 180
minutes for a standard battery.
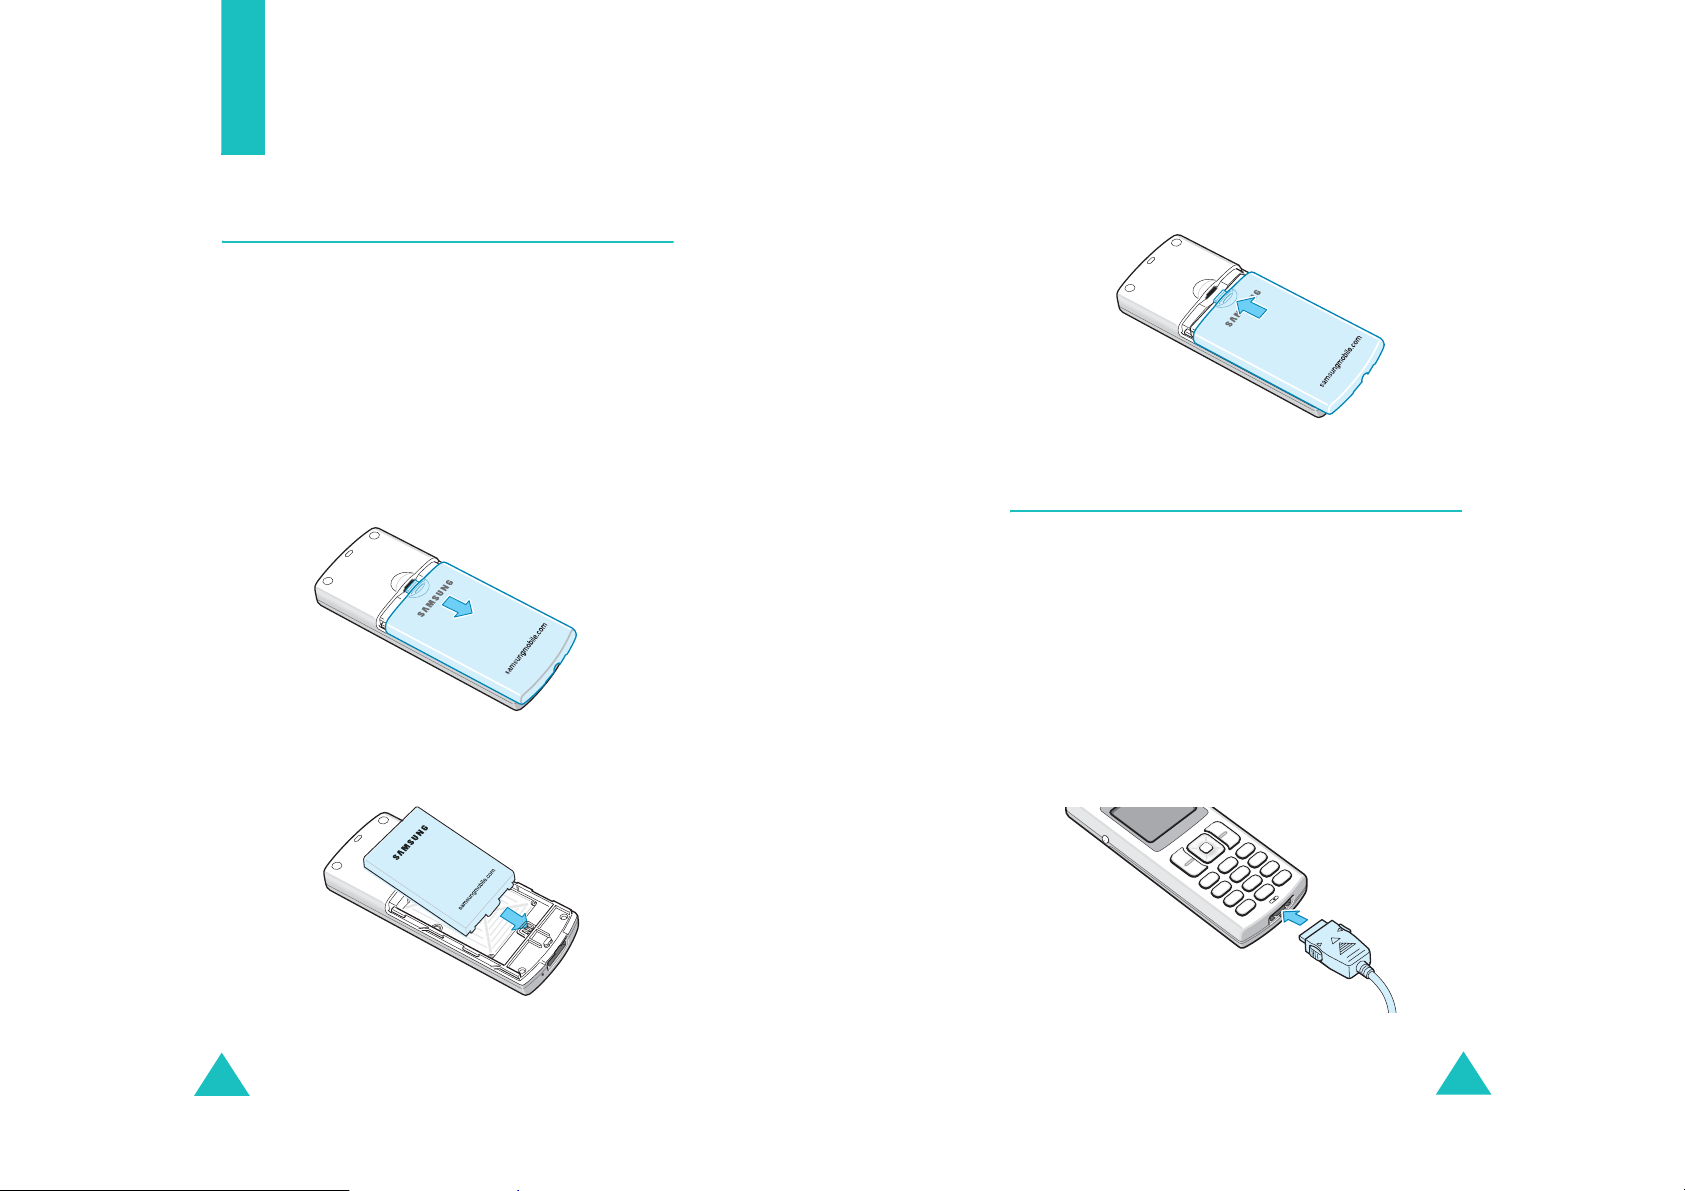
1. Remove the battery cover by pressing down the
groove and then sliding the cover ou t.
Getting Started
3. Place the battery cover, as shown, and slide it
toward the top of the p ho ne until it cli cks into
place.
Charging the Battery
Your pho ne is powered by a rechargable Li-ion
battery. A travel adap te r comes w i t h your phone.
Use only approved batteries and chargers. Ask your
local Samsung dealer.
You can us e the ph one while the battery is being
charged, but this will cause the battery to charge
more slowly.
2. Place the battery into the battery slot, making
sure that the metal contacts are facing down.
16
1. With the batter y in position on the pho ne, plug
the connector of the travel adapter into the
adapter jack at the bottom of the phone.
17
Getting Started
Getting Started
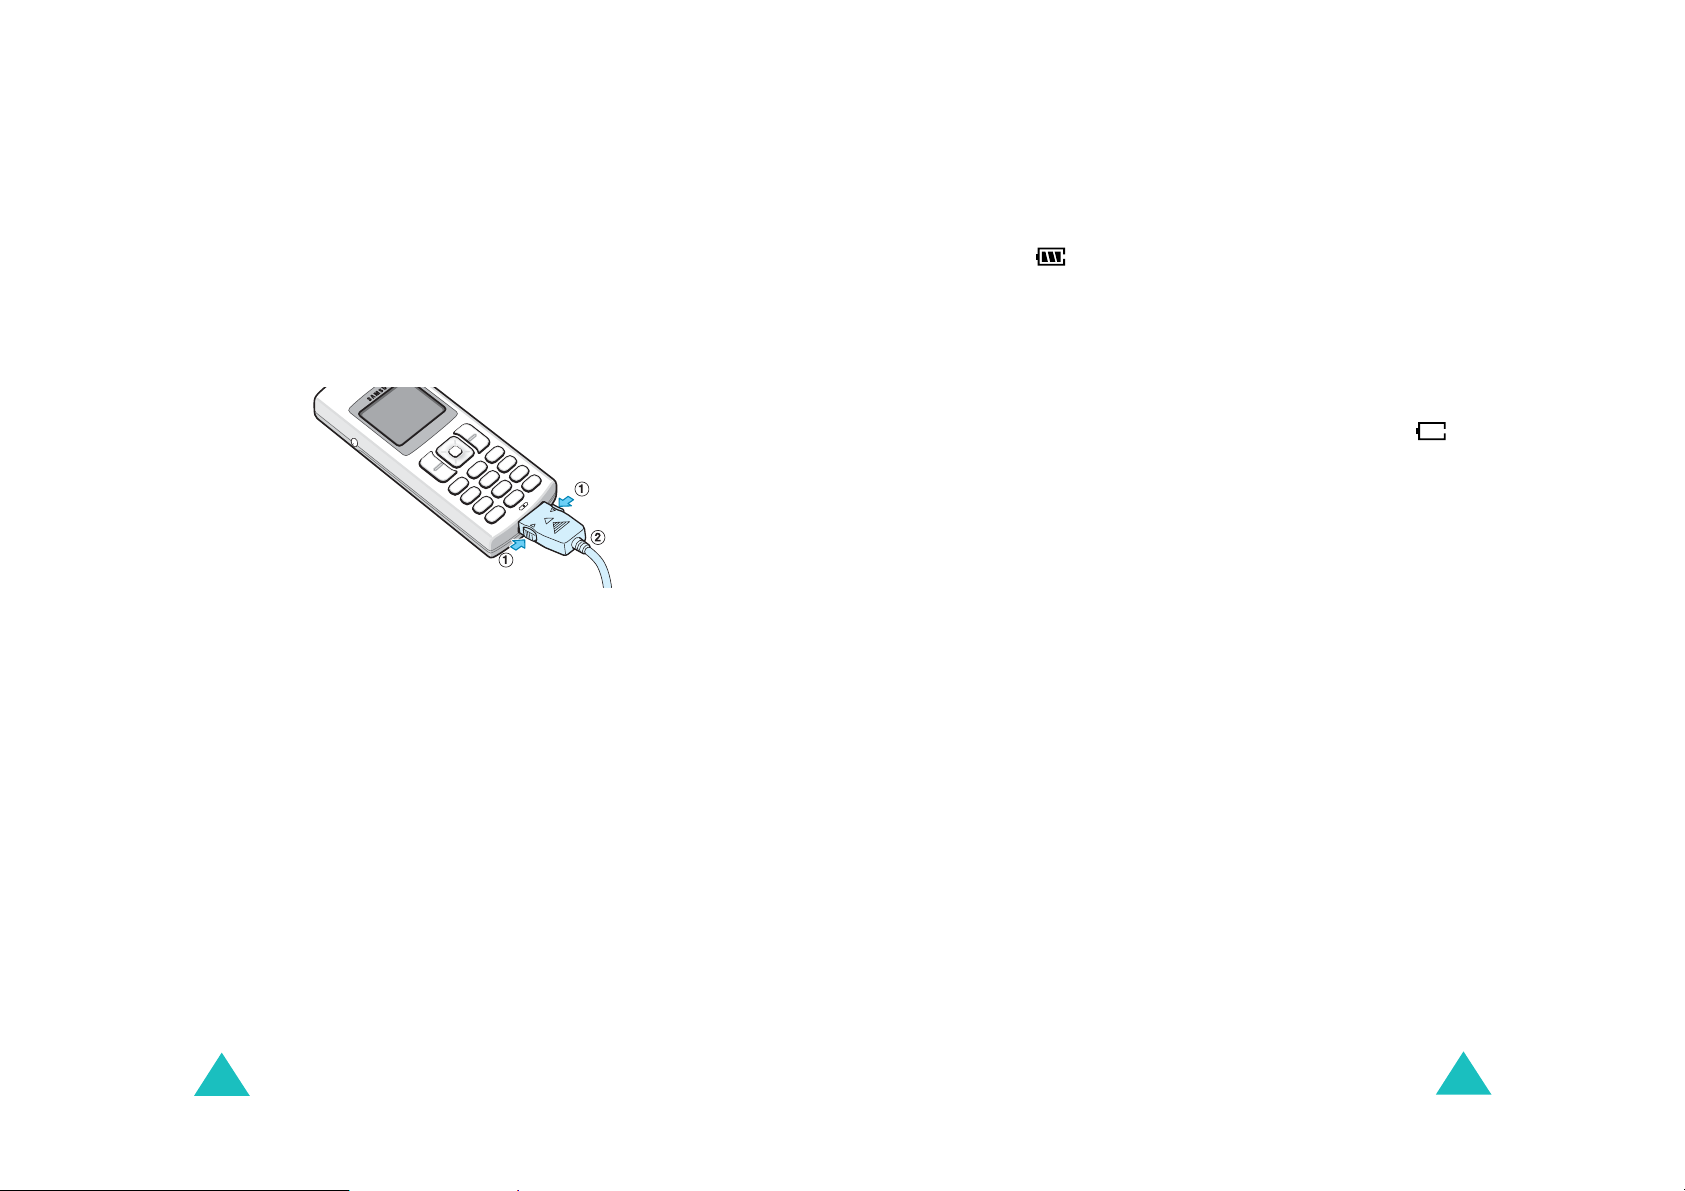
2. Plug the adapter into a standard AC wall outlet.
The Battery Strength icon on the display
repeats filling and emptying itself to indicate
that the battery is charging.
3. When charging is finished, unplug the adapter
from both the power outlet and the phone by
pressing the buttons on both sides of the
connector and pulling the connector out.
Note
: Do not remove th e battery from the phone
without unplugging the adapter while it is
charging. Otherwise, the phone may be
damaged.
Low Battery Indicator
You can easily tell if your battery needs to be
recharged by checking the battery strength icon
( ) at the upper-right corner of your phone’s
display. The presence of all three bars indicates a
full charge, two bars indicates a smaller charge
and one bar indicates an even smaller charge. No
bars (the battery icon is empty) means your
battery must be charged.
When the battery charge level gets low, the
battery sensor blinks an empty battery icon ( )
and sounds a warning tone. If the battery level
gets too l ow , the p hon e wi ll aut oma ticall y tu rn o ff.
Unfortunately , if this happens, yo u’ll lose whatever
you are doing, and your phone call will cut off.
Watch the battery strength icon and make sure
your battery is adequately charged.
18
19

Getting Started
Getting Started
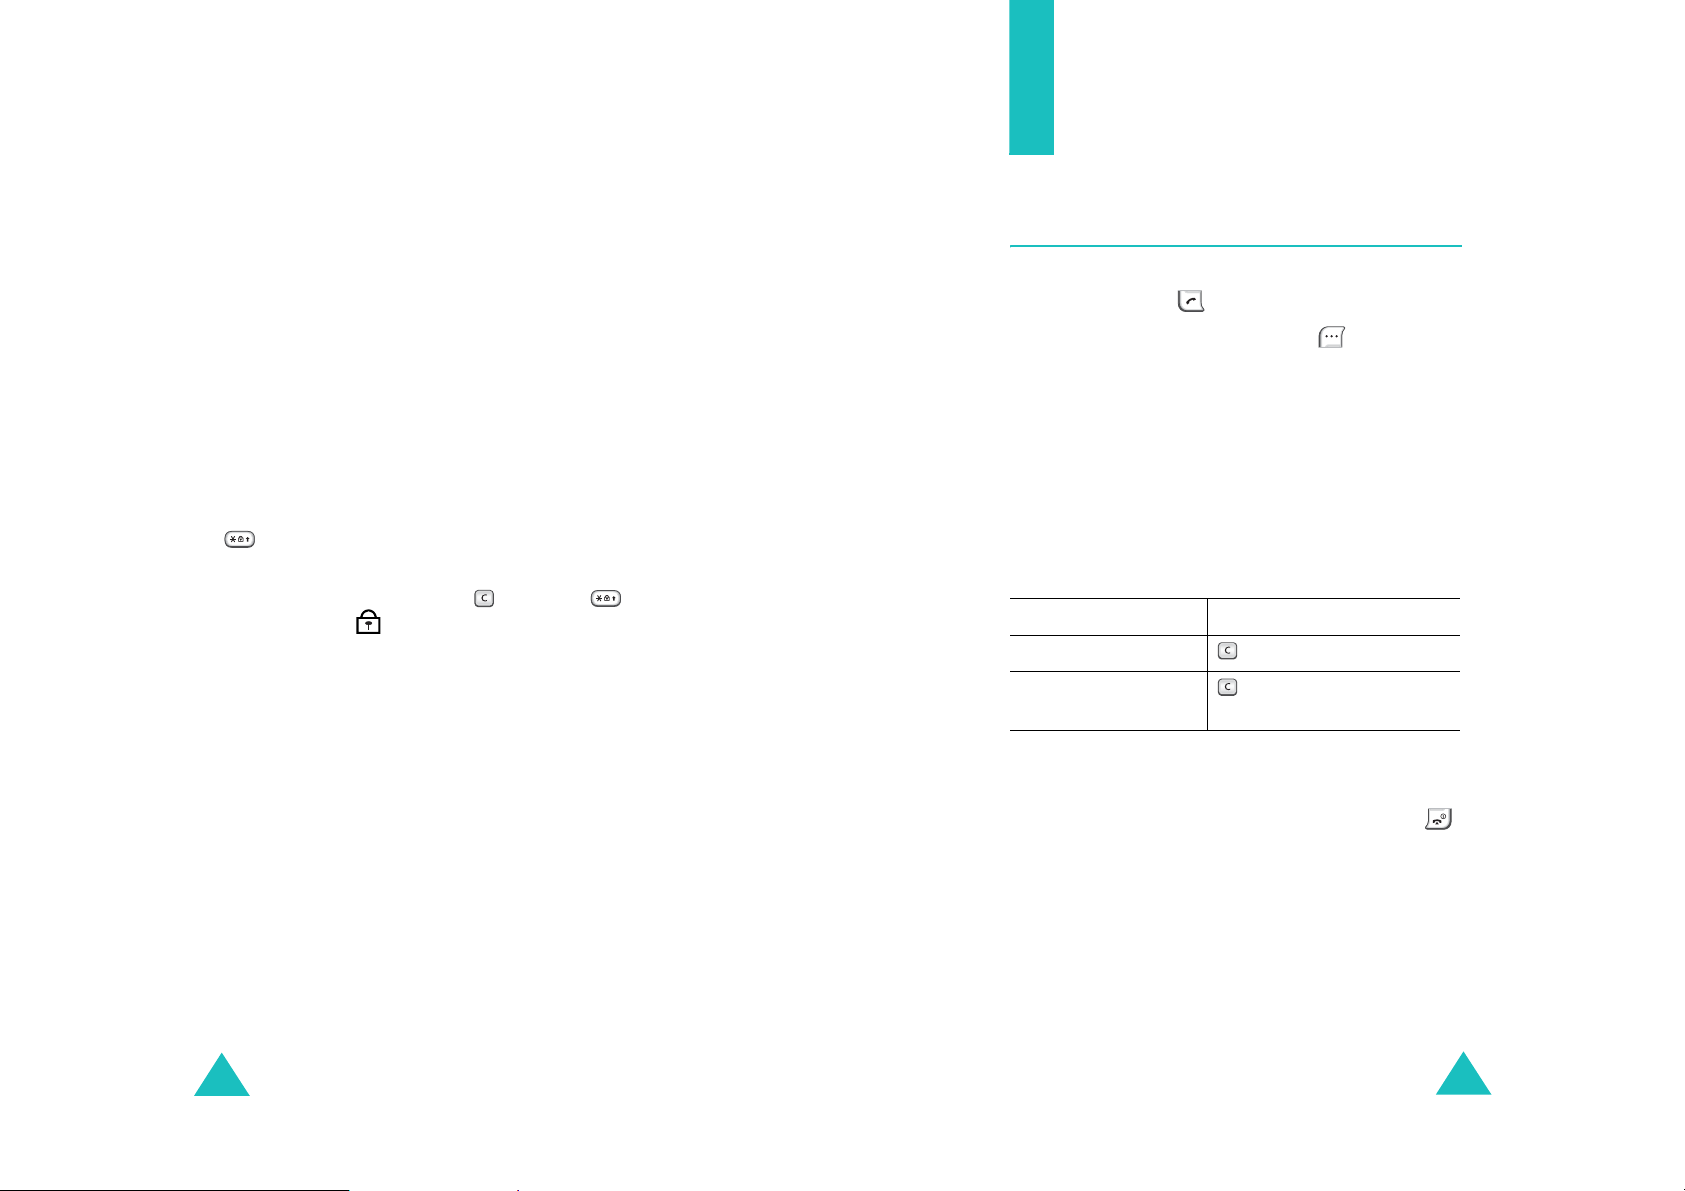
Switching the Phone On/Off
1. Hold down until the powe r-on an imati on is
displayed to switch the phone on.
When the system locates services, the gre eting
message displays along with the curre nt d ate
and time. You can now place and receive calls.
If your phone is out of service, the No Service
icon ( ) appears on the display. In this case,
you cannot make and receive calls. You can try
again later when service is a vailable.
Note
: You can change the LCD language using
Language
the
); for further details, refer to page 84.
5
2. When you wish to switch the phone off, hold
down until the power-off animation is
displayed.
menu option (
Menu 7-
Your Phone’s Mode
Standby Mode
Standby is the most basic state of your phone.
The phone goes into Standby mo de after you turn
it on, or whenever you briefly press . When
your phone is in Standby mode, you wil l typi cally
see the greeting message and current date and
time. If you enter a phone number, you can press
to dial it or press to save it in the internal
Contacts.
Press at any time to return to Standby mode.
Be careful; if you are on a call when you press
, you will disc onnect the call and return to
Standby mode. Press several times or hold it
down to return to Standby mode without ending
the call.
The main menu can be accessed when you are in
Standby mode.
Talk Mode
20
You can place and answer calls only when your
phone is turned on. During a call, the phone is in
Talk mode. While you a re in Talk mod e, pr e ss ing
gives you a li st of opt ions. See page 31 for
details on the options.
21
Getting Started
Power Save Mode
Call Functions
Your phone comes with a Power Save feature that
will automa tically be activated if your phone is
unable to find a signal after 15 minutes of
searching. While this feature is active, the phone’s
battery charge is conserved. The phone will
automatica lly recheck for a si g na l p eriodically . To
manually force the phone to recheck for a signal,
press any key. A message on the display lets you
know when your phone is operating in Power Save
mode.
Key Lock Mode
You can lock the k eyp a d by pressing and ho lding
in Standby mode. By doing this, you can
prevent accidental key pressing.
To unlock the keypad, press and then . The
Key Lock icon ( ) displays in the d i sp lay.
When you have an incoming call or the alarm goes
off while in K ey Lock mode, the mode is
automatically deactivated and the phone goes to
Standby mo d e .
Note
: You can set t he phon e to auto matica lly loc k the
keypad after a specified period of time, in the
Auto Key Lock
page 83.
menu (
Menu 7-1
). See
Making a Call
In Standby mode, key i n the area code and phone
number and press .
When entering a number, pressing allows you
to insert a pause or a hyphen. For more details
about pause dialing, see page 27.
Note
: If you have activated
Menu 7-4
(
to make the call when the line is busy or the
remote person does not answer you.
), the phone will a utomatically retry
Correcting the Number
To clear the Press
last digit displayed .
whole display for more than one
Ending a Call
When you want to finish your call, briefly press .
The call time , the length of th e call, displa ys briefly
and the phone returns to Standby mode.
Auto Retry
second.
menu
22
23

Call Functions
Call Functions
Redialing the Last Call
T o redial t he last c all yo u made , press twice in
Standby mo d e .
Your pho ne sto res the last 20 inco m ing , outgoing
and missed calls. To recall any of these numbers:
1. If there are any characters on the display,
press to return to Standby mod e .
2. Press . The list of the cal l logs is displayed.
3. Use or t o sc roll through the list until
you select the required name or number.
4. Press to dial the number.
Making a Call from your Contacts list
You can store the phone numbers called regularly
in memory, which is called Contacts list. You then
simply recall the number to dial. For further
information on the Contacts feature, refer to
page 51.
Prepend Dialing
The
Prepend
area codes and network fe ature activation code s
to a phone number that is in your internal
Contacts or call logs.
To prepend existing phone numbers in the
Contacts or call logs:
1. Access a ca ll log entry referring t o in page 24
or a Contacts entry referring to in page 51.
2. When the desired phone nu mber displays,
press to access the opt ion menu.
3. Use or to scroll through the list until
Prepend
4. Press .
5. Enter the area code or feature code.
6. Press to dial the number.
option lets you add digits, such as
option is highlighted .
Emergency Dialing
You can pl ac e an em erg e nc y cal l from your
emergency number list, even if you r ph one is
locked or all outgoi ng calls are restric ted. For
further informatio n on emergency numbers, ref er
to page 88 .
24
25

Call Functions
Call Functions
Speed Dialing
Once you have stored phon e numbers in the
Contacts memory, you can dial them easily by
pressing a few keys.
One-Touch Dial
Memory locations 00 1 th rou gh 009 are special
one-touch locations. You can dial the phone
numbers sto red i n tho se mem ory loca tion s simp ly
by pressing one number key.
Press and hold the third digit of the memory
location.
For exa mple
The number (and name) stored is displayed, then
dialed.
Two-Touch Dial
Memory locations 01 0 th rou gh 099 are special
two-touch locations.
Press the second digit briefly, then hold down the
third digit of the memory cell.
For exa mple
The number (and name) stored is displayed, then
dialed.
: Location no. 009
Press and hold.
: Location no. 023
Press briefly and hold down
.
Three-Touch Dial
Memory locations 10 0 th rou gh 999 are special
three-touch locations.
Press the first and the second digit briefly , then hold
down the third digit of the memory cell.
For exa mple
: Location no. 123
Press and briefly, then hold
down .
The number (and name) stored is displayed, then
dialed.
Note
: When several numbers are saved in one
location, only the phone number which is
specified with the
Speed Dial
label categor y
will be automatically dialed. For details, refer to
page 53.
Pause Dialing
When you cal l automated sy st e ms, like bank ing
services, you are often required to enter a password
or account number. Instead of manually entering
the numbers each time, you ca n store them i n yo ur
Contacts, se par ated by spec ial char acte rs which are
called pauses.
Storing Pauses in a Contacts Entry
To store a number in your Contacts that contains
pauses:
1. Enter the phone number y ou want to st ore, such
as the bank’s teleservice phone nu m ber.
26
2. Press to display the menu options.
27

Call Functions
Call Functions
3. Press or to highlight the desired pause
type.
• P
Pause
: The letter “P” displays w ithin the
number, meaning that a hard pause will
occur at tha t p oint in the calling sequence.
T Pause
•
: The letter “T” displays in the
number, meaning that a timed (2-second)
pause will occur at that point in the calling
sequence.
4. Press to enter a pause. Continue entering
numbers and using to enter pauses.
5. Store the number in your Contacts as you
normally would by pressing and following
the screen prompts.
Pause Dialing from a Stored Contacts Entry
1. Dial the number from the Contacts.
2. If you stored the number using “T” pause,
simply call the number form the Contacts.
If you stored the numb er using “P” pau se, wai t
for the appropriate prompt for the number,
such as a credit card number or a bank
account number.
Manual Pause Dialing
You can enter pauses manually during the dialing
process.
1. Enter the phone number of the service you
want to connect to, such as a bank’s
teleservice phone number.
2. Press to display the menu options.
3. Press or to highlight the desired pause
type.
4. Press to enter a pause. Continue entering
numbers and using to enter pauses.
5. When you finish entering the numbers, press
to dial the n umber.
3. When prompted, press to send the DTMF
(Dual-Tone Multi-Frequency) number that
follows your pa use.
28
29

Call Functions
Call Functions
Answering a Call
When somebody calls you, the phone rings and
the phone icon is displayed in the middle of the
display.
The caller’s phone number, or name if stored in
Contacts, displays.
1. To answer a call, press . Your phone is
preset to answer a call when the key is pressed
via the
If the menu is set to
a call by pressing any key except for .
When you set the menu to
must press to answer a call. For details
about the menu, see page 84.
2. End the call by pressing .
Note
Call Answer
: You can answer a call while using the Contacts
or menu features. The current operation will
be interrupted.
menu (
Any Key
SEND Key
Menu 7-3
, you can answer
).
, you
Options During a Call
Your ph one provides a number of functions that
you can use during a call. As many of these
options are network services, you may not be able
to use all of them at all times.
Press during a call to access the following
options:
Mute/Quit
microphone off, so that the other person cannot
hear you.
Example
person in the room but do not want the other
person to hear you.
Calls
details, see page 48
Phone Book
menu.For details, see page 51.
Silent/Quit
allows you to pre ss ke ys with out hea ring ann oying
key tones during a call.
Send Tel #
other party.
: allows you to switch your phone’s
: You wish to say something to another
: allows you to access the Calls menu. For
: allows you to access the Contacts
: does not transmit the key tones. It
: send your telephone number to the
30
My Phone #
Version:
hardware version of your phone.
: displays own number.
allows you to view the software and
31

Call Functions
Call Functions
Send DTMF (Dual Tone Multi Frequency):
Sends DTMF tones from the displayed numbe r.
DTMF tones ca n be us ed t o control e-service s,
such as telebanking or voice m a il. Du ring a call,
input the digits you wish to send as DTMF tones,
for instance, your bank account number and
password. Subsequently select the Send DTMF
option.
Using the Caller ID
This feature tells you who is c alling you by
displaying the caller’s number when the ph on e
rings. If a caller’s name and number are stored in
the Contacts, the corresponding name is also
displayed. If you call someone who has this
feature, your phone number will be displayed on
the their phone.
Note
: Contact your service provider to set up the
Caller line identification service.
Viewing Missed Calls
Quickly Switchin g to Sil ent Mode
Silent mode disables all sounds on the phone. This
feature is best used in situations where the pho ne
might disturb others, such as in a meeting, in a
library or at the theater. Your phone can be set to
Silent mode with one press of a key.
To enter Silent mode, press and hold down
until “Enteri ng S ilent M ode” and th e Vibr a tion ic on
( ) appear.
Pressing and holding down once again Exits
Silent Mode. The Vibration icon is no more
displayed.
Call Forwarding
This feature provides the option of forwarding
incoming calls to another phone number, even
while your phone is turned off . Activating Call
Forwarding does not affect outgoing c a lls made
from this phone. Contact your service provider to
activate Call Forwarding.
Your phone keeps a list of cal l s t hat you do not
answer when the phone is on and service is
availabl e. The phone indicat es a missed call b y
displaying a text notification on the screen.
Additionally, if caller information is av ailable, the
screen displays the phone number of the most
recent missed call.
Press to call the displayed number.
32
33

Call Functions
Call Functions
Call Waiting
Call Waiting lets you receive a second call during
conversation. Your phone notifies you of a call
waiting by beeping an displaying “Call Waiting.”
Your pho ne pro vides the option of turn ing the Call
Waiting feature on and off if you have subscribed
to the service. Call Waiting is on by default in the
phone. If you choose to ha ve a undisturbed
conversation, simply turn off the feature for the
current call.
Note
: Contact your servic e provider to activate the
Call W aiting service.
To answer a waiting call:
1. To answer the call, press . The phone
connects the ca lling party and places the
current party on hold.
2. Press again to switch between the two
parties.
Note
: If you do not res pond to a Call Waiting
notification, the phon e will forward the cal l to
voicemail or another number that you have
set up. Contact your service provider for more
information.
Three-way Calling
This feature enables you to conduct conference
calls with two separate parties at the same time.
The phone re cords each party into the Outgoing
calls log. Also, Yo u are billed airtim e for each
outgoing call separately.
Note
: Contact your service provider to activa te
Three-way Calling.
To place a Three-way call:
1. During a convers ation, en ter the phone
number for the third party , and then press .
The phone places the other party on hold and
dials the third party.
2. When you are connected to the third party,
press again to begin your three-w a y c all.
If one of the callers (not y ou) hangs up, you a nd
remaining ca ll e r st ay connected . If you initiated
the call and you hang up first, all three parties are
disconnected.
34
35
 Loading...