

Page 1

XL30.10_LMa790_091305_F2
Sprint PCS International Phone
IP-A790 by Samsung
®
User’s Guide
Page 2

Table of Contents
Welcome to Sprint. . . . . . . . . . . . . . . . . . . . . . . . . . . . . . i
Introduction . . . . . . . . . . . . . . . . . . . . . . . . . . . . . . . . . . ii
Section 1: Getting Started . . . . . . . . . . . . . . . . . . . . . . . 1
1A.Setting Up Service . . . . . . . . . . . . . . . . . . . . . . . . . . . . . . . . . . 2
Getting Started With Sprint PCS Service . . . . . . . . . . . . . . . . . . . . . . . . . . .3
Setting Up Your Voicemail . . . . . . . . . . . . . . . . . . . . . . . . . . . . . . . . . . . . . .4
Sprint PCS Account Passwords. . . . . . . . . . . . . . . . . . . . . . . . . . . . . . . . . . .5
Getting Help . . . . . . . . . . . . . . . . . . . . . . . . . . . . . . . . . . . . . . . . . . . . . . . . .6
Section 2: Your Sprint PCS Phone . . . . . . . . . . . . . . . . . 8
2A.Your Sprint PCS Phone: The Basics . . . . . . . . . . . . . . . . . . . . 9
Front View of Your Phone . . . . . . . . . . . . . . . . . . . . . . . . . . . . . . . . . . . . .10
Key Functions . . . . . . . . . . . . . . . . . . . . . . . . . . . . . . . . . . . . . . . . . . . . .11
Viewing the Display Screen . . . . . . . . . . . . . . . . . . . . . . . . . . . . . . . . . . . .13
Features of Your Sprint PCS International Phone . . . . . . . . . . . . . . . . . . .17
Turning Your Phone On and Off . . . . . . . . . . . . . . . . . . . . . . . . . . . . . . . .18
Using Your Phone’s Battery and Charger. . . . . . . . . . . . . . . . . . . . . . . . . .19
Displaying Your Phone Number. . . . . . . . . . . . . . . . . . . . . . . . . . . . . . . . .22
Making and Answering Calls. . . . . . . . . . . . . . . . . . . . . . . . . . . . . . . . . . . .22
Making Calls. . . . . . . . . . . . . . . . . . . . . . . . . . . . . . . . . . . . . . . . . . . . . . .22
Answering Calls . . . . . . . . . . . . . . . . . . . . . . . . . . . . . . . . . . . . . . . . . . . .23
Missed Call Notification. . . . . . . . . . . . . . . . . . . . . . . . . . . . . . . . . . . . . .24
Calling Emergency Numbers . . . . . . . . . . . . . . . . . . . . . . . . . . . . . . . . . .25
In-Call Options . . . . . . . . . . . . . . . . . . . . . . . . . . . . . . . . . . . . . . . . . . . . .25
End-of-Call Options . . . . . . . . . . . . . . . . . . . . . . . . . . . . . . . . . . . . . . . . .26
Saving a Phone Number . . . . . . . . . . . . . . . . . . . . . . . . . . . . . . . . . . . . .26
Finding a Phone Number. . . . . . . . . . . . . . . . . . . . . . . . . . . . . . . . . . . . .27
Dialing and Saving Phone Numbers With Pauses . . . . . . . . . . . . . . . . . .27
Abbreviated Dialing . . . . . . . . . . . . . . . . . . . . . . . . . . . . . . . . . . . . . . . . .28
Dialing From Contacts . . . . . . . . . . . . . . . . . . . . . . . . . . . . . . . . . . . . . . .29
Using Speed Dialing. . . . . . . . . . . . . . . . . . . . . . . . . . . . . . . . . . . . . . . . .29
Using Plus (+) Code Dialing. . . . . . . . . . . . . . . . . . . . . . . . . . . . . . . . . . .30
Entering Text . . . . . . . . . . . . . . . . . . . . . . . . . . . . . . . . . . . . . . . . . . . . . . .31
Selecting a Character Input Mode . . . . . . . . . . . . . . . . . . . . . . . . . . . . . .31
Entering Characters Using T9 Text Input . . . . . . . . . . . . . . . . . . . . . . . .31
Entering Characters by Tapping the Keypad . . . . . . . . . . . . . . . . . . . . .32
Entering Numbers and Symbols . . . . . . . . . . . . . . . . . . . . . . . . . . . . . . .33
2B.Controlling Your Phone’s Settings . . . . . . . . . . . . . . . . . . . . 34
Network Settings. . . . . . . . . . . . . . . . . . . . . . . . . . . . . . . . . . . . . . . . . . . . .35
Sound Settings. . . . . . . . . . . . . . . . . . . . . . . . . . . . . . . . . . . . . . . . . . . . . . .36
Page 3

Ringer Types . . . . . . . . . . . . . . . . . . . . . . . . . . . . . . . . . . . . . . . . . . . . . .36
Key Tone Level . . . . . . . . . . . . . . . . . . . . . . . . . . . . . . . . . . . . . . . . . . . .38
Selecting Tone Length . . . . . . . . . . . . . . . . . . . . . . . . . . . . . . . . . . . . . . .39
Adjusting the Phone’s Volume Settings. . . . . . . . . . . . . . . . . . . . . . . . . .39
Alert Notification . . . . . . . . . . . . . . . . . . . . . . . . . . . . . . . . . . . . . . . . . . .40
Application Volume. . . . . . . . . . . . . . . . . . . . . . . . . . . . . . . . . . . . . . . . .41
Silence All. . . . . . . . . . . . . . . . . . . . . . . . . . . . . . . . . . . . . . . . . . . . . . . . .41
Display Settings. . . . . . . . . . . . . . . . . . . . . . . . . . . . . . . . . . . . . . . . . . . . . .42
Changing the Text Greeting . . . . . . . . . . . . . . . . . . . . . . . . . . . . . . . . . .42
Changing the Backlight Time Length . . . . . . . . . . . . . . . . . . . . . . . . . . .43
Changing the Display Screen. . . . . . . . . . . . . . . . . . . . . . . . . . . . . . . . . .44
Changing the Phone’s Menu Style. . . . . . . . . . . . . . . . . . . . . . . . . . . . . .45
Location Settings. . . . . . . . . . . . . . . . . . . . . . . . . . . . . . . . . . . . . . . . . . . . .46
Airplane Mode. . . . . . . . . . . . . . . . . . . . . . . . . . . . . . . . . . . . . . . . . . . . . . .47
TTY Use With Sprint PCS Service. . . . . . . . . . . . . . . . . . . . . . . . . . . . . . . .48
Phone Setup Options . . . . . . . . . . . . . . . . . . . . . . . . . . . . . . . . . . . . . . . . .49
Shortcut . . . . . . . . . . . . . . . . . . . . . . . . . . . . . . . . . . . . . . . . . . . . . . . . . .49
Call Answer Mode . . . . . . . . . . . . . . . . . . . . . . . . . . . . . . . . . . . . . . . . . .50
Auto-Answer Mode . . . . . . . . . . . . . . . . . . . . . . . . . . . . . . . . . . . . . . . . .50
Display Language . . . . . . . . . . . . . . . . . . . . . . . . . . . . . . . . . . . . . . . . . . .51
2C.Setting Your Phone’s Security . . . . . . . . . . . . . . . . . . . . . . . . 52
Accessing the Security Menu . . . . . . . . . . . . . . . . . . . . . . . . . . . . . . . . . . .53
Using Your Phone’s Lock Feature . . . . . . . . . . . . . . . . . . . . . . . . . . . . . . .53
Locking Your Phone . . . . . . . . . . . . . . . . . . . . . . . . . . . . . . . . . . . . . . . .53
Unlocking Your Phone . . . . . . . . . . . . . . . . . . . . . . . . . . . . . . . . . . . . . .53
Locking Pictures/Videos . . . . . . . . . . . . . . . . . . . . . . . . . . . . . . . . . . . . .54
Changing the Lock Code . . . . . . . . . . . . . . . . . . . . . . . . . . . . . . . . . . . . .54
Calling in Lock Mode . . . . . . . . . . . . . . . . . . . . . . . . . . . . . . . . . . . . . . . .54
Restricting Calls . . . . . . . . . . . . . . . . . . . . . . . . . . . . . . . . . . . . . . . . . . . . .54
Lock Services. . . . . . . . . . . . . . . . . . . . . . . . . . . . . . . . . . . . . . . . . . . . . . . .55
Locking Voice Calls . . . . . . . . . . . . . . . . . . . . . . . . . . . . . . . . . . . . . . . . .55
Locking Sprint PCS Vision Services . . . . . . . . . . . . . . . . . . . . . . . . . . . . .55
Using Special Numbers . . . . . . . . . . . . . . . . . . . . . . . . . . . . . . . . . . . . . . . .56
Erasing Contacts . . . . . . . . . . . . . . . . . . . . . . . . . . . . . . . . . . . . . . . . . . . . .56
Erasing Downloads . . . . . . . . . . . . . . . . . . . . . . . . . . . . . . . . . . . . . . . . . . .57
Erasing Pictures/Videos . . . . . . . . . . . . . . . . . . . . . . . . . . . . . . . . . . . . . . .57
Resetting Your Phone. . . . . . . . . . . . . . . . . . . . . . . . . . . . . . . . . . . . . . . . .58
Resetting Your Picture Account . . . . . . . . . . . . . . . . . . . . . . . . . . . . . . . . .58
Security Features for Sprint PCS VisionSM . . . . . . . . . . . . . . . . . . . . . . . . .59
Enabling and Disabling Sprint PCS Vision Services . . . . . . . . . . . . . . . . .59
Net Guard. . . . . . . . . . . . . . . . . . . . . . . . . . . . . . . . . . . . . . . . . . . . . . . . .59
Updating Your Sprint PCS Vision Profile. . . . . . . . . . . . . . . . . . . . . . . . .60
Page 4

2D.Controlling Your Roaming Experience . . . . . . . . . . . . . . . . . 61
Understanding Roaming . . . . . . . . . . . . . . . . . . . . . . . . . . . . . . . . . . . . . . .62
Setting Your Phone’s CDMA Roam Mode . . . . . . . . . . . . . . . . . . . . . . . . .64
Controlling Roaming Charges Using Call Guard . . . . . . . . . . . . . . . . . . . .65
2E.Navigating Through Menus . . . . . . . . . . . . . . . . . . . . . . . . . . 66
Menu Navigation. . . . . . . . . . . . . . . . . . . . . . . . . . . . . . . . . . . . . . . . . . . . .67
Menu Structure . . . . . . . . . . . . . . . . . . . . . . . . . . . . . . . . . . . . . . . . . . . . . .67
Viewing the Menus . . . . . . . . . . . . . . . . . . . . . . . . . . . . . . . . . . . . . . . . . . .68
2F.Managing Call History . . . . . . . . . . . . . . . . . . . . . . . . . . . . . . 84
Viewing History . . . . . . . . . . . . . . . . . . . . . . . . . . . . . . . . . . . . . . . . . . . . .85
Call History Options . . . . . . . . . . . . . . . . . . . . . . . . . . . . . . . . . . . . . . . . . .86
Making a Call From Call History . . . . . . . . . . . . . . . . . . . . . . . . . . . . . . . . .86
Saving a Contact From Call History . . . . . . . . . . . . . . . . . . . . . . . . . . . . . .87
Prepending a Phone Number From Call History . . . . . . . . . . . . . . . . . . . .88
Erasing Call History. . . . . . . . . . . . . . . . . . . . . . . . . . . . . . . . . . . . . . . . . . .88
2G.Using Contacts . . . . . . . . . . . . . . . . . . . . . . . . . . . . . . . . . . . . 89
Adding a New Contact Entry . . . . . . . . . . . . . . . . . . . . . . . . . . . . . . . . . . .90
Finding Contact Entries . . . . . . . . . . . . . . . . . . . . . . . . . . . . . . . . . . . . . . .90
Adding a Phone Number to a Contact . . . . . . . . . . . . . . . . . . . . . . . . . . . .91
Editing a Contact Entry’s Phone Number. . . . . . . . . . . . . . . . . . . . . . . . . .91
Assigning Speed Dial Numbers. . . . . . . . . . . . . . . . . . . . . . . . . . . . . . . . . .92
Selecting a Ringer Type for an Entry . . . . . . . . . . . . . . . . . . . . . . . . . . . . .93
Dialing Sprint Customer Service. . . . . . . . . . . . . . . . . . . . . . . . . . . . . . . . .93
2H.Personal Organizer . . . . . . . . . . . . . . . . . . . . . . . . . . . . . . . . . 94
Using Your Phone’s Scheduler . . . . . . . . . . . . . . . . . . . . . . . . . . . . . . . . . .95
Adding an Event to the Scheduler . . . . . . . . . . . . . . . . . . . . . . . . . . . . . .95
Event Alerts . . . . . . . . . . . . . . . . . . . . . . . . . . . . . . . . . . . . . . . . . . . . . . .96
Viewing Events . . . . . . . . . . . . . . . . . . . . . . . . . . . . . . . . . . . . . . . . . . . .96
Erasing a Day’s Events . . . . . . . . . . . . . . . . . . . . . . . . . . . . . . . . . . . . . . .96
Erasing Events . . . . . . . . . . . . . . . . . . . . . . . . . . . . . . . . . . . . . . . . . . . . .97
Erasing All Events. . . . . . . . . . . . . . . . . . . . . . . . . . . . . . . . . . . . . . . . . . .97
Using Your Phone’s Alarm Clock . . . . . . . . . . . . . . . . . . . . . . . . . . . . . . . .98
Using Your Phone’s Memo Pad . . . . . . . . . . . . . . . . . . . . . . . . . . . . . . . . .99
Using Your Phone’s Tools . . . . . . . . . . . . . . . . . . . . . . . . . . . . . . . . . . . .100
Using the Calculator . . . . . . . . . . . . . . . . . . . . . . . . . . . . . . . . . . . . . . .100
World Time . . . . . . . . . . . . . . . . . . . . . . . . . . . . . . . . . . . . . . . . . . . . . . . .101
Countdown . . . . . . . . . . . . . . . . . . . . . . . . . . . . . . . . . . . . . . . . . . . . . . . .101
Managing Voice Memos . . . . . . . . . . . . . . . . . . . . . . . . . . . . . . . . . . . . . .102
Recording Voice Memos . . . . . . . . . . . . . . . . . . . . . . . . . . . . . . . . . . . .102
Reviewing and Erasing Memos . . . . . . . . . . . . . . . . . . . . . . . . . . . . . . .103
Page 5

2I. Using Voice Recognition . . . . . . . . . . . . . . . . . . . . . . . . . . . 105
New Features . . . . . . . . . . . . . . . . . . . . . . . . . . . . . . . . . . . . . . . . . . . . . .106
Activating Voice Recognition . . . . . . . . . . . . . . . . . . . . . . . . . . . . . . . . . .107
Using Call <Name or #> . . . . . . . . . . . . . . . . . . . . . . . . . . . . . . . . . . . . . .108
Calling Contacts Entries. . . . . . . . . . . . . . . . . . . . . . . . . . . . . . . . . . . . .108
Calling Numbers Phone Numbers (Digit Dialing). . . . . . . . . . . . . . . . .109
Adapting Digit Dial. . . . . . . . . . . . . . . . . . . . . . . . . . . . . . . . . . . . . . . . .109
Using Choice Lists . . . . . . . . . . . . . . . . . . . . . . . . . . . . . . . . . . . . . . . . .111
Enabling/Disabling Choice Lists . . . . . . . . . . . . . . . . . . . . . . . . . . . . . .111
Using Send Text <Name>. . . . . . . . . . . . . . . . . . . . . . . . . . . . . . . . . . . . .112
Using Lookup <Name>. . . . . . . . . . . . . . . . . . . . . . . . . . . . . . . . . . . . . . .112
Using Go to <App>. . . . . . . . . . . . . . . . . . . . . . . . . . . . . . . . . . . . . . . . . .113
Using Check <Item>. . . . . . . . . . . . . . . . . . . . . . . . . . . . . . . . . . . . . . . . .113
2J.Using Your Phone’s Built-in Camera and Camcorder . . . . 114
Taking Pictures . . . . . . . . . . . . . . . . . . . . . . . . . . . . . . . . . . . . . . . . . . . . .115
Camera Mode Options. . . . . . . . . . . . . . . . . . . . . . . . . . . . . . . . . . . . . .117
Sharing Sprint PCS Picture Mail . . . . . . . . . . . . . . . . . . . . . . . . . . . . . . . .119
Sharing Sprint PCS Picture Mail From Review/Share Mode . . . . . . . . .119
Sharing Sprint PCS Picture Mail From Messaging . . . . . . . . . . . . . . . . .121
Storing Pictures. . . . . . . . . . . . . . . . . . . . . . . . . . . . . . . . . . . . . . . . . . . . .121
Creating Your Sprint PCS Picture MailSM Password. . . . . . . . . . . . . . .122
In Camera. . . . . . . . . . . . . . . . . . . . . . . . . . . . . . . . . . . . . . . . . . . . . . . .123
Saved to Phone . . . . . . . . . . . . . . . . . . . . . . . . . . . . . . . . . . . . . . . . . . .123
Online Albums . . . . . . . . . . . . . . . . . . . . . . . . . . . . . . . . . . . . . . . . . . . .124
Managing Sprint PCS Picture MailSM . . . . . . . . . . . . . . . . . . . . . . . . . . . .125
Using the Sprint PCS Picture Mail Website . . . . . . . . . . . . . . . . . . . . . .125
Managing Online Pictures From Your Phone . . . . . . . . . . . . . . . . . . . .125
Sharing Online Sprint PCS Picture Mail. . . . . . . . . . . . . . . . . . . . . . . . .126
Accessing Online Picture Options. . . . . . . . . . . . . . . . . . . . . . . . . . . . .126
Taking Video Clips . . . . . . . . . . . . . . . . . . . . . . . . . . . . . . . . . . . . . . . . . .127
Taking a Video Clip . . . . . . . . . . . . . . . . . . . . . . . . . . . . . . . . . . . . . . . .129
Sharing Sprint PCS Video Mail . . . . . . . . . . . . . . . . . . . . . . . . . . . . . . . . .129
2K.Using Your Phone’s Built-in Media Player . . . . . . . . . . . . . 130
Your Multimedia Channel Options. . . . . . . . . . . . . . . . . . . . . . . . . . . . . .131
Accessing Your Media Player’s Channel Listings . . . . . . . . . . . . . . . . . . .132
Playing a Video or Audio Clip. . . . . . . . . . . . . . . . . . . . . . . . . . . . . . . . . .133
Multimedia FAQs. . . . . . . . . . . . . . . . . . . . . . . . . . . . . . . . . . . . . . . . . . . .134
Page 6

Section 3: Sprint PCS Service Features . . . . . . . . . . . 138
3A.Sprint PCS Service Features: The Basics . . . . . . . . . . . . . . 139
Using Voicemail . . . . . . . . . . . . . . . . . . . . . . . . . . . . . . . . . . . . . . . . . . . .140
Setting Up Your Voicemail . . . . . . . . . . . . . . . . . . . . . . . . . . . . . . . . . .140
Voicemail Notification . . . . . . . . . . . . . . . . . . . . . . . . . . . . . . . . . . . . . .140
New Voicemail Message Alerts . . . . . . . . . . . . . . . . . . . . . . . . . . . . . . .141
Retrieving Your Voicemail Messages . . . . . . . . . . . . . . . . . . . . . . . . . .141
Voicemail Options . . . . . . . . . . . . . . . . . . . . . . . . . . . . . . . . . . . . . . . . .143
Clearing the Message Icon. . . . . . . . . . . . . . . . . . . . . . . . . . . . . . . . . . .146
Voicemail Menu Key . . . . . . . . . . . . . . . . . . . . . . . . . . . . . . . . . . . . . . .146
Using SMS Text Messaging . . . . . . . . . . . . . . . . . . . . . . . . . . . . . . . . . . . .147
Composing SMS Text Messages. . . . . . . . . . . . . . . . . . . . . . . . . . . . . . .147
Accessing SMS Text Messages . . . . . . . . . . . . . . . . . . . . . . . . . . . . . . . .148
Erasing Messages . . . . . . . . . . . . . . . . . . . . . . . . . . . . . . . . . . . . . . . . . .149
Using Caller ID . . . . . . . . . . . . . . . . . . . . . . . . . . . . . . . . . . . . . . . . . . . . .149
Responding to Call Waiting . . . . . . . . . . . . . . . . . . . . . . . . . . . . . . . . . . .150
Making a Three-Way Call . . . . . . . . . . . . . . . . . . . . . . . . . . . . . . . . . . . . .150
Using Call Forwarding . . . . . . . . . . . . . . . . . . . . . . . . . . . . . . . . . . . . . . .151
3B.Sprint PCS VisionSM . . . . . . . . . . . . . . . . . . . . . . . . . . . . . . 152
Getting Started With Sprint PCS Vision . . . . . . . . . . . . . . . . . . . . . . . . . .153
Your User Name . . . . . . . . . . . . . . . . . . . . . . . . . . . . . . . . . . . . . . . . . .153
Launching a Vision Connection . . . . . . . . . . . . . . . . . . . . . . . . . . . . . .154
Net Guard. . . . . . . . . . . . . . . . . . . . . . . . . . . . . . . . . . . . . . . . . . . . . . . .155
Vision Connection Status and Indicators . . . . . . . . . . . . . . . . . . . . . . .155
Navigating the Web . . . . . . . . . . . . . . . . . . . . . . . . . . . . . . . . . . . . . . .156
Accessing Messaging. . . . . . . . . . . . . . . . . . . . . . . . . . . . . . . . . . . . . . . . .159
Message Types . . . . . . . . . . . . . . . . . . . . . . . . . . . . . . . . . . . . . . . . . . . .159
Downloading Premium Services Content . . . . . . . . . . . . . . . . . . . . . . . .159
Accessing Games. . . . . . . . . . . . . . . . . . . . . . . . . . . . . . . . . . . . . . . . . . . .162
Accessing Ringers . . . . . . . . . . . . . . . . . . . . . . . . . . . . . . . . . . . . . . . . . . .164
Accessing Screen Savers . . . . . . . . . . . . . . . . . . . . . . . . . . . . . . . . . . . . . .166
Exploring the Web . . . . . . . . . . . . . . . . . . . . . . . . . . . . . . . . . . . . . . . . . .168
Using the Browser Menu . . . . . . . . . . . . . . . . . . . . . . . . . . . . . . . . . . . .169
Sprint PCS Vision FAQs. . . . . . . . . . . . . . . . . . . . . . . . . . . . . . . . . . . . . . .172
3C.Sprint PCS Voice CommandSM . . . . . . . . . . . . . . . . . . . . . . . 173
Getting Started With Sprint PCS Voice Command. . . . . . . . . . . . . . . . . .174
Creating Your Own Address Book . . . . . . . . . . . . . . . . . . . . . . . . . . . . . .174
Making a Call With Sprint PCS Voice Command . . . . . . . . . . . . . . . . . . .175
Accessing Information Using Sprint PCS Voice Command . . . . . . . . . . .176
Page 7

3D.Sprint PCS International Roaming . . . . . . . . . . . . . . . . . . . 177
Using Your Phone’s SIM Card. . . . . . . . . . . . . . . . . . . . . . . . . . . . . . . . . .178
Installing a SIM Card . . . . . . . . . . . . . . . . . . . . . . . . . . . . . . . . . . . . . . .178
Using Your SIM Card’s PIN . . . . . . . . . . . . . . . . . . . . . . . . . . . . . . . . . .179
Using Your SIM Card’s Phone Book . . . . . . . . . . . . . . . . . . . . . . . . . . .179
Using Your Phone in GSM Mode . . . . . . . . . . . . . . . . . . . . . . . . . . . . . . .180
Entering GSM Mode. . . . . . . . . . . . . . . . . . . . . . . . . . . . . . . . . . . . . . . .180
Making and Answering Calls in GSM Mode. . . . . . . . . . . . . . . . . . . . . .181
Calling Emergency Numbers in GSM Mode . . . . . . . . . . . . . . . . . . . . .181
Using Plus (+) Code Dialing. . . . . . . . . . . . . . . . . . . . . . . . . . . . . . . . . .181
Accessing Voicemail in GSM Mode . . . . . . . . . . . . . . . . . . . . . . . . . . . .182
Setting GSM Services Options. . . . . . . . . . . . . . . . . . . . . . . . . . . . . . . . . .183
Using Call Diverting (GSM) . . . . . . . . . . . . . . . . . . . . . . . . . . . . . . . . . .183
Using Call Barring (GSM) . . . . . . . . . . . . . . . . . . . . . . . . . . . . . . . . . . . .184
Activating Call Waiting (GSM) . . . . . . . . . . . . . . . . . . . . . . . . . . . . . . . .184
Manually Selecting a GSM Network . . . . . . . . . . . . . . . . . . . . . . . . . . .185
Activating Caller ID (GSM) . . . . . . . . . . . . . . . . . . . . . . . . . . . . . . . . . .185
Activating Closed User Group (GSM) . . . . . . . . . . . . . . . . . . . . . . . . . .186
Section 4: Safety Guidelines and
Warranty Information. . . . . . . . . . . . . . . . . . . . . . . . . 187
4A.Safety . . . . . . . . . . . . . . . . . . . . . . . . . . . . . . . . . . . . . . . . . . . 188
Getting the Most Out of Your Reception. . . . . . . . . . . . . . . . . . . . . . . . .189
Maintaining Safe Use of and Access to Your Phone. . . . . . . . . . . . . . . . .190
Caring for the Battery . . . . . . . . . . . . . . . . . . . . . . . . . . . . . . . . . . . . . . . .192
Acknowledging Special Precautions and the FCC Notice . . . . . . . . . . . .193
Consumer Information on Wireless Phones . . . . . . . . . . . . . . . . . . . . . .195
Owner’s Record . . . . . . . . . . . . . . . . . . . . . . . . . . . . . . . . . . . . . . . . . . . .209
User’s Guide Proprietary Notice. . . . . . . . . . . . . . . . . . . . . . . . . . . . . . . .209
4B.Terms & Conditions and Manufacturer’s Warranty . . . . . . 210
Terms and Conditions. . . . . . . . . . . . . . . . . . . . . . . . . . . . . . . . . . . . . . . .211
Manufacturer’s Warranty . . . . . . . . . . . . . . . . . . . . . . . . . . . . . . . . . . . . .227
Index . . . . . . . . . . . . . . . . . . . . . . . . . . . . . . . . . . . . . . 230
Page 8

Welcome to Sprint
Sprint has the most complete, all-digital wireless network in the
nation. Depend on it. We are committed to bringing you the best
wireless technology available. With Sprint, you get the most
complete, all-digital wireless network in the nation so all your
services work the same wherever you go on the network. We built
our network right from the start, so no matter where you are on
the enhanced Sprint Nationwide PCS Network, all your services –
whether it’s Voicemail, Caller ID, email, or Sprint PCS Picture Mail
– will work the same.
This guide will familiarize you with our technology and your new
Sprint PCS Phone through simple, easy-to-follow instructions. If
you have already reviewed the Guide to Activating and Using Your
Phone, that was packaged with your new phone, then you're ready
to explore the advanced features outlined in this guide.
If you have not read your Guide to Activating and Using Your Phone,
go to Section One – Getting Started. This section provides all the
info rmat ion yo u n eed to un lo ck yo ur phone, set up your voicemail,
and much more. It also contains information on how to contact
Sprint if you have any questions about your service, wish to check
your account balance, or want to purchase additional products or
services.
Sprint is different. All your services work the same wherever you
go on the most complete, all-digital wireless network in the nation.
Welcome and thank you for choosing Sprint.
i
Page 9

Introduction
This User’s Guide introduces you to Sprint PCS Service and all the
features of your new phone. It’s divided into four sections:
Section 1: Getting Started
Section 2: Your Sprint PCS Phone
Section 3: Sprint PCS Service Features
Section 4: Safety Guidelines and Warranty Information
Throughout this guide, you'll find tips that highlight special
shortcuts and timely reminders to help you make the most of your
new phone and service. The Table of Contents and Index will also
help you quickly locate specific information.
You'll get the most out of your phone if you read each section.
However, if you'd like to get right to a specific feature, simply
locate that section in the Table of Contents and click on the page
number to go directly to that page. Follow the instructions in that
section, and you'll be ready to use your phone in no time.
Note:
GSM
Note:
You can view this guide online or print it to keep it on hand. If you're
viewing it online, simply click on a topic in the Table of Contents or Index
or on any page reference. The PDF will automatically display the
appropriate page.
Your new Sprint PCS Vision International Phone IP-A790 allows you to
roam internationally in over 100 countries using GSM technology and a
SIM card. Many features that are available on the Sprint Nationwide
PCS Network and while roaming on other CDMA (domestic) networks
may not be available while roaming internationally in GSM mode. For
information on using your phone in GSM mode, please refer to Section
3D:"Sprint PCS International Roaming" on page 177.
ii
Page 10

Getting Started
Section 1
Page 11

Section 1A
Setting Up Service
In This Section
Getting Started With Sprint PCS Service
Setting Up Your Voicemail
Sprint PCS Account Passwords
Getting Help
Setting up service on your new Sprint PCS Phone is quick and easy.
This section walks you through the necessary steps to set up your
phone, unlock your phone, set up your voicemail, establish passwords,
and contact Sprint Customer Service for assistance with your
Sprint PCS Service.
Section 1A: Setting Up Service 2
Page 12

Getting Started With Sprint PCS Service
Determining if Your Phone is Already Activated
If you purchased your phone at a Sprint PCS Store, it is probably
activated, unlocked, and ready to use. If you received your phone
in the mail, it probably has been activated; all you need to do is
unlock it.
If your phone is not activated, please refer to the Guide to Activating
and Using Your Phone included with your phone.
Unlocking Your Phone
To unlock your phone, follow these easy steps:
1. Press to turn the phone on.
2. Select Unlock (right soft key).
Note:
To select a soft key, press the soft key button directly below the soft key
text that appears at the bottom left and bottom right of your phone’s
display screen. Soft key actions change according to the screen you’re
viewing and will not appear if there is no corresponding action available.
3. Enter your four-digit lock code. (For security purposes, the
code is not visible as you type.)
Tip:
If you can’t recall your lock code, try using the last four digits of either
your Social Security number or Sprint PCS Phone Number or try 0000. If
none of these work, call Sprint Customer Service at 1-888-211-4PCS
(4727).
Section 1A: Setting Up Service 3
Page 13

Setting Up Your Voicemail
All unanswered calls to your Sprint PCS Phone are automatically
transferred to your voicemail, even if your phone is in use or turned
off. Therefore, you will want to set up your voicemail and personal
greeting as soon as your Sprint PCS Phone is activated.
To set up your voicemail:
1. Press and hold .
2. Follow the system prompts to:
Create your pass code
Record your greeting
Record your name announcement
Choose whether or not to activate One-Touch Message
Access (a feature that lets you access messages simply by
pressing and holding
enter your pass code)
, bypassing the need for you to
Note:
The voicemail setup process may vary in certain Affiliate areas.
For more information about using your voicemail, see
“Using Voicemail” on page 140.
GSM
Note:
If your phone is in GSM mode and in a GSM service area, unanswered
calls will not be transferred to voicemail. For more information about
using your phone and service in GSM mode, see Section 3D:"Sprint PCS
International Roaming" on page 177.
Section 1A: Setting Up Service 4
Page 14

Sprint PCS Account Passwords
As a Sprint PCS customer, you enjoy unlimited access to your
personal account information, your voicemail account, and your
Sprint PCS Vision account. To ensure that no one else has access to
your information, you will need to create passwords to protect your
privacy.
Account Password
If you are the account owner, you'll have an account password to
sign on to www.sprintpcs.com and to use when calling Sprint
Customer Service. Your default account password is the last four
digits of your Social Security number. If you are not the account
owner (if someone else pays for your Sprint PCS Service), you can
get a sub-account password at
Voicemail Password
You'll create your voicemail password (or pass code) when you set
up your voicemail. See “Setting Up Your Voicemail” on page 4 for
more information on your voicemail password.
Sprint PCS Vision Password
If you have a Sprint PCS Phone, you can set up a Vision Password.
This optional password may be used to authorize purchase of
Premium Services content and to protect personal information on
multi-phone accounts.
For more information or to change your passwords, sign on to
www.sprintpcs.com or call Sprint Customer Service at 1-888-211-4PCS
(4727).
www.sprintpcs.com.
Section 1A: Setting Up Service 5
Page 15

Getting Help
Visit Our Website
You can get up-to-date information on Sprint PCS Services and
Options by signing onto our Website at
When you visit us online, you can
Review coverage maps
Learn how to use voicemail
Access your account information
Purchase accessories
Add additional options to your service plan
Check out frequently asked questions
And more
Reaching Sprint Customer Service
You can reach Sprint Customer Service many different ways:
Dial on your Sprint PCS Phone
Sign on to your account at www.sprintpcs.com
Write to us at Sprint Customer Service, P.O. Box 8077,
London, KY 40742
Receiving Automated Invoicing Information
For your convenience, your phone gives you access to invoicing
information on your Sprint PCS Account. This information includes
balance due, payment received, invoicing cycle, and the number of
minutes used since your last invoicing cycle. (Normal airtime usage
will apply.)
To access automated invoicing information:
www.sprintpcs.com.
SM
Press .
Note:
This service may not be available in all Affiliate areas.
Section 1A: Setting Up Service 6
Page 16

Sprint PCS Directory Assistance
You have access to a variety of services and information through
Sprint PCS Directory Assistance, including residential, business, and
government listings; assistance with local or long-distance calls;
movie listings; and hotel, restaurant, shopping, and major local
event information. There is a per-call charge and you will be billed
for airtime.
To call Sprint PCS Directory Assistance:
Press .
Sprint PCS Operator Services
Sprint PCS Operator Services provides assistance when placing
collect calls or when placing calls billed to a local telephone calling
card or third party.
To access Sprint PCS Operator Services:
Press .
For more information or to see the latest in products and services,
visit us online at
www.sprintpcs.com.
Note:
Sprint PCS Operator Services may not be available in all Affiliate areas.
Sprint PCS International Roaming Customer Solutions
For assistance with your phone’s GSM capabilities, SIM card
use, or for other international roaming questions, you can contact
Sprint PCS International Roaming Customer Solutions. (For more
details about using your phone’s GSM mode, see
"Sprint PCS
International Roaming" on page 177.)
While in the United States, call 1-888-226-7212.
While traveling outside of the United States, call 1-817-698-4199.
Section 1A: Setting Up Service 7
Page 17

Your Sprint PCS Phone
Section 2
Page 18

Section 2A
Your Sprint PCS Phone: The Basics
In This Section
Front View of Your Phone
Viewing the Display Screen
Features of Your Sprint PCS International Phone
Turning Your Phone On and Off
Using Your Phone’s Battery and Charger
Displaying Your Phone Number
Making and Answering Calls
Entering Text
Your Sprint PCS International Phone is packed with features that simplify
your life and expand your ability to stay connected to the people and
information that are important to you. This section will guide you
through the basic functions and calling features of your phone.
Section 2A: Your Sprint PCS Phone - The Basics 9
Page 19

Front View of Your Phone
Section 2A: Your Sprint PCS Phone - The Basics 10
Page 20

Key Functions
1. Speaker: The speaker allows you to hear the other caller and
the different ring tones and sounds offered by your phone.
2. Signal Strength Indicator: This icon represents the signal
strength by displaying bars. The more bars displayed, the
better the signal strength.
3. Application Icons: These icons represent the menu structure of
the phone. By pressing the navigation key, you can select the
desired function.
4. Display Screen: This screen displays all the information needed
to operate your phone.
5. OK Key: Pressing when navigating through a menu accepts
the highlighted choice in the menu. If you press once in
standby mode, the Pics. Video menu is displayed. If you press
and hold, the camera is launched.
6. Left Soft Key: This key is used to navigate through menus and
applications by selecting the choice available in the Left Soft
Key Option on your display screen.
7. Volume Key: Allows you to adjust the ringer volume in standby
mode (with the flip open) or adjust the voice volume during a
call. The volume key can also be used to scroll up or down to
navigate through the different menu options. To mute the
ringer during an incoming call, press the volume key up or
down.
8. Camera Key: Allows you to launch the Camera with the press of
a button when the flip is open.
9. TALK Key: Allows you to place or receive a call. In standby
mode, press the key once to access the Recent call log. If you
press and hold the key down, you will initiate the Voice
Recognition feature.
10. Voicemail Key: Press and hold to automatically dial your
voicemail.
11. Numeric Keypad: Use these keys to enter numbers, letters, and
characters.
Section 2A: Your Sprint PCS Phone - The Basics 11
Page 21

12. Shift/Asterisk Key: Enters the asterisk [*] character for calling
features. In text entry mode, press to change the character
input type.
13. Power/Accessory Interface Connector: This connector is used to
plug in the charging accessories and also connect any available
accessory cables to your phone.
14. Space/Pound Key: Enters the pound [#] character for calling
features. In text entry mode, press to enter a space.
15. Next/Plus Code Key: Allows you to make international calls by
placing a plus (+) sign prefix and country code before the
other digits of the phone number. Also allows you to cycle
through different word options when using T9 Word predictive
text mode.
16. END Key: Ends a call. Press and hold this key for a few seconds
to turn your phone on or off. While in the main menu, it
returns the phone to standby mode and cancels your input.
When you receive an incoming call, press to enter silent mode
and mute the ringer.
17. Navigation Key: This key allows you to scroll through the phone
menu options and provides a shortcut to phone functions from
standby mode.
18. BACK Key: Deletes characters from the display when you are in
text entry mode. When in a menu, press to return to the
previous menu. This key also allows you to return to the
previous screen in a Sprint PCS Vision session.
19. Side Camera Key: Allows you to launch the Camera with the
press of a button when the flip is open. When the flip is
closed, you can press and hold to launch the camera using the
external LCD as a viewfinder.
20. Right Soft Key: This key is used to navigate through menus and
applications by selecting the choice available in the Right Soft
Key Option on your display screen.
21. Vibrate/Ringer Indicator: This icon indicates whether the ringer
is set to ring only, ring and vibrate, or vibrate only.
Section 2A: Your Sprint PCS Phone - The Basics 12
Page 22

22. Battery Indicator: The battery indicator displays the amount of
remaining battery charge currently available in your phone.
When all bars are displayed in the battery icon, the phone’s
battery is fully charged. When no bars are displayed, the
phone’s battery is completely discharged or empty.
23. Position Location: This icon indicates that the position location
feature is active.
Viewing the Display Screen
Your phone’s display screen provides a wealth of information about
your phone’s status and options. This list identifies the symbols
you’ll see on your phone’s display screen:
displays your current signal strength. The more
lines you have, the stronger your signal.
means your phone cannot find a signal.
tells you a call is in progress.
indicates that your phone is in GSM mode.
indicates that you have voicemail, text,
numeric pages, picture messages, video
messages, or Sprint PCS Web Alert messages
waiting. Press briefly to see a list of pending
messages or press and hold to dial your
voicemail box.
indicates that there is an unread message in
your inbox.
indicates that the text message has been read.
indicates that there is an unread urgent message in your
inbox.
indicates that you have read the urgent message.
indicates that you have new Sprint PCS Picture Mail waiting
in your inbox.
indicates that you have new voicemail.
indicates that the message was sent.
indicates that the message failed to send.
Section 2A: Your Sprint PCS Phone - The Basics 13
Page 23

indicates that you have a pending message.
indicates that the message is a draft.
indicates that there is URL text contained in the
text message.
indicates that your Sprint PCS Vision connection
is active.
indicates that your Sprint PCS Vision connection is
dormant or inactive.
indicates that you are receiving information.
indicates that you are sending information.
indicates that your phone is in vibrate mode.
indicates that your phone is in ringer+vibrate mode.
indicates that the ringer is set at a level
between 1-8 or that 1-Beep is selected.
indicates that the ringer is turned off.
shows your current battery charge strength.
(Icon shown fully charged.)
indicates that position location is active.
indicates that position location is inactive.
indicates that the TTY option is on.
indicates that your phone is roaming in CDMA mode.
There is no roaming in GSM.
indicates that your message is locked.
indicates that your phone is in security mode.
indicates that an alarm is set on your phone.
indicates that a file (ringer, game, screen saver,
java app, etc.) has been downloaded to your
phone.
indicates that the camera is enabled.
indicates that the self-timer function is enabled. With the
self-timer enabled, a set amount of time is required prior
to taking a picture.
Section 2A: Your Sprint PCS Phone - The Basics 14
Page 24
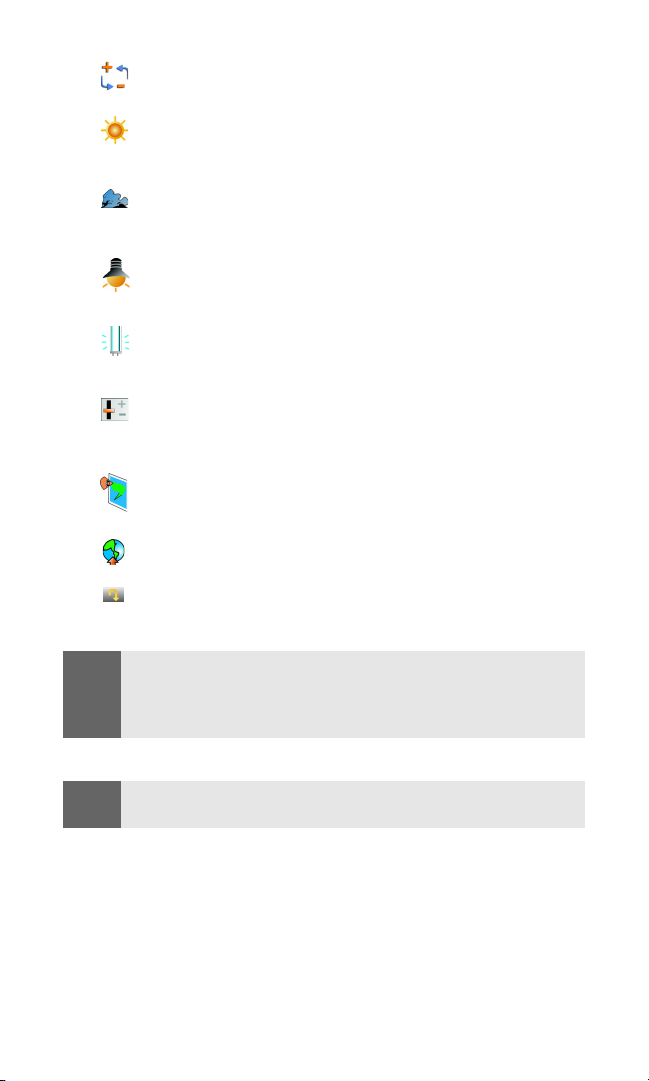
indicates that the white balance has been set to Auto. This
automatically adjusts the white balance.
indicates that the white balance has been set to Sunny.
This is used for taking pictures or movies outdoors on
bright sunny days.
indicates that the white balance has been set to Cloudy.
This is used for taking pictures or movies outdoors under
cloudy conditions.
indicates that the white balance has been set to Tungsten.
This is used for taking pictures or movies indoors under
normal lighting conditions.
indicates that the white balance has been set to
Fluorescent. This is used for taking pictures or movies
indoors under fluorescent lighting conditions.
indicates that the white balance has been set to Manual.
This is used for taking pictures indoors or outdoors using
your own custom settings.
indicates that a picture has been assigned a function. An
example may be Picture ID, Screen Saver, or Incoming
Call.
indicates that a picture has been uploaded to an online
album or folder.
indicates that a picture has been downloaded.
Note:
Display indicators help you manage your roaming charges by letting you
know when you’re off the Sprint Nationwide PCS Network and whether
you’re operating in digital or analog mode. (For more information, see
Section 2D: Controlling Your Roaming Experience on page 61.)
Tip:
You can also view a list of onscreen icons on your phone by navigating
to [Settings > Phone Info > Icon Glossary].
Section 2A: Your Sprint PCS Phone - The Basics 15
Page 25

External LCD
External LCD:
Time/Date is displayed in Digital 2 mode.
displays your current signal strength. The more
lines you have, the stronger your signal.
indicates that you have voicemail, text,
numeric pages, picture messages, video
messages, or Sprint PCS Web Alert messages
waiting. Press briefly to see a list of pending
messages or press and hold to dial your
voicemail box.
shows your current battery charge
strength. (Icon shown fully charged.) Icon
is animated while charging.
indicates that an alarm is set on your
phone.
indicates that the ringer is set at a level
between 1-8 or 1-Beep.
indicates that your phone is in vibrate mode.
indicates that your phone is in vibrate+ringer mode.
indicates that TTY option is on.
means your phone cannot find a signal.
tells you a call is in progress.
Section 2A: Your Sprint PCS Phone - The Basics 16
Page 26

Features of Your Sprint PCS International Phone
Congratulations on the purchase of your Sprint PCS International
Phone. The IP-A790 by Samsung® is lightweight, easy-to-use, reliable,
and it also offers many significant features and service options. The
following list previews some of those features and options and
provides page numbers where you can find out more:
Digital quad-band capability allows you to make and receive calls
while on the Sprint Nationwide PCS Network, to roam on other
1900 and 800 MHz CDMA digital networks where Sprint has
implemented roaming agreements with other carriers (
and to make and receive calls on compatible 900 and 1800 MHz
GSM digital networks while roaming internationally in GSM
page 178).
mode (
Sprint PCS Video Mail allows you to send video clips to other
Sprint PCS phones or to the email addresses of friends
and family.
Media Player allows you to watch full motion video clips on your
phone when you log in to Sprint PCS Vision (page 130).
Sprint PCS Vision
SM
provides access to the wireless Internet in
digital mode (page 152).
Sprint PCS Mail and SMS Text Messaging provide quick and
convenient text messaging capabilities (page 159).
Sprint PCS Voice Command
SM
lets you dial phone numbers by
speaking someone’s name or the digits in their phone number
page 173).
(
Games, ringers, screen savers, and other applications can be
downloaded to your phone to make your Sprint PCS Phone as
unique as you are (page 159).
The built-in organizer lets you schedule alerts to remind you of
important events (page 94).
Contacts allows you to store up to 500 phone numbers and email
addresses (page 89).
Sprint PCS Picture Mail
you to take and send pictures to others (
SM
and the built-in Digital Camera allow
page 114).
page 61),
Section 2A: Your Sprint PCS Phone - The Basics 17
Page 27

Turning Your Phone On and Off
Turning Your Phone On
To turn your phone on:
Press .
Once your phone is on, it displays “Information: Sprint / CDMA
system start” which indicates that your phone is searching for a
signal. When your phone finds a signal, it automatically enters
standby mode – the phone’s idle state. At this point, you are ready to
begin making and receiving calls.
If your phone is unable to find a signal after 15 minutes of searching,
a Power Save feature is automatically activated. When a signal is
found, your phone automatically returns to standby mode.
In Power Save mode, your phone searches for a signal periodically
without your intervention. You can also initiate a search for
Sprint PCS Service by pressing any key (when your phone is
turned on).
Tip:
The Power Save feature helps to conserve your battery power when you
are in an area where there is no signal.
Turning Your Phone Off
To turn your phone off:
Press and hold for two seconds until you see the
powering down animation on the display screen.
Your screen remains blank while your phone is off (unless the
battery is charging).
Section 2A: Your Sprint PCS Phone - The Basics 18
Page 28

Using Your Phone’s Battery and Charger
Battery Capacity
Your Sprint PCS Phone is equipped with a Lithium Ion (LiIon)
battery. The standard battery provides up to 3.0 hours of continuous
digital talk time in CDMA mode and up to 3.5 hours of continuous
digital talk time in GSM mode.
The extended battery provides up to 4.7 hours of continuous digital
talk time in CDMA mode and up to 5.2 hours of continuous digital
talk time in GSM mode.
When the battery reaches 5% of its capacity, the battery icon blinks.
When there are approximately two minutes of talk time left, the
phone sounds an audible alert and then powers down.
Note:
Tip:
Long backlight settings, searching for service, vibrate mode, and
browser use affect the battery’s talk and standby times.
Be sure to watch your phone’s battery level indicator and charge the
battery before it runs out of power.
Installing the Battery
To install the Li-Ion battery:
1. Insert the battery into the opening on the back of the phone at
an angle, making sure the plastic tab on the bottom of the
battery is inserted into the matching slot in the phone.
2. Press down until the battery snaps into place.
Section 2A: Your Sprint PCS Phone - The Basics 19
Page 29
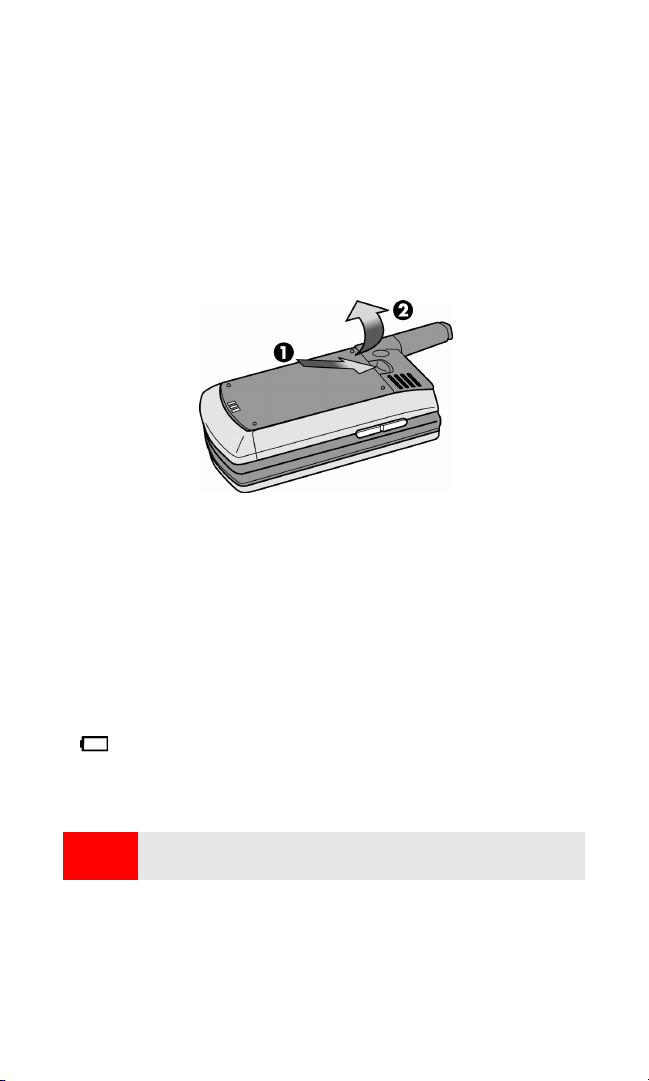
Removing the Battery
To remove your battery:
1. Make sure the power is off so that you don’t lose any stored
numbers or messages.
2. Push the battery release latch up completely.
3. Using the side tabs, pull the top of the battery away from the
phone and remove.
Charging the Battery
Your Sprint PCS Phone’s Li-Ion battery is rechargeable and should be
charged as soon as possible so you can begin using your phone.
Keeping track of your battery’s charge is important. If your battery
level becomes too low, your phone automatically turns off and you
will lose all the information you were just working on. For a quick
check of your phone’s battery level, glance at the battery charge
indicator located in the upper-right corner of your phone’s display
screen. If the battery charge is getting too low, the battery icon
) blinks and the phone sounds a warning tone.
(
Always use a Sprint approved desktop charger, travel adapter, or
vehicle power adapter to charge your battery.
Warning!
Section 2A: Your Sprint PCS Phone - The Basics 20
Using the wrong battery charger could cause damage to your phone
and void the warranty.
Page 30

Using the Travel Adapter
To use the travel adapter provided with your phone:
Plug the round end of the AC adapter into your phone and the
other end into the electrical outlet.
A red light on the phone lets you know the battery is
charging.
A yellow light on the phone indicates that there is a
problem charging the battery.
A green light indicates that the battery is at least
90 percent charged.
It takes approximately 4 hours to fully recharge a completely
rundown battery. With the Sprint-approved Li-Ion battery,
you can recharge the battery before it becomes completely
run down.
When the flip is open, an animated battery icon is displayed on the
screen. When the flip is closed and the battery is completely
charged, a green light is displayed continuously.
GSM
Note:
Your IP-A790 comes with a standard North American travel charger and
an adapter for use in Europe. If you require an outlet adapter for use in the
U.K. or Australia, please call Sprint PCS International Roaming Customer
Solutions at 1-888-226-7212. For more information about international
roaming, see "Sprint PCS International Roaming" on page 177.
Section 2A: Your Sprint PCS Phone - The Basics 21
Page 31
Displaying Your Phone Number
Just in case you forget your phone number, your Sprint PCS Phone
can remind you.
To display your phone number:
1. Press the left for Menu.
2. Highlight Settings and press .
3. Press to access Phone Number. (Your phone
number and Sprint PCS Vision User name information will be
displayed.)
Note:
To access the phone’s main menu, press Menu (Left Soft Key) from
standby mode. Menu items may be selected by highlighting them with
the navigation key and pressing OK, or you can press the number
corresponding to the menu item on your keypad.
Making and Answering Calls
Making Calls
Placing a call from your Sprint PCS Phone is as easy as making a call
from any land-line phone. Just enter the number and press
you’re on your way to clear calls.
GSM
Note:
For information on making calls while roaming internationally in GSM
mode, see "Sprint PCS International Roaming" on page 177.
To make a call using your keypad:
1. Make sure your phone is on.
2. Enter a phone number. (If you make a mistake while dialing,
press
erase the entire number.)
3. Press . (To make a call when you are roaming and
Call Guard is enabled, press and then . See “Call
Guard” on page 65.)
4. Press or close the phone when you are finished.
to erase one digit at a time. Press and hold to
and
Section 2A: Your Sprint PCS Phone - The Basics 22
Page 32

Tip:
To redial your last outgoing call, press TALK twice.
When making calls while roaming off the Sprint Nationwide PCS
Network, always dial using 11 digits (1 + area code + phone number). For
more information, see "Sprint PCS International Roaming" on page 177.
You can also place calls from your Sprint PCS Phone by using
Sprint PCS Voice CommandSM (page 173), Speed Dialing numbers
from your Contacts (page 29), and using your Call History listings
(page 86).
Tip:
To speed dial a phone number from standby mode, press and hold the
speed dial number. If the speed dial number is two digits, enter the first
digit, then press and hold the second digit. (For information on setting up
speed dial numbers, see “Assigning Speed Dial Numbers” on page 92.)
(This feature will not work when you are roaming off the Sprint
NationwidePCS Network; when roaming you must dial using eleven
digits [1 + the area code + the seven-digit phone number.])
Answering Calls
To answer an incoming call:
1. Make sure your phone is on. (If your phone is off, incoming
calls go to voicemail.)
2. Press to answer an incoming call. (Depending on your
phone’s settings, you may also answer incoming calls by
opening the phone or by pressing any number key. See “Call
Answer Mode” on
Your Sprint PCS Phone notifies you of incoming calls in the
following ways:
The phone rings or vibrates (unless set to Silence All).
The LED flashes.
The backlight illuminates.
The screen displays an incoming call message.
page 50 for more information.)
Section 2A: Your Sprint PCS Phone - The Basics 23
Page 33
If the incoming call is from a number stored in contacts, the entry
name is displayed. The caller’s phone number may also be displayed,
if available.
The following options are also available:
Press to quiet the ringer.
Press the left to Answer or right to Ignore.
Press and hold the volume key to send the incoming call to your
voicemail box or press and release to silence the ringer.
Answering a Roam Call With Call Guard Enabled
Call Guard is an option that helps you manage your roaming charges
when making or receiving calls while outside the Sprint Nationwide
PCS Network. Please see Section 2D: Controlling Your Roaming
Experience for more information about roaming.
To answer a call when you are roaming and Call Guard is enabled:
Press to answer the incoming call and then to
acknowledge roaming. (See “Call Guard” on page 65 for
additional information.)
Note:
When your phone is off, incoming calls go directly to voicemail.
Ending a Call
To disconnect a call when you are finished:
Close the phone or press .
Missed Call Notification
When an incoming call is not answered, the Missed Call log is
displayed on your screen.
To display the Missed Call entry:
Highlight the entry and press . (To dial the phone number,
press .)
Section 2A: Your Sprint PCS Phone - The Basics 24
Page 34

Calling Emergency Numbers
You can place calls to 911 (dial and press ),
even if your phone is locked or your account is restricted.
GSM
Note:
If you are roaming internationally in GSM mode, dial [1][1][2][Talk] to
place an emergency. For more information, see "Sprint PCS
International Roaming" on page 177.
In-Call Options
Select options by pressing the right during a call. A list of
features is displayed that allows you to perform different actions
during the course of a call. The following options are available: (To
select an option, press the corresponding keypad number or
highlight the option and press
(1) Key Mute or UnMute allows you to mute the microphone on
your phone so the other caller cannot hear you talking.
(2) Contacts accesses the Contacts menu.
(3) Messaging allows you to check for voicemail, Sprint PCS
Picture Mail, email, and notifications.
(4) 3-Way Call allows you to talk to two different people at the
same time. (For more information, see
on page 150.)
(5) Call History checks your call log for Outgoing, Incoming,
Missed, and All Recent calls. You can also erase the logs from this
menu.
(6) Voice Memo allows you to record your conversation. (For more
information, see "Managing Voice Memos" on page 102.)
(7) Tools accesses the Tools menu options.
(8) Phone Info displays the following menu:
(1) Phone Number
(2) Icon Glossary
(3) Version
(4) Advanced
.)
"Making a Three-Way Call"
Section 2A: Your Sprint PCS Phone - The Basics 25
Page 35
End-of-Call Options
After receiving a call from or making a call to a phone number that is
not in your Contacts, the phone number and the duration of the call
are displayed. Press the left
your Contacts. (See below for more information on “Saving a Phone
Number.”)
(Save) to add the new number to
Note:
The End-of-Call options are not displayed for calls identified as
No ID or Restricted.
Saving a Phone Number
Your Sprint PCS Phone can store up to 500 Contact numbers.
Contact entries can store up to a total of five phone numbers, and
each entry’s name can contain up to 20 characters. (For more
information, see Section 2G: Using Contacts on
To save a number from standby mode:
1. Enter a phone number and press .
Note:
The
New Entry
saved into the contacts. Skip to step 3 if you are entering the
first number in the contacts.
screen does not display for the first entry
2. Press again for New Entry.
— or—
Highlight Existing Entry and press to launch the Find
screen. Locate the desired contact and add the additional
number to the selected entry.
3. Use your navigation key to select a label (Mobile, Home, Work,
Pager, or Others) and press
.
4. Press and enter a name for the entry using the numeric
keys. Press the right to select the desired entry method
(T9 (English), Alpha, Symbol, and Number. See "Entering Text" on
page 31.)
5. When finished entering the name, press to return to the
contact entry.
6. Press the left for Done to save the entry.
page 89.)
Section 2A: Your Sprint PCS Phone - The Basics 26
Page 36

Finding a Phone Number
This feature allows you to search for phone numbers saved in your
contacts by entering the last digits of the phone number. When
searching, you must enter the digits in sequential order starting from
the last number. For example; if you have a number saved as
“555-555-1234”, you can enter “1234” and a match will be found. If
you enter “5551”, no match will be found since the numbers are not
the last digits.
To find a phone number:
1. Enter three to six numbers of the last digits of a phone number,
press the right
, and select Find. (A list of possible matches is
displayed.)
2. Use your navigation key to display the desired entry.
3. To dial the number, highlight it and press the left for Call.
Dialing and Saving Phone Numbers With Pauses
You can dial or save phone numbers with pauses for use with
automated systems, such as voicemail or credit card billing numbers.
There are two types of pauses available on your phone:
Hard Pause sends the next set of numbers when you press .
2-Second Pause automatically sends the next set of numbers after
two seconds.
Note:
You can have multiple pauses in a phone number and combine 2-second
and hard pauses.
To dial or save phone numbers with pauses:
1. Enter a phone number from standby mode.
2. Press the right and select Hard pause or 2-sec pause. Hard
pauses are displayed as a “P” and 2-second pauses as a “T”.
3. Enter additional numbers.
Section 2A: Your Sprint PCS Phone - The Basics 27
Page 37
4. Press to dial the number.
— or—
Press the right and select Save to save the number in your
internal Contacts. (Follow steps 2-6 under "Saving a Phone
Number" on page 26.).
Note:
When dialing a number with a hard pause, press TALK to send the next
set of numbers.
Abbreviated Dialing
Abbreviated dialing allows you to program a five or six-digit prefix
for commonly used phone numbers. When abbreviated dialing is on,
you can enter the last four or five digits of any phone number that
matches the five or six digit prefix, and the number is dialed.
To set up abbreviated dialing:
1. Press the left .
2. Highlight Settings and press .
3. Press for Others.
4. Press for Abbrev. Dial.
5. Press the navigation key up or down to select On and
press .
6. Input the five or six digit prefix and press to Save.
Making an Abbreviated Dial Call
To make a call:
1. Enter the last four or five digits of the prefix phone number.
2. Abbrev. Dial is displayed in the lower left corner with the
prefix digits displayed.
Note:
If there is a Contact entry that matches the last four digits, a list is
displayed which allows you to select the desired number to call.
3. Press to begin the call.
Section 2A: Your Sprint PCS Phone - The Basics 28
Page 38

Dialing From Contacts
To dial directly from a Contact entry:
1. Press the right to display your Contacts Find menu.
2. Enter the first few letters of the Contact name using the
numeric keypad.
3. The matching contact is automatically highlighted.
4. Press to make the call.
Note:
If the desired entry contains more than one phone number, scroll left
or right to display the icon for the number you wish to call and press
TALK to make the call.
Using Speed Dialing
You can store up to 99 numbers in your phone’s speed dial memory
to make contacting friends and family as easy as pressing a few
buttons. With this feature, you can dial Speed Dial entries using one
key press for locations 1-9 or two key presses for locations 10-99.
To use One-Touch Dialing for Speed Dial locations 1-9:
Press and hold the appropriate key for approximately two
seconds. (The display confirms that the number has been
dialed when it shows “Calling...”.)
To use Two-Touch Dialing for Speed Dial locations 10-99:
1. Press the first digit.
2. Press and hold the second digit for approximately two seconds.
(The display confirms that the number has been dialed when it
shows “Calling...”.)
Note:
Speed dialing is not available when you are roaming; when you are
roaming off the Sprint Nationwide PCS Network, you must always dial
using eleven digits (1 + area code + number).
Section 2A: Your Sprint PCS Phone - The Basics 29
Page 39
To reassign a speed dial number:
1. Press the right for Contacts.
2. Highlight the desired entry and press .
3. Press the right for Edit.
4. Highlight the desired label and press the right for Options.
5. Press for Speed Dial.
6. Enter the desired number using the keypad or press up or
down to highlight the desired number and press the left
for Select.
7. Press the left for Done.
Using Plus (+) Code Dialing
When placing calls outside of the country in which you’re located,
Plus Code Dialing automatically dials the international access code
for the country in which you are located (for instance, 011 for
international calls placed from the United States). When activated,
Plus Code Dialing works both in CDMA and GSM (International
Roaming) modes.
To enable or disable Plus Code Dialing:
1. From standby mode, press the left for Menu.
2. Highlight Settings and press .
3. Press for Others.
4. Press for Plus Code Dialing.
5. Press for Plus Code.
6. Highlight Enable or Disable and press .
To make a call using Plus Code Dialing:
1. Press and hold until a “+” sign displays on your phone.
2. Dial the country code and phone number you’re calling and
press . (The access code for international dialing will
automatically be dialed, followed by the country code and the
phone number you entered.)
Section 2A: Your Sprint PCS Phone - The Basics 30
Page 40

Entering Text
Selecting a Character Input Mode
Your Sprint PCS Phone provides convenient ways to enter words,
letters, punctuation, symbols, and numbers whenever you are
prompted to enter text (for example, when adding a Contact entry
or when sending Sprint PCS Mail and SMS Text Messages).
To change the character input mode:
1. When you are prompted to enter text, press the
right (Options).
2. Select a character input mode:
T9 (English) to enter characters using predictive
T9 Text Input (see page 31).
Alpha to enter characters by tapping the keypad
(see page 32).
Symbol to enter symbols (see page 33).
Number to enter numbers (see page 33).
Entering Characters Using T9 Text Input
T9 Text Input lets you enter text in your Sprint PCS Phone by
pressing keys just once per letter. (To select the T9 (English) mode
when entering text, see “Selecting a Character Input Mode” above.)
T9 Text Input analyzes the letters you enter using an intuitive word
database and creates a suitable word. (The word may change as you
type.) If the word you want does not display after you have entered
all the letters, press
selections. To accept a word and insert a space, press .
If you make a mistake, press to erase a single character. Press
and hold to delete an entire entry.
To enter text using T9:
1. From the text entry screen (for example, a new event in
scheduler), press the right and select T9 (English).
2. Use your keypad to enter the new event. (For example, to
enter “Meeting”, press
once, once, and once.)
to scroll through additional word
once, twice, once,
Section 2A: Your Sprint PCS Phone - The Basics 31
Page 41
Entering Characters by Tapping the Keypad
To enter characters by tapping the keypad, select the Alpha mode
(see “Selecting a Character Input Mode” on
corresponding key repeatedly until the desired character appears.
By default, the first letter of the first word is capitalized and
following letters are lowercase.
To enter text using Alpha:
1. From a text entry screen (for example, a contact entry), press
the right
and select Alpha.
2. Use your keypad to enter the contact's name. (For example, to
enter "Bill," press
twice, three times, three
times, press to advace the cursor or wait for it to
advance automatically, and press three times.)
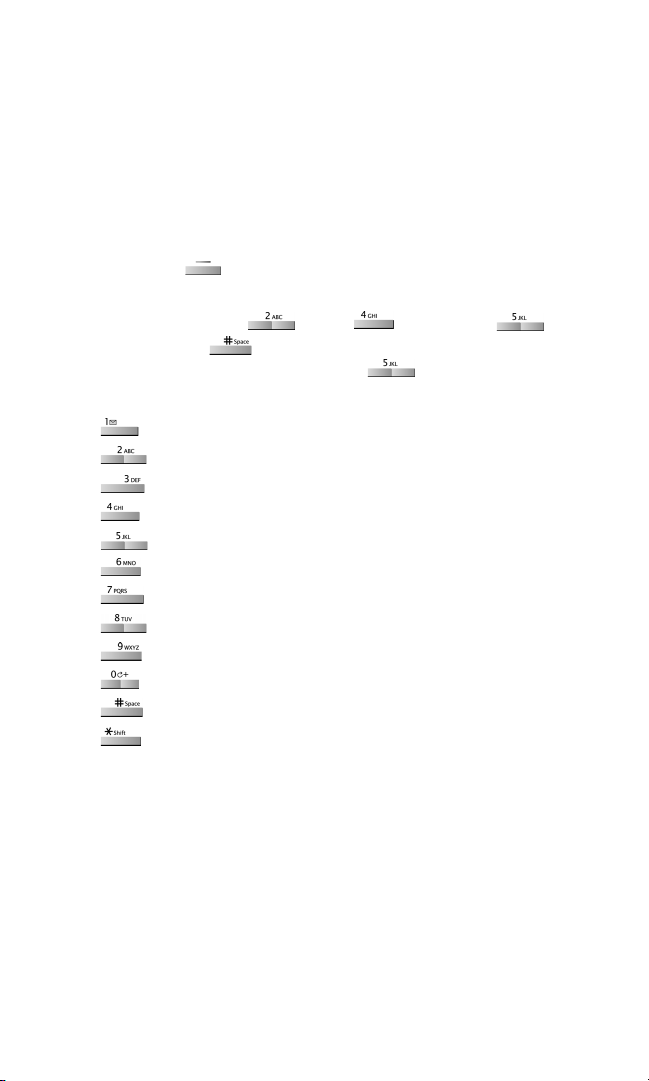
Characters scroll in the following order:
. , @ 1 ? ! * # /
A B C 2
D E F 3
G H I 4
J K L 5
M N O 6
P Q R S 7
T U V 8
W X Y Z 9
0
Space
Shift
After a character is entered, the cursor automatically advances to the
next space after two seconds or when you enter a character on a
different key.
page 31). Press the
Section 2A: Your Sprint PCS Phone - The Basics 32
Page 42

Entering Numbers and Symbols
To enter numbers:
Select the Number mode and press the appropriate key. (See
“Selecting a Character Input Mode” on
To enter symbols:
Select the Symbol mode. (See “Selecting a Character Input
Mode” on page 31.) To enter a symbol, press the appropriate
key indicated on the display.
page 31.)
Section 2A: Your Sprint PCS Phone - The Basics 33
Page 43

Section 2B
Controlling Your Phone’s Settings
In This Section
Network Settings
Sound Settings
Display Settings
Location Settings
Airplane Mode
TTY Use With Sprint PCS Service
Phone Setup Options
Using the menu options available on your Sprint PCS Phone, you can
customize your phone to sound, look, and operate just the way you want it to.
This section describes how you can change your phone’s settings to
best suit your needs. Take a few moments to review these options and
to adjust or add settings that are right for you.
Section 2B: Controlling Your Phone’s Settings 34
Page 44

Network Settings
The digital quad-band capability of your IP-A790 by Samsung allows
you to operate on both CDMA (Code Division Multiple Access)
digital networks (including the Sprint Nationwide PCS Network) and
GSM (Global System for Mobile communications) digital networks,
depending on your phone’s settings. The default setting is CDMA
mode, which is the setting used throughout the U.S.
To switch from CDMA (default) mode to GSM (International Roaming)
mode:
Note:
When switching from GSM mode to CDMA or from CDMA to
GSM, the phone will power off and then back on
automatically.
1. Make sure you have a valid SIM (Subscriber Identity Module)
card inserted into the phone’s SIM card slot (see
"Installing a
SIM Card" on page 178).
2. From standby mode, press the left for Menu.
3. Highlight Settings and press .
4. Press for Switch Network.
5. Select int’L-GSM and press . (“Change Phone Mode?” will
display.)
6. Press the left for Ye s. (Your phone is now in GSM mode
and the icon will appear on the phone’s display.)
GSM
Note:
For more information about GSM mode and international roaming, see
"Sprint PCS International Roaming" on page 177.
To switch from GSM mode to CDMA mode:
1. From standby mode, press the left for Menu.
2. Highlight Settings and press .
3. Press for Switch Network.
4. Select Sprint/CDMA and press . (“Change Phone Mode?”
will display.)
5. Press the left soft key for Yes . (Your phone is now in CDMA
mode.)
Section 2B: Controlling Your Phone’s Settings 35
Page 45
Sound Settings
Ringer Types
Ringer types help you identify incoming calls and messages. You can
assign ringer types to individual contact entries, types of calls,
Scheduler entries, and types of messages.
Single Tones are non-polyphonic traditional style ring tones.
Ring Tones include a variety of standard ringer types.
Melodies includes a variety of standard musical melodies.
Downloaded can be downloaded right to your phone. (See
“Downloading Ringers, Screen Savers and Games” on
and “Ringers” on page 164.)
Vibrate alerts you to calls or messages without disturbing others.
To select vibrate mode, press the volume key down while your
phone is in idle mode until Vibrate is selected.
Selecting Ringer Types for Voice Calls
Your Sprint PCS Phone provides a variety of ringer options that
allow you to customize your ring and volume settings. These options
allow you to identify incoming calls by the ring.
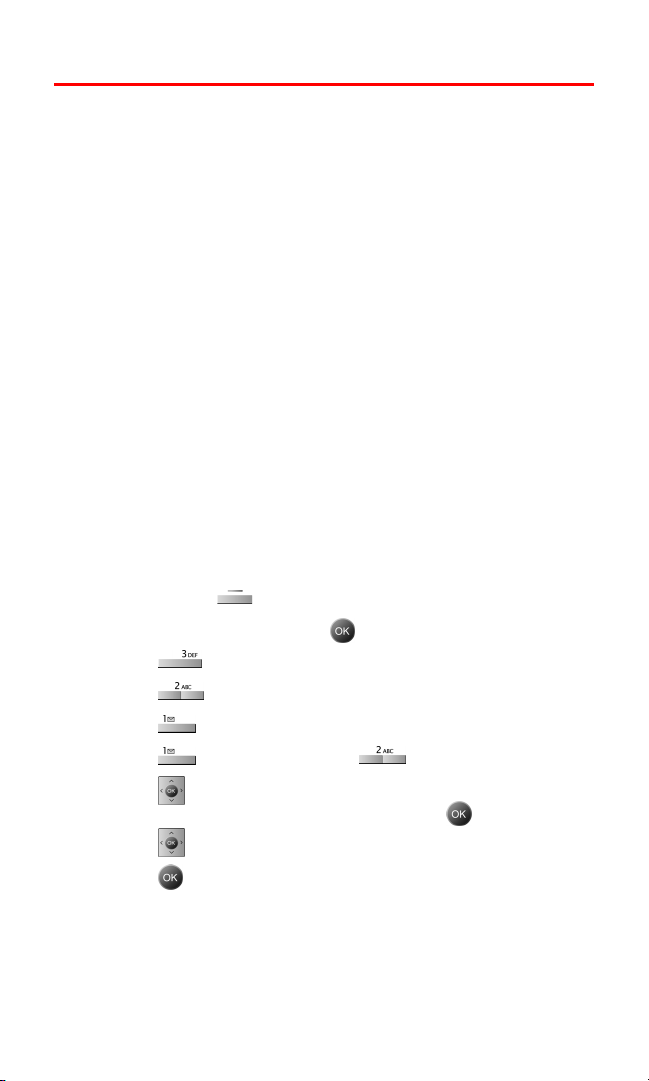
To select a ringer type for voice calls:
1. Press the left for Menu.
2. Highlight Settings and press .
3. Press for Sounds.
4. Press for Ringer Type.
5. Press for Voice Calls.
6. Press for With Caller ID or for No Caller ID.
7. Press up or down to select Single Tones, Ring Tones,
Melodies, or Downloaded ringers and press .
8. Press up or down to select the desired Ringer.
9. Press to Save and exit.
page 159
Section 2B: Controlling Your Phone’s Settings 36
Page 46
Note:
To access the phone’s main menu, press (Menu) from standby mode.
Menu items may be selected by highlighting them with the navigation
key and pressing OK, or you can press the number corresponding to the
menu item on your keypad.
Selecting Ringer Types for Messages
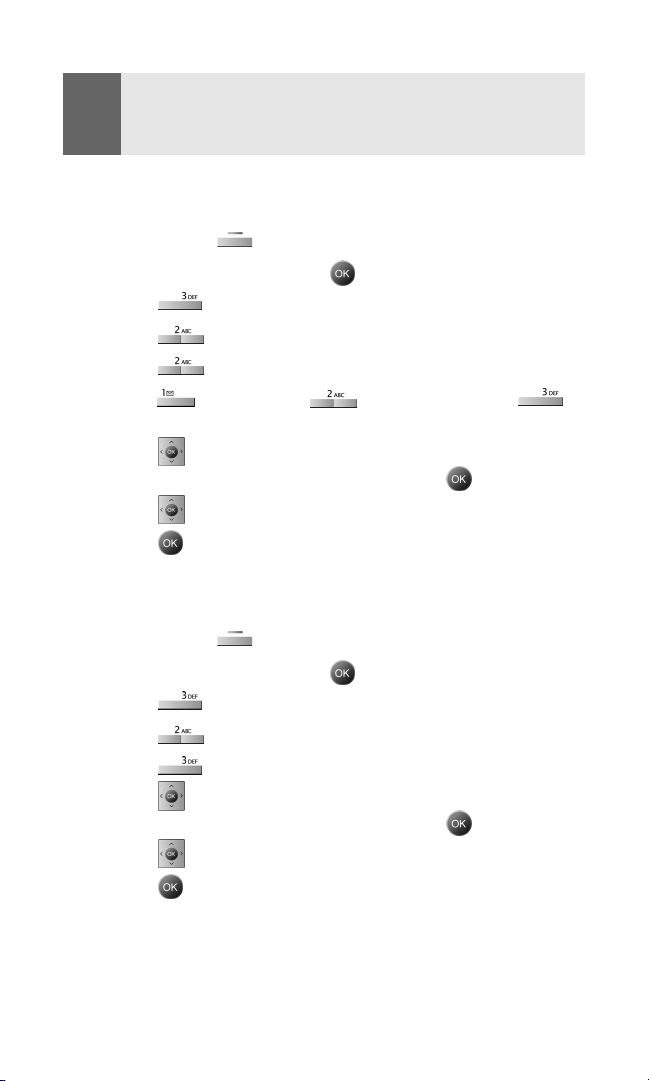
To select a ringer type for messages:
1. Press the left for Menu.
2. Highlight Settings and press .
3. Press for Sounds.
4. Press for Ringer Type.
5. Press for Messages.
6. Press for Voicemail, for Text Message, or for
Picture Mail.
7. Press up or down to select Single Tones, Ring Tones,
Melodies, or Downloaded ringers and press .
8. Press up or down to select the desired Ringer.
9. Press to Save and exit.
Selecting Ringer Types for Scheduled Alerts
To select a ringer type for scheduled alerts:
1. Press the left for Menu.
2. Highlight Settings and press .
3. Press for Sounds.
4. Press for Ringer Type.
5. Press for Schedule.
6. Press up or down to select Single Tones, Ring Tones,
Melodies, or Downloaded ringers and press .
7. Press up or down to select the desired Ringer.
8. Press to Save and exit.
Section 2B: Controlling Your Phone’s Settings 37
Page 47
Selecting Ringer Type for Roam Ringer
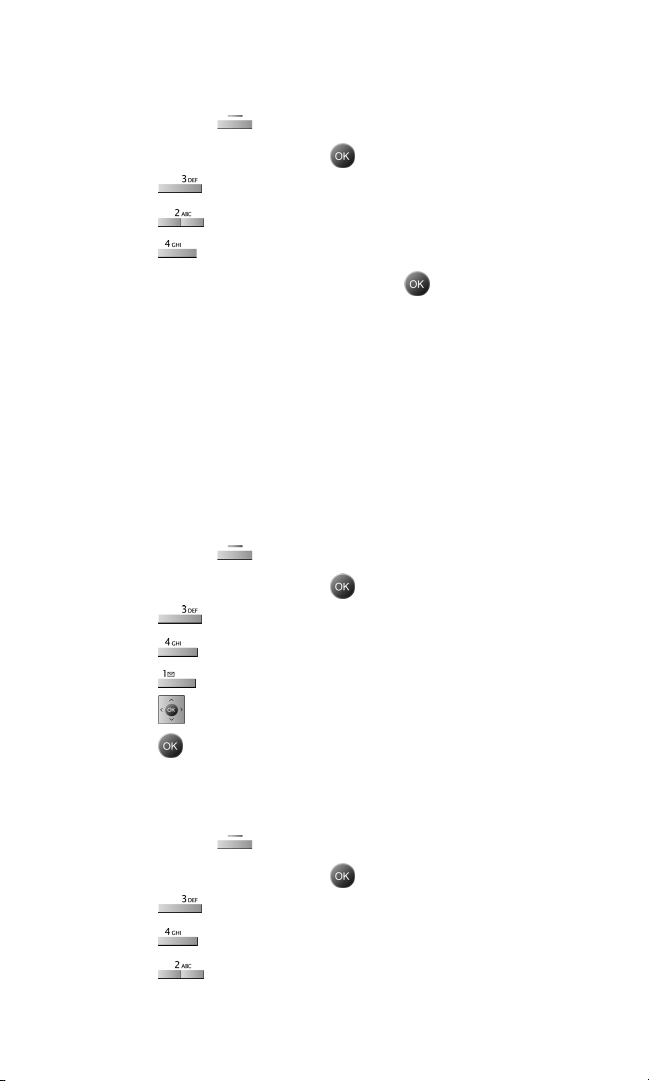
To select a ringer type for incoming roam calls:
1. Press the left for Menu.
2. Highlight Settings and press .
3. Press for Sounds.
4. Press for Ringer Type.
5. Press for Roam Ringer.
6. Select Normal or Distinctive and press .
Key Tone Level
Your phone offers a number of options for selecting the audible
tones accompanying a key press.
There are three different tones available:
Normal - Normal key beeps are heard when a button is pressed.
Rain Drop - Polyphonic tones are heard when a key is pressed.
Voice - Polyphonic voice tones are heard when you press a key.
To select a key tone:
1. Press the left for Menu.
2. Highlight Settings and press .
3. Press for Sounds.
4. Press for Key Tone.
5. Press for Tone Type.
6. Press up or down to select the desired tone type.
7. Press to Save.
Key Tone Volume
To adjust the key tone volume:
1. Press the left for Menu.
2. Highlight Settings and press .
3. Press for Sounds.
4. Press for Key Tone.
5. Press for Key Tone Level.
Section 2B: Controlling Your Phone’s Settings 38
Page 48
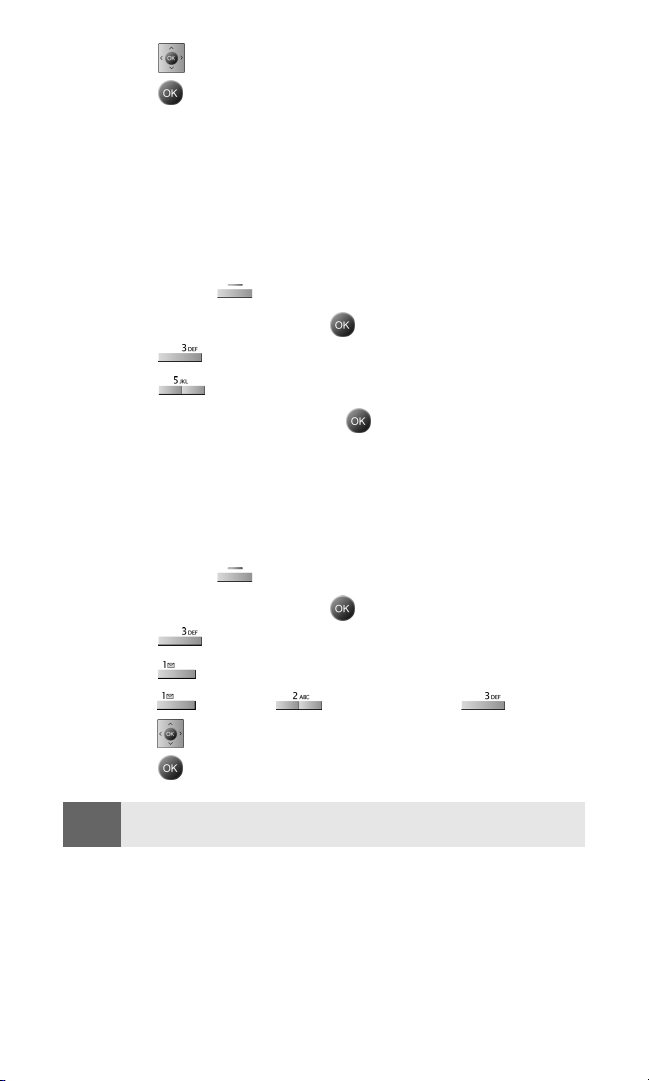
6. Press right to increase or left to decrease the volume.
7. Press to Save.
Selecting Tone Length
Your phone offers a number of options for selecting the audible
tones accompanying a key press. Longer tone lengths may be better
for tone recognition when dialing voicemail or other automated
systems.
To select a key tone:
1. Press the left for Menu.
2. Highlight Settings and press .
3. Press for Sounds.
4. Press for Tone Length.
5. Select Short or Long and press .
Adjusting the Phone’s Volume Settings
You can adjust your phone’s volume settings to suit your needs and
your environment.
To adjust the ringer, key beep, or earpiece volume:
1. Press the left for Menu.
2. Highlight Settings and press .
3. Press for Sounds.
4. Press for Ringer Volume.
5. Press for Calls, for Messages, or for Alarms.
6. Press left or right until the desired volume level is selected.
7. Press to Save and exit.
Tip:
Section 2B: Controlling Your Phone’s Settings 39
You can adjust the ringer volume in standby mode (or the earpiece
volume during a call) by using the volume key on the side of your phone.
Page 49
Alert Notification
Your Sprint PCS Phone can alert you with an audible tone when you
change service areas, once a minute during a voice call, or when a
call has been connected.
The different actions available are:
Minute Beep - An alert tone is sounded every minute that you are
connected.
Service - An alert tone is sounded when you come in or out of
your coverage area.
Connect - An alert tone is sounded when you are initially
connected.
Signal Fade Tone - An alert tone is sounded when the signal fades
and the connection is lost.
Power On/Off - An alert tone is sounded when your phone is
powered on or off.
To enable or disable alert sounds:
1. Press the left for Menu.
2. Highlight Settings and press .
3. Press for Sounds.
4. Press for Alerts.
5. Press:
for Minute Beep.
for Service.
for Connect.
for Sig. Fade Tone.
for Power On/Off.
6. Press up or down to select On or Off and press .
Section 2B: Controlling Your Phone’s Settings 40
Page 50
Application Volume
This setting allows you to control the default volume and vibrate
settings in downloaded applications on your Sprint PCS phone.
When the application is opened, the default setting is enabled and
you can adjust the volume setting by using the volume keys located
on the side of the handset.
To set the Application Volume:
1. Press the left for Menu.
2. Highlight Settings and press .
3. Press for Sounds.
4. Press for App. Volume.
5. Press:
for Sound.
for Vibrate.
6. Press left or right to select a desired volume level or
vibrate.
7. Press to save.
Silence All
There may be times when you need to silence your phone entirely.
The phone’s Silence All option allows you to mute all sounds
without turning your phone off.
To activate Silence All:
Press and hold the volume key down in standby mode.
(The screen will display “Silence All.” )
To deactivate Silence All:
Press the volume key up repeatedly to select a desired
volume level.
Section 2B: Controlling Your Phone’s Settings 41
Page 51
Display Settings
Changing the Text Greeting
The text greeting can be up to fourteen characters and is displayed
on your phone’s screen in standby mode. You may choose to display
a custom greeting or you may display the phone's default greeting
(“Sprint PCS”) on the screen.
To display or change your custom greeting:
1. Press the left for Menu.
2. Highlight Settings and press .
3. Press for Display.
4. Press for Greeting.
5. Press up or down to select Custom and press .
6. Press and hold to clear the existing greeting.
7. Use the numeric keypad to enter a new custom greeting. (See
"Entering Text" on page 31.)
8. Press to Save and exit.
To display “Sprint PCS” as your greeting:
1. Press the left for Menu.
2. Highlight Settings and press .
3. Press for Display.
4. Press for Greeting.
5. Press up or down to select Sprint PCS and press .
Section 2B: Controlling Your Phone’s Settings 42
Page 52

Changing the Backlight Time Length
The backlight setting lets you select how long the display screen and
keypad are backlit after any key press is made.
To change the backlight setting:
1. Press the left for Menu.
2. Highlight Settings and press .
3. Press for Display.
4. Press for Backlight.
5. Press for Main Display, for Keypad, or for
Pwr Save Mode.
6. Press up or down to select:
Main Display - Flip open, 30 seconds, 15 seconds,
8 seconds.
Keypad - Flip open, 30 seconds, 15 seconds, 8 seconds,
or Off
Pwr Save Mode - On or Off.
7. Press to Save.
Note:
Section 2B: Controlling Your Phone’s Settings 43
Long backlight settings affect the battery’s talk and standby times.
Page 53
Changing the Display Screen
Your new Sprint PCS Phone offers options for what you see on the
display screen when in standby mode.
Changing the Main Display
To change the main displayimages:
1. Press the left for Menu.
2. Highlight Settings and press .
3. Press for Display.
4. Press for Screen Saver.
5. Press for Main LCD.
6. Press up or down to select:
Preset Images
Downloads
My Pictures
My Video
7. Press .
8. Use to select an image or video, and press the left
for Assign
Changing the External Display
To change the external display images:
1. Follow steps 1-4 above.
2. Press for Sub LCD.
3. Press up or down to select:
Preset Images
Main LCD Dlds (Downloads)
Main LCD Pic (Pictures)
4. Press .
5. If you have selected Preset Images, use to select an image
and press the left for Assign.
Section 2B: Controlling Your Phone’s Settings 44
Page 54

Changing the Phone’s Menu Style
Your Sprint PCS Phone allows you to choose how the menu appears
on your display screen.
To select the display’s menu style:
1. Press the left for Menu.
2. Highlight Settings and press .
3. Press for Display.
4. Press for Menu Style.
5. Press up or down to select 3x3 Style or Wheel Style and
press .
Note:
The instructions in this guide refer to the default 3x3 Style menu; if you
select the Wheel Style menu, the top-level menu numbering will differ
(for example, in 3x3 Style, Settings is option 7; in Wheel Style, Settings is
option 9).
Section 2B: Controlling Your Phone’s Settings 45
Page 55
Location Settings
Your Sprint PCS Phone is equipped with a Location feature for use in
connection with location-based services that may be available in the
future.
The Location feature allows the network to detect your position.
Turning Location off will hide your location from everyone
except 911.
Note:
Even if the Location feature is enabled, no service may use your locati on
without your express permission.
To enable your phone’s Location feature:
1. Press the left for Menu.
2. Highlight Settings and press .
3. Press for Others.
4. Press for Location. (A brief explanation will display. Use
to scroll through to read the entire text.)
5. Press up or down to select On or Off.
6. Press to Save.
When the Location feature is on, your phone’s standby screen will
display the
display.
icon. When Location is turned off, the icon will
Section 2B: Controlling Your Phone’s Settings 46
Page 56
Airplane Mode
Airplane Mode allows you to use many of your phone’s features,
such as Games, Memo Pad, Voice Memos, etc., when you are in an
airplane or in any other area where making or receiving calls or data
is prohibited. When your phone is in Airplane Mode, it cannot send
or receive any calls or access online information. All incoming calls
will be sent directly to your voicemail box.
To set your phone to Airplane Mode:
1. Press the left for Menu.
2. Highlight Settings and press .
3. Press for Others.
4. Press for Airplane Mode. (A brief explanation of Airplane
Mode will display.)
5. Press to continue.
6. Press up or down to select On or Off and press .
While in Airplane Mode, your phone’s standby screen will
display “Phone off.”
Section 2B: Controlling Your Phone’s Settings 47
Page 57
TTY Use With Sprint PCS Service
A TTY (also known as a TDD or Text Telephone), is a telecommunications device that allows people who are deaf or hard of
hearing, or who have speech or language disabilities, to
communicate by telephone.
Your phone is compatible with select TTY devices. Please check
with the manufacturer of your TTY device to ensure that it supports
digital wireless transmission. Your phone and TTY device will
connect via a special cable that plugs into your phone's headset
jack. If this cable was not provided with your TTY device, contact
your TTY device manufacturer to purchase the connector cable.
When establishing your Sprint PCS Service, please call Sprint
Customer Service via the state Telecommunications Relay Service
(TRS) by first dialing
the state TRS with this number: 866-727-4889.
To turn TTY Mode on or off:
1. Press . (A brief
explanation of TTY Mode will display.)
2. Press to continue.
3. Press key up or down to select Enable TTY or Disable TTY
and press .
. Then provide
Note:
IMPORTANT
NOTICE:
Section 2B: Controlling Your Phone’s Settings 48
In TTY Mode when your headset is plugged in, your phone will display
the TTY access icon.
If TTY mode is enabled, the audio quality of non-TTY devices connected
to the headset jack may be impaired.
911 Emergency Calling
Sprint recommends that TTY users make emergency calls by
other means, including Telecommunications Relay Services
(TRS), analog cellular, and land line communications. Wireless
TTY calls to 911 may be corrupted when received by public safety
answering points (PSAPs) rendering some communications
unintelligible. The problem encountered appears related to TTY
equipment or software used by PSAPs. This matter has been
brought to the attention of the FCC, and the wireless industry and
PSAP community are currently working to resolve this.
Page 58

Phone Setup Options
Shortcut
Your phone offers you the option of assigning shortcut keys to
favorite or often-used functions. Pressing the navigation key in the
proper direction in standby mode will launch your personally
designated shortcuts.
To assign a shortcut key:
1. Press the left for Menu.
2. Highlight Settings and press .
3. Press for Launch Pad.
4. Press for Up Key, for Down Key, for Left Key,
or for Right Key.
5. Press the navigation key up or down to select one of the
following functions:
Contacts
Voi c e M e m o
Scheduler
Messaging
Voice Service
Ringer Type
Downloads
Display
Alarms
Calculator
Mediaplayer
Web
Inbox
Send Text
6. Press to Save.
Section 2B: Controlling Your Phone’s Settings 49
Page 59
Call Answer Mode
You can determine how to answer incoming calls on your phone,
whether you want to be required to press
, to press any
number key, or simply to open the phone.
To set call answer mode:
1. Press the left for Menu.
2. Highlight Settings and press .
3. Press for Others.
4. Press for Call Answer and select one of the following:
Any Key
Tal k K ey
Flip Open
5. Press to Save.
Auto-Answer Mode
You may set your phone to automatically pick up incoming calls
when connected to an optional hands-free car kit or headset.
To set Auto-Answer mode:
1. Press the left for Menu.
2. Highlight Settings and press .
3. Press for Others.
4. Press for Auto Answer.
5. Press up or down to select Yes or No.
6. Press to Save.
Section 2B: Controlling Your Phone’s Settings 50
Page 60

Display Language
You can choose to display your Sprint PCS Phone’s on-screen menus
in English or in Spanish.
To assign a language for the phone’s display:
1. Press the left for Menu.
2. Highlight Settings and press .
3. Press for Others.
4. Press for Language.
5. Press up or down to select English or Español.
6. Press to Save.
Section 2B: Controlling Your Phone’s Settings 51
Page 61

Setting Your Phone’s Security
In This Section
Accessing the Security Menu
Using Your Phone’s Lock Feature
Restricting Calls
Lock Services
Using Special Numbers
Erasing Contacts
Erasing Downloads
Erasing Pictures/Videos
Resetting Your Phone
Resetting Your Picture Account
Security Features for Sprint PCS Vision
SM
Section 2C
By using the security settings on your Sprint PCS Phone, you receive
peace of mind without sacrificing flexibility. This section will familiarize
you with your phone’s security settings. With several options available,
you can customize your phone to meet your personal needs.
Section 2C: Setting Your Phone’s Security 52
Page 62
Accessing the Security Menu
All of your phone’s security settings are available through the
Security menu. You must enter your lock code to view the
Security menu.
To access the Security menu:
1. Press the left for Menu.
2. Highlight Settings and press .
3. Press for Security.
4. Enter your lock code. (The security menu is displayed.)
Tip:
If you can’t recall your lock code, try using the last four digits of either
your Social Security number or Sprint PCS Phone Number or try 0000. If
none of these work, call Sprint Customer Service at 1-888-211-4PCS
(4727).
Using Your Phone’s Lock Feature
Locking Your Phone
When your phone is locked, you can only receive incoming calls or
make calls to 911, Sprint Customer Service, or special numbers.
To lock your phone:
1. From the Security menu, press for Lock Phone.
2. Highlight Lock Now and press .
To lock on power-up
1. From the Security menu, press for Lock Phone.
2. Use to select On Power-Up and press .
Unlocking Your Phone
To unlock your phone:
1. Press either .
2. Enter your lock code.
Section 2C: Setting Your Phone’s Security 53
Page 63

Locking Pictures/Videos
To lock pictures:
1. From the Security menu, press for Lock Pic/Video.
2. Press the navigation key up or down to select On or Off and
press
.
Changing the Lock Code
To change your lock code:
1. From the Security menu, press for Change Lock.
2. Enter your new lock code and press .
3. Re-enter your new lock code and press .
Calling in Lock Mode
You can place calls to 911 and to your special numbers when in
lock mode. (For information on special numbers, see “Using Special
Numbers” on
To place an outgoing call in lock mode:
To call an emergency number, special number, or Sprint
page 56.)
Customer Service, enter the phone number and press
Restricting Calls
.
There may be occasions when you want to limit the numbers your
phone can call. You can use the Restrict Calls setting to do just that.
(The Restrict Calls setting does not apply to 911 or Sprint Customer
Service.)
You can select one of the following options:
Allow all - Allows all calls to be made without any restrictions.
(Default setting.)
Contacts Only - Allows you to call only the entries saved in the
contacts. You can receive incoming calls from anyone.
Special# Only - Allows you to call only the three numbers stored
in the Special# section in the Security menu. You can receive
incoming calls from anyone.
Section 2C: Setting Your Phone’s Security 54
Page 64
To restrict calls:
1. Press the left for Menu.
2. Highlight Settings and press .
3. Press for Others.
4. Press for Restriction and enter your lock code using the
keypad.
5. Press for Outgoing Call.
6. Press up or down to select Allow all, Contacts Only, or
Special# Only and press .
Lock Services
Locking Voice Calls
With this feature active, you will not be able to make or receive
voice calls except 911.
To lock or unlock voice calls:
1. From the security menu, press for Lock Services.
2. Press for Voice.
3. Press up or down to select Lock or Unlock and press .
Locking Sprint PCS Vision Services
To lock or unlock Sprint PCS Vision services:
1. From the security menu, press for Lock Services.
2. Press for PCS Vision.
3. Press up or down to select Lock or Unlock and press .
Section 2C: Setting Your Phone’s Security 55
Page 65
Using Special Numbers
Special numbers are important numbers that you have designated as
being “always available.” You can call and receive calls from special
numbers even if your phone is locked.
You can save three special numbers in addition to your Contact
entries (the same number may be in both directories).
To add or replace a special number:
1. From the Security menu, press for Special #.
2. Select entry one, two, or three and press .
3. Enter the number using the keypad.
4. Press to Save.
Note:
There are no Speed Dial options associated with special numbers.
Erasing Contacts
You can quickly and easily erase all of your Contacts.
To erase all the names and phone numbers in your Contacts:
1. From the Security menu, press for Erase Phone.
2. Press for Erase Contacts.
3. Press up to select Yes and press .
4. Press up again to select Yes to confirm and press to
permanently delete.
Section 2C: Setting Your Phone’s Security 56
Page 66
Erasing Downloads
This option deletes all saved downloaded content from the phone,
including games, ringers, screen savers, and applications.
To erase your downloads:
1. From the Security menu, press for Erase Phone.
2. Press for Erase Downloads.
3. Press up and select Ye s.
4. If you are certain you wish to erase all downloaded content,
press
.
Note:
If you have assigned any downloaded content, such as ringers or screen
savers, to phone tasks, erasing the content will return the tasks to their
default settings.
Erasing Pictures/Videos
You can quickly and easily delete all pictures or videos currently
saved in your phone.
To erase your pictures/Videos:
1. From the Security menu, press for Erase Phone.
2. Press for Erase Pic/Video.
3. Press up and select Yes .
4. Press .
Section 2C: Setting Your Phone’s Security 57
Page 67
Resetting Your Phone
Resetting the phone restores all the factory defaults, including the
ringer types and display settings. The Contacts, Call History,
Scheduler, and Messaging are not affected.
To reset your phone:
1. From the Security menu, press for Reset Phone.
2. Press up to select Yes and press .
3. Press up again to confirm and select Ye s.
4. Press to reset.
Resetting Your Picture Account
This option erases the token (login) information for your
Sprint PCS Picture Mail account.
To reset your account:
1. From the Security menu, press for Reset Pic/Video
Account.
2. Press up and select Yes .
3. Press to reset.
Section 2C: Setting Your Phone’s Security 58
Page 68
Security Features for Sprint PCS Vision
SM
Enabling and Disabling Sprint PCS Vision Services
You can disable Sprint PCS Vision services without turning off your
phone; however, you will not have access to all Vision services,
including Web and messaging. Disabling Sprint PCS Vision will avoid
any charges associated with Vision services. While signed out, you can
still place or receive phone calls, check voicemail, and use other voice
services. You may enable Vision services again at any time.
To disable Vision services:
1. Press the left for Menu.
2. Highlight Settings and press .
3. Press for PCS Vision.
4. Press for Enable/Disable Vision.
5. Read the Sprint PCS information message and press .
6. Select Disable Vision or Enable Vision and press to Save.
Net Guard
The Net Guard option allows you to be prompted each time you
connect to Vision services. When you access Vision, a screen is
displayed with the following two choices:
Connect
Always Auto-Connect
If you select Connect, you are connected to Vision services and you
are prompted again the next time you sign in. If you select Always
Auto-Connect, you are connected automatically each time you sign in
to Vision services.
To set Net Guard:
1. Press the left for Menu.
2. Highlight Settings and press .
3. Press for PCS Vision.
4. Press for Net Guard.
5. Press up or down to select On or Off.
6. Press to Save.
Section 2C: Setting Your Phone’s Security 59
Page 69

Updating Your Sprint PCS Vision Profile
The data profile keeps all your user name and login information
which allows you to connect to Vision services. It may become
necessary to update the profile to maintain peak efficiency.
To update your profile:
1. Press the left for Menu.
2. Highlight Settings and press .
3. Press for PCS Vision.
4. Press for Update Profile.
Your phone will connect to the browser and update your Vision
profile. When the update is finished, the idle screen is displayed.
Section 2C: Setting Your Phone’s Security 60
Page 70

Section 2D
Controlling Your Roaming Experience
In This Section
Understanding Roaming
Setting Your Phone’s CDMA Roam Mode
Controlling Roaming Charges Using Call Guard
Roaming is the ability to make or receive calls when you’re off the
Sprint Nationwide PCS Network. While in CDMA mode, your new
digital quad-band Sprint PCS Vision Phone works anywhere on the
Sprint Nationwide PCS Network and allows you to roam on other 1900
and 800 MHz CDMA digital networks where we’ve implemented
roaming agreements with other carriers. While roaming internationally
in GSM mode with a SIM card installed, you can make and receive calls
on compatible 900 and 1800 MHz GSM digital networks.
This section explains how CDMA roaming works as well as special
features that let you manage your roaming experience. For more
information about roaming internationally in GSM mode, see Section
3D: Sprint PCS International Roaming on
Section 2D: Controlling Your Roaming Experience 61
page 177.
Page 71
Understanding Roaming
Recognizing Icons on the Display Screen
Your phone’s display screen always lets you know when you’re off the
Sprint Nationwide PCS Network and whether your phone is operating
in analog or digital mode. The following chart indicates what you’ll
see depending on where you’re using your phone.
Roaming Indicator
Sprint Nationwide PCS Network
Other CDMA Digital Networks
GSM Digital Networks (International Roaming
in GSM Mode)
Tip:
Note:
Remember, when you are using your phone off the Sprint Nationwide
PCS Network (in CDMA mode), always dial numbers using 11 digits
(1 + area code + number). For more information, see page 177.
Unless your Service Plan includes roaming, you will pay a higher
per-minute rate for roaming calls.
Roaming on Other CDMA Digital Networks
When you’re roaming on digital networks in CDMA mode, your call
quality and security will be similar to the quality you receive when
making calls on the Sprint Nationwide PCS Network. However, you
may not be able to access certain features, such as Sprint PCS Vision.
Section 2D: Controlling Your Roaming Experience 62
Page 72

Checking for Voicemail Messages While Roaming
When you are roaming off the Sprint Nationwide PCS Network in
CDMA mode, you may not receive on-phone notification of new
voicemail messages. Callers can still leave messages, but you will
need to periodically check your voicemail for new messages if you
are in a roaming service area for an extended period of time.
To check your voicemail while roaming in CDMA mode:
1. Dial 1+area code+your Sprint PCS Phone Number.
2. When you hear your voicemail greeting, press .
3. Enter your pass code at the prompt and follow the voice
prompts.
When you return to the Sprint Nationwide PCS Network, voicemail
notification will resume as normal.
Section 2D: Controlling Your Roaming Experience 63
Page 73

Setting Your Phone’s CDMA Roam Mode
Your Sprint PCS Phone allows you to control your ability to roam.
By using the Roaming menu option, you can determine which
signals your phone accepts. To switch your phone to raom in GSM
mode, see
Set Mode
Choose from three different settings on your quad-band phone to
control your roaming experience.
To set your phone’s CDMA roam mode:
1. Press the left for Menu.
2. Highlight Settings and press .
3. Press for Roaming.
4. Press for Set Mode.
5. To select an option, highlight it and press .
"Sprint PCS International Roaming" on page 177.
Automatic: This setting seeks Sprint PCS Service. When
service is unavailable, the phone searches for an alternate
system.
Roaming only: This setting forces the phone to seek an
analog roaming system. The previous setting (Sprint or
Automatic) is restored the next time the phone is turned on.
Sprint: This setting allows you to access the enhanced Sprint
Nationwide PCS Network only and prevents roaming on other
networks.
Note:
Section 2D: Controlling Your Roaming Experience 64
To access the phone’s main menu, press (Menu) from standby mode.
Menu items may be selected by highlighting them with the navigation
key and pressing OK, or you can press the number corresponding to the
menu item on your keypad.
Page 74
Controlling Roaming Charges Using Call Guard
Your phone has two ways of alerting you when you are roaming off
the Sprint Nationwide PCS Network in CDMA mode: the on-screen
roaming icon and Call Guard. Call Guard makes it easy to manage
your roaming charges by requiring an extra step before you can
place or answer a roaming call. (This additional step is not required
when you make or receive calls while on the Sprint Nationwide PCS
Network.)
To turn Call Guard on or off:
1. Press the left for Menu.
2. Highlight Settings and press .
3. Press for Roaming.
4. Press for Call Guard.
5. Highlight On or Off and press . (A message confirming your
choice will display briefly.)
Note:
Reminder:
Section 2D: Controlling Your Roaming Experience 65
Voice Dialing and Speed Dialing are not available when you are roaming
with Call Guard enabled.
To place roaming calls with Call Guard on:
1. From standby mode, dial 1 + area code + the seven-digit
number and press
Contacts, Call History, or Messaging.)
2. A message is displayed indicating that roaming rate applies.
Press
To answer incoming roaming calls with Call Guard on:
1. Press . (A message will appear notifying you that roaming
charges will apply.)
2. Press to accept and answer the call.
to place the call.
If the Call Guard feature is set to On, you need to take extra steps
to make and receive roaming calls, even if you have selected the
Analog setting (see page 64).
. (You can also initiate a call from the
Page 75

Section 2E
Navigating Through Menus
In This Section
Menu Navigation
Menu Structure
Viewing the Menus
Every function and feature of your Sprint PCS International Phone
IP-A790 by Samsung® can be accessed through an on-screen menu. This
section is a road map to using your Sprint PCS Phone. Please take a few
moments to learn your way around and you’ll find your phone easier to
use.
Section 2E: Navigating Through Menus 66
Page 76
Menu Navigation
The navigation key on your Sprint PCS Phone allows you to scroll
through menus quickly and easily. The scroll bar at the right of the
menu keeps track of your position in the menu at all times.
To navigate through a menu, simply press the navigation key up or
down. If you are in a first-level menu, such as Settings, you may also
navigate to the next or previous first-level menu by pressing the
navigation key right or left.
Menu Structure
Selecting Menu Items
As you navigate through the menu, menu options are highlighted.
Select any numbered option by simply pressing the corresponding
number on the phone’s keypad. You may also select any item by
highlighting it and pressing
For example, if you want to view your last incoming call:
1. Press the left for Menu.
2. Highlight Call History and press .
3. Press for Incoming Calls.
Backing Up Within a Menu
To go to the previous menu:
.
Press .
To return to standby mode:
Press .
Section 2E: Navigating Through Menus 67
Page 77

Viewing the Menus
Menu Diagram
The following list outlines your phone’s menu structure:
Call History
1: Outging Calls
2: Incoming Calls
3: Missed Calls
4: All Recent
Contacts
1: Find
2: Add New Entry
3: My Phone #
4: Speed Dial #s
5: Group
1: Unassigned
2: Family
3: Friends
4: Colleague
5: VIPs
6: Empty
7: Empty
6: Services
1: Account Info
2: Customer Service
3: Dir Assist
Messaging
1: Send Message
1: Text
2: Picture
1: Camera Review
2: New Picture
3: Video
1: Video Review
2: New Video
2: Text Message
1: Inbox
2: Outbox
3: Drafts
4: Send Text
3: Picture Mail
Section 2E: Navigating Through Menus 68
Page 78

1: Inbox
2: Send Picture
3: Send Video
4: Email
5: Instant Message
6: Voicemail
1: Call Voicemail
2: Details
3: Clear Envelope
7: Settings
1: Notification
1: Message & Icon
2: Icon only
2: Sending Options
1: Priority
1: Normal
2: Urgent
2: Call Back #
1: None
2: Phone Number (xxx-xxx-xxxx)
3: Other
3: Preset Messages
1: Can’t talk right now. Send me a message.
2: Call me
3: Where are you?
4: Can you pick up
5: Meet me at
6: Let’s get lunch.
7: The meeting has been cancelled.
8: I’ll be there at
9: What time does it start?
10: I love you!
11: [Empty]
12: [Empty]
13: [Empty]
14: [Empty]
15: [Empty]
16: [Empty]
17: [Empty]
18: [Empty]
19: [Empty]
20: [Empty]
4: Edit Signature (On/Off)
5: Message Alert
Section 2E: Navigating Through Menus 69
Page 79

1: Volume
2: Type
1: Voicemail
2: Text Message
3: Picture Mail
3: Reminder
1: Off
2: Once
3: Every 2 min
6: Save in Outbox (Yes/No)
7: Auto-Erase (Yes/No)
8: GSM Setting (only available in GSM mode)
1: Vodafone
1: Service Center
2: Default Destination
3: Default Type
1: Text
2: E-mail
3: Paging
4: Default Validity
1: One Hour
2: 6 Hours
3: 24 Hours
4: 1 Week
5: Maximum
5: Setting Name
2: Setting 2
1: Service Center
2: Default Destination
3: Default Type
1: Text
2: E-mail
3: Paging
4: Default Validity
1: One Hour
2: 6 Hours
3: 24 Hours
4: 1 Week
5: Maximum
5: Setting Name
3: Reply Path (On/Off)
4: Delivery Reports (On/Off)
5: Sending Setting
1: Vodafone
Section 2E: Navigating Through Menus 70
Page 80

2: Setting2
6: Voice Mail #
Pictures Video
1: Camera
Press the right to display the following options:
1: Flash
1: Off
2: On This Shot
3: Always On
2: Self-Timer
1: Off
2: 5 Seconds
3: 10 Seconds
3: Fun Tools
1: Fun Frames (must be in full screen mode)
1: Off
2: Spring
3: Roses for Love
4: Love
5: Flower
6: Between Stars
7: Under the sea
8: Top secret
9: $$$
10: Scuba Diving!
11: Winter Greetings
2: Color Tones
1: Auto
2: Monochrome
3: Sepia
4: Green
5: Aqua
6: Antique
7: Cool
8: Warm
4: Controls
1: Brightness (-5 ~ 0 ~+5)
2: White Balance
1: Auto
2: Sunny
3: Cloudy
4: Tungsten
5: Fluorescent
6: Manual
Section 2E: Navigating Through Menus 71
Page 81

5: Settings
1: Resolution
1: HI:640x480
2: Med:320x240
3: Low:176x165
2: Quality
1: Fine
2: Normal
3: Economy
3: Shutter Sound
1: Off
2: Shutter 1-3
3: Say Cheese
4: Auto-Erase (On/Off)
5: View Mode (Wide Screen/Full Screen)
6: Review Pictures
7: Camcorder
2: Camcorder
Press the right to display the following options:
1: Movie Light
1: Off
2: On This Movie
3: Always On
2: Self-Timer
1: Off
2: 5 Seconds
3: 10 Seconds
3: Color Tones
1: Auto
2: Monochrome
3: Sepia
4: Green
5: Aqua
6: Antique
7: Cool
8: Warm
4: Controls
1: Brightness (-5 ~ 0 ~ +5)
2: White Balance
1: Auto
2: Sunny
3: Cloudy
4: Tungsten
5: Fluorescent
Section 2E: Navigating Through Menus 72
Page 82

6: Manual
5: Settings
1: Quality
1: Fine
2: Normal
3: Economy
2: Auto-Erase (On/Off)
6: Review Videos
7: Camera Mode
3: My Pictures
1: In Camera
2: Saved to Phone
4: My Videos
1: In Camcorder
2: Saved to Phone
5: Online Albums
1: View Albums
2: Upload Pictures
3: Upload Videos
6: Account Info
7: Cam. Key Guard (On/Off)
Downloads
1: Games
1: Get New Games
2: My Content Manager Games
3: Ms. PAC-MAN Demo
4: Solitaire Deluxe Demo
5: Tetris Deluxe Demo
2: Ringers
1: Get New Ringers
2: My Content Manager Ringers
3: Ringers Preview
3: Screen Savers
1: Get New Screen Savers
2: My Content Manager Screen Savers
3: Screen Saver Preview
4: Applications
1: Get New Applications
2: My Content Manager Applications
3: AccuWeather.com Premium
4: MobiTV Trial
5: Real - rTV Trial
Web
Media Player
Section 2E: Navigating Through Menus 73
Page 83

Tools
1: Voice Service
2: Voice Memo
1: Record
2: Review
3: Erase All (Yes/No)
3: Today
4: Scheduler
5: Task List
6: Memo Pad
7: World Time
1: Set Home Area
2: Set Visit Area
3: DST Setting
8: Alarm Clock
1: Alarm #1
2: Alarm #2
3: Alarm #3
9: Calculator
10: Countdown
11: Set Time (Only seen in GSM mode)
Settings
1: Switch Network
1: Sprint/CDMA
2: Int’l-GSM
2: Display
1: Screen Saver
1: Main LCD
1: Preset Images
1: Image Gallery 01
2: Image Gallery 02
3: Image Gallery 03
4: Image Gallery 04
5: Silver Dew
6: Calendar
7: Idle Clock B
8: Idle Clock DUAL
2: Downloads
1: Images
2: Videos
3: My Pictures
1: In Camera
2: Saved to Phone
4: My Videos
Section 2E: Navigating Through Menus 74
Page 84

1: In Camcorder
2: Saved to Phone
2: Sub LCD
1: Preset Images
1: Digital 1 - 3
2: Analog 1 - 2
2: Main LCD Dlds
3: Main LCD Pic
2: Menu Style
1: 3x3 Style
2: Wheel Style
3: Incoming Call
1: With Caller ID
1: Preset Animation
2: Downloads
3: My Pictures
2: No Caller ID
1: Preset Animation
2: Downloads
3: My Pictures
4: Greeting
1: Sprint PCS
2: Custom
5: Backlight
1: Main Display
1: Flip Open
2: 30 seconds
3: 15 seconds
4: 8 seconds
2: Keypad
1: Flip Open
2: 30 seconds
3: 15 seconds
4: 8 seconds
5: Off
3: Pwr Save Mode (On/Off)
6: Service LED (On/Off)
3: Sounds
1: Ringer Volume
1: Calls
2: Messages
3: Alarms
2: Ringer Type
1: Voice Calls
Section 2E: Navigating Through Menus 75
Page 85

1: With Caller ID
2: No Caller ID
2: Messages
1: Voicemail
2: Text Message
3: Picture Mail
3: Schedule
1: Single Tones
2: Ring Tones
3: Melodies
4: Downloaded
4: Roam Ringer
1: Normal
2: Distinctive
3: Alerts
1: Minute Beep (On/Off)
2: Service (On/Off)
3: Connect (On/Off)
4: Sig. Fade Tone (On/Off)
5: Power On/Off (On/Off)
4: Key Tone
1: Tone Type
1: Normal
2: Rain Drop
3: Voice
2: Key Tone Level
1: Silence All
2: Level 1-8
5: Tone Length
1: Short
2: Long
6: App. Volume
1: Sound
2: Vibrate (On/Off)
4: PCS Vision
1: Enable/Disable Vision
2: Net Guard (On/Off)
3: Update Profile
5: Voice Service
1: Choice Lists
1: Automatic
2: Always On
3: Always Off
2: Digit Dialing
Section 2E: Navigating Through Menus 76
Page 86

1: Select Location
1: North America
2: Netherlands
3: Belgium
4: France
5: Spain
6: United Kingdom
7: Denmark
8: Norway
9: Germany
10: Czech Republic
11: South Korea
12: Other
2: Adapt Digits
3: Reset Digits
3: Sensitivity
1: Commands
1: Reject More
2: Recommended
3: Reject Less
2: Names
1: Reject More
2: Recommended
3: Reject Less
4: Sound
1: Prompts (On/Off)
2: Digits (On/Off)
3: Names (On/Off)
4: Name Settings
1: Speed
1: Faster
2: Recommended
3: Slower
2: Volume
1: Louder
2: Recommended
3: Softer
5: Voice Launch
1: Talk Key
2: Talk Key and Flip Open
6: About
6: Security
1: Lock Phone
1: Unlocked
Section 2E: Navigating Through Menus 77
Page 87

2: On Power-Up
3: Lock Now
2: Lock Pic/Video (On/Off)
3: Change Lock
4: Lock Services
1: Voice: Lock/Unlocked
2: PCS Vision: Lock/Unlocked
5: Special #
1: Empty
2: Empty
3: Empty
6: Erase Phone
1: Erase Contacts (Yes/No)
2: Erase Downloads (Yes/No)
3: Erase Pic/Video (Yes/No)
7: Reset Phone (Yes/No)
8: Reset Pic/Video Account (Yes/No)
9: Card Setup (GSM Mode only)
1: PIN Check
2: Change PIN
7: Roaming
1: Set Mode
1: Automatic
2: Roaming only
3: Sprint
2: Call Guard (On/Off)
8: Launch Pad
1: Up Key
1: Contacts
2: Voice Memo
3: Scheduler
4: Messaging
5: Voice Service
6: Ringer Type
7: Downloads
8: Display
9: Alarms
10: Calculator
11: Mediaplayer
12: Web
13: Inbox
14: Send Text
2: Down Key
1: Contacts
Section 2E: Navigating Through Menus 78
Page 88

3: Left Key
4: Right Key
9: Others
2: Voice Memo
3: Scheduler
4: Messaging
5: Voice Service
6: Ringer Type
7: Downloads
8: Display
9: Alarms
10: Calculator
11: Mediaplayer
12: Web
13: Inbox
14: Send Text
1: Contacts
2: Voice Memo
3: Scheduler
4: Messaging
5: Voice Service
6: Ringer Type
7: Downloads
8: Display
9: Alarms
10: Calculator
11: Mediaplayer
12: Web
13: Inbox
14: Send Text
1: Contacts
2: Voice Memo
3: Scheduler
4: Messaging
5: Voice Service
6: Ringer Type
7: Downloads
8: Display
9: Alarms
10: Calculator
11: Mediaplayer
12: Web
13: Inbox
14: Send Text
Section 2E: Navigating Through Menus 79
Page 89

1: Abbrev. Dial (On/Off)
2: Contacts Match (On/Off)
3: Restriction
1: Outgoing Call
1: Allow all
2: Contacts Only
3: Special# Only
4: Call Answer
1: Any Key
2: Talk Key
3: Flip Open
5: Auto Answer (Car Kit/Headset) (Yes/No)
6: Language
1: English
2: Español
7: Airplane Mode (On/Off)
8: Location (On/Off)
9: Plus Dialing
1: Plus Code
1: Disable
2: Enable
2: Int’l Dial Prefix
3: Info
1: Anguilla 011
2: Antigua 011
3: Argentina 00
4: Barbados 011
5: Barbuda 011
6: Bermuda 011
7: Bolivia 00
8: Caicos Is. 011
9: Canada 011
10: Caymen 011
11: Chile 00
12: China 00
13: Colombia 009
14: Dominica 011
15: Dom. Rep. 011
16: Ecuador 00
17: Grenada 011
18: Grendines 00
19: Guam 011
20: Guatemala 00
21: Hong Kong 00
Section 2E: Navigating Through Menus 80
Page 90

22: Mexico 00
23: Monserrat 011
24: Nevis 011
25: N. Zealand 00
26: Paraguay 00
27: Puer Rico 011
28: St. Kitts 011
29: St. Lucia 011
30: St. Vince 011
31: Tobago 011
32: Trinidad 011
33: Turks Isl 011
34: Uruguay 00
35: US Virgin 011
10: Phone Info
1: Phone Number
2: Icon Glossary
3: Version
4: Advanced
11: GSM Services (only available in GSM mode)
1: Call Diverting
1: Divert Always
2: Busy
3: No Reply
4: Unreachable
5: Cancel All
2: Call Barring
1: All outgoing
2: International
3: International except to home
4: All incoming
5: Incoming while abroad
6: Cancel all
7: Change barring password
3: Call Waiting
4: Network Selection
1: Automatic
2: Manual
5: Caller ID
1: Default
2: Hide Number
3: Send Number
6: Closed User Group
1: Index List
Section 2E: Navigating Through Menus 81
Page 91

2: Outside Access (Yes/No)
3: Default Group (Yes/No)
Section 2E: Navigating Through Menus 82
Page 92

InUse Menu
Press the right to display the following options:
1: Key Mute/Unmute
2: Contacts
3: Messaging
4: 3-Way Call
5: Call History
6: Voice Memo
7: Tools
8: Phone Info
Section 2E: Navigating Through Menus 83
Page 93

Section 2F
Managing Call History
In This Section
Viewing History
Call History Options
Making a Call From Call History
Saving a Phone Number From Call History
Prepending a Phone Number From Call History
Erasing Call History
The Call History keeps track of incoming calls, calls made from your
Sprint PCS Phone, and missed calls. This section guides you through
accessing and making the most of your Call History.
Section 2F: Managing Call History 84
Page 94
Viewing History
You’ll find the Call History feature very helpful. It is a list of the last
20 phone numbers (or Contact entries) for calls you placed,
accepted, or missed. Call History makes redialing a number fast and
easy. It is continually updated as new numbers are added to the
beginning of the list and the oldest entries are removed from the
bottom of the list.
Each entry contains the phone number (if it is available) and Contact
entry name (if the phone number is in your Contacts). Duplicate
calls (same number and type of call) may only appear once on the
list.
To view a Call History entry:
1. Press the left for Menu.
2. Highlight Call History and press .
3. Press for Outgoing Calls. (The Outgoing Calls list
will display.) To view an entry, highlight it and press .
- or Press for Incoming Calls. (The Incoming Calls list will
display.) To view an entry, highlight it and press .
- or Press for Missed Calls. (The Missed Calls list will
display.) To view an entry, highlight it and press .
- or Press for All Recent. (The All Recent call list will display.)
To view an entry, highlight it and press .
Note:
Section 2F: Managing Call History 85
To access the phone’s main menu, press (Menu) from standby mode.
Menu items may be selected by highlighting them with the navigation
key and pressing OK, or you can press the number corresponding to the
menu item on your keypad.
Page 95
Call History Options
For additional information and options on a particular call, highlight
a Call History entry and press
. This feature displays the time and
date of the call. By pressing the right , you can select from the
following options:
Send Msg.
Save/Show Contacts
Prepend
Erase
Making a Call From Call History
To place a call from Call History:
1. Press the left for Menu.
2. Highlight Call History and press .
3. Select Outgoing Calls , Incoming Calls ,
Missed Calls , or All Recent .
4. Highlight the entry you want to call and press the left or
to call the number.
Note:
Section 2F: Managing Call History 86
You cannot make calls from Call History to entries identified as No ID or
Restricted.
Page 96

Saving a Contact From Call History
Your Sprint PCS Phone can store up to 500 phone numbers. Contact
entries can store up to a total of five phone numbers, and each
contact name can contain up to 20 characters.
To save a Contact from Call History:
1. Press the left for Menu.
2. Highlight Call History and press .
3. Highlight the desired entry in the Outgoing Calls, Incoming
Calls, Missed Calls, or All Recent and press
4. Press the right to save the number.
—or—
Press twice to save the number.
5. Follow the on-screen prompts to complete the entry. (See
"Saving a Phone Number" on page 26.)
After you have saved the number, the new Contact entry
is displayed.
.
Note:
Section 2F: Managing Call History 87
You cannot save phone numbers already in your Contacts or from calls
identified as No Caller ID or Restricted.
Page 97
Prepending a Phone Number From Call History
If you need to make a call from Call History and you happen to be
outside your local area code, you can add the appropriate prefix by
prepending the number.
To prepend a phone number from Call History:
1. Press the left for Menu.
2. Highlight Call History and press .
3. Highlight the desired entry in the Outgoing Calls, Incoming
Calls, Missed Calls, or All Recent and press
4. Select a phone number.
5. Press the right to Prepend the number.
6. Use the keypad to enter the desired numbers.
7. Press the left or to call.
.
Erasing Call History
To erase Call History:
1. Press the left for Menu.
2. Highlight Call History and press .
3. Select Outgoing Calls , Incoming Calls ,
Missed Calls , or All Recent .
4. Select Erase or Erase All and press .
5. Select Yes and press to confirm your selection.
Section 2F: Managing Call History 88
Page 98

Section 2G
Using Contacts
In This Section
Adding a New Contact Entry
Finding Contact Entries
Adding a Phone Number to a Contact
Editing a Contact Entry’s Phone Number
Assigning Speed Dial Numbers
Selecting a Ringer Type for an Entry
Dialing Sprint PCS Services
Now that you know the basics that make it easier to stay in touch with
people and information, you’re ready to explore your phone’s more
advanced features. This section explains how to use your phone’s
Contacts and helps you make the most of your contacts and time when
you are trying to connect with the important people in your life.
Section 2G: Using Contacts 89
Page 99
Adding a New Contact Entry
Your Sprint PCS Phone can store up to 500 phone numbers. Contact
entries can store up to a total of five phone numbers, and each
entry’s name can contain up to 20 characters.
To add a new entry:
1. Enter a new phone number and press .
2. Press for New Entry.
3. Press up or down to select the Label and press .
4. Enter the name using the keypad and press .
5. Press the left for Done to save.
6. Press to return to the idle screen.
GSM
Note:
Your phone’s SIM card (for use while roaming internationally in GSM
mode) contains a separate phone book. For information on how to use
the SIM card phone book and how to copy entries from Contacts to the
SIM card, see "Using Your Phone’s SIM Card" on page 178.
Finding Contact Entries
There are several ways to display your Contact entries: by name, by
speed dial number, by group, and by voice dial recognition. Follow
the steps outlined in the sections below to display entries from the
Contacts menu.
Finding Names
To find Phone Book entries by name:
1. From the idle screen, press the right for Contacts.
2. Enter the first few letters of the contact entry name to locate
the desired entry.
3. When a possible match is found, it is highlighted. Press to
make the call or press to display the entry.
Section 2G: Using Contacts 90
Page 100
Adding a Phone Number to a Contact
To add a phone number to an existing Contact:
1. From the idle screen, press the right for Contacts.
2. Highlight the desired entry and press .
3. Press the right for Edit.
4. Press down until the desired label is selected.
5. Enter the phone number using the keypad and press .
6. Press the left for Done to save.
7. Press to return to the idle screen.
Editing a Contact Entry’s Phone Number
To edit an entry’s phone number:
1. From the idle screen, press the right for Contacts.
2. Highlight the desired entry and press .
3. Press the right for Edit.
4. Press up or down to select the desired number and
press .
5. Press and hold to erase the entire number or press once
to erase just the last number.
6. Enter the new number using the keypad and press .
7. Press the left for Done to save.
8. Press to return to the idle screen.
Section 2G: Using Contacts 91
 Loading...