

Page 1
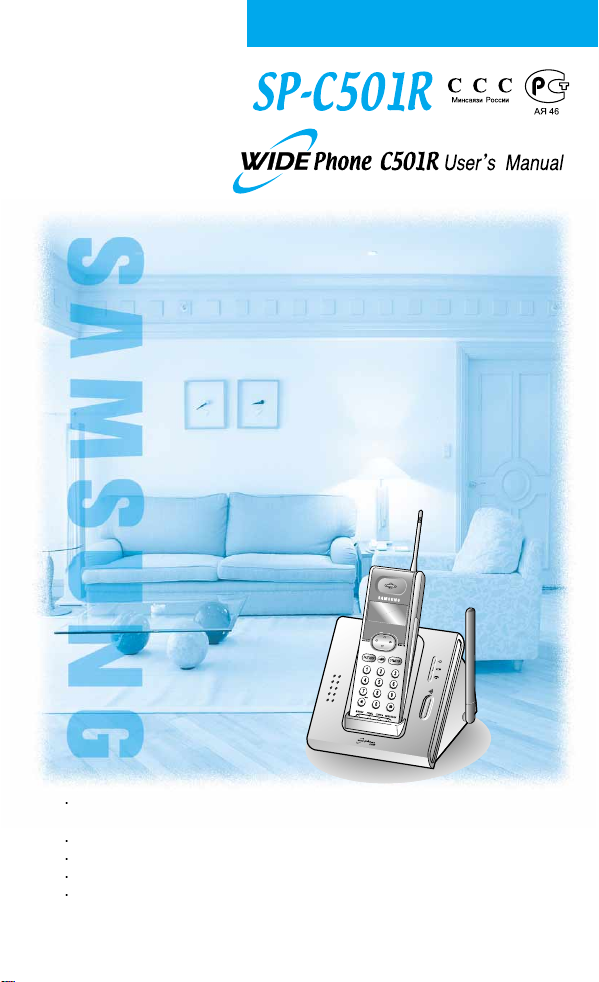
900MHz Cordless Phone
The Battery of the Remote set is an article of consumption and the battery
life has a 6 months warranty after purchase.
Charge the battery fully before using after purchase.
This set can use within the country only.
Do not use for any other country.
Within the Warranty Card
GG68-00441B
03/10. Rev.1.0
Page 2
Safety Precautions
1
2
3
4
5
6
7
8
9
0
기
능
#
통
화
취
소
1
2
3
4
5
6
7
8
9
0
기
능
#
통
화
취
소
1
2
3
4
5
6
7
8
9
0
기
능
#
통
화
취
소
1
2
3
4
5
6
7
8
9
0
기
능
#
통
화
취
소
1
2
3
4
5
6
7
8
9
0
기
능
#
통
화
취
소
1
2
3
4
5
6
7
8
9
0
기
능
#
통
화
취
소
1
2
3
4
5
6
7
8
9
0
기
능
#
통
화
취
소
1
2
3
4
5
6
7
8
9
0
기
능
#
통
화
취
소
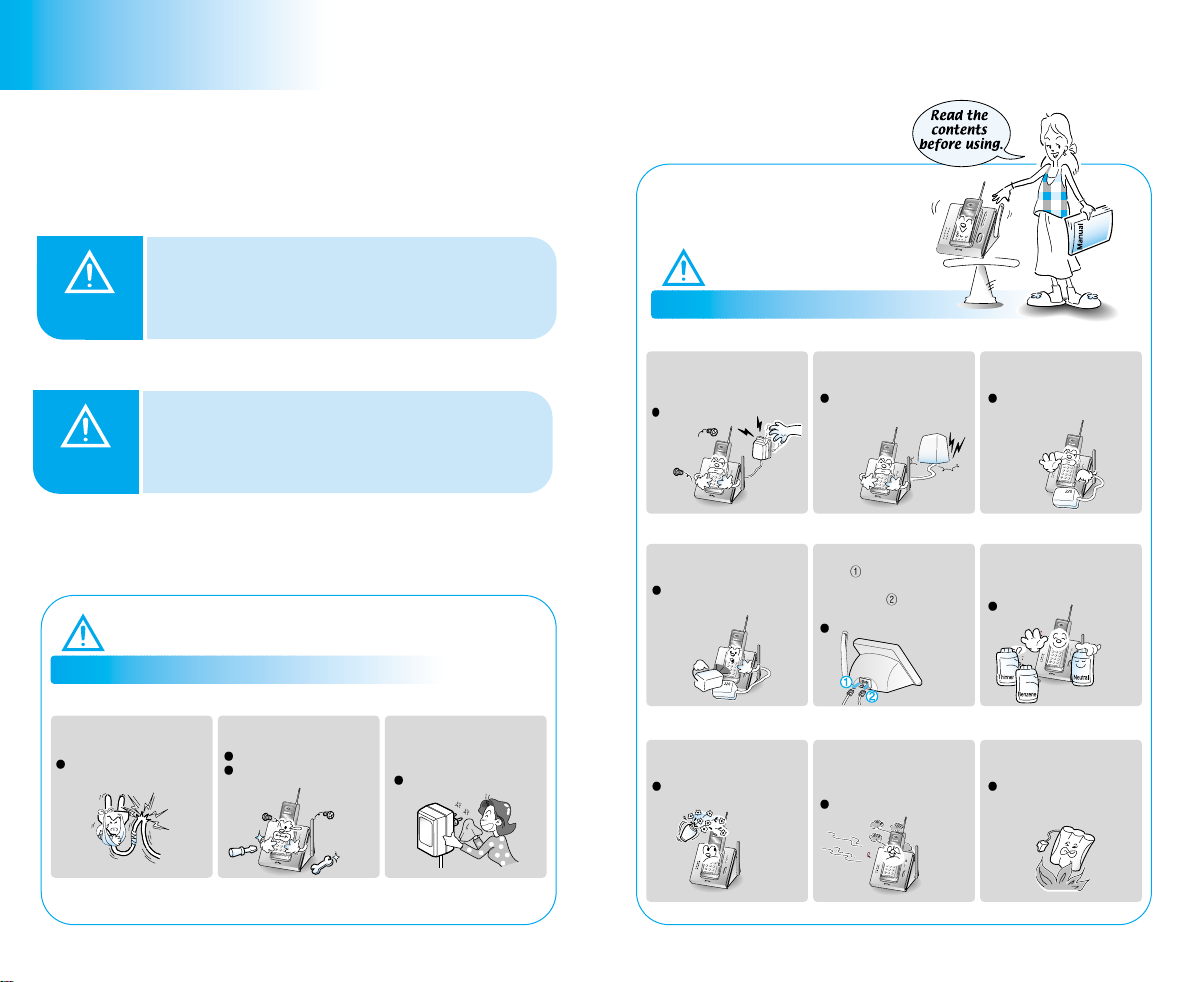
The following safety measures are for the user, in order to minimize
potential damage.
Carefully read the following guidelines and use in accordance with
the instructions.
When you see this sign, it indicates a warning
that something can cause death or serious
Warning
injury.
Note
When you see this sign, it indicates a
warning that something can cause
Note
minor or product damage.
Warning
Do not use the damaged
power line or loose plug.
It can cause electrical shock or fire.
1
Do not disassemble or repair.
It can cause electric shock, fire, or injury.
If it needs repairing, please contact a local
SAMSUNG Service Center.
If there is dust or water on
power plug, wipe it off with a
dry cloth.
It can cause electric shock or fire.
Never pull out the power plug by
pulling the line or when your
hands are wet.
Do not fold the power line or
leave it under heavy objects.
It can cause electric shock or fire.
Use only the designated
adapter.
It can cause fire.
Do not pour water or any
liquid on the phone.
It can cause electric shock or fire.
Always disconnect the Phone
Jack ( ) first before
disconnecting the DC
Power Jack ( ) of the adapter
from the phone.
If you hear any weird or unusual
noise or smell anything weird,
immediately disconnect the power
line and call the service center.
It can cause electric shock or fire.
It can cause electric shock.
It can cause electric shock or fire.
This set is for 220V only.
Do not use for any other voltage.
It can cause electric shock or fire.
Always disconnect from the power supply
when cleaning. Do not spray water, and
do not use benzene, thinner or any other
alcohol while cleaning the phone.
It can cause electric shock or fire.
Do not dispose the battery into
a fire.
It can cause an explosion.
2
Page 3

Main Functions
WIDE Phone 900MHz
Cordless Phone
phone numbers)
Using the Phone directory (Up to 10
phone numbers)
Base Set Remote Set
The size of the Base set
is small, therefore this
set is convenient for
installation and
Remote Set : Saving the Recent dialed call (Up to 10
administration.
This product have
power, charging and
in-use lamp,
therefore you can
easily know for the
phone status.
For your convenience, there
is an illuminated dial pad, and
it allows you
dial phone numbers in the
dark.
Page 33
Re-dialing the
recently dialing number
You can easily search and redial
the most recent numbers you
called without dialing them up
again. (Search up to 10 call
numbers)
You can easily carry
the remote set when
moving around.
Page 23
Using the phone
directory
You can save up to 10
calls, and can dial phone
directory numbers.
(Search up to 10 call
numbers)
Canceling function
Use it for canceling
various phone functions.
Page 37
Reducing noise
during call
Function to page the Remote Set
Pressing the button,
you can easily find the Remote Set.
Page 39
The phone will detect a
clear channel when
encountering
misconnected
call or noise.
Convenient Search
You can search conveniently
the most recent numbers and
the phone directory numbers
by the navigator key.
3
Setting function
Use it for setting various
phone functions.
4
Page 4
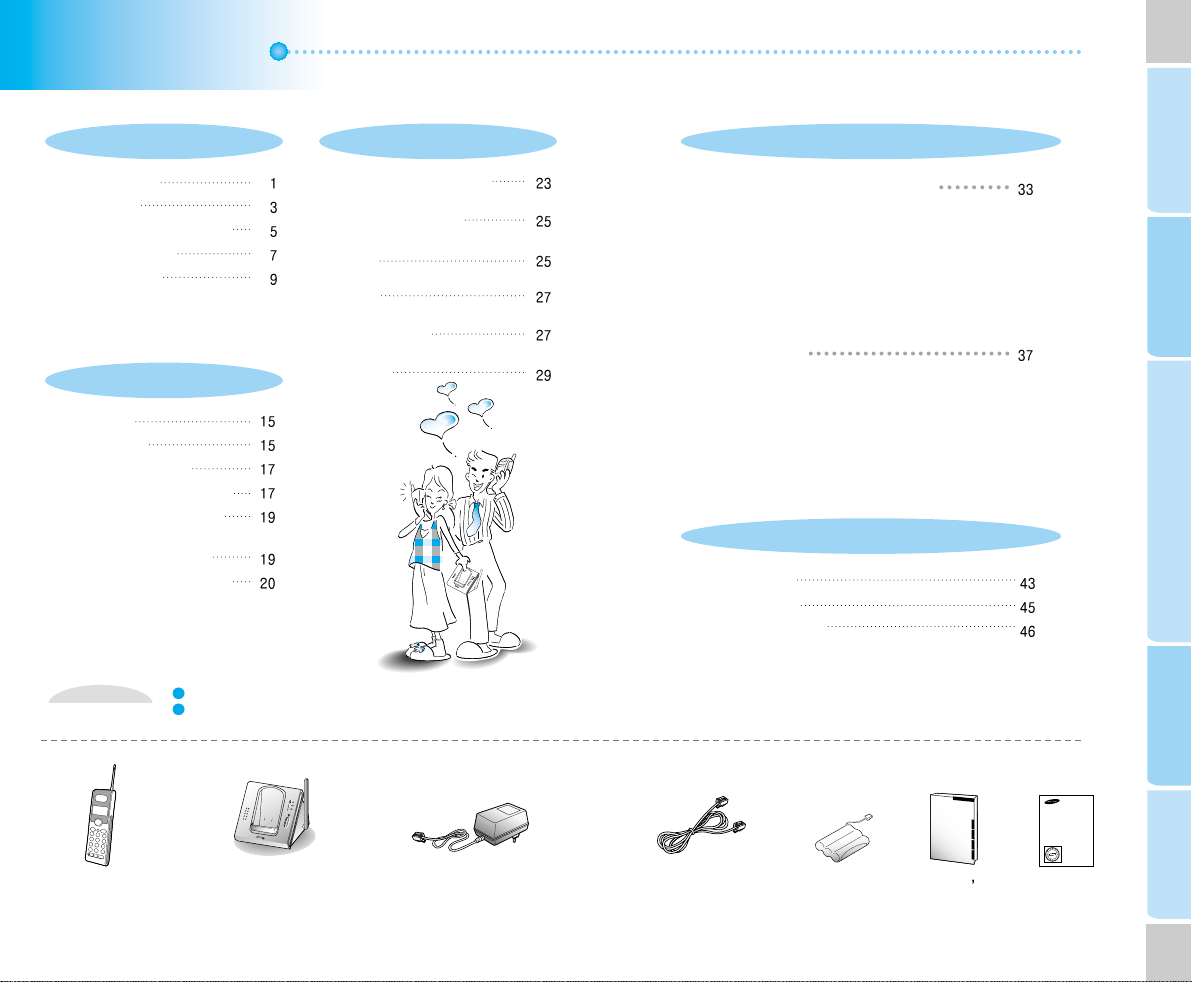
Table of Contents
Preparation & Installation
Safety Precautions
Main functions
Table of contents / Components
Product Introduction
Phone Installation
Basic Features
Making Calls
Receiving Calls
Setting the Date / Time
Selecting Pulse / Tone dial type
Selecting the Ringing Melody
(Receiving bell)
Adjusting the Ring Volume
Adjusting the Receiving Voice Volume
Please check the components.
Components
In case of a problem with components, please contact a retail
shop where you made your purchase.
Phone Directory Features
Registering the Phone Numbers
Searching the Phone Number
from the Phone Directory
Modifying the Phone Directory
Numbers
Making a call from the Phone
Directory
Deleting the Phone Directory
numbers selectively
Deleting the Phone Directory
Number All
Convenient Features
Convenient feature for making call
Searching the Recently dialed number
Re-dialing the Recently dialed number
Deleting the Recently dialed number
Use it for making another call without hang up (Flash)
Pause function
Help functions
Noise reduction
Out of range warning
Low voltage warning
Initializing the Remote set
Registering the Remote set
Paging the Remote set
Reference
Troubleshooting
Cleaning method
Product specification
Installation
Preparation &
Basic features
Phone directory function
features
Convenient
Remote Set
5
Base Set Adapter
(DC 11V 500mA/DC 9V 150mA)
Phone line cord Battery
(DC 3.6V 450mAh)
User s
Manual
Warranty
Card
Reference
6
Page 5
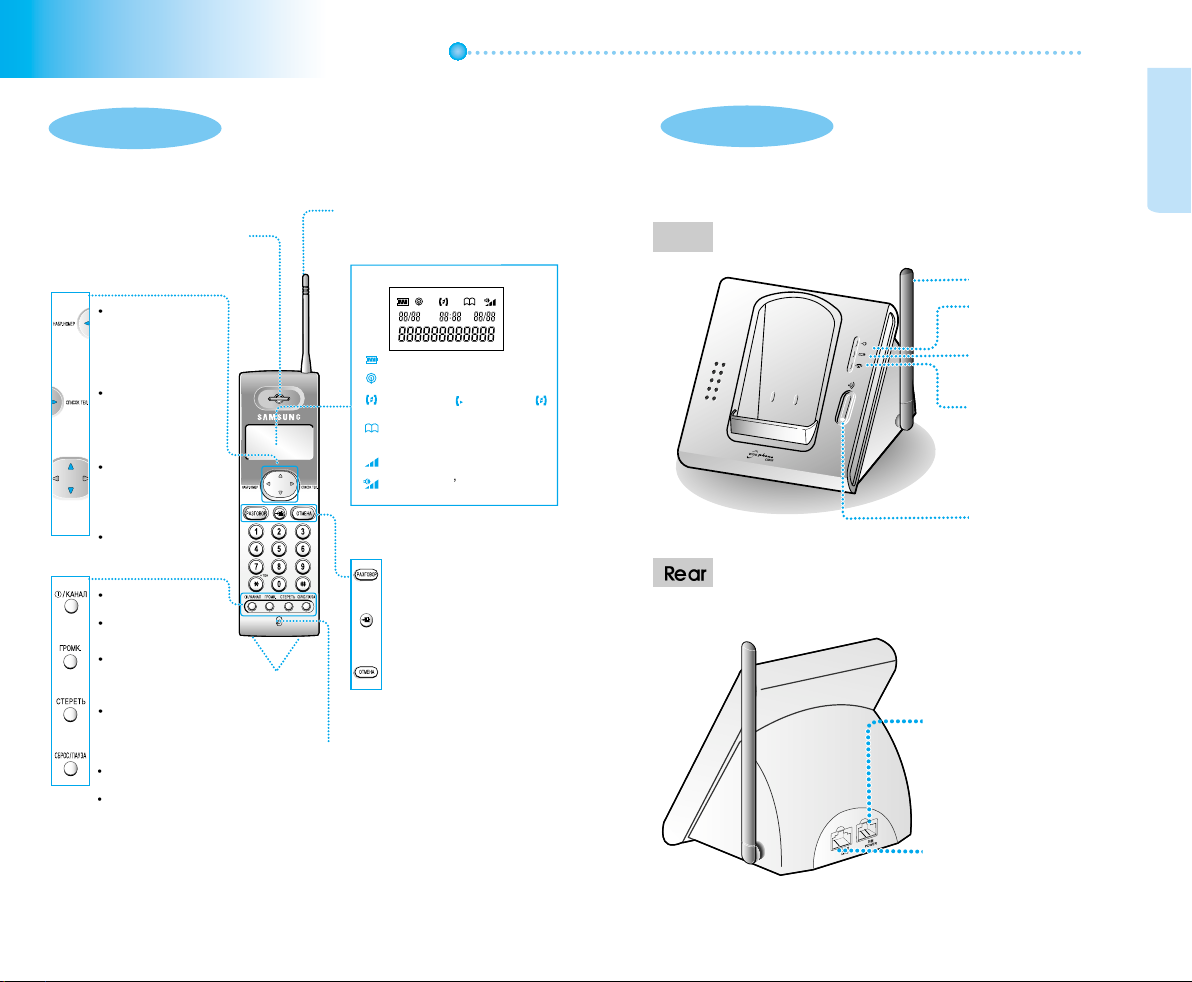
Product Introduction (SP-C501R)
Antenna
Speaker
Base SetRemote Set
Front
Installation
Preparation &
Use it for re-dialing
the last or the most
recent numbers.
(Search up to 10 call
numbers)
Use it for searching or
registering numbers in
the phone directory.
(Search up to 10 call
numbers)
Use it for searching
in order of the
recent dialled calls
or the phone
directory calls.
Use it for changing
the bell type.
Use it for turning
on/off the power
Use it for reducing radio
interference or noise
Use it for adjusting the
level of ring or the
volume of receiving voice
Use it for deleting the
most recent call number
or the registered number
in the phone directory
Use it for making another call
without hanging up. (Flash)
Use it for stopping temporarily
during dialing. (Pause)
Charger
connector
Mike
Display
Battery charging / discharging status
When out of range from the base set
During a call ( ) or a paging ( )
Phone directory registering or
searching
Volume of receiving ring (2 levels)
Volume of one s voice during a call
(3 levels)
Use it for calling,
receiving or hang up
Use it for setting or canceling
function related to the phone
Use it for canceling a function
Antenna
Power lamp : for power on/off
Charging lamp : for recharging
In-use lamp : for calling,
Page button
Power cord connector
Phone line connector
status (Red)
receiving call or
paging (Yellow)
status (Yellow)
87
Page 6
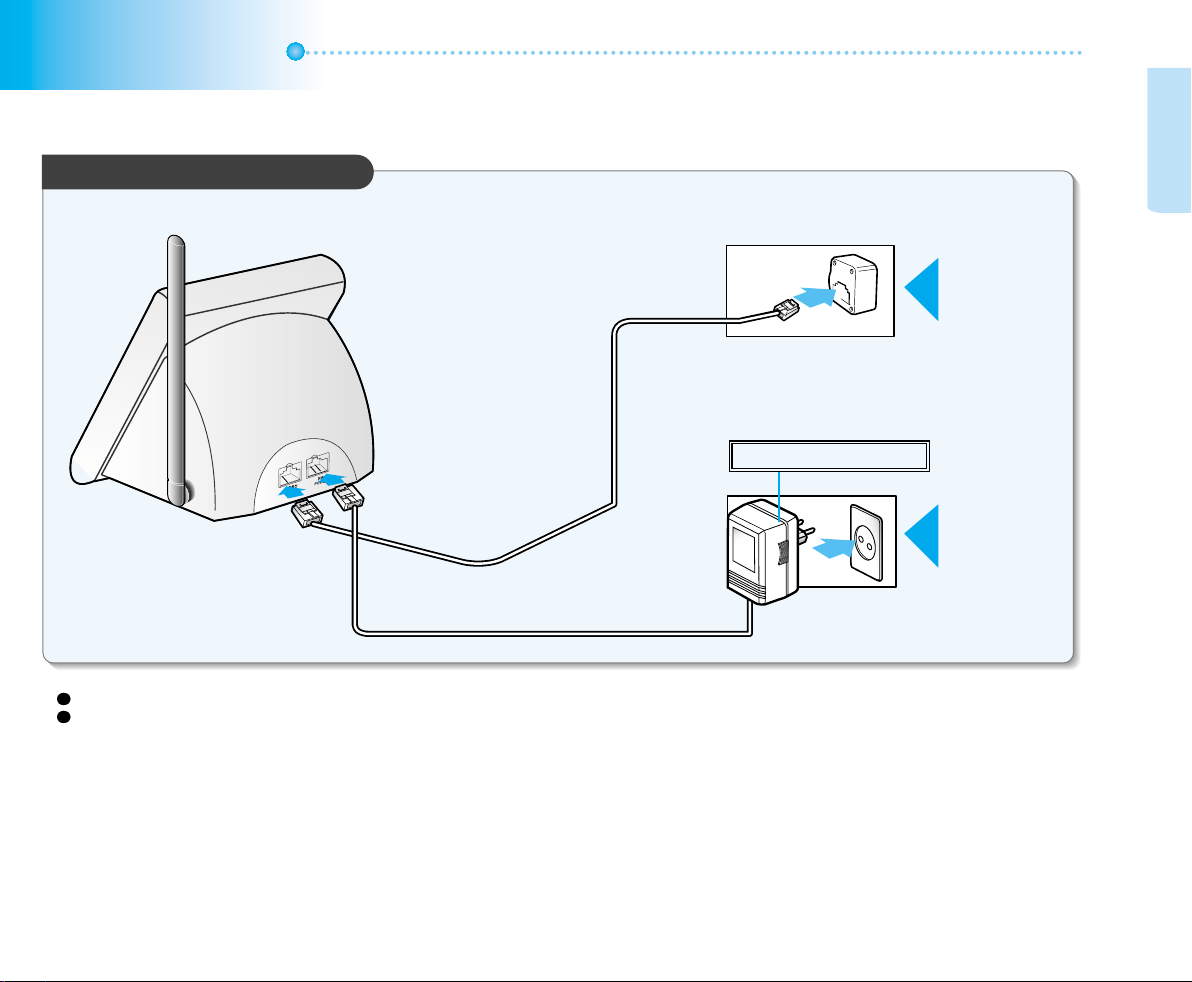
Phone Installation
Installing the Base set
Phone line cord
Power cord
Pay extreme attention when connecting both the power line and phone line.
This product works only at 220V
DC 11V 500mA/DC 9V 150mA
Connect the
phone line
Connect the
power plug to
220V
Installation
Preparation &
109
Page 7
Phone Installation (Continue)
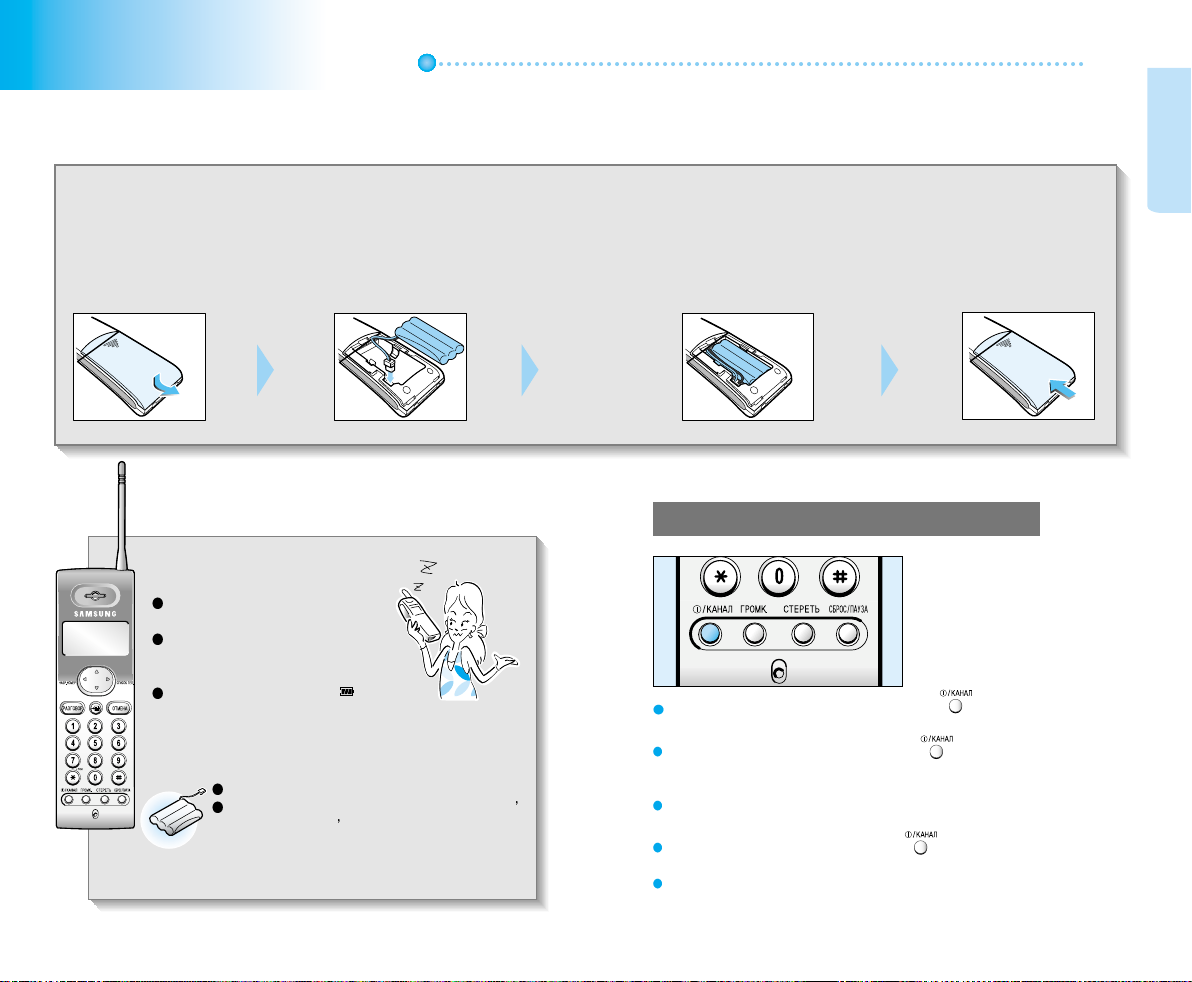
Loading the battery to the remote set
Installation
Preparation &
Open the battery
cover.
1
Place the battery as
shown in the picture.
2
How to use the battery?
Charge the battery for approximately 24
hours before using.
Always remove the battery from the remote
set, when you are not using the remote set
for an extended period.
Charge the battery until you see .
Battery Life
The battery life has a 6 months warranty after purchase.
As time goes by, there will be a reduction in the battery s
power. When battery
half, purchase a new battery and replace it.
s power capacity is reduced by
Rearrange the line
by setting the
3
battery as shown in
the picture.
Close the
battery cover.
4
To turn on / off the power
To turn on the power :
If it does not turn on when you press the button, then you probably
need to recharge the remote set. It should then turn on automatically.
Please recharge the battery for 24 hours before using it.
If you do not charge the battery for at least 6 hours, then in other protect it,
the battery must be fully charged or it will stop operating.
To turn off power : Press and hold the button for more than 3 seconds
If you hear a error sound when you turn on the power, register the remote
set.(Refer to page 39)
Press and hold the button for more than 2
seconds until you begin to hear the beeping sound.
until you hear the beeping sound.
1211
Page 8

Basic Features
Basic Features
Making Calls 15~16
Receiving Calls 15~16
Date / Time Setting 17
Selecting Pulse / Tone Dial type
Selecting the ringing melody
(receiving bell)
Adjusting the ring volume 19
Adjusting the voice volume 20
17
19
1413
Page 9

Making Calls
When the remote set is
placed on the base set
Pull out the remote set from base set,
press the button and dial the
number you want to call.
You can dial the number before pressing the button.
If you have dialed the number in standby mode incorrectly, you can
delete a digit by pressing the button, and then press the button.
When the remote set is
not placed on the base set
Press the button and dial the
number you want to call.
Receiving Calls
When hanging up the
Place the remote set on the base
set or press the button.
When the remote set is
placed on the base set
phone
Basic features
When the remote set is
not placed on the base set
When the
Phone Rings
Pull out the remote set from base set,
press the button to answer a call.
Press the button to answer a call.
1615
Page 10

Setting the Date / Time (the current time)
You can set up the current time.
1
Press the button
in standby mode.
In the case of a power failure or if you have deliberately
disconnected the power, the date and time will be erased.
Therefore you will have to set up it up once again.
While you set the time and date, if you press the button then
it will return to the standby mode.
23
Display
Selecting Pulse / Tone Dial type
1
Press the
button in
standby mode.
2
3
Display
4 5
Press eight digits in
order to set up day,
month, hours and
minutes.
e.g.) 15 day 08 month 17 hours 30 minutes
4 5
Press the [ ] or [ ] button,
and select a want dial type.
You can select by pressing the
button continuously.
Press the button.
press button.
Press the button.
You will hear a
beep tone
confirming the
completing of
the setting.
You will hear a
beep tone
confirming the
completing of
the setting.
Basic features
You can select between pulse and tone dial type.
The pulse dial is originally set.
You can change pulse dial into tone one by pressing button before
dialing a number.
1817
Page 11

Selecting the Ringing Melody (Receiving Bell)
You can select ring type and adjust ring volume.
1
Press the
button in
standby mode.
The volume can be adjusted by 2 levels, Low and High.
The original setting is High.
standby
23 45
The current melody will ring
and the number of the melody
will be displayed.
Adjusting the Ring Volume
In
mode
Press the button continuously.
You can switch the volume to high or
low by pressing the button
continuously.
Display
Press the [ ] or [ ] button, and
select a melody. (Select up to 10
melody)
You can select by pressing the
button continuously.
Press the button.
Adjusting the Receiving Voice Volume
You can adjust the volume to three levels. (High/Medium/Low)
The original setting is medium.
During a
call after
pressing
the
button
Press the button continuously.
You can switch the volume to
high, medium or low by pressing
the button continuously.
You will hear
a beep tone
confirming the
completing of
the setting.
Basic features
2019
Page 12

Phone Directory Features
Phone Directory Features
Registering the phone numbers 23
Searching the phone number from
the phone directory 25
Modifying the phone directory number
Making a call from the phone directory
Deleting the phone directory
numbers selectively 27
Deleting the phone directory number all
25
27
29
2221
Page 13

Registering the phone number
The phone numbers can be registered up to 10 number
in the remote set.
1
Press the
button in
standby mode.
Registering the phone number to the directory when the set is
connected to the PBX or keyphone.
In case this set is connected to the PBX or keyphone, press the external prefix number (mostly
9) and then press phone number. To store the phone number, press button between the
external prefix number and the phone number.
Lets try 095-554-5500
e.g.
23 45
Press the button. Press the [ ] or [ ]
button, and select the
desired address.
��
Enter the phone number.
(Enter within 20 digits)
Press the button.
Phone directory function
2423
Page 14

Searching the phone number
from the phone Directory
12
Certify the
searched number.
Press the
button in standby mode.
If press the button duration searching, the set will return
in standby mode.
Press the [ ] or [ ] button, and
search the registered numbers.
Modifying the phone directory numbers
1
Press the button
in standby mode.
23 45
Press the button. Press the [ ] or [ ] button,
and select address that phone
number to modify is registered.
Phone directory function
Enter the new phone numbers.
Press the button.
(Can enter up to 20 digit)
Registered phone number will be deleted, and new entered phone
number will be saved.
25 26
Page 15

Making a call from the phone directory
12
Press the button in
standby mode.
Deleting the phone directory number
selectively
Press the [ ] or [ ] button,
and select phone number.
12
3
You can talk to
the other party
when the call is
connected.
Press the button.
Phone directory function
3
The Selected
phone number
is deleted.
Press the button in
standby mode.
Press the [ ] or [ ] button, and
select phone number.
Press the button.
After the phone number has been deleted, the previous
or next address’s phone number is displayed.
2827
Page 16

Deleting the phone directory number all
12
Press the button in
standby mode.
While it displays “ ” on the LCD if you press
the button, it will return to the state of search
Press the button
more than 3 seconds.
34
Display
All registered
phone directory
numbers are
deleted.
Press the button.
Phone directory function
3029
Page 17

Convenient Features
Convenient Features
Convenient features for making calls 33
Searching the Recently dialled numbers
Re-dialing the Recently dialled numbers
Deleting the Recent dialled numbers
Use it for making another call without
hanging up (Flash)
Pause Funtion
Help Functions
Noise Reduction
Out of Range Warning
Low Voltage Warning
Initializing the Remote set
Registering the Remote set
Paging the Remote set
37
3231
Page 18

Convenient features for making calls
You can make a call without dialing the number, by searching the
number with the [НАБР.НОМЕР] button.
Searching the recently dialed number
1 2
Press the button in
standby mode.
Re-dialing the recently dialed numbers
Search the recently dialed numbers
by pressing the [ ] or [ ] button.
1 2 3
Press the button in
standby mode.
The recently dialled numbers can be registered up to 10 numbers.
When press the button in standby mode and press the button,
then the call is connected to the number dialed last (most recently).
Search the recently dialed numbers
by pressing the [ ] or [ ] button.
3
Display
Press the button.
You can talk to the other
party when the call is
connected.
Press the button for
stopping search mode.
features
Convenient
If the set have been turn off, all registered call numbers are deleted.
3433
Page 19

Convenient features for making calls
Deleting the Recently dialled number
1 2 3
The selected recently
dialled number is
deleted.
Press the button in
standby mode.
You can use it for making another call without hanging up.
Search the recently dialled number
by pressing the [ ] or [ ] button.
Use it for making another call without hanging up (Flash)
Do not hang
up after
finishing a
call
Press the button.
When hear new dial tone,
press the number of the
other party and talk
to the other party.
Press the button.
This function is used for making external calls within the internal
switchboard.
Use it for stopping temporarily duration dialing. (Pause)
In standby
mode
In case of an installed switchboard or internal phone line, you can make
external calls by pressing the external prefix number (mostly 9) and then
press button and phone number.
(protect for PBX local phone-line
connection)
Select the desired
number from to
and press the
button.
Press the phone number to dial. Press the button.
Press the button.
features
Convenient
35 36
Page 20

Help Functions
When there is a lot of noise, or when the call is disconnected, you can
use this function to reduce irrelevant noise by changing channel.
Noise reduction
Noise
Reduction
(Using the
Remote set)
This prevent the remote set from being disconnected from the base set.
Press the button.
If the noise is not reduced,
press the a button
several times.
Out of Range Warning
When the battery voltage of the remote set falls below a certain level, a
warning is given.
Low Voltage Warning in the Remote set
When the battery
needs recharging
You can initialize the phone to its original condition.
You will hear a warning tone
with these mark
blinking.
When this occurs, immediately
recharge your remote set.
Initializing the Remote set
All functions will be
initialized with a
Press three buttons at the same
time and hold more than 3
seconds.
completion tone.
When the remote set gets
too far from the base set
You will see a mark on top
of screen with a warning tone.
When this occurs, move closer
toward the base set and talk
continually.
Initial state of the phone
Remote set
Ring type : 1
Ring volume : High
Receiving voice volume : Medium
Phone directory : None
Recent call Number : None
Current time : 01/1 24:00
3837
features
Convenient
Page 21

Help Functions
You have to register the remote set after purchase.
Registering the Remote set
1
Remote set in
standby mode
Press the button.
23 45 6
Display
7
You will hear a beep tone
Base set
Press the button
more than 2 seconds.
It should necessarily set in order to register number. It will not be
registered properly if you don’t press the button right after
pressing the registering number.
Paging the Remote set (from the base set to the remote set)
If you press the button, the
paging function is worked
with this in-use lamp blinking
for 30 seconds.
confirming the completion of
the setting.
Press the
button twice.
Press the button.
features
Convenient
If you place the remote set on the charger during the paging, the paging is canceled.
You are able to use this set for paging only.
Note
Use it for looking for the remote set. You can’t response to paging.
To cancel paging, press the button on the base set or any buttons on the remote set.
4039
Page 22

Reference
Reference
Troubleshooting 43
Cleaning Method 45
Product Specification 46
41
Page 23

Troubleshooting
The phone does not
work at all.
Check if the phone is correctly
installed. (Refer to page 9)
Is the power correctly connected to
appropriate voltage.
(Refer to page 9)
Check if the battery is correctly
inserted to the remote set.
(Refer to page 11)
Check if the battery is adequately
charged. (Refer to page 11)
Check if the power is on.
(Refer to page 12)
The remote set does
not charge.
Check if the charging connector
is clean.
If the charging connector is not clean,
use a cotton cloth or an eraser to
wipe it. (Refer to page 45)
Check if the power voltage is
appropriate. (Refer to page 9)
If you have cleaned the charging
connector but it still does not work,
then please contact your local service
center and purchase new battery.
(Refer to page 11)
The remote set does
not ring.
Check if the battery is correctly
inserted. (Refer to page 11)
Check if the battery is adequately
charged. (Refer to page 11)
Check if the power of the remote
set is on. (Refer to page 11)
Check if the remote set is
registered to the base set.
(Refer to page 39)
I hear many noises while
using a remote set.
Press the button to reduce the
noise. (Refer to page 37)
Check if the distance is not too far
from the base set.
(Refer to page 37)
Make stand the antenna of the base set.
Try installing the base set at a different
location.
I hear warning beep
tone in remote set.
Check if you are not too far away
from the base set. If yes, move
closer toward the base set.
(Refer to page 37)
If you see mark on the
screen, hang up the phone and
adequately charge your phone.
(Refer to page 38)
4443
Reference
Page 24

Cleaning Method
Product Specifications
When cleaning the
outsider of the phone
Apply washer liquid and wipe it
with a cloth.
Do not use benzene, thinner,
etc..
When cleaning the
charger connector of
the remote set or the
base set
Frequently wipe the charging
connector.
Model Name : SP-C501R
Item Unit Remote Set Base Set
DC 3.6V, 450mAh
Power
Output RF Power
Occupied Frequency
Band
Receiving Sensitivity
Using time for
remote set
Operating
temperature
Operating humidity
Weight
Dimension
(lengthxwidthxheigt)
V/mA
Rechargeable battery
mW
kHz
Hours
%
g
mm
Below 10
Below 16
Below 2
Standby : over 20,
Call : over 3
-10 ~ +40
5~90
138
178 x 44 x 27 120 x 129 x 106
DC 11V 500mA /
DC 9V 150mA
Only for 220V
270
This set is not secure from other cross talks that may disconnect your talk.
Reference
4645
Page 25

Memo
 Loading...