

Samsung SM-G355M Disassembly & Reassembly
Level
7.
Disassembly and assembly Instructions
7-1.
Repair
2
7-1-1.
1
Disassembly
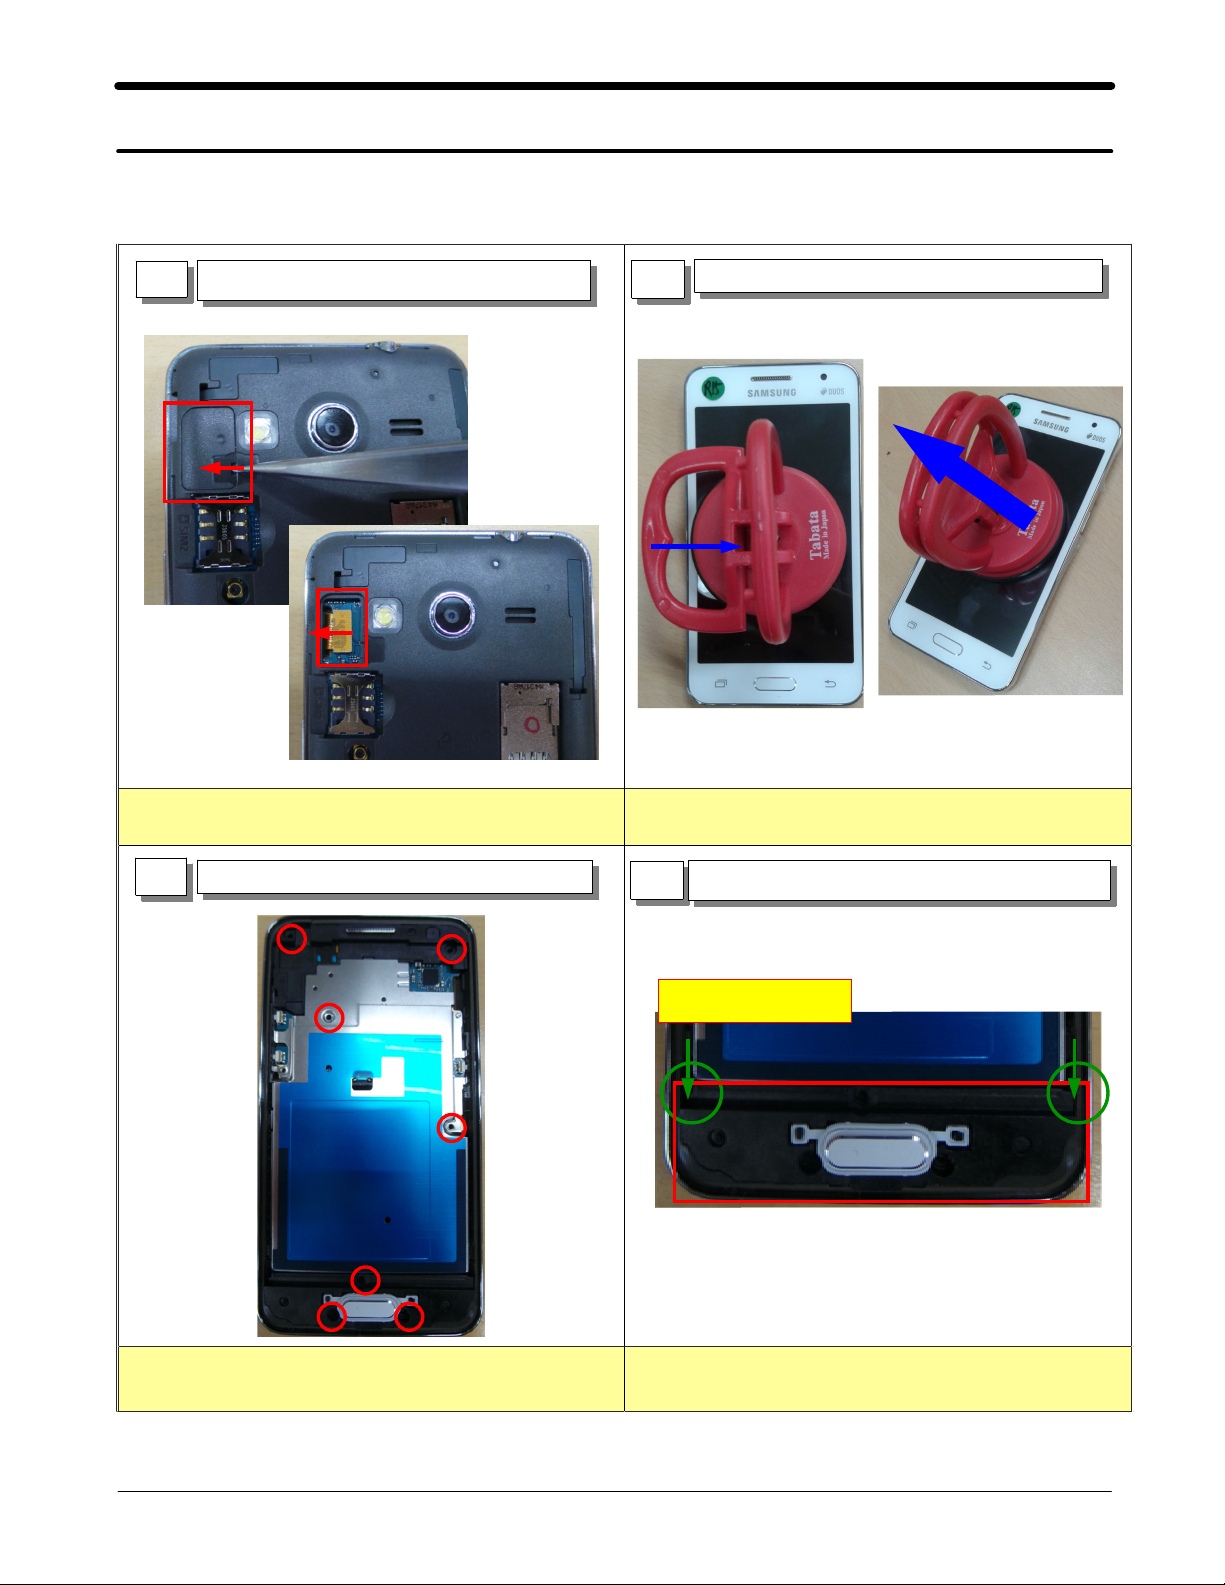
Detach LCD Connector cover and connector.
Detach the TSP Ass'y
2
Be careful not to damage the FPCB connector. Be careful not to damage the TSP Ass'y.
3
Unscrew 7 Poi nt.
Be careful not to damage the shieldcan Be careful not to damage the Ass'y
4
Disassemble M otor/Homek ey Ass'y
Disassemble Point
7-1
SAMSUNG Proprietary-Contents may change without notice
This Document can not be used without Samsung's authorization
Level2Repair
7.
5
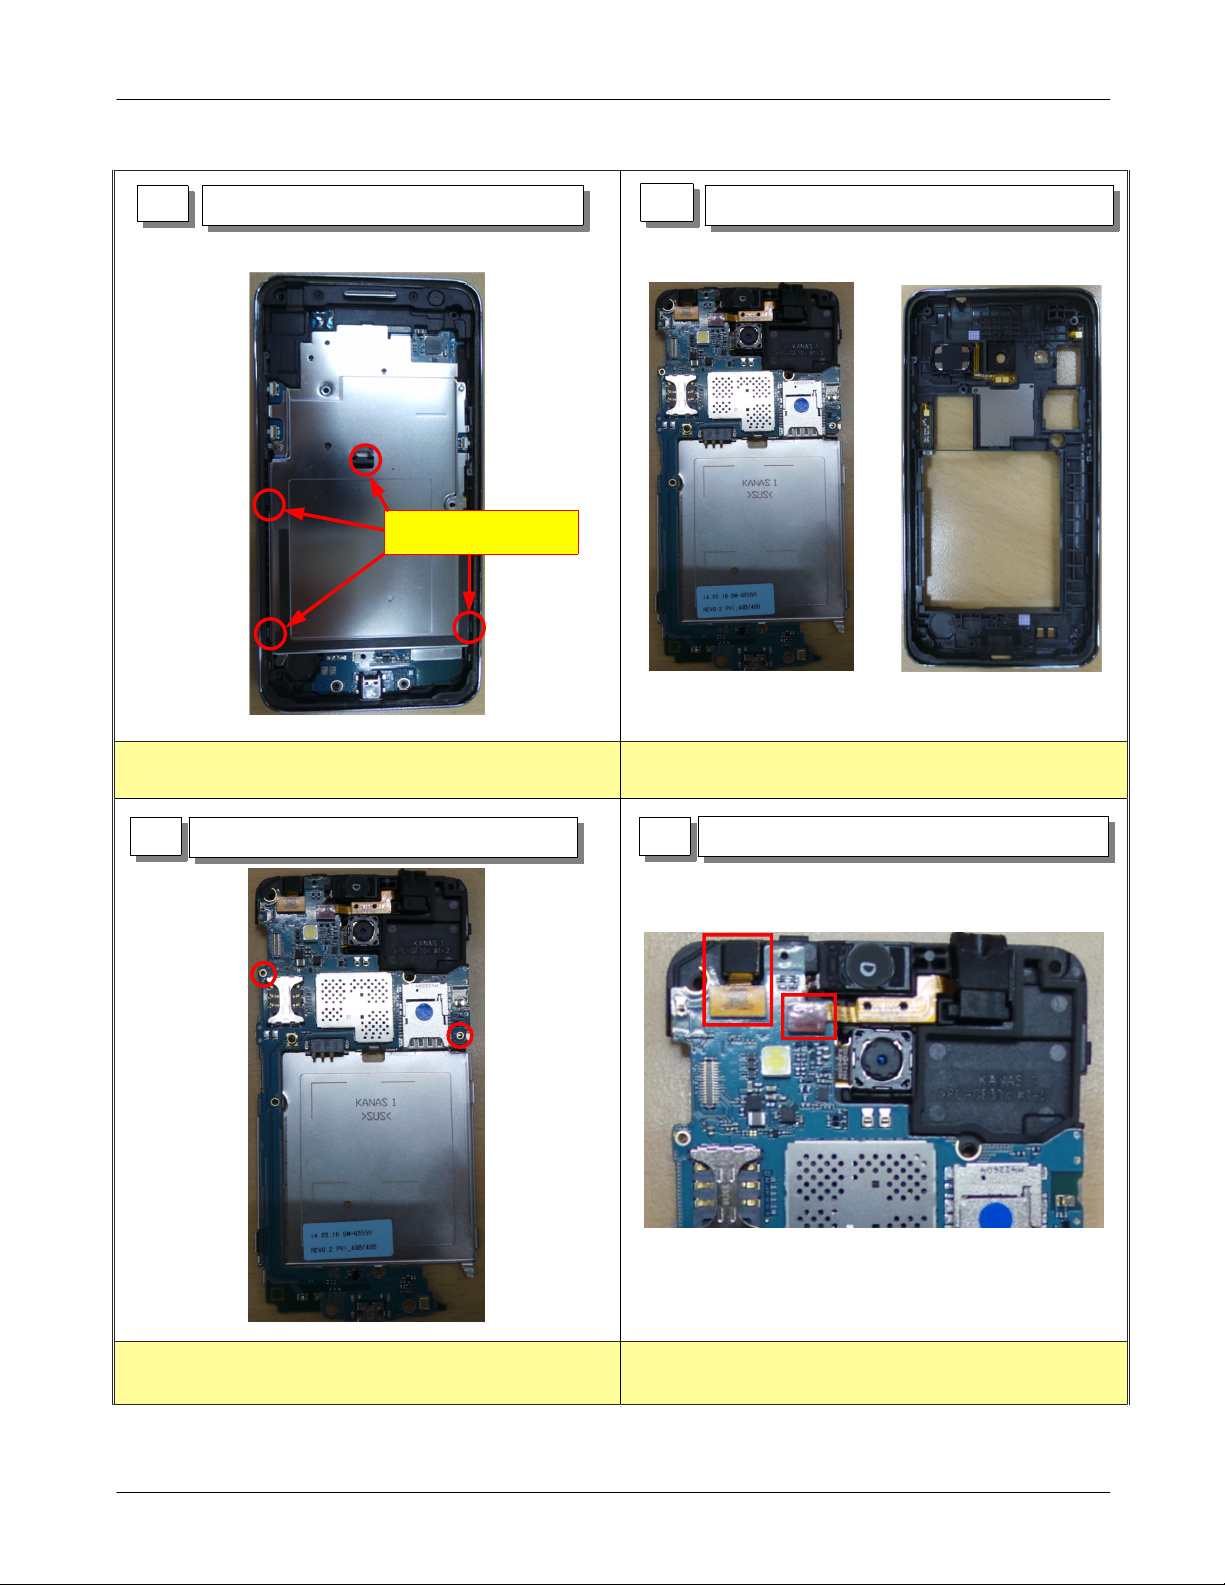
Detach PBA Ass'y Hook
6
Disassemble PBA Ass'y and REAR.
Disassemble Point
Be careful not to damage the PBA and the Shieldcan. Be careful not to damage PBA Ass'y.
7
Unscrew 2 Poi nt.
8
Detach FPCB Connector and Disassemble VT CAM.
Be careful not to damage the PBA. Be careful not to damage the FPCB connector.
.
7-2
SAMSUNG Proprietary-Contents may change without notice
This Document can not be used without Samsung's authorization
 Loading...