

Samsung SHP-3701F User Manual
In-ceiling Housing
Installation Manual
SHP-3701F
TABLE OF CONTENTS
Overview ····························································································································
What’s Included ·················································································································
Installation Instructions ······································································································
Installation (SCP-3430 Series) ···························································································
Installation (SCP-3370/SNP-5200 SERIES) ······································································
Installation (SCP-3371/SNP-5300 SERIES) ···································································
Product Specifi cations····································································································
3
3
4
4
9
13
18
2_ SHP-3701F
OVERVIEW
This In-CEILING HOUSING is a mounting ADAPTOR that is designed to mount the smart
dome camera in built-in style on a double-layer ceiling.
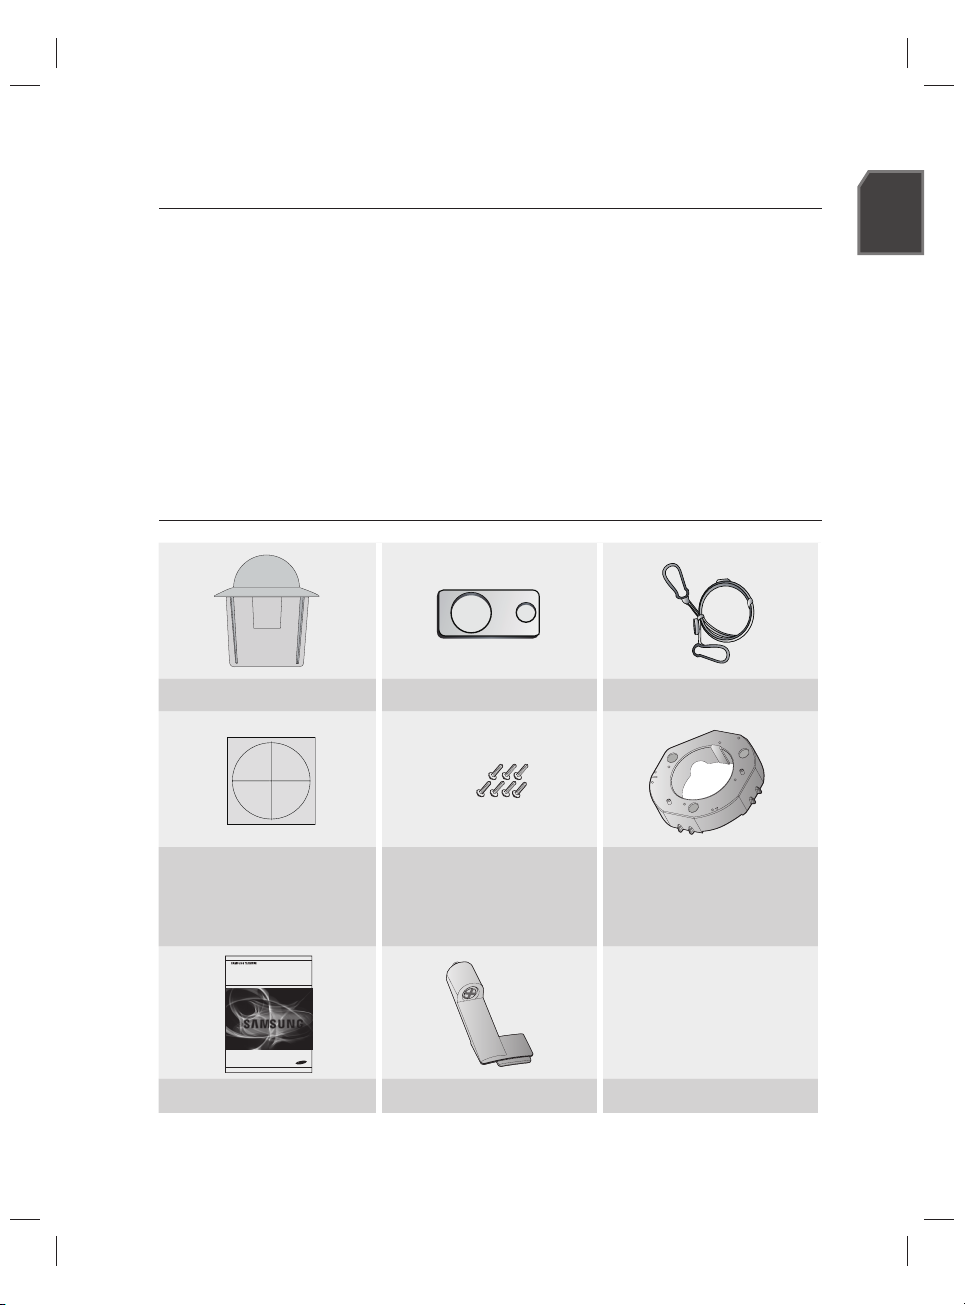
WHAT’S INCLUDED
ENG
HOUSING SAFETY BRACKET (
TEMPLATE (1EA)
In-ceiling Housing
Installation Manual
INSTALLATION MANUAL
SHP-3701F
Fixing Bracket (1EA)
SCREW (7EA)
1EA)
SAFETY WIRE (1SET)
LOWER BRACKET (1EA)
Applicable model :
SCP-3430/2430/3250/2250/2251
SCP-3371/2371/2271/2373/2273/6322
SNP-5300/6201/6320/5430
SHP-3701F _3
INSTALLATION INSTRUCTIONS
Select an installation position or place that can endure more than 4 times of the total
1.
weight of the installation structure.
At least 250mm or more of spare height is required above the CEILING BOARD.
2.
CEILING BOARD’s thickness should be less than 40mm.
3.
Be sure to secure the SAFETY WIRE to avoid a product fall.
4.
If you want to attach the camera to the ADAPTOR, use the only provided SCREWS.
5.
More than 250mm
250mm 이상일 것
천장보드
CEILING BOARD
40mm 이하일 것
Less than 40mm
INSTALLATION (SCP-3430 SERIES)
Applicable model : SCP-3430/2430/3250/2250/2251
1.
Place the TEMPLATE on the CEILING BOARD and drill a guided hole.
❶ Remove the round fi lling (“C”) from the TEMPLATE.
➋ Place TEMPLATE A onto the CEILING BOARD to which you will attach the ceiling
mount ADAPTOR and drill a hole of Ø219mm in diameter.
See the fi gure below for the hole shape.
4_ SHP-3701F
Ø219mm
형판
TEMPLATE
Ø219mm
천장 보드
CEILING BOARD
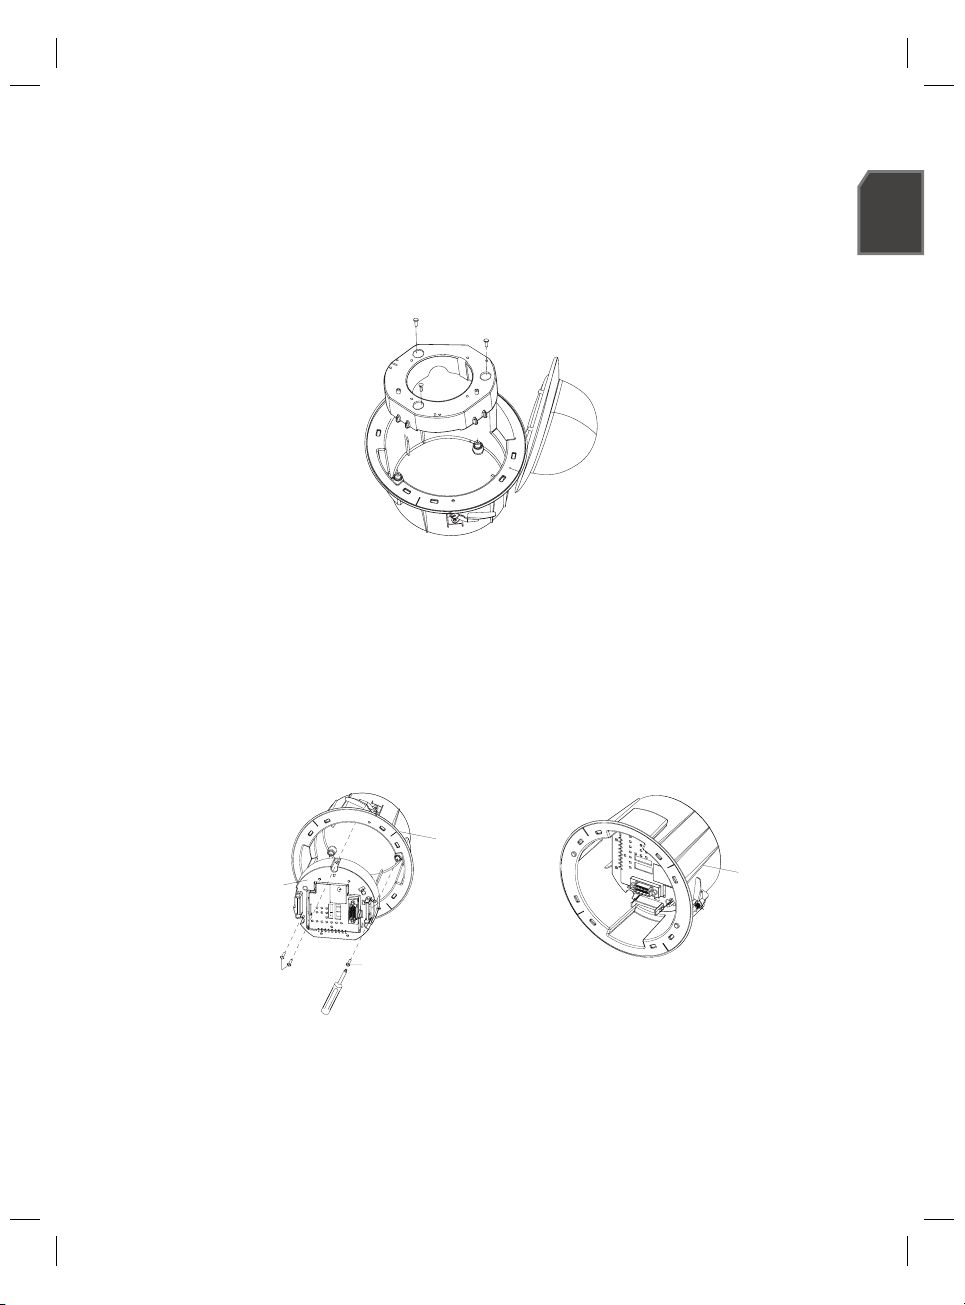
See the fi gure below to fi x the lower BRACKET with the provided SCREWs.
2.
The lower BRACKET is specifi c to “SCP-3430 Series/SNP-5300 Series”.
Insert the FRAME SET included in the smart dome camera package into the HOUSING
3.
and fi x it using 3 provided SCREWs.
ENG
프레임세트
FRAME SET
스크류
SCREW
스크류
SCREW
하우징
HOUSING
HOUSING
하우징
SHP-3701F _5

INSTALLATION (SCP-3430 SERIES)
Applicable model : SCP-3430/2430/3250/2250/2251
Fix the ANCHOR BOLT onto the concrete CEILING, and secure the SAFETY WIRE to the
4.
ANCHOR BOLT as below:
❶ Tighten the nut (“N1”) on the ANCHOR BOLT.
➋ Insert the provided SAFETY BRACKET into the ANCHOR BOLT.
➌ Tighten two nuts (“N2”,”N3”) onto the ANCHOR BOLT.
➍ Hook and fi x one end of the SAFETY WIRE onto the SAFETY BRACKET.
➎ Hook and fi x the other end of SAFETY WIRE onto the HOUSING as shown below.
Nut (N1)
너트(N1)
안전브라켓
Safety BRACKET
너트(N2,N3)
Nut (N2,N3)
안전와이어
앙카볼트
ANCHOR BOLT
천장
CEILING
The ANCHOR BOLTs and nuts are optional and not included in the product package.
5.
Press the SNAP-FIT on the ADAPTOR to open it, and insert camera cables and external
SAFETY WIRE
connection cables into the HOUSING through the side hole (see fi gure below).
천장
CEILING
앙카볼트
ANCHOR BOLT
하우징
HOUSING
M
천장
CEILING
Hole
6_ SHP-3701F
Refer to the installation manual of the camera that you want to install, and prepare necessary
cables for camera connection.
HOUSING
하우징
어댑터
Adaptor
Snap-fi t
하우징
홀
HOUSING
스냅핏
External Cable
외부케이블
 Loading...