

l
y
6. From the list of found devices, tap the target device,
then follow the prompts to complete the pairing:
•
If the target device requires a PIN, enter a PIN for the target
OK
device and tap
device.
•
If the device allows automatic or smart pairing, your device
attempts to pair with the device automatically. Follow the
prompts on your device and the target device to complete the
pairing.
7. Confirm is now showing your devices are paired.
Sharing Data with a Bluetooth Device
To send data to a Bluetooth device:
1. Select a file or item from an appropriate application.
2. Select an option for sharing data with the Bluetooth
feature.
Note:
The method for selecting an option may vary by data
type.
3. Search for and pair with a Bluetooth device. For more
information, refer to “Pairing with a Bluetooth Device”
on page 155.
. When prompted, enter the PIN on the target
nterna
Receiving Data from a Bluetooth Device
To receive data from a Bluetooth device:
1. Turn Bluetooth on. For more information, refer to
“Turning Bluetooth On or Off” on page 154.
Note:
To select the length of time that your device will be
visible, select
2. Pair with the Bluetooth device from which you want to
receive data. For more information, refer to “Pairing
with a Bluetooth Device” on page 155.
A Bluetooth authorization request pop-up displays
when a Bluetooth device sends data to your device.
3. Select
Received data is saved to the Bluetooth folder. If you receive
a contact, it is saved to your contacts automatically.
Accept
data. A File received message displays.
Menu
➔
Visible time-out
to confirm that you are willing to receive
.
se
nl
Connections 156

l
y
USB Tethering
This option allows you to share your device’s mobile data
connection via a direct USB connection between your device
and computer. A wireless version of this same functionality
would be the Mobile AP feature.
Note:
If additional software or USB drivers are required,
navigate to: http://www.samsung.com/us/support/
downloads.
Apps
1. From a Home screen, tap
(
Mobile HotSpot
– or –
From a Home screen, tap
➔
More settings
2. Plug in the USB cable between your computer and your
device.
3. When prompted for a USB mode, tap to exit the
menu.
).
➔
Tethering and Mobile HotSpot
➔
Apps
➔ Settings
.
4. Tap
To disconnect tethering:
1. From a Home screen, tap
2. Tap
3. Remove the USB cable from the device.
USB tethering
a green check mark next to the entry and activates the
feature. A Tethering or HotSpot active notification
briefly appears on the screen.
Look for the USB Tethering active icon in the
Status bar area of the screen.
(
USB tethering
the check mark and deactivate the feature.
from the Tethering menu. This places
Apps
Mobile HotSpot
).
from the Tethering menu to remove
➔
157
nterna
se
nl
l
y
Portable Wi-Fi HotSpot
This feature allows you to turn your device into a Wi-Fi
hotspot. The feature works best when used in conjunction
with HSPA+ (4G) data services (although 3G service can also
be used).
Important!
Note:
The Mobile AP service can not be active at the
same time as Wi-Fi. Please close your Wi-Fi
connection prior to launching the Mobile AP
service.
You must have a tethering plan on your account to use
the Wi-Fi HotSpot. You can not use data on the device
while it is being used as a hotspot.
To edit the Portable Wi-Fi HotSpot information:
1. From a Home screen, tap
(
Mobile HotSpot
– or –
From a Home screen, tap
➔
More settings
➔
Tethering and Mobile HotSpot
Apps
➔
).
Apps
➔ Settings
.
nterna
2. On the Mobile HotSpot field, tap the
to turn the feature on.
3. Tap t he
4. Select a Security option and enter a new security
5. With security enabled, delete the previous password
6. Ta p
7. Confirm the Mobile HotSpot active icon appears
Note:
Network SSID
Open, WPA-PSK
option (
and enter a new one into the
Save
to store the new settings.
at the bottom of the screen.
Using your 4G service and Portable Wi-Fi HotSpot drains
your device’s battery at a much faster rate than when
using any other feature combination.
The best way to keep using the device as a hotspot is to
have it connected to a power supply.
field and edit the name if desired.
, or
WPA2-PSK
Password
OFF / ON
).
field.
icon
se
nl
Connections 158
l
y
To connect to the HotSpot:
1. Enable Wi-Fi (wireless) functionality on your target
device (laptop, media device, etc.).
2. Scan for Wi-Fi networks from the device and select
your device hotspot from the network list.
•
The SSID name for your device’s hotspot is determined by what
you entered into the
•
You can change the name by tapping
Configure ➔
3. Select this HotSpot and follow your on-screen
instructions to complete the connection.
4. Launch your Web browser to confirm you have an
Internet connection.
Network SSID
Network SSID
field.
Mobile HotSpot ➔
and changing the entry.
To secure the Portable HotSpot service:
The two most common methods for securing your connection
to the HotSpot are to a security method (WPA2 PSK) and to
Hide your device’s SSID name.
Apps
1. From a Home screen, tap
(
Mobile HotSpot
Mobile HotSpot ➔ Configure
2. Tap
3. Tap t he
4. With security enabled, enter a new password into the
Important!
5. Tap
Security
Password
field.
The more complex the password, the harder it will
be for intruders to break your security. It is
recommended that you not use names, birthdays,
or other personal information.
Save
to store the new settings.
).
field and select
➔
.
WPA2 PSK
.
159
nterna
se
nl
l
y
Kies Via Wi-Fi
Samsung Kies is a software that enables you to update your
device firmware, synchronize files, and transfer data to and
from your device directly by connecting to the PC.
Note:
Some features will be supported through the System
Updates feature in the future. For more information,
refer to “Software Update” on page 246.
To learn more about Samsung Kies and Samsung
applications, browse featured applications and download
http://www.samsung.com/us/support/downloads
Kies at:
Note:
Samsung Kies works on both PC and Macintosh
computers.
Connecting With Samsung Kies
1. Install Samsung Kies software on your PC.
Warning!
Close any running applications before connecting
your device to a PC.
.
3. From a Home screen, tap
➔
More settings
Select the source of the Wi-Fi connection for Kies air.
4. Follow the prompts from Kies to update your device
firmware.
5. Refer to Samsung Kies Help for more information.
Synchronizing with Windows Media
Player
Ensure that Windows Media Player is installed on your PC.
1. Attach your device to the computer with the USB cable.
Your computer recognizes the connection and displays
the AutoPlay screen.
2. Click the option to
to synchronize music files.
3. Select and drag the music files you want to the sync
list and begin synchronizing.
4. When finished, exit Windows Media Player and
disconnect the USB cable.
➔ Kies via Wi-Fi
Sync digital media files to this device
Apps
.
➔
Settings
2. Run Samsung Kies.
nterna
se
nl
Connections 160

l
y
Connecting as a Mass Storage Device
You can connect your device to a PC as a removable disk and
access the file directory.
1. Attach your device to the computer with the USB cable.
Your computer recognizes the connection and displays
the AutoPlay screen.
2. Click the option to Open device to view files.
You should see a Tablet folder.
3. Copy files to or from the PC from or to the device
(Tablet folder).
4. When finished, close the PC folder and disconnect the
USB cable.
GPS Applications
GPS applications allow you to achieve real-time, GPSenabled, turn-by-turn navigation and to access local
searches based on a variety of category parameters.
To receive better GPS signals, avoid using your device in the
following conditions:
•
inside a building or between buildings
•
in a tunnel or underground passage
•
in poor weather
•
around high-voltage or electromagnetic fields
•
in a vehicle with tinted windows
Global GPS turn-by-turn navigation, mapping, and Point of
Interest content is available for three continents, including
North America (U.S., Canada, and Mexico), Western Europe,
and China, where wireless coverage is available.
161
nterna
Important!
se
If you tap or cover the internal GPS antenna while
using GPS services, it may impede the GPS signal
resulting in the GPS services not working in an
optimal manner. Refer to the following diagram to
locate the approximate location of the internal GPS
antenna.
nl
l
y
Section 10: Applications and Widgets
This section contains a description of each application that is
available on the Apps screen, its function, and how to
navigate through that particular application. If the application
is already described in another section of this user manual,
then a cross reference to that particular section is provided.
Various widgets are also described.
Tip:
To open applications quickly, add the icons of frequentlyused applications to one of the Home screens. For details,
see “App Shortcuts” on page 41.
Update Available
When you open an application that is preloaded on your
device, an
there is a new version of the app available.
Update Available
Tap
Upgrade
the app without updating.
For more information, refer to “Updates to Downloaded
Apps” on page 189.
message may be displayed if
to update the app or tap
Not Now
to open
nterna
Alarm
Set alarms for reminders or for wake-up times.
Adding and Configuring Alarms
1. From a Home screen, tap
2. Tap
3. Use the arrow symbols to enter adjust the hour, and
4. Tap t he
5. Slide the slider bar left or right in the
6. Tap t he
se
Create alarm
set.
minutes, then tap
which was last selected).
Alarm repeat
times you want this alarm to repeat. Selections are:
day blocks or
blue when active.
to decrease or increase the alarm volume. A sample of
the volume level plays.
Alarm tone
tone or select
alarm ringtone. Tap
AM
field and touch the number of
Repeat weekly
field and either select an available
Add
to use locate a sound to use as an
nl
OK
Applications and Widgets 162
Apps
➔
or tap an alarm that is already
or PM (toggles depending on
. Selected day blocks turn
Alarm volume
to activate the ringtone.
Alarm
.
field
l
y
Snooze
7. Tap t he
Tap the available fields to assign a
minutes,
5 minutes, 10 minutes, 15 minutes, or 30 minutes) and
Repeat
10 times).
•Duration
silent between alarm notifications (snooze time).
• Repeat
assigned to this alarm. How many times will the snooze silence
the alarm.
8. Tap t he
feature which slowly increases screen brightness and
the volume of nature tones to simulate dawn breaking.
Tap t he
(3 minutes, 5 minutes, 10 minutes, 15 minutes, or
30 minutes) and nature tone (Fairy fountain, Birdsong
by the lake, The secret forest, Serenity, Gentle spring
rain, and Sparkling mist).
•Interval
remain silent between alarm notifications (snooze time).
163
box to the right to activate the feature.
Duration
time (3
(1 time, 2 times, 3 times, 5 times, and
indicates the length of time the alarm will remain
indicates the numbers of snooze sessions that are
Smart alarm
Interval
category describes the length of time the alarm will
box to the right to activate this
field to assign a interval time
nterna
•Tone
category provides one of several nature sounds that are
used as the alarm tone.
9. Tap t he
10. Ta p
Activating Alarms
1. From a Home screen, tap
2. Tap
3. Tap an alarm to change any of its settings and then
Deactivating and Deleting Alarms
1. From a Home screen, tap
2. Touch and hold an alarm and then tap one of the
se
Name
field and enter a name for this Alarm.
Done
to save the alarm.
The main Alarm screen displays showing the new or
updated alarm.
Apps
➔
Turn alarm on
alarm means the alarm is deactivated.
select
Done
to save the updates.
following options:
• Delete alarm
– or –
Delete
Tap
to delete, and then tap
to activate the alarm. A gray
Apps
➔
: Delete the alarm.
and select the existing alarms you want
Done
nl
.
Alarm
Alarm
.
.
l
y
Turning Off an Alarm
When the alarm sounds, to turn off the alarm:
Touch and drag in any direction.
Setting the Snooze Feature
To activate the Snooze feature after an alarm sounds:
Touch and slide in any direction. Snooze must
first be set in the alarm settings.
AllShare Play
AllShare PlayTM allows your tablet to stream photos, music,
and videos from its memory to other DLNA certified
Living Network Alliance) devices. Your tablet can also play
digital content streamed from other DLNA certified devices.
Note:
To view more information about DLNA certified products
visit
http://www.dlna.org/home
.
TM
(Digital
nterna
Configuring AllShare
You must first connect both of your communicating devices
to the same Wi-Fi and be using an active and registered
Samsung account prior to using this application. For more
information, refer to “Turning Wi-Fi On or Off” on page 150.
Connect to Wi-Fi, configure AllShare Play settings to identify
your device as a server, and set treatment of copied files.
Important!
Note:
The Samsung account manages the access
information (username and password) to several
applications, such as AllShare Play.
1. Connect to a Wi-Fi network. For more information, refer
to “Wi-Fi” on page 150.
Apps
2. From a Home screen, tap
➔
AllShare Play
If prompted, read the on-screen message about network
charges and tap OK to continue.
.
The AllShare Play Sign In screen displays.
3. Ta p
Sign in
se
. The Samsung account screen displays.
nl
Applications and Widgets 164
l
y
Create new account
4. Tap
Samsung account, or select
set up a Samsung account.
For more information, refer to “Creating a Samsung
Account” on page 17.
The AllShare Play main screen displays.
5. For more information, tap
Using Group Cast
While using various applications, such as
Share
you tap
option.
Group Cast is an easy way to share files in real time with
others who are on the same Wi-Fi network. Group Cast can
be used when you want to share documents, images, music,
and so on.
You can use Group Cast for meetings, sales presentations,
conferences, and classes. All you need is a Wi-Fi network
that works with Group Cast, and most do.
To share a file using Group Cast:
1. From a Home screen, tap
to share a file, you see Group Cast as an
, if you have not set up a
Sign in
, if you have already
Menu ➔ FAQ
Apps
Gallery
➔
.
Gallery
, when
nterna
165
2. Navigate to the file you want to share and touch
Share
➔
Group Cast
For more information, refer to “Gallery” on page 116.
Note:
After the initial Group Cast request, tap
instead of
3. Use the keyboard to enter a PIN code and tap
This process makes sure only desired recipients can
view your shared image.
The AllShare Play - Group Cast screen displays and the
device waits for other connected recipients to accept
the connection and enter the PIN on their screens.
4. Tap
users connect.
You can now interact and draw with the on-screen
image, and users will instantaneously see the same
gestures and also be able to interact.
.
se
Share
OK
to start the group cast process while other
nl
.
Group Cast
.
Done
.
l
y
5. The newly altered image (with markups and
comments) can not be saved, but you can take a
screen shot of the current image and save it to your
Clipboard. For more information, refer to “Navigating
Your Device” on page 30.
Calculator
The calculator provides the basic arithmetic functions to
solve simple arithmetic problems and advanced operators to
solve more complex problems.
1. From a Home screen, tap
2. Enter the first number using the numeric keys.
3. Enter the operation for your calculation by tapping the
+
(add), - (subtract), × (multiply), or ÷ (divide) key.
4. Enter the next number.
5. To view the result, tap the
6. Repeat Steps 3 through 5 as many times as required.
7. Tap to clear the result.
8. For more advanced problems, rotate your device to
landscape mode and use the advanced operators
ln, cos, log, tan
pocket calculator.
, and so on, just as you would on a
Apps
➔
Calculator
=
(equals) key.
nterna
sin
9. Touch and hold the Calculator’s display to copy or cut
the contents of the display.
Copied to clipboard
another app.
displays. Paste the copied value in
Calendar
Your device includes a powerful Calender to help you
organize your schedules more conveniently and effectively.
Learn to create and manage events and tasks, and set
alarms to remind yourself of important events and tasks.
.
1. From a Home screen, tap
2. Tap a tab to choose a calendar view:
•Year
: Display all twelve months of this year. Sweep across the
years at the bottom of the screen to display another year.
•Month
: Display the current month. Tap a month and year at the
bottom of the screen to display another month.
• Week
: Display the current week. Tap a week at the bottom of
the screen to display another week.
•Day
: Display today’s schedule by hour. Tap day at the bottom of
,
the screen to display another day.
se
nl
Applications and Widgets 166
Apps
➔
Calendar
.

l
y
•List
: Display only event and task names and dates for a
selected year. Tap a year at the bottom of the screen to display
another year. Tap a date to hide or show the event or task
name.
•Task
: Display your list of tasks. Tap the sort field to change how
your tasks are sorted. Tasks can be sorted by due date, priority,
date, week, month, or group.
3. Swipe left or right across the screen to view other days
or other weeks. Swipe up or down the screen to view
other events.
4. To find an event or task, tap
Use the on-screen keyboard to enter a search term.
Possible events display as you type.
Tap an event to send, edit, or delete the event.
5. Tap
6. Tap
167
Add event / Add task
a new event to your calendar. For more information,
refer to “Creating an Event or Task” on page 168.
Menu
•Zoom in
area being viewed.
for these options:
: In the Week and Day views, increase the size of the
Search
.
and then tap
Done
nterna
to add
• Zoom out
•Go to
•Delete
• Sync
• Show controls
• Settings
7. Tap
8. Tap
Tap
accounts from which calendar events can be synced.
se
: In the Week and Day views, decrease the size of the
area being viewed.
: Use the Set date pop-up to enter a date and then tap
Set to display that date on your calendar.
: Delete events for the year, month, week, day, week,
month, before today, or all events, depending on the Calendar
view.
: Manually synchronizes the calendar entries among all of
your current accounts, for example, Gmail, Exchange, and so
on.
/
Hide controls
calendar and a list of events in landscape mode.
: Customize the calendar. For more information, refer
to
“Calendar Settings”
Tod ay
to return to the current date.
Calendars
to configure which events to display.
Add account
➔
: Show or hide a small month
on page 169.
Add account
to add additional
nl

l
y
Creating an Event or Task
1. From a Home screen, tap
2. Double-tap the date for which you want to enter an all
day event or task.
•
Tap the
Add event
or
Add task
•
Tap the
My calendar
or task should be added.
•
Use the keyboard to enter the event or task name.
– or –
Tap the date for which you want to enter an event or
task.
•
Tap .
•
Tap the
Add event
•
Enter the event or task information.
3. Ta p
Save
.
field and tap a calendar to which the even
or
Add task
tab.
tab.
Apps
➔
Calendar
Managing Events
.
You can delete, send, and edit events on your mobile device:
1. From a Home screen, tap
2. Tap an event. A pop-up displays event information.
Options
3. Tap
Forward or Share via.
4. Ta p
Delete
– or –
Edit
Ta p
Share via
5. Ta p
Messaging
. Choose from: Reply, Reply all,
and then tap OK to delete the event.
to update the event details.
and then select
, or
Wi-Fi Direct
Apps
Bluetooth, Email
to share the event.
➔
Calendar
,
.
nterna
se
nl
Applications and Widgets 168
l
y
Add Additional Calendar Accounts
1. From a Home screen, tap
➔
Calendars
➔
Add account
– or –
From a Home screen, tap
➔
Accounts and sync
The Accounts and sync screen displays.
2. Tap
Add account
3. Select an account type and enter your account
information.
Calendar Settings
To set up Calendar preferences:
1. From a Home screen, tap
2. Tap
The following options display:
View settings
• First day of week
• Hide declined events
to display the Add account option.
Menu
➔ Settings
: Choose a day to begin each week.
: Enable or disable display of events.
Apps
➔
.
Apps
➔
.
Apps
➔
.
Calendar
Settings
Calendar
• Lock time zone
.
based on your selected time zone, which is defined by the
following field.
• Select time zone
option to select a time zone to lock event times and dates.
• Show week number
each week in the Month view.
•Calendars
Event notification
• Set alerts & notifications
set the Alert, Status bar notification, or Off.
• Select ringtone
• Default reminder time
before an event is to occur.
• Notifications while screen is off
of notifications on the full screen while the screen is turned off.
: Allows you to lock event times and dates
: If
Lock time zone
: Show the week number to the left of
: Enable calendars for your various accounts.
: Choose a tone for calendar notifications.
: Set the default time for a notification
is enabled, used this
: Tap to select, which allows you to
: Enable or disable the display
169
nterna
se
nl
l
y
Sync settings
• Sync events/tasks
For more information, refer to
Synchronization”
(Accounts)
to enable or disable the calendar sync for that account.
: Displays the General sync settings.
“Accounts and
on page 222.
: Tap an account and then tap the check box
Camera
Take photos and record video with your device’s built in
Camera.
For more information, refer to “Camera” on page 102.
From a Home screen, tap
Apps
➔
Contacts
Store contact information for your friends, family and
colleagues, to quickly access information or to send a
message. For more information, refer to “Contacts” on
page 66.
From a Home screen, tap
Apps
➔
Camera
Contacts
Downloads
Files, apps, and other items you download in Internet, Gmail,
Email, or in other ways, are stored on your tablet’s internal
storage. Use the Downloads app to view, reopen, or delete
what you have downloaded.
1. From a Home screen, tap
Downloads
➔
2. Tap an item to open it.
3. Tap headings for earlier downloads to view them.
4. Tap items you want to send, to check them, and then
Share via
.
.
tap
Options are: Bluetooth, Email, Gmail, Google+, Google
Cast, Messaging, Photo editor, Picasa, or Wi-Fi Direct.
5. Tap items you want to delete, to check them, and then
tap
Delete
Sort by size
6. Ta p
Downloads pop-up, to switch back and forth.
.
. Select an option to share the item.
. The items are deleted from your tablet.
or
Sort by date
Apps
, at the bottom of the
nterna
se
nl
Applications and Widgets 170

l
y
Email
TM
Send and receive email using popular email services.
For more information, refer to “Email” on page 88.
From a Home screen, tap
Apps
➔
Email
Gallery
Use Gallery to view, capture, and manage photos and videos.
For more information, refer to “Gallery” on page 116.
From a Home screen, tap
Apps
➔
Gallery
Game Base
The T-Mobile Game Base provides access to a game rental
and purchase services for compatible T-Mobile Android
devices.
1. From a Home screen, tap
Base
).
2. Tap an available category and follow the on-screen
instructions.
Apps
➔ (
TM
Game
Gmail
Send and receive email with Gmail, Google’s web-based
email. For more information, refer to “Gmail” on page 84.
.
From a Home screen, tap
Apps
➔
Gmail
.
Google+
Share updates and see what is going on around you with
Google+ for mobile.
For more information, refer to “Google+” on page 141.
.
From a Home screen, tap
Apps
➔
Google+
.
Internet
Your device includes a full HTML browser, to access the
internet. For more information, refer to “Internet” on
page 141.
Tip:
A shortcut to Internet displays on the main Home screen
by default.
From a Home screen, tap
Apps ➔
Internet
.
nterna
171
se
nl
l
y
Latitude
Latitude
With Google Latitude, you can see the location of all of your
friends on a map or on a list. You can also share or hide your
location.
You must first set up your tablet to use wireless networks to
help pinpoint your location. Also, Latitude works best when
Wi-Fi is enabled.
To enable Wi-Fi:
1. From a Home screen, tap
Location services
2. Ta p
A green check mark indicates the feature is
enabled.
Location services
3. Ta p
A green check mark indicates the feature is
enabled.
4. Ta p
Location services
A green check mark indicates the feature is
enabled.
5. Under
Wireless and network
OFF / ON
icon to turn Wi-Fi on.
For more information, refer to “Wi-Fi” on page 150.
➔
➔
➔
Apps
➔
Settings
Use wireless networks
Use GPS satellites
Location and Google search
, on the Wi-Fi tab, tap the
.
.
nterna
6. Log on to your Google account.
To create a Google account or set up your Google
account on your device use
For more information, refer to “Accounts and
Synchronization” on page 222.
7. Ta p
.
Sharing Your Location with Friends
1. Ta p
2. From the Latitude map screen, tap to
3. Ta p
.
4. Ta p
5. At the
se
Home
➔
Your location is displayed on the map, accurate to 30
meters.
Menu ➔ Latitude
display your Latitude list of friends. At first, only your
name is displayed.
Menu ➔ Add friends
Select from Contacts
– or –
Add via email address
Ta p
tap the
Send
key or close the keyboard and tap
friends
.
Send sharing requests
nl
Applications and Widgets 172
Accounts and sync
Apps
➔
.
.
and select a contact
, enter an email address, and
prompt, tap
Latitude
Yes
settings.
.
Add
.
l
y
Your friend will receive an email or text message with your
Latitude
location marked on a map. They will also receive instructions
on how to view your location from the Internet or use
Latitude on their device, if it is available. Once they
acknowledge your request, their location will display on your
tablet. They can share their location from their computer,
device, or tablet.
For more information, go to
Latitude Menu
1. From a Home screen, tap
2. Tap , if necessary.
3. From the top-right select any of the following
functions:
• My Location
location.
•Local
Launch the Local app. For more information, refer to
“Local”
on page 174. This option only displays in portrait
mode.
• Directions
Allows you to enter a start and end point for
directions.
http://www.google.com/latitude
Apps
➔
Latitude
Uses GPS technology to determine your current
nterna
173
•Layers
: Enable or disable a map layer to display. Choose from
Traffic, Satellite, Terrain, Transit Lines, Latitude, My Maps,
Bicycling, or Wikipedia. This option only displays in portrait
mode.
– or –
Menu
Tap
.
.
• Add friends
information, refer to
Friends”
• Check in
location.
• Refresh friends
• Show stale friends / Hide stale friends
depending on the accuracy of their Latitude information.
• Location settings
For more information, refer to
•Clear Map
• Make available offline
available even no network connection is available.
• Join Latitude/Latitude
se
with friends you choose and Google.
for these options:
: Share your location with friends. For more
“Sharing Your Location with
on page 172.
: Tap a location to check-in so others will know your
: Update your Latitude list of friends.
: Show or hide friends
: Configures the location reporting settings.
“Maps Menu”
: Remove search results from the map.
: Makes the current map functionality
: Join Latitude, to share your location
nl
on page 176.

l
y
• My Places
• Offers
•Settings
•Help
Local
Local (formerly known as Google Places) displays company
logos on a layer of Google Maps. When viewing an area you
can quickly locate a business or person, find out more
information about the business, see coupons, public
responses, and more.
1. From a Home screen, tap
2. Tap
to manually enter a desired place or choose from
among the various categories. Matches are filtered by
those closest to your current location.
: Displays a list of Starred places.
: Displays nearby local offers based on your current
location.
: Configure settings. For more information, refer to
“Maps Settings”
: Launches Google mobile Help.
on page 178.
Search
and then use the
Apps
➔
Search Maps
Local
field
3. Locate and tap one of the listed places (Restaurants,
Cafes, Bars, Attractions, [user added searches],
RECOMMENDATIONS, or IN THIS AREA a list of places
within this category displays.
4. Tap the Maps icon to launch the related maps feature.
– or –
Ta p
Menu
and then tap either
– or –
Tap the Maps icon (upper-right) to launch the related
maps feature.
•
Ta p
Menu
➔
Latitude
.
application are similar to those of the Navigation
application, but work along with the Latitude service
where you can share your location with your chosen
Google friends.
My Places ➔ Starred
. The functions of this
.
nterna
se
nl
Applications and Widgets 174

l
y
Lookout Security
Lookout™ provides mobile device-specific security features
that are coupled with a minimal performance hit. Lookout
Mobile Security provides key security options that are unique
to the mobile market. Along with the antivirus and
anti-malware tech, there's a lost and stolen device locator
service, an application privacy adviser, and a backup service.
Apps
1. From a Home screen, tap
Security
).
2. Read the on-screen descriptions and tap
begin your configuration.
3. Read the on-screen information about Security and if
desired, tap the
feature.
Next
4. Tap
5. Read the on-screen information about Backup and if
desired, tap the
feature.
6. Tap
Next
Enable Security
.
Enable Backup
.
➔ (
field to activate the
field to activate the
Lookout
Get started
to
7. Read the on-screen information about the feature that
can help locate your missing device and if desired, tap
New user
(to setup a new account) or
log into your account field to activate the feature).
Start Lookout
8. Tap
From the main application, the main features are presented
as buttons. Tap one to reveal a button that will run the
feature.
.
Existing user
(to
175
nterna
se
nl
l
y
Maps
Use Google Maps to find your current location, get directions,
and other location-based information.
Tip:
A shortcut to Maps displays on the main Home screen by
default.
Note:
You must enable location services to use Maps. Some
features require Standalone or Google location services.
For more information, refer to “Location Services” on
page 224.
From the Home screen, tap
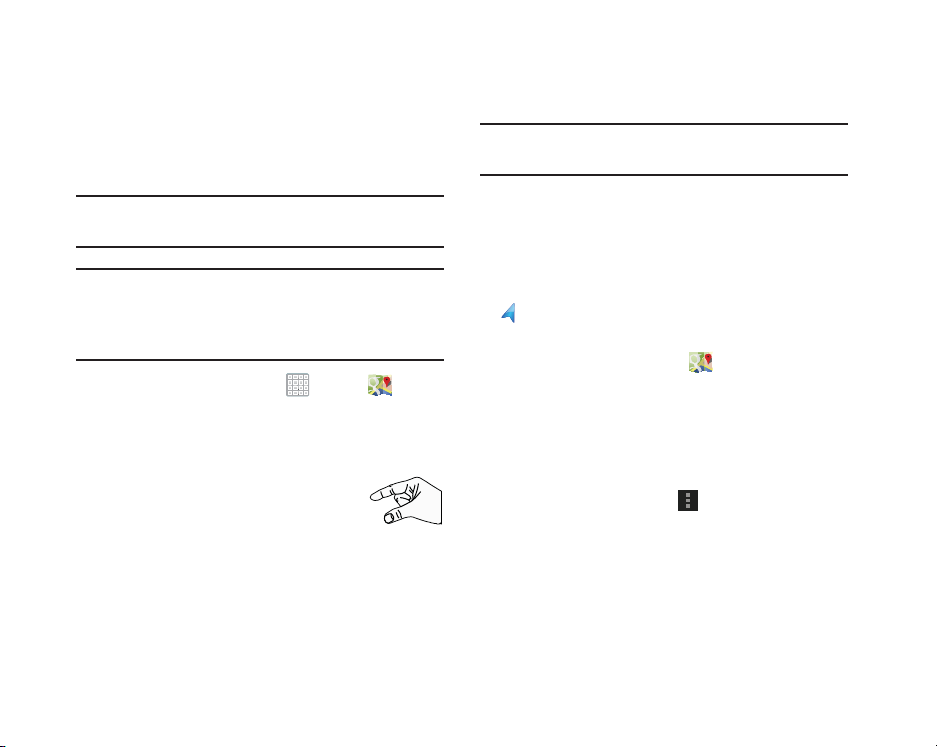
Navigating the Map
Zooming
•
Double-tap on the screen to zoom in.
• Use two fingers, such as your index finger
and thumb, to zoom out by making an
inward pinch motion on the screen. To zoom
in, make an outward motion by sweeping your fingers out.
Apps
➔
Maps
nterna
.
Tip:
For convenient browsing, you can rotate the device to
landscape mode.
Scrolling
•
Touch and drag on the screen to reposition the map in the display.
Tap
•
Tap an icon on the map to display information about the location.
For example, your location is indicated by a flashing
and a pop-up that displays your name.
Maps Menu
1. From the Home screen, tap
2. From the top-right select any of the following
functions: My Location, Local, Directions, and Layers.
For more information, refer to “Other Map Options” on
page 177.
– or –
While viewing a map, tap
• Clear Map
• Make available offline
se
: Remove search results from the map.
: Makes the current map functionality
available even no network connection is available.
nl
Applications and Widgets 176
Maps
.
Menu
for these options:
l
y
• Join Latitude/Latitude
with friends you choose and Google.
• My Places
• Offers
• Settings
•Help
Tip:
Local and Layers display in the Application Bar in
landscape mode.
Other Map Options
Tap the indicated icon to use these additional Map options:
: Display starred locations.
: Displays nearby local offers based on your current
location.
: Configure settings. For more information, refer to
“Maps Settings”
: Learn about Google maps.
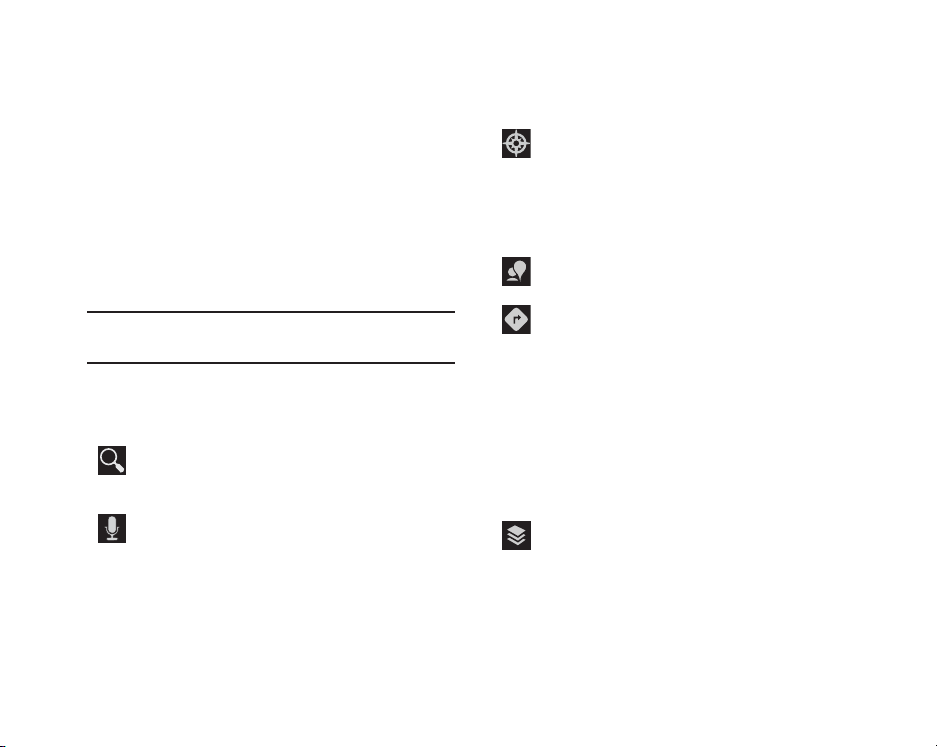
Search Maps
to Search the map for a city, location, and so on.
Suggestions are displayed as you type.
Speak
: Just speak a city, location, and so on, to
display.
: Join Latitude, to share your location
on page 178.
: Use the keyboard to enter your request
nterna
177
se
Compass
: Set the map to always display north at the
top of the screen or to automatically rotate like a
compass, keeping north on the map facing north,
and so on. Your device may have to be calibrated the
first time you use this feature. Follow the on-screen
instructions.
Local
: Launch the Local app. For more information,
refer to “Local” on page 174.
Directions
: Displays the Directions pop-up. Enter
My Location
the right of the fields to choose your current location,
a contact’s location, or to tap a point on the map.
• Tap the automobile, bus, bicycle, or walking
• Tap the Directions list and scroll up or down.
Layers
Choose from Traffic, Satellite, Terrain, Transit Lines,
Latitude, My Maps, Bicycling, or Wikipedia.
and
End point
or tap the button to
icon for the appropriate directions. Then tap
to display a list of directions.
Tap an entry in the Directions list to show the
point mentioned on the map.
: Enable or disable a map layer to display.
Go
nl
l
y
Maps Settings
Use the Maps settings to customize your Maps application.
Maps
1. From the Home screen, tap
Menu
➔
Settings
2. Ta p
options:
•Display
: Set the following Maps display options:
–
Zoom Buttons
buttons are displayed on the map.
–
Scale Bar
: If enabled, the scale bar is displayed on the map,
which shows the scale of the map in feet and meters.
–
Bubble action
appears within on-screen bubbles.
• Offline and cache
–
Automatic caching
while charging and using either Wi-Fi or mobile networks.
–
Clear all map tiles
• Location settings
Latitude.
to set the following Maps
: If enabled, the zoom in (+) and zoom out (-)
: If enabled, the “Get directions” button
: If enabled, automatic caching occurs
: Tap OK to clear map tile cache.
: These settings display if you have joined
.
nterna
–
Location reporting
the following options:
• Detect your location
location is updated automatically.
• Set your location
• Do not update your location
your automatic location.
–
Report from this device
your location from this device.
–
Enable location sharing
with people you know.
–
Manage your friends
your location.
–
Enable location history
–
Sign out of Latitude
the Maps application.
–
Automatic check-ins
designated.
–
Check-in notifications
places to check in.
se
: To update your location automatically, set
: Enable or disable whether your
: Set your location manually.
: Your friends cannot see
: Allows you to automatically update
: Allows you to share your location
: Add or remove friends who can see
: This history is only seen by you.
: Signs you out of Latitude and launches
: Checks you in to places that you have
: Enables notifications that suggest
nl
Applications and Widgets 178

l
y
–
Manage your places
ins and muted places.
•Labs
: Access experimental features.
•What’s New
for a Maps update.
• About
: View information about Maps.
• Feedback
• Terms, Privacy & Notices
: Display a Maps feedback form.
Maps, including the Terms and Conditions, Privacy Policy, Legal
Notices, and Web History.
: View and modify your automatic check-
: Link to Google Play Store where you can check
: View information about Google
Media Hub
Samsung Media Hub is your one stop for the hottest movie
and TV content.
For more information, refer to “Media Hub” on page 122.
Tip:
A shortcut to Media Hub displays on the main Home
screen by default.
Note:
Media Hub service requires a Media Hub account and
depends on service availability.
From a Home screen, tap
➔
Media Hub
.
Apps
179
nterna
se
nl

l
y
Memo
Create and manage text memos and use Bluetooth to send
memos to paired Bluetooth devices.
Composing a Memo
1. From a Home screen, tap
2. Tap
For more information, refer to “Entering Text” on page 55.
Memo List Options
To access options while viewing the list of Memos:
1. Tap
2. To delete one or more memos, tap
3. Ta p
New memo
Done
to save.
List
entry in the list on the left to view the memo on the
right of the screen.
one or all memos, and tap
Menu
•Sort by
: Set whether to sort the memo list by
Color
.
•Share via
Bluetooth, Email, Gmail, Messaging,
memos to another device or another person.
, compose the memo, then select
to view your memos in a list mode. Tap an
for the following options:
: Select one or all memos, tap
Apps ➔ Memo
Delete
, select
Delete
.
Date, Title
Share
, and then tap
or
nterna
Wi-Fi Direct
to send
, or
•Print
: Select one or all memos, tap
to a Samsung printer.
• Sync memo
your memos.
.
• PIN lock
•Font size
Normal, Large, and Huge.
4. Touch and hold a memo thumbnail or list entry to
display the following options:
• Delete
• Lock/Unlock
remove the lock form the memo. Once you lock a memo, you
have to use your PIN number to view the memo.
•Share via
Wi-Fi Direct
more information, refer to
: Sign in to Google and use Google docs to back up
: Set a PIN number to use to lock your memos.
: Set the text font size. Options are: Tiny, Small,
: Delete the selected memo.
: Lock the memo or use your PIN number to
: Tap
Bluetooth, Email, Gmail, Messaging,
to send the memo by the selected method. For
Print
“Bluetooth”
, and send the memos
or
on page 154.
se
nl
Applications and Widgets 180
l
y
Memo Options
While viewing a Memo:
Tap
Memo options
Delete
Color
Lock/Unlock
number to remove the lock form the memo. Once
you lock a memo, you have to use your PIN
number to view the memo.
Print
: Send this memo to a Samsung printer.
Share via
Messaging,
the selected method. For more information, refer
to “Bluetooth” on page 154.
181
for the following options:
: Delete this Memo.
: Choose a color for this memo.
: Lock the memo or use your PIN
: Tap
Bluetooth, Email, Gmail,
or
Wi-Fi Direct
to send the memo by
nterna
Messaging
1. From a Home screen, tap
Messaging
2. Follow the on-screen prompts.
For more information, refer to “Messaging” on page 76.
.
Apps
➔
Messenger
With Google Messenger, you can bring groups of friends
together into a simple group conversation.
For more information, refer to “Messenger” on page 101.
From a Home screen, tap
Apps
➔
Messenger
Mobile HotSpot
Provides access to the Tethering and portable HotSpot menu
where you can use either the USB tethering or Mobile
HotSpot functionality.
Apps
1. From a Home screen, tap
(
Mobile HotSpot
2. Activate the desired connection method.
For more information see either "USB Tethering"on page 157
or "Portable Wi-Fi HotSpot"on page 158.
se
).
nl
➔
.

l
y
More for Me
Provides customized offers, discounts and deals right to your
device by providing some brief customer and location
information. The application uses your current location to
bring you the best deals in your area.
Initial Setup
1. From a Home screen, tap
(
More for Me
2. Read the on-screen information and configure the
necessary options such as: Gender, Age, and
agreements.
Continue
3. Ta p
Using the More for Me Application
1. From a Home screen, tap
(
More for Me
2. From the upper-right, tap the button to access an
available tab for more options:
•What’s Hot
•Great Apps
applications.
• All Deals
).
to complete the setup process.
).
: displays a listing of current hot offers in your area.
: Provides you with current Daily Deals & Shopping
: Provides you with current Top Deals & Discounts.
Apps
➔
Apps
➔
nterna
Music Player
Play music and other audio files that you copy from your computer.
For more information, refer to “Music Player” on page 133.
From a Home screen, tap
➔
Music Player
.
Apps
My Files
Find, view, and manage folders and files, such as music files,
photo files, video files, and so on, stored on your tablet. If the
file is associated with an application on your device, you can
launch the file in the application.
Apps
➔
1. From a Home screen, tap
2. Tap a folder and scroll down or up until you locate a
file.
Note:
You may have to tap one or more subfolders before you
encounter files.
3. Tap a file to launch it in the associated application, if
se
the file is associated with an application.
nl
Applications and Widgets 182
My Files
.

l
y
4. While browsing files, use these controls: 5. To view a photo file:
•
Up
: Display a higher directory.
Search
: Use the keyboard to enter a search term.
The current folder is searched and results are
displayed. Tap
Display mode
each file.
Root
: Display the root directory.
X
to remove the search field.
: Enable or disable thumbnails for
Tap the file.
The Gallery app is used to open the photo.
For more information, refer to
on page 117.
6. To view a video file:
•
Tap the file.
The Video player is launched and plays the video.
For more information, refer to
“Viewing Photos and Videos”
“Video Player”
on page 113.
183
Add Folder:
Mark files
next to the folder to select all files in the folder.
Then tap send, copy, cut, or delete in the
Application bar.
Add a new folder in the current folder.
: Tap the box to the left of each file or
nterna
se
nl

l
y
Navigation
Use Google Navigation to find a destination and to get
walking or driving directions.
Note:
You must first create a Wi-Fi connection to use
Navigation.
Apps
1. From a Home screen, tap
Accept
2. Ta p
message.
3. Tap in the Application bar and then tap either
Driving
you want.
4. Tap
(Driving) or a satellite image (Walking) of your area.
to accept the Google Maps Navigation beta
or
Walking
to describe the type of directions
Map
in the Application bar to see a map
➔
Navigation
5. Ta p
.
6. To find a destination, tap an option:
Menu
• Route options
and
highways
•Settings
: Display Navigation settings:
–
Screen dimming
lets the screen dim between instructions to save power.
–
Terms, privacy & notices
conditions, Privacy policy, and Legal notices.
•Help
: Display Navigation help information.
• Speak destination
destination.
• Type destination
•Contacts
: Choose a destination from a contact record.
•Starred places
favorites.
• Recent destinations
option is not available until a destination has been requested.
for the following options:
: Set whether directions should
Avoid tolls
.
: Enable or disable screen dimming, which
: View Google’s Terms and
: Say the name or address of your
: Enter the destination.
: Choose destinations you have marked as
: Choose from recent destinations. This
Avoid
nterna
se
nl
Applications and Widgets 184
l
y
7. While navigating, tap:
ROUTE AND ALTERNATES
about the current route and alternate routes.
Directions List
list.
SHOW MAP
viewing ROUTE AND ALTERNATES or the
directions list.
Layers
: Choose map layers to display.
185
: View information
: View directions in a step-by-step
: Return to the map view after
nterna
Menu
: To display these options:
•
Turn off voice/Turn on voice
disable voice-guided prompts.
•
Exit navigation
discard route information.
•
Search
•
Set destination
destination.
•
Settings
and view Google’s Terms and conditions,
Privacy policy, and Legal notices.
•
Help
Photo Editor
To perfect any photos stored on your tablet, use Photo editor
to crop, rotate, resize, adjust color and contrast, and much
more.
For more information, refer to “Photo Editor” on page 121.
se
From a Home screen, tap
➔
Photo editor
nl
: Close Navigation and
: Find a location.
: Choose or enter a
: Enable or disable screen dimming
: Display Navigation help information.
.
Apps
: Enable or
 Loading...