

Samsung SGH-D880 Schematics Direy

11. Disassembly and Assembly Instructions
11-1. Disassembly Instructions
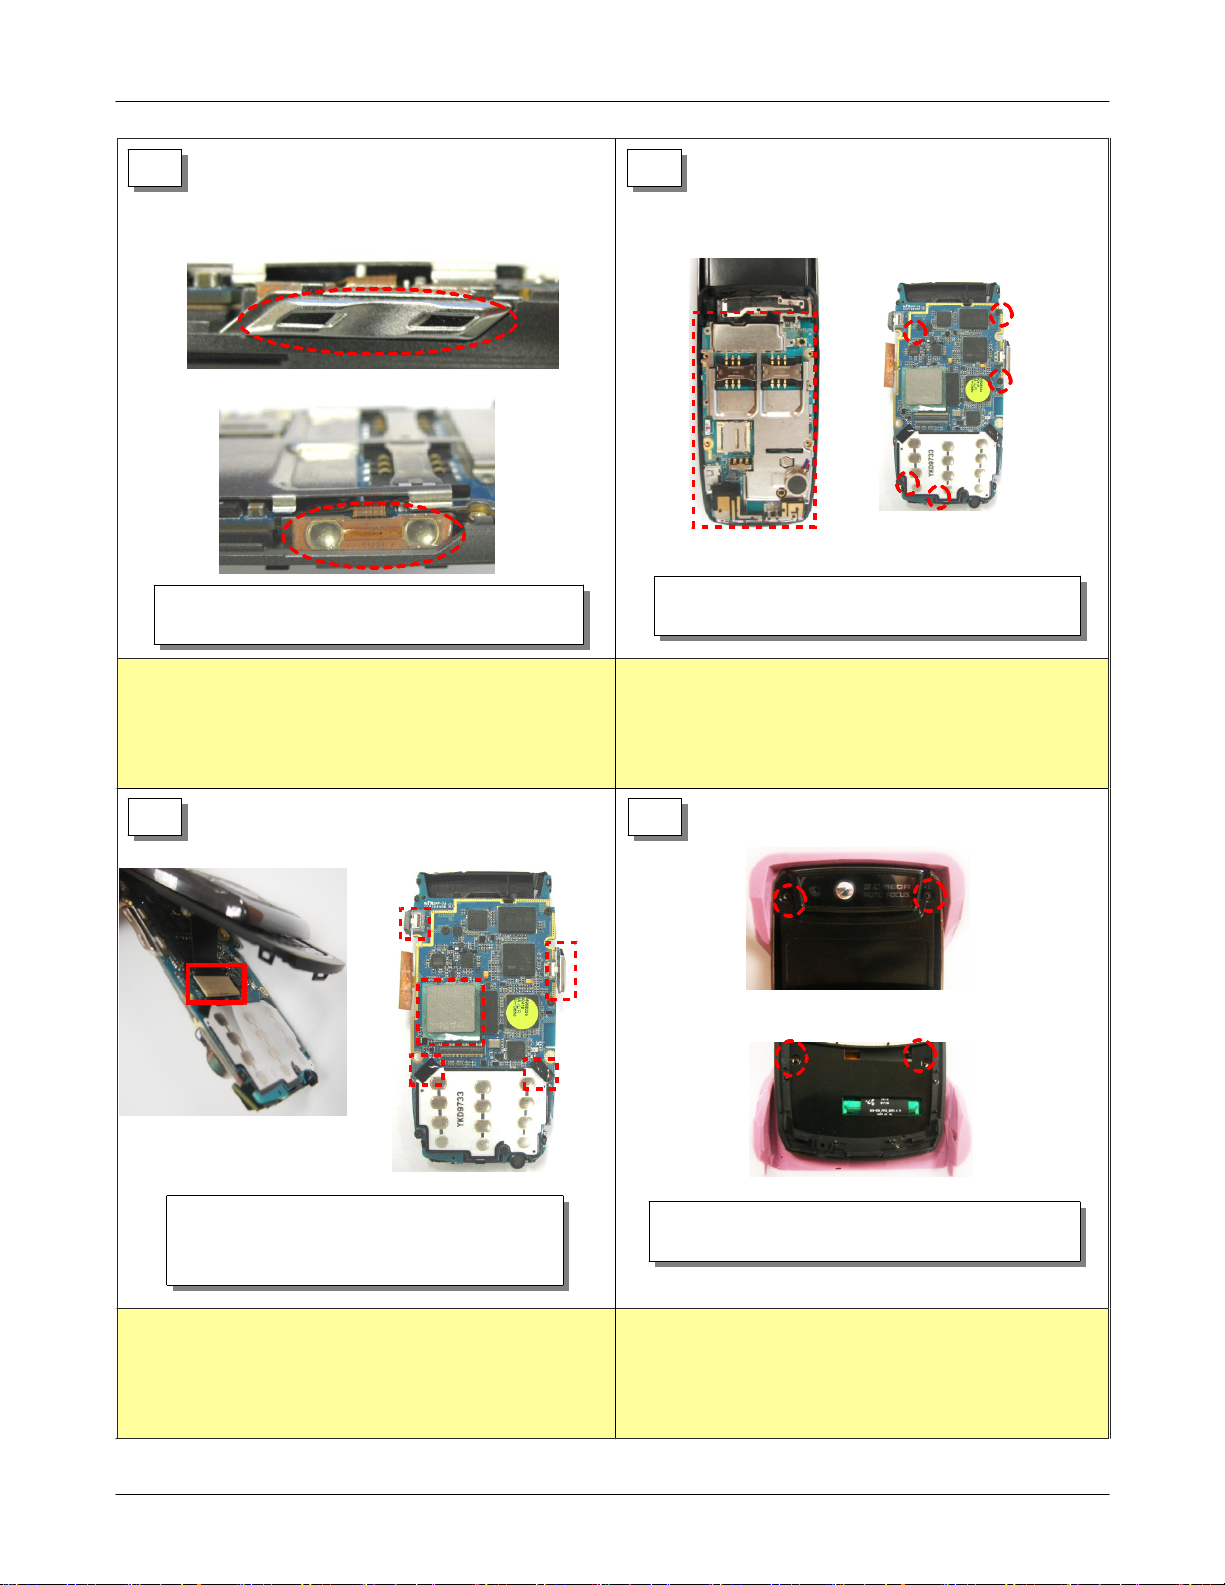
1 2
1) Remove the Battery and two SIM card.
3 4
1) Separate the Rear and the Front
with holding bottom of the Rear.
1)Remove 4 screws of the Rear
1) Don't scratch the surface of the handset.
Please pay attention.
1) Separate the center hook and side both
hooks with holdng the bottom of the Rear
1) Don't devote heavily the top of the Rear. 1) Be careful to break the center and both side Hooks.
11-1
SAMSUNG Proprietary-Contents may change without notice
This Document can not be used without Samsung's authorization
Disassembly and Assembly Instructions
5 6
1) Take off the Volume from the Front
2) Take off the Volume Key-FPCB from the Front
1) Take off the PBA from the Front.
2) Remove 5 screws of the PBA
1) Be careful to damage the FPCB. 1) Be careful to damage the FPCB.
7 8
1) Separate Slide-FPCB and the Main PBA.
2) Take off the shading tape from the PBA.
3) Separate camera and sim changing key
1) Be careful to damage the SLIDE FPCB.
2) Be careful to damage the DOME SHEET.
SAMSUNG Proprietary-Contents may change without notice
This Document can not be used without Samsung's authorization
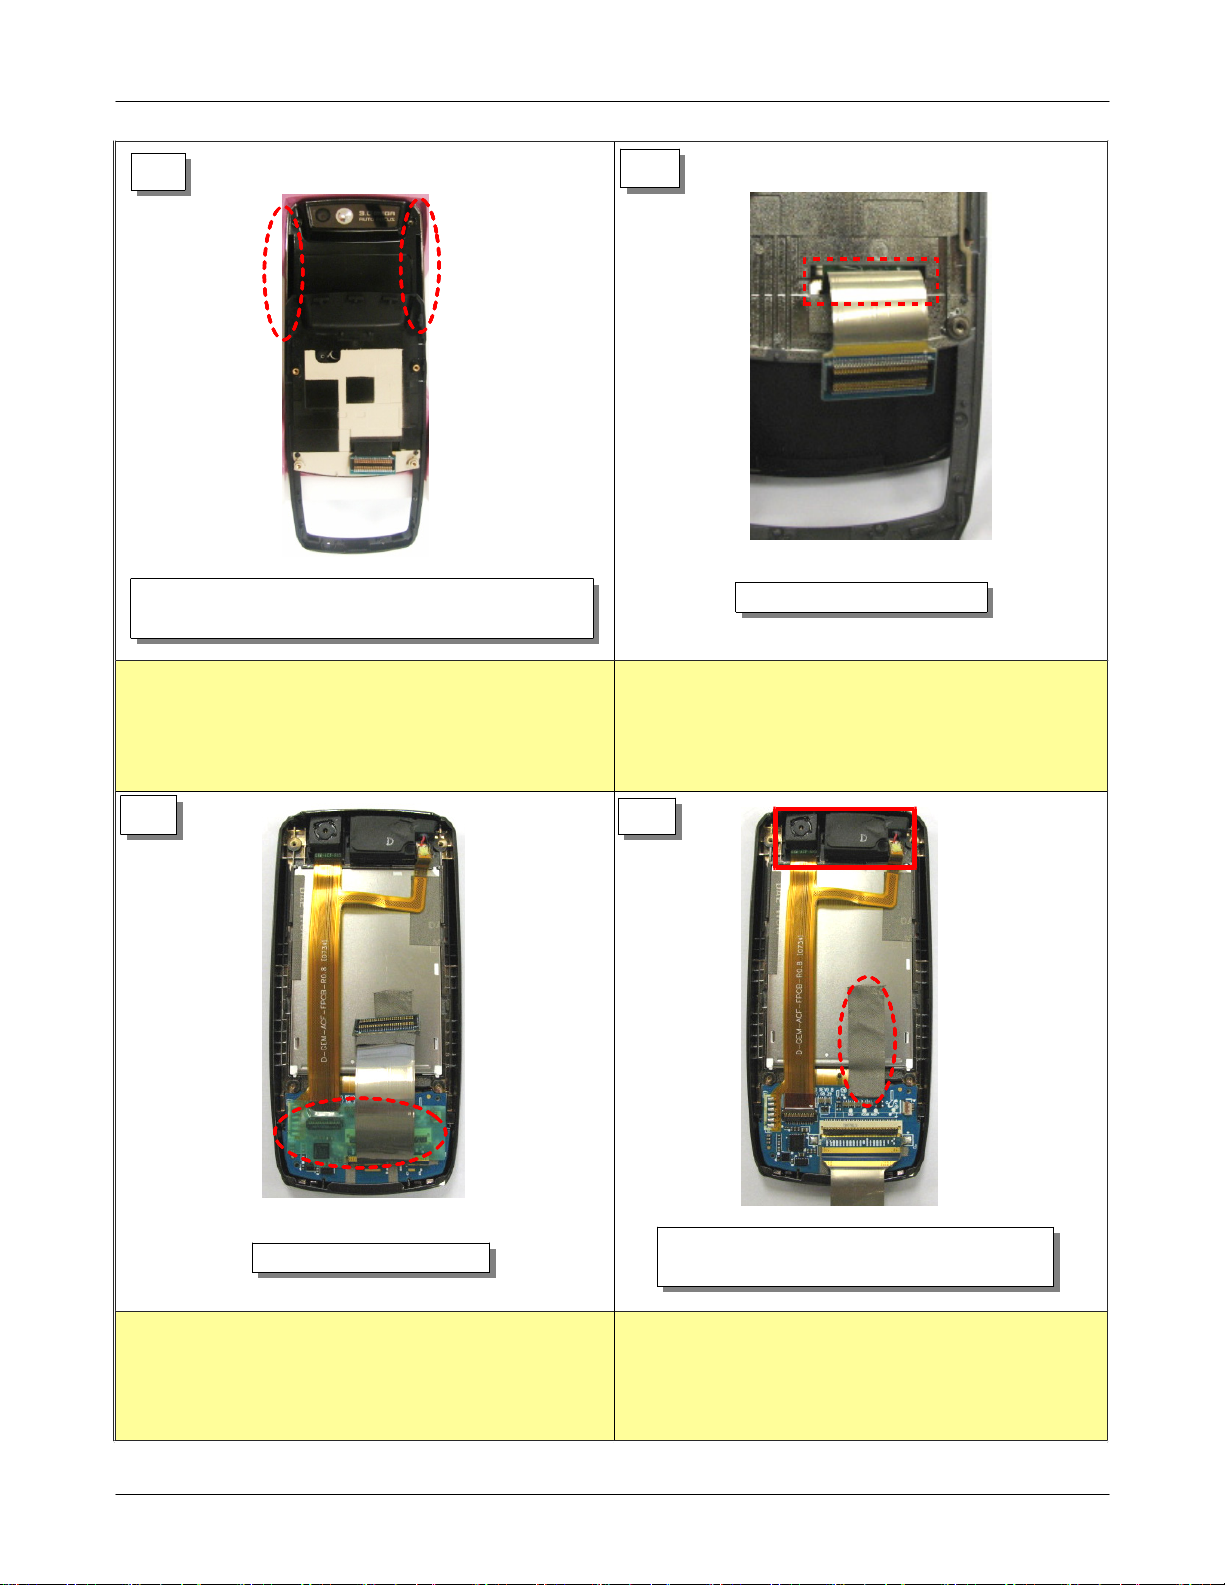
1) Remove 2 screwcaps of the lower.
1) Remove 4 screws of the Front.
1) Don't scratch the surface of the handset.
Please pay attention.
11-2
Disassembly and Assembly Instructions
9
1) Separate the UPPER and LOWER with pushing the
UPPER ahead.
1) Be careful to damage the Hooks of the Front.
10
1) Pass through the F-PCB
1) Be careful to damage the S-FPCB
2) Pass through the S-FPCB with closing the Slide.
11
1) Remove the green tape
1) Don't scratch the surface of the handset.
Please pay attention.
12
1) Separate the camera and apeaker
2) Remove the Conductive tape
1) Don't scratch the surface of the handset.
Please pay attention.
11-3
SAMSUNG Proprietary-Contents may change without notice
This Document can not be used without Samsung's authorization
 Loading...