

Samsung SDC-007 Precautions

Samsung Electronics 1-1
The program is to adjust a camera and diagnose a fault when the unit is serviced. The program isn't provided for customers and only service center to check the camera setting without disassembling and read/modify the camera control value. Some functions not required in service center aren't used.
1. Provision for program
The program isn't provided with the additional disc and must be downloaded from Single.
2. System Requirements
1. IBM compatible PC (pentium standard)
2. Windows 95 & Mouse
3. Video Card supported more than 256 color
4. 5MB Hard disk space
3. Program Functions
1. SSFDC(SMART MEDIA) FORMAT, DELETE ALL
2. FUNCTION KEY TEST
3. LCD PIXEL TEST
4. LOGO TEST
5. CONTROL LED TEST, LCD PANEL TEST
6. MACRO MODE CHECK, VIDEO JACK TEST, STROBE (FLASH) JACK CHECK
7. OSD (ON SCREEN DISPLAY) OFF
8. PC SHOT, SELF TIMER SHOT
9. AE ADJUSTMENT
10. 3100K, 5100K WHITE BALANCE ADJUSTMENT
11. JPEG, THUMBNAIL DOWN LOAD
12. BACK FOCUS ADJUSTMENT MODE
13. POWER CONSTANT ON
14. RS-232C CHANGER TEST
15. NTST, PAL CONVERT ADJUSTMENT
4.Installing Program
1. Unzip the Dscstudi.zip file downloaded from Single in a folder.
2. Execute the Setup.exe file in the unzipped files.
3. Install as dialog box's message.
4. After completing the installation, check to run the DSCStudio.exe file in the folder where program is
installed.
* Generally, it is created in C:\Program files\Samsung\DSCStudio.
1. Introduction
1-1. Camera Adjustment Program
1-1-1. About the Program
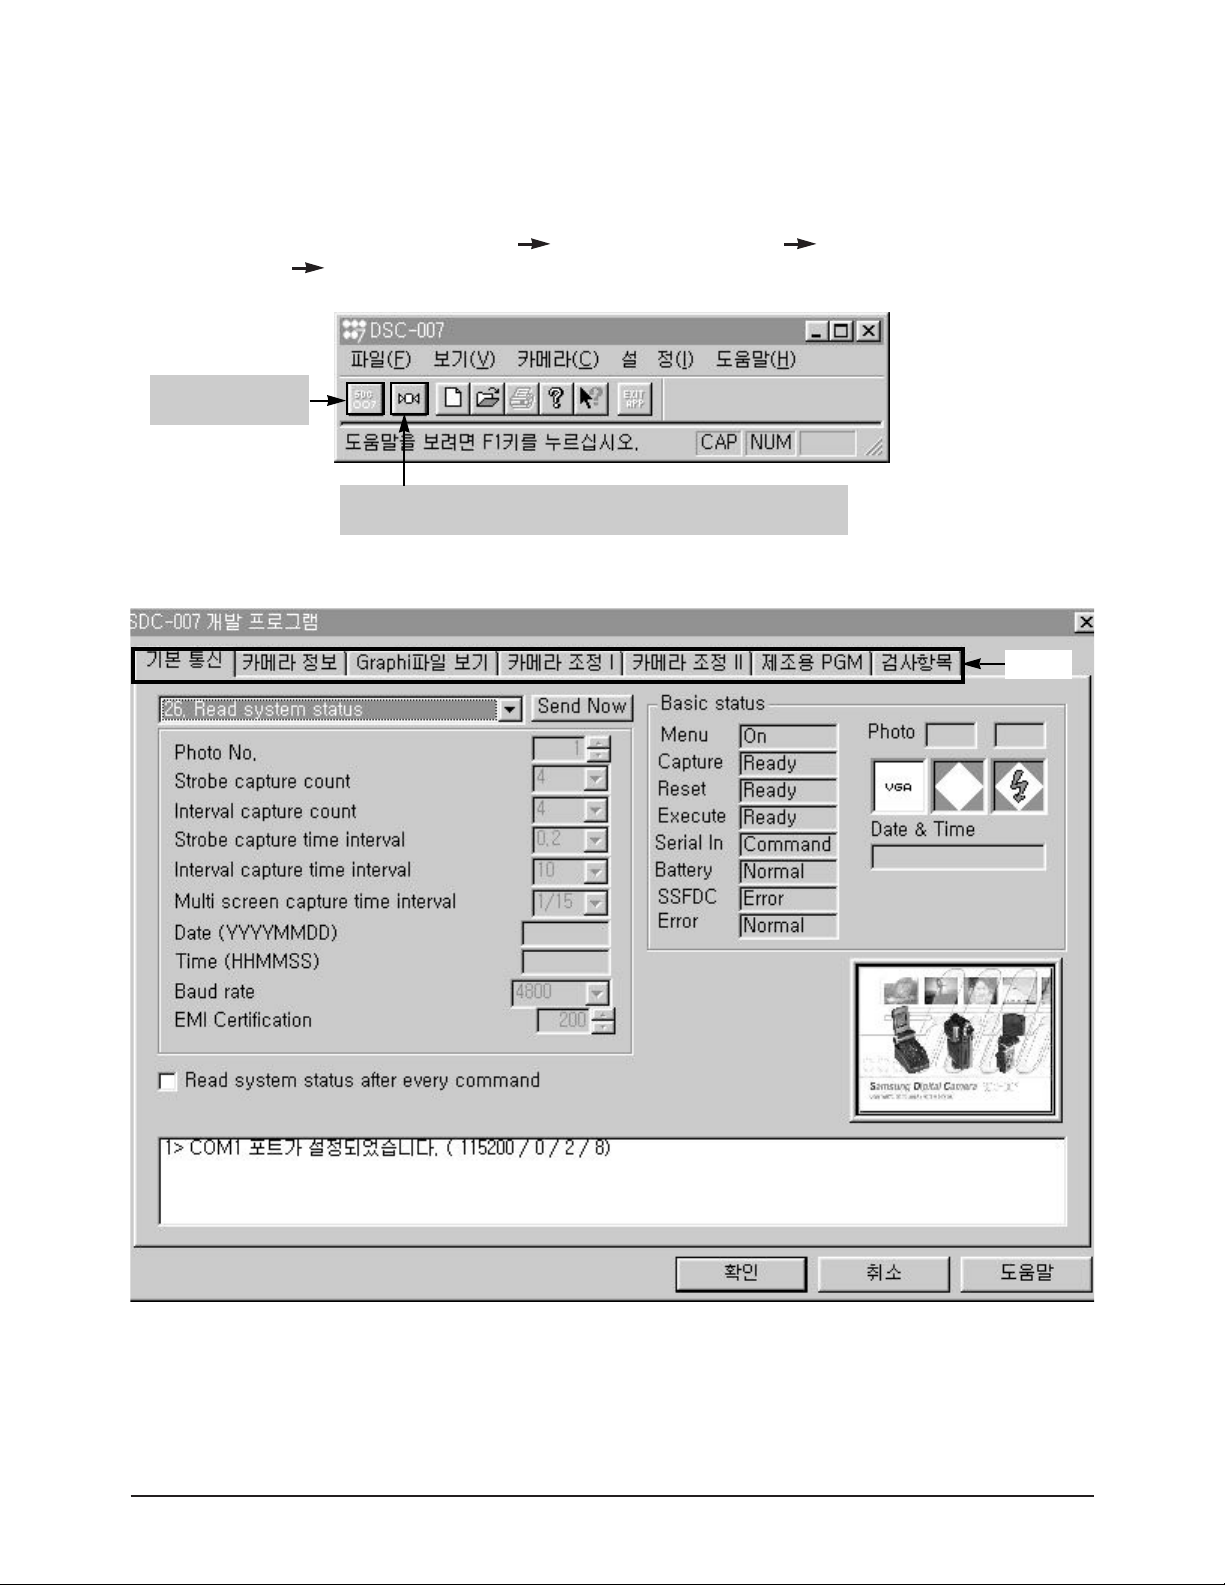
(Figure 2) Basic communication dialog box
(Figure 1) Initial screen dialog box
¥ Program start : Turn on PC for Windows Connect PC with camera Power on camera
Execute DSCStudio.exe in Windows
About TAP : ¥ Camera Adjustment I : (see Figure 4) ¥Camera Adjustment II : (see Figure 5)
¥ View Graphic File : (see Figure 6) ¥Test Options : (see Figure 7)
¥ PGM for Manufacturing : (see Figure 8)
Samsung Electronics1-2
Introduction
1-1-2. DSCStudio Description
Start Dos studio.
(see Figure 2)
Set up Communication port and communication speed.
(see Figure 3)
TAP
Samsung Electronics 1-3
Introduction
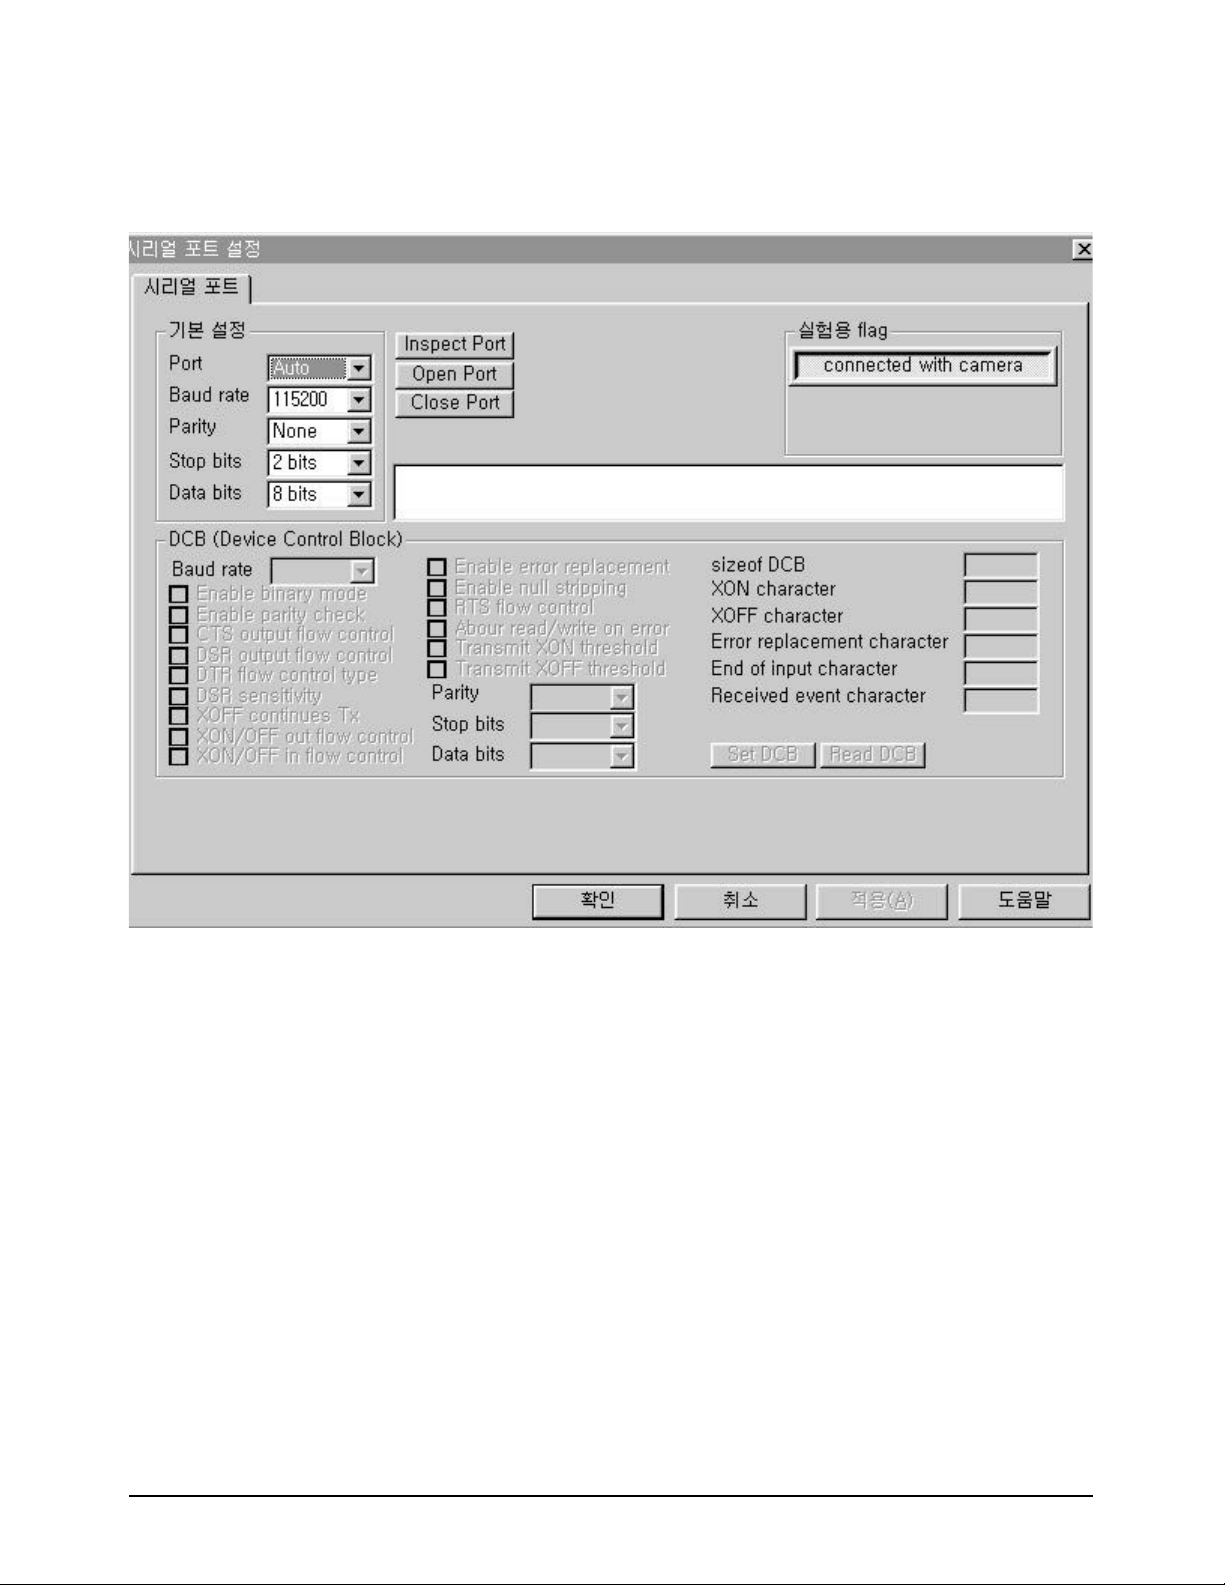
¥ Port setting
1. Port : Select the port you want.
Auto : Select the port automatically.
2. Baud rate: Set up serial speed.
3. Parity, stop bit and Data bit are a communication agreement.
Default value Parity : none Stop bit : 2bit Data bit : 8 bit
4. Inspect port : Check the port used for serial port.
5. OPEN PORT : Open the port.
6. CLOSE PORT : Close the port.
7. Flag for test
CONNECTED WITH CAMERA : Execute the program when it is connected with camera.
DISCONNECTED WITH CAMERA : Execute the program when it is disconnected with camera.
(Figure 3) Setup of Serial Port
 Loading...