

Page 1
Troubleshooting
Samsung Electronics
Service Manual
6-1
6
6
6. Troubleshooting
6.1 Printing Problems – Causes and Solutions
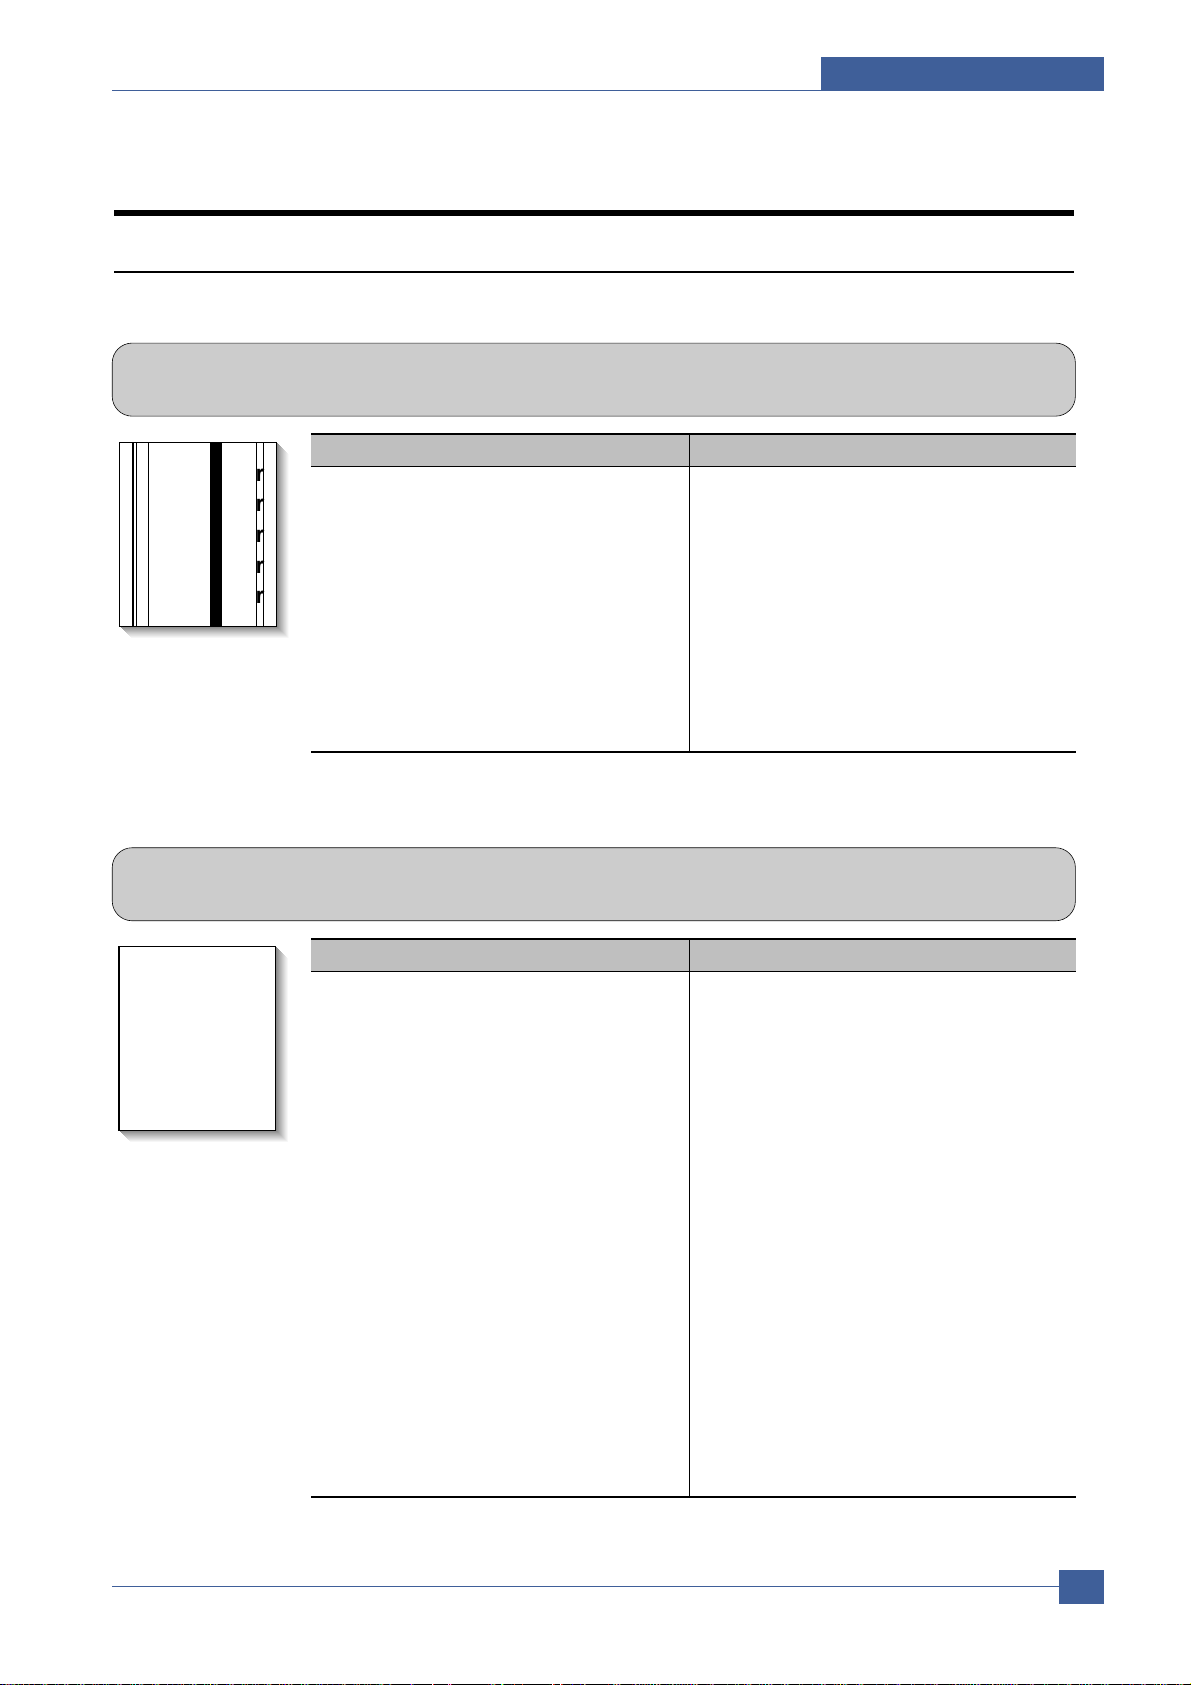
6.1.1 Vertical Black Lines and Bands
• Description
1. Straight thin black vertical lines occur in the printing.
2. Dark black vertical bands occur in the printing.
Digital Printer
Digital Printer
Digital Printer
Digital Printer
Digital Printer
Check and Cause Solution
1. Damaged developer roller, deformed
Doctor-blade in the Toner cartridge.
2. Scratched surface of the charge roller in
the toner cartridge.
1. Replace the toner cartridge and test
again.
2. Replace the toner cartridge and test
again.
6.1.2 Vertical White Line
• Description White vertical voids in the image.
Digital Printer
Digital Printer
Digital Printer
Digital Printer
Digital Printer
Check and Cause Solution
1. 1. Contamination of the window or
internal lenses of LSU mirror.
2. Foreign object inside the toner cartridge
or low toner.
3. Foreign object, contamination or burr on
the edge of the toner cartridge window.
4. If the fuser is defective, voids occur
periodically at the top of a black image.
5. Contamination of the OPC drum.
1. Clean the LSU window with recommended
cleaner (IPA) Clean the window with a
clean cotton swab. If dirt is inside the LSU
– replace LSU.
2. Replace the toner cartridge.
3. Clean the exposure window.
4. Open the front cover and check the ribs
that correspond to the position of the
voids. Remove if found.
5. If the problems are not solved, replace
the toner cartridge.
Page 2

Samsung Electronics
Service Manual
Troubleshooting
6-2
6.1.3 Horizontal Black Bands
• Description
1. Dark or blurry horizontal stripes occur in the printing periodically.
(These may occur at regular intervals down the page.)
Digital Printer
Digital Printer
Digital Printer
Digital Printer
Digital Printer
Check and Cause Solution
1. Bad contacts on the toner cartridge high
voltage terminals.
2. The rollers in the toner cartridge may be
contaminated.
Charge roller = 37.8 mm
Supply roller = 44.9 mm
Develop roller = 35.2 mm
Transfer roller = 45.3 mm
1. Clean all HV terminals on the cartridge and
on the set frame. Ensure all toner or paper
dust particles are removed.
2. Clean the right Gear that has relatively
small tooth gap on the OPC.
3. If the problem persists replace the toner
cartridge.
6.1.4 Black/White Spot
• Description
1. Dark or blurry black spots occur periodically in the printing.
2. White spots occur periodically in the printing.
Digital Printer
Digital Printer
Digital Printer
Digital Printer
Digital Printer
Check and Cause Solution
1. If dark or blurry black spots occur periodically, the rollers in the Developer may be
contaminated with foreign matte or paper
particles.
( Charge roller : 37.8 mm interval
OPC drum : 75.5 mm interval)
2. If faded areas or voids occur in a black
image at intervals of 75.5 mm, or black
spots occur elsewhere, the OPC drum
surface is damaged.
3. If a black image is partially broken, the
transfer voltage is abnormal or the
transfer roller's life has expired.
1. Print several OPC cleaning Mode Prints
and then run the Self-test 2 or 3 times.
2. 75.5 mm repetition: Examine the surface of
the OPC drum and carefully clean with a
soft, lint free cloth. If unsuccessful replace
the cartridge.
37.8mm repetition: Replace the toner cartridge
3. The transfer roller guarantees 50,000
sheets printing. If the roller's life is expired,
replace it.
Note. Cleaning the inside of the set to
remove excess toner particles or paper
dust will reduce the occurrence of this
problem..
Page 3

Troubleshooting
Samsung Electronics
Service Manual
6-3
6.1.5 Light Image
• Description The printed image is light, with no ghost.
Digital Printer
Digital Printer
Digital Printer
Digital Printer
Digital Printer
Check and Cause Solution
1. Toner Save mode enabled
2. Develop roller is contaminated or the
toner cartridge is almost empty.
3. Ambient temperature is below than 10°C.
4. Bad contact caused by dirty terminals on
the toner cartridge or set.
5. Abnormal output from the HVPS.
(Run EDC mode – see sections 6.1.2
and 6.1.3)
1. Ensure the Toner Save mode is off. Check
set and driver settings.
2. Replace the toner cartridge and try to print
out again.
3. Wait 30 minutes after printer is powered on
before you start printing.
4. Clean the cartridge and set contacts.
Generally clean dirt from inside the set.
5. Replace the HVPS if the problems are not
solved by the above four instructions.
6.1.6 Dark Image or a Black
• Description The printed image is dark.
Digital Printer
Digital Printer
Digital Printer
Digital Printer
Digital Printer
Check and Cause Solution
1. No charge voltage in the engine board.
2. Charge voltage fault due to bad contact
between toner cartridge and set contacts.
3. VD0 signal of the Main PBA is Low state.
1. Check the state of the connector which
connects the engine board and HVPS.
2. Clean the high voltage charge terminals.
Note if 1 and 2 do not resolve the problem
and the problem persists replace the
HVPS.
3. Replace the LSU Unit or Main PBA.
Page 4
Samsung Electronics
Service Manual
Troubleshooting
6-4
6.1.7 Uneven Density
• Description Print density is uneven between left and right.
Check and Cause Solution
1. The pressure force on the left and right
springs of the transfer roller is not even,
the springs are damaged, the transfer
roller is improperly installed, or the transfer roller bushing or holders are damaged.
2. The life of the Toner cartridge has
expired.
3. The toner level is not even on the toner
cartridge roller due to the damaged blade
or low toner.
1. Replace both the left and right bush and
spring assemblies.
2. Replace the toner cartridge and try to print out
3. Gently shake the toner cartridge and try
printing again. If the problem persists
replace the toner cartridge.
6.1.8 Background
• Description Light dark background appears in whole area of the printing.
Digital Printer
Digital Printer
Digital Printer
Digital Printer
Digital Printer
Check and Cause Solution
1. Printing large quantities of low coverage
(2%) pages or the printer has not been
used for a long time.
2.
Is a recycled toner cartridge be
used?
3.
Has the life span of the toner
cartridge ended?
4.
Is the movement(Up and Down) of
the transfer roller smooth?
5. Is the HVPS normal?
1. The toner cartridge is basically designed to
print 3,000 sheets with 5% image. If it
prints more than 3,600 sheets with 2%
coverage, a background can occur.
2. The A/S is not guaranteed if using a recycled toner cartridge.
Note try shaking the toner cartridge gently
from side to side. If the problem persists
replace the toner cartridge.
3. Replace the toner cartridge when its life is
expired.
4. Clean the transfer roller bushes.
5. Clean the high voltage charge terminals.
If this does not resolve the problem replace
the HVPS.
Page 5
Troubleshooting
Samsung Electronics
Service Manual
6-5
6.1.9 Ghost (1)
• Description Ghost occurs at 75.5 mm intervals of the OPC drum in the whole printing.
Digital Printer
Digital Printer
Digital Printer
Digital Printer
Digital Printer
Digital Printer
75.5 mm
Check and Cause Solution
1. Bad contacts caused by contamination
from toner particles between high voltage
terminal in the main body and the electrode of the Toner cartridge.
2. Bad contacts caused by contamination
from toner particles between high voltage
terminal in the main body and the one in
the HVPS board.
3. The life of toner cartridge is expired.
4. Transfer roller life (50,000 sheets) has
expired.
5. Low ambient temperature (below 10°C).
1 and 2. Clean all HV contacts, If problem
persists replace the HVPS.
If problem still persists replace the Main PBA
3. Replace the toner cartridge and try to print
out.
4. Check the transfer roller lifetime and
replace it.
5. Wait about 30 minutes after power on
before using printer.
6.1.10 Ghost (2)
• Description
Ghost occurs at 75.5mm intervals of the OPC drum in the whole printing.
(When printing on card stock or transparencies using manual feeder)
Digital Printer
Digital Printer
Digital Printer
Digital Printer
Digital Printer
Digital Printer
75 mm
Check and Cause Solution
When printing on card stock, thicker than
normal paper or transparencies, such as
OHP, a higher transfer voltage is required.
Ensure that the correct paper type is selected
in the printer driver or application software.
Remember to set back to normal paper after
use.
Page 6

Samsung Electronics
Service Manual
Troubleshooting
6-6
6.1.11 Ghost (3)
• Description Ghost occurs at 64 mm intervals.
Digital Printer
Digital Printer
Digital Printer
Digital Printer
Digital Printer
Digital Printer
64 mm
Check and Cause Solution
1. Disassemble the fuser and remove any
contamination on the rollers. Clean any
contamination from between the
Thermistor and the Heat roller. (Caution:
Take care not to deform the rollers.)
Fuser contamination.
6.1.13 Stains on the Face of the Page
• Description The background on the face of the printed page is stained.
Digital Printer
Digital Printer
Digital Printer
Digital Printer
Digital Printer
Check and Cause Solution
1. Toner leakage due to improperly sealed
toner cartridge.
1. Replace the toner cartridge.
2. If the transfer roller is contaminated, run
PC Cleaning Mode Print 2 or 3 times and
then perform Self-Test 2 or 3 times to
remove contamination.
6.3.12 Ghost (4)
• Description A White ghost occurs in a black image printing at 35.2mm intervals.
Digital Printer
Digital Printer
Digital Printer
Digital Printer
Digital Printer
Digital Printer
35.5 mm
Check and Cause Solution
1. Problem in the toner cartridge, replace the
toner cartridge and try to print out again.
2. Check the HVPS supply voltage. Clean all
HV terminals on the cartridge and on the
set. Replace the HVPS if the problem
persists.
1. The life of the developer may be expired.
2. Abnormal output from the HVPS.
(Run EDC mode – see sections 6.1.2)
Page 7

Troubleshooting
Samsung Electronics
Service Manual
6-7
6.1.14 Stains on Back of Page
• Description The back of the page is stained at 45.3 or 75.3 mm intervals.
Digital
Digital Pri
Digital Printer
Digital Printer
Digital Printer
Check and Cause Solution
1. 45.3mm : Transfer roller is contaminated.
2. 75.3mm : Pressure roller is contaminated.
1. Perform the OPC Cleaning Mode Print 2 or
3 times. Run Self-Test to remove the
contamination from the transfer roller.
Note. Replace the transfer roller if
contaminated severely.
2. Disassemble the fuser and clean the
H/R(Heat Roller) and P/R(Pressure roller).
Check and clean the area between the
H/R and the Thermistor. (Caution: Take
care not to deform the rollers.)
6.1.15 Blank Page Print out (1)
• Description Blank page is printed.
Check and Cause Solution
Bad ground contacts in OPC and/or toner
cartridge.
1. Check if the Ground-OPC or the OPC
Ground Zener diode are defective or open
circuit. (set inside left side).
2. Remove contamination of the terminals on
the toner cartridge and the unit.
6.1.16 Blank Page Print out (2)
• Description
1. Blank page is printed.
2. One or several blank pages are printed.
3. When the printer turns on, several blank pages print.
Check and Cause Solution
1. Abnormal solenoid.
1. Perform the engine self test using TECH
Mode to check if the Solenoid is normal.
If the problem persists replace the main
PBA
Page 8

Samsung Electronics
Service Manual
Troubleshooting
6-8
6.2.1 White Copy
• Description
Blank page is printed out when copying.
6.2 Copy Problems
6.2.2 Black Copy
• Description
Black page is printed out when Copying.
Check and Cause Solution
1. Check for CIS problem on the Main PBA.
2. Check shading profile.
1. Check the CIS harness is properly connected.
2. Redo shading profile in the tech mode.
Check and Cause Solution
1. Check the Scanner Cover is properly closed.
2. Check shading profile.
3. Check white/black reference voltage on Main PBA. e.q
• CIS_SI, CIS_CLK at CN8
• Or Check the FFC
1. Room light can pass through a thin original.
2. Redo shading profile in the tech mode.
3. Replace CN8 if it is defective.
• CN8-Pin6(CIS-SI)
• CN8-Pin7(CIS-CLK)
Page 9

Troubleshooting
Samsung Electronics
Service Manual
6-9
6.2.3 Abnormal noise
• Description There is noise from the Platen when copying.
Check and Cause Solution
1. Check the Scan Motor and gesr.
2. Check the Motor Driver on Driver PBA.
6.2.4 Defective Image Quality
• Description The copied image is excessively light or dark
Check and Cause Solution
1. Check shading profile.
2. Check the gap between original and scanner
glass.
3. Check printing quality.
1. Redo shading profile in the tech mode.
2. Agap of more than 0.5 mm can cause a blurred
image. Ensure cover close correctly. Replace as
necessary .
3. See "Print" troubleshooting.
1. Check for correct assembly of gear and motor.
Ensure no parts are fouling and there are no foreign
objects in the mechanism or scanner path. Replace
any worn parts
2. Replace the main PBA.
Page 10

Samsung Electronics
Service Manual
Troubleshooting
6-10
6.3 Paper Feed problems – Causes and Solutions
6.3.1 Wrong Print Position
• Description Printing begins at wrong position on the paper.
Check and Cause Solution
Wrong sensor timing caused by defective feed sensor
actuator.
Replace the defective actuator
6.3.2 JAM 0
• Description
1. Paper does not exit from the cassette.
2. Jam-0 occurs when the paper feeds into the printer.
PTL
P
I
C
K
/
R
PR
CR
DR
SR
TR FR
Empty Sensor
OPC
L S U
Fuser
Toner Cartridge
EXIT
Sensor
Feed
Sensor
MP Sensor
Check and Cause Solution
1. Check the Solenoid by using Tech
Mode.
2. Check cassette/MP knock-up plate
and springs.
3. Check paper separator pad
4. Check the pick up roller for
contamination and correct assembly.
5. If continuous clusters occur, check all
rollers between pickup and registration
sensor.
6 If the paper feeds into the printer and
Jam 0 occurs, perform Tech Mode to
check feed sensor.
1. Replace the solenoid.
2. Repair / replace as required
3 Clean with soft cloth dampened with
IPA (Isopropyl Alcohol) or water.
Replace if required.
4. Clean with soft cloth dampened with
IPA (Isopropyl Alcohol) or water.
Replace if required
5. Ensure all rollers are clean and free to
operate correctly.
6. Check the SMPS PBA, Main PBA and
all connections. Replace any faulty
parts or the
Page 11

Troubleshooting
Samsung Electronics
Service Manual
6-11
6.3.4 JAM 2
• Description
1. Recording paper is jammed in front of or inside the fuser.
2. Recording paper is stuck in the discharge roller and in the fuser just after passing through the
Actuator-Feed.
Check and Cause Solution
1. If the paper is completely fed out of
the printer, but Jam 2 occurs: The
Exit sensor may be defective.
• After the paper is completely
discharged the Exit sensor actuator
should return to its original position
to shut the photo-sensor. It may
stick open or return only slowly due
to contamination be paper debris or
foreign objects.
2. If the paper is rolled in the Fuser
Roller:
• This occurs when a Guide claw is
broken away, damaged or
deformed.
• It occurs when the Spring of a
Guide claw is broken or damaged.
• It occurs when the Heat-Roller or
Pressure-Roller is seriously
contaminated with toner.
1. Check if the exit sensor actuator is
defective.
• Check if the actuator exit is deformed
(Check if the lever part is deformed).
• Check whether burrs occur in the
assembly part of the exit actuator
and if the actuator operates smoothly.
• Check if foreign objects or paper
debris are preventing the correct
operation of the actuator.
2. If the paper is stuck in the fuser :
disassemble the fuser and remove the
jammed paper, and clean the surface
of the pressure roller with dry gauze.
Check all ribs, claws and springs.
6.3.3 JAM 1
• Description
1. Paper is jammed in front of or inside the fuser.
2. Paper is stuck in the exit roller and in the fuser just after passing through the Actuator-Feed.
Check and Cause Solution
1. If the recording paper is jammed in
front of or inside the fuser.
2. If the recording paper is stuck in the
exit roller and the fuser just after
passing through the Actuator-Feed,
Feed Actuator may be defective.
1. Replace the Exit-Sensor, SMPS or
main PBA.
2. Reassemble the Actuator-Feed and
Spring-Actuator if the movement is
bad. Replace if necessary.
Fuser
EXIT
PR
Sensor
Fuser
EXIT
PR
Sensor
Empty Sensor
L S U
CR
OPC
TR FR
DR
SR
PTL
Feed
Sensor
Toner Cartridge
MP Sensor
R
/
K
C
I
P
L S U
Empty Sensor
CR
DR
OPC
PTL
TR FR
Toner Cartridge
SR
Feed
Sensor
R
/
K
C
I
P
MP Sensor
Page 12

Samsung Electronics
Service Manual
Troubleshooting
6-12
6.3.5 Multi-Feeding
• Description Multiple sheets of paper are fed at once.
Check and Cause Solution
1. Check that the paper size guides are set correctly
(cassette and MPF tray).
2. Solenoid malfunction (the solenoid does not work
properly).
3. Friction Pad is contaminated.
4. Paper has a rough surface texture.
1. Adjust paper guides.
2. Replace the solenoids or PBAas appropriate.
3. Clean the friction pad rubber with a soft cloth
dampened with IPA (Isopropyl Alcohol) or water.
4. Use paper with a smother surface finish.
6.3.6 Paper rolled in the fuser
• Description Paper rolled around fuser rollers or ‘Concertina’ jam
Check and Cause Solution
1. Contamination of the pressure roller or heat roller.
2. Damaged or deformed ribs, claws or springs.
1. After disassembling the fuser, clean contamination
from between the heat roller and the thermistor and
also clean contamination from the pressure roller.
Clean the surface of the rollers with IPA or water
2. Check for damage or deformation of the print claws
and the holder plate claws, and repair or replace as
appropriate.
Page 13

Troubleshooting
Samsung Electronics
Service Manual
6-13
6.3.7 Paper rolled on the OPC Drum
• Description Paper is rolled up in the OPC.
Check and Cause Solution
1. Paper is too thin.
2. The face of paper is curled.
1. Use paper that conforms to the printer specification.
2. Ensure paper is stored properly to prevent curl.
Note. To remove paper rolled in the OPC.
• Remove the toner cartridge from the set, taking
care not to touch the green surface. Use the
gearwheel at the side to rotate the OPC drum and
pull the paper from the cassette.
• Clean fingerprints on the OPC gently with soft
tissue, taking care not to scratch the surface.
Page 14

Samsung Electronics
Service Manual
Troubleshooting
6-14
6.4 Printer Faults – Causes and Solutions
6.4.1 Fuser Error
• Description
A message "Open Heat Error/Over heat/Heating Error' is displayed in the LCD panel.
Check and Cause Solution
1. Thermostat, fuser power cable or heat lamp is
open circuit.
2. Thermistor is open circuit.
3. Heat lamp ON/OFF test
4. Drive gear melted
1. Replace the whole fuser assembly if the
thermostat is open circuit.
2. Replace the whole fuser assembly if the thermistor sensor is faulty.
3. Replace the fuser.
6.4.2 LSU Error
• Description
A message “LSU Error” is displayed in the LCD panel.
Check and Cause Solution
1. LSU cable or connector faulty.
2. LSU motor is faulty.
3. Check the HSYNC signal.
Use
TECH
mode to test the LSU
- Replace the LSU
- Replace a main board if the same error persists after
replacing a LSU.
Page 15

Troubleshooting
Samsung Electronics
Service Manual
6-15
6.4.3 Fuser gear melts due to overheating causing Paper Jam.
• Description
Constant Jam where paper is entering Fuser unit.
Fuser rollers do not turn
Check and Cause Solution
1. Check the Heat Lamp, thermostat and thermistor 1. Use EDC Mode to test the fuser.
Replace Fuser unit
Replace SMPS or Main PBA as appropriate.
6.4.4 Paper Empty
• Description
Paper Empty is displayed in the LCD panel even when paper is loaded in the cassette.
Check and Cause Solution
1. Deformed paper sensor actuator or faulty sensor.
2. SMPS PBA or Main PBA is defective
3. Faulty cables or connectors.
1. Replace the defective actuator or sensor.
2. Replace the SMPS PBA or MAIN PBA as
appropriate.
Page 16

Samsung Electronics
Service Manual
Troubleshooting
6-16
6.4.5 Paper Empty without indication
• Description
The paper empty message does not appear in the LCD when the paper cassette is empty.
Check and Cause Solution
1. Deformed paper sensor actuator or faulty sensor.
2. SMPS PBA or Main PBA is defective
.
1. Replace the defective actuator.
2. Replace the SMPS PBA or MAIN PBA as
appropriate
6.4.6 Cover Open
• Description
The Cover Open message appears on the LCD even when the print cover is closed.
Check and Cause Solution
1. The ‘Open Cover’ microswitch may be stuck or faulty
2. The tab on the front cover may be damaged or broken
3. Check the connector and cables between Switch and
main PBA.
1. Use
TECH
mode(“cover sensor test”) to check
cover switch operation. Check and replace switch if
necessary .
2. Replace the front cover.
3. Replace the Main Control board or Cover Open
S/W as necessary.
Page 17

Troubleshooting
Samsung Electronics
Service Manual
6-17
6.4.7 No error message when the cover is open
• Description
The Cover Open message does not appears on the LCD even when the print cover is open.
Check and Cause Solution
1. The ‘Open Cover’ microswitch may be stuck or faulty
2. Check the connector and cables between Switch and
main PBA.
1. Use
TECH
mode(“cover sensor test”) to check
cover switch operation. Check and replace switch if
necessary .
2. Replace the Main Control board or Cover Open
S/W as necessary.
Page 18

Samsung Electronics
Service Manual
Troubleshooting
6-18
6.4.8 Defective motor operation
• Description
Main motor is faulty and paper does not feed into the printer, resulting in Jam 0'
Check and Cause Solution
1. The main motor harness or Motor PCB may be faulty. 1. Check the motor harnesses and connectors, replace
if defective.. If the problem persists replace the main
PBA.
Note Check motor operation using EDC Mode.
6.4.9 No Power
• Description
When system power is turned on the LCD panel does not come on.
Check and Cause Solution
1. Check if the power input and SMPS output are normal.
2. LCD panel does not come on but normal start up
sounds are heard.
3. After replacing SMPS display does not come on and no
start up sounds are heard.
1. Replace the power supply cord or SMPS. Check
power fuse and SMPS fuses replace if necessary.
2. Replace the OP panel.
3. Replace the main PBA panel.
Page 19

Troubleshooting
Samsung Electronics
Service Manual
6-19
6.4.10 Printed Vertical Lines become curved
• Description
When printing, vertical lines are not straight.
Check and Cause Solution
1. Check stability of 24V supply to LSU. 1. 24V stable - Replace LSU.
24V unstable replace SMPS, if the problem persists
replace the main PBA.
Page 20

Samsung Electronics
Service Manual
Troubleshooting
6-20
6.5 Toner Cartridge Service
Only toner cartridges supplied by Samsung should be used. Printing defects or set damage caused by the use of
non-approved toner cartridges or un-licensed toner refills are not covered by the guarantee.
6.5.1 Precautions on Safe-keeping of Toner Cartridge
Excessive exposure to direct light for more than a few minutes may cause damage to the cartridge.
6.5..2 Service for the Life of Toner Cartridge
If the printed image is light due to the toner supply becoming low you can temporarily improve the print quality by
redistributing the toner (Shake the toner cartridge), however you should replace the toner cartridge to solve the problem
permanently .
6.5.2.1 Redistributing Toner
When the toner cartridge is near the end of its life, white streaks or light print occurs. You can temporarily reestablish the
print quality by redistributing the remaining toner in the cartridge.
1. Open the Front Cover.
2. Lightly pushing the used cartridge down, pull it out.
Note : Help the environment by recycling your used toner car-
tridge. Refer to the recycling brochure packed with the
toner cartridge for details.
3. Unpack the new toner cartridge and gently shake it horizontally four or five times to distribute the toner evenly
inside the cartridge.
4. Save the box and the cover for shipping. Slide the new
toner cartridge in until it locks into place.
6.5.3 Standard of guarantee for consumable parts.
Please refer to User's Manual or Instructions on Printer Consumables SVC manual for the criteria for judging the quality
of consumable parts the standard of guarantee on those parts.
• Spotting a refilled cartridge by eye.
One way security screws are used in the manufacture of the cartridge – check if these are damaged.
Page 21

Troubleshooting
Samsung Electronics
Service Manual
6-21
6.5.4 Signs and Measures of Poor toner cartridge
Fault Signs Cause & Check Solution
Light image and
partially blank
image
(Cartridge life is
ended.)
T oner
Contamination
• The printed image
is light or dirty and
untidy .
• Parts of the image
are not printed.
• Periodically a "tick
tick" noise occurs.
• Toner
contamination of
the printed page at
regular intervals
down the page.
• Random Toner
contamination over
the whole or large
parts of the paper
surface.
1. If the image is light or dirty
and untidy - Shake the toner
cartridge and then recheck.
OK: Lack of toner, so the life
is nearly expired.
2. Some part of image is not
printed - Shake the toner
cartridge and then recheck.
(1)NG: clean the LSU window
with a cotton swab, then
recheck.
(2)OK: Lack of toner, so the
life is nearly closed.
3. Periodically a noise like "tick
tick" occurs - Measure the
time between ticks.
4. White vertical stripes on the
whole or part of the page :
Shake the toner cartridge and
then recheck. OK: Lack of
toner, so the life is nearly
expired
1. Contamination at regular
intervals.
(a)Check the distance
between contamination
marks.
(b)Check the appearance of
both ends of the toner
cartridge OPC drum.
2. Random page contamination.
(a) Check that the terminals
(contact points) of the toner
cartridge and the set are
clean.
(b) Check that the terminals
(contact points) of the toner
cartridge and the set are not
damaged.
1. All of 1, 2, 3
If image quality improves by
shaking, replace with a new
toner cartridge. Perhaps up to
100 pages left before out of
toner.
2. For item 2If image quality improves after
cleaning the LSU window then
the toner cartridge is normal.
(Contamination on the LSU
window has caused image
quality problems.)
3. For item 3If the time between ticks is
about 2 seconds, the toner
inside the toner cartridge is
almost exhausted.
( Purchase and replace with a
new toner cartridge. Perhaps up
to 200 pages left before out of
toner)
4. For item 3This is a phenomenon caused
by lack of toner, so replace the
toner cartridge.
1.(a) Refer to section 6.5
1.(b) If both ends of the OPC drum
are contaminated with toner:
Check no. of pages printed using
this cartridge – perhaps waste
toner collector is full.
2. Clean all HV contacts. If the
problem persists replace the
cartridge.
Digital Printer
Digital Printer
Digital Printer
Digital Printer
Digital Printer
Page 22

Samsung Electronics
Service Manual
Troubleshooting
6-22
Fault Signs Cause & Check Solution
White Black spot
Recycled product
• Light or dark black
dots on the image
occur periodically.
• White spots occur
in the image
periodically .
• Poor appearance of
the toner cartridge.
• Dirty or rough
printouts.
• Bad background in
the image.
1. If light or dark black dots
occur at regular intervals this
is because the toner cartridge
rollers are contaminated with
foreign substance or paper
particles.
(1)37.8mm interval : Charge
roller
(2)75.5mm interval : OPC
cycle
2. If white spots occur in a black
image at intervals of 75.5mm,
or black spots occur
elsewhere, the OPC drum is
damaged or foreign
substance is stuck to the
surface.
3. If a black and white or
graphic image is partially
broken at irregular intervals,
the transfer roller's life has
been expired or the transfer
voltage is abnormal.
1. Poor appearance of the toner
cartridge.
(a)Check for damage to label
and if different materials are
used.
(b)Check the appearance of
parts of the toner cartridge,
such as frame, hopper, screws
2. Unclean and rough printouts.
(a)Check that the terminals
(contact point) of the toner
cartridge and the set are clean.
(b)Check that the terminals
(contact point) of the toner
cartridge and the set are not
damaged.
1. For item 1 Run OPC Cleaning Mode Print
4-5 times repeatedly to remove
excess toner. Especially check
for foreign substances on the
OPC surface Clean with a clean
gauze moistened with IPA
Isopropyl Alcohol) take care not
to damage the OPC surface.
Never use other forms of alcohol.
2. For Item 2 If running OPC Cleaning Mode
Print 4-5 times does not resolve
the problem
: at intervals of 37.8mm - place
the toner cartridge.
: at intervals of 75.5mm – clean
OPC drum.
3. For item 3 - Change the transfer
roller because the life of the
transfer roller has expired.
(Check the transfer voltage and
readjust if necessary.)
1. For Item 1 the cartridge is judged
to be a recycled product (a) If there is any evidence of
disassembling the toner cartridge.
(b) If materials other than normal
parts of the toner cartridge are
added or substituted.
2. Clean all HV contacts. If the
problem persists replace the
cartridge.
Note If the cartridge is judged to be
recycled then these types of
problems can occur when the
toner cartridge is recycled over
2 times.
If ‘nearly empty’ cartridges are
collected for re-use this is
judged as recycling the toner
cartridge.
Digital Printer
Digital Printer
Digital Printer
Digital Printer
Digital Printer
Page 23

Troubleshooting
Samsung Electronics
Service Manual
6-23
Fault Signs Cause & Check Solution
Ghost & Image
Contamination
• The printed image
is too light or dark,
or partially
contaminated black.
• Totally
contaminated black.
(Black image
printed out)
• The density of
printouts is too dark
and ghost occurs.
1. The printed image is too light
or dark, or partially
contaminated black.
(a) Check if foreign substance
or toner are stuck to the
terminals (point of contact)
of the toner cartridge or set.
(b) Check if the terminal
assembly is normal.
2. Totally contaminated black.
(Black image printed out)
(a) Check if foreign
substances are stuck to
the terminal (point of
contact) of the toner
cartridge or set.
(b) Check if the terminal
assembly is normal.
(Especially check the
charge roller terminal.)
3. The printed image is dark and
ghost occurs.
(a) Check if foreign
substances are stuck to
the terminal (point of
contact) of the toner
cartridge or set.
(b) Check if the terminal
assembly is normal.
(Especially check the
developer roller terminal.)
1. All of Items 1, 2, 3
(a) Clean the contacts on the
toner cartridge.
(b) Clean the contact points on
the set.
(c) If the terminal assembly is
damaged repair or replace
the terminals in the set or
replace the cartridge
2. In Item 2
This is particularly related to
problems with the charge roller
contact. Pay close attention to
the charge roller contacts.
3. In Item 3
This is particularly related to
problems with the developer
bias voltage contact. Pay close
attention to the charge roller
contacts.
Page 24

6.6.2 Abnormal Printing
• Description
Printing does not work – even after replacing the cable
Printer does not work at all or strange fonts are printed,
Check and Cause Solution
1. Set up the parallel port using CMOS SETUP.
2. Printer Driver Error.
3. Error message “insufficient memory”.
(The printing job sometimes stops due to insufficient
virtual memory, this is caused by insufficient space on
the hard disk.)
1. Ensure that ECP (best) or SPP is selected in the
CMOS (BIOS) setup.
2. Ensure that the correct driver is loaded. Use the
driver supplied on the CD or downloaded from the
Samsung web site. DO NOT use the Microsoft
driver supplied with the Windows operating system.
If the printer is a GDI or SPL type printer ensure that
ALL OTHER GDI or SPL drivers are uninstalled as
Windows allows only 1 of this type of driver to be
loaded.
3. Delete any unnecessary files to secure enough
space on the hard disk and start the print job again.
Samsung Electronics
Service Manual
Troubleshooting
6-24
6.6 Software Problems – Causes and Solutions
6.6.1 The printer is not working (1)
• Description
While Power turned on, the printer is not working in the printing mode.
Check and Cause Solution
1. Run Self-Test Mode: using the menu buttons print the
test page. (Menu, Enter, Enter).
2. Check that the PC and the printer are properly
connected and that the toner cartridge installed
correctly .
3. Check that the printer cable is directly connected to the
printer.
1. If the test print works that means there are no
problems in the printer itself. If the test printing does
not work that means the printer is faulty and the
problem is not due to computer software or driver
settings.
2. Replace the printer cable. If the problem is not
solved even after the cable is replaced, check the
amount of the remaining toner. (refer to Toner
Cartridge Service 7-6, Page 7-25)
3. If you have other devices that need to share the
printer port try temporarily disconnecting these
devices 9and perhaps even uninstalling their drivers) to ensure the printer works by itself. If you are
using a USB hub try connecting directly to the back
of the PC instead.
Page 25

Troubleshooting
Samsung Electronics
Service Manual
6-25
6.6.3 SPOOL Error
• Description
SPOOL (simultaneous peripheral operations online) is the process Windows uses to
manage print jobs. Jobs are processed and then stored on the hard disk until the printer is
ready to accept them
Check and Cause Solution
1. Insufficient space on the hard disk in the directory
assigned for the basic spool.
2. If previous printing errors were not solved.
3. There may be conflict with other drivers or programs.
4. When an application program or the printer driver is
damaged.
5. When some files related to the OS are damaged or
virus infected.
6. Memory is less than suggested.
1. Delete any unnecessary files to provide more space
for spool storage.
2. There may be files from previous failed print jobs on
the hard disk with the name in the form ‘*.jnl’.
Delete these files and Reboot Windows to restart
the printer.
3. Shut down all other programs except the current
one, if possible.
4. Delete the printer driver completely and reinstall it.
5 After rebooting the computer, check for viruses,
restore the damaged files and reinstall the
application program which is not working properly.
6. Add up more memory to the PC.
How to delete the data in the spool manager.
In the spool manager, the installed drivers and the list of the documents waiting to be printed are shown.
Select the document to be deleted and check delete in the menu.
If the job you are deleting is the current job when you delete the job data that has already been transferred to
the printer’s memory will still be printed. If there is a problem with the printer (out of toner, offline, out of paper
etc.) the job may take a long time to delete as it must wait for a time out.
 Loading...