

Page 1
3. Disassembly and Reassembly
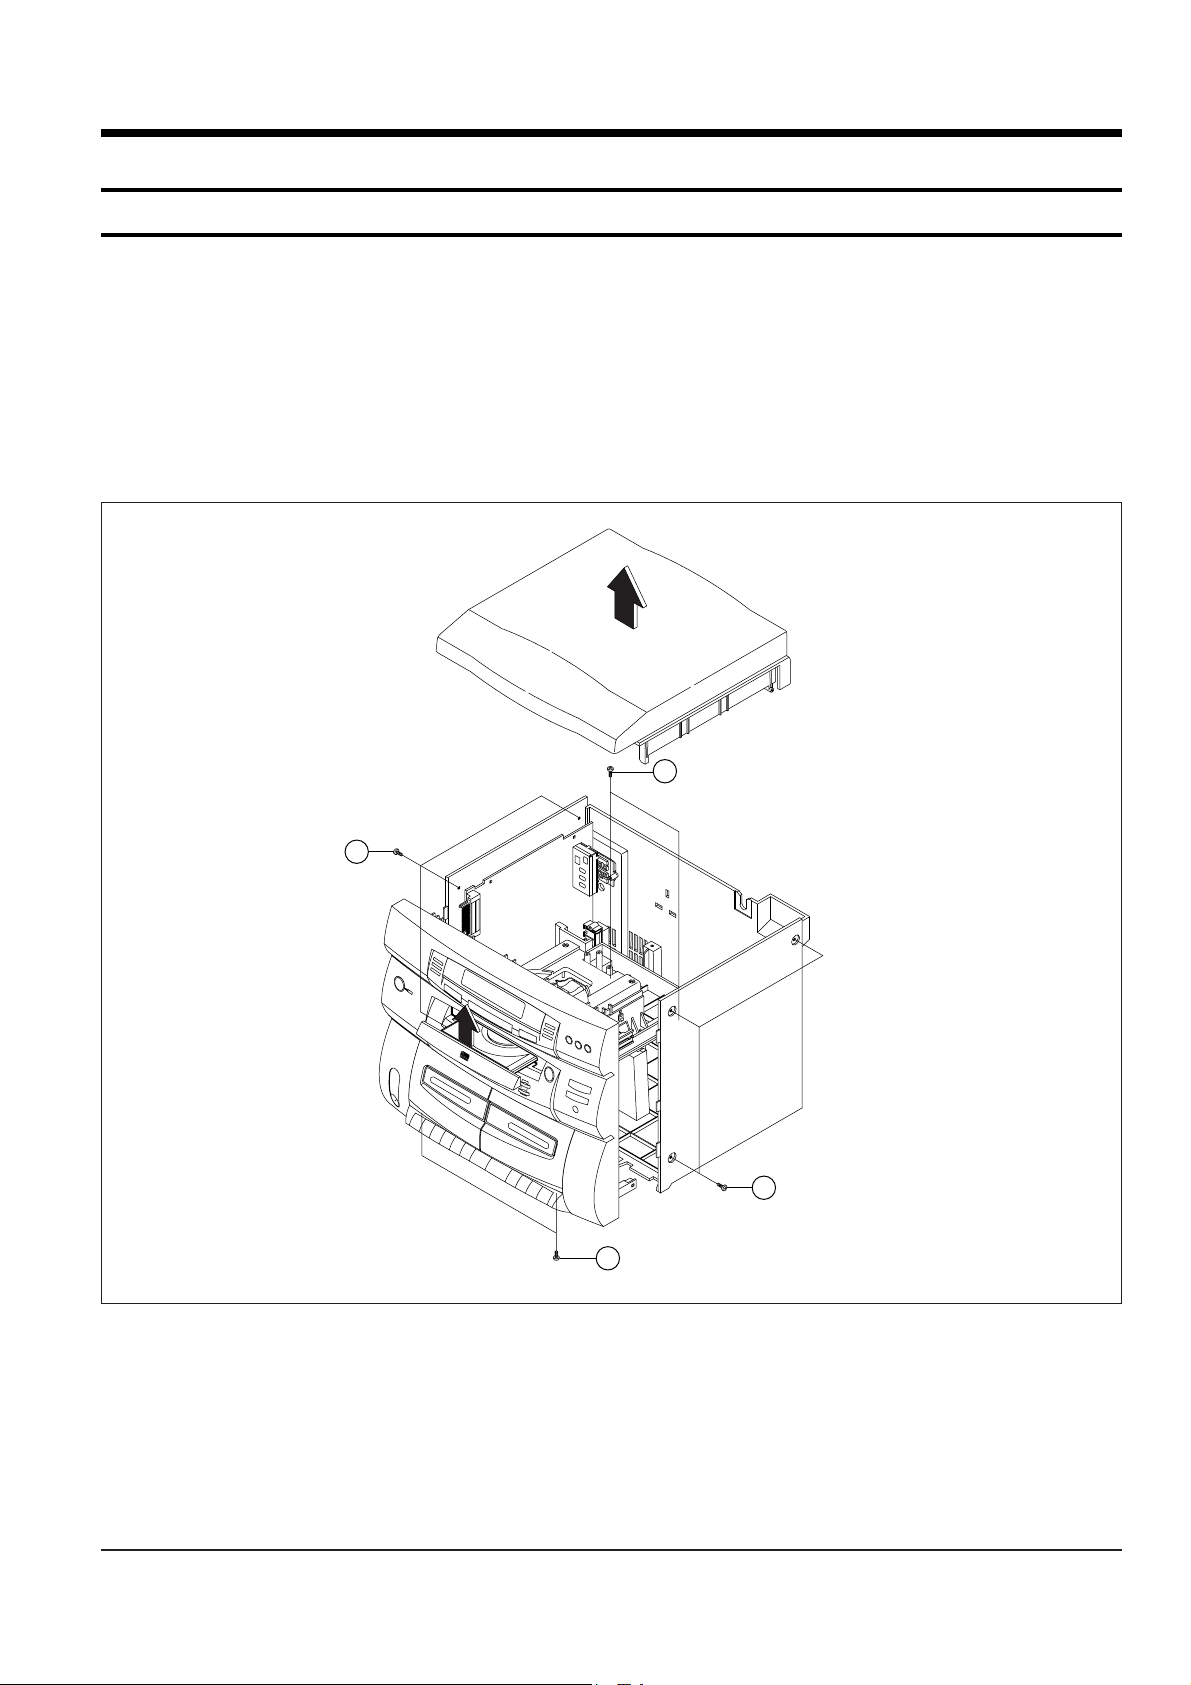
3-1 Turn-Table, Cabinet-Front , Cabinet-Bottom
1. Remove Door-CD (Direction A).
2. Release 6 screws !.
3. Remove Turn-Table (Direction B).
4. Release 2 screws @.
5. Release 2 screws #.
6. Remove Front-Cabinet.
45
33
2
1
1
B
3
A
Figure 3-1
Samsung Electronics 3-1
Page 2
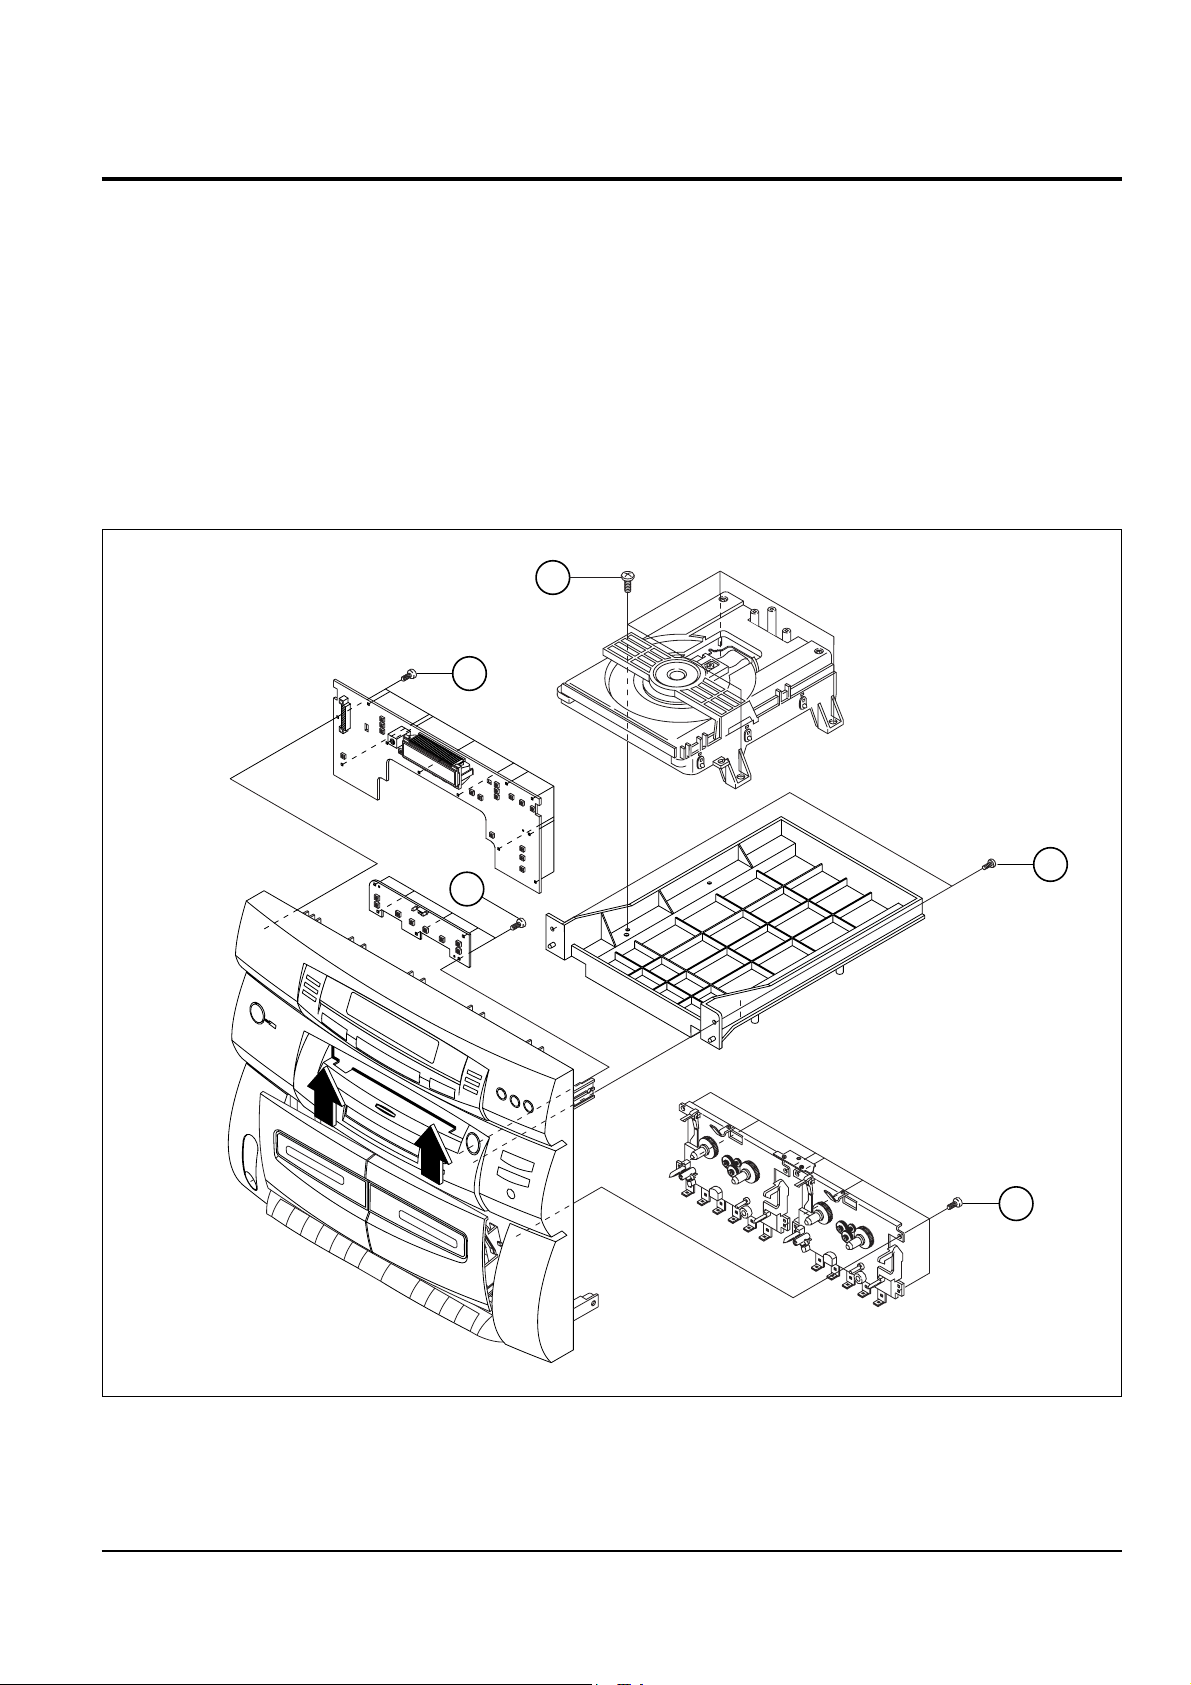
Figure 3-2
3-2 Samsung Electronics
3-2 Deck-CD, Front-PCB, Cassette-Deck, Door-Cassette
Disassembly and Reassembly
1. Release 2 screws !.
2. Remove Deck-CD AssÕy.
3. Release 4 screws @.
4. Remove Deck-CD.
5. Release 17 screws #.
6. Remove Front-PCB, SUB-PCB.
7. Release 7 screws $.
8. Remove Cassette-Deck.
2
3
3
1
4
A
A
Page 3

3-3 Cabinet-Bottom and Main-PCB
1. Release 3 screws !.
2. Remove the Main-PCB .
1
Figure 3-3
Samsung Electronics 3-3
Disassembly and Reassembly
Page 4

Figure 3-4
3-4 CD Pack
3-4 Samsung Electronics
Disassembly and Reassembly
3
5
6
8
9
10
17
18
19
20
14
21
11
12
13
14
17
16
17
16
16
23
2
4
7
15
1. Undo 2 screws (A), and remove the Chuck-Bracket @, the Ferrite-Magnet 5, Chuck Union-Table $ and
Chunk-Holder &.
2. Undo 2 screws(B), pull the Tray-M1 1 forward to remove.
3. Undo 1 screw(C), and remove the Cam-Spring 8 and the Cam #.
4. Undo 1 screw(D), and remove the Gear-Pulley ( the Belt-Pulley @, the Gear-A % and the Gear-B ^.
5. Undo 2 screws(E), and remove the Motor-Pulley ) and the Dc-Motor 0.
6. Undo 2 screws(F), and remove the Leaf-Switch 9 and the Detector-Switch “.
Disconnect the Lead-Connector assÕy 4 with soldering iron.
7. Remove the AssÕy PCB 3 with soldering iron and remove the PCB-Holder +.
8. Undo 4 screws from the CD-Shaft 7, and remove the CD-Rubber 6 and the CD-Deck ‘.
Page 5

Figure 3-5
Samsung Electronics 3-5
3-5 CD Deck
1. Remove the Shaft !.
2. Lift the P/U @.
Note : Do not to touch the surface of lens.
3. Lift the Center-ring #.
4. Remove the Spring-T/Table $.
5. Remove the Turn-Table (M) %.
6. Remove 2 screws ^ and then remove the Spindle-Motor &.
7. Remove the Cover-Gear * by pushing the hook.
8. Remove the Gear (c) ( by pushing the hook.
9. Lift the Gear(b) ).
10. Remove the Gear(a) 1.
11. Remove 2 screws 2 and the then remove the Feed-Motor 3.
12. Remove the Chassis-Deck (M) 4.
Disassembly and Reassembly
3
4
5
6
12
2
1
8
9
10
11
13
14
7
 Loading...