

Samsung SCH-2000 User Manual

Sprint PCS
SM
The Clear Alternative to Cellular
SM
TM
Sprint PCS Phone
SCH-2000
Manufactured by Samsung
User Guide
Please read this manual before operating the phone,
and keep it for future reference.

Intellectual Property
All Intellectual Property, as defined below, owned by or which is
otherwise the property of Samsung, Sprint PCS and their respective
suppliers relating to the PCS phone, including but not limited to,
accessories, parts, or software relating thereto (the Phone System), is
the sole and exclusive property of Samsung or Sprint PCS.
Intellectual Property includes, but is not limited to, inventions
(patentable or unpatentable), patents, trade secrets, copyrights,
software, computer programs, and related documentation and other
works of authorship. You may not infringe or otherwise violate the
rights secured by the Intellectual Property. Moreover, you agree you
will not (and will not attempt to) modify, prepare derivative works
of, reverse engineer, decompile, disassemble, or otherwise attempt
to create source code from the software. No title to or ownership in
the Intellectual Property is transferred to you. All applicable rights of
the Intellectual Property shall remain with Samsung, Sprint PCS, and
their respective suppliers.
Sprint PCS Customer Care
To contact Sprint PCS Customer Care:
, , , or call 1.888.211.4PCS (4727).
Dial
© 1998 Sprint Spectrum L.P. All rights reserved. No reproduction in
whole or in part without prior written approval. Sprint, Sprint PCS,
Sprint Personal Communication Services and the diamond logo are
trademarks of Sprint Communications Company L.P., used under
license. Samsung and SCH-2000 are registered trademarks of
Samsung Electronics Co., Ltd. All other trademarks are the property
of their respective owners.
Printed in the United States of America

Welcome to Sprint PCS
Only Sprint PCS built an all-digital, nationwide network from
the ground up . . . for a new level of clarity. We’ve built our
network to give you what we believe you really want from a
wireless phone company: clear sound, private conversations
and time-saving features. But Sprint PCS also has the
potential to do something even more far-reaching — simplify
your life. Our advanced technology is designed to grow with
your communication needs so that, one day, you will be able
to rely entirely on your Sprint PCS Phone
connected.
This User Guide will introduce you to our technology and
your new phone through easy-to-follow instructions. If you
have additional questions, we’ll be happy to help you in
person. Just stop by any Sprint PCS Center, or call
Sprint PCS Customer Care at , ,
dialing 1.888.211.4PCS (4727).
(In Southern California, call 1.800.455.4551.)
Thank you for choosing Sprint PCS.
TM
to stay
or
by

First Things First
Read this before you do anything else:
Determine if your phone is pre-activated:
If you received your Sprint PCS
purchased it at a Sprint PCS Center, your phone is already
activated and simply needs to be unlocked. See “How to
Unlock Your Phone” later in this section.
How to activate your phone:
There are two ways to activate your phone.
1. The fastest way is to call from your new Sprint PCS
Phone:
• Fully charge your battery.
• Turn on your Sprint PCS Phone.
• Press , , while in a Sprint PCS
Service Area. (In Southern California, call
1.800.PCS.6699 from any other phone.)
2. Another option is to call Sprint PCS Customer Care from
any phone other than your new Sprint PCS Phone. Call
us toll-free at 1.888.715.4588. (In Southern California,
call 1.800.PCS.6699.)
What you should know before you call:
The call typically takes about 30 minutes, but may take longer
at peak times. Your Sprint PCS Phone will be ready for use
approximately one to three hours after this call is complete.
PhoneTM in the mail or

What you should have handy:
• Your new Sprint PCS Phone
• The original packaging for your new phone
• Your billing address
• Your Social Security number or Tax ID number
• Your driver’s license number
• Pen and paper to write down your new
Sprint PCS Phone Number
During this call, a Sprint PCS Customer Care Advocate will
collect your information and help you select your Sprint PCS
Service Plan. Once you’ve made all your selections, they’ll
guide you through the activation process.

How to unlock your phone:
If you received your Sprint PCS PhoneTM in the mail or
purchased it at a Sprint PCS Center, your phone is already
activated. Just enter your four-digit lock code, and you’ll be
ready to begin making calls.
If you can’t recall your lock code, try the last four digits of
either your Sprint PCS Phone number, Social Security
number or Tax ID number. If none of these numbers work,
your phone should be reprogrammed. Take it to the nearest
Sprint PCS Center for assistance.

How to get help:
If you need help with these steps or anything else regarding
your new Sprint PCS Phone, please call Sprint PCS Customer
Care at 1.888.211.4PCS (4727).
(In Southern California, call 1.800.455.4551. )
You can also press , ,
Sprint PCS Phone.
(In Southern California, press:
, , , , .)
A Sprint PCS Customer Care Advocate will answer your call
24 hours a day and will be happy to assist you.
Note: Our services are provided to you under certain terms
and conditions, all of which are listed in the literature
included in your customer package.
on your activated

Introduction To Your Sprint PCS Phone
Congratulations on the purchase of your Sprint PCS Phone
Using the latest digital technology, your Sprint PCS Phone
operates in a similar manner to other wireless phones, while
providing superior resonance and tone quality.
The following options make your Sprint PCS Phone both fun
and easy to use:
• Voice Dialing – 20 Locations
• Voice Memo – 10 Memos, One Minute Each
• 9 Ring Types, 4 Melody Tones, Vibrator Alert
• Active Flip
• Phone Book Memory – 179 Locations
• Call Logs – 9 Locations Each: Outgoing, Incoming, and
Missed Calls
• Short Message Services (SMS) and Voice Mail
• Pause Dialing
• Ringer Mute During Incoming Call
•Alarm
•Programmable Lock
• Redial – 9 Numbers
• Variable Character Display
TM
.

Table Of Contents
Getting Started - - - - - - - - - - - - - - - 1
Your Consumer Package - - - - - - - - - - - - - - - - - - 2
Description of Your Sprint PCS Phone - - - - - - - - - - 3
Screen Display - - - - - - - - - - - - - - - - - - - - - - - - 4
Key Functions - - - - - - - - - - - - - - - - - - - - - - - - 5
Status / Alert Indicators - - - - - - - - - - - - - - - - - - - 6
Battery Installation, Charging and Care - - - - - - - - - - 8
Installing the Battery - - - - - - - - - - - - - - - - - - - - 8
Dual-Slot Desktop Charger - - - - - - - - - - - - - - - - - 8
Charging the Battery - - - - - - - - - - - - - - - - - - - - 9
Battery Charge Indicator - - - - - - - - - - - - - - - - - - 9
Caring for the Battery - - - - - - - - - - - - - - - - - - - 10
Battery Storage Temperatures - - - - - - - - - - - - - - 10
Battery Disposal and Recycling- - - - - - - - - - - - - - 11
Sprint PCS Phone and Battery Specifications - - - - - - 11
Basic Operations of Your Sprint PCS Phone- - - - - - - 12
Turning on Your Sprint PCS Phone - - - - - - - - - - - 13
Display Options - - - - - - - - - - - - - - - - - - - - - - 14
Menu Organization - - - - - - - - - - - - - - - - - - - - 16
Main Menu Structure - - - - - - - - - - - - - - - - - - - 17
Calling Options- - - - - - - - - - - - - - - 19
Overview: Calling Options - - - - - - - - - - - - - - - - 20
Character Entry - - - - - - - - - - - - - - - - - - - - - - 20
Alpha Entry - - - - - - - - - - - - - - - - - - - - - - - - 21
Digit Entry - - - - - - - - - - - - - - - - - - - - - - - - - 21
Punctuation Entry - - - - - - - - - - - - - - - - - - - - - 22
Placing a Call- - - - - - - - - - - - - - - - - - - - - - - - 22
Digit Entry Menu - - - - - - - - - - - - - - - - - - - - - 23
Dropped Call Alert - - - - - - - - - - - - - - - - - - - - 24
Failed Call Alert - - - - - - - - - - - - - - - - - - - - - - 24
Mute Microphone - - - - - - - - - - - - - - - - - - - - - 24
Prepend Dialing - - - - - - - - - - - - - - - - - - - - - - 25
Automatic Hyphenation- - - - - - - - - - - - - - - - - - 25
Correcting a Misdialed Number - - - - - - - - - - - - - 25
Minute Beep - - - - - - - - - - - - - - - - - - - - - - - - 26
Ending a Call - - - - - - - - - - - - - - - - - - - - - - - - 26
i

Table Of Contents
Incoming Call Notification - - - - - - - - - - - - - - - - 27
Answering a Call - - - - - - - - - - - - - - - - - - - - - - 27
Missed Call Notification - - - - - - - - - - - - - - - - - - 28
Ringer / Alert Options - - - - - - - - - - - - - - - - - - - 29
Ring Volume Setting - - - - - - - - - - - - - - - - - - - - 30
Ring Type Setting - - - - - - - - - - - - - - - - - - - - - 31
Message Ring Setting- - - - - - - - - - - - - - - - - - - - 31
Key Beep Setting - - - - - - - - - - - - - - - - - - - - - - 32
Tone Length Setting - - - - - - - - - - - - - - - - - - - - 32
Ring Tone Mute - - - - - - - - - - - - - - - - - - - - - - 32
Alerts Menu - - - - - - - - - - - - - - - - - - - - - - - - - 33
Alert Volume - - - - - - - - - - - - - - - - - - - - - - - - 33
Alarm - - - - - - - - - - - - - - - - - - - - - - - - - - - - 34
Tracking Calls Through Call Logs - - - - - - - - - - - - - 36
Erasing Call Logs - - - - - - - - - - - - - - - - - - - - - - 37
Call Logs Shortcut - - - - - - - - - - - - - - - - - - - - - 37
Reviewing Airtime - - - - - - - - - - - - - - - - - - - - - 38
Internal Phone Book - - - - - - - - - - - - 39
Overview: Internal Phone Book- - - - - - - - - - - - - - 40
Storing Phone Numbers / Names - - - - - - - - - - - - - 41
Viewing Stored Entries- - - - - - - - - - - - - - - - - - - 42
Finding Entries By Location - - - - - - - - - - - - - - - - 42
Finding Entries by Name- - - - - - - - - - - - - - - - - - 42
Dialing from the Internal Phone Book - - - - - - - - - - 43
Dialing By Memory Location - - - - - - - - - - - - - - - 43
Memory Dialing Shortcuts - - - - - - - - - - - - - - - - - 43
Four-Digit Dialing - - - - - - - - - - - - - - - - - - - - - 43
Displaying Your Phone Number - - - - - - - - - - - - - 44
Editing Phone Book Entries - - - - - - - - - - - - - - - - 44
Erasing Phone Book Entries - - - - - - - - - - - - - - - - 45
Storing Secret Numbers - - - - - - - - - - - - - - - - - - 46
Special Calling Services - - - - - - - - - - - - - - - - - - 46
Short Message Services / Voicemail- - - - 47
Overview: Short Message Services / Voicemail - - - - - 48
Message Management - - - - - - - - - - - - - - - - - - - 49
Setting Up Your Voicemail Box - - - - - - - - - - - - - - 50
ii

Table Of Contents
Reviewing Voicemail Messages- - - - - - - - - - - - - - 50
One-touch Voicemail Access - - - - - - - - - - - - - - - 50
Reviewing Page and Text Messages - - - - - - - - - - - 51
Erasing Messages - - - - - - - - - - - - - - - - - - - - - 52
Advanced Features - - - - - - - - - - - - - 53
Pause Dialing- - - - - - - - - - - - - - - - - - - - - - - - 54
Entering and Storing Pauses - - - - - - - - - - - - - - - 54
Voice Dialing- - - - - - - - - - - - - - - - - - - - - - - - 55
Training the Phone for Voice Dialing - - - - - - - - - - 55
Voice Dialing Activation - - - - - - - - - - - - - - - - - 56
Placing a Call Using Voice Dialing - - - - - - - - - - - - 56
Reviewing Voice Dialing Entries - - - - - - - - - - - - - 57
Erasing Voice Dialing Entries - - - - - - - - - - - - - - - 57
Voice Memo - - - - - - - - - - - - - - - - - - - - - - - - 58
Recording a Voice Memo - - - - - - - - - - - - - - - - - 58
Reviewing a Voice Memo - - - - - - - - - - - - - - - - - 59
Security Options- - - - - - - - - - - - - - - - - - - - - - 59
Lock Mode - - - - - - - - - - - - - - - - - - - - - - - - - 60
Lock Code Setting - - - - - - - - - - - - - - - - - - - - - 60
Locking the Phone - - - - - - - - - - - - - - - - - - - - 61
Dialing in Lock Mode - - - - - - - - - - - - - - - - - - - 61
Call Restriction Options- - - - - - - - - - - - - - - - - - 62
Restricting Calls - - - - - - - - - - - - - - - - - - - - - - 62
Restricting the Phone Book- - - - - - - - - - - - - - - - 63
Restricting Roaming Calls- - - - - - - - - - - - - - - - - 63
Resetting the Phone Book - - - - - - - - - - - - - - - - 64
Resetting the Phone - - - - - - - - - - - - - - - - - - - - 64
KeyGuard - - - - - - - - - - - - - - - - - - - - - - - - - 65
Emergency and Special Numbers - - - - - - - - - - - - 65
Storing Special Numbers - - - - - - - - - - - - - - - - - 66
Dialing Emergency / Special Numbers- - - - - - - - - - 66
Special Sprint PCS Features - - - - - - - - 67
Any Key Answer- - - - - - - - - - - - - - - - - - - - - - 68
Call Waiting - - - - - - - - - - - - - - - - - - - - - - - - 68
Answering a Call Waiting Call - - - - - - - - - - - - - - 68
Deactivating Call Waiting - - - - - - - - - - - - - - - - - 69
iii

Table Of Contents
Call Forwarding - - - - - - - - - - - - - - - - - - - - - - 69
Activating Call Forwarding - - - - - - - - - - - - - - - - 69
Three-Way Calling - - - - - - - - - - - - - - - - - - - - - 70
Placing a Three-way Call- - - - - - - - - - - - - - - - - - 70
Block Own Number Option- - - - - - - - - - - - - - - - 70
Accessories - - - - - - - - - - - - - - - - - 71
Batteries- - - - - - - - - - - - - - - - - - - - - - - - - - - 72
Dual-Slot Desktop Charger - - - - - - - - - - - - - - - - 72
Cigarette Lighter Adapter - - - - - - - - - - - - - - - - - 72
Travel Charger - - - - - - - - - - - - - - - - - - - - - - - 73
Hands-Free Car Kit - - - - - - - - - - - - - - - - - - - - - 73
Leather Case - - - - - - - - - - - - - - - - - - - - - - - - 73
Hand Strap - - - - - - - - - - - - - - - - - - - - - - - - - 74
Headset - - - - - - - - - - - - - - - - - - - - - - - - - - - 74
Charging Times with Accessories- - - - - - - - - - - - - 74
Appendix - - - - - - - - - - - - - - - - - - 75
Troubleshooting - - - - - - - - - - - - - - - - - - - - - - 76
Maximizing Call Quality - - - - - - - - - - - - - - - - - - 76
Caring for the Antenna - - - - - - - - - - - - - - - - - - 76
Common Questions - - - - - - - - - - - - - - - - - - - - 76
Safety Considerations - - - - - - - - - - - - - - - - - - - 79
Compliance with Safety Standards - - - - - - - - - - - - 79
Driving - - - - - - - - - - - - - - - - - - - - - - - - - - - 79
Electronic Devices - - - - - - - - - - - - - - - - - - - - - 80
Aircraft - - - - - - - - - - - - - - - - - - - - - - - - - - - 80
Blasting Areas- - - - - - - - - - - - - - - - - - - - - - - - 80
Other Dangerous Areas - - - - - - - - - - - - - - - - - - 81
FCC Notice - - - - - - - - - - - - - - - - - - - - - - - - - 81
Maintenance - - - - - - - - - - - - - - - - - - - - - - - - 81
Glossary of Terms - - - - - - - - - - - - - 82
Index - - - - - - - - - - - - - - - - - - - - 85
iv

Getting Started
1
Getting Started
Your Consumer Package
Description of Your Sprint PCS Phone
Battery Installation, Charging, and Care
Basic Operations of Your Sprint PCS Phone
Menu Organization
1

Getting Started
User
Guide
Samsung SCH-2000
Sprint
Personal
Communication
Services
Your Consumer Package
Your Consumer Package contains the following items:
• Sprint PCS Phone
• Standard LiIon Battery
• Dual-Slot Desktop Charger
• User Guide and Quick Reference Card
TM
2

Getting Started
Description of Your Sprint PCS Phone
Function keys and other controls activate the features of your
Sprint PCS Phone. The following illustration identifies the
function keys, controls and indicators:
1) LED Indicator
(Calls, messages, power on)
2) Voice Memo
3) LCD Screen
4) Volume Control
5) Talk Key
6) Scroll Keys
7) Power Key
(Not actual size)
8) Clear Key
9) Microphone
10) Flip
11) OK (Store) Key
12) Menu Key
13) End Key
14) Messages Key
15) Antenna
3

Getting Started
Screen Display
This Sprint PCS Phone features dynamic character sizing,
which enables the screen to display from 12 to 16 characters
per line. The five-line screen includes four text lines and one
icon line, which displays active options and selected menu
items.
During conversation, the screen displays the call timer and
the name and number of the other party, if available. Active
in-use options, such as Mute and Call Waiting, also display
during conversation. For additional indicators, see “Table 2:
Status / Alert Indicators” on page 6.
The following icons or text messages display at power-on:
Signal
Strength
No Service
/ In Use Voicemail
Roaming Battery
New Text
Message
(Not actual size)
Strength
Vibrator On
4

Getting Started
Table 1: Key Functions
Press TALK to:
• place and answer calls,
• initiate Three-Way Calling,
• access Call Logs or the Phone Book*.
Press and hold TALK to initiate Voice Dialing.
Press CLR to:
• erase one character at a time,
• go back one menu level at a time.
Press and hold CLR to:
• erase all displayed characters,
• return to Standby while viewing menus.
Press END to:
• end a call,
• exit the current menu,
• mute the ringer on an incoming call.
Press and hold END to deactivate KeyGuard.
Press MENU to display the Main Menu and to
scan menu options.
Press and hold MESSAGES to access Sprint PCS
Voi cem ail.
Press OK to save menu option settings.
Press the arrow keys to scan menu options.
Press PWR to turn the phone on and off.
Press and hold MEMO to record memos; press
MEMO to review memos.
Press the VOLUME button to:
• adjust voice volume during conversation,
• adjust ringer volume in Standby mode,
• mute the ringer during an incoming call,
• scroll Call Logs and Phone Book entries.
*Access the Setup menu to select the Talk Key option for Call
Logs or Phone Book.
5

Getting Started
Table 2: Status / Alert Indicators
Signal Strength
Indicates current signal strength
No Service
Indicates that the phone is outside a service
area and cannot send or receive calls, or the
phone is in Power Save mode.
Battery Charge
Indicates battery charge level
Voicemail Message
Indicates voicemail messages
Tex t M es s age
Indicates text messages
Roaming
Displays when the phone is in a network
other than a Sprint PCS Network. The text
message “Digital Roam” also displays.
Vibrate
Indicates Vibrate mode
6

Getting Started
Table 2: Status / Alert Indicators (Continued)
The following status / alert indicators are text only:
Locked
Text display indicates Lock mode
Ringer
Text display indicates ringer status: Off or Vibrate
Greeting
A personal greeting of up to 12 characters displays at
power-on and in Standby mode, when set.
Incoming Call
Text display and ringer signal incoming calls
Missed Call
Text display indicates an unanswered call while the
phone is on
Dropped Call
Text display indicates a dropped call
Minute Beep
Sounds every 60 seconds in Conversation mode,
when set
Call Waiting
Text display indicates Call Waiting
7

Getting Started
Battery Installation, Charging, and Care
Your Sprint PCS Phone package includes a partially charged,
rechargeable battery so that you can use the phone
immediately after it is activated.
Installing the Battery
To attach the battery to your Sprint PCS Phone:
1. Hold the battery so that the metal contacts on the base
of the battery line up with the metal contacts on the
base of the phone.
2. Place the battery on the back of the phone with the top
of the battery about a quarter of an inch from the latch.
3. Gently slide the battery toward the top of the phone
until it snaps into place.
Dual-Slot Desktop Charger
The Dual-Slot Desktop Charger contains:
• Front compartment for charging the battery while
attached to the phone
• Rear compartment for charging the battery alone (not
attached to the phone)
• Red light to indicate that the battery is charging
(A yellow light indicates that the battery is operating at
a temperature that is too high or too low, or that the
battery is misaligned in the charger. Please check the
charger and battery.)
• Green light to indicate that the battery is fully charged
8

Getting Started
Charging the Battery
To charge the battery using the Dual-Slot Desktop Charger:
1. Plug the power cord of the charger into a wall outlet.
2. Select one of the following options:
• Insert the entire phone with battery attached into the
front compartment of the charger.
• Insert a single battery (alone, not attached to the
phone) into the rear compartment of the charger.
When two batteries are in the charger, the batteries charge
simultaneously. If you charge the battery while it is attached
to your Sprint PCS Phone, the Battery Charge Indicator
activates. A green LED indicates a full battery charge.
A completely discharged standard battery recharges fully in
about 2.5 hours in the front slot of the Dual-Slot Desktop
Charger. The extended battery recharges in about three
hours in the front slot of the Dual-Slot Desktop Charger.
Leaving your Sprint PCS Phone powered on during charging
or charging batteries simultaneously increases charging time.
Leaving the battery in the charger once it is fully charged
does not harm the battery.
Note: Use only the Samsung-approved Dual-Slot Desktop
Charger with your Sprint PCS Phone by Samsung. Using the
wrong charger could damage the battery.
Battery Charge Indicator
The Battery Charge Indicator displays in the upper right
corner of the screen and indicates four levels of charge.
Three solid bars indicate a fully charged battery. When the
battery charge level is low or empty, a clear Battery Charge
Indicator (no bars displayed) flashes on the screen.
9

Getting Started
Caring for the Battery
Use only Samsung-approved batteries, desktop and travel
chargers. These chargers maximize battery life and
performance. Using other batteries or chargers may
invalidate your warranty and may damage the battery.
For proper battery care, please follow these guidelines:
• To avoid damage, charge the battery in temperatures
that range from 32°F to 104°F (O°C to 40°C).
• Do not use the battery charger in direct sunlight or in
high humidity areas (such as a bathroom).
• Never dispose of the battery by incineration (fire).
• Keep the metal contacts at the battery base clean.
• Do not attempt to disassemble or short-circuit the
battery, as injuries or burns may result.
• Replace the battery when it no longer provides
acceptable performance.
• Do not store the battery in high-temperature areas for
a long time.
• Do not allow metal objects or liquids to contact or
short-circuit the battery terminals, as injuries or burns
may result.
Table 3: Battery Storage Temperatures
Recommended Storage Temperature Ranges
Less than one month 4°F to 122°F (-20° C to 50° C)
More than one month -4°F to 95°F (-20°C to 35°C)
10

Getting Started
Battery Disposal and Recycling
Please be aware of the following guidelines when disposing
of or recycling the battery:
• Do not dispose of the battery in a fire; the cell may
explode. Check the regulations in your area for
special disposal instructions.
• Do not open or puncture the battery; the released
electrolyte is corrosive and may cause damage to the
eyes and skin. This substance also can be toxic if
swallowed.
• Charge the battery in accordance with the
instructions specified in this manual.
• Lithium Ion batteries are recyclable. Return unwanted
Samsung batteries to your nearest Samsung Service
Center. For the Samsung Service Center nearest you,
call toll-free 1.888.987.HELP (4357) in the U.S.
Table 4: Sprint PCS Phone and Battery Specifications
CDMA PCS Digital: Single Mode CDMA PCS 1900 MHz
Graphic LCD: 5 Lines (4 Text Lines, 1 Icon Line)
Battery Type: Standard: 1000 mAh Li-Ion
Extended: 1600 mAh Li-Ion
PCS Antenna: 1/4 Wave (down), 5/8 Wave (up)
PCS Phone with: Standard Battery Extended Battery
Dimensions (H x W x D): 4.8 x 2 x 1 inches 4.8 x 2 x 1.1 inches
122 x 50 x 24.5 mm 122 x 50 x 28.5 mm
Weight: 5.4 oz. 5.9 oz.
Volume: 140 cc 160 cc
Talk Time: up to 2.5 hours up to 4 hours
Standby Time: up to 35 hours up to 55 hours
154 g 168 g
or or
11

Getting Started
Basic Operations of Your Sprint PCS Phone
Power On / Off Press and hold .
Menu Scrolling Press , then or .
Make Calls Enter number, and then press .
Voice Dialing Open Flip, or press and hold
(setting dependent), and then say
the name.
Correct Mistakes Press .
Redial Call Press twice.
Speed Dialing Enter memory location, and then
press .
End Call Press , or close flip.
Answer Call Press , or open flip.
Save Numbers Enter phone number, press ,
and then follow screen prompts.
Outgoing Call Press , , to review
the last 9 outgoing calls.
Incoming Call Press , , to review
the last 9 incoming calls.
Missed Call Press , , to review
the last 9 missed calls.
Name Search Press in Standby Mode.
12

Getting Started
Turning on Your Sprint PCS Phone
To power on your Sprint PCS Phone, press and hold .
The red light flashes, an alert sounds, and “Searching for
Service” displays. The display updates to reflect the following
conditions:
• When the system locates service, the greeting
displays, along with the date and time. You can now
place and receive calls.
• If the system cannot locate service, “No Service
Available” displays. In this case, you cannot place and
receive calls. Power off the phone, and then try again
later when service is available.
• If your Sprint PCS Phone is locked, “Locked” displays.
Enter the four-digit lock code to unlock the phone.
• If KeyGuard is active, “KeyGuard” displays. Press and
hold to unlock the keypad.
Conversation Mode
You can place and answer calls only when your Sprint PCS
Phone is powered on. During a call, the phone is in
Conversation mode.
Standby Mode
When your Sprint PCS Phone is on but no call is in progress,
the phone is in Standby mode.
Power Save Mode
Your Sprint PCS Phone automatically enters Power Save
mode if it does not locate service 15 minutes after you press
. In this case, “Power Save – No Service Available”
displays. The phone periodically “wakes up” and searches
for service. While in Power Save mode, your Sprint PCS
Phone also searches for service in response to any keypress.
The time and date do not display while the phone is outside
of a Sprint PCS Service Area.
13
Getting Started
Display Options
Your Sprint PCS Phone provides several display options:
Backlight Control
When the phone is attached to the Hands-Free Car Kit, the
backlight remains on. When KeyGuard is active, the backlight
remains off. At other times, you can select backlight options.
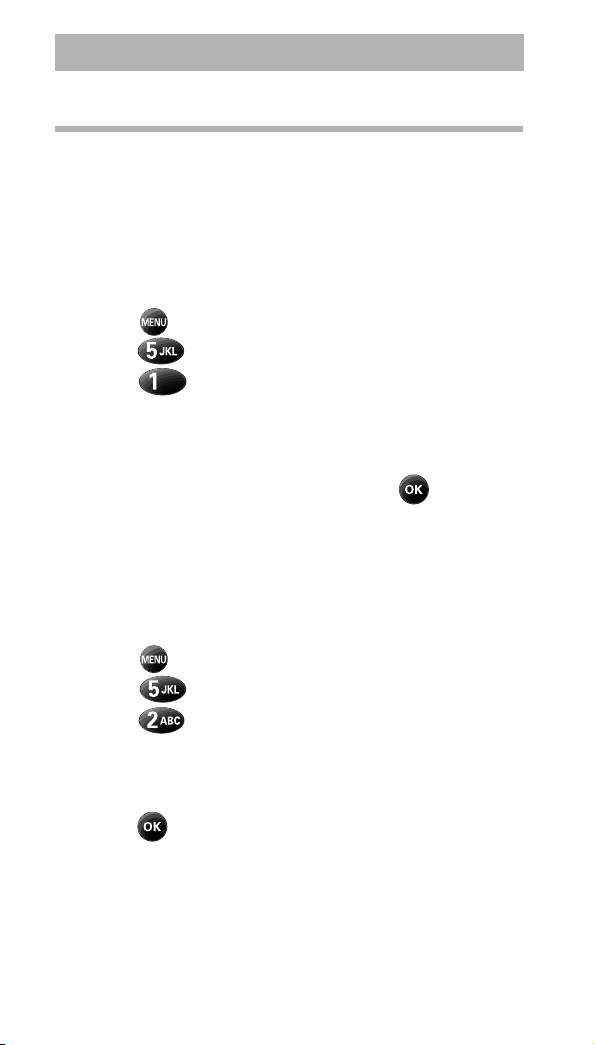
To select backlight options:
1. Press to display the Main Menu.
2. Press for Display.
3. Press for Backlight.
4. Press the scroll keys to scan menu options: 10 Seconds
(after last keypress), 30 Seconds (after last keypress), On
Flip Open, Off.
5. When the desired option displays, press to save the
setting.
Personal Greeting
You can create a 12-character personal greeting that displays
in Standby mode.
To create a personal greeting:
1. Press to display the Main Menu.
2. Press for Display.
3. Press for Greeting.
4. Enter your personal greeting by pressing the
alphanumeric keys on the keypad. (See “Alpha Entry” on
page 21.)
5. Press to save the setting.
14

Getting Started
Version Display
You can view the software version of your Sprint PCS Phone
during conversation or in Standby mode.
To view the version in Standby mode:
1. Press to display the Main Menu.
2. Press for Display.
3. Press for Version.
4. Press or to return to the previous screen.
To view the version in Conversation mode:
• Press , .
15

Getting Started
Menu Organization
Your Sprint PCS Phone includes both a Main Menu and an In
Use Menu.
Main Menu
The Main Menu in Standby mode contains 10 primary
options, many of which contain sub-menus with more
specific options. See “Table 5: Main Menu Structure” on
page 17.
In Use Menu
The In Use Menu options are available in Conversation mode:
1. (Un)mute
2. Silent Key
3. Phone Book
4. Version
5. Send Tel #
Menu Navigation
To access a menu option, press , and then press the
associated digit key to select the desired option. As an
alternative to pressing the digit keys, access the menu, and
then press the scroll keys to scan options. Pressing the scroll
keys highlights each option in sequence. Press to select
the highlighted option.
16

Getting Started
Table 5: Main Menu Structure
Sprint PCS Phone SCH-2000 Standby Menu
Main Menu Menu Level 1 Menu Level 2
Menu Level 3
1. Calls ➪ 1. Outgoing
2. Incoming
3. Missed
4. Air Time ➪ 1. Last Call
2. Phone Book ➪ 1. Find Name
2. My Phone #
3. Add Entry
4. Find Entry
5. Services ➪ 1. Dir. Assist
3. Voice Dial ➪ 1. Record
2. Review
3. Erase All
4. Set Active ➪ Talk Only
4. Sounds ➪ 1. Ring Vol.
2. Ring Type ➪ 1. Calls ➪ 1. With ID
3. Msg. Ring
4. Key Beep
5. Tone Length
6. Alert Vol.
2. Total
3. Erase Total
2. Customer Care
3. Prepaid
Talk or Flip
2. Without ID
2. Messages ➪ 1. Voice
2. Page
3. Text
3. Alarm
17

Getting Started
Sprint PCS Phone SCH-2000 Standby Menu (Cont.)
Main Menu Menu Level 1 Menu Level 2 Menu Level 3
5. Display ➪ 1. Backlight
2. Greeting
3. Version
6. Security ➪ 1. Lock Phone
2. Limit Use ➪ 1. Outgoing
2. Incoming
3. Phone Book
4. Roaming
3. Lock Code
4. Special #s
5. Erase ➪ 1. Call Logs ➪ 1. Outgoing
2. Messages
3. Phone Book
6. Reset Phone
7. Alerts ➪ 1. Minute Beep
2. Service
8. Setup ➪ 1. AnyKey Ans.
2. Talk Key ➪ Calls
Phone Book
9. Alarm ➪ 1. Set
2. Cancel
0. KeyGuard*
* The KeyGuard menu option is available only in Standby mode.
2. Incoming
3. Missed
4. All
18
 Loading...