

Samsung SCH-1900 User Manual

1910 OM-PRINT 11/19/56 12:11 AM Page A

1910 OM-PRINT 11/19/56 12:11 AM Page B
Intellectual Property
Intellectual Property.All Intellectual Property,as defined below,owned by
or which is otherwise the property of Samsung or its suppliers relating to
the PCS phone,including but not limited to,accessories,parts or softwar e
relating thereto (the Phone System),is proprietary to federal laws and state
laws,and international treaty provisions. Intellectual Property includes,but
is not limited to,inventions (patentable or unpatentable),patents,trade
secrets,copyrights,software,computer programs,and related
documentation and other works of authorship. You may not infringe or
otherwise violate the rights secured by the Intellectual Property.Moreover,
you agree you will not (and will not attempt to) modify,prepare derivative
works of,reverse engineer,decompile,disassemble,or otherwise attempt
to create source code from the software.No title to or ownership in the
Intellectual Property is transferred to you. All applicable rights of the
Intellectual Property shall remain with Samsung and its suppliers.
Samsung Telecommunications America, Inc.
Headquarters
1130 E.Arapaho Road
Richardson,Texas 75081
Phone:(972) 761-7000
FAX:(972) 761-7001
Samsung Telecommunications America, Inc.
Customer Care Center
1601 E.Plano Parkway,Suite 150
Plano,Texas 75074
Phone:(972) 761-7500
Phone:(888) 987-4357
FAX:(972) 761-7501
©1997 Samsung Telecommunications America,Inc. All rights reserved.No
reproduction in whole or in part allowed without prior written approval.

1910 OM-PRINT 11/19/56 12:11 AM Page C
Samsung
SCH-1910
CDMA PCS Digital Phone
Owners Manual
Operating Instructions:Before operating phone,please read this
manual thoroughly.Keep it for future reference.

1910 OM-PRINT 11/19/56 12:11 AM Page D
1910 OM-PRINT 11/19/56 12:11 AM Page i
Table of Contents
Chapter 1: Getting Started 1
Unpacking Your Consumer Package 2
Phone–Basic Description 3
Battery Installation 7
Installing the Standard Battery 7
Battery Charge Indicator 8
Charging Your Battery 9
Rapid Desktop Charger with Conditioner 9
Using the Conditioner Cycle 10
Using the Phone–Basic Funcitons 11
Menu Structure 11
Placing a Call 13
Recieving a Call 13
Ending a Call 13
Correcting a Misdialed Number 13
Redialing a Number 13
Call Waiting 14
Disabling Call Waiting 14
Call Forwarding 15
Three–Way Calling 15
Chapter 2: Using Your Phone 17
The Internal Phone Book 18
Storing a Phone Number 18
Storing Numbers Shortcuts 19
Confidential Numbers 19
Entering Names 20
Correcting Mistakes 20
Recalling Stored Numbers 20
Erasing Phone Numbers 21
i

1910 OM-PRINT 11/19/56 12:11 AM Page ii
Table of Contents
Dialing from the Internal Phone Book 22
Prepending Stored Phone Numbers 23
Caller ID 24
Memory Locations 25
One–Touch Dialing 25
Two–Touch Dialing 25
Customizing Your Phone’s Features 26
Setting Ringer Type 26
Setting Ringer Volume 26
Setting Key Tone Volume 27
Setting Message Ring Frequency 27
Setting Up Your Greeting 27
Obtaining Numeric Characters 28
Setting Up Audible Alerts 28
Set Up 28
Backlighting 29
Displaying Your Phone Number 29
Chapter 3: Advanced Features 31
Call Logs & Tracking Calls 32
Checking Airtime 33
Last Call Airtime 33
Total Airtime 33
Erase Total Airtime 33
Entering & Storing a Hard Pause 34
Using the Hard Pause 35
Phone Security 35
Lock Code 36
Locking the Phone 36
Restricting Your Phone Book 36
Restricting Incoming/Outgoing Calls 37
Changing the Lock Code 38
ii
1910 OM-PRINT 11/19/56 12:11 AM Page iii
Table of Contents
Storing Emergency Phone Numbers 38
Entering Emergency Numbers 38
Dialing When the Phone is Locked 39
Voice Mail 40
Chapter 4: Special PCS Functions 41
Defining In Use Menu 42
KeyGuard 42
Ring Tone Mute 43
Any Key Answer Features 43
True Alpha Search and Sort 43
Shortcut Keys/Menu Navigation 44
Optional PCS Phone Accessories 45
Phone Specifications 48
Appendix 49
Battery Care and Maintenance 50
Caring for Your Batteries 50
Disposal of Your Batteries 51
Recycling Nickel Metal Hydride Batteries 51
Troubleshooting 52
Common Questions 53
Important Saftey Instructions 56
Glossary of Terms 59
Index 63
iii

1910 OM-PRINT 11/19/56 12:11 AM Page iv
List of Tables
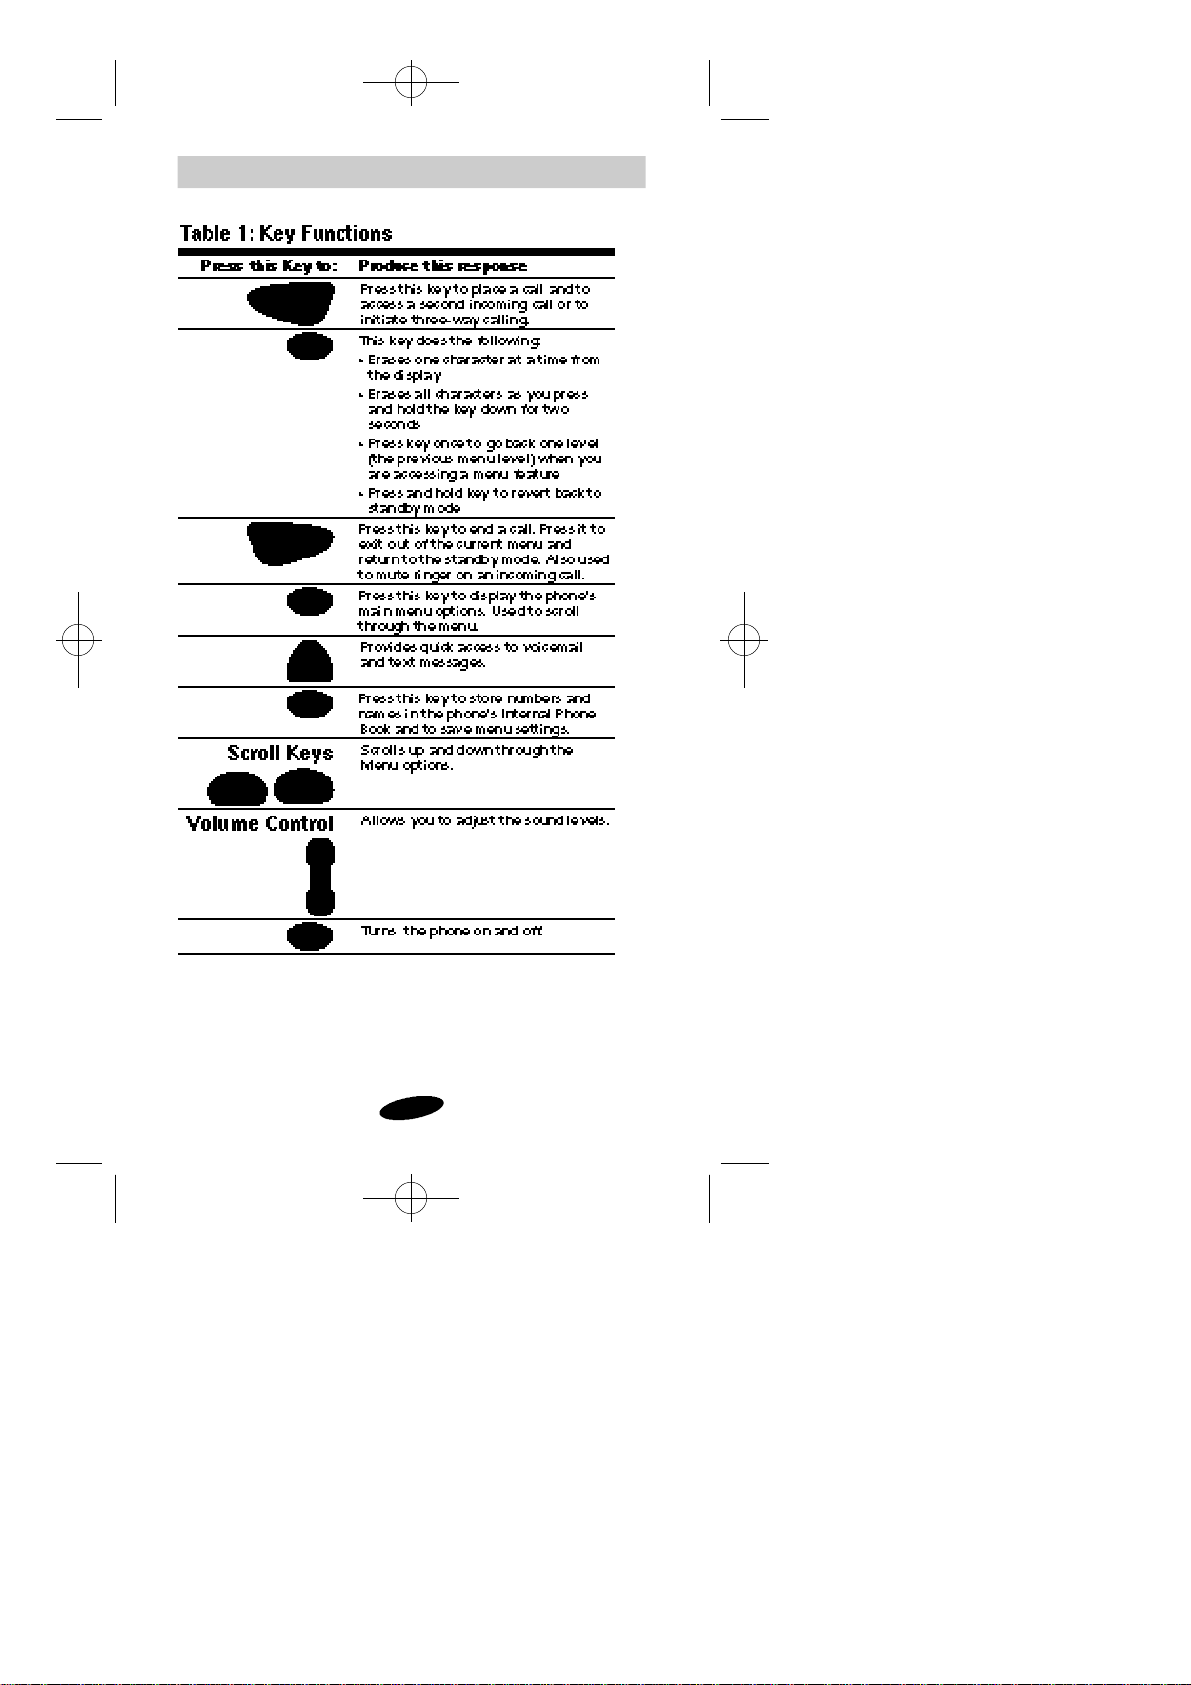
Table 1: Key Functions 4
Table 2: Icon Functions 6
Table 3: Battery Specifications 8
Table 4: In Use Menu 11
Table 5: Menu Structure 12
Table 6: Dialing Shortcuts 25
Table 7: Specifications 48
Table 8: Storage Temperatures 50
iv

1910 OM-PRINT 11/19/56 12:11 AM Page v
Introduction
Using Your PCS Phone
The Samsung PCS phone is based on the latest CDMA digital
technology.It is used the same way as other wireless portable
phones.You will notice the sound and tone quality is clearer.
The Samsung CDMA PCS Phone
Congratulations on the purchase of your new Samsung CDMA PCS
Phone which uses the latest CDMA technology.
The PCS phone is easy to use. Among its fe a t u res and functions are :
• Large Five-Line LCD
• Three-Line,12-Character, Alphanumeric Display
• Two Icon Lines
• 99 Alphanumeric Memory Locations
• Caller ID
• Last Nine Numbers Redial
• Short Message Service (SMS)
• Call Restriction
• Power Save Mode
v

1910 OM-PRINT 11/19/56 12:11 AM Page vi

1910 OM-PRINT 11/19/56 12:11 AM Page 1
1
Getting Started
Unpacking Your Consumer Package
Phone–Basic Description
Battery Installation
Charging Your Battery
Using the Phone–Basic Functions
1
1910 OM-PRINT 11/19/56 12:11 AM Page 2
Getting Started
Unpacking Your Consumer Package
Upon unpacking your Samsung PCS phone, you should find the
following components:
• PCS Phone
• Standard NiMH Battery
• Rapid Desktop Charger
• Owner’s Manual
2
1910 OM-PRINT 11/19/56 12:11 AM Page 3
Getting Started
Phone – Basic Description
The Samsung PCS phone has a number of function keys and
controls that activate all features available on the phone. The
indicators and controls are described in this section.
1
2
3
4
5
6
1.Red Light
2.Volume Control
3.Send key
4.Scrolling keys
5.Power key
1
(not actual size)
6.Clear key
7.Microphone
8.Store key
9.Menu key
10.Message key
13
12
11
10
4
9
8
7
11.End key
12.LCD
13. Antenna
3
1910 OM-PRINT 11/19/56 12:11 AM Page 4
Getting Started
4

1910 OM-PRINT 11/19/56 12:11 AM Page 5
Getting Started
1
signal
strength
paging,
text or
voicemail
phone
lock
ringer off
battery
strength
Figure 1: LCD Display (example only)
The display icons described match the displayed icons on the LCD
display when you first power up the phone.
5

1910 OM-PRINT 11/19/56 12:11 AM Page 6
Getting Started
Table 2: Icon Functions
Image Icon Name Description/Function
SVC
NOSVC
IN USE
ROAM
Signal Measures your current real-
Service Indicates that you are inside a
No
Service
In Use Indicates that a call is in
Roaming Indicates the phone is outside
Battery Indicates the level of your
Message Flashes when you have a page,
Lock Displayed when the phone is
Ringer Ringer off
Banner A personalized 12 character
time signal strength. The more
bars there are, the stronger the
signal.
service area and can make a
call with your phone.
Indicates that you are outside a
service area and cannot make a
call with your phone.
progress.
of its home service area.
battery charge. The more bars
you see, the more power you
have left. When the charge is
low, the icon blinks and an
alert tone sounds.
text message or voicemail
message.
locked. You must enter your
four-digit lock code to unlock
the phone.
greeting available on the
display that announces the
label at power up and in
standby mode.
6

1910 OM-PRINT 11/19/56 12:11 AM Page 7
Getting Started
Battery Installation
Your new PCS Phone comes with a rechargeable battery that is
partially charged so you can use it immediately after you activate
with your PCS carrier. The phone and the battery are not initially
attached. To use the phone battery the first time,install the batter y
according to the instructions below. Use the phone until the
battery icon in the display window flashes or until the phone turns
itself off.
Installing the Standard Battery
1. Hold the battery,with the label facing down,making sure the
metal contacts at the base of the battery line up with the metal
contacts on the base of the phone.
2. Place the battery on the back of the phone with the top of the
battery about a quarter of an inch from the latch.
3. Gently slide the battery toward the top of the phone until it
snaps into place.
1
7

1910 OM-PRINT 11/19/56 12:12 AM Page 8
Getting Started
Battery Charge Indicator
The display icon (in the lower right corner of the phone’s
display window) tells you the status of the battery’s charge.As the
battery charge level goes down,sections of the battery icon
disappear.When the battery charge level is extremely low,the
battery icon will blink and a tone will sound.
When the battery is completely discharged,a tone will sound and
the phone will turn off automatically.Watch the indicator to be
sure the battery charge is at an acceptable level.
If your battery seems to be losing its charge rapidly,it may need to
be conditioned.This is done by using the Conditioner feature of
the Samsung Rapid Desktop Charger.(See “Using the Conditioner
Cycle”on page 10.)
PostScript Picture
(Microsoft Word - tablesv)
8

1910 OM-PRINT 11/19/56 12:12 AM Page 9
Getting Started
Charging Your Battery
Rapid Desktop Charger with Conditioner
1. Insert the battery (with the phone attached) into the
front compartment.
2. Insert a second (or spare) battery into the back
compartment,if you wish to charge the two batteries
sequentially. The battery in the front compartment will
charge first.
The Front Compartment is used for charging a battery with the
phone attached.
The Back Compartment is used for charging an unattached
battery and/or conditioning the battery.
A Red Light on the charger means the battery is being charged. A
green light means the battery is at least 90% charged.
If the standard battery is completely discharged,it will fully
recharge in approximately two hours.(The extended battery takes
up to three hours to fully recharge.)
If you leave the power on your phone turned ON while it is in the
charger,it will take longer to recharge the battery.It will not harm
the battery to remain in the charger once it is fully charged.
1
9

1910 OM-PRINT 11/19/56 12:12 AM Page 10
Getting Started
Using the Conditioner Cycle
1. Insert the battery into the back compartment of the Rapid
Desktop Charger.
2. Within the first five seconds after inserting the battery,press the
Conditioner button on the side of the charger for one full
second to begin the conditioning cycle.
3. The LED will change from a solid red to a blinking amber light.
This indicates that the battery is discharging.
4. After the battery is completely dischar ged,the LED will change
to a solid red,indicating that the discharge cycle is complete and
the battery is being charged.
5. The charger will rapidly charge the battery until it is 90%
charged.The LED will turn green.The charger will then begin to
trickle charge the battery until it is completely charged.
6. After the discharge-charge cycle is complete,the battery has
been conditioned.
Note:Use only the Samsung-approved Rapid Desktop Charger and
AC Adapter with the Samsung PCS phone.Using the wrong
charger could damage the battery.
10
1910 OM-PRINT 11/19/56 12:12 AM Page 11
Getting Started
Using the Phone—Basic Features
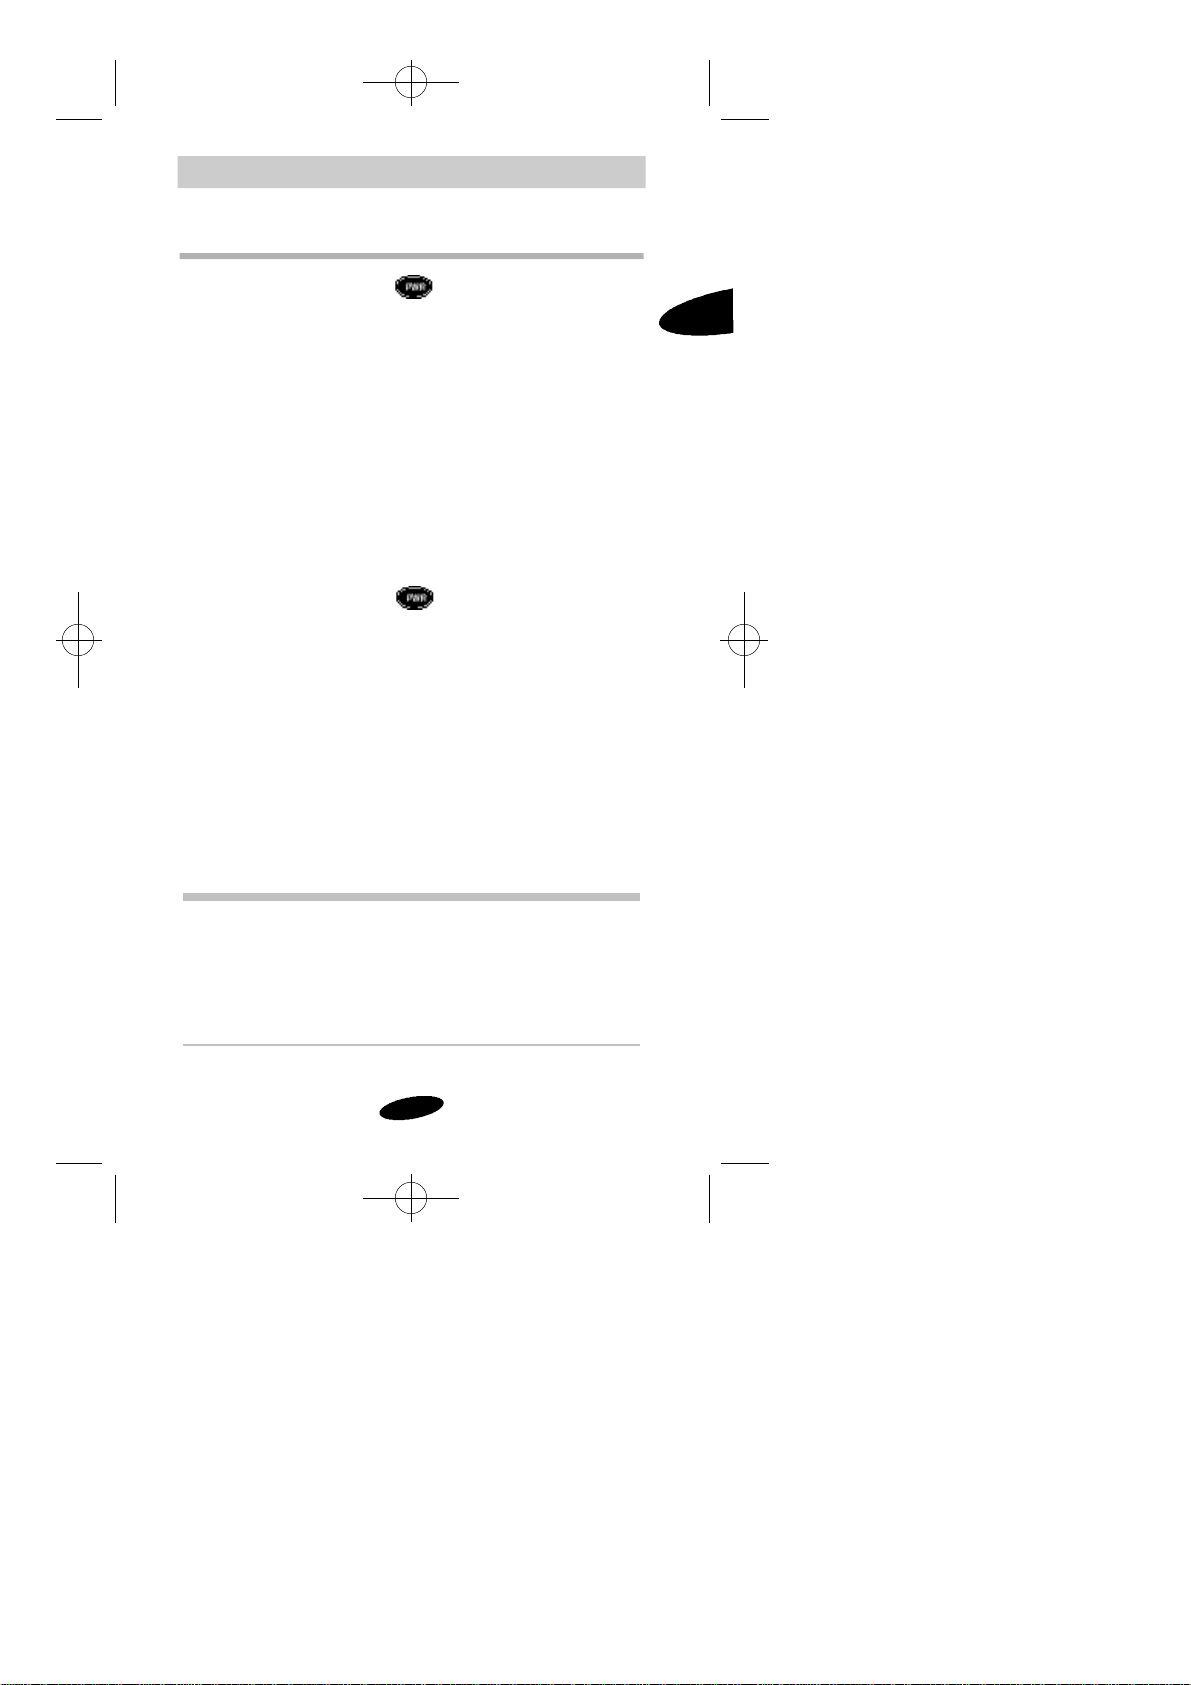
1. To turn the phone on,press for one full second.The red
light flashes,a tone sounds,and the display icons brief ly flash
the personal greeting,“SAMSUNG PCS”,and the phone’s number
displays momentarily on the LCD.“FINDING SERVICE”appear s
while the phone locates service.
2. Once service is located,the Banner shows, for example this
service provider:
Samsung PCS
11:30P Jul04 (Refer to page 5 for an example of the LCD.)
3. You can only place and receive calls if the phone’s power is on.
When the power is on and you are not talking,the phone is in
“Standby Mode.”
4. To turn the phone off,press for one full second. A tone
will sound and the display clears.
Menu Structures
The organization of the menu items is determined by the
frequency of use. For each menu level,there will be at most 10 sublevels. The labels for each menu do not exceed 10 characters.Each
menu item is prefixed by a number from 1 to 7, including 0 for the
Keyguard function.Table 5:Menu Structure represents the
organization of menus used in the handset. The menu options that
contain other menu sub-levels are shown in bold type.
1
Table 4: In Use Menu
In Use Menu 1: Mute
2: Silent Key
3. Phone Book
4. My Phone #
5: Version
6: Send Tel#
1: Recall by
2: Store
3. Erase
11

1910 OM-PRINT 11/19/56 12:12 AM Page 12
Getting Started
Table 5: Menu Structure
Main Menu Menu Level 1 Menu Level 2
1: Call Logs 1: Outgoing
2: Phone
Book
3: Sounds 1: Ring Vol
4: Display 1: Backlight
5: Security 1: Lock
6: Alert 1: MinuteBeep
7: Setup 1: AutoRetry
2: Incoming
3: Erase Logs
4: Air Time 1: Last Call
1: Recall by
2: Store
3: Erase by
2: Key Vol
3: Ring Type
4: MSG Ring
2: My Phone#
3: Greeting
4: Version
2: Restrict
3: Lock Code
4: Emergency
5: ResetPhone
2: Service
2: AnyKeyAns
3: ToneLength
2: Total
3: EraseTotal
1: Name
2: Digits
3: Mem #
1: Name
2: Mem#
1: Phone Book
2: incoming
3: Outgoing
1: <Number1>
2: <Number2>
3: <Number3>
12

1910 OM-PRINT 11/19/56 12:12 AM Page 13
Getting Started
Placing A Call
1. Be sure the phone is turned on.If display icons appear on the
screen,the power is on.There is no dial tone.
2. Enter a phone number (up to 32 digits).
3. Press .You hear tones as the phone dials the
number. The display shows the connection, for example
(972) 555-1111.
4. At the end of the call,press to disconnect.
Receiving a Call
1. When your phone rings,press to answer.
2. To disconnect at the end of the call,press .Do not turn the
power off if you are expecting further calls.
Ending a Call
1. Press to terminate a call.
2. Press again to return to the phone’s GREETING.
Correcting a Misdialed Number
1. If you make a mistake while entering a phone number,press
to erase the number,one digit at a time.
2. Delete the entire number at once by pressing and holding down
until the number disappears or simply press .
3. Re-enter the phone number.
Redialing a Number
1. Press while in Standby Mode.
2. The last nine outgoing numbers will be displayed.
3. S c ro l lt h ro u g ht h e l a s tn i n e nu m b e rs u s i n gt h e s c roll key s .
1
4. Press to call the displayed number with an arrow by it. To
redial the last outgoing call,press ,then press again.
13

1910 OM-PRINT 11/19/56 12:12 AM Page 14
Getting Started
Call Waiting
While connected in a call and a second call is received,use Call
Waiting. A tone sounds when the second call is received.
To use Call Waiting,do the following:
1. To put the first caller on hold,press to speak to the
second caller.
2. To switch back to the first caller,press again.
Disabling Call Waiting
Call Waiting can be temporarily disabled for the duration of a
specific call. To temporarily disable Call Waiting during a specific
call,do the following:
1. Press in this sequence: , , before dialing the
number.
2. When the call is ended,Call Waiting will be automatically
reactivated.
3. To permanently deactivate Call Waiting,call your service
provider by pressing in sequence: , , .
14

1910 OM-PRINT 11/19/56 12:12 AM Page 15
Getting Started
Call Forwarding
Incoming calls can be forwarded to another number,even if the
PCS Phone is turned off.When Call Forwarding is activated,
outgoing calls can still be made.
To Activate Call Forwarding
1. Press in sequence: , , .
2. Enter the 10-digit phone number (area code plus phone
number) of the forward-to phone number.
3. Press . A tone confirms that Call Forwarding is activated.
Deactivating Call Forwarding
Press in sequence: , , , , .A tone
confirms that Call Forwarding has been deactivated.
Three-Way Dialing
Three-Way Calling connects people at three different phone
numbers to talk to each other at the same time.This feature is
useful for call conferencing.
To Set Up a Three-Way Call:
1. While connected in a call,press to put the first
call on hold.
1
2. Dial the second number and press .
3. Wait until the second call is connected.
4. Press and the three-way call is complete.
15
 Loading...