

Page 1
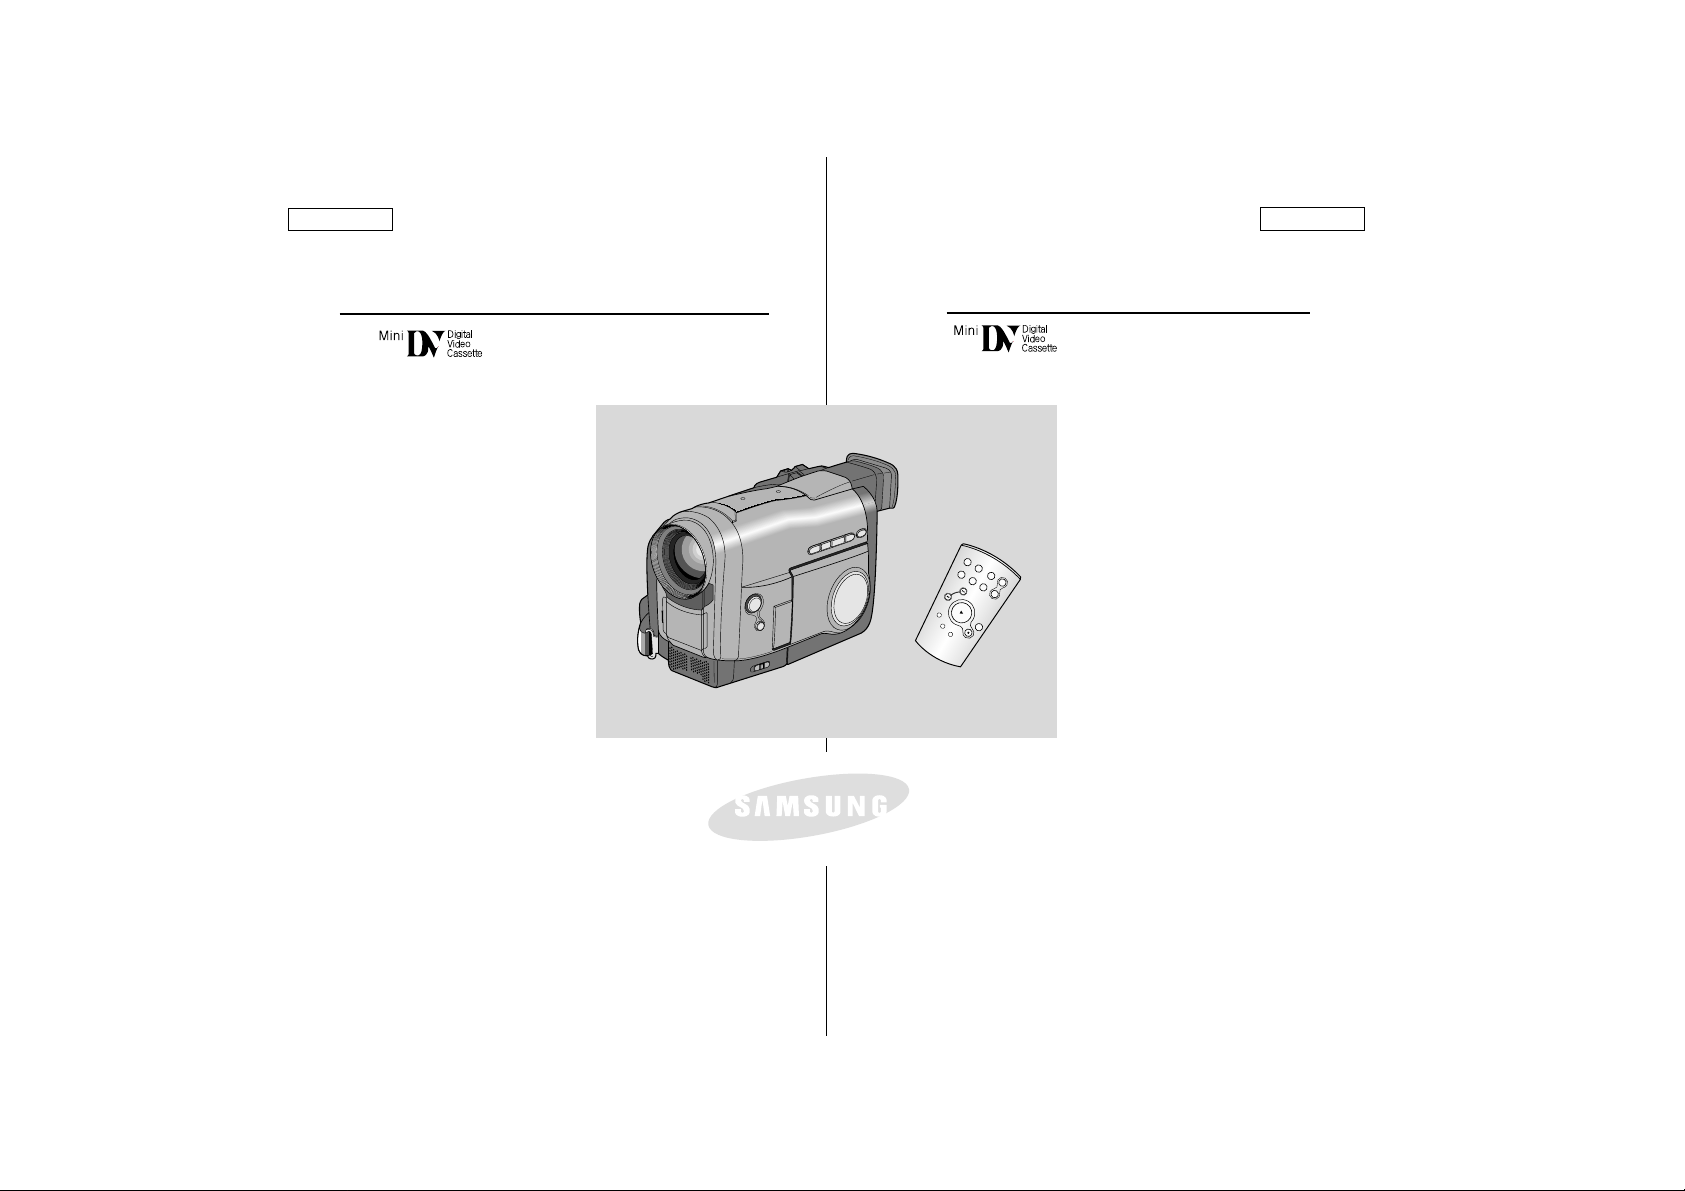
Digital Video Camcorder
Owner’s Instruction Book
Before operating the unit, please read this
instruction book thoroughly, and retain it for
future reference.
ELECTRONICS
SCD73/D75/D77
AD68-00400B
AF
Auto Focus
CCD
Charge Coupled Device
LCD
Liquid Crystal Display
Videocámara digital
AF
Enfoque automático
CCD
Dispositivo unido de recarga
LCD
Pantalla de cristal líquido
Manual de instrucciones del usuario
Antes de utilizar la videocámara, lea completamente el presente manual de instrucciones y
consérvelo para futuras consultas.
SCD73/D75/D77
ENGLISH ESPAÑOL
START/
STOP
PHOTO DISPLAY
SELF
TIMER
ZERO
MEMORY
WIDE
A.DUB
TELE
X2
SLOW
STILL
F.ADV
Page 2

2
Contents Contenido
ENGLISH ESPAÑOL
Features................................................................................................................................. 9
Accessories Supplied your with camcorder........................................................................ 10
Descriptions
FRONT & LEFT VIEW ................................................................................................. 11
LEFT SIDE VIEW........................................................................................................ 12
RIGHT & TOPVIEW ................................................................................................... 13
REAR & BOTTOM VIEW ............................................................................................ 14
REMOTE CONTROL................................................................................................... 15
OSD (On Screen Display) ........................................................................................... 16
How to use the Remote Control ......................................................................................... 18
Lithium Battery installation................................................................................................... 19
Adjusting the Hand Strap and Shoulder Strap.................................................................... 20
Connecting a Power Source .............................................................................................. 21
Using the Lithium Ion Battery Pack......................................................................................22
Inserting and Ejecting a Cassette ....................................................................................... 25
Making your First Recording ............................................................................................... 26
Hints for Stable Image Recording....................................................................................... 28
Adjusting the LCD................................................................................................................ 29
Using the VIEWFINDER...................................................................................................... 29
Playing back a tape you have recorded on the LCD .......................................................... 30
Controlling Sound from the Speaker................................................................................... 31
Using the various Functions
Setting the menu item.................................................................................................. 32
Availability of functions in each mode ......................................................................... 33
LCD ADJUST............................................................................................................... 34
CUSTOM SET ............................................................................................................. 34
DIS ............................................................................................................................... 35
PIP................................................................................................................................ 36
Zooming In and Out with DIGITALZOOM .................................................................. 37
PROGRAM AE............................................................................................................. 39
DSE (Digital Special Effects)....................................................................................... 40
WHITE BALANCE ....................................................................................................... 42
SHUTTER.................................................................................................................... 43
IRIS .............................................................................................................................. 44
Preparing
Advanced Recording
Basic Recording
Notices and Safety Instructions ................................................... 4
Getting to Know Your Camcorder
Características ........................................................................................................................9
Accesorios suministrados con la videocámara ..................................................................10
Descripciones
VISTAFRONTALY LATERAL IZQUIERDA..................................................................1 1
VISTALATERALIZQUIERDA ......................................................................................12
VISTALATERALDERECHA Y SUPERIOR ................................................................13
VISTAPOSTERIOR E INFERIOR................................................................................14
MANDO A DISTANCIA..................................................................................................15
OSD (Visualizador en pantalla) ....................................................................................16
Cómo utilizar el mando a distancia. ....................................................................................18
Instalación de la pila de litio..................................................................................................19
Ajuste de la correa de mano y de hombro ..........................................................................20
Conexión a la fuente de energía. ........................................................................................21
Uso de la batería de iones de litio........................................................................................22
Introducción y extracción de un casete ................................................................................25
Filmando por primera vez ....................................................................................................26
Consejos para la filmación de imágenes estables ..............................................................28
Ajuste de la pantalla LCD.................................................................................................... 29
Uso del VISOR..................................................................................................................... 29
Reproducción de la cinta en LCD ...................................................................................... 30
Control del sonido del altavoz .............................................. .............................................. 31
Uso de diversas funciones
Ajuste del elemento de menú ......................................................................................32
Funciones disponibles en cada modo..........................................................................33
LCD ADJUST ................................................................................................................34
CUSTOM SET ..............................................................................................................34
DIS ................................................................................................................................35
PIP ................................................................................................................................36
Lejos y cerca con DIGITALZOOM.............................................................................. 37
PROGRAMAAE............................................................................................................39
DSE (Efecto digital especial) ........................................................................................40
WHITE BALANCE ........................................................................................................42
SHUTTER ....................................................................................................................43
IRIS................................................................................................................................44
Preparación
Filmación avanzada
Filmación básica
Avisos e instrucciones de seguridad .......................................... 4
Conozca su videocámara
Page 3
3
Contents Contenido
ENGLISH ESPAÑOL
REC MODE.................................................................................................................. 45
REC LAMP................................................................................................................... 46
WIND CUT.................................................................................................................. 46
AUDIO MODE.............................................................................................................. 47
DISPLAY...................................................................................................................... 48
DATE/TIME.................................................................................................................. 49
DEMO........................................................................................................................... 50
CLOCK SET................................................................................................................. 51
Easy mode........................................................................................................................... 52
Custom mode....................................................................................................................... 53
MF/AF(Manual Focus/Auto Focus) ..................................................................................... 54
BLC ...................................................................................................................................... 55
Fade In and Out................................................................................................................... 56
Audio dubbing...................................................................................................................... 57
PHOTO ................................................................................................................................ 59
Using the video light ............................................................................................................ 61
Lighting Techniques............................................................................................................. 62
Various Recording Techniques............................................................................................ 63
To watch with the LCD......................................................................................................... 64
To watch with a TV monitor ................................................................................................ 64
Playback............................................................................................................................... 65
Various Functions in PLAYER mode................................................................................... 66
After finishing a recording .................................................................................................... 88
Cleaning and Maintaining the Camcorder .......................................................................... 89
Playing back a Tape
Using Your Camcorder Abroad ................................................. 90
Troubleshooting ............................................................................... 91
Specifications ................................................................................... 94
Index ................................................................................................... 96
IEEE 1394 Data Transfer ............................................................... 69
USB interface ................................................................................... 71
Digital Still Camera mode (SCD75/D77 only).............................. 75
Maintenance...................................................................................... 88
REC MODE ..................................................................................................................45
REC LAMP ..................................................................................................................46
WIND CUT ....................................................................................................................46
AUDIO MODE .............................................................................................................. 47
DISPLAY ......................................................................................................................48
DATE/TIME ..................................................................................................................49
DEMO ..........................................................................................................................50
CLOCK SET ................................................................................................................51
Modo de filmación EASY ....................................................................................................52
Modo de filmación CUSTOM ..............................................................................................53
MF/AF(Enfoque manual/Enfoque automático) ....................................................................54
BLC ......................................................................................................................................55
Entrada y salida gradual ...................................................................................................... 56
Doblaje de sonido ................................................................................................................57
PHOTO ................................................................................................................................59
Utilización del FOCO de ILUMINACIÓN del VÍDEO ..........................................................61
Técnicas de iluminación ......................................................................................................62
Diversas técnicas de filmación ............................................................................................63
Para ver en la pantalla LCD.................................................................................................64
Para ver en el monitor de TV .............................................................................................. 64
Reproducción........................................................................................................................65
Diversas funciones en modo PLAYER. ..............................................................................66
Al terminar la filmación ........................................................................................................88
Limpieza y mantenimiento de la videocámara....................................................................89
Reproducción de una cinta
Utilizar la videocámara en el extranjero .............................. 90
Resolución de problemas ............................................................ 91
Especificaciones ............................................................................ 94
Índice.................................................................................................. 96
Transferencia de datos IEEE 1394 ............................................ 69
Interfaz USB .................................................................................... 71
Modo digital Still Camera (sólo en SCD75/D77) ........................ 75
Mantenimiento ................................................................................ 88
Page 4
4
Notices and Safety Instructions Avisos e instrucciones de seguridad
ENGLISH ESPAÑOL
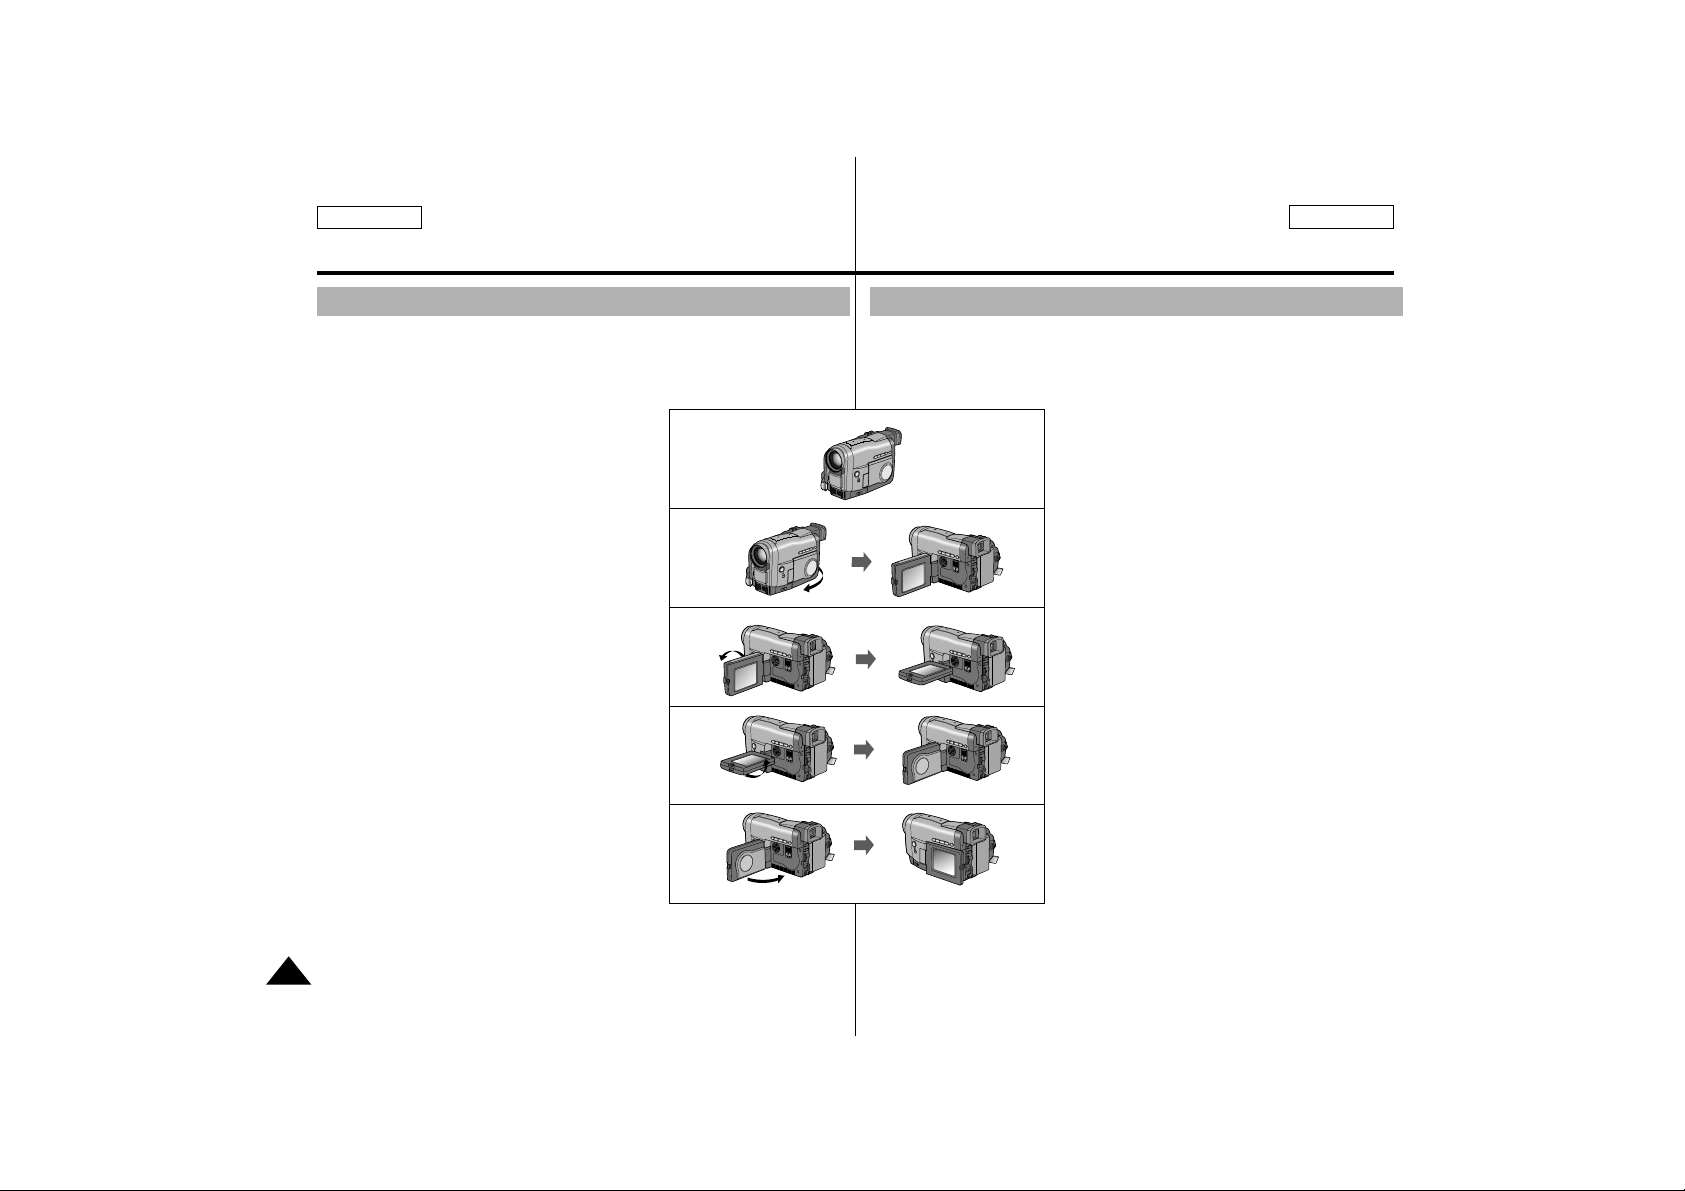
Please rotate the LCD screen carefully as illustrated.
Unintended rotation may cause damage to the inside of the hinge that
connects the LCD screen to the Camcorder.
1. LCD screen closed.
2. Standard recording by using the
LCD screen.
3. Making a recording by looking at the LCD
screen from the top.
4. Making a recording by looking at the LCD
screen from the front.
5. Making a recording with the LCD screen
closed.
Notices regarding rotation of LCD screen
1
2
3
4
5
90°
90°
90°
90°
Por favor, gire la pantalla LCD con cuidado como se muestra en la
ilustración. Un giro no intencionado puede ocasionar daños en la parte
interior de la bisagra que une la pantalla LCD con la videocámara.
1. Pantalla LCD cerrada.
2. Filmación estándar usando la
pantalla LCD.
3. Filmación mirando la pantalla LCD
desde arriba.
4. Filmación mirando la pantalla LCD
desde delante.
5. Filmación con la pantalla LCD
cerrada.
Avisos relativos al giro de la pantalla LCD
Page 5
5
Notices and Safety Instructions Avisos e instrucciones de seguridad
ENGLISH ESPAÑOL
Notices regarding COPYRIGHT
Television programs, video tapes, DVD titles, films, and other program
materials may be copyrighted.
Unauthorized copying of copyrighted material may be against the law.
1. A sudden rise in atmospheric temperature may cause condensation to
form inside the camcorder.
for example:
- When you move the camcorder from cold outside to warm inside
during the winter.
- When you move the camcorder from cool inside to hot outside during
the summer.
2. If the “DEW” protection feature is activated, leave the camcorder for at
least two hours in a dry, warm room with the cassette compartment
opened and the battery removed.
1. Do not leave the camcorder exposed to high temperature (above 60˚C
or 140˚F).
For example, in a parked car in the sun or under direct sunlight.
2. Do not let the camcorder get wet.
Keep the camcorder away from rain, sea water, and any other form of
moisture. If the camcorder gets wet, it may be damaged.
Sometimes malfunction cannot be repaired.
Notices regarding moisture condensation
Notices regarding CAMCORDER
Los programas de televisión, cintas de vídeo, títulos de DVD, películas y
otros materiales de programas pueden estar sometidos al derecho de
propiedad intelectual. La copia no autorizada de este material puede constituir un delito.
Avisos relativos a la condensación de la humedad
1. Un aumento repentino de la temperatura atmosférica puede generar
condensación en el interior de la videocámara:
Por ejemplo:
- Cuando pase la videocámara desde el frío exterior a un interior
caldeado en invierno.
- Cuando pase la videocámara de un interior fresco a un exterior
caliente en verano.
2. Si la función de protección “DEW” está activada, deje reposar la
videocámara durante dos horas como mínimo en un lugar seco y
caliente con el compartimento del casete abierto y la batería
extraída.
Avisos relativos al derecho de propiedad intelectual
Avisos relativos a la VIDEOCÁMARA
1. No deje la videocámara expuesta a altas temperaturas
(por encima de 60˚C ó 140˚F).
Por ejemplo, en un coche aparcado al sol o bajo la luz directa del sol.
2. No permita que se moje.
Proteja la videocámara de la lluvia, agua del mar y cualquier otra
forma de humedad. Si se moja la videocámara, podría dañarse y
a veces no se puede reparar.
Page 6

6
Notices and Safety Instructions Avisos e instrucciones de seguridad
ENGLISH ESPAÑOL
- Make sure the battery pack is fully charged before
recording starts.
- To preserve battery power, keep your camcorder
turned off when you are not operating it.
- When your camcorder is in CAMERA mode,
if it is left in STBY mode without operation for
more than 5 minutes with a tape installed,
it will automatically turn off to protect against
unnecessary battery discharge.
- Make sure that the battery pack is fitted firmly into place.
Dropping the battery pack may damage it.
- A brand new battery pack is not charged.
Before using the battery pack, charge it completely.
- It is a good idea to use the viewfinder instead of the LCD when recording for a long time, because the LCD uses up more battery power.
* When the battery reaches the end of its life, please contact your local
dealer.
The batteries have to be dealt with as chemical waste.
Notices regarding the battery pack
Notices regarding video head cleaning
- To ensure normal recording and a clear picture, clean the video heads
reguarly. If a square block-shaped noise distorts playback pictures, or if
only a blue screen is displayed during playback, the video heads may
be dirty. If this happens, clean the video heads with a dry type cleaning
cassette.
- Do not use a wet type cleaning cassette. It may damage the video
heads.
- Asegúrese de que la batería está totalmente
cargada antes de filmar en el exterior.
- Para conservar la energía de la batería, mantenga
su videocámara apagada cuando no la utilice.
- Cuando su videocámara esté en modo CAMERA,
se apagará automáticamente si se deja en STBY
más de cinco minutos sin funcionar con una cinta
instalada, para evitar una descarga innecesaria
de la batería.
- Asegúrese de que la batería está firmemente
colocada en su lugar.
La batería se puede dañar al caer al suelo.
- Las baterías nuevas no están cargadas.
Antes de utilizar la batería, debe cargarla totalmente.
- Es recomendable utilizar el visor en lugar de la pantalla LCD al filmar
durante un largo período de tiempo, ya que ésta consume más
energía de la batería.
*Cuando la batería llegue al final de su vida útil, póngase en contacto-
con su distribuidor local.
Las baterías deben tratarse como si fueran residuos químicos.
Avisos relativos a la batería
Avisos relativos a la limpieza del cabezal del vídeo
- Para asegurar filmaciones normales e imágenes claras, limpie los
cabezales del vídeo regulamente Si las imágenes reproducidas aparecen distorsionadas por ruido en forma de bloques cuadrados o si sólo
se visualiza una pantalla azul durante la reproducción, es que los
cabezales del vídeo están sucios. En este caso, limpie los cabezales
del vídeo con un cassette de limpieza de tipo seco.
- No utilice un cassette de limpieza de tipo húmedo.
Puede dañar los cabezales del vídeo.
Page 7
ENGLISH ESPAÑOL
7
Notices and Safety Instructions Avisos e instrucciones de seguridad
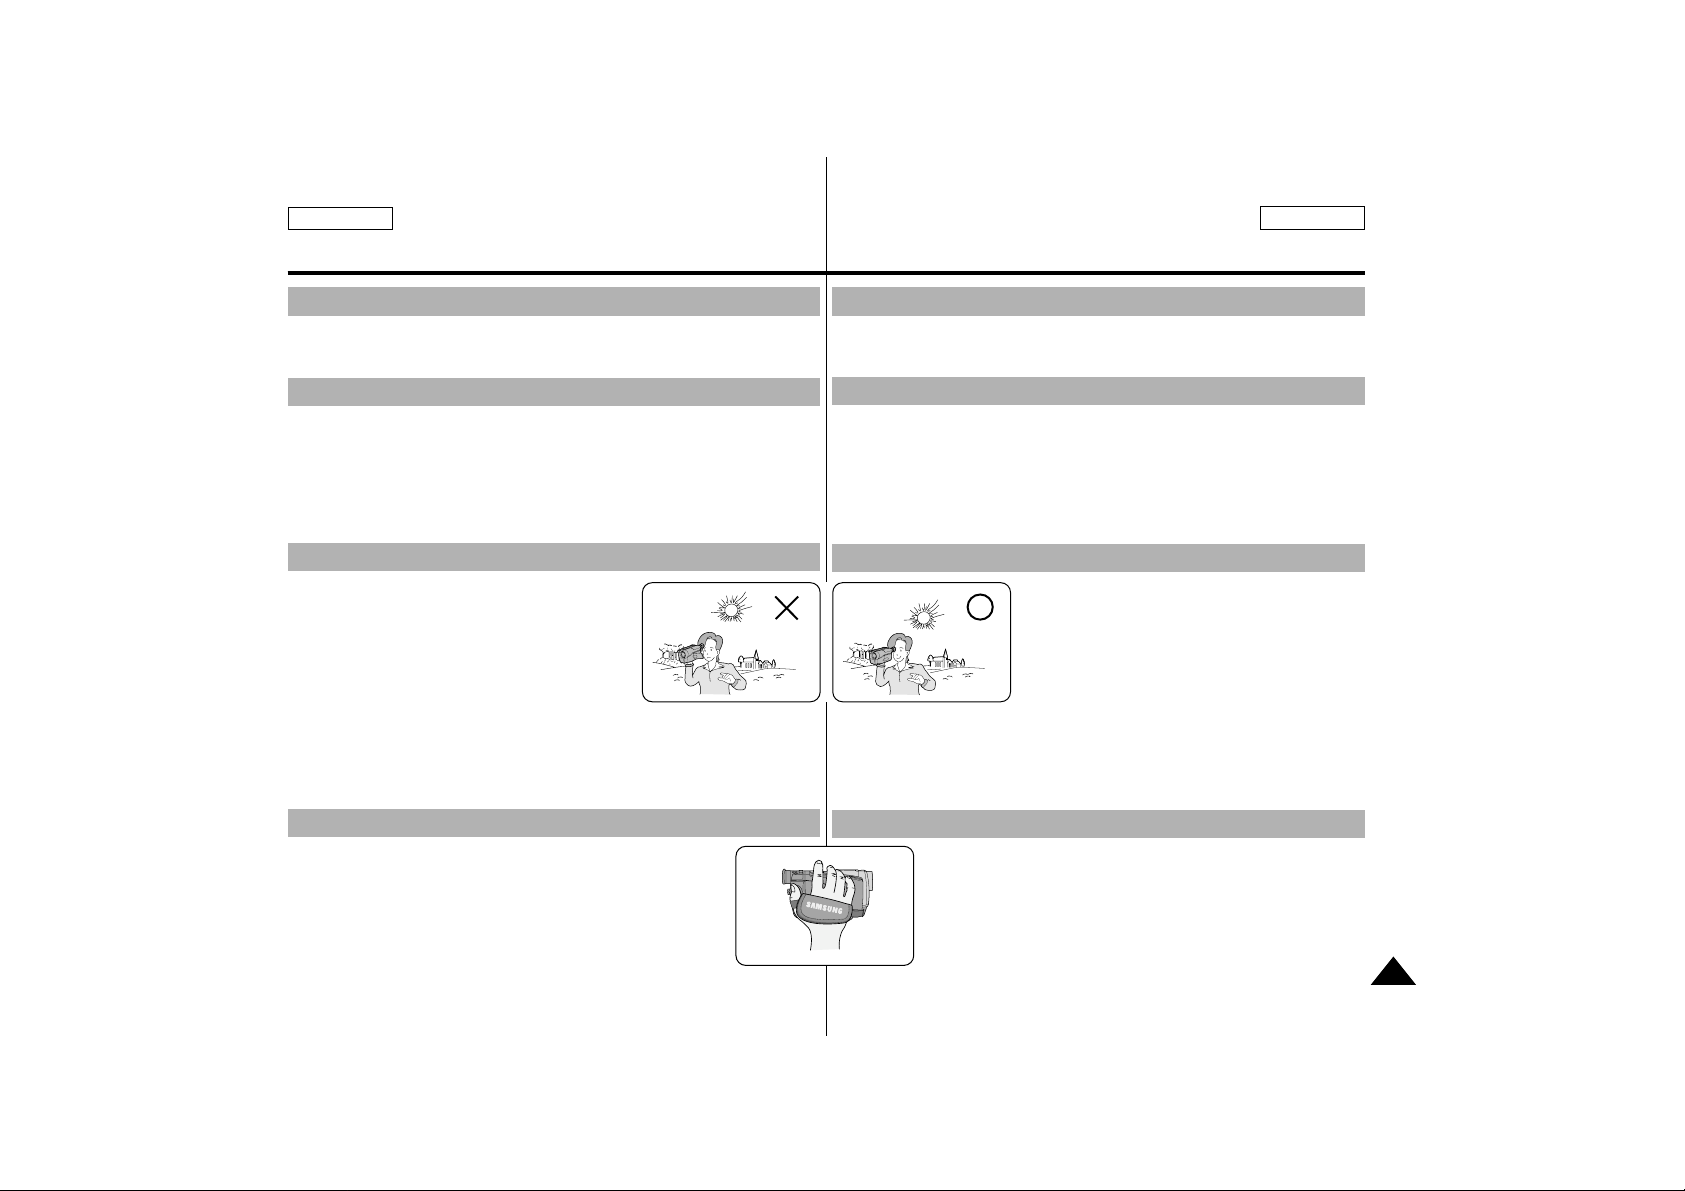
- Do not film with the camera lens pointing directly at the sun.
Direct sunlight can damage the CCD(Charge Coupled Device).
1. Do not position the camcorder such that the viewfinder is pointing
towards the sun.
Direct sunlight can damage the inside of the viewfinder.
Be careful when placing the camcorder under sunlight or by a window.
2. Do not pick up the camcorder by the viewfinder.
3. Over-rotation of the viewfinder may damage it.
1. The LCD display is manufactured using
high precision technology.
However, there can be tiny dots (red, blue
or green in color) that appear on the LCD
display.
These dots are normal and do not affect the
recorded picture in any way.
2. When you use the LCD display in direct sunlight or outdoors,
it may be difficult to see the picture.
If this occurs, we recommend that the viewfinder is used.
3. Direct sunlight can damage the LCD monitor.
- To ensure a steady picture during filming, check that the
hand strap is properly adjusted.
- Do not force your hand into the hand strap as you could
damage it.
Notice regarding the LENS
Notices regarding electronic viewfinder
Notices regarding Record or Playback using LCD
Notices regarding the hand strap
- No filme con las lentes de la cámara orientadas directamente hacia el sol.
La luz solar directa puede dañar el CCD (Dispositivo unido de recarga).
1. No coloque la videocámara de modo que el visor quede orientado
hacia el sol.
La luz directa del sol puede dañar el interior del visor.
Tenga cuidado cuando coloque la videocámara bajo el sol o junto a
una ventana.
2. No sujete la videocámara por el visor.
3. Si gira demasiado el visor, puede dañarse.
1. La pantalla LCD está fabricada con
tecnología de alta precisión.
Sin embargo, pueden aparecer pequeños
puntos (de color rojo, azul o verde) en la
pantalla LCD.
Estos puntos son normales y no afectan
a las imágenes filmadas.
2. Cuando utilice la pantalla LCD bajo la luz del sol o en el exterior, puede
que tenga dificultades para ver la imagen.
En este caso, es recomendable utilizar el visor.
3. La luz directa del sol pueden dañar la pantalla LCD.
- Para asegurar unas imágenes estables durante la
filmación, compruebe que la correa de mano esté
ajustada correctamente.
- No inserte la mano en la correa forzándola, podría
dañarla.
Aviso relativo a las lentes
Avisos relativos a la filmación y reproducción utilizando la LCD
Avisos relativos a la correa de mano
Avisos relativos al visor electrónico
Page 8
8
Notices and Safety Instructions Avisos e instrucciones de seguridad
ENGLISH ESPAÑOL
Precautions regarding the Lithium battery
Warning: Keep the LITHIUM BATTERY out of the reach of children.
Should any battery be swallowed, consult a doctor
immediately.
1. The lithium battery maintains the clock function and user settings;
even if the battery pack or AC adapter is removed.
2. The lithium battery for the camcorder lasts about 6 months under
normal operation from time of installation.
3. When the lithium battery becomes weak or dead, the date/time
indicator will flash for about five seconds when you set the power
switch to CAMERA.
In this case, replace the lithium battery with a new one(type CR2025 ).
Danger:
The video light can become extremely hot. Do not touch it during
operation or after turning it off, otherwise serious injury may result.
Take 5 minutes (approx.) for the light to cool down.
Do not place the camcorder into the carrying case immediately after
using the video light. The video light will be hot. Please allow time for it
to cool down.
Do not use near flammable or explosive materials.
It is recommended that you consult your nearest SAMSUNG dealer for
replacement bulbs.
DANGER - NOT TO BE HANDLED BY CHILDREN. EMITS INTENSE
HEATAND LIGHT. USE WITH CAUTION TO REDUCE
THE RISK OF FIRE OR INJURY TO PERSONS.
DO NOT DIRECT LIGHT AT PERSONS OR MATERIALS
FROM LESS THAN FOUR FEET DURING USE AND
UNTIL COOL. DISCONNECT WHEN NOT IN USE.
DANGER - TO PREVENT POSSIBLE BURN HAZARD,
DISCONNECT SUPPLY CORD AND ALLOW LAMP TO
COOL BEFORE REPLACING.
Notice regarding VIDEO LIGHT
Precauciones relativas a la pila de litio
Precaución: Mantenga la PILA DE LITIO fuera del alcance de los
niños. En caso de ingestión, consulte un médico de
inmediato.
1. La pila de litio mantiene la función de reloj y la memoria con contenidos prefijados; aunque se quite la batería o el adaptador de
corriente CA.
2. La pila de litio de la videocámara dura aproximadamente 6 meses
bajo funcionamiento normal, desde su instalación.
3. Cuando la pila de litio se debilita o se agota, el indicador de fecha/
hora parpadea unos 5 segundos cuando se pone el interruptor de
encendido en CAMERA. En este caso, cambie la pila de litio por
una nueva (de tipo CR2025).
Peligro:
El foco de iluminación del vídeo puede calentarse mucho. No lo toque
cuando esté en funcionamiento ni inmediatamente después de apagarlo, podría quemarse.
Deje transcurrir 5 minutos (aproximadamente) para que se enfríe
No guarde la videocámara en su bolsa inmediatamente después de
utilizar el foco de iluminación del vídeo, ya que estará caliente.
Deje pasar un rato para que se enfríe.
No lo utilice cerca de materiales inflamables ni explosivos.
Se recomienda consultar al concesionario de SAMSUNG más cercano
para reemplazar las bombillas.
PELIGRO - LOS NIÑOS NO DEBEN MANEJARLO. EMITE CALOR Y
LUZ INTENSOS. DEBE UTILIZARSE CON CUIDADO
PARA REDUCIR EL RIESGO DE INCENDIO Y QUEMADURAS. NO DIRIJA LA LUZ HACIA PERSONAS O
MATERIALES SITUADOS A MENOS DE CUATRO PIES
DURANTE SU USO Y HASTA QUE SE HAYA ENFRIADO.
DEBE DESCONECTARSE CUANDO NO SE UTILICE.
PELIGRO - PARA EVITAR QUEMADURAS, DESCONECTE EL
CABLE ELÉCTRICO Y DEJE QUE EL FOCO SE ENFRÍE
ANTES DE CAMBIARLO.
Aviso relativo al FOCO de ILUMINACIÓN del VÍDEO
Page 9

9
Getting to Know Your Camcorder Conozca su videocámara
ENGLISH ESPAÑOL
•
Digital data transfer function with IEEE1394
By incorporating IEEE 1394 (i.LINKTM: i.LINK is a serial data transfer protocol
and interconnection system, used to transmit DV data) high speed data
transport port, moving and still images can be transferred to PC, making it
possible to produce or edit various images.
•
USB interface for digital image data transfer
You can transfer standstill images and short video clip to PC using the USB
interface without any add-on card.
•
PHOTO
The PHOTO function lets you capture an object as a still along with sound,
while in Camera mode.
•
500x Digital zoom
Allow you to magnify an image to up to 500 times its original size.
•
Color TFT LCD
A high-resolution color TFT LCD (with 112,320 pixels) gives you clean,
sharp images as well as the ability to review your recordings immediately.
•
Digital Image Stabilizer
The DIS compensates for handshake, reducing unstable images particularly at
high magnification.
•
Various digital effects
The DSE (Digital Special Effects) allows you to give your films a special look by
adding various special effects.
•
Back Light Compensation ( BLC )
When you record a subject with the light source behind it or a subject with a
light background, the BLC function compensates for the bright background.
•
Program AE
The Program AE enables you to alter the shutter speed and aperture to suite
the type of scene/action to be filmed.
•
Digital Still Camera function (SCD75/D77 only)
■
Using the built-in 4MB memory (SCD75 only) or Smart Media Card
(SCD77 only), you can easily record and playback standstill images.
■
You can transfer standstill images on the built-in memory or Smart Media
Card to PC using USB interface.
Features
•
Función de transferencia de datos digital con IEEE1394
Mediante la incorporación del puerto de transporte de datos a alta
velocidad IEEE 1394 (i.LINKTM: i.LINK es un protocolo de transferencia de datos
serie y un sistema de interconexión, que se utiliza para transmitir datos DV), se
pueden transferir imágenes en movimiento y fijas a un PC, lo que permite
producir o editar diversas imágenes.
•
Interfaz USB para la transferencia de datos de imágenes digitales
Puede transferir imágenes fijas y vídeos cortos al PC con la interfaz USB y sin
ninguna tarjeta adicional.
•
PHOTO
La función PHOTO permite capturar un objeto como imagen fija junto con
sonido, mientras está en modo CAMERA.
•
Zoom digital 500x
Permite aumentar una imagen hasta 500 veces su tamaño original.
•
LCD TFT en color
La pantalla LCD TFT en color de alta resolución (112.320 píxeles)
ofrece imágenes limpias y precisas así como la posibilidad de revisar las
filmaciones inmediatamente.
•
Estabilizador digital de imágenes
DIS compensa el temblor de manos que puede producirse, lo que reduce las
imágenes inestables especialmente a gran aumento.
•
Diversos efectos digitales
DSE (Efectos especiales digitales) permiten dar a las películas un toque
especial añadiendo varios efectos especiales.
•
Compensación de la iluminación posterior (BLC)
Al filmar un motivo con la fuente de luz detrás del mismo o con un fondo claro,
la función BLC compensa la iluminación del fondo.
•
Programa AE
El Programa AE le permite adaptar la velocidad y abertura del obturador al tipo
de escena o acción que va a filmarse.
•
Función Digital Still Camera (sólo en SCD75/D77)
■
Con la memoria de 4 MB incorporada (sólo en SCD75) o la tarjeta Smart
Media (sólo en SCD77, puede grabar y reproducir imágenes fijas con facilidad.
■
Puede transferir imágenes fijas de la memoria incorporada o la tarjeta Smart
Media al PC mediante la interfaz USB.
Características
Page 10
ENGLISH ESPAÑOL
10
Getting to Know Your Camcorder Conozca su videocámara
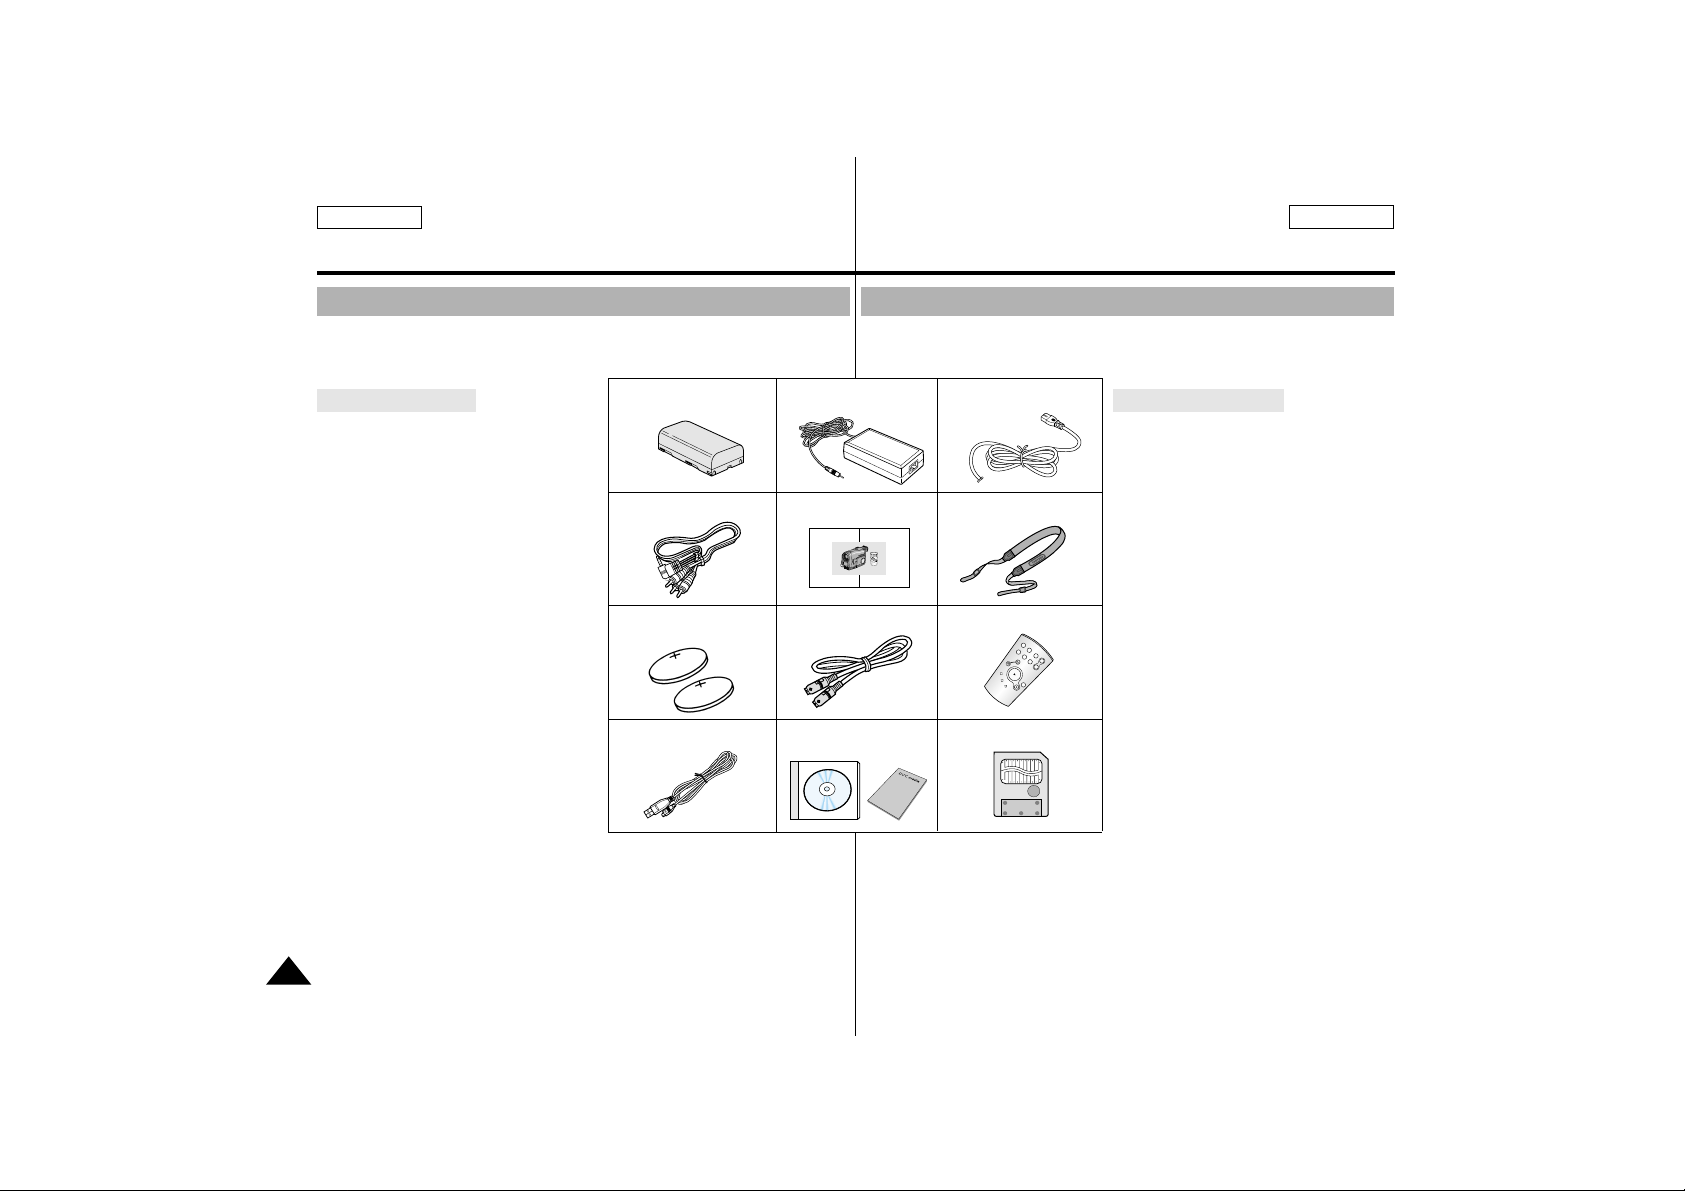
Make sure that the following basic accessories are supplied with your
digital video camera.
Accessories Supplied with camcorder
Basic Accessories
1. Lithium Ion Battery pack
2. AC Power Adapter
3. AC cord
4. AUDIO/VIDEO cable
5. Instruction Book
6. Shoulder Strap
7. Lithium batteries for Remote
Control and Clock.
(TYPE: CR2025, 2 EA)
8. S-VIDEO cable
9. Remote Control
10. USB cable
11. Software CD/Instruction Book
12. SmartMediaCard
(SCD77 only)
1. Lithium Ion Battery pack
3. AC cord
4. AUDIO/VIDEO cable
9. Remote Control
8. S-VIDEO cable7. Lithium batteries (2EA)
5. Instruction Book
2. AC Power Adapter
6. Shoulder Strap
START/
STOP
SELF
TIMER
X2
SLOW
F.ADV
A.DUB
ZERO
MEMORY
WIDE
TELE
STILL
PHOTO DISPLAY
8MB-3.3
10. USB cable
11. Software
CD/Instruction Book
12. SmartMediaCard
Asegúrese de que la videocámara digital se suministra con los siguientes accesorios básicos.
Accesorios suministrados con la videocámara
1. Batería de iones de litio
2. Adaptador de corriente CA
3. Cable CA
4. Cable de AUDIO/VÍDEO
5. Manual de instrucciones
6. Correa de hombro
7. Pilas de litio para el mando a
distancia y el reloj.
(TIPO: CR2025, 2 EA)
8. Cable de S-VIDEO
9. Mando a distancia
10. Cable USB
11. CD/Manual de instrucciones
de software
12. Tarjeta SmartMedia
(sólo en SCD77)
Accesorios básicos
START/
WIDE
PHOTODISPLAY
STOP
ZERO
SELF
A.DUB
MEMORY
TIMER
TELE
STILL
X2
SLOW
F.ADV
Page 11
11
Getting to Know Your Camcorder Conozca su videocámara
ENGLISH ESPAÑOL
Front & Left View
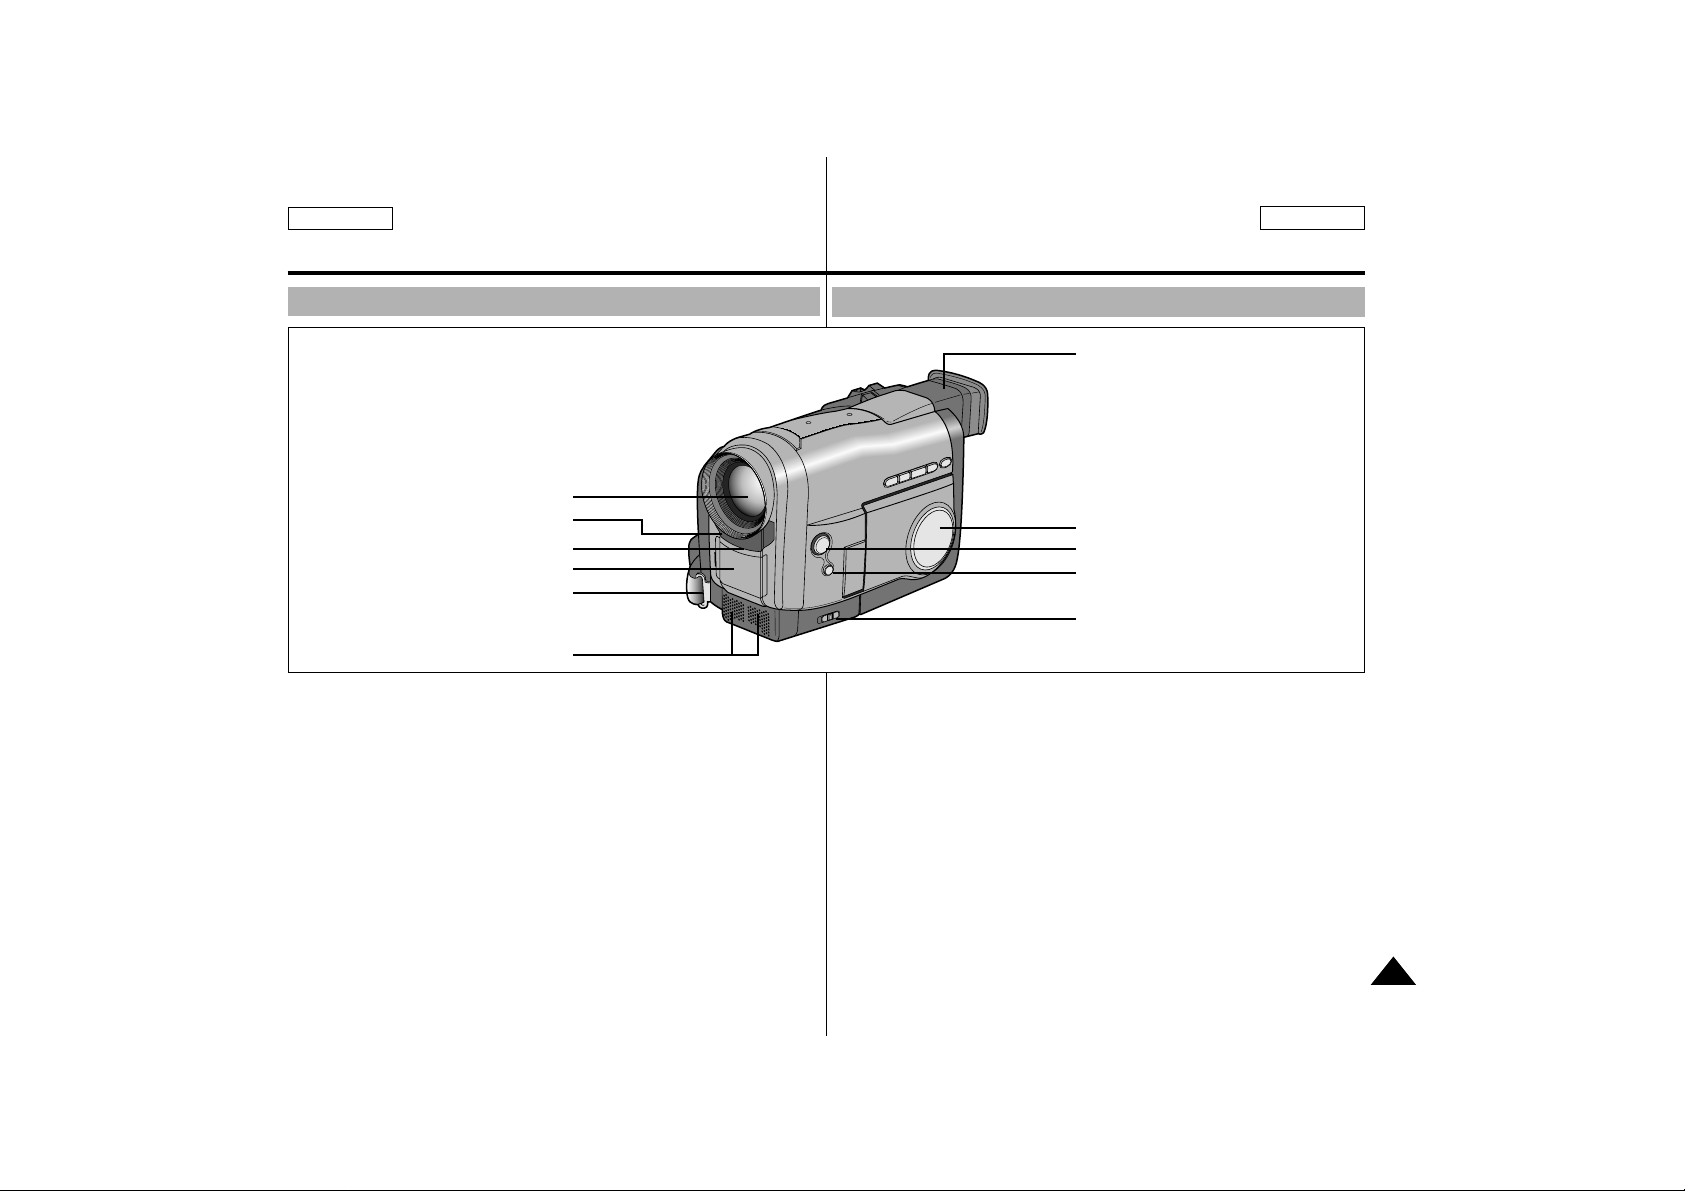
1. Lens
3.
Remote sensor
4. Video Light
5. Hook for hand strap
6. Internal MIC
11. Viewfinder
10. TFT LCD monitor
9. EASY button
8. CUSTOM button
7. Mode switch
(SCD75/D77 only)
1. Lens
2. REC lamp
3. Remote sensor
4. Video Light (see page 61)
5. Hook for hand strap (see page 20)
6. Internal MIC
7. Mode switch: CAMCORDER DSC (see page 21)
(SCD75/D77 only)
8. CUSTOM button (see page 53)
9. EASY button (see page 52)
10. TFT LCD monitor
11. Viewfinder (see page 29)
2.
REC lamp
↕
Vista frontal e izquierda
1. Lentes
2. Indicador de filmación
3. Sensor remoto
4. Foco de iluminación del vídeo (consulte la página 61)
5. Gancho para la correa de mano (Consulte la página 20)
6. Micrófono interno
7. Interruptor de modo: CAMCORDER DSC (consulte la página 21)
(sólo en SCD75/D77)
8. Tecla CUSTOM (Consulte la página 53)
9. Tecla EASY (Consulte la página 52)
10. Pantalla LCD TFT
11. Visor (Consulte la página 29)
↕
Page 12
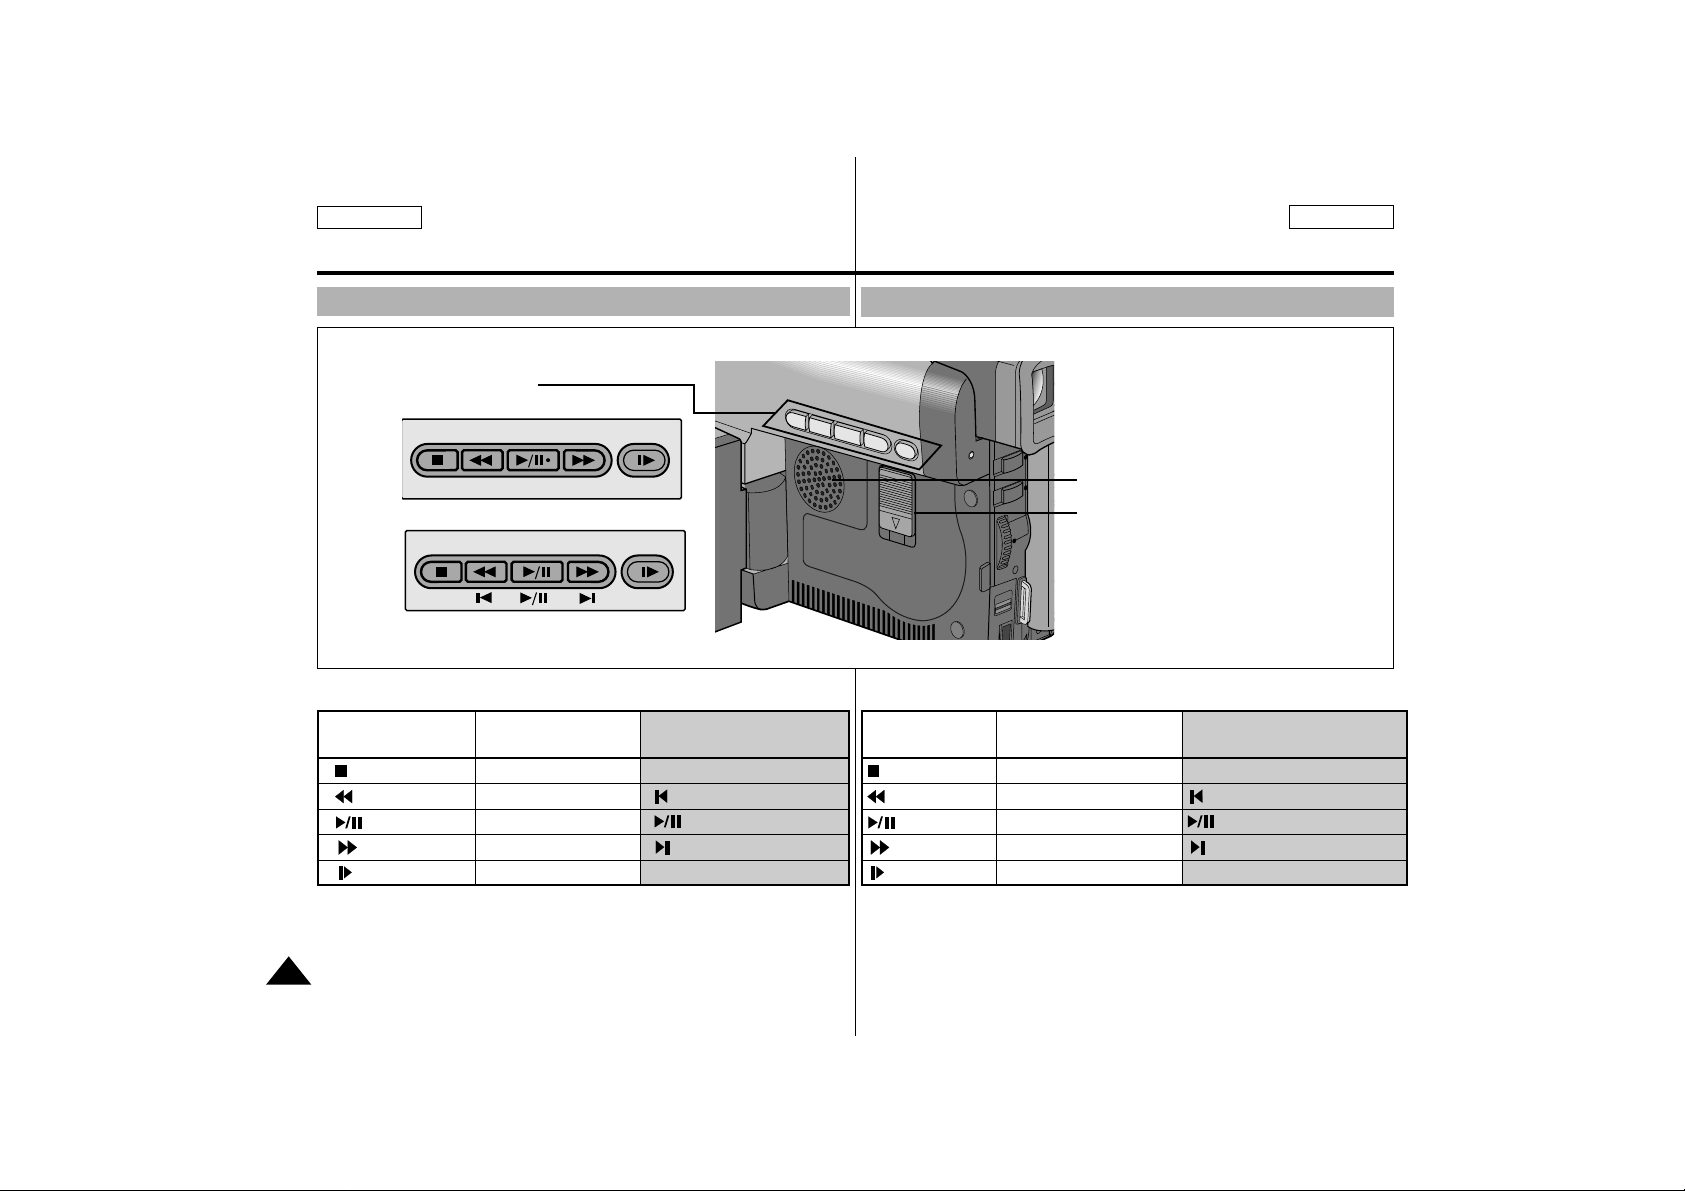
1. Teclas de función
2. Clavija para expulsar la tarjeta (consulte la página 77)
(sólo en SCD77)
3. ALTAVOZ
1. Function Keys
2. Card Eject switch (see page 77)
(SCD77 only)
3. SPEAKER
12
Getting to Know Your Camcorder Conozca su videocámara
ENGLISH ESPAÑOL
Left Side View
1. Function Keys
* SCD73
* SCD75/D77
3. SPEAKER
2. Card Eject Switch
(SCD77 only)
PLA YER CAMERA
DSC PLAYER
(SCD75/D77 only)
: (STOP) BLC (see page 55) DELETE (see page 83)
: (REW) EDIT – : MEM.–
: (PLAY/STILL) FADE (see page 56) : SLIDE (see page 81)
: (FF) EDIT + : MEM.+
: (SLOW) MF/AF (see page 54)
PLA YER CAMERA
DSC PLAYER
(sólo en SCD75/D77)
: (STOP) BLC
(consulte la página 55) DELETE (consulte la página 83)
: (REW) EDIT – : MEM.–
: (PLAY/STILL) FADE
(consulte la página 56)
:
SLIDE (consulte la página 81)
: (FF) EDIT + : MEM.+
: (SLOW)
MF/AF (consulte la página 54)
Vista lateral izquierda
BLC EDIT— FADE EDIT+ MF/AF
STOP REW
BLC EDIT— FADE EDIT+ MF/AF
DELETE
PLAY/STILL
FF SLOW
Page 13
13
Getting to Know Your Camcorder Conozca su videocámara
ENGLISH ESPAÑOL
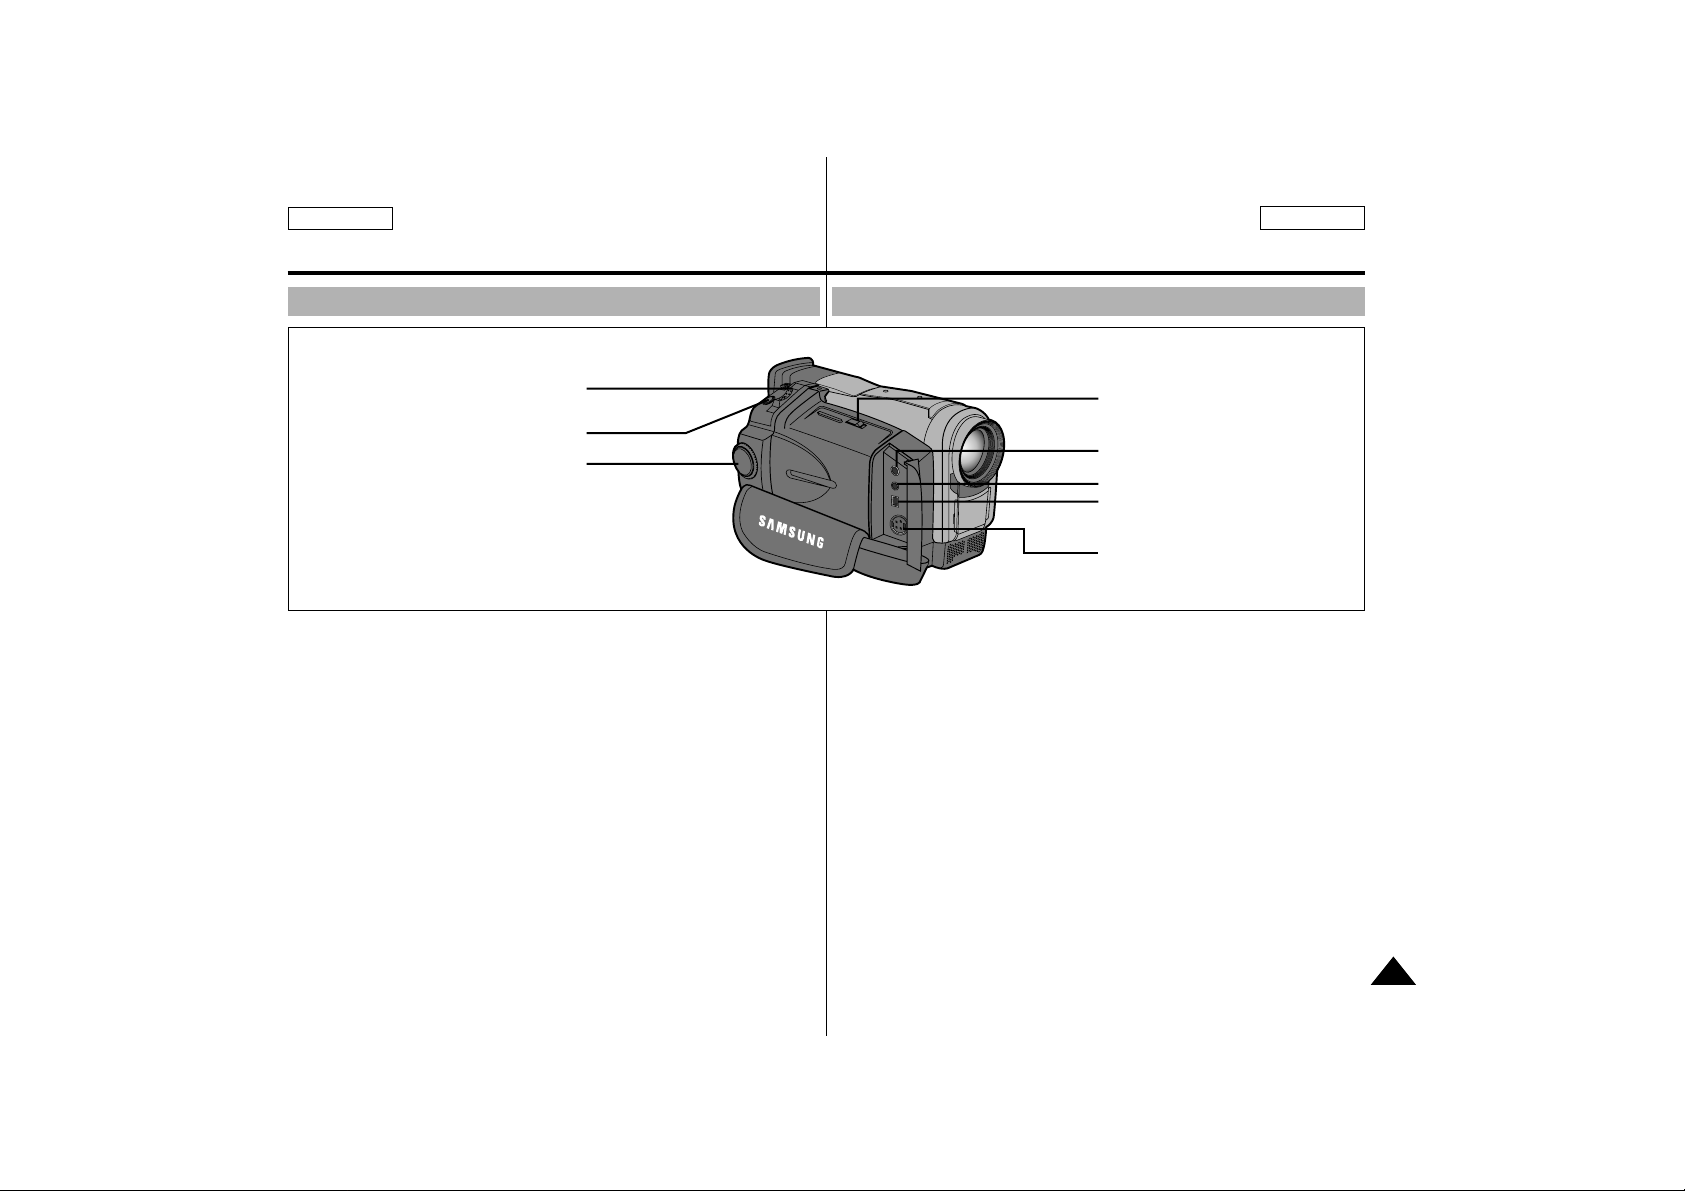
Right & Top View
8. OPEN/EJECT button
7. Audio/Video out
6. External MIC in
5. DV IN/OUT
4. S-VIDEO out
1. Zoom lever and Volume control
2. PHOTO button
3. Power switch
(CAMERA or PLAYER)
1. Zoom lever and Volume control (see page 31, 37)
2. PHOTO button (see page 59)
3. Power switch (CAMERA or PLAYER) (see page 21)
4. S-VIDEO out
5. DV IN/OUT (see page 70)
6. External MIC in (see page 57)
7. Audio/Video out
8. OPEN/EJECT button (see page 25)
Vista lateral derecha y superior
1. Palanca del zoom y control del volumen (Consulte la página 37)
2. Tecla PHOTO (Consulte la página 58)
3. Interruptor de encendido (CAMERA o PLAYER)
(Consulte la página 21)
4. Salida de S-VIDEO
5. DV IN/OUT (Consulte la página 70)
6. Entrada de micrófono externo (Consulte la página 57)
7. Salida de audio/vídeo
8. Tecla OPEN/EJECT (Consulte la página 25)
Page 14
14
Getting to Know Your Camcorder Conozca su videocámara
ENGLISH ESPAÑOL
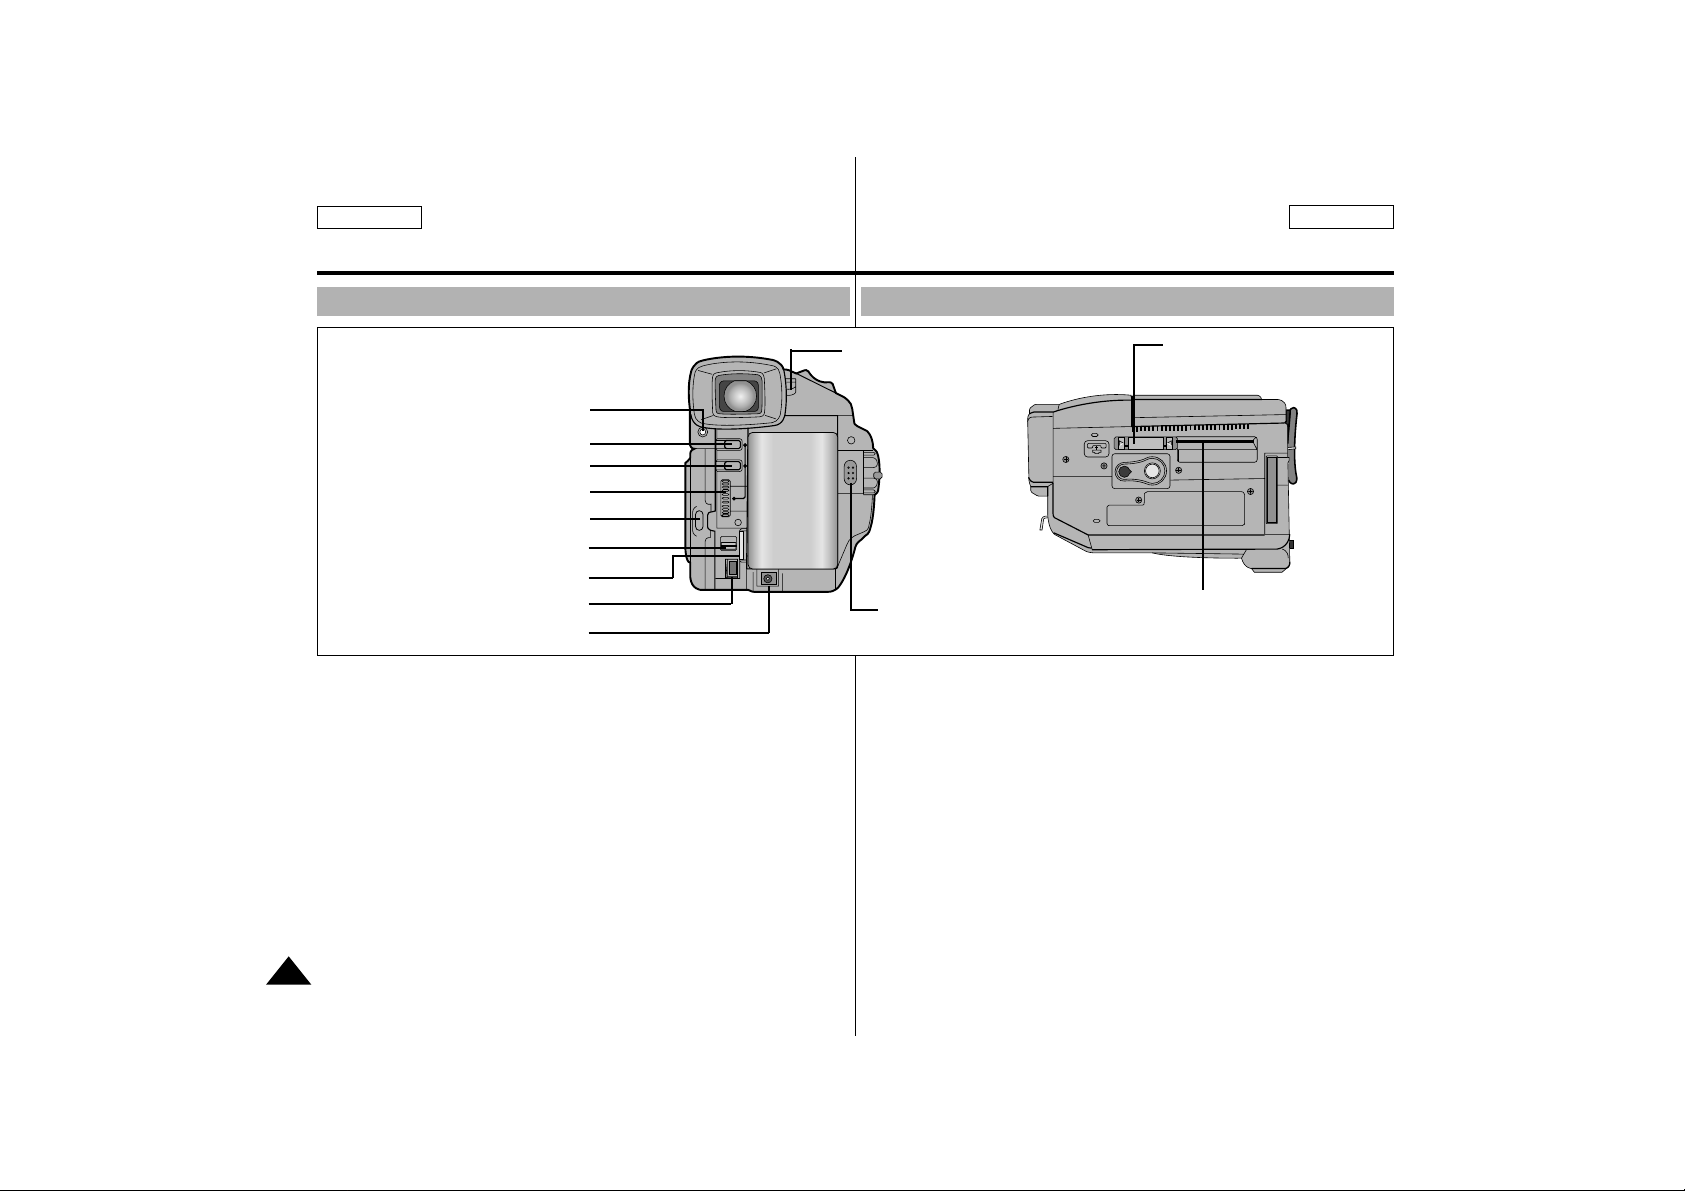
Rear & Bottom View
11. Battery Release button
10. START/STOP button
13. CARD slot
(SCD77 only)
12. Lithium Battery
Holder
1. Charging indicator
2. MENU ON/OFF button
3. ENTER/DISPLAY button
4. MENU DIAL
5. LCD open
6. LIGHT switch
7. Hook for shoulder strap
8. USB jack
9. DC jack
1. Charging indicator
(see page 22)
2. MENU ON/OFF button
(see page 32)
3. ENTER/DISPLAY button
4. MENU DIAL (see page 32)
5. LCD open
6. LIGHT switch (see page 61)
7. Hook for shoulder strap
8. USB jack (see page 74)
9. DC jack (see page 21)
10. START/STOP button
(see page 26)
11. Battery Release button
(see page 88)
12. Lithium Battery holder
(see page 19)
13. CARD slot
(SCD77 only)
Vista posterior e inferior
1. Indicador de carga
(Consulte la página 22)
2. Tecla MENU ON/OFF
(Consulte la página 32)
3. Tecla ENTER/DISPLAY
4. MENU DIAL
(Consulte la página 32)
5. Abrir LCD
6. Interruptor del FOCO de
ILUMINACIÓN (consulte la
página 61)
7. Gancho para la correa de
hombro
8. Conexión USB (consulte la
página 74)
9. Salida de CC
(Consulte la página 21)
10. Tecla START/STOP
(Consulte la página 26)
11. Tecla de liberación de la
batería
(Consulte la página 88)
12. Soporte de la pila de litio
(Consulte la página 19)
13. Ranura para tarjeta
(sólo en SCD77)
Page 15
15
Getting to Know Your Camcorder Conozca su videocámara
ENGLISH ESPAÑOL
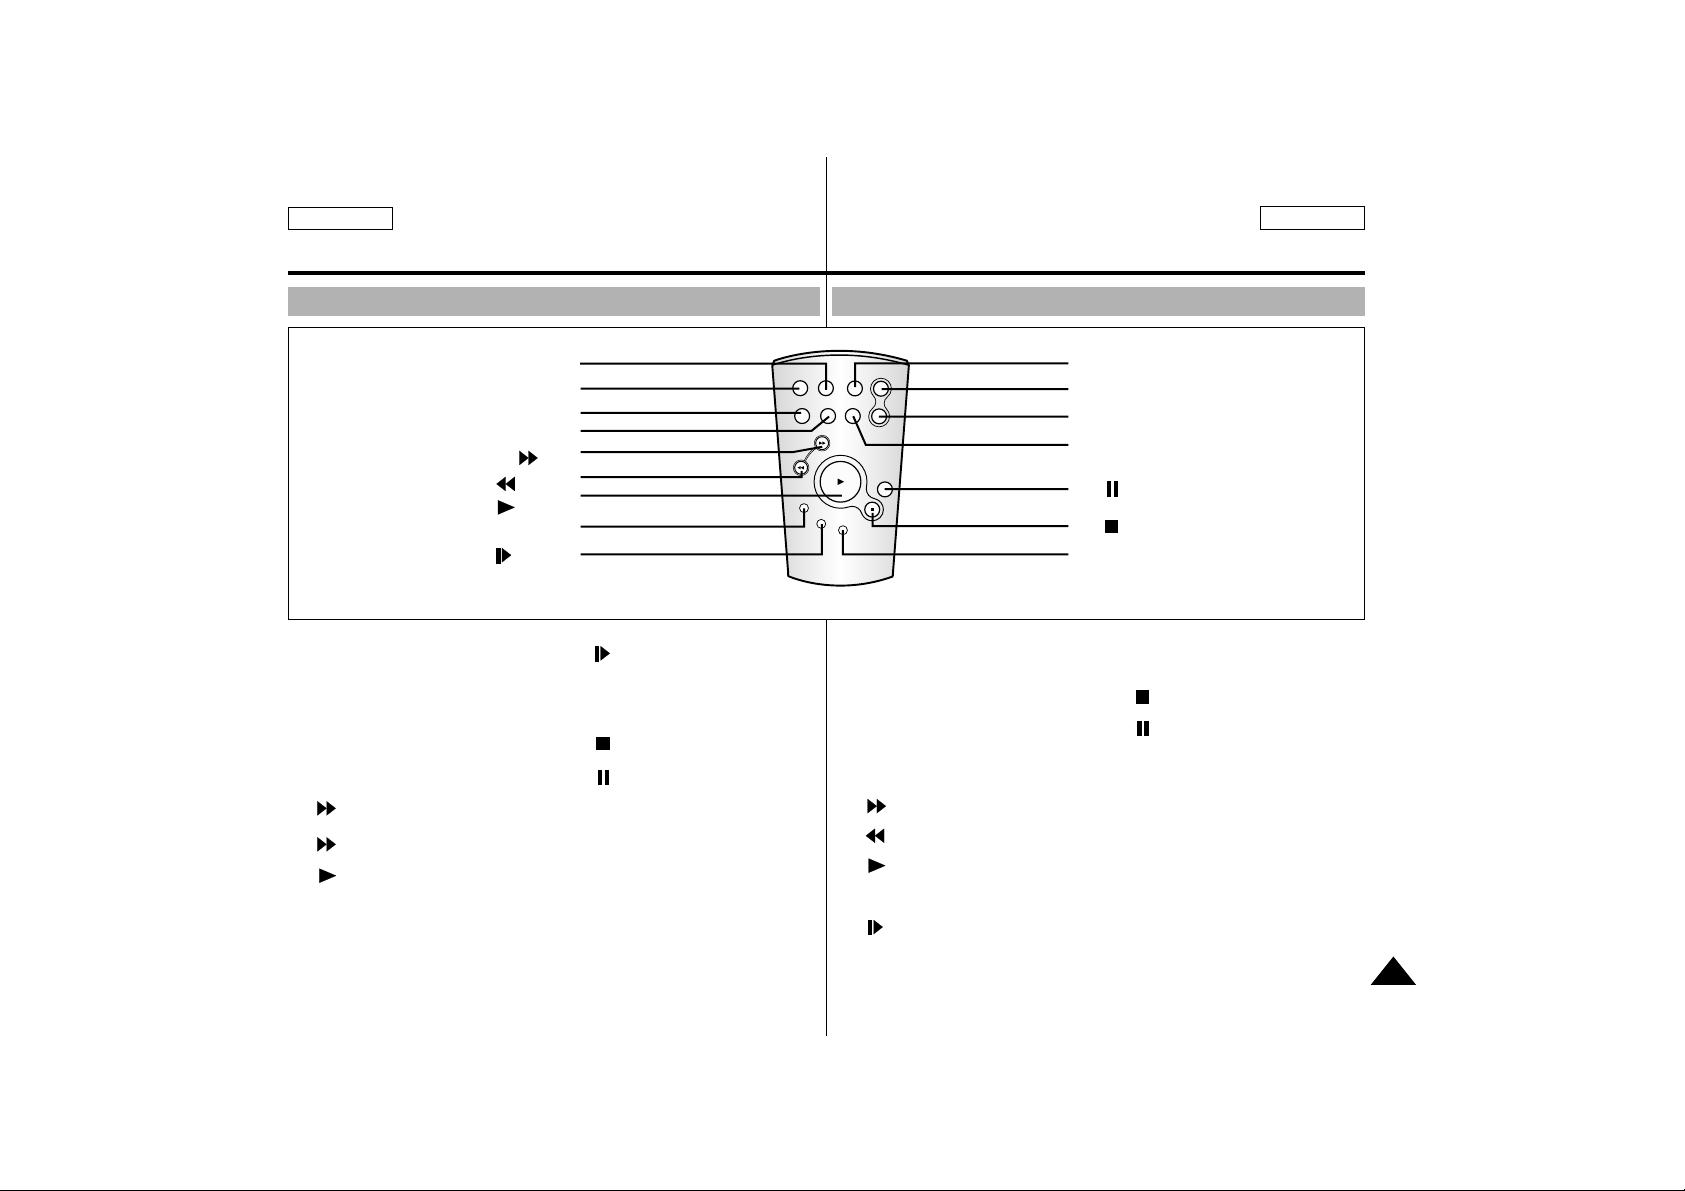
Remote control
1. PHOTO
2. START/STOP
3. SELF TIMER
4. ZERO MEMORY
5. (FF)
6. (REW)
7. (PLAY)
8.X2
9. (SLOW)
16. DISPLAY
15. Zoom WIDE
14. Zoom TELE
13. A.DUB
12. (STILL)
11. (STOP)
10. Frame Advance
1. PHOTO
2. START/STOP
3. SELF TIMER (see page 18)
4. ZERO MEMORY
(see page 68)
5. (FF)
6. (REW)
7. (PLAY)
8. X2 (see page 67)
9. (SLOW)
10. Frame Advance
(see page 67)
11. (STOP)
12. (STILL)
13. A.DUB (see page 57)
14. Zoom TELE
15. Zoom WIDE
16. DISPLAY (see page 17)
Mando a distancia
1. PHOTO
2. START/STOP
3. SELF TIMER
(Consulte la página 18)
4. ZERO MEMORY
(Consulte la página 68)
5. (FF)
6. (REW)
7. (PLAY)
8. x2 (Consulte la página 67)
9. (SLOW)
10. Avanzar trama
(Consulte la página 67)
11. (STOP)
12. (STILL)
13. A.DUB
(Consulte la página 57)
14. Zoom TELE
15. Zoom WIDE
16. DISPLAY
(Consulte la página 17)
START/
STOP
SELF
TIMER
X2
SLOW
WIDE
PHOTO DISPLAY
ZERO
A.DUB
MEMORY
TELE
STILL
F.ADV
Page 16

16
Getting to Know Your Camcorder Conozca su videocámara
ENGLISH ESPAÑOL
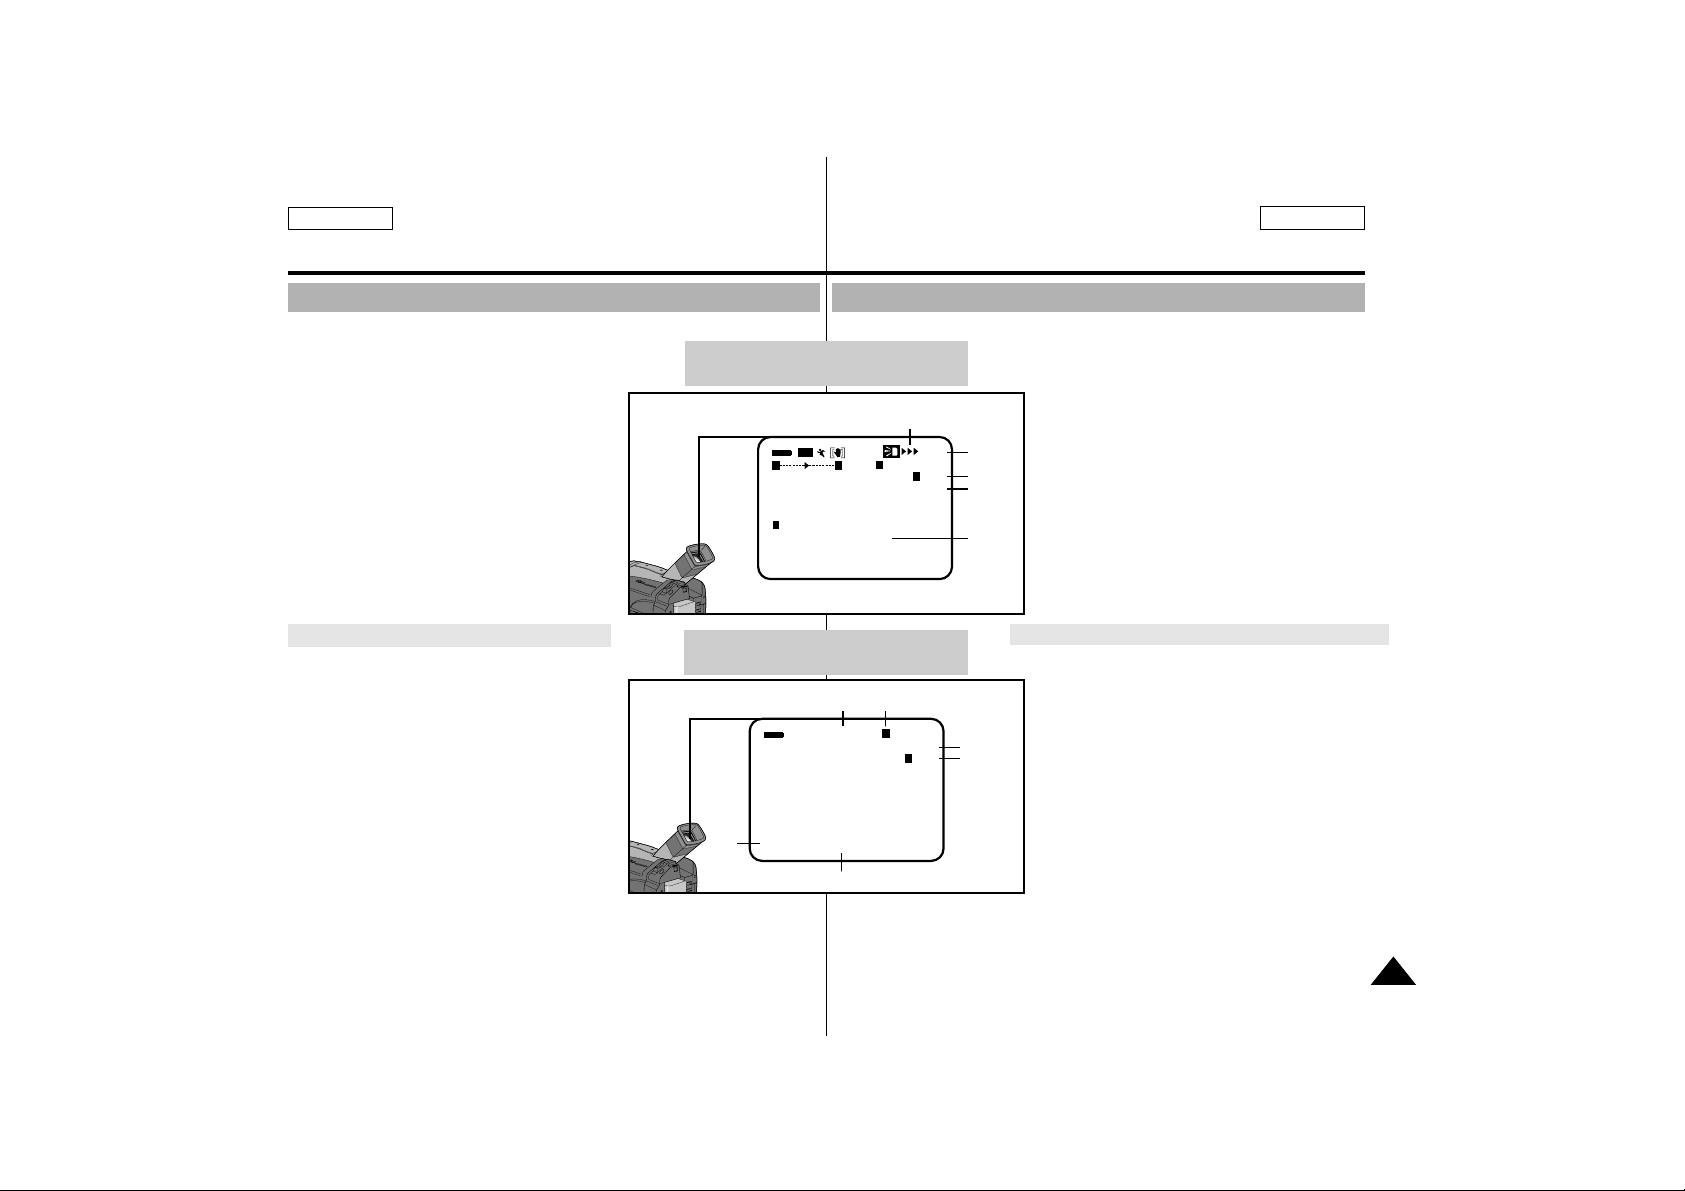
OSD (On Screen Display in Camcoder mode)
1. Battery level (see page 24)
2. Zoom position (see page 37)
3. Manual focus (see page 54)
4. DSE (Digital Special Effect) mode
(see page 40)
5. White Balance mode (see page 42)
6. Shutter speed and IRIS (see page 43, 44)
7. Audio record mode (see page 47)
8. Self record and waiting timer
(see page 18)
9. WIND CUT(see page 46)
10. DATE/TIME (see page 49)
11. Self diagnosis (see page 91)
12. DEW condensation (see page 91)
13. PIP (Picture in Picture) (see page 36)
14. Photo (see page 59)
15. Digital zoom mode (see page 38)
16. Remaining Tape (measured in minutes)
17. Tape counter
18. Zero memory indicator (see page 68)
19. Operating mode
20. Record speed mode (see page 45)
21. Light ON (see page 61)
22. Custom or Easy mode (see page 52, 53)
23. DIS (Digital Image Stabilizer) (see page 35)
24. Program AE (see page 39)
25. BLC (Back Light Compensation)
(see page 55)
26. Volume control (see page 31)
27. Audio playback channel (see page 58)
28. Audio playback mode
29. DV IN (DV data receiving mode) (see page 70)
30. A. DUB (see page 57)
OSD in CAMCORDER RECORD mode
OSD in CAMCORDER PLAYBACK mode
WAIT-10S
CUSTOM
SP STBY
MIRROR PHOTO
OUTDOOR
1/500
TAPE
M.FOCUS 100 MIN
DEW
PIP
11:30 PM
SELF-30S
DEC.31,2001
500 0:00:00
18
17
16
15
14
13
12
11
10
1
2
3
4
5
6
25 24 23 22 21 20 19
W
BLC
T M
x
I 29
W.CUT
USB
9
I
8
16BIT
7
OSD (On Screen Display en modo Camcorder)
1. Nivel de la batería (Consulte la página 24)
2. Posición del zoom (Consulte la página 37)
3. Enfoque manual (Consulte la página 54)
4. Modo DSE (Efecto digital especial)
(Consulte la página 40)
5. Modo Balance de blancos
(Consulte la página 42)
6. Velocidad de obturador e IRIS
(Consulte las páginas 43 y 44)
7. Modo de grabación de sonido (Consulte la
página 47)
8. Filmación automática y temporizador
de espera (Consulte la página 18)
9. WIND CUT (Consulte la página 46)
10. DATE/TIME (Consulte la página 49)
11 . Diagnósticos automáticos (Consulte la
página 91)
12. Condensación DEW (Consulte la página 91)
13. PIP (Imagen en imagen)
(Consulte la página 36)
14. Foto instantánea (Consulte la página 59)
15. Modo de zoom digital (Consulte la página 38)
16. Cinta restante (medida en minutos)
17. Contador de cinta
18. Indicador de memoria cero (Consulte la
página 68)
19. Modo de funcionamiento
20. Modo de velocidad de filmación (Consulte
la página 45)
21. Foco de iluminación encendido (ON)
(consulte la página 61)
22. Modo personalizado o fácil (Consulte la
página 52, 53)
23. DIS (Estabilizador digital de imagen)
(Consulte la página 35)
24. Programa AE (Consulte la página 39)
25. BLC (Compensación de iluminación posterior) (Consulte la página 55)
26. Control del volumen (Consulte la página 31)
27. Canal de reproducción de sonido (Consulte la página 58)
28. Modo de reproducción de sonido
29. DV IN (modo de recepción de datos DV) (Consulte la página 70)
30. A.DUB (Consulte la página 57)
1
13
11
26
SOUND2
27
16BIT DEC.31,2001
28
20 19
SP STILL
DEW
TAPE
VOLUME
–
0 16 31
USB
41
0:00:00:00
100 MIN
–
11:30 PM
A.DUB
DV IN
17
16
30
29
10
Page 17
17
Getting to Know Your Camcorder Conozca su videocámara
ENGLISH ESPAÑOL
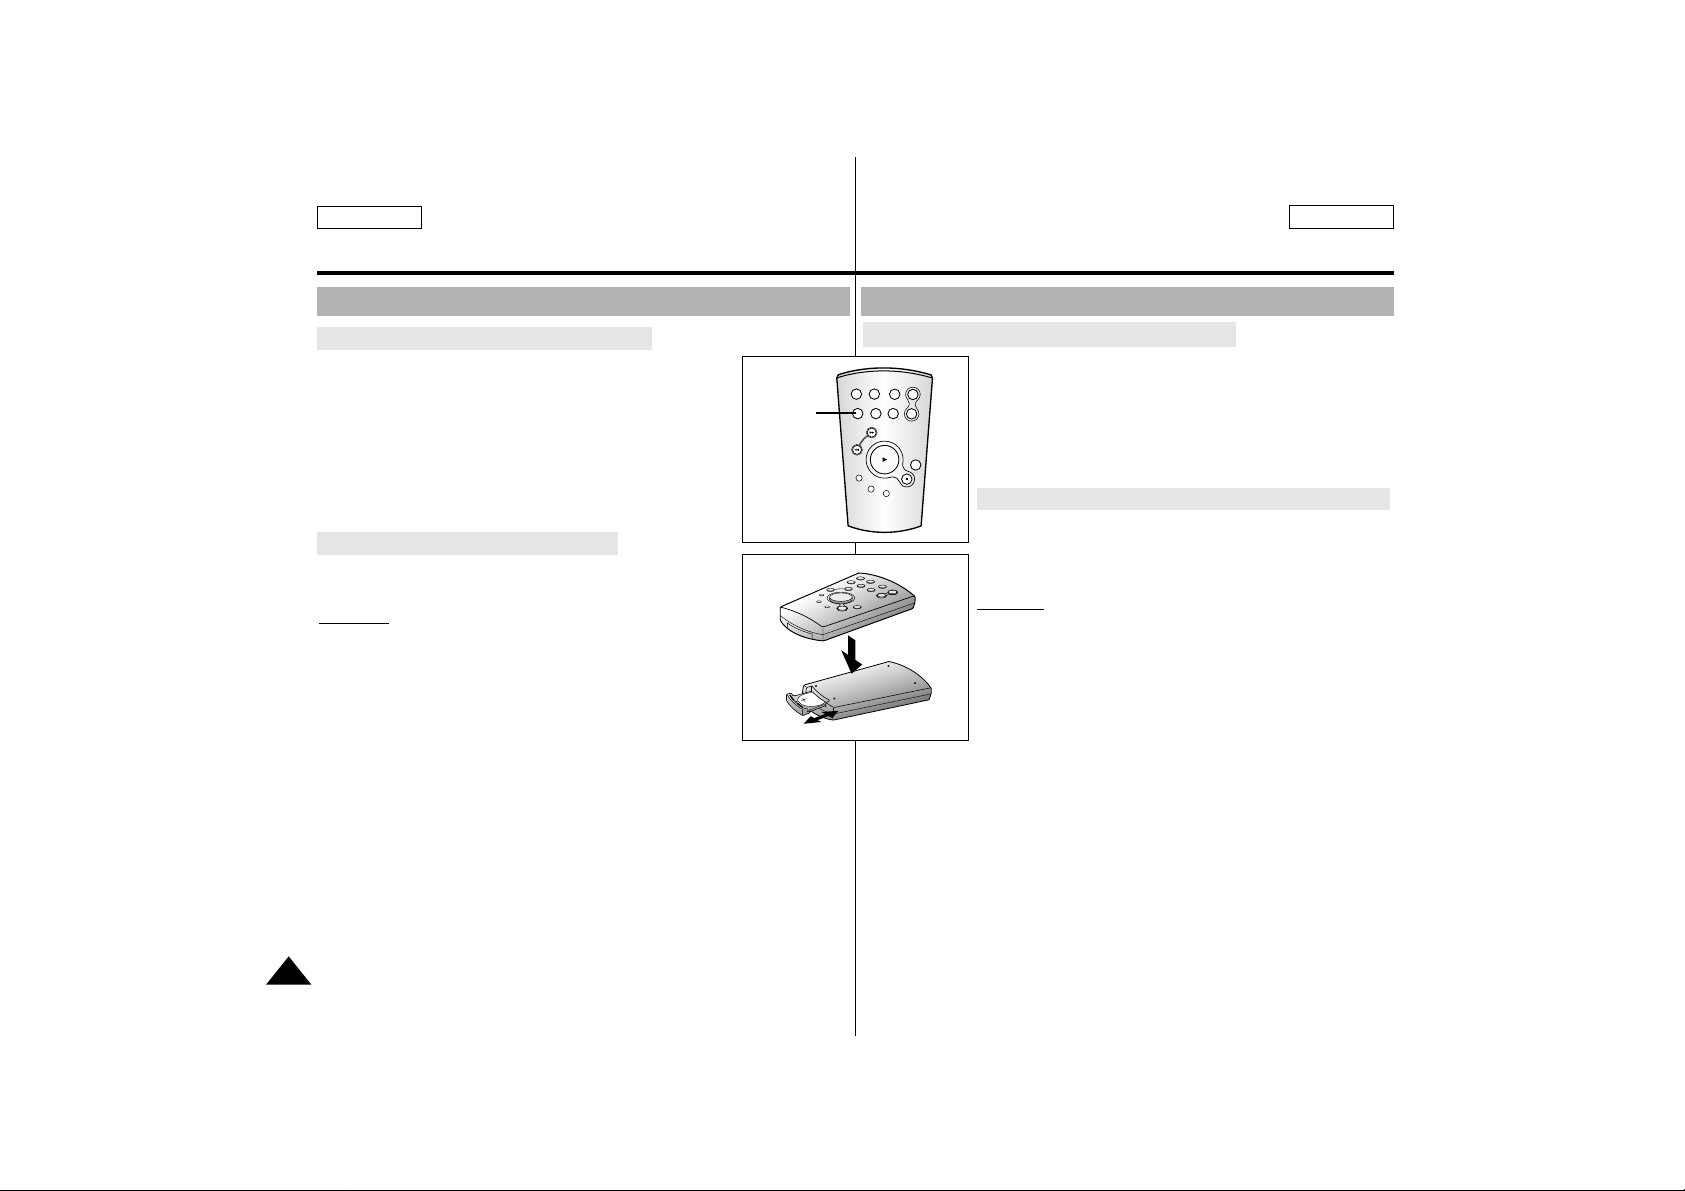
OSD (On Screen Display in DSC mode)
✤ These items are available in SCD75/D77 models only.
31. Folder number-file number
(see page 78)
32. Message line (see page 92)
33. Photo mode (FRAME/FIELD) (see page 79)
34. Image counter
- Current still image/Total number of
recordable still images.
35. CARD (memory) indicator
36. Image recording and loading indicator
(see page 76)
37. Image counter
- Current still image/Total number of
recorded still images.
38. SLIDE SHOW indicator (see page 81)
39. ERASE PROTECT indicator (see page 82)
40. DPOF mark (see page 84)
41. USB (see page 71)
Turning the OSD on/off (On Screen Display)
✤ When you set the power switch to CAMERA,
and the OSD is automatically turned on.
✤ When you set the power switch to PLAYER,
and the OSD is automatically turned off.
✤ Refer to page 48.
•
Turning OSD on/off
Press the ENTER (DISPLAY) button on the rear
side panel.
- Each press of the button toggles the OSD
function on and off.
- When you turn the OSD off,
In CAMERA mode: You only see those
features being used.
In PLAYER mode: All OSD messages flash
for 3 seconds then disappear.
•
Turning on/off the DATE/TIME
- The DATE/TIME is not affected when the OSD function is switched ON or OFF.
- To turn the DATE/TIME on or off, access the menu and change the DATE/TIME
mode. (see page 49 )
OSD in DSC RECORD mode
OSD in DSC PLAYBACK mode
OSD (On Screen Display en modo DSC)
✤ Estas opciones sólo están disponibles en los modelos SCD75/D77.
31. Número de carpeta-número de archivo
(consulte la página 78)
32. Línea de mensajes (consulte la página 92)
33. Modo Photo (FRAME/FIELD) (consulte la
página 79)
34. Contador de imágenes
- Imagen fija actual/Número total de imágenes
fijas que se pueden grabar.
35. Indicador CARD (memoria)
36. Indicador de grabación y carga de
imágenes (consulte la página 76)
37. Contador de imágenes
- Imagen fija actual/Número total de imágenes
fijas grabadas.
38.
Indicador SLIDE SHOW (consulte la página 81)
39. Indicador ERASE PROTECT (consulte la
página 82)
40. Marca DPOF (consulte la página 84)
41. USB (consulte la página 71)
✤
Cuando desliza el interruptor de encendido
hacia la posición CAMERA, el OSD se activa
automáticamente.
✤
Cuando desliza el interruptor de encendido
hacia la posición PLAYER, el OSD se
desactiva automáticamente.
✤
Consulte la página 48.
•
Activar/Desactivar el OSD
Pulse la tecla ENTER situado en el panel
posterior.
- Cada pulsación de la tecla activa o desactiva
la función OSD.
- Cuando se desactiva el OSD,
En modo CAMERA: Puede ver las
características que se están utilizando.
En modo PLAYER: Todos los mensajes de
OSD parpadean durante 3 segundos y
después desaparecen.
•
Activar y desactivar la fecha y la hora
- La función de fecha y hora no se ve afectada cuando se activa o
desactiva la función OSD.
- Para activar o desactivar DATE/TIME, vaya al menú y cambie
el modo DATE/TIME. (Consulte la página 49)
Activar/Desactivar el OSD (Visualizador en pantalla)
31
36
EASY
BLC
W
M.FOCUS 22/67
MIRROR FIELD
OUTDOOR
1/500
I 29
NO STORED IMAGE
000-0000 DEC.31,2001
x
500 STBY
T
NO STORED IMAGE
USB
40
DP0F000
DEW
USB
41
E
11:30 PM
31.DEC,2001
39
P
MEM.
SLIDE
E
10/22
11:30 PM
MEM.
35
34
33
PIP
32
38
37
Page 18
18
Getting to Know Your Camcorder Conozca su videocámara
ENGLISH ESPAÑOL
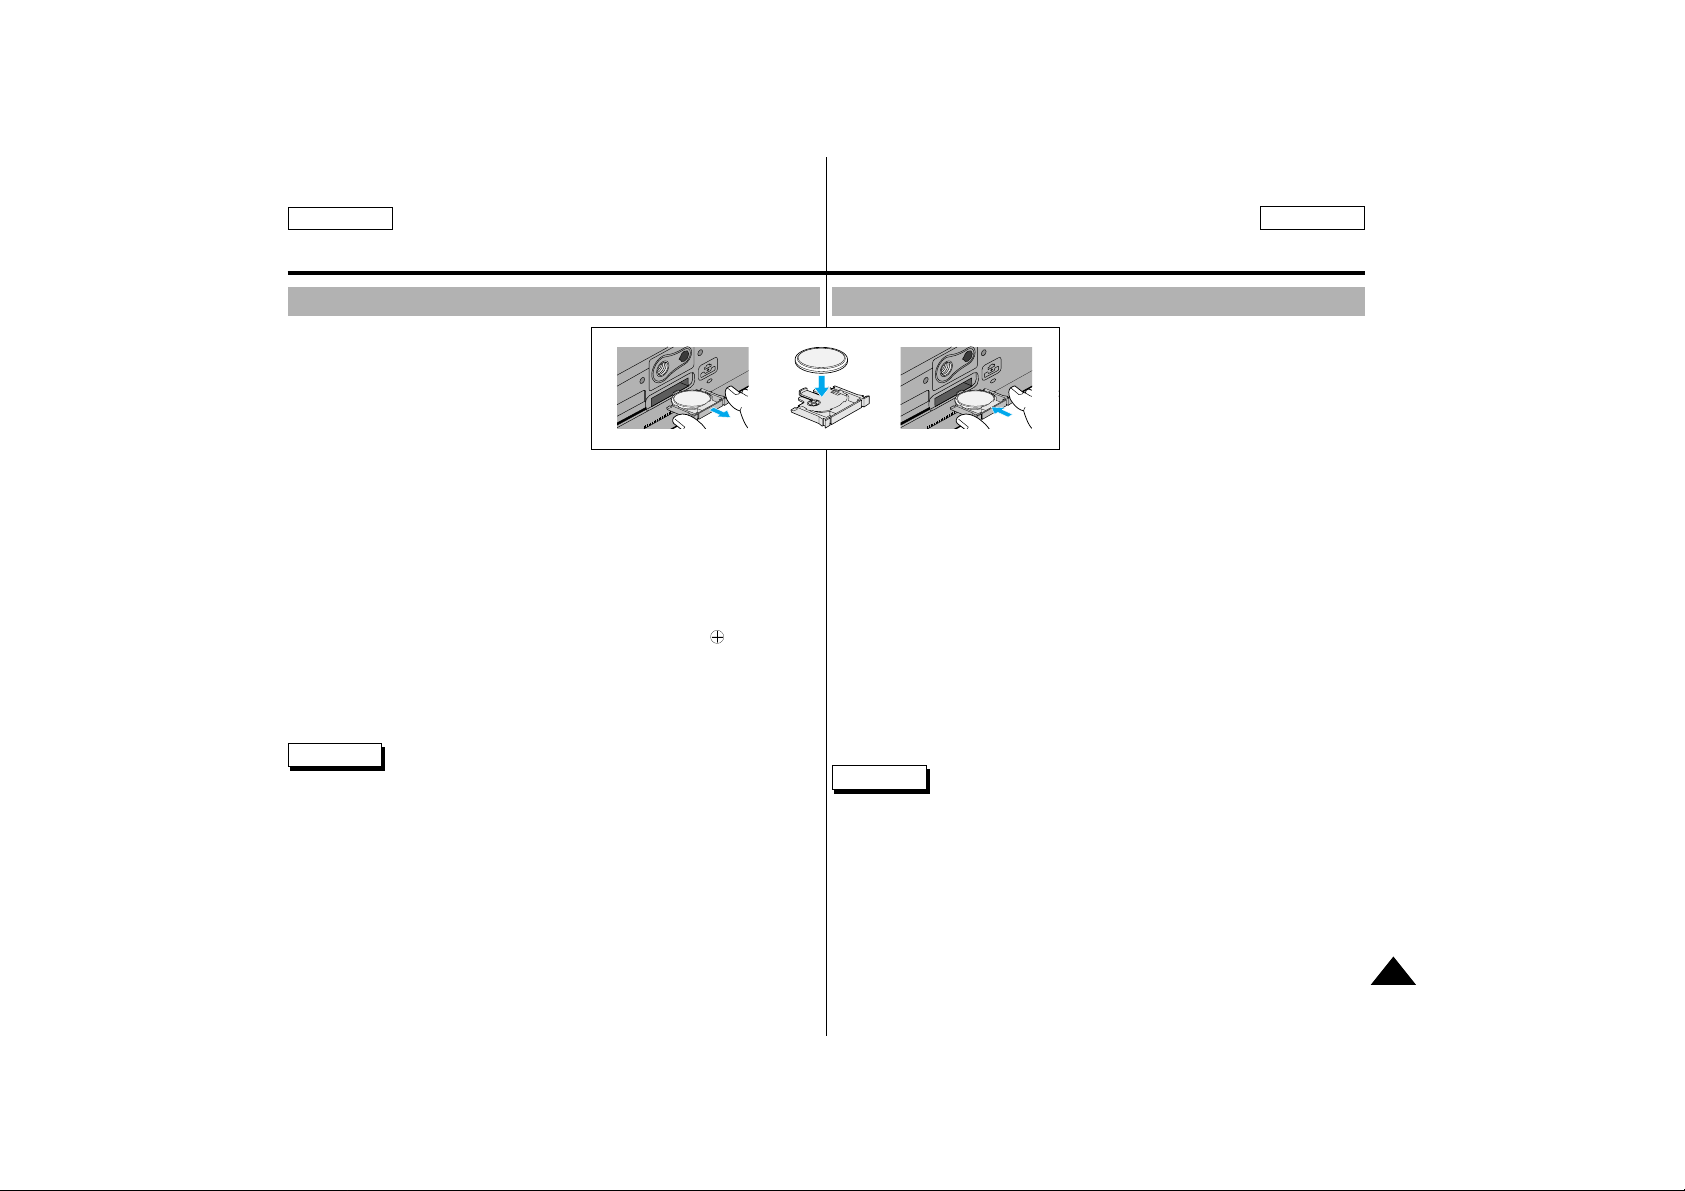
Battery Installation for the Remote Control
✤ You must insert or replace the lithium battery when:
- You purchase the camcorder.
- The remote control doesn’t work.
✤ Ensure that you insert the lithium cell correctly,
following the + and – markings.
✤ Be careful not to reverse the polarity of the battery.
Self Record using the Remote Control
The Self-Timer function on the remote control allows you to
start and stop recording automatically.
Example: Scene with all members of your family
Two options are available
■
WAIT-10S/SELF-30S: 10 seconds wait, 30 seconds
of recording.
■
WAIT-10S/SELF-END: 10 seconds wait, records
until you press the
START/STOP button again.
1. Set the camcorder to CAMERA mode.
2. Press the SELF TIMER button until the appropriate indicator is
displayed in the viewfinder :
■
WAIT -10S/SELF-30S
■
WAIT -10S/SELF-END
3. Press the START/STOP button to start the timer.
: After a 10 second wait, recording starts.
: If you have selected SELF-30S, recording stops automatically after 30
seconds.
: If you have selected SELF-END, press START/STOP again when you
wish to stop recording.
How to use the Remote Control
START/
STOP
SELF
TIMER
X2
SLOW
F.ADV
A.DUB
ZERO
MEMORY
WIDE
TELE
STILL
PHOTO DISPLAY
SELF
TIMER
✤ Debe insertar o cambiar la pila de litio cuando:
- Adquiera la videocámara.
- El mando a distancia no funcione.
✤ Asegúrese de que inserta la pila de litio correctamente,
indicado por los signos + y -.
✤ Tenga cuidado de no invertir la polaridad de la pila.
Filmación automática utilizando el mando a distancia
La función del temporizador automático del mando a
distancia le permite iniciar y detener la filmación
automáticamente.
Ejemplo:
Escena con todos los miembros de su familia
Hay dos opciones disponibles
■
WAIT-10S/SELF-30S: 10 segundos de espera,
30 segundos de filmación.
■
WAIT-10S/SELF-END: 10 segundos de espera y
después filma hasta que vuelve a pulsar la tecla
START/STOP .
1. Ponga la videocámara en modo CAMERA.
2. Pulse la tecla SELF TIMER hasta que aparezca el indicador adecuado
en el visor:
■
WAIT-10S/SELF-30S
■
WAIT-10S/SELF-END
3. Pulse la tecla START/STOPpara iniciar el temporizador.
: Después de 10 segundos de espera, empieza la filmación.
: Si ha seleccionado SELF-30S, la filmación se detiene automática-
mente después de 30 segundos.
: Si ha seleccionado SELF-END, pulse la tecla START/STOP de nuevo
cuando desee detener la filmación.
Cómo utilizar el mando a distancia
Instalación de la pila para el mando a distancia
Page 19
19
Preparing Preparación
ENGLISH ESPAÑOL
✤ The lithium battery maintains the
clock function and preset contents of
the memory; even if the battery pack
or AC power adapter is removed.
✤ The lithium battery for the camcorder
lasts about 6 months under
normal operation from the time of
installation.
✤ When the lithium battery becomes weak or dead, the date/time
indicator flashes for about 5 seconds when you set the power switch to
CAMERA.
In this case, replace the lithium battery with CR2025 type.
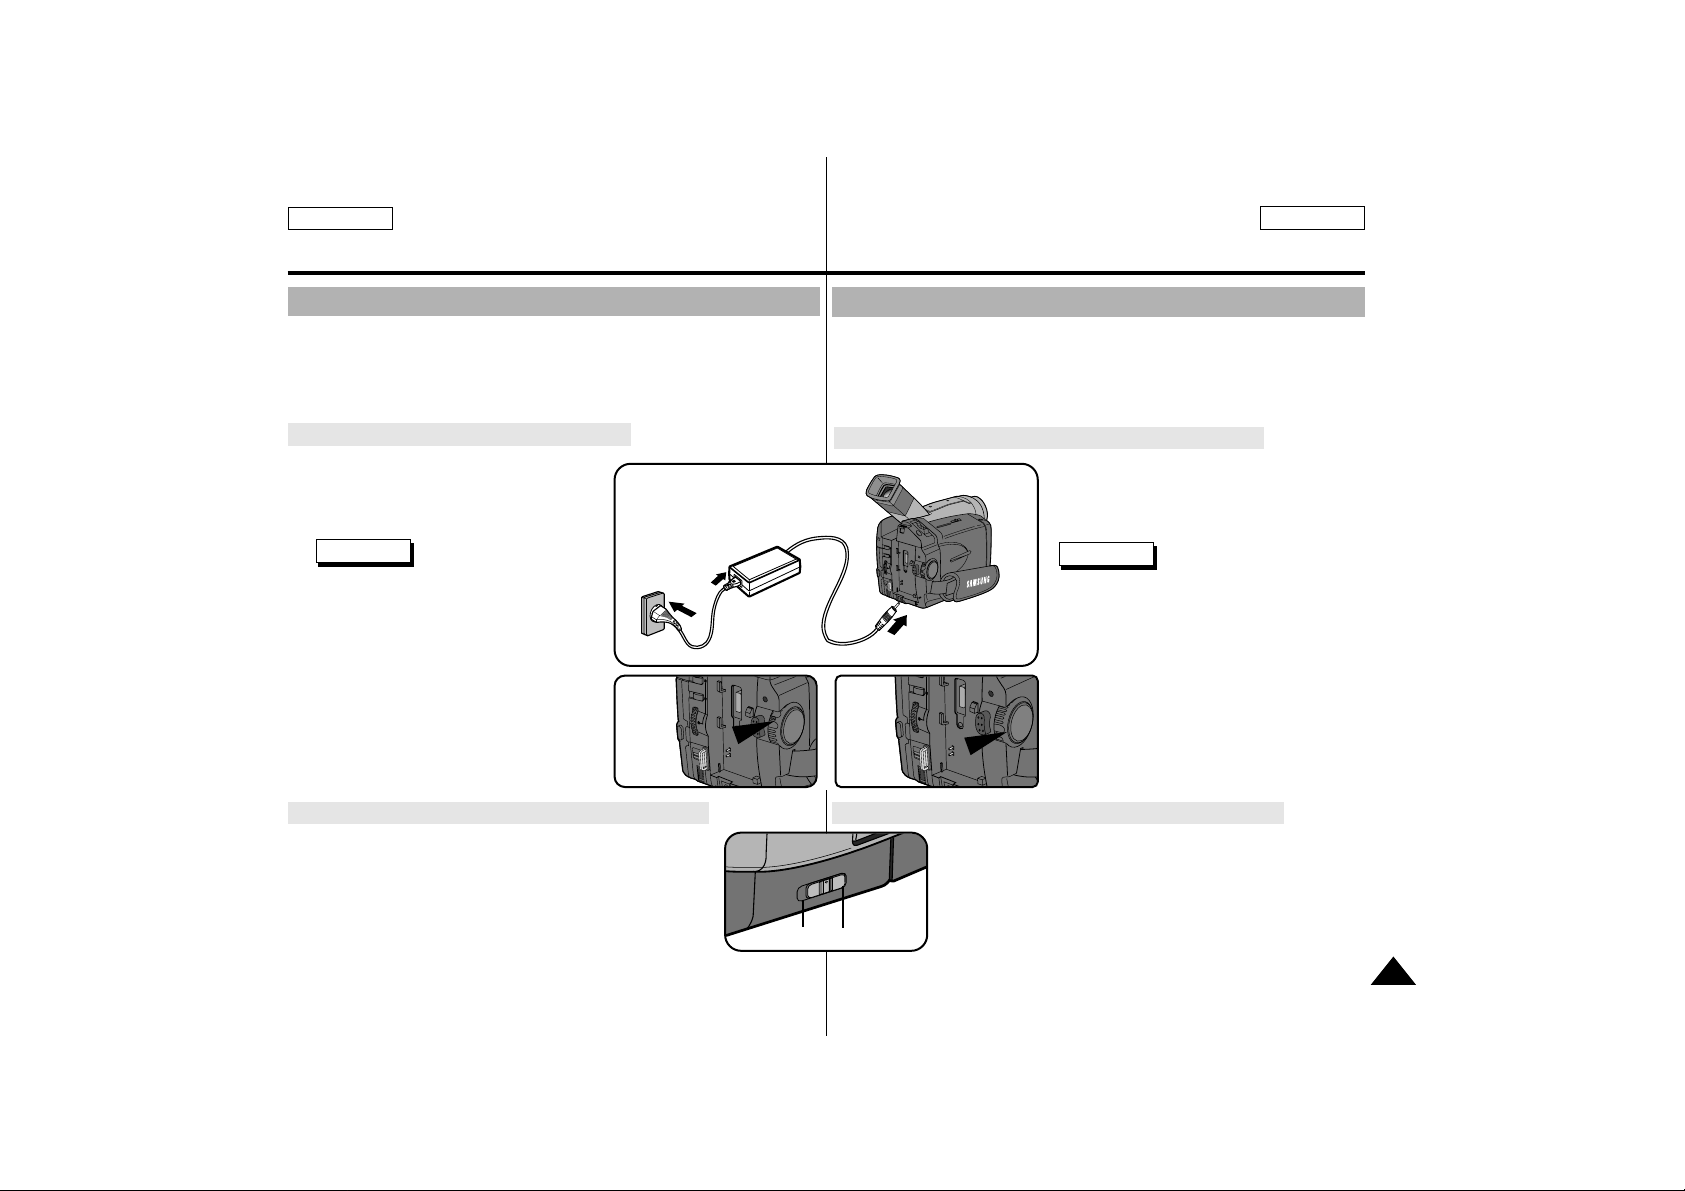
1. Remove the Lithium battery holder from the camera.
2. Position the Lithium cell in the holder, with the positive ( ) terminal
face down.
3. Reinsert the holder into the lithium battery compartment.
Reference The holder must be inserted in the correct direction or it
will not fit properly.
Warning: Keep the LITHIUM BATTERY out of the reach of the
children.
Should any battery be swallowed, consult a doctor
immediately .
Lithium Battery Installation
✤ La pila de litio mantiene la función del
reloj y el contenido prefijado de la
memoria, incluso si se retiran la
batería o el adaptador de corriente CA.
✤ La pila de litio de la videocámara
tiene una duración de 6 meses aproximadamente con un funcionamiento
normal, desde su instalación.
✤ Cuando la pila de litio se debilita o se descarga por completo, el
indicador de fecha/hora parapadea durante 5 segundos al deslizar
el interruptor de encendido hacia la posición CAMERA.
En este caso, cambie la pila de litio por una del tipo CR2025.
1. Extraiga el soporte de la pila de litio fuera de la cámara.
2. Ponga la pila de litio en el soporte, con el terminal positivo (+)
hacia abajo.
3. Reinserte el soporte en el compartimento de la pila de litio.
Notas Si el soporte no se inserta en la posición correcta
no se ajustará correctamente.
Precaución: Mantenga la PILA DE LITIO fuera del alcance de los
niños.
En caso de ingestión, consulte un médico e inmediato.
Instalación de la pila de litio
Page 20

20
Preparing Preparación
ENGLISH ESPAÑOL
It is very important to ensure that the Hand strap is correctly adjusted
before you begin your recording.
The hand strap enables you to :
- Hold the camcorder in a stable, comfortable position.
- Press the Zoom and START/STOP button without having to change
the position of your hand.
Hand strap
a. Pull open the Hand Strap cover and release
the Hand Strap.
b. Adjust its length and stick it back onto the
Hand Strap cover.
c. Close the Hand Strap cover back up again.
Shoulder Strap
The Shoulder Strap enables you to carry your
camcorder around in complete safety.
1. Insert the end of strap into the Shoulder
Strap hook on the camcorder.
Insert the other end of strap into ring
inside hand strap.
2. Thread each end into the buckle, adjust the
length of the strap and then pull it tight in the buckle.
Adjusting the Hand Strap and Shoulder Strap
a
c
b
12
Es muy importante ajustar correctamente la correa de mano
antes de empezar la filmación.
La correa de sujeción de mano le permite:
- Sujetar la cámara en una postura cómoda y estable.
- Pulsar el Zoom y la tecla START/STOP sin cambiar la posición de la
mano.
Correa de mano
a. Tire de la cubierta de la correa para abrirla y
despegue la correa.
b. Ajuste su longitud y vuelva a pegarla en
la cubierta.
c. Cierre la cubierta de la correa.
Correa de hombro
La correa de hombro le permite llevar la cámara
con total seguridad.
1. Introduzca el extremo en el enganche situado
en la videocámara.
Inserte el otro extremo en la anilla del interior
de la correa de mano.
2. Pase los extremos por la hebilla, ajuste la
longitud de la correa y tire para asegurarla en
la hebilla.
Ajuste de la correa de mano y de hombro
Page 21
ENGLISH ESPAÑOL
21
Preparing Preparación
There are two types of power source that can be connected to your
camcorder.
- The AC Power Adapter and AC cord : used for indoor recording.
- The battery Pack : used for outdoor recording.
To use the AC Power adapter and DC Cable
1. Connect the AC Power adapter to the
AC cord.
2. Connect the AC cord to a wall socket.
Reference The plug and wall socket
type may be different
depending on the
country you’re in.
3. Connect the DC cable to the DC jack
socket of the camcorder.
4. Set the camcorder to the CAMERA
or PLAYER mode by holding down
the tab on the power switch and turning
it to the CAMERA or PLAYER position.
To select the mode of CAMCORDER (SCD75/D77 only)
✤ If you want to use this camcorder as the camcorder,
set the mode switch to CAMCORDER position.
✤ If you want to use this camcorder as the DSC (Digital
Still Camera), set the mode switch to DSC position.
Connecting a Power Source
2
1
3
4-a
CAMERA
DSC
CAMCORDER
Existen dos tipos de fuente de energía que pueden conectarse a la
videocámara.
- El adaptador de corriente CA y el cable CA: para la filmación en
interiores.
- La batería: para la filmación en exteriores.
Para utilizar el adaptador de corriente CA y el Cable CC
1. Conecte el Adaptador de corriente CA
al cable CA.
2. Enchufe el cable CA a la toma eléctrica.
Notas
■
El enchufe y la toma eléctrica pueden
ser diferentes dependiendo de la zona
donde se encuentre.
3. Conecte el cable CC a la salida CC
de la videocámara.
4. Ponga la videocámara en modo
CAMERA o PLAYER manteniendo
pulsada la pestaña del interruptor de
encendido y girándolo hacia la posición
CAMERA o PLAYER.
Para seleccionar el modo CAMCORDER (sólo en SCD75/D77)
✤ Si desea utilizar esta videocámara como filmadora,
ponga el interruptor de modo en la posición
CAMCORDER.
✤ Si desea utilizar la videocámara como DSC (Cámara de
imágenes fijas digitales), ponga el interruptor de modo
en la posición DSC.
Conexión a la fuente de energía
4-b
PLAYER
Page 22
22
Preparing Preparación
ENGLISH ESPAÑOL
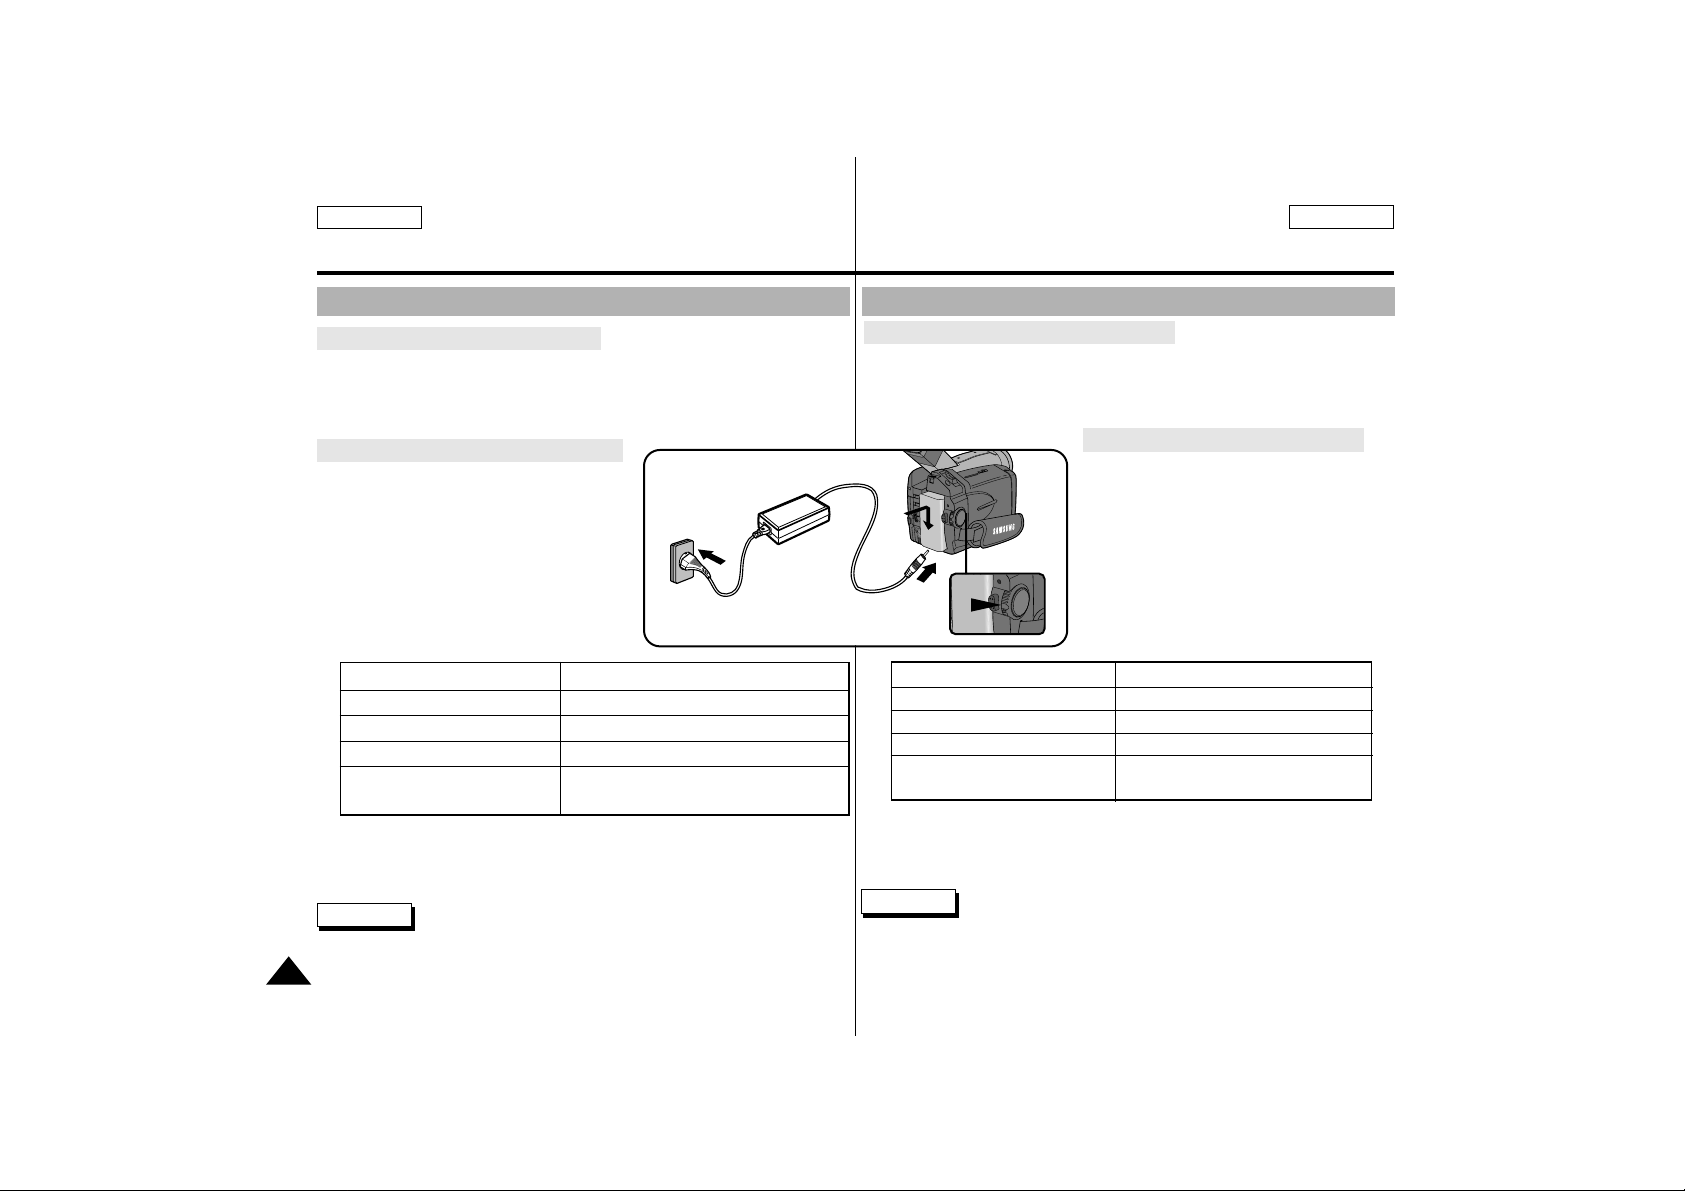
To use the Lithium Ion Battery Pack
✤ The amount of continuous recording time available depends on :
- The type and capacity of battery pack you are using.
- How much you use the Zoom function.
It is, recommended that you have several batteries available.
Charging the Lithium Ion Battery Pack
1. Lift the viewfinder up and attach the
battery pack to the camcorder.
2. Connect the AC Power adapter to an AC
cord and connect the AC cord to a wall
socket.
3. Connect the DC cable to the DC jack
socket on the camcorder.
4. Turn the Camera power switch to off,
the charging indicator will start to flash
showing that the battery is charging.
5. When it has finished charging, disconnect the battery and AC Power
adapter from the camcorder.
- Even with the power switched off, the battery will still discharge is left
connected to the camcoder.
Reference
■
The battery pack may be charged a little at the time of purchase.
■
To prevent reduction in the life and capacity of the battery pack,
always remove it from the camcorder after it is fully charged.
Using the Lithium Ion Battery Pack
Blinking time Charging rate
Once in a second Less than 50%
Twice in a second 50% ~ 75%
Three times in a second 75% ~ 100%
On for a second and Error - Reset the battery and
off for a second DC cable.
2
1
3
4
✤ La cantidad de tiempo de filmación contínuo depende de:
- El tipo y la capacidad de la batería que utilice.
- La frecuencia de uso de la función Zoom.
Es recomendable que tenga preparadas varias baterías.
Carga de la batería de iones de litio
1. Levante el visor y acople la batería a la
videocámara.
2. Conecte el Adaptador de corriente CA
a un cable CA y enchufe éste a una
toma eléctrica.
3. Conecte el cable CC a la salida CC
de la videocámara.
4. Ponga el interruptor POWER de la cámara
en posición de apagado, el indicador de
carga empezará a parpadear lo que indica
que la batería se está cargando.
5. Cuando haya finalizado, desconecte la batería y el adaptador de
corriente CA de la videocámara.
- Incluso con el interruptor de encendido en la posición de apagado,
la baterá se descargará si se deja acoplada a la videocámara.
Notas
■
La batería puede estar un poco cargada cuando la adquiera.
■
Para evitar reducir la vida útil y la capacidad de la batería, sáquela
siempre de la videocámara depués de cargarla.
Para utilizar la batería de iones de litio
Uso de la batería de iones de litio
Tiempo de parpadeo Velocidad de carga
Una vez cada segundo Menos del 50%
Dos veces cada segundo Del 50% al 75%
Tres veces cada segundo Del 75% al 100%
Encendido un segundo y Error – Restablezca la batería y
apagado un segundo el cable CC.
Page 23
23
Preparing Preparación
ENGLISH ESPAÑOL
Using the Lithium Ion Battery Pack
✤ If you close the LCD screen, it switches off and the EVF switches on
automatically.
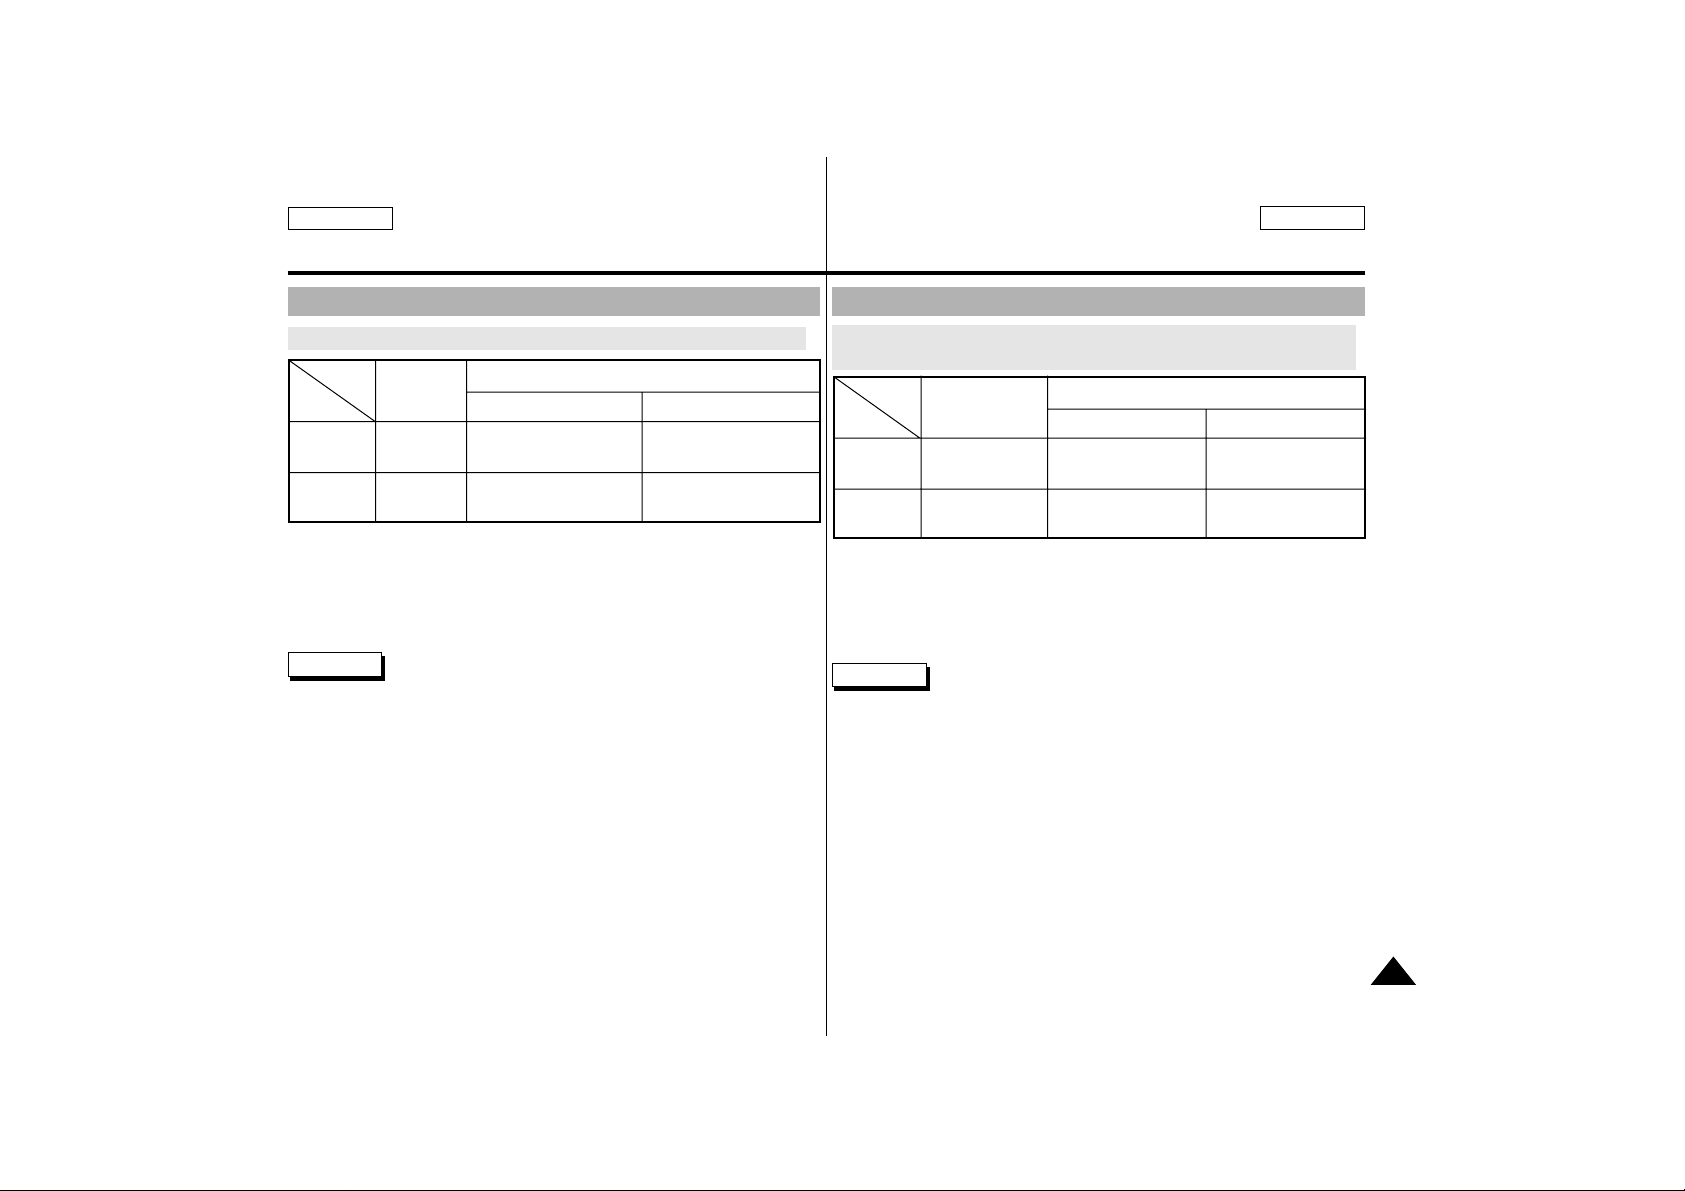
✤ The continuous recording times given in the table are approximate.
Actual recording time depends on usage.
✤ If you turn on the LIGHT, the recording time becomes very short.
Reference
■
The battery pack should be recharged in an environment of between
32°F (0°C) and 104°F (40°C).
It should never be charged in a room temperature that is below 32°F
(0°C).
■
The life and capacity of the battery pack will be reduced if it is used in
temperatures below 32°F (0°C) or left in temperatures above 104°F
(40°C) for a long period, even when it is fully recharged.
■
Do not put the battery pack near any heat source (fire or flames, for
example).
■
Do not disassemble, process, pressure, or heat the Battery Pack.
■
Do not allow the + and – terminals of the battery pack to be
short-circuited.
It can cause leakage, heat generation, induction of fire and over heating.
Table of continuous recording time based on model and battery type.
Battery
SB-L110
SB-L220
Charging
time
Approx.
2hr
Approx.
3hr 30min
LCD ON EVF ON
Continuous recording time
Time
Approx.
1hr 10min
Approx.
2hr 20min
Approx.
1hr 30min
Approx.
3hr
✤ Si cierra la pantalla LCD, ésta se apaga y el EVF se enciende
automáticamente.
✤ Los tiempos de filmación continuos incluídos en la tabla son aproxima-
dos. El tiempo real de filmación depende del uso.
✤ Con el foco encendido, el tiempo de grabación puede ser muy corto.
Notas
■
La batería debe recargarse a una temperatura ambiente entre 32°F
(0°C) y 104°F (40°C).
Nunca la recargue a temperaturas inferiores a 32°F (0°C).
■
La vida útil y la capacidad de la batería se reducirán si se utiliza
a temperaturas inferiores a 32°F (0°C) o se deja a temperaturas
superiores a 104°F (40°C) durante un período prolongado de tiempo,
incluso si se ha recargado completamente.
■
No ponga la batería cerca de una fuente de calor (por ejemplo, fuego
o llamas).
■
No desmonte, manipule, aplique presión o calor a la batería.
■
No permita que los terminales + y - de la batería provoquen un cortocircuito.
Puede ocasionar fugas, generación de calor, inducción a incendio y
sobrecalentamiento.
Tabla de tiempo de filmación contínuo basada en el modelo y tipo
de batería
Uso de la batería de Ion-Litio
Batería
SB-L110
SB-L220
Tiempo
de carga
Aprox.
2 horas
Aprox.
3 hora 30 min.
LCD ON EVF ON
Tiempo de filmación contínua
Tiempo
Aprox.
1 hora 10 min.
Aprox.
2 hora 20 min.
Aprox.
1 hora 30 min.
Aprox.
3 hora
Page 24
24
Preparing Preparación
ENGLISH ESPAÑOL
Battery level display
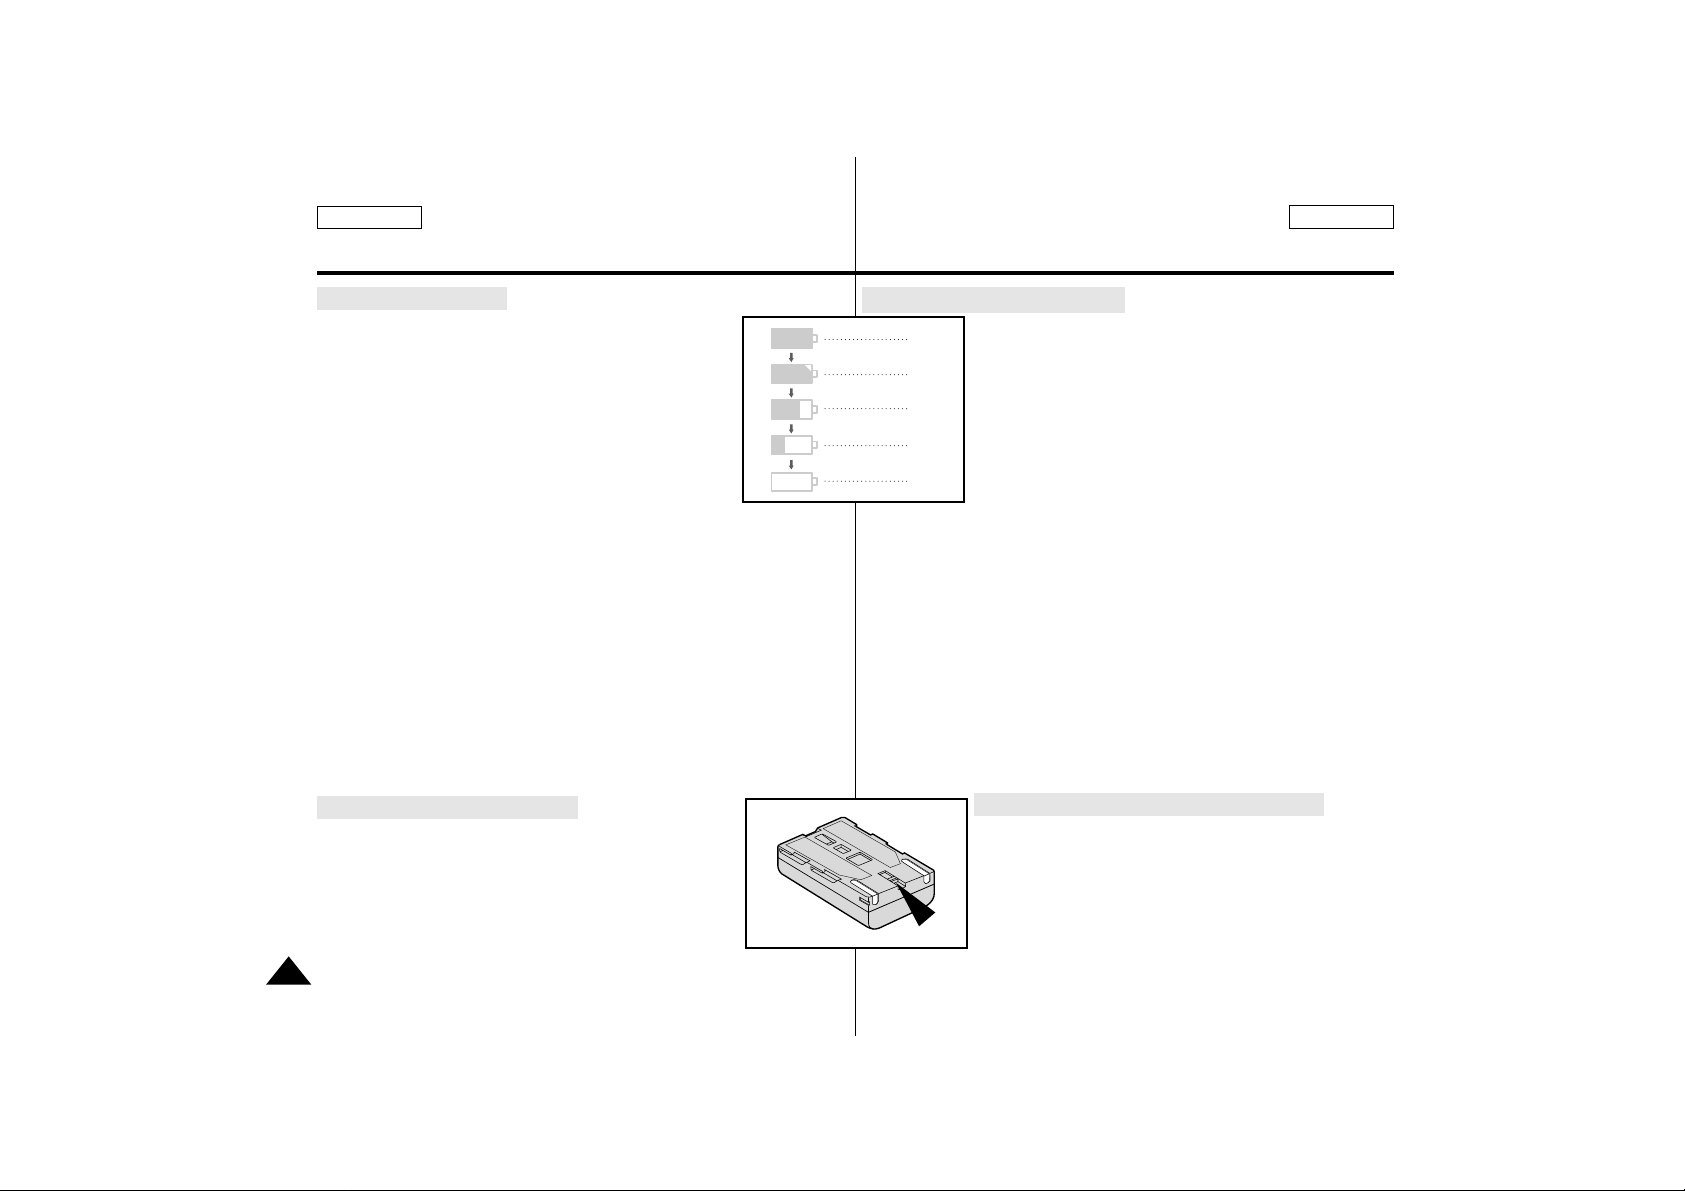
•
The battery level display indicates the amount of
power remaining in the battery pack.
a. Fully charged
b. 10% used
c. Half used
d. Mostly used
e. Completely used (flickers)
(camcorder will turn off soon,
change the battery as soon as possible)
✤ Please refer to the table on page 23 for approximate continuous
recording times.
✤ The recording time is affected by environmental temperature and
conditions.
The recording time becomes very short in a cold
environment. The continuous recording time in the operating instructions is measured using a fully charged battery pack at 77°F(25°C).
As the environmental temperature and conditions may be different
when you actually use the camcorder, the remaining battery time may
not be the same as the approximate continuous recording times given
in these instructions.
Tips for Battery Identification
A charge mark is provided on the battery pack to help
you remember whether it has been charged or not.
Two colors are provided (red and black)-you may
choose which one indicates charged and which indicates
discharged.
a
b
c
d
e
•
El visualizador del nivel de batería indica la
cantidad de energía que aún queda en la batería.
a. Totalmente cargada
b. Consumido el 10%
c. Consumido la mitad
d. Consumido la mayor parte
e. Totalmente consumida (parpadea)
(la videocámara se apagará pronto, cambie la
batería en cuanto sea posible)
✤ Consulte la tabla de la página 23 para ver los tiempos aproximados
de filmación continua.
✤ El tiempo de filmación puede verse afectado por las condiciones
ambientales y de temperatura.
El tiempo de filmación se reduce mucho en un ambiente frío.
El tiempo de filmación continua que aparece en el manual de
instrucciones ha sido medido con una batería totalmente cargada y
a 77°F(25°C).
Debido a que las condiciones y la temperatura ambiente pueden ser
diferentes cuando utilice la videocámara, el tiempo de batería
disponible puede no ser igual al que aparece en las instrucciones.
Consejos para la identificación de la batería
La marca de carga suministrada con la batería le ayuda
a saber si se ha cargado o no.
Existen dos colores (rojo y negro) y usted elige
cuál indica que está cargada o descargada.
Visualizador del nivel de batería
Page 25
ENGLISH ESPAÑOL
25
Preparing Preparación
✤ There are three types of Mini DV CASSETTE tapes: DVM80, DVM60 and
DVM30.
✤ When inserting a tape or closing a cassette holder, do not apply
excessive force. It can cause a malfunction.
✤ Do not use tapes other than Mini DV CASSETTE.
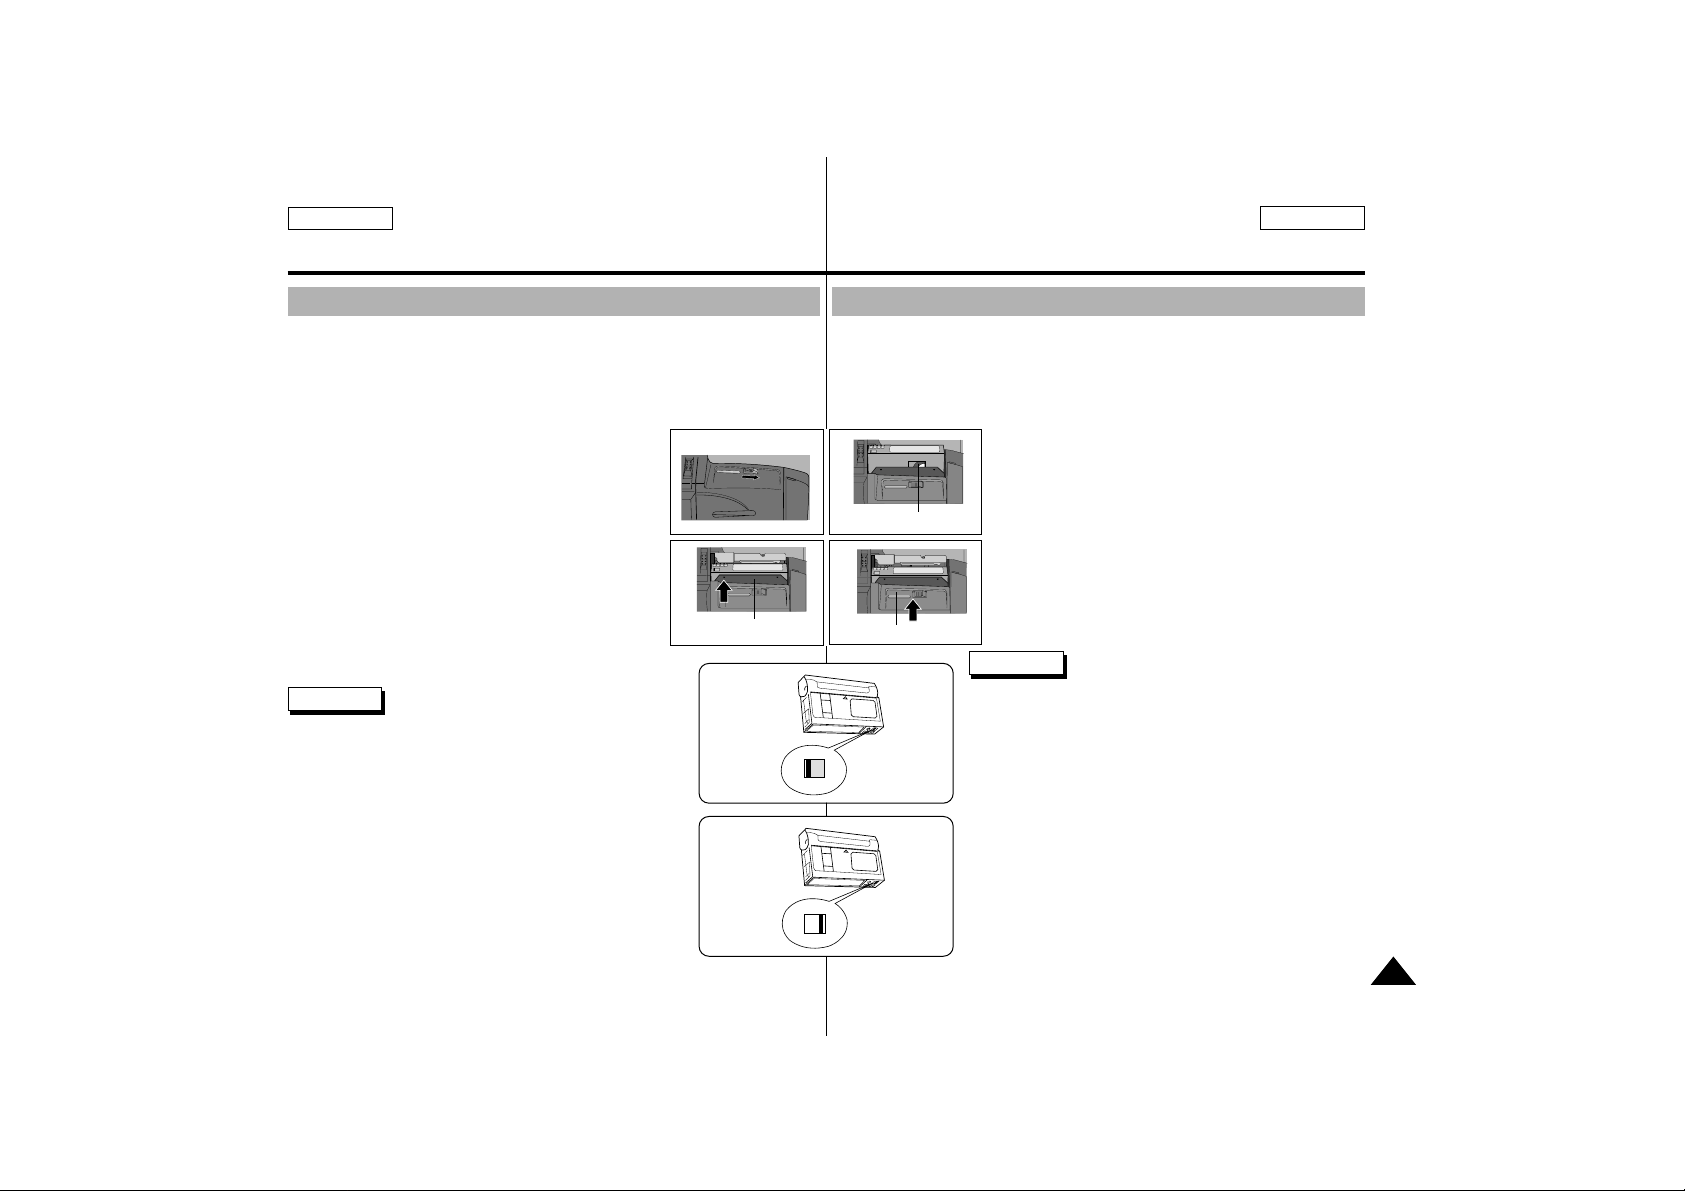
1. Connect a power source and slide the
OPEN/EJECT button the camcorder forwards and
open the cassette door.
- The cassette holding mechanism rises
automatically .
2. Insert a tape into the cassette holder with the tape
window facing outward and the protection tab
toward the top.
3. Press the area labelled PUSH on the cassette
holding mechanism until it clicks into place.
- The cassette is loaded automaticcally.
4. Close the cassette door.
- The camcorder will not operate with the
cassette door open.
Reference When you have recorded something that
you wish to keep, you can protect it so
that it will not be accidentally erased.
a. Protecting a tape :
Push the safety tab on the cassette so that the
hole is not covered.
b. Removing tape protection :
If you no longer wish to keep the recording on the
cassette, push the protection tab back so that it
covers the hole.
•
How to keep a tape
a. Avoid places where there are magnets.
b. Avoid humidity-and-dust prone places.
c. Keep it in an upright position and avoid storing in
direct sunlight.
d. Avoid dropping or knocking your tapes.
Inserting and Ejecting a Cassette
1
3
2
4
Tape window
Cassette holder
Cassette door
a. SAVE
b. REC
✤ Existen tres tipos de cintas Mini DV: DVM80, DVM60 y DVM30.
✤ Al insertar un casete o al cerrar el contenedor de este, no lo haga con
fuerza, podría estropear el mecanismo.
✤ Únicamente utilice cintas Mini DV CASSETTE.
1. Conecte una fuente de energía, deslice la tecla
OPEN/EJECT hacia adelante y abra la puerta del
casete.
- El mecanismo de soporte del casete sube
automáticamente.
2. Introduzca una cinta en el soporte del casete con
la ventana situada hacia el exterior y la pestaña
de protección hacia arriba.
3. Empuje el área con la grabación PUSH del
soporte del casete hasta que encaje en su lugar.
- El casete se carga automáticamente.
4. Cierre la puerta del casete.
- La videocámara no funciona con la puerta
del casete abierta.
Notas
Cuando haya terminado de filmar una cinta que
desee guardar, puede protegerla para evitar borrarla
accidentalmente.
a. Protección de una cinta
Deslice la pestaña de seguridad de la cinta de modo
que no cubra la abertura.
b. Desprotección de una cinta
Si ya no desea guardar la filmación de la cinta, deslice
la pestaña de protección de modo que cubra la abertura.
•
Cómo guardar una cinta
a. Evite lugares en los que haya imanes.
b. Evite lugares con humedad y polvo.
c. Guárdela en posición recta y evite los lugares
expuestos al sol.
d. No deje caer ni golpee las cintas.
Inserción y extracción de un casete
Page 26
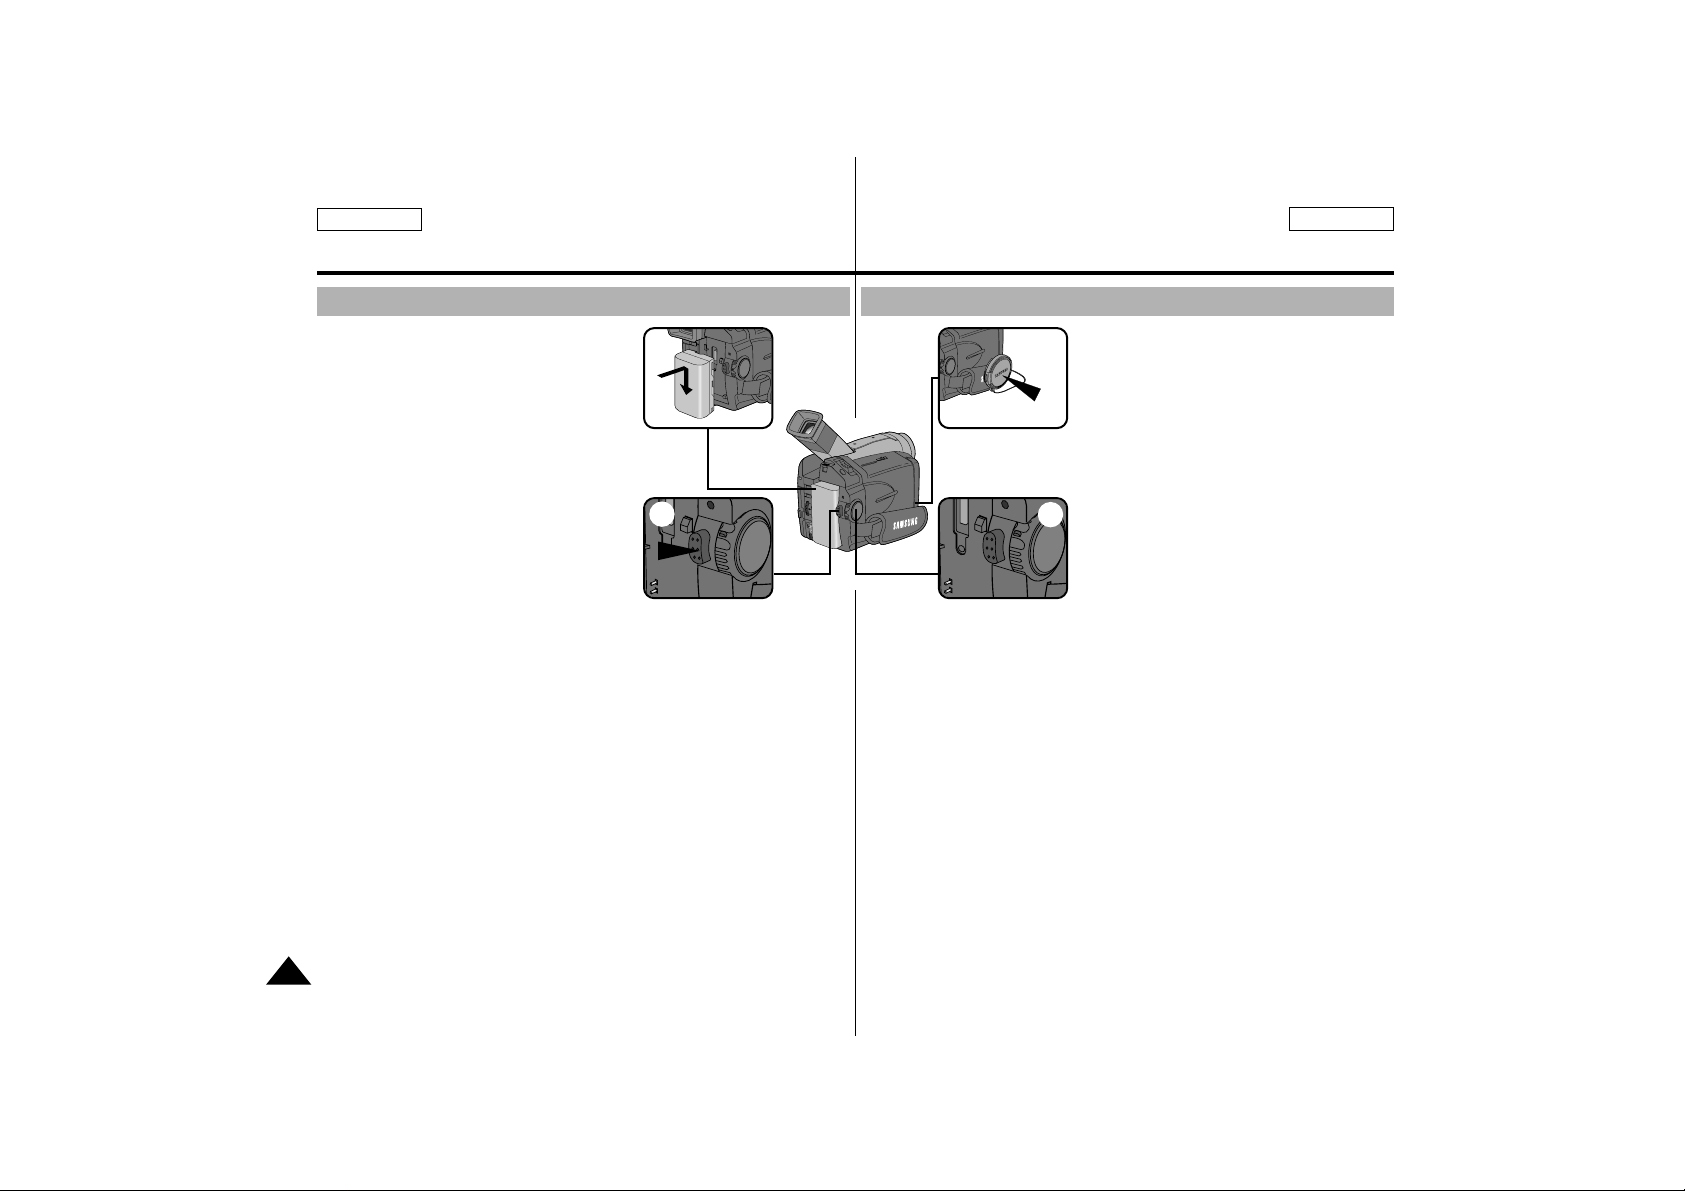
ENGLISH ESPAÑOL
26
Basic Recording Filmación básica
1. Connect a Power source. (see page 21)
(Battery pack or AC power adapter)
■
Insert a cassette. (see page 25)
2. Remove the LENS CAP and hook it
onto the hand strap.
3. Set the power switch to the CAMERA
position.
■
Set the mode switch to
CAMCORDER position.
(SCD75/D77 only)
■
Open the LCD monitor and make
sure that STBY is displayed.
■
If the protection tab of the cassette is open,
STOP will be displayed.
■
Make sure the image you want to record appears in the
LCD monitor or viewfinder.
■
Make sure the battery level indicates that there is enough
remaining power for your expected recording time.
4. To start recording, press the START/STOP button.
■
REC is displayed in the LCD.
To stop recording, press the START/STOP button again.
■
STBY is displayed in the LCD.
Making your First Recording
1
1. Conecte la fuente de energía.
(Consulte la página 21)
(Batería o adaptador de corriente CA)
■
Introduzca un casete.
(Consulte la página 25)
2. Retire la tapa de la lente y engánchela
en la correa de mano.
3. Deslice el interruptor de encendido a
la posición CAMERA.
■
Ponga el interruptor de modo en la
posición CAMCORDER (sólo en
SCD75/D77)
■
Abra la pantalla LCD y asegúrese
de que aparece el indicador STBY.
■
Si la pestaña de protección de la
cinta está abierta, aparecerá el
indicador STOP.
■
Asegúrese de que la imagen que desea filmar aparece en la
pantalla LCD or viewfinder.
■
Asegúrese de que el nivel de batería indica que queda suficiente
energía para el tiempo que espera filmar.
4. Para empezar a filmar, pulse la tecla START/STOP.
■
Se visualiza REC en la LCD.
Para detener la filmación, pulse la tecla START/STOP de nuevo.
■
Se visualiza STBY en la LCD.
Filmando por primera vez
2
4
3
Page 27
27
Basic Recording Filmación básica
ENGLISH ESPAÑOL
When a cassette is loaded and the camcorder is left in the STBY mode
for more than 5 minutes without being used, it will switch off
automatically. To use it again, push the START/STOP button or set the
Power switch to OFF and then back to CAMERA.
This Auto Power off feature is designed to save battery power.
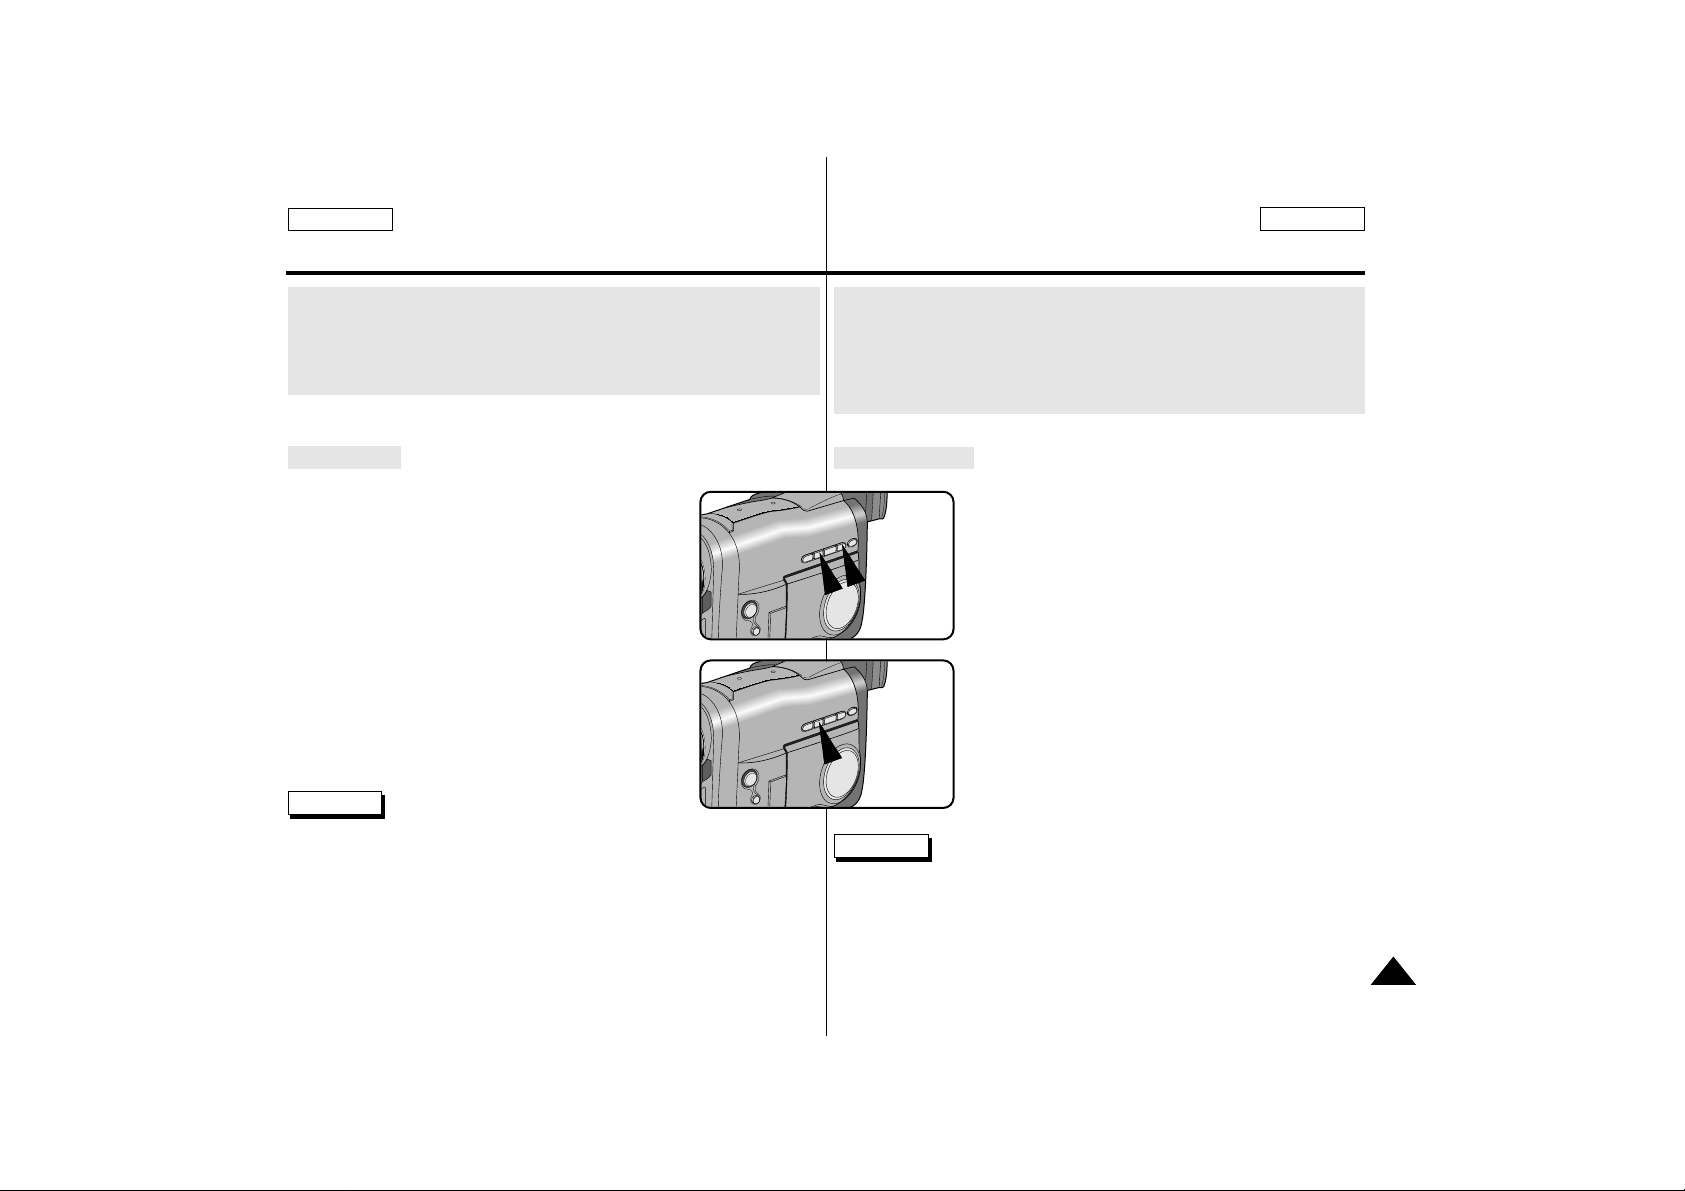
Edit Search
✤ You can view a recording using with the
EDIT +, – function in STBY mode.
EDIT – enables you to play it backwords and
EDIT + enables you to play it forwards,
for as long as you keep each button pressed.
.
✤ If you press the the EDIT – button quickly in
STBY mode, your camcorder will play in
reverse for 3 seconds and return to the original
position automatically.
Reference
■
Mosaic shaped noise may appear on the screen
during edit search mode.
EDIT +,
-
EDIT
-
Si introduce un casete y la videocámara permanece en el modo STBY
durante más de 5 minutos, se apargará automáticamente.
Para volver a utilizarla, pulse la tecla START/STOP o ponga el interruptor
de encendido en la posición OFF y después en CAMERA.
Esta función de apagado automático ha sido diseñada para ahorrar
batería.
Editar búsqueda
✤ Podrá ver una escena filmada con la función
EDIT +, – en el modo STBY.
EDIT – le permite rebobinar y EDIT + le permite
avanzar rápidamente, mientras mantenga la tecla
pulsado.
✤ Si pulsa durante un instante la tecla EDIT – en
el modo STBY, la videocámara reproducirá hacia
atrás durante 3 segundos y después volverá
automáticamente a la posición inicial.
Notas
■
Puede aparecer ruido en forma de mosaico en la
pantalla durante el modo de editar búsqueda.
Page 28
28
Basic Recording Filmación básica
ENGLISH ESPAÑOL
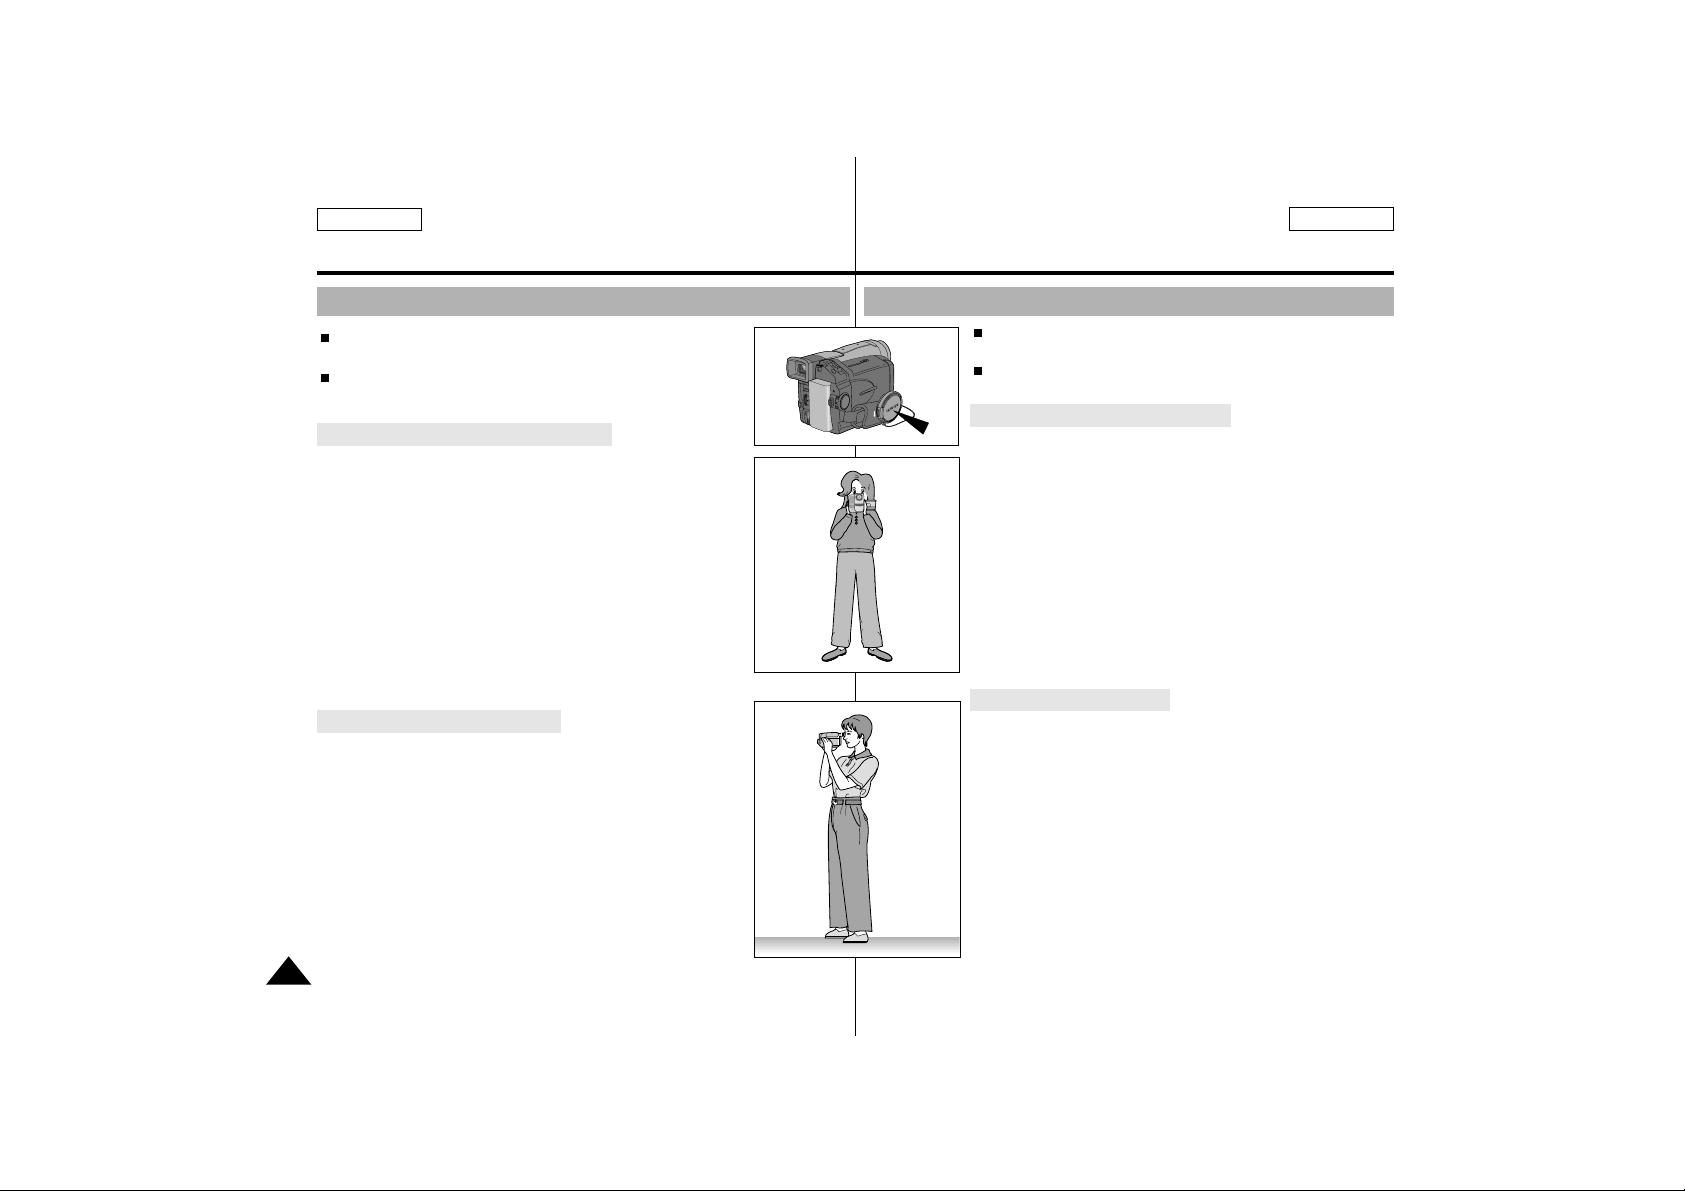
Hints for Stable Image Recording
While recording, it is very important to hold the
camcorder correctly.
Fix the LENS cap firmly by clipping it on the hand strap.
(refer to figure)
Recording with the LCD monitor
1. Hold the camcorder firmly using the hand strap.
2. Place your right elbow against your side.
3. Place your left hand under or beside the LCD to support
and adjust it.
Do not touch the built-in microphone.
4. Choose a comfortable, stable position for the shots that
you are taking.
You can lean against a wall or on a table for greater
stability. Do not forget to breathe gently.
5. Use the LCD frame as a guide to determine the
horizontal plane.
6. Whenever possible, use a tripod.
Recording with Viewfinder
1. Hold the camcorder firmly using the hand strap.
2. Place your right elbow against your side.
3. Place your left hand under the camcorder to support it.
Be sure not to touch the built-in microphone.
4. Choose a comfortable, stable position for the shots that
you are taking.
You can lean against a wall or on a table for greater
stability. Do not forget to breathe gently.
5. Place your eye firmly against the viewfinder eyecup.
6. Use the viewfinder frame as a guide to determine the
horizontal plane.
7. Whenever possible, use a tripod.
Consejos para la filmación de imágenes estables
Mientras filma, es muy importante sujetar la
videocámara correctamente.
Asegúre la tapa de la lente con firmeza enganchándola
a la correa de mano. (Consulte la figura)
Filmar utilizando la pantalla LCD
1. Sujete la videocámara con firmeza utilizando la correa
de mano.
2. Apoye el codo derecho en su costado.
3. Coloque la mano izquierda debajo o junto a la pantalla
LCD para poder sostenerla y ajustarla.
No toque el micrófono incorporado.
4. Elija una posición estable y cómoda.
Puede apoyarse contra una pared o en una mesa para
conseguir mayor estabilidad. No olvide respirar con
suavidad.
5. Utilice el marco de la LCD como guía para determinar
el plano horizontal.
6. Siempre que sea posible, utilice un trípode.
Filmar utilizando el visor
1. Sujete la videocámara con firmeza utilizando la correa
de mano.
2. Apoye el codo derecho en su costado.
3. Coloque la mano izquierda debajo de la videocámara
para sostenerla.
No toque el micrófono incorporado.
4. Elija una posición estable y cómoda.
Puede apoyarse contra una pared o en una mesa para
conseguir mayor estabilidad. No olvide respirar con
suavidad.
5. Sitúe el ojo con firmeza en el borde ocular del visor.
6. Utilice el marco del visor como guía para determinar
el plano horizontal.
7. Siempre que sea posible, utilice un trípode.
Page 29
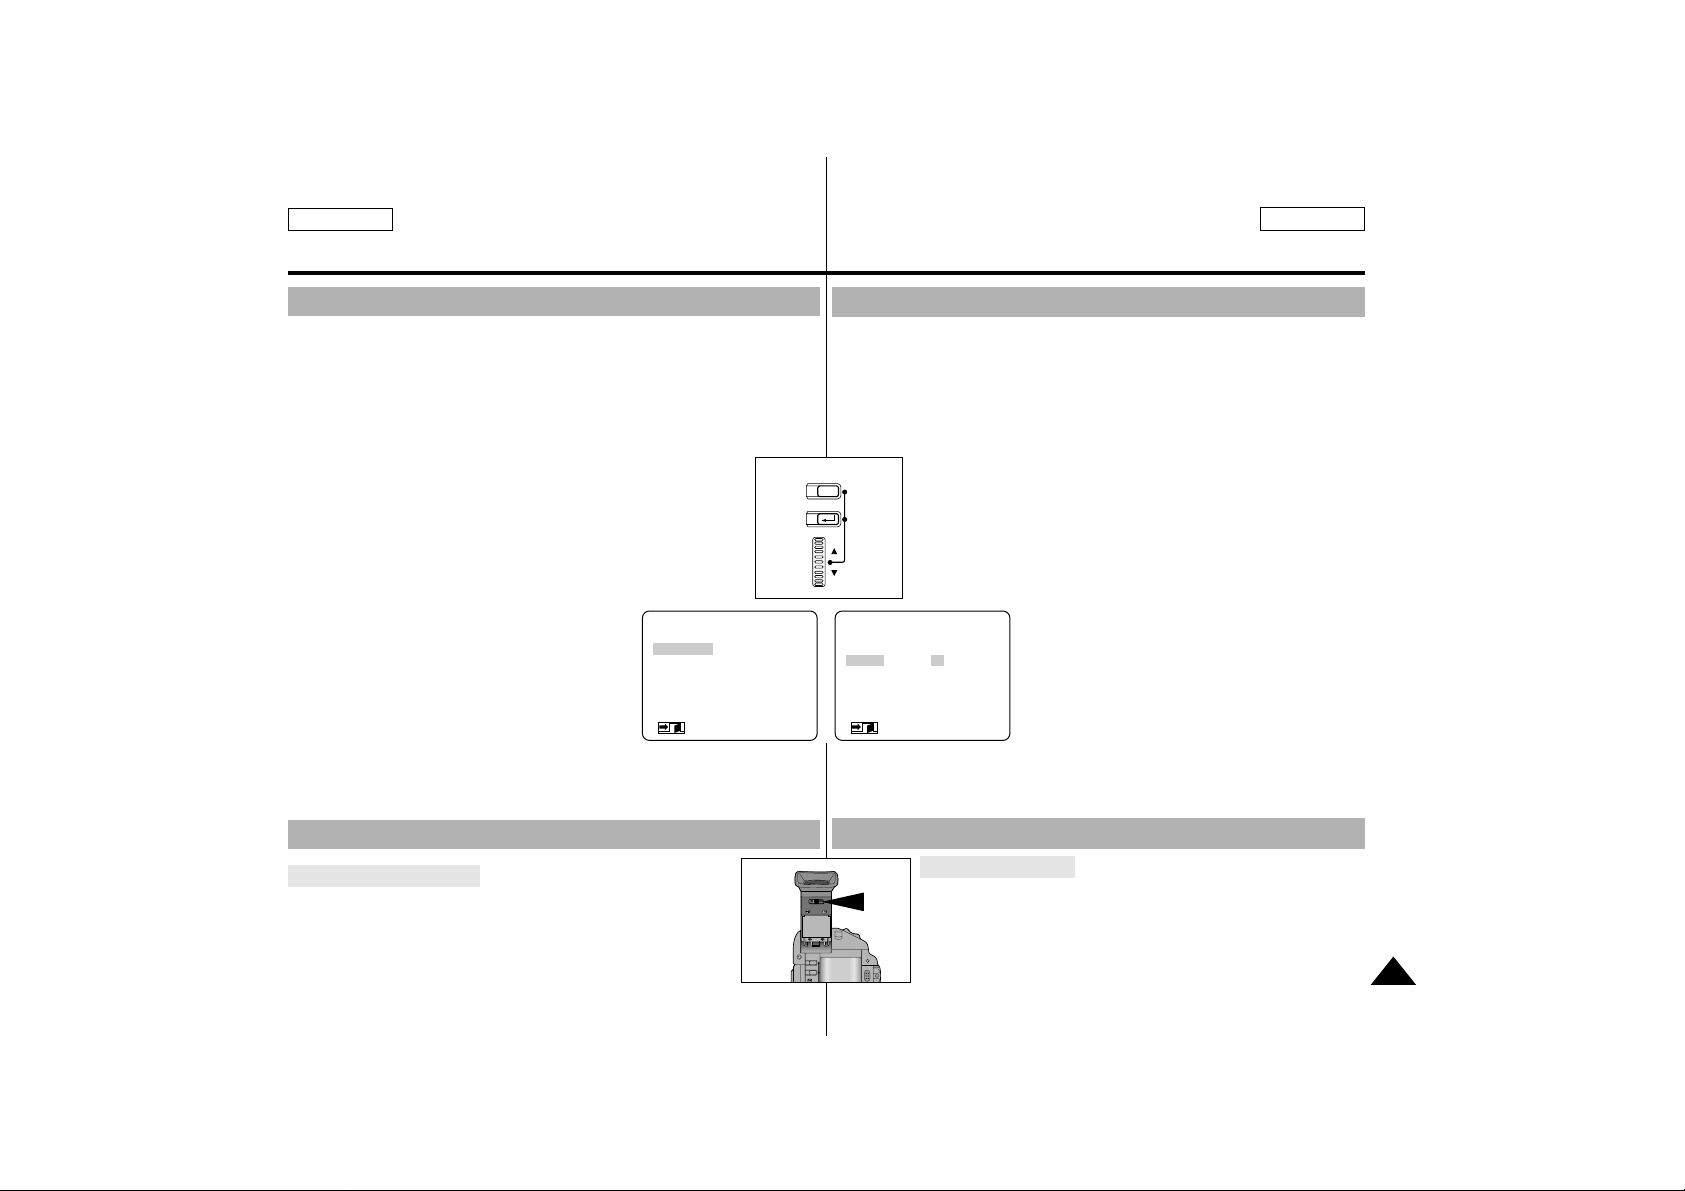
ENGLISH ESPAÑOL
29
Basic Recording Filmación básica
Adjusting the LCD
✤ Your camcorder is equipped with a 2.5 inch color Liquid Crystal
Display(LCD) screen, which enables you to view
what you are recording or playing back directly.
✤ Depending on the conditions in which you are using the camcorder
(indoors or outdoors for example), you can adjust ;
■
Brightness
■
Color
1. Set the POWER switch to CAMERA or PLAYER position.
2. Open the LCD screen, the LCD switches on.
3. Press the MENU ON/OFF button.
4. Turn the MENU DIAL so that LCD ADJUST is highlighted.
5. Press ENTER to enter the sub-menu.
6. Turn the MENU DIAL so that it highlights
the menu item you want to adjust
(BRIGHT, COLOR).
7. Press ENTER again.
■
You can adjust the LCD using the
MENU DIAL.
8. Press ENTER.
■
For further adjustment, repeat steps 6, 7, 8.
9. Press the MENU ON/OFF button to finish the setting.
Adjusting the Focus
Use the focus adjustment knob of the VIEWFINDER to focus
the picture. (refer to figure )
Using the VIEWFINDER
ON/OFF
ENTER
DISPLAY
MENU
(MENU) SP STBY
LCD ADJUST
CUSTOM SET
DIS............................OFF
PIP............................OFF
D.ZOOM...................OFF
PROGRAM AE.........AUTO
: MENU
●
LCD ADJUST●SP STBY
BRIGHT I–00 18 36–I
COLOR
RETURN
: MENU
Ajuste de la pantalla LCD
✤ La videocámara está equipada con una Pantalla de cristal
líquido (LCD), que le permite ver lo que está filmando o
reproducirlo directamente.
✤ Dependiendo de las condiciones en las que esté utilizando
la videocámara (ej., interior o exterior), puede ajustar:
■
La luminosidad
■
El color
1. Ponga el interruptor de encendido en la
posición CAMERA o PLAYER.
2. Abra la pantalla LCD, ésta se encenderá.
3. Pulse la tecla MENU ON/OFF.
4. Gire el disco selector MENU a LCD ADJUST.
5. Pulse ENTER para que aparezca el
submenú.
6. Gire el disco selector MENU hasta la opción
del menú que desea ajustar (BRIGHT,
COLOR).
7. Pulse ENTER de nuevo.
■
Puede ajustar la LCD utilizando el disco
selector MENU.
8. Pulse ENTER.
■
Para realizar ajustes posteriores, repita
los pasos 6, 7 y 8.
9. Pulse la tecla MENU ON/OFF para finalizar
la configuración.
Utilice la tecla de ajuste del enfoque del VISOR para
enfocar la imagen. (Consulte la figura)
Uso del VISOR
Ajustar el enfoque
Page 30
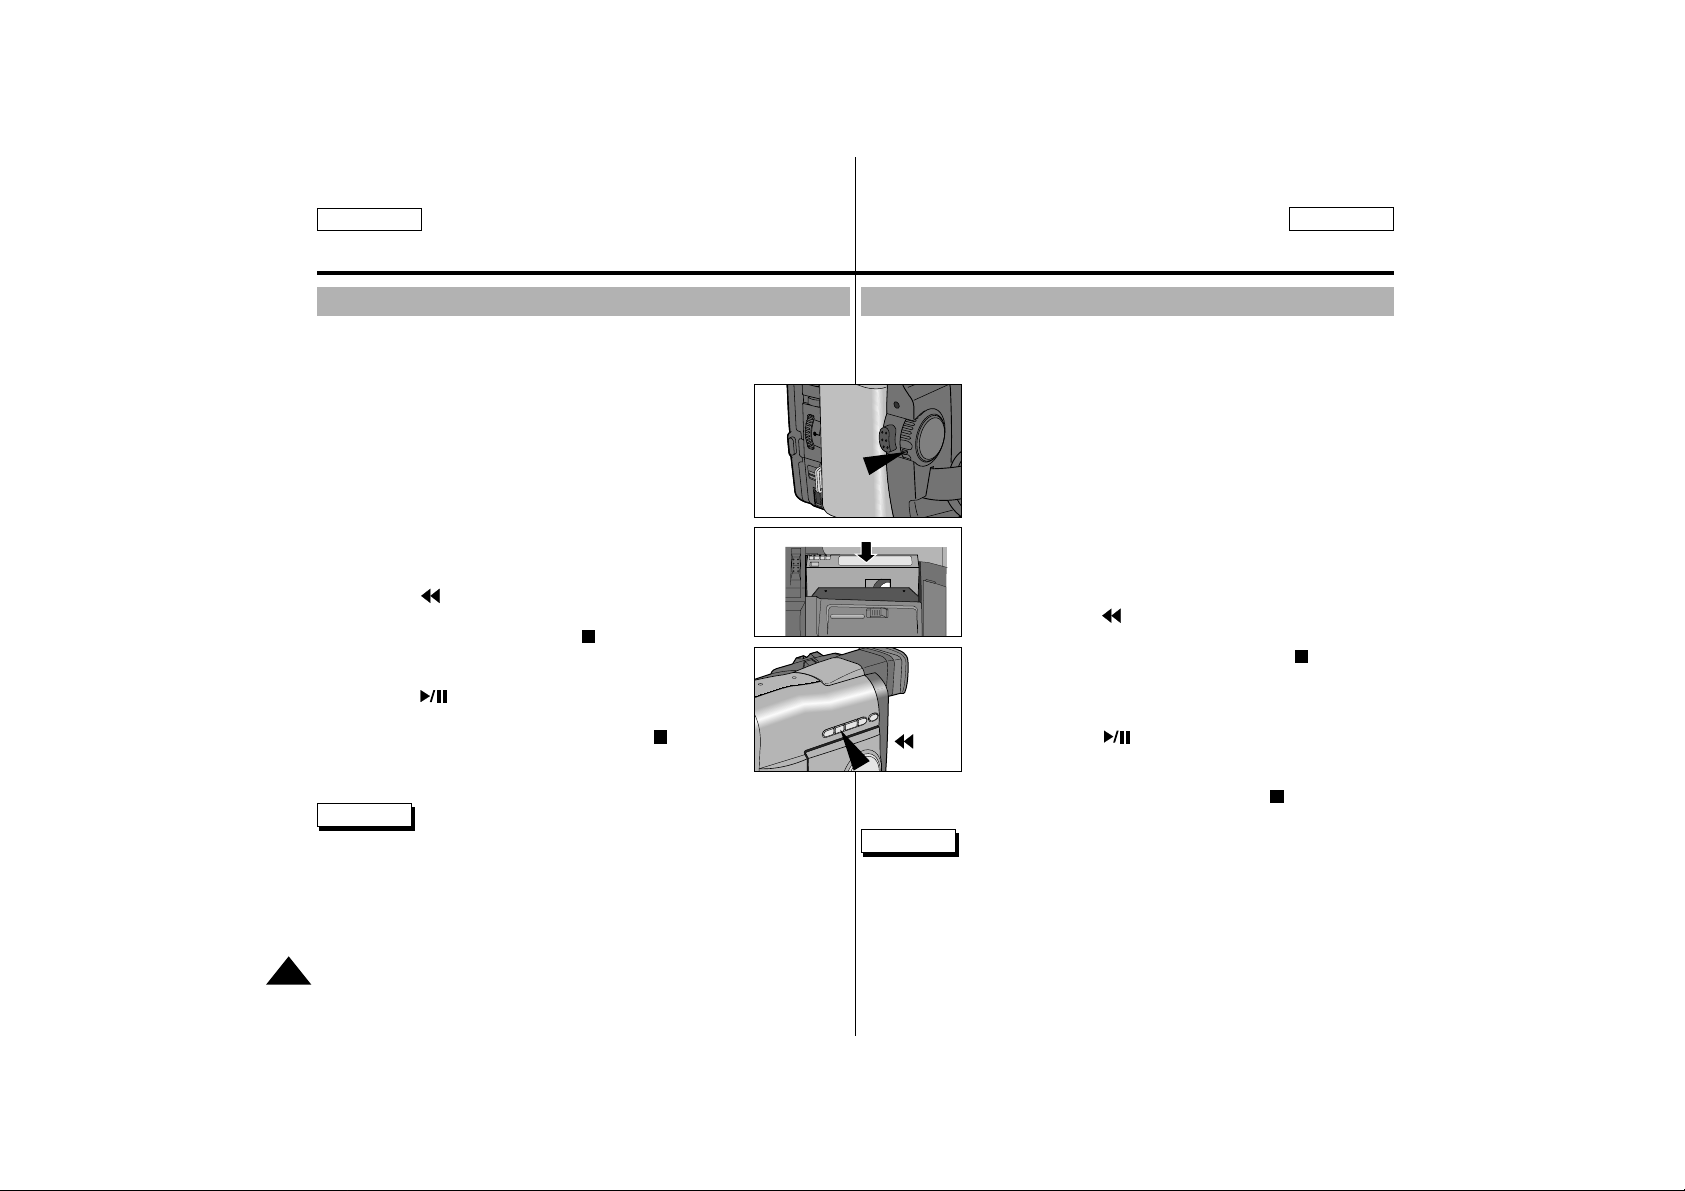
30
Basic Recording Filmación básica
ENGLISH ESPAÑOL
Playing back a tape you have recorded on the LCD
✤ You can monitor the playback picture on the LCD monitor.
✤ Make sure that the battery pack is in place.
1. Hold down the tab of the Power switch and turn it
to the PLAYER position.
2. Insert the tape you want to view.
3. Open the LCD screen and make sure that STOP is
displayed.
Adjust the angle of the LCD screen and set the
brightness or the color if necessary.
4. Press the (REW) button to rewind the tape to the
start point.
■
To stop REWIND, press the (STOP) button.
■
Camcorder stops automatically after rewinding.
5. Press the (PLAY/STILL) button to start playback.
■
You can see the picture you recorded on the LCD.
■
To stop the PLAY operation, press the (STOP)
button.
Reference
■
You can also view the picture on a TV screen, after connecting the
camcorder to a TV or VCR. (see page 64)
■
Various functions are availble in playback mode. (see page 66)
1
2
4
REW
Reproducción de la cinta en LCD
✤ Puede reproducir las imágenes filmadas en la pantalla LCD.
✤ Asegúrese de que la batería está instalada correctamente.
1. Mantenga pulsada la pestaña del interruptor de
alimentación y deslícelo a la posición PLAYER.
2. Introduzca la cinta que desea ver.
3. Abra la pantalla LCD y asegúrese de que que aparece
el indicador STOP.
Ajuste el ángulo de la pantalla LCD y configure
la luminosiddad y el color, si es necesario.
4. Pulse la tecla (REW) para rebobinar la cinta
hasta el principio.
■ Para detener REWIND, pulse la tecla (STOP).
■ La videocámara se detiene automáticamente
después de rebobinar.
5. Pulse la tecla (PLAY/STILL) para comenzar la
reproducción.
■ Puede ver en la LCD las imágenes filmadas.
■ Para detener PLAY, pulse la tecla (STOP).
Notas
■ También puede ver las imágenes en una pantalla de televisión,
después de conectar la videocámara a un televisor o reproductor.
(Consulte la página 64)
■ Existen diversas funciones en modo de reproducción.
(Consulte la página 66)
Page 31
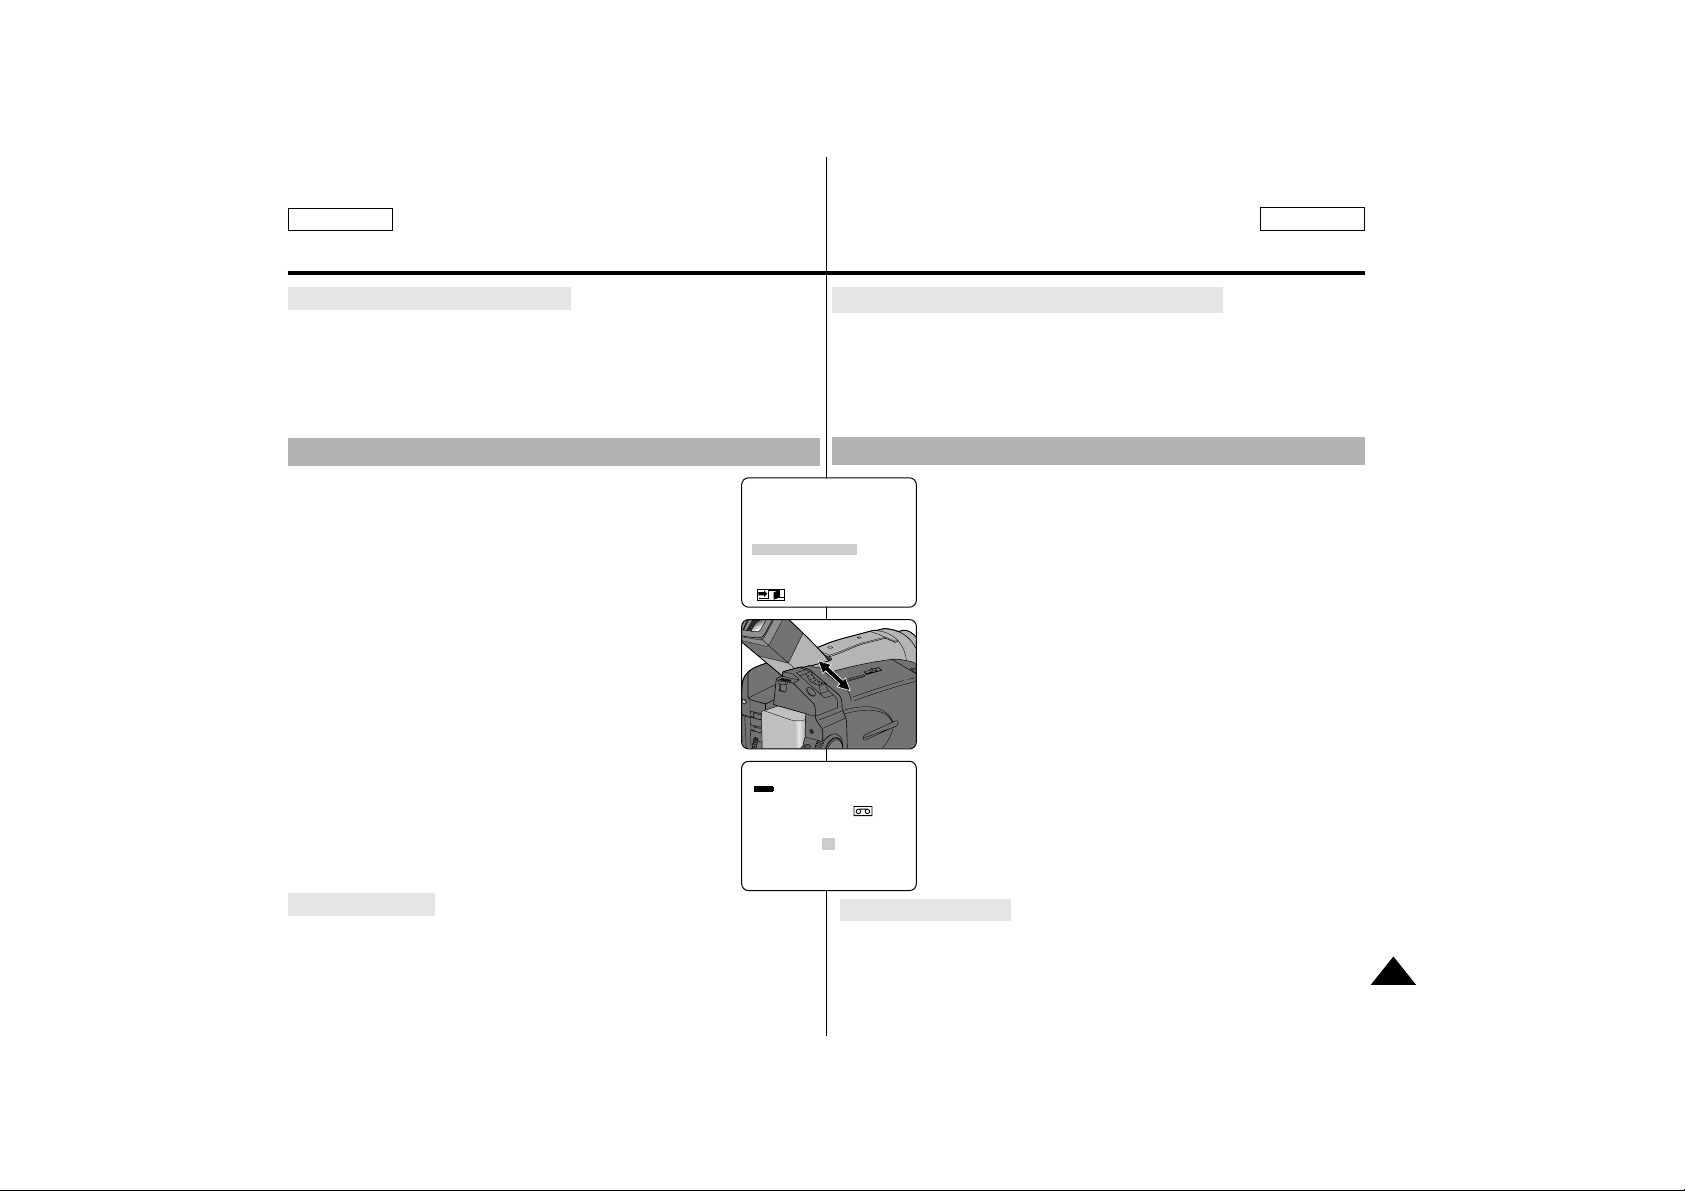
31
Basic Recording Filmación básica
ENGLISH ESPAÑOL
Adjusting the LCD during PLAY
✤ You can adjust the LCD during playback.
✤ The adjustment method is the same procedure as used in
CAMERA mode. (see page 29)
The Speaker works in PLAYER mode only.
■
When you use the LCD screen for playback, you can
hear the recorded sound from the built-in Speaker.
- If you do not want to hear the sound, set SPEAKER
to OFF in the menu.
1. Set the power switch to PLAYER mode.
2. Press the MENU ON/OFF button.
3. Turn the MENU DIAL to highlight SPEAKER.
4. Press the ENTER button to change the setting.
5. Press the MENU ON/OFF button to finish the SPEAKER
setting.
■
If you close the LCD screen, both the screen and
speaker are switched off.
■
If the speaker does not work properly, check these
points;
- Is the LCD screen closed?
- Is the volume adjusted to a low?
- Is the SPEAKER set to OFF?
Volume Control
✤ The volume of the Speaker is controlled by moving the ZOOM
lever (Volume control) during playback.
Controlling Sound from the Speaker
(MENU) SP STOP
LCD ADJUST
PHOTO SEARCH
AUDIO SEL..............SOUND1
SPEAKER.................ON
REC MODE ..............SP
DISPLAY...................LCD
: MENU
SP PLAY
0:00:00:00
100MIN
VOLUME
I–0 16 20–I
✤ Puede ajustar la pantalla LCD durante la reproducción.
✤ El método de ajuste es igual que el procedimiento utilizado
en modo CAMERA: (Consulte la página 29)
El altavoz sólo funciona en modo PLAYER.
■
Cuando utilice la pantalla LCD para reproducir
imágenes, puede escuchar el sonido grabado por el
altavoz incorporado.
- Si no desea escuchar el sonido, seleccione OFF
para SPEAKER en el menú.
1. Deslice el interruptor de encendido a la posición PLAYER.
2. Pulse la tecla MENU ON/OFF.
3. Gire el disco selector MENU a SPEAKER.
4. Pulse la tecla ENTER para cambiar el ajuste.
5. Pulse la tecla MENU ON/OFF para finalizar la
configuración de SPEAKER.
■
Si cierra la pantalla LCD, se apagarán la pantalla y
el altavoz.
■
Si el altavoz no funciona correctamente, verifique lo
siguiente;
- ¿Está abierta la pantalla LCD?
- ¿Está el volumen ajustado demasiado bajo?
- ¿Está SPEAKER en OFF?
✤ El volumen del altavoz se controla moviendo la palanca del ZOOM
(Control del volumen) durante la reproducción.
Ajuste de la pantalla LCD durante la reproducción
Control del volumen
Control del sonido del altavoz
Page 32
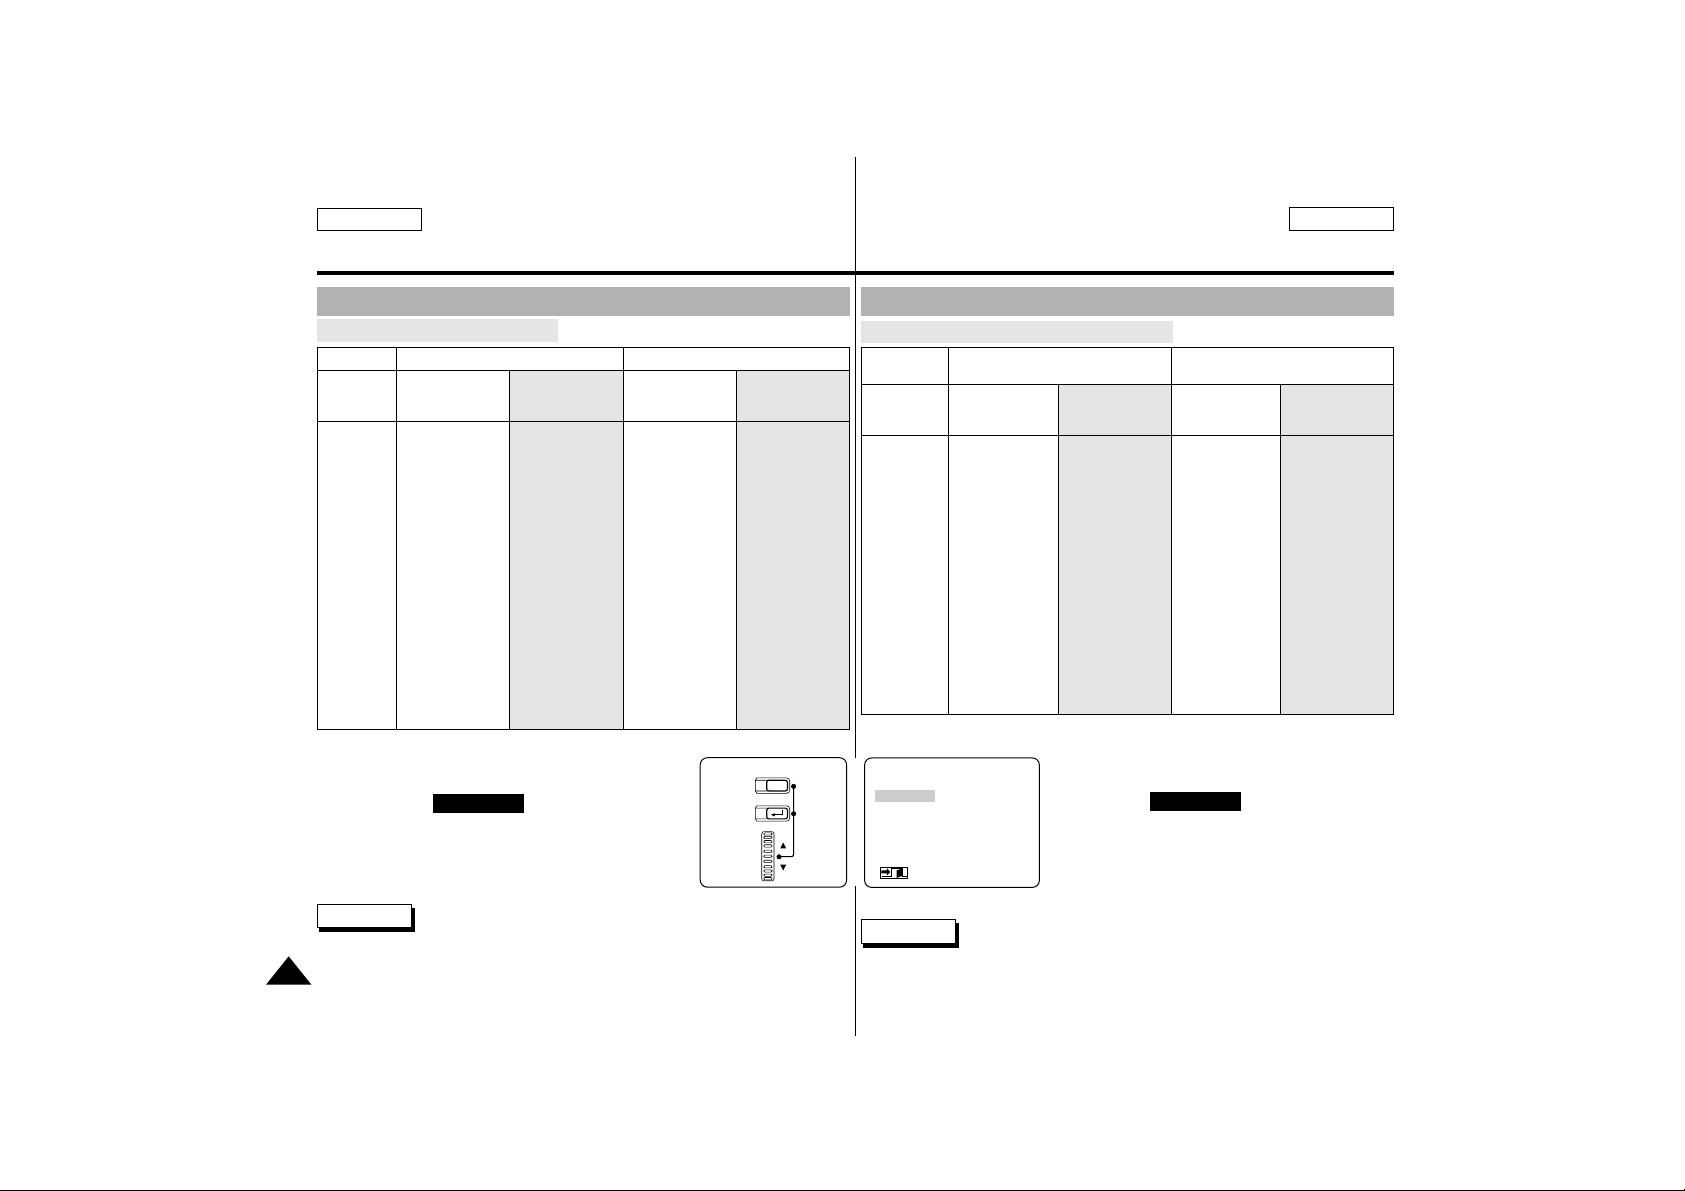
ENGLISH ESPAÑOL
32
Advanced Recording Filmación avanzada
Using the Various Functions
●
Setting the menu item
CAMERA PLAYER
Power switch
Mode switch
Functions
in menu
LCD ADJUST
CUSTOM SET
DIS
PIP
DIGITALZOOM
PROGRAM AE
DSE SELECT
WHITE BALANCE
SHUTTER SPEED
IRIS
REC MODE
REC LAMP
WIND CUT
AUDIO MODE
PHOTO MODE
DISPLAY
DATE/TIME
DEMO
CLOCK SETTING
PHOTO MODE
QUALITY
MEMORY FORMAT
LCD ADJUST
CUSTOM SET
DIS
PIP
DIGITALZOOM
PROGRAM AE
DSE SELECT
WHITE BALANCE
SHUTTER SPEED
IRIS
DISPLAY
DATE/TIME
CLOCK SETTING
LCD ADJUST
PHOTO SEARCH
AUDIO SELECT
SPEAKER
REC MODE
DISPLAY
DATE/TIME
FILE COPY
FILE DELETE
PROTECT
DPOF
LCD ADJUST
DISPLAY
DATE/TIME
CAMCORDER
mode
DSC mode
(SCD75/D77) only)
CAMCORDER
mode
DSC mode
(SCD75/D77 only)
CAMERA PLAYER
Interruptor
de encendido
Interruptor de
modo
PLAYER
Funciones
del menú
LCD ADJUST ,
CUSTOM SET,
DIS, PIP,
DIGITALZOOM,
PROGRAM AE,
DSE SELECT,
WHITE BALANCE,
SHUTTER SPEED,
IRIS, REC MODE,
REC LAMP,
WIND CUT,
AUDIO MODE,
PHOTO MODE,
DISPLAY,
DATE/TIME,
DEMO,
CLOCK SETTING
PHOTO MODE
QUALITY
MEMORY FORMAT
LCD A DJUST
CUSTOM SET
DIS
PIP
DIGITALZOOM
PROGRAM AE
DSE SELECT
WHITE BALANCE
SHUTTER SPEED
IRIS
DISPLAY
DATE/TIME
CLOCK SETTING
LCD ADJUST ,
PHOTO SEARCH,
AUDIO SELECT,
SPEAKER,
REC MODE,
DISPLAY,
DATE/TIME
FILE COPY
FILE COPY
FILE DELETE
PROTECT
DPOF
LCD ADJUST
DISPLAY
DATE/TIME
Modo
Videocámara
Modo DSC
(Sólo en
SCD75/D77)
Modo
Videocámara
Modo DSC
(Sólo en
SCD75/D77)
•
Set the camcorder to CAMERA or PLAYER mode.
1. Press the MENU ON/OFF button.
The MENU OSD is displayed.
The cursor (
HIGHLIGHT
) indicates the feature
you are currently adjusting.
2. Using the MENU DIAL and ENTER buttons on
the rear side panel, select and activate the item.
3. You can exit the menu mode by pressing the
MENU ON/OFF button.
Reference Functions in DSC mode work only in SCD75/D77.
ON/OFF
ENTER
DISPLAY
MENU
(MENU) SP STBY
LCD ADJUST
CUSTOM SET
DIS............................OFF
PIP............................OFF
D.ZOOM...................OFF
PROGRAM AE.........AUTO
: MENU
•
Ponga la videocámara en modo CAMERA o PLAYER.
1. Pulse la tecla MENU ON/OFF.
Aparece MENU OSD.
El cursor ( ILUMINADO ) indica la función
que está ajustando.
2. Con el disco selector MENU y la tecla
ENTER del panel posterior,
seleccione y active la opción.
3. Puede salir del modo de menú pulsando la tecla MENU ON/OFF.
Nota Las funciones de modo DSC sólo funcionan en
SCD75/D77.
Uso de diversas funciones
●
Ajuste de opciones del menú
Page 33
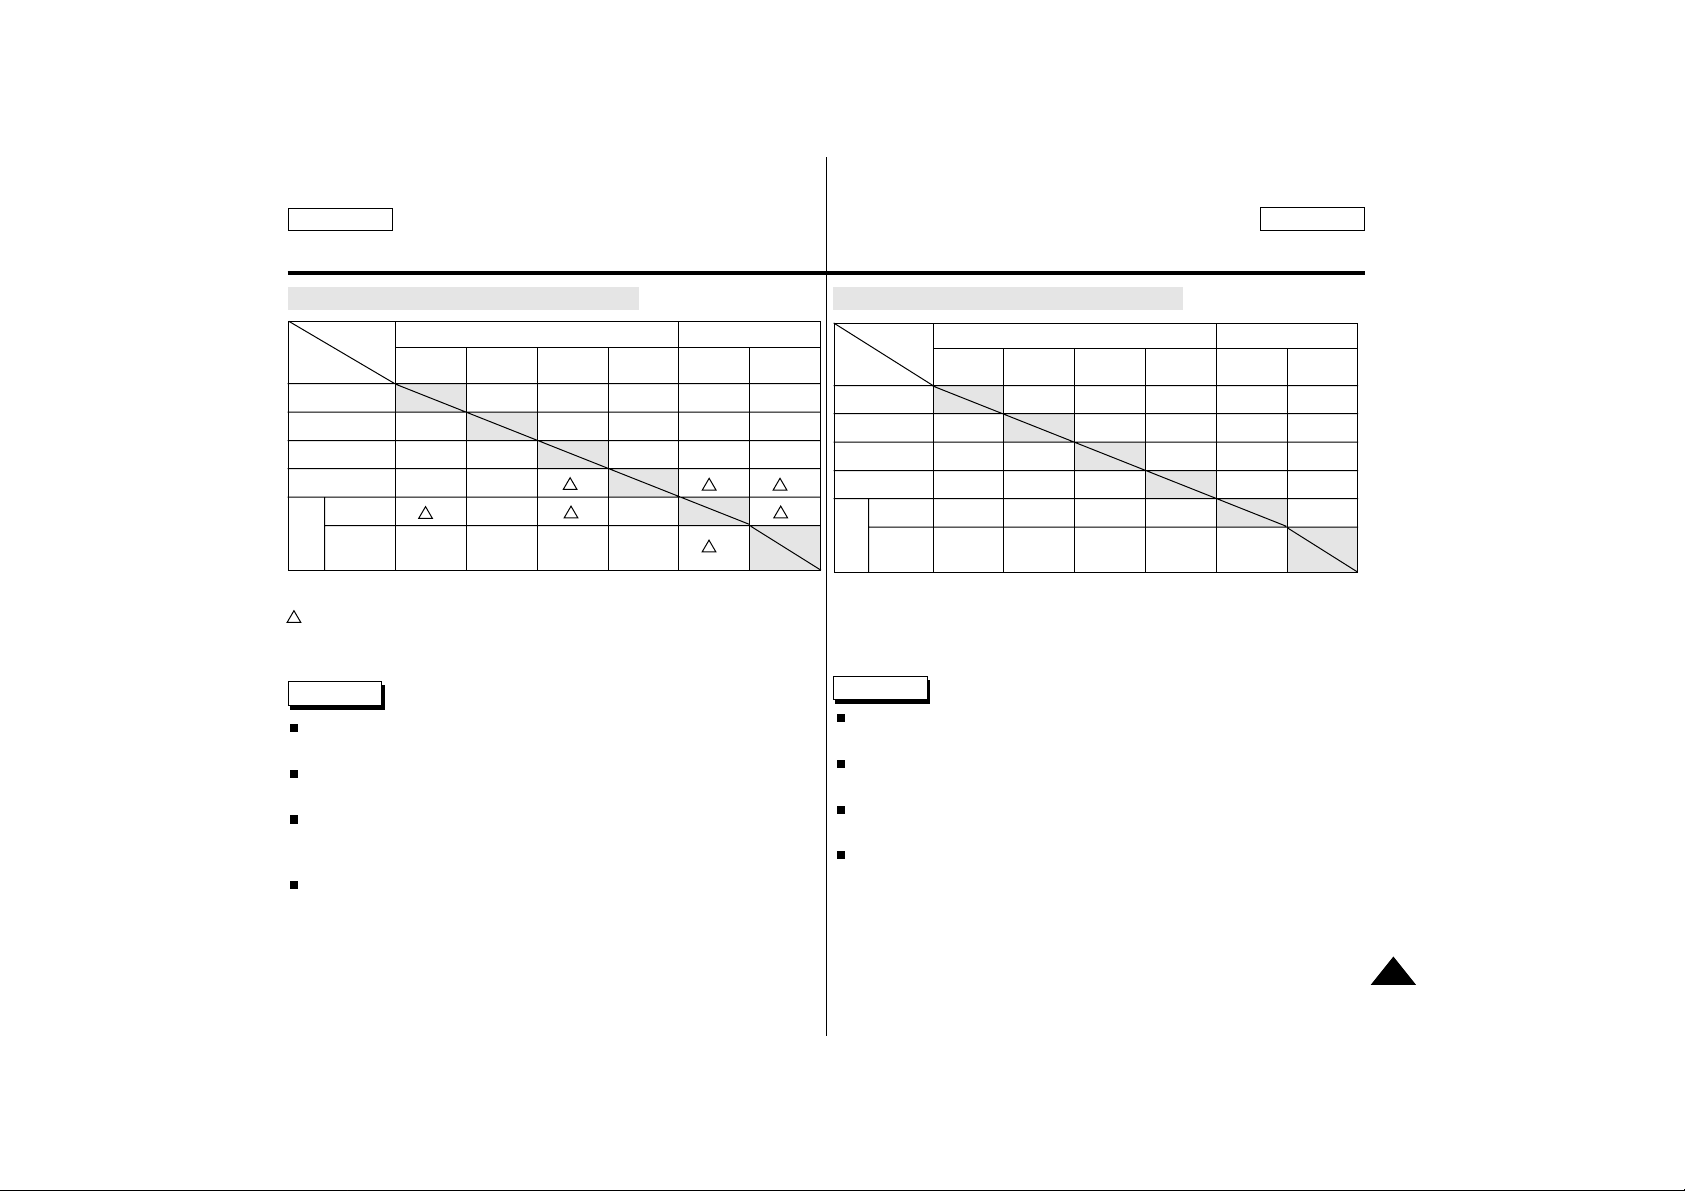
33
Advanced Recording Filmación avanzada
ENGLISH ESPAÑOL
●
Availability of functions in each mode
Digital functions Digital Special Effects
DIS
OOO✕ O
D.ZOOM
OOOOO
PHOTO
✕✕ ✕✕✕
PIP
OO
GHOST
O ✕
DSE
OTHER
OOO
✕
EFFECTS
Requested
Mode
Operating
Mode
DIS D.ZOOM PHOTO PIP Sub
OTHER
EFFECTS
O
: The requested mode will work with the operating mode.
: The operating mode will be released and the requested mode will work.
✕
: You can not change the requested mode.
Reference
If the menu item displays DISABLE for some functions, you are not
able to change that menu setting.
When you set the IRIS mode to manual(not AUTO) mode,
- The PROGRAM AE mode will be changed to AUTO.
When you set the SHUTTER SPEED mode to manual (not AUTO)
mode,
- The PROGRAM AE mode will be changed to AUTO.
When you set the PROGRAM AE mode to manual(not AUTO) mode,
- The SHUTTER SPEED and IRIS mode will be changed to AUTO.
Notas
Si la opción del menú indica DISABLE para algunas funciones, no
puede cambiar la configuración de ese menú.
Cuando fije el modo IRIS en modo manual (no AUTO),
- El modo de PROGRAM AE cambiará a AUTO.
Cuando fije el modo SHUTTER SPEED en modo manual (no AUTO),
- El modo de PROGRAM AE cambiará a AUTO.
Cuando fije el modo PROGRAM AE en modo manual (no AUTO),
- El modos de SHUTTER SPEED y IRIS cambiará a AUTO.
●
Funciones disponibles en cada modo
Funciones digitales
Efectos especiales digitales
DIS
OOO✕ O
D.ZOOM
O OOOO
PHOTO
✕✕ ✕✕✕
PIP
OO
qqq
GHOST
q
O
q
✕
q
DSE
OTROS
OOO
✕
q
EFECTOS
DIS D.ZOOM PHOTO PIP GHOST
OTROS
EFECTOS
O : El modo solicitado funcionará en modo operativo.
q
: Se desactivará el modo operativo y funcionará el modo
solicitado.
✕ : No puede cambiar el modo solicitado.
Modo
operativo
Modo
Solicitado
Page 34
34
Advanced Recording Filmación avanzada
ENGLISH ESPAÑOL
●
LCD ADJUST
✤ The LCD ADJUST function works in CAMERA and PLAYER mode.
Please see page 29.
●
CUSTOM SET
✤ You can customize settings and save them for future use.
■
The CUSTOM SET function operates in CAMERA mode only.
✤ If you want to use the CUSTOM function (see page 53) correctly,
set the status of each item to what you want before using the
CUSTOM function.
✤ You can set and store the following items :
■
DIS, PIP, D.ZOOM, PROGRAM AE, DSE, SHUTTER, IRIS.
1. Set the power switch to CAMERA mode.
2. Press the MENU ON/OFF button, to bring up the MENU
list.
3. Turning the MENU DIAL, select CUSTOM SET and press
the ENTER button.
4. Using the MENU DIAL and ENTER button,
set the status of each item to what you want.
5. To store settings and to exit the menu, press the MENU
ON/OFF button .
Reference
■
If you want to activate the CUSTOM function,
press the CUSTOM button in CAMERA mode.
■
If you set the SHUTTER to 1/8, 1/15, 1/30 the DIS will be changed to
OFF.
■
If you set the IRIS to manual, the PROGRAM AE will be changed to
AUTO.
(MENU) SP STBY
LCD ADJUST
CUSTOM SET
DIS............................OFF
PIP............................OFF
D.ZOOM...................OFF
PROGRAM AE.........AUTO
: MENU
●
CUSTOM SET●SP STBY
DIS............................ON
PIP............................OFF
D.ZOOM...................OFF
PROGRAM AE.........AUTO
DSE .........................OFF
W.BALANCE.............AUTO
: MENU
●
LCD ADJUST
✤ La función LCD ADJUST funciona en los modos CAMERA y PLAYER.
Consulte la página 29.
●
CUSTOM SET
✤ Puede personalizar los ajustes y guardarlos para utilizarlos con
posterioridad.
■
La función CUSTOM SET sólo funciona en modo CAMERA.
✤ Si desea utilizar correctamente la función CUSTOM (consulte la
página 53), fije el estado que desee para cada opción utilizando
la función CUSTOM.
✤ Puede fijar y guardar las opciones siguientes:
■
DIS, PIP, D.ZOOM, PROGRAM AE, DSE, SHUTTER, IRIS.
1. Deslice el interruptor de encendido a la posición
CAMERA.
2. Pulse la tecla MENU ON/OFF para que aparezca
la lista MENU.
3. Girando el disco selector MENU, seleccione CUSTOM
SET y pulse la tecla ENTER.
4. Con el disco selector MENU y la tecla ENTER, fije
el estado de cada opción que desee.
5. Para guardar la configuración y salir del menú, pulse la
tecla MENU ON/OFF.
Notas
■
Si desea activar la función CUSTOM, pulse la tecla CUSTOM en modo
CAMERA.
■
Si fija SHUTTER en 1/8, 1/15, 1/30, DIS cambiará OFF.
■
Si fija IRIS en manual, PROGRAM AE cambiará a AUTO.
Page 35
ENGLISH ESPAÑOL
●
DIS (Digital Image Stabilizer)
✤ The DIS function works in CAMERA mode only.
✤ DIS(Digital Image Stabilizer) is a handshake compensation
function that compensates for any shaking or moving of the hand
holding the camcorder (within reasonable limits).
✤ It provides more stable pictures when:
■
Recording with the zoom
■
Recording a small object close-up
■
Recording and walking at the same time
■
Recording through the window of a vehicle
1. Set the camcorder to CAMERA mode.
2. Press the MENU ON/OFF button.
■
The menu list will appear.
3. Turn the MENU DIAL highlight to DIS.
4. To activate the DIS function, press the ENTER button.
■
The DIS menu is changed to ON.
■
If you do not want to use the DIS function, set the DIS menu to OFF.
5. To exit, press the MENU ON/OFF button.
Reference
■
It is recommended that you deactivate the handshake compensation
function when using a tripod.
■
The DIS function will not operate in the low SHUTTER 1/8, 1/15, 1/30
mode.
■
If you set DIS function to ON in GHOST mode, the GHOST mode will
be switched off.
■
If you use the DIS function, the picture quality may deteriorate.
35
Advanced Recording Filmación avanzada
(MENU) SP STBY
LCD ADJUST
CUSTOM SET
DIS............................OFF
PIP............................OFF
D.ZOOM...................OFF
PROGRAM AE.........AUTO
: MENU
(MENU) SP STBY
LCD ADJUST
CUSTOM SET
DIS............................ON
PIP............................OFF
D.ZOOM...................OFF
PROGRAM AE.........AUTO
: MENU
●
DIS (Estabilizador digital de imagen)
✤ La función DIS sólo funciona en modo CAMERA.
✤ DIS (Estabilizador digital de imagen) es una función de compen-
sación de temblor de la mano que compensa cualquier ligero
temblor o movimiento de la mano que sostiene la videocámara (dentro de unos límites razonables).
✤ Proporciona imágenes más estables cuando:
■
Se filma con Zoom
■
Se filma un primer plano de un objeto pequeño
■
Se filma y camina al mismo tiempo
■
Se filma a través de la ventana de un vehículo
1. Ponga la videocámara en modo CAMERA.
2. Pulse la tecla MENU ON/OFF.
■
Aparecerá la lista de menús.
3. Gire el disco selector MENU a DIS.
4. Para activar la función DIS, pulse la tecla
ENTER.
■
El menú DIS cambia a ON.
■
Si no desea utilizar la función DIS,
seleccione OFF en el menú DIS.
5. Para salir, pulse la tecla MENU ON/OFF.
Notas
■
Se recomienda desactivar la función de compensación de temblor de
la mano cuando se utilice un trípode.
■
La función DIS no funcionará en modo SHUTTER 1/8, 1/15, 1/30.
■
Si selecciona ON para DIS en modo GHOST, éste se desactivará.
■
Si utiliza la función DIS, puede deteriorarse la calidad de las imágenes.
Page 36
ENGLISH ESPAÑOL
36
Advanced Recording Filmación avanzada
●
PIP (Picture-in-Picture)
✤ The PIP (Picture-in-Picture) function works in CAMERA mode only.
✤ The PIP feature works in combination with the various functions by
using a small, super imposed screen to show an original image
(Ex. Digital Zoom). This should help you to get a more clear idea
of what you are shooting.
1. Set the camcoder to CAMERA mode.
2. Press the MENU ON/OFF button.
■
The menu list will appear.
3. Turn the MENU DIAL to highlight PIP.
4. To activate the PIP function, press the ENTER button.
■
The PIP menu is changed to ON.
■
If you do not want to use the PIP function, set the PIP menu to OFF.
5. To exit, press the MENU ON/OFF button.
Reference
■
When you use the PIP function, the PIP screen will be
recorded on the tape.
■
The PIP function will not operate in the DSE function.
■
If you set the SHUTTER to manual (1/8, 1/15, 1/30) in PIP mode,
the PIP will disappear.
(MENU) SP STBY
LCD ADJUST
CUSTOM SET
DIS............................OFF
PIP............................OFF
D.ZOOM...................OFF
PROGRAM AE.........AUTO
: MENU
(MENU) SP STBY
LCD ADJUST
CUSTOM SET
DIS............................OFF
PIP............................ON
D.ZOOM...................OFF
PROGRAM AE.........AUTO
: MENU
●
PIP (Imagen a imagen)
✤ La función PIP (Imagen a imagen) sólo funciona en modo CAMERA.
✤ La función PIP funciona en combinación con otras funciones utilizando
una pequeña pantalla superimpuesta para mostrar una imagen original
(Ej. Zoom digital). Esto le puede ayudar a tener una idea más clara de
lo que está filmando.
1. Ponga la videocámara en modo CAMERA.
2. Pulse la tecla MENU ON/OFF.
■
Aparecerá la lista de menús.
3. Gire el disco selector MENU a PIP.
4. Para activar la función PIP, pulse la tecla
ENTER.
■
El menú PIP cambia a ON.
■
Si no desea utilizar la función PIP,
seleccione OFF para el menú PIP.
5. Para salir, pulse la tecla MENU ON/OFF.
Notas
■
Cuando utilice la función PIP, la pantalla PIP se grabará en la cinta.
■
La función PIP no funcionará en la función DSE.
■
Si selecciona manual para SHUTTER (1/8, 1/15, 1/30) en modo PIP,
éste desaparecerá.
Page 37
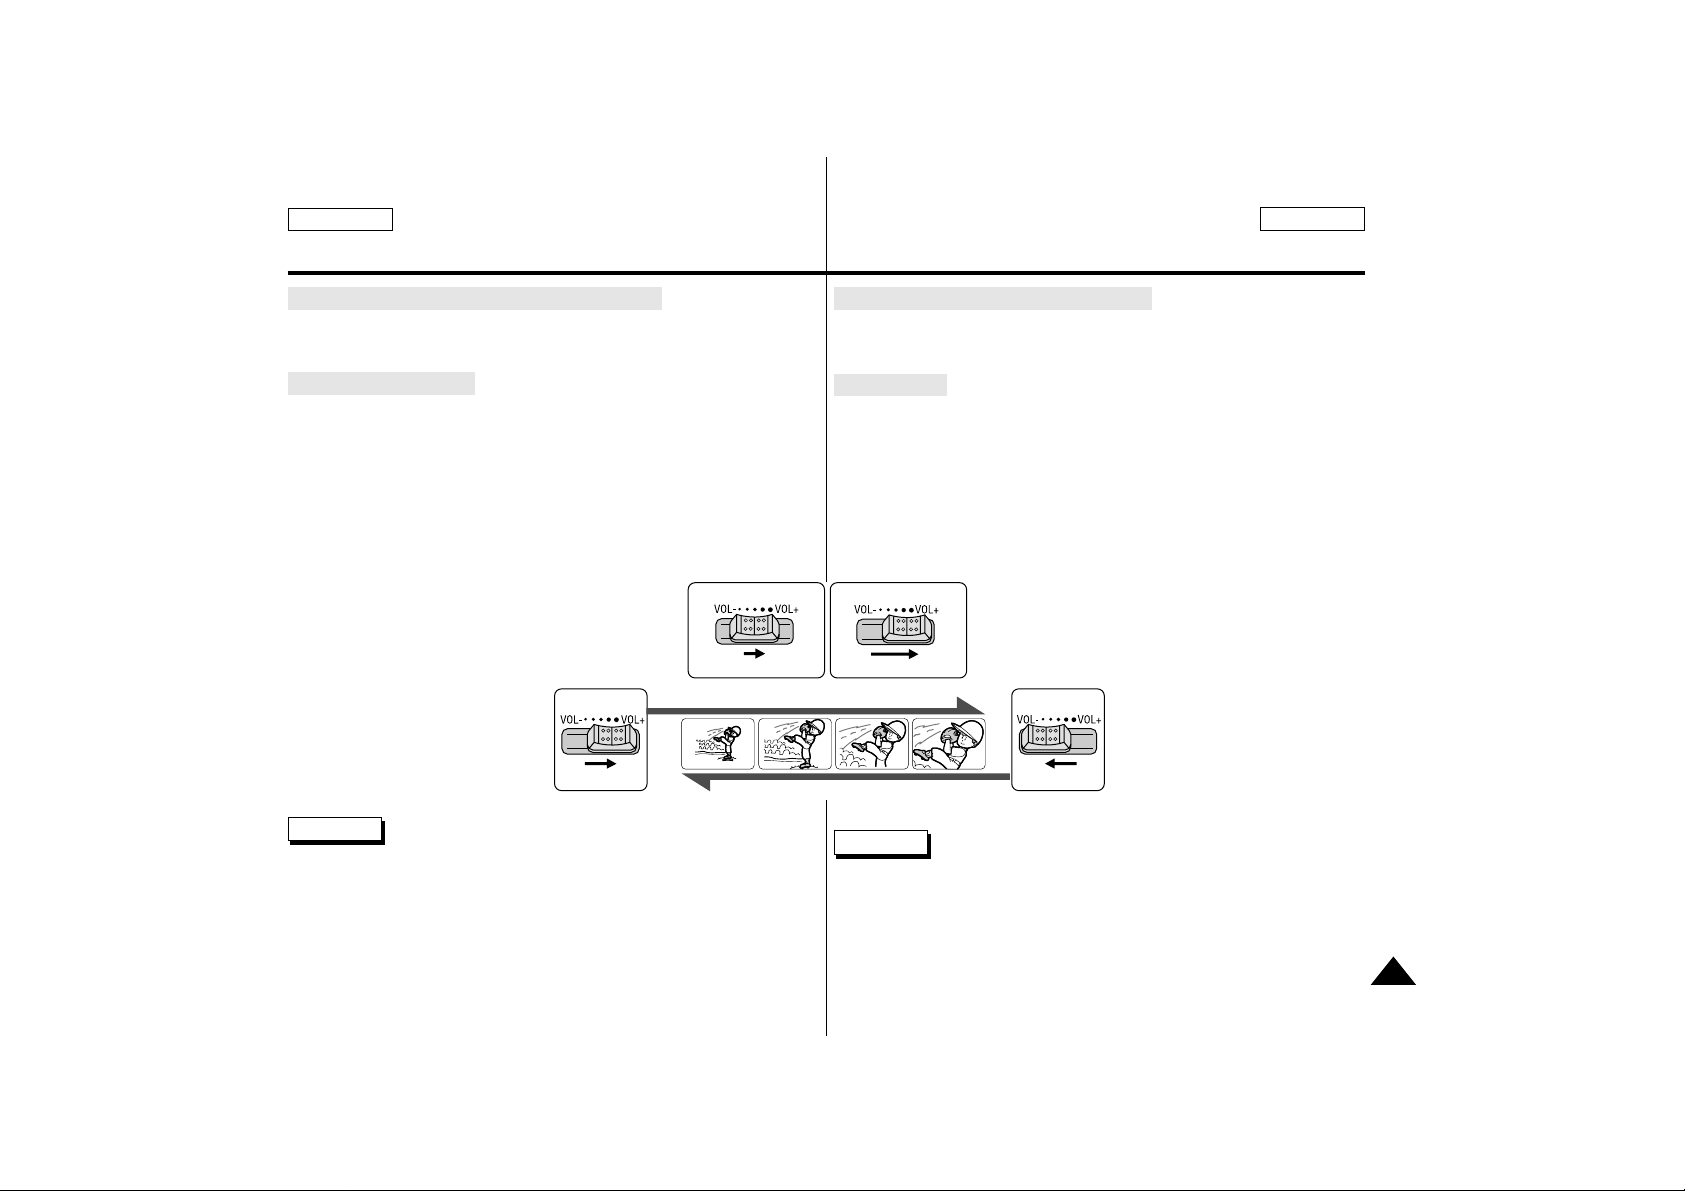
37
Advanced Recording Filmación avanzada
ENGLISH ESPAÑOL
●
Zooming In and Out with DIGITAL ZOOM
✤ Zoom works in CAMERA mode only.
Zooming In and Out
✤ Zooming is a recording technique that lets you change the size of
the subject in the scene.
For more professional looking recordings, do not use the zoom
function too often.
✤ You can zoom using a variable zoom speed.
✤ Use these features for different shots; Please note that over use of
the zoom feature can lead to unprofessional looking results and
a reduction of battery usage time.
1. Move the zoom lever a little for a gradual
zoom, move it further for a high-speed zoom.
Your zooming is monitored on the OSD.
2. T(Telephoto) side:
Subject appears closer.
3. W(Wide angle) side:
Subject appears farther away.
Reference You can record a subject that is a minimum of 1 m
(about 2.65 feet) away from the lens surface in the TELE
position, or about 10 mm (about 0.5 inch) away in the
WIDE position.
W
T
W
T
TELE
WIDE
1-1
23
1-2
W
T
W
T
●
Lejos y cerca con DIGITAL ZOOM
✤ El zoom sólo funciona en modo CAMERA.
Lejos y cerca
✤ El zoom es una técnica de filmación que permite cambiar el
tamaño del tema de la escena.
Para lograr filmaciones profesionales, no utilice el zoom con
demasiada frecuencia.
✤ Puede utilizar una velocidad de zoom variable.
✤ Utilice estas funciones para tomas diferentes. Tenga en cuenta
que si abusa de la función zoom obtendrá resultados poco proferionales y reducirá el tiempo de uso de la batería.
1. Mueva la palanca del zoom un poco para
el zoom gradual, múevala más para el
zoom de alta velocidad.
El zoom se supervisa en la pantalla OSD.
2. T(Telefoto):
El tema aparece más cerca.
3. W(Ángulo amplio):
El tema aparece más lejos.
Notas Puede filmar un tema que esté a un mínimo de 1 m
de la superficie de la lente en la posición TELE o a
10 mm en la posición WIDE.
Page 38
ENGLISH ESPAÑOL
38
Advanced Recording Filmación avanzada
Digital Zoom
✤ More than 22x zoom is a achieved digitally.
✤ The picture quality deteriorates the more you zoom in on the
subject.
✤ We recommend that you use the DIS feature with the DIGITAL
ZOOM for picture stability.
1. Set the camcorder to CAMERA mode.
2. Press the MENU ON/OFF button.
■
The menu list will appear.
3. Turn MENU DIAL to D.ZOOM.
4. Press the ENTER to enter the sub-menu.
5. Turn the MENU DIAL so that it highlights the zoom magnification.
■
Press ENTER to activate the digital zoom and return to main menu.
■
If you exit the sub-menu without pressing the ENTER button,
the DIGITAL ZOOM mode is not changed.
6. To exit, press the MENU ON/OFF button.
Reference
■
If you use the digital zoom function, the picture quality may deteriorate.
(MENU) SP STBY
LCD ADJUST
CUSTOM SET
DIS............................OFF
PIP............................OFF
D.ZOOM...................OFF
PROGRAM AE.........AUTO
: MENU
●
D.ZOOM
●
SP STBY
OFF
44 X
500X
SEL.:ENTER
: MENU
Zoom digital
✤ El zoom de más de 22x funciona digitalmente.
✤ La calidad de la imagen se deteriora a medida que se acerca
al tema.
✤ Le recomendamos que utilice la función DIS con DIGITAL ZOOM
para lograr una imagen estable.
1. Ponga la videocámara en modo CAMERA.
2. Pulse la tecla MENU ON/OFF.
■
Aparecerá la lista de menús.
3. Gire el disco selector MENU a D.ZOOM.
4. Pulse ENTER para que aparezca el submenú.
5. Gire el disco selector MENU a la opción de aumento con zoom.
■
Pulse ENTER para activar el zoom digital y volver al menú principal.
■
Si sale del submenú sin pulsar la tecla ENTER, no se cambia el
modo DIGITALZOOM.
6. Para salir, pulse la tecla MENU ON/OFF.
Notas
■
Si utiliza la función de zoom digital, puede deteriorarse la calidad de
las imágenes.
Page 39
ENGLISH ESPAÑOL
39
Advanced Recording Filmación avanzada
●
PROGRAM AE
✤ The PROGRAM AE function works in CAMERAmode only.
✤ The PROGRAM AE modes allow you to adjust shutter speeds and
apertures to suit different shooting conditions.
✤ They give you creative control over the depth of field.
■ AUTO mode
- Auto balance between the subject and the background.
- To be used in normal conditions.
- The shutter speed automatically varies from 1/60 to 1/250
second,depending on the scene.
■ PORTRAIT mode ( )
- For focusing on the background of the subject,
when the background is out of focus.
- The PORTRAIT mode is most effective when used outdoors.
- The shutter speed automatically varies from 1/60 to 1/1000 second.
■ SPORT mode ( )
- For recording people or objects moving quickly.
■ HSS mode ( )
- For shooting fast-moving subjects such as the players in golf or
tennis games.
Setting the PROGRAM AE
1. Press the MENU ON/OFF button.
■
The menu list will appear.
2. Turn the MENU DIAL to highlight
PROGRAM AE.
3. Press ENTER to enter the sub-menu.
4. Using the MENU DIAL, select the PROGRAM AE mode.
■
Press ENTER to confirm the program AE mode.
5. To exit, press the MENU ON/OFF button.
(MENU) SP STBY
LCD ADJUST
CUSTOM SET
DIS............................OFF
PIP............................OFF
D.ZOOM...................OFF
PROGRAM AE ........AUTO
: MENU
●
PROGRAM AE ●SP STBY
(AUTO)
AUTO
PORTRAIT
SPORT
HSS
RETURN
SEL.:ENTER
: MENU
●
PROGRAM AE
✤ La función PROGRAM AE sólo funciona en modo CAMERA.
✤ Los modos de PROGRAM AE le permiten ajustar las velocidades del
obturador y aberturas para que se adapten a las distintas
condiciones en que se filma.
✤ Permiten controlar creativamente la profundidad de campo.
■ Modo AUTO
- Equilibrio automático entre el motivo y el fondo.
- Se utiliza en condiciones normales.
- La velocidad del obturador varía automáticamente de 1/60 a 1/250
de segundo, según la escena.
■ Modo PORTRAIT ( )
- Para enfocar el motivo principal y frontal, cuando el fondo queda
desenfocado.
- El modo PORTRAIT es más efectivo cuando se utiliza en el exterior.
- La velocidad del obturador varía automáticamente de 1/60 a 1/1000
de segundo.
■ Modo SPORT ( )
- Para filmar personas u objetos que se mueven con rapidez.
■ Modo HSS ( )
- Para filmar motivos que se mueven con rapidez como jugadores
de golf o partidos de tenis.
Configuración de PROGRAM AE
1. Pulse la tecla MENU ON/OFF.
■
Aparecerá la lista de menús.
2. Gire el disco selector MENU a PROGRAM AE.
3. Pulse ENTER para que aparezca el submenú.
4. Con el disco selector MENU, seleccione el
modo PROGRAM AE.
■
Pulse ENTER para confirmar el modo
PROGRAM AE.
5. Para salir, pulse la tecla MENU ON/OFF.
Page 40
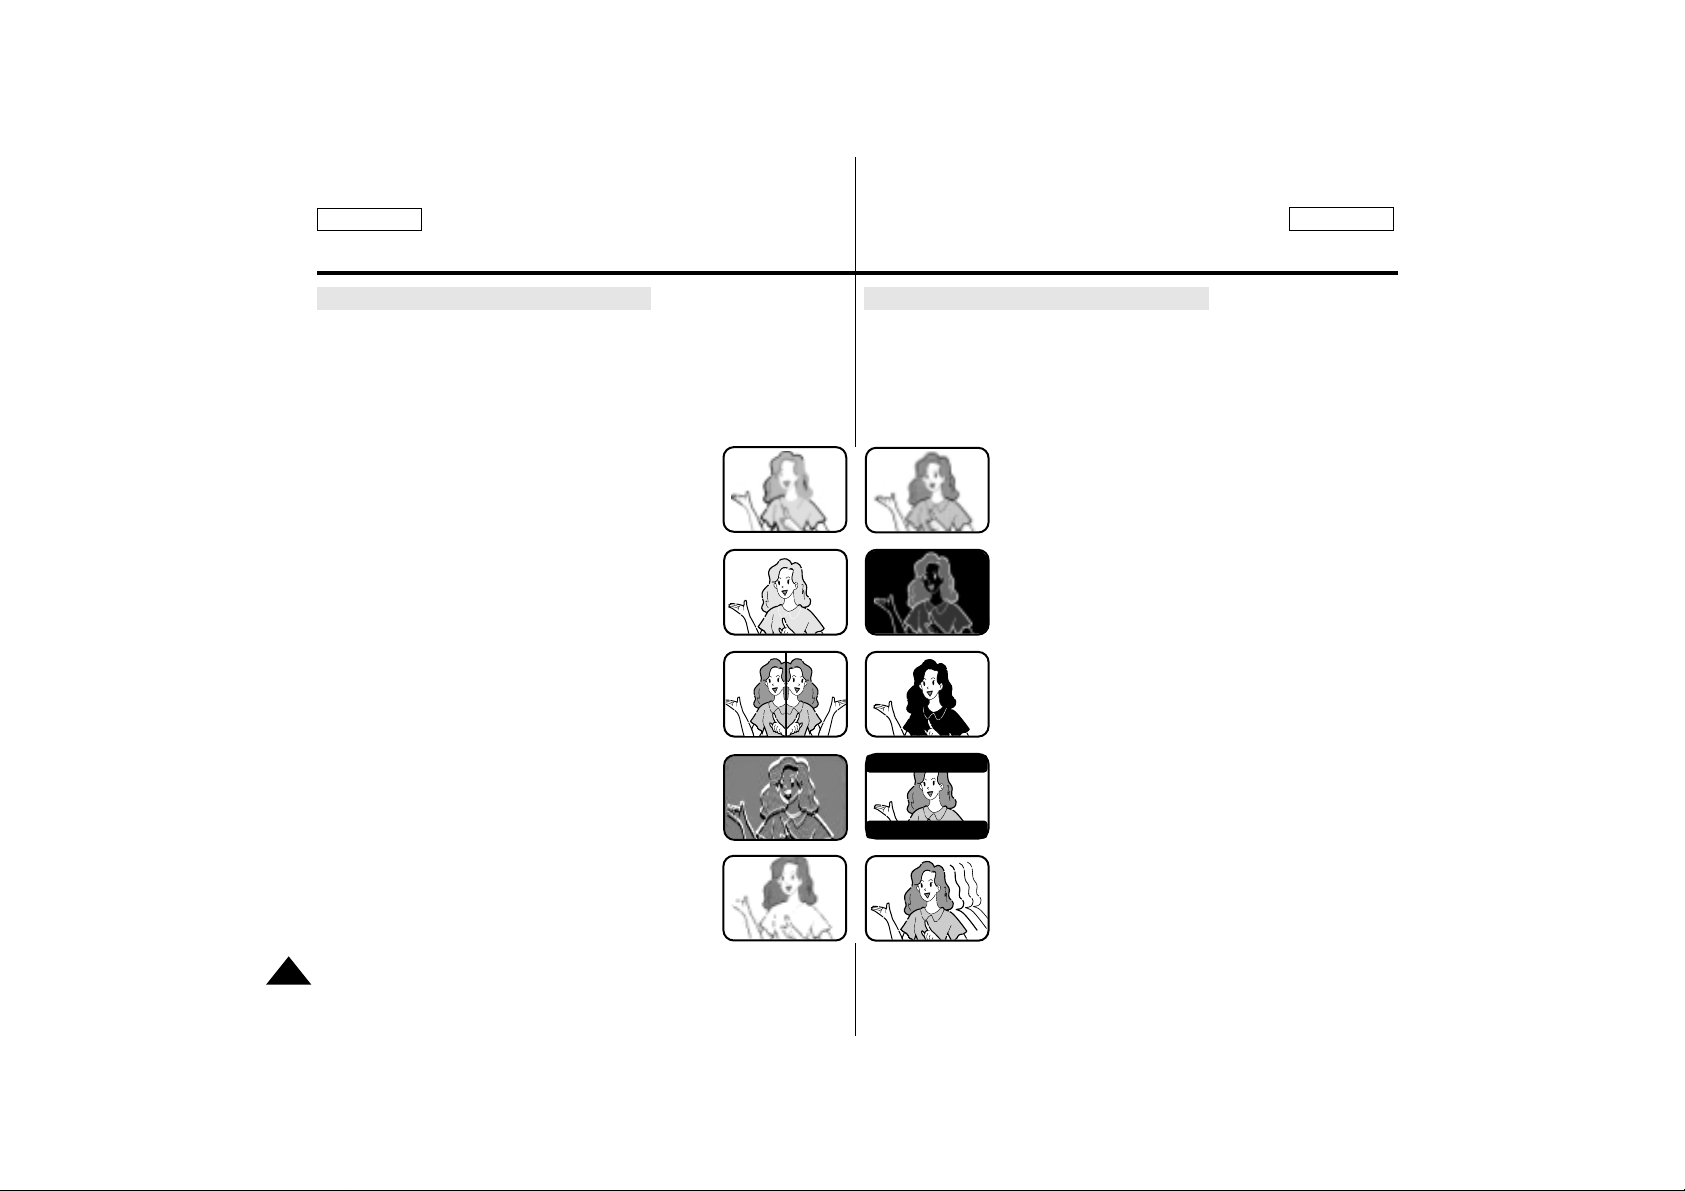
ENGLISH ESPAÑOL
40
Advanced Recording Filmación avanzada
●
DSE(Digital Special Effects) SELECT
✤ The DSE function works in CAMERA mode only.
✤ The digital effects enable you to give a creative look to your
recording by adding various special effects.
✤ Select the appropriate digital effect for the type of picture that you
wish to record and the effect that you wish to give.
✤ There are 10 DSE modes.
a. ART mode
This mode gives the images a coarse effect.
b. MOSAIC mode
This mode gives the images a mosaic effect.
c. SEPIA mode
This mode gives the images a reddish-brown
pigment.
d. NEGA mode
This mode reverses the colors of the image
creating a negative image.
e. MIRROR mode
This mode cuts the picture in half, using a mirror
effect.
f. B/W mode
This mode changes the images to black and white.
g. EMBO mode
This mode creates a 3D effect.
h.
CINEMA mode
This mode covers the upper/lower portions of the
screen to give a movie-like effect.
i. MAKE UP mode
This mode allows the images to be selected in red,
yellow, green or blue colors.
j. GHOST mode
This mode gives the images a dragging effect.
b
dc
e f
h
j
g
i
a
●
DSE(Efecto digital especial) SELECT
✤ La función DSE sólo funciona en modo CAMERA.
✤ Los efectos digitales le permiten dar un aspecto creativo a su
filmación añadiendo varios efectos especiales.
✤ Seleccione el efecto digital adecuado para el tipo de imagen que
desea filmar y el efecto que desea obtener.
✤ Dispone de 10 modos DSE.
a. Modo ART
Este modo da a las imágenes un efecto normal.
b. Modo MOSAIC
Este modo da a las imágenes un efecto mosaico.
c. Modo SEPIA
Este modo da a las imágenes un color rojizo
amarronado.
d. Modo NEGA
Este modo invierte los colores de la imagen,
creando una imagen negativa.
e. Modo MIRROR
Este modo corta la imagen por la mitad, utilizando
el efecto de espejo.
f. Modo B/W
Este modo cambia las imágenes a blanco y negro.
g. Modo EMBO
Este modo crea un efecto en 3D.
h. Modo CINEMA
Este modo cubre la parte superior/inferior de
la pantalla dar un efecto similar a una película.
i. Modo MAKE UP
Este modo permite seleccionar las imágenes en
rojo, amarillo, verde o azul.
j. Modo GHOST
Este modo da a las imágenes un efecto de
arrastre de la imagen.
Page 41
ENGLISH ESPAÑOL
41
Advanced Recording Filmación avanzada
Selecting an effect
1. Set the camcorder to CAMERA mode.
2. Press the MENU ON/OFF button.
■
The menu list will appear.
3. Turn the MENU DIAL to highlight DSE SELECT.
4. Press ENTER to enter the sub-menu.
5. Using the MENU DIAL, select the DSE
mode.
■
Press ENTER to confirm the DSE mode.
– In MAKE-UP mode, a MENU list
for selecting RED/GREEN/BLUE
/YELLOW will appear.
6. To exit, press the MENU ON/OFF button.
Reference
■
If you select the DSE mode with the PIP mode, the PIP mode will be
switched off.
■
GHOST function will not operate in DIS and 1/8, 1/15, 1/30 SHUTTER
mode.
(MENU) SP STBY
CUSTOM SET
DIS............................OFF
PIP............................OFF
D.ZOOM...................OFF
PROGRAM AE.........AUTO
DSE SELECT ..........OFF
: MENU
●
DSE SELECT●SP STBY
(OFF)
OFF
ART
MOSAIC
SEPIA
NEGA
MIRROR
SEL.:ENTER
: MENU
ON/OFF
ENTER
DISPLAY
MENU
Selección de un efecto
1. Ponga la videocámara en modo CAMERA.
2. Pulse la tecla MENU ON/OFF.
■
Aparecerá la lista de menús.
3. Gire el disco selector MENU a
DSE SELECT.
4. Pulse ENTER para que aparezca el
submenú.
5. Girando el disco selector MENU,
seleccione el modo DSE.
■
Pulse ENTER para confirmar el
modo DSE.
– En modo MAKE-UP, aparecerá una
lista MENU para selecccionar RED/
GREEN/BLUE/YELLOW.
6. Para salir, pulse la tecla MENU ON/OFF.
Notas
■
Si selecciona el modo DSE con el modo PIP, el modo PIP se
desactivará.
■
La función GHOST no estará activada en los modos DIS y
SHUTTER 1/8, 1/15, 1/30.
Page 42
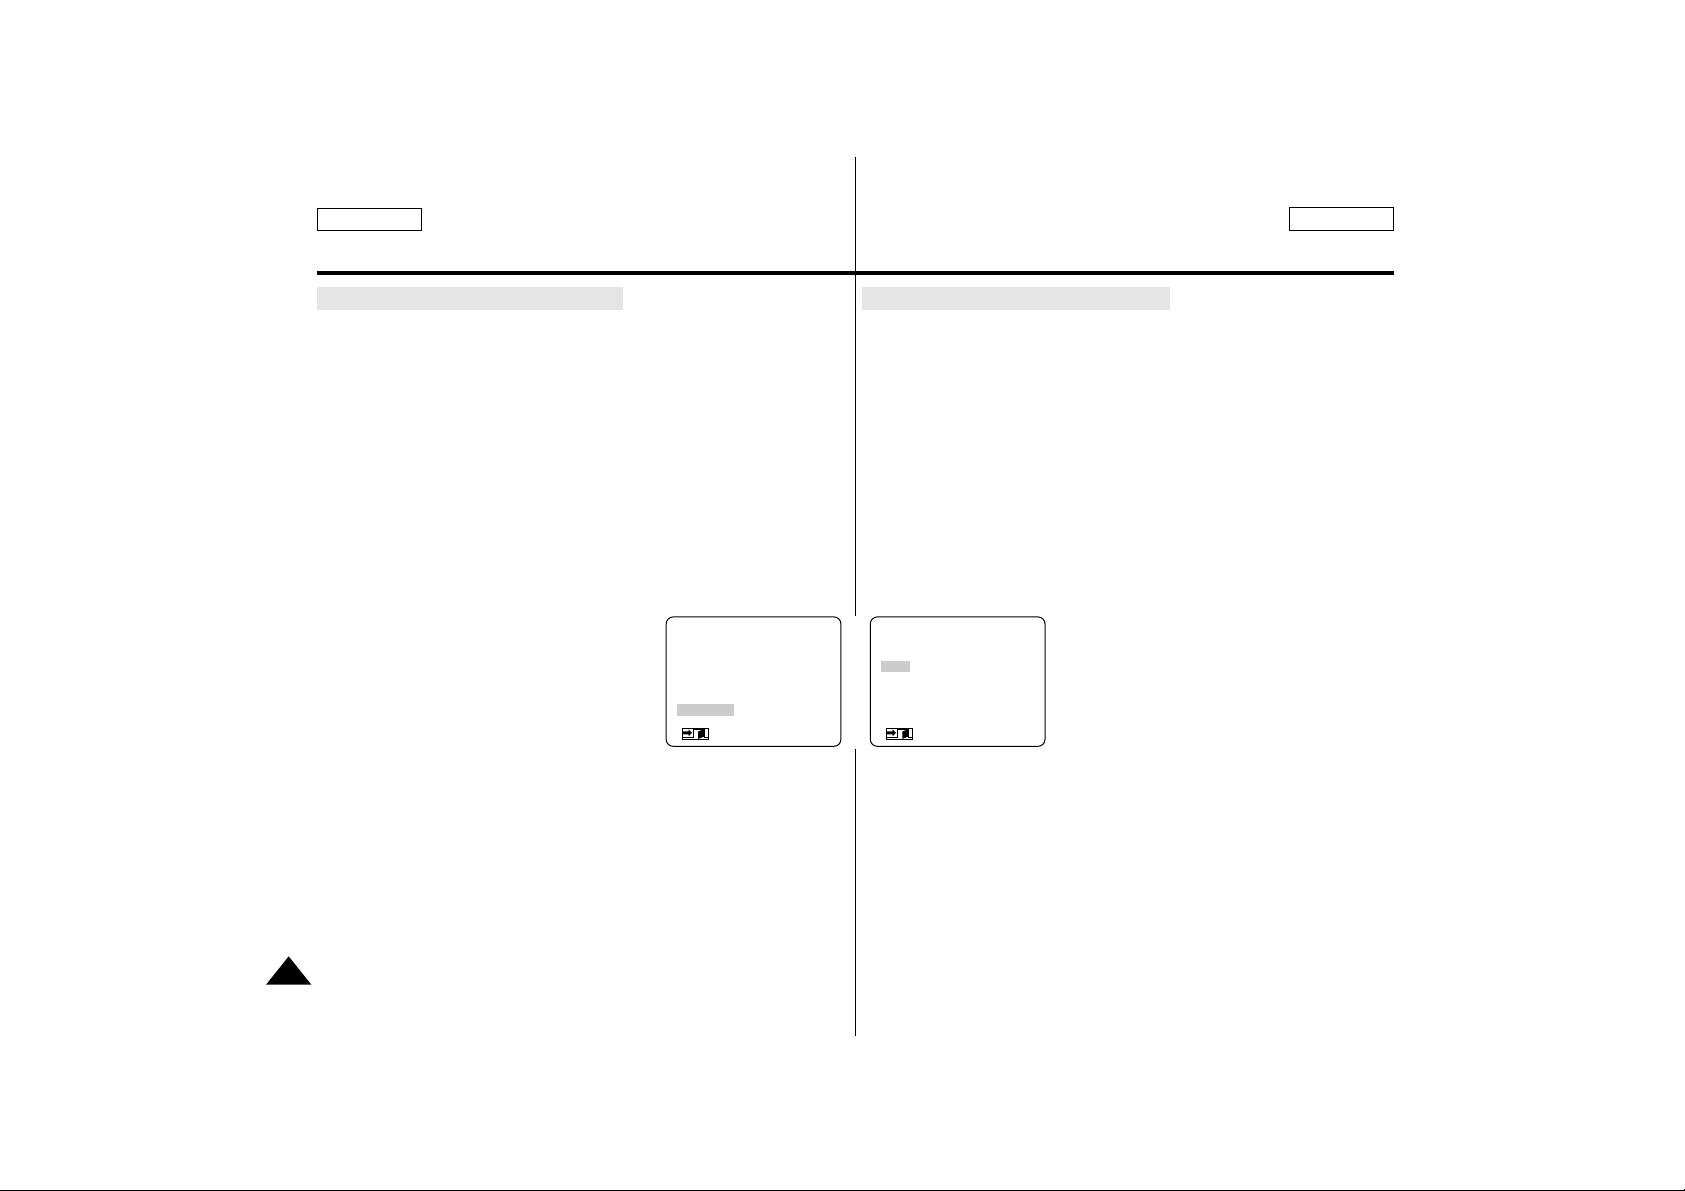
ENGLISH ESPAÑOL
42
Advanced Recording Filmación avanzada
●
W.BALANCE (WHITE BALANCE)
✤ The WHITE BALANCE function works in CAMERA mode only.
✤ The WHITE BALANCE is a recording function that preserves the
unique color of the object in any recording condition.
✤ You may select the appropriate WHITE BALANCE mode to obtain
good quality color of the image.
■
AUTO: This mode is generally used to control the
WHITE BALANCE automatically.
■
HOLD: It fixes the current WHITE BALANCE value.
■
INDOOR: It controls WHITE BALANCE according to the indoor
ambience.
■
OUTDOOR: It controls WHITE BALANCE according to the
outdoor ambience.
1. Set the camcorder to CAMERA mode.
2. Press the MENU ON/OFF button.
■
The menu list will appear.
3. Turn the MENU DIAL to highlight
W.BALANCE.
4. Press ENTER to enter the sub-menu.
5. Using the MENU DIAL, select the WHITE BALANCE mode.
■
Press ENTER to confirm the WHITE BALANCE mode.
6. To exit, press the MENU ON/OFF button.
(MENU) SP STBY
DIS............................OFF
PIP............................OFF
D.ZOOM...................OFF
PROGRAM AE.........AUTO
DSE SELECT ...........OFF
W.BALANCE ...........AUTO
: MENU
●
W.BALANCE ●SP STBY
(AUTO)
AUTO
HOLD
INDOOR
OUTDOOR
RETURN
SEL.:ENTER
: MENU
●
W.BALANCE (WHITE BALANCE)
✤ La función WHITE BALANCE sólo funciona en modo CAMERA.
✤ WHITE BALANCE es una función de filmación que conserva el
color exclusivo del objeto en cualquier condición de filmación.
✤ Puede seleccionar el modo WHITE BALANCE adecuado para
obtener una buena calidad de color de la imagen.
■
AUTO:Este modo se utiliza generalmente para controlar
automáticamente el balance de blancos.
■
HOLD:Fija el valor actual de WHITE BALANCE.
■
INDOOR: Controla el valor de WHITE BALANCE de acuerdo a
un ambiente interior.
■
OUTDOOR:Controla WHITE BALANCE de cuerdo al ambiente
exterior.
1. Ponga la videocámara en modo CAMERA.
2. Pulse la tecla MENU ON/OFF.
■
Aparecerá la lista de menús.
3. Gire el disco selector MENU a
W.BALANCE.
4. Pulse ENTER para que aparezca el submenú.
5. Utilizando el disco selector MENU, seleccione el modo
WHITE BALANCE.
■
Pulse ENTER para confirmar el modo WHITE BALANCE.
6. Para salir, pulse la tecla MENU ON/OFF.
Page 43
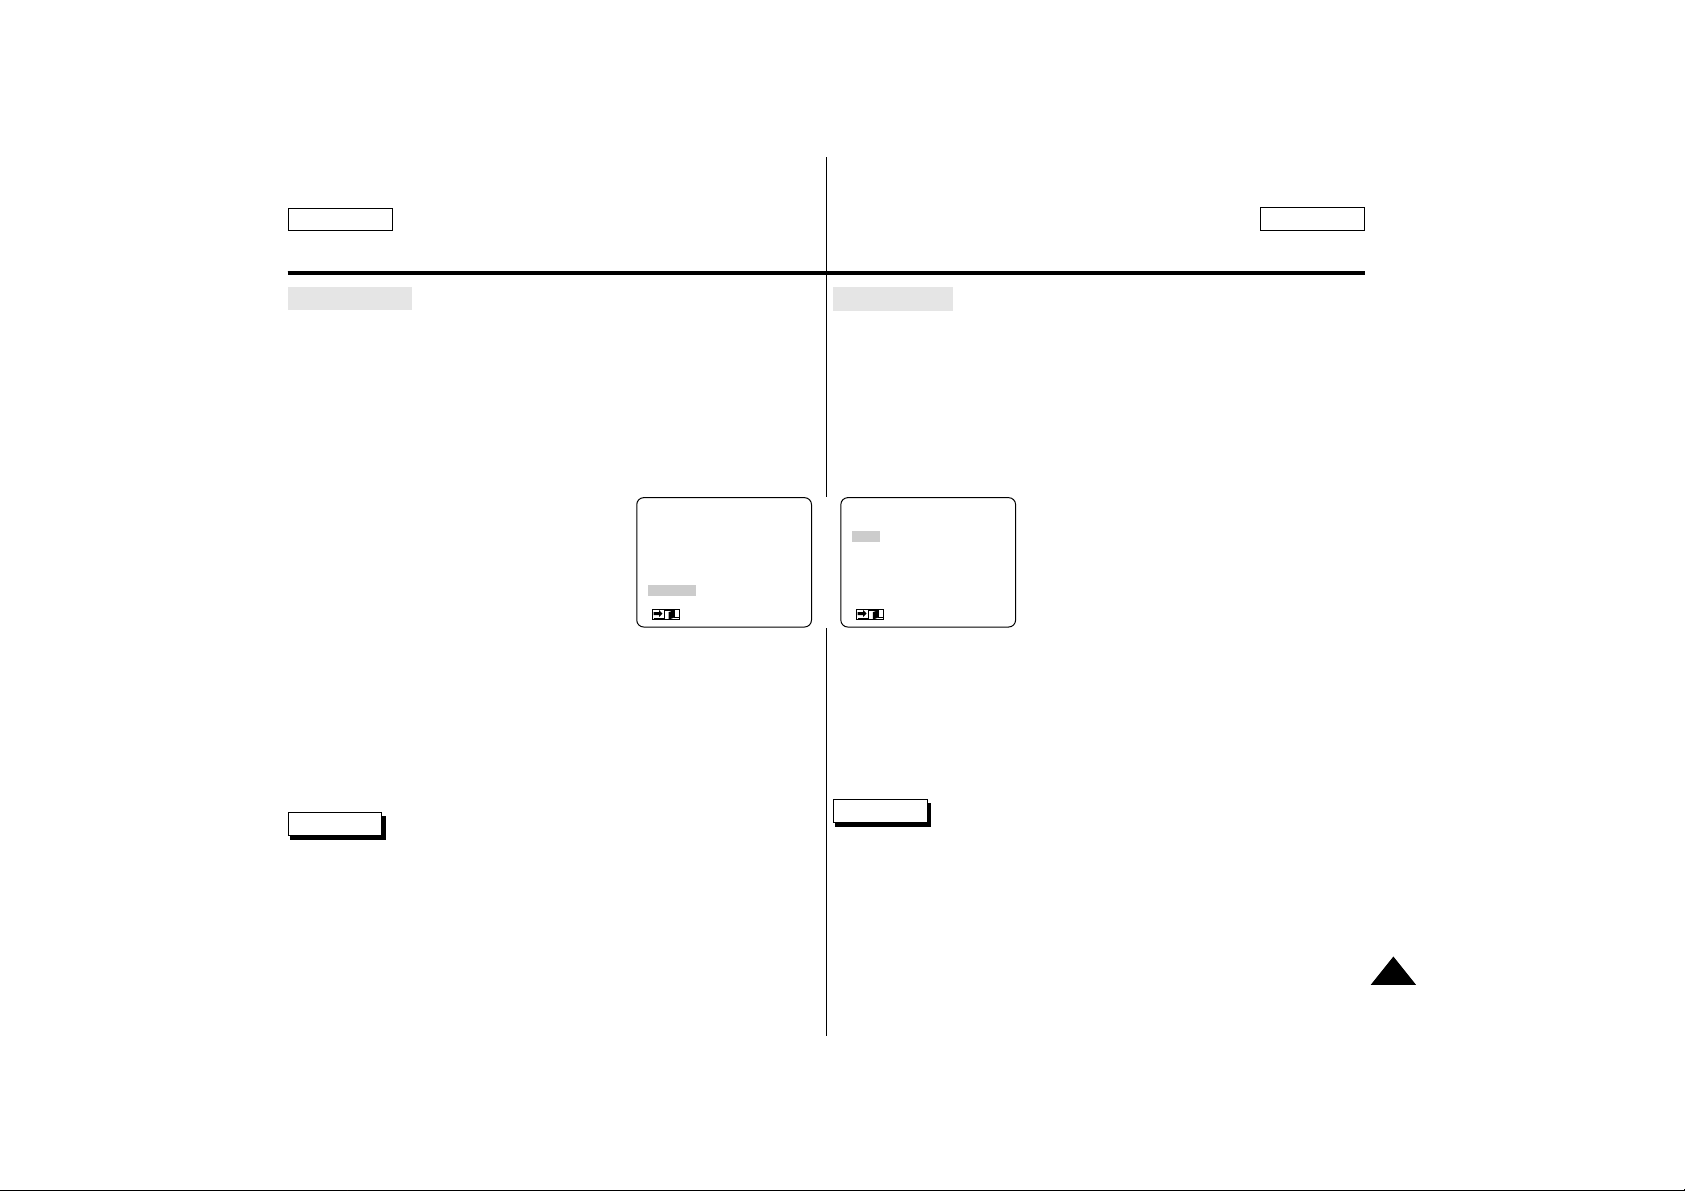
ENGLISH ESPAÑOL
43
Advanced Recording Filmación avanzada
●
SHUTTER
✤ The SHUTTER SPEED function works in CAMERA mode only.
✤ The shutter speed can be controlled, allowing you to shoot both
fast and slow moving objects.
■
You can select one of the following.
AUTO, 1/8, 1/15, 1/30, 1/60, 1/100, 1/250, 1/500, 1/1000,
1/2000, 1/4000, 1/10000 second.
AUTO is fixed at 1/60 second.
1. Set the camcorder to CAMERA mode.
2. Press the MENU ON/OFF button.
■
The menu list will appear.
3. Turn the MENU DIAL to highlight SHUTTER.
4. Press ENTER to enter the sub-menu.
5. Using the MENU DIAL, select the SHUTTER SPEED mode.
■
Press ENTER to confirm the SHUTTER SPEED mode.
6. To exit, press the MENU ON/OFF button.
Reference
■
The SHUTTER SPEED function will not operate with either the DIS or
the GHOST modes ON.
(MENU) SP STBY
PIP............................OFF
D.ZOOM...................OFF
PROGRAM AE.........AUTO
DSE SELECT ...........OFF
W.BALANCE.............AUTO
SHUTTER ...............AUTO
: MENU
●
SHUTTER
●
SP STBY
(AUTO)
AUTO
1/8
1/15
1/30
1/60
1/100
SEL.:ENTER
: MENU
●
SHUTTER
✤ La función SHUTTER SPEED sólo funciona en modo CAMERA.
✤ La velocidad del obturador puede controlarse, permitiéndole que
filme tanto objetos en movimiento rápido como lento.
■
Puede seleccionar una de las opciones siguientes.
AUTO, 1/8, 1/15, 1/30, 1/60, 1/100, 1/250, 1/500, 1/1000,
1/2000, 1/4000, 1/10000 de segundo.
AUTO se fija a 1/60 de segundo.
1. Ponga la videocámara en modo CAMERA.
2. Pulse la tecla MENU ON/OFF.
■
Aparecerá la lista de menús.
3. Gire el disco selector MENU a SHUTTER.
4. Pulse ENTER para que aparezca el submenú.
5. Utilizando el disco selector MENU, seleccione el modo SHUTTER
SPEED.
■
Pulse ENTER para confirmar el modo SHUTTER SPEED.
6. Para salir, pulse la tecla MENU ON/OFF.
Notas
■
La función SHUTTER SPEED no funcionará con los
modos DIS o GHOST en ON.
Page 44
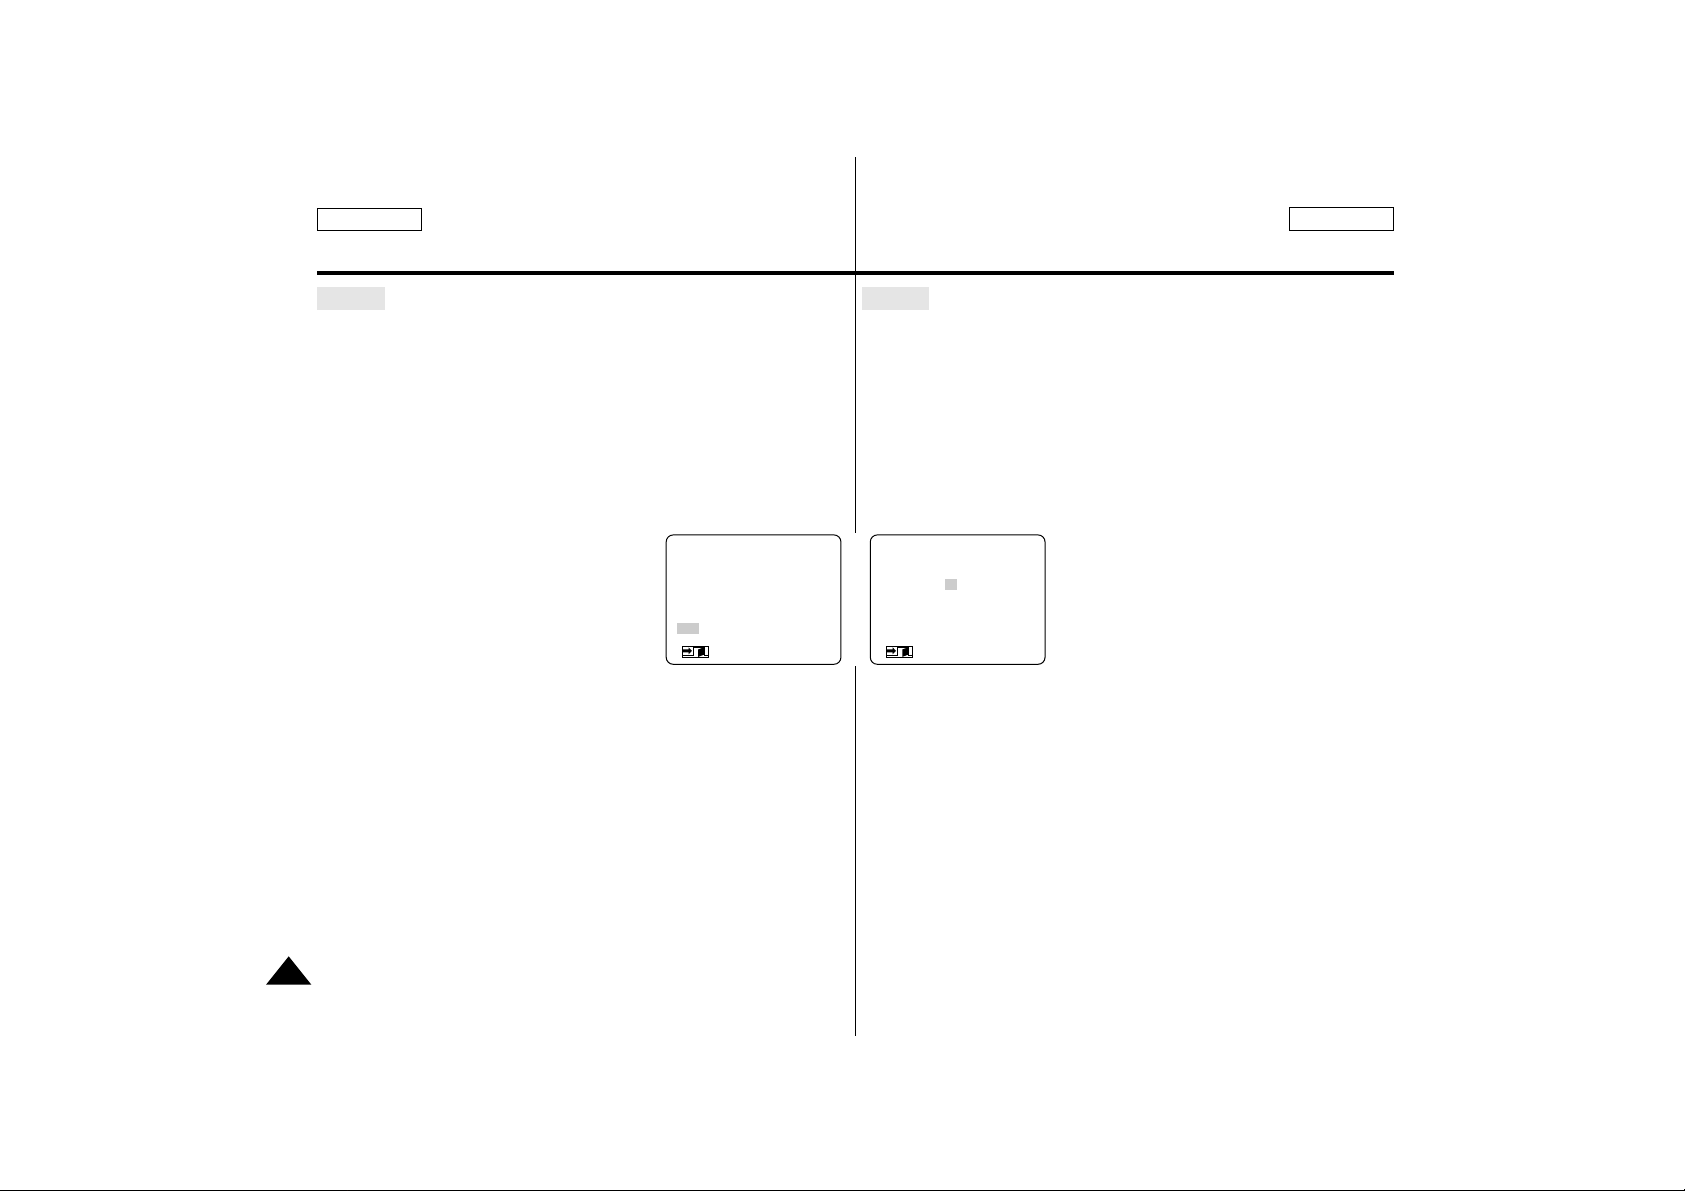
ENGLISH ESPAÑOL
44
Advanced Recording Filmación avanzada
●
IRIS
✤ The IRIS function works in CAMERA mode only.
✤ The IRIS controls the quantity of light entering through the lens.
✤ If you select a higher value, the iris opens, and the
image will be brighter.
If you select a lower value, the iris will be closed more, and the
image will be darker.
■
You can select one a the following.
AUTO : It selects the iris value for the proper exposure.
MANUAL: 0 ~ 29
1. Set the camcorder to CAMERA mode.
2. Press the MENU ON/OFF button.
■
The menu list will appear.
3. Turn the MENU DIAL to highlight IRIS.
4. Press the ENTER to enter the sub-menu.
■
If you want to use manual mode, select MANUAL and press
ENTER.
■
Using the MENU DIAL, select the IRIS value.
5. To exit, press the MENU ON/OFF button.
(MENU) SP STBY
D.ZOOM...................OFF
PROGRAM AE.........AUTO
DSE SELECT ...........OFF
W.BALANCE.............AUTO
SHUTTER.................AUTO
IRIS...........................AUTO
: MENU
●
IRIS
●
AUTO
MANUAL I–0 15 29–I
RETURN
SEL.:ENTER
: MENU
●
IRIS
✤ La función IRIS sólo funciona en modo CAMERA.
✤ IRIS controla la cantidad de luz que entra a través de las lentes.
✤ Si selecciona un valor positivo, el iris se abre, y la imagen
tendrá más iluminación .
Si selecciona un valor negativo, el iris se cerrará y la imagen
se oscurecerá.
■
Puede seleccionar una de las opciones siguientes.
AUTO : Selecciona el valor de iris para la próxima exposición.
MANUAL: 0 ~ 29
1. Ponga la videocámara en modo CAMERA.
2. Pulse la tecla MENU ON/OFF.
■
Aparecerá la lista de menús.
3. Gire el disco selector MENU a IRIS.
4. Pulse ENTER para que aparezca el submenú.
■
Si desea utilizar el modo manual, seleccione MANUAL y pulse
ENTER.
■
Girando el disco selector MENU, seleccione el valor de IRIS.
5. Para salir, pulse la tecla MENU ON/OFF.
Page 45
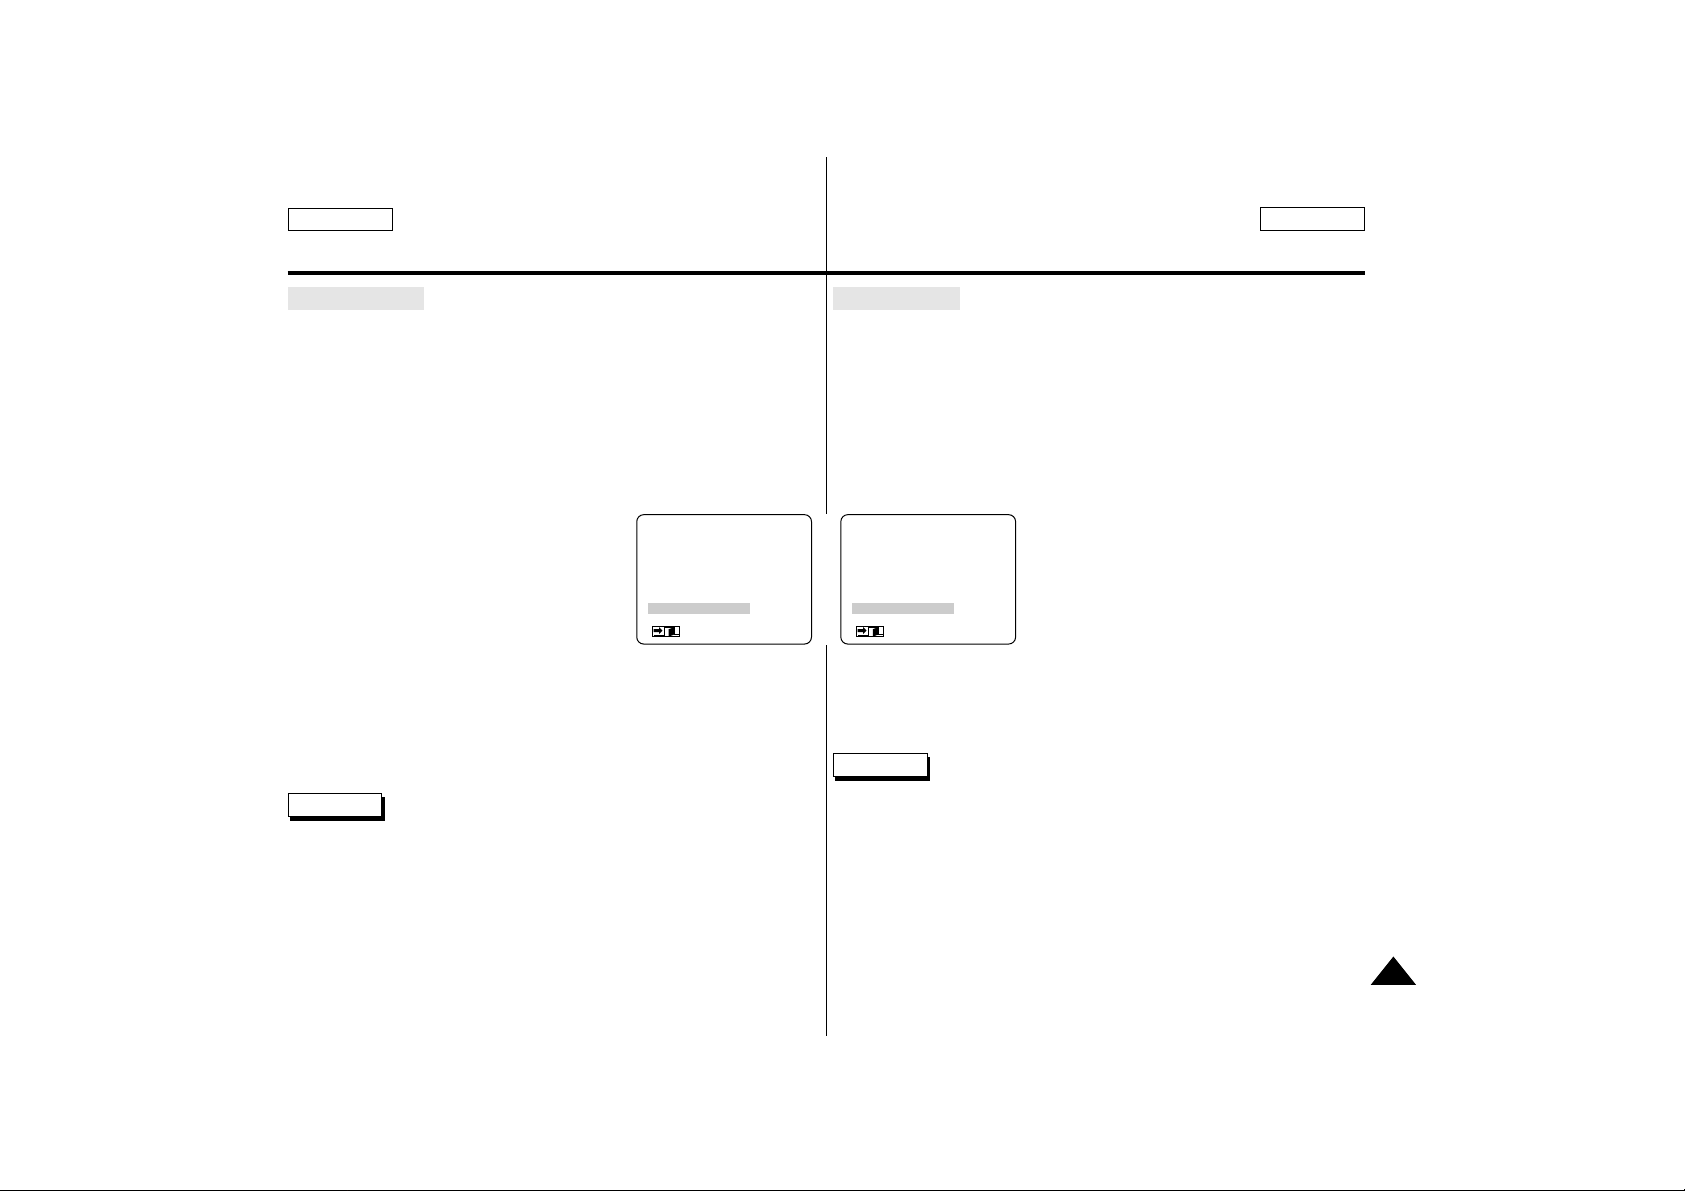
ENGLISH ESPAÑOL
45
Advanced Recording Filmación avanzada
●
REC MODE
✤ The REC MODE function works in both CAMERA and PLAYER
modes.
✤ This camcorder records and plays back in SP (standard play)
mode and in LP (long play) mode.
■
SP (standard play): This mode permits 60 minutes of recording
time with a DVM60 tape.
■
LP (long play): This mode permits 90 minutes of recording time
with a DVM60 tape.
1. Set the camcorder to CAMERA or PLAYER
mode.
2. Press the MENU ON/OFF button.
■
The menu list will appear.
3. Turn the MENU DIAL to highlight REC
MODE.
4. To select the REC MODE, press the ENTER button.
■
The REC MODE switches between SP and LP with each press.
5. To exit, press the MENU ON/OFF button.
Reference
■
We recommend that you use this camcorder to play back any tape
recorded on this camcorder.
Playing back a tape recorded in other equipment may produce mosaic
shaped noise.
■
When you record in SP and LP modes on one tape or you record
some scenes in LP mode, the playback picture may be distorted or the
time code may not be written properly between scenes.
■
Record using SP mode for best picture and sound quality.
(MENU) SP STBY
PROGRAM AE.........AUTO
DSE SELECT ...........OFF
W.BALANCE.............AUTO
SHUTTER.................AUTO
IRIS...........................AUTO
REC MODE ..............SP
: MENU
(MENU) LP STBY
PROGRAM AE.........AUTO
DSE SELECT ...........OFF
W.BALANCE.............AUTO
SHUTTER.................AUTO
IRIS...........................AUTO
REC MODE ..............LP
: MENU
●
REC MODE
✤ La función REC MODE funciona en los modos CAMERA y
PLAYER.
✤ Esta videocámara filma y reproduce en modo SP (reproducción
estándar) y en modo LP (reproducción larga).
■
SP (reproducción estándar): Este modo permite 60 minutos
de filmación con una cinta DVM60.
■
LP (reproducción larga): Este modo permite 90 minutos de
filmación con una cinta DVM60.
1. Ponga la videocámara en modo CAMERA
y PLAYER.
2. Pulse la tecla MENU ON/OFF.
■
Aparecerá la lista de menús.
3. Gire el disco selector MENU a REC MODE.
4. Para seleccionar REC MODE, pulse la tecla ENTER.
■
REC MODE cambia entre SP y LP con cada pulsación.
5. Para salir, pulse la tecla MENU ON/OFF.
Notas
■
Recomendamos que utilice esta videocámara para reproducir las
cintas filmadas en esta videocámara.
La reproducción de una cinta filmada en otro equipo puede producir
un ruido de mosaico.
■
Cuando filme en los modos SP y LP en una cinta o filme algunas
escenas en modo LP, las imágenes reproducicas pueden estar
distorsionadas o el código de tiempo entre escenas puede ser
incorrecto.
■
Grabe usando el modo SP para conseguir una mejor calidad de
imagen y sonido.
Page 46
ENGLISH ESPAÑOL
46
Advanced Recording Filmación avanzada
●
REC LAMP
✤ The REC LAMP function works in CAMERA mode only.
✤ You can turn the REC indicator on or off during recording.
1. Set the camcorder to CAMERA mode.
2. Press the MENU ON/OFF button.
■
The menu list will appear.
3. Turn the MENU DIAL to highlight REC
LAMP.
4. To turn the REC indicator ON or OFF during recording, press the
ENTER button.
■
The REC LAMP menu is changed to ON or OFF respectively.
■
If you want to turn off the indicator, set the REC LAMP to OFF.
5. To exit, press the MENU ON/OFF button.
●
WIND CUT
✤ The WIND CUT function works in CAMERA mode only.
✤ The WIND CUT function minimizes wind noise or other noise
during recording.
- When the wind cut is on, some low sounds are cut out along with
the sound of the wind.
✤ The WIND CUT selecting method is the same as the REC LAMP
mode.
(MENU) SP STBY
DSE SELECT ...........OFF
W.BALANCE.............AUTO
SHUTTER.................AUTO
IRIS...........................AUTO
REC MODE ..............SP
REC LAMP ...............ON
: MENU
(MENU) SP STBY
DSE SELECT ...........OFF
W.BALANCE.............AUTO
SHUTTER.................AUTO
IRIS...........................AUTO
REC MODE ..............SP
REC LAMP ...............OFF
: MENU
●
REC LAMP
✤ La función REC LAMP sólo funciona en modo CAMERA.
✤ Puede activar o desactivar el indicador REC durante la filmación.
1. Ponga la videocámara en modo
CAMERA.
2. Pulse la tecla MENU ON/OFF.
■
Aparecerá la lista de menús.
3. Gire el disco selector MENU a
REC LAMP.
4. Para activar o desactivar el indicador REC durante la filmación,
pulse la tecla ENTER.
■
El menú REC LAMP cambia entre ON y OFF respectivamente.
■
Si desea desactivar el indicador, seleccione OFF para REC
LAMP.
5. Para salir, pulse la tecla MENU ON/OFF.
●
WIND CUT
✤ La función WIND CUT sólo funciona en modo CAMERA.
✤ La función WIND CUT minimiza el ruido del viento y otros ruidos
durante la filmación.
- Cuando la pantalla contra el viento está activada, se cortan
algunos sonidos bajos con el sonido del viento.
✤ El método de selección WIND CUT es igual al del modo
REC LAMP.
Page 47
ENGLISH ESPAÑOL
47
Advanced Recording Filmación avanzada
●
AUDIO MODE
✤ The AUDIO MODE function works in CAMERAmode only.
✤ This camcorder records the sound in two ways. (12BIT, 16BIT)
■
12BIT: You can record two 12bit stereo sound tracks.
The original stereo sound can be recorded onto the
MAIN (SOUND1) track.
Additional stereo sound can be dubbed onto the SUB
(SOUND2) track.
■
16BIT: You can record one high quality stereo sound using the
16bit recording mode.
Audio dubbing is not possible when using this mode.
1. Set the camcorder to CAMERA mode.
2. Press the MENU ON/OFF button.
■
The menu list will appear.
3. Turn the MENU DIAL to highlight AUDIO
MODE.
4. To select the AUDIO MODE, press the ENTER button.
■
The AUDIO MODE switches between 12BIT-16BIT with each
press.
5. To exit, press the MENU ON/OFF button.
(MENU) SP STBY
SHUTTER.................AUTO
IRIS...........................AUTO
REC MODE ..............SP
REC LAMP ...............ON
WIND CUT ...............OFF
AUDIO MODE..........12BIT
: MENU
(MENU) SP STBY
SHUTTER.................AUTO
IRIS...........................AUTO
REC MODE ..............SP
REC LAMP ...............ON
WIND CUT ...............OFF
AUDIO MODE..........16BIT
: MENU
●
AUDIO MODE
✤ La función MODE AUDIO sólo funciona en modo CAMERA.
✤ Esta videocámara graba el sonido de dos maneras.
(12 BIT, 16 BIT)
■
12 BIT: Puede grabar dos pistas de sonido estéreo de 12 bits.
El sonido estéreo original puede grabarse en la pista
MAIN (SOUND1).
El sonido estéreo adicional puede doblarse en la
pista SUB (SOUND2).
■
16 BIT: Puede grabar un sonido estéreo de alta calidad
utilizando el modo de grabación de 16 bits.
El doblaje del sonido no es posible cuando se utiliza
este modo.
1. Ponga la videocámara en modo
CAMERA.
2. Pulse la tecla MENU ON/OFF.
■
Aparecerá la lista de menús.
3. Gire el disco selector MENU a
AUDIO MODE.
4. Para seleccionar AUDIO MODE, pulse la tecla ENTER.
■
AUDIO MODE conmuta entre 12 BIT y 16 BIT cada vez que se
pulsa la tecla.
5. Para salir, pulse la tecla MENU ON/OFF.
Page 48
ENGLISH ESPAÑOL
48
Advanced Recording Filmación avanzada
●
DISPLAY
✤ The DISPLAY function works in CAMERA and PLAYER mode.
✤ You can select the output path of OSD (On Screen Display).
✤ There are two ways;
■
LCD: The OSD appears in the LCD screen and EVF only.
■
LCD/V-OUT: The OSD appears in the LCD screen, EVF and
TV.
1. Set the camcorder to CAMERA mode.
2. Press the MENU ON/OFF button.
■
The menu list will appear.
3. Turn the MENU DIAL to highlight DISPLAY.
4. To select the DISPLAY mode, press the
ENTER button.
■
The DISPLAY mode switches between
LCD - LCD/V-OUT with each press.
5. To exit, press the MENU ON of OFF button.
■
Turning OSD ON or OFF.
– Press the ENTER button on the rear side panel.
(MENU) SP STBY
REC MODE ..............SP
REC LAMP ...............ON
WIND CUT ...............OFF
AUDIO MODE..........12BIT
PHOTO MODE.........FIELD
DISPLAY...................LCD
: MENU
(MENU) SP STBY
REC MODE ..............SP
REC LAMP ...............ON
WIND CUT ...............OFF
AUDIO MODE..........12BIT
PHOTO MODE.........FIELD
DISPLAY...................LCD/V-OUT
: MENU
●
DISPLAY
✤ La función DISPLAY funciona en los modos CAMERA y PLAYER.
✤ Puede seleccionar la salida para el OSD (Visualizador en pan-
talla).
✤ Hay dos maneras;
■
LCD: OSD sólo aparece en la pantalla LCD y EVF.
■
LCD/V-OUT: OSD aparece en la pantalla LCD, EVF y TV.
1. Ponga la videocámara en modo CAMERA o PLAYER.
2. Pulse la tecla MENU ON/OFF.
■
Aparecerá la lista de menús.
3. Gire el disco selector MENU a DISPLAY.
4. Para seleccionar el modo DISPLAY,
pulse la tecla ENTER.
■
El modo DISPLAY cambia entre LCD y
LCD/V-OUT en cada pulsación.
5. Para salir, pulse la tecla MENU ON/OFF.
■
Activar y desactivar OSD.
– Pulse la tecla ENTER situado en el panel posterior.
Page 49
ENGLISH ESPAÑOL
49
Advanced Recording Filmación avanzada
●
DA TE/TIME
✤ The DATE/TIME function works in both CAMERAand PLAYER
modes.
✤ The date and time is automatically recorded on a special data area
of the tape.
✤ You can choose to display - either the date, time or both.
■
DATE only
■
TIME only
■
DATE/TIME
1. Press the MENU ON/OFF button.
■
The menu list will appear.
2. Turn the MENU DIAL to DATE/TIME.
3. Press ENTER to enter the sub-menu.
4. Using the MENU DIAL, select the DATE/TIME mode.
■
Press ENTER to confirm the
DATE/TIME mode and return to the
main menu.
■
If you exit the sub-menu without pressing ENTER, the DATE/TIME
mode is not changed.
5. To exit, press the MENU ON/OFF button.
Reference
■
The DATE/TIME is not affected by the OSD ON/OFF (ENTER) button.
■
The DATE/TIME will read “– – –” in the following conditions.
– During playback of a blank section of tape.
– If the tape was recorded before setting the DATE/TIME in the
camera’s memory.
(MENU) SP STBY
REC LAMP ...............OFF
WIND CUT ...............OFF
AUDIO MODE..........12BIT
PHOTO MODE.........FIELD
DISPLAY...................LCD
DATE/TIME .............OFF
: MENU
●
DATE/TIME
●
SP STBY
OFF
DATE
TIME
DATE/TIME
SEL.:ENTER
: MENU
●
DATE/TIME
✤ La función DATE/TIME funciona en los modos CAMERA y
PLAYER.
✤ La fecha y la hora se graban automáticamene en un área
especial de la cinta.
✤ Puede elegir que aparezca la fecha, la hora o las dos.
■
DATE: sólo la fecha
■
TIME: sólo la hora
■
DATE/TIME: la fecha y la hora
1. Pulse la tecla MENU ON/OFF.
■
Aparecerá la lista de menús.
2. Gire el disco selector MENU a DATE/TIME.
3. Pulse ENTER para que aparezca el
submenú.
4. Con el disco selector MENU, seleccione el modo DATE/TIME.
■
Pulse ENTER para confirmar el modo DATE/TIME y volver
al menú principal.
■
Si sale del submenú sin pulsar la tecla ENTER, el modo
DATE/TIME no se cambiará.
5. Para salir, pulse la tecla MENU ON/OFF.
Notas
■
DATE/TIME no se ve afectada por la tecla OSD ON/OFF (ENTER).
■
DATE/TIME indicará “–––” en las condiciones siguientes.
– Durante la reproduccción de una sección en blanco de la cinta.
– Si la cinta se ha filmado antes de fijar la fecha y la hora en la
memoria de la cámara.
– Cuando la batería de lítio se debilita o se gasta.
Page 50
ENGLISH ESPAÑOL
50
Advanced Recording Filmación avanzada
●
DEMO
✤ Demonstration automatically shows you the major functions that
are included with your camcorder so that you may use them more
easily.
✤ The DEMO function is only available in CAMERA mode when you
are not recording.
✤ The demonstration operates repeatedly until the DEMO mode is
set to OFF.
1. Set the camcorder to CAMERA mode.
2. Press the MENU ON/OFF button.
■
The menu list will appear.
3. Turn the MENU DIAL to highlight DEMO.
4. To activate the DEMO function, set the DEMO to ON.
■
Press the menu button to quit the menu.
■
The demonstration will start.
5. To end the demonstration, set the DEMO to OFF.
Reference
■
The DEMO function only works without a TAPE installed.
■
If you set the DEMO to ON during recording or STBY mode, the
demonstration will activate 3 minutes later after the tape ejecting.
■
If you press other keys (ZOOM, FADE, BLC, PHOTO, EASY,
CUSTOM) during the DEMO mode, the DEMO stops for a while and
resume the demonstration if you do not operate any other functions
within 3 minutes.
(MENU)
WIND CUT ...............OFF
AUDIO MODE..........12BIT
PHOTO MODE.........FIELD
DISPLAY...................LCD
DATE/TIME...............OFF
DEMO.......................OFF
: MENU
SAMSUNG
DEMONSTRATION
●
DEMO
✤ La demostración muestra automáticamente la mayoría de las
funciones que se incluyen en la videocámara para que pueda
utilzarlas con más facilidad.
✤ DEMO sólo funciona en modo CAMERA cuando no se está
filmando.
✤ La demostración se va repitiendo hasta que el modo DEMO se
fija en OFF.
1. Ponga la videocámara en modo CAMERA.
2. Pulse la tecla MENU ON/OFF.
■
Aparecerá la lista de menús.
3. Gire el disco selector MENU a DEMO.
4. Seleccione ON para DEMO a fin de activar la función.
■
Pulse la tecla del menú para salir del menú.
■
Empezará la demostración.
5. Para finalizar la demostración, seleccione OFF para DEMO.
Notas
■
DEMO sólo funciona sin una CINTA instalada.
■
Si selecciona ON para DEMO cuando está filmando o en modo STBY,
la demostración se activará 3 minutos después de expulsar la cinta.
■
Si pulsa otras teclas (ZOOM, FADE, BLC, PHOTO, EASY, CUSTOM)
durante el modo DEMO, la demostración se detendrá durante un
tiempo y se reanudará si no utiliza ninguna otra función en 3 minutos.
Page 51
ENGLISH ESPAÑOL
51
Advanced Recording Filmación avanzada
●
CLOCK SET
✤ Setting the CLOCK only works in CAMERA mode.
✤ The DATE/TIME is automatically recorded on a tape.
Before recording, please set the DATE/TIME.
1. Press the MENU ON/OFF button.
■
The menu list will appear.
2. Turn the MENU DIAL to highlight CLOCK
SET.
3. Press the ENTER button to enter the
SETTING mode.
■
BLINKING indicates the setting to be
changed.
The year will be the first to blink.
4. Using the MENU DIAL, change the year
setting.
5. Press the ENTER button.
■
The month will blink.
6. Using the MENU DIAL, change the month setting.
7. Press the ENTER button.
■
The day will blink.
8. You can set the day, hour and minute following the same procedure
used for setting year and month.
9. Press ENTER after setting the minute.
■
COMPLETE! will blink, and then a few seconds later, the menu
screen will return to main menu.
●
CLOCK SETTING ●SP STBY
(00)
10: 00 PM
FEB. 3, 2002
: MENU
(MENU) SP STBY
AUDIO MODE..........12BIT
PHOTO MODE.........FIELD
DISPLAY...................LCD
DATE/TIME...............OFF
DEMO.......................OFF
CLOCK SET
: MENU
●
CLOCK SETTING ●SP STBY
( 2001 )
11:00 PM
JAN. 1, 2001
: MENU
●
CLOCK SETTING ●SP STBY
( COMPLETE! )
10:25 PM
FEB. 3, 2002
: MENU
●
CLOCK SET
✤ CLOCK sólo funciona en modo CAMERA.
✤ DATE/TIME se graba automáticamente en la cinta.
Antes de filmar, fije la fecha y la hora.
1. Pulse la tecla MENU ON/OFF.
■
Aparecerá la lista de menús.
2. Gire el disco selector MENU a
CLOCK SET.
3. Pulse la tecla ENTER para entrar en
el modo SETTING.
■
El PARPADEO indica el ajuste que debe
cambiarse,
El año será el primero en parpadear.
4. Girando el disco selector MENU, cambie el
valor del año.
5. Pulse la tecla ENTER.
■
El mes parpadeará.
6. Girando el disco selector MENU, cambie el valor del mes.
7. Pulse la tecla ENTER.
■
El día parpadeará.
8. Puede fijar el día, la hora y los minutos siguiendo el mismo
procedimiento utilizado para fijar el año y el mes.
9. Pulse ENTER después de fijar el minuto.
■
COMPLETE! parpadeará y, después de unos segundos, la pantalla
volverá al menú principal.
Page 52
52
Advanced Recording Filmación avanzada
ENGLISH ESPAÑOL
✤ Even a beginner can make a recording using the EASY mode.
■
The EASY mode only operates in CAMERA mode.
1. Set the power switch to CAMERA mode.
2. By pressing the EASY button, all the functions on the
camera will be set to off and the recording settings will
be set to the following basic mode.
■
Battery level, recording mode, counter, DATE/TIME,
DIS ( ) will be displayed.
■
The word “EASY” will appear on the LCD at the
same time.
However, the DATE/TIME will only be seen if it has
been previously set. (see page 49)
3. Press START/STOP to start recording.
■
Recording will begin using the basic automatic
settings.
4. Pressing the EASY button again turns the EASY mode off.
■
The camera will return to the settings that were set prior to the
EASY mode being switched on.
Reference
■
In the EASY mode, certain functions are not available, such as
MENU, BLC, FADE, MF/AF.
– If you want to use these functions, you must first switch the EASY
mode off.
■
The EASY mode settings are stored in the camera (provided a good
lithium battery has been installed).
EASY Mode (for Beginners)
EASY SP STBY
0:00:00
63MIN
EASY
✤ Incluso un principiante puede filmar utilizando el modo EASY.
■
EASY sólo funciona en modo CAMERA.
1. Deslice el interruptor de encendido a la posición CAMERA.
2. Si pulsa la tecla EASY, todas las funciones de la
cámara se desactivarán y la configuración para la
filmanción se fijará en el modo básico siguiente.
■
El nivel de batería, el modo de filmación, el
contador, DATE/TIME, DIS ( ) aparecerán
cuando la videocámara se pona en marcha.
■
La palabra “EASY” aparecerá en la pantalla
LCD al mismo tiempo.
Sin embargo, la fecha y la hora sólo se verán si
se han fijado con anterioridad.
(Consulte la página 49)
3. Pulse START/STOP para empezar a filmar.
■
La filmación empezará y utilizará los ajustes de
entorno automáticos básicos.
4. Cuando se pulsa la tecla EASY de nuevo se desactiva el modo
EASY.
■
La cámara volverá a la configuración que existía antes de
la activación del modo EASY.
Notas
■
En modo EASY, ciertas funciones no están disponibles como, por
ejemplo, MENU, BLC, FADE, MF/AF.
- Si desea utilizar estas funciones, primero debe desactivar
el modo EASY.
■
La configuracón del modo EASY se guarda en la cámara (siempre
que se haya instalado una batería de litio).
Modo de filmación EASY (para principiantes)
Page 53
53
Advanced Recording Filmación avanzada
ENGLISH ESPAÑOL
CUSTOM Mode
✤ You can customize settings and save them for future use.
■
The CUSTOM SET function operates in CAMERA mode only.
✤ Please set custom settings before using this function. (see page 34)
1. Set the power switch to CAMERA mode.
2. To activate the CUSTOM function, press the CUSTOM
button.
■
“CUSTOM” will be displayed on the screen.
3. Press START/STOP to start recording.
■
Recording will begin using the CUSTOM settings.
4. To switch the CUSTOM mode off, press the CUSTOM
button again.
■
The camcorder will revert to the settings that were
set prior to the custom mode being selected.
Reference
■
In CUSTOM mode, you cannot change settings of CUSTOM SET
items.
– If you want to change custom settings, you must switch the
CUSTOM mode off.
■
The CUSTOM settings will be stored in the camera (providing a good
lithium battery has been installed).
CUSTOM SP STBY
0:00:00
63MIN
CUSTOM
Modo de filmación CUSTOM
✤ Puede personalizar la configuración y guardarla para utilizarla con
posterioridad.
■
La función CUSTOM SET sólo funciona en modo CAMERA.
✤ Fije la configuración personalizada antes de utilizar esta función.
(Consulte la página 34)
1. Deslice el interruptor de encendido a la posición
CAMERA.
2. Para activar la función CUSTOM, pulse la tecla
CUSTOM.
■
Aparecerá la palabra “CUSTOM” en la pantalla.
3. Pulse START/STOP para empezar a filmar.
■
La filmación empezará y utilizará la configuración
CUSTOM.
4. Para desactivar la función CUSTOM, pulse la tecla
CUSTOM de nuevo.
■
La videocámarfa volverá a la configuración que se
había fijado antes de que seleccionase el modo
personalizado.
Notas
■
En modo CUSTOM, no puede cambiar la configuración de
CUSTOM SET.
– Si desea cambiar la configuración personalizada, debe desactivar
el modo CUSTOM.
■
La configuración de CUSTOM se guardará en la cámara (siempre
que se haya instalado una batería de litio).
Page 54
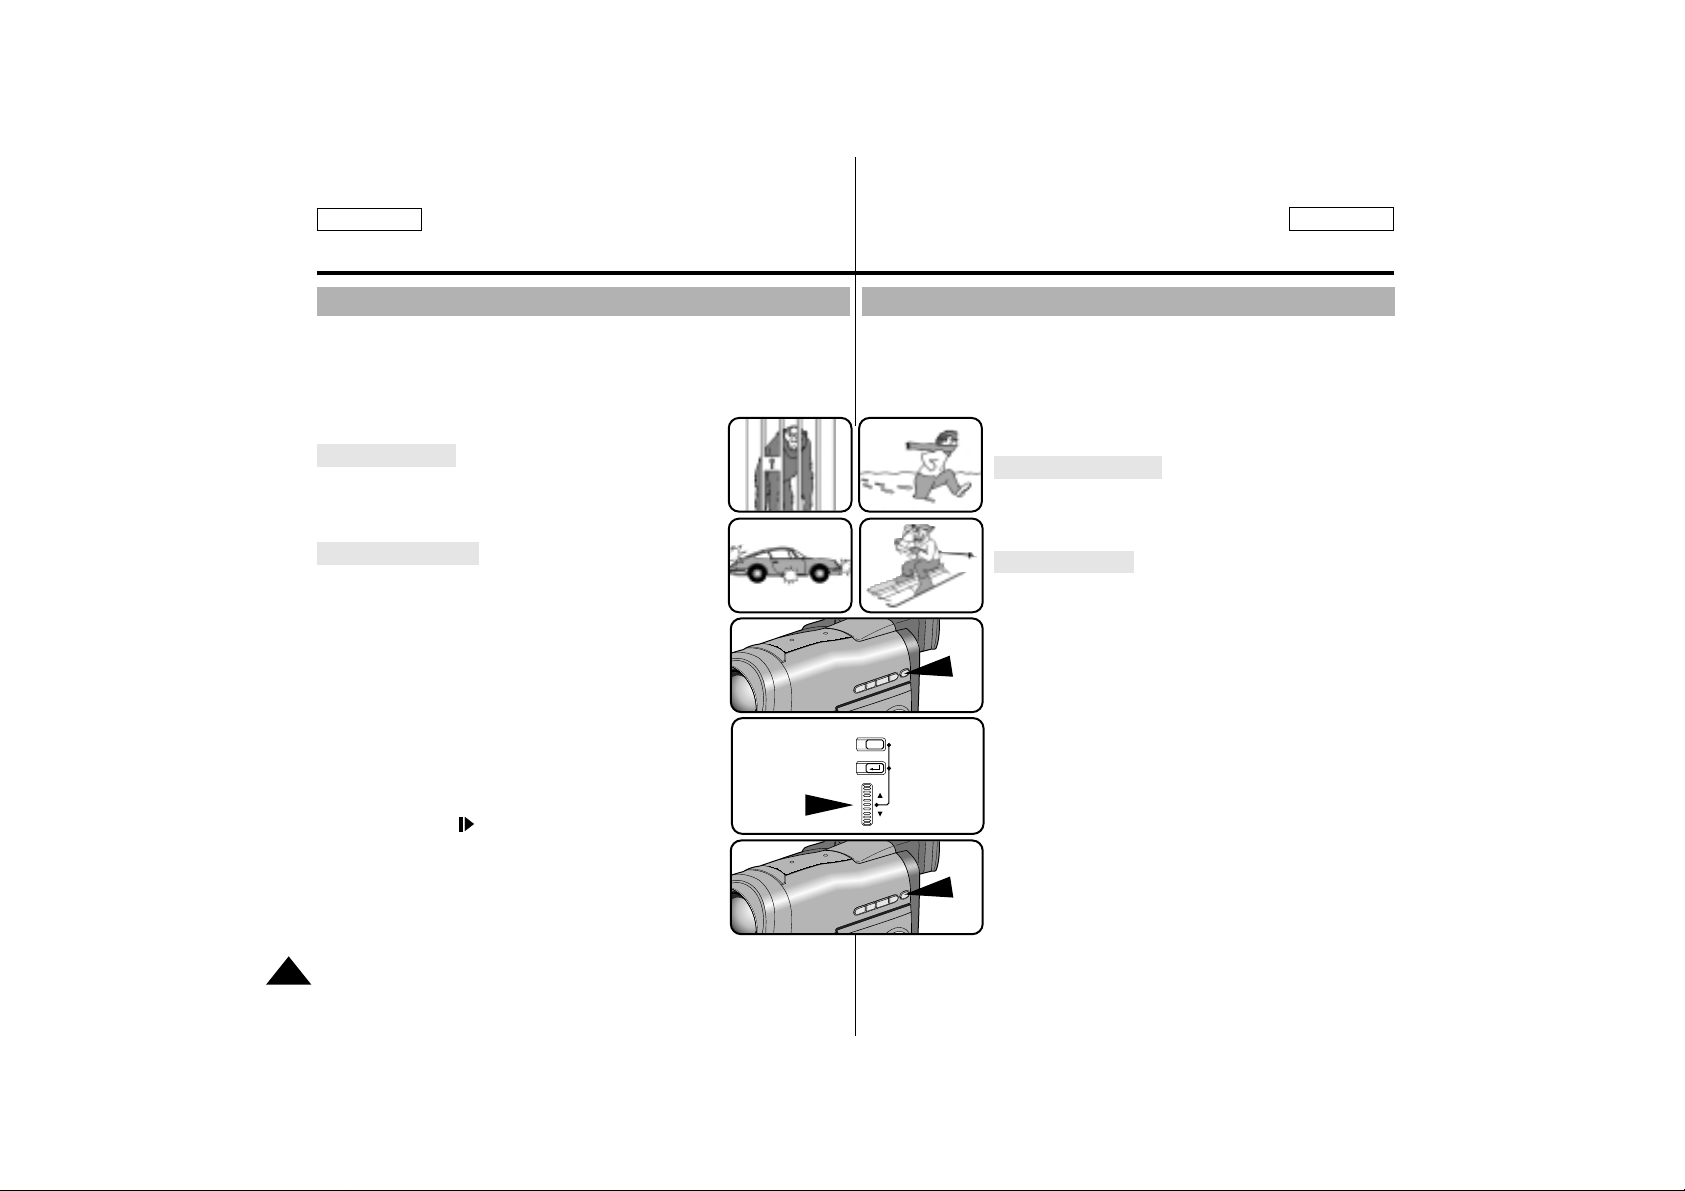
ENGLISH ESPAÑOL
54
Advanced Recording Filmación avanzada
MF/AF (Manual Focus/Auto Focus)
✤ The MF/AF function works in CAMERA mode only.
✤ In most situations, it is better to use the automatic focus feature, as
it enables you to concentrate on the creative side of your recording.
✤ Manual focusing may be necessary under certain conditions that
make automatic focusing inadequate.
Auto Focusing
✤ If you are inexperienced with camcorders,
we recommend that you make use of the
Auto Focus mode.
Manual Focusing
✤ In the following cases you could obtain better
results by adjusting the focus manually.
a. A picture containing several objects, some close to
the camcorder, others further away.
b. A person enveloped in fog or surrounded by snow.
c. Very shiny or glossy surfaces like a car.
d. People or objects moving constantly or quickly
like an athlete or crowd.
1. Set power switch to CAMERA mode.
2. Press MF/AF ( ) button.
3. Turn MF DIAL (MENU DIAL) up or down until the
object is focused.
■
Zoom out a little if focusing is difficult.
4. To return to AF(Auto Focus), press the MF/AF button again.
2
4
ON/OFF
ENTER
DISPLAY
MENU
3
MF/AF
MF/AF
MF/AF (Enfoque manual/Enfoque automático)
✤ MF/AF sólo funciona en modo CAMERA.
✤ En la mayoría de situaciones, es mejor utilizar la función de enfoque
automático, ya que le permite concentrarse en la parte creativa de la
filmación.
✤ El enfoque manual puede ser necesario bajo determinadas condi
ciones que hacen que el enfoque automático sea
inadecuado.
Enfoque automático
✤ Si no tiene experiencia con videocámaras, le
recomendamos que utilice el modo de enfoque
automático.
Enfoque manual
✤ En los casos siguientes podría obtener mejores
resultados ajustando el enfoque manualmente.
a. Una imagen con varios objetos, unos cercanos a
la videocámara y otros lejanos.
b. Una persona rodeada de niebla o de nieve.
c. Superficies muy brillantes o esmaltadas, como un
coche.
d. Personas u objetos que se mueven constante
mente o con rápidez como un deportista o una
multitud.
1. Deslice el interruptor de encendido a la posición
CAMERA.
2. Pulse la tecla MF/AF.
3. Gire el MF DIAL (MENU DIAL) hacia arriba o hacia
abajo hasta que el objeto quede enfocado.
■
Aléjese un poco si el enfoque es difícil.
4. Para volver a AF(Enfoque automático), pulse la
tecla MF/AF de nuevo.
Page 55
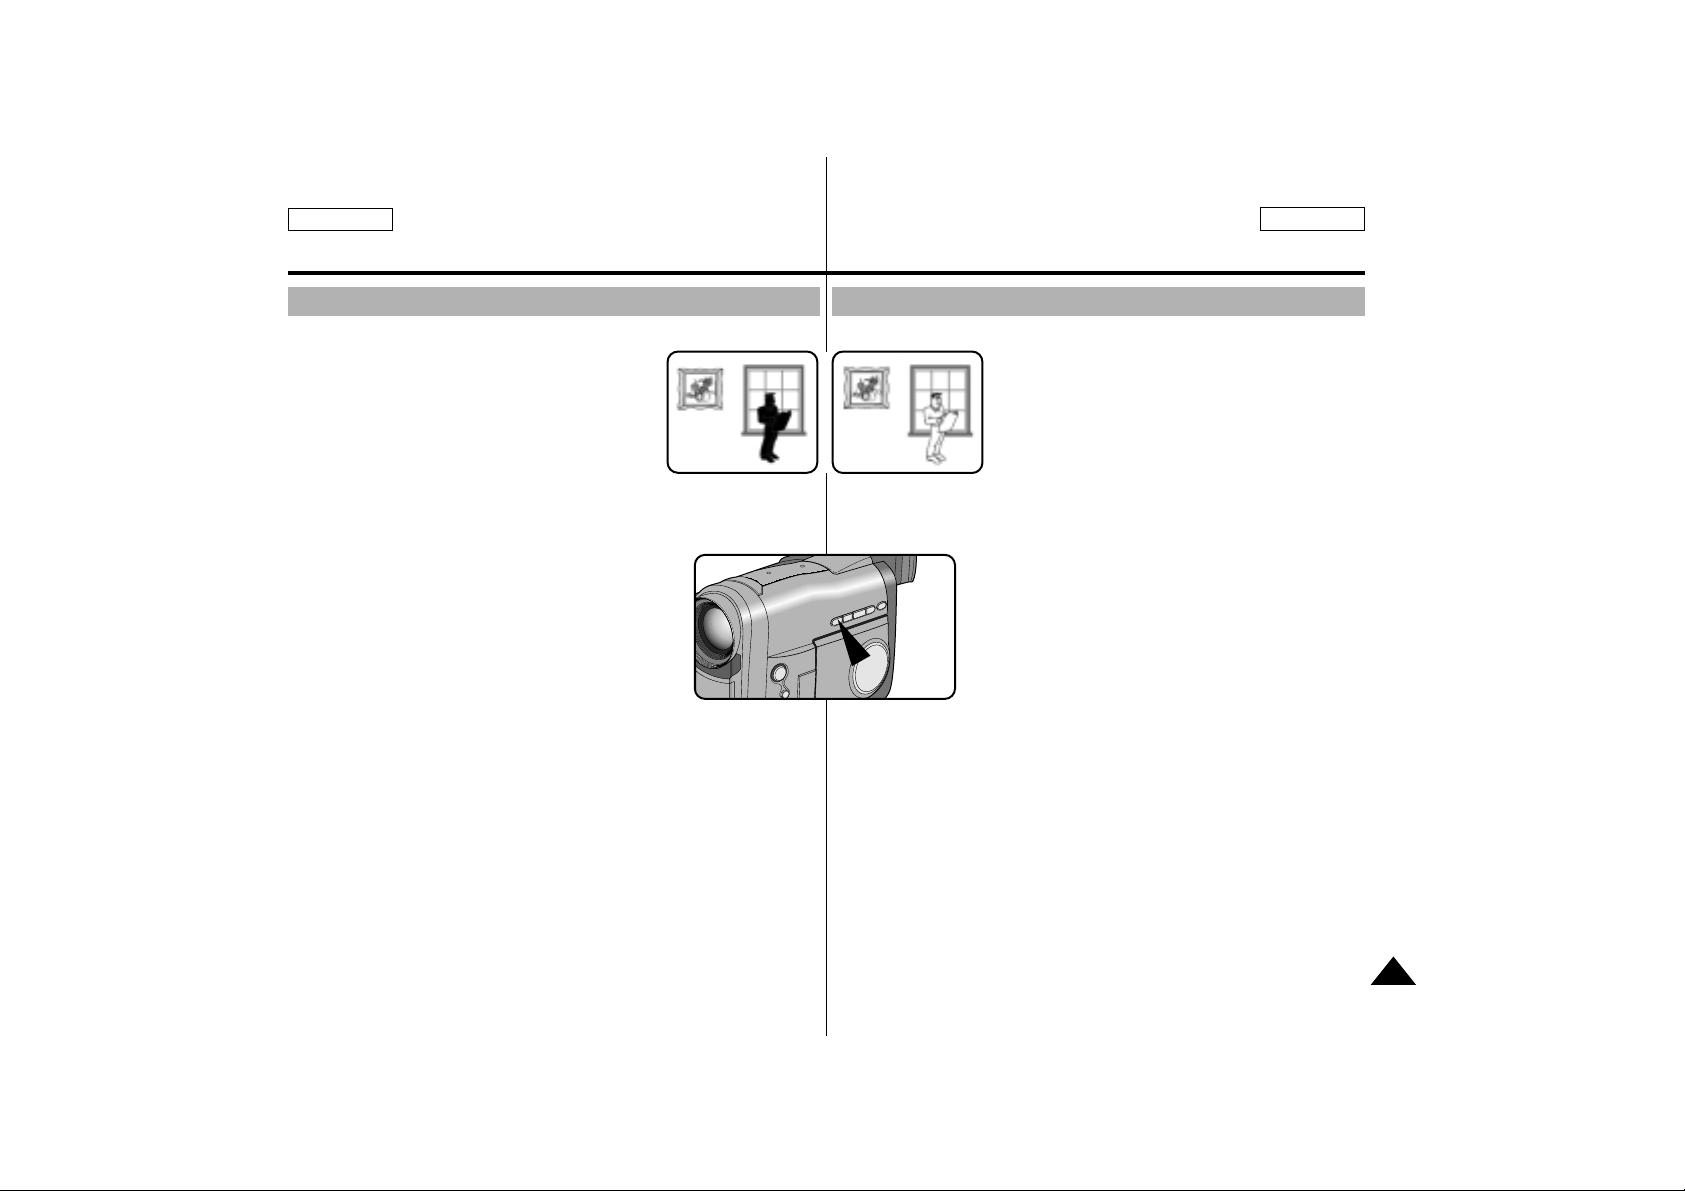
✤ BLC funciona en modo CAMERA.
✤ Cuando el motivo está más oscuro que el
fondo, entonces hay contraluz:
■
El motivo está colocado frente a una
ventana.
■
La persona que se desea filmar lleva ropa
blanca o brillante y está colocada frente de
un fondo claro; la cara de la persona es
demadiado oscura para distinguuir sus
facciones.
■
El movio está en el exterior y el fondo es
un cielo cubierto.
■
Las fuentes de iluminación son demasiados brillantes.
■
El motivo está contra un fondo nevado.
1. Ponga el interruptor de encendido en modo
CAMERA.
2. Pulse la tecla BLC.
■
Normal - BLC - Normal
■
BLC sólo destaca el motivo.
55
Advanced Recording Filmación avanzada
ENGLISH ESPAÑOL
BLC (Back Light Compensation)
✤ BLC works in CAMERA mode.
✤ Back lighting exists when the subject is darker
than the background:
■
The subject is placed in front of a window.
■
The person to be shot is wearing white or
shiny clothes and is placed against a bright
background; the person’s face is too dark to
distinguish their features.
■
The subject is in the outdoors and the background is overcast.
■
The light sources are too bright.
■
The subject is against a snowy background.
1. Set the power switch to CAMERA mode.
2. Press the BLC button.
■
Normal - BLC - Normal
■
BLC enhances only the subject.
* BLC on* BLC off
BLC
BLC (Compensación de contraluz)
Page 56
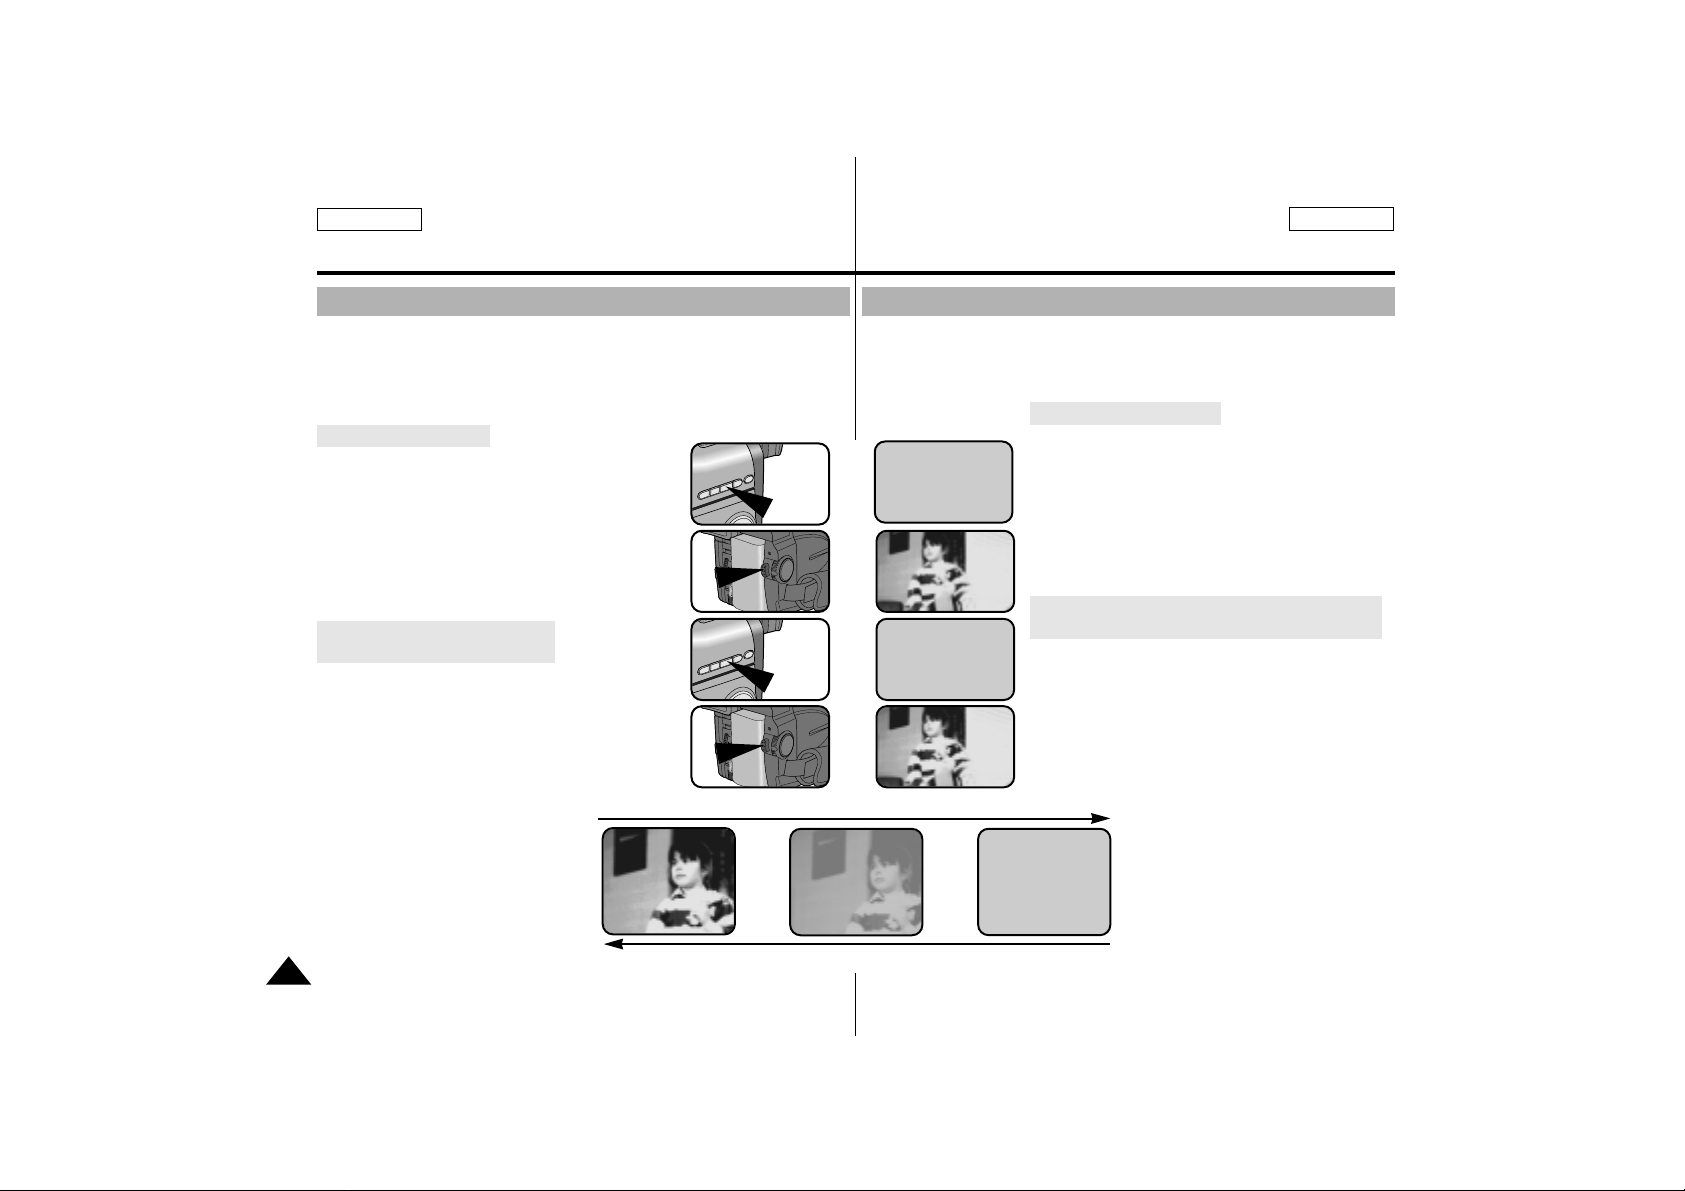
ENGLISH ESPAÑOL
56
Advanced Recording Filmación avanzada
✤ The FADE function works in CAMERAmode only.
✤ You can give your films a professional look by using special effects
such as fade in at the beginning of a sequence or fade out at the
end of a sequence.
To Start Recording
1. Before shooting, hold down the FADE button.
The picture and sound gradually disappears
(fade out).
2. Press the START/STOP button and at the
same time release the FADE button.
Recording starts and the picture and sound
gradually appears (fade in).
To Stop Recording
(use FADE IN / FADE OUT)
3. When you wish to stop shooting, hold down
FADE button.
The picture and sound gradually disappears
(fade out).
4. When the picture has disappeared,
press START/STOP button to stop
recording.
a. FADE OUT
(Approx. 4 seconds)
b. FADE IN
(Approx. 4 seconds)
Fade In and Out
Press the FADE button a. FADE OUT Gradual disappearance
Gradual appearance b. FADE IN Release the FADE button
➔
➔
REC
0:00:15
REC
0:00:15
STBY
0:00:15
➔
➔
➔
➔
FADE
STBY
0:00:00
➔
➔
FADE
✤ La función FADE sólo funciona en modo CAMERA.
✤ Puede dar a sus películas un toque personal utilizando efectos espe-
ciales como la entrada gradual al principio de una secuencia o la salida gradual al final de una secuencia.
Para iniciar la filmación
1. Antes de filmar, presione la tecla FADE.
La imagen y el sonido desaparecen
gradualmente (salida gradual).
2. Pulse la tecla START/STOP y a la vez.
suelte la tecla FADE.
La filmación empieza y la imagen y el sonido
aparecen gradualmente (entrada gradual).
Para detener la filmación (utilizar FADE IN /
FADE OUT)
3. Cuando desee detener la filmación, mantenga
pulsado la tecla FADE.
La imagen y el sonido desaparecen gradualmente (salida gradual).
4. Cuando la imagen haya desa
parecido, pulse la tecla
START/STOP para detener la
filmación.
a. FADE OUT
(Aprox. 4 segundos)
b. FADE IN
(Aprox. 4 segundos)
Entrada y salida gradual
Page 57
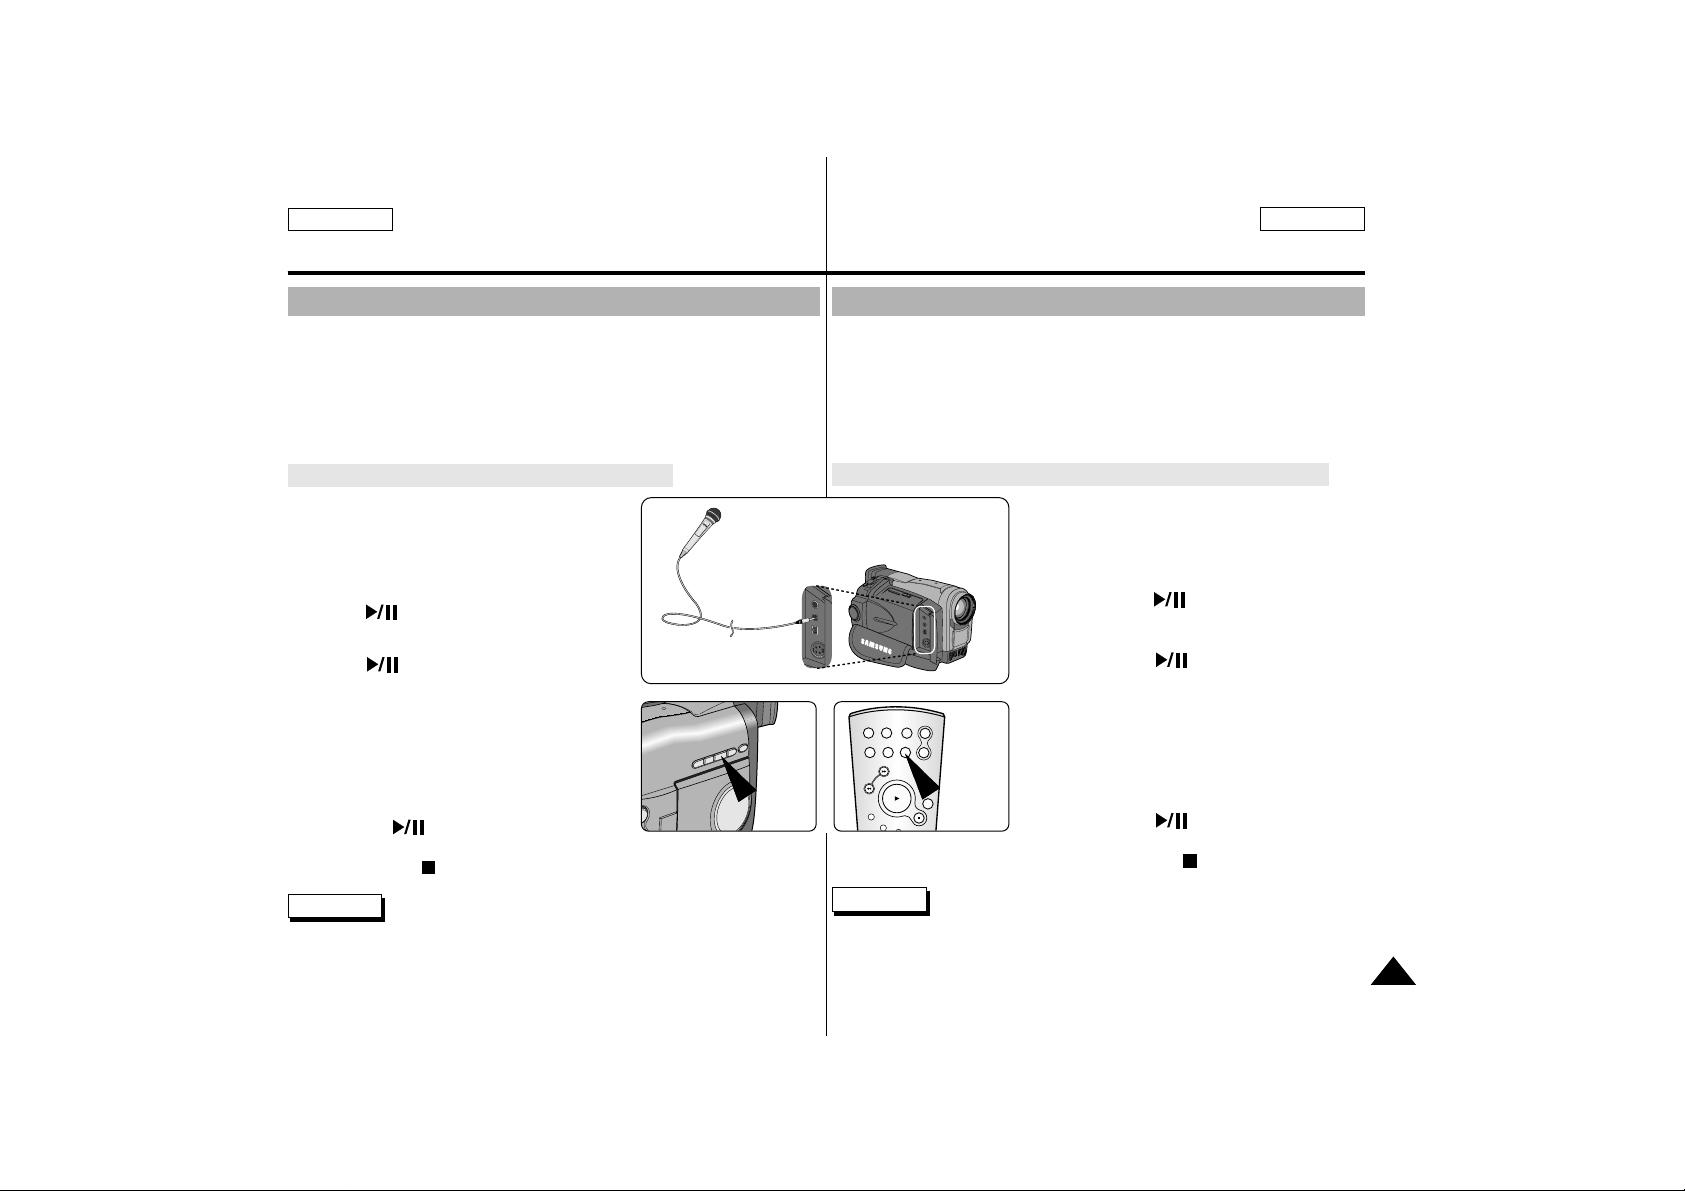
ENGLISH ESPAÑOL
57
Advanced Recording Filmación avanzada
Audio dubbing
✤ The AUDIO DUBBING function only works in PLAYER Mode.
✤ You can add sound to the original sound on a pre-recorded tape,
recorded in the SP mode with 12bit sound.
✤ Use the internal , an external microphone or other audio equipment.
✤ The original sound will not be erased.
Record the sound again using MIC dubbing.
1. Set the camcorder to PLAYER mode
■
If you want to use the external
microphone, connect the microphone
to the external MIC input on the
camcorder.
2. Press (PLAY/STILL) button and find
the start position of the scene to be dubbed.
3. Press (PLAY/STILL) button to pause
the scene.
4. Press A.DUB button on the Remote
Control
■
A.DUB will be displayed in the LCD.
■
The camcorder is in a ready-to-dub
state for dubbing.
5. Press the (PLAY/STILL) button to
start dubbing.
-
Press the (STOP) button to stop the dubbing.
Reference You can not dub sound on a pre-recorded tape
recorded in LP mode or 16 bit mode.
START/
STOP
SELF
TIMER
X2
SLOW
F.ADV
A.DUB
ZERO
MEMORY
WIDE
TELE
STILL
PHOTO DISPLAY
PLAY/
STILL
A.DUB
Doblaje de sonido
✤ La función AUDIO DUBBING sólo funciona en modo PLAYER.
✤ Puede añadir sonido al sonido original en una cinta pregrabada,
grabada en modo SP con sonido de 12 bits.
✤ Utilice el micrófono interno, uno externo u otro equipo de audio.
✤ El sonido original no se borrará.
Grabar el sonido de nuevo utilizando el doblaje del micrófono.
1. Ponga la videocámara en modo PLAYER.
■
Si desea utilizar el micrófono externo,
conecte el micrófono a la entrada MIC
externa de la videocámara.
2. Pulse la tecla (PLAY/STILL) y busque
el inicio de la escena que desea doblar.
3. Pulse la tecla (PLAY/STILL) para
detener la escena.
4. Pulse la tecla A.DUB del mando a distancia.
■
A.DUB aparecerá en la pantalla LCD.
■
La videocámara está preparada para
el doblaje.
5. Pulse la tecla (PLAY/STILL) para
empezar el doblaje.
■
Pulse el boton (STOP) para detener
el doblaje.
Notas
No puede doblar el sonido en una cinta grabada en modo LP o en
modo de 16 bits.
Page 58
ENGLISH ESPAÑOL
58
Advanced Recording Filmación avanzada
Playing back dubbed Audio
1. Insert the dubbed tape and press the
MENU ON/OFF.
2. Turn the MENU DIAL to highlight
AUDIO SEL.
3. Press ENTER to enter the sub-menu.
4. Using the the MENU DIAL, select the AUDIO playback channel.
■
Press ENTER to confirm the audio playback channel and return to
main menu.
– SOUND1: play the original sound.
– SOUND2: play the dubbed sound.
– MIX : playback an equally mixed sound of SOUND1 and 2.
5. To exit, press the MENU ON/OFF button.
Reference
■
When you playback added sound (SOUND2 or MIX mode), the sound
may be broken or loss in sound quality may be experienced.
(MENU) SP STOP
LCD ADJUST
PHOTO SEARCH
AUDIO SEL..............SOUND1
SPEAKER.................ON
REC MODE ..............SP
DISPLAY...................LCD
: MENU
●
AUDIO SEL
●
SP STOP
SOUND1
SOUND2
MIX
SEL.:ENTER
: MENU
Reproducir el sonido doblado
1. Introduzca la cinta doblada y pulse
MENU ON/OFF.
2. Gire el disco selector MENU a AUDIO SEL.
3. Pulse ENTER para que aparezca el
submenú.
4. Con el disco selector MENU, seleccione el canal de reproducción
AUDIO.
■
Pulse ENTER para confirmar el canal de reproducción de audio
y volver al menú principal.
– SOUND1 : reproduce el sonido original.
– SOUND2 : reproduce el sonido doblado.
– MIX : reproduce un sonido mezclado por igual de
SOUND1 y 2.
5. Para salir, pulse la tecla MENU ON/OFF.
Notas
■
Cuando reproduzca sonido añadido (modos
SOUND2 o MIX), el sonido puede interrumpirse o
perder calidad.
Page 59
ENGLISH ESPAÑOL
59
Advanced Recording Filmación avanzada
✤ The PHOTO function lets you capture an object as a still along with
sound, while in CAMERA mode.
✤ You can select one of these PHOTO modes ;
■
FIELD : You can record a normal resolution still picture.
■
FRAME: You can record a high resolution still picture.
– If you shoot a fast moving subject in this mode,
you may get a duplicated still picture.
– We recommend you use this mode to shoot a
motionless picture.
1. Set power switch to CAMERA mode.
2. Press the MENU ON/OFF button.
■
The menu list will appear.
3. Using the MENU DIAL to PHOTO MODE.
4. Turn the PHOTO mode, press the ENTER button.
■
The PHOTO MODE is changed to [FIELD - FRAME] repeatedly.
5. To exit, press the MENU ON/OFF button.
✤ La función PHOTO le permite capturar un objeto como imagen fija
combinada con sonido cuando está en modo CAMERA.
✤ Puede seleccionar uno de estos modos PHOTO:
FIELD: puede grabar una imagen fija a resolución normal.
FRAME: Puede filmar una imagen fija a alta resolución.
- Si filma un motivo que se mueve rápidamente en este
modo, puede aparecer una imagen fija duplicada.
- Se recomienda utilizar este modo para filmar imágenes
estáticas.
1. Coloque el interruptor de encendido en
modo CAMERA.
2. Pulse el botón MENU ON/OFF.
■
Aparecerá la lista de menús.
3. Con el disco selector MENU seleccione
PHOTO MODE.
4. Cambie el modo PHOTO, pulse el botón ENTER.
■
PHOTO MODE va cambiando entre FIELD y FRAME
repetidamente.
5. Para salir, pulse el botón MENU ON/OFF.
PHOTO PHOTO
(MENU) SP STBY
IRIS...........................AUTO
REC MODE ..............SP
REC LAMP ...............ON
WIND CUT ...............OFF
AUDIO MODE..........12BIT
PHOTO MODE.........FIELD
: MENU
(MENU) SP STBY
IRIS...........................AUTO
REC MODE ..............SP
REC LAMP ...............ON
WIND CUT ...............OFF
AUDIO MODE..........12BIT
PHOTO MODE.........FRAME
: MENU
Page 60
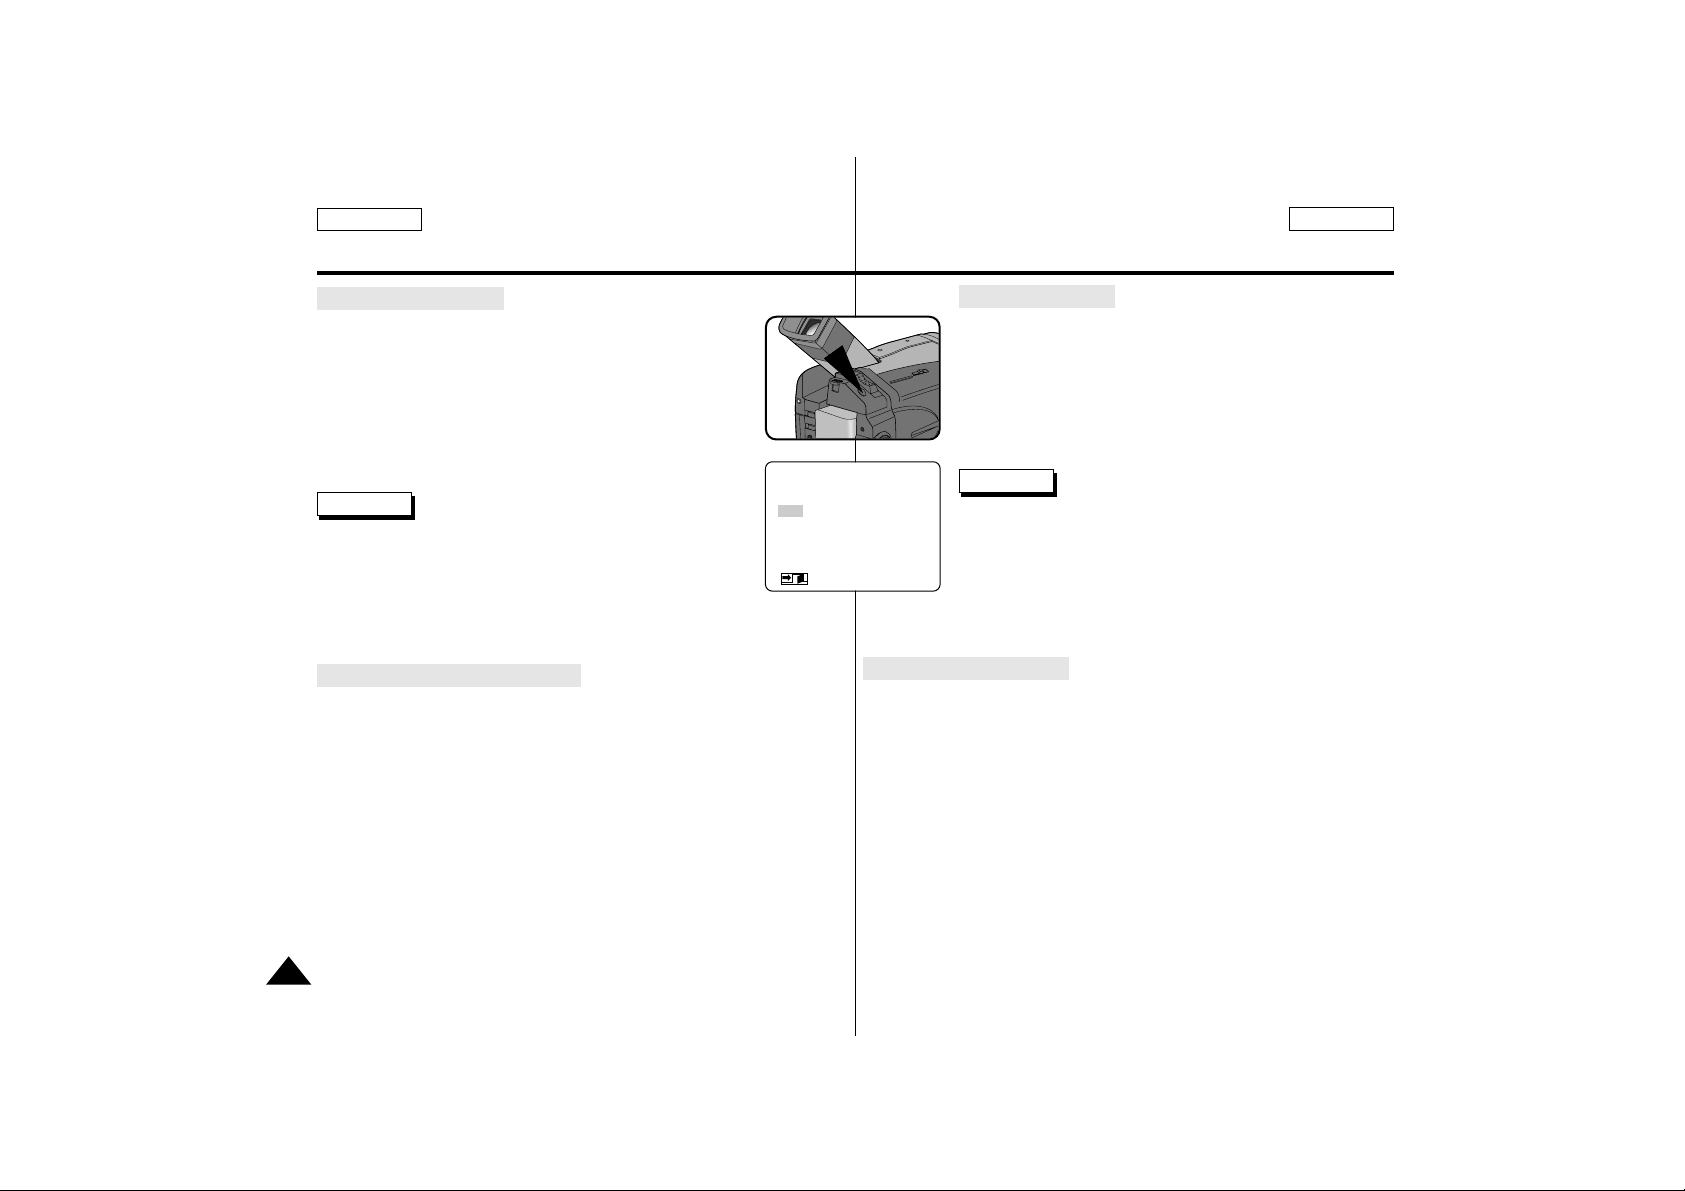
60
Advanced Recording Filmación avanzada
ENGLISH ESPAÑOL
Taking a still picture
1. Press the PHOTO button.
■
The still picture appears on the LCD monitor or
viewfinder.
■
To quit the PHOTO mode without recording,
press the PHOTO button again.
2. Press the START/STOP button.
■
The still picture is recorded for about 8 seconds.
3. After the PHOTO recording, PHOTO mode is canceled.
Reference
■
To record the still picture, you must press the
START/STOP button.
■
If you press the PHOTO button in the GHOST or PIP
mode, the GHOST or PIP mode will be released.
■
If you use the PHOTO function, the picture quality may deteriorate.
Searching for PHOTO picture
✤ The PHOTO SEARCH works in PLAYER mode only.
1. Press the MENU ON/OFF button.
■
The menu list will appear.
2. Turn the MENU DIAL to highlight PHOTO SEARCH.
3. Press ENTER to enter the sub-menu.
4. Using the MENU DIAL, select the search direction
■
Press the ENTER button.
■
After searching, the camcorder displays the still image and
automatically returns to main menu.
5. To exit, press the MENU ON/OFF button.
●
PHOTO SEARCH ●SP STILL
FF
REW
RETURN
SEL.:ENTER
: MENU
Tomar una foto fija
1. Pulse la tecla PHOTO.
■
La imagen fija aparece en la pantalla LCD o en el
visor.
■
PHOTO de nuevo.
2. Pulse la tecla START/STOP.
■
La imagen fija se graba durante 8 segundos.
3. Después de grabar la foto, se cancela el modo PHOTO.
Notas
■
Para filmar una imagen fija, debe pulsar el botón
START/STOP .
■
Si pulsa la tecla PHOTO en modo GHOST o PIP
se desactivarán los modos GHOST o PIP.
■
Si utiliza la función PHOTO, puede deteriorarse la
calidad de las imágenes.
Buscar imágenes PHOTO
✤ PHOTO SEARCH sólo funciona en modo PLAYER.
1. Pulse la tecla MENU ON/OFF.
■
Aparecerá la lista de menús.
2. Gire el disco selector MENU a PHOTO SEARCH.
3. Pulse ENTER para que aparezca el submenú.
4. Con el disco selector MENU, seleccione la dirección de la búsqueda
■
Pulse la tecla ENTER.
■
Después de buscar, la videocámara muestra la imágen fija y
vuelve automáticamente al menú principal.
5. Para salir, pulse la tecla MENU ON/OFF.
Page 61
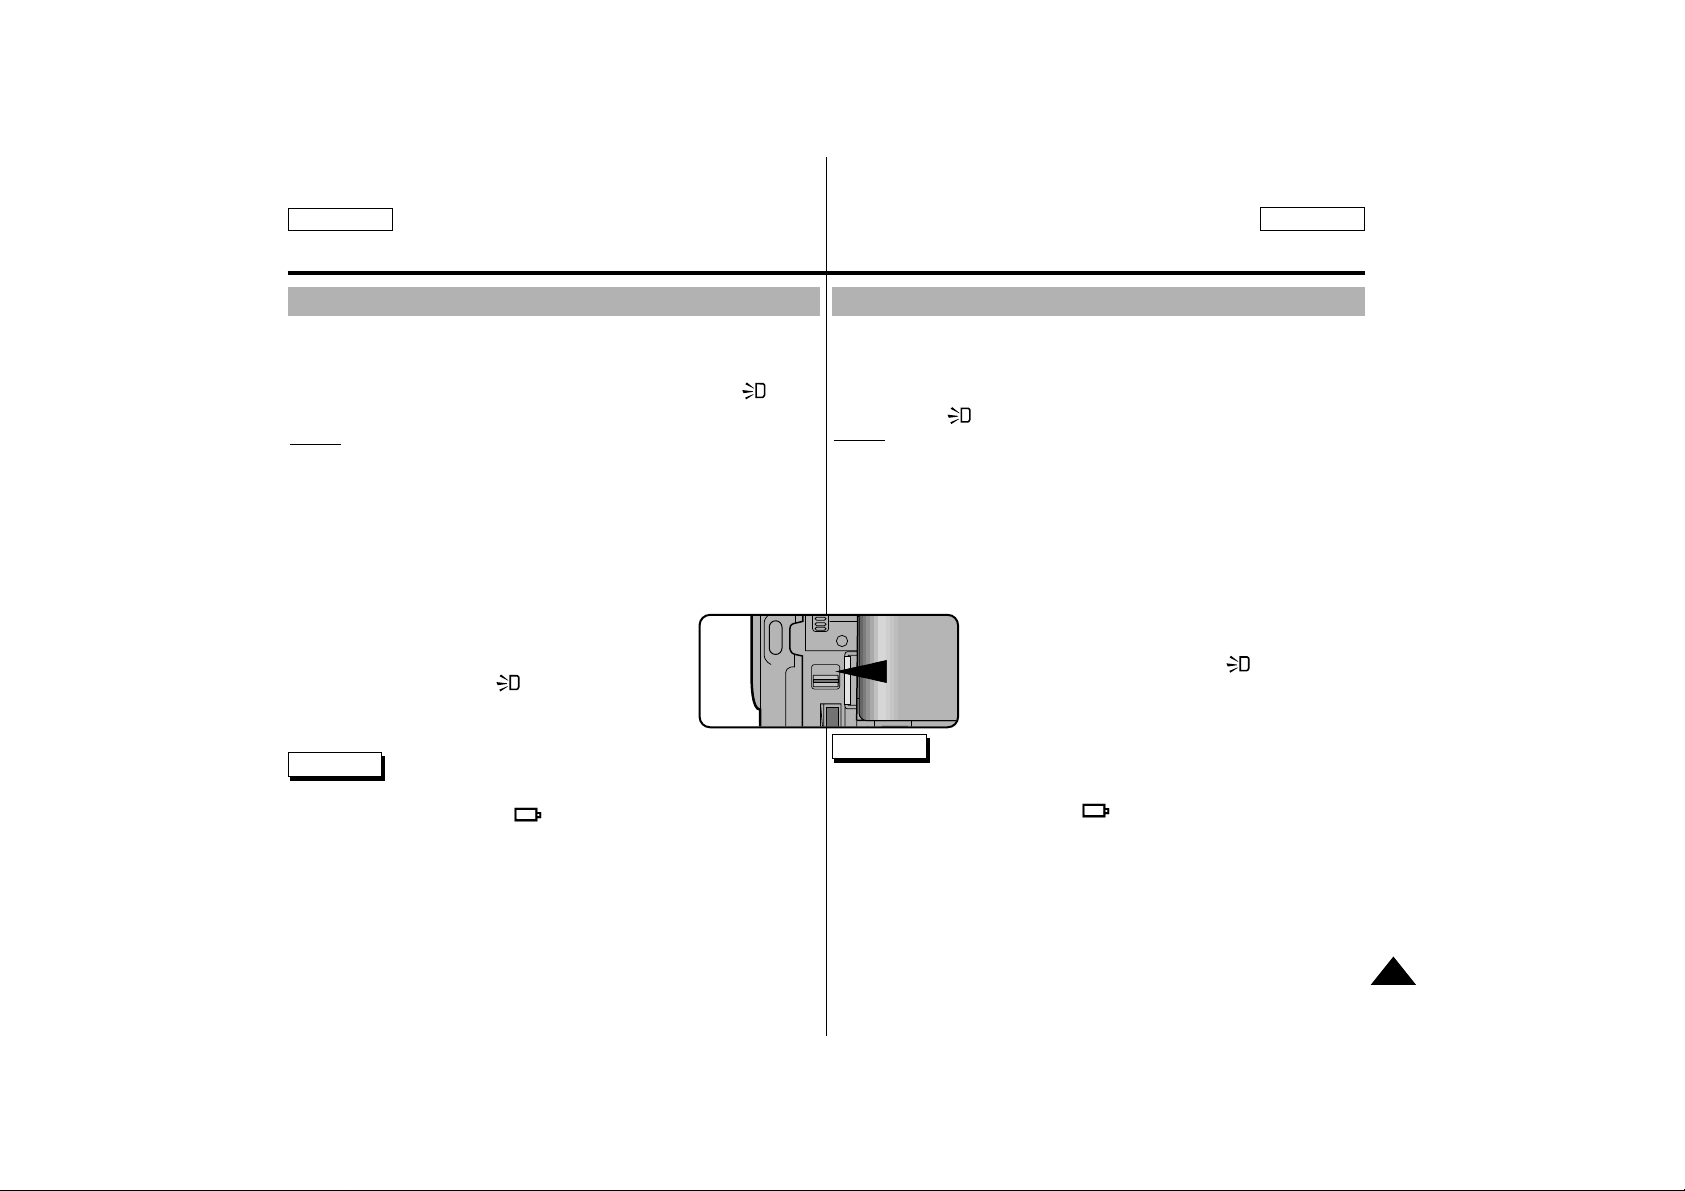
61
Advanced Recording Filmación avanzada
ENGLISH ESPAÑOL
Using the VIDEO LIGHT
✤
VIDEO LIGHT works in CAMERA mode only.
✤
To brighten the scene when natural lighting is too dim.
✤
VIDEO LIGHT works in SP mode only.
– If you turn on the LIGHT in LP mode, the LIGHT indicator ( )
and “LP” will be blinking in the LCD.
Danger
■
The video light can become extremely hot.
Do not touch it either while in operation or soon after turning it off,
otherwise serious injury may result.
■
Do not place the camcorder into the carrying case immediately after using
the video light, since it can remain extremely hot for some time.
■
Do not use near flammable or explosive materials.
■
It is recommended that you consult your nearest SAMSUNG for bulb
replacement.
– The life of the bulb is approximately 50 hours.
1. Set the camcorder to the CAMERA mode.
2. Set the LIGHT switch to ON.
■
The LIGHT indicator ( ) appears in the LCD
and the light is turned on.
3. If you want to turn off the VIDEO LIGHT,
set the LIGHT switch to OFF.
Reference
■
The LIGHT is turned off automatically during EJECTING or tape INSERTING.
■
Even if the battery indicator ( ) does not blink when the battery pack’s
charge is low, the camcorder may turn off automatically when you turn on
the LIGHT, or when you start recording with LIGHT turned on.
■
The built-in light is used as a subsidiary light, it may not be enough for
outdoor lighting.
■
The picture quality may deteriorate if you use the VIDEO LIGHT
continuously for more than 20 minutes.
■
If you turn on the LIGHT in 1/8, 1/15, 1/30 SHUTTER mode,
the manual SHUTTER mode will be switched off.
■
The SHUTTER mode does not operate when the LIGHT is on.
Utilización del FOCO de ILUMINACIÓN del VÍDEO
✤
El FOCO de ILUMINACIÓN del VÍDEO sólo funciona en modo CAMERA.
✤
Sirve para iluminar mejor una escena cuando la luz natural es demasiado
tenue.
✤
El FOCO de ILUMINACIÓN del VÍDEO sólo funciona en modo SP.
– Si enciende el FOCO de ILUMINACIÓN en modo LP, el indicador
LIGHT ( ) y “LP” parpadearán en la LCD.
Peligro
■
El foco de iluminación del vídeo puede calentarse mucho.
No lo toque cuando esté en funcionamiento ni inmediatamente después de
apagarlo ya que podría quemarse.
■
No guarde la videocámara en su bolsa justo después de utilizar el foco de
iluminación del vídeo, puede tardar en enfriarse.
■
No lo utilice cerca de materiales inflamables ni explosivos.
■
Se recomienda consultar al concesionario de SAMSUNG más cercano para
la cambiar las bombillas.
– La bombilla dura aproximadamente 50 horas.
1. Coloque la videocámara en modo CAMERA.
2. Ponga el interruptor LIGHT en ON.
■
Aparece el indicador LIGHT ( ) en la LCD y se
enciende el foco de iluminación.
3. Si desea apagar el foco de iluminación del vídeo,
ponga el interruptor LIGHT en OFF.
Notas
■
El FOCO de ILUMINACIÓN se apaga automáticamente durante la EXPULSIÓN o INSERCIÓN de la cinta.
■
Aunque el indicador de batería ( ) no parpadee para indicar que queda
poca batería, la videocámara puede apagarse automáticamente cuando
encienda el foco de iluminación o cuando empiece a filmar con el foco de
iluminación encendido.
■
El foco de iluminación incorporado se utiliza como luz subsidiaria, problablemente no sea suficiente como iluminación en el exterior.
■
La calidad de la imagen puede deteriorarse si utiliza el foco de iluminación
del vídeo de forma continua durante más de 20 minutos.
■
Si enciende el foco de iluminación en modo 1/8, 1/15, 1/30 SHUTTER, se
desactivará el modo SHUTTER manual.
■
El modo SHUTTER no funciona cuando el foco de iluminación está encendido.
ON
OFF
Page 62
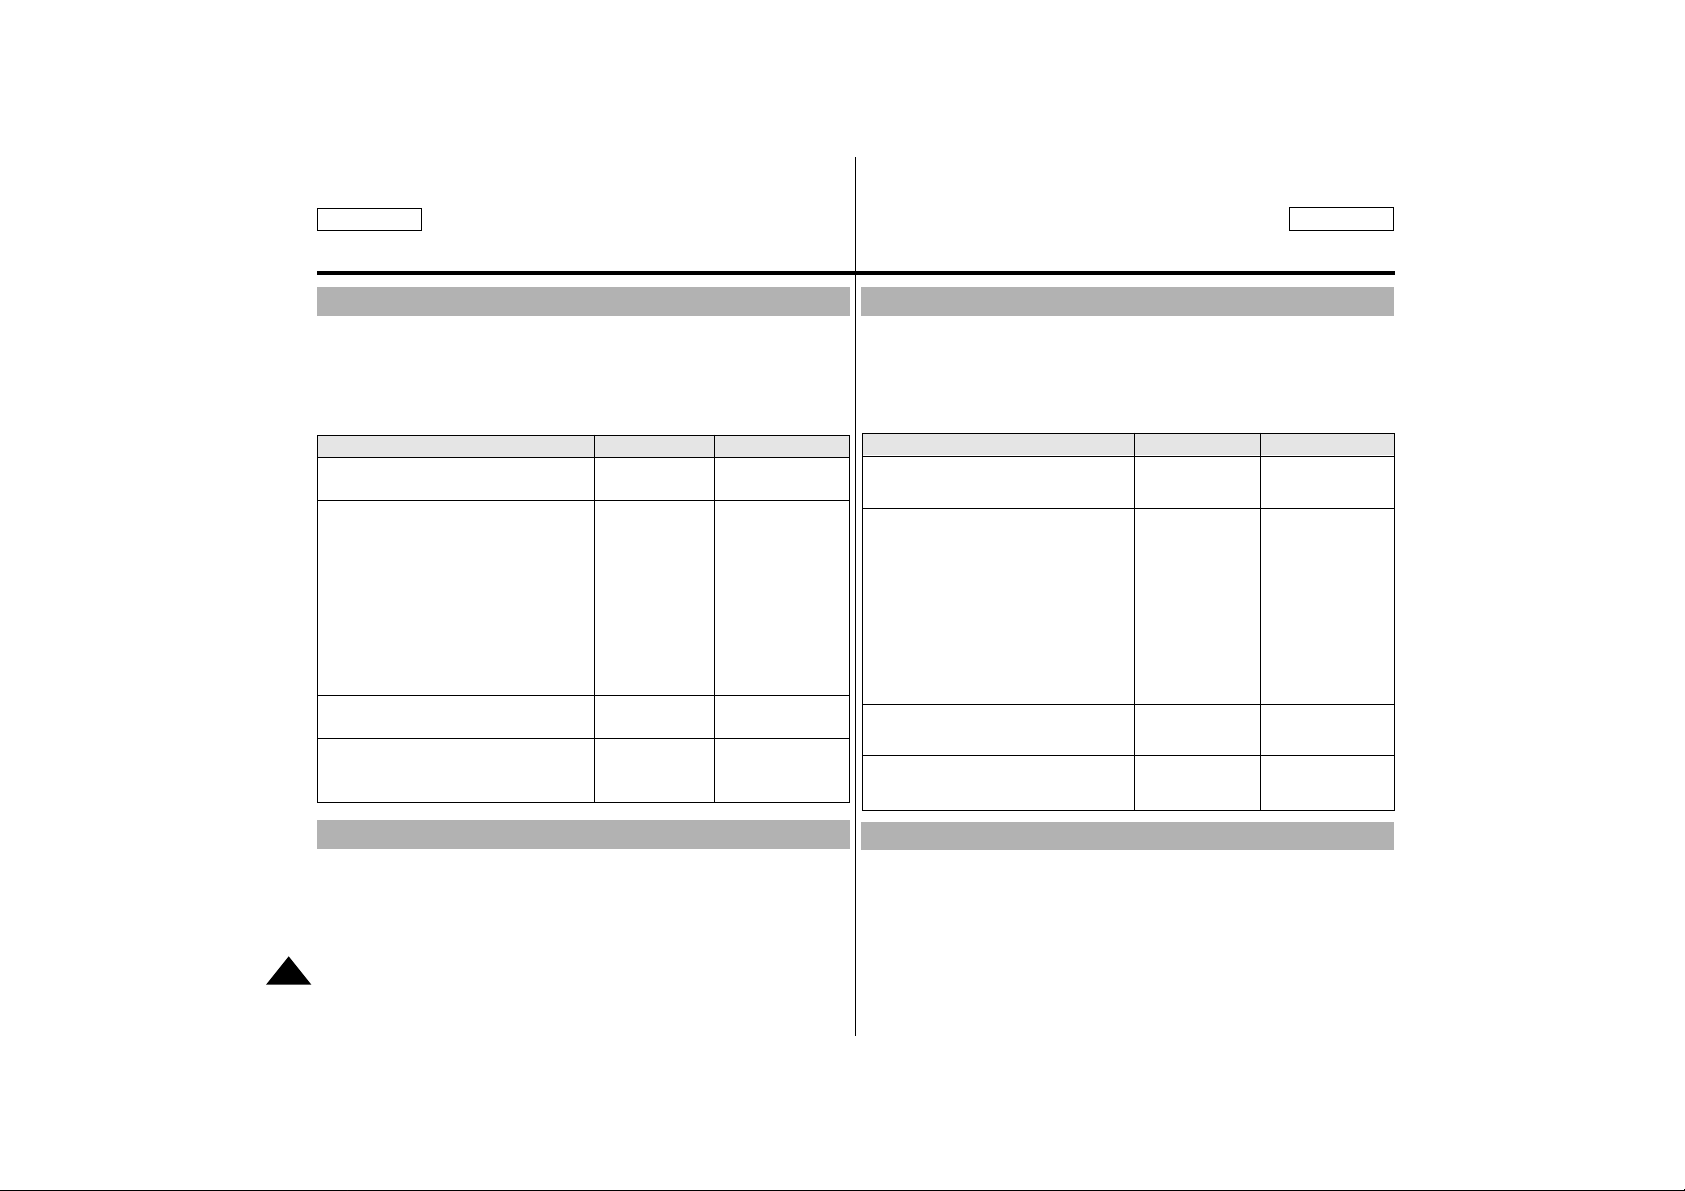
62
Advanced Recording Filmación avanzada
ENGLISH ESPAÑOL
Lighting Techniques
✤ The single greatest influence on picture quality is the level of light,
measured in lux.
✤ The following table lists a few common conditions of usage,
along with the corresponding level of brightness and any associated
lighting recommendations.
After Recording
1. Eject the tape you have recorded. (see page 25)
2. If you want to protect a tape against accidental erasure,
move the protective tab on the cassette.
3. Set the POWER switch to OFF.
4. Close the LENS cover.
5. Remove the BATTERY PACK from the camcorder.
Situations Brightness (Lux) Recommendations
• Snow-covered mountains or fields.
100,000
• Sandy beach on a hot summer’s day.
• Sunny around midday. 100,000
• Sunny day in the middle of the
35,000
afternoon.
• Overcast day around midday. 32,000
• Overcast day one hour after sunrise. 2,000
• Office with fluorescent lighting near to
1,000
a window.
• Sunny day one hour before sunset. 1,000
• Department store counter. 500 to 700
• Station ticket counter. 650
• Office with fluorescent lighting. 400 to 500
• Room lit by two 30W fluorescent lights. 300
• Arcade at night. 150 to 200
• Theater (theatre) lobby. 15 to 30
• Candle light. 10 to 15
ND filter
recommended.
Normal recording.
Video light
recommended.
Video light
required.
Situaciones Luminosidad (Lux) Recomendaciones
• Montañas o campos cubiertos de nieve.
• Playa de arena en un día de verano 100.000
caluroso.
• Día soleado alrededor de mediodía. 100.000
• Día soleado por la tarde. 35.000
• Día nublado, alrededor del mediodía. 32.000
• Día nublado una hora antes de la
salida del sol. 2.000
• Oficina iluminada por fluorescentes
cerca de una ventana. 1.000
• Día soleado una hora antes de la
puesta del sol. 1.000
• Caja de centro comercial. De 500 a 700
• Mostrador de expendeduría de billetes
de una estación. 650
• Oficina iluminada por fluorescentes. De 400 a 500
• Habitación iluminada por dos tubos
fluorescentes de 30 W. 300
• Arcada de noche. De 150 a 200
• Entrada al cine. De 15 a 30
• Luz de velas. De 10 a 15
Filtro ND recomendado.
Filmación normal.
Se recomienda uti-
lizar el foco de ilu-
minación del vídeo.
Se requiere el foco
de iluminación del
vídeo.
Técnicas de iluminación
Después de filmar
1. Extraiga la cinta que haya filmado. (Consulte la página 25)
2. Si desea proteger la cinta de un borrado accidental, deslice la
pestaña de protección del casete.
3. Ponga el interruptor de encendido en la posición OFF.
4. Cierre la tapa de la lente.
5. Retire la batería de la videocámara.
✤ Lo que tiene una mayor influencia en la calidad de la imagen es el
nivel de luminosidad, medida en lux.
✤ La tabla siguiente muestra una lista de algunas situaciones, su corre-
sponidente nivel de luminosidad y las recomendaciones asociadas.
Page 63
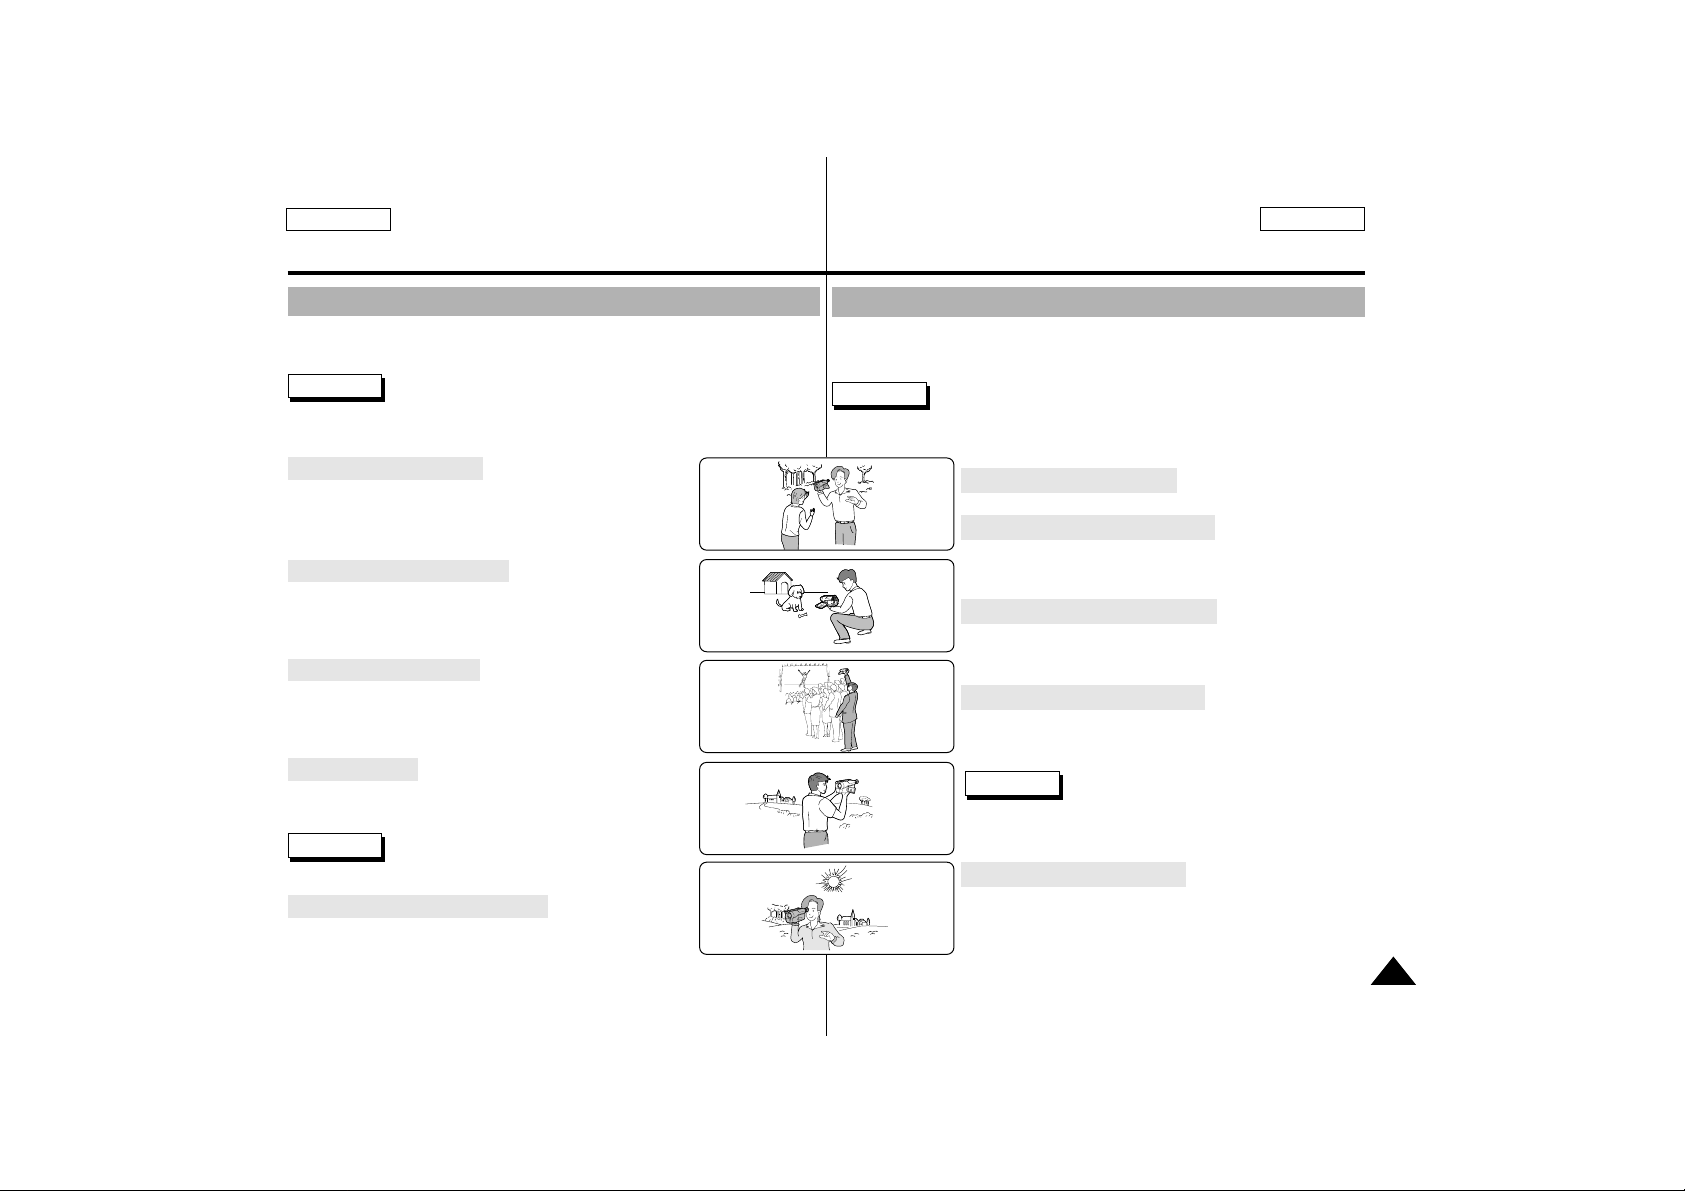
63
Advanced Recording Filmación avanzada
ENGLISH ESPAÑOL
Various Recording Techniques
✤ In some situations different recording techniques may be required for
more dramatic results.
Reference Please rotate the LCD screen carefully over rotation
may cause damage to the inside of the hinge that
connects the LCD screen to the Camcorder.
1. General recording.
2. Downward recording.
Making a recording by looking at the LCD screen from
the top.
3. Upward recording.
Making a recording by looking at the LCD screen from
the bottom.
4. Self record
Making a recording by looking at the LCD screen from
the front.
Reference When the LCD screen faces front,
indications are turned off.
5. Recording with Viewfinder.
■
In circumstances where it is difficult to use the
LCD monitor, the viewfinder can be used as a
convenient alternative.
1
2
3
4
5
Diversas técnicas de filmación
✤ En algunas situaciones es necesario aplical diferentes técnicas de
filmación para obtener resultados más espectaculares.
Notas Gire la pantalla LCD con cuidado Si la gira
demasiado puede dañar el interior del gozne que
une la pantalla LCD con la videocámara.
1. Filmación general.
Filmar mirando la pantalla LCD desde
arriba.
2. Filmación hacia abajo.
Filmar mirando la pantalla LCD desde
abajo.
3. Filmación hacia arriba.
Filmar mirando la pantalla LCD desde
delante.
Notas Cuando la pantalla LCD mira hacia
adelante, las indicaciones desaparecen.
4. Filmación automática
Cuando es difícil utilizar la pantalla LCD,
puede utilizarse el visor como alternativa adecuada.
5. Filmar con el visor.
Page 64
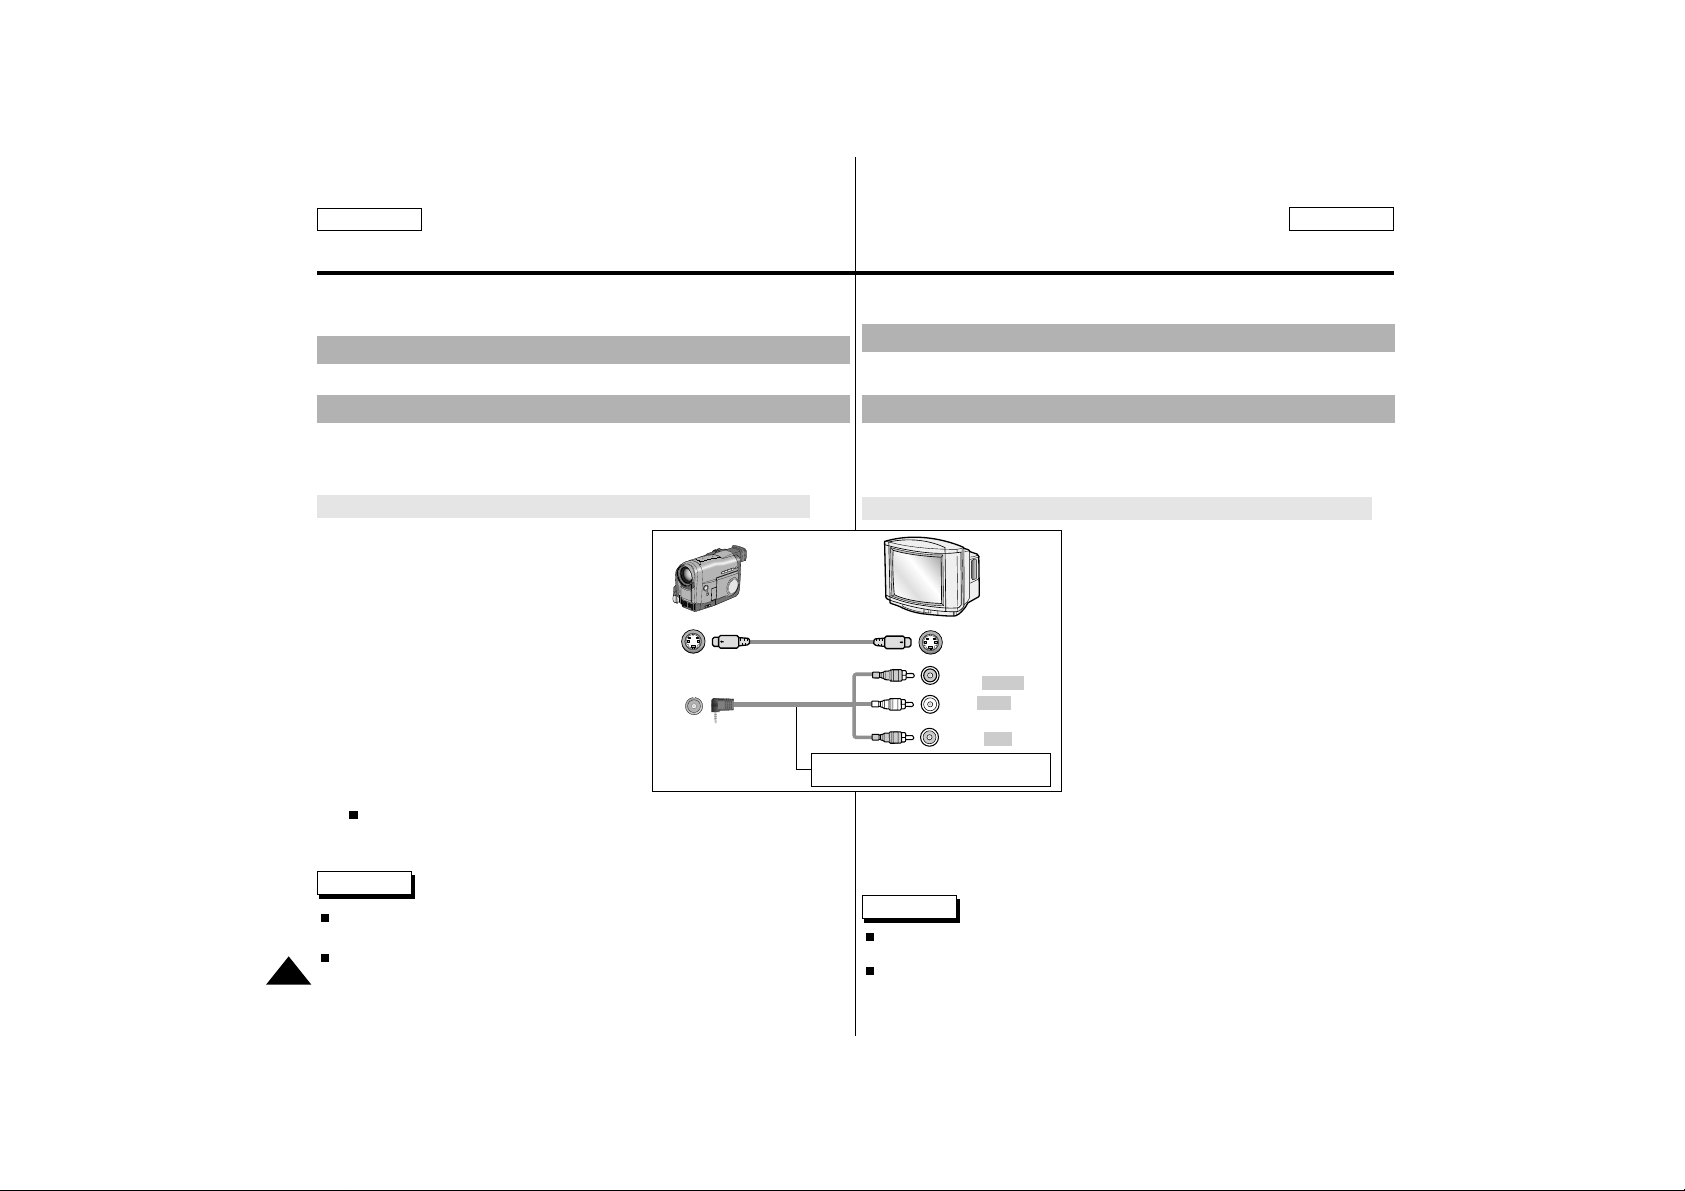
64
Playing back a tape Reproducción de una cinta
ENGLISH ESPAÑOL
✤ To watch a tape you recorded.
✤ Playback function works in PLAYER mode only.
✤ It is practical to view a tape using the LCD is a car or outdoors.
✤ To play a tape back, the TV must feature a compatible color system.
✤ We recommend that you use the AC Power Adapter as the power
source of the camcorder.
Connecting to a TV which has Audio and Video input jack
1. Connect the camcorder and TV with the
Audio/Video cable.
■
The yellow plug: Video
■
The white plug: Audio(L)
■
The red plug: Audio(R) – STEREO only
– If you connect with monaural TV
or VCR, connect yellow plug
(Video) to video input of TV or
VCR and white plug (Audio L) to
audio input of TV or VCR.
2. Set the power switch of camcorder to
PLAYER.
3. Turn on a TV and set the TV/VIDEO
selector on the TV to VIDEO.
Refer to Instruction Book of TV or VCR.
4. Playback a tape.
Reference
You can use the S-VIDEO cable to obtain better quality pictures if you
have a S-VIDEO connector on your TV.
Even if you user S-video cable, you must connect an audio cable.
Camcorder TV
S-VIDEO
OUT
A/V OUT
When you have input terminal for video
and audio on the television set
S-video input
Audio input
(left)-White
(right)-Red
Video
input-Yellow
To watch with the LCD
To watch with a TV monitor
✤ Para ver una cinta filmada.
✤ La función de reproducción sólo funciona en modo PLAYER.
✤ Es práctico ver una cinta utilizando la pantalla LCD en un coche o en
exteriores.
✤ Para reproducir una cinta, el televisor debe tener un sistema color
compatible.
✤ Se recomienda utilizar el adaptador de corriente CA como fuente de
energía de la videocámara.
Conexión a un televisor con conexión de entrada de audio y vídeo
1. Conecte la videocámara y el televisor con
el cable de audio/vídeo.
■
El enchufe amarillo: Vídeo
■
El enchufe blanco: Audio(L)
■
El enchufe rojo: Audio(R) –
sólo ESTÉREO
– Si utiliza un televisor o un reproductor
de vídeo monoaural para la conexión,
conecte el enchufe amarillo (Vídeo) a
la entrada de vídeo del televisor o del
reproductor de vídeo y el enchufe
blanco (Audio L) a la entrada de audio
del televisor o del reproductor de
vídeo.
2. Ponga el interruptor de encendido de
la videocámara en la posición PLAYER.
3. Encienda el televisor y ponga el selector TV/VIDEO del televisor en
VIDEO.
■
Consulte el manual de instrucciones del televisor o del reproductor
de vídeo.
4. Reproduzca una cinta.
Notas
Puede utilizar el cable S-VIDEO para obtener una calidad mejor de las
imágenes si tiene un conector S-VIDEO en el televisor.
Aunque utilice el cable S-video, debe conectar un cable de audio.
Para ver en la pantalla LCD
Para ver en el monitor de TV
Page 65
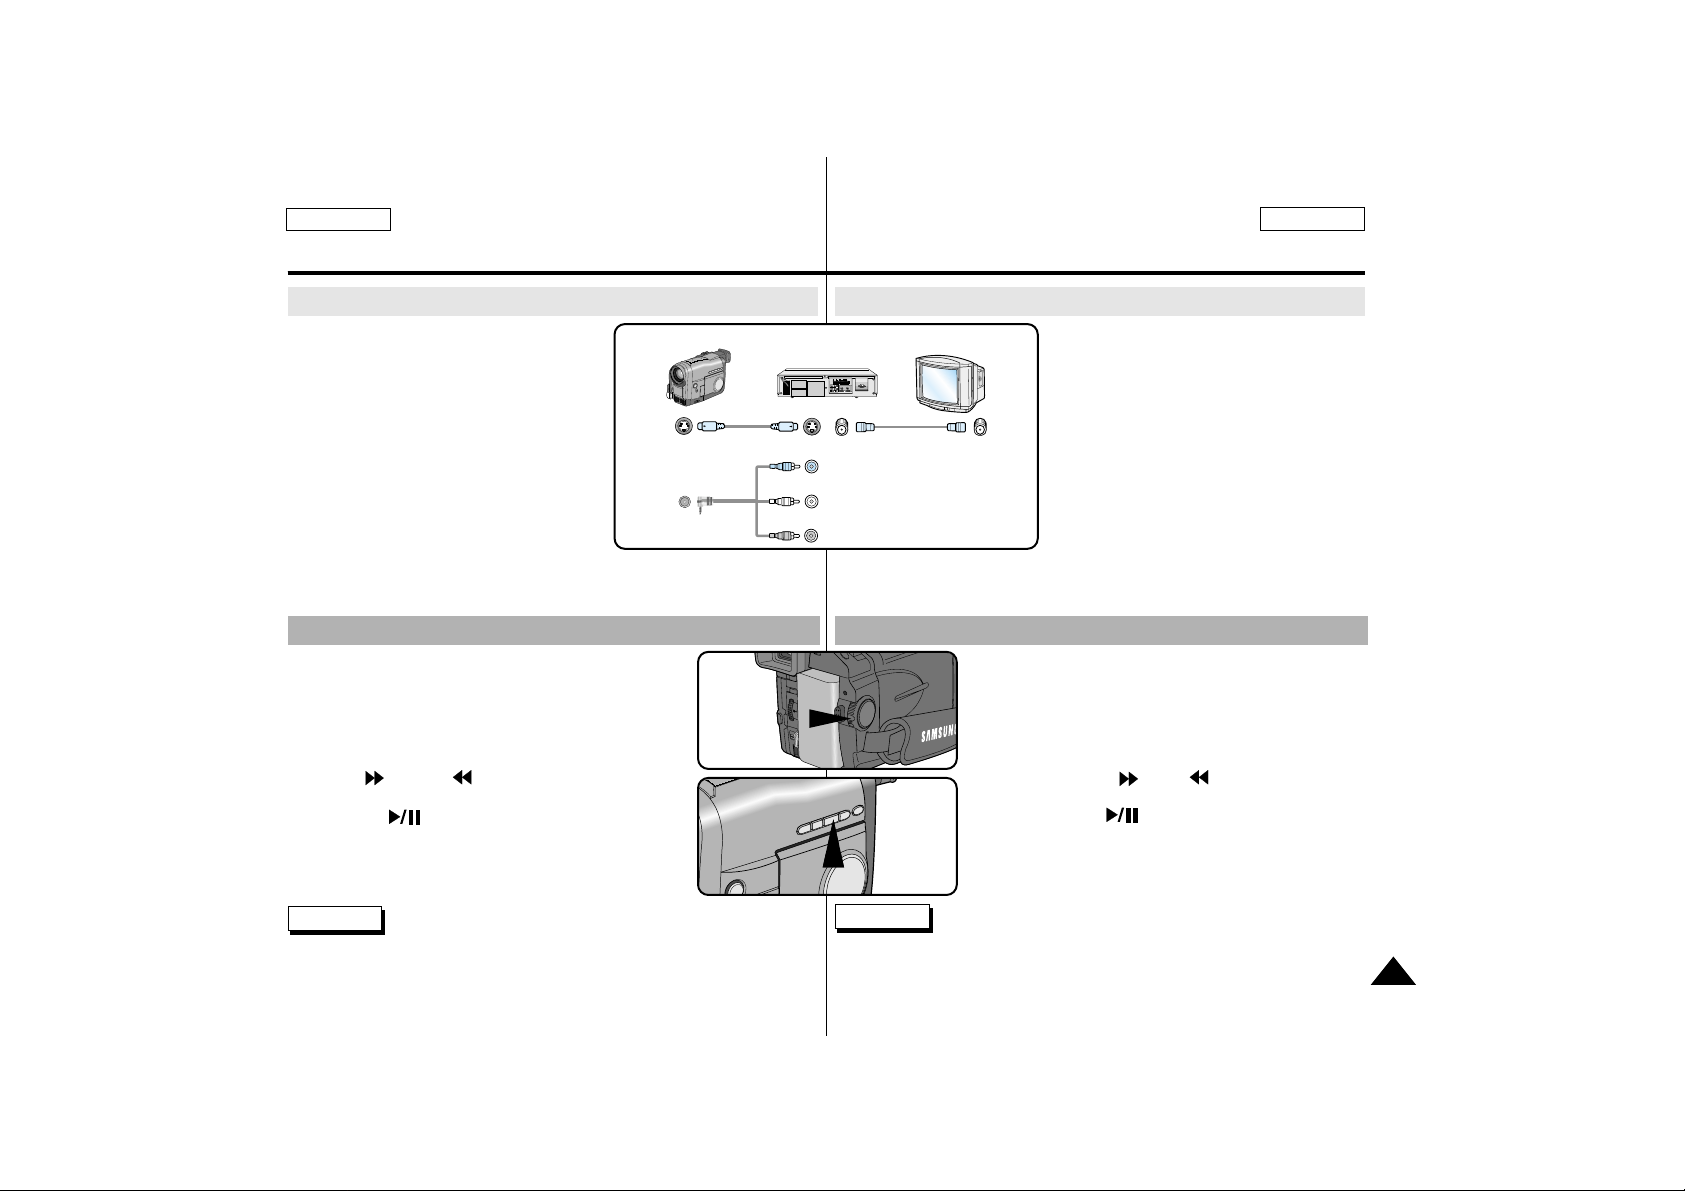
65
Playing back a tape Reproducción de una cinta
ENGLISH ESPAÑOL
Connecting to a TV which has no Audio and Video input jack
✤
You can connect your camcorder to a TV
through a VCR.
1. Connect the comcorder and VCR with the
Audio/Video cable.
■
The yellow plug : Video
■
The white plug : Audio(L)
■
The red plug : Audio(R) – STEREO
only
2. Connect a TV with the VCR.
3. Set the power switch of camcorder to
PLAYER.
4. Turn on the TV and VCR.
■
Set the input selector on the VCR to LINE.
■
Turn on the TV and select the channel reserved for your VCR on the TV.
5. Playback a tape.
✤
You can play the recorded tape in PLAYER mode.
1. Connect a power source and
Set power switch to PLAYER.
■
Set the mode switch to CAMCORDER.
(SCD75/D77 only)
2. Insert a tape you want to see.
3. Using (FF) and (REW) buttons, find the first
position that you want to see.
4. Press the (PLAY/STILL) button.
■
The picture you recorded appears on the TV
after a few seconds.
■
If the tape reaches its end during playback,
the tape will rewind automatically.
Reference
■
It is best to decrease the volume of the built-in speaker when your
camcorder is connected to the TV.
■
The playback mode (SP/LP) is selected automatically.
Playback
1 2 3 4 5
6 7 8 9
10
ALARM INALARM OUT ALARM RESET GNDTRIGGER OUT
TAPE END OUTSERIES OUT GNDSERIES IN 1 SHOT REC IN
12 3 45 67 891012 3 45 67 89
10
IN
OUT
OUT
IN
Conexión a un televisor sin conexión de entrada de audio y vídeo
✤
Puede conectar su videocámara al televisor a través de un reproductor de vídeo.
1. Conecte la videocámara y el reproductor
de vídeo con el cable de audio/vídeo.
■
El amarillo: Vídeo
■
El blanco: Audio(L)
■
El rojo: Audio(R) – sólo ESTÉREO
2. Conecte un televisor al reproductor de vídeo.
3. Ponga el interruptor de encendido de la
videocámara en la posición PLAYER.
4. Encienda el televisor y el reproductor de vídeo.
■
Ponga el selector de entrada del repro
ductor de vídeo en LINE.
■
Encienda el televisor y seleccione el canal reservado para el reproductor
de vídeo del televisor.
5. Reproduzca una cinta.
✤
Puede reproducir la cinta filmada en modo PLAYER.
1. Conecte la fuente de energía y Ponga el interruptor de
encendido en la posición PLAYER.
■
Ponga el interruptor de modo en CAMCORDER.
(sólo en SCD75/D77)
2. Introduzca la cinta que desee ver.
3. Con los botones (FF) y (REW), busque la
primera posición que desee ver.
4. Pulse el botón (PLAY/STILL).
■
La imagen filmada aparece en el televisor
transcurridos unos segundos.
■
Si la cinta llega al final durante la reproducción,
se rebobinará automáticamente.
Notas
■
Es mejor bajar el volumen del altavoz incorporado cuando la videocámara
esté conectada al televisor.
■
El modo de reproducción (SP/LP) se selecciona automáticamente.
Reproducción
CAMCORDER
VCR
TV
S-VIDEO
S-VIDEO
VIDEO
(L)
(R)
AUDIO
TV
ANTENNA
PLAYER
PLAY/
STILL
Page 66
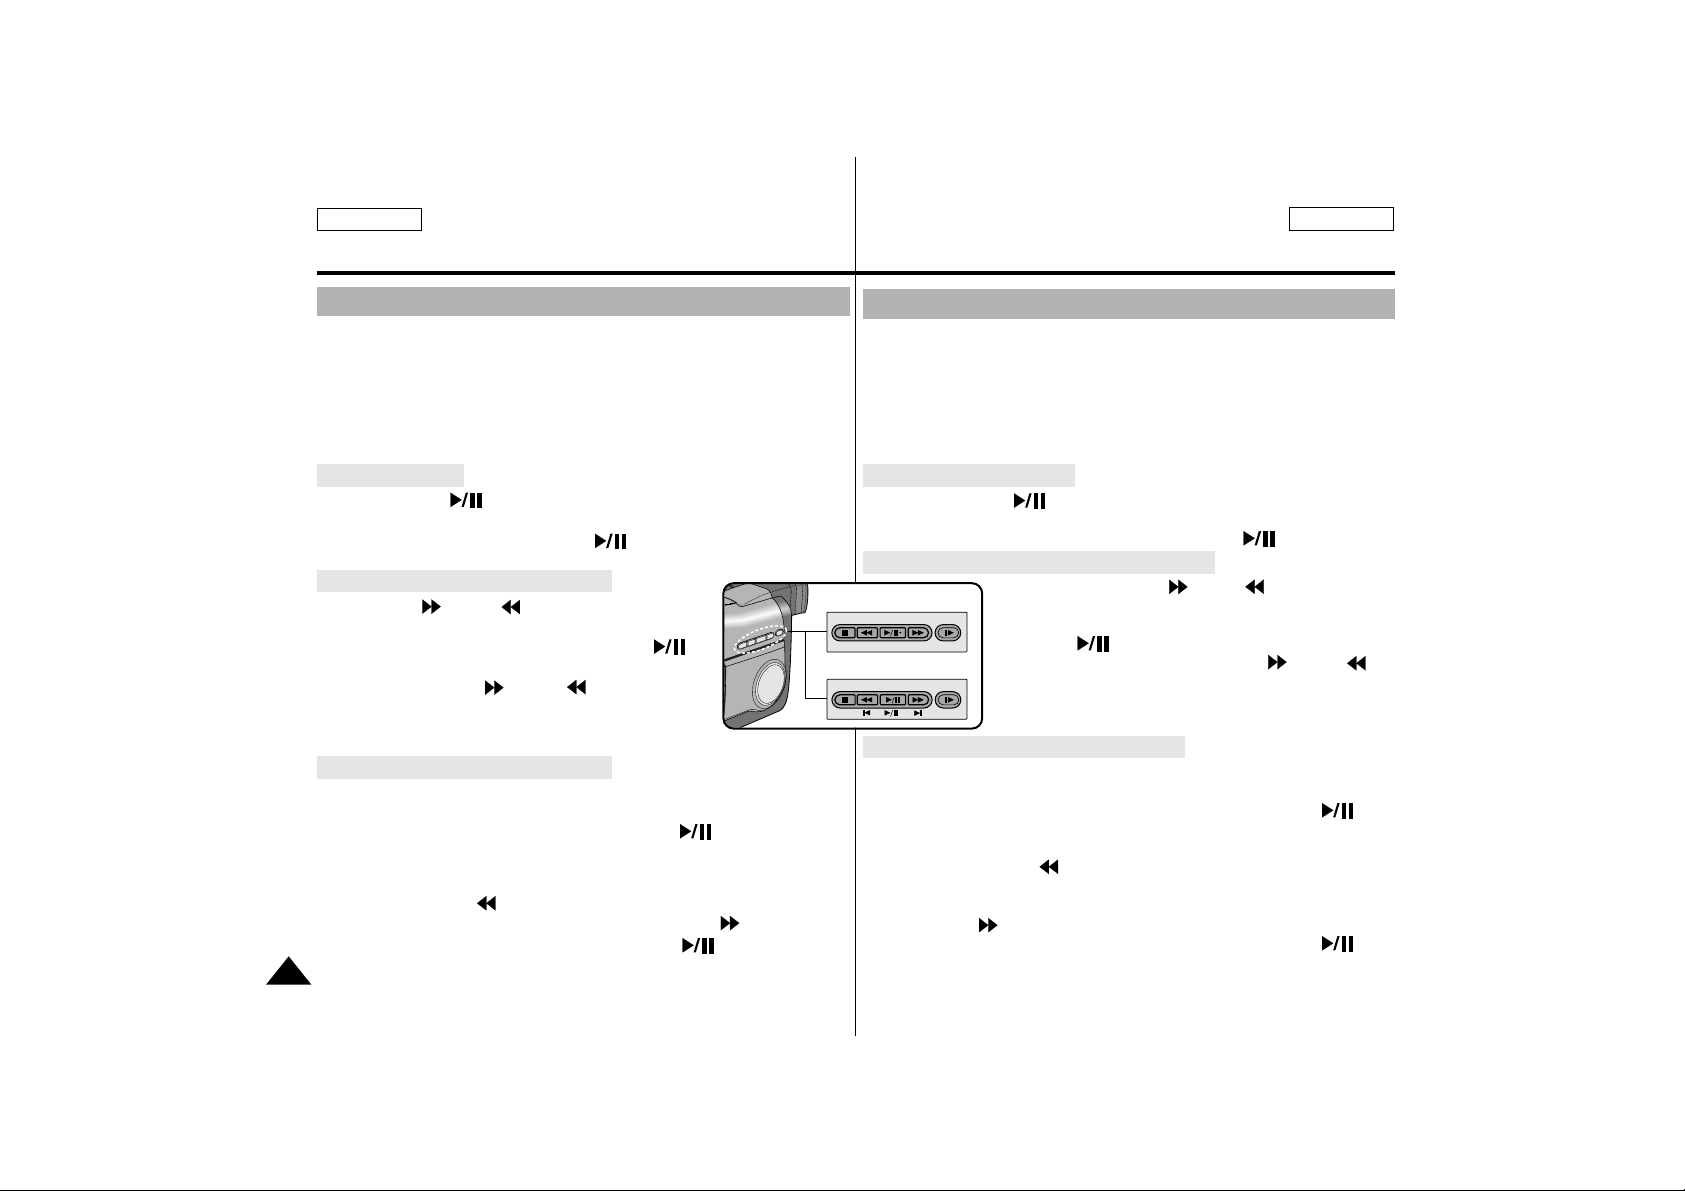
66
Playing back a tape Reproducción de una cinta
ENGLISH ESPAÑOL
Various Functions in PLAYER mode
✤ The PLAY/STILL, STOP, FF, REW, SLOW buttons are located on the
camcorder and the Remote Control.
✤ The F.ADV(Frame advance), X2 buttons are located on the Remote
Control only.
✤ To prevent tape and head-drum wear, your camcorder will automatical-
ly stop if it is left for more than 3 minutes in STILL or SLOW mode.
Playback pause
✤ Press the (PLAY/STILL) button during Playback or Slow
playback
✤ To resume playback, press the (PLAY/STILL) button.
Picture search (Forward/Reverse)
✤ Press (FF) or (REW) buttons once
during Playback or Still mode.
To resume normal playback, press the
(PLAY/STILL) button.
✤ Keep pressing (FF) or (REW) buttons
during Playback or Still mode.
To resume normal playback, release the button.
Slow playback (Forward/Reverse)
✤ Forward Slow Playback
■
Press the SLOW button during Playback.
■
To resume normal playback, press the (PLAY/STILL)
button.
✤ Reverse slow playback
■
Press the (REW) button during Forward Slow Playback.
■
To resume forward slow playback, press the (FF) button.
■
To resume normal playback, press the (PLAY/STILL)
button.
STOP REW
PLAY/STILL
FF SLOW
BLC EDIT— FADE EDIT+ MF/AF
DELETE
BLC EDIT— FADE EDIT+ MF/AF
Diversas funciones en modo PLAYER
✤ Los botones PLAY/STILL, STOP, FF, REW, SLOW están situados en
la videocámara y en el mando a distancia.
✤ Los botones F.ADV(avance) y X2 sólo se encuentran en el mando
a distancia.
✤ Para evitar que se gasten la cinta y el tambor del cabezal, la videocá-
mara se detendrá automáticamente si se deja más de 3 minutos en
los modos STILL o SLOW.
Pausa en la reproducción
✤ Pulse la tecla (PLAY/STILL) durante la reproducción en
Playback o Slow.
✤ Para reanudar la reproducción, pulse la tecla (PLAY/STILL).
Búsqueda de imágenes (Avance/Retroceso)
✤ Pulse los botones (FF) o (REW) una vez
en los modos Playback o Still.
Para reanudar la reproducción normal, pulse la
tecla (PLAY/STILL).
✤ Continúe pulsando los botones (FF) o
(REW) en los modos Playback o Still.
Para reanudar la reproducción normal, suelte la
tecla.
Reproducción lenta (Avance/Retroceso)
✤ Reproducción lenta hacia adelante
■
Pulse la tecla SLOW durante la reproducción.
■
Para reanudar la reproducción normal, pulse la tecla
(PLAY/STILL).
✤ Reproducción lenta hacia atrás
■
Pulse la tecla (REW) durante la Reproducción lenta hacia
adelante.
■
Para reanudar la reproducción lenta hacia adelante, pulse la
tecla (FF).
■
Para reanudar la reproducción normal, pulse la tecla
(PLAY/STILL).
*SCD73
*SCD75/D77
Page 67
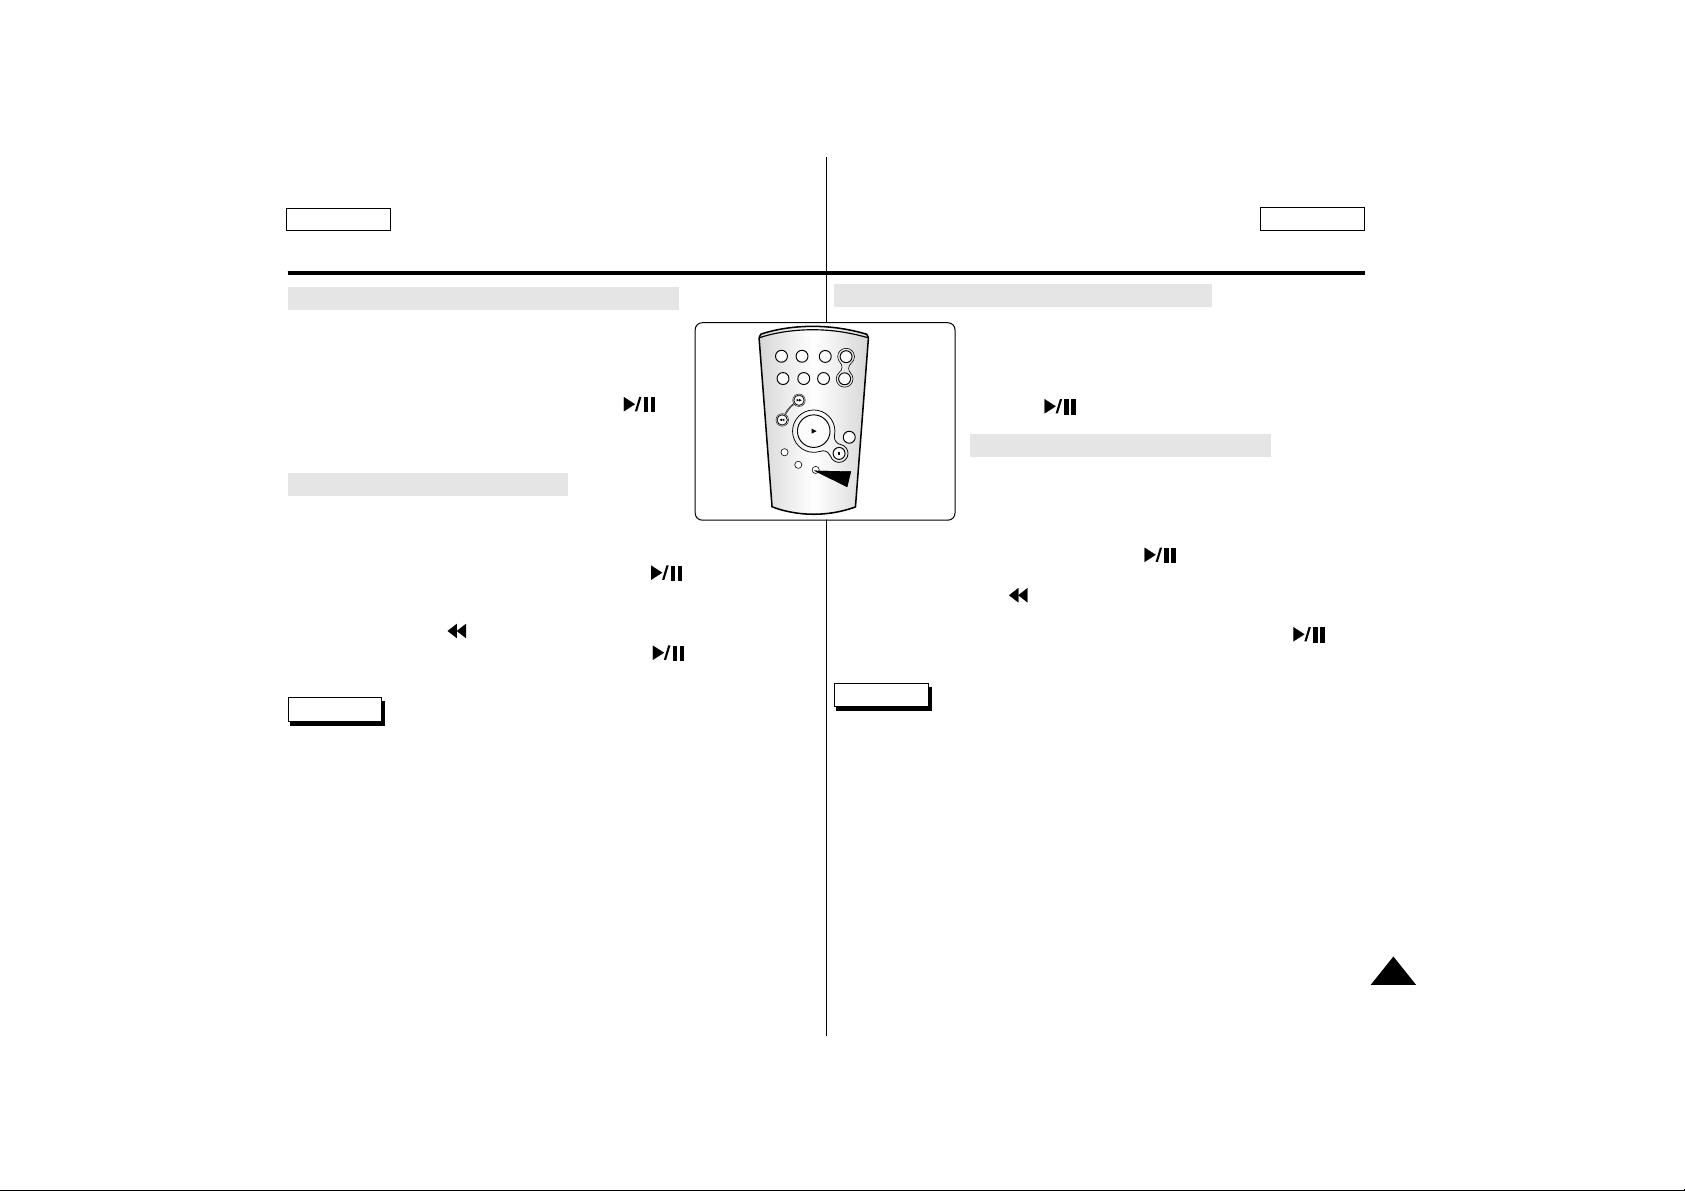
67
Playing back a tape Reproducción de una cinta
ENGLISH ESPAÑOL
Frame advance (To playback frame by frame)
✤
Press the F.ADV button on the Remote
Control in Still mode.
The F.ADV function function works in still
mode only.
✤
To resume normal playback, press the
(PLAY/STILL) button.
X2 Playback (Forward/Reverse )
✤
Forward X2 Playback
■
Press the X2 button on the Remote
Control during Playback.
■
To resume normal playback, press the (PLAY/STILL)
button.
✤
Reverse X2 Playback
■
Press the (REW) button during Forward X2 Playback
■
To resume normal playback, press the (PLAY/STILL)
button.
Reference
■
Mosaic shaped noise appears on the screen during some of various
playback modes.
– Mosaic shaped noise can be experienced when you playback tapes
recorded in LP containing various playback functions.
■
There is no sound when using some playback functions.
START/
STOP
SELF
TIMER
X2
SLOW
F.ADV
A.DUB
ZERO
MEMORY
WIDE
TELE
STILL
PHOTO DISPLAY
F.ADV
Avance de trama (Reproducción trama a trama)
✤
Pulse la tecla F.ADV del mando a distancia
en modo Still.
La función F.ADV sólo funciona en modo STILL.
✤
Para reanudar la reproducción normal, pulse el
botón (PLAY/STILL).
Reproducción X2 (Avance/Retroceso)
✤
Reproducción X2 hacia adelante
■
Pulse la tecla X2 del mando a distancia
durante la reproducción.
■
Para reanudar la reproducción normal,
pulse la tecla (PLAY/STILL).
✤
Reproducción X2 hacia atrás
■
Pulse la tecla (REW) durante la Reproducción X2 hacia
adelante.
■
Para reanudar la reproducción normal, pulse la tecla
(PLAY/STILL).
Notas
■
Aparece un ruido en forma de mosaico en la pantalla durante varios
modos de reproducción.
– El ruido en forma de mosaico puede aparecer al reproducir cintas
filmadas en LP que contienen varias funciones de reproducción.
■
No hay sonido cuando se utilizan algunas funciones de reproducción.
Page 68
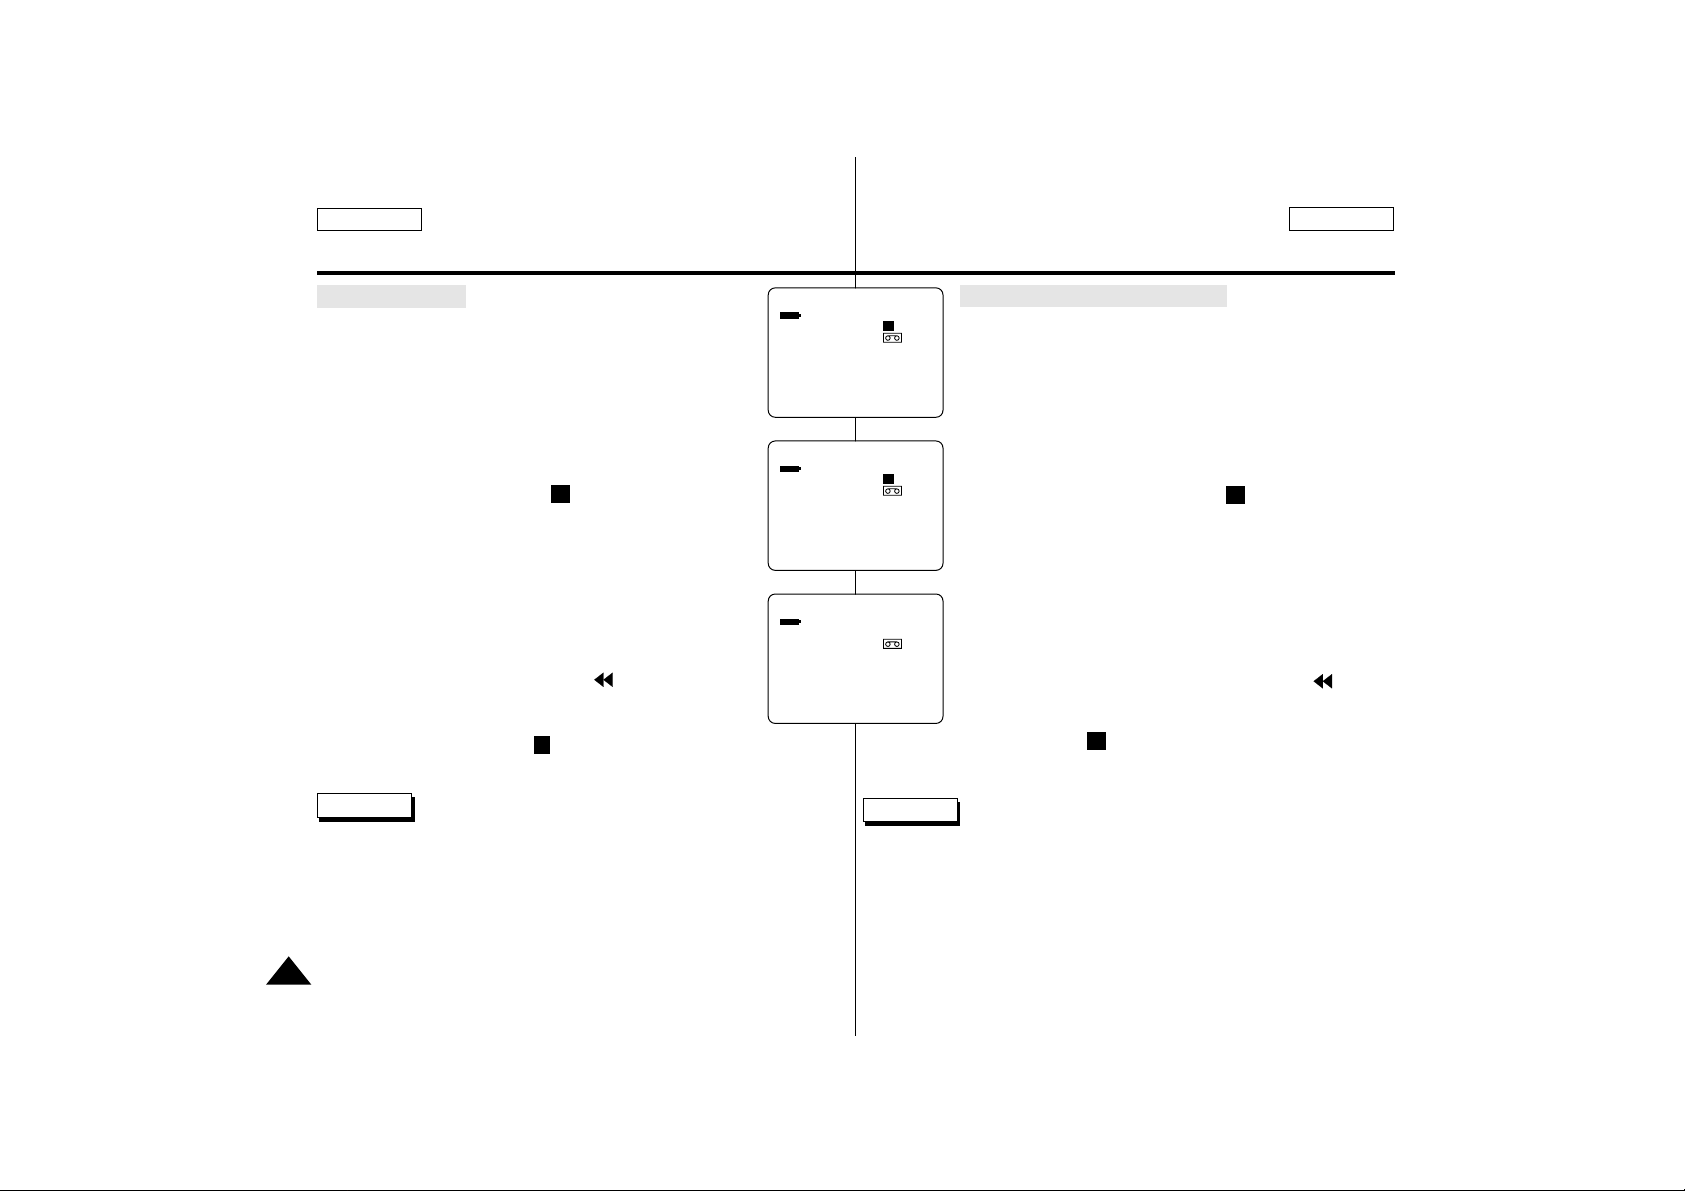
68
Playing back a tape
ZERO MEMORY
✤
The MEMORY function works in both CAMERA and
PLAYER modes.
✤
You can mark a point on a tape that you want to
return to following playback.
1. Press the ZERO MEMORY button on the remote control
during playback or recording at the point you want to
return to later.
■
The time code is changed to a tape counter that is set
to zero memory with the M (Zero memory indicator)
■
If you want to cancel the zero memory function,
press the ZERO MEMORY button again.
2. Find the zero position.
■
When you have finished playback, fast forward or
rewind the tape.
– The tape stops automatically when it reaches the
zero position.
■
When you have finished recording, turn the power
switch PLAYER and press the (REW) button.
– The tape stops automatically when it reaches the
zero position.
3. The tape counter with the M (Zero memory indicator) disappears from
the display and the tape counter is changed to time code.
Reference
■
In the following situations, the ZERO MEMORY mode may be canceled
automatically
– At the end of the section marked with the ZERO MEMORY function.
– When the tape is ejected.
– When you remove the battery pack or power supply.
■
The zero mem may not function correctly where there is a break
between recordings on the tape.
■
The ZERO MEMORY will not operate in DV IN mode.
SP STOP
M 0:20:00
33MIN
SP REW
M 0:10:00
43MIN
SP STOP
0:10:00:00
53MIN
Reproducción de una cinta
ENGLISH ESPAÑOL
ZERO MEMORY (Retorno a cero)
✤
La función ZERO MEMORY funciona en los modos
CAMERA y PLAYER.
✤
Puede marcar un punto de la cinta al que desea
volver después de la reproducción.
1. Pulse la tecla ZERO MEMORY del mando a distancia
durante la reproducción o filmación en el punto al
que desea volver luego.
■
El código de tiempo se cambia por un contador de
cinta que se fija en cero con (Indicador de
memoria a cero).
■
Si desea cancelar la función de memoria a cero,
pulse de nuevo la tecla ZERO MEMORY.
2. Busque la posición cero.
■
Cuando termine la reproducción, avance rápidamente la cinta o rebobínela.
– La cinta se detiene automáticamente cuando
llega a la posición cero.
■
Al terminar la filmación, ponga el interruptor de
alimentación en PLAYER y pulse la tecla (REW).
– La cinta se detiene automáticamente cuando
llega a la posición cero.
3. El contador de la cinta con (Indicador de memoria a cero).
desaparece de la pantalla y el contador de la cinta cambia a código
de tiempo.
Notas
■
En las situaciones siguientes, el modo ZERO MEMORY se cancela
automáticamente.
– Al final de la sección marcada con la función ZERO MEMORY.
– Cuando se extrae la cinta.
– Cuando se elimina la batería o la fuente de energía.
■
Es posible que la memoria a cero no funcione correctamente cuando
existen interrupciones entre filmaciones de la cinta.
■
ZERO MEMORY no funcionará en modo DV IN.
M
M
Page 69
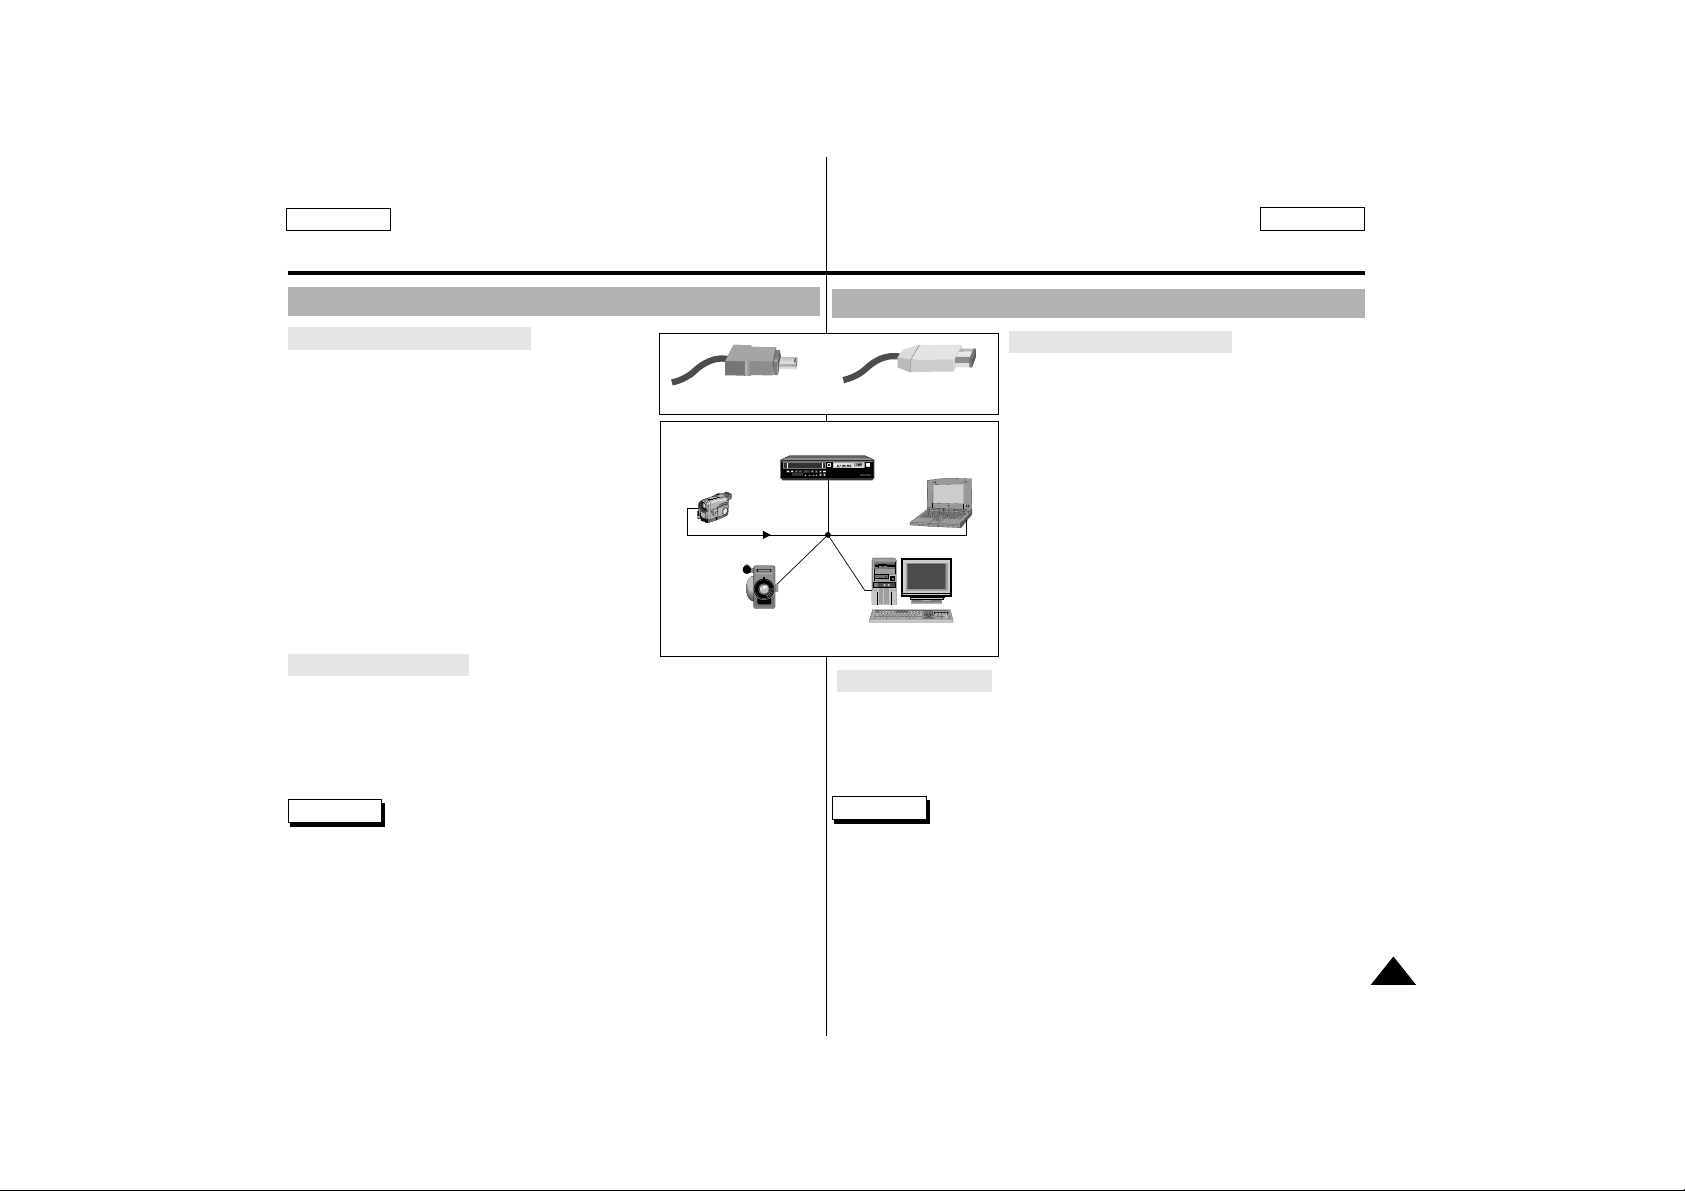
69
Transferring IEEE1394 (i.LINK)-DV standard data connection
Connecting with DV device
✤
Connecting with other DV standard
products.
■
DV standard connecting is quite
simple. If a product has a DV port,
you can transfer data by connecting to
the DV port with the correct cable.
!!! Be careful since there are two types of
DV port. (4pin, 6pin)
this camcorder has a 4pin terminal.
✤
With digital connection, video and audio
signals are transmitted in digital, allowing
high quality images to be transferred.
Connecting to a PC
✤
If you want to transmit data to PC, you must install a IEEE 1394
add-on card in the PC. (not supplied)
✤
The frame rate recorded for video capturing is dependent on the
capability of the PC.
Reference
■
When you transmit data from this camcorder to another DV device,
some functions may not work.
In this case, please reconnect the DV cable or turn the power OFF
and ON again.
4Pin Type
6Pin Type
DV format VCR
Mini DV camcorder
Desk top PC with DV port
Portable PC with
DV port
IEEE 1394 Data Transfer Transferencia de datos IEEE 1394
ENGLISH ESPAÑOL
Conexión de transferencia de datos estándar IEEE1394 (i.LINK)-DV
Conexión al dispositivo DV
✤
Conexión con otros productos DV estándar.
■
La conexión estándar DV es bastante
sencilla.
Si un producto dispone de un puerto DV,
puede transferir datos mediante un
conex- ión al puerto DV con el cable correcto.
!!! Tenga cuidado ya que existen dos tipos
de puerto DV. (de 4 patillas y de 6 patillas)
Esta videocámara dispone de un terminal
de 4 patillas.
✤
Con una conexión digital, las señales de
vídeo y de audio se transmiten digitalmente,
lo que permite transferir imágenes de alta
calidad.
Conexión a un PC
✤
Si desea transmitir datos a un PC, debe instalar una tarjeta
adicional IEEE 1394 en el PC. (No se suministra)
✤
La velocidad de trama registrada para la captura de vídeo
depende de las posibilidades del PC.
Notas
■
Cuando transmita datos desde esta videocámara a otro dispositivo
DV, puede que algunas funciones no vayan bien.
En este caso, vuelva a conectar el cable DV o ponga el interruptor
de encendido en OFF y otra vez en ON.
Page 70
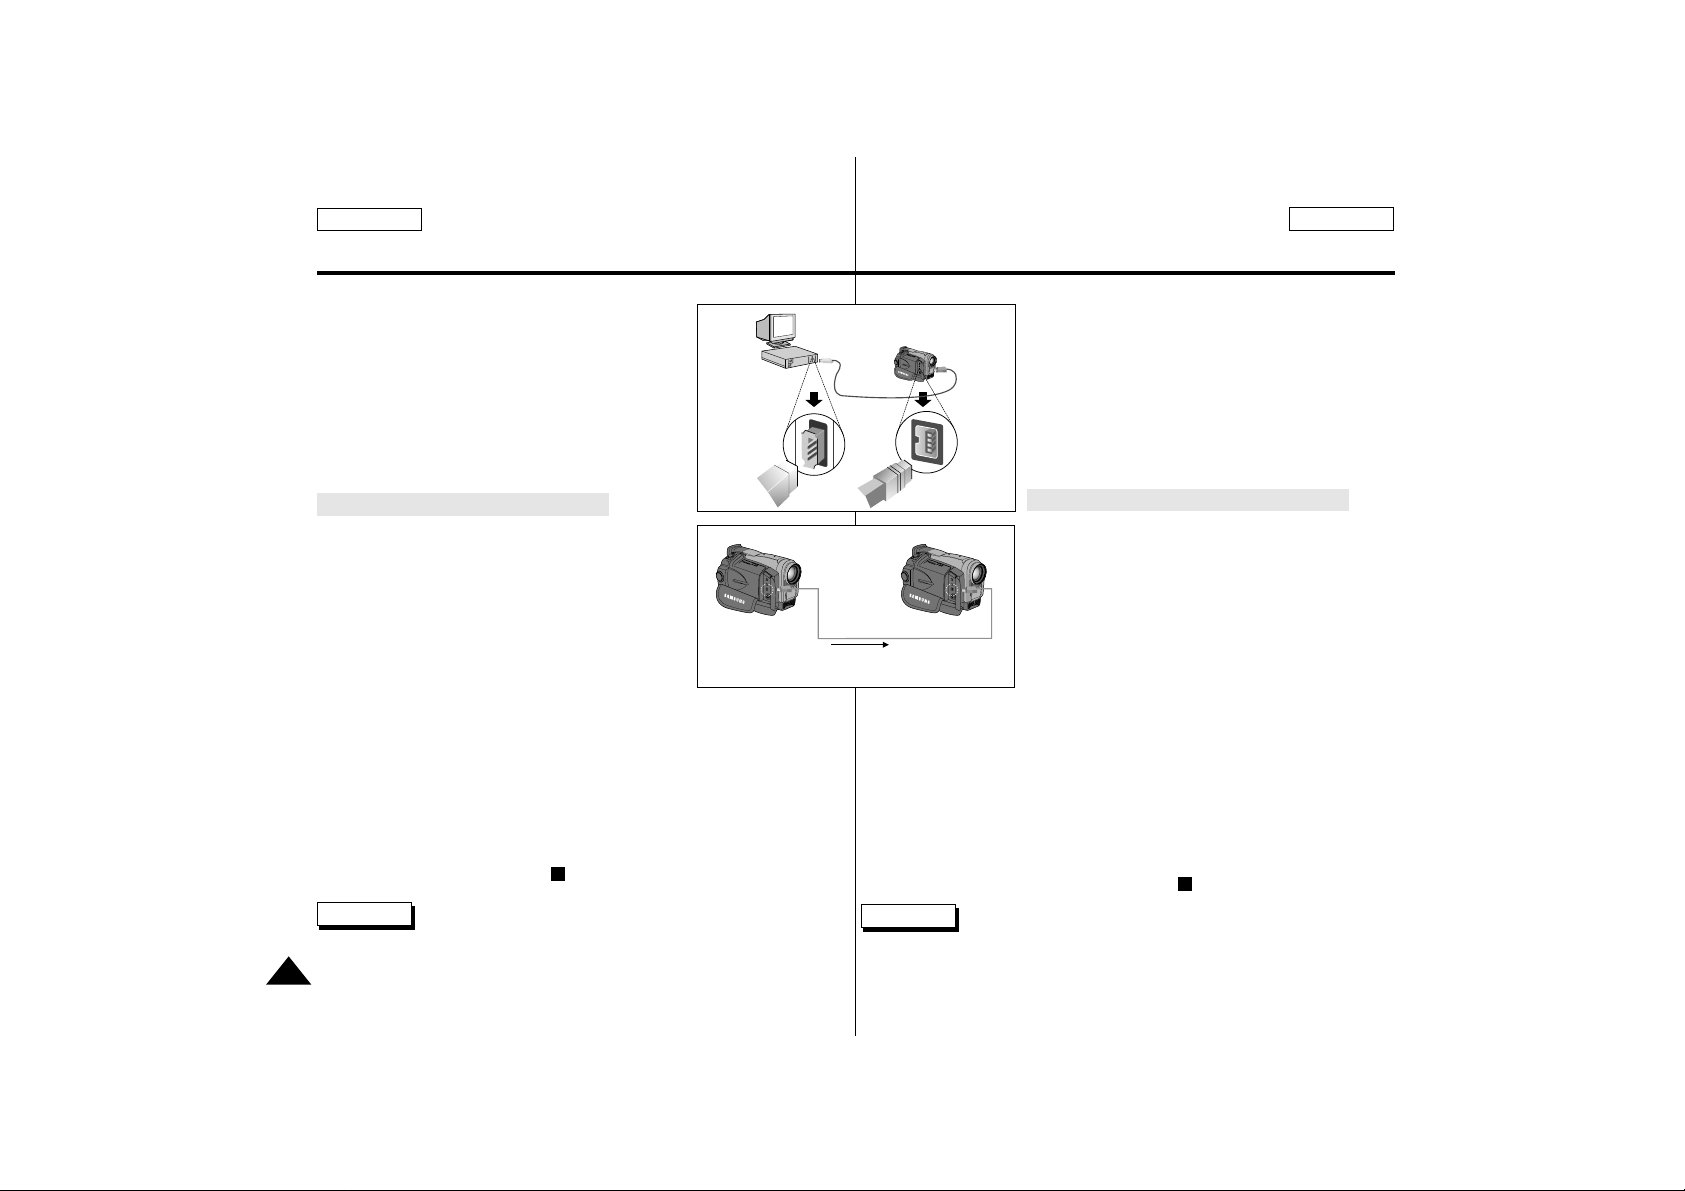
70
IEEE 1394 Data Transfer Transferencia de datos IEEE 1394
ENGLISH ESPAÑOL
●
System requirement
■
CPU: faster Intel®Pentium III™ 450Mhz
compatible
■
Operating system: Windows®98SE, ME,
Mac OS
■
Main memory: more than 64 MB RAM
■
IEEE1394 add-on card or built in IEEE1394
card
Recording with DV connecting cable
1. Set the power switch to PLAYER mode.
2. Connect the DV cable (not supplied) to the
DV IN/OUT port of camcorder and to the
DV IN/OUT port of the other DV device.
■
Make sure DV IN appears on the screen.
3. Press the START/STOP button to enter the
REC PAUSE mode.
■
PAUSE is displayed in the OSD.
4. Start playback on the other DV device while you monitor the picture.
5. Press the START/STOP button to start recording.
■
If you want to pause recording for a while, press the START/STOP
button again.
6. To stop recording, press the (STOP) button.
Reference When using this camcorder as a recorder,
the pictures on a monitor may be uneven,
however recorded pictures are not affected.
DV port linking diagram
(Not Supplied)IN/OUT
●
Requisitos del sistema
■
CPU: Intel® Pentium IIITMa 450 Mhz o más
rápido
■
Sistema operativo: Windows®98SE, ME,
XP, Mac OS
■
Memoria principal: más de 64 Mb de RAM
■
Tarjeta adicional IEEE1394 o tarjeta IEEE1394
incorporada
Filmación con un cable de conexión DV
1. Ponga el interruptor de encendido en la
posición PLAYER.
2. Conecte el cable DV (no se suministra) al
puerto DV IN/OUT de la videocámara y al
puerto DV IN/OUT del otro dispositivo DV.
■
Asegúrese que aparece el indicador DV IN
en la pantalla.
3. Pulse la tecla START/STOP para iniciar el
modo REC PAUSE.
■
Aparece la indicación PAUSE en la pantalla
OSD.
4. Empiece la reproducción en el otro dispositivo DV mientras supervisa
las imágenes.
5. Pulse la tecla START/STOP para empezar a filmar.
■
Si desea hacer una pausa en la filmación, pulse la tecla
START/STOP de nuevo.
6. Para detener la filmación, pulse la tecla (STOP).
Notas Cuando se utiliza esta videocámara para filmar, las
imágenes de un monitor pueden ser desiguales, sin
embargo las imágenes filmadas no se ven afectadas.
(Not Supplied)
6Pin 4Pin
Page 71
71
USB interface Interfaz USB
ENGLISH ESPAÑOL
Transferring Digital Image by USB Connection
✤ You can easily transfer the still image from the camera, tape, memory
or Smart Media Card to PC without other optional add-on cards via
USB connection.
✤ You can transfer the image to PC via USB connection.
✤ If you transfer data to PC, you must install the software (Driver, Editing
software) supplied with the camcorder.
System Requirement
■
CPU: Intel®Pentium II™ processor
compatible or better
■
Operating system: Windows®98/98SE/ME/2000
■
RAM: 32 MB or more
■
CD-ROM: 4x CD-ROM drive
■
VIDEO: 65,000-color or better video display card
■
Available USB port
Reference
■
Intel®Pentium II™ is trademark of Intel Corporation.
■
Windows®is registered trademark of Microsoft Corporation.
■
All other brands and names are property of their respective owners.
Transferencia de imágenes digitales mediante conexión USB
✤ Con la conexión USB, es fácil transferir las imágenes fijas de una
cámara, cinta, memoria o tarjeta Smart Media al PC sin adiciones
opcionales.
✤ Puede transferir imágenes al PC mediante una conexión USB.
✤ Si transfiere datos a un PC, debe instalar el software (de controlador y
edición) que se suministra con la videocámara.
Requisitos del sistema
■
CPU: Procesador compatible Intel®Pentium II™
o superior
■
Sistema operativo: Windows® 98/98SE/ME/2000
■
RAM: 32 Mb o más
■
CD-ROM: Unidad de CD-ROM 4x
■
VÍDEO: Tarjeta de pantalla de vídeo de 65.000
o superior
■
Puerto USB disponible
Notas
■
Intel®Pentium II™ es una marca comercial de Intel Corporation.
■
Windows®es una marca comercial registrada de Microsoft Corporation.
■
Las demás marcas y nombres pertenecen a sus propietarios correspondientes.
Page 72
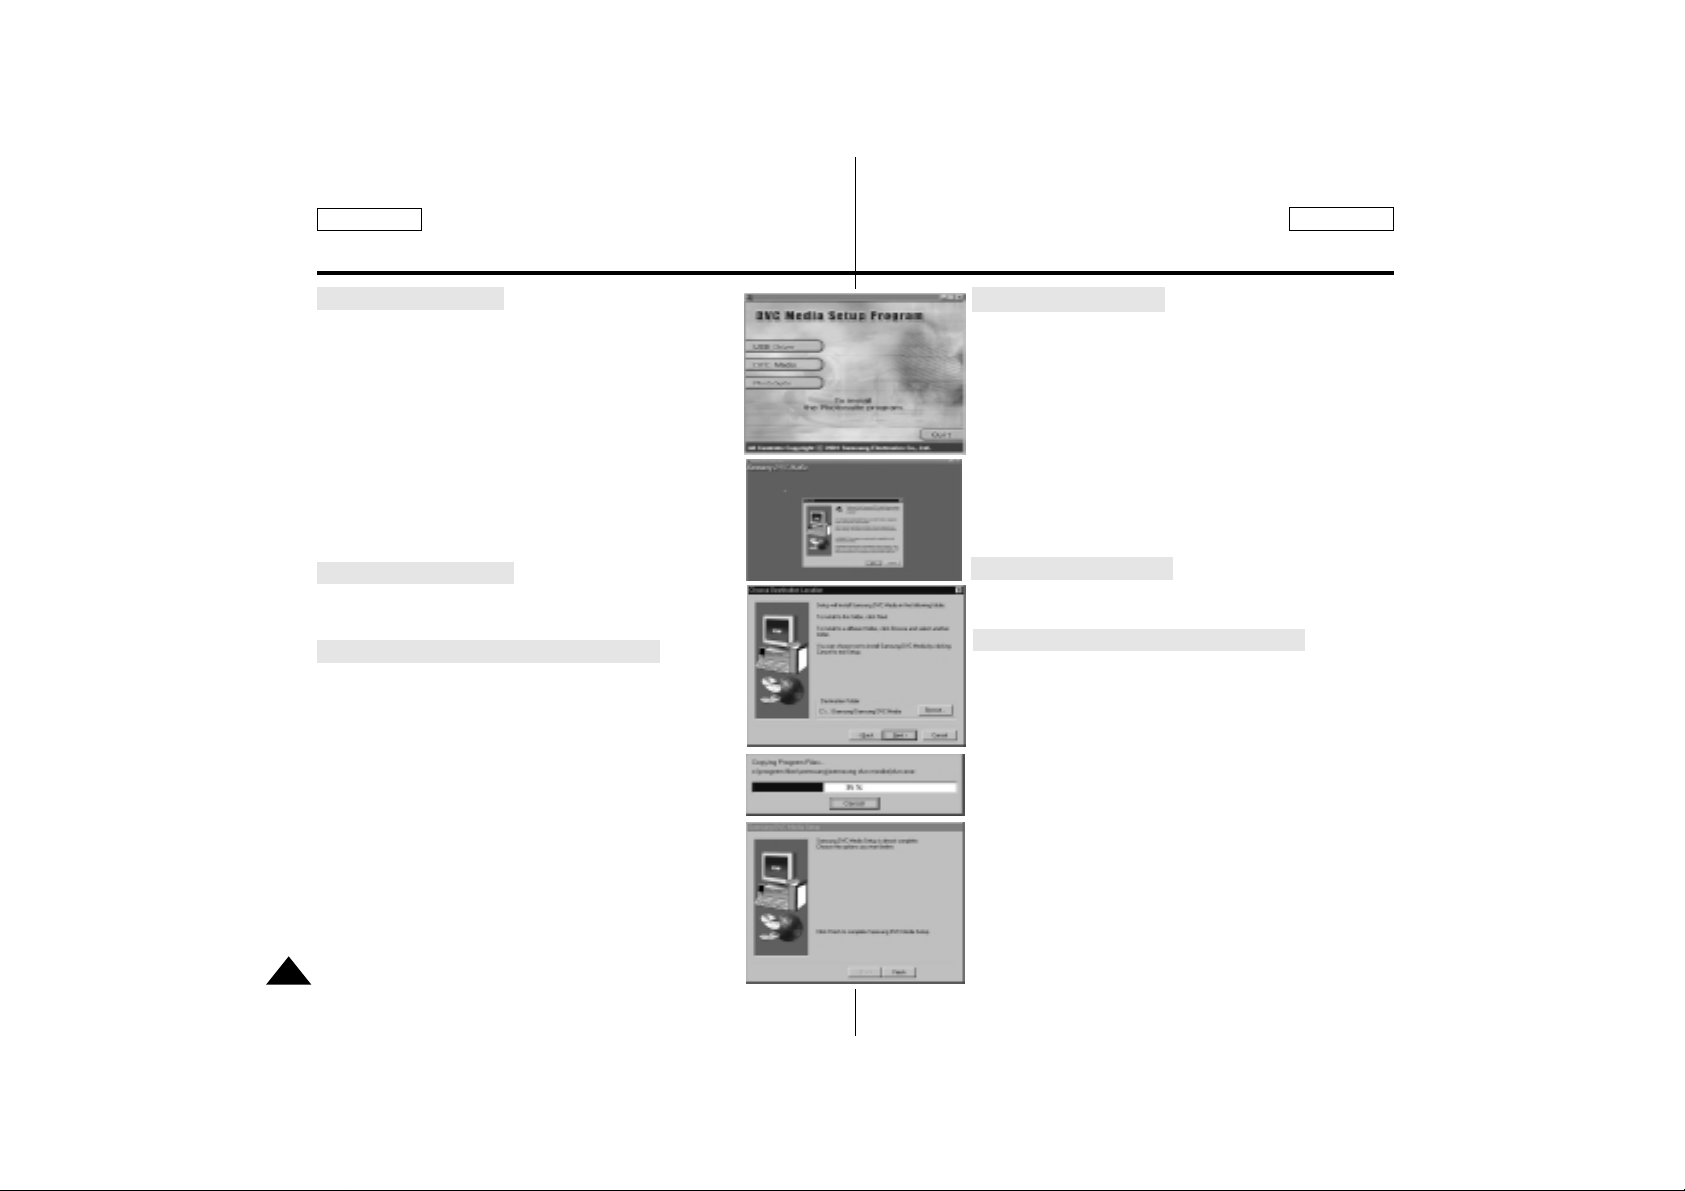
ENGLISH ESPAÑOL
72
USB interface Interfaz USB
Program installation
1. Insert the software CD into CD-ROM drive.
■
Installation selection screen appears in the monitor.
2. If the Installation selection screen does not appear
after inserting CD click “Run” on the Windows “Start”
menu and execute SETUP.EXE file to begin installation.
■
When CD-ROM drive is set to “D:” drive: type
“D:\setup.exe” and press Enter.
3. Click a button to install the selected software.
■
USB Driver
■
USB Software
■
Photo Editing Software
Install the USB Driver
4. When you see the Start window, click “USB Driver”
to continue installation.
Install the USB Software (DVC mediaTM)
4. When you see the Start window, click “DVC mediaTM”
to continue installation.
5. Select a language and click “OK”.
6. When the dialogue box appears, click the “NEXT”
button.
7. Choose the Destination Folder:
■
To install to default folder, click “NEXT”
■
To install to different folder, click “ Browse” and
select another folder.
8. Click the “NEXT” button.
9. Files are copied to selected folder.
10.When the next dialogue box appears, select “Yes,
I want to restart my computer now” and click Finish to
restart your PC.
1.
6.
7.
9.
10.
Instalación Programa
1 . Insertar el CD en la unidad CD-ROM de su PC.
■
La pantalla de instalación aparecerá.
2. Si la pantalla de instalación no apareciera use el menú
“ejecutar” del menú "inicio" de Windows y ejecute
SETUP.EXE para empezar la instalación.
■
Cuando el CD-ROM es “D:” escriba:
“D:\setup.exe” y presione Enter.
3. Seleccione el menú que quiere instalar.
■
USB Driver
■
USB Software
■
Photo Editing Software
Instalación USB Driver
4. En la pantalla de Start, pulsar “USB Driver” para
continuar la instalación.
Instalación USB Software (DVC media™)
4. En la pantalla de Start, pulsa “DVC media™” para
continuar la instalación.
5. Seleccionar el lenguaje y pulsar “OK”.
6. Cuando el cuadro de dialogo aparece pulsar “NEXT”.
7. Escoger carpeta de destino:
■
Para instalar en la carpeta por defecto, pulsar
“NEXT”.
■
Para instalar en una carpeta distinta, pulsar “ Browse”
y seleccionar otra carpeta.
8. Pulsar “NEXT”.
9. Los ficheros se copiarán en el destino seleccionado.
10.En el siguiente cuadro aparece, seleccionar “Yes,
I want to restart my computer now” y pulsar "Finish"
para reiniciar el PC.
Page 73
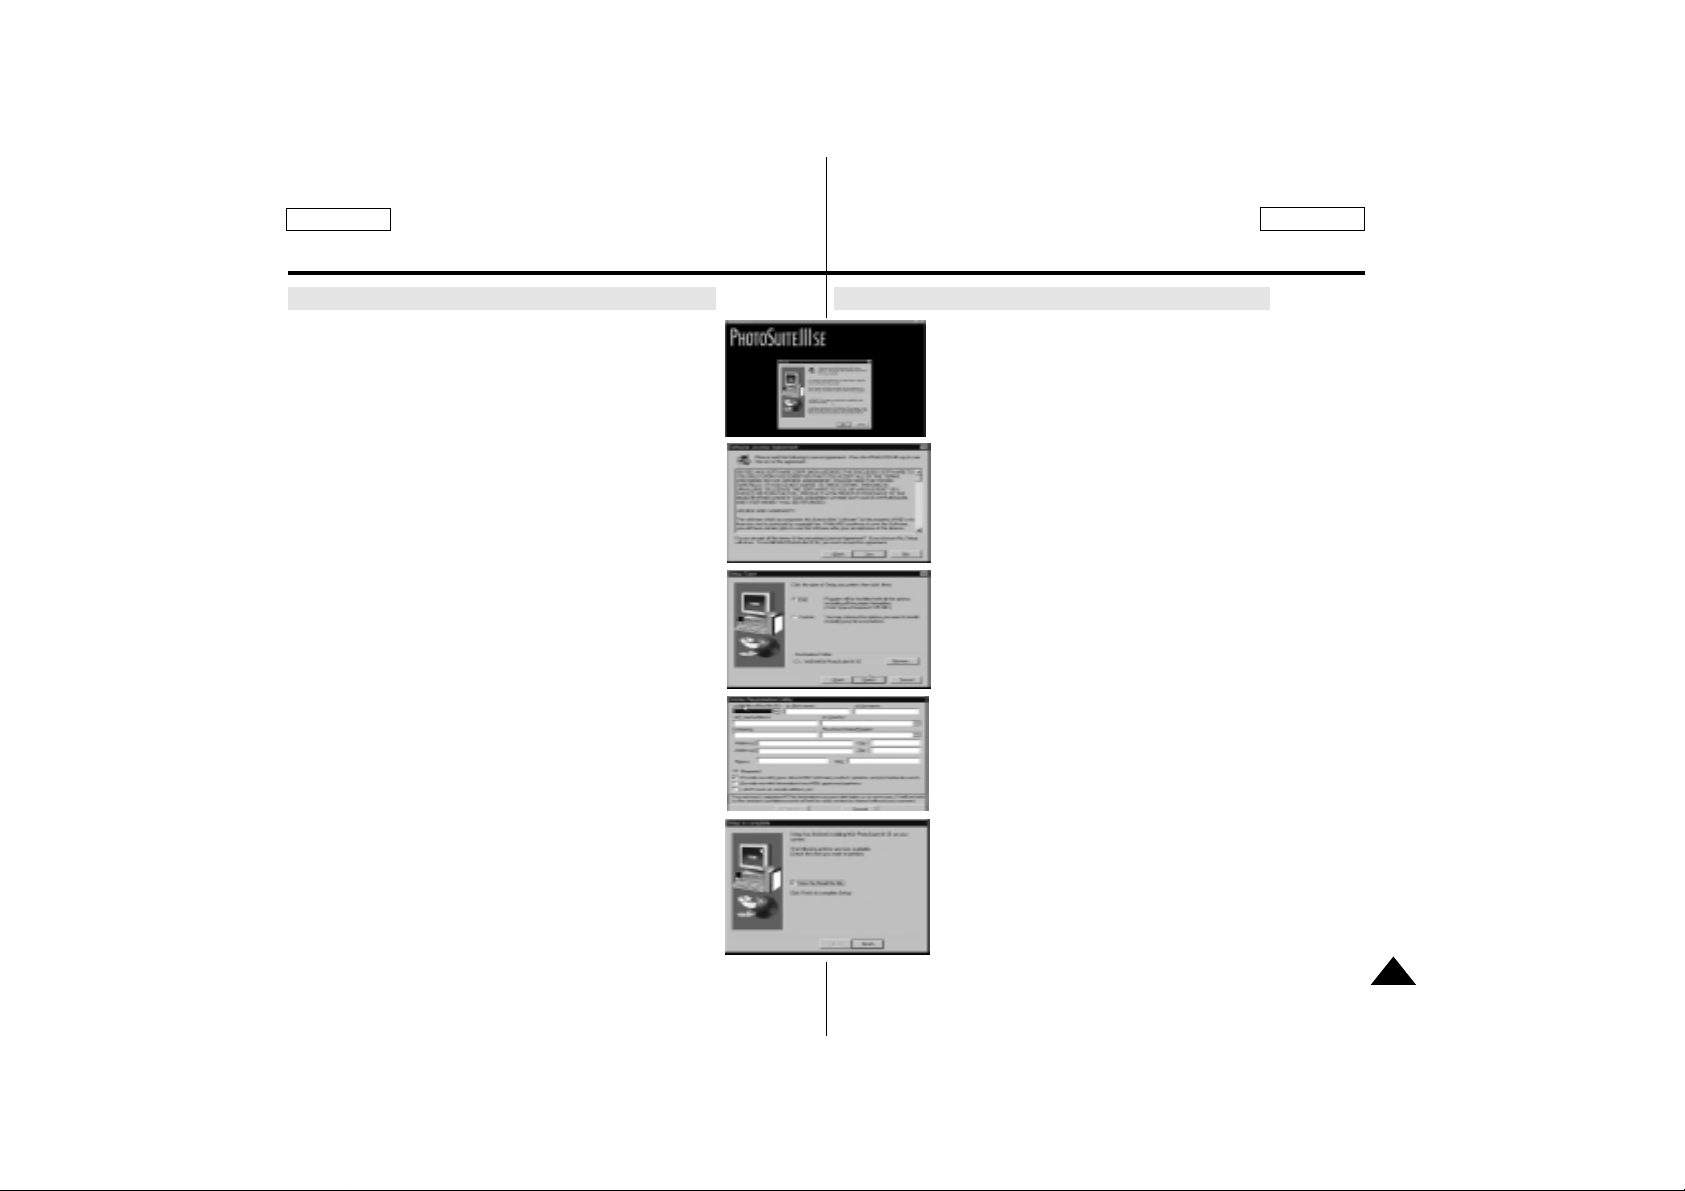
ENGLISH ESPAÑOL
73
Interfaz USB
USB interface
Install the Photo editing Software (Photo SuiteTM)
4. Repeat steps 1~3.
5. When you see the Start window, click “Photo Suite
TM
”
to continue installation.
6. Select a language and click “OK”.
7. When the dialogue box appears, click the “NEXT”
button.
8. When the License Agreement window appears,
click the “YES” button.
9. Choose the Destination Folder:
■
To install to default folder, click “NEXT”
■
To install to different folder, click “Browse” and
select another folder.
10.Click the “NEXT" button.
11.Files are copied to selected folder.
12.When the registration window appears,
click the “Continue” button.
13.Fill out blanks and click the “Register” button.
■
If you want to register later, click the “Cancel”
button.
14.When the next dialogue box appears, click
the “Finish” button.
Instalar el Photo editing Software (Photo suite™)
4. Repetir pasos 1~3.
5. Pulsar “Photo Suite™” para continuar la instalacion.
6. Seleccionar lenguaje y pulsar “OK”.
7. Cuando el cuadro de dialogo aparece, pulsar “NEXT”.
8. Cuando la ventana "License Agreement" aparece,
pulsar “YES” .
9. Escoja carpeta de destino:
■
Para instalar en la carpeta por defecto, pulsar
“NEXT”.
■
Para instalar en una carpeta distinta, pulsar
"Browse" y seleccionar otra carpeta.
10.Pulsar “NEXT".
11.Los ficheros se copiar n en el destino seleccionado.
12.Cuando la ventana de registro aparece, pulsar
“Continue”.
13.Rellene los campos y pulse register.
■
Para registrarse más tarde pulse “Cancel”.
14.En el siguiente cuadro de dialogo pulse “Finish” .
7.
8.
9.
13.
14.
Page 74
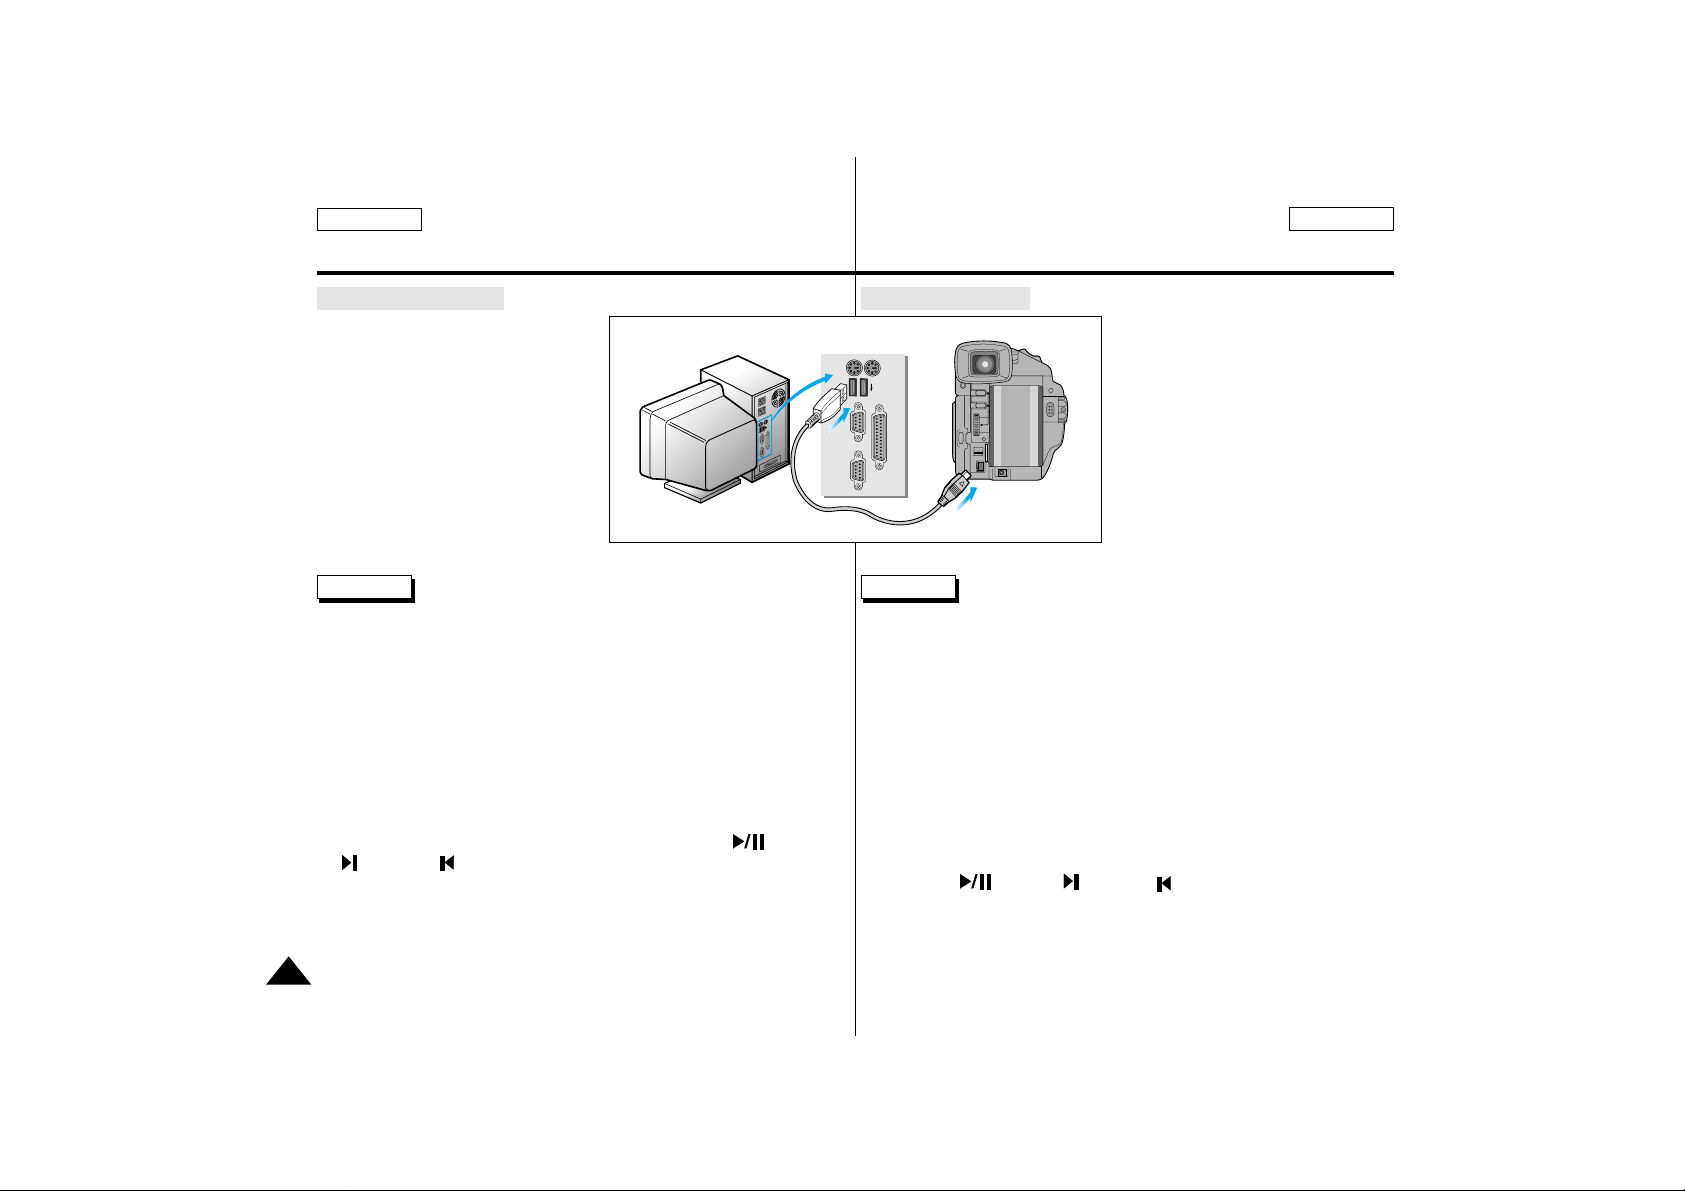
74
USB interface
Interfaz USB
ENGLISH ESPAÑOL
Connection with PC
1. Connect USB cable into USB
connector on the PC.
2. Connect USB cable into the proper
terminal of camcorder. (USB jack)
Reference
■
If you disconnect the USB cable from PC or camcorder during
transferring, the data transmission may stop and it could cause to
damage data.
■
If you connect the USB cable to PC via USB HUB or connect the USB
cable with other USB devices simultaneously, The camcorder may not
work properly.
– In this case, remove other USB devices from the PC and
reconnect the camcorder.
■
If the PC trys to find driver files after program installation, identify the
path (folder) as following
– D:\Driver (When CD-ROM is set to “D:”)
■
If the USB cable is connected to camcorder, DELETE, (SLIDE),
(MEM.+), (MEM._) buttons are not available in the DSCPLAYER mode and the START/STOP button is not available in DSCCAMERA mode.
■
If you connect the IEEE1394(DV) and USB at the same time, the USB
may not operate normally function.
Conexión a un PC
1. Conecte el cable USB en el
conector USB del panel posterior
del PC.
2. Conecte el cable USB en el
terminal adecuado de la vídeocá-
mara (conexión USB).
Notas
■
Si desconecta el cable USB del PC o de la videocámara durante la
transferencia, puede detenerse la transmisión de datos y podría dañar
los datos.
■
Si conecta el cable USB al PC mediante un concentrador USB o si
conecta el cable USB a otros dispositivos USB simultáneamente, es
posible que la videocámara no funcione correctamente.
– En este caso, desconecte los otros dispositivos USB del PC y
vuelva a conectar la videocámara.
■
Si el PC intenta encontrar los archivos de controlador después de la
instalación del programa, identifique la ruta (carpeta) de la manera
siguiente.
– D:\Driver (cuando el CD-ROM esté configurado en “D:”)
■
Si se ha conectado el cable USB a otra cámara de vídeo, los botones,
DELETE, (SLIDE), (MEM.+), (MEM.-) no se encuentran
disponibles en el modo DSC-PLAYER y el botón START/STOP no se
encuentra disponible en el modo DSC-CAMERA.
■
Si se conecta IEEE 1394(DV) y USB al mismo tiempo, es posible que
el USB no funcione de manera normal.
Page 75
ENGLISH ESPAÑOL
75
C
D
S
C
Page 76
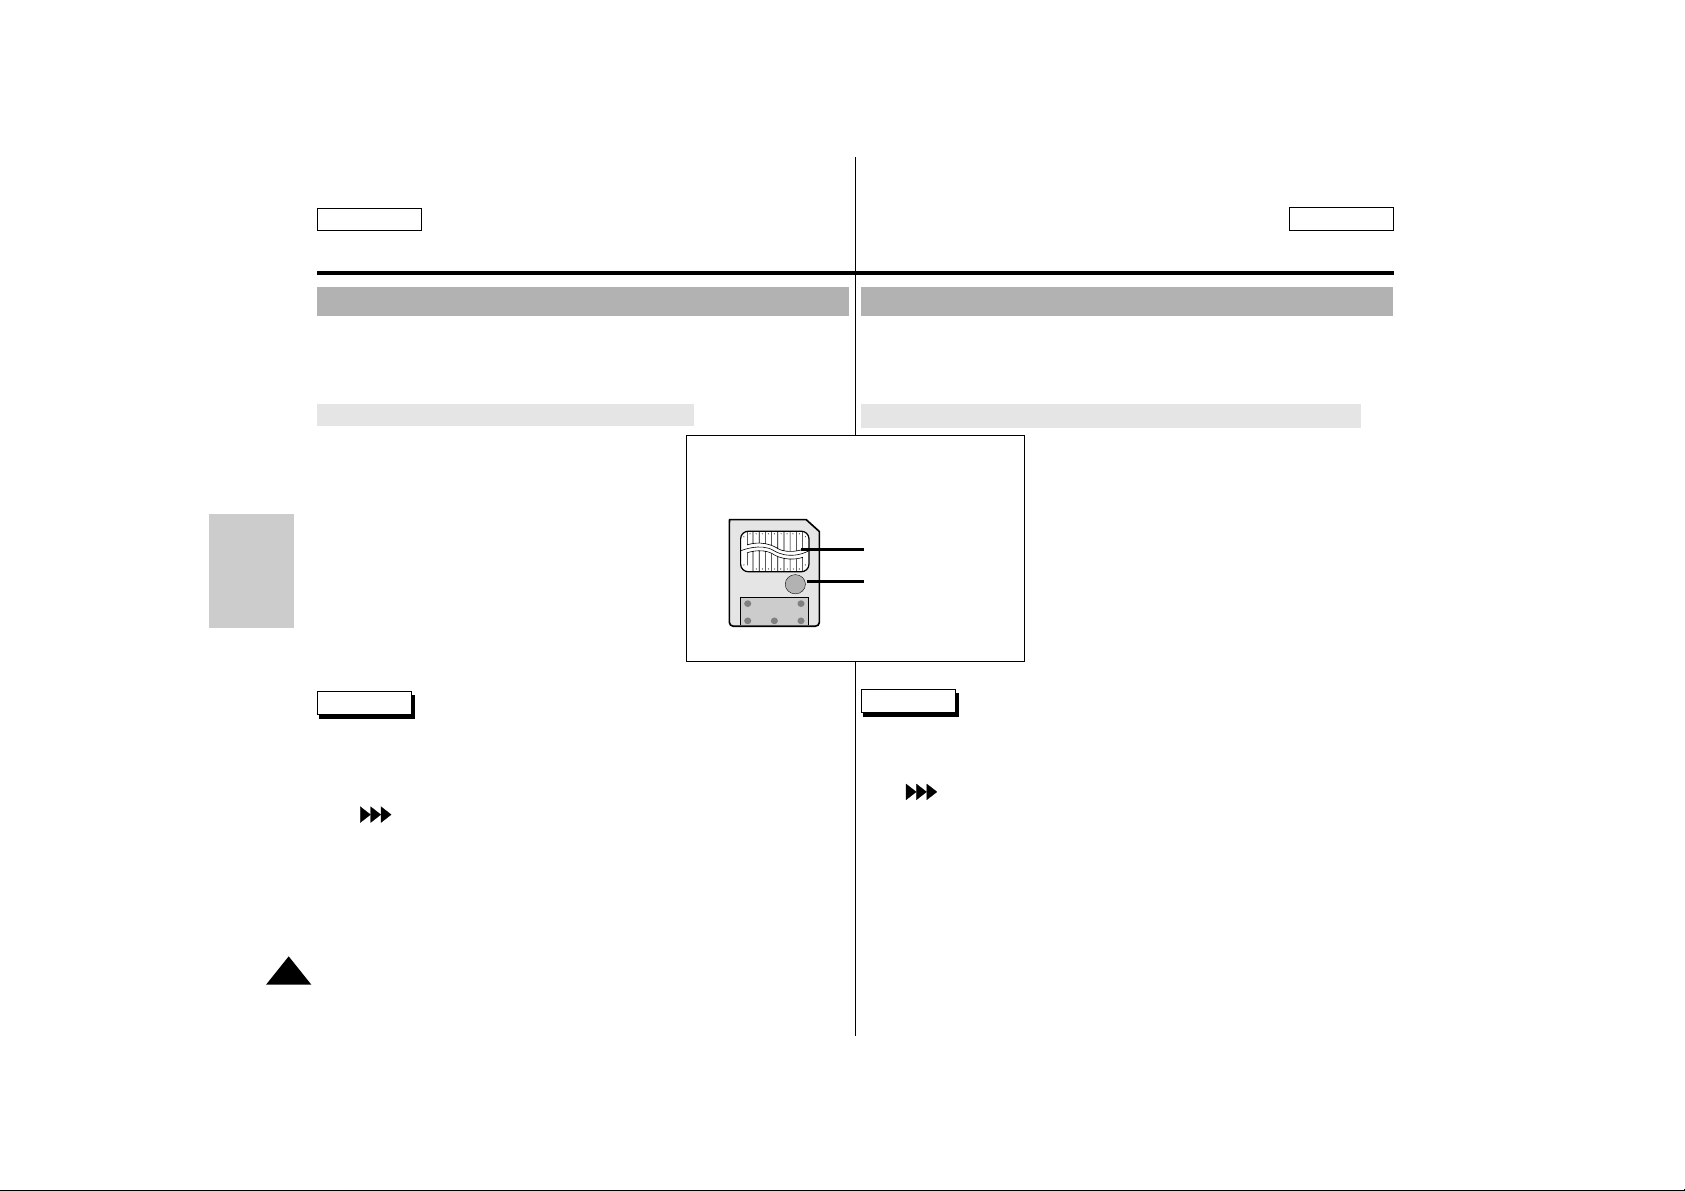
76
Digital Still Camera mode (SCD75/D77 only)
Modo Digital Still Camera (sólo en SCD75/D77)
ENGLISH ESPAÑOL
SmartMediaCard and Built –in Memory
✤
The SmartMediaCard (SMC) or Built-in Memory (4MB) store and
manage still images recorded by camera.
Functions with SMC and Built – In memory
✤
Record still images.
✤
View still images.
■
Single
■
Slide show
✤
Protect images against accidental erasure
✤
Delete images recorded on a card or
memory.
✤
Print mark still images.
✤
Format a card or memory.
✤
Copying still images to a cassette.
Reference
■
You can use most of the camera’s functions when recording to a SMC
or built-in memory.
(ex) DSE, program AE, shutter, white balance and other manual
adjustment.
■
“ MEM.” appears on the screen while recording to card or memory.
■
While recording or loading the image, do not eject or insert the
SmartMediaCard.
– Inserting or ejecting the SmartMediaCard while recording or
loading the image could cause to damage data.
■
If you want to save all images on the SmartMediaCard.
affix the protection label to protection tab on the SmartMediaCard.
SmartMediaCard
Terminal
Protection tab
Tarjeta SmartMedia y memoria incorporada
✤
La tarjeta SmartMedia (SMC) o la memoria incorporada (4 Mb) almacenan y administran las imágenes fijas filmadas por la cámara.
Funciones de la tarjeta SMC y de la memoria incorporada
✤
Grabación de imágenes fijas.
✤
Visualización de imágenes fijas.
■
Una sola
■
Presentación de diapositivas
✤
Protección de las imágenes contra el borrado
accidental.
✤
Supresión de las imágenes grabadas en una
tarjeta o la memoria.
✤
Impresión de las imágenes fijas marcadas
✤
Formateo de una tarjeta o la memoria.
✤
Copia de imágenes fijas en un casete.
Nota
■
Pueden utilizarse la mayoría de funciones de la cámara al grabar en
una tarjeta SMC o en la memoria incorporada, por ejemplo, DSE,
program AE, obturador, balance de blancos y otros ajustes manuales.
■
“ MEM.” aparece en la pantalla al grabar en la tarjeta o la memoria.
■
Al grabar o cargar las imágenes, no extraiga ni inserte la tarjeta Smart
Media.
– Si se inserta o extrae la tarjeta Smart Media mientras se graban o
cargan las imágenes podrían dañarse los datos.
■
Si desea guardar todas las imágenes de la tarjeta SmartMedia, pegue
la etiqueta de protección a la pestaña de protección de la tarjeta
SmartMedia.
D
S
C
Page 77
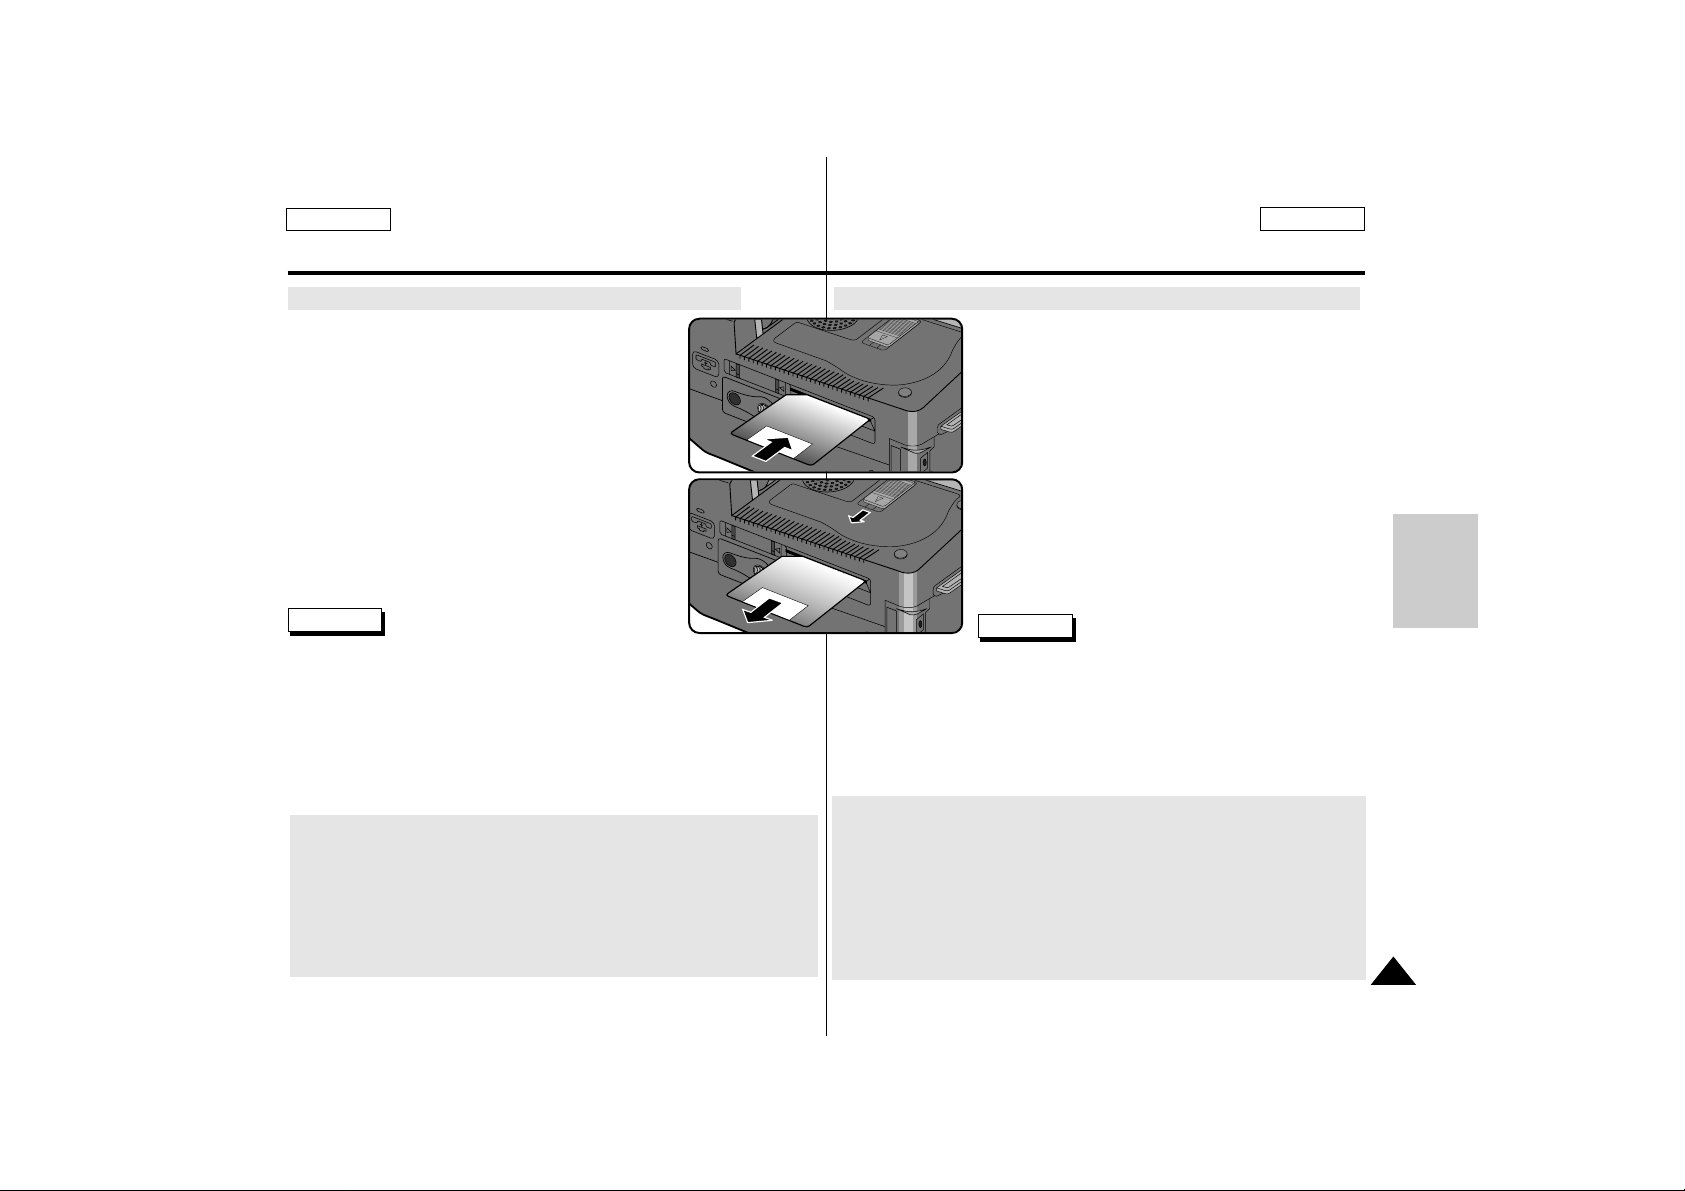
77
Digital Still Camera mode (SCD75/D77 only)
Modo Digital Still Camera (sólo en SCD75/D77)
ENGLISH ESPAÑOL
Inserting ejecting the SmartMediaCard (SCD77 only)
●
Inserting card
1. Turn the Power switch to OFF.
2. Insert the SmartMediaCard into the CARD
slot located beneath the camcorder in the
direction of the arrow.
●
Ejecting card
1. Turn the Power switch to OFF.
2. Open the LCD monitor.
3. Slide down the Card Eject switch and pull
out the card.
Reference
■
If you turn the power switch to PLAYER and set the mode switch to
DSC, the last recorded image appears.
– If there are no recorded images on the SmartMediaCard,
NO STORED IMAGE and MEM. will be blinking on the screen.
■
Do not turn off the power during recording, loading, erasing or
formatting.
■
Please turn off the power when you insert or eject the
SmartMediaCard.
You could lose data on the SmartMediaCard.
■
Do not allow metal substances to contact terminals of the Card.
■
Do not bend the Card.
■
After pulling the card out from camcorder, please keep the
SmartMediaCard in soft case to prevent static shock.
■
The memorized contents may be changed or lost due to misuse,
static electricity, electric noise, trouble and repair. Save important
images separately.
■
We are not responsible for data loss due to misuse.
Inserción y expulsión de la tarjeta Smart Media (sólo en SCD77)
●
Inserción de la tarjeta
1. Ponga el interruptor de encendido en la posición
OFF.
2. Inserte la tarjeta Smart Media en la ranura para
tarjetas situada en la parte inferior de la vídeocá-
mara, siguiendo la dirección de la flecha.
●
Expulsión de la tarjeta
1. Ponga el interruptor de encendido en la posición
OFF.
2. Abra el monitor LCD.
3. Deslice hacia abajo la clavija de expulsión de la
tarjeta y saque la tarjeta.
Notas
■
Si coloca el interruptor de encendido en PLAYER y el interruptor de
modo en DSC, aparecerá la última imagen grabada.
– Si no hay ninguna imagen grabada en la tarjeta Smart Media, el
mensaje NO STORED IMAGE y la indicación MEM. parpadearán
en la pantalla.
■
No apague la energía durante la grabación, carga, borrado o formateo.
■
Apague la energía cuando inserte o expulse la tarjeta Smart Media.
Podría perder los datos de la tarjeta Smart Media.
■
No permita que objetos metálicos entren en contacto con los
terminales de la tarjeta.
■
No doble la tarjeta.
■
Después de sacar la tarjeta Smart Media de la videocámara, guárdela
en una caja adecuada para impedir descargas electroestáticas.
■
El contenido de la memoria se puede modificar o perder a causa del
mal uso, la electricidad estática, el ruido eléctrico, los fallos y las
reparaciones. Guarde por separado las imágenes importantes.
■
No nos hacemos responsables de la pérdida de datos a causa del
mal uso.
D
S
C
Page 78
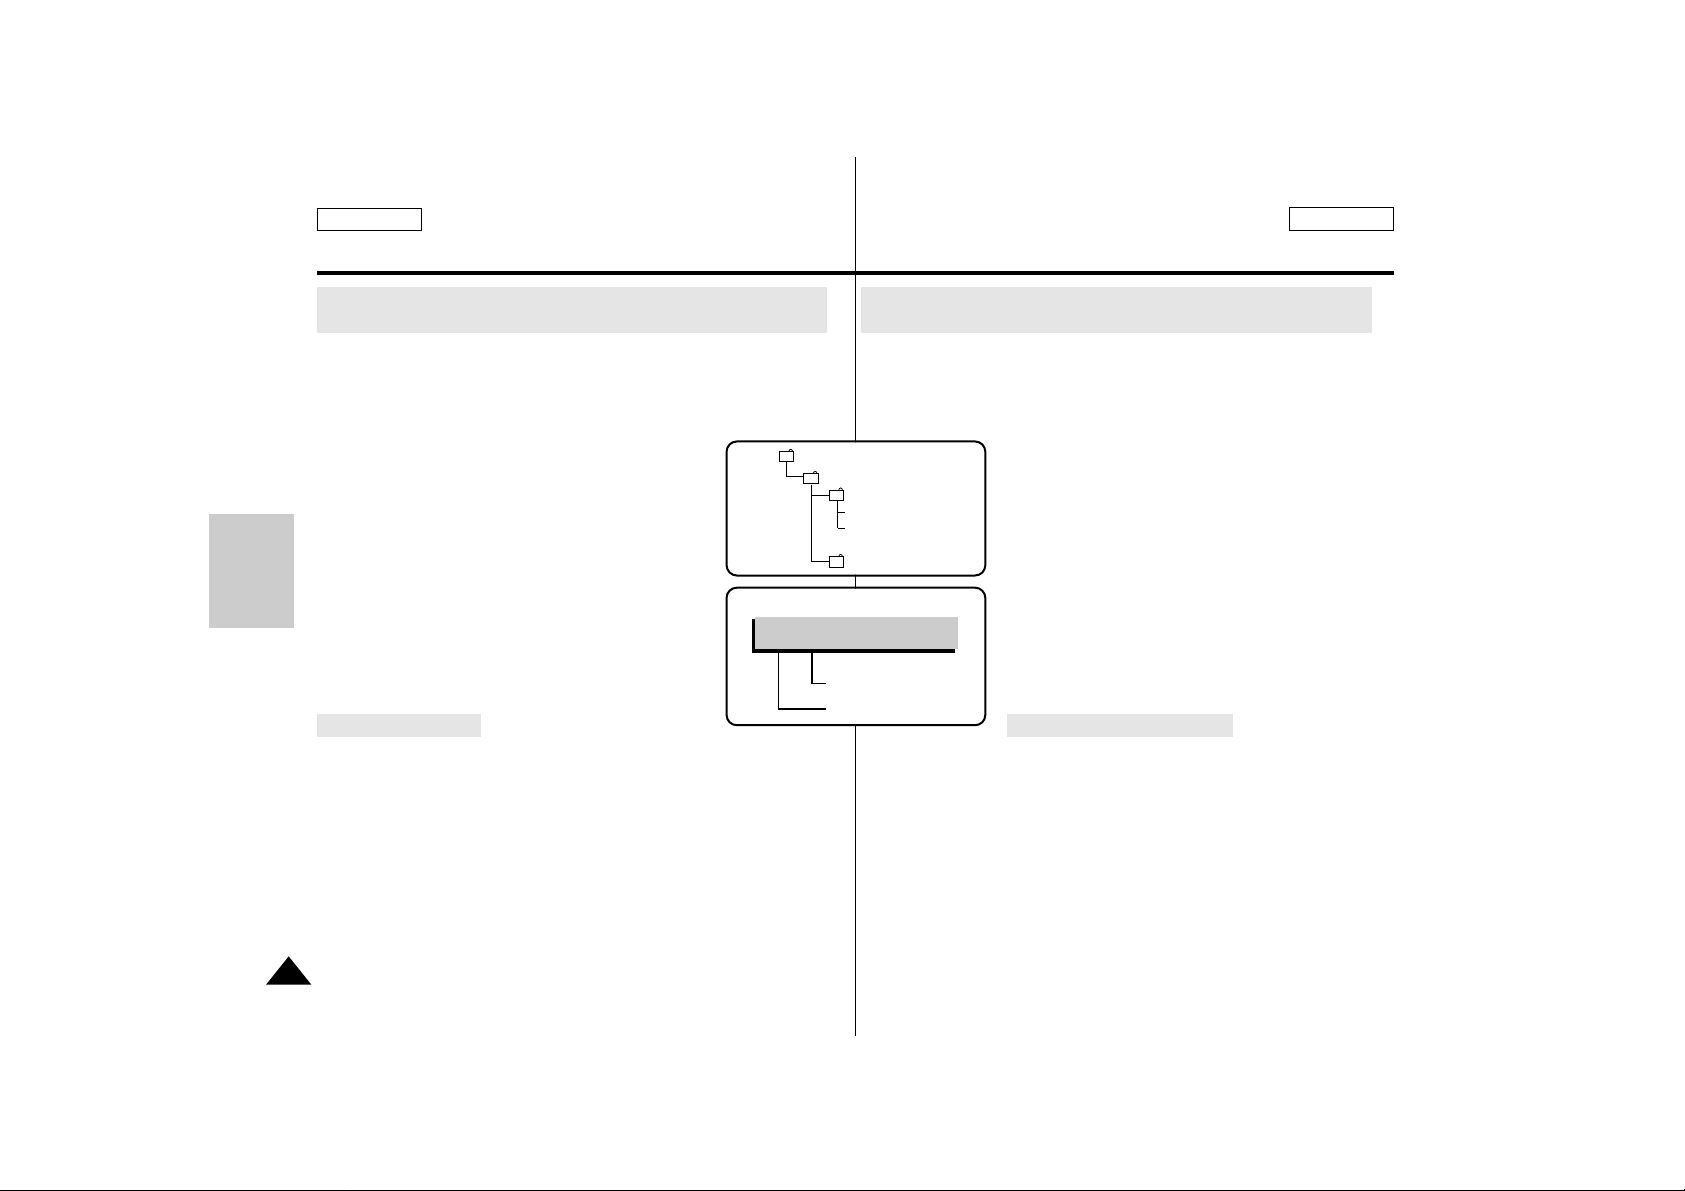
78
Digital Still Camera mode (SCD75/D77 only)
Modo Digital Still Camera (sólo en SCD75/D77)
ENGLISH ESPAÑOL
Structure of folders and files on the SmartMediaCard and
built- in memory
✤
The still images that you recorded are saved as JPEG file format
on the card or memory.
✤
Each file has a file number and all files are
assigned to folder.
■
The file number from DCAM0001 to
DCAM9999 is assigned to each recorded
image with order.
■
Each folder is numbered from 100SSDVC
to 999SSDVC and recorded on the CARD
or on the MEMORY.
Format of images
✤
Images are compressed in the JPEG (Joint Photographic Experts
Group) format.
✤
The number of pixels is 624x472 (VGA) in each modes.
Estructura de las carpetas y archivos de la tarjeta Smart
Media y de la memoria incorporada
✤
Las imágenes fijas que ha grabado se guardan en formato de
archivo JPEG en la tarjeta o la memoria.
✤
Cada archivo tiene un número de archivo y todos
los archivos se asignan a una carpeta.
■
Se asignan los números de archivo de
DCAM0001 a DCAM9999 a las imágenes
grabadas, por orden.
■
Las carpetas se numeran de 100SSDVC a
999SSDVC y se graban en la tarjeta o en la
memoria.
Formato de las imágenes
✤
Las imágenes se comprimen en formato JPEG (Joint
Photographic Experts Group).
✤
El número de píxeles es 624x472 (VGA) en cada modo.
D
S
C
File number
Folder number
DCIM
100 SSDVC
DCAM 0001
DCAM 0002
101 SSDVC
...
100-0001
100-0001
*DSC-PLA YER
Page 79
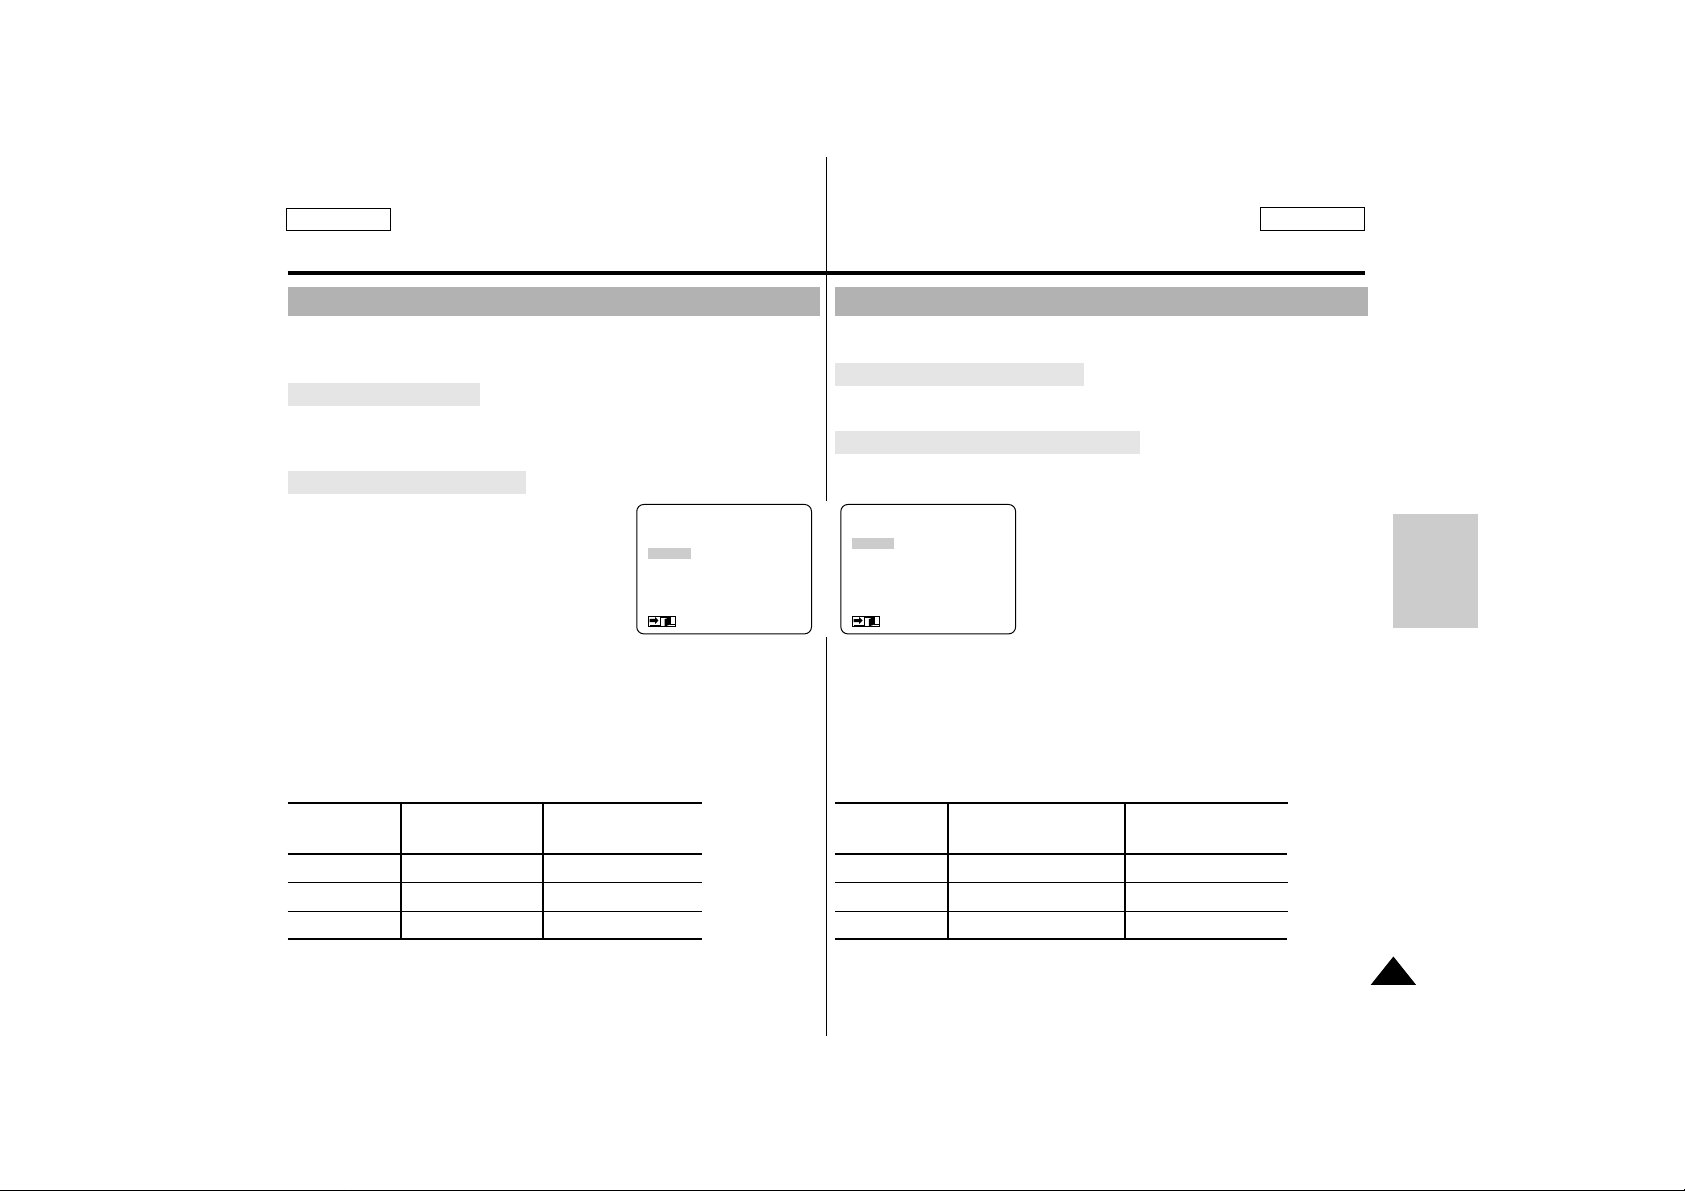
ENGLISH ESPAÑOL
79
Digital Still Camera mode (SCD75/D77 only)
Modo Digital Still Camera (sólo en SCD75/D77)
Selecting the quality of image
✤
You can select the quality of a still image to be recorded.
PHOTO MODE select
✤
This function is same with the PHOTO MODE. (see page 59)
Select the quality of image
1. Set the power switch to CAMERA Mode
and set the mode switch to DSC.
2. Press the MENU ON/OFF button.
■
The menu list will appear.
3. Turn the MENU DIAL to highlight QUALITY.
4. Press the ENTER to enter the sub-menu.
5. Using the MENU DIAL, select the image
quality.
■
Press the ENTER to confirm the image quality and return to main
menu.
■
If you exit the sub-menu without pressing the ENTER, the quality
mode is not changed.
6. To exit, press the MENU ON/OFF button.
● Number of images on the CARD or built-in memory
– The actual number that you can record varies depending on the image
size.
QUALITY
4MB 8MB
Built-in memory SmartMediaCard
FINE Approx. 30 Approx. 60
NORMAL Approx. 60 Approx. 120
ECONOMIC Approx. 110 Approx. 240
Selección de la calidad de la imagen
(MENU)
PHOTO MODE.........FIELD
QUALITY..................ECONOMIC
MEMORY FORMAT
LCD ADJUST
CUSTOM SET
DIS............................OFF
: MENU
D
S
C
✤
Puede seleccionar la calidad de la imagen fija que va a grabar.
Selección de PHOTO MODE
✤
Esta función es igual con PHOTO MODE (consulte la página 59).
Seleccione la calidad de la imagen
1. Ponga el interruptor de encendido en modo CAMERA y el interruptor
de modo en DSC.
2. Pulse el botón MENU ON/OFF.
■
Aparecerá la lista de menús.
3. Gire el disco selector MENU hasta
seleccionar QUALITY.
4. Pulse ENTER para que aparezca el
submenú.
5. Con el disco selector MENU, seleccione la
calidad de la imagen.
■
Pulse ENTER para confirmar la calidad de la imagen y volver al
menú principal.
■
Si sale del submenú sin pulsar ENTER, no se cambia el modo de
calidad.
6. Para salir, pulse el botón MENU ON/OFF.
● Número de imágenes de la tarjeta o de la memoria
incorporada
– El número real que puede grabar varía según el tamaño de la imagen.
CALIDAD
4 Mb de Tarjeta Smartmedia
Memoria incorporada De 8 Mb
FINE Aprox. 30 Aprox. 60
NORMAL Aprox. 60 Aprox. 120
ECONOMIC Aprox. 110 Aprox. 240
●
QUALITY
●
NORMAL
ECONOMIC
FINE
SEL : ENTER
: MENU
Page 80
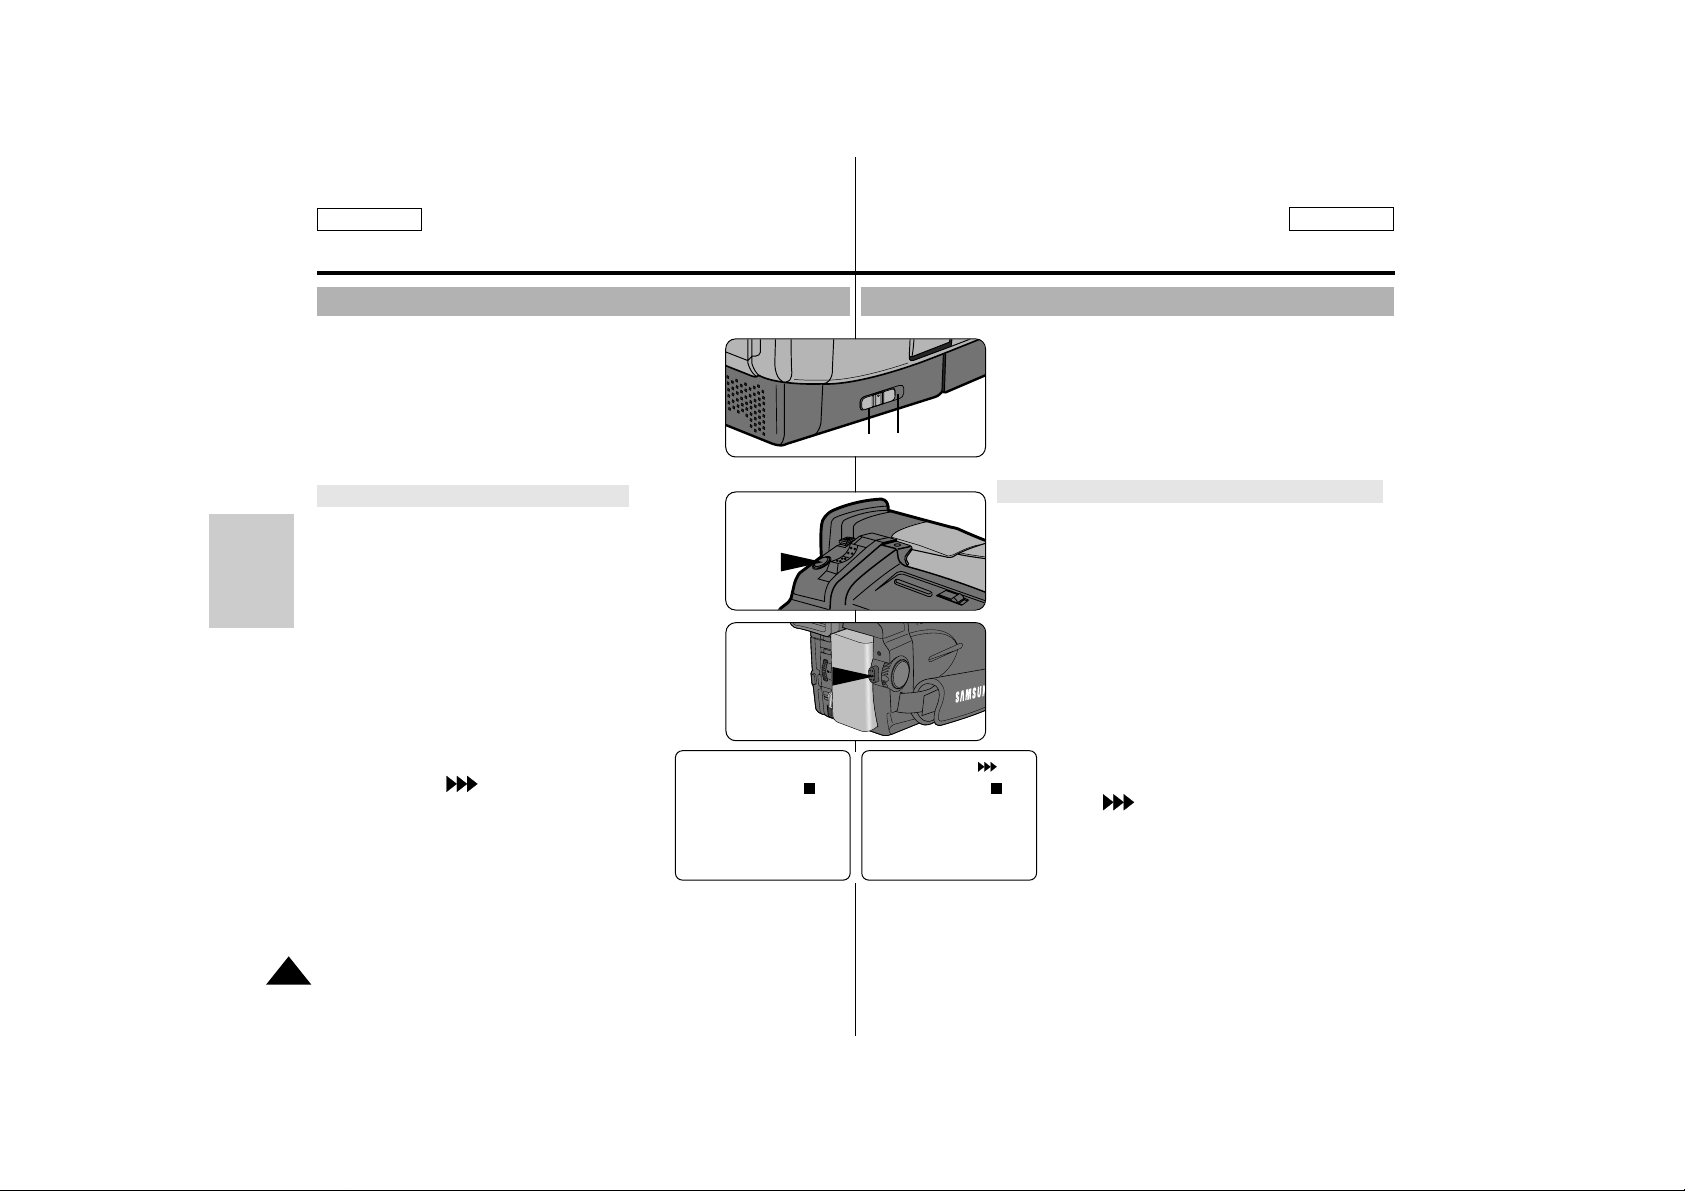
ENGLISH ESPAÑOL
80
Digital Still Camera mode (SCD75/D77 only)
Modo Digital Still Camera (sólo en SCD75/D77)
✤
It is impossible to record moving Picture onto a
SmartMediaCard or built-in memory.
✤
Audio can not be recorded onto a card or memory.
Recording images to a card or memory
1. Set the mode switch to DSC
2. Set the power switch to CAMERA mode.
3. Press the PHOTO button to capture the image.
■
The STBY appears on the screen
■
If you want to change the captured image
without recording, press the PHOTO button
again and select image again.
4. Press the START/STOP to record the
captured image onto a card or memory.
■
While the camera is recording the still
image, “ ”appears on the screen.
Recording Still images to a SMC or MEMORY Grabación de imágenes fijas en una tarjeta SMC o la memoria
D
S
C
PHOTO
START/
STOP
✤
Es imposible grabar una imagen en movimiento en
una tarjeta SmartMediaCard o en la memoria
incorporada.
✤
El sonido no puede grabarse en una tarjeta o la
memoria.
Grabación de imágenes en una tarjeta o memoria
1. Ponga el interruptor de modo en DSC.
2. Coloque el interruptor de encendido en el modo
CAMERA.
3. Pulse el botón PHOTO para capturar la imagen.
■
STBY aparece en la pantalla
■
Si desea cambiar la imagen capturada sin
grabarla, pulse el botón PHOTO de nuevo y
seleccione la imagen otra vez.
4. Pulse START/STOP para grabar la imagen
capturada en una tarjeta o la memoria.
■
Mientras la cámara graba la imagen fija,
“ ” aparece en la pantalla.
DSC
CAMCORDER
MEM.
STBY
01/60
MEM.
02/60
N N
Page 81
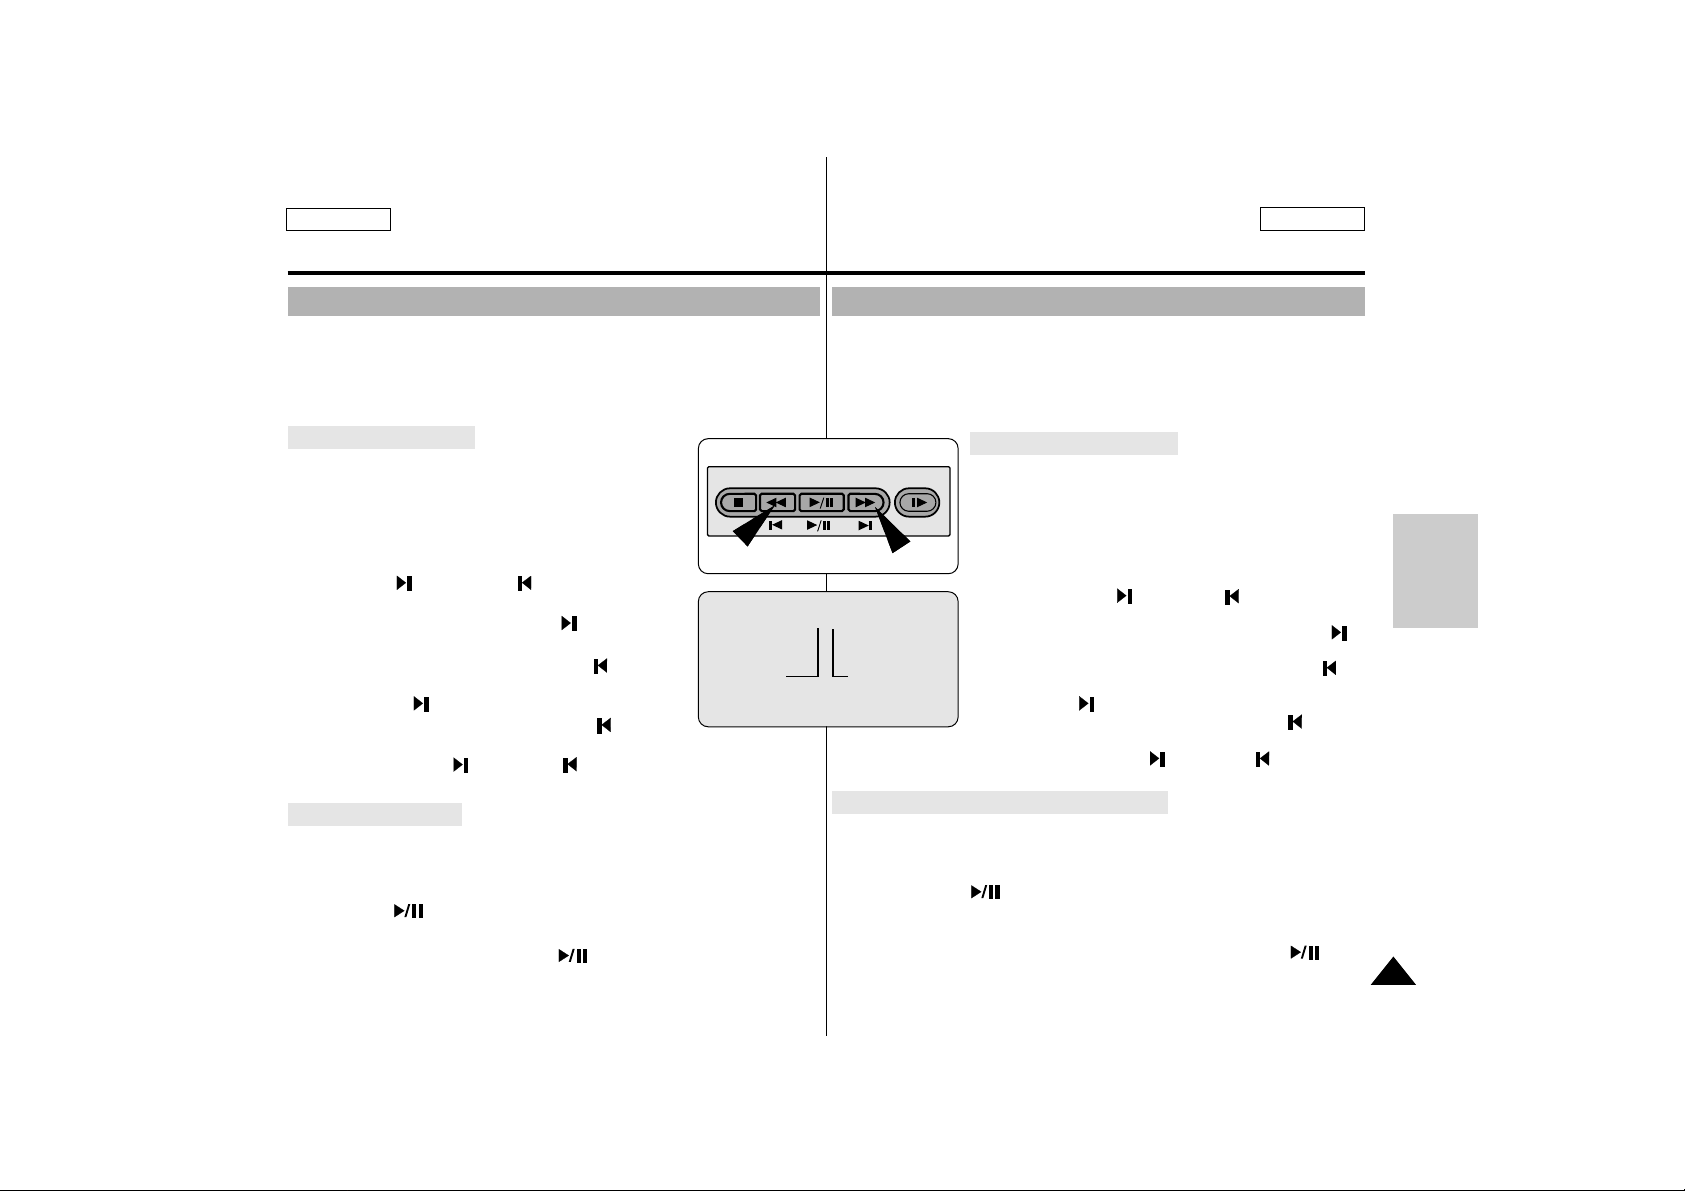
81
Digital Still Camera mode (SCD75/D77 only)
Modo Digital Still Camera (sólo en SCD75/D77)
ENGLISH ESPAÑOL
✤ You can playback and view still images recorded on SmartMediaCard
or built-in memory.
✤ There are 2 ways to view recorded images.
■
Single: To view a image frame by frame
■
Slide show: To view all images automatically in order
To view a Single image
1. Set the mode switch to DSC.
2. Set the power switch to PLAYER mode.
■
The last recorded image appears.
– If there are no recorded images on the
Smart Media Card, NO STORED IMAGE
and MEM. will be blinking on the screen.
3. Using the (MEM.+) and (MEM.–) buttons,
search the desired still image.
■
To view the next image: press (MEM.+)
button.
■
To view the previous image: press (MEM.–)
button.
■
Pressing (MEM.+) at the last image will take
you to the first image and pressing (MEM.–)
at the first image will take you to the last image.
■
Keep pressing (MEM.+) or (MEM.–) to search for the image
quickly.
To view a slide show
1. Set the mode switch to DSC.
2. Set the power switch to PLAYER mode.
■
The last recorded image appears.
3. Press the (SLIDE) button.
■
All images will playback one after the other for 4~5 seconds each.
4. To stop the slide show, press the (SLIDE) button again.
Viewing Still images
✤ Puede reproducir y ver las imágenes fijas grabadas en la tarjeta
SmartMediaCard o la memoria incorporada.
✤ Hay dos maneras de ver las imágenes grabadas.
■
Single : Para ver una imagen trama a trama
■
Presentación de diapositivas: Para ver todas las imágenes
automáticamente por orden
Para ver una sola imagen
1. Ponga el interruptor de modo en DSC.
2. Ponga el interruptor de encendido en modo
PLAYER.
■
Aparece la última imagen grabada.
– Si no hay imágenes grabadas en la tarjeta, el
mensaje NO STORED IMAGE y la indicación
MEM. parpadearán en la pantalla.
3. Con los botones (MEM.+) y (MEM.–),
busque las imágenes fijas que desee.
■
Para ver la siguiente imagen: pulse el botón
(MEM.+).
■
Para ver la imagen anterior: pulse el botón
(MEM.–).
■
Si pulsa (MEM.+) en la última imagen
aparecerá la primera imagen y si pulsa
(MEM.–) en la primera imagen aparecerá la última.
■
Continúe pulsando (MEM. +) o (MEM.–)
para buscar rápidamente la imagen.
Para ver una presentación de diapositivas
1. Ponga el interruptor de modo en DSC.
2. Ponga el interruptor de encendido en modo PLAYER.
■
Aparece la última imagen grabada.
3. Pulse el botón (SLIDE).
■
Se reproducirán todas las imágenes una tras otra, durante 4 ó 5
segundos cada una.
4. Para detener la presentación de diapositivas, pulse el botón
(SLIDE) de nuevo.
Visualización de imágenes fijas
DELETE
BLC EDIT— FADE EDIT+ MF/AF
D
S
C
10/22
Current
viewing image
Total number of
recoreded
still image
en SCD75/D77)
Page 82
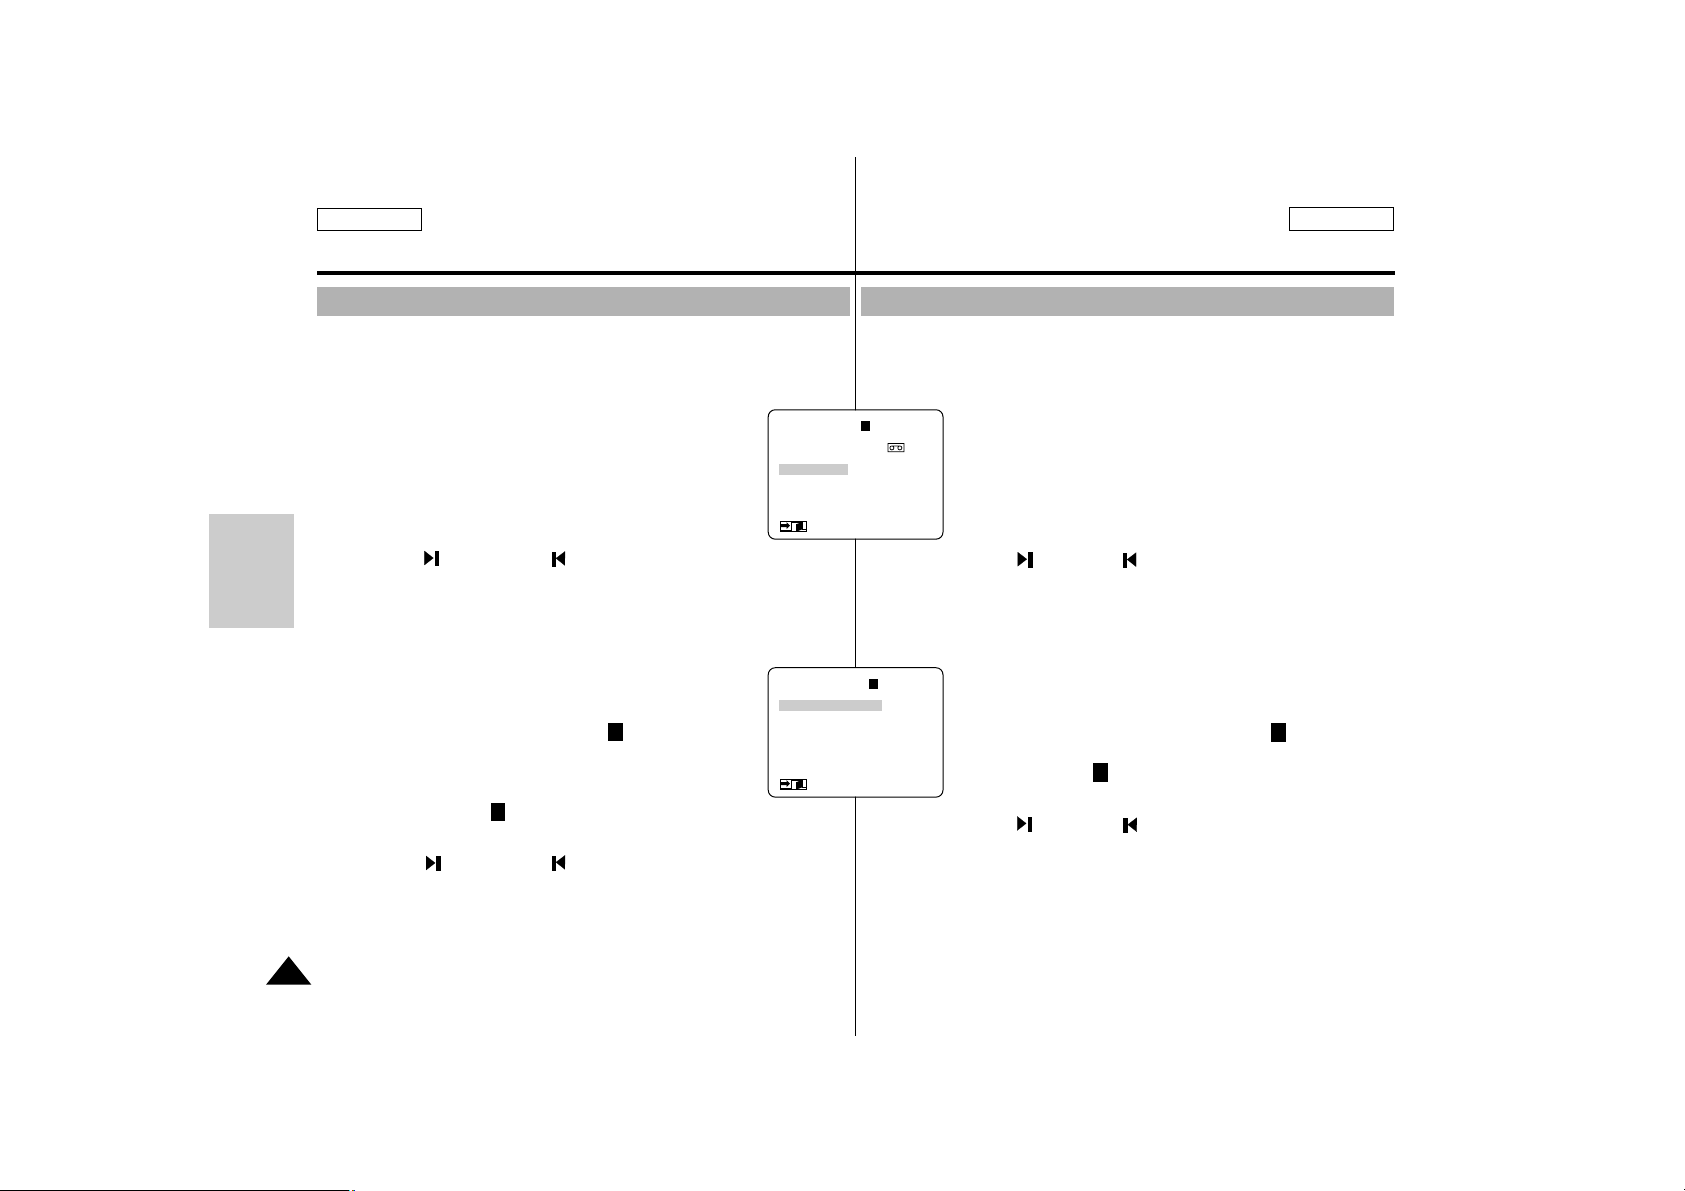
82
Digital Still Camera mode (SCD75/D77 only)
Modo Digital Still Camera (sólo en SCD75/D77)
ENGLISH ESPAÑOL
Protecting from accidental erasure
✤ You can protect important images from accidental erasure.
■
If you execute the MEMORY FORMAT, all images including
protected images will be erased.
1. Set the mode switch to DSC.
2. Set the power switch to PLAYER mode.
■
The last recorded image appears.
■
If there are no recorded images on the Smart Media
Card, NO STORED IMAGE and MEM. will be blinking
on the screen.
3. Using the (MEM.+) and (MEM._) buttons, Search the still
image that you want to protect.
4. Press the MENU ON/OFF button.
5. Turn the MENU DIAL to highlight PROTECT SET and press ENTER.
6. To activate or deactivate the PROTECT mode,
press ENTER.
■
ON : To protect the viewing image.
- The protect indicator P appears on the
screen.
■
OFF : To release the protecting mode of viewing
image.
- The P mark disappears on the screen.
■
RETURN: To return to main menu.
7. Using the (MEM.+) and (MEM._) buttons, search the still
image that you want to protect again.
■
Protect or release the image using step 6.
8. To exit the menu, press the MENU ON/OFF button.
D
S
C
(MENU) P
FILE COPY (MEMORY→ )
FILE DELETE
PROTECT SET
DPOF
LCD ADJUST
DISPLAY...................LCD/V.OUT
: MENU
●
PROTECT●P
PROTECT ................ON 10/22
RETURN
: FF/REW
: MENU
Protección contra el borrado accidental
✤ Puede proteger las imágenes importantes contra el borrado accidental.
■
Si ejecuta MEMORY FORMAT, se borrarán todas las imágenes
incluidas las imágenes protegidas.
1. Ponga el interruptor de modo en DSC.
2. Ponga el interruptor de encendido en modo PLAYER.
■
Aparece la última imagen grabada.
■
Si no hay imágenes grabadas en la tarjeta Smart
Media Card, el mensaje NO STORED IMAGE y
la indicación MEM. parpadearán en la pantalla.
3. Con los botones (MEM.+) y (MEM. _ ), busque la imagen fija
que desee proteger.
4. Pulse el botón MENU ON/OFF.
5. Gire el disco selector MENU hasta PROTECT SET y pulse ENTER.
6. Para activar o desactivar el modo PROTECT,
pulse ENTER.
■
ON: Para proteger la imagen visualizada.
- Aparece el indicador de protección P en la pantalla.
■
OFF: Para desproteger la imagen visualizada.
- La marca P desaparece de la pantalla.
■
RETURN: Para volver al menú principal.
7. Con los botones (MEM.+) y (MEM._), busque la imagen fija
que desee proteger de nuevo.
■
Proteja o desproteja la imagen siguiendo el paso 6.
8. Para salir del menú, pulse el botón MENU ON/OFF.
Page 83
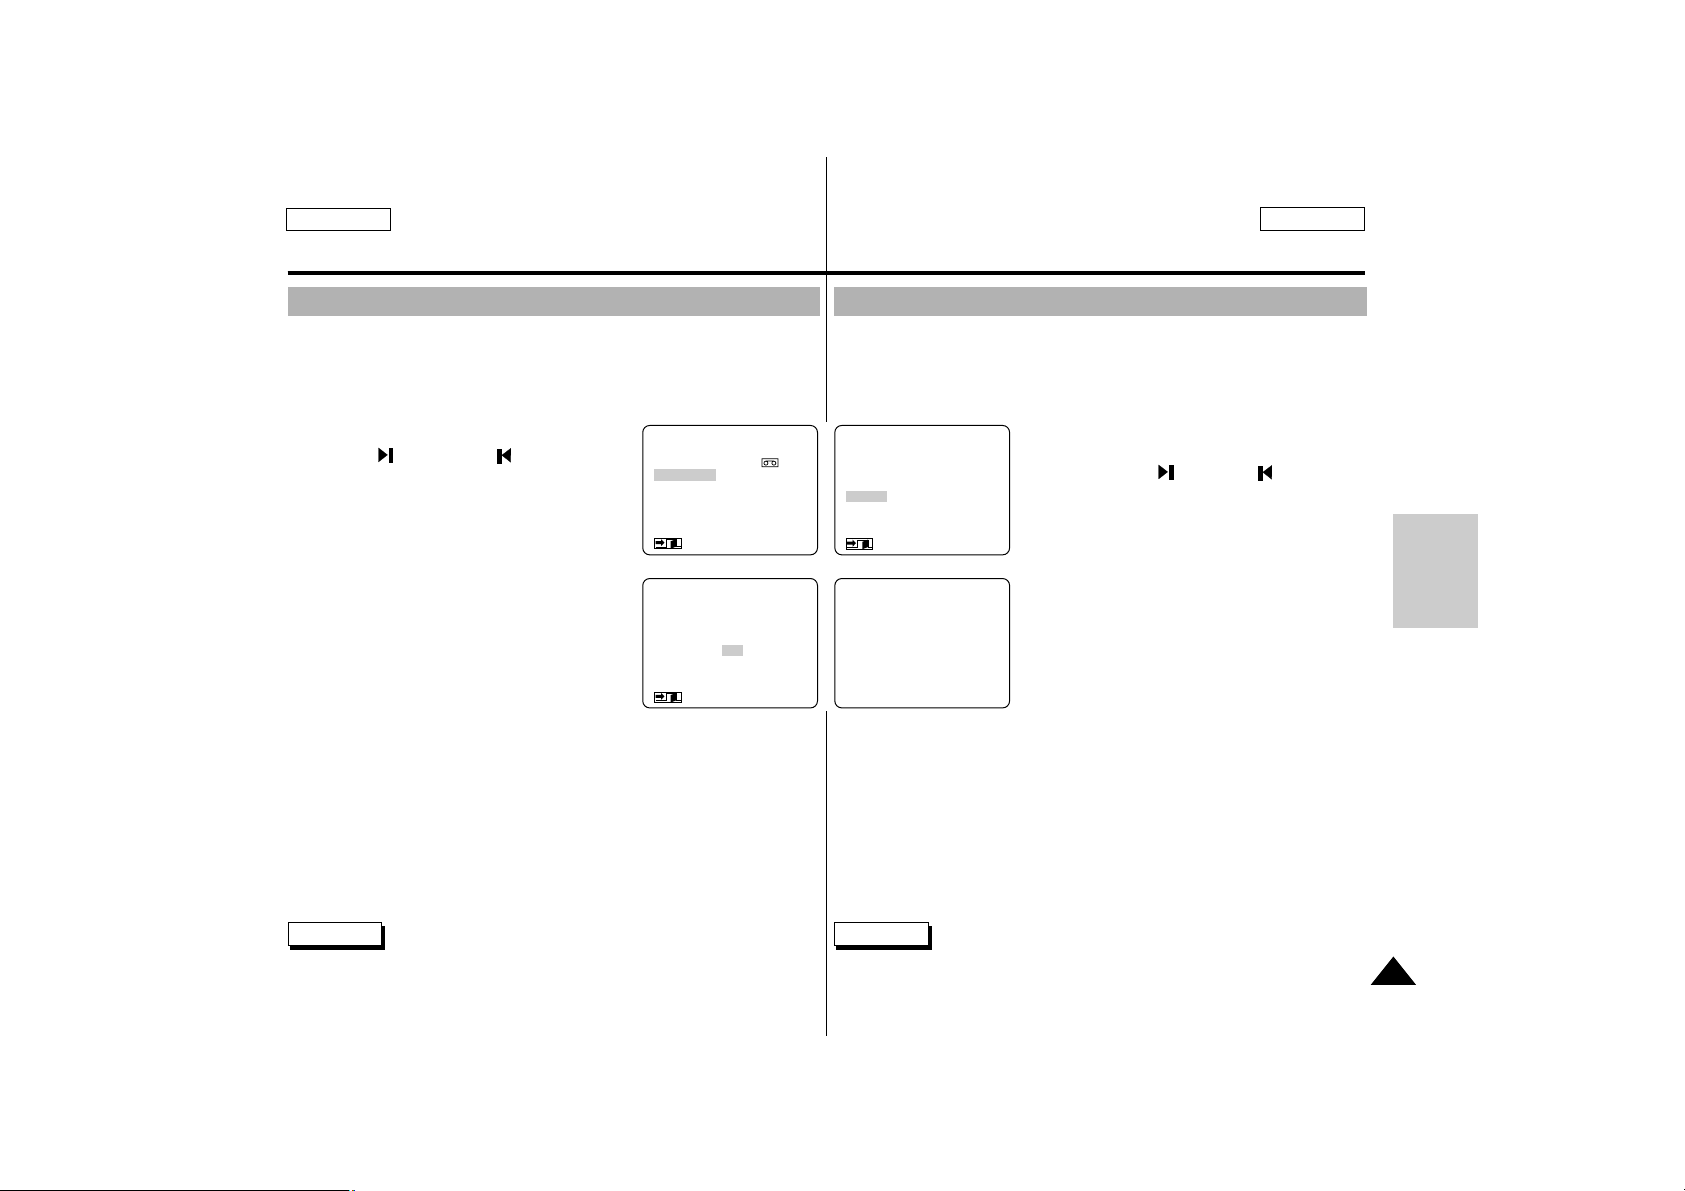
ENGLISH ESPAÑOL
83
Digital Still Camera mode (SCD75/D77 only)
Modo Digital Still Camera (sólo en SCD75/D77)
✤
You can erase the still images recorded on the SmartMediaCard or built-in
memory.
✤
If you want to delete protected images, release the image protection first.
✤
An image which has been deleted cannot be recovered.
1. Set the mode switch to DSC.
2. Set the power switch to PLAYER mode.
3. Using the (MEM.+) and (MEM._)
buttons, search the still image that you want to
delete.
■
Press the DELETE button.
- Using the MENU DIAL, select NO or
YES and press the ENTER.
●
NO : Returns to sub menu
●
YES : Images will be deleted without
protected images.
FILE DELETE appears on the
screen
■
Enter the menu and select the FILE DELETE.
a. Press the ENTER button to view a
sub menu.
b. Select the item and press the ENTER.
●
SINGLE : To delete images one at a time.
●
ALL : To delete all still images at a time except protected images.
-
“DO YOU DELETE ALL? NO YES” appears on the screen.
●
RETURN : To return to main menu.
c. Using the MENU DIAL, select NO or YES and press the ENTER.
●
NO : Returns to sub menu
●
YES : Images will be deleted without protected images.
FILE DELETE appears on the screen
d. To exit the menu, press the MENU ON/OFF.
Reference
■
If you try to delete the protected image,
“CONFIRM PROTECTION” appears on the screen.
Deleting Still images
(MENU)
FILE COPY (MEMORY→ )
FILE DELETE
PROTECT SET
DPOF
LCD ADJUST
DISPLAY...................LCD/V-OUT
: MENU/STOP
●
FILE DELETE
●
SINGLE
ALL
RETURN
SEL : ENTER
: MENU
FILE DELETE
10/10
DO YOU DELETE ALL?
NO
YES
: FF/REW
: MENU
✤
Puede borrar las imágenes fijas grabadas en la tarjeta SmartMediaCard o
la memoria incorporada.
✤
Si desea suprimir imágenes protegidas, primero desproteja las imágenes.
✤
Una imagen que se ha suprimido no puede recuperarse.
1. Ponga el interruptor de modo en DSC.
2. Ponga el interruptor de encendido en modo
PLAYER.
3. Con los botones (MEM.+) y (MEM._),
busque la imagen fija que desea suprimir.
■
Pulse el botón DELETE.
- Con el disco selector MENU, seleccione
NO o YES y pulse ENTER.
●
NO: Vuelve al submenú
●
YES: Se suprimirán las imágenes
excepto las protegidas.
FILE DELETE aparece en la pantalla
■
Entre en el menú y seleccione FILE DELETE.
a. Pulse el botón ENTER para ver un submenú.
b. Seleccione la opción y pulse ENTER.
●
SINGLE: Para suprimir una imagen cada
vez.
●
ALL: Para suprimir todas las imágenes fijas a la vez excepto las
protegidas.
-
El mensaje “DO YOU DELETE ALL? NO aparece en la pantalla.
●
RETURN: Para volver al menú principal.
c. Con el disco selector MENU, seleccione NO o YES y pulse ENTER.
●
NO: Vuelve al submenú
●
YES: Se suprimirán las imágenes excepto las protegidas.
FILE DELETE aparece en la pantalla
d. Para salir del menú, pulse MENU ON/OFF.
Nota
■
Si intenta suprimir una imagen protegida, aparece el
mensaje “CONFIRM PROTECTION” en la pantalla.
Supresión de imágenes fijas
D
S
C
Page 84
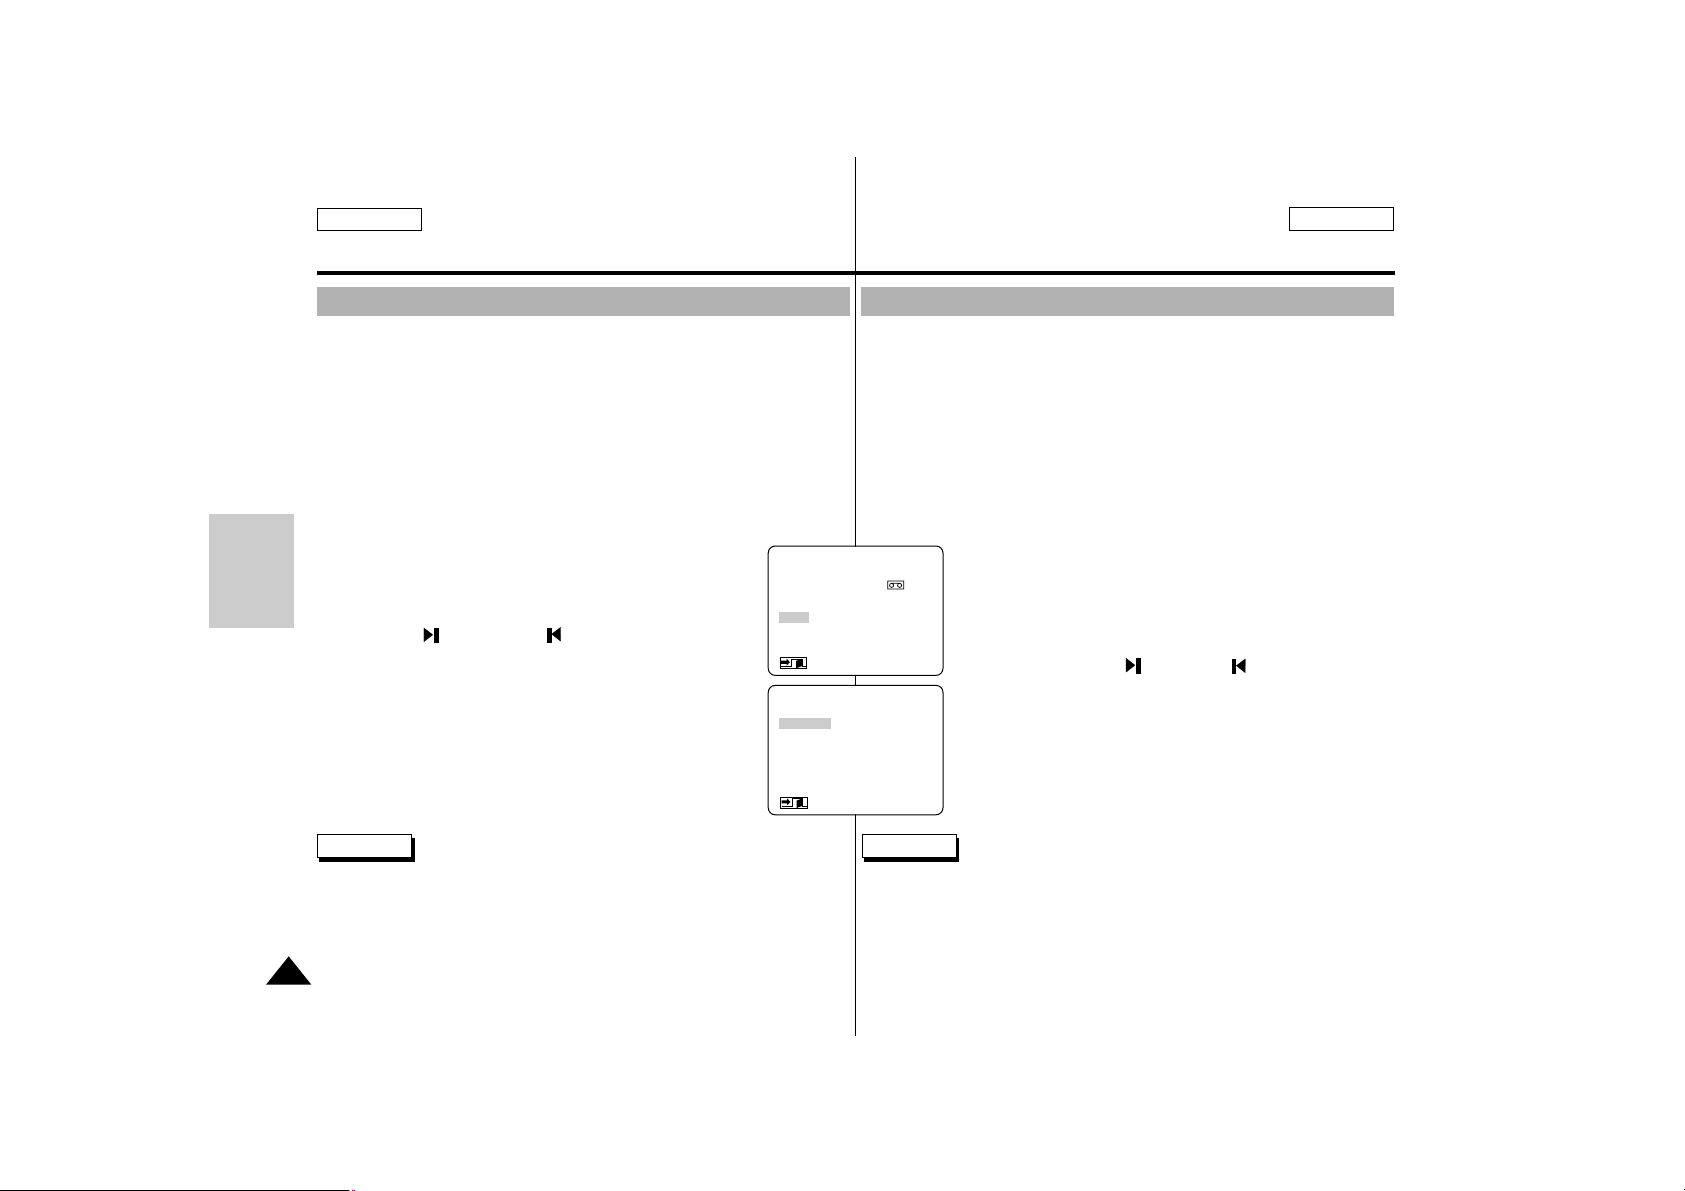
84
Digital Still Camera mode (SCD75/D77 only)
Modo Digital Still Camera (sólo en SCD75/D77)
ENGLISH ESPAÑOL
✤
This camcorder supports the DPOF (Digital Print Order Format) print
format.
✤
You can automatically print images recorded on a SmartMediaCard on
a DPOF supporting printer.
✤
There are 3 ways to mark a DPOF mark.
■
SELECTED : To print a number of sheets of same image.
■
ALL 1 : To print all pictures as one sheet at a time.
■
ALL 0 : To restore the print mark of all images to “0”.
1. Set the mode switch to DSC.
2. Set the power switch to PLAYER mode.
■
The last recorded image appears.
3. Using the (MEM.+) and (MEM._) buttons,
search the still image that you want to mark.
4. Enter the menu and select the DPOF and press ENTER.
5. Select method and press ENTER.
■
Return : To return to main menu.
Reference
■
Although you delete marked images, DPOF marks are not deleted.
- Set the DPOF mark of the image to 0 before deleting the image.
Marking on images for printing (SCD77 only)
(MENU)
FILE COPY (MEMORY→ )
FILE DELETE
PROTECT SET
DPOF
LCD ADJUST
DISPLAY
: MENU
●
DPOF
●
SELECTED
ALL1
ALL0
RETURN
SEL : ENTER
: MENU
✤
Esta videocámara admite el formato de impresión DPOF (Digital Print
Order Format).
✤
Puede imprimir automáticamente las imágenes grabadas que contiene
una tarjeta SmartMediaCard en una impresora que compatible con
DPOF.
✤
Hay tres maneras de poner marcas DPOF.
■
SELECTED: Para imprimir un número de veces la misma imagen
en distintas hojas.
■
ALL 1: Para imprimir todas las imágenes en una hoja a la vez.
■
ALL 0: Para restablecer la marca de impresión de todas las imá-
genes en “0”.
1. Ponga el interruptor de modo en DSC.
2. Ponga el interruptor de encendido en modo PLAYER.
■
Aparece la última imagen grabada.
3. Con los botones (MEM.+) y (MEM._), busque la
imagen fija que desee marcar.
4. Entre en el menú, seleccione DPOF y pulse ENTER.
5. Seleccione el método y pulse ENTER.
■
Return : Para volver al menú principal.
Nota
■
No obstante haya borrado las imágenes marcadas, DPOF las marca
como no borradas.
- Coloque la marca DPOF de la imagen en 0 antes de borrar la
imagen.
Marcar imágenes para impresión (sólo en SCD77)
D
S
C
Page 85
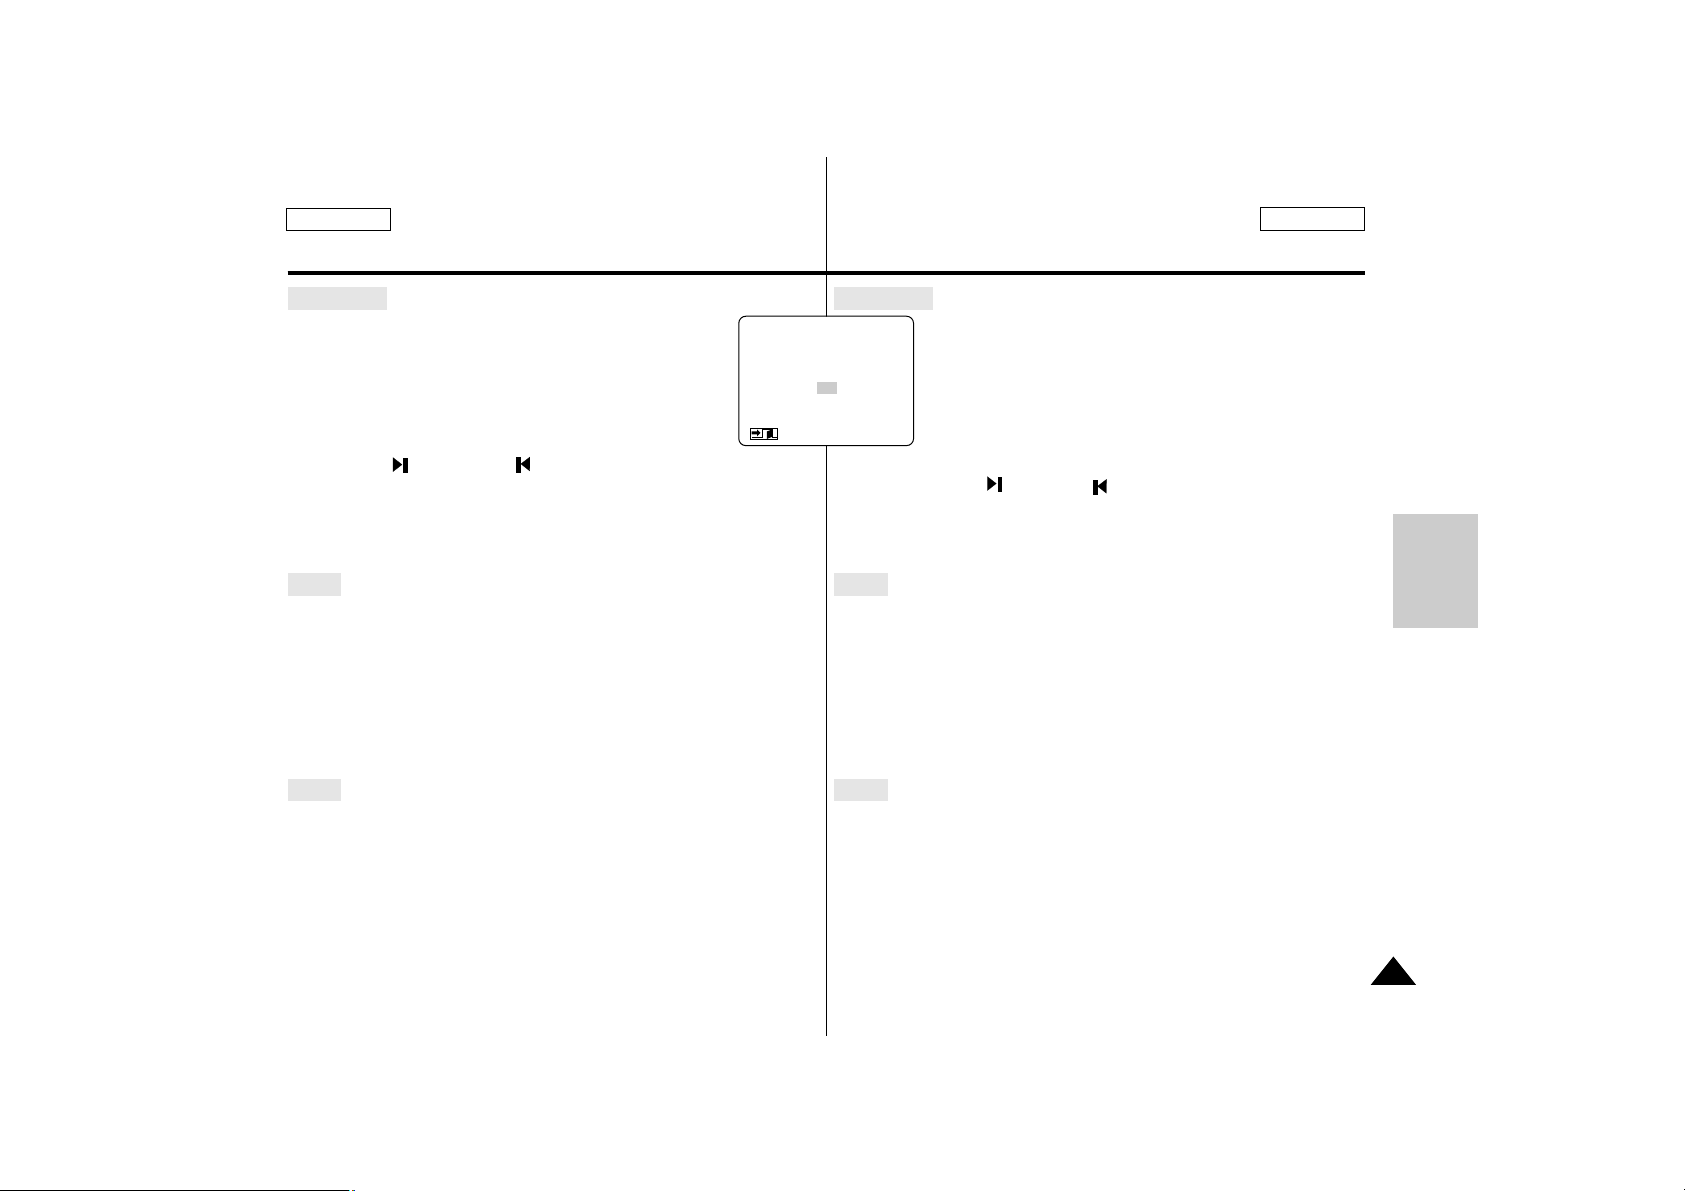
85
en SCD75/D77)
Digital Still Camera mode (SCD75/D77 only)
Modo Digital Still Camera (sólo en SCD75/D77)
ENGLISH ESPAÑOL
SELECTED
6. “DPOF000” and “DPOF SELECT 000” appears on the
screen.
7. Using the MENU DIAL select the number of sheets to
print image that you selected and press the ENTER.
■
The number of sheets varies from 000 to 999.
8. Using the (MEM.+) and (MEM._) select another
image that you want to mark.
9. To exit the menu, press the MENU ON/OFF.
ALL1
6. “DPOF001” appears on the screen.
7. DPOF001 mark will be marked on 200 images from current still image.
■
DPOF001 will be blinking.
■
It may take several minutes depending on the number of images.
8. To exit the menu, press the MENU ON/OFF.
ALL0
6. “DPOF000” appears on the screen.
7. DPOF marks of all images are canceled.
8. To exit the menu, press the MENU ON/OFF.
DPOF000
DPOF SELECT
005
: FF/REW
: MENU
SELECTED
6. Las indicaciones “DPOF000” y “DPOF SELECT 000”
aparecen en la pantalla.
7. Con el disco selector MENU, seleccione el número de
hojas en las que debe imprimirse la imagen
seleccionada y pulse ENTER.
■
El número de hojas puede variar entre 000 y 999.
8. Con los botones (MEM.+) y (MEM._) seleccione otra imagen
que desee marcar.
9. Para salir del menú, pulse MENU ON/OFF.
ALL1
6. La indicación “DPOF001” aparece en la pantalla.
7. Se pondrá la marca DPOF001 en 200 imágenes a partir de la imagen
fija actual.
■
DPOF001 parpadeará.
■
El proceso puede durar varios minutos.
8. Para salir del menú, pulse MENU ON/OFF.
ALL0
6. La indicación “DPOF000” aparece en la pantalla.
7. Se cancelan las marcas DPOF de todas las imágenes.
8. Para salir del menú, pulse MENU ON/OFF.
D
S
C
Page 86
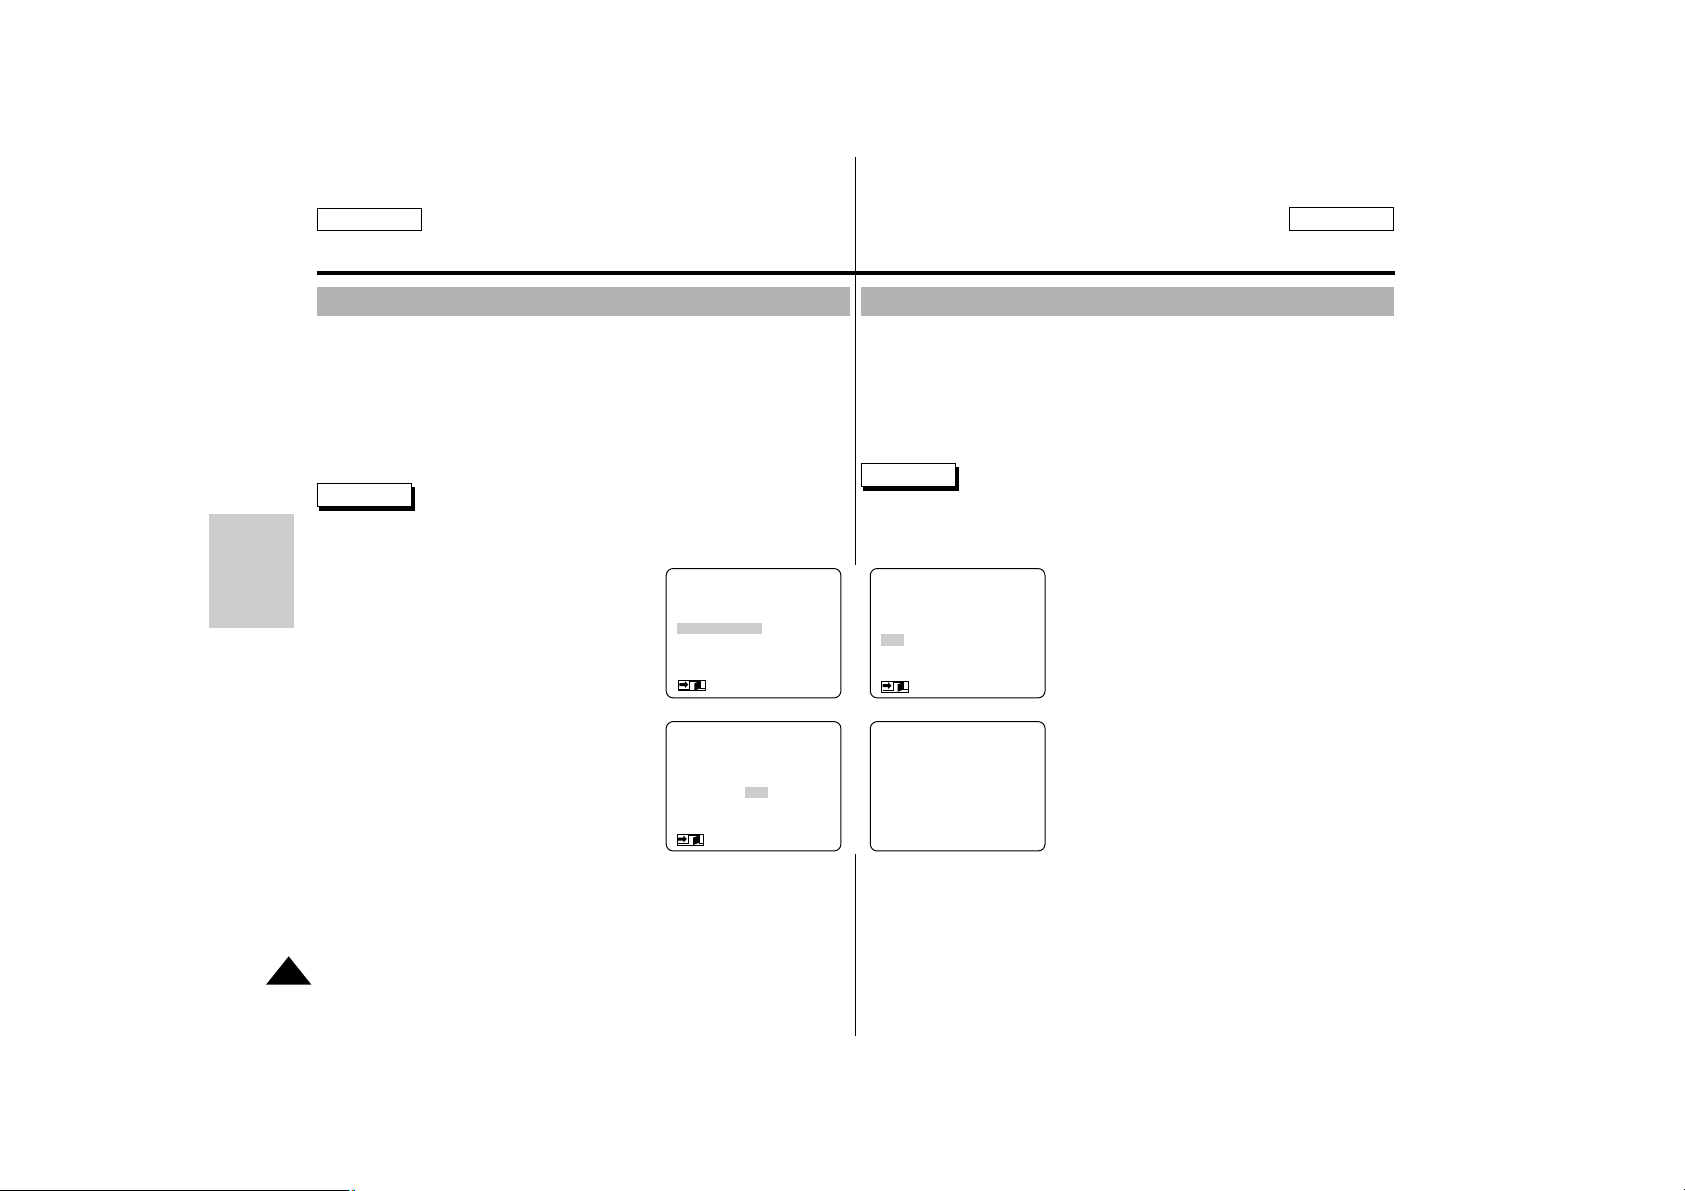
ENGLISH ESPAÑOL
86
Digital Still Camera mode (SCD75/D77 only)
Modo Digital Still Camera (sólo en SCD75/D77)
✤
You can use the MEMORY FORMAT functions to completely delete all
images and options on a SmartMediaCard and built-in memory,
including protected images.
✤
The format function restores a SmartMediaCard and built-in memory to
initial state.
✤
The SmartMediaCard supplied with this camcorder has already been
formatted.
Attention
●
If you execute the MEMORY FORMAT function,
all images will be completely erased and erased
images can not be recovered.
1. Set the mode switch to DSC.
2. Set the power switch to CAMERA mode.
3. Press the ENTER button to enter the menu
and select the MEMORY FORMAT.
4. Press the ENTER button.
■
The sub menu appears.
5. Using the MENU DIAL, select the item.
■
NO : To return to main menu
■
YES : To start formatting.
6. Press the ENTER button.
■
“DO YOU FORMAT” appears on the
screen.
7. Using the MENU DIAL, select YES or NO and press the ENTER button.
■
If you select YES, Formatting starts and “MEMORY FORMAT” is
blinking on the screen.
■
If you select NO, you return to sub menu.
8. To exit the menu, press the MENU ON/OFF button.
Formatting a SMC or built-in memory
✤
Puede utilizar las funciones de MEMORY FORMAT para suprimir completamente todas las imágenes y opciones de una tarjeta SmartMedia
y la memoria incorporada, incluidas las imágenes protegidas.
✤
La función de formateo restablece la tarjeta SmartMedia y la memoria
incorporada a su estado inicial.
✤
La tarjeta SmartMedia suministrada con esta videocámara ya se ha
formateado.
Atención
●
Si ejecuta la función MEMORY FORMAT, se borrarán todas las imágenes completamente y no
podrán recuperarse.
1. Ponga el interruptor de modo en DSC.
2. Coloque el interruptor de encendido en
modo CAMERA.
3. Pulse el botón ENTER para entrar en el
menú y seleccione MEMORY FORMAT.
4. Pulse el botón ENTER.
■
Aparece el submenú.
5. Con el disco selector MENU, seleccione la
opción.
■
NO: Para volver al menú principal
■
YES: Para iniciar el formateo.
6. Pulse el botón ENTER.
■
El mensaje “DO YOU FORMAT” aparece
en la pantalla.
7. Con el disco selector MENU, seleccione NO o YES y pulse el botón
ENTER.
■
Si selecciona YES, empieza el formateo y la indicación “MEMORY
FORMAT” parpadea en la pantalla.
■
Si selecciona NO, volverá al submenú.
8. Para salir del menú, pulse el botón MENU ON/OFF.
Formateo de una SMC o de la memoria incorporada
(MENU)
PHOTO MODE.........FIELD
QUALITY..................ECONOMIC
MEMORY FORMAT
LCD ADJUST
CUSTOM SET
DIS............................OFF
: MENU
●
MEMORY FORMAT
●
NO
YES
SEL : ENTER
: MENU
MEMORY FORMATDO YOU FORMAT?
NO
YES
: MENU
D
S
C
Page 87
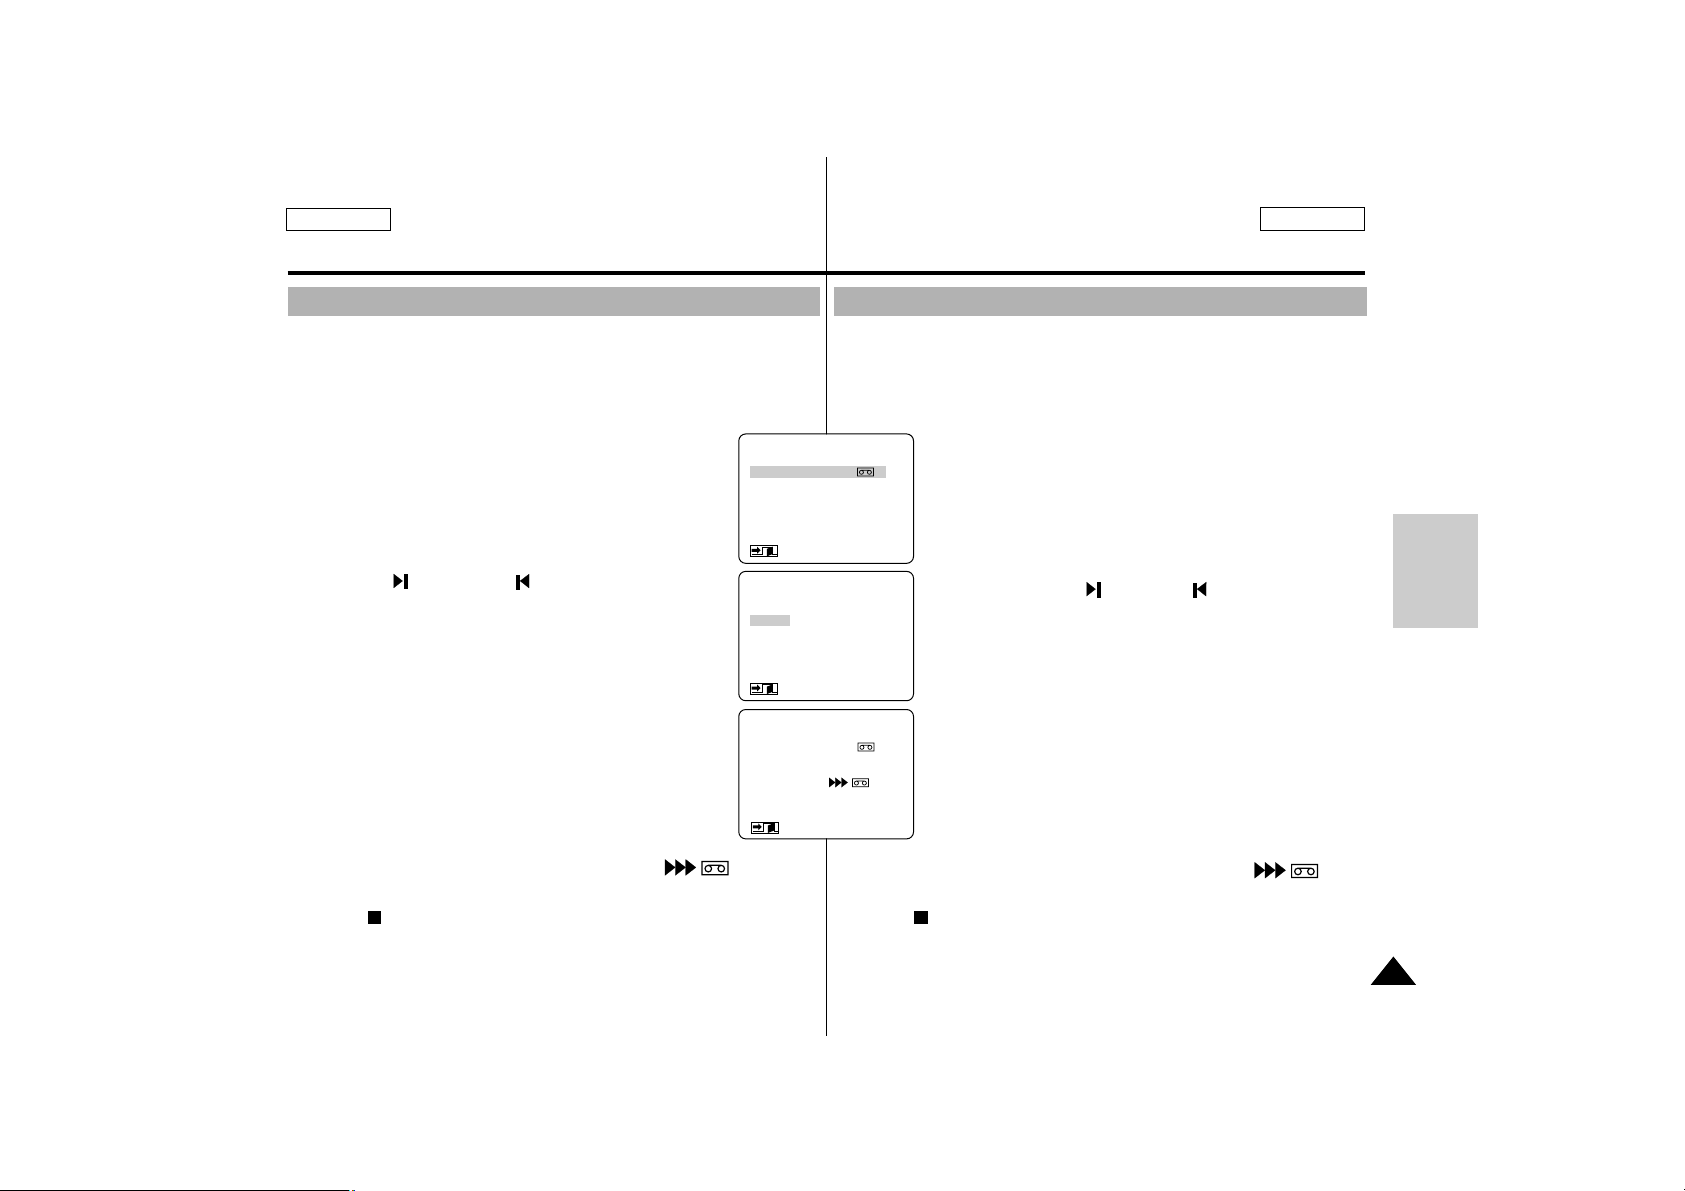
ENGLISH ESPAÑOL
87
en SCD75/D77)
Digital Still Camera mode (SCD75/D77 only)
Modo Digital Still Camera (sólo en SCD75/D77)
✤
You can copy images on the SMC or built-in memory to a cassette.
✤
There are 2 ways to copy images from a card or memory to a cassette.
■
Single
■
ALL
1. Set the mode switch to CAMCORDER.
2. Set the power switch to PLAYER mode.
3. Locate the point on the cassette where you want to start
copying and set it to stop.
4. Set the mode switch to DSC.
5. Using the (MEM.+) and (MEM._) buttons,
find the first still image that you want to copy.
6. Enter the menu and select the FILE COPY.
7. To select the FILE COPY mode, press the ENTER button.
8. Select the item and press the ENTER.
■
SINGLE:To record a single image to a cassette.
■
ALL: To record all still images that recorded on the
SMC or memory to a cassette.
■
RETURN:To return to main menu.
9. Copying starts.
■
Each image is copied for about 8 seconds on the
cassette.
■
The currently copying image and [
MEMORY
]
appears on the screen.
10. Press (STOP) or MENU ON/OFF button to stop copying.
■
Copying stops when all images have been copied or the tape
reaches its end.
Copying still images to a cassette
(MENU)
FILE COPY (MEMORY→ )
FILE DELETE
PROTECT SET
DPOF
LCD ADJUST
DISPLAY...................LCD
: MENU
●
FILE COPY
●
SINGLE
ALL
RETURN
SEL : ENTER
: MENU
SP REC
0:00:00:00
63MIN
FILE COPY
MEMORY
: MENU/STOP
D
S
C
✤
Puede copiar imágenes de la tarjeta SMC o de la memoria incorpora-
da en un casete.
✤
Hay dos maneras de copiar imágenes de una tarjeta o memoria en un
casete.
■
Single
■
ALL
1. Ponga el interruptor de modo en CAMCORDER.
2. Ponga el interruptor de encendido en modo PLAYER.
3. Localice el punto del casete en el que desea empezar la
copia y deténgalo.
4. Ponga el interruptor de modo en DSC.
5. Con los botones (MEM.+) y (MEM._), busque la
primera imagen fija que desee copiar.
6. Entre en el menú y seleccione FILE COPY.
7. Para seleccionar el modo FILE COPY, pulse el botón
ENTER.
8. Seleccione la opción y pulse ENTER.
■
SINGLE: Para grabar una sola imagen en un casete.
■
ALL: Para grabar todas las imágenes fijas que ha
grabado en la tarjeta SMC o la memoria en un casete.
■
RETURN: Para volver al menú principal.
9. Empieza la copia.
■
Cada imagen se copia durante 8 segundos
aproximadamente en el casete.
■
La imagen que se copia actualmente y [MEMORY ]
aparecen en la pantalla.
10. Pulse (STOP) o el botón MENU ON/OFF para detener la copia.
■
La copia se detiene cuando todas las imágenes se han copiado o
la cinta ha llegado al final.
Copia de imágenes fijas en un casete
Page 88
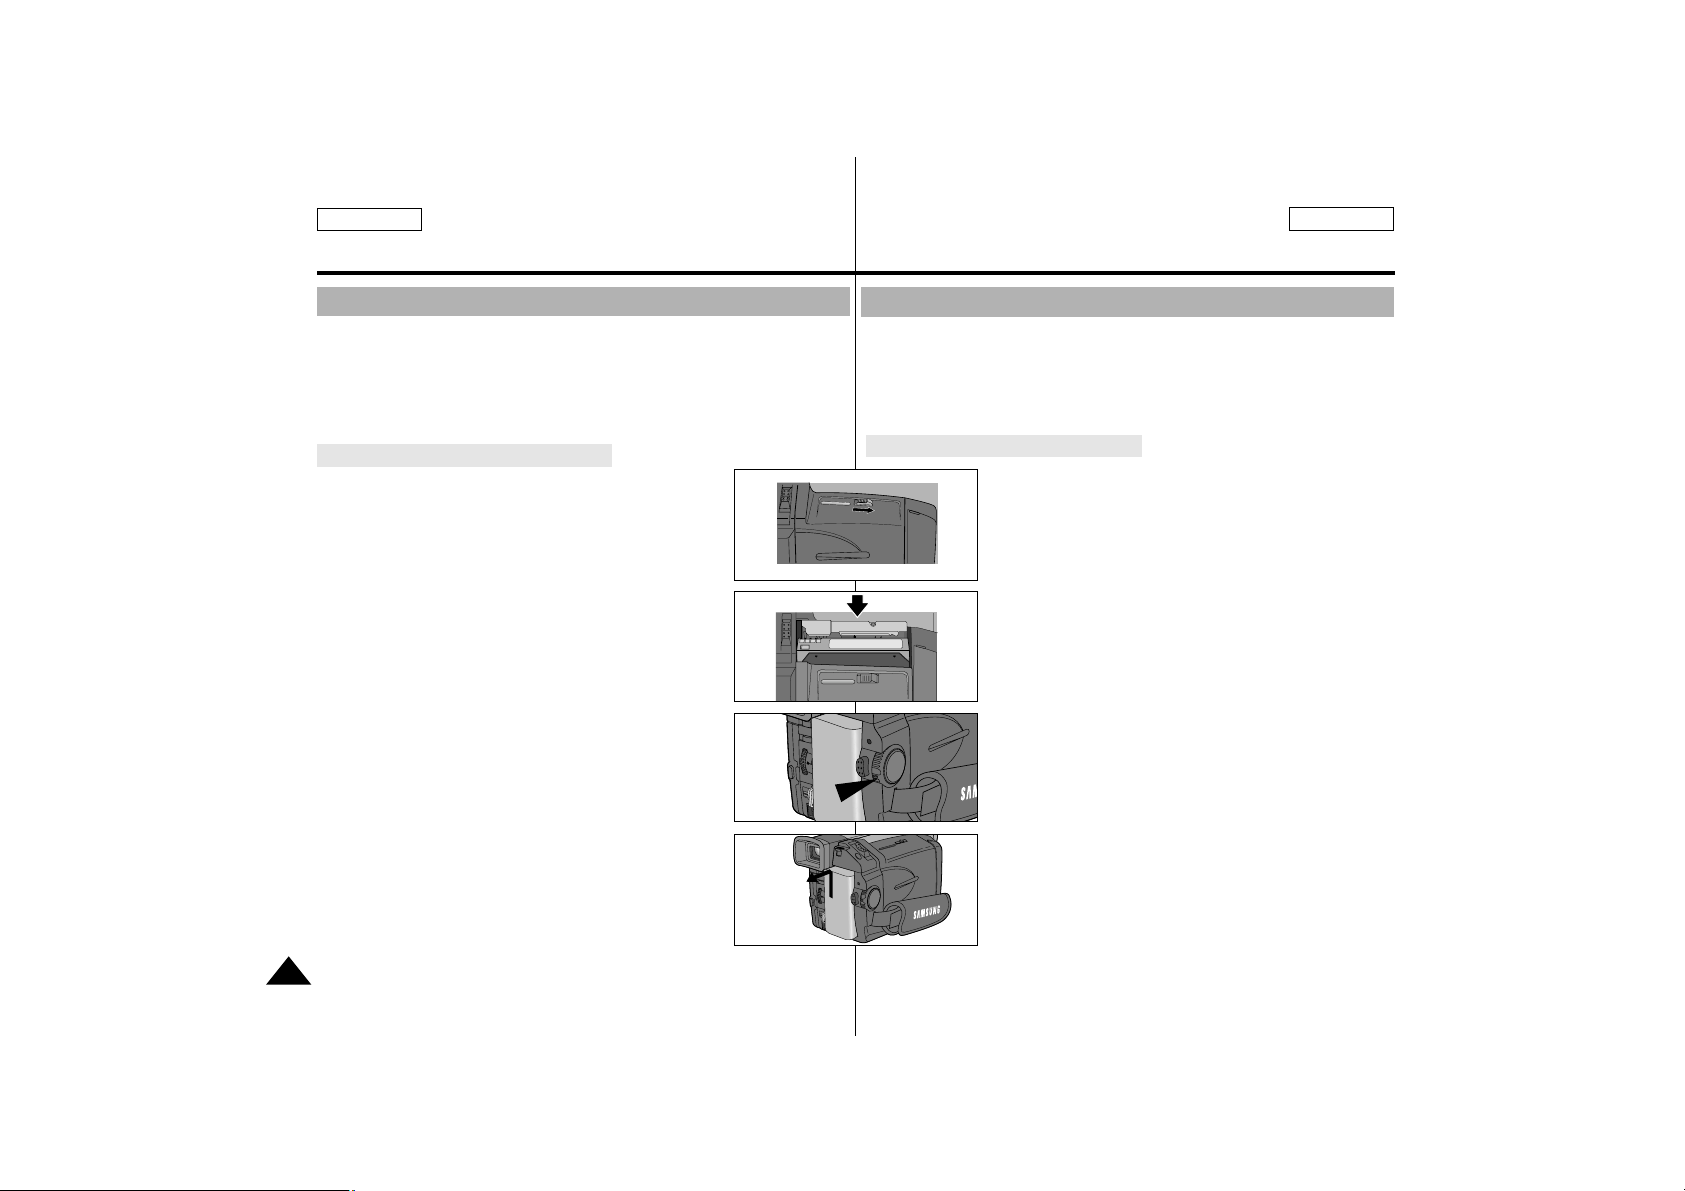
88
Maintenance Mantenimiento
ENGLISH ESPAÑOL
✤
At the end of a recording you must remove the power source.
✤
When recording with Lithium Ion battery Pack, leaving the pack on the
camcorder can reduce the life span of the battery, Hence, it should be
remored from the camcorder.
After completing a recording session
1. Slide the EJECT switch in the direction of the arrow.
■
Opening the cassette door ejects the tape
automatically.
■
Please wait while the tape is completely ejected.
2. After removing the tape, close the door and store
the camcorder in a dust free environment.
■
Dust and other foreign materials can cause
square-shaped noise or hesitative image.
3. Set the power switch to OFF mode.
4. Disconnect the power source or remove the
Lithium Ion Battery Pack.
■
When connecting a power supply, separate it in
reverse order by referring to page 21.
■
Hold down the BATT. RELEASE button and slide
the battery pack in the direction of the arrow.
After finishing a recording
3
4
1
2
OFF
✤
Al terminar una filmación, debe retirar la fuente de energía.
✤
Si deja la batería de iones de litio en la videocámara, puede reducir
la vida útil de la batería, por lo que debe retirarla de la videocámara.
Al terminar la sesión de filmación
1. Deslice el interruptor EJECT en la dirección de la
flecha.
■
Si se abre la puerta del casete, se expulsa
automáticamente la cinta.
■
Espere hasta que se haya expulsado completamente la cinta.
2. Después de extraer la cinta, cierre la puerta y
guarde la videocámara en un lugar sin polvo.
■
El polvo y otras materias extrañas pueden
causar ruido en forma de cuadrados o imágenes
temblorosas.
3. Ponga el interruptor de encendido a la posición
OFF.
4. Desconecte la fuente de energía o retire la batería
de iones de litio.
■
Al desconectar una fuente de energía, sepárela
en orden inverso al explicado en la página 21.
■
Mantenga pulsado la tecla BATT. RELEASE y
deslice la batería en la dirección de la flecha.
Al terminar la filmación
Page 89
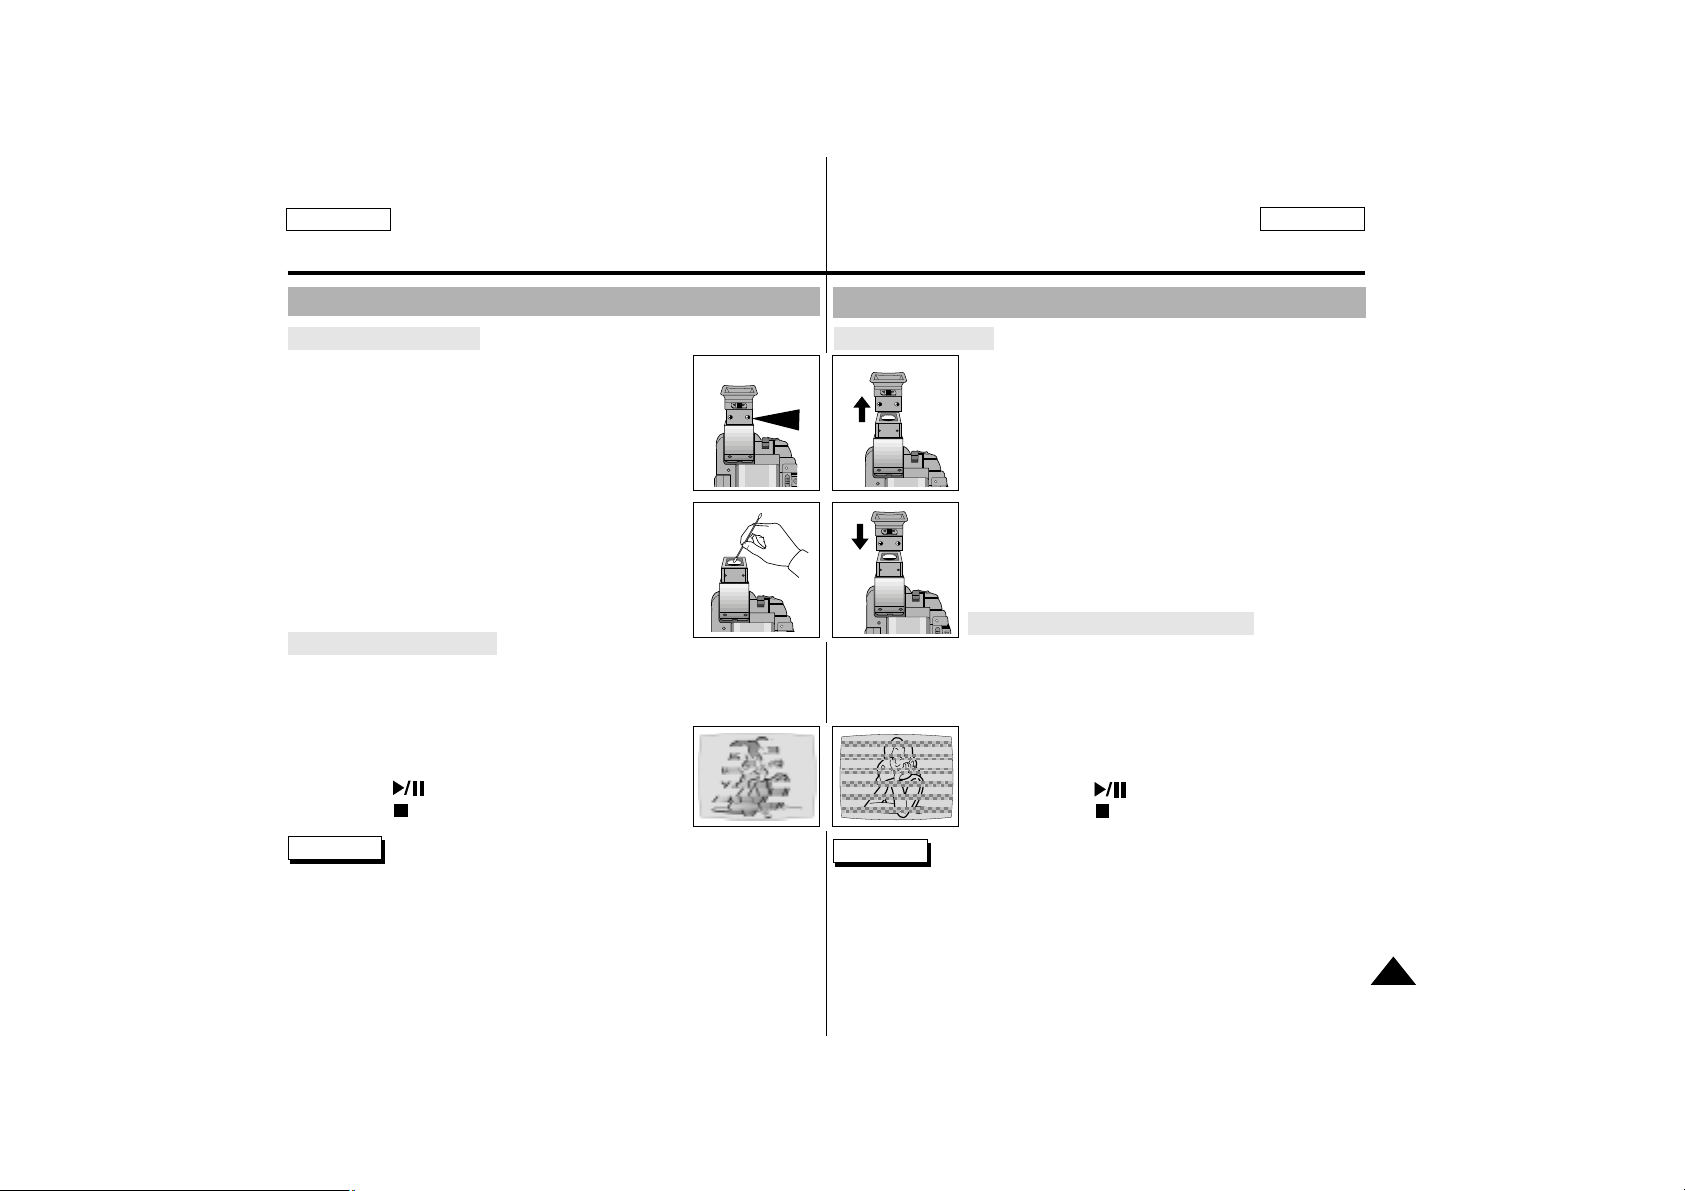
ENGLISH ESPAÑOL
89
Maintenance Mantenimiento
Cleaning and Maintaining the Camcorder
Cleaning the viewfinder
●
Releasing the Eyecup
1. Pull the VIEWFINDER up and then turn the two
screws counter-clock-wise.
2. Pull EYECUP out.
3. Clean the EYECUP and the VIEWFINDER screen
with a soft cloth and cotton swab or a blower.
●
Reattaching the Eyecup
4. Put the EYECUP on the VIEWFINDER.
5. Refit the screws.
Cleaning the Video Heads
To ensure normal recording and clear pictures, clean the video heads
when the playback pictures display square block-shaped noise or only the
blue screen appears during playback, as the video heads may be dirty.
1. Set the power switch to PLAYER mode.
2. Insert the cleaning tape.
3. Press the (PLAY/STILL)button.
4. Press the (STOP) button after 10 seconds.
Reference
■
Check the quality of the picture using a video cassette. If It is still bad,
repeat the operation.
If the problem continues, contact your local authorized service center.
■
Clean the video heads with the dry type cassette cleaner.
12
34
Limpieza y mantenimiento de la videocámara
Limpieza del visor
●
Cómo desmontar el ocular
1. Tire del VISOR hacia arriba y gire los dos tornillos
en sentido contrario a las agujas del reloj.
2. Saque el ocular.
3. Limpie el ocular y la pantalla del visor con un paño
suave y de algodón o un ventilador.
●
Colocación del ocular
4. Ponga el ocular en el visor.
5. Apriete los tornillos.
Limpieza de los cabezales del vídeo
Para asegurar filmaciones normales e imágenes claras, limpie los
cabezales del vídeo cuando las imágnes reproducidas muestren ruido
en forma de bloques cuadrados o sólo aparezca la pantalla azul, ya que
los cabezales deben estar sucios.
1. Ponga el interruptor de encendido en la posición
PLAYER.
2. Inserte la cinta de limpieza.
3. Pulse la tecla (PLAY/STILL).
4. Pulse la tecla (STOP) después de 10 segundos.
Notas
■
Compruebe la calidad de las imágenes de un casete de vídeo.
Si sigue siendo mala, repita la operación.
Si el problema continúa, póngase en contacto con el centro de
servicio local autorizado.
■
Limpie los cabezales del vídeo con una cinta de limpieza de tipo seco.
Page 90
90
Using Your Camcorder Abroad Uso de la videocámara en el extranjero
ENGLISH ESPAÑOL
✤ Each country or area has its own electric and TV color system.
✤ Before using your camcorder abroad, check the following points.
Power sources
■
You can use your camcorder in any country or area with the
supplied AC Power Adapter within 100V to 240V, 50/60 Hz.
■
Use a commercially available AC plug Adapter, if necessary,
depending on the design of the local wall outlet.
Color system
■
You can view your recording in the viewfinder.
However, to view it on a television or copy it to a video cassette
recorder, the television or VCR must be NTSC-compatible and
have the appropriate audio/video jacks.
Otherwise, you may need to use a transcoder.
•
PAL-compatible area
Australia, Austria, Belgium, Bulgaria, China, CIS, Czech Republic, Denmark,
Egypt, Finland, France, Germany, Greece, Great Britain, Holland, Hong Kong,
Hungary, India, Iran, Iraq, Kuwait, Libya, Malaysia, Mauritius, Norway,
Rumania, Saudi Arabia, Singapore, Slovak Republic, Spain, Sweden,
Switzerland, Syria, Thailand, Tunisia, etc.
•
NTSC-compatible area
Bahamas, Canada, Central America, Japan, Mexico, Philippines, Korea,
Taiwan, United States of America, etc.
Reference You can make recordings with your camcorder anywhere
in the world and you can watch the playback picture
on the LCD screen.
✤ Cada país o área tiene su propio sistema eléctrico y de color de tele-
visión.
✤ Antes de utilizar su videocámara en el extranjero, revise los siguientes
aspectos.
Fuentes de energía
■
Puede utilizar su videocámara en cualquier país o zona con
electricidad de 100V a 240V, 50/60 Hz utilizando el adaptador
de corriente CA.
■
Utilice un adaptador de enchufe CA disponible, en caso de ser
necesario, dependiendo del diseño del enchufe de pared local.
Sistema de color
■
Puede ver sus filmaciones en el visor.
Sin embargo, para verlas en un televisor o copiarlas en una cinta
de vídeo, el televisor o el reproductor de vídeo deben ser compatibles con NTSC y disponer de las entradas adecuadas de audio/vídeo.
De lo contrario, podría tener que utilizar un transcodificador.
• Área compatible con PAL
Alemania, Arabia Saudí, Australia, Austria, Bélgica, Bulgaria, China,
CIS, Dinamarca, Egipto, España, Finlandia, Francia, Gran Bretaña,
Grecia, Holanda, Hong Kong, Hungría, India, Irak, Irán, Kuwait,
Libia, Malasia, Mauricio, Noruega, Rumania, República Checa,
República Eslovaca, Singapur, Siria, Suecia, Suiza, Tailandia,
Túnez, etc.
• Área compatible con NTSC
América Central, Bahamas, Canadá, Corea, Estados Unidos,
Filipinas, Japón, Méjico, Taiwán, etc.
Notas Puede realizar filmaciones con la videocámara en
cualquier lugar del mundo y reproducir las imágenes
utilizando la pantalla LCD.
Page 91
91
Troubleshooting Resolución de problemas
ENGLISH ESPAÑOL
slow
fast
slow
no
slow
slow
slow
slow
the battery pack is almost Change to a charged one.
discharged.
the battery pack is fully Change to a charged
discharged. battery.
When the remaining time of Prepare a new one.
the tape is about 3 minutes.
the tape reached its end. Change to a new one.
there is no tape in camcorder. Insert a tape.
the tape is protected If you want to record,
to record. release the protection.
the camcorder has some 1. Eject the tape.
mechanical fault. 2. Set to OFF.
3. Detach the battery.
4. Reattach the battery.
* If unresolved contact your
local service representative.
moisture condensation has see below.
formed in the camcorder.
2MIN
TAPE END
TAPE
TAPE
C.EMG
D.EMG
L.EMG
R.EMG
DEW
Display Blinking Informs that... Action
Troubleshooting
✤ Before contacting a service center, perform the following simple checks.
They may save you the time and expense of an unnecessary call.
Self Diagnosis Display
Moisture Condensation
✤
If the camcorder is brought directly from a cold place to a warm place,
moisture may condense inside the camcorder, on the surface of the
tape, or on the lens. In this condition, the tape may stick to the head
drum and be damaged or the unit may not operate correctly.
To prevent possible damage under these circumstances,
the camcorder is fitted with a moisture sensor.
✤
If there is moisture inside the camcorder, “DEW” is displayed.
If this happens, none of the functions except cassette ejection will work.
Open the cassette compartment and remove the battery.
Leave the camcorder for at least two hours in a dry warm room.
Resolución de problemas
✤ Antes de ponerse en contacto con el centro de servicio, efectúe estas
sencillas verificaciones.
Le pueden ahorrar el tiempo y el dinero de una visita innecesaria.
Pantalla de autodiagnóstico
Condensación de la humedad
✤
Si se pasa la videocámara directamente de un lugar frío a otro con
una temperatura más elevada, puede condensarse la humedad en el
interior de la videocámara, en la superficie de la cinta o en las lentes.
En este caso, la cinta puede adherirse al tambor del cabezal y dañarse,
o hacer que el funcionamiento no sea correcto.
Para evitar posibles daños bajo estas circunstancias, la videocámara
dispone de un sensor de humedad.
✤
Si hay humedad en el interior de la videocámara, aparecerá “DEW”.
Si pasa esto, no funcionará ninguna función excepto la de expulsión del casete.
Abra el compartimento del casete y retire la batería.
Deje la videocámara durante dos horas como mínimo en un lugar
seco y caliente.
la batería está casi descargada. Cámbiela por una cargada.
la batería está completamente Cámbiela por una batería
descargada. cargada.
Cuando el tiempo que queda de Prepare una nueva.
cinta sea de 3 minutos
aproximadamente.
la cinta ha llegado al final. Cámbiela por una nueva.
no hay cinta en la videocámara. Introduzca una cinta.
la cinta está protegida contra Si desea filmar, quite la
filmación. protección.
la videocámara tiene alguna 1.Extraiga la cinta.
avería mecánica. 2.Ponga la videocámara en OFF.
3.Retire la batería.
4.Vuelva a colocar la batería.
* Si el problema continúa,
póngase en contacto con el
servicio local.
se ha formado condensación de Consulte más abajo.
humedad en la videocámara.
Pantalla
Parpadeo
Informa que... Acción
lento
rápido
lento
no
lento
lento
lento
lento
2MIN
TAPE END
TAPE
TAPE
C.EMG
D.EMG
L.EMG
R.EMG
DEW
Page 92
92
Troubleshooting Resolución de problemas
ENGLISH ESPAÑOL
slow
slow
slow
slow
slow
slow
slow
slow
slow
slow
slow
There no card or memory Insert a card.
The CARD or memory is Format a card or memory
damaged. or change to a new card.
There is not enough Change to a new card or
memory to record. erase recorded image.
There is no images recorded Record new images.
on the SMC or memory.
The card or memory is Remove the protection
protected to record. label.
When you try to delete to Cancel the protect of
protected image. image.
The camera can not Format a card or memory
playback. or insert card recorded
on this camcorder.
The camera can not record. Format a card or memory
or change to a new card.
The card or memory Format a card or memory.
needs to format.
When progressing Wait until the end of
FILE DELETE. deleting.
When progressing Wait until the end of
MEMORY FORMAT. formatting.
When progressing Wait until the end of
FILE COPY. copying.
NO MEMORY!
MEMORY IS
FULL
NO STORED
IMAGE
CONFIRM WRITE
PROTECTION
CONFIRM
PROTECTION
MEMORY READ
ERROR
MEMORY WRITE
ERROR
NEED FORMAT
FILE DELETE
MEMORY
FORMAT
FILE COPY
Display Blinking Informs that... Action
Self Diagnosis Display in DSC made Pantalla de diagnósticos automáticos en modo DSC
Lento
Lento
Lento
Lento
Lento
Lento
Lento
Lento
Lento
Lento
Lento
No hay ninguna tarjeta ni Inserte una tarjeta.
memoria en la videocámara. Formatee una tarjeta o
La tarjeta o la memoria se memoria o ponga una
ha dañado. nueva tarjeta.
No hay suficiente memoria Ponga una nueva tarjeta o
para grabar. borre una imagen grabada.
No hay imágenes grabadas en Grabe nuevas imágenes.
la tarjeta SMC ni en la memoria.
La tarjeta o la memoria están Retire la pestaña de
protegidas contra grabación. protección.
Intenta suprimir una imagen Cancele la protección de
protegida. la imagen.
La videocámara no puede Formatee una tarjeta o
reproducir. memoria o inserte una
tarjeta grabada en esta
videocámara.
La cámara no puede grabar. Formatee una tarjeta o
memoria o ponga una
nueva tarjeta.
Es necesario formatear la Formatee una tarjeta o la
tarjeta o la memoria. memoria.
Al procesar FILE DELETE. Espere hasta el final de la
supresión.
Al procesar MEMORY Espere hasta el final del
FORMAT. formateo.
Al procesar FILE COPY. Espere hasta el final de la
copia.
NO MEMORY!
MEMORY IS
FULL
NO STORED
IMAGE
CONFIRM WRITE
PROTECTION
CONFIRM
PROTECTION
MEMORY READ
ERROR
MEMORY WRITE
ERROR
NEED FORMAT
FILE DELETE
MEMORY
FORMAT
FILE COPY
Aparece
Parpadeo
Informa que... Acción
Page 93
93
Troubleshooting Resolución de problemas
ENGLISH ESPAÑOL
You cannot switch the
camcorder on.
START/STOP button
does not operate while
recording.
The camcorder goes off
automatically .
The battery pack is
quickly exhausted.
When you see a blue
screen during playback.
A vertical strip appears
on the screen when
recording a dark
background.
The image in the
viewfinder is blurred.
Auto focus does not
work.
Play, FF or REW button
does not work.
When you see the broken block image during
the EDIT SEARCH.
Check the battery pack or the AC Power Adapter.
Check the POWER switch is set to CAMERA.
You have reached the end of the cassette.
Check the record protection tab on the cassette.
You have left the camcorder set to STBY for more
than 5 minutes without using it.
The battery pack is fully exhausted.
The atmospheric temperature is too low.
The battery pack has not been charged fully.
The battery pack is completely dead, and cannot
be recharged, Use another battery pack.
The video heads may be dirty.
Clean the head with a cleaning tape.
The contrast between the subject and the
background is too great for the camcorder to
operate normally. Make the background bright to
reduce the contrast or use the BLC function while
you are recording brighter.
The Viewfinder lens has not been adjusted.
Adjust the viewfinder control lever until the
indicators displayed on the viewfinder come into
sharp focus.
Check the M.FOCUS menu. Auto focus does not
work in the Manual Focus mode.
Check the POWER switch.
Set the power switch to PLAYER.
You have reached the beginning or end of the
cassette.
It is the characteristic of this camcorder and it is
not a failure or defect.
Explanation/SolutionSymptom
✤ If these instructions do not allow you to solve the problem, contact your
nearest authorized service center.
No puede encender
la videocámara.
La tecla START/STOP
no funciona durante la filmación.
La videocámara se apaga
automáticamente.
La batería se gasta
rápidamente.
Cuando vea una pantalla azul
durante la reproducción.
Aparece una línea vertical en
la pantalla cuando filma sobre
un fondo oscuro.
El enfoque automático no
funciona.
Los botones Play, FF o REW
no funcionan.
Verifique la batería o el adaptador de corriente CA.
Verifique que el interruptor POWER esté en la posición
CAMERA.
Ha llegado al final del casete.
Verifique la pestaña de protección contra filmación del
casete.
Ha dejado la videocámara en STBY durante más de
5 minutos sin utilizarla.
La batería está completamente descargada.
La temperatura atmosférica es demasiado baja.
La batería no se ha cargado completamente.
La batería está completamente agotada y no se puede
volver a cargar. Utilice otra batería.
Los cabezales del vídeo pueden estar sucios.
Limpie los cabezales con una cinta de limpieza.
El contraste entre el motivo y el fondo
es demasiado grande para que la videocámara pueda
funcionar con normalidad.
Aclare el fondo para reducir el contraste o
utilice la función BLC mientras filma.
La imagen del visor
se ve borrosa.
No se han ajustado las lentes del visor.
Ajuste la palanca del control del visor hasta que los indicadores que aparecen en el visor se vean nítidamente.
Verifique el menú M.FOCUS.
El enfoque automático no funciona en modo de
enfoque manual.
Verifique el interruptor POWER.
Ponga el interruptor de encendido en la posición PLAYER.
Ha llegado al principio o al final del casete.
Cuando vea la imagen de un
bloque discontinuo durante
EDIT SEARCH.
Se trata de una característica de la videocámara y no
es ninguna anomalía ni defecto.
Explicación/Solución Síntoma
✤ Si estas instrucciones no le permiten resolver su problema, póngase
en contacto con el servicio autorizado más próximo.
Page 94
94
Specifications Especificaciones
ENGLISH ESPAÑOL
Model name: SCD73/D75/D77
System
Video signal NTSC
Video recording system 2 rotary heads, Helical scanning system
Audio recording system Rotary heads, PCM system
Usable cassette Digital video tape (6.35mm width):
Mini DV cassette
Tape speed SP: approx. 18.81mm/s LP: approx. 12.56mm/s
Tape recording time SP: 60 minutes (when using DVM 60)
LP: 90 minutes (when using DVM 60)
FF/REW time Approx. 150 sec. (using DVM60 tape)
Image device CCD (Charge Coupled Device)
Lens F1.6 22x(Optical), 500x(Digital)
Electronic zoom lens
Filter diameter Ø37
LCD monitor/Viewfinder
Size/dot number 2.5inch/112,320
LCD monitor Method TFT LCD
Viewfinder 0.24” B/W LCD
Connectors
Video output 1Vp-p (75Ωterminated)
S-video output Y: 1Vp-p, 75Ω, C: 0. 286Vp-p, 75Ω
Audio output -7.5dBs (600Ω terminated)
DV input/output 4pin special in/out connector
USB output Mini-B type connector
External mic Ø3.5 stereo
Sistema
Señal de vídeo NTSC
Sistema de filmación de vídeo 2 cabezales rotatorios,
sistema Helical scanning
Sistema de grabación de sonido Cabezales rotatorios, sistema PCM
Casete utilizable Cinta de vídeo digital (6,35 mm de anchura):
Mini DV cassette
Velocidad de cinta SP: aprox. 18,81 mm/s
LP: aprox. 12,56 mm/s:
Tiempo de filmación de cinta SP: 60 minutos (si se utiliza DVM 60)
LP: 90 minutos (si se utiliza DVM 60)
Tiempo de FF/REW Aprox. 150 seg.
(si se utiliza una cinta DVM60)
Dispositivo de imagen CCD (Dispositivo unido de recarga)
Lentes F1.6 22x(ópticas), 500x(digitales)
Lentes de zoom electrónicas
Diámetro de filtro Ø37
Pantalla LCD/Visor
Tamaño/número de punto 2,5 pulg/112.320
Método de pantalla LCD LCD TFT
Visor LCD en blanco y negro de 0,24 pulgadas
Conectores
Salida de vídeo 1 Vp-p (75Ω terminado)
Salida de S-video Y: 1Vp-p, 75Ω, C: 0. 286 Vp-p, 75Ω.
Salida de audio –7,5 dBs (600Ω terminado)
Entrada/salida de DV conector de entrada/salida especial de
4 patillas
Conexión USB conector de Mini-B
Micrófono externo Ø3,5 estéreo
Nombre de modelo: SCD73/D75/D77
Page 95
95
Specifications Especificaciones
ENGLISH ESPAÑOL
General
Power source DC 8.4V, Lithium Ion Battery Pack 7.4V
Power source type Lithium Ion Battery Pack,
Power supply (100V~240V) 50/60Hz
Power consumption 6.5W(LCD), 5.2W(EVF)
(Recording)
Operating temperature 0˚~40˚C (32˚F~104˚F)
Storage temperature -20˚C ~ 60˚C (-4˚F ~ 140˚F)
External dimension Length 153mm, Height 93mm, Width 87mm
Weight 595g
(Except for Lithium Ion Battery Pack and tape)
Built-in MIC Omni-directional stereo condenser microphone
Remote control Indoors: greater than 15m (straight line)
Outdoors: greater than 5m (straight line)
• These technical specifications and design may be changed without notice.
General
Fuente de energía CC 8,4V, Batería de iones de litio 7,4V
Tipo de fuente de energía Batería de iones de litio, suministro de
energía (100V~240V) 50/60Hz
Consumo de energía (Filmación) 6.5W(LCD), 5.2W(EVF)
Temperatura de funcioamiento De 0° a 40°C (de 32°F a 104°F)
Temperatura de almacenamiento De -20°C a 60°C (de -4°F a 140°F)
Dimensiones externas Longitud 158 mm, Altura 93 mm,
Anchura 87 mm
Peso 595g (Excepto por la batería de iones de
litio y la cinta)
Micrófono incorporado Micrófono condensado estéreo omni-
direccional
Mando a distancia En el interior: más de 15m (en línea recta)
En el exterior: más de 5m (en línea recta)
• Estas especificaciones técnicas y el diseño pueden modificarse
sin notificación.
Page 96
96
INDEX
Índice
ENGLISH ESPAÑOL
ART............................................................40
AUDIO MODE...........................................47
AF ..............................................................54
BATTERY PACK ......................................22
B/W ...........................................................40
Charge.......................................................22
Cleaning ...................................................89
CUSTOM ..................................................53
DATE/TIME ...............................................49
Digital Zoom ............................................. 38
DIS ............................................................35
DPOF.........................................................84
DSE ..........................................................40
DUBBING .................................................57
DV in/out ...................................................70
EASY.........................................................52
EDIT SEARCH .........................................27
FADE ........................................................56
FORMAT....................................................86
F.ADV .......................................................67
F.F/REW ...................................................66
IEEE 1394 ................................................69
IRIS ...........................................................44
MEM. .........................................................80
MF .............................................................54
MIRROR ...................................................40
MIX ............................................................58
MOSAIC ....................................................40
NEGA ........................................................40
ND FILTER ...............................................62
NTSC ........................................................90
PAL ...........................................................90
PHOTO......................................................59
PIP ............................................................36
PLAY .........................................................65
POWER ADAPTER ..................................21
PROGRAM AE .........................................39
PROTECTION TAB ..................................76
REC LAMP................................................46
REC MODE...............................................45
REMOTE CONTROL................................18
SAFETY TAB (red tab)..............................25
SELF TIMER ............................................18
SHUTTER SPEED .................................. 43
Smart Media Card.....................................76
SOUND 1...................................................58
SOUND 2...................................................58
S-VIDEO ...................................................64
TAPE EJECT ............................................25
TELE..........................................................37
USB ...........................................................71
VIEWFINDER ...........................................29
VIDEO LIGHT............................................61
WIDE ........................................................37
WHITE BALANCE .................................... 42
ZERO MEMORY.......................................68
ZOOM .......................................................37
- A -
- B -
- C -
- D -
- E -
- F -
- I -
- M -
- N -
- P -
- S -
- R -
- T -
- U -
- V -
- W -
- Z -
ADAPTADOR DE POTENCIA ........21
AVANCE/REBOBINADO .................66
BALANCE DE BLANCOS................42
BATERIA .........................................22
CARGA.............................................22
DOBLAJE DE SONIDO ..................57
ENFOQUE MANUAL/
AUTOMA TICO.................................54
ENTRADA/SALIDA DIGITAL
(DV IN OUT) ....................................70
ESTABILIZADOR DIGITAL DE
IMAGEN...........................................36
FECHA/HORA..................................49
FILTRO ND......................................62
FUNCION CUSTOM .......................53
FUNCION EASY .............................52
FUNCION EDIT/SEARCH ..............25
FUNCION FADE..............................56
FUNCION FOTO..............................59
FUNCION PIP .................................36
GRABACION ...................................45
IEEE 1394........................................67
IRIS ..................................................44
LIMPIEZA Y MANTENIMIENTO......89
MODO ART......................................40
MODO BLANCO Y NEGRO ............40
MODO MIRROR..............................40
MODO MOSAICO............................40
MODO NEGATIVO..........................40
MODO STBY ..................................26
MODO WIDE....................................37
MANDO A DISTANCIA ....................18
PROGRAMAAE ..............................39
PROTECCION DE LA CINTA..........25
REC LAMP ......................................46
REPRODUCCION ..........................66
REPRODUCCION DE SONIDO
DOBLADO .......................................58
SISTEMA PAL..................................90
SITEMA NTSC ................................90
S-VIDEO ..........................................64
TELE ................................................37
TEMPORIZADOR............................18
VELOCIDAD DE OBTURACION ....23
VISOR. ............................................29
ZERO MEMORY..............................68
ZOOM ..............................................38
- A -
- B -
- C -
- D -
- E -
- F -
- G -
- I -
- L -
- M -
- P -
- R -
- S -
- T -
- V -
- Z -
Page 97

THIS CAMCORDER IS MANUFACTURED BY:
ELECTRONICS
*Samsung Electronics’ Internet Home Page
United States http://www.samsungusa.com
United Kingdom http://www.samsungelectronics.co.uk
France http://www.samsung.fr
Australia http://www.samsung.com.au
Germany http://www.samsung.de
Sweden http://www.samsung.se
Poland http://www.samsung.com.pl
Canada http://www.samsungcanada.com
Panama http://www.samsung-panama.com
Italia http://www.samsung.it
Spain http://www.samsung.es
*Samsung Electronics’ Internet Home Page
United States http://www.samsungusa.com
United Kingdom http://www.samsungelectronics.co.uk
France http://www.samsung.fr
Australia http://www.samsung.com.au
Germany http://www.samsung.de
Sweden http://www.samsung.se
Poland http://www.samsung.com.pl
Canada http://www.samsungcanada.com
Panama http://www.samsung-panama.com
Italia http://www.samsung.it
Spain http://www.samsung.es
ESTA VIDEOCÁMARA DE
VÍDEO ESTÁ FABRICADA POR:
ELECTRONICS
ENGLISH ESPAÑOL
 Loading...