

Samsung SyncMaster 171 S, SCC-B5203S, SCC-B5205S, SCC-B5201, SCC-B5201S User Manual
...
AB68-00437A(01)
ELECTRONIC
E
F
G
ES
I
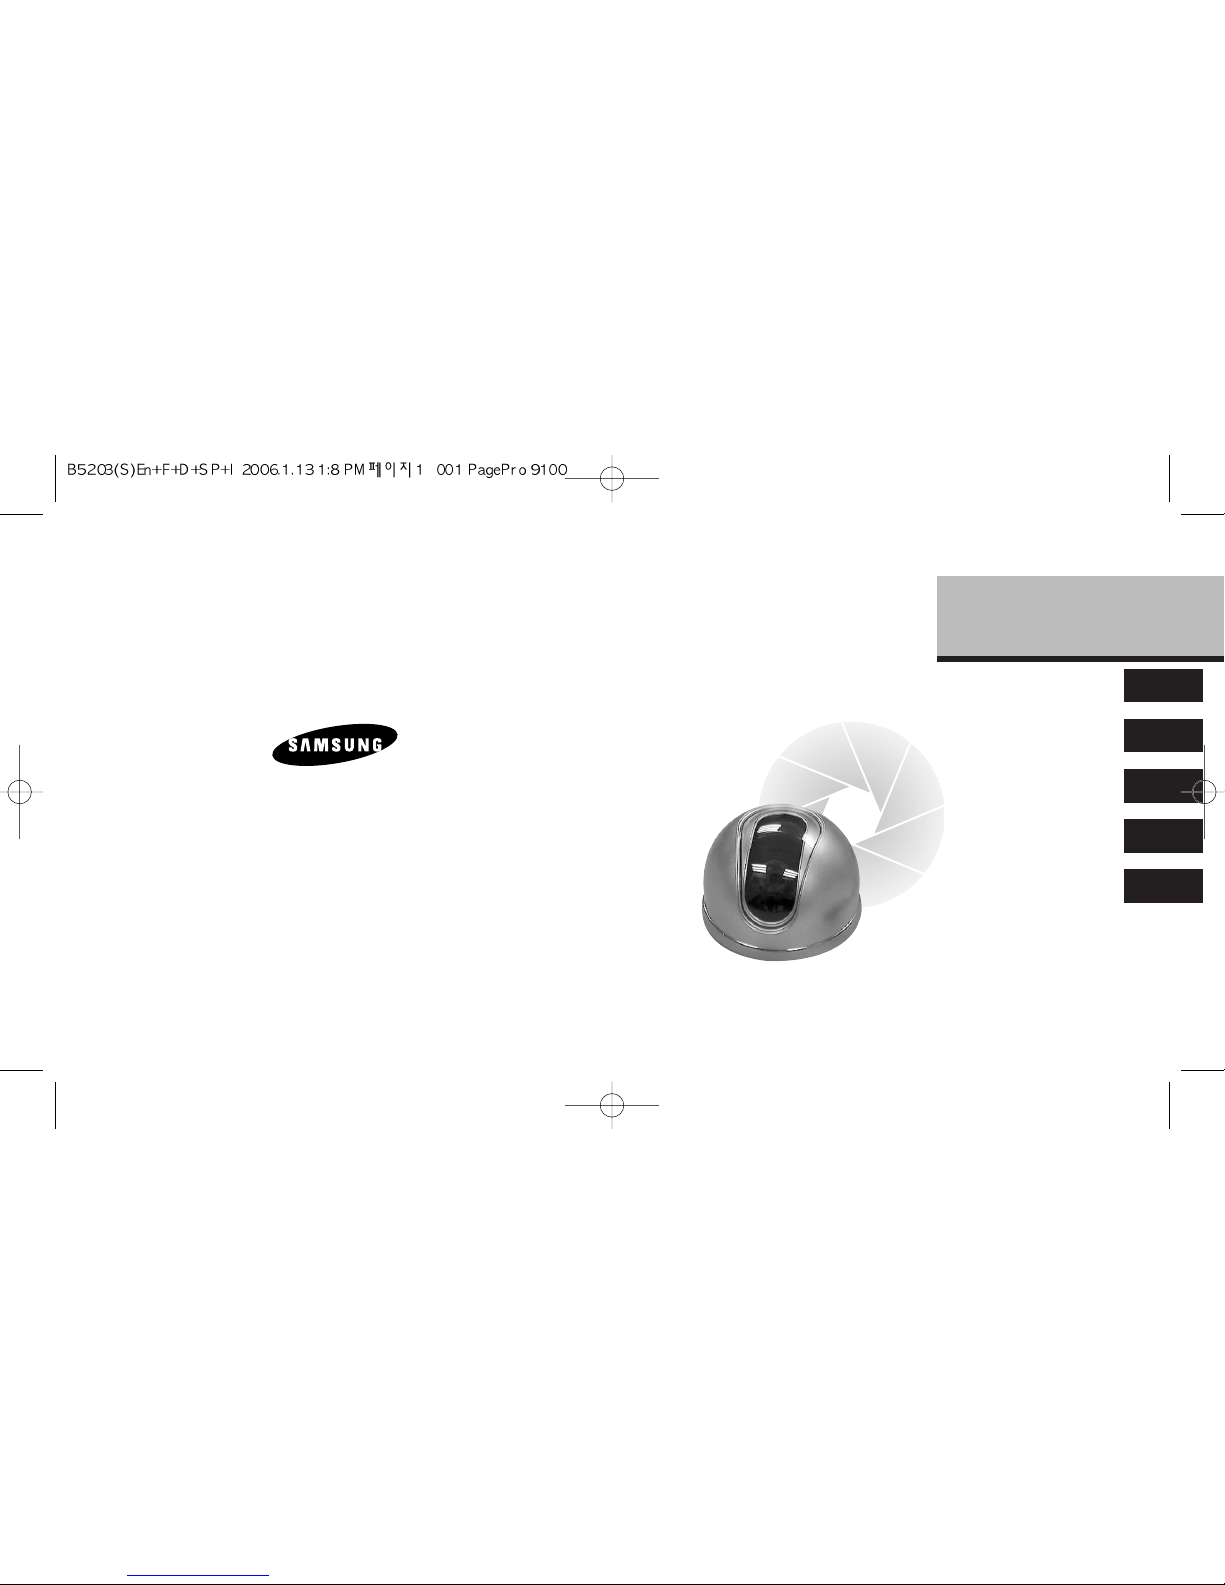
SCC-B5201(S)
SCC-B5203(S)
SCC-B5205(S)
Digital Color Dome Camera
User Guide
Caméra de dôme colorée digitale
Manuel de l’utilisateur
Digitale Farb-Kuppelkamera
Benutzerhandbuch
Cámara Digital de Bóveda del Color
Guia del usuario
Ditale Colore Dome Camera
Manuale d’uso
User Guide User Guide
CAUTION: TO REDUCE THE RISK OF
ELECTRIC SHOCK, DO NOT REMOVE
REAR COVER. NO USER SERVICEABLE
PARTS INSIDE. REFER TO QUALIFIED
SERVICE PERSONNEL.
To prevent damage which may result in fire or electric shock hazard, do not
expose this appliance to rain or moisture.
This device complies with part 15 of the FCC Rules. Operation is subject to the
following two conditions.
1) This device may not cause harmful interference, and
2) This device must accept any interference that may cause undesired operation.
CAUTION:
Danger of explosion if battery is incorrectly replaced.
Replace only with the same or equivalent type recommended by the
manufacturer.
Dispose of used batteries according to the manufacturer’s instructions.
This symbol indicates high
voltage is present inside.
It is dangerous to make any kind
of contact with any inside part of
this product.
This symbol alerts you that
important literature concerning
operation and maintenance has
been included with this product.
CAUTION
RISK OF ELECTRIC
SHOCK DO NOT OPEN
1. Read these instructions.
2. Keep these instructions.
3. Heed all warnings.
4. Follow all instructions.
5. Do not use this apparatus near water.
6. Clean only with dry cloth.
7. Do not block any ventilation openings. Install in accordance with the
manufacturer’s instructions.
8. Do not install near any heat sources such as radiators, heat registers, or
other apparatus (including amplifiers) that produce heat.
9. Do not defeat the safety purpose of the polarized or grounding-type plug.
A polarized plug has two blades with one wider than the other. A grounding
type plug has two blades and a third grounding prong. The wide blade or the
third prong are provided for your safety. If the provided plug does not fit into
your outlet, consult an electrician for replacement of the obsolete outlet.
10. Protect the power cord from being from being walked on or pinched
particularly at plugs, convenience receptacles, and the point where they exit
from the apparatus.
11. Only use attachments/accessories specified by the manufacturer.
12. Use only with cart, stand, tripod, bracket, or table specified by the
manufacturer, or sold with the apparatus. When a used, caution when
moving the cart/apparatus combination to avoid injury from tip-over.
13. Unplug this apparatus. When a cart is used, use caution when moving the
cart/apparatus combination to avoid injury from tip-over.
14. Refer all servicing to qualified service personnel. Servicing is required when
the apparatus has been damaged in any way, such as power-supply cord or
plug is damaged, liquid has been spilled or objects have fallen into the
apparatus, the apparatus has been exposed to rain or moisture, does not
operate normally, or been dropped.
❈
Avoid aiming the camera directly towards extremely bright objects such as the
sun, as this may damage the CCD image sensot.
E
User GuideUser Guide
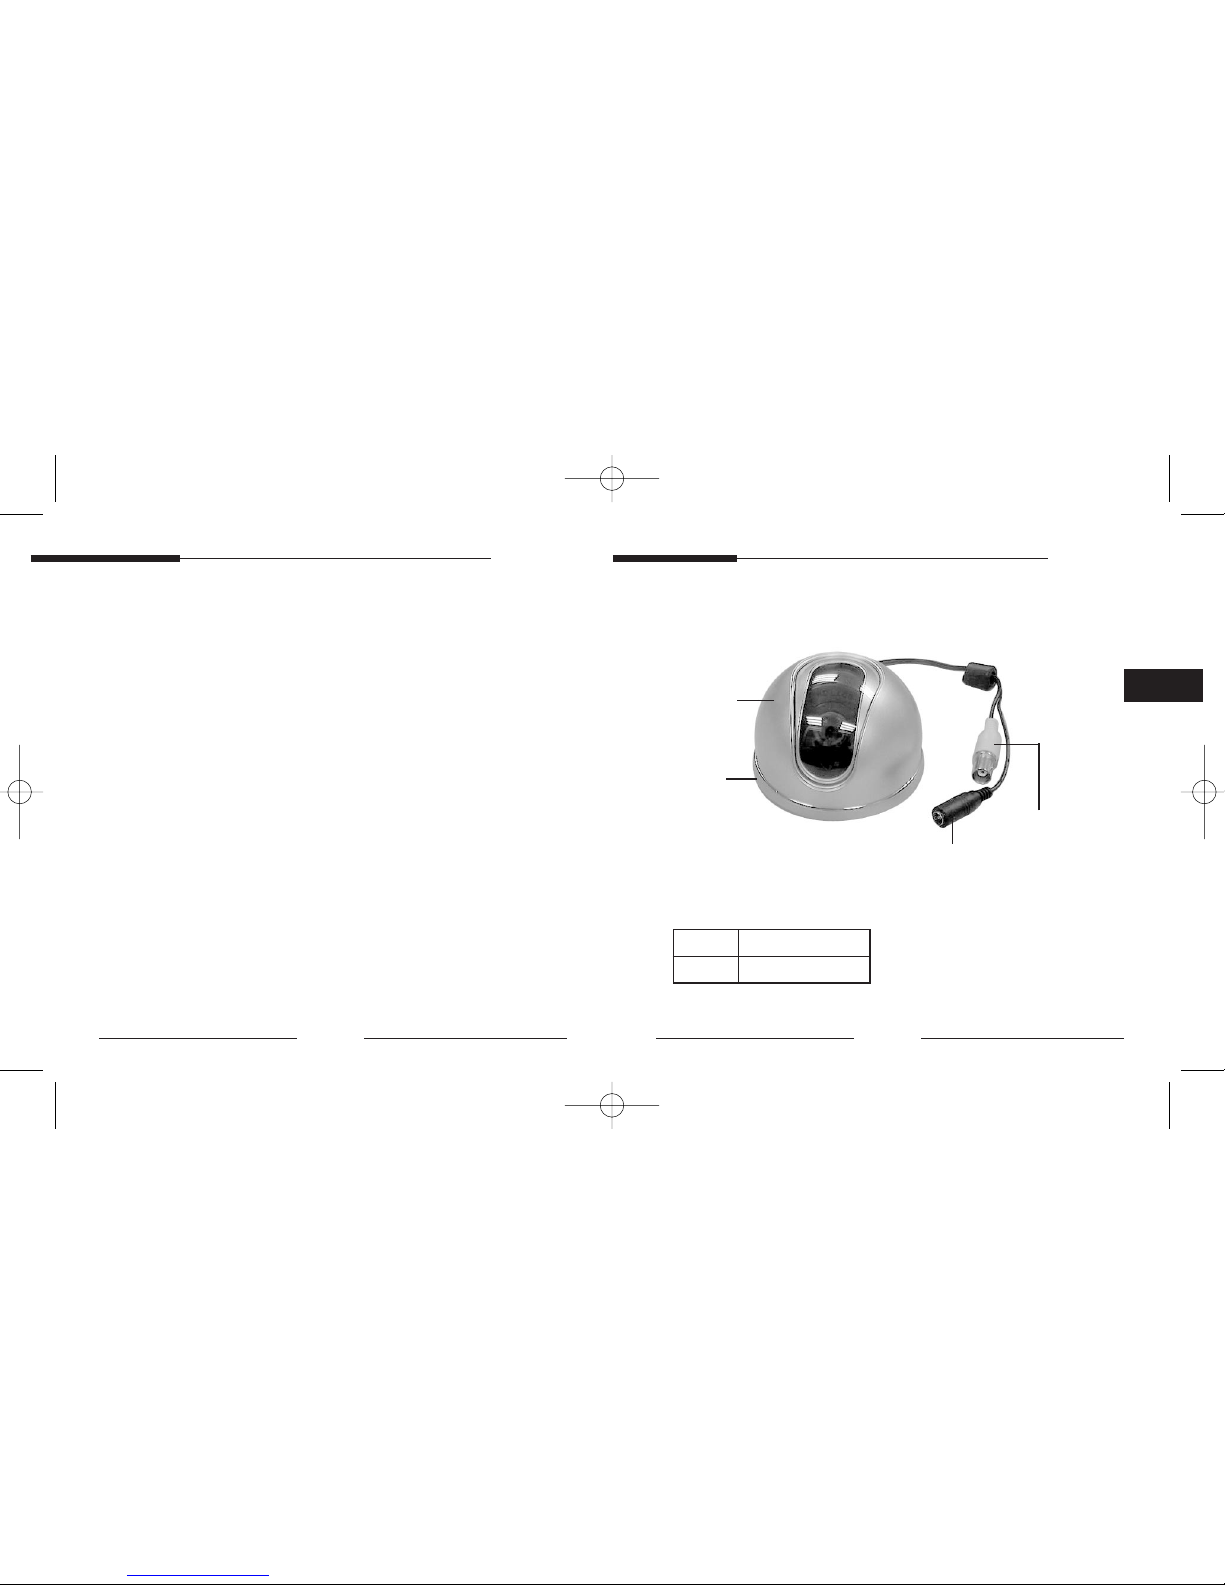
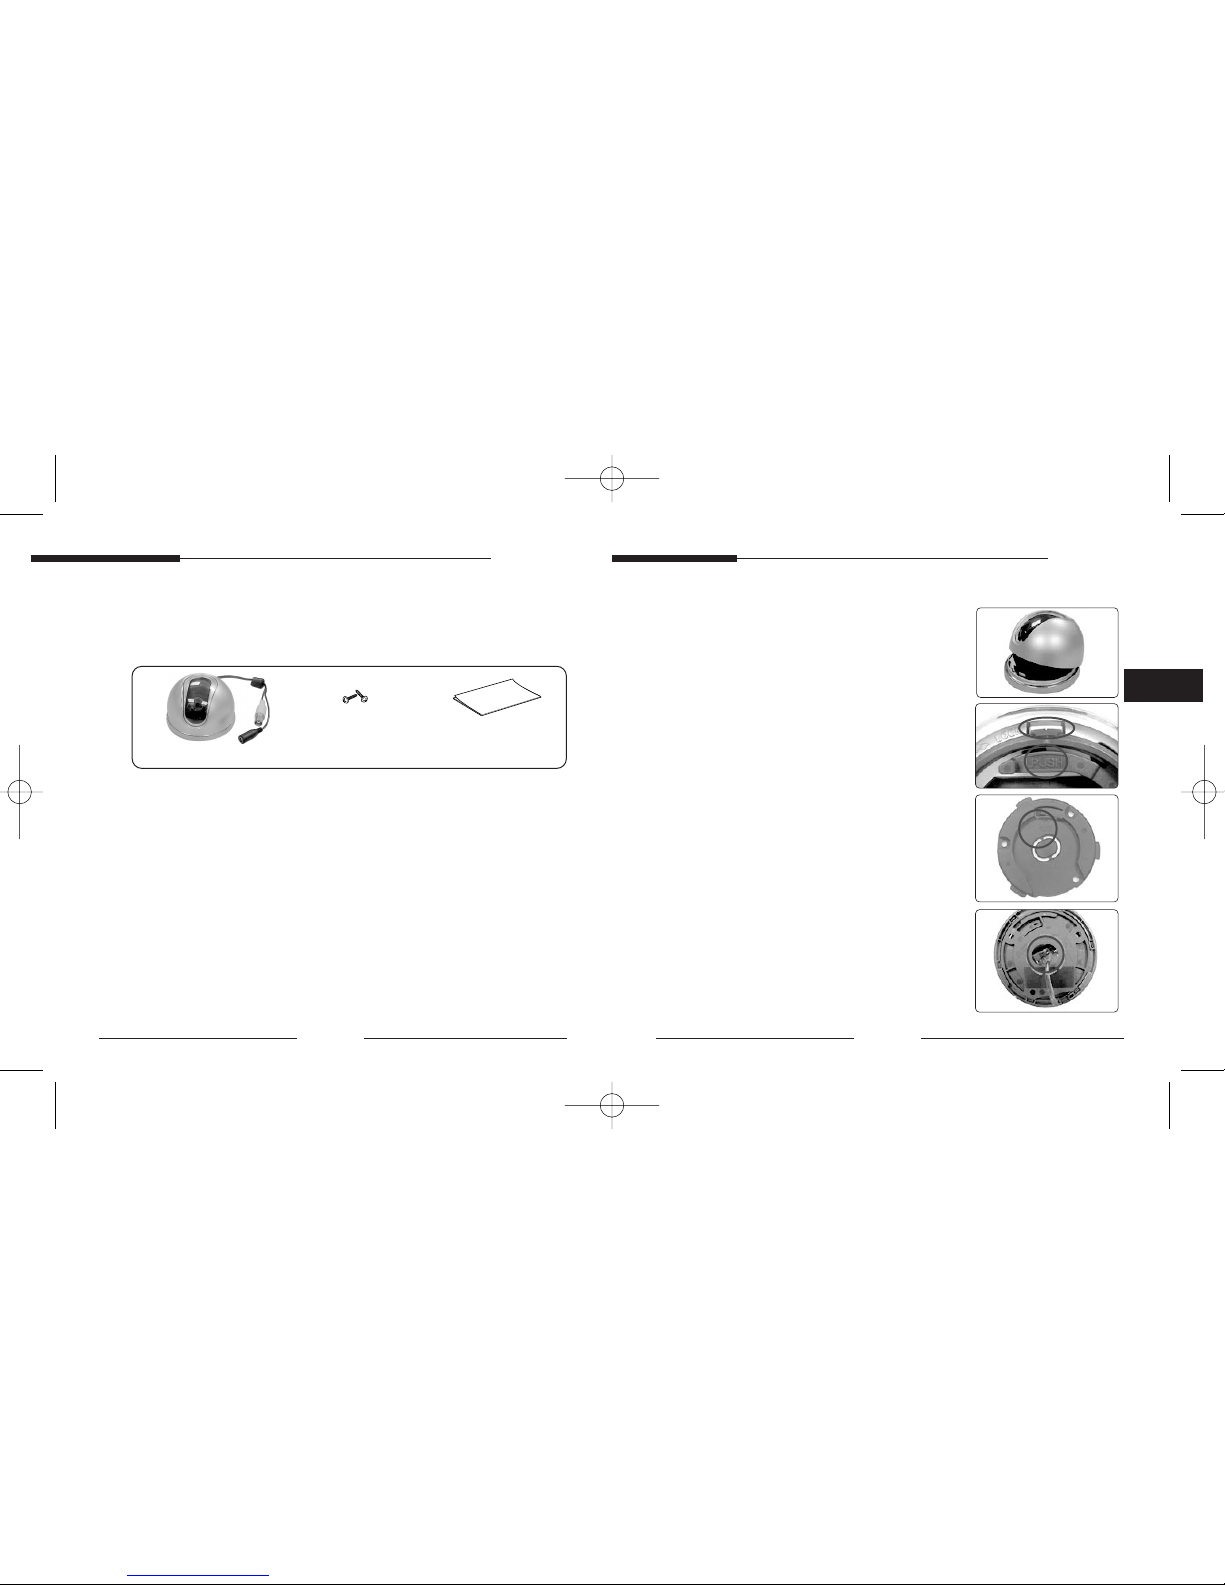
2. Component Name
+ DC 12V
-
GND
●
Power cable
2 3
1. Overview
CCTV COLOR DOME CAMERA are the monitoring cameras incorporated
with the recent CCD that provides the best monitoring function in
connection with the CCTV system equipment.
■ Number of CCD pixels
• 410,000 pixel
■ Power supply
• DC 12V
■ Automatic function and special function
• ATW/AWC
• BLC
• AGC
• ELC(Electronic shutter iris)
Dome cover
Main body
Video cable
Power cable
E
User GuideUser Guide
■
Function Switch
Function switch located at the rear side of the camera within the dome
cover. Sets the White Balance mode.
■
ATW (Auto Tracing White Balance
Automatically adjusts the color temperature of the screen (within 25009500 color temperature range) according to the temperature change in
external environments.
■
AWC (Auto White Balance Control)
Adjusts the color temperature to the color temperature stored when
switched to AWC.
4 5
3. Function of Each Component
■
Fixed focus lens
• Fixed focus lens installed on the camera.
Please take cautions that any dust or foreign matter gathers on the
front glass surface of the lens.
■
Main body
• A body that supports the camera.
■
PCB board
• This part is quite important since it performs the camera function.
Please handle with care.
■
Power cable
• The terminal that is connected to the power (adaptor) cable.
Connect to DC 12V.
■
Video signal output cable
• The cable that sends the video signal.
■
Dome cover
• The transparent plastic cover that protects the camera.
Be careful not to make a scratch on it.
E
User GuideUser Guide
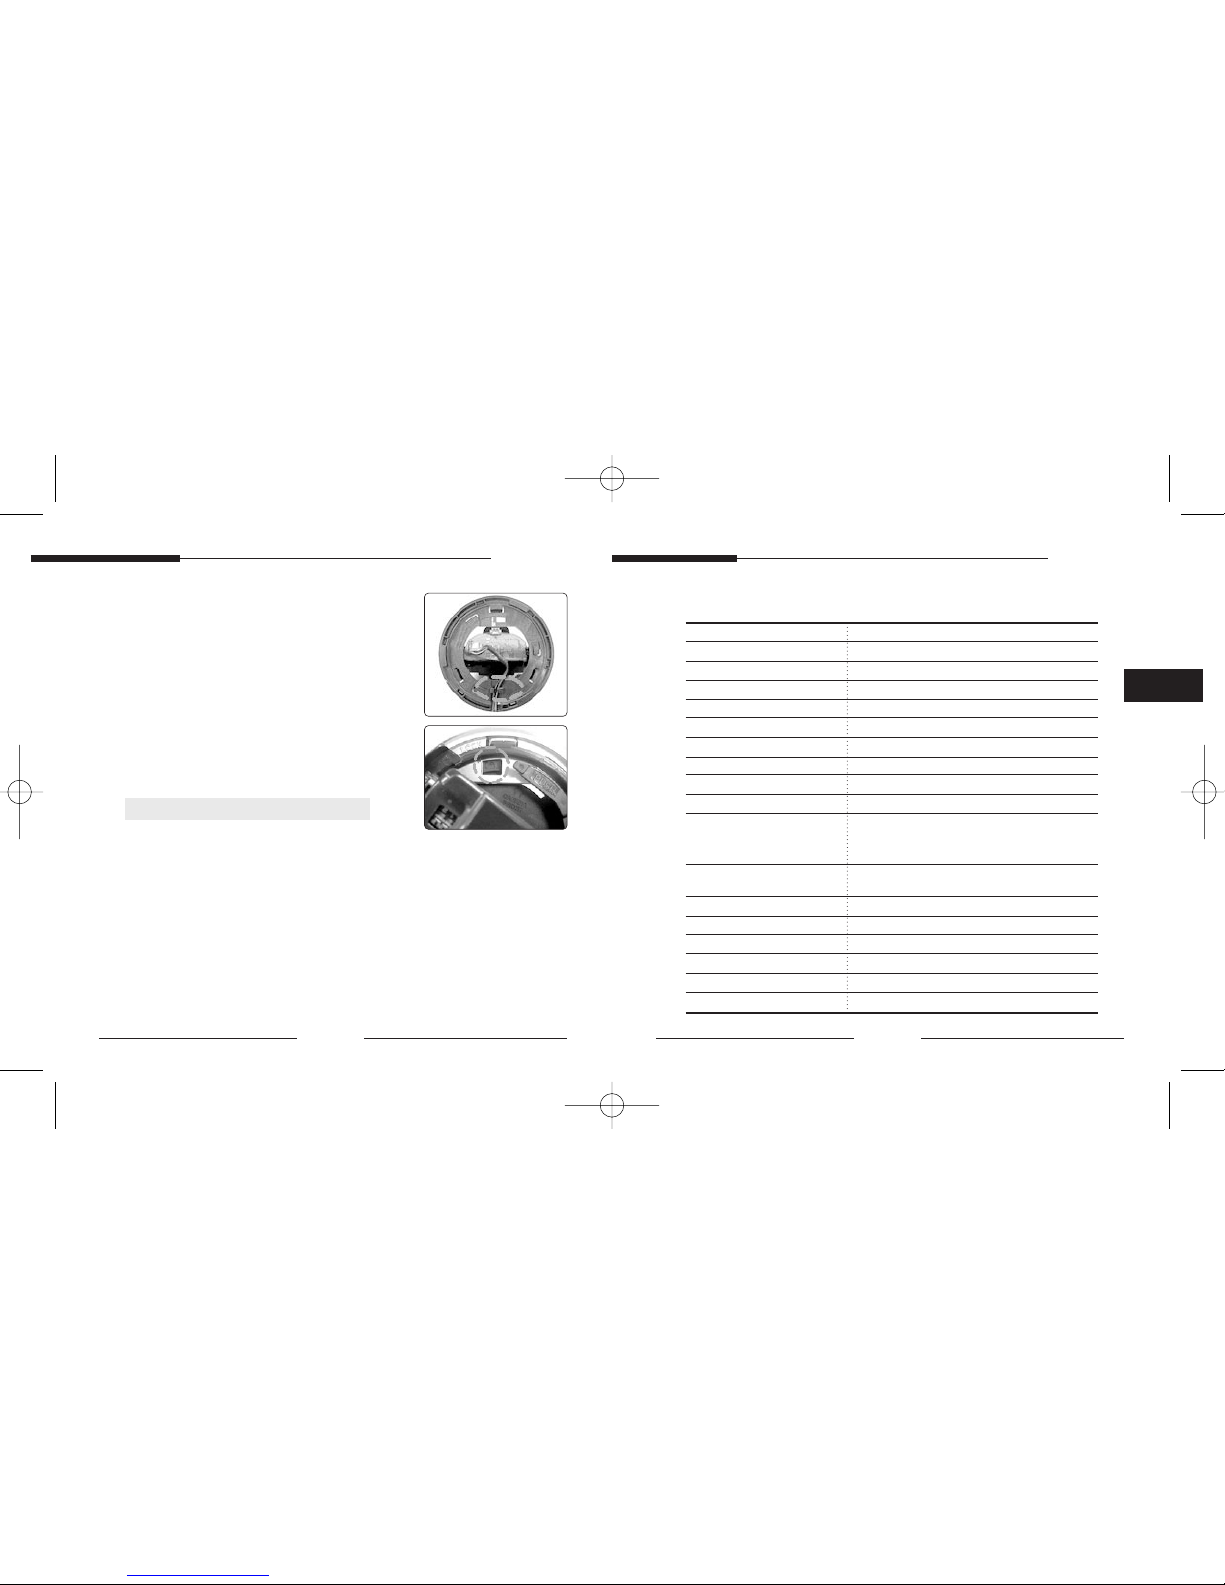
1. Raise the COVER-DOME towards the FRONT
direction to separate from the product.
2. Move the PUSH arrow in alignment with the
BOTTOM arrow, and then turn the BRACKET
CEILING anti-clockwise while pressing the PUSH
part to detach.
3. Move the BRACKET-CEILING CAMERA mark
towards the desired direction, and then screw down
the screw including as an ACCESSORY to fix in
position.
4. Create a hole in the ➀ installation position.
If the CAMERA wiring comes from the bottom,
remove a part of the centre and remove the cable
from the hole.
■
Installation
➞
➞
➞
6 7
4. Installation
■
Check what is inside the package
• Check to see if the following parts are included in the purchased package.
User's guide
Camera
tab screw
■
Notes on installation and usage
1. Users should not disassemble the camera from the front direction.
2. Always handle the camera with care. Please do not apply a shock or vibration
as much as possible and take cautions not to cause damage or make a
scratch on the camera due to careless storage.
3. Please do not install the camera with the rainy place or highly humid areas.
And do not operate the camera in the wet place.
4. Do not clean the camera body with the strong abrasives or soaps. When the
camera becomes dirty, clean it with the dry rugs. Especially, make sure to use
the dedicated rugs for lens to clean the dome cover.
5. Please keep the camera at the cool area that is not exposed to the direct
sunlight. If you do, it can cause bad effects on the product.
E
User GuideUser Guide
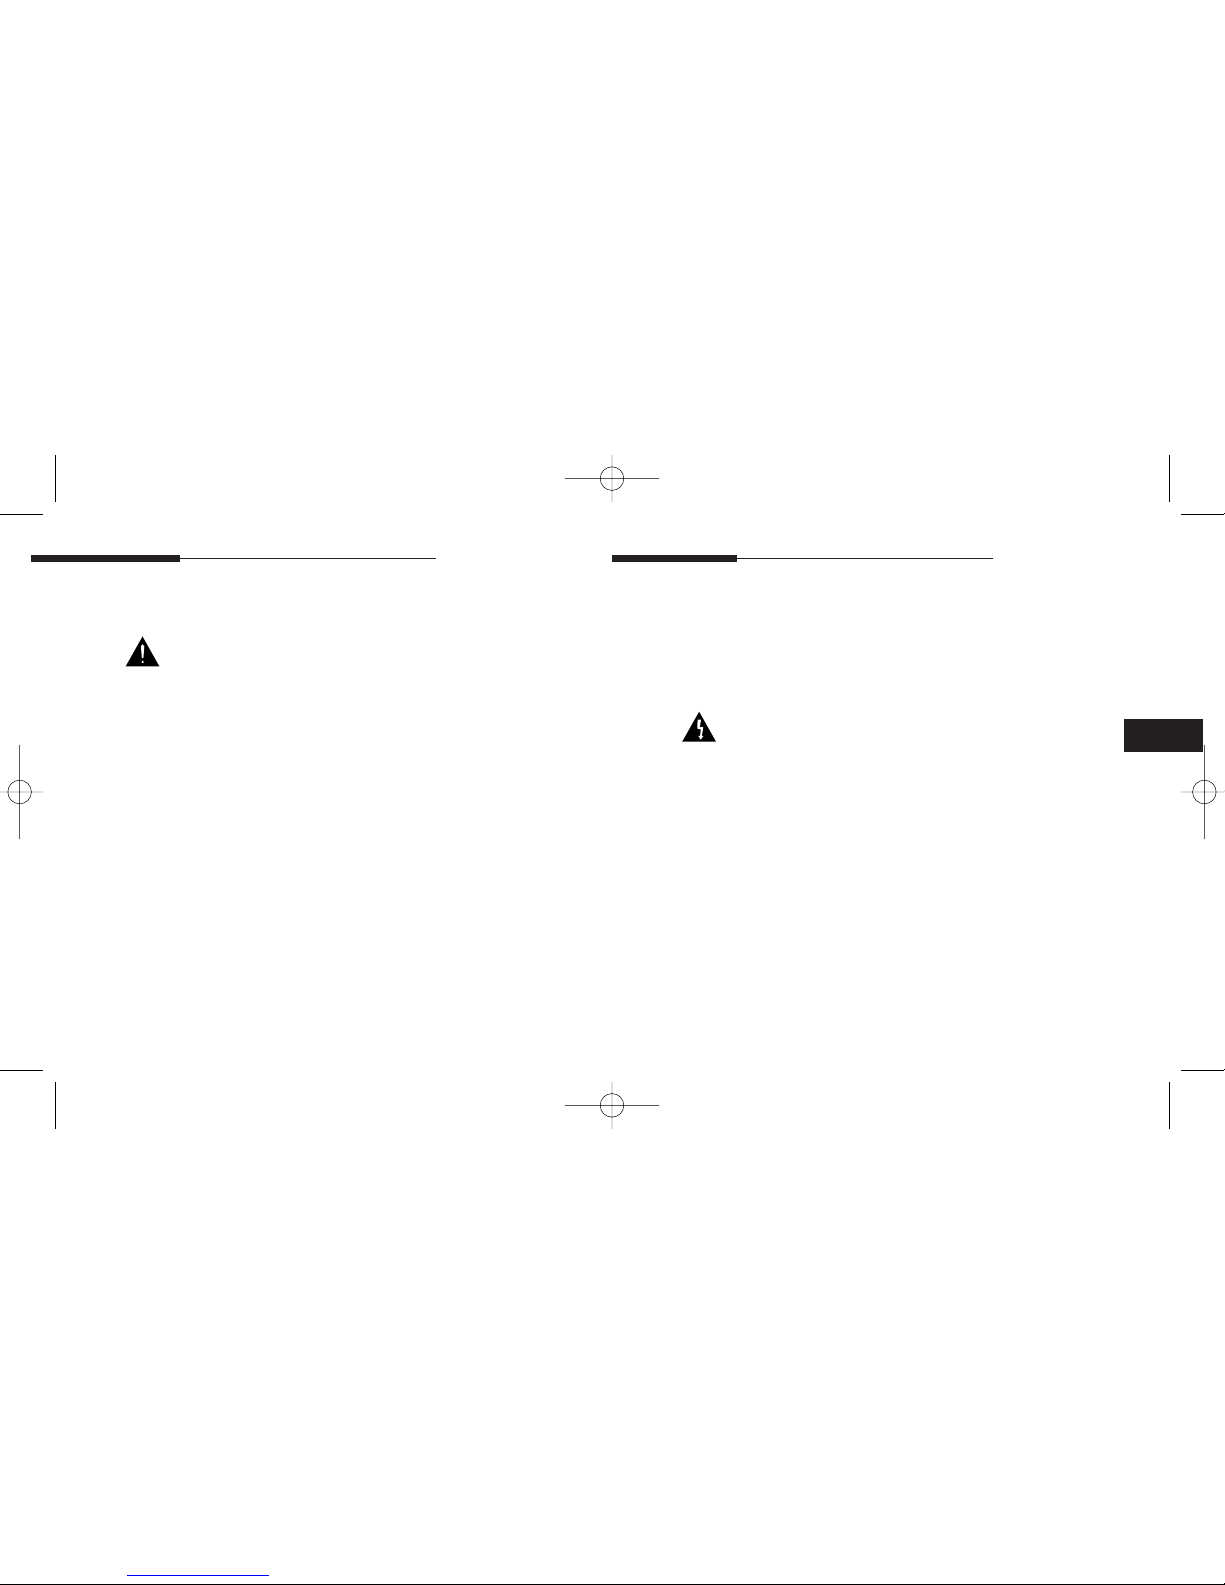
If the CAMERA wiring comes from the side with no
need of the hole in the ➁ installation position, turn
the CAMERA anti-clockwise taking care that the
wiring does not shorten, and then connect to the
cable guide pull out as in the image.
6. To fix the CAMERA body with BOTTOM, move the
key figure on the BOTTOM in alignment with the
PUSH hole, and then turn the CAMERA body
clockwise to fix.
❈ Move the lens to adjust the Tilt angle.
7. Move the COVER-DOME to show the CAMERA in
the window of the lens position, and then push the
No. 1 arrow anti-clockwise.
Move the cover left and right to adjust the
CAMERA in the desired direction. Now you are
ready to use your CAMERA.
5. Specifications
Item
Display Standard
Pick-up device
Effective Number of Pixels
Synchronization
Resolution
Signal Output
S/N ratio
Minimum Object Illumination
Shutter Speed
Lens
Body Color
In/out connector
Operating temperature
Power source
Power consumption
Size
Weight
Details
PAL STANDARD
1/3" SUPER HAD IT CCD
752(H) x 582(V)
Internal
520 TV Lines
VBS 1.0Vp-p(75Ω, composite)
50dB
0.3 Iux
Max. 1/100 Ksec
B5201(S) : f=3.8mm, View=100°
B5203(S) : f=3.0mm, View=126°
B5205(S) : f=8.0mm, View=38.6°
B52XX :
Black
B52XXS :
Silver
Signal output:
BNC,
Power input :
Jack
-10~+50°C
DC 12V +10%,-5%
2 W
85(ø) x 53(H)mm
125g
8 9
E
Manuel de l’utilisateur Manuel de l’utilisateur
L’objectif des précautions de sécurité est d’assurer l’utilisation correcte de ce produit afin
d’éloigner tout risque et tout dégât à la propriété. Assurez-vous de bien observer toutes les
précautions.
Avertissement
Ne pas tenir compte d’un avertissement risque de causer des blessures
graves, voire mortelles.
1. Assurez-vous d’utiliser uniquement l’adaptateur fourni avec le produit. (L’utilisation d’un
adaptateur autre que celui fourni peut endommager le produit ou causer un incendie ou
des décharges électriques.)
2. Avant de brancher le cordon d’alimentation et les câbles de signal, vérifiez d’abord les
bornes extérieures. Reliez les câbles des signaux d’alarme à leur borne respective.
Branchez l’adaptateur CA sur la prise CA et l’adaptateur CC sur la prise CC tout en
tenant compte de la bonne polarité. (La connexion incorrecte à la source d’alimentation
peut endommager le produit ou causer un incendie ou des décharges électriques.)
3. Ne branchez jamais plus d’une caméra sur un seul adaptateur.
(Le dépassement de la capacité de charge risque de générer une chaleur anormale au
point de causer un incendie.)
4. Branchez le cordon d’alimentation sur la prise murale. Assurez-vous que la connexion
est solidement fixée. (Une mauvaise connexion peut constituer le risque d’un incendie.)
5. Lorsque vous installez la caméra au mur ou au plafond, assurez-vous qu’elle y soit
fixée solidement et de faáon sécuritaire. (La chute de la caméra peut causer des
blessures corporelles.)
6. Ne placez jamais d’objets conducteurs (p. ex., un tournevis, des pièces de monnaie,
tout autre objet métallique) ni de contenants remplis d’eau sur la caméra. (Cela pourrait
présenter un risque de blessures corporelles en raison d’un incendie, d’une décharge
électrique ou de la chute d’un objet.)
7. N’installez pas la caméra dans un emplacement plein de suie, de poussière ou
d’humidité. Cela pourrait causer un incendie ou provoquer une décharge électrique.
8. Si vous détectez une odeur étrange ou de la fumée qui sort du produit, débranchez
immédiatement le cordon d’alimentation et contactez le centre de soutien technique.
(Une sollicitation continue de l’appareil dans ces conditions pourrait causer un incendie
ou provoquer des décharges électriques.)
9. Si ce produit cesse de fonctionner correctement, communiquez avec votre revendeur ou
le centre d’entretien dans votre localité. Ne démontez ni ne modifiez jamais ce produit.
(Samsung n’est pas responsable des problèmes techniques découlant d’une
modification non autorisée ou d’une tentative de réparation.)
10. Lorsque vous nettoyez le produit, veillez à ne pas vaporiser d’eau directement sur les
composants du produit. (Cela pourrait causer un incendie ou provoquer une décharge
électrique.) Nettoyez la surface au moyen d’un chiffon doux. N’utilisez jamais de
détersifs ni de nettoyants chimiques. Cela pourrait provoquer une décoloration ou
endommager le fini du produit.
Mise en garde
Ne pas tenir compte d’une mise en garde peut entraåner des blessures cor
porelles ou des dégâts à la propriété.
1. Ne laissez pas tomber d’objets sur le produit ni ne soumettez le produit à de forts coups.
Ne placez pas le produit dans un emplacement où il pourrait subir de fortes vibrations ou
des interférences magnétiques.
2. Ne placez pas le produit dans un emplacement où il fait très chaud (plus de
50°C/122°F), très froid (moins de ‘10°C/14°¯F) ou très humide. (Cela pourrait causer un
incendie ou provoquer une décharge électrique.)
3. Évitez un emplacement où le produit est exposé à des rayons directs du soleil ou à une
source de chaleur, telle qu’un radiateur ou un appareil de chauffage. (Le non-respect de
cette consigne pourrait présenter un risque d’incendie.)
4. Si vous désirez déplacer le produit à la suite de son installation, assurez-vous de couper
le courant avant son déplacement et sa réinstallation.
5. Installez le produit dans une aire bien ventilée.
6. En cas d’orage, débranchez le cordon électrique de la prise murale. (Le non-respect de
cette consigne pourrait provoquer un incendie ou endommager le produit.)
7. Évitez de diriger l’appareil photo directement en direction d’objets très brillants, tels qur
le soleil, cela risque d’endommager le capteur d’ image CCD.
F

Manuel de l’utilisateur Manuel de l’utilisateur
2.
Description
+ CC 12V
-
GND
●
Câble électrique
2 3
1.
Vue d’ensemble
Les dômes couleur sont des caméras de surveillance avec un CCD intégré
offrant les meilleures fonctions de surveillance en connexion avec le
système CCTV.
■ Nombre de pixels CCD
• 410,000 pixels
■ PAlimentation
• CC 12V
■
Fonctions automatiques et fonctions spéciales
• ATW/AWC
• BLC
• AGC
• ELC(Obturateur électrique Iris)
Couverture
de dôme
Corps
principal
Câble vidéo
Câble électrique
F
 Loading...