

Samsung SC-148S User Manual [en, de, ru]
1
CD-ROM DRIVE
SC-148
User's Guide - ENGLISH
BG68-00328A Ver:01
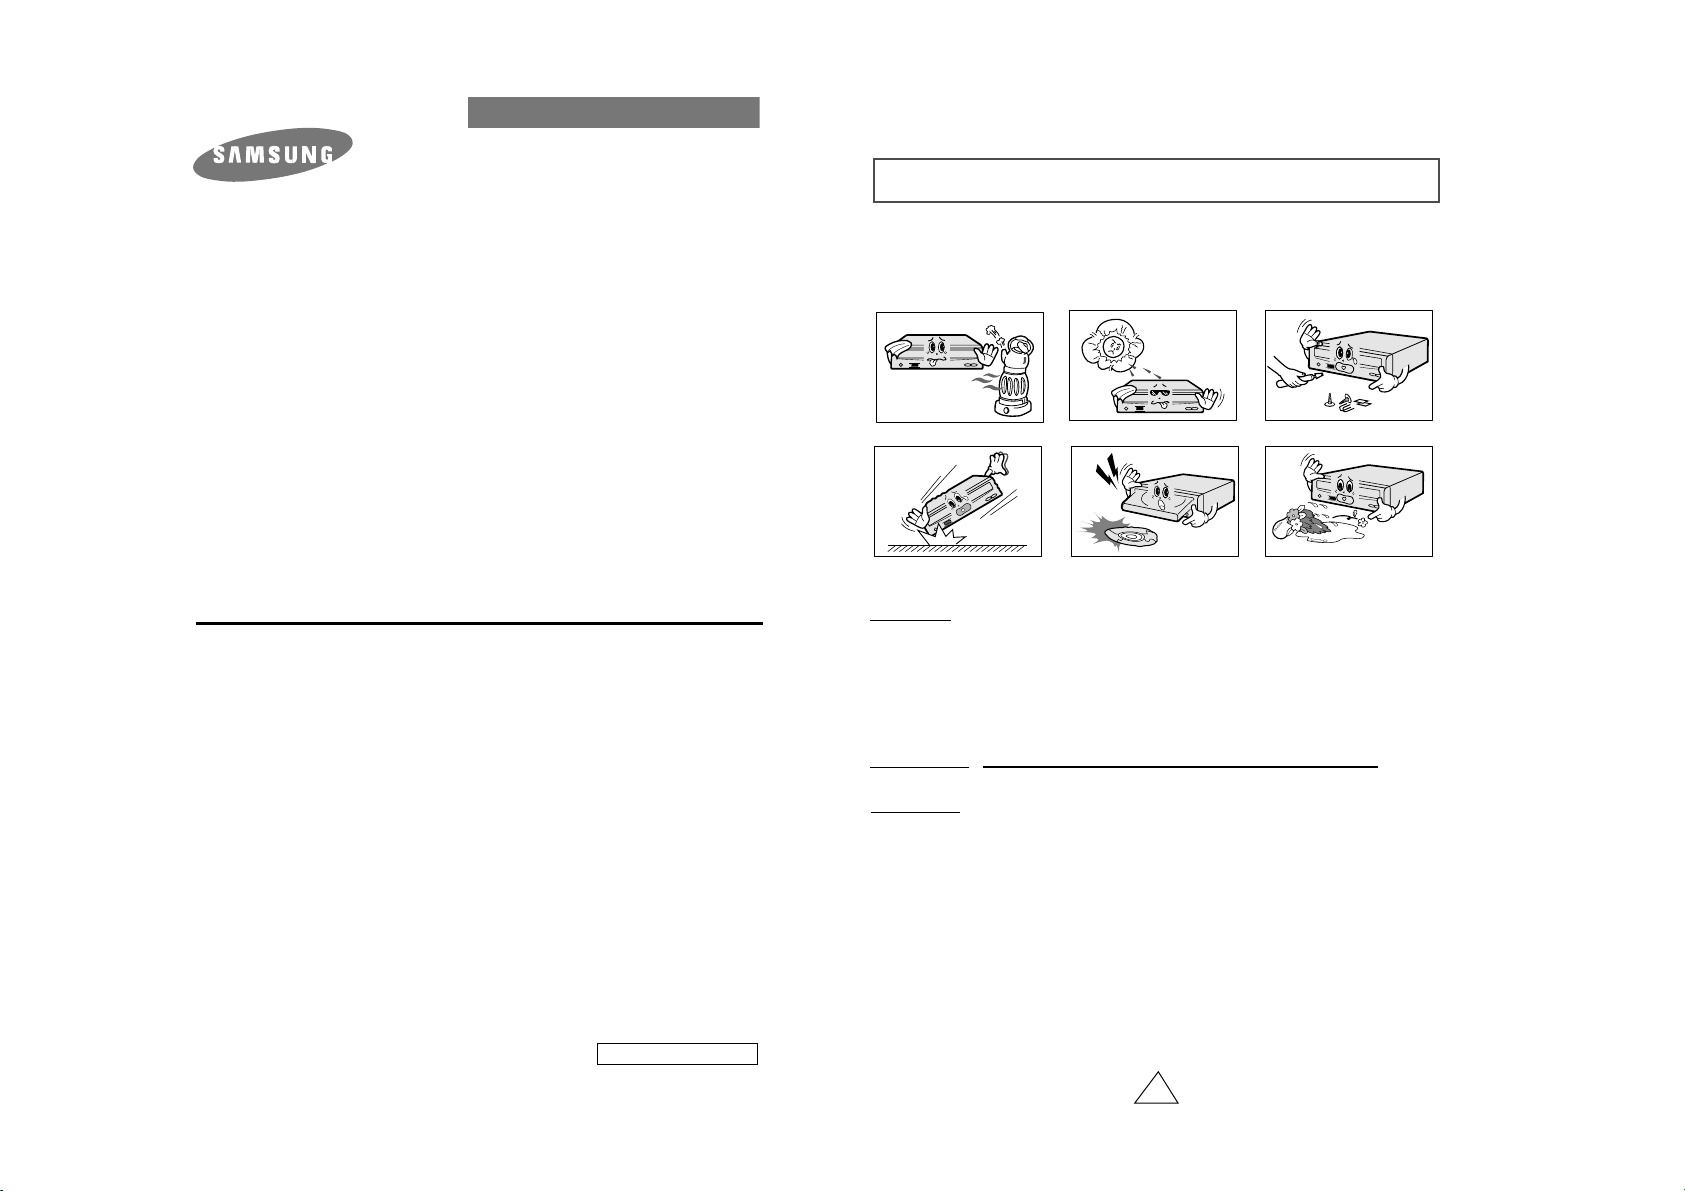
Safety Precautions
The following diagrams illustrate the precautions to be taken when using
your CD-ROM drive.
You must not use the drive in any manner other than that specified in this guide.
Avoid exposing your eyes or skin to direct or scattered radiation.
CAUTION
Do not attempt to repair the CD-ROM drive yourself. Contact
your dealer or local SAMSUNG representative for all repairs.
If you make any adjustments or perform any operations other
than those specified in this guide, you run the risk of exposure to
hazardous radiation.
WARRANTY
Please refer to the Samsung limited warranty statements.
Precautions
1.To reduce the risk of fire or electric shock, do not expose
this appliance to rain or moisture.
2. Always check each disc for cracks before using it. If there are
cracks on the surfaces, especially around the border of the
center hole, we recommend that you make a copy of the disc
immediately and then stop using it. If you continue using the
disc, it will probably develop more cracks and eventually cause
irreparable damage.
3. Do not use poor quality discs:
● From unknown sources
● Without any copyright
● Scratched or damaged in any way
FCC Compliance
This equipment has been tested and found to comply with the limits for a
Class B digital device, pursuant to Part 15 of the FCC rules.
These limits are designed to provide reasonable protection against harmful
interference in a residential installation.
This equipment generates, uses, and can radiate radio frequency energy and,
if not installed and used in accordance with the instructions, may cause
harmful interference to radio communications. However, there is no guarantee
that interference will not occur in a particular installation. If this equipment
does cause harmful interference to radio or television reception, which can be
deter-mined by turning the equipment off and on, the user is encouraged to
try to correct the interference by one or more of the following measures:
• Re-orient or relocate the receiving antenna.
• Increase the separation between the equipment and receiver.
• Connect the equipment into an outlet on a circuit different from that to
which the receiver is connected.
• Consult the dealer or an experienced radio/TV technician for help.
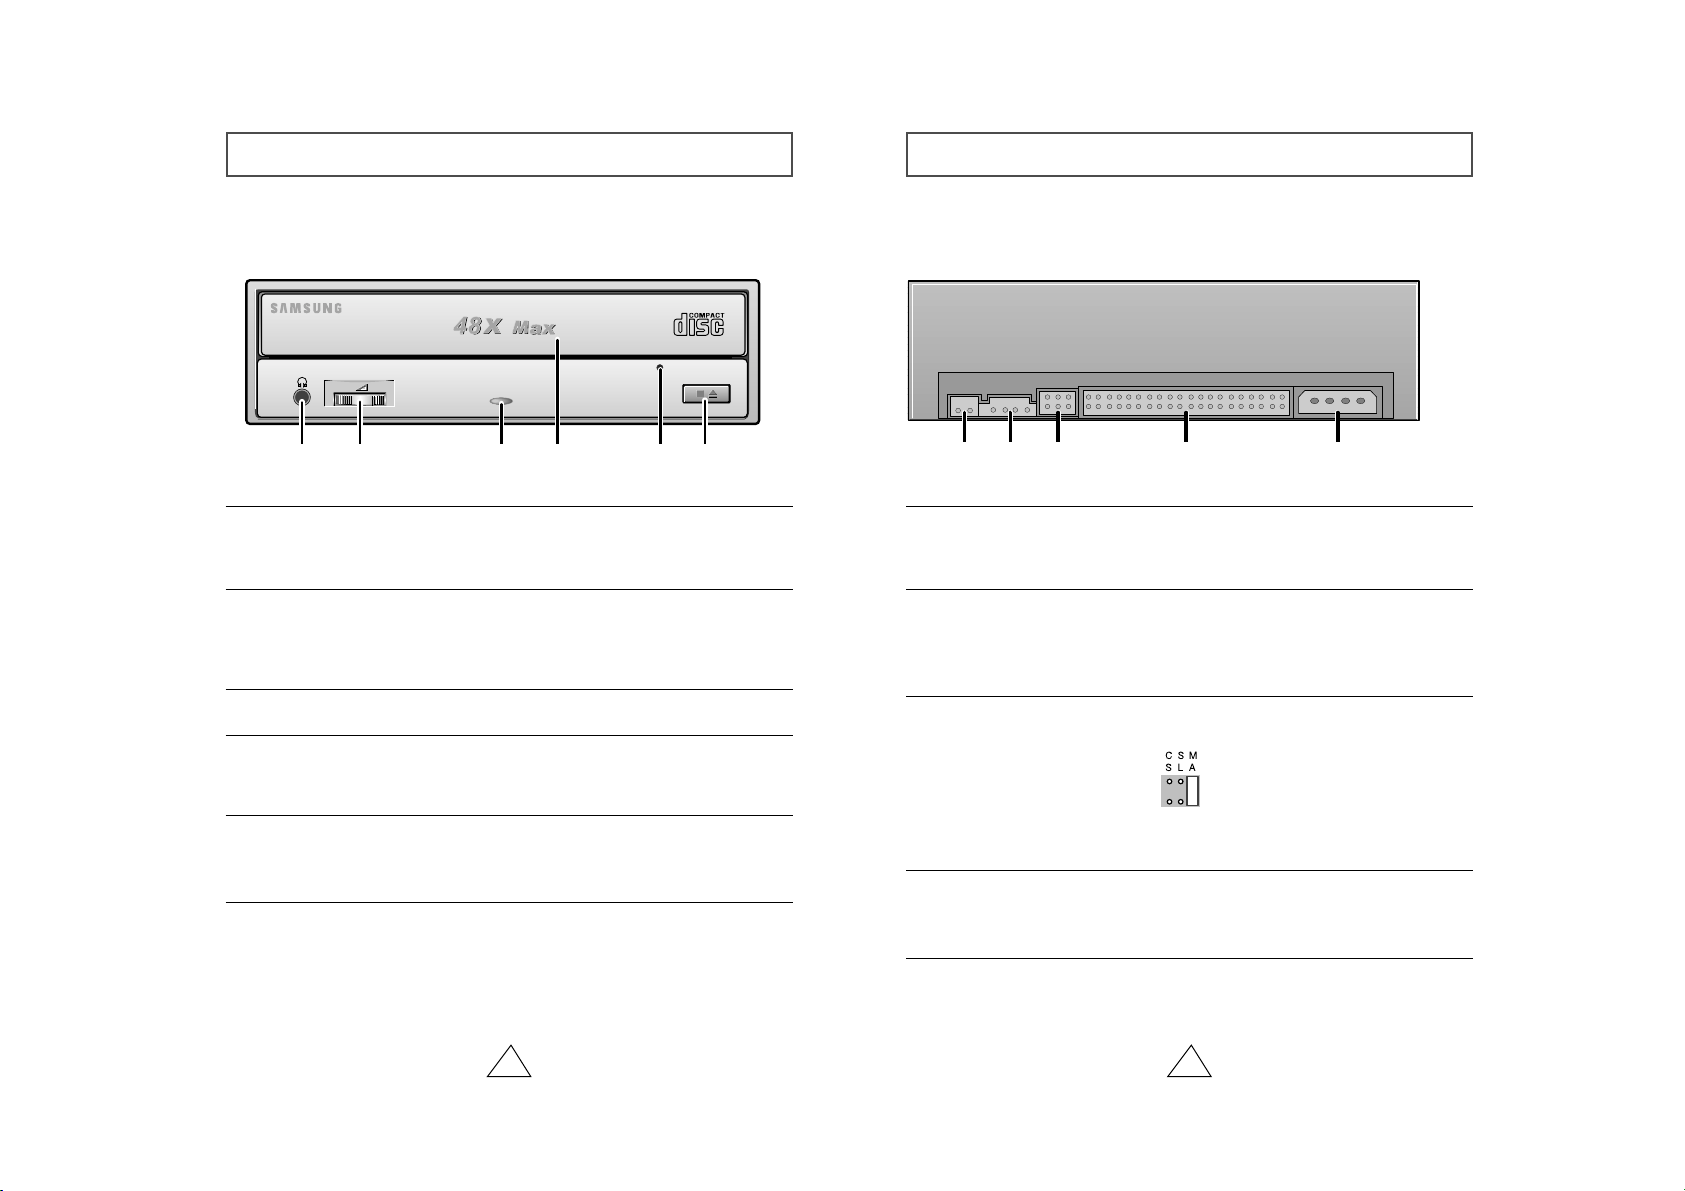
Front View of the CD-ROM Drive
2
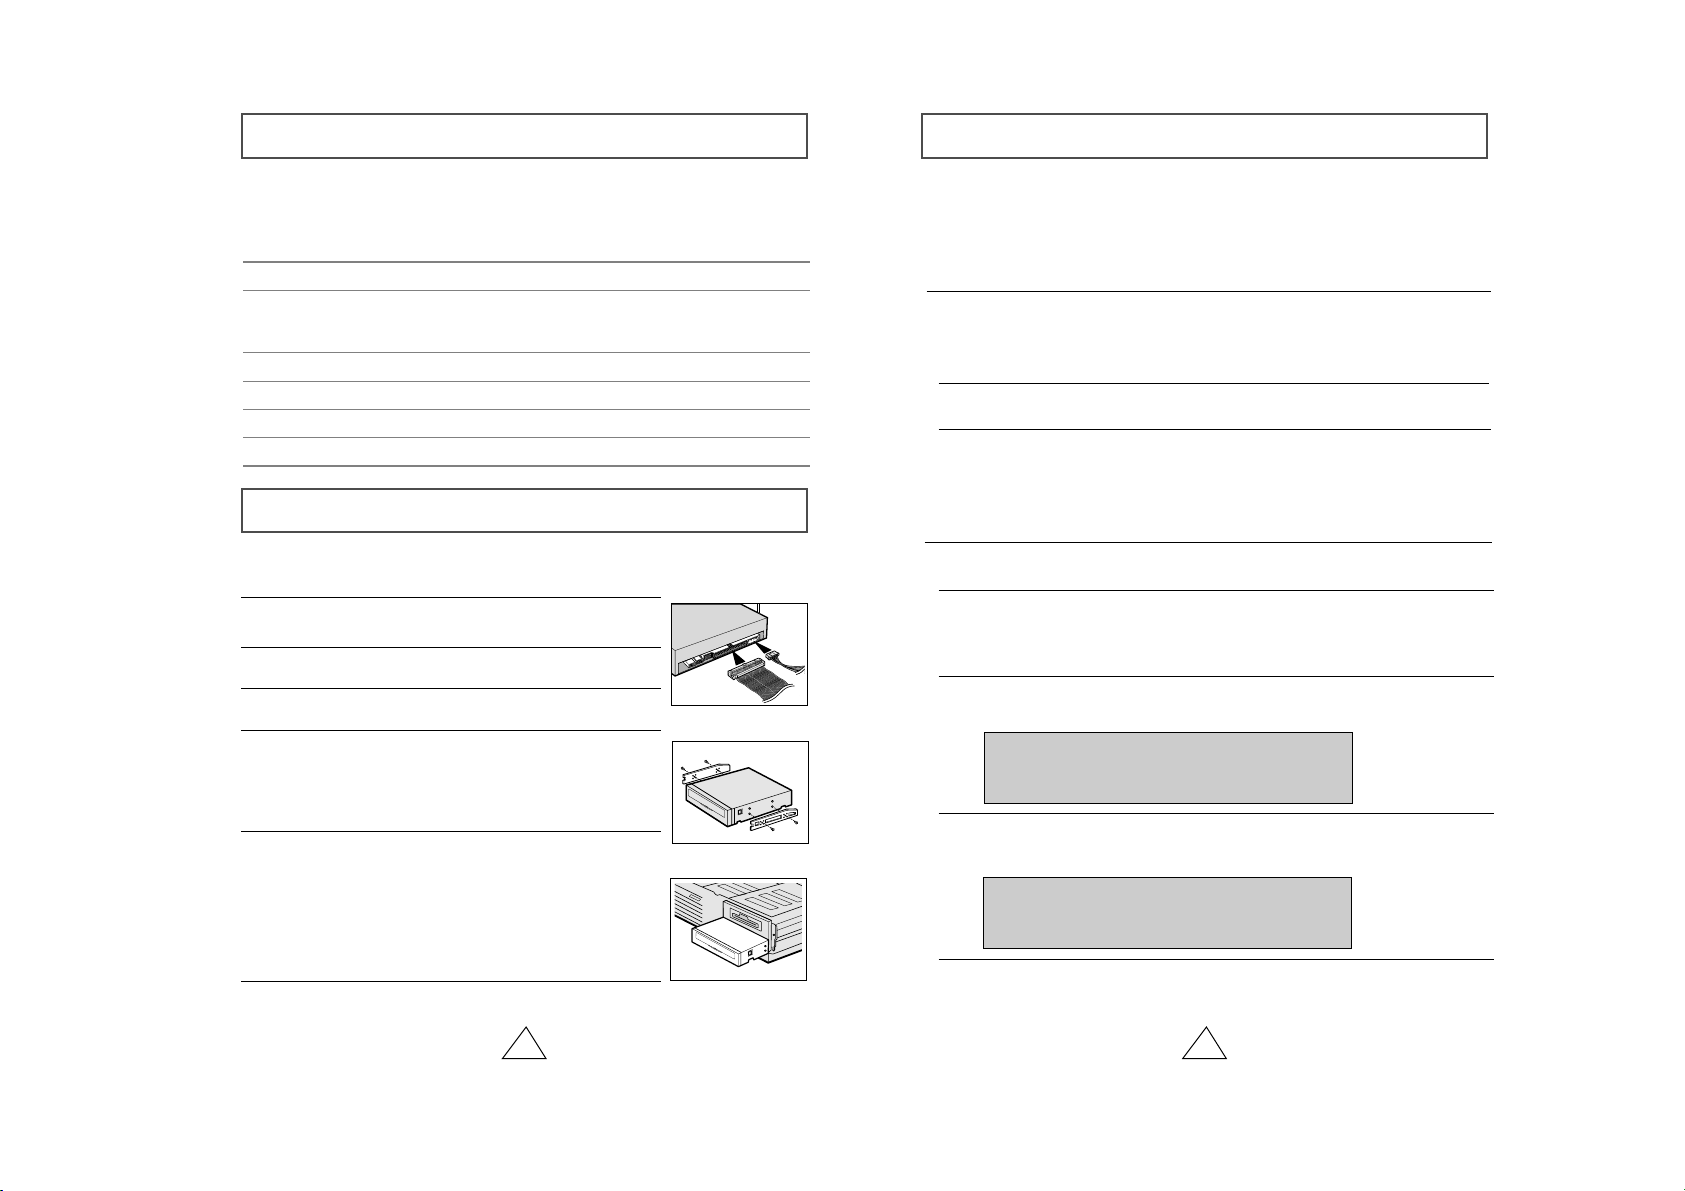
Rear View of the CD-ROM Drive
3
112
3
4
56
Headphone Connector
The sound output terminal enables you to plug stereo headphones into the drive.
It requires a 3.6 mm stereo mini-jack.
1123 4 5
Digital output terminal
You can connect a sound card or MPEG card which support Digital output
terminal to your drive using this two-pin terminal.
2
Sound output terminal
You can connect a sound card to your drive using this four-pin terminal.
☛ This function is not covered in detail in this guide. Refer to the documentation
supplied with your sound card.
3
Master/slave select terminal
Usually, this is a pre-set configuration as illustrated below.
☛ Verify that the setting is as illustrated. If it is not, simply remove the jumper
and place it in the correct position.
4
Interface terminal
This input/output interface terminal is used to connect the 40-pin flat cable from
the IDE interface to the CD-ROM drive.
5
Power terminal
The power terminal is a four-conductor male plug.
Eject Button
4
Disc compartment
The compartment opens and closes automatically when you press
the Eject button.
Emergency eject hole
If the compartment does not open when you press the Eject button, power off
the computer, insert a pin or unfolded paper clip in the hole and push firmlhy)
6
Eject Button
5
Emergency eject hole
If the compartment does not open when you press the Eject button, power off
the computer, insert a pin or unfolded paper clip in the hole and push firmlhy)
2
Headphone volume control
This headphone volume control adjusts the volume for your headphones. You can only
use the headphone jack and volume control when you have installed the required
software utilities. For example, the Microsoft Windows Media player can be used.
3
LED
* The design of this product can be more or less changed according to its
characteristics.
System Requirements
4 5
1
Turn OFF your computer. Remember to verify the
configuration jumper on the rear of the CD-ROM drive.
2
Remove the cover of your PC(main unit of the computer)
3
Remove the blank cover panel of the 5.25 inch unit in
which the CD-ROM drive is to be installed.
6
Put the cover back on your PC.
5
Install the CD-ROM drive into the unit and secure it with
mounting screws (recommended standard M3x6x4)
☛ ◆ Depending on your PC model, you may need to
attach guide rails to the drive, so that the drive is
held firmly in place.
☛◆ If you use screws that are longer than the
recommended standard, you may damage the
drive.
Before you install the CD-ROM drive, we strongly recommend that you make certain
that your set-up meets the system requirements listed below.
Installing the CD-ROM Drive
Install the CD-ROM drive in your computer horizontally, making sure that the Open/Close
button is on the right.
To install the drive, proceed as follows.
4
Connect the CD-ROM drive to the IDE interface and power
cables Iocated inside your computer.
☛ Connectors are keyed so it is impossible to put them in
an incorrect position. Do not force the connectors, if they
do not seem to fit.
Item
Windows version
MS-DOS version
Disk space
Free expansion unit
Type of computer
Description
3.1(or higher)
5.0(or higher)
100KB minimum
5.25 inch
IBM 486SX 20MHz (or higher) with
an IDE interface(or a 100% IBMcompatible computer)
Setting Up the Device Driver
It is not necessary to set up additional device driver for Window
95/98/2000/NT because it uses the device driver provided by the Window.
◆
Automatic Setup
◆
Manual Setup
LAST DRIVE = Z
- - - - - - - - - - - - - - - - - - - - - - - - - - - - - - - - - - - -
- - - - - - - - - - - - - - - - - - - - - - - - - - - - - - - - - - - DEVICE = C :\SAMSUNG\SSCDROM.SYS /D : SSCD000 /V
- - - - - - - - - - - - - - - - - - - - - - - - - - - - - - - - - - - -
- - - - - - - - - - - - - - - - - - - - - - - - - - - - - - - - - - - C :\SAMSUNG\MSCDEX /D:SSCD000
1Insert the setup diskette in the diskette drive and change the directory to A:,
where A: is the diskette drive.
To do so, type A: after the C:\ prompt and press [Enter].
2Type CDSETUP and press [Enter].
3Reboot the computer.
1Make the C:\SAMSUNG directory.
2Copy the files from the diskette to the C:\SAMSUNG directory.
To do so, type COPY A:
*.*
C:\SAMSUNG after the C:\ prompt and press
[Enter].
3Edit the CONFIG.SYS file.
Add the DEVICE=C:\SAMSUNG\SSCDROM.SYS \D:SSCD000 /V entry.
4Edit the AUTOEXEC.BAT file.
Add the C:\SAMSUNG\MSCDEX /D:SSCD000 entry.
5Reboot the computer.
 Loading...