

Samsung OmniA II User Manual

PORTABLE Dual-Mode
SMARTPHONE
Windows Mobile 6.5 Professional
User Manual
Please read this manual before operating your
phone, and keep it for future reference.

Intellectual Property
All Intellectual Property, as defined below, owned by or which is otherwise the property of Samsung or its respective suppliers relating to
the SAMSUNG Phone, including but not limited to, accessories, parts, or software relating there to (the “Phone System”), is proprietary to
Samsung and protected under federal laws, state laws, and international treaty provisions. Intellectual Property includes, but is not limited
to, inventions (patentable or unpatentable), patents, trade secrets, copyrights, software, computer programs, and related documentation
and other works of authorship. You may not infringe or otherwise violate the rights secured by the Intellectual Property. Moreover, you
agree that you will not (and will not attempt to) modify, prepare derivative works of, reverse engineer, decompile, disassemble, or
otherwise attempt to create source code from the software. No title to or ownership in the Intellectual Property is transferred to you. All
applicable rights of the Intellectual Property shall remain with SAMSUNG and its suppliers.
Samsung Telecommunications America (STA), LLC
Headquarters: Customer Care Center:
1301 E. Lookout Drive 1000 Klein Rd.
Richardson, TX 75082 Plano, TX 75074
Toll Free Tel: 1.888.987.HELP (4357)
Internet Address:
©
2009 Samsung Telecommunications America, LLC is a registered trademark of Samsung Electronics America, Inc. and its related
entities.
Do you have questions about your Samsung Mobile Phone?
For 24 hour information and assistance, we offer a new FAQ/ARS System (Automated Response System) at:
www.samsungtelecom.com/support
http://www.samsungusa.com
VZW_SCH-I920_OmniaII_English_UM_CJ10D_TE_110909_F14

GH46-00985A
Licensed by Qualcomm Incorporated under one or more of the following patents: U.S. Patent No. 4, 901, 307; 5, 056, 109; 5, 099, 204; 5,
101, 501; 5, 103, 459; 5, 107, 225; 5, 109, 390.
T9 Text Input is licensed by Tegic Communications and is covered by U.S. Pat. 5,818,437; U.S. Pat. 5,953,541; U.S. Pat. 6,011,554 and
other patents pending.
The Bluetooth® word mark, figure mark (stylized “B Design”), and combination mark (Bluetooth word mark and “B Design”) are registered
trademarks and are wholly owned by the Bluetooth SIG.
microSD™ and the microSD logo are Trademarks of the SD Card Association.
Swype and the Swype logos are trademarks of Swype, Inc.© 2009 Swype, Inc. All rights reserved.
ABOUT DIVX VIDEO: DivX® is a digital video format created by DivX, Inc., Pat. 7,295,673. This is an official DivX Certified device that plays
DivX video. Visit www.divx.com for more information and software tools to convert your files into DivX video. Visit www.divx.com for more
information and software tools to convert your files into DivX video. ABOUT DIVX VIDEO-ON-DEMAND: This DivX Certified® device must be
registered in order to play DivX Video-on-Demand (VOD) content. To generate the registration code, locate the DivX section in the General
Settings menu. Go to vod.divx.com with this code to complete the registration process and learn more about DivX VOD.
SRS CS Headphone™, SRS WOW HD™, SRS and the symbol are trademarks of SRS Labs, Inc. CS Headphone and WOW HD
technologies are incorporated under license from SRS Labs, Inc.
Open Source Software
Some software components of this product incorporate source code covered under GNU General Public License (GPL), GNU Lesser General
Public License (LGPL), OpenSSL License, BSD License and other open source licenses. To obtain the source code covered under the open
source licenses, please visit:
http://www.samsungnetwork.com/Home/opensource
.

Disclaimer of Warranties; Exclusion of Liability
EXCEPT AS SET FORTH IN THE EXPRESS WARRANTY CONTAINED ON THE WARRANTY PAGE ENCLOSED WITH THE PRODUCT, THE
PURCHASER TAKES THE PRODUCT "AS IS", AND SAMSUNG MAKES NO EXPRESS OR IMPLIED WARRANTY OF ANY KIND WHATSOEVER
WITH RESPECT TO THE PRODUCT, INCLUDING BUT NOT LIMITED TO THE MERCHANTABILITY OF THE PRODUCT OR ITS FITNESS FOR ANY
PARTICULAR PURPOSE OR USE; THE DESIGN, CONDITION OR QUALITY OF THE PRODUCT; THE PERFORMANCE OF THE PRODUCT; THE
WORKMANSHIP OF THE PRODUCT OR THE COMPONENTS CONTAINED THEREIN; OR COMPLIANCE OF THE PRODUCT WITH THE
REQUIREMENTS OF ANY LAW, RULE, SPECIFICATION OR CONTRACT PERTAINING THERETO. NOTHING CONTAINED IN THE INSTRUCTION
MANUAL SHALL BE CONSTRUED TO CREATE AN EXPRESS OR IMPLIED WARRANTY OF ANY KIND WHATSOEVER WITH RESPECT TO THE
PRODUCT. IN ADDITION, SAMSUNG SHALL NOT BE LIABLE FOR ANY DAMAGES OF ANY KIND RESULTING FROM THE PURCHASE OR USE OF
THE PRODUCT OR ARISING FROM THE BREACH OF THE EXPRESS WARRANTY, INCLUDING INCIDENTAL, SPECIAL OR CONSEQUENTIAL
DAMAGES, OR LOSS OF ANTICIPATED PROFITS OR BENEFITS.

Table of Contents
Section 1: Getting Started ..............................................4
Understanding this User Manual . . . . . . . . . . . . . . . . . . . . . . . . 4
Notes and Tips . . . . . . . . . . . . . . . . . . . . . . . . . . . . . . . . . . . . . 4
Activating Your Phone . . . . . . . . . . . . . . . . . . . . . . . . . . . . . . . 4
Remove and Replace the Rear Cover . . . . . . . . . . . . . . . . . . . . 5
Attach a Strap . . . . . . . . . . . . . . . . . . . . . . . . . . . . . . . . . . . . . 5
Battery . . . . . . . . . . . . . . . . . . . . . . . . . . . . . . . . . . . . . . . . . . . 6
Powering the Phone On and Off . . . . . . . . . . . . . . . . . . . . . . . . 9
Turning the Phone Feature On and Off . . . . . . . . . . . . . . . . . . . 9
Sounds and Ringtones . . . . . . . . . . . . . . . . . . . . . . . . . . . . . . . 9
Voice Mail . . . . . . . . . . . . . . . . . . . . . . . . . . . . . . . . . . . . . . . 11
Visual Voice Mail . . . . . . . . . . . . . . . . . . . . . . . . . . . . . . . . . . 12
microSD Memory Card (Optional) . . . . . . . . . . . . . . . . . . . . . . 13
Rebooting your Phone . . . . . . . . . . . . . . . . . . . . . . . . . . . . . . 15
Resetting Phone Settings . . . . . . . . . . . . . . . . . . . . . . . . . . . . 15
Section 2: Understanding Your Phone ......................... 16
Features of Your Phone . . . . . . . . . . . . . . . . . . . . . . . . . . . . . 16
Front View of Your Phone . . . . . . . . . . . . . . . . . . . . . . . . . . . . 17
Side View of Your Phone . . . . . . . . . . . . . . . . . . . . . . . . . . . . 18
Rear View of Your Phone . . . . . . . . . . . . . . . . . . . . . . . . . . . . 19
Home Screen . . . . . . . . . . . . . . . . . . . . . . . . . . . . . . . . . . . . . 20
Notification Bar Icons . . . . . . . . . . . . . . . . . . . . . . . . . . . . . . . 22
Cube . . . . . . . . . . . . . . . . . . . . . . . . . . . . . . . . . . . . . . . . . . . 23
Section 3: Displays ...................................................... 24
Home Screen . . . . . . . . . . . . . . . . . . . . . . . . . . . . . . . . . . . . . 24
Widgets and the Widget Bar . . . . . . . . . . . . . . . . . . . . . . . . . 26
Main Menus . . . . . . . . . . . . . . . . . . . . . . . . . . . . . . . . . . . . . 32
Cube . . . . . . . . . . . . . . . . . . . . . . . . . . . . . . . . . . . . . . . . . . . 40
Section 4: Navigation ................................................... 41
Navigation Keys . . . . . . . . . . . . . . . . . . . . . . . . . . . . . . . . . . . 41
Touch Screen Navigation . . . . . . . . . . . . . . . . . . . . . . . . . . . . 42
Section 5: Call Functions ............................................. 43
Making a Call . . . . . . . . . . . . . . . . . . . . . . . . . . . . . . . . . . . . 43
Answering a Call . . . . . . . . . . . . . . . . . . . . . . . . . . . . . . . . . . 45
Call Logs . . . . . . . . . . . . . . . . . . . . . . . . . . . . . . . . . . . . . . . . 46
Call Forwarding . . . . . . . . . . . . . . . . . . . . . . . . . . . . . . . . . . . 48
Three-way Calling . . . . . . . . . . . . . . . . . . . . . . . . . . . . . . . . . 49
Voice Recognition . . . . . . . . . . . . . . . . . . . . . . . . . . . . . . . . . 49
Roaming . . . . . . . . . . . . . . . . . . . . . . . . . . . . . . . . . . . . . . . . 50
TTY Mode . . . . . . . . . . . . . . . . . . . . . . . . . . . . . . . . . . . . . . . 51
Section 6: Entering Text ............................................... 52
Virtual QWERTY keyboards . . . . . . . . . . . . . . . . . . . . . . . . . . 52
Text Input Methods . . . . . . . . . . . . . . . . . . . . . . . . . . . . . . . . 52
Changing the Text Input Method . . . . . . . . . . . . . . . . . . . . . . 52
1

Section 7: My Contacts ................................................57
Adding a New Contact . . . . . . . . . . . . . . . . . . . . . . . . . . . . . .57
Finding a Contact . . . . . . . . . . . . . . . . . . . . . . . . . . . . . . . . . . 59
Editing a Contact . . . . . . . . . . . . . . . . . . . . . . . . . . . . . . . . . .60
Deleting a Contact . . . . . . . . . . . . . . . . . . . . . . . . . . . . . . . . . 60
Making a Call from My Contacts . . . . . . . . . . . . . . . . . . . . . . .61
Sending a Contact via vCard . . . . . . . . . . . . . . . . . . . . . . . . . . 61
Sending Contact(s) via Bluetooth . . . . . . . . . . . . . . . . . . . . . . 61
Categories . . . . . . . . . . . . . . . . . . . . . . . . . . . . . . . . . . . . . . . 62
Speed dial . . . . . . . . . . . . . . . . . . . . . . . . . . . . . . . . . . . . . . .62
Favorites . . . . . . . . . . . . . . . . . . . . . . . . . . . . . . . . . . . . . . . . 63
Section 8: Messaging Applications .............................64
Types of Messages . . . . . . . . . . . . . . . . . . . . . . . . . . . . . . . . . 64
Creating and Sending Messages . . . . . . . . . . . . . . . . . . . . . . . 64
Message Folders . . . . . . . . . . . . . . . . . . . . . . . . . . . . . . . . . .69
Viewing Messages . . . . . . . . . . . . . . . . . . . . . . . . . . . . . . . . . 70
Quick Text . . . . . . . . . . . . . . . . . . . . . . . . . . . . . . . . . . . . . . . 72
E-mail . . . . . . . . . . . . . . . . . . . . . . . . . . . . . . . . . . . . . . . . . . 73
Mobile Email . . . . . . . . . . . . . . . . . . . . . . . . . . . . . . . . . . . . . . 75
Mobile IM . . . . . . . . . . . . . . . . . . . . . . . . . . . . . . . . . . . . . . . .75
Section 9: Multimedia and Music Applications ........... 76
Media Player . . . . . . . . . . . . . . . . . . . . . . . . . . . . . . . . . . . . . 76
V CAST Music with Rhapsody . . . . . . . . . . . . . . . . . . . . . . . . . 82
V CAST Song ID . . . . . . . . . . . . . . . . . . . . . . . . . . . . . . . . . . .84
VZW Tones . . . . . . . . . . . . . . . . . . . . . . . . . . . . . . . . . . . . . . .84
V CAST Videos . . . . . . . . . . . . . . . . . . . . . . . . . . . . . . . . . . . . 85
2
Streaming Player . . . . . . . . . . . . . . . . . . . . . . . . . . . . . . . . . . 86
VZ Navigator . . . . . . . . . . . . . . . . . . . . . . . . . . . . . . . . . . . . . 86
FM Radio . . . . . . . . . . . . . . . . . . . . . . . . . . . . . . . . . . . . . . . . 87
Connected Home . . . . . . . . . . . . . . . . . . . . . . . . . . . . . . . . . . 88
Video Editor . . . . . . . . . . . . . . . . . . . . . . . . . . . . . . . . . . . . . . 89
Section 10: Document Applications ............................ 91
Office Mobile . . . . . . . . . . . . . . . . . . . . . . . . . . . . . . . . . . . . . 91
Section 11: Personal Information Applications .......... 95
Smart Search . . . . . . . . . . . . . . . . . . . . . . . . . . . . . . . . . . . . . 95
My Calendar . . . . . . . . . . . . . . . . . . . . . . . . . . . . . . . . . . . . . . 96
Tasks . . . . . . . . . . . . . . . . . . . . . . . . . . . . . . . . . . . . . . . . . . . 98
Task Switcher . . . . . . . . . . . . . . . . . . . . . . . . . . . . . . . . . . . 101
Memo . . . . . . . . . . . . . . . . . . . . . . . . . . . . . . . . . . . . . . . . . 102
Voice Recorder . . . . . . . . . . . . . . . . . . . . . . . . . . . . . . . . . . . 104
Clock and Alarm . . . . . . . . . . . . . . . . . . . . . . . . . . . . . . . . . . 105
Calculator . . . . . . . . . . . . . . . . . . . . . . . . . . . . . . . . . . . . . . 106
Unit Converter . . . . . . . . . . . . . . . . . . . . . . . . . . . . . . . . . . . 107
MS File Explorer . . . . . . . . . . . . . . . . . . . . . . . . . . . . . . . . . . 107
My Files . . . . . . . . . . . . . . . . . . . . . . . . . . . . . . . . . . . . . . . . 108
City ID . . . . . . . . . . . . . . . . . . . . . . . . . . . . . . . . . . . . . . . . . 108
WeatherBug . . . . . . . . . . . . . . . . . . . . . . . . . . . . . . . . . . . . . 109
ActiveSync . . . . . . . . . . . . . . . . . . . . . . . . . . . . . . . . . . . . . . 109
Windows Mobile Device Center for Windows Vista . . . . . . . . 112
Games . . . . . . . . . . . . . . . . . . . . . . . . . . . . . . . . . . . . . . . . . 113

Section 12: Photo and Image Applications ...............114
Camera . . . . . . . . . . . . . . . . . . . . . . . . . . . . . . . . . . . . . . . . 114
My Pictures . . . . . . . . . . . . . . . . . . . . . . . . . . . . . . . . . . . . . 118
Camcorder . . . . . . . . . . . . . . . . . . . . . . . . . . . . . . . . . . . . . . 120
Digital Frame . . . . . . . . . . . . . . . . . . . . . . . . . . . . . . . . . . . . 122
Smart Reader . . . . . . . . . . . . . . . . . . . . . . . . . . . . . . . . . . . . 123
Section 13: Web Applications .................................... 124
BingTM . . . . . . . . . . . . . . . . . . . . . . . . . . . . . . . . . . . . . . . . . 124
Opera Browser . . . . . . . . . . . . . . . . . . . . . . . . . . . . . . . . . . . 125
Internet Explorer . . . . . . . . . . . . . . . . . . . . . . . . . . . . . . . . . 126
RSS Reader . . . . . . . . . . . . . . . . . . . . . . . . . . . . . . . . . . . . . 127
Podcast . . . . . . . . . . . . . . . . . . . . . . . . . . . . . . . . . . . . . . . . 128
Communities . . . . . . . . . . . . . . . . . . . . . . . . . . . . . . . . . . . . 128
Facebook . . . . . . . . . . . . . . . . . . . . . . . . . . . . . . . . . . . . . . . 129
Section 14: Bluetooth and Wi-Fi Services ................. 130
Wireless Manager . . . . . . . . . . . . . . . . . . . . . . . . . . . . . . . . 130
Bluetooth Wireless Technology . . . . . . . . . . . . . . . . . . . . . . . 131
About Wi-Fi . . . . . . . . . . . . . . . . . . . . . . . . . . . . . . . . . . . . . 137
Section 15: Changing Your Settings .......................... 139
Basic Settings . . . . . . . . . . . . . . . . . . . . . . . . . . . . . . . . . . . 139
Advanced Settings . . . . . . . . . . . . . . . . . . . . . . . . . . . . . . . . 144
Section 16: Health and Safety Information ...............146
Health and Safety Information . . . . . . . . . . . . . . . . . . . . . . . 146
Samsung Mobile Products and Recycling . . . . . . . . . . . . . . . 147
UL Certified Travel Adapter . . . . . . . . . . . . . . . . . . . . . . . . . . 148
Consumer Information on Wireless Phones . . . . . . . . . . . . . . 148
Road Safety . . . . . . . . . . . . . . . . . . . . . . . . . . . . . . . . . . . . . 154
Responsible Listening . . . . . . . . . . . . . . . . . . . . . . . . . . . . . 155
Operating Environment . . . . . . . . . . . . . . . . . . . . . . . . . . . . 157
Using Your Phone Near Other Electronic Devices . . . . . . . . . 157
FCC Hearing-Aid Compatibility (HAC) Regulations
for Wireless Devices . . . . . . . . . . . . . . . . . . . . . . . . . . . . 158
Potentially Explosive Environments . . . . . . . . . . . . . . . . . . . 159
Emergency Calls . . . . . . . . . . . . . . . . . . . . . . . . . . . . . . . . . 160
FCC Notice and Cautions . . . . . . . . . . . . . . . . . . . . . . . . . . . 161
Other Important Safety Information . . . . . . . . . . . . . . . . . . . 161
Product Performance . . . . . . . . . . . . . . . . . . . . . . . . . . . . . . 161
Availability of Various Features/Ring Tones . . . . . . . . . . . . . 162
Battery Standby and Talk Time . . . . . . . . . . . . . . . . . . . . . . 163
Battery Precautions . . . . . . . . . . . . . . . . . . . . . . . . . . . . . . . 163
Care and Maintenance . . . . . . . . . . . . . . . . . . . . . . . . . . . . . 164
Section 17: Warranty Information ............................. 166
Standard Limited Warranty . . . . . . . . . . . . . . . . . . . . . . . . . 166
Index ............................................................................ 170
3

Section 1: Getting Started
This section helps you to start using your phone by activating
your service, inserting and charging the battery, inserting an
optional memory card, and setting up your voicemail.
Understanding this User Manual
The chapters of this guide generally follow the same order as the
menus and sub-menus in your phone. A robust index for quick
reference to most features begins on page 170.
Also included in this manual is important safety information that
you should know before using your phone. You can find this
information beginning on page 146.
Notes and Tips
Throughout this guide are icons and text that are set apart from
the rest. These are intended to point out important information,
quick methods for activating features, to define terms, and more.
The definitions for these are as follows:
•
Notes
: Additional information about the current feature, menu, or sub-
menu.
•
Tips
: Quick or innovative methods for performing functions related to
the subject at hand.
•
Important!
: Points out important information that could affect
performance, or even damage your phone.
4
Activating Your Phone
If you purchased your phone at a Verizon Wireless store, it is
probably activated and ready to use. If you have upgraded your
phone or received a new phone by mail, it probably needs to be
activated before you can use it.
To activate your phone, follow these steps:
1. Visit a Verizon Wireless store to activate your phone, or
visit
www.verizonwireless.com
password in the
My Verizon
, and enter your User ID and
➔
Manage Your Account
option
available on the home page.
2. When you have accessed the My Account Overview page,
select
Activate a new phone
to display instructions needed
to activate your phone online.
After gathering the required materials, follow the instructions to
complete the activation process.
Displaying Your Phone Number
䊳
Press the
Settings
Main Menu
tab ➔
key ➔
Phone Settings
Settings
➔
My Phone Number
➔
.
Basic
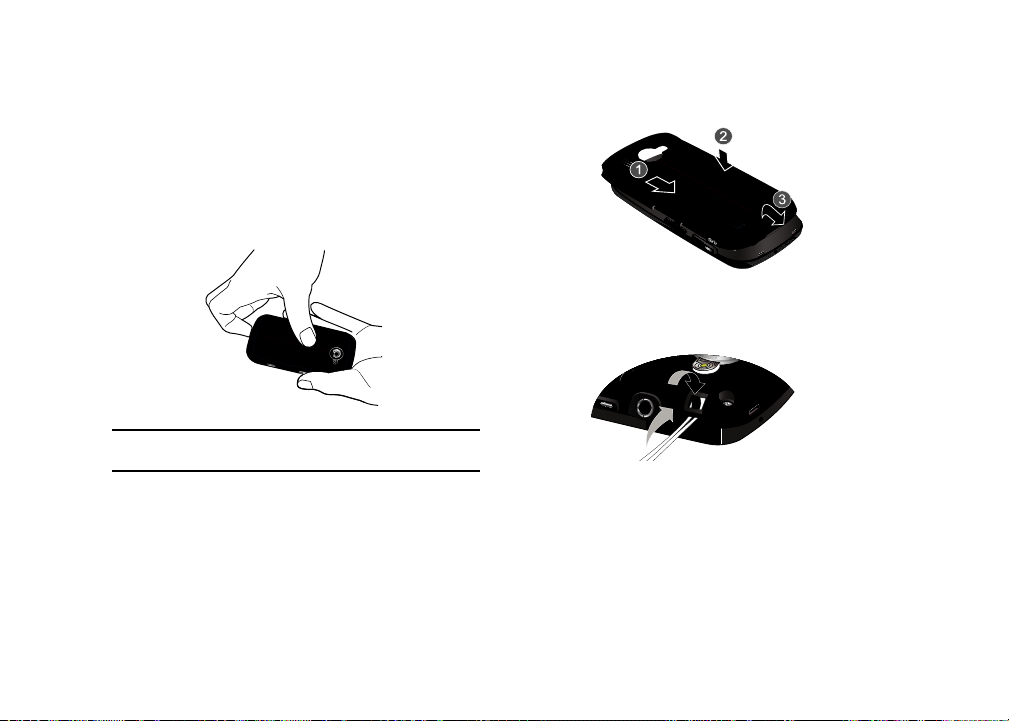
Remove and Replace the Rear Cover
Your Omnia II has a removable rear cover, which covers the
battery, microSD card slot and a slot for attaching a strap.
Remove the Cover
䊳
Remove the cover by pulling up using the slot provided, while
lifting the cover up and off the phone.
Warning!:
Take care when removing the battery cover with a fingernail, to
prevent breaking your fingernail.
Replace the Cover
䊳
Align the cover and press it firmly into place, being sure it
snaps into place at the corners.
Attach a Strap
You can attach an optional strap (not included) to your Omnia II.
1. Remove the rear cover as shown at left.
2. Slide the loop of the strap or lanyard into the slot and over
the tab to secure it.
3. Snap the cover into place.
Getting Started 5
Battery
Your Omnia II is powered by a rechargeable standard Li-Ion
battery, and comes with a wall charger for charging.
Note:
The battery comes partially charged. You must fully charge the battery
before using your phone for the first time. A fully discharged battery
requires up to 4 hours of charge time.
Warning!:
Use only Samsung-approved charging devices and batteries.
Samsung accessories are designed to maximize battery life. Using
other accessories may invalidate your warranty and may cause
damage.
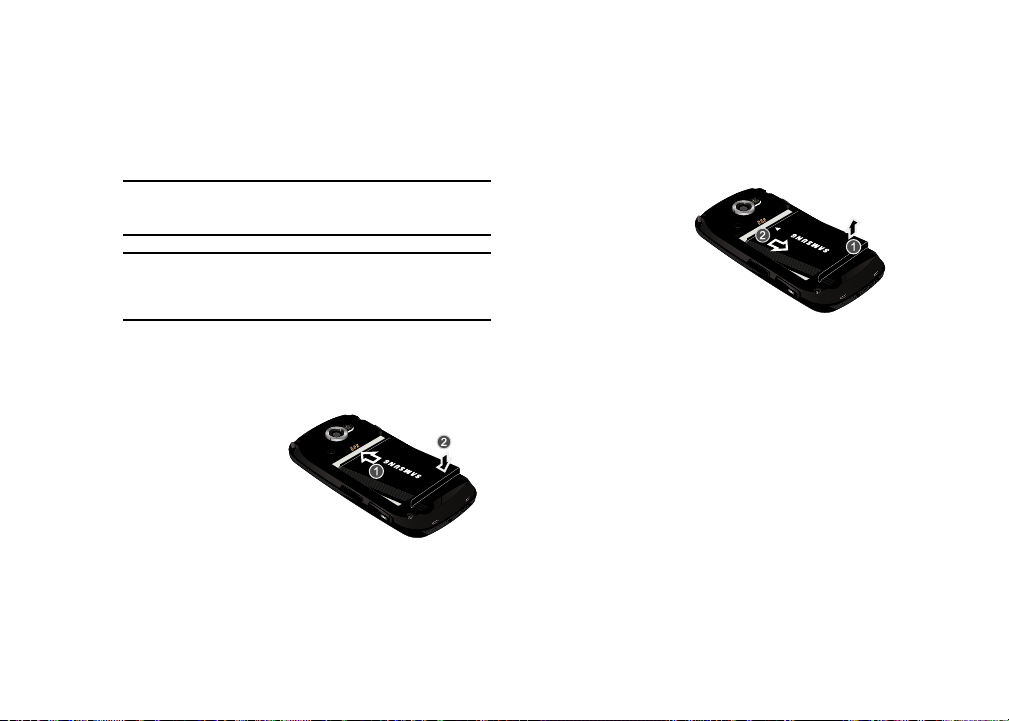
Installing the Battery
1. Remove the rear cover (see “Remove and Replace the
Rear Cover” on page 5.)
2. Insert the top end
of the battery into
the phone,
aligning the gold
contacts on the
battery with the
phone’s contacts.
3. Snap the rear cover back into place.
6
Removing the Battery
1. Remove the rear cover (see “Remove and Replace the
Rear Cover” on page 5.)
2. Lift the battery up
and out of the
phone.
3. Snap the rear
cover back into
place.
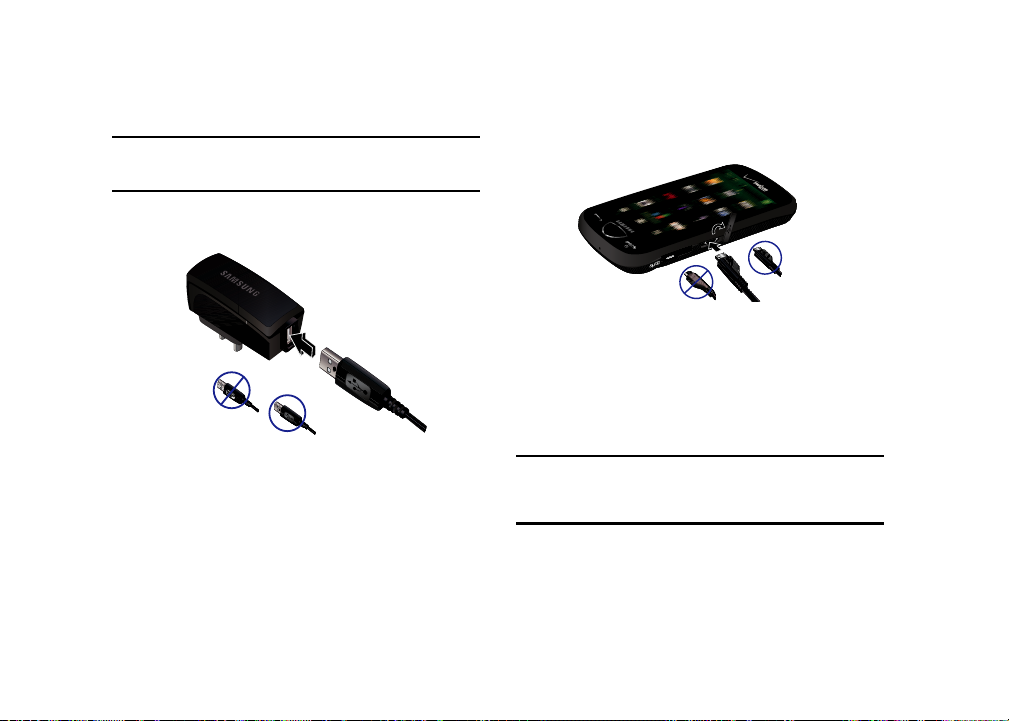
Charging the Battery
Charging Head
USB Cable
Correct
Incorrect
Correct
Incorrect
Note:
The battery comes partially charged. You must fully charge the battery
before using your phone for the first time. A fully discharged battery
requires up to 4 hours of charge time.
1. Connect the USB cable to the Charging Head.
2. Insert the USB cable into the phone’s power/accessory
port.
3. Plug the Wall/USB charger into a standard AC power outlet.
When the phone is completely charged (the indicator light
turns green), unplug the charger from the power outlet.
Remove the USB cable from the phone.
Warning!:
Please use only an approved charging accessory to charge your
phone. Improper handling of the charging port, as well as the use
of an incompatible charger, may cause damage to your phone and
void the warranty.
Getting Started 7
Battery Capacity
Your Omnia II is powered by a rechargeable standard Li-ion
battery. There is also an internal backup battery that saves all
phone settings if the regular battery is discharged. The internal
battery maintains data for approximately four hours. This internal
backup battery needs an initial charge of 24 hours.
Perform ActiveSync operations or use a backup utility frequently
to avoid losing any information in case the battery is fully
discharged. For more information see “ActiveSync” on page 109.
Note:
Long backlight settings, simultaneous use of Wi-Fi and Bluetooth,
searching for service, vibrate mode and browser use affect the
battery’s talk and standby times.
For more information about Battery and External power settings, see
“General Settings” on page 140.
Battery Indicator
The battery indicator in the upper-right corner of the display
indicates battery charge level. Four bars indicate a full charge,
while an empty icon indicates an almost-empty battery.
Two to three minutes before the battery becomes too low to
operate, a blinking empty battery icon appears and a tone
sounds. If you continue to operate the phone without charging, it
will shut down.
8
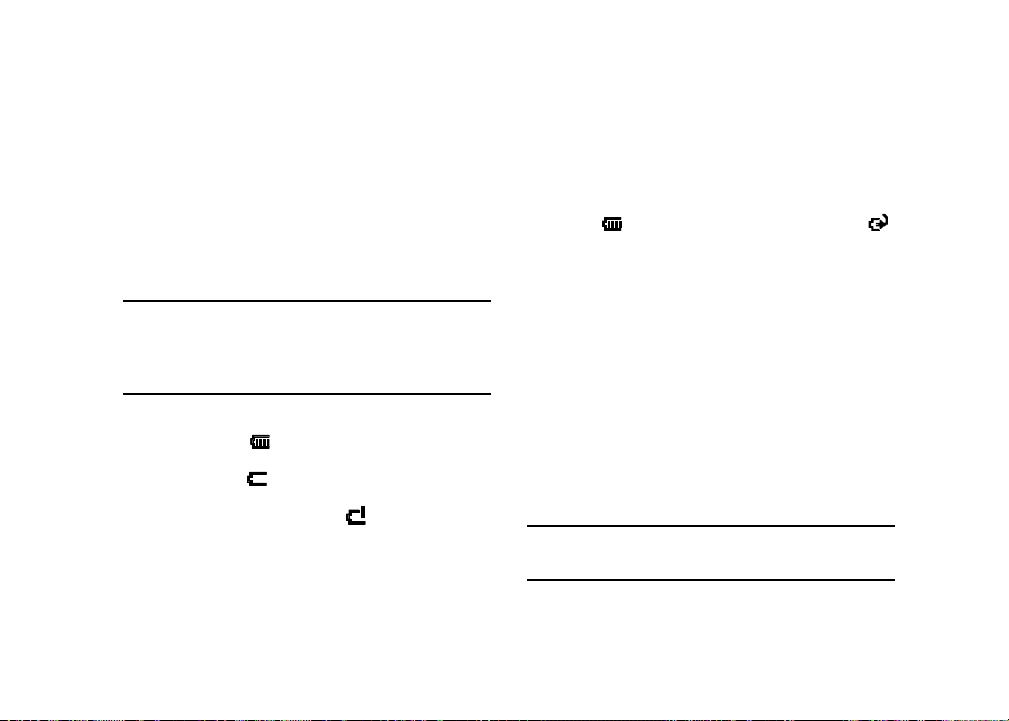
Checking Battery Charge
Keeping track of the battery’s charge is important. If the battery
level becomes too low, your phone automatically shuts down and
you could lose important data.
䊳
To quickly check your battery charge level, tap the
indicator on the Title Bar, then tap the
to display the
Battery Power
settings.
Charging
Battery
icon
Use of Non-Supported Batter y or Accessories
Only use Samsung-approved charging devices and batteries.
Samsung accessories are designed to maximize battery life.
Using other accessories may invalidate your warranty and may
cause damage.
Samsung handsets do not support the use of a non-supported
battery. When using a non-supported battery, you will hear a
series of beeps and you will see a warning message that
indicates “
NON-SUPPORTED BATTERY. SEE USER MANUAL.
” If you
receive this warning, battery charging has been disabled.
Samsung charging accessories (i.e. wall charger, and cigarette
lighter adapter) will only charge a Samsung approved battery.
Important!:
When using a non-supported battery the handset can only be
used for the duration of the life of the battery and cannot be
recharged.
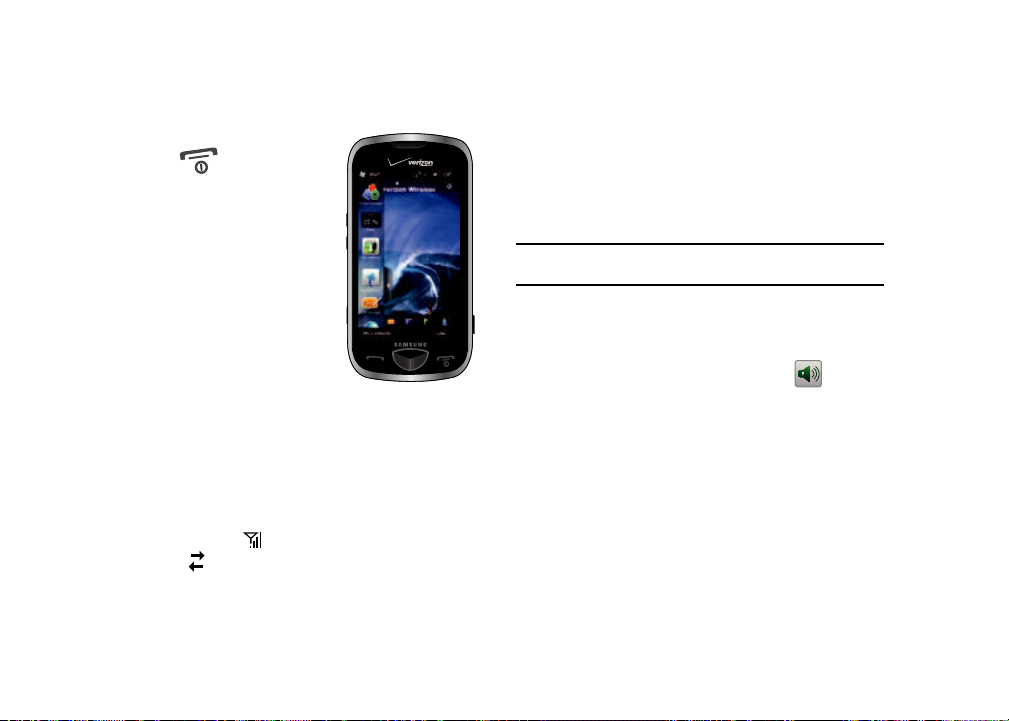
Powering the Phone On and Off
1. Press and hold the End/Power
key .
2. When powering
On
, the phone
receives a signal from your
home network and then logs
in. At this point, the phone
displays the
home screen
(page 24) and only functions
as a PDA (allowing you to run
applications) until you activate
the phone features.
3. When powering
message “Shutdown the device?” displays. Tap
Off
, the
Yes
to
power off the phone.
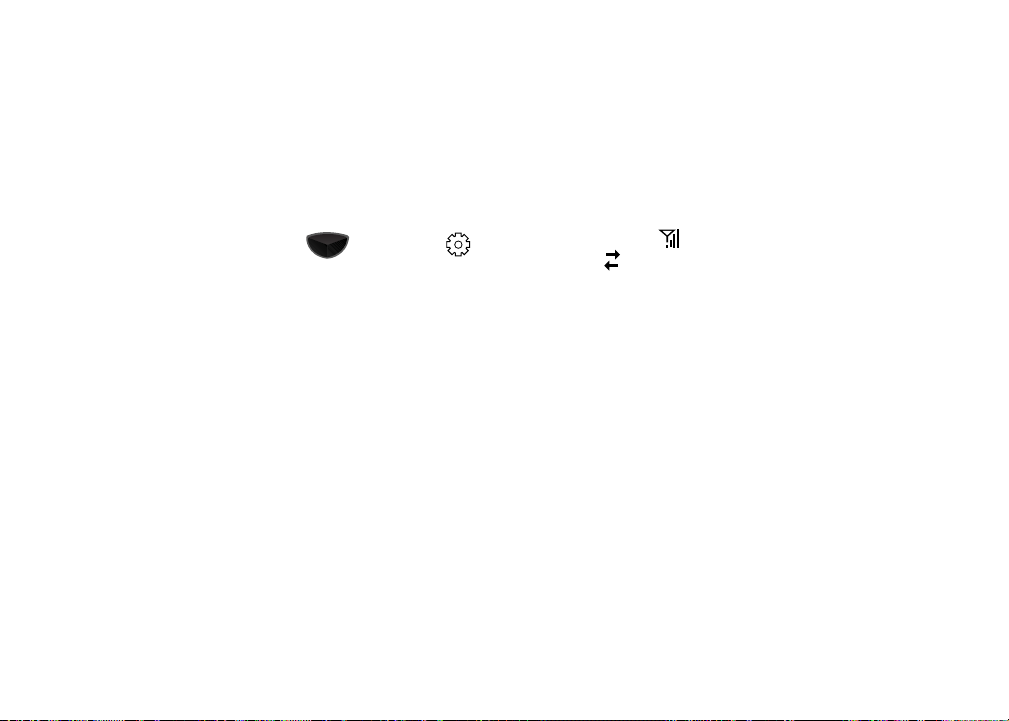
Turning the Phone Feature On and Off
Before you can use your Omnia II™ phone features, the onboard
phone must first be activated. To turn the phone on or off:
䊳
Tap t he
Signal
Manager
icon on the
, ➔
Phone
.
Annunciator line
➔
Wireless
Sounds and Ringtones
When starting to use your phone, it’s helpful to set the sounds
and tones your phone will use to alert you to its status, and to
notify you of incoming calls and messages.
For information on setting all Sound Settings, see “Sound
Settings” on page 139.
Tip:
You can easily access System Volume and Ring Volume, Wireless
Manager, and Power Settings by tapping in the Annunciator Line.
Sound Profiles
Sound Profile
provides an easy way to quickly set the sounds for
your phone.
1. From the
2. On the
Widget Bar
, tap the
move it to the
•Vibrate
•Volume On
•Volume Off
home screen
Sound Profile
widget, choose from:
: The phone vibrates, but plays no tones.
: The phone plays all selected tones.
: No tones are played.
Sound Profile
.
widget to
Getting Started 9
Ringtones and Call Alerts
Your Omnia II contains a number of standard ringtones, or you
may choose to purchase and download special ringtones using
VZW Tones. For more information, refer to “VZW Tones” on
page 84.
You may also set your phone to notify you by vibrating.
1. Press the
2. Tap the
Main Menu
Basic Settings
Call alert type
key ➔ then
tab ➔
Sound Settings
➔
Ring
field, then tap an alert from the drop-
Settings
.
➔
down list. A sample of the alert will play. Tap the left soft
key
Done
to save your selection.
3. Tap the
Ringtone
field, then tap a tone from the drop-down
list. A sample of the tone will play. Tap the left soft key
Done
to save your selection.
4. Tap the
Vibration type
field, then tap a pattern from the
drop-down list. A sample of the tone will play. Tap the left
soft key
Done
to save your selection.
5. Tap the left soft key
10
Done
to save your selections.
Airplane Mode
Airplane Mode
turns off all radio communications for your Omnia
II (phone, FM Radio, Bluetooth, Wi-Fi, and Data connections), but
allows you to use your phone’s other features. When your phone
is in Airplane Mode, it cannot send or receive calls or messages,
or access online information.
䊳
Tap t he
Signal
Manager
icon on the
➔
Airplane Mode
Annunciator line
.
➔
Wireless
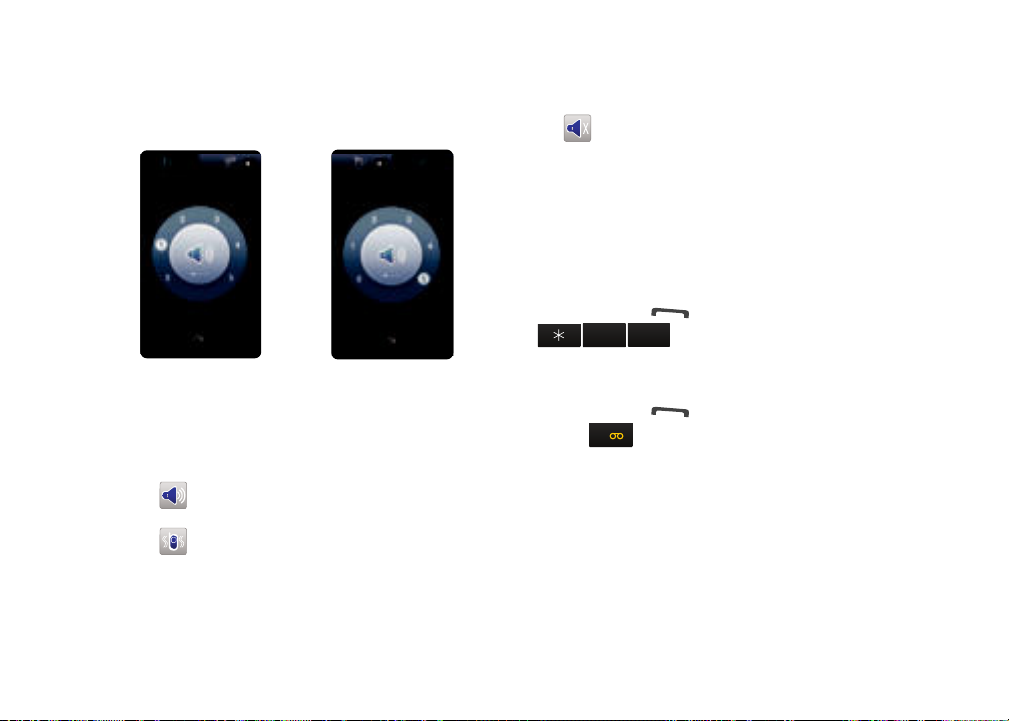
Set Volume
tuv
8
mno
6
䊳
Press the
Volume
key on the side of the phone.
Tap the
System Volume
and other system sounds. Tap the
tab to set the volume for alerts, key tones
Ring Volume
tab to set the
ringer volume.
Tap the icon in the center of the ring to toggle between these
settings:
Sound Profile
: Tap the number on the ring to set the
volume level.
Vibration
: Tap the number on the ring to set the
vibration pattern.
No Sound
: No sounds will be played.
Voice Mail
Setting Up Your Voice Mail
All unanswered calls to your phone are sent to voice mail, even if
your device is turned off. Therefore, you’ll want to set up your
voicemail and personal greeting as soon as you activate your
phone.
䊳
Press the
Send
key to launch the
Dialer
, then tap
and follow the automated instructions
to set up your voice mail.
Checking Voice mail
䊳
Press the
Send
key to launch the
and hold to connect to
1
Voice mail
Dialer
, then touch
. Follow the
automated instructions to access your voice mail.
Getting Started 11
Visual Voice Mail
Visual Voice Mail
allows you to manage voice mail directly from
the device, without having to dial voice mail, listen to voice
instructions, or listen to prior messages.
You must set up your Voice Mail before using Visual Voice Mail.
For more information, refer to “Setting Up Your Voice Mail” on
page 11.
Note:
Extra service charges may apply when using Visual Voice Mail service.
Contact Verizon Wireless for more information.
Note:
Visual Voice Mail may store voicemail messages in electronic form on
the device. Anyone in possession of the device can access the
voicemail. To limit unauthorized access to the voicemail, consider
Password Lock
using
For more information about setting a
information, refer to “Security Settings” on page 143.
to lock the phone when not in use.
Password Lock
, For more
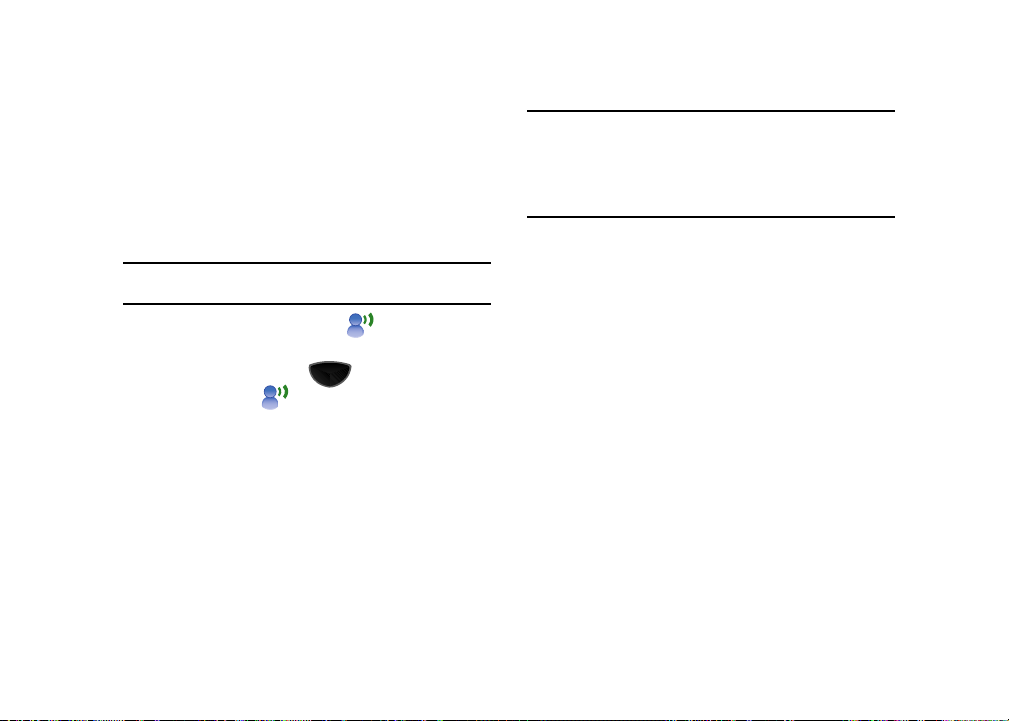
1. Tap the
Visual Voice Mail
widget .
– or –
Press the
Main Menu
key ➔
Visual Voice Mail
2. Follow the prompts to
3. When prompted, enter the voice mail password that you
.
Accept
Main Menu 1
the terms and conditions.
established during voice mail set up.
4. Continue to follow the prompts and instructions to
complete the activation of Visual Voice Mail. When
activation is complete, exit the application and return after
about 5 minutes to begin using Visual Voice Mail.
12
➔
microSD Memory Card (Optional)
Your phone supports the use of microSDTM or microSDHCTM
memory cards of up to 16GB capacity. These memory cards are
specifically designed for mobile phones and other ultra-small
devices, and are ideal for storing media-rich files such as music,
programs, videos, and photographs for use with your phone.
Note:
Use only compatible memory cards with your phone. Using
incompatible memory cards may damage the card and data stored on
the card, as well as the phone.
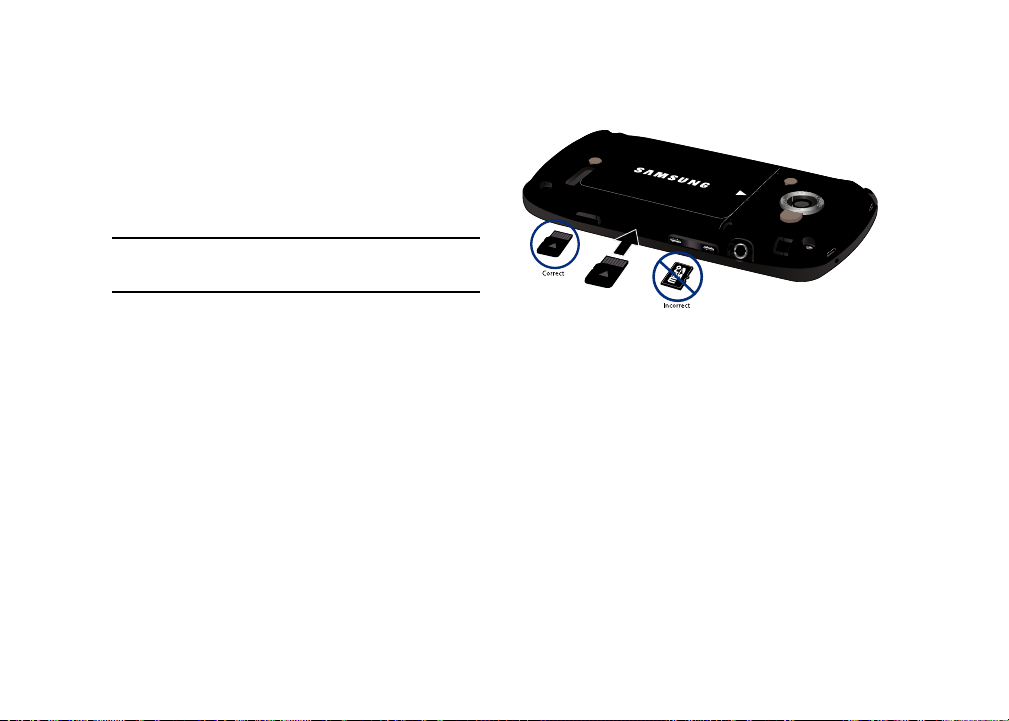
Installing the microSD Memory Card
The memory card slot is located on the side of the phone, under
the battery cover.
1. Remove the rear cover (see “Remove and Replace the
Rear Cover” on page 5.).
2. Locate the memory card slot and orient the microSD card
so the contact pins are facing up (see illustration).
3. Carefully insert the microSD memory card into the opening
and firmly push it in until you hear a click that indicates the
card is securely installed. The card is secure when it is not
protruding from the slot within the phone.
4. Snap the rear cover back into place.
Removing the microSD Memory Card
1. Remove the rear cover (see “Remove and Replace the
Rear Cover” on page 5.)
2. Firmly push in the microSD memory card, then release so
that it pops out from the slot.
3. Carefully pull the card out of the slot.
4. Snap the rear cover back into place.
Getting Started 13

Formatting the microSD Memory Card
You can format your microSD memory card to delete all data
stored on the card.
Note:
Repeated formatting may shorten the life of the memory card.
1. Press the
2. Tap the
3. At the
Main Menu
Basic Settings
Format
Format
tab ➔
key ➔
Memory Settings
Settings
➔
Storage Card
button to format your microSD card.
prompt, tap Yes . The card will be formatted,
and the display will return to the Storage Card settings.
Transferring Files to the microSD card from a PC
1. Insert the microSD card into the card slot of your Omnia II.
For information on inserting the microSD card, see
“Installing the microSD Memory Card” on page 13.
2. Synchronize your Omnia II with your PC via ActiveSync.
3. Open Windows Explorer on your PC, then highlight the
application or folder that you wish to transfer to the
microSD card.
4. Highlight and copy the file(s) or folder(s) to your computer’s
clipboard.
14
➔
5. Using the ActiveSync menu, click the Explore icon to open
the Mobile Device folder.
6. Double-click on the My Windows Mobile-Based Device
folder.
.
7. Double-click the Storage Card folder to open. Any contents
of the microSD card appear in the display.
8. Locate the folder or sub folder on the microSD card where
you wish to paste the files that you’ve copied.
9. Paste the files or folders on your computer’s clipboard onto
the microSD card.
Using the microSD card
Once you’ve transferred files from your computer to the microSD
card using ActiveSync, you can access the files that have been
transferred to your microSD card.
For example, if you’ve transferred any multimedia files onto your
microSD card that are compatible with Media Player, simply open
Media Player and use the Search feature to find the media files
you wish to play.

Rebooting your Phone
The
Reboot
button
allows you to
quickly reboot the
phone in the event
of a program or
application error.
Note:
This action is similar to that of a reboot action on your computer, which
only restarts the machine while maintaining all data intact.
1. Remove the rear cover (see “Remove and Replace the
Rear Cover” on page 5.)
2. Locate the recessed
Reboot
button located on the left side
of the phone, adjacent to the OK key.
3. Carefully insert the stylus into the recessed Reboot button.
After depressing the button, the phone will reboot.
4. Snap the rear cover back into place.
Resetting Phone Settings
Note:
To completely remove any personal information stored on your device,
see “Precautions for Transfer and Disposal” on page 169.
Resetting your phone resets your phone to its factory default
settings, ends all applications currently running, and erases all
data (pictures/video/contacts) from your phone.
Note:
You can save important files by storing them on a removable microSD
memory card (not included).
1. Press the
2. At the
3. Enter the
Main Menu
Basic Settings
Clear all data
Device Lock Code
key ➔
tab ➔
prompt, tap
Memory Settings
Yes
.
, then tap
Settings
➔
➔
Clear All Data
Done
to proceed. Your
phone will reset to the factory settings and reboot. After
the phone reboots, you will need to align the screen and
set your local time. Follow the on-screen prompts when
directed.
Note:
During the reset process, you will be prompted to enter your Device
Lock Code. The default Device Lock Code is the last four digits of the
phone number.
Getting Started 15
.

Section 2: Understanding Your Phone
Congratulations on your purchase of the Samsung Omnia II.
This section outlines many key features of your phone. It also
describes your display, frequently used keys, and how to install
and charge your battery.
Features of Your Phone
•
16M color 3.7” 480x800 AMOLED (Active Matrix Organic LED) Touch
Screen with virtual QWERTY keyboard
•
512MB ROM/208MB RAM and 8GB internal user memory
•
Supports microSD™/microSDHC™ Expansion Memory (up to 16GB
capacity)
•
High Speed Data (3G-capable) Technology
•
Open and Assisted Global Positioning (GPS) Technology with VZ
SM
Navigator
•
Wireless Internet Capability
•
Full Internet Browser with touch gesture support
•
Windows Mobile® 6.5 Professional
•
Built-in Bluetooth® Technology
•
802.11b/g Wi-Fi Support
•
5.0 Megapixel Camera with Auto Focus, Flash and DVD-quality
Camcorder
16
•
Messaging Services, including:
–
Standard Text Messaging (SMS)
–
Multimedia Messaging (MMS) for Picture and Video Messaging
–
E-mail Messaging, including support for mobile and corporate E-mail
–
Mobile Instant Messenger (IM)
–
Visual Voice Mail
•
Nuance Voice Recognition technology for no-training voice recognition
of dialing and commands
•
Personal organization tools, including Calendar, Clock and Alarm,
Memos and Tasks
•
V CAST Music with Rhapsody® (Subscription, Wireless & PC
Downloads)
•
V CAST Videos
•
V CAST Song ID
•
VZW Tones
•
Social Networking Service applications (Facebook and Communities)
and one-touch upload
•
Ferrari GT Evolution racing game
•
Bing Search
•
Podcasts and RSS Reader

Front View of Your Phone
3
5
2
1
4
Key Functions
1.
Earpiece
: Allows you to hear callers and other audio played
by the phone.
2.
AMOLED Display/Touch Screen
3.
Send key
: Press to display the Dialer, or to dial a call after
: Displays phone information.
entering a telephone number. Press and hold to launch
Voice Recognition.
4.
Main Menu key
hold to open
5.
End/Power key
: Press to open the
Task Switcher
.
Main Menu
. Press and
: Press and hold to turn the phone On or Off.
Press to wake up display. Press to end a call, or to hide an
application. Press to ignore an incoming call and send the
caller to voice mail.
Warning!:
Please note that a touch screen responds best to a light touch
from the pad of your finger or a non-metallic stylus. Using
excessive force or a metallic object when pressing on the touch
screen may damage the tempered glass surface and void the
warranty. For more information, please refer to the “Standard
Limited Warranty” on page 166.
Understanding Your Phone 17
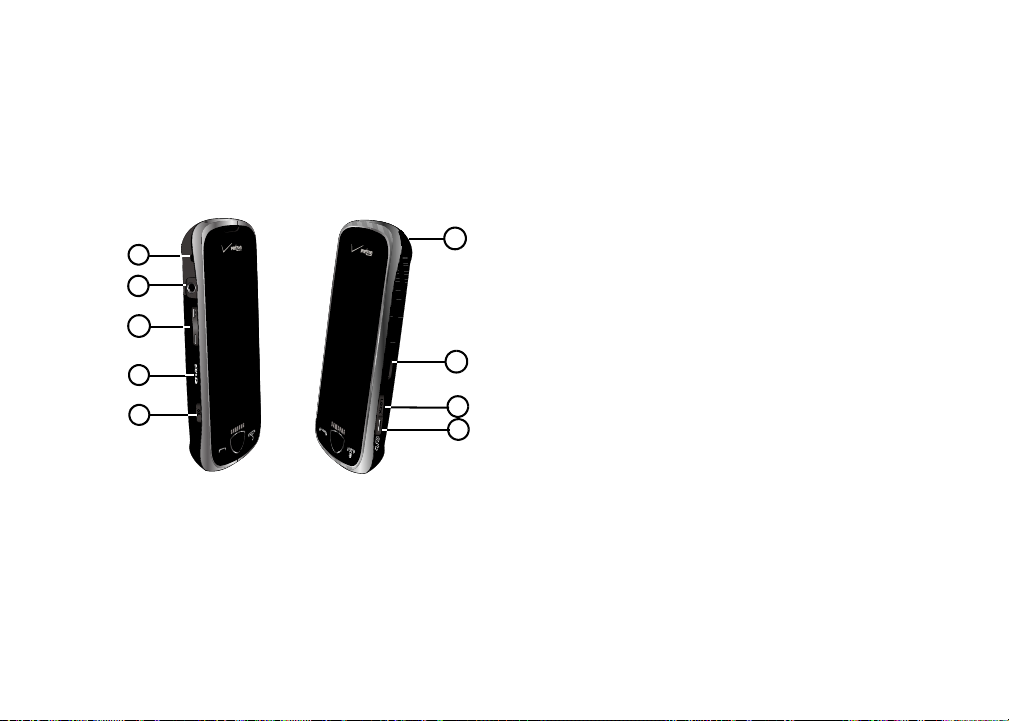
Side View of Your Phone
2
4
1
8
7
3
9
5
6
Key Functions
1.
Strap attachment
2.
Headset Jack
: Attach a strap (not included).
: Plug in an optional 3.5mm headset or other
device. For best reception when using the FM Radio, use
the included FM antenna/Microphone adaptor.
3.
Volume key
: Press to adjust audio volume, adjust the
master volume in idle mode, adjust the voice volume
during a call, or to mute the ringer for an incoming call.
4.
Memory card slot
5.
OK key
: Remove cover to access microSD slot.
: Press to accept entries, close an item, or hide an
application. Press and hold to go to the home screen.
6.
18
Camera/Camcorder key
and hold to launch the camcorder. In camera/camcorder
mode, press to take the picture or begin/stop recording.
7.
Lock key
: Press to put the screen to sleep. Press to wake
the screen, or press and hold to unlock the phone.
8.
Power/Accessory Port
optional accessory cables.
9.
Stylus
: Use the stylus for screen navigation and entries.
Store the stylus in the slot.
: Press to launch the camera. Press
: Plug in the charging cable or

Rear View of Your Phone
1 2
3
Key Functions
1.
Camera/Camcorder lens
camcorder.
2.
Flash
: The built-in flash has manual and automatic
capabilities.
3.
Stereo speakers
ringtones and sounds.
: The lens of the built-in camera/
: Allows you to hear and play music,
Understanding Your Phone 19
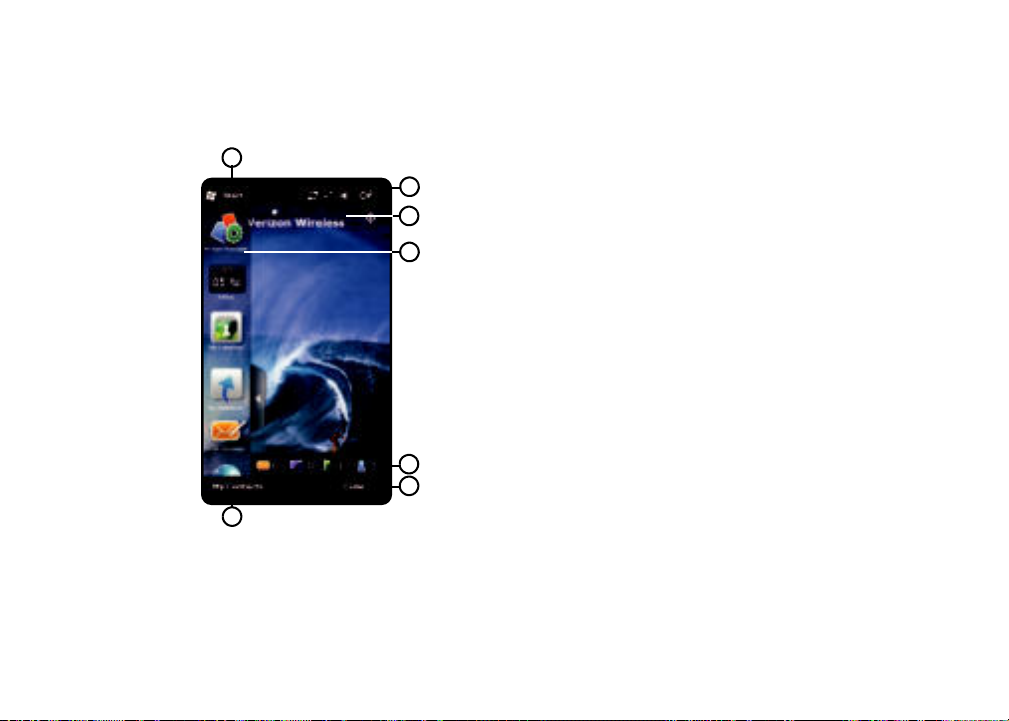
Home Screen
1
3
4
6
7
2
5
20
Home Screen Functions
1.
Start
: Tap Start to display Main Menu for access to
applications, Settings and Task Switcher.
2.
Annunciator Line
: Displays the active program, and icons to
show Connectivity, Phone status, Ring/Volume, and Power
status. Tap the icons to quickly access Wireless Manager,
Volume, and Power Settings.
3.
ERI Banner
: Displays “
Verizon Wireless
” when the device is
activated and functioning in the Verizon Wireless Home
Network.
4.
Widget Bar
: Contains user-selectable widgets such as
Analog and Digital Clock, Calendar, and Shortcuts. Tap the
Widget Bar tab to open and close the bar.
5.
Notification Bar
: Presents notification of text, multimedia
and e-mail messages, voice mails and missed calls. Tap
an icon to launch the application.
6.
Right Soft Key
: Presents commands based on the status or
open application.
7.
Left Soft Key
: Presents commands based on the status or
open application.
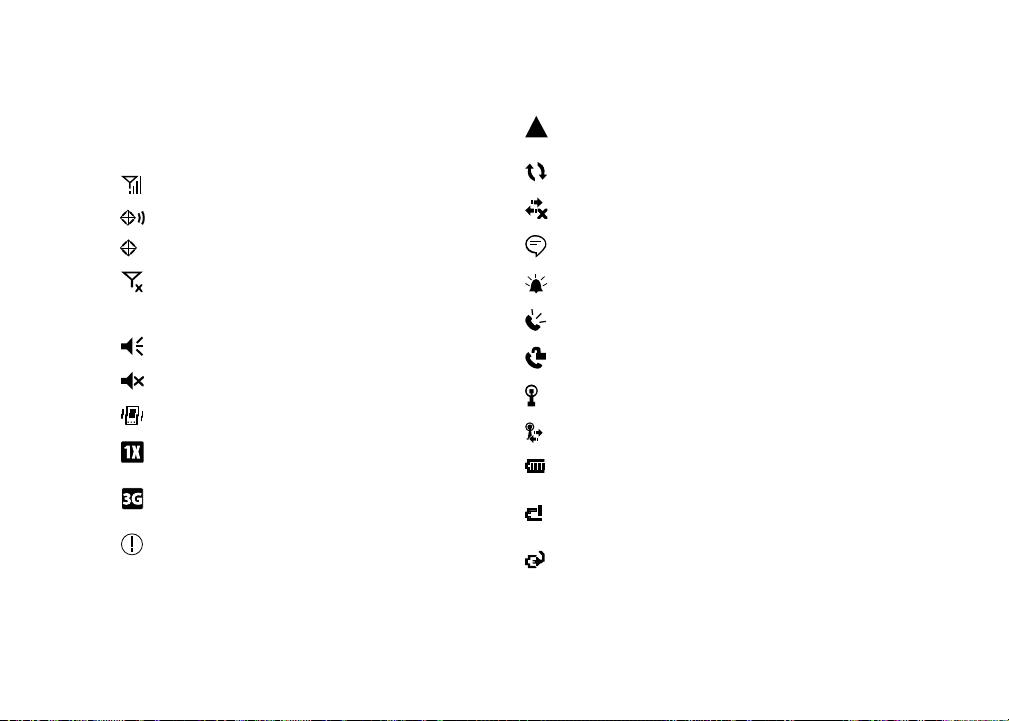
Annunciator Icons
Icons in the Annunciator line display network, phone and battery
status, as well as notifications for events and connections. .
Signal strength
GPS Location On
GPS 911 Only
Airplane Mode
: More bars mean better signal.
: GPS for location is active.
: GPS only active for 911 calls.
: Phone is turned off, but other features are
available. For more information, refer to “Airplane Mode”
on page 10.
Ringer On
: The ringer is set to On.
Ringer Off
: The ringer is set to Off.
Vibrate On
: The ringer is set to Vibrate.
1xRTT
: 1xRTT high speed data transfer service is available,
which is required for MMS and data services.
3G
: 3G high speed data protocol is available, which is
required for video streaming and downloads.
Information
: Alerts you to informational messages.
Roaming
: Your phone is outside of the home service area,
and is in Roaming mode.
Connecting
No Connection
Attention
Reminder
Speakerphone
Voice Privacy
Wi-Fi Inactive
Wi-Fi Active
Battery Status
: ActiveSync or Data session is currently in use.
: There are no data sessions active.
: Two or more message icons are being displayed.
: A calendar event is upcoming.
: The phone is in Speakerphone mode.
: Voice Privacy Enhanced Mode is available.
: A Wi-Fi connection is available, but inactive.
: A Wi-Fi connection is available and active.
: Current battery charge (shown fully
charged).
Battery Charge Needed
: Battery is fully discharged. Phone
will shut off if not charged.
Battery Charging
: Charger is connected and battery is
charging.
Understanding Your Phone 21

Notification Bar Icons
The
Notification Bar
displays at the bottom of the home screen to
inform you of new messages and e-mails, missed calls, and
voice mail.
A number beside an icon indicates the number of notifications for
the type.
New SMS/MMS Message
: Tap the icon to go to the
Inbox.
New E-mail
Missed Calls
New Voice mail
: Tap the icon to go to Messaging.
: Tap the icon to go to Call Logs.
: Tap the icon to go to Visual Voice
Mail. For more information, see “Visual Voice Mail”
on page 12.
22
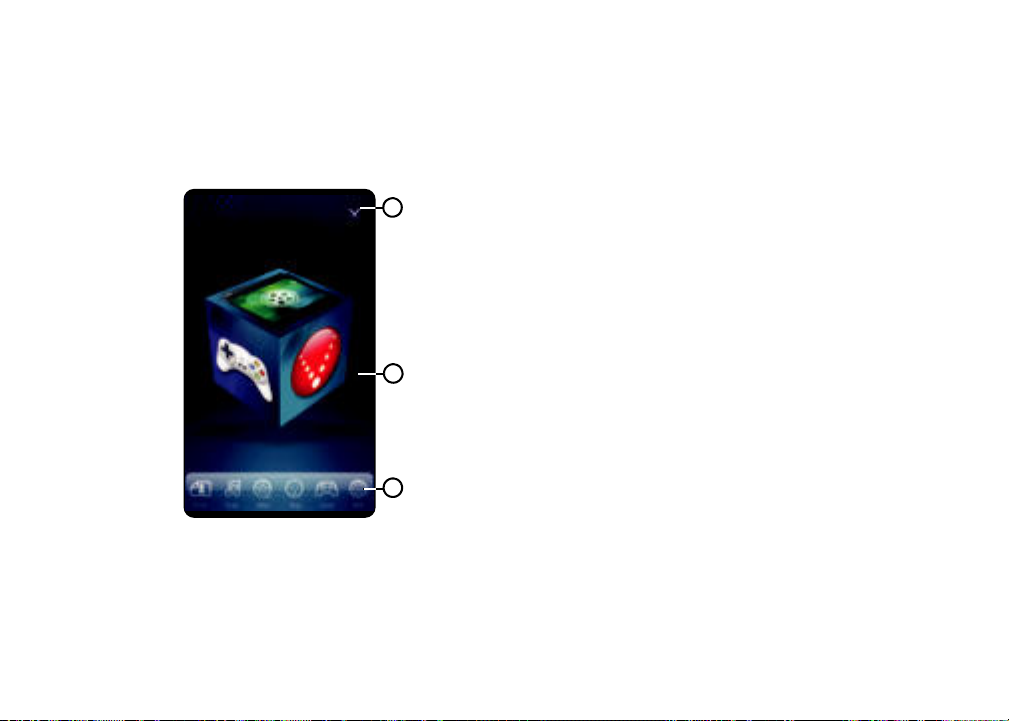
Cube
1
2
3
Cube Functions
1.
Close/Back
: Tap to close
2.
Cube
: Flick or drag with your finger or stylus to rotate the
Cube
, or Back to return to Cube.
Cube. Choose from Photo, Music, Video, Shop, Game, or
Web.
3.
Menu
: Tap to select from Photo, Music, Video, Shop, Game,
or Web.
Understanding Your Phone 23

Section 3: Displays
Home Screen
The
home screen
on your phone. You can customize each home screen by placing
Widgets according to your preference.
Extended Home Screen
The home screen extends beyond the display width to provide
more space for adding icons, widgets, and more.
Slide your finger horizontally across the screen to scroll to the
left or right side of the extended home screen.
You can scroll continuously between home screens, as shown in
the illustration.
The wallpaper for each home screen is different to aid you in
navigation.
The indicator at the top of the screen indicates the current
screen.
24
is your starting point for using the applications

Customizing Home Screens
Each home screen can be customized to fit your needs by
docking widget(s) on the home screen, and by selecting
wallpaper.
Docking and Undocking Widgets
For more information about using widgets, see “Docking and
Undocking Widgets” on page 27.
Moving Widgets
Widgets are locked in place when docked on a
home screen
move a widget on a home screen, touch and hold the widget until
it resizes, then drag it to a new area of the home screen.
Note:
A widget can only exist in one place, so if a widget is undocked on a
home screen, it is no longer available in the Widget Bar or on another
home screen.
Change the Home Screen Wallpaper
1. From a home screen, display the
Widget Bar
by tapping the
Widget Bar Tab.
2. Tap t h e
Wallpapers
widget . Use the left or right
triangle to scroll through preloaded or downloaded images.
3. Ta p
Images
to view Photos captured using the camera, or
copied to your phone or memory card.
. To
4. Ta p
Set
to use the displayed image as the new wallpaper.
Note:
Wallpaper settings can also be made in Settings. For more
information, see “Display Settings” on page 139.
Displays 25

Widget
Bar Tab
Widgets and the Widget Bar
Widgets
are links to mini-applications or tools, which can be
docked in the
Widget Bar
, or on a home screen. For a list of
available widgets and their functions, see page 29.
The
Widget Bar
, located at the left of the home screen:
•
Provides quick access
to widgets
•
Keeps widgets
organized and always
accessible
•
Maximizes available
display space.
•
Gives you information
at a glance
Accessing the
Widget Bar
䊳
To
access
the
Widget Bar, tap the
Widget bar tab, located on the left side of the main display.
䊳
To
close
the Widget Bar, tap the Widget Bar tab, or tap the
home screen.
26
Note:
The Widget Bar tab can be moved vertically on the screen by dragging.
Widget Bar Navigation
Use your fingertip or stylus along the Widget Bar to flick up and
down to scroll through the list
Customizing the Widget Bar
By default, widgets are docked in the Widget Bar. You can drag
widgets to a home screen to use the application or feature
(undocking), then drag it back to dock it in the Widget Bar when
you are finished.
 Loading...