

Page 1

GT-I8000
user manual
Page 2

Read me first!
When you need information, instructions, and tips to learn more about
your device, you have several options available:
•
Help System
embedded, searchable help system explains how to use various
programs and features.
•
Extended Usage Guide
will find the Extended Usage Guide in Adobe Acrobat (.pdf) format.
You can either view the guide online or download and print the file
for your convenience. The Extended Usage Guide contains
advanced usage tips and more details about particular functions of
your device. To view the file, you must have Adobe Reader or
Adobe Acrobat installed-you can download Adobe Reader free
(on your device) - your device includes Help. This
(online) - on the Samsung website, you
from Adobe's website (www.adobe.com).
•
User Manual
designed to guide you through the functions and features of your
device. It contains extensive information about Samsung software
and features and tips for using and maintaining the device. For any
topics not covered in this manual, please refer to the embedded
help as described above.
(printed) - this user manual has been specially
2
Page 3
Instructional icons
Before you start, familiarise yourself with the icons you will see in this
manual:
X
>
Warning
yourself or others
Caution
device or other equipment
Note
Refer to
for example: X p. 12 (represents "see page 12")
Followed by
must select to perform a step; for example: Tap
Settings (represents
– situations that could cause injury to
– situations that could cause damage to your
– notes, usage tips, or additional information
– pages with related information;
– the order of options or menus you
Start
, followed by
Settings
)
Start
>
[ ]
Square brackets
(represents the End/Power key)
– device keys; for example: [ ]
3
Page 4
Copyrights and trademarks
Rights to all technologies and products that comprise this device are
the property of their respective owners:
• This product includes software licensed from MS, an affiliate of the
Mi
crosoft Corporation. Microsoft and software bearing the
Microsoft name are registered trademarks of the Microsoft
Corporation.
• Java™ is a trademark of Sun Microsystems, Inc.
• Bluetooth
®
is a registered trademark of the Bluetooth SIG, Inc.
worldwide. Bluetooth QD ID: B015224
®
•Wi-Fi
, the Wi-Fi CERTIFIED logo, and the Wi-Fi logo are registered
trademarks of the Wi-Fi Alliance.
®
•DivX
is a registered trademark of DivX, Inc., and is used under
licence.
•
and
are trademarks of SRS Labs, Inc. CS Headphone
and WOW HD technologies are incorporated under licence from
SRS
Labs, Inc.
• XTRA is a registered trademark of Qualcomm, Inc.
4
Page 5

ABOUT DIVX VIDEO
DivX® is a digital video format created by DivX, Inc. This is an official
DivX Certified device that plays DivX video. Visit www.divx.com for
more information and software tools to convert your files into Divx
video. DivX Certified to play Divx
®
video up to 320x240.
ABOUT DIVX VIDEO-ON-DEMAND
This DivX Certified® device must be registered in order to play DivX
Video-on-Demand (VOD) content. To generate the registration code,
locate the DivX VOD section in the device setup menu. Go to
vod.divx.com with this code to complete the registration process and
learn more about DivX VOD.
5
Page 6

Contents
Introducing your device ................................................. 9
Unpack ............................................................................... 9
Get to know your device ................................................... 10
Assemble and prepare your device ................................... 15
Turn on your device for first time ....................................... 20
Customise your device ...................................................... 25
Use Widgets ..................................................................... 28
Work with applications ...................................................... 32
Enter text .......................................................................... 35
Communication ............................................................ 42
Work with contacts ........................................................... 42
Calling ............................................................................... 47
Messaging ........................................................................ 50
Multimedia ................................................................... 54
Camera ............................................................................. 54
Media Player ..................................................................... 65
Photo ................................................................................ 69
6
Page 7

Digital Frame ..................................................................... 70
FM Radio .......................................................................... 72
Video Editor ...................................................................... 74
Games .............................................................................. 78
Java .................................................................................. 78
Personal productivity ................................................... 79
ActiveSync ........................................................................ 79
Smart Sync ....................................................................... 83
Clock ................................................................................ 86
Schedule ........................................................................... 89
Notes ................................................................................ 91
Memo ............................................................................... 92
Recorder ........................................................................... 93
Tasks ................................................................................ 94
Calculator .......................................................................... 95
Unit Converter ................................................................... 97
Smart Reader .................................................................... 98
Smart Search .................................................................. 101
Web applications ....................................................... 103
Web browsing with Opera ............................................... 103
Rich Internet .................................................................... 106
7
Page 8

Search Widget ................................................................ 106
Streaming Player ............................................................. 107
Midomi ............................................................................ 108
RSS Reader .................................................................... 110
Podcast .......................................................................... 112
QIK ................................................................................. 115
Communities ................................................................... 118
Samsung Application Store ............................................. 121
Marketplace .................................................................... 122
Microsoft My Phone ........................................................ 122
Remote Desktop Mobile .................................................. 123
Connectivity ............................................................... 124
Connect to the internet or your network .......................... 124
GPS ................................................................................ 129
Bluetooth ........................................................................ 132
Wi-Fi ............................................................................... 137
Connected Home ............................................................ 139
Troubleshooting ......................................................... 144
Safety and usage information .................................... 149
Index .......................................................................... 162
8
Page 9

Introducing your device
Unpack
Your package contains the following items:
• Handset
•Battery
• Travel adapter (charger)
•CD-ROM
• Stereo headset
•PC data cable
• User manual
The items supplied with your device and available accessories may
be different depending on your region or service provider.
* The CD-ROM contains Microsoft ActiveSync software, add-on
software, and other applications.
*
9
Page 10
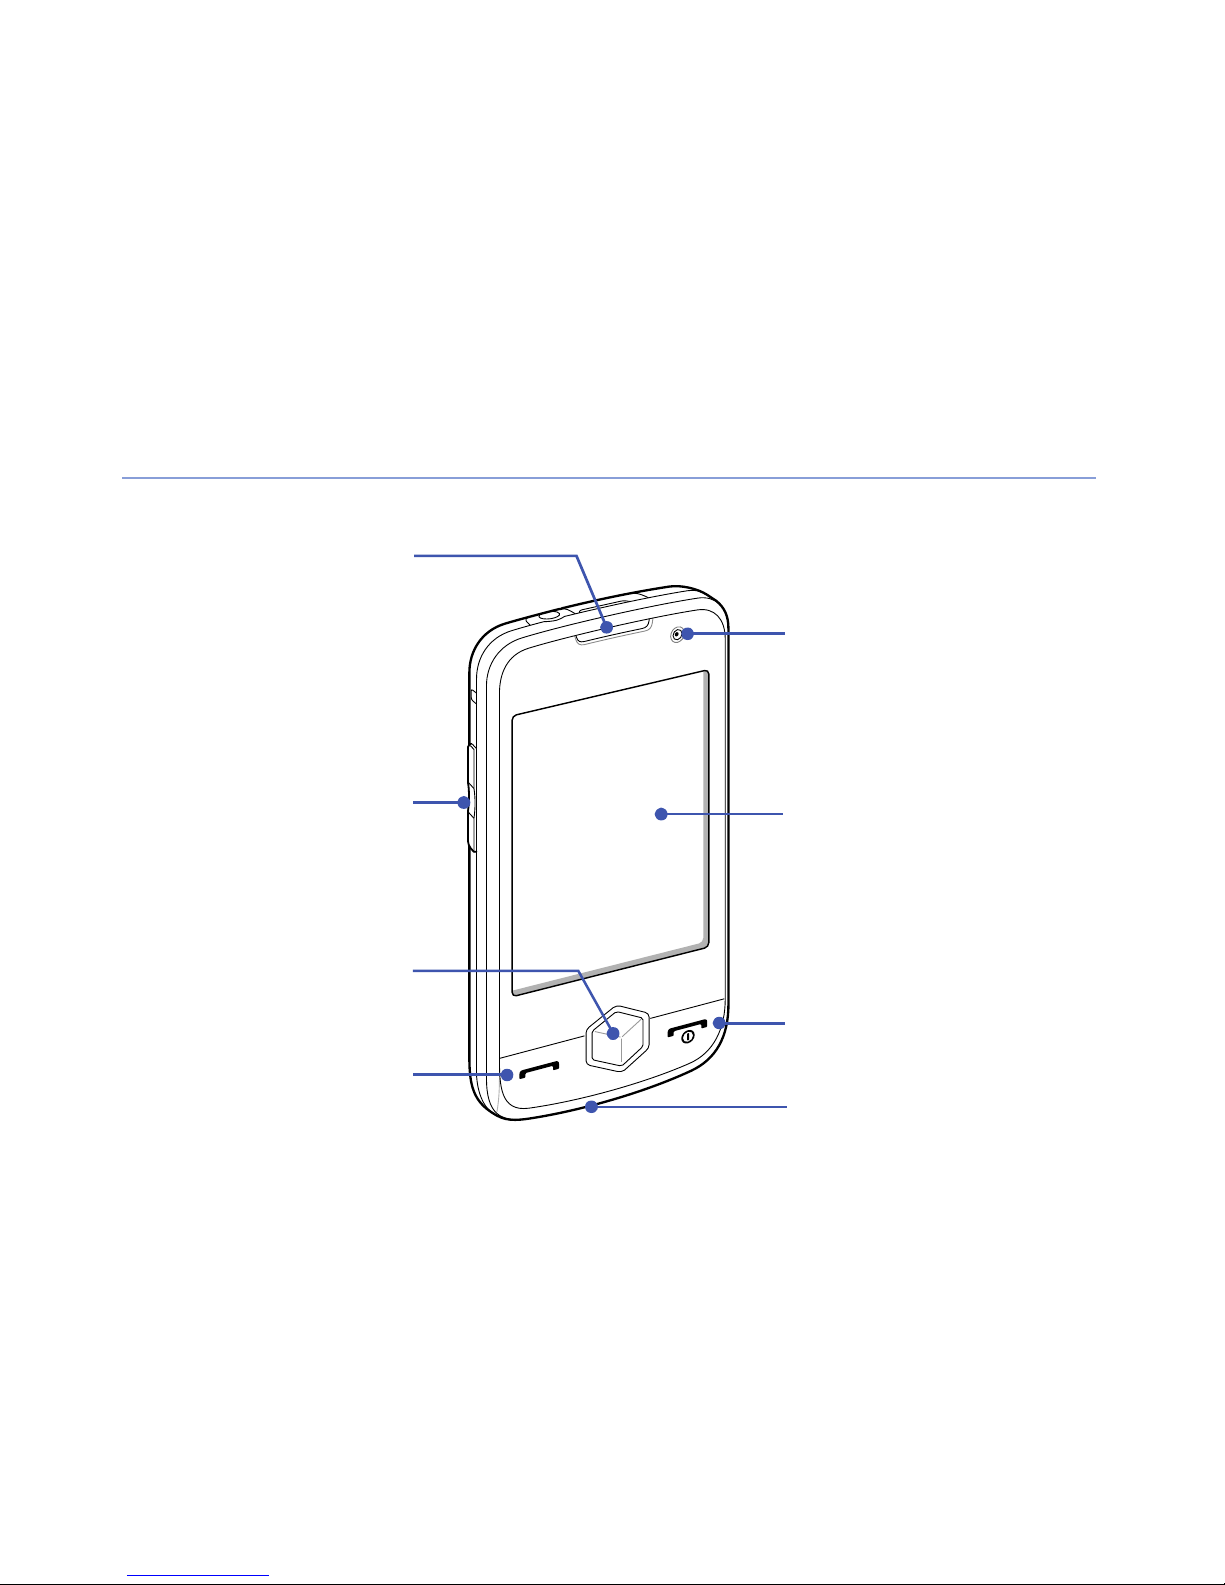
Get to know your device
Front camera lens
Earpiece
Touch screen
Volume key
Talk/
Speakerphone key
End/Power key
Mouthpiece
Menu key
Front view
10
Page 11
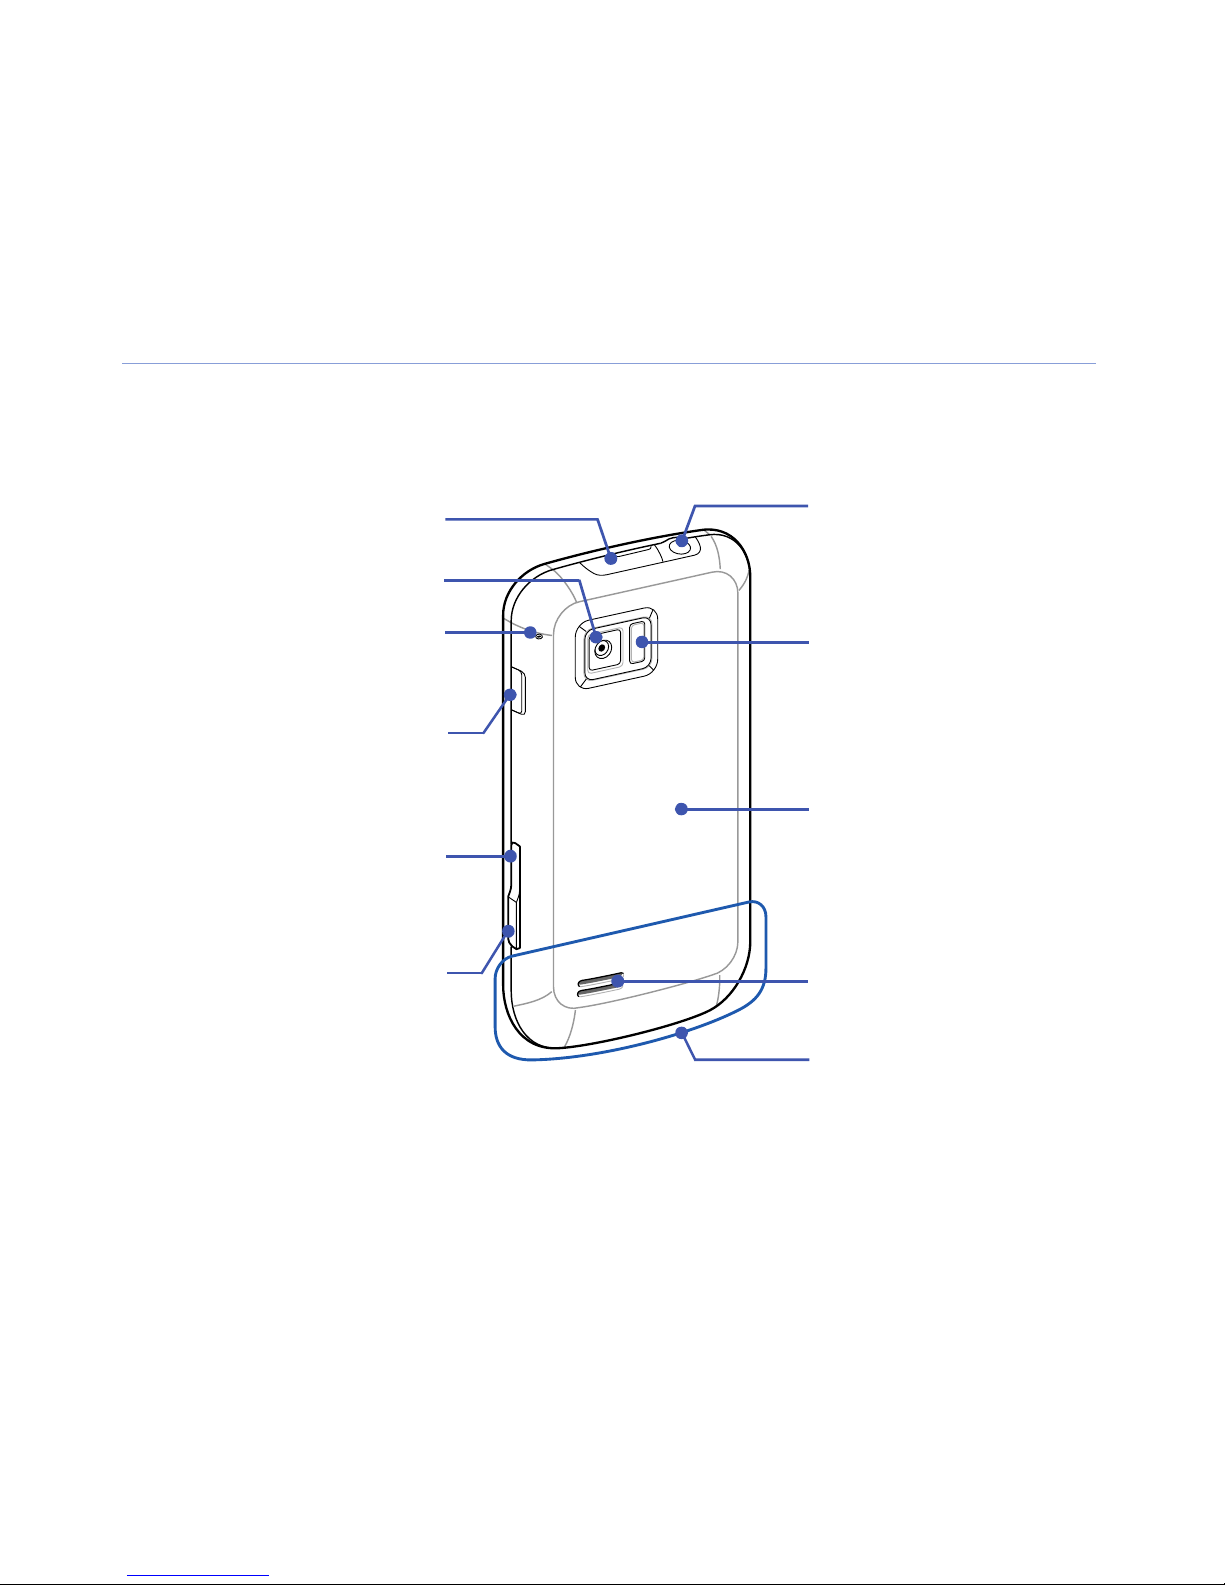
Rear view
Headset (3.5 mm)/
TV out jack
Multifunction jack
Lock key
Camera key
Flashbulb
Battery cover
Rear camera lens
Internal antenna
Back/Cube
launcher key
Speaker
Microphone for
speakerphone
11
Page 12
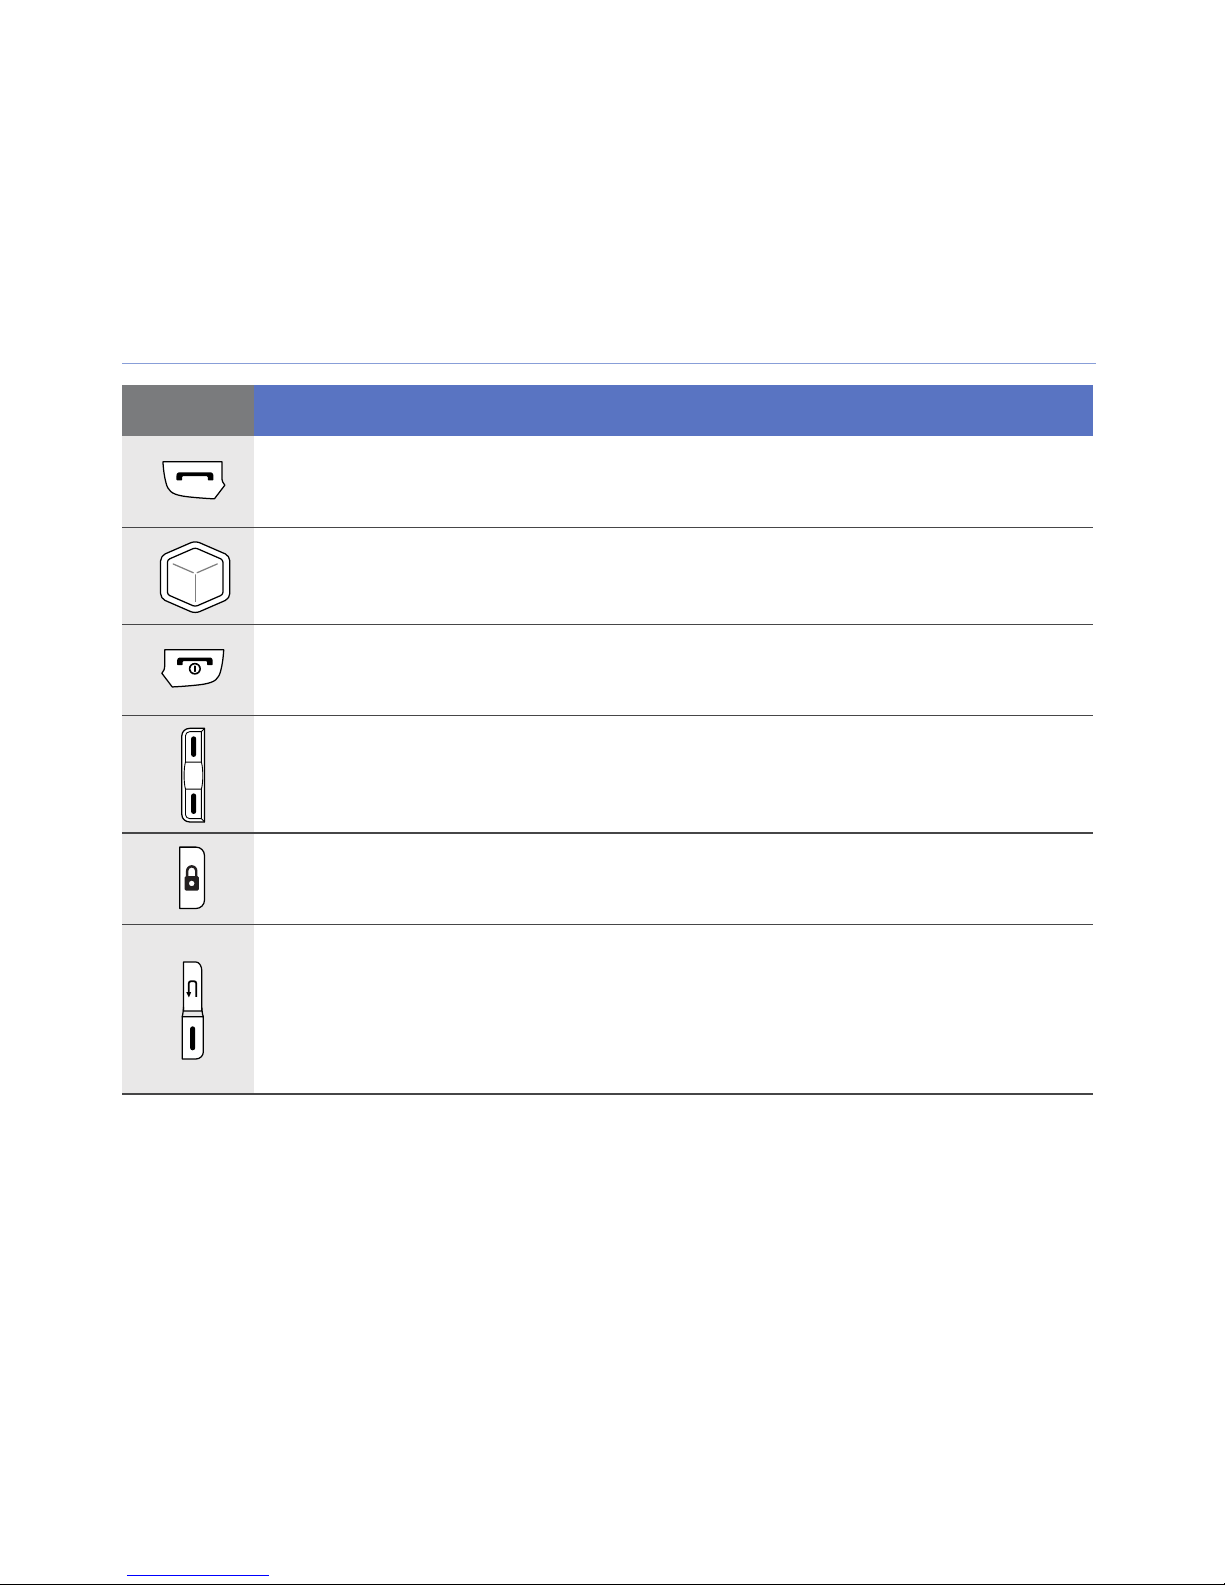
Keys
Key Function
Open the dialling screen; Make or answer a call; Activate the
speakerphone during a call (press and hold)
Access Main menu; Open the Task Switcher screen (press
and hold)
Turn the device on or off (press and hold); End a call; Return
to the Today screen
Adjust the volume; During a call, adjust the voice volume;
During an incoming call, mute the call ringer
Activate or deactivate Sleep mode; Lock or unlock the
external keys and the touch screen (press and hold)
•
Up
- Return to the previous menu level; Open the Cube
launcher (press and hold)
•
Down
photo or record a video
- Activate the camera; In Camera mode, take a
12
Page 13
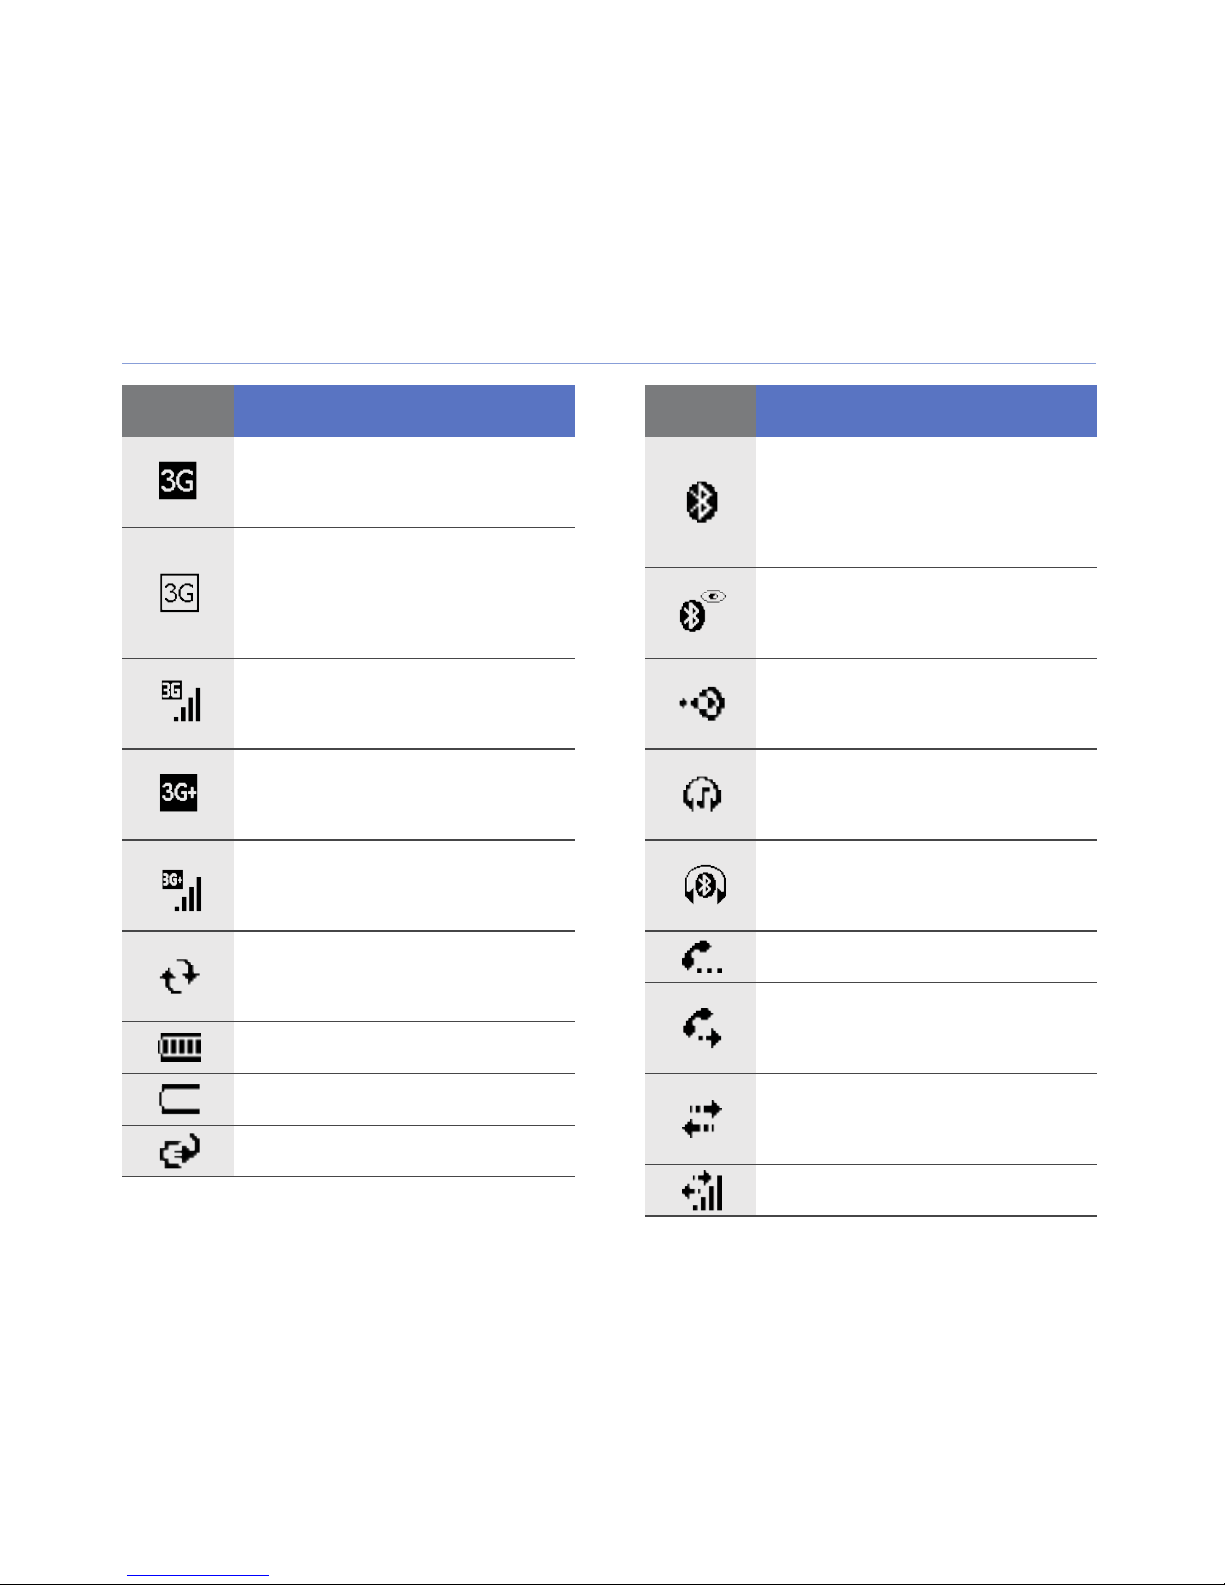
Icons
Icon Function
UMTS network
available
UMTS network
available (data call
unavailable)
UMTS network
connected
HSDPA network
available
HSDPA network
connected
ActiveSync in
Icon Function
Attempt to access via
Bluetooth or
Bluetooth activated
Bluetooth visibility
activated
Receiving data via
Bluetooth
Bluetooth stereo
headset connected
Bluetooth hands-free
connected
Call on hold
progress
Battery level
Low battery
Battery charging
Call forwarding
activated
Connected to a
computer
Data call in progress
13
Page 14
Icon Function
Icon Function
EDGE network
available
EDGE network
connected
GPRS network
available
GPRS network
connected
Searching for a signal
Missed call
More status icons
available (tap the icon
to see them)
No signal
No SIM or USIM card
Pending alarm
Radio off
Ringer on
Ringer set to vibrate
Roaming (outside of
normal service area)
Signal strength
Synchronisation error
Urgent notification
(tap the icon to see
New text message
New email message
New multimedia
message
New voice mail
message
the message)
Voice call in progress
Wi-Fi activated
Wi-Fi data call in
progress
14
Page 15
Assemble and prepare your device
Before you can use your device, you must install the SIM or
USIM card, install the battery, and charge the battery. Installing
a SIM or USIM card is optional, but may be required to fully
utilise some applications and store media files.
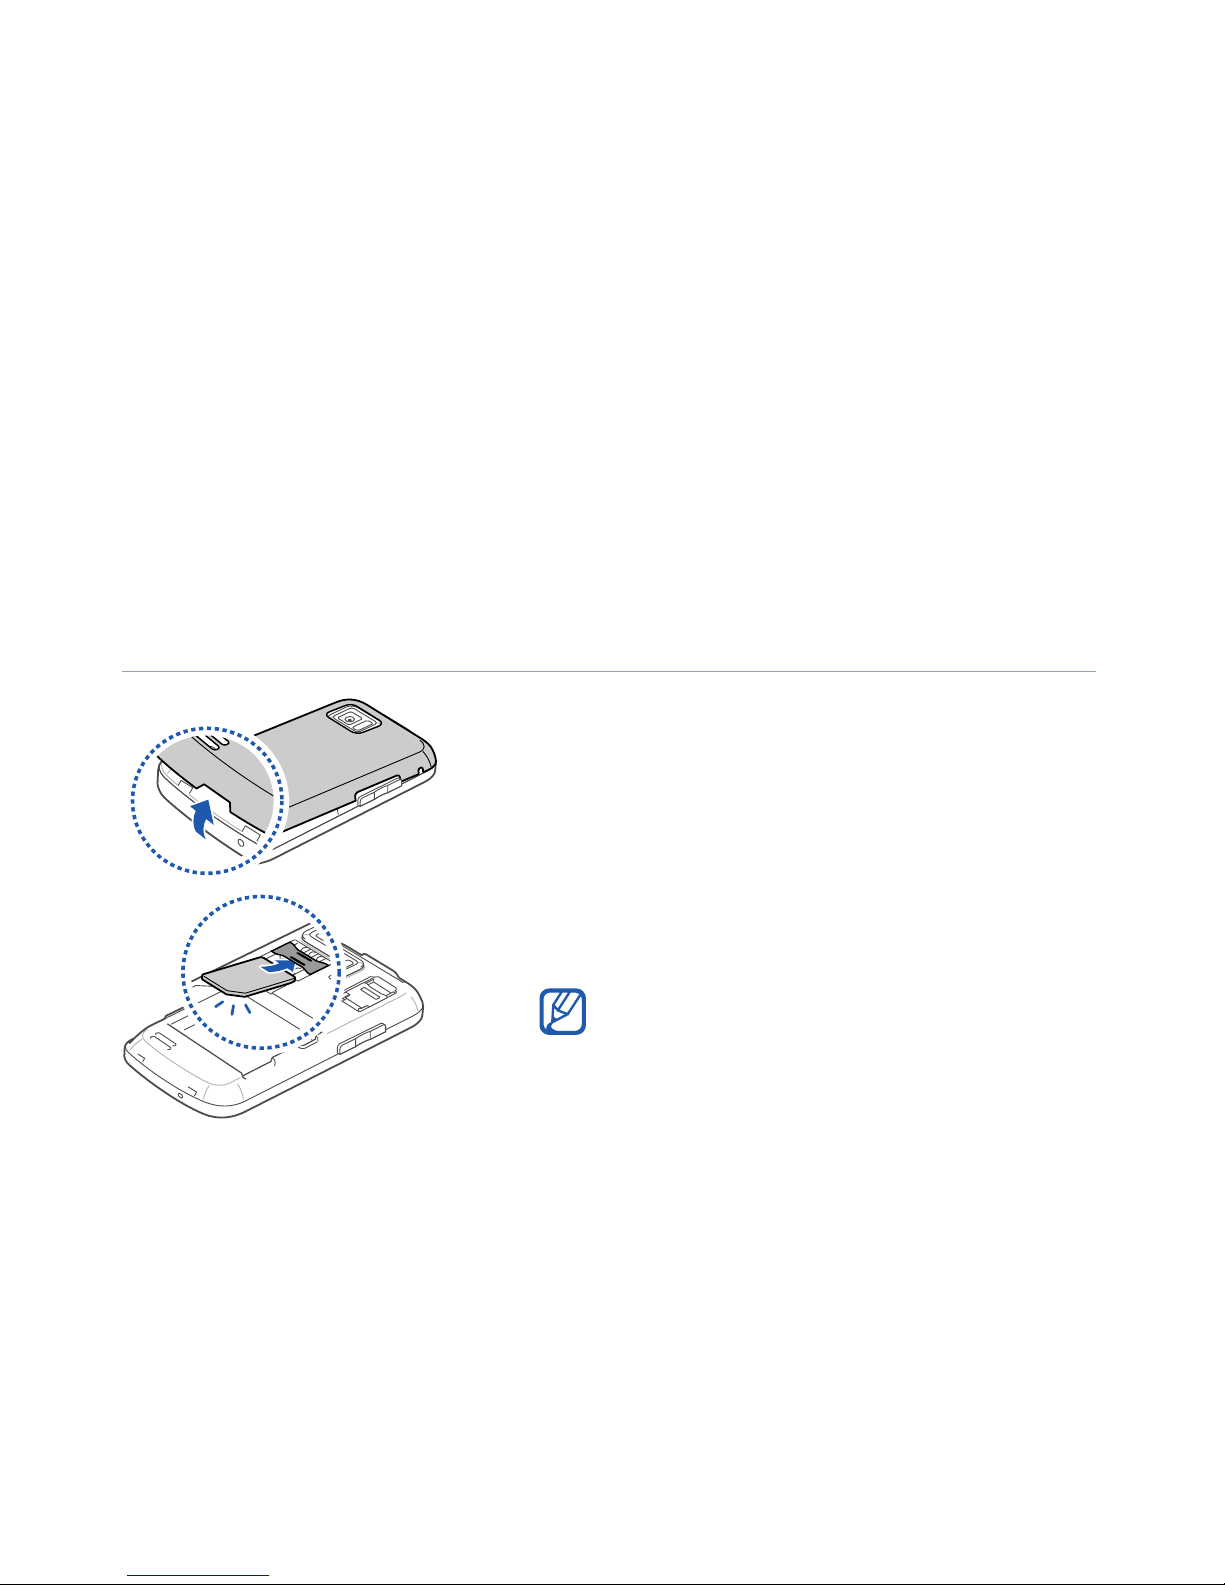
Insert the SIM or USIM card and battery
1
Remove the battery cover.
2
Insert the SIM or USIM card.
Insert the SIM or USIM card with the
gold-coloured contacts facing the
device.
15
Page 16
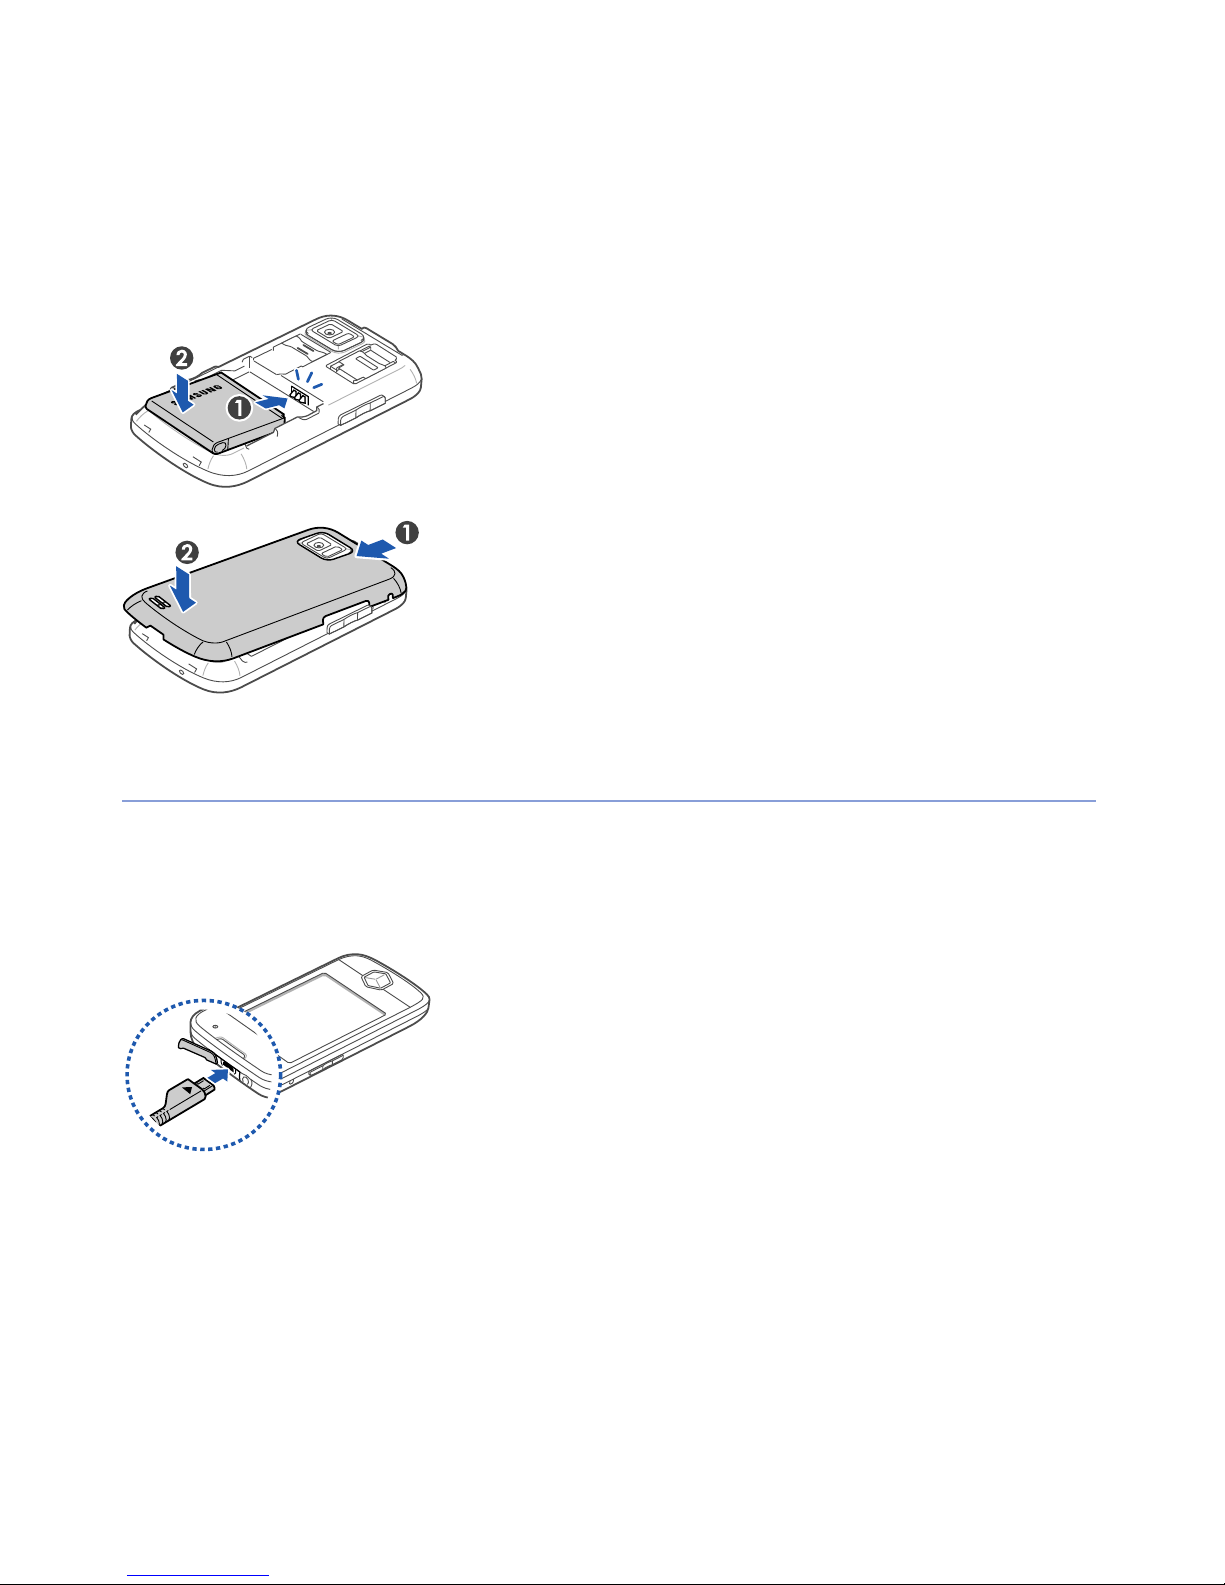
Charge battery
3
Insert the battery.
4
Replace the battery cover.
1
Open the cover to the multifunction
jack on the top of the device.
2
Plug the small end of the travel
adapter into the device.
3
Plug the large end of the travel
adapter into a power outlet.
16
Page 17

4
When charging is finished, unplug the travel adapter from
the power outlet.
5
Remove the travel adapter from the device.
Although a charger cable is connected,
• The battery may not charge in some situations to protect the
device.
• The battery level may remain low if the device is using a large
mount of power.
a
Insert a memory card (optional)
By inserting a memory card, you can store multimedia files and
messages or back up your important information. Your device
accepts microSD
TM
or microSDHCTM memory cards up to 32
GB (depending on memory card manufacturer and type).
Formatting the memory card on a PC may cause incompatibility with
your device. Format the memory card only on the device.
17
Page 18
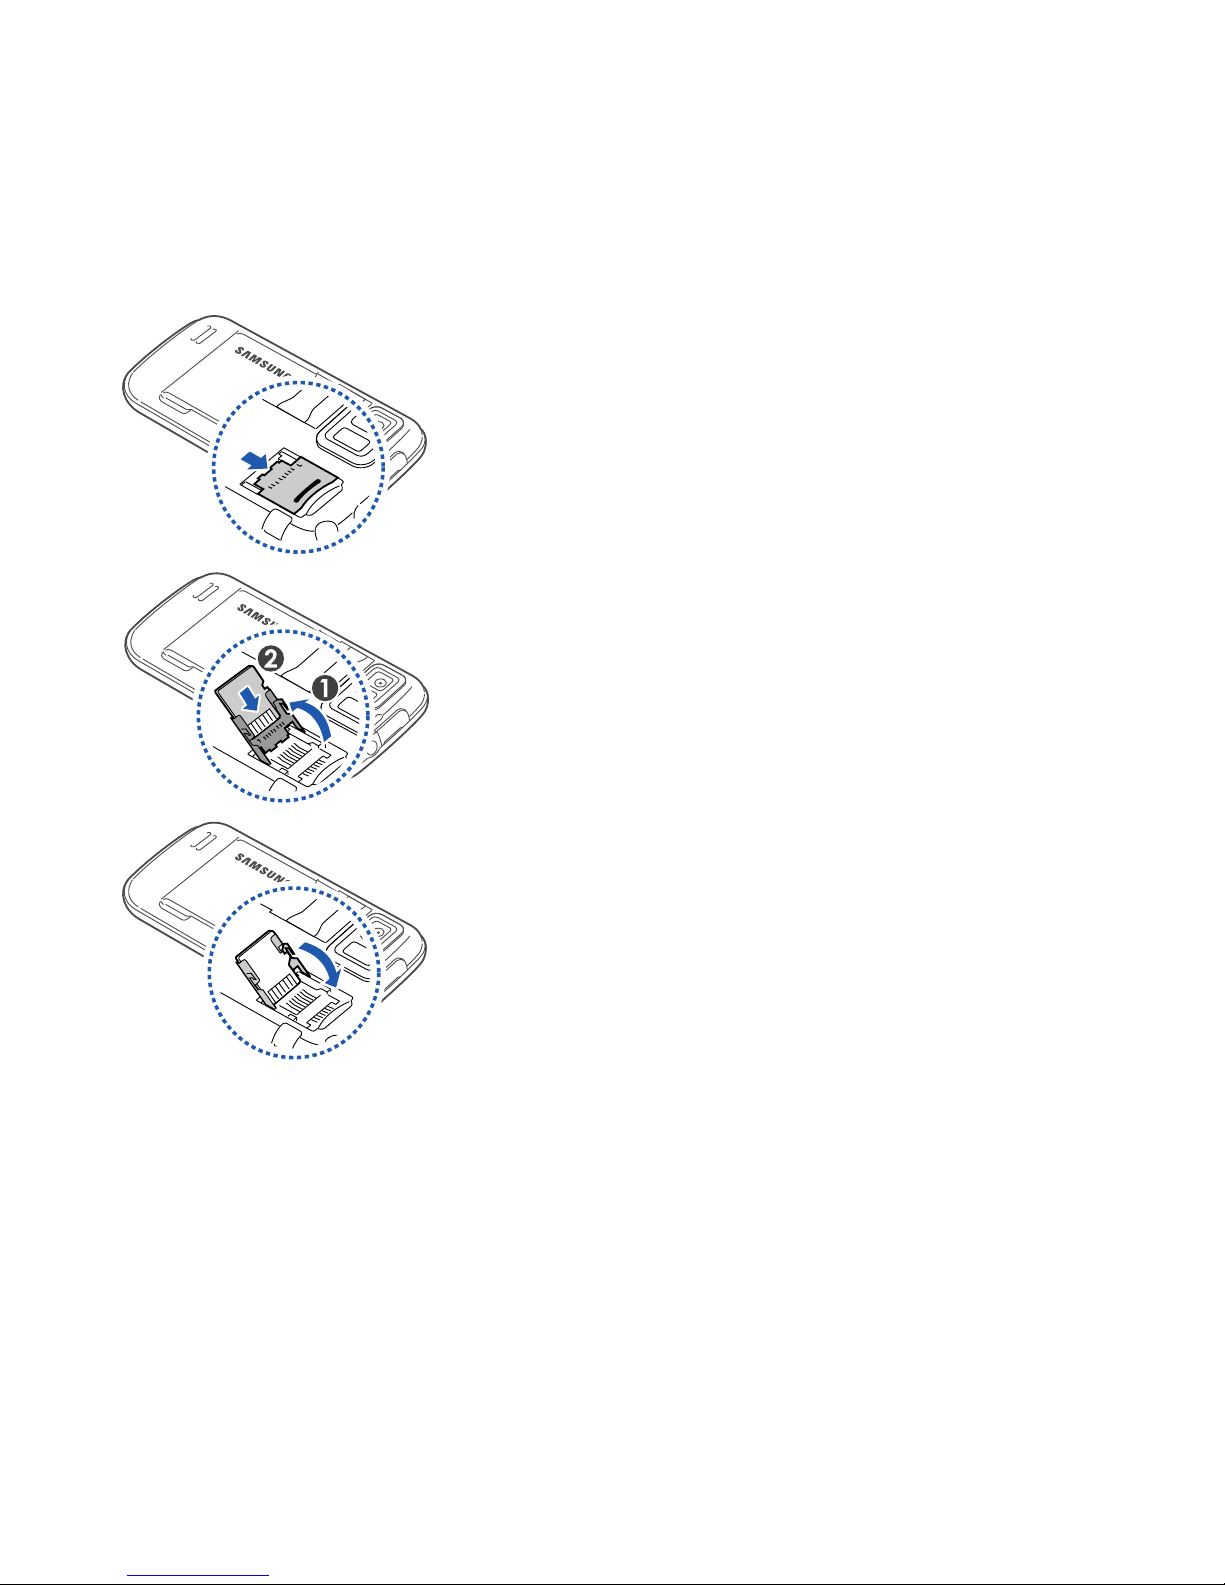
1
Remove the battery cover.
2
Unlock the memory card holder.
3
Lift the memory card holder and
insert a memory card, as shown.
4
Close the memory card holder.
18
Page 19

5
Lock the memory card holder.
6
Replace the battery cover.
Attach a hand strap (optional)
1
Remove the battery cover.
2
Slide a hand strap through the slot
and hook it over the small
projection.
3
Replace the battery cover.
19
Page 20

Turn on your device for first time
1
Press and hold [ ] to turn on your device.
2
Follow the on-screen instructions. Your device will
automatically connect to the cellular network.
Activate Sleep mode
You can activate Sleep mode to save power when you do not
use your device.
To activate Sleep mode, press the Lock key. Your device will
turn off the screen. To deactivate Sleep mode, press the Lock
key again.
Lock external keys and touch screen
You can lock the external keys and the touch screen to prevent
any unwanted device operations from accidentally pressing any
of the keys and the screen.
To lock the keys and the screen, press and hold the Lock key.
To unlock, press and hold the Lock key again, or tap and hold
the lock icon.
20
Page 21

Use the touch screen
You can perform the following actions on your device's touch
screen:
For optimal use of the touch screen, remove the screen protection
film before using your device.
• Tap: Touch the screen once to select commands or launch
pplications.
a
• Tap-and-hold: Tap and hold an item to see a list of available
ac
tions. Tap the action you want to perform on the pop-up
menu.
• Drag: Tap-and-hold a scroll bar or text and then drag it to
m
ove the bar or select text.
If your device does not respond accurately to your screen taps,
realign your touch screen. To realign the screen, tap
>
Basic Settings
screen
.
tab >
General Settings
>
Align Screen
Start > Settings
>
Align
21
Page 22
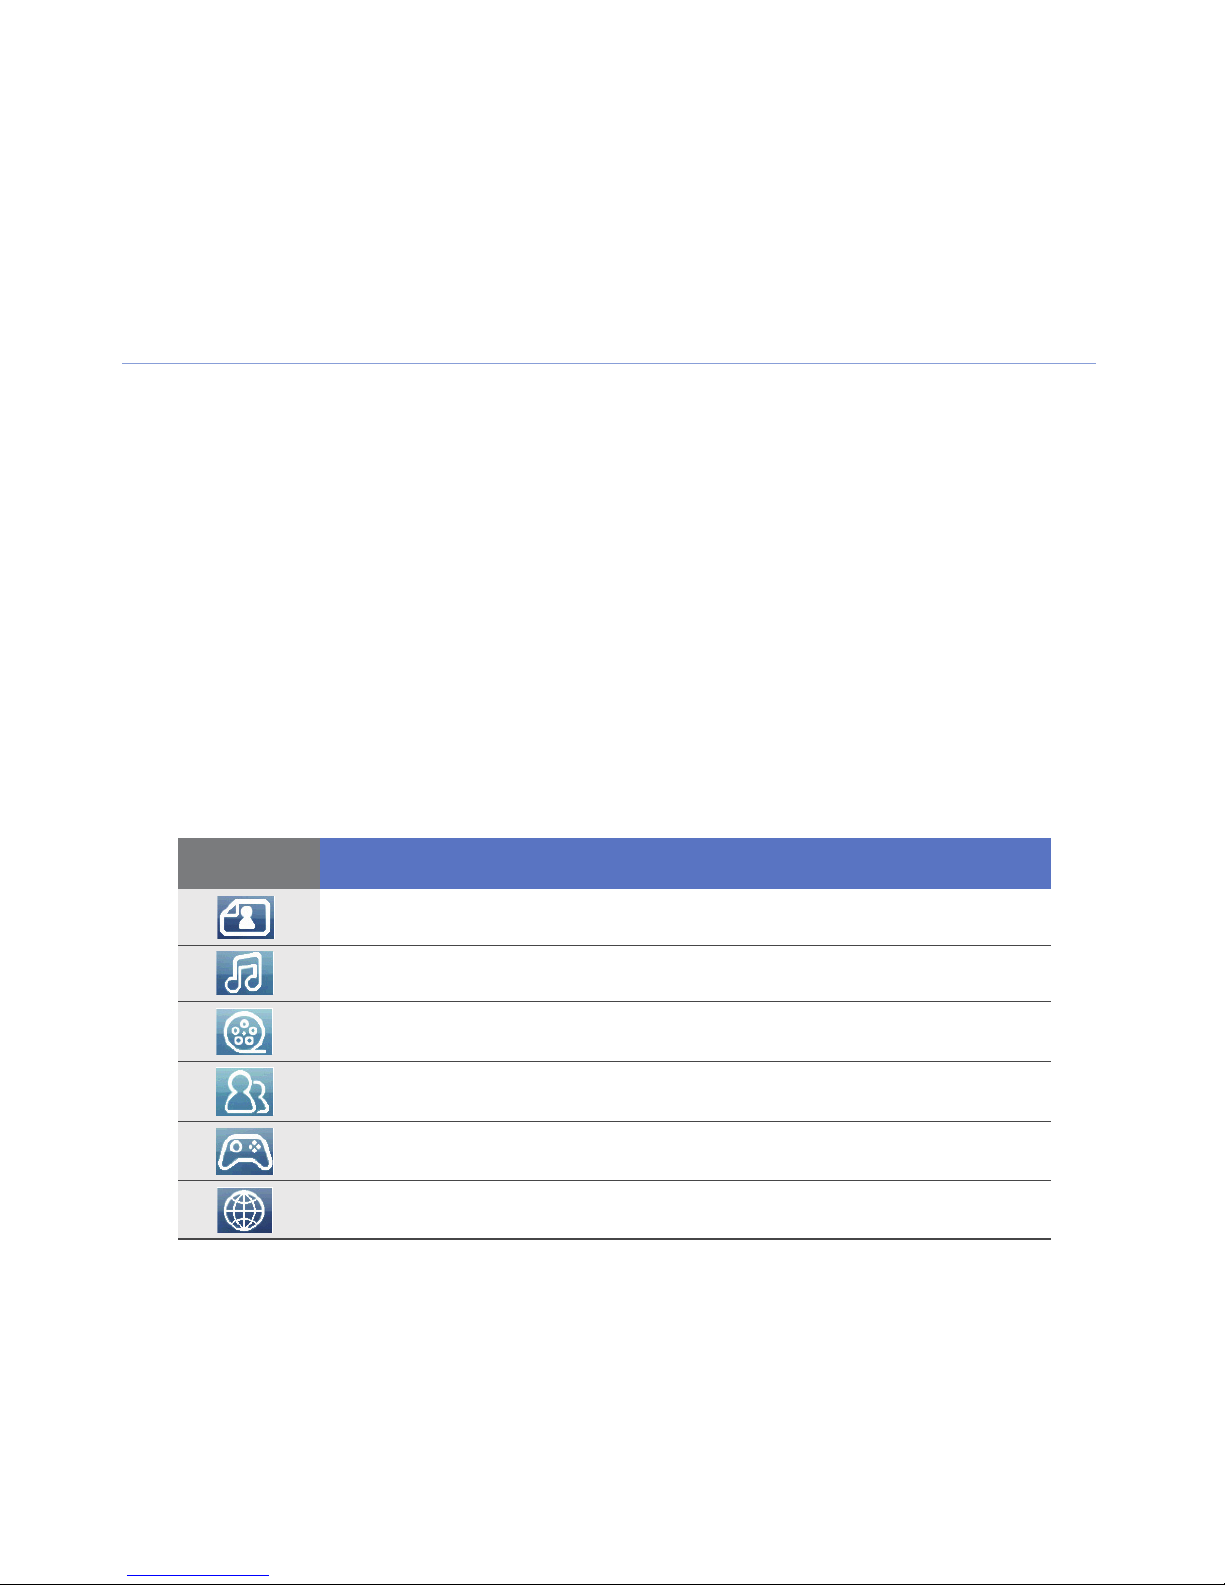
Use the Cube launcher
The Cube launcher key provides quick access to some
applications.
1
Press and hold the
launcher.
2
Select the shortcut you want by rotating the cube to the
appropriate side.
3
Tap the icon to launch the application.
The Cube launcher provides shortcuts to the following:
Icon Function
Cube launcher key
to open the Cube
Photo album
Music library
Video library
Phonebook
Games
Internet
22
Page 23

Disable wireless functions
1
2
Ta p
On the
Start > Settings
Basic Settings
.
tab, tap
General Settings
>
Wireless
Manager
3
Ta p next to
• Your device will show on the Today screen.
To enable wireless functions, repeat steps 1-3 above.
.
Phone
.
23
Page 24
01-I8000_Introducing your device.fm Page 24 Friday, November 13, 2009 9:58 AM
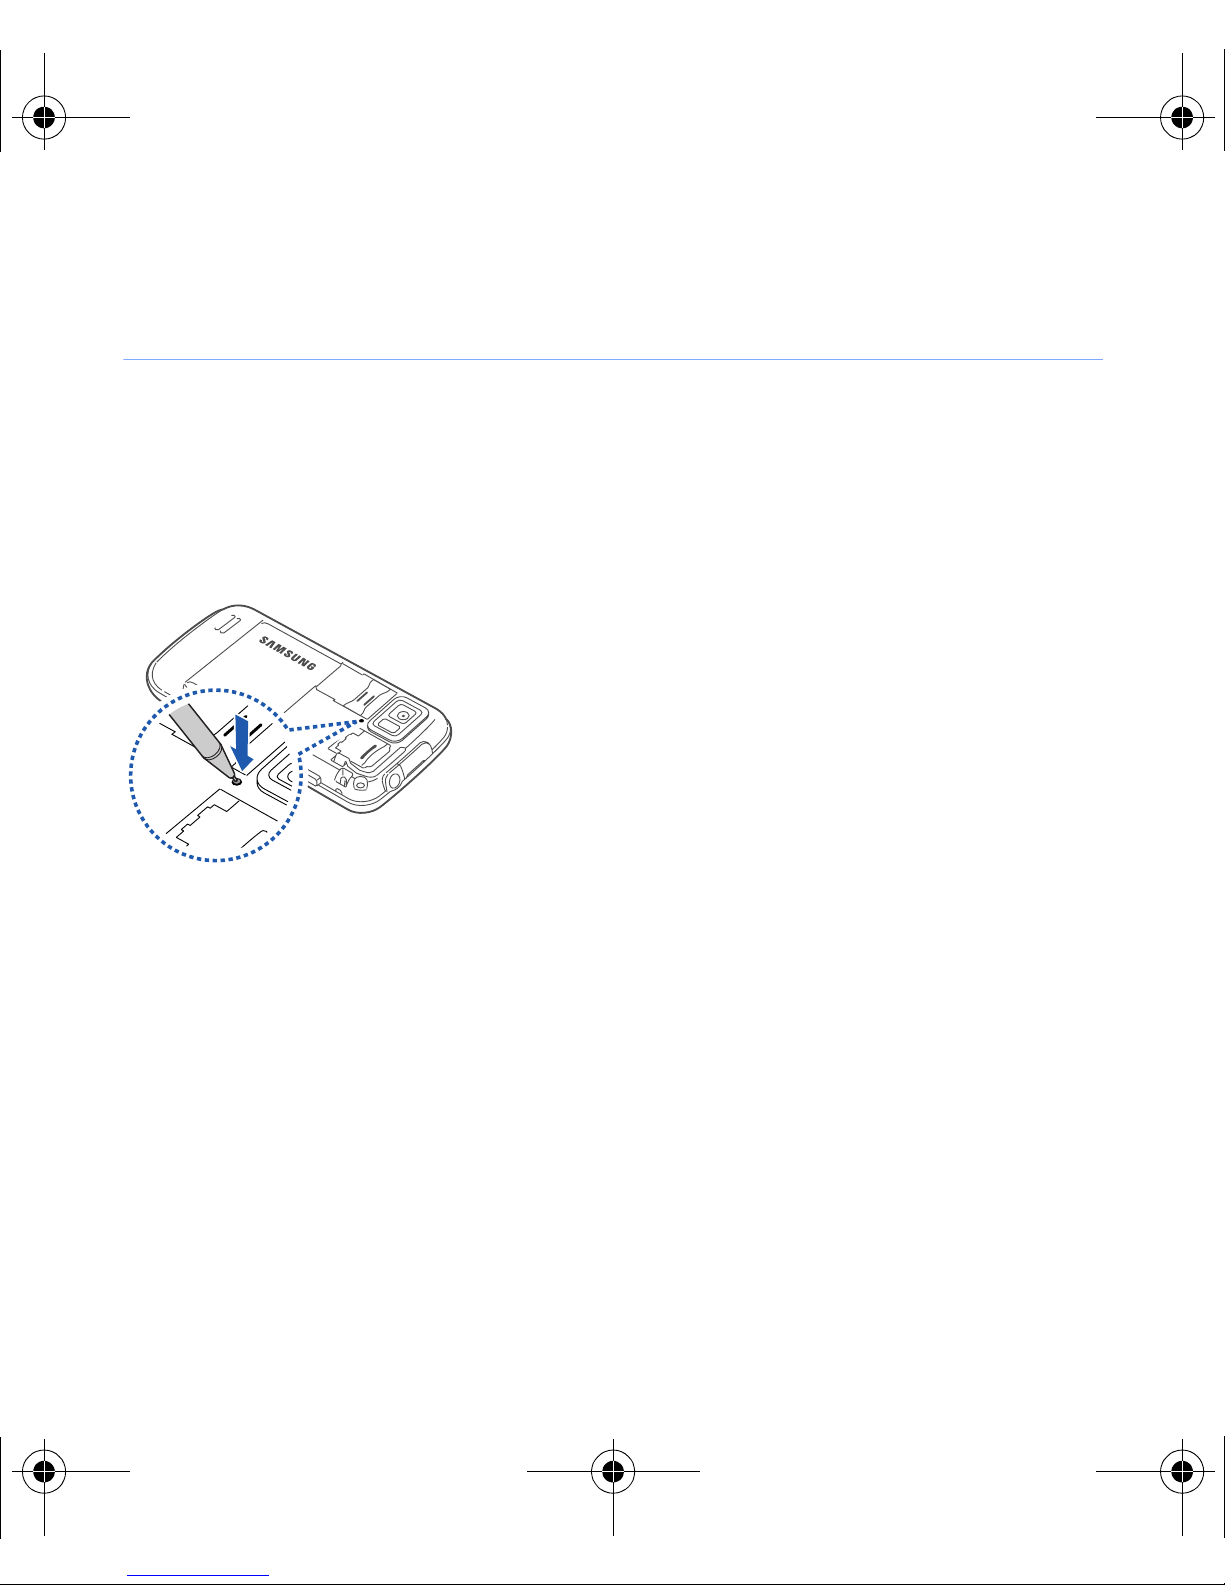
Reset the device
If your device freezes or hangs, you may
need to close programs or reset the
device to regain functionality. If your
device is still responsive but a program
is frozen, close the program via Task
Switcher.
X
p. 33
If your device is frozen and
unresponsive, remove the battery cover
and use a small object, such as a
toothpick, to press the reset button.
24
Page 25

Customise your device
Learn to change themes and background images, add or
remove items, and adjust the system volume from the Today
screen.
Change your theme or background image
1
Ta p
2
On the
3
Ta p
customise the display.
Start > Settings
Basic Settings
Theme
or
Wallpaper
.
tab, tap
and select the desired option to
Display and Light
.
4
Ta p
5
When you are finished, tap
Yes
>
No
(if necessary).
OK
25
or
Done
.
Page 26

Add or remove items on the Today screen
1
Ta p
2
On the
3
Ta p
4
Tap the check boxes next to each item to add or remove
items.
Start > Settings
Basic Settings
Items on Today
Some items are not compatible with Samsung widgets. If you
.
tab, tap
.
Display and Light
.
choose to add
will work simultaneously are
Search
5
Ta p
6
When you are finished, tap
Done
.
.
Samsung WidgetPlus
, the only other items that
Windows Live
OK
.
26
and
Windows Live
Page 27

Adjust the system volume
To adjust the system volume, press the Volume key up or
down. To set the device to vibrate, press and hold the Volume
key down. To deactivate the vibrate feature, press and hold the
Volume key down again.
Activate Etiquette pause
You can temporarily pause the music player or mute event
alarms by placing the device face down when Etiquette pause
is activated. To activate Etiquette pause,
1
Ta p
Start > Settings
.
2
On the
3
Ta p next to
4
Ta p
Done
Basic Settings
Enable etiquette pause
.
tab, tap
27
Motion Settings > Etiquette
.
.
Page 28
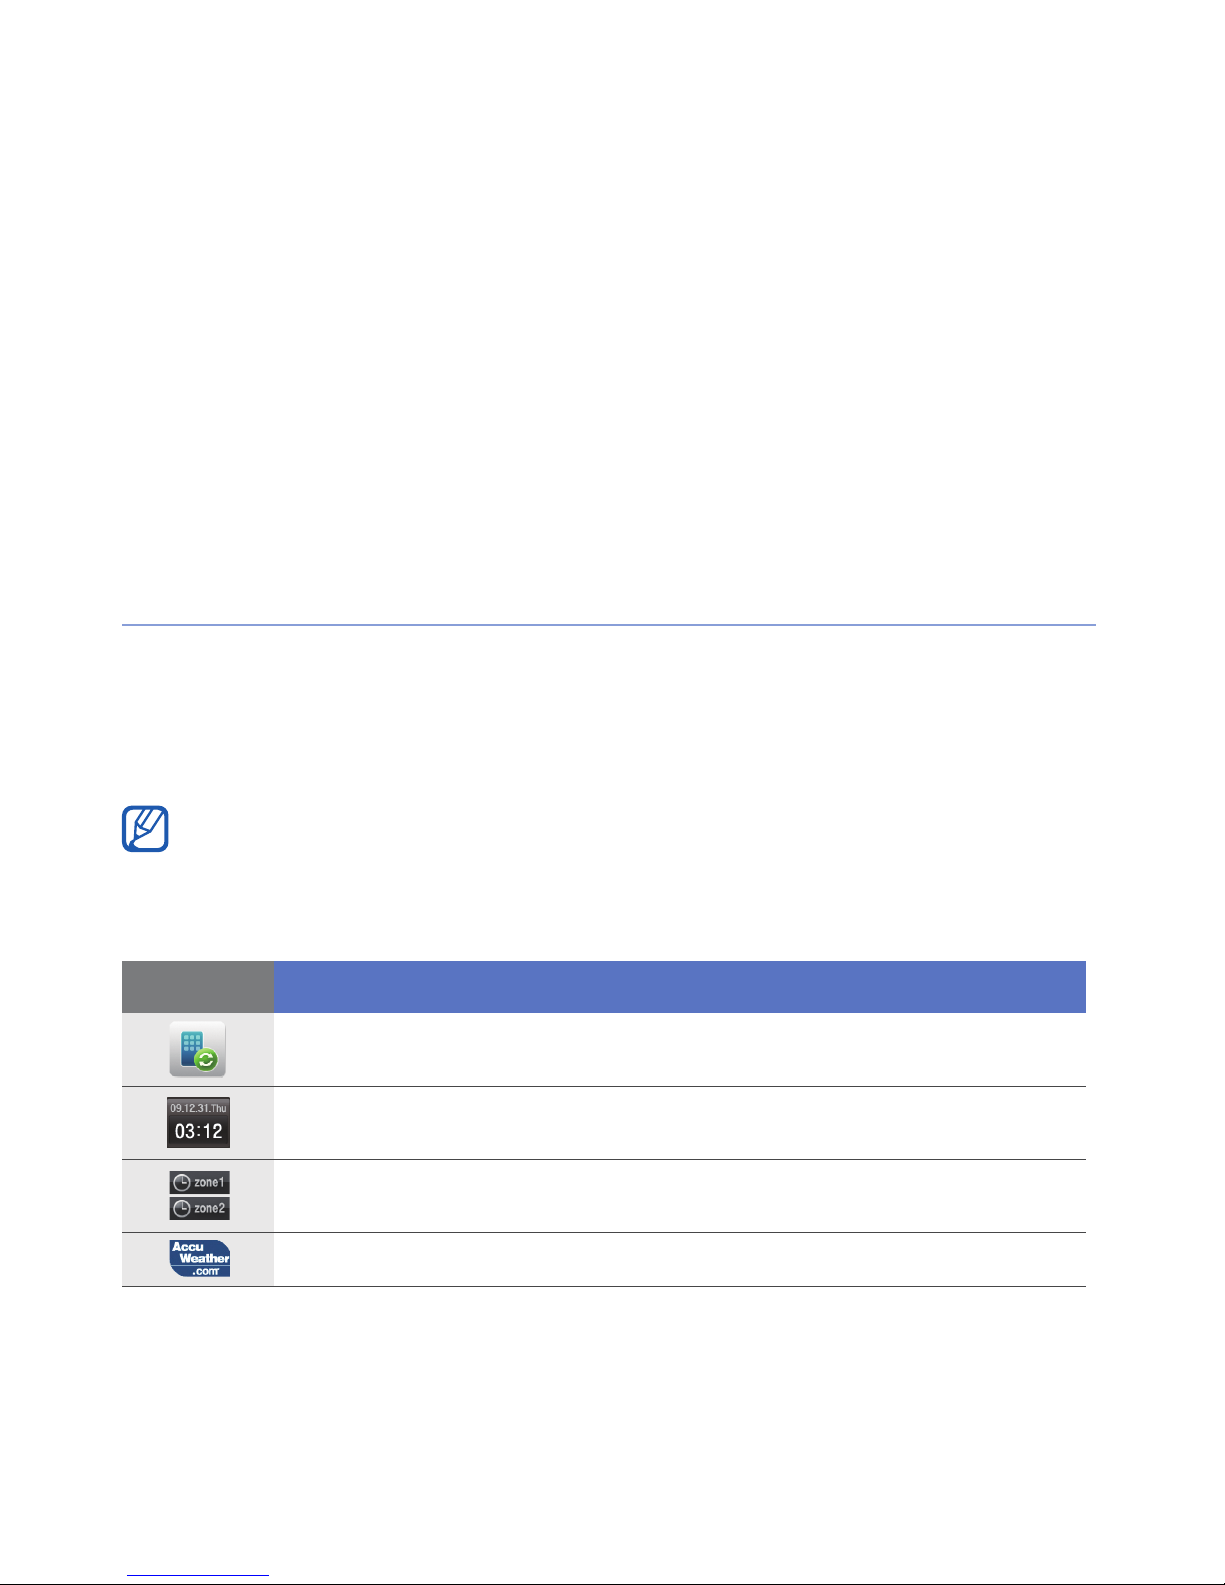
Use Widgets
Use widgets on the Today screen. Widgets are user friendly
shortcuts to commonly used applications allowing you to
customise the Today screen.
Open the toolbar
Tap the arrow at the bottom left of the Today screen to open
the toolbar. You can rearrange widgets on the toolbar or drag
them to the Today screen.
Depending on your region or service provider, available widgets may
vary.
Widget Function
Synchronise your data via ActiveSync
View the current time and date
View the time in other cities or regions
Get the latest weather updates from AccuWeather
*
28
Page 29
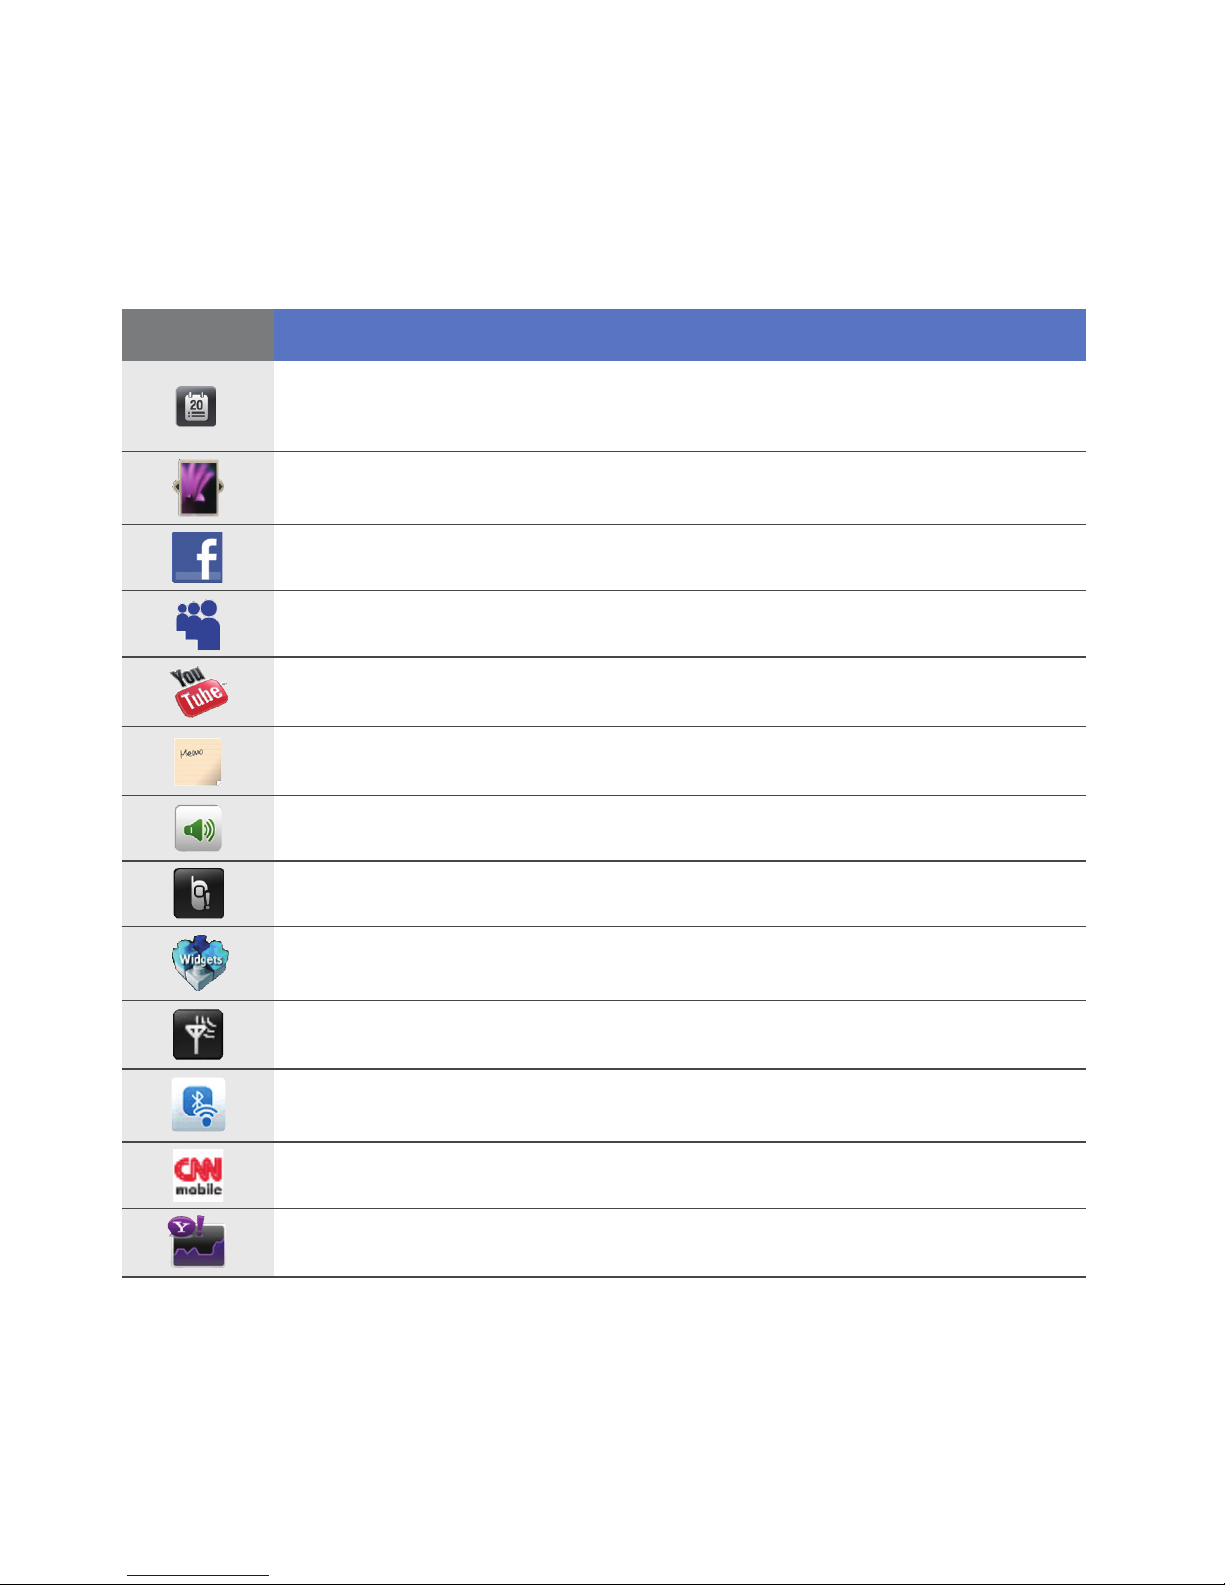
Widget Function
View two upcomming schedules and all schedules for
today
Browse your photos and set a photo as the wallpaper
Use services from FaceBook*
Use services from MySpace*
Use services from YouTube*
Create and view memos
Change the current sound profile
View a new message or missed calls
Download new widgets from a website*
View the network connection status
Monitor your wireless connections
Get news updates from CNN*
Get updates from Yahoo! Finance*
29
Page 30
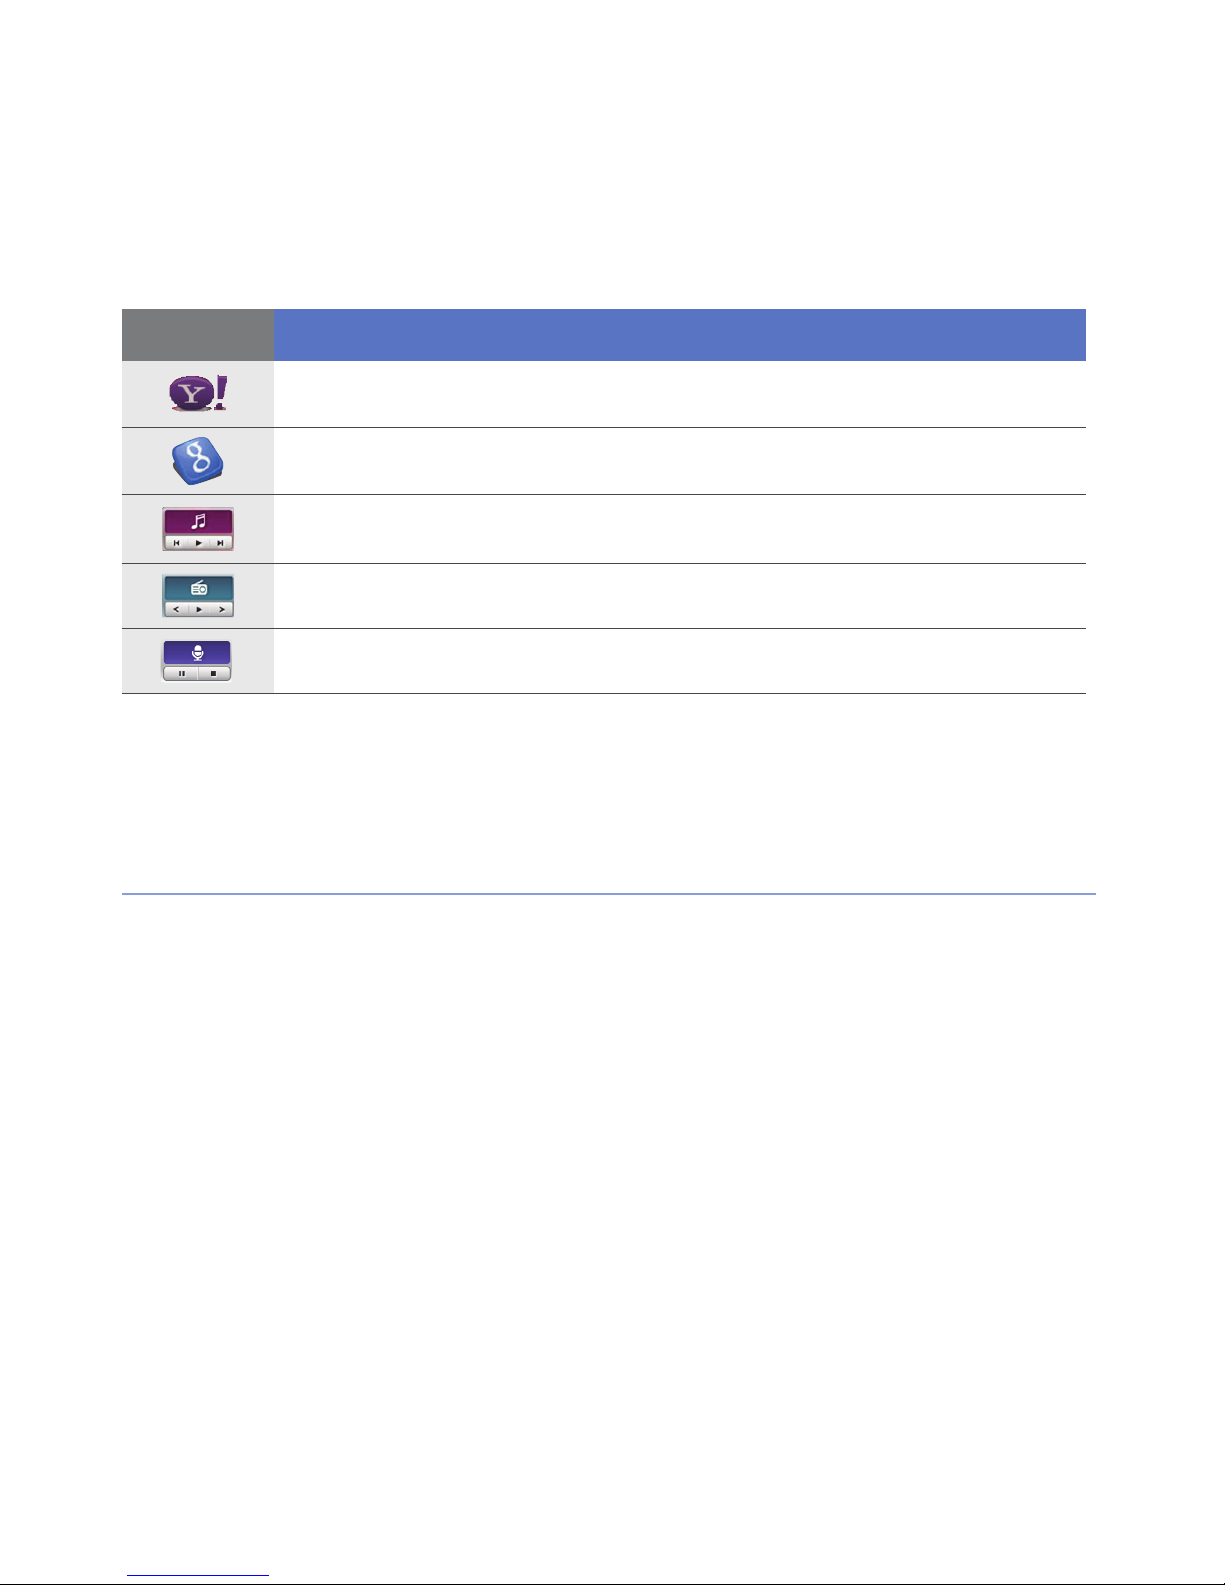
Widget Function
Search the web with Yahoo!*
Search the web with Google*
Listen to music via the mini player
Listen to the FM radio
Create and save audio notes
* These widgets require a connection to the internet, which may
result in additional charges.
Drag the widgets to the Today screen
1
Open the toolbar.
2
Drag a widget from the toolbar to the Today screen. You
can position the widget anywhere on the screen.
30
Page 31

Customise widgets
1
Tap the arrow at the bottom left of the Today screen to
open the widget toolbar.
2
Ta p at the top of the toolbar.
3
Tap the check boxes next to items that you want to appear
on the toolbar.
4
When you are finished, tap
Done
.
31
Page 32

Work with applications
Learn to open applications or folders and switch between open
applications.
Open applications or folders
1
Ta p
2
To open an application, tap the application icon.
3
To open a folder, tap
folder.
Organise applications
Start
or press the Menu key.
My Files
and navigate to the desired
1
Press the Menu key.
2
Ta p
•Tap to move an application to
•Tap to move an application from
• Scroll left or right to move to one of the Menu mode
Edit
sc
reens.
.
32
Others
Others
.
.
Page 33

• Tap an application icon and move it to the location you
want.
• Tap the screen name field to edit the screen name.
3
Ta p
Save
.
Switch applications
Your device allows you to multi-task by running multiple
applications at the same time.
To switch from one active application to another,
1
Press and hold the Menu key.
• Task Switcher shows thumbnail images of all open
programs.
2
Tap a thumbnail to switch to the corresponding application.
Close applications
To send the current application to the background, tap X or
OK
.
33
Page 34

To close an application,
1
Press and hold the Menu key.
2
3
Ta p
Ta p .
End
.
If you tap
to close it.
,
scroll left or right to an application, and tap
Access the help system
To access the help system of your device, tap
The embedded Help system appears.
Start > Help
.
34
Page 35

Enter text
When you need to enter text, tap the default input panel icon
( ) at the bottom of the screen. Tap the arrow next to the icon
and select one of the following input methods for entering text:
• Block Recognizer
•Keyboard
• Letter Recognizer
• Samsung Keypad
•Transcriber
You can tap the input panel icon at any time to show or hide
e input panel.
th
35
Page 36

Enter text with Block Recognizer
Write individual letters and numbers in the writing area in the
Palm Graffiti style.
1
Tap the input panel icon.
2
Tap the arrow next to the input panel
icon and select
3
Write each character in the writing
Block Recognizer
area at the bottom of the screen:
• Write letters on the left side of the
writing area.
• Write numbers on the right side of
t
he writing area.
Drag your finger upward to change
the case (
once on the screen to enter symbols
(
123
or
icon). Drag your finger leftward to
delete the last letter. To view
ABC, Abc
abc
will change to the
, or
abc
.
). Tap
demonstrations of how to enter
characters, refer to the embedded
help system.
36
Page 37

Enter text with the keyboard
1
Tap the input panel icon.
2
Tap the arrow next to the input panel icon and select
Keyboard
3
Tap characters to enter your text:
• To switch to numbers and symbols, tap
• To access special characters, tap
.
áü
123
.
.
37
Page 38

Enter text with Letter Recognizer
Write individual letters and numbers on the touch screen.
1
Tap the input panel icon.
2
Tap the arrow next to the input panel
icon and select
3
Write each character in the writing
Letter Recognizer
area at the bottom of the screen:
• Write upper-case letters in the
column on the left side of the writing
area.
• Write lower-case letters in the
column in the middle of the writing
area.
• Write numbers and symbols in the
123
column on the right side of the
writing area.
To view demonstrations of how to
.
ABC
abc
write characters, refer to the
embedded help system.
38
Page 39

Enter text with Samsung Keypad
1
Tap the input panel icon.
2
Tap the arrow next to the input panel icon and select
Samsung Keypad
3
Tap characters to enter your text:
• To enter the text in T9 mode, tap
the appropriate keys to enter an entire word.
• To enter the text in ABC mode, tap
the appropriate key to enter a character.
• To enter symbols, tap
• To enter numbers, tap
To change the keypad style, tap and hold
and tap
Done
When you rotate the
.
Mode
Mode
SYM
123
.
.
.
to turn on
to turn off
Mode
, select a style,
xt9
xt9
device anti-clockwise to the landscape
. Tap
. Tap
orientation, you can enter text using the landscape QWERTY
keyboard.
39
Page 40

The following applications support the landscape QWERTY
keyboard:
E-mail, Message, Word Mobile, Excel Mobile, and Notes
The applications supporting the landscape QWERTY keyboard may
vary depending on your region or service provider.
Enter text with Transcriber
With Transcriber, you can write anywhere on the screen. Unlike
Letter Recognizer or Block Recognizer, you can use cursive
(joined-up) handwriting to write complete words.
1
Tap the input panel icon.
2
Tap the arrow next to the input panel
icon and select
3
Write legibly anywhere on the
screen.
4
Pause and allow Transcriber to
convert your writing to text.
40
Transcriber
.
Page 41

You can access the following tools from the Transcriber
toolbar:
Tap To
Change Transcriber options
View demonstrations of how to write characters
Open the list of punctuation marks, symbols, and numbers
Change the input mode to A, a, or
Insert a space
Start a new line
Move the cursor to the left
Move the cursor to the right
Clear your input
Open the embedded help
123
41
Page 42

Communication
Work with contacts
Learn to use contact cards and groups to store personal
information, such as names, phone numbers, and addresses.
Create a new Outlook or SIM contact card
1
Ta p
2
Ta p
3
Enter contact information.
Start >
New
>
Phonebook
Save to outlook or Save to SIM
.
.
4
When you are finished entering information, tap
save the contact card.
42
Done
to
Page 43

Search for a contact card
1
Ta p
2
Ta p .
3
Tap a few letters of the contact's name.
• As you enter letters, the screen will show contacts that
4
Tap a contact to open it.
Start >
match your input.
Phonebook
.
Copy or move contact cards
To copy or move contact cards from your device's memory to
a SIM or USIM card and vice versa,
1
Ta p
2
To copy contacts, tap
to step 4.
3
To move contacts, tap
Start >
Phonebook
Menu
.
Menu
43
>
>
Copy
>
Move
a copy option. Refer
>
a move option.
Page 44

4
Tap the check boxes next to the contacts that you want to
copy or move.
5
Ta p
Done
.
Organise your contacts into categories
1
Ta p
2
Tap a contact in the device’s memory.
3
Ta p
4
Scroll down and tap the categories field.
5
Tap the check boxes next to the desired categories.
Start >
Edit
.
Phonebook
.
6
7
Ta p
Ta p
Done
Done
.
to save the contact card.
44
Page 45

Assign a speed dial number to a contact card
1
Ta p
2
Ta p .
3
Ta p
4
Select the contact's phone number to use for speed
dialling.
5
Select a speed dial location.
Start >
New
and select a contact.
Phonebook
.
Assign a photo to a contact card
1
Ta p
2
Tap a contact in the device’s memory.
3
Ta p
4
Tap the photo icon at the top left of the contact card.
5
Take a new photo or select a photo.
6
Ta p
Start >
Edit
Done
.
twice to save the contact card.
Phonebook
.
45
Page 46

Assign a ringtone to a contact card
1
Ta p
2
Tap a contact in the device’s memory.
3
Ta p
4
Scroll down and tap
5
Scroll down and tap the ringtone field.
6
Select a ringtone.
7
Ta p
8
Ta p
Start >
Edit
Done
Done
.
.
twice to save the contact card.
Phonebook
Add field
.
.
46
Page 47

Calling
Learn to make and receive calls, reject calls, and adjust the call
volume.
Make a call
1
Press [
2
Enter an area code and phone number.
3
Ta p or press [ ].
]
.
• For a video call, tap
4
To end the call, press [ ].
Menu
>
Video Call
Make a call from Phonebook
1
Ta p
2
Tap a contact.
3
Tap a number.
Start >
Phonebook
.
47
.
Page 48

Answer a call
1
Press
2
For a video call, tap
via the front camera lens.
3
To end the call, press [ ].
[ ]
.
Show me
to allow the caller to see you
Reject a call
Press [ ]. When you reject a call, the caller will hear a busy
tone.
Adjust the call volume
To adjust the call volume, press the Volume key up or down
during a call.
48
Page 49

Call an international number
1
Press
2
Ta p
3
Tap and hold to insert the + character (this replaces the
international access code).
4
Tap the number keys to enter the complete number you
want to dial (country code, area code, and phone number),
and then tap or press [ ] to dial.
5
To end the call, press [ ].
[ ]
Keypad
.
(if necessary).
Access the call log
1
Ta p
2
Select one of the following filters for your call log results:
Start
Icon Function
>
Call Log
All calls
Incoming calls
.
49
Page 50

Icon Function
Outgoing calls
Missed calls
3
Scroll through the call log.
• To make a call, tap
dial.
• To check the call time, tap
reset the call time.
next to the number you want to
Menu
Messaging
Learn to use messaging functions.
Send a text message
1
2
Ta p
Ta p .
Start >
Message
.
>
Call Timer
. Tap to
3
Ta p
Tap to add recipients
to enter a contact.
50
Page 51

4
Tap the message field and enter your message text.
5
Ta p
Send
to send the message.
Send a multimedia message
1
Ta p
2
Ta p .
3
Ta p
4
Tap the message field and enter your message text.
5
Ta p
Start >
Tap to add recipients
Menu
Message
>
Insert
.
to add an attachment.
to enter a contact.
6
Ta p
(if necessary).
7
Ta p
Menu
Send
>
Attach
to send the message.
>
an option to attach other types of files
51
Page 52

Send an email message
Depending on your service provider, you need to add an email
account first.
1
Ta p
2
Tap the name of an email account.
3
Ta p
4
Enter the recipient’s address in the to field or tap
Start >
Menu >
E-mail
New
.
.
Menu
>
Add Recipient...
The Cc and Bcc fields are located above the from field.
5
Tap the subject field and enter a message subject.
6
Tap the message field and enter your message text.
7
8
Ta p
Ta p
Menu
Send
>
to send the message.
to select a contact.
Insert
>
an option to attach files (if necessary).
52
Page 53

View messages
You can access message folders for all your messaging
accounts (email, SMS, and MMS).
To view messages,
1
Ta p
2
Tap the name of an account (if necessary).
3
Tap a message to view it.
Start >
You can view all text or multimedia messages sent to and received
from a specific contact like a messenger.
Message
or
E-mail
.
Add an email account
1
Ta p
2
Ta p
3
Enter your email address and password and tap
4
Follow the on-screen instructions to complete the account
setup.
Start >
Setup E-mail
E-mail
.
.
Next
53
.
Page 54

Multimedia
Learn to capture photos and videos, listen to music, and take
advantage of your device's multimedia features.
Camera
Your device allows you to take digital photos or record videos.
Capture a photo
1
Press the Camera key.
2
Rotate the device anti-clockwise to the landscape
orientation.
The camera interface
appears only in the
landscape
orientation.
54
Page 55

3
Aim the lens at the subject and make any adjustments.
X
p. 55
4
Press the Camera key to capture the photo.
View a photo
1
From the viewfinder, tap .
2
Scroll to the photo you want.
Adjust Camera settings
From the viewfinder, tap an icon and then tap a mode or
setting.
Icon Function
Switch to camcorder
Change the shooting mode:
•: Single
• : Continuous
•: Smile
•: Mosaic
•: Panorama
•: Action
55
Page 56

Icon Function
Change the scene mode:
•: None
• : Portrait
• : Landscape
•: Sunset
• : Dusk & Dawn
• : Night Shot
•: Text
Change the image size
Change the camera settings
Change the flash setting:
•: Off
•: On
•: Auto
•: Sports
• : Back Light
• : Party & Indoors
• : Beach & Snow
• : Fall Color
• : Firework
•: Candle Light
Change the auto focus setting:
•: Auto
• : Macro
•: Face
Adjust the brightness
Access quick view
56
Page 57

Record a video
1
Press the Camera key.
2
Rotate the device anti-clockwise to the landscape
orientation.
The camera interface
appears only in the
landscape
orientation.
3
Ta p to launch the camcorder.
4
Aim the lens at the subject and make any adjustments.
X
p. 58
5
Press the Camera key to begin recording.
6
When you are finished, tap or press the Camera key to
stop recording.
57
Page 58

Play a video
1
From the viewfinder, tap .
2
Scroll to the video you want.
3
Ta p to play the video.
Adjust Camcorder settings
From the viewfinder, tap an icon and then tap a setting.
Icon Function
Switch to camera
Change the recording mode:
•: Normal
• : MMS
•: Slow
Change the video resolution
Change the camcorder settings
58
Page 59

Icon Function
Change the flash setting:
•: Off
•: On
•: Auto
Adjust the brightness
Access quick view
Capture photos in Smile shot mode
1
Press the Camera key.
2
Rotate the device anti-clockwise to the landscape
orientation.
3
Ta p > .
4
Aim the camera lens at your subject and press the Camera
key.
• The device recognises faces in an image and detects when
your subjects smile. When all your subjects are smiling, the
camera will automatically capture the photo.
59
Page 60

In some cases, you may have to disable smile shot to capture a
photo of your subject, even if he or she is smiling.
Create a photo mosaic
1
Press the Camera key.
2
Rotate the device anti-clockwise to the landscape
orientation.
3
Ta p
4
Select a mosaic type.
5
Aim the camera lens at your subject and press
>
.
the Camera
key
to capture the first shot.
60
Page 61

6
Repeat step 5 to capture the rest of the shots. When you
have captured all the shots necessary for the mosaic, the
camera will automatically combine them into one photo.
Capture panoramic photos
1
Press the Camera key.
2
Rotate the device anti-clockwise to the landscape
orientation.
3
Ta p
>
.
61
Page 62

4
Aim the camera lens at your subject and press the Camera
key to capture the first shot.
5
Slowly move the device to a direction. The device captures
the next photo automatically.
6
Repeat step 5 to capture the rest of the shots. When you
have captured all the shots necessary for the panoramic
photo, the camera will automatically combine them into one
panoramic photo.
62
Page 63

Capture photos in Action shot mode
In Action shot mode, you can capture shots of a moving
subject and then combine them into a single photo that shows
the action.
1
Press the Camera key.
2
Rotate the device anti-clockwise to the landscape
orientation.
3
Ta p
4
Aim the camera lens at your subject in motion and press
>
.
the Camera key
5
Move the device to follow the moving subject. The device
captures the next photo automatically.
to capture the first shot.
63
Page 64

6
Continue to follow the subject until the device has captured
all the shots necessary for the action photo. The camera will
automatically combine them into one photo.
• Move the device horizontally or vertically to track the moving
subject.
• In Action shot mode, the part of the scene that is not captured
appears black.
• The distance between the camera and subject should be at least
3 me
• For best results, capture photos in well-lit areas with plenty of
contrast between the subject and the background.
tres.
64
Page 65

Media Player
Your device is equipped with Media Player, as well as Windows
Media Player. The procedures that follow explain how to use
Media Player. For information about Windows Media Player,
refer to embedded help system.
Add music files to your device
Use any of the following methods to add music files to your
device:
• Copy files to a memory card and insert the card into the
de
vice
• Download files from the wireless web (refer to the embedded
X
p. 17
lp system)
he
• Receive via Bluetooth
X
p. 135
• Synchronise with ActiveSync
®
X p. 80
65
Page 66

Update the library
1
Ta p
2
Ta p
library.
3
When the library is updated, tap
Start >
Search
Media Player
to locate and add new files to the Media Player
.
Play music or video files
1
2
Ta p
Ta p
Start >
Player
(if necessary).
Media Player
.
Done
.
3
Ta p to open the currently playing list.
4
Ta p .
5
Select files you want to play and tap
6
Ta p a f il e .
66
Done
.
Page 67

7
During playback, use the following controls:
Icon Function
Adjust the volume
Skip to the previous file; Scan backward in a file
(tap and hold)
Pause playback
Resume playback
Skip to the next file; Scan forward in a file
(tap and hold)
• : Change the sound effect
• : Select a surround sound system
• : Change the shuffle or repeat option
• : Specify a section to repeat
• SRS CS HeadphoneTM delivers a 5.1 surround sound experience
over standard headphones or earbuds when listening to
multichannel content, such as DVD movies.
TM
•WOW HD
delivering a dynamic 3D entertainment experience with deep, rich
bass and high frequency clarity for crisp detail.
significantly improves the playback quality of audio,
67
Page 68

Create a playlist
1
Ta p
2
Ta p
3
Ta p .
4
Ta p
5
Enter a title for your new playlist.
6
Select a photo for your playlist (if necessary).
7
Ta p
Start >
Library
Menu
Done
>
.
Media Player
to view the library.
New Playlist
.
.
Add files to a playlist
1
Select a playlist.
2
Ta p .
3
Select files you want to add and tap
68
Done
.
Page 69

Photo
Learn to view photos and slideshows.
View a photo
1
Ta p
2
Tap a folder or tap
3
Tap a thumbnail to view the photo.
• While viewing the photo, tap and hold the screen. When up
Start >
and down arrows appear, scroll up or down to zoom in or
out.
Photo
.
All
to view all thumbnails.
Start a slideshow
1
Ta p
2
Tap a folder or tap
3
Ta p
• You can tap the screen and
Start >
Menu
music.
Photo
>
Slide show
.
All
to view all thumbnails.
, or
Slide show
to select a background
69
.
Page 70

4
To end the slideshow, tap the screen and .
Digital Frame
With Digital Frame, you can view slideshows with background
music.
View slideshows with background music
1
Ta p
2
Rotate the device anti-clockwise to the landscape
orientation.
Start > Digital Frame
.
3
Ta p .
4
Rotate the device clockwise to the portrait orientation.
5
Select a folder of photos to view and set transition effects
and time.
6
Tap the sound field.
7
Tap the check boxes next to music files you want.
70
Page 71

8
Ta p
9
Ta p next to
10
Ta p
11
Rotate the device anti-clockwise to the landscape
orientation.
12
To begin the slideshow, tap .
13
During playback, use the following controls:
Select
Done
Icon Function
.
Enable Background Sound
.
Change the layout of the display
.
Skip to the previous photo
End the slideshow
Skip to the next photo
Change the style of the date and time on the screen
Change the slideshow settings
Close Digital Frame
• Use the Volume key to adjust the volume.
71
Page 72

FM Radio
You can listen to your favourite stations with FM radio.
Listen to the FM radio
1
Plug a headset into the headset jack.
2
Tap a type and tap
3
Ta p
4
Ta p to turn on the radio.
5
Ta p or to scan through available radio stations.
• To tune a radio station, tap or .
Start >
FM Radio
OK
.
.
• To adjust the volume, tap .
• To change the sound output, tap .
Save radio stations by automatic tuning
1
From the radio screen, tap
2
When the scan is complete, tap
Scan
72
.
Done
.
Page 73

Save radio stations manually
1
From the radio screen, scroll to the radio station you want
to save.
2
Ta p on e of t he symbols near the bottom of the screen.
Select a station
1
From the radio screen, tap
2
Tap the station you want from the area near the bottom of
the screen.
FM 1
or
FM 2
.
Record the FM radio
1
From the radio screen, tap
current station.
2
When you are finished, tap
in
My Storage
>
FM Radio
Menu
Stop
.
73
>
Record
. The recorded file is saved
to record the
Page 74

Video Editor
Done
With Video Editor, you can edit or make videos by combining
photos or videos.
Create a storyboard
1
Ta p
2
Rotate the device anti-clockwise to the landscape
orientation.
3
Ta p
4
Ta p .
Start >
Storyboard
Video Editor
.
.
5
Tap the check boxes on each thumbnail image (videos or
images) you want to add to the storyboard. To select all, tap
(to deselect all, tap ).
6
Ta p .
74
Page 75

7
Customise the storyboard as desired by tapping the
following icons (refer to the Extended Usage Guide for more
information about customising storyboards):
•
• : add audio files
• : create a text slide
• : delete clips or change the order of clips
• To edit viewable duration, dub clips (record audio), add
8
Ta p .
9
Ta p to preview the video.
10
Ta p to save the video.
11
Ta p .
: add clips
su
btitles, edit transitions, and add effects, tap a thumbnail
image and an appropriate icon.
Add pre-recorded audio to a video
1
Ta p
Start >
Video Editor
.
75
Page 76

2
Rotate the device anti-clockwise to the landscape
orientation.
3
Select
4
Select a style and tap .
5
Tap the check boxes on images to add and tap .
6
Delete images or tap to change how they are displayed
(if necessary).
7
Ta p .
8
Tap an audio file and tap .
9
Ta p .
Music movie
.
10
Ta p
11
Rotate the device clockwise to the portrait orientation.
12
Enter a video title and tap
13
Rotate the device anti-clockwise to the landscape
orientation.
Enter text here
.
Done
76
.
Page 77

14
Ta p .
15
Ta p to preview the video.
16
Ta p to save the video.
17
Ta p .
Auto-crop a video
1
Ta p
2
Rotate the device anti-clockwise to the landscape
orientation.
Start >
Video Editor
.
3
Select
4
Select a style and tap .
5
Tap the check box on a video and tap .
6
Ta p to preview the video.
7
Ta p to save the video.
8
Ta p .
Auto cut
.
77
Page 78

Games
Play fun games, such as Bubble Breaker and Solitaire. You can
also download and play Java games on your device. To access
games, tap
Start
>
Games
and a game.
Java
Your device supports applications and games built on the Java
platform. To download Java-based applications,
1
Ta p
2
Ta p
and go to the Samsung Mobile website.
3
Follow the directions on the website to download new
Java-based applications.
Start >
Download Applications...
Java
.
to launch the Opera browser
78
Page 79

Personal productivity
ActiveSync
With ActiveSync, you can synchronise your device with a
computer and back up and restore your data.
Install ActiveSync on your computer
Before you can synchronise your data, you must install
ActiveSync, either from the supplied CD-ROM or the Microsoft
website (http://www.microsoft.com).
To install ActiveSync from the supplied CD-ROM,
1
Insert the CD-ROM into your computer.
2
Follow the on-screen instructions to complete the setup.
3
When installation is complete, follow the on-screen
instructions in the Synchronisation Setup Wizard to connect
your device to the computer and create a data sharing
partnership.
79
Page 80

Connect your device to a computer
1
2
Ta p
On the
Start
>
Settings
Basic Settings
.
tab, tap
General Settings
>
USB
Connection
3
Ta p
4
Connect one end (mini-USB) of the PC data cable to the
multifunction jack on your device and the other end to the
USB port on your computer.
Done
>
ActiveSync
.
.
Synchronise your data
When you connect your device to a computer, ActiveSync
should begin synchronising your data automatically. You can
begin the synchronisation manually by tapping
synchronisation in progress, tap
Stop
.
Sync
. To stop a
You can also manually find and copy files from your device to a
co
mputer and vice versa. From the Microsoft ActiveSync
window, click
Explore
.
80
Page 81

For more information on synchronising your data, refer to the
embedded help system.
If you format the My Storage folder by using a connected computer,
the writing speed to the My Storage folder may be reduced. Format
the My Storage folder only from the device to avoid this situation.
Add an Exchange server
1
Ta p
2
Ta p
3
Enter an email address.
Start >
Menu
>
ActiveSync
Add Server Source...
.
4
Ta p
5
Enter your Exchange user name, password, and domain
name.
6
Ta p
7
Enter a server address. To establish a secure connection,
tap the check box that reads
encrypted (SSL) connection
Next
Next
.
.
This server requires an
.
81
Page 82

8
Ta p
9
Select the types of data to synchronise.
10
When you are finished, tap
Next
.
Finish
.
Change the synchronisation schedule
If you routinely synchronise your data via an Exchange server,
you can configure settings for both peak and off-peak
schedules. To change the synchronisation schedules,
1
2
Ta p
Ta p
Start >
Menu
>
ActiveSync
Schedule...
.
3
Set the following options:
•
Peak times
peak hours
•
Off-peak times
during off-peak hours
•
Use above settings when roaming
synchronisation schedules even when roaming
: set the frequency of synchronisations during
: set the frequency of synchronisations
: set to use the
82
Page 83

•
Send/receive when I click Send
: set to synchronise when
you tap
4
When you are finished, tap
Send
in Messaging
OK
.
Smart Sync
With Smart Sync, you can back up and synchronise the
contacts, calendar events, and tasks on your device with the
server you have specified.
Configure a server
1
Ta p
Start
>
Smart Sync
.
2
Ta p
•Tap
3
Enter the URL address of the remote server, as well as the
user name and password for your account.
Next
• Secure connections are supported.
• For secure connections, use https:// instead of http:// to start
.
Menu
the server URL.
>
Options
>
Main server
83
>
Setup
(if necessary).
Page 84

4
Enter the server ID (if necessary).
5
Ta p
6
Ta p
7
Tap the check boxes next to the items you want to back up.
8
Tap the server path field and enter the database name for
each of the data categories.
Server Test
If the server test fails, verify the account information you set in
the previous step.
Next
These options are server-specific and determine how the data is
referenced. This information must be supplied by your service
provider.
.
.
9
Ta p
10
Ta p
11
Tap the desired network connection type from the list
provided.
12
Ta p
13
Ta p to return to the main synchronisation window.
Next
Menu
Done
.
>
Options
.
>
Connection
84
.
Page 85

Configure a proxy server
For security purposes, some service providers only allow
access into their network via a proxy server.
1
Ta p
2
Ta p
3
Enter the information requested and tap
4
Ta p to return to the main synchronisation window.
Start
Menu
>
Smart Sync
>
Options
.
>
Proxy Server
.
Done
.
Synchronise your data
1
2
Ta p
Ta p
Start
Sync start
>
Smart Sync
.
.
Set the synchronisation schedule
1
2
Ta p
Ta p
Start
Menu
>
Smart Sync
>
Options
.
>
Update
.
85
Page 86

3
Ta p next to
4
Ta p t he
select an interval to synchronise your contacts, calendar
events, and tasks with the server.
5
Ta p
6
Ta p to return to the main synchronisation window.
Synchronization Schedule
Done
.
Auto sync.
drop-down menu and
Clock
Learn to set and control alarms, reminders, and world clocks.
You can also use the stopwatch.
Set an alarm
1
Ta p
2
On the
3
Set the alarm options.
4
When you are finished, tap
Start >
Alarm
Clock
tab, tap
.
New
.
Done
86
.
Page 87

The auto power-up feature sets the device to automatically turn on
and sound the alarm at the designated time if the device is turned
off. To use this feature, set the alarm to sound at least 3 minutes
later.
Stop an alarm
When an alarm without snooze sounds, tap
alarm with snooze sounds, tap
delay the alarm for the length of time you specified. Alarms with
snooze will repeat according to the number of times you
specified in the settings or until you tap
Dismiss
to stop it or
Dismiss
Dismiss
.
. When an
Snooze
to
Schedule an anniversary
1
Ta p
2
On the
3
Set the anniversary options.
Start >
Anniversary
Clock
.
tab, tap
New
.
4
When you are finished, tap
Done
87
.
Page 88

Create a world clock
1
Ta p
2
On the
3
Ta p to open a list of cities.
4
Ta p a c ity.
5
Ta p
6
Ta p
7
Ta p
Start >
World Clock
Ta p
Name
Done
Set as Home clock
Done
Clock
.
.
or
.
Time
tab, tap
to sort the list by name or timezone.
New
to reset the time zone (if necessary).
.
Use the stopwatch
1
Ta p
2
On the
3
Ta p
Start >
Stop watch
Lap
Clock
to record lap times.
.
tab, tap
Start
88
.
Page 89

4
When you are finished, tap
5
Ta p
Reset
to clear the recorded times.
Stop
.
Schedule
Use Schedule to keep track of appointments, birthdays, or
other events.
Create a calendar event
1
2
Ta p
Ta p
Start >
New
.
Schedule
.
3
Complete the fields and adjust the settings for your event.
4
When you are finished, tap
In the month view, a small triangle will appear under dates with
scheduled appointments.
Done
89
.
Page 90

Change the calendar view
1
Ta p
2
Tap a tab to change the calendar view:
Start >
• : a full month in one view
• : hourly blocks for the days in one full week (Monday to
Sunday)
• : hourly blocks for one full day
• : a list of scheduled appointments
Schedule
.
Stop an event reminder
When the reminder alarm sounds for a calender event, tap
Dismiss
.
90
Page 91

Notes
Use Notes to create memos, sketches, and recordings.
Create a note
1
Ta p
2
Ta p
3
Enter your note with the input panel.
• To create sketches X Create a sketch
Start >
New
to create a new note
Notes
.
(if necessary)
.
• To create recordings, tap
4
When you are finished, tap
Create a sketch
1
Ta p
2
Ta p
3
Make your sketch with strokes.
Start >
New
.
Notes
.
Menu
OK
.
91
>
View Recording Toolbar
.
Page 92

4
To edit the sketch, tap
• Tap the sketch to make the selection handles appear. You
can then use the handles to drag or resize the sketch or tap
Menu
>
Draw
.
Menu
5
When you are finished, tap
to access other options.
OK
.
Memo
Use Memo to create memos that combine text and freehand
drawing. To create a smart memo:
1
Ta p
2
Ta p
3
Create your memo with the drawing tools and input panel.
Start >
New
(if necessary).
Memo
.
4
When you are finished, tap
5
Ta p
OK
.
Save
92
.
Page 93

Recorder
Use Recorder to record, listen to, and send voice memos.
Record a voice memo
1
Ta p
2
Ta p
3
Set recording volume and tap to begin the recording.
4
Record your voice memo.
5
When you are finished, tap .
Start >
Record
Recorder
.
.
6
Ta p
OK
.
Listen to a voice memo
1
Ta p
2
Tap a memo. Playback will begin automatically.
Start >
Recorder
.
93
Page 94

3
During playback, use the following controls:
Icon Function
Adjust the volume
Skip to the previous file; Scan backward in a file
(tap and hold)
Pause playback
Resume playback
Skip to the next file; Scan forward in a file (tap and hold)
Tasks
Use Tasks to create to-do lists and reminders.
Create a task
1
Ta p
2
Ta p
Start >
Menu
>
Tasks
New Task
.
.
94
Page 95

3
Enter details for the task.
To set a reminder for the task, tap the due field and set a due
date. Next, tap the reminder field, select
specify the time and date of the reminder.
4
When you are finished, tap
OK
.
Remind me
, and then
Mark a task as completed
After completing a task, tap
box next to the task name. Once you have marked a task
complete, you will no longer receive any scheduled reminders
for that task.
Start >
Tasks,
and tap the check
Calculator
Use the calculator to perform basic mathematical calculations.
To perform a calculation,
1
Ta p
2
Enter the first number using the calculator buttons on the
screen.
Start >
Calculator
.
95
Page 96

• To clear the displayed numbers, tap .
• To clear the last digit entered in a multi-digit entry, tap .
3
Tap the appropriate math function.
4
Enter the second number.
5
To view the result, tap .
You can use the following buttons while performing
calculations:
• : clear the number you entered
• : clear any value that is stored in the calculator's memory
• : recall the stored value from memory and inserts it into the
current calculation
• : add the current number to the value stored in the
calculator's memory
To use a scientific calculator,
1
2
Ta p
Ta p
Start >
Scientific
Calculator
.
.
96
Page 97

3
Rotate the device anti-clockwise to the landscape
orientation.
4
Perform a calculation by using the buttons on the screen.
Unit Converter
Use Unit Converter to convert one unit of measure to another.
To perform a conversion,
1
Ta p
2
Select a type of measurement from the tabs at the top of
the screen:
• : Tip Calculator
Start >
Unit Converter
.
• : Length
• : Weight
• : Area
• : Volume
• : Temperature
• : Currency
3
Select the unit of measure to convert.
97
Page 98

4
Enter the base amount. The device displays the conversion
result.
For Currency, tap
Edit Rate
to input the basic rate first.
Smart Reader
Use Smart Reader to capture information from a business card
or a document, and translate text.
Capture images of business cards or documents
1
Ta p
2
Rotate the device anti-clockwise to the landscape
orientation.
Start >
Smart Reader
.
3
Ta p
4
Align the business card or document in the screen.
• For business cards, you must align the corners of the card
BizCard
with the corners of the frame (the frame will turn green when
aligned).
or
Document
.
98
Page 99

5
Press the Camera key to capture the image.
6
7
• If you have activated the
device will automatically capture the image once the card is
aligned in the frame.
• For best results, place business cards or documents on a flat,
evel surface and ensure adequate lighting.
l
Ta p
Ta p
Save
OK
.
.
BizCard automatic capture
Translate text
1
Ta p
2
Rotate the device anti-clockwise to the landscape
Start >
Smart Reader
.
setting, the
orientation.
3
Ta p
4
Ta p
5
Align the text in the screen.
6
Press the Camera key to capture the image.
Translation
to select a translation type.
.
99
Page 100

7
Draw a rectangle over the area you want to translate.
8
Ta p .
• To check the translated word, tap .
• To draw a new rectangle, tap
.
View captured images
1
Ta p
2
Rotate the device anti-clockwise to the landscape
orientation.
3
Ta p
4
Tap the following tabs to sort captured images:
Start >
Image
Icon Functions
Smart Reader
.
View all captured images
.
View captured images of business cards
View captured images of documents
View captured images of translations
5
Scroll left or right to an image.
100
 Loading...