

Samsung NX58H9950WS/AA-01, NX58H9950WS/AA-00, NX58H9500WS/AA-02, NX58H9500WS/AA-01, NX58H9500WS/AA-00 Owner’s Manual
Slide-In GasRange
User manual
iiiiiiiiiiiiiiiiiiililililililililiiii!ii!!!!ii
• DO NOT store or use gasoline or other flammable vapors and
liquids in the vicinity of this or any other appliance.
• WHATTO DO IFYOLI SMELl. GAS:
- DO NOT try to lightany appliance.
- DO NOT touch any electrical switch.
- DO NOT use any phone in your building.
- Immediately call your gas supplier from a neighbor's phone.
Follow the gas supplier's instructions.
- Ifyou cannot reach your gassupplier, callthe fire
department.
. Installation and service must be performed by aqualified
!nsta!!er,serv!ce agency, or the gas supp!!er.
Anti-tip devioe
®WARNING
ALL RANGESCANTIP,RESULTINGINPERSONALINJURY.
'TIPPING RANGESCAN CAUSEBURNSFROMSPILLS,
®
To prevent accidental tipping of the range, attach an approved
anti-tip device to the floor. (SeeInstalling the Anti-Tip Device
in the Installation Instructions.) Check for proper installation by
carefully tipping the range forward.The anti-tip device should
engage and prevent the range from tipping over.
PERSONALINJURY,AND/OR DEATH.
INSTALLAND CHECKTHEANTI-TIPBRACKETUSINGTHE
INSTRUCTIONSANDTEMPLATESUPPLIEDWITHTHE
BRACKET.
English - 2
• Ifthe range is pulled out away from the wall for any reason, make
sure the antPtip device is reengaged after the range has been
pushed back into place.
• Follow the installation instructions found in the Installation
Manual. Failure to follow these instructions can result in death,
serious personal injury, and / or property damage.
• To prevent the range from tipping, do not step/sit/lean on the
door or drawer.
tXeyfeature
Bigger is better
With acapacityof 9.8cubic feet,thisSamsunggasover]rangeoffersmore spacethan manyother
leadingbrandsin the United StatesandCanadianmarkets.Theenhancedcapacitymeansa better
cooking experience.
A cooktop with 5 burners
Powerburners,simmer burners,aswell asacenter oval burner provideflexiblecooktop heatfora
varietyofcookware.Thecenter oval burner deliversheat evenlyover alargearea,and providesthe
optimum temperaturesforgriddle cooking.
Enhanced convenience with easy maintenance
TheSamsunggasover]rangecombines all thebenefitsof 3separatehome appliances- gasrange,
gasover],andwarming drawer- to maximizecustomer corwer]iencewith its careful,stylishdesign.
English - 3
Oontent
Important safety
information
Overview
i_,i.....ii_i_
Before you start
Gas range
Gas oven
Warming drawer
5 Symbols used in this manual
5 State of California Propositoin 65 Warning
5 Commonwealth of Massachusetts
6 General safety
7 Fire safety
7 Gas safety
8 Electricaland grounding safety
9 Installation safety
10 Location safety
10 Cooktop safety
12 Oven safety
] 3 Warming drawer/lower drawer safety
] 3 Self-cleaning oven safety
]4 Layout
] 5 What's included
]6 Control panel
17 Display mode
]8 Clock
]9 Kitchen timer
] 9 Oven vent/cooling vent
21 Cookware
22 Wok grate
23 Griddle
24 Gas burners
25 Ignition
27 Cooking mode
32 Recipe guide
34 Racks
36 Cooking options
38 Special features
43 Changing option settings
48 Others
50 Warming drawer
Maintenance
Troubleshooting
51 Cleaning
58 Replacement
59 Reinstallation
6] Checkpoints
67 Information codes
English - 4
mportant af ty nformaton
READ ALL INSTRUCTIONS BEFOREUSING THiS APPLIANCE
All electricaland gas equipment with moving partscan bedangerous.Pleasereadthe important
safetyinstructionsfor this appliancein this manual.Theinstructionsmust befollowed to
minimizethe riskof injury,death,or propertydamage.
Savethis manual.PleaseDoNot Discard.
Symbols tJsed in this mantJal
A ARNING: Hazardsor unsafepracticesthat mayresultinseverepersonalinjuryor death.
+
A AUTION:Hazardsorunsafepracticesthat may resultin electricshock,personalinjury,or
propertydamage.
[_ NOTE:Usefultips and instructions
Thesewarning icons andsymbolsarehereto preventinjuryto you and others.Pleasefollow them
explicitly.After readingthis section,keep it in asafeplaceforfuture reference.
State of CaliforniaPropositoin65 Warning
Thisproduct containschemicalsknown to the Stateof Californiato causecancerand
reproductivetoxicity.
GasappliancescancauseIowqevelexposureto Proposition65 listedsubstances,including but
not limitedto, benzene,carbonmonoxide,formaldehydeand soot,substancesresultingfrom the
incompletecombustion of naturalgasor LPfuels.
Commonwealth of MassachtJsetts
This product must be installed by a licensed plumber or gas fitter qualified or licensed by the
State of Massachusetts. When using ball-type gas shut-off valves,you must use theT-handle type.
Multiple flexible gas lines must not be connected in series.
English - S
Generalsafe
A ARhllhlGTo reducethe riskof fire,electric shock,personalinjuries,and/or death,obeythe
following precautions.
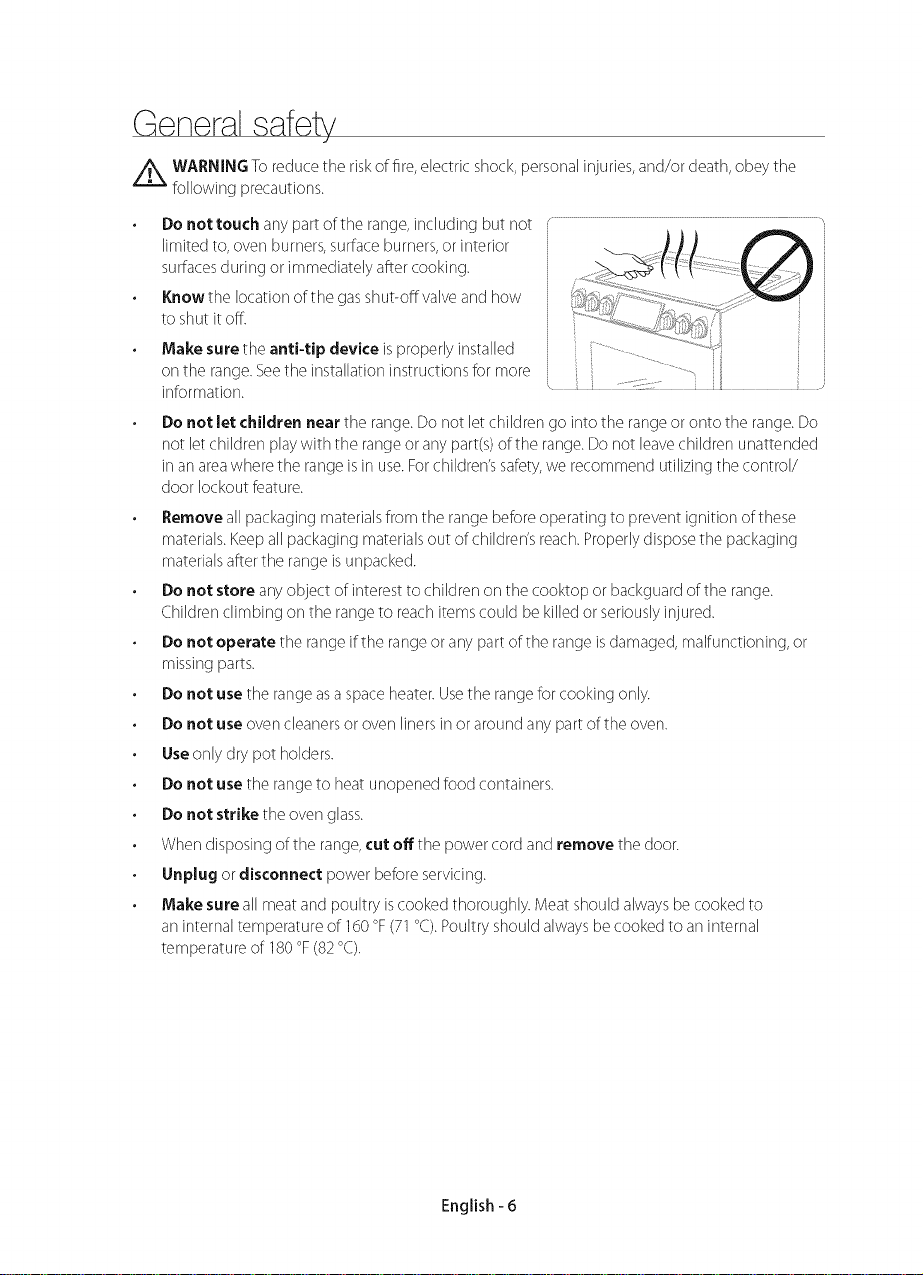
Donot touch anypartof the range,ir]cluding but not
limited to,oversburners,surfaceburners,or interior
surfacesduring or immediately aftercooking.
Know the locationof the gasshut-off valveand how
to shutitoff.
Make sure the anti-tip device isproperly installed
orsthe range. See the installation instructions for more
information.
Donot let children near the range.Donot letchildren go into the rangeor or]to the range.Do
not letchildren playwith the rangeor anypart(s)ofthe range.Do not leavechildren unattended
in anareawherethe rangeisin use.Forchildren'ssafety,werecommend utilizing the controY
door lockout feature.
Removeallpackagingmaterialsfromthe rangebeforeoperatingto prevent ignition of these
materials.KeepaJJpackagingmaterialsout of children'sreach.Properlydisposethe packaging
materialsafterthe rangeisunpacked.
Donot store anyobject of interestto childrenorsthe cooktopor backguardof the range.
Childrenclimbing orsthe rangeto reachitemscould be killedorseriouslyinjured.
Donot operate the rangeif the rangeor any partofthe range isdamaged,malfunctioning,or
missingparts.
Donot use the rangeasaspaceheater.Usethe rangefor cooking only.
Donot use over]cleanersor overslinersinor aroundany part of the overs.
Useonly drypot holders.
Donot use the rangeto heatunopenedfood containers.
Donot strike the over] glass.
Whendisposing ofthe range,cut off the power cord andremove the door.
Unplug or disconnect power beforeservicing.
Make sure all meatandpoultry iscooked thoroughly.Meat shouldalwaysbe cookedto
an internaltemperature of 160°F(71°C).Poultryshouldalwaysbecookedto an internal
temperature of 180°F(82°C).
English - 6
Firesafety
A ARNING To reduce the riskof fire, electric shock, personal injuries, and/or death, obey the
following precautions.
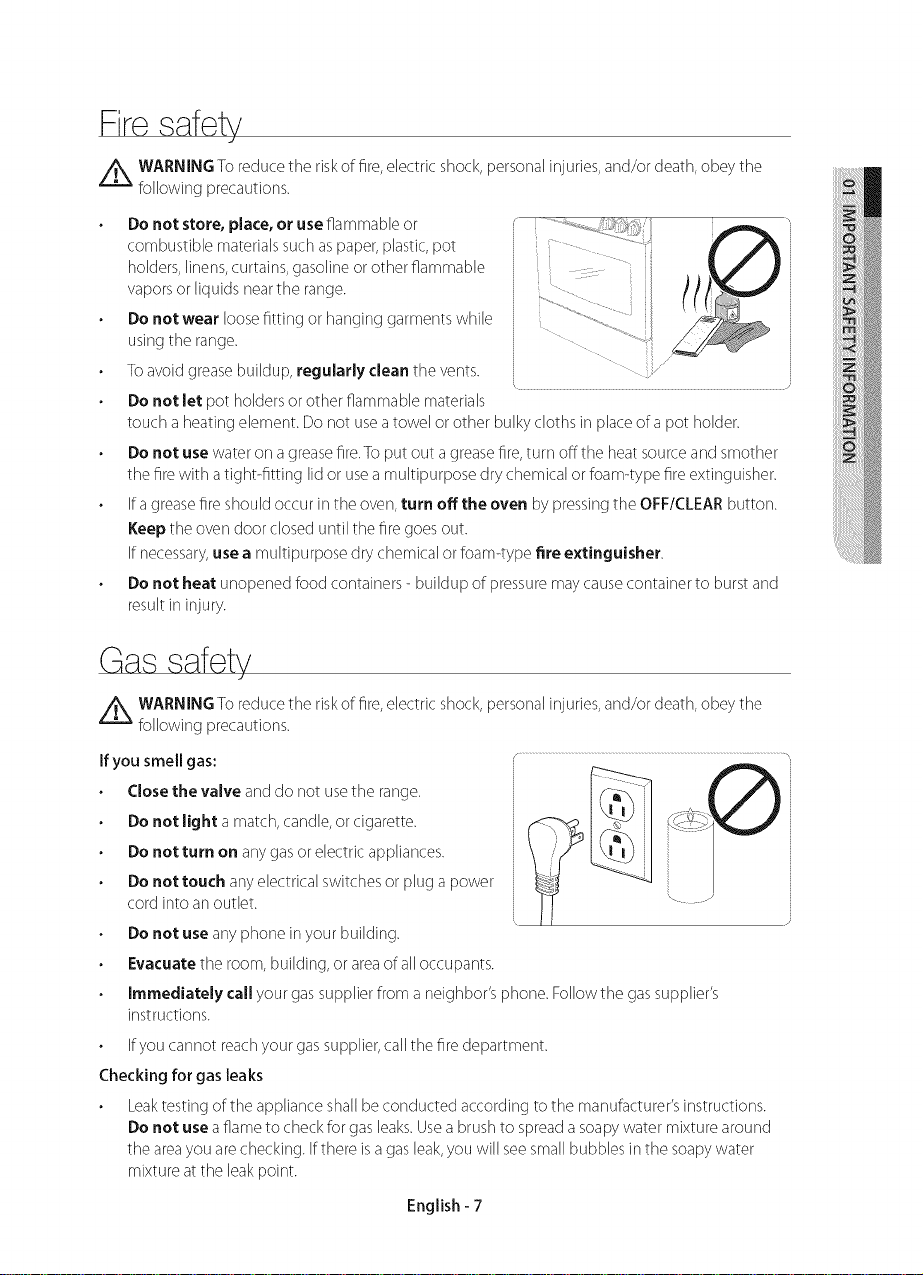
Do not store, place, or use flammable or
combustibb materials such as paper, plastic, pot
holders, liner]s, curtains, gasoline or other flammable
vapors or liquids near the range.
Do not wear loose fitting or hanging garments while
using the range.
To avoid grease buildup, regularly clean the versts.
Do not let pot holders or other flammable materials
touch a heating ebment. Do not use a towel or other bulky cloths in place of a pot holder.
Do not use water ors a grease fre.To put out a grease fire, turn offthe heat source and smother
the fire with a tight-fitting lid or use a multipurpose dry chemical or foam4ype fire extinguisher.
if a grease fire should occur in the overs,turn off the oven by pressing the OFF/CLEAR button.
Keep the overs door closed until the fire goes out.
If necessary, use a multipurpose dry chemical or foam4ype fire e×tinguisher.
Do not heat unopened food containers - buildup of pressure may cause container to burst and
result in injury.
Gas safety
A ARNINGToreducethe riskof fire,electric shock,personal injuries,and/or death,obeythe
following precautions.
If you smell gas:
Close the valve and do not use the range.
Do not light a match, car]die, or cigarette.
Do not turn on any gas or electric appliances.
Do not touch any electrical switches or plug a power
cord into an outbt. \ ....
Do not use any phone in your building.
Evacuatetheroom,building,orareaofalloccupants.
Immediately call your gas supplier from a neighbor's phone. Follow the gas supplier's
instructions.
Ifyou car]not reach your gas supplier, call the fire department.
Checking for gas leaks
Leaktesting of the appliance shall be conducted according to the manufacturer's instructions.
Do not use a flame to check for gas leaks. Use a brush to spread a soapy water mixture around
the areayou are checking. If there is a gas leak,you will see small bubbles in the soapy water
mixture at the leak point.
English - 7
Electricaland groLJndingsafety
A ARNINGToreducethe riskof fire,electric shock,personalinjuries,and/or death,obeythe
following precautions.
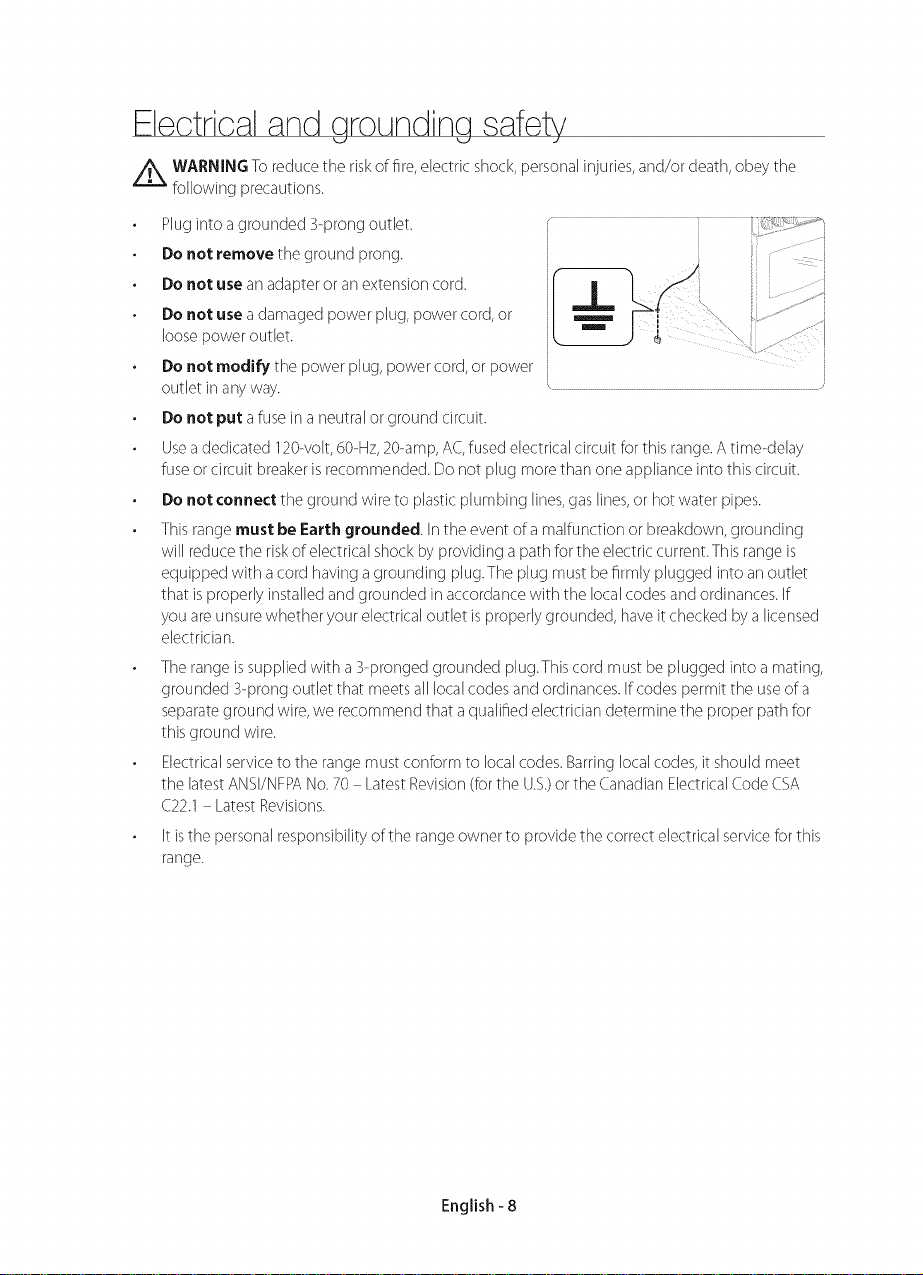
Pluginto agrounded 3-prongoutlet.
Donet remove the ground prong.
Donet use anadapteror an extensioncord.
Donet use a damagedpower plug, power cord, or
loosepoweroutlet.
Donet modify thepower plL_g,power cord,or power
outlet in anyway.
Donet put afuse in a neutralorground circuit.
Useadedicated 120-volt,60-Hz,20-amp,AC,fusedelectricalcircuitfor thisrange.A time-deBy
fuseorcircuit breakerisrecommended.Do not plug more than oneapp%nce into this circuit.
Donet cennect the ground wire to plastic pk_mbing lines,gaslines,or hot water pipes.
Thisrangemust be Earthgrounded. In theevent of a malfunction or breakdown,grounding
will reducethe riskofelectricalshockbyproviding a pathfor the electric current.This rangeis
equipped with a cord having agrounding plug.The plLlgmustbefirmly plugged into an outlet
that isproperly instalbd and grounded in accordancewith the localcodesand ordinances.If
you areunsurewhether yourelectricaloutlet isproperlygrounded, haveit checked bya licensed
electrician.
The range is supplied with a 3-pronged grounded pklg.This cord must be plL_gged into a mating,
grounded 3-prong outlet that meets all local codes and ordinances. If codes permit the use of a
separate ground wire, we recommend that a qualified electrician determine the proper path for
this ground wire.
Electrical service to the range must conform to local codes. Barring local codes, it should meet
the latest ANSI/NFPA No. 70 Latest Revision (for the U.S.)or the Canadian Electrical Code CSA
C22.1 Latest Revisions.
It isthe personal responsibility of the range owner to provide the correct electrical service for this
range.
English - 8
Installationsafety
_ ARNINGToreducethe riskof fire,eJectricshock,personaJinjuries,and/or death,obey the
following precautions.
Haveyour rangeinstalledand properly grounded bya
qualified installer, in accordancewith the instaJJation
instructions.Anyadjustmentand serviceshouldbe
performedonly by qualifiedgasrange instalbrsor
servicetechnicians.
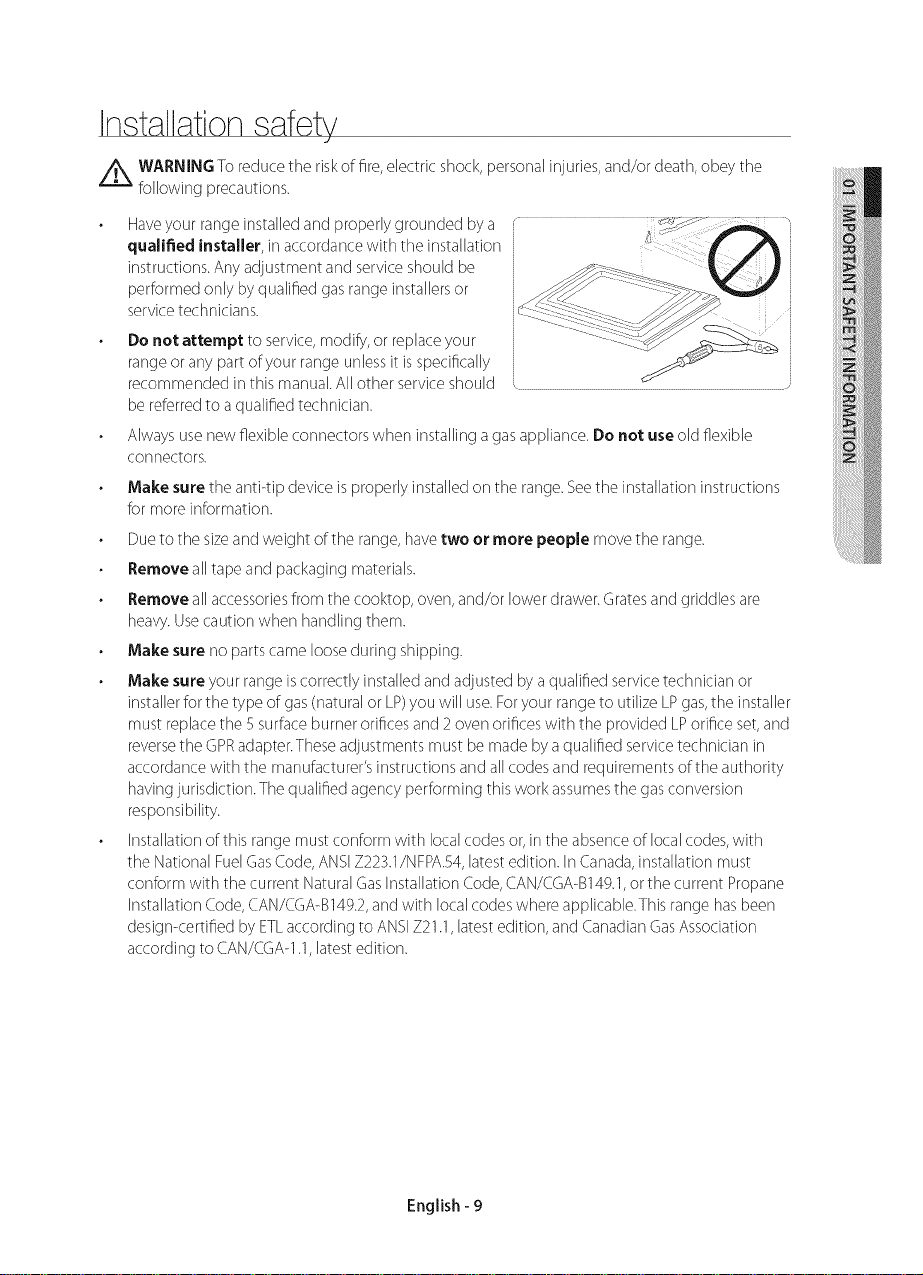
Donet attempt to service,modify,or replaceyour
rangeor anypart ofyour rangeunbss it is specifically
recommendedin thismanual.Allother serviceshould
bereferredto aqualified technician.
Alwaysusenew flexibleconnectorswhen installinga gasappliance.Do not useold flexible
cor]nectors.
Make surethe anti4ip deviceisproperly instaJbdor] the range.Seethe insta%tion instructions
for more information.
Dueto the sizeandweight of the range,havetwo or more people movethe range.
Remove aJJtapeand packagingmateriaJs.
Remove allaccessoriesfrom the cooktop,over],and/or lower drawer.Gratesandgriddlesare
heavy.Usecaution when handling them.
Make sure nopartscamelooseduring shipping.
Make sure your rangeiscorrectlyinstalled andadjustedbyaqualified servicetechnician or
installerforthe type of gas(naturalor LP)you will use.Foryour rangeto utilize LPgas,the installer
mustreplacethe 9surfaceburnerorificesand2 over]orificeswith the provided LPorifice set,and
reversethe GPRadapter.Theseadjustments must bemade byaqualified servicetechnician in
accordancewith the manufacturer'sinstructionsand allcodesand requirementsof theauthority
havingjurisdiction.The qualifiedagency performing thiswork assumesthe gasconversion
responsibility.
Installationof this rangemust conform with localcodesor,in the absenceof localcodes,with
the National FuelGasCode,ANSIZ22}}.l/NFPA.54,latestedition. InCanada,installationmust
conform with the currentNaturalGasInstallationCode,CAN/CGA-B149.1,orthe current Propane
InstallationCode,CAN/CGA-B149.2,and with localcodes whereapplicable.Thisrange hasbeer]
design<ertifled by ETLaccording to ANSIZ21.1,latestedition, andCanadianGasAssociation
accordingto CAN/CGA-1.1,latestedition.
English - 9
l ooation safety
A ARNING To reduce the riskof fire, electric shock, personal injuries, and/or death, obey the
following precautions.
This range isfor indoor, household use only.
Do net install the range in areas exposed to the
weather and/or water.
Donet install the rangein aplacewhich isexposed
to astrong draft.
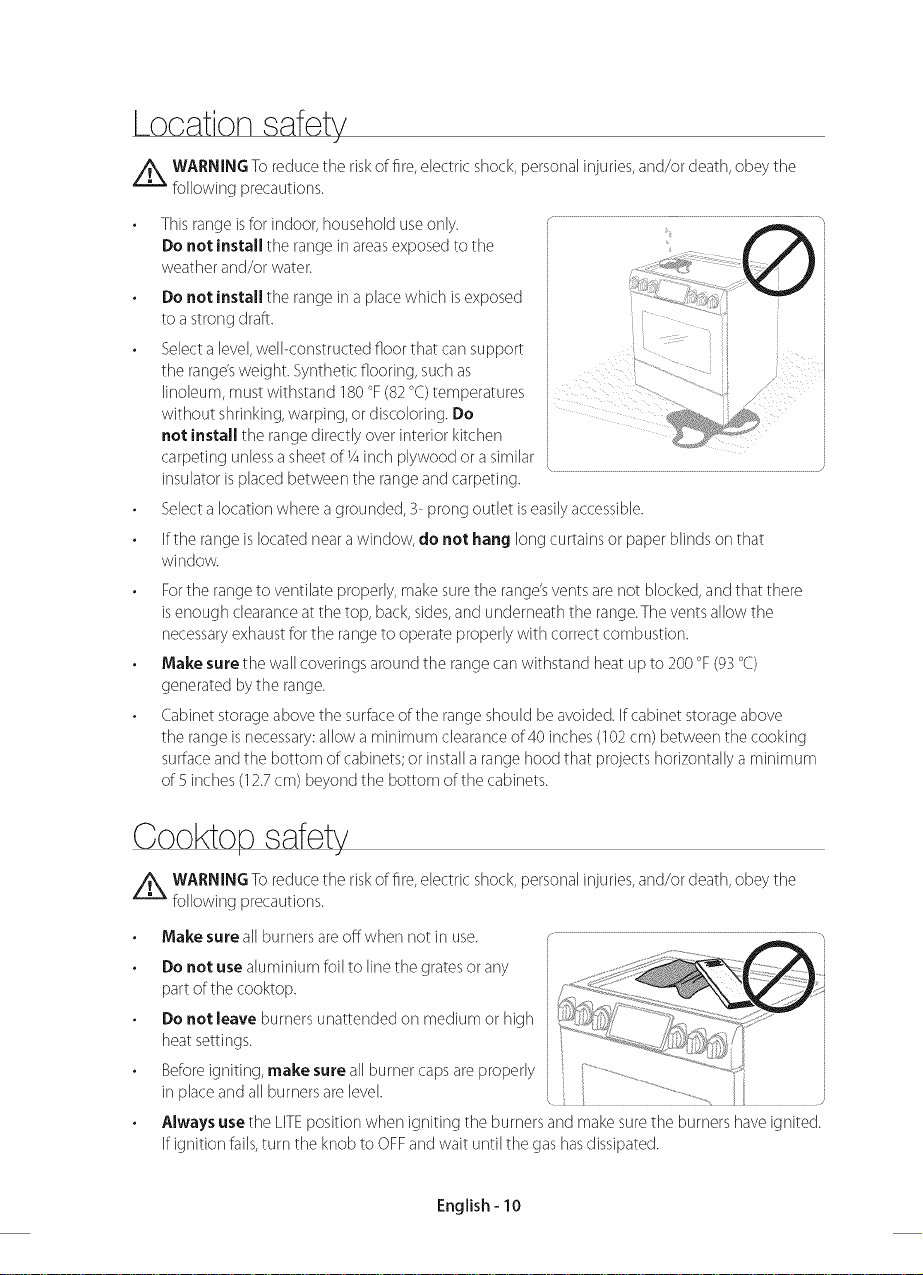
Select a level, well-constructed floor that carssupport
linoleum, must withstand 180 °F (82 °C)temperatures
shrinking, warping, or discoloring.
not install the range directly over interior kitchen
carpeting unless a sheet ofl/4 inch plywood or a similar
insulator is placed between the range and carpeting.
Select a location where agrounded, 3- prong outlet is easily accessible.
Ifthe rangeis locatedneara window,do net hang long curtainsorpaper blindsorsthat
window.
Forthe rangeto ventilateproperly,makesurethe range'sverstsarenot blocked,andthat there
isenough clearanceat the top, back,sides,andunderneaththe range.Theverstsallow the
necessaryexhaustfor the rangeto operate properlywith correct combustion.
MaResure thewall coveringsaroundthe rangecarswithstand heatupto 200°F(93°C)
generated bythe range.
Cabinetstorageabove the surfaceofthe range shouldbeavoided.If cabinet storageabove
the rangeisnecessary:allow a minimum clearanceof 40inches(102cm) between the cooking
surfaceandthe bottom of cabinets;or installarange hood that projectshorizontally aminimum
of 9inches(12.7cm) beyondthe bottom ofthe cabinets.
\ /
Cooktop safety
WARNING To reduce the riskof fire, electric shock, personal injuries, and/or death, obey the
following precautions.
MaRe sure all burners are offwhen not in use.
Do net use aluminium foil to line the grates or any ..s:_s_k_N;:¢_...... ::
part of the cooktop, i:_:_ :* 2
DO not leave burners unattended ors r'r_ediumor high I_ _y _ ,,i:_:,,_i_,_i_-:_....
heat settings, j _'_,., __"_iIx;,
Before igniting, make sure all burner caps are properly i ........................
in place and all burners are level. ', ............_ l ,
Always use the LITEposition when igniting the burners and make sure the burners have ignited.
If ignition fails, turn the knob to OFFand wait until the gas has dissipated.
English - 10
l ......................................
.........,,:_:_._::::::::........................
Whenyousetaburnertosimmer,do not turn the knob quickly. Make sure the flame stays ors.
Do not place any objects other than cookware ors the cooktop.
This cooktop isdesigned to cook with a wok or wok ring attachment. Iffoods are flamed, they
should only be flamed under aventilation hood that isors.
Before removing or changing cookware, turn offthe burners.
Remove food and cookware immediately after cooking.
Before removing any parts of the burner for cleaning, make sure the range is off and completely
cool.
After cleaningtheburner spreader,mare sureit iscompletely dry beforere-assembling.
MaResure the sparkmarkorsthe dual burnerspreaderisplacedbesidethe electrode when it is
assembled.
To avoid carbon monoxide poisoning, do not pour water into the cooktop well while cleaning.
Select cookware that is designed for top-range cooking. Usecookware that is large enough to
cover the burner grates. Adjust the burner flames so that the flames do not extend beyond the
bottom of the cookware.
To avoid cookware discoloration, deformity, and/or carbon monoxide poisoning, do not use
cookware that is substantially larger than the grate.
Make sure cookware handles are turned to the side or rear of the cooktop, but not over other
surface burners.
Standawayfrom the rangewhile frying.
Alwaysheatfrying oilsslowly,andwatch asthey heat.Ifyou arefrying foodsat high heat,
carefullywatchduring the cooking process.Ira combination offatsor oils isto be usedduring
frying, mixthem together before heating.
Useadeep-fryerthermometer wheneverpossible.Thispreventsoverheating the fryer beyond
the smoking point.
Useaminimum amount ofoil when shallowpan4rying or deep4rying.Avoidcooking unthawed
food or food with excessiveamounts of ice.
Before moving cookware full of fats or oils, make sure it has completely cooled.
To prevent delayed eruptive boiling, always allow heated liquids to stand at least 20 seconds after
you have turned offthe burner so that the temperature in the liquid cars stabilize. In the event of
scalding, follow these first aid instructions:
1) Immerse the scalded area in cool or lukewarm water for at least 10 minutes.
2) Do not apply any creams, oils, or lotions.
3) Cover with a clears,dry cloth.
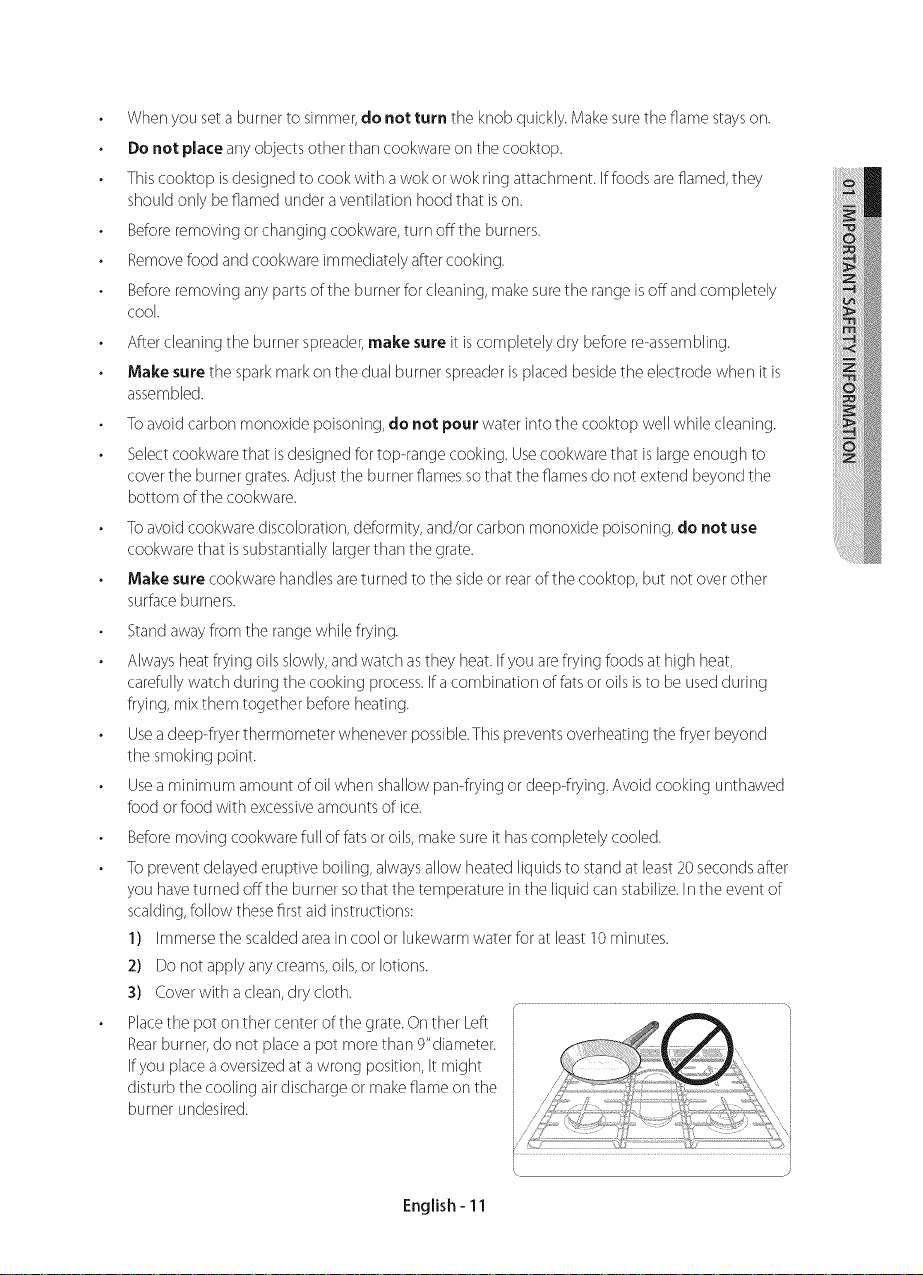
Place the pot orsther center of the grate. Orsther Left
Rear burner, do not place a pot more than 9"diameter.
Ifyou place a oversized at a wrong position, It might
disturb the cooling air discharge or make flame ors the
burner undesired.
English - 11
Ovensafety
//_ WARNINGTo reducethe riskof fire,electric shock,personalinjuries,and/or death,obey the
following precautions.
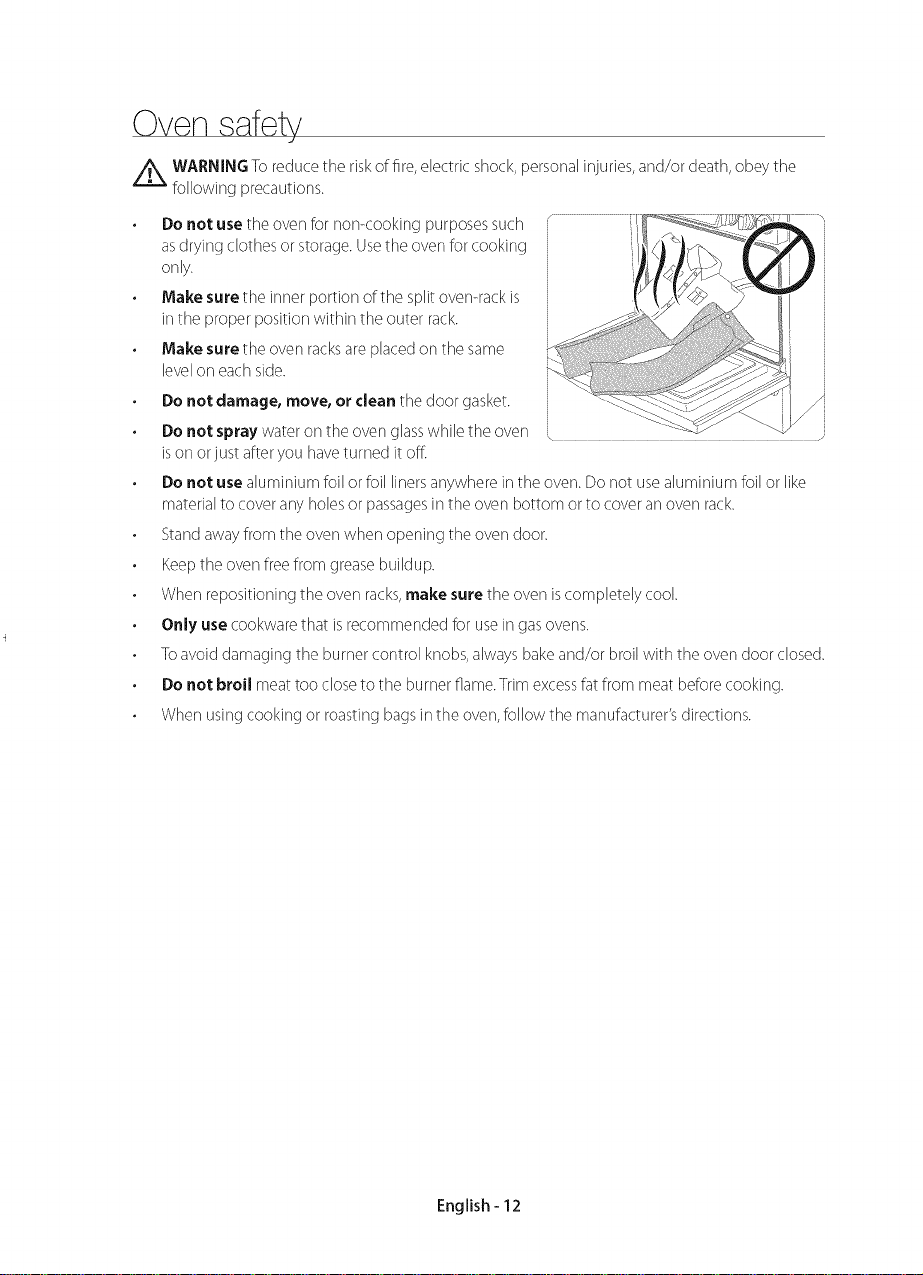
De net use theoven for r_or_<ookingpurposessuch
asdrying clothes orstorage.Usethe ovenfor cooking J'_
only.
Make surethe inner portion of the spJitoven-rackis
in the proper positionwithin the outer rack.
Make surethe oven racksare pBcedon the same
bveJon eachside.
Donot damage, move, orclean the door gasket.
Donet spray wateron the oven glasswhile the oven ....
ison or justafteryou haveturned it off_
Donet use aluminium foil orfoil linersanywhereinthe oven.Do notusealuminium foil or like
materialto coverany holesor passagesin the oven bottom orto coveran ovenrack.
Standawayfrom the oven when opening theoven door.
Keepthe ovenfreefrom greasebuildup.
When repositioningthe ovenracks,make sure the oven iscompletely cool.
Only use cookwarethat isrecommendedfor useingasovens.
Toavoid damaging theburner control knobs,alwaysbakeand/or broil with the ovendoor closed.
Donot broil meattoo closeto the burnerflame.Trimexcessfat from meat beforecooking.
When usingcooking orroasting bagsin the oven,follow the manufacturer'sdirections.
/
English - 12
Warming drawer/lower drawer safe
A ARNING To reduce the riskof fire, electric shock, personal injuries, and/or death, obey the
following precautions.
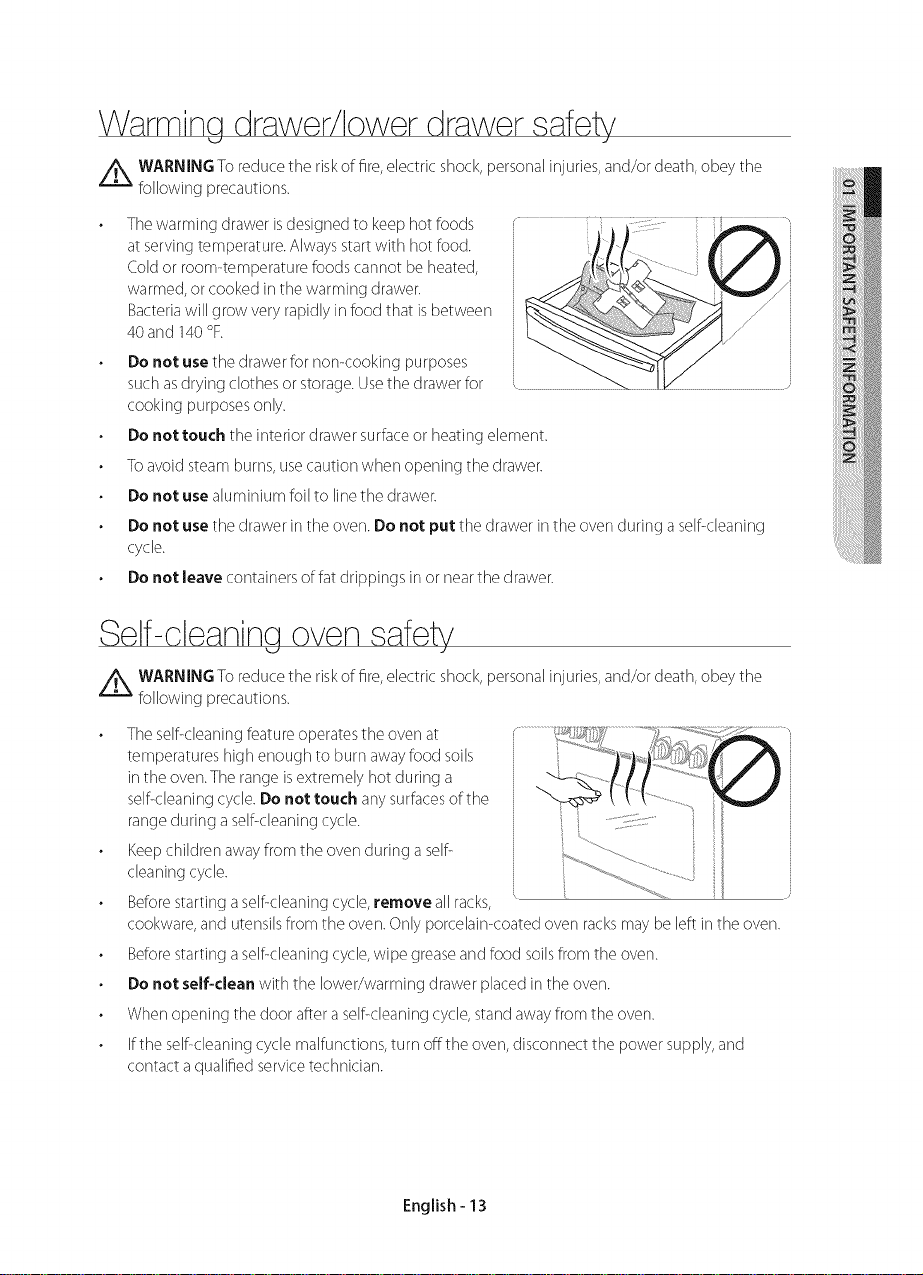
The warming drawer is designed to keep hot foods
at serving temperature. Always start with hot food.
Cold or room-temperature foods car]not be heated,
warmed, or cooked in the warming drawer.
Bacteria will grow very rapidly in food that is between
40 and 140 °F.
Do not use the drawer for r]or]<ooking purposes
such asdrying clothes or storage. Usethe drawer for
cooki ng purposes only.
Do not touch the interior drawer surface or heating ebment.
To avoid steam burr]s, use caution when opening the drawer.
Do not use ak_minium foil to line the drawer.
Donot use the drawerin theover].Donot put thedrawer inthe over]during aself-cleaning
cycle.
Do not leave containersof fat drippings inor nearthe drawer.
Self-cleaning oven safe
A ARNING To reduce the riskof fire, electric shock, personal injuries, and/or death, obey the
following precautions.
Theself-cleaningfeatureoperatesthe over]at
temperatures highenoughto burr] awayfood soils
in the oven.The rangeisextremelyhot during a
self-cleaningcycle.Do not touchany surfacesof the
rangeduring aself-clear]ingcycle.
Keepchildrenawayfrom the over] during aself-
charting cycle.
Beforestartingaself-charting cycle,removeall racks, '
cookware,and utensilsfrom the over].Only porcelain<oaredover]racksmay beleft inthe over].
Beforestartingaself-cleaningcycle,wipe greaseandfood soilsfrom theover].
Do not self-clean with the lower/warming drawer placed inthe over].
Whenopening the door afteraself-dear]ingcycle,standawayfrom theover].
Ifthe self-clear]ingcyclemalfur]ctions,turn offthe over],discor]nect the power supply,and
contact aqualified servicetechnician.
English - 13
_V@R/@W
@
@}
@
@
@
@
z @
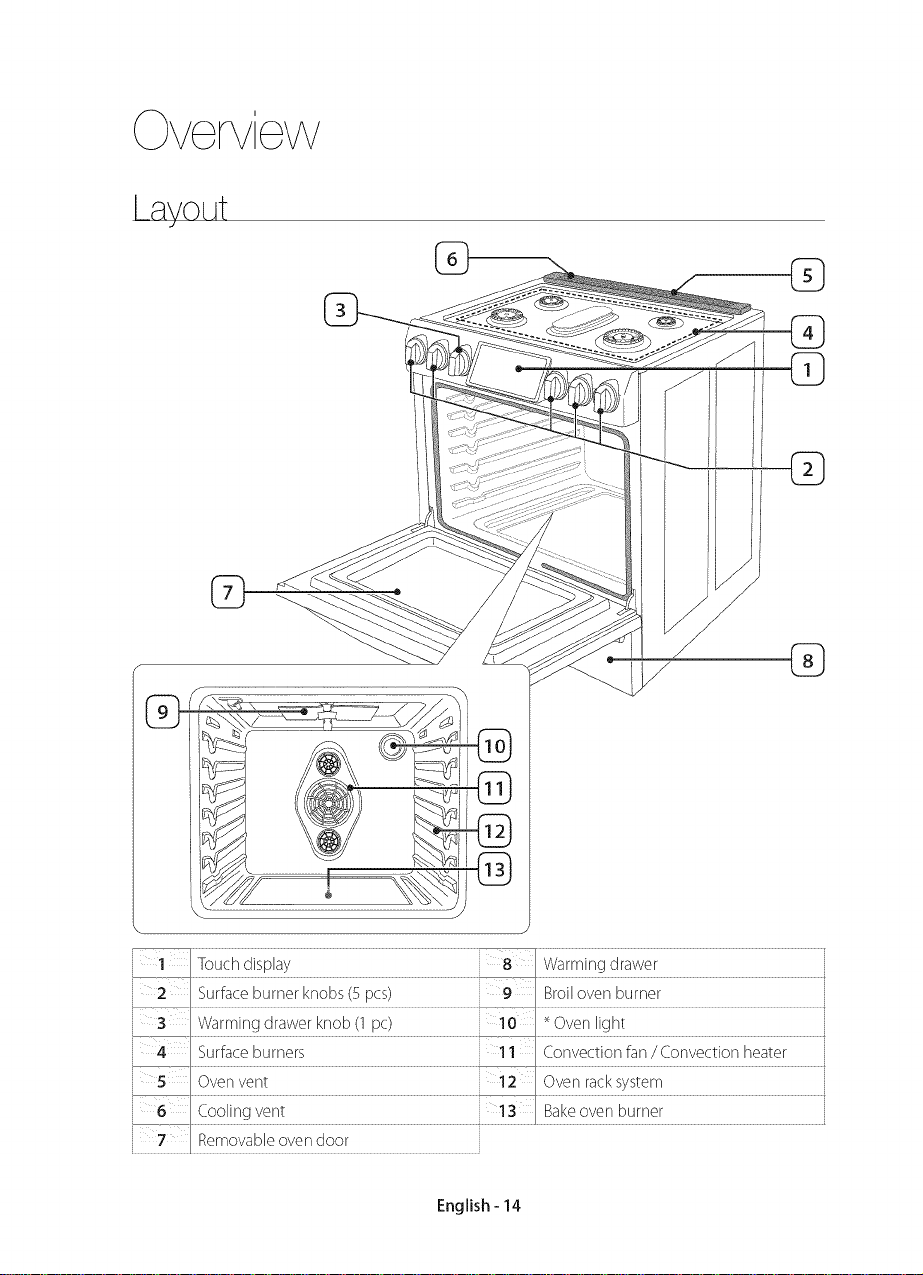
--1 Touch display j 8 Warming drawer
i 2 Surface burner knobs(5 pcs) i 9 Broilover] burner
i 3 Warming drawer knob(1 pc) i 10 _OVer] light
j4_ Surfaceburners ' ]-1 Cor]vec_ior]far]JCor]ve_ior]heater
[ Over]ver]_ i 12-----Over]ra_ksys_em
l_6 Coolir]_ver]_ j 1_-- Bakeover]burner
Removable over] door ]_
English - 14
What's incltJded
©
0
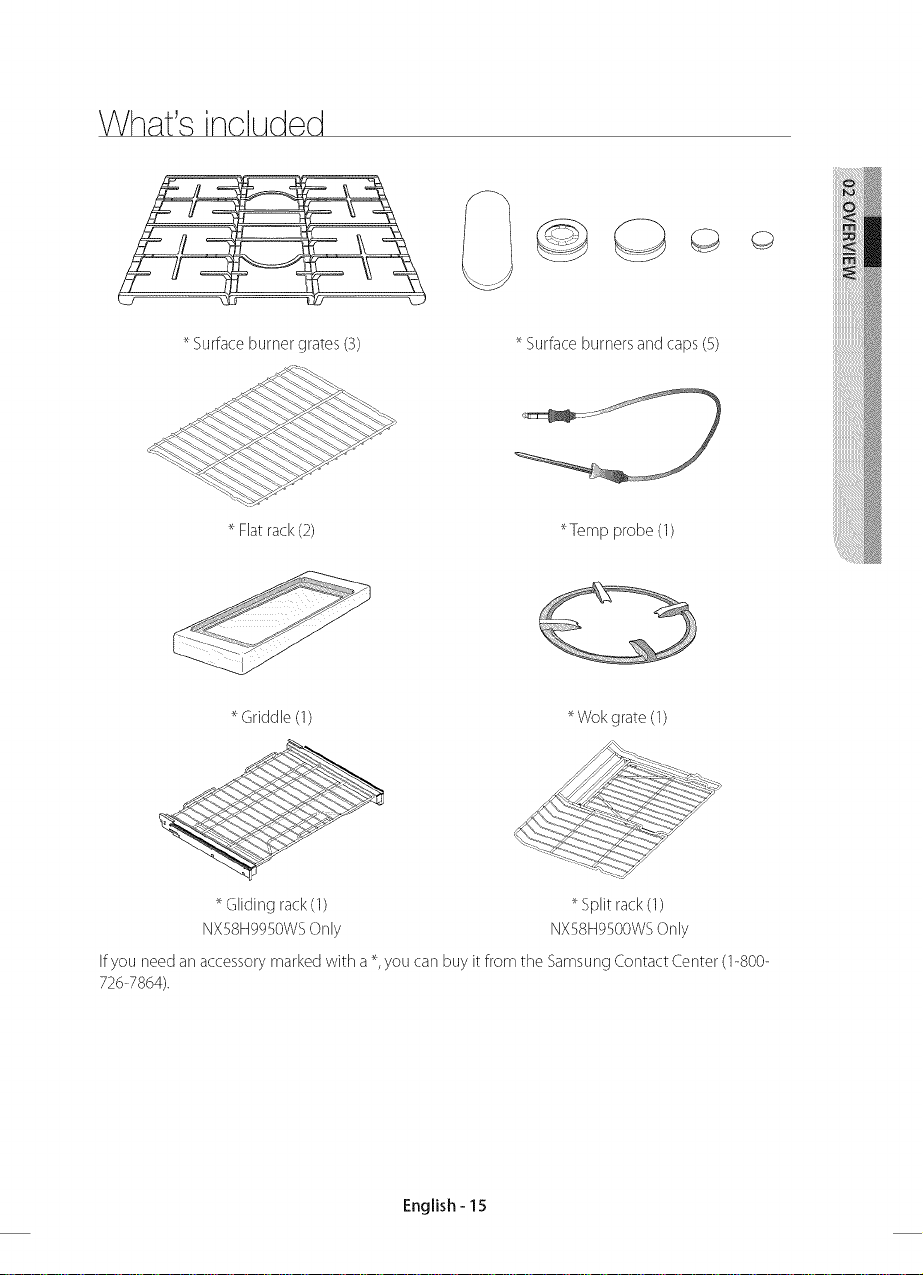
Surface burner grates (3)
"Flat rack (2)
Griddle(1)
Gliding rack(1)
NX98H9990WSOnly
Ifyou need an accessory marked with a_,you car] buy it from the Samsung Contact Center (1-800-
726-7864).
Surface burners and caps (5)
_Temp probe (1)
Wokgrate(1)
Splitrack(1)
NXS8HSSOOWSOnly
English - 15
©ontrol panel
(_ i i Roas[ Bake Broi
F Healthy Cony. Keep Self
TOUCh to
waKe-up
(3see)
1 2 3 cock L__
1 n
4 5 6 I opros_ T,_o_.O..-
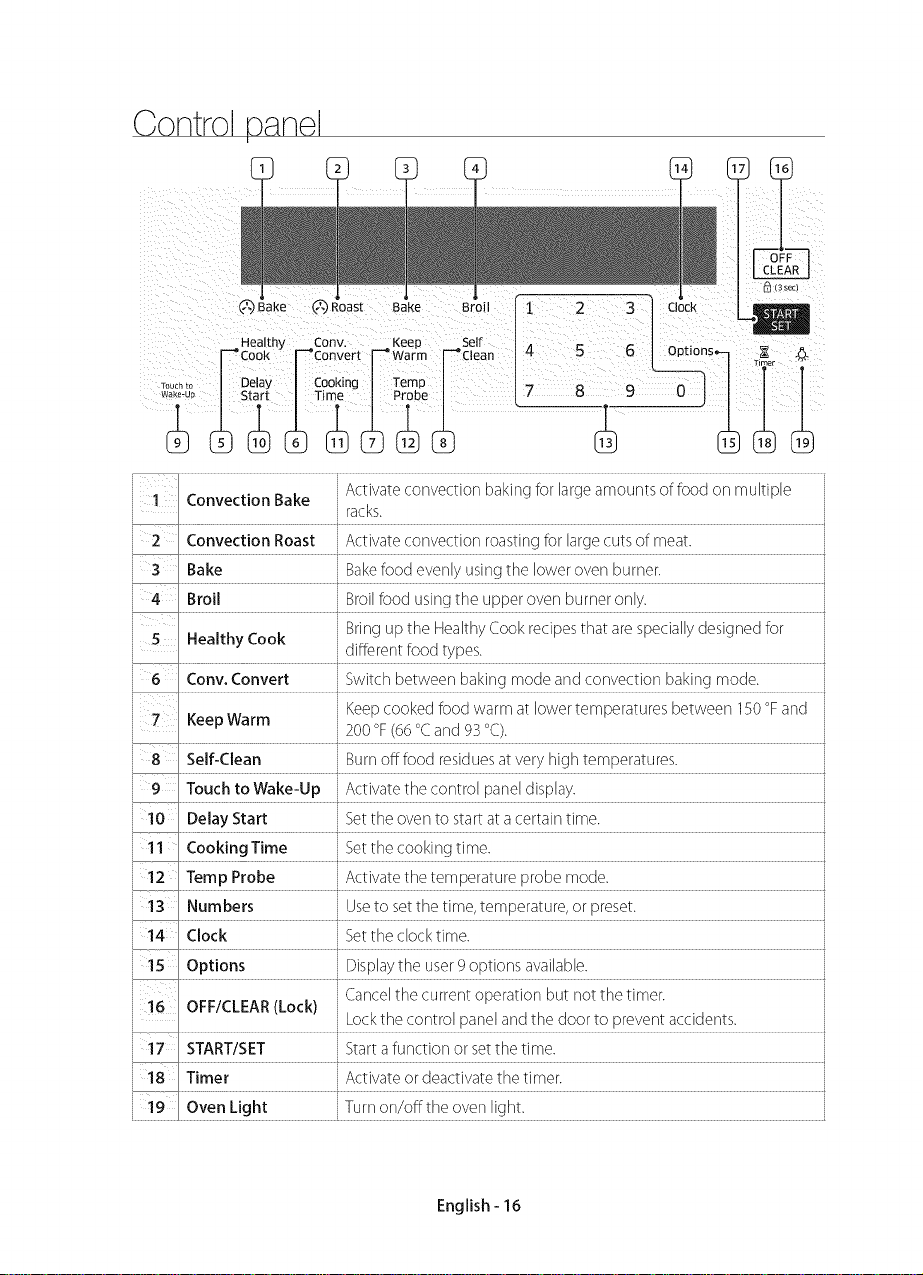
i I Convection Bake
i racks.
i 2 Convection Roast Activate convection roasting for large cuts of meat.
_Bake Bakefood evenly using the lower over] burner.
J 4 Broil Broil food using the upper over] burner only.
i Bring up the Healthy Cook recipes that are specially designed for
l S Healthy Cook
l different food types.
l 6 Conv. Convert Switch between baking mode and convection baking mode.
L
i 7 Keep Warm
___ _200 °F(66 °C and 93 °C). .
i 8 Self-Clean Burr] offfood residues at very high temperatures.
i 9 Touch to Wake-Up Activate the controJ paneJdisplay.
i 10 DelayStart Set the oven to start at acertain time.
_11 Cooking Time Setthe cooking time.
[12 Temp Probe _Activate the temperature probe mode.
i 13 Numbers Useto set the time, temperature, or preset.
i 14 Clock Settheclocktime.
i 15 Options Displaythe user g options available.
i Cancel the current operation but not the timer.
] 16 OFF/CLEAR(Lock)
___ . Lock the control par]el and the door to prevent accidents. .
J 17 START/SET Start a function or set the time.
18 Timer Activate or deactivate the timer.
_9 Oven Light Turn on/offthe over] light.
Activate convection baking for large amounts of food or] multiple
Keep cooked food warm at lower temperatures between 190 °Fand
English - 16

Youshouldknowaboutthefollowingfeaturesandcomponentsbeforeyouuseyourrangeforthe
firsttime.
Display mode
Sleep
After 2 minutes of inactivity (or 1 minute when the over] is in standby mode), the control par]el
enters Sleep mode. In Sleep mode, the control par]el staysinactive with just the time display until it is
reactivated by the user.
Wake-Up
Toactivatethe control panel,pressTouch to
Wake-Up. Userpreferencesareavailableinthis
mode includir]gthe timer,over] light,and/or
control lock.
\ J
English - 17
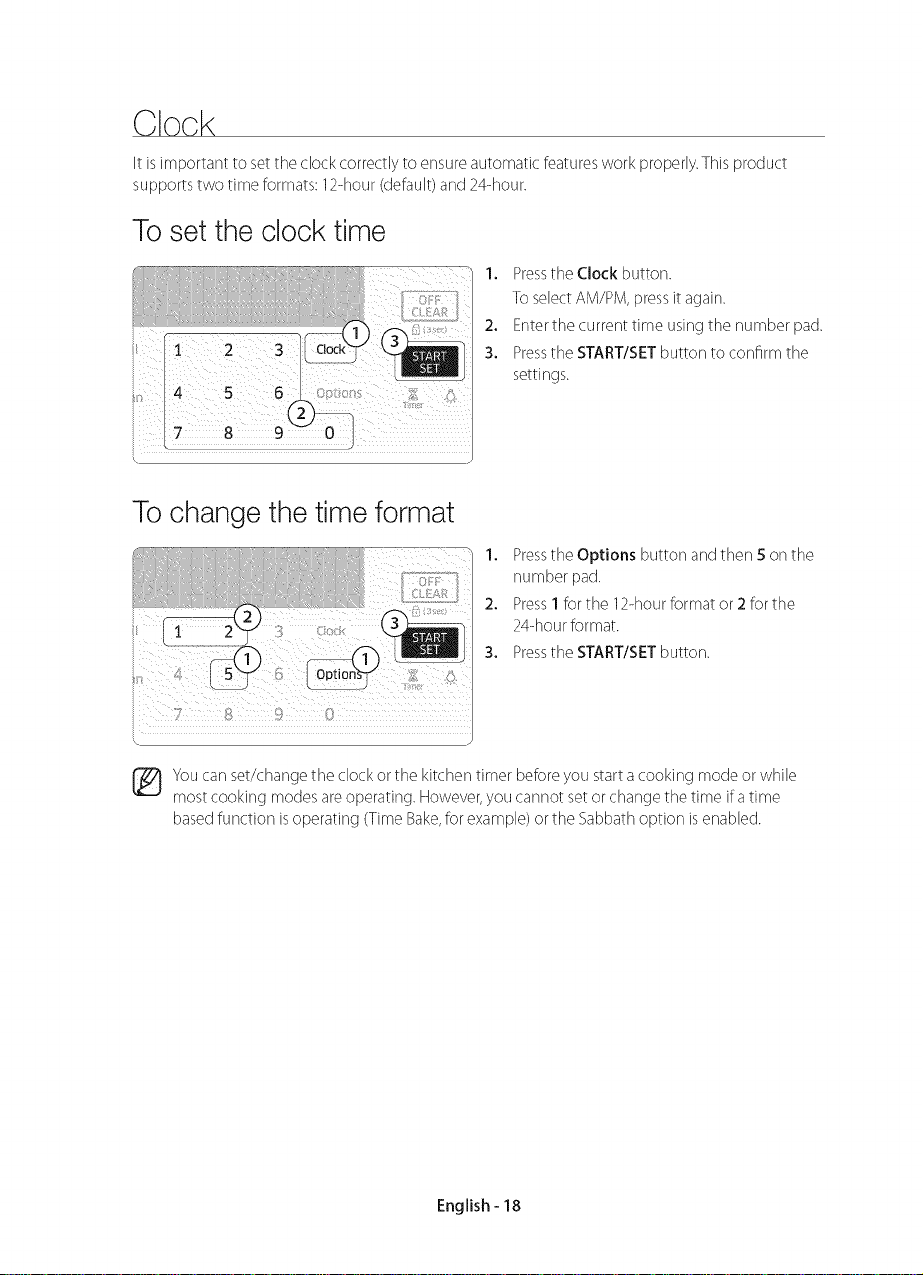
Clock
It is important to set the clock correctly to ensure automatic features work properly.This product
supports two time formats: 12-hour (default) and 24-hour.
To set the clock time
1. Pressthe Clock button.
To select AM/PM, press it again.
2. Enter the current time using the number pad.
3. Pressthe START/SET button to confirm the
settings.
To change the time format
1. Pressthe Options button and then 5or]the
number pad.
2. Press1for the 12-hour format or2 forthe
24-hourformat.
pt,o.
3. Pressthe START/SETbutton.
You car] set/change the clock or the kitchen timer before you start a cooking mode or while
most cooking modes are operating. However, you car]not set or change the time ira time
based fur]orion isoperating (Time Bake,for example) or the Sabbath option isenabled.
English - 18
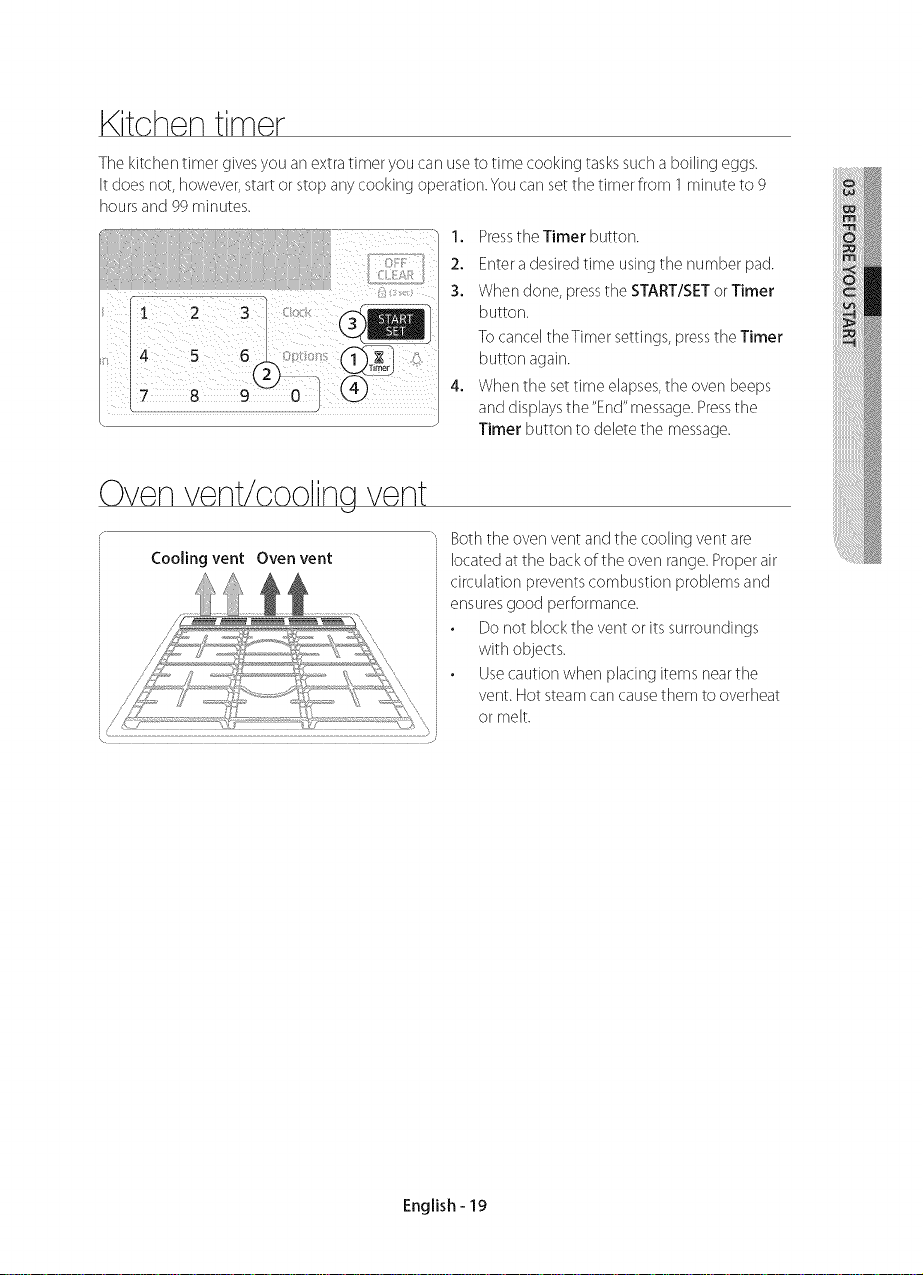
Kitohentimer
The kitchen timer gives you an extra timer you carsuse to time cooking tasks such a boiling eggs.
It does not, however, start or stop any cooking operation. Youcars set the timer from 1 minute to 9
hours and 99 minutes.
Pressthe Timer button.
Enteradesiredtime using the numberpad.
Whendone, pressthe START/SETorTimer
button.
TocanceltheTimer settings,pressthe Timer
button again.
4o
Whenthe settime eJapses,the oversbeeps
anddisplaysthe "End"message.Pressthe
Timer button to deJetethe message.
Oven vent/cooling vent
Boththe over]verstandthe cooJingverstare
Cooling vent Oven vent
locatedat the backof the oversrange.Properair
circuJationpreventscombustion probJemsand
ensuresgood performance.
• Do not bJockthe verstorits surroundings
with objects.
Usecautionwhen placing itemsnearthe
verst.Hotsteamcarscausethem to overheat
or melt.
English - 19
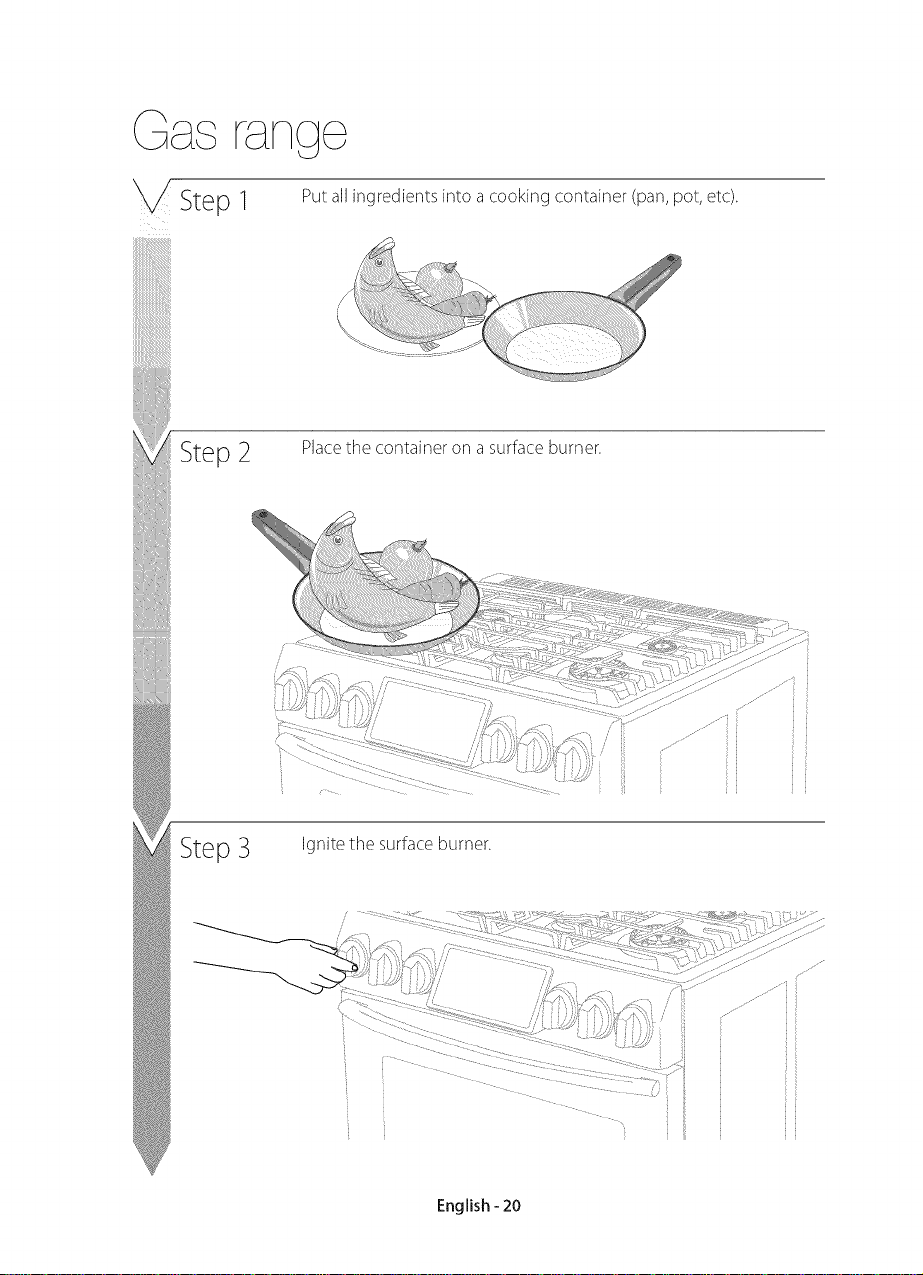
_a_ range
Step 1
liii
_Step 2
Put all ingredients into a cooking container (pan, pot, etc).
Place the container on a surface burner.
Step 3 Ignite the surface burner.
English -20
i i

©ookware
Requirements
Flat bottom and straight sides
Tight-fitting lid
WelPbaBnced with the handle weighing less than the main portion of the pot or par].
Material characteristics
Aluminum: An excellent heat conductor. Some types of food may cause the alumir]um to
darker]. However, anodized ak_minum cookware resistsstaining and pitting.
Copper: An excelbnt heat conductor but discolors easily.
Stainless steel: A slow heat conductor with uneven cooking performance but is durabb, easy to
clear], and resists staining.
Cast-Iron: A poor conductor but retains heat very well.
Enamelware: Heating characteristics depend or] the base materiaJ.
Glass: A slow heat conductor. UseonJy gBss cookware that is specified for top-of-range cooking
or over] use.
Size limitations
/ ................................................................................................................................................................................................................................-
6 inches or less
English- 21
Z_ CAUTION Do not place a small par] or pot
with a bottom diameter of about 6 inches
or less or] the center grate.This cookware
may tip over. Use the rear burners for this
small-sized cookware.
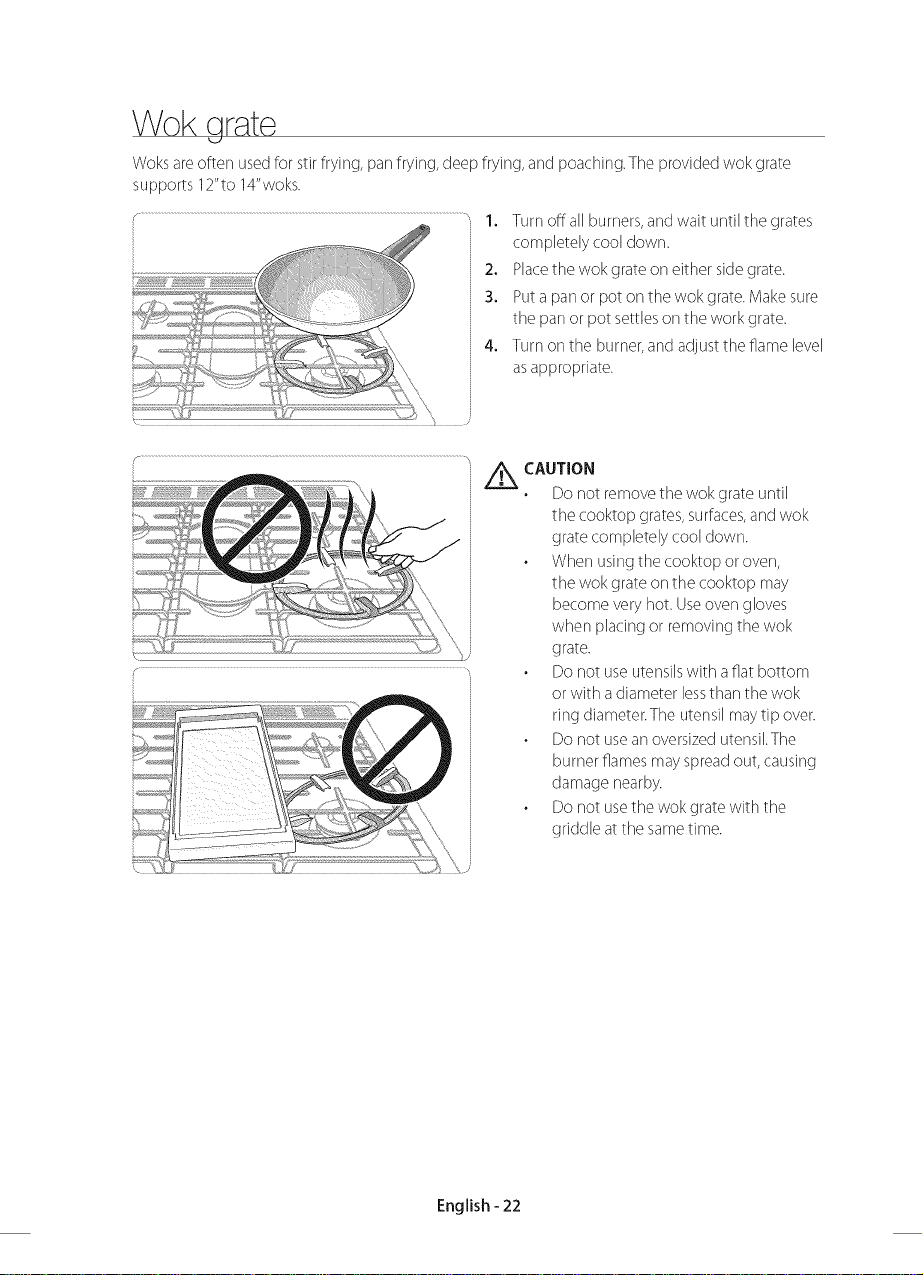
Wok grate
Woks are often used for stir frying, parsfrying, deep frying, and poaching.The provided wok grate
supports1Z'to 14"woks.
1. Turn offall burners, and wait until the grates
completely cool down.
2. Place the wok grate orseither side grate.
3. Put a parsor pot ors the wok grate. Make sure
the parsor pot settles ors the work grate.
4, Turn ors the burner, and adjust the flame level
as appropriate.
A CAUTION
Do not removethe wokgrate until
the cooktopgrates,surfaces,andwok
gratecompletely cooldown.
When usingthe cooktop or overs,
the wokgrate orsthecooktop may
becomevery hot.Useoversgloves
when placingor removingthe wok
grate.
Do not useutensilswith a flat bottom
or with adiameter lessthan the wok
ringdiameter.The utensilmaytip over.
Do not usean oversizedutensikThe
burner flamesmay spreadout, causing
damagenearby.
Do not usethe wok gratewith the
griddle atthe sametime.
English -22

Griddl
The removable coated griddle provides an extra cooking surface.This is useful especially when
cooking meats, pancakes, or other foods requiring a large cooking space.
" The griddle is available only with the center
burner ors the center grate. Usecaution when
putting the griddle orsthe center grate.
It isadvisable to preheat the griddle. See the table below.
' Pancakes 9 rain. 7 (HI) 6 (MED-HI)
Hamburgers 9 rain. 7 (HI) 7 (HI)
Fried Eggs 9 rain. 7 (HI) 6 (MED-HI)
' Bacon Norse 7 (HI)
Breakfast Sausages 5 rain. 7 (HI) 7 (HI)
Grilled cheese Sandwich 4 rain. 7 (HI) 6 (MED-HI)
i I
A CAUTION
Do not remove the griddle until the cooktop grates, surfaces, and griddle itself cool down.
The griddle ors the cooktop may become very hot when you use the cooktop or overs. Use
overs gloves when placing or removing the griddle.
The griddle is quite heavy because it is made of cast iron. Use both hands when placing or
removing the griddle.
Do not overheat the griddle.This carsdamage the coating of the griddle.
Do not use metal utensils that carsdamage the griddle surface.
Do not use the griddle for other purposes like a cutting board or storage.
Do not cook excessively greasy foods.The grease may spill over.
. Griddle settings may need to be readjusted over time.
The griddle may discolor over time as it becomes seasoned with use.
Do not leave the griddle rusty. Remove the rust before or during use of the griddle.
English -23
Gas bt rners
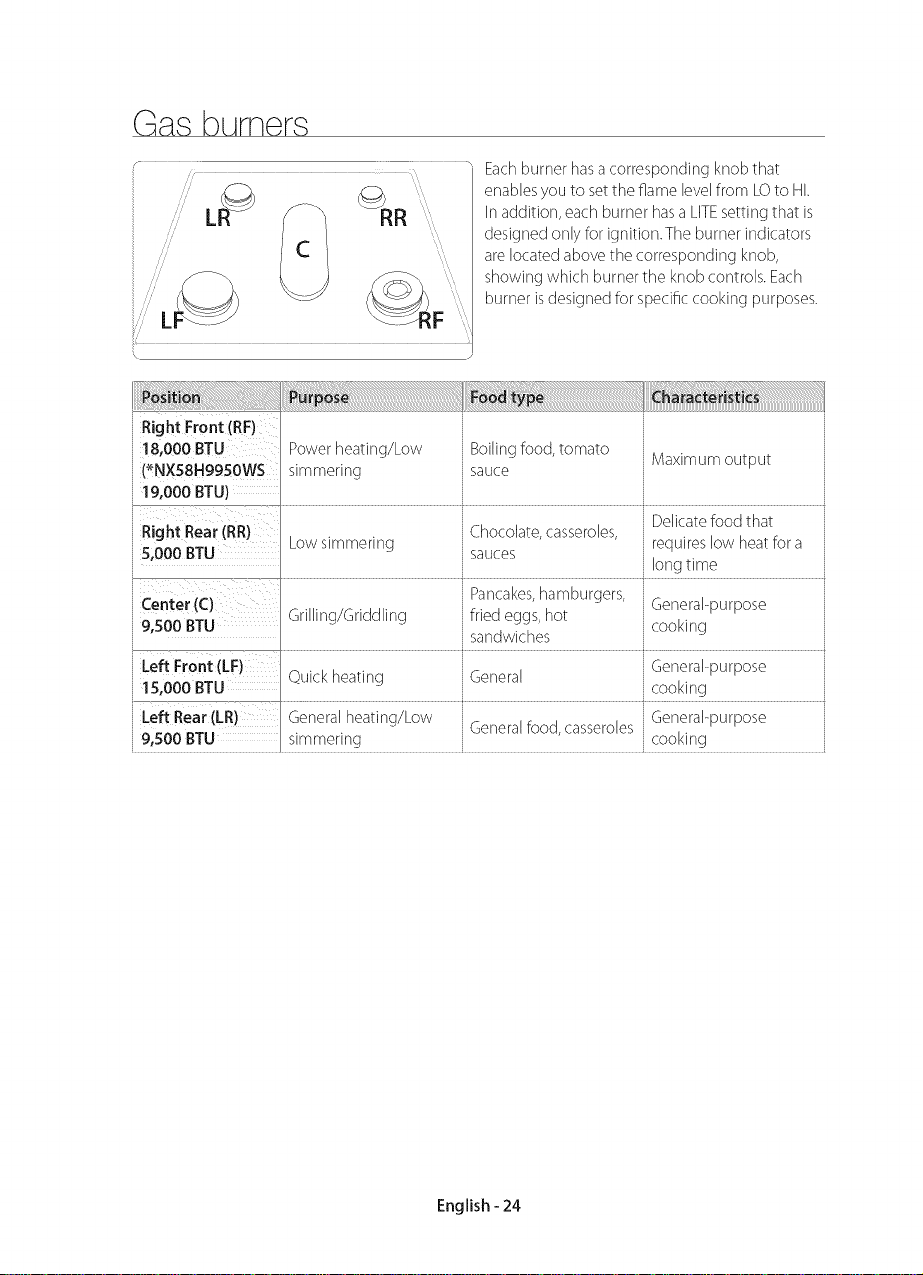
Eachburnerhasacorresponding knobthat
enabbs you to setthe flame levelfrom LOto HI.
Inaddition, eachburner hasaLITEsetting that is
designedonlyfor ignition.The burnerindicators
arelocatedabovethe correspondingknob,
showingwhich burner the knobcontrols.Each
burner isdesignedfor specific cooking purposes.
i'
llllllllllllllllllllllllllllllllllllllllllllllllllllllllllllllllllllllllllllllllllllllllllllllllllllllll:_:_:
RightFront (RF)
18,000BTU Powerheating/Low Boilingfood,tomato Maximum output
(_NX58H9950WS simmering sauce
' 19'000BTU)
j Right Rear(RR) ChocoBte,casseroles, Delicatefood that
,'5,000 BTU Lowsimmering sauces longtime
jCenter(C) : _ Par]cakes,hamburgers, General-purpose
i 9,500 BTU Grilling/Griddling fried eggs,hot cooking
, sandwiches ,
j Left Front (LF) General-purpose
,J15,000 BTU Quickheating General cooking
,iLeft Rear(LR) Generalheating/Low Generalfood,casseroles General-purpose
j 9,500 BTU simmering , , cooking
requireslow heatfora
English -24
Lgnition
F
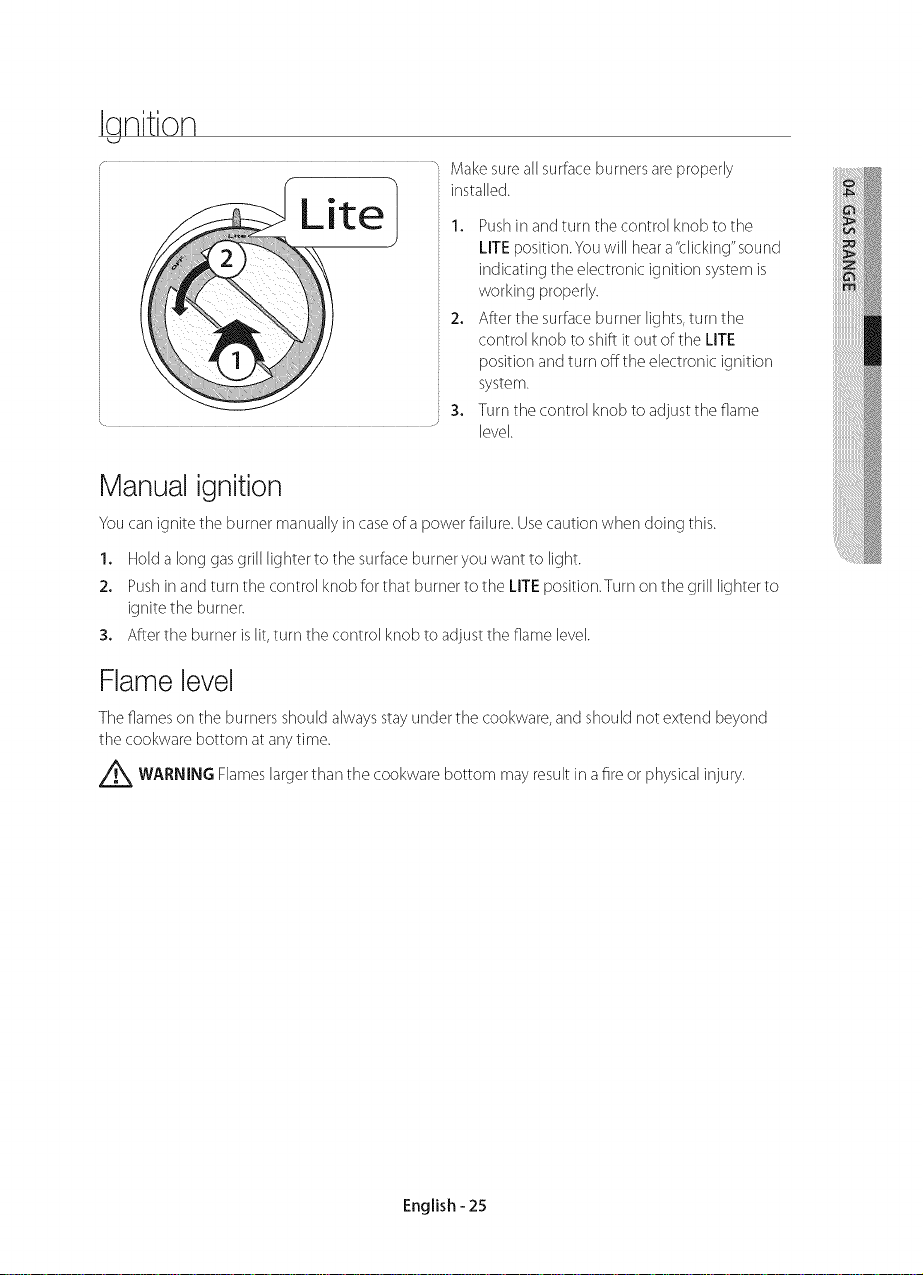
Make sure all surface burners are properly
installed.
Lite I
1, Push in and turn the control knob to the
LITE position. You will hear a"clicking" sound
indicating the electronic ignition system is
working properly.
2. After the surface burner lights, turn the
control knob to shift it out of the LITE
position and turn offthe electronic ignition
system.
3, Turn the control knob to adjust the flame
level.
Manual ignition
You carsignite the burner manually in case of a power faik_re. Use caution when doing this.
1. Hold a long gas grill lighter to the surface bumeryou want to light.
2. Push in and turn the control knob for that burner to the LITE position.Turn orsthe grill lighter to
ignite the burner.
3. After the burner is lit, turn the control knob to adjust the flame level.
Flame level
The flames ors the burners should always stay under the cookware, and should not extend beyond
the cookware bottom at any time.
A WARNIN6 Flames larger than the cookware bottom may result in afire or physical injury.
English -25
OVON
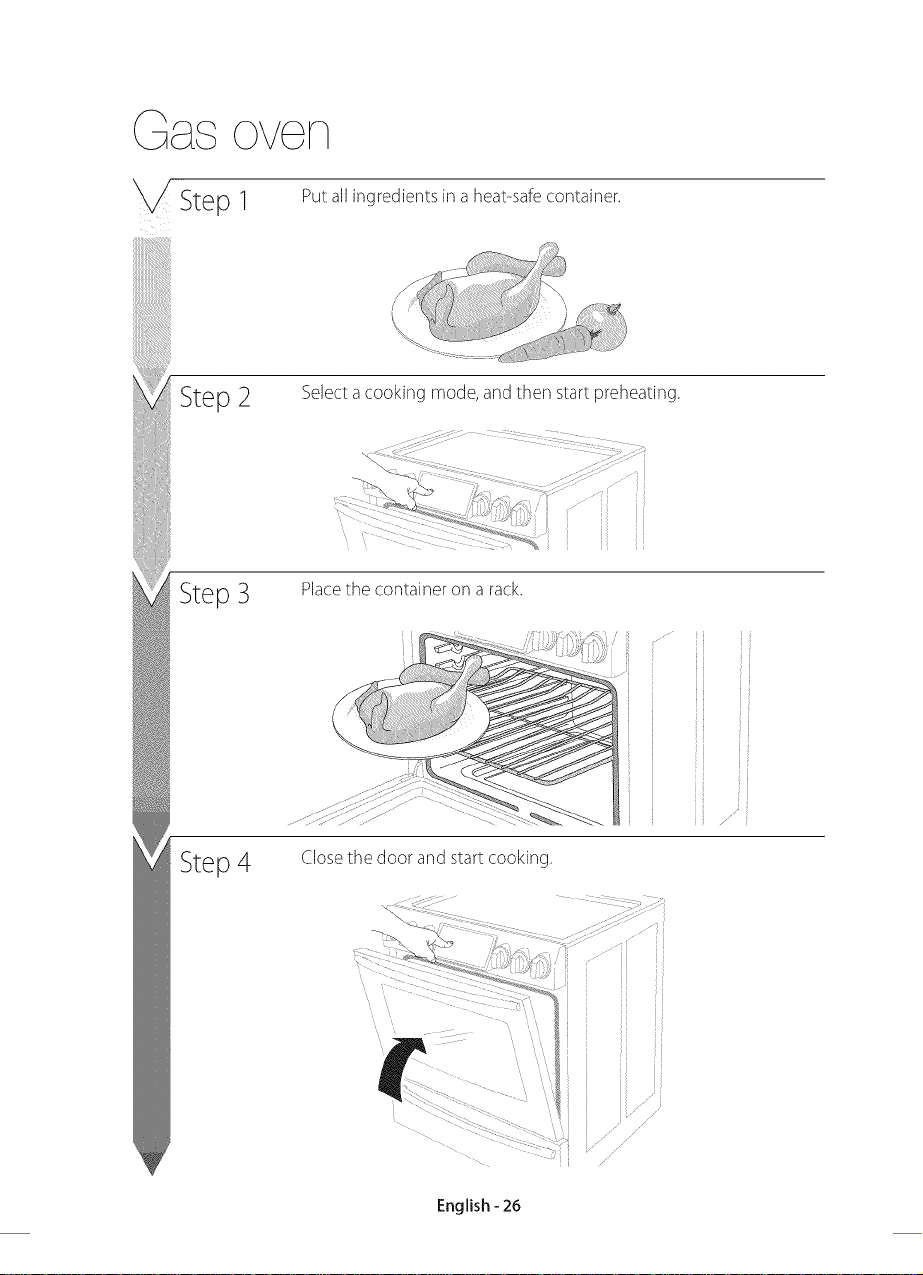
Step I
Put:allingredients in a heat-safe container.
Step 2 Select acooking mode, and then start preheating.
Step 3
Placethe container on arack.
Step 4
Close the door and start cooking.
English -26
Cooking
!!
mode
Q
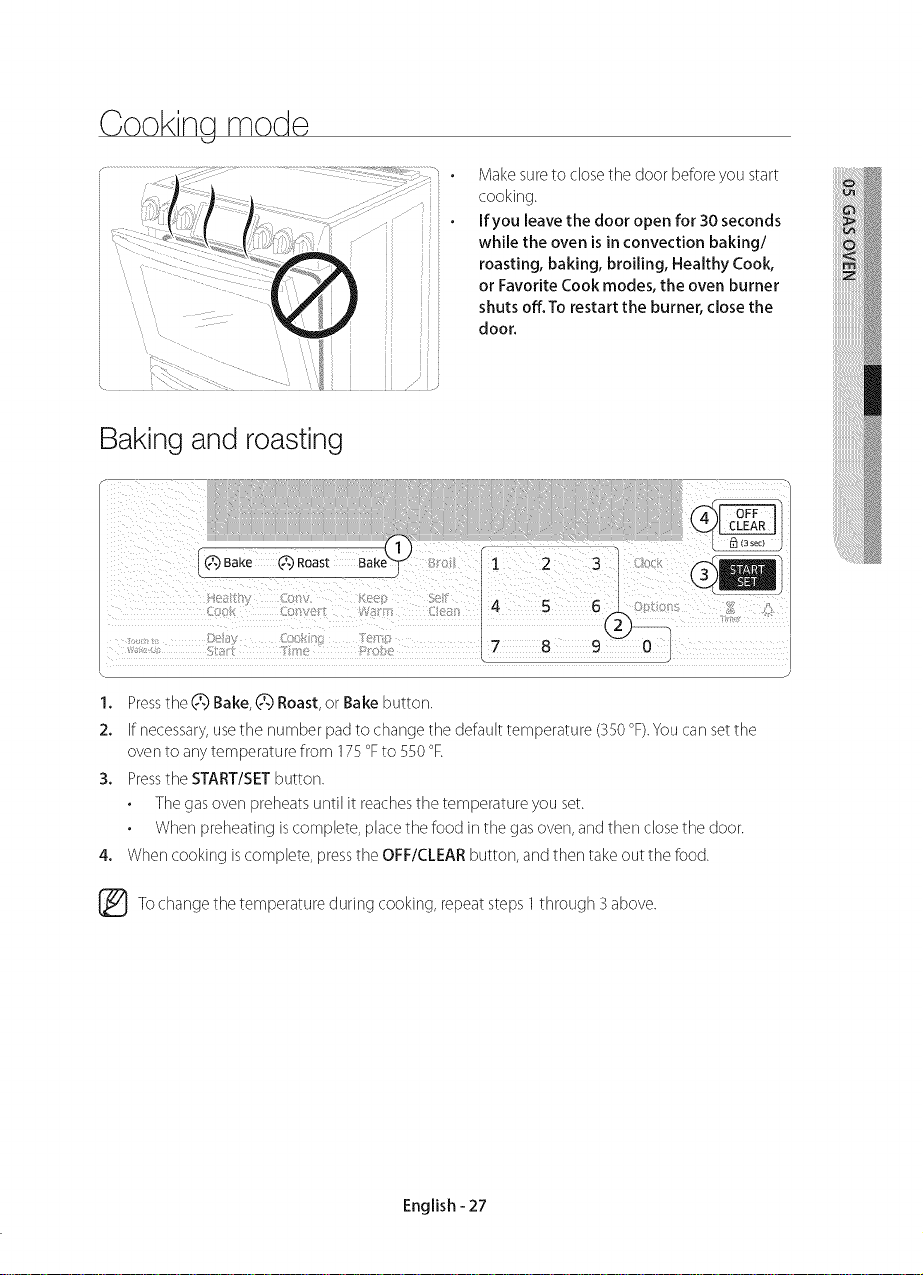
Make sure to close the door before /ot s_ar_
cooking.
If you leave the door open for 30 seconds
while the oven Jsin convection baking/
roasting, baking, broiling, Healthy Cook,
or Favorite Cook modes, the oven burner
shuts off.To restart the burner, close the
door.
Baking and roasting
1. Pressthe (;_ Bake,(_R)Roast,or Bakebutton.
2. If necessary,usethe number padto changethe default temperature (350°F).Youcar]setthe
over]to anytemperature from 175°Fto 550°R
3. Pressthe START/SETbutton.
Thegasover]preheatsuntil itreachesthe temperatureyou set.
Whenpreheatingiscomplete,placethefood inthe gasover],andthen closethe door.
4. Whencooking iscomplete,pressthe OFF/CLEARbutton, andthen takeout the food.
/
To change the temperature during cooking, repeat steps 1 through 3above.
English -27
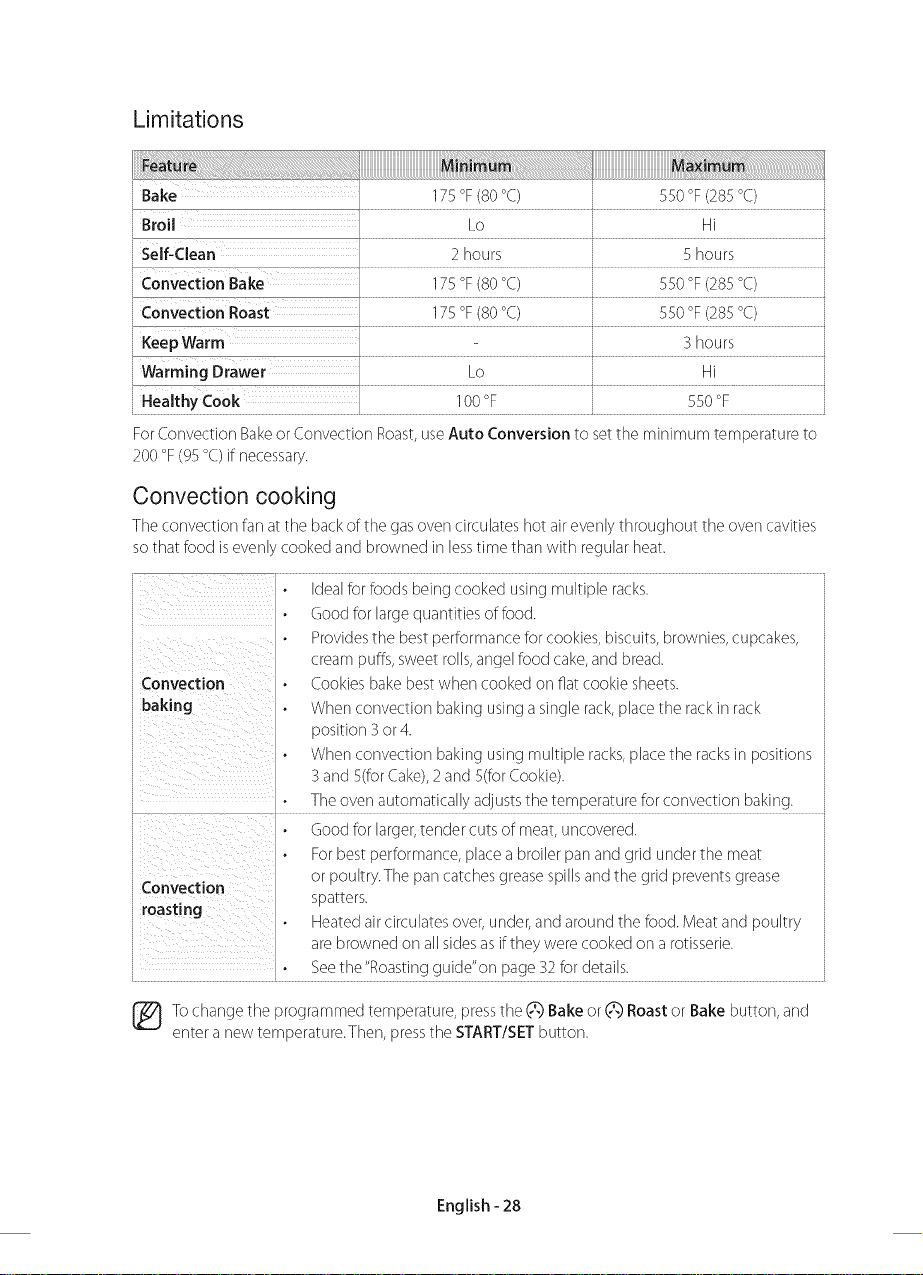
Limitations
iiiiiiiiiiiiiiiiiiiiiiiiiiiiiiiiiiiiiiiiiiiiiiiiiiiiiiii_!iiii_!iii_!;_i_i¸iii¸i!i¸__iiiii!i!i!i!i!i!i!i!i!i!i!i!i!i!i!i!i!i!i!i!i!i!i!i!i!i!i!i!i!i!i!i!i!i!i!i!i!i!i!i!_!i!_!!!!!!_
Bake 175 °F(80 °C) 550 °F(285 °C)
[ Broil Lo Hi
Self-Clean 2 hours 5 hours
[convection Bake 175 °F(80 °C) 550 °F(285 °C)
[ convection Roast 175 °F(80 °C) 550 °F (285 °C)
' Keep Warm 3 hours
Warming Drawer Lo Hi
Healthy Cook 100°F , 550°F
ForConvectionBakeorConvectionRoast,useAuto Conversion to set theminimum temperatureto
200°F(95°C)if necessary.
Convection cooking
The convection far] at the back of the gas over] circuBtes hot air evenly throughout the over] cavities
so that food is evenly cooked and browned in less time than with reguBr heat.
Jealfor foods being cooked using multiple racks.
3ood for large quantities of food.
Provides the best performance for cookies, biscuits, brownies, cupcakes,
:rear puffs, sweet rolls, angel food cake, and bread.
Convection
baking
Convection
roasting
:ookies bake best when cooked or] fiat cookie sheets.
Nhen convection baking using a singb rack, place the rack in rack
oosition 3 or 4.
Nhen convection baking using multiple racks, place the racks in positions
3and 5(for Cake),2 and 5(for Cookie).
The over] automatical y adjusts the temperature for convection baking.
3ood for larger, tender cuts of meat, uncovered.
For best performance, place a broiler par] and grid under the meat
or poultry.The par]catches grease spills and the grid prevents grease
sDaEers.
neared air circulates over, under, and around the food. Meat and poultry
are DrownecJ or] a sides asif they were cooked or] a rotisserie.
Seethe"Roasting guide"or] page 32 for details. •
Tochangethe programmed temperature,pressthe(2:)Bakeor (2:)Roastor Bakebutton, and
enter a newtemperature.Then,pressthe START/SETbutton.
English -28
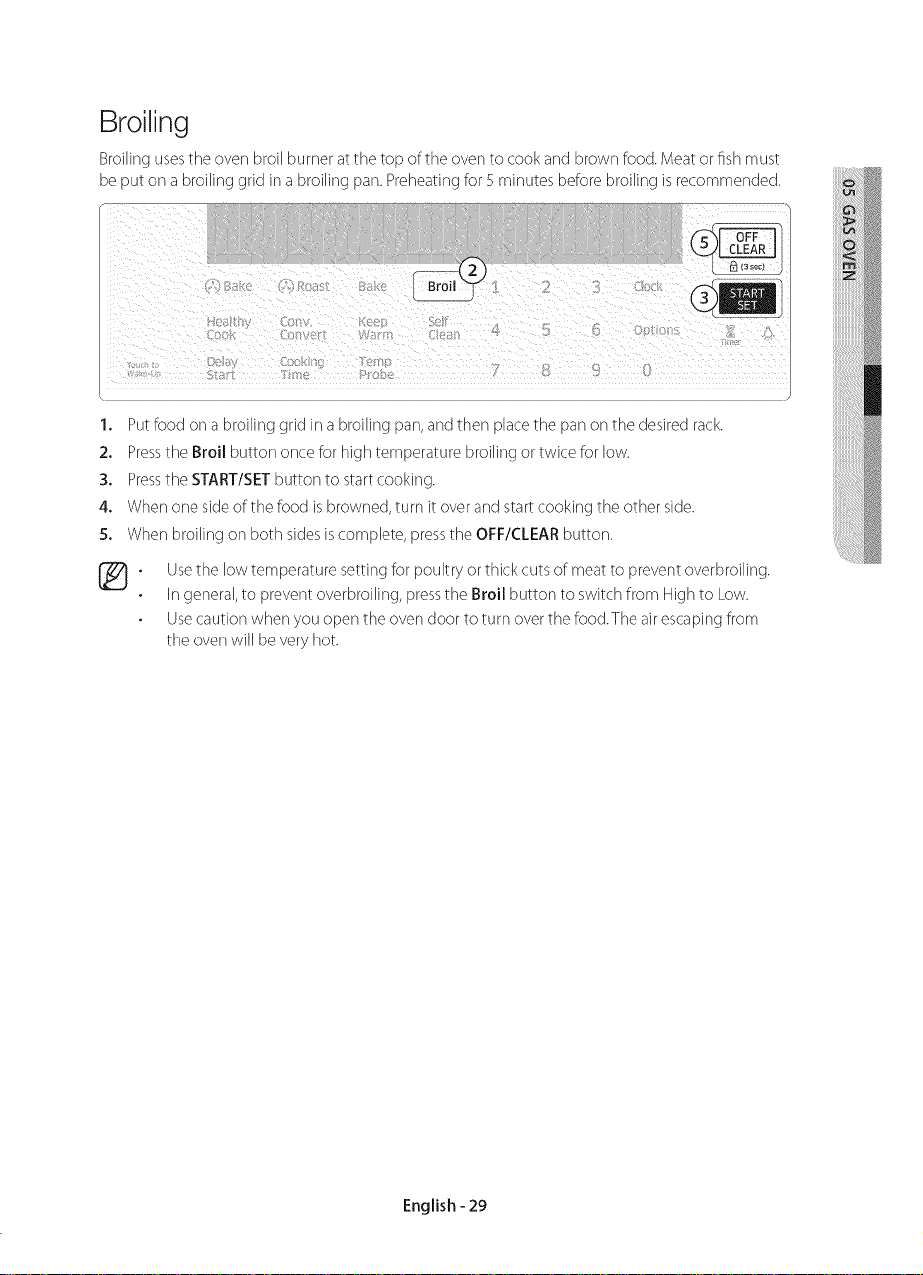
Broiling
Broilingusesthe over]broil burneratthe top ofthe over]to cook andbrown food.Meator fishmust
beput or] abroiling gridin a broiling par].Preheatingfor 5minutes beforebroiling isrecommended.
1,
Putfoodor]a broiling grid ina broiling par],andthen placethe par]or] thedesiredrack.
2.
Pressthe Broil button once forhigh temperature broilingor twice for low.
3.
Pressthe START/SETbutton to startcooking.
4.
Whenone sideof the food isbrowned,turn it over andstartcooking the other side.
5.
When broiling or]both sidesis complete, pressthe OFF/CLEARbutton.
®.
Usethe low temperaturesetting for poultryor thickcuts of meatto preventoverbroiling.
Ingeneral,to preventoverbroiling, pressthe Broil button to switchfrom Highto Low.
Usecautionwhenyou open the over]doorto turn overthe food.Theairescapingfrom
the ovenwill bevery hot.
English -29
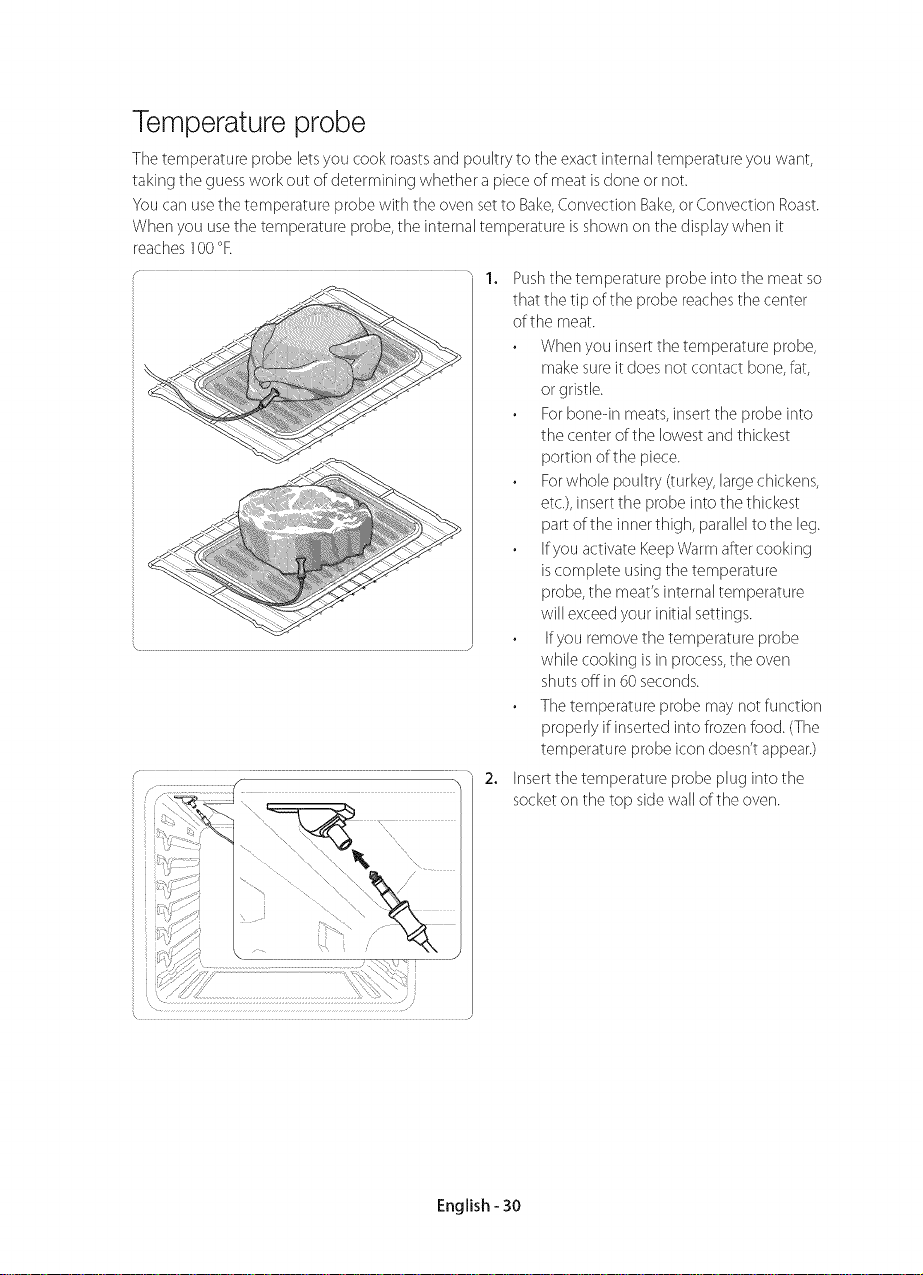
Temperature probe
Thetemperature probeletsyou cook roastsand poultry to the exactinternal temperatureyouwar]t,
takingthe guesswork out of determining whetherapieceof meatisdone or not.
Youcar]usethe temperature probewith theover] setto Bake,ConvectionBake,or Convection Roast.
Whenyou usethe temperature probe,the internaltemperatureisshown or] the displaywhen it
reaches1O0°F.
1. Pushthe temperature probeinto the meatso
._ .....
that the tip ofthe probe reachesthe center
ofthe meat.
Whenyou insertthe temperature probe,
makesureitdoes notcontact bone,fat,
or gristle.
Forbonedn meats,insertthe probeinto
the centerof the lowestandthickest
portion ofthe piece.
Forwhole poultry (turkey,largechickens,
etc.),insertthe probeinto the thickest
partofthe innerthigh, parallelto the leg.
Ifyou activate KeepWarmafter cooking
iscomplete usingthe temperature
probe,the meat'sinternaltemperature
will exceedyourinitial settings.
Ifyou removethe temperature probe
while cooking is in process,the over]
shutsoff in 60seconds.
Thetem perature probe may not funotion
properlyif insertedinto frozenfood.(The
temperature probeicon doesn'tappear.)
2. Insertthe temperature probe pJL_ginto the
socketor]the top sidewallof the over].
English - 30
 Loading...