

3 The tracks on the audio CD are displayed in the Playlist and the first track is automatically
played.
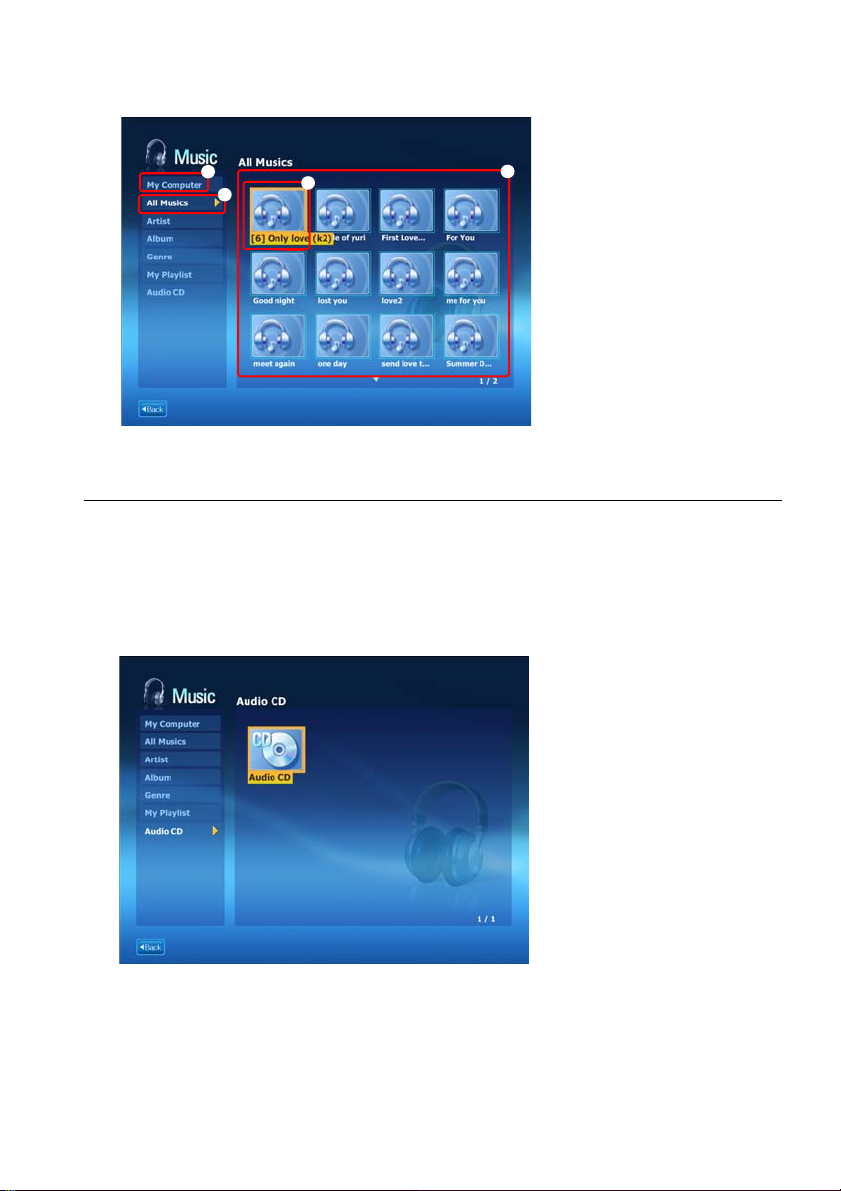
If an audio CD is already in the CD drive, double-click the album title in the Audio CD folder
of the Library and add the tracks to the Playlist. The tracks added to the Playlist are played.
Playing a Music File
If a music file is registered to the MUSIC Library, you can easily play the music file.
For the procedures to register tracks to the Library, refer to (
p.72).
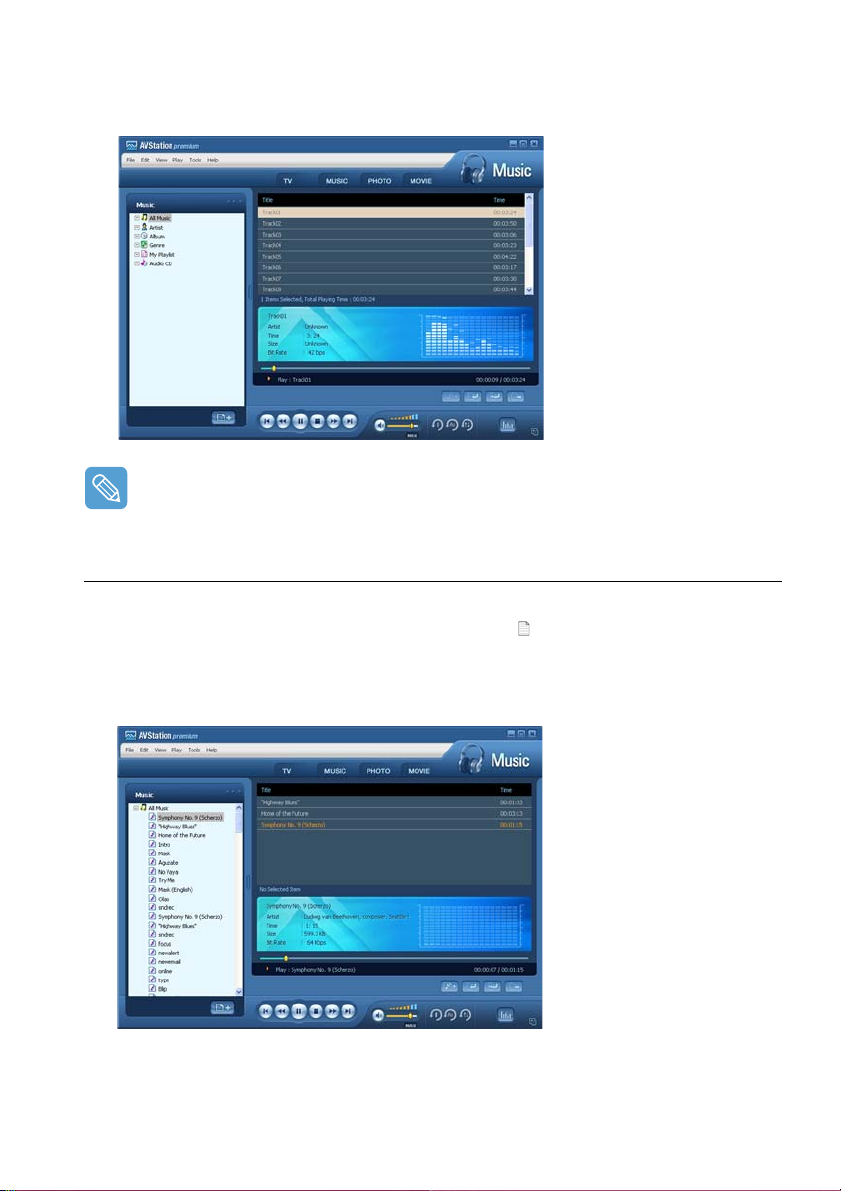
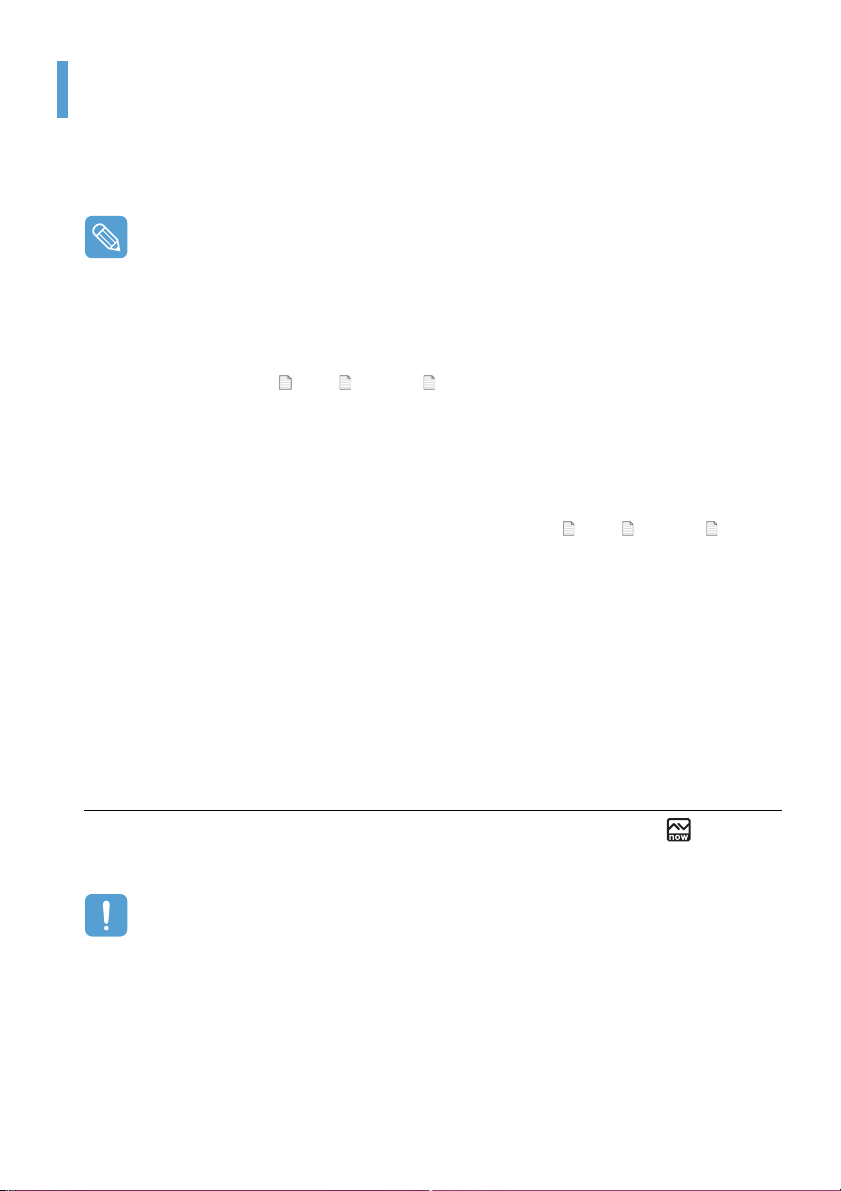
1 Move to MUSIC Station and double-click on All Music.
2 Double-click a music file. The file is added to the playlist and played.
Using AVStation premium 71

• Playing a Track not registered to the Library
Click File > Open, select a music file to be play ed and c lic k Open. The sel ect ed tra ck is regis tered to the Library and played.
• Creating My Playlist
My Playlist is a personal album used to collect, manage and play your favorite music files. For
the procedures to create My Playlist, refer to the descriptions of MUSIC Station in Help.
Adding Music Files to the Library
MUSIC Library is a library of music files used by MUSIC Station. The procedures to add music files
saved on the computer to the Library are described below.
You can add files, folders or search and add files. As an example, the procedures to add a folder are
described below.
1 Click on the Register a File ( ) button below the Library and click on Add by Folders.
2 Select a folder which includes music files and c lick the OK button . The music fil es in the f older
are added to the Library.
The tracks used in AVStation are automatically added to the Library.
Using AVStation premium 72
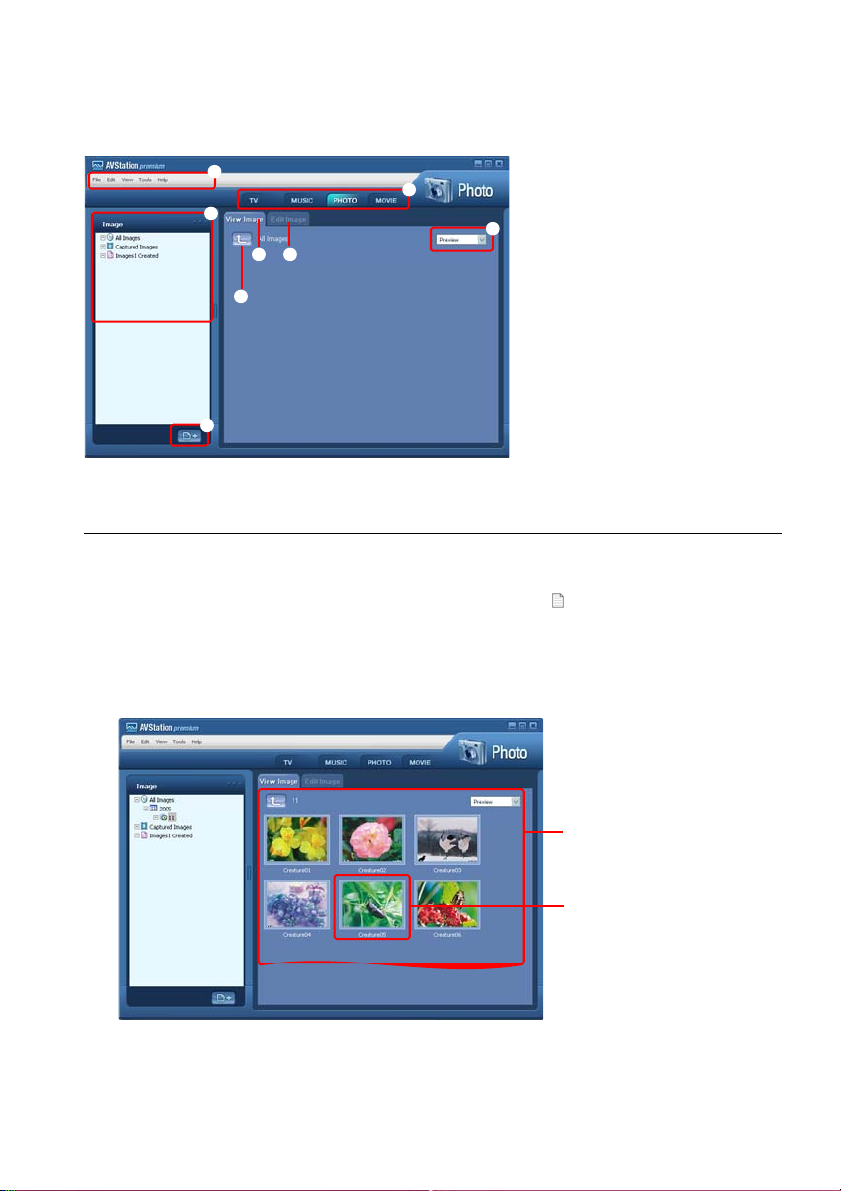
PHOTO Station
Launch AVStation premium and click PHOTO on the Station Bar.
z
c
b
n
m
v
x
z
PHOTO Menu Bar
,
x Station Bar
c PHOTO Library
v Register a File
b Image Viewer Tab
n Image Editor Tab
m Move to a Higher-Level Folder
, Preview/Zoom-in
Viewing an Image
The procedures to view images registered to the PHOTO Library indivedually or via a SlideShow are
described below.
For the procedures to register image files to the Library, refer to (
p.75).
1 Move to PHOTO Station and double-click on All Images.
2 Click on a folder which includes images, and the images in the folder are displayed in the Image
Viewer window.
Image Viewer Window
Image
Using AVStation premium 73

3 Double-click on an image. The selected image is zoomed in on.
• Viewing an Image not registered to the Library
Click File > Open, select an image file to view and click Open.
The selected image file is registered to the Library and displayed in the Image Viewer window.
• Viewing an Image in Full Screen or through a SlideShow.
Click the Full Screen () button or SlideShow ( ) button below the Image Viewer
window.
To return to the Image Viewer window, double-click on the screen.
• Watching a SlideShow while Listening to Music
To view a SlideShow while listening to music, play music from MUSIC Station and run SlideShow.
• Setting an Image as the Background.
Click the Set as Background ( ) button below the Image Viewer window. The selected
image is set as the Desktop background.
Editing an Image
You can change the shape of an image, edit an image or apply special effects to an image. The image editor functions are described below.
1 Select an image to edit in the Image Viewer window, and select the Image Editor tab. The
Image Editor screen appears.
Using AVStation premium 74
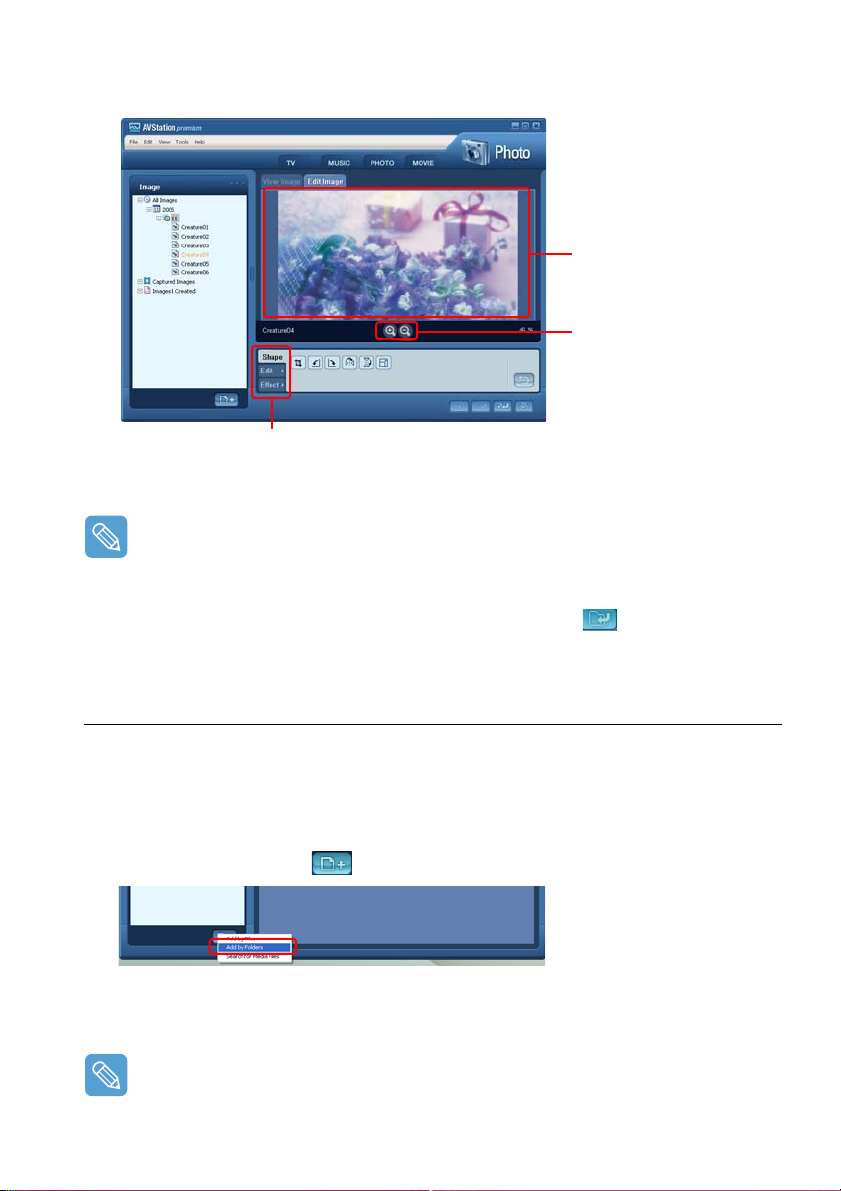
The Image Editor screen consists of an Image Workspace window and 3 Tool tabs.
Image Workspace
Zoom In / Zoom Out
Tool Tabs
2 Edit the image using the Shape, Edit and Effect tools.
Shape tool: Change the shape of an image through cut, resize.
Edit tool: Draw a line, add some clip art or enter letters.
Effect tool: Apply various effects to an image.
3 When finishing editing an image, click the Save Edited Image ( ) button below the Im-
age Editor window. The edited image is saved.
Adding Images to the Library
The PHOTO Library is a library storing image files to be used by PHOTO Station. The procedures to
add image files saved on the computer to the Library are described below.
You can add files, add folders or search and add files. As an example, the procedures to add folders
are described below.
1 Click the Register a File ( ) button below the Library and click on Add by Folders.
2 Select a folder with image files and click the OK button. The image files in the folder are added
to the Library.
The image files used in AVStation are automatically added to the Library.
Using AVStation premium 75

MOVIE Station
Launch AVStation premium and click on MOVIE on the Station Bar.
z
c
x
z
b
x
c
v
b
n
m
, Capture Button
MOVIE Menu Bar
Station Bar
MOVIE Library
Register a File
Video Play window
Play Control Buttons
Volume Control
n
mv
,
Playing a DVD
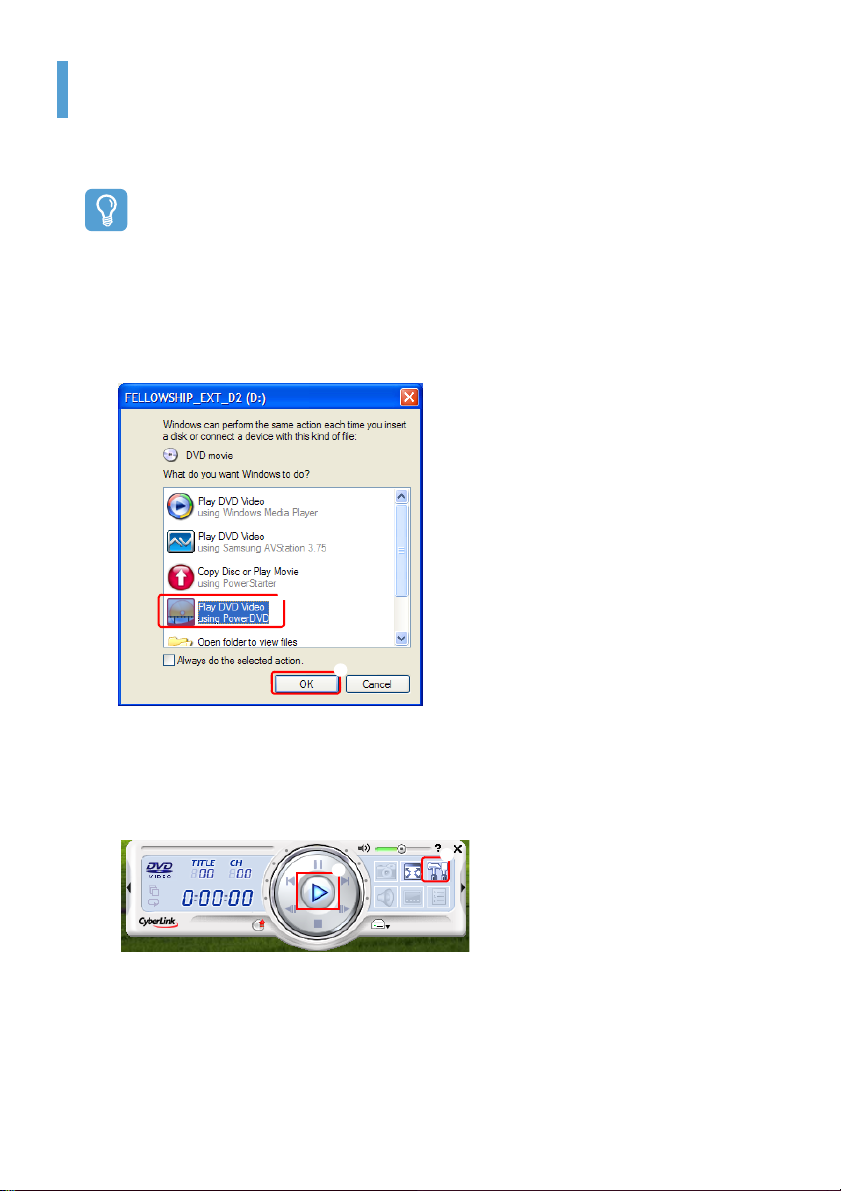
The procedures to play a DVD title are described below.
To play a DVD title, DVD playing software (e.g. CyberLin k PowerDVD) must be installed. Install
the DVD playing software fir s t .
1 Launch AVStation premium and insert a DVD titl e into the DVD drive.
2 In the 'What do you want Windows to do?' window, select Play DVD Video using Sam-
sung AVStation and click the OK button.
Using AVStation premium 76

3 The DVD title is played.
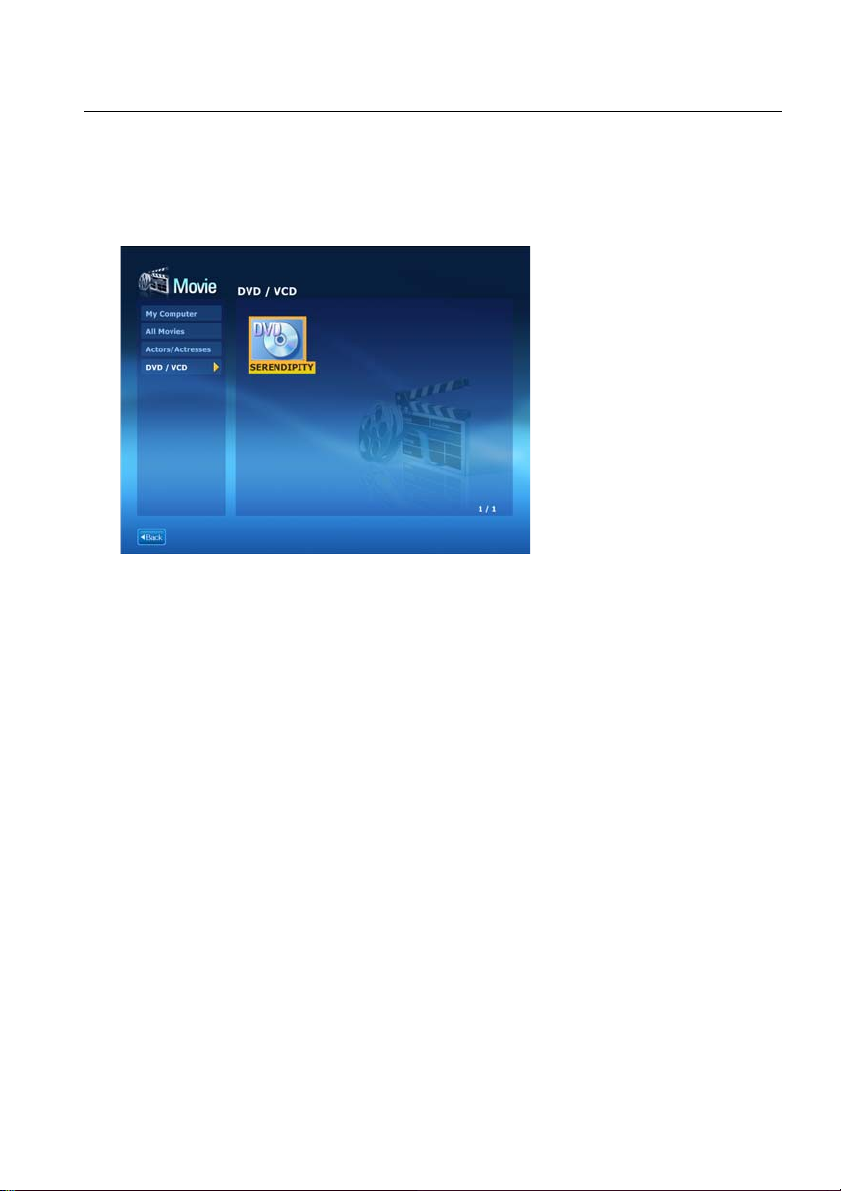
If a DVD title is already in the DVD drive, double-click the DVD title in the DVD / VCD folder
of the Library. The DVD title is played.
Playing a Movie(Video) File
The procedures to play a video file registered to the MOVIE Library are described below. For the
procedures to register files to the Library, refer to
p.78.
1 Move to MOVIE Station and double-click All Movies.
2 Double-click a video file. The file is played.
• Playing a Video File not Registered to the Library
Click File > Open, select a video file to be played and click Open. The selected file is registered
to the Library and played.
Using AVStation premium 77
• Playing a Video File in Full Screen
1) Double-click on the current playback screen.
2) The video is played in full screen. In full screen, move the mouse pointer to the bottom of
the screen to show the Play Control bar.
To play at the default screen size, double-click on the screen.
• Capturing the Video Screen
Click on Capture Current Screen ( ) below the Play window when the desired image appears on the screen and click the OK button.
Captured images are saved in the C:
x.x
\Data\Captured Images folder.
In addition, you can view captured images in the PHOTO Station > Captured Images folder.
\Program Files\Samsung\AVStation premium
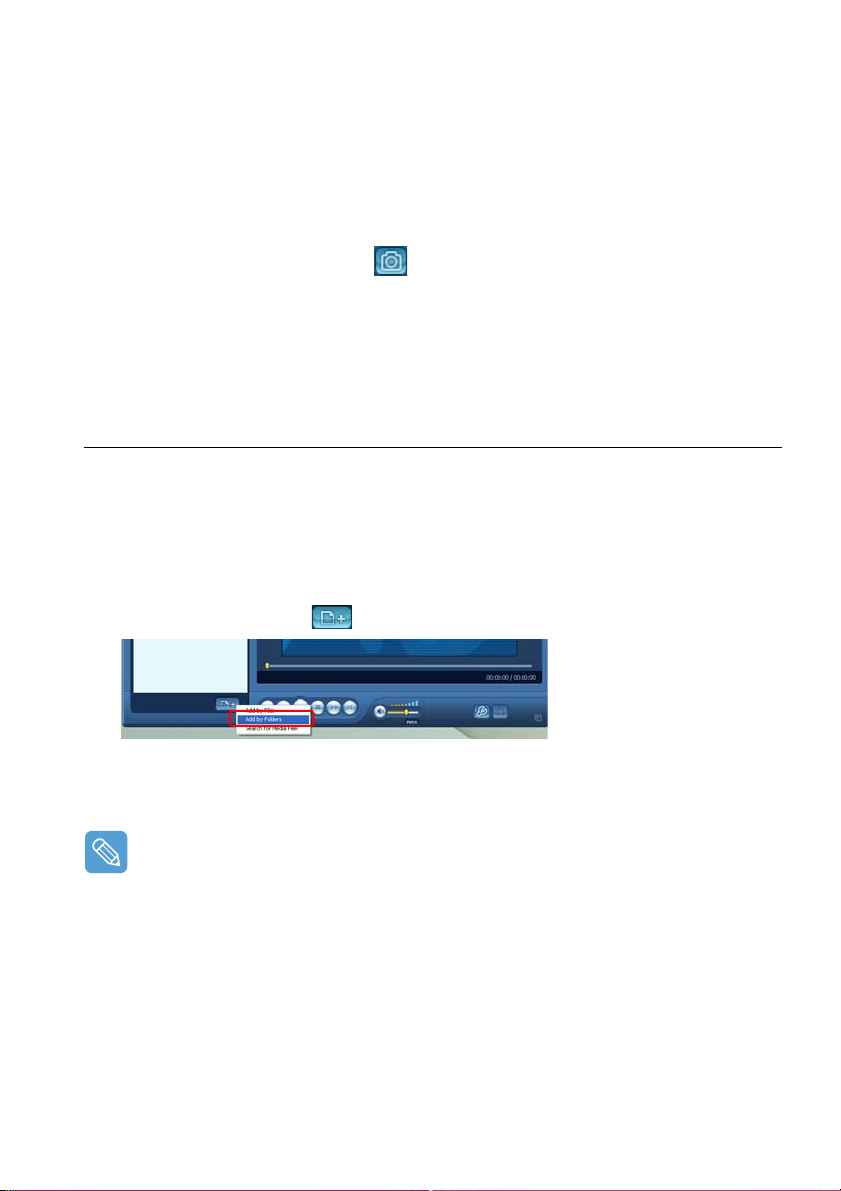
Adding Videos to the Library
The MOVIE Library is a library storing video fi les to be used by MOVIE Station. The procedures to
add video files saved on the computer to the Library are described below.
You can add files, add folders or search and add files. As an example, the procedures to add folders
are described below.
1 Click the Register a File ( ) button below the Library and click Add by Folders.
2 Select a folder which includes vid eo files and click the OK button. The video files in the folder
are added to the Library.
The video files used in AVStation are automatically added to the Library.
Using AVStation premium 78
Using AVStation NOW / AVStation Viewer
Using these programs, you can play music, photographs, video and movies in full screen. You can enjoy
multimedia files using AVStation NOW when the c omputer is off and using AVStation V iewer when the computer is on.
Before Starting!
• AVStation NOW and AVStation Viewer are optional and may not be provided depending on
the model.
• AVStation NOW Restrictions
You can only use AVStation NOW when the computer is turned off.
Using AVStation NOW, you can play files re gist ered to the AVStatio n premium Library, saved
to My Computer, and saved on the multi-card slot. ( For the procedures t o register files t o the
Library, refer to p.72,
If a login password for a Windows user account has been defined or if the folder is protected,
you cannot play the files in the folder in AVStation NOW.
• In AVStation NOW, the Auto Scaler function is not available.
• AVStation Viewer Restrictions
Using AVStation Viewer, you can only play files registered to the AVStation premium Library.
(For the procedures to register files to the Library, refer to
• Since the screen layout and usage of the two programs are si milar, the manual de scribes the
functions and screens on the basis of AVStation NOW.
• The screenshots figures may differ from actual ones depending on the progra m version.
• TV Station is only available for systems supporting the TV function.
p.75 and p.78.)
p.72, p.75 and p.78.)
Start / Exit AVStation NOW
Starting
To turn the computer on, slide the Power switch/AVS NOW switch to the left ( ) and hold it
for more than 0.1 seconds.
If the HOLD switch on the left side of the comput er is slid upwards all buttons of the computer
are locked and do not function. If AVStation NOW is not launched, check the position of the
HOLD switch.
Using AVStation NOW / AVStation Viewer 79

Exiting
Move the mouse pointer to the top screen and click the Exit () button.
Alternatively, slide and hold the Power switch/AVS NOW switch to the right for more than 0.1
seconds.
Start / Exit AVStation Viewer
Starting
Select Start > All Programs > Samsung > AVStation premium > AVStation Viewer from
Windows.
Exiting
Move the mouse pointer to the top of the screen and click the Exit () button.
Using AVStation NOW / AVStation Viewer 80

Screen Layout
MUSIC
You can play a music file or audio CD.
PHOTO
You can view a photograph or image file one by one or in a SlideShow.
MOVIE
You can play a video, DVD or VCD title.
Settings
You can configure the Music, Photo and Movie settings.
Move to the start screen while using the program
Click over the top left in the current screen. Then the icon appears. When dicking this icon,
you can move to the start screen.
MUSIC Station
The procedures to play a music file or an audio CD are described below.
Playing a Music File
The procedures to play a music file registered to the MUSIC Library are described below. (Fo r the
procedures to register files, refer to
1 Launch AVStation NOW and click on Music.
p.72.)
Using AVStation NOW / AVStation Viewer 81
2 Click on All Music and double-click a file in the right pane. The music file is played.
My Computer
z
This only appears in AVS-
z
x
v
c
tation NOW. You can
manually find and play
files on My Computer or a
removable disk.
x All Music
c Playlist Window
v Music File
Playing an Audio CD
1 Launch AVStation NOW and insert an audio CD into the CD drive.
2 In the AVStation NOW start screen, click on Music.
3 Double-click the Audio CD in the left pane and double-click on an album or music file in the
right pane. The selected music file is played.
Using AVStation NOW / AVStation Viewer 82
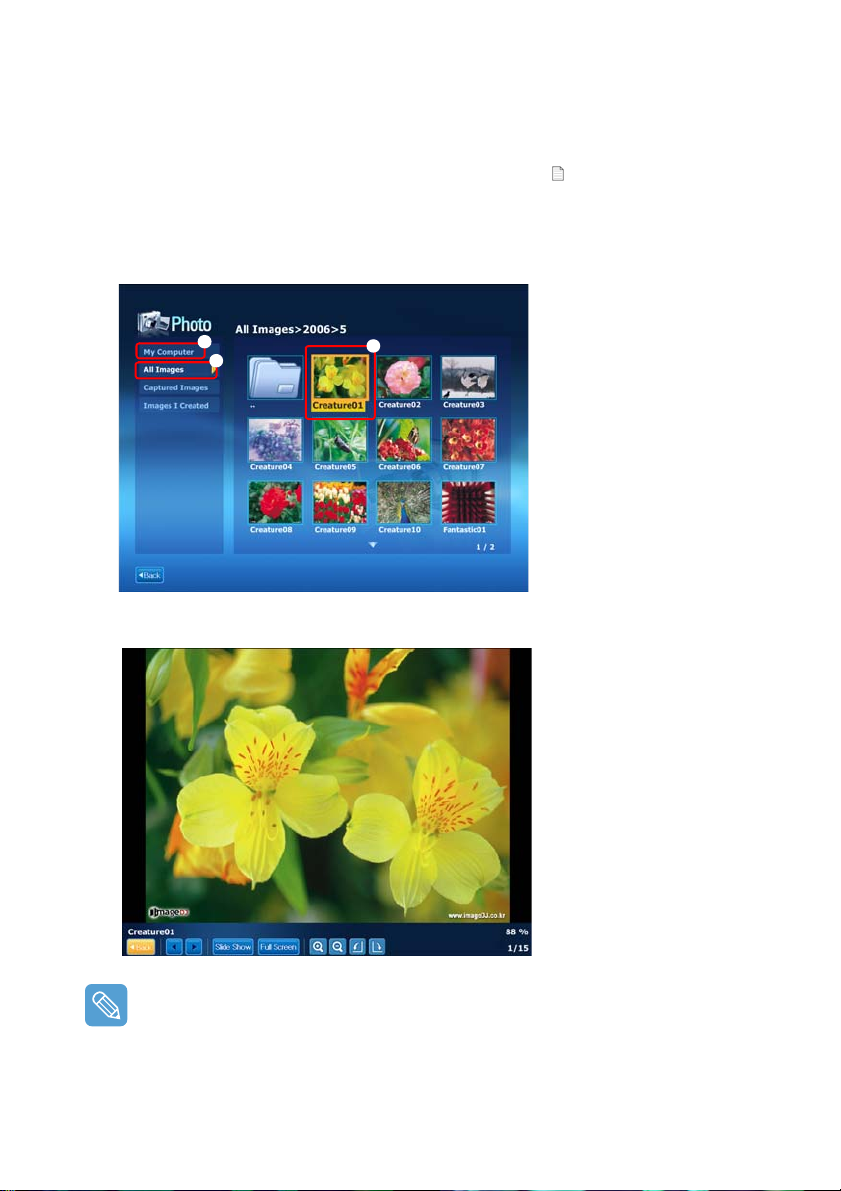
PHOTO Station
The procedures to view images registered to the PHOTO Library one by one and through a SlideShow are described below.
(For the procedures to register image files to the Library, refer to
1 Launch AVStation NOW and click on Photo.
2 Click on All Images and double-click on an image file in the righ t p a ne.
z
x
c
3 The selected image is zoomed in on.
p.75.)
z My Computer
This only appears in AVStation NOW. You can
manually find and play
files on My Computer or a
removable disk.
x All Images
c Image File
To view an image in Full Sreen or via a SlideShow.
Click on the SlideShow or Full Screen button below the zoomed in image.
To return to the previous status in the SlideShow or Full Screen, double-click on the screen. In
AVStation NOW, double-click and click on Back.
Using AVStation NOW / AVStation Viewer 83

MOVIE Station
The procedures to play a video (movie) file or DVD/VCD title are described below.
Playing a Movie File
The procedures to play a video file registered to the MOVIE Library are described below. (Refer to
p.78.)
1 Launch AVStation NOW and click the Movie.
2 Click on All Movies and double-click a movie file in the right pane. The movie file is played.
z
My Computer
z
x
c
This only appears in AVStation NOW. You can
manually find and play
files on My Computer or a
removable disk.
x
All movies
c
movie File
Displaying the Play Control window
When clicking on the screen once, the Play Control window appears at the bottom.
Using AVStation NOW / AVStation Viewer 84
Playing a DVD
1 Launch AVStation NOW and insert a DVD title into t he DVD drive.
2 In the AVStation NOW start screen, click on Movie.
3 Click on DVD/VCD and double-click on the DVD title. The DVD title is played.
Using AVStation NOW / AVStation Viewer 85
CyberLink PowerDVD
CyberLink PowerDVD is a DVD player program.
Before Starting!
CyberLink PowerDVD is supplied with the external USB ODD. So, it is optional and is not supplied
with some models.
In addition, to use this program, you have to install the program manually using the external
USB ODD.
1 Insert a DVD title into the DVD drive.
2 Select Play DVD Video Using PowerDVD and click OK.
z
x
After a moment, the DVD title is played.
3 If the DVD title is not played automatically, click Start > All Programs > CyberLink Pow-
erDVD > CyberLink PowerDVD.
4 Click the Play button in the CyberLink PowerDVD play control panel.
z
x
PLAY
z
x SETTINGS
CyberLink PowerDVD 86

For more detailed usage
For more detailed usage, click Start > All Programs > CyberLink PowerDVD > PowerDVD
Help.
DVD Region Code
A DVD title has a region code according to the internat ional specifications so that it can be played
only in that specific region. DVD titles with a region code will only play on DVD drives with the
same region code.
A DVD drive is sold with an empty region code and the region code is set when the user inserts
a DVD title into the drive for the first time . W hene v er a DV D tit le is ins erted with a region code
that is different from that of the DVD drive, the region code of the DVD drive is automatically
changed to the region code of the DVD title. However, changing the region code of a DV D drive
is limited to 5 changes. After that, the region code is permanently fixed to the last region code.
CyberLink PowerDVD 87
Chapter 6. Settings
Using System Setup 89
Starting System Setup 89
The System Setup Screen 90
Setting a Booting Password 92
Changing the Booting Priority 95
Using the Battery 96
Removing and Attaching a Battery 96
Charging the Battery 97
Monitoring the Battery Charge 97
Extending the Battery Usage Time 99
Using System Setup
The System Setup (BIOS) program enables the configuration of the computer hardware.
Before Starting!
• Use the BIOS setup to define a booting password, change the booting priority or add a new
device.
Since incorrect settings may cause yo ur syste m t o ma lf unc tio n o r c rash , take ca re whe n con figuring up the BIOS.
• The functions of the BIOS setup are subject to change for product function enhancement
purposes.
• Press the + or - Volume Con trol buttons at the top of the co mputer while ho lding down the
Menu button to adjust the LCD brightness.
Starting System Setup
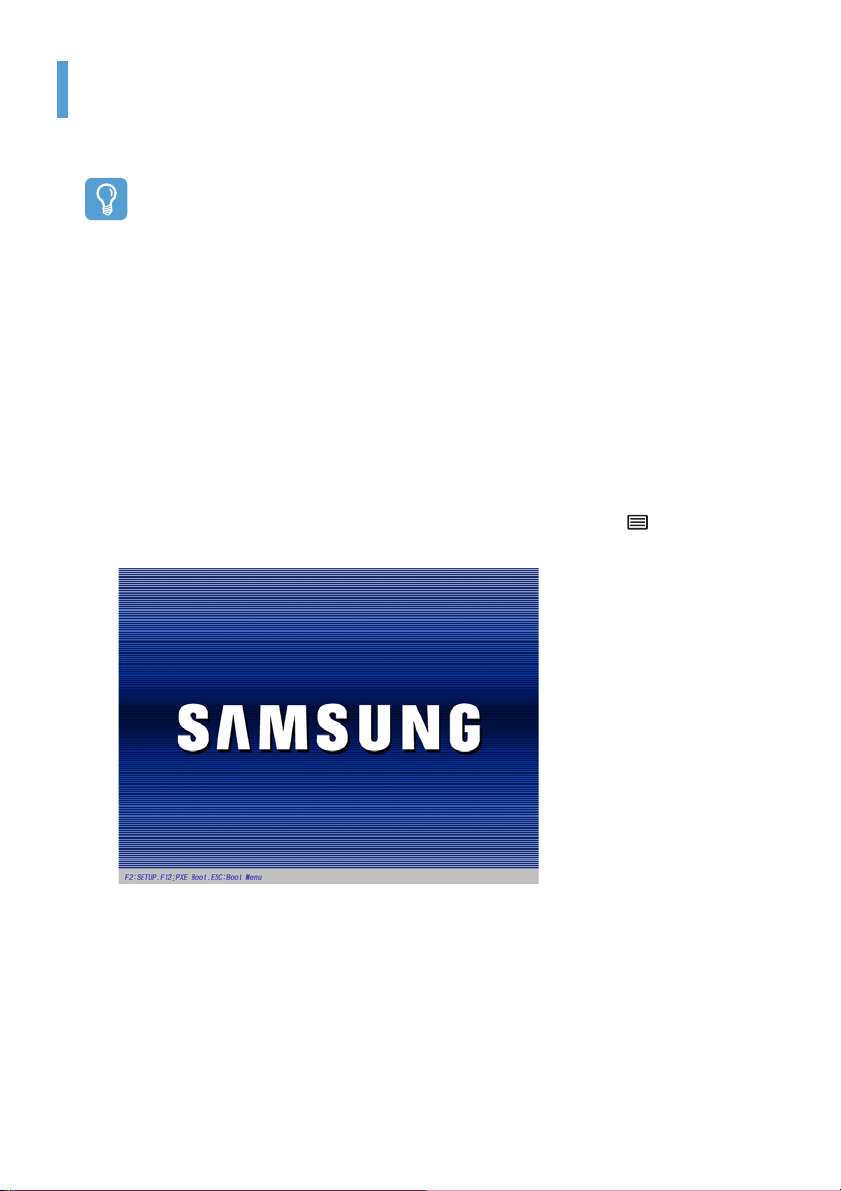
1 Slide the Power switch to the right to turn the computer on.
2 The booting screen (SAMSUNG logo) appears. Press the Menu button ( ) on the right side
of the computer. When an external keyboard is connected, press the F2 key.
Using System Setup 89

3 After a moment, the BIOS setup screen appears. The items of the BIOS setup may differ de-
pending on the product.
z
z Setup Menu
x
c
x Setup Items
c Help
Descriptions of
the selected item
are displayed.
The System Setup Screen
Menu Function
Main Changes the basic system.
Advanced Configures the advanced functions on your computer.
Security Enables the security functions, including passwords.
Boot Specifies the order of the boot devices and configures them.
Exit Exits System Setup
Using System Setup 90
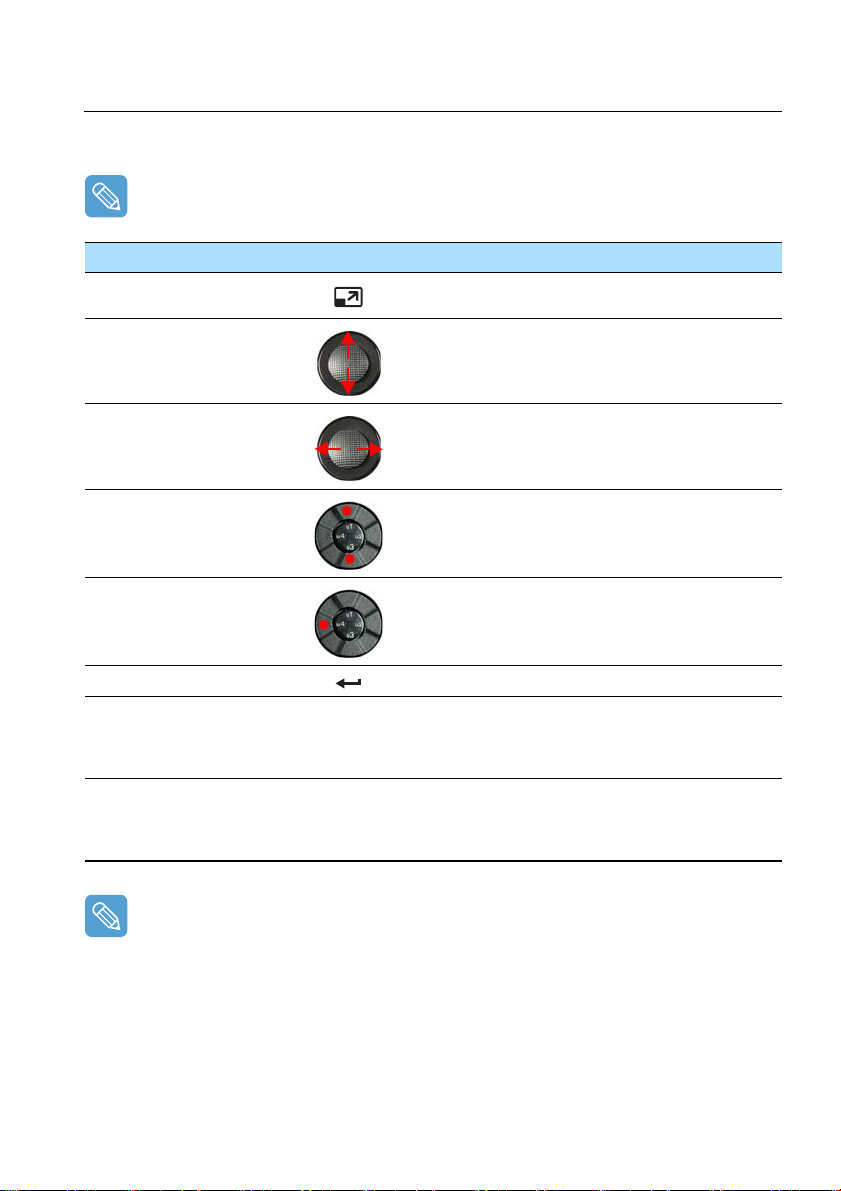
System Setup Buttons(Keys)
The following buttons (keys) are used in System Setup.
When an external keyboard is connected, you can use the keys enclosed by parenthesis. For example, you can press the F1 key instead of the Auto Scaler button.
Setup Key Button Function
Auto Scaler Button (F1)
When pressing the Auto Scaler button, Help appears.
When pressing the button again, Help disappears.
↑,↓
←, →
)
)
Up & Down Keys (
Left & Right Keys (
u3(F5) / u1(F6)
u4(Esc)
Enter Selects an item or opens a submenu.
(F9)
(F10)
Move the Joystick up or down to move the cursor up and
down.
Move the Joystick left or right to move the cursor left or
right.
Press the u3 (F5) / u1 (F6) u3 and u1 buttons to change
the value of an item.
Press the u4 button to return to a higher-level menu or to
move to the Exit menu.
To initialize the setup settings, press the F9 key on the
external keyboard.
If an external keyboard is not connected, select Exit >
Load Setup Default from the setup menu.
To save the changes press the F10 key on the external
keyboard.
If an external keyboard is not connected, select Exit >
Exit Saving Changes from the setup menu.
Exiting the System Setup
z Move to Exit menu > Exit Saving Changes using the Joystick and press Enter.
x Select Yes and press the Enter button. The System Setup is closed and Windows is started.
Using System Setup 91
 Loading...