


Samsung NP940X3G-K06US, NP940X3G-K05US User Manual

User Manual
www.samsung.com

•
This user manual describes procedures for using the
About this manual
•
This user manual is specially designed to detail the computer’s
functions and features.
•
The user manual supplied with the computer may vary
depending on the model.
•
Please read this manual before using the computer to ensure
safe and proper use.
•
Optional items, some devices and software referred to in the
user manual may not be provided or subject to upgrades.
Note that the computer environment referred in the user
manual may not be the same as your environment.
•
Descriptions are based on the computer’s default settings
and Windows 8.1 operating system. Available features and
additional services may vary by computer or operating
system.
touchpad, mouse, and touch screen. Instructions for using the
touch screen are for models with the touch screen feature.
•
Images and screenshots are those of the representative model
of the series and may differ in appearance from the actual
product.
•
Content may differ from the final product and is subject to
change without prior notice. For the latest version of the
manual, refer to the Samsung website,
www.samsung.com
.
2

About this manual
Instructional icons and
expressions
Warning: situations that could cause injury to yourself or
others
Caution: situations that could cause damage to the
computer or other equipment
Note: notes, usage tips, or additional information
The order of options or menus you must select to perform
a step. For example, select the
(represents select the
Select Click or touch. For example, when using a mouse or
touchpad, select
Settings
Settings
Settings
charm and then
means click
charm →
Settings
Power
Power
. When
Copyright
© 2013 Samsung Electronics Co., Ltd.
This manual is protected under international copyright laws.
No part of this manual may be reproduced, distributed, translated,
or transmitted in any form or by any means, electronic or
mechanical, including photocopying, recording, or storing in any
information storage and retrieval system, without the prior written
permission of Samsung Electronics.
Computer specifications or the contents of this manual may
be changed without prior notice due to an upgrade of the
computer’s functions.
).
using a touch screen, it means touch
Settings
.
3
About this manual
Trademarks
HDMI, the HDMI logo, and the
term High Definition Multimedia
•
Samsung and the Samsung logo are trademarks or registered
trademarks of Samsung Electronics.
•
Intel and Core are trademarks or registered trademarks of the
Intel Corporation.
•
Microsoft, MS-DOS, and Windows are trademarks or registered
trademarks of the Microsoft Corporation.
•
Bluetooth® is a registered trademark of Bluetooth SIG, Inc.
worldwide.
•
Wi-Fi®, Wi-Fi Protected Setup™, Wi-Fi Direct™, Wi-Fi
CERTIFIED
the Wi-Fi Alliance.
, and the Wi-Fi logo are registered trademarks of
™
Interface are trademarks or
registered trademarks of HDMI
Licensing LLC.
As an ENERGY STAR® Partner,
Samsung has determined that this
product meets the ENERGY STAR
guidelines for energy efficiency.
•
The ENERGY STAR Program has reduced greenhouse gas
emissions and saved energy through voluntary labeling.
•
Power management setting of this product have been
enabled by default, and have various timing settings from
1 minute to 5 hours.
•
The product can wake with a button press on the chassis from
sleep mode.
®
•
All other trademarks and copyrights are the property of their
respective owners.
4

About this manual
Caution for the data
Samsung Electronics shall not be liable for any data loss. Please
take care to avoid losing any important data and back up your
data to prevent any such data loss.
Operating system and software
support
If you change the product’s factory OS (Operating System) to
another OS or if you install software which is not supported by the
product’s original factory OS, you will not receive any technical
support, product exchange or refund, and a fee will be charged
when requesting a service.
Please use your computer with the original factory OS. If you
install an OS other than the factory OS, data may be deleted or the
Product capacity representation
Storage capacity representation
The capacity of the storage device (HDD, SSD) of the manufacturer
is calculated assuming that 1KB=1,000 Bytes.
However, the operating system (Windows) calculates the storage
device capacity assuming that 1KB=1,024 Bytes, and therefore the
capacity representation of the HDD in Windows is smaller than
the actual capacity due to the difference in capacity calculation.
For example, for a 80GB HDD, Windows represents the capacity
as 74.5GB, 80x1,000x1,000x1,000 byte/(1,024x1,024x1,024)byte =
74.505GB.
In addition, the capacity representation in Windows may be even
smaller because some programs such as Recovery may reside in a
hidden area of the HDD.
computer may not start.
Recommended screen resolutions
The recommended screen resolution for Windows is “FHD”
(1,920x1,080) and for Windows 8.1 is “QHD+” (3,200x1,800).
If you set the resolution higher than the recommended value, it
may result in problems with some applications, due to limitations
of the operating system.
Memory capacity representation
The memory capacity reported in Windows is less than the actual
capacity of memory. This is because BIOS or a video adapter uses
a portion of memory or claims it for further use. For example,
for 1GB(=1,024MB) memory installed, Windows may report the
capacity as 1,022MB or less.
5

Table of contents
Applications
66 Using applications
Troubleshooting
89 Recover/Backup
Getting started
7 Layout
13 Connecting the AC
adapter
16 Turning the computer on
and off
19 Unlocking the screen
Windows
20 About Windows
22 Desktop
23 Start screen
25 The Charms
28 Applications
Basics
35 Touch screen (optional)
44 Keyboard
47 Touchpad
50 LCD brightness
52 Volume
53 Setup utility (BIOS)
Network & Internet
59 Wired LAN
62 Wireless LAN
64 Mobile broadband
(Wireless WAN, optional)
67 Settings
68 Software Update
69 Support Center
70 S Player+
71 TPM security solution
(optional)
External devices
81 External CD/DVD drive
83 Memory card
86 External display
88 Slim security slot
96 Windows recovery
function
96 Q&A
Appendix
101 Product specifications
102 Ergonomic tips
106 Battery
108 Safety precautions
121 Important safety
information
124 Replacement parts and
accessories
126 Regulatory compliance
statements
144 WEEE symbol information
34 Microsoft account
34 Store
146 Samsung package
Take-Back program
147 TCO certified
(for corresponding
models only)
6
Getting started
Layout
•
Features or options may differ depending on the model.
•
The items marked as optional may not be provided or
may be provided in different locations.
•
Since some space on the SSD is reserved for system
recovery and operations, the displayed capacity of the
SSD may be less than the actual capacity.
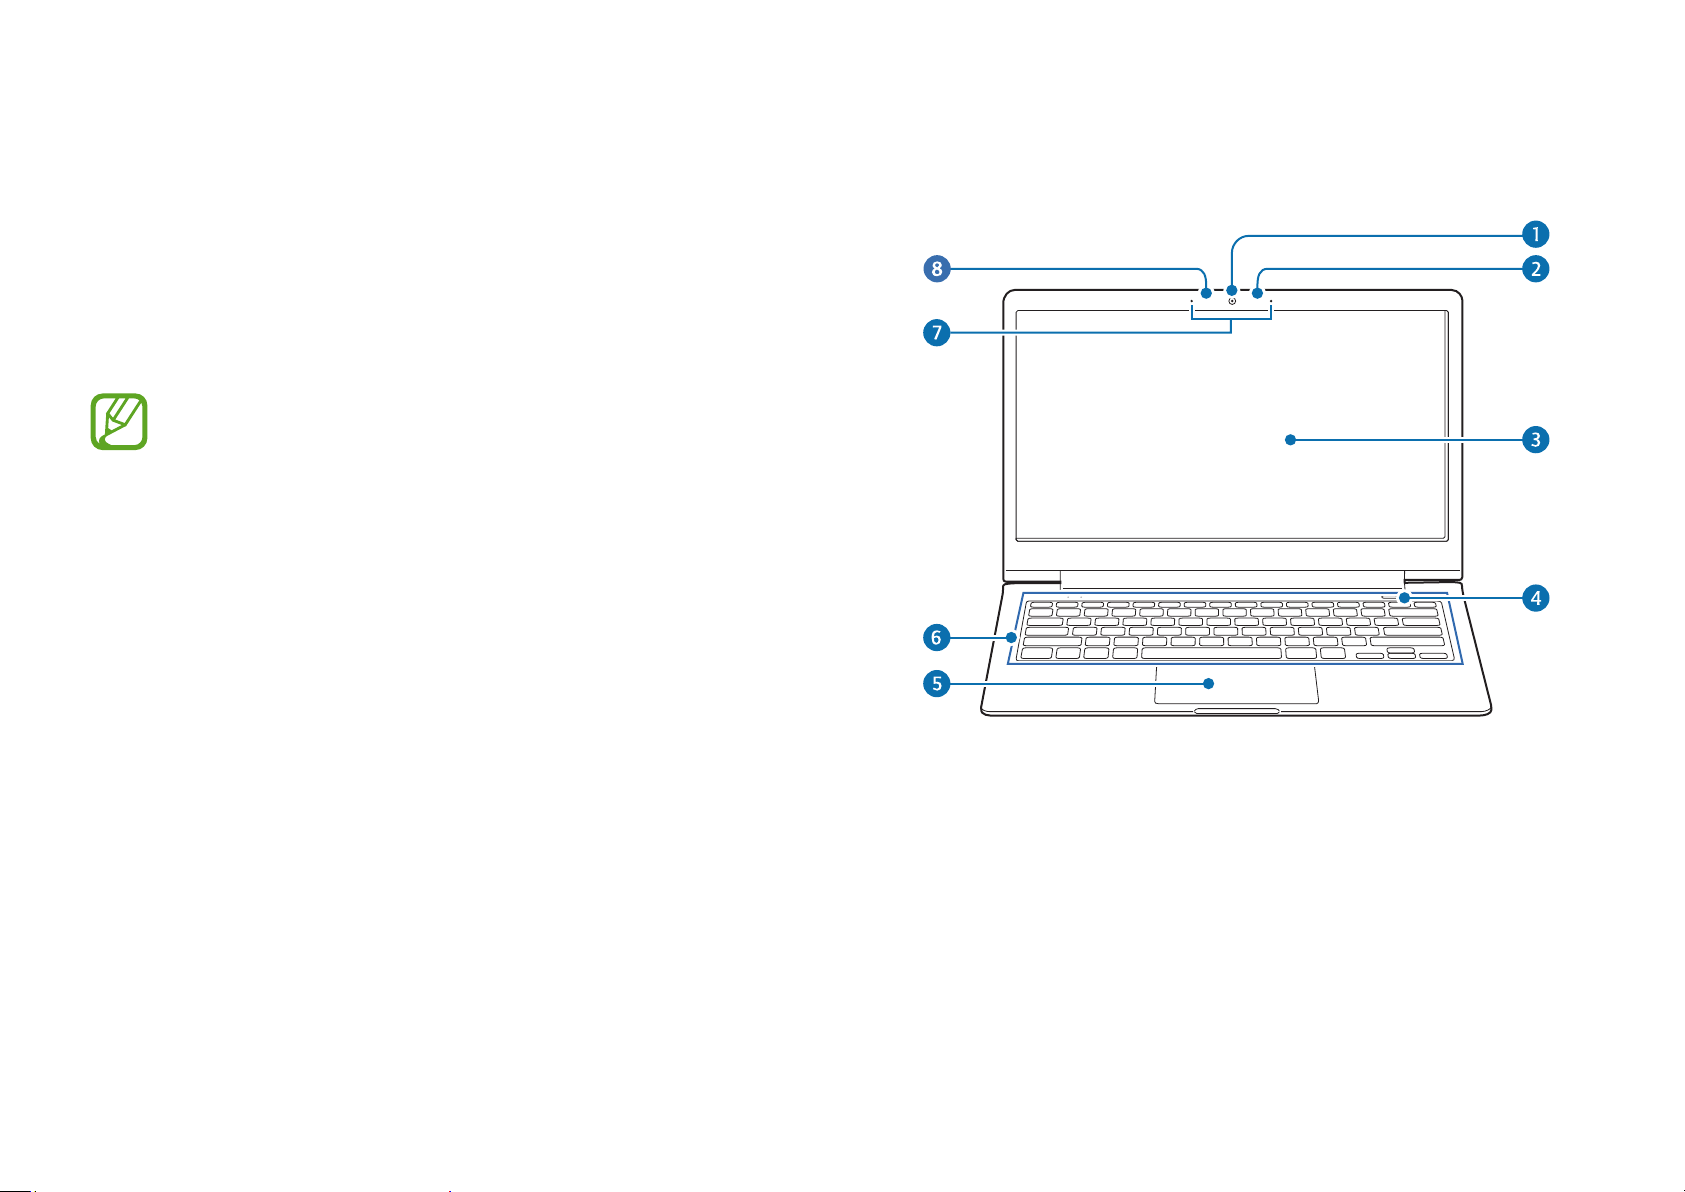
Front view
7
Getting started
Number/Name Description
•
Takes photos or videos.
•
Camera
Light sensor
Use the camera application on
Start
the
videos.
•
This sensor detects the ambient
illumination of the computer.
If the ambient illumination
becomes dark, the LCD becomes
dimmer and the keyboard
backlight is lit. On the contrary,
if the ambient illumination
becomes brighter, the LCD
becomes brighter and the
keyboard backlight is turned off.
•
Do not cover the sensor.
screen to take photos or
Number/Name Description
•
Displays the user interface.
LCD/Touch screen
(optional)
Power button
Touchpad
Keyboard
Microphone
Camera indicator
light
•
Recognizes touches on the screen.
(Only for models with the touch
screen.)
•
Press to turn the computer on.
•
Move the cursor and click options.
•
Works actions as those of a
mouse.
•
Press keys to enter data.
•
Use the built-in microphone.
•
Indicates the camera status.
8

Getting started
Operating indicator light
1
2
Number/Name Description
•
Turns on when the computer is
Power LED
Charge LED
turned on.
•
Shows the battery’s charging
status.
–
Red
charging is in progress
–
Green
complete or the battery is
not installed
–
Off
: When the AC adapter
is disconnected and the
computer is running on the
battery
or
Orange
: When charging is
: While
9
Getting started
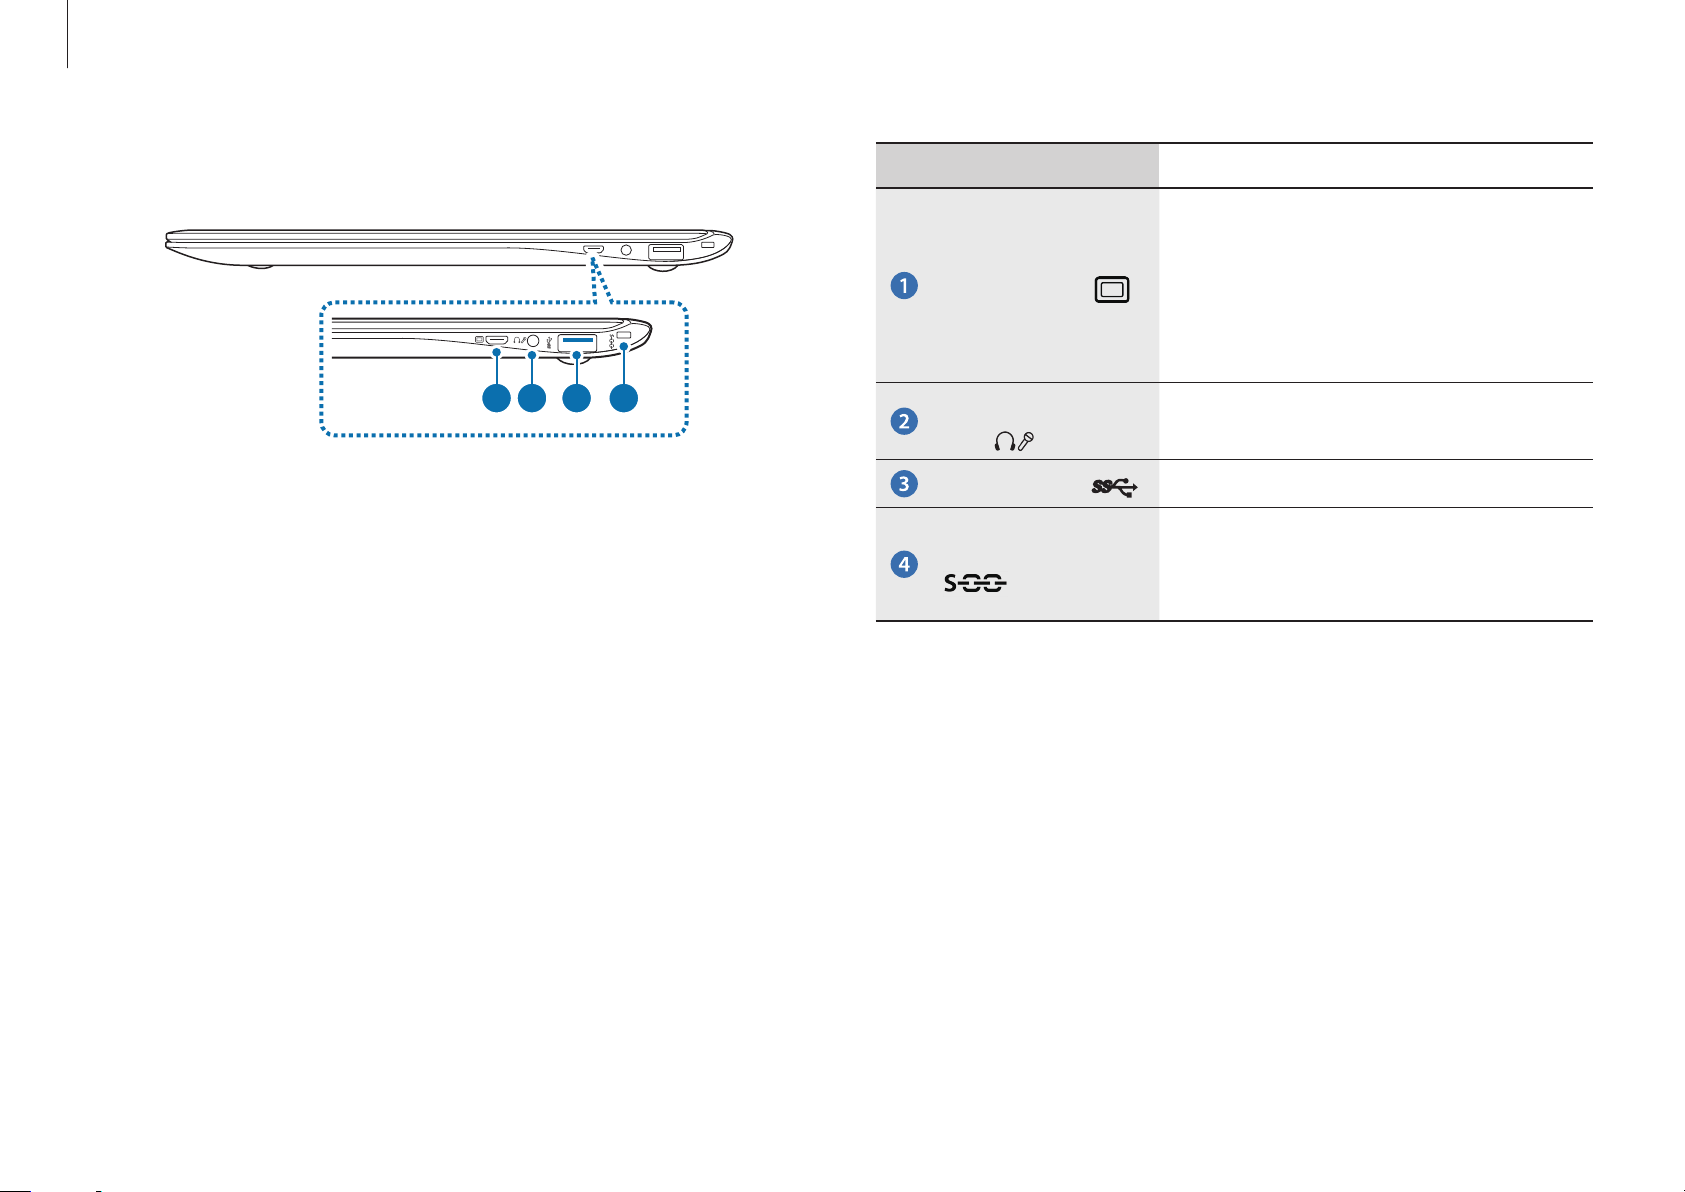
Right view
1 2 3
Number/Name Description
•
Connect external display devices
that support a 15-pin analog
Monitor port
4
Ear-set/Headset
jack
USB 3.0 port
Slim security slot
connector.
•
You can connect a VGA adapter
(optional).
•
Connect a headset or ear-set.
•
Connect a USB device.
•
Secure the computer by
connecting an optional lock and
cable to it.
10
Getting started
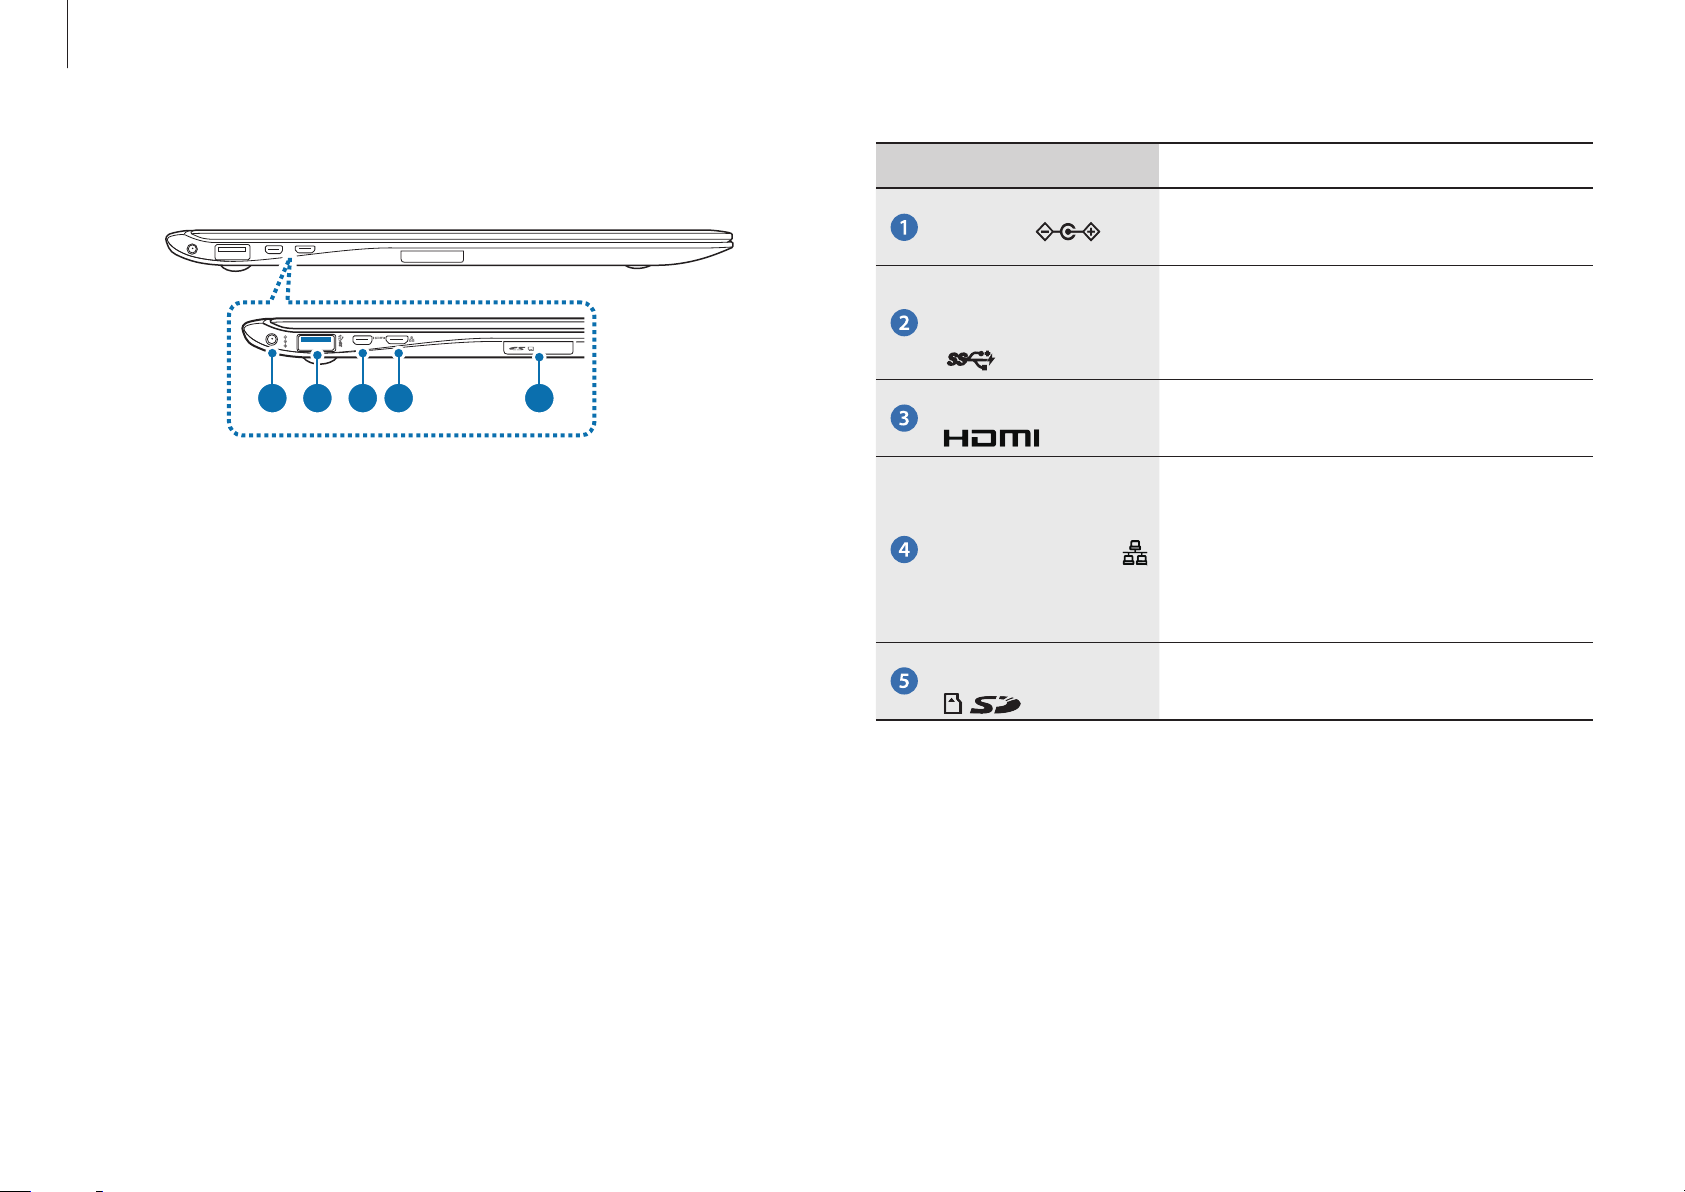
Left view
1 2 3 4 5
About the chargeable USB port
•
It may take longer to charge the battery when charging a USB
device.
•
The battery power level may be reduced when charging a USB
device while the computer is powered by the battery.
•
The charging status of the USB device is not displayed on the
Number/Name Description
•
Connect the AC adapter to supply
DC jack
Chargeable USB
3.0 port (optional)
Micro HDMI port
Wired LAN port
Memory card slot
the power to the computer.
•
Connect and charge a USB device.
•
Connect external display devices
that support HDMI.
•
Connect an Ethernet cable to
this port when connecting to the
Internet via a wired LAN. Use a
LAN adapter (optional) to connect
to a wired LAN.
•
Insert a memory card into the slot.
computer.
•
To turn on the chargeable function while the computer is
turned off:
Open the
Management
•
This feature may not be available with some USB devices.
Settings
→
USB Charging → ON.
application and select Power
11
Getting started
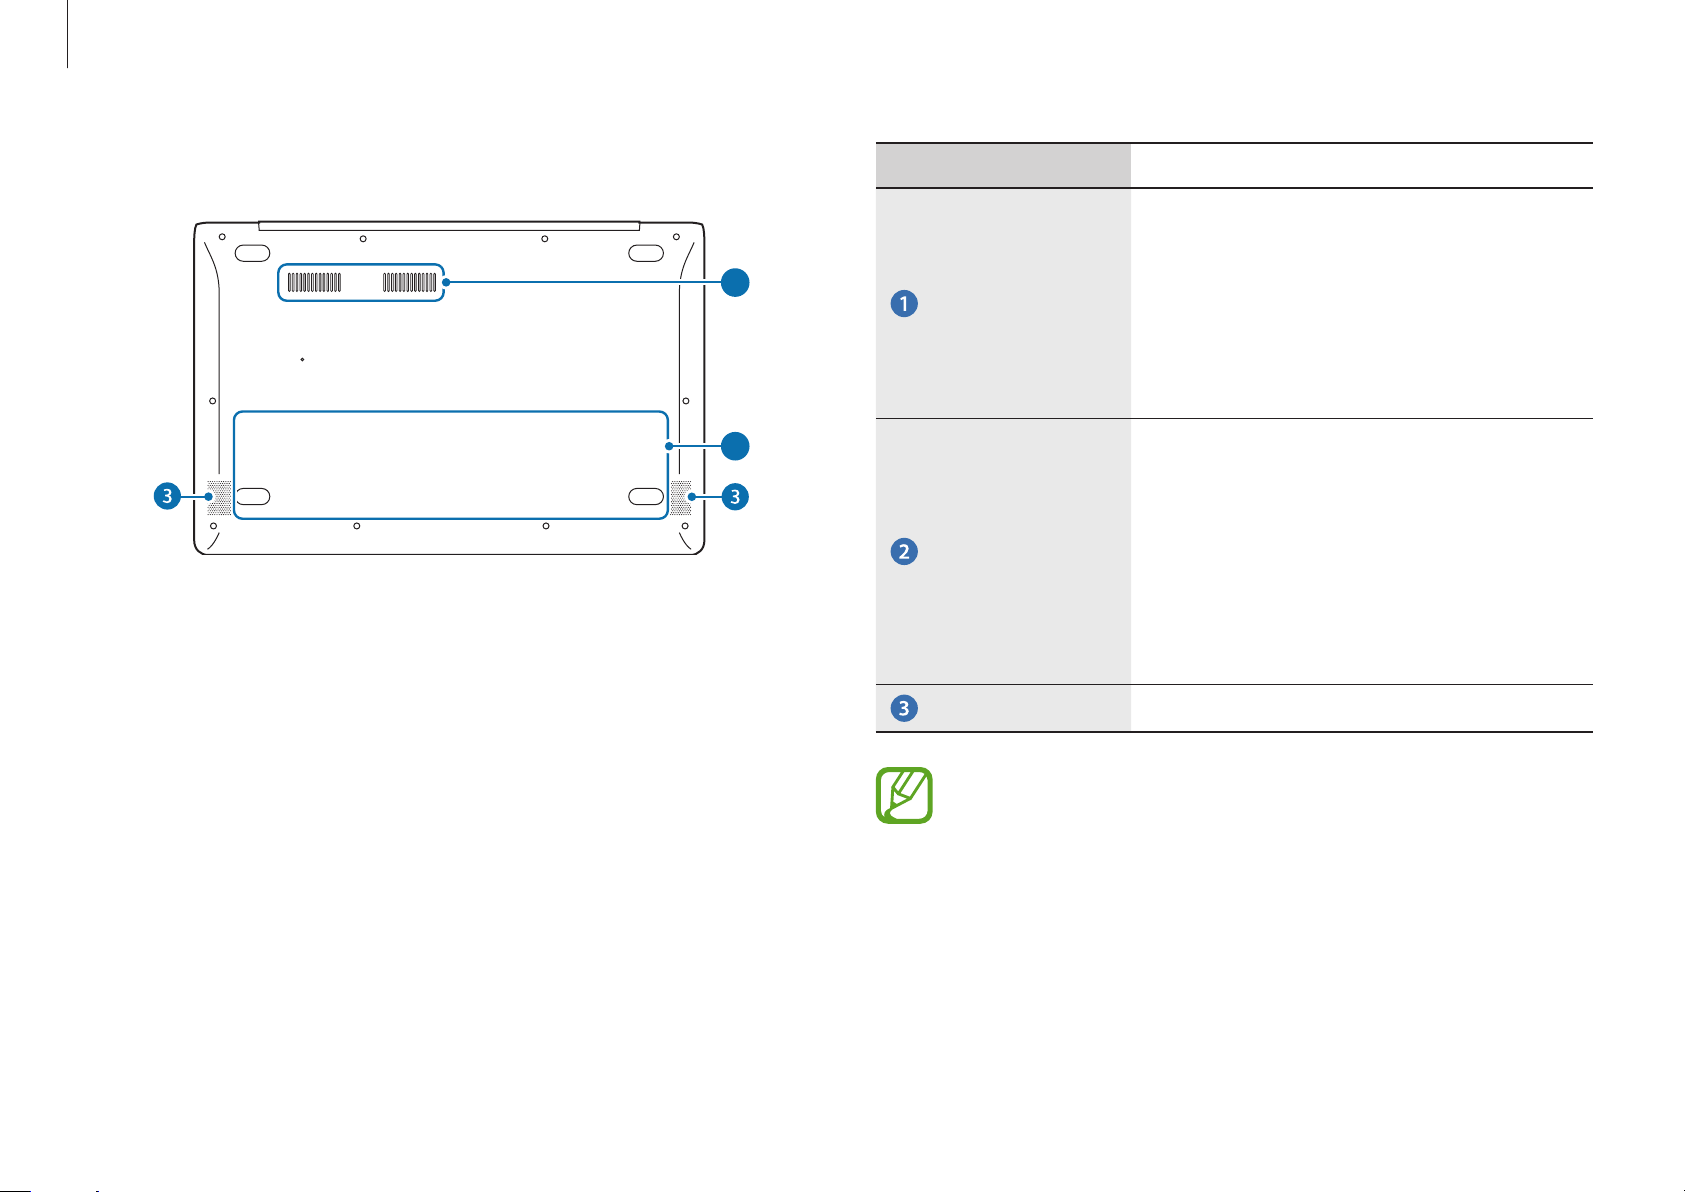
Bottom view
Number/Name Description
•
The internal heat of the computer is
emitted through these holes.
1
Fan vents
2
Internal battery
Speaker
•
If the vents are blocked the
computer may overheat. Avoid
blocking the vents as this may be
dangerous.
•
Provides power to the computer
when not connected to an AC
adapter.
•
To remove or replace the internal
battery, take it to the Samsung
Service Center. You will be charged
for this service.
•
Emits sound from the computer.
12
After replacing the bottom of the computer, the model
name, serial number and some logos on will no longer
be present. For more information, contact the Samsung
Service Center to request assistance.
Getting started
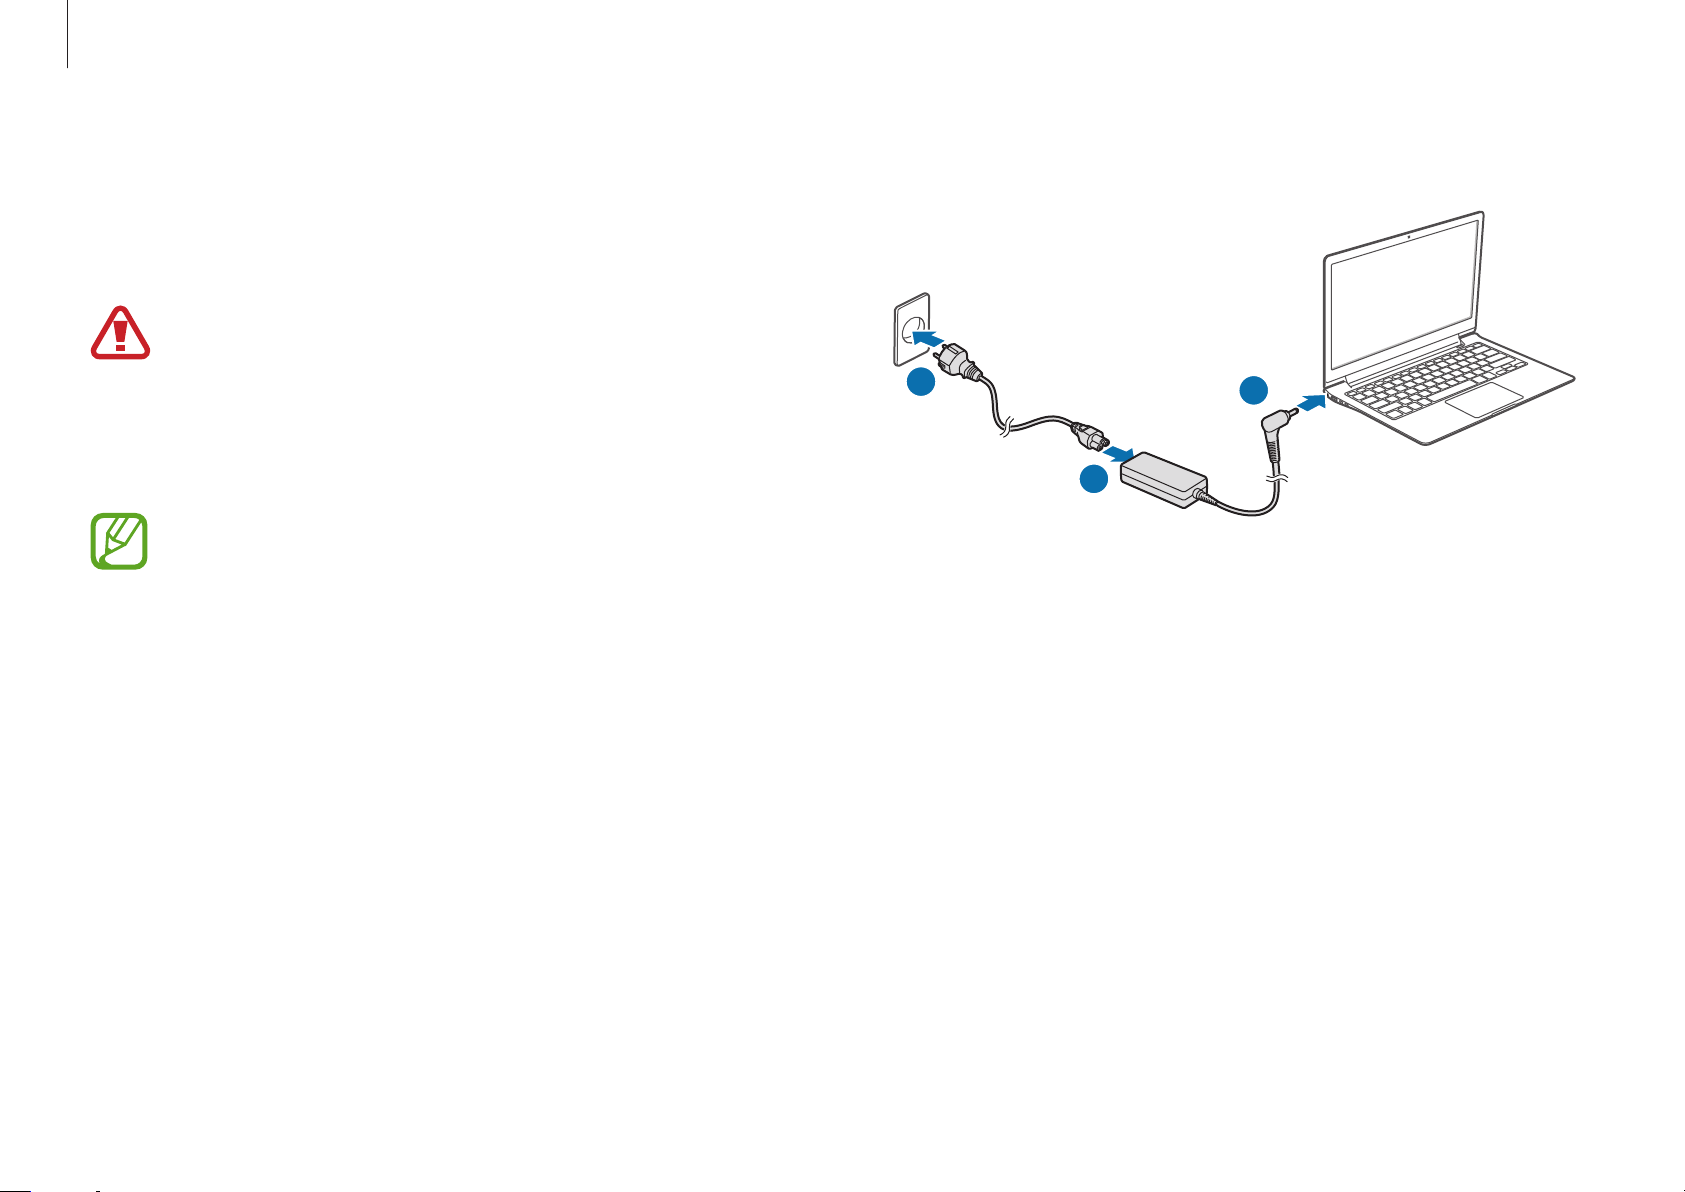
Connecting the AC adapter
Charge the battery before using it for the first time. Use the AC
adapter to charge the battery.
•
Use only Samsung-approved AC adapters, batteries,
and cables. Unapproved adapters or cables can cause
the battery to explode or damage the computer.
•
Incorrectly connecting the charger may cause serious
Plug the power cable into an electric socket.
3
3
2
damage to the computer.
To restore the battery power after cutting it, connect the
AC adapter.
Connect the power cable to the AC adapter.
1
Connect the AC adapter to the DC jack of the computer.
2
1
13

Getting started
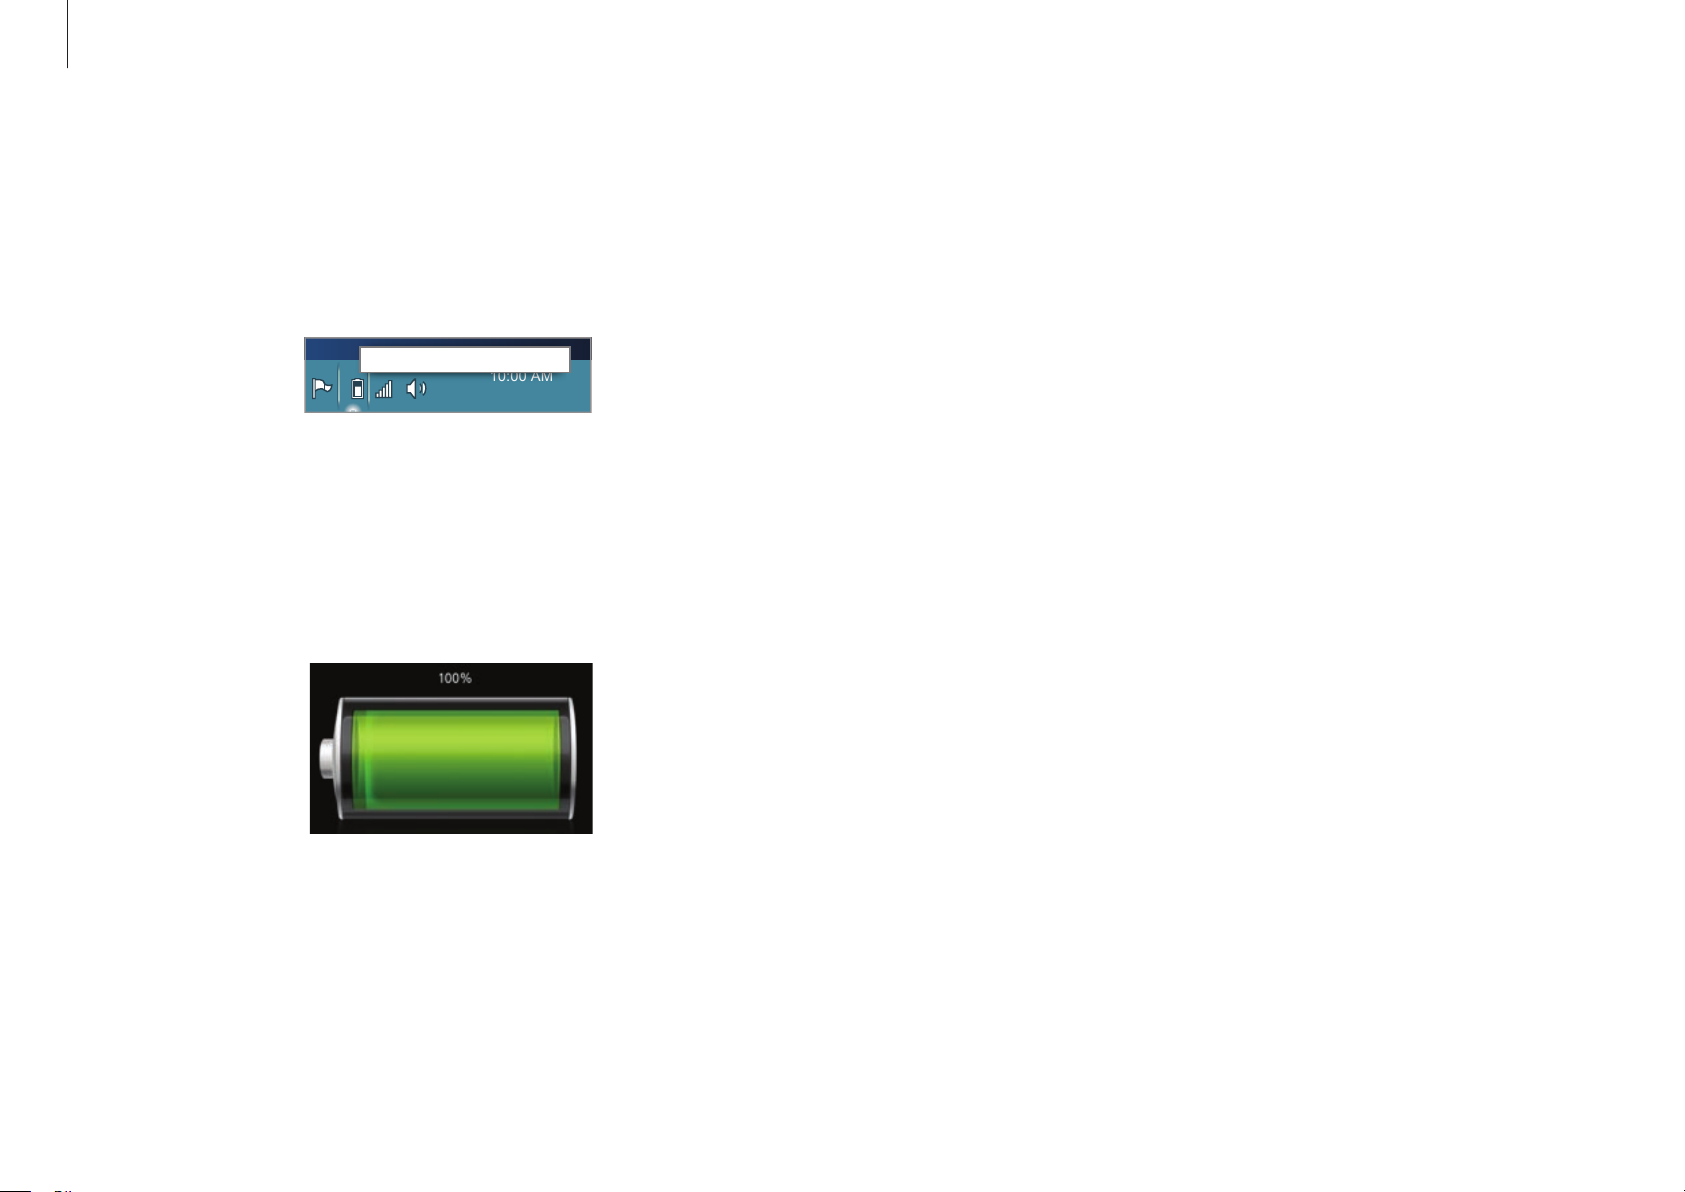
When charging is complete, the charge status turns green.
Charge LED
Status
•
Red or Orange: Charging
•
Green: Fully charged
After charging, disconnect the AC adapter from the computer.
4
Unplug it from the electric socket.
5
•
This computer is equipped with an internal battery.
The battery is not user-serviceable or user-replaceable.
•
To have battery removed or replaced safely, take the
device to a Samsung Service Center. You will be charged
for this service.
•
You can use the computer while it is charging, but
the battery charging time may increase. If the battery
temperature rises too much, the charging may stop as a
safety measure.
•
No color: AC adapter not connected
14
Getting started
Battery status
Move the cursor over the battery icon on the taskbar to view the
current battery charge when disconnecting the AC adapter from
the computer.
5 hr 21 min (64%) remaining
Viewing the current battery charge when the
computer is turned off
Connect or disconnect the AC adapter from the computer to view
the current battery charge when the computer is turned off.
ENG
10:00 AM
1/1/2014
10:00
2013/7/1
Battery usage time
Batteries are replacement items and over time the battery’s
capacity to hold a charge and its power level is reduced. If a
battery can only hold its charge for half of the time that it could
when new, it is recommended to purchase a new, replacement
battery.
When not using the battery for extended periods, charge the
battery to 30-40% of full charge before storing it. This extends
battery life.
15
Getting started
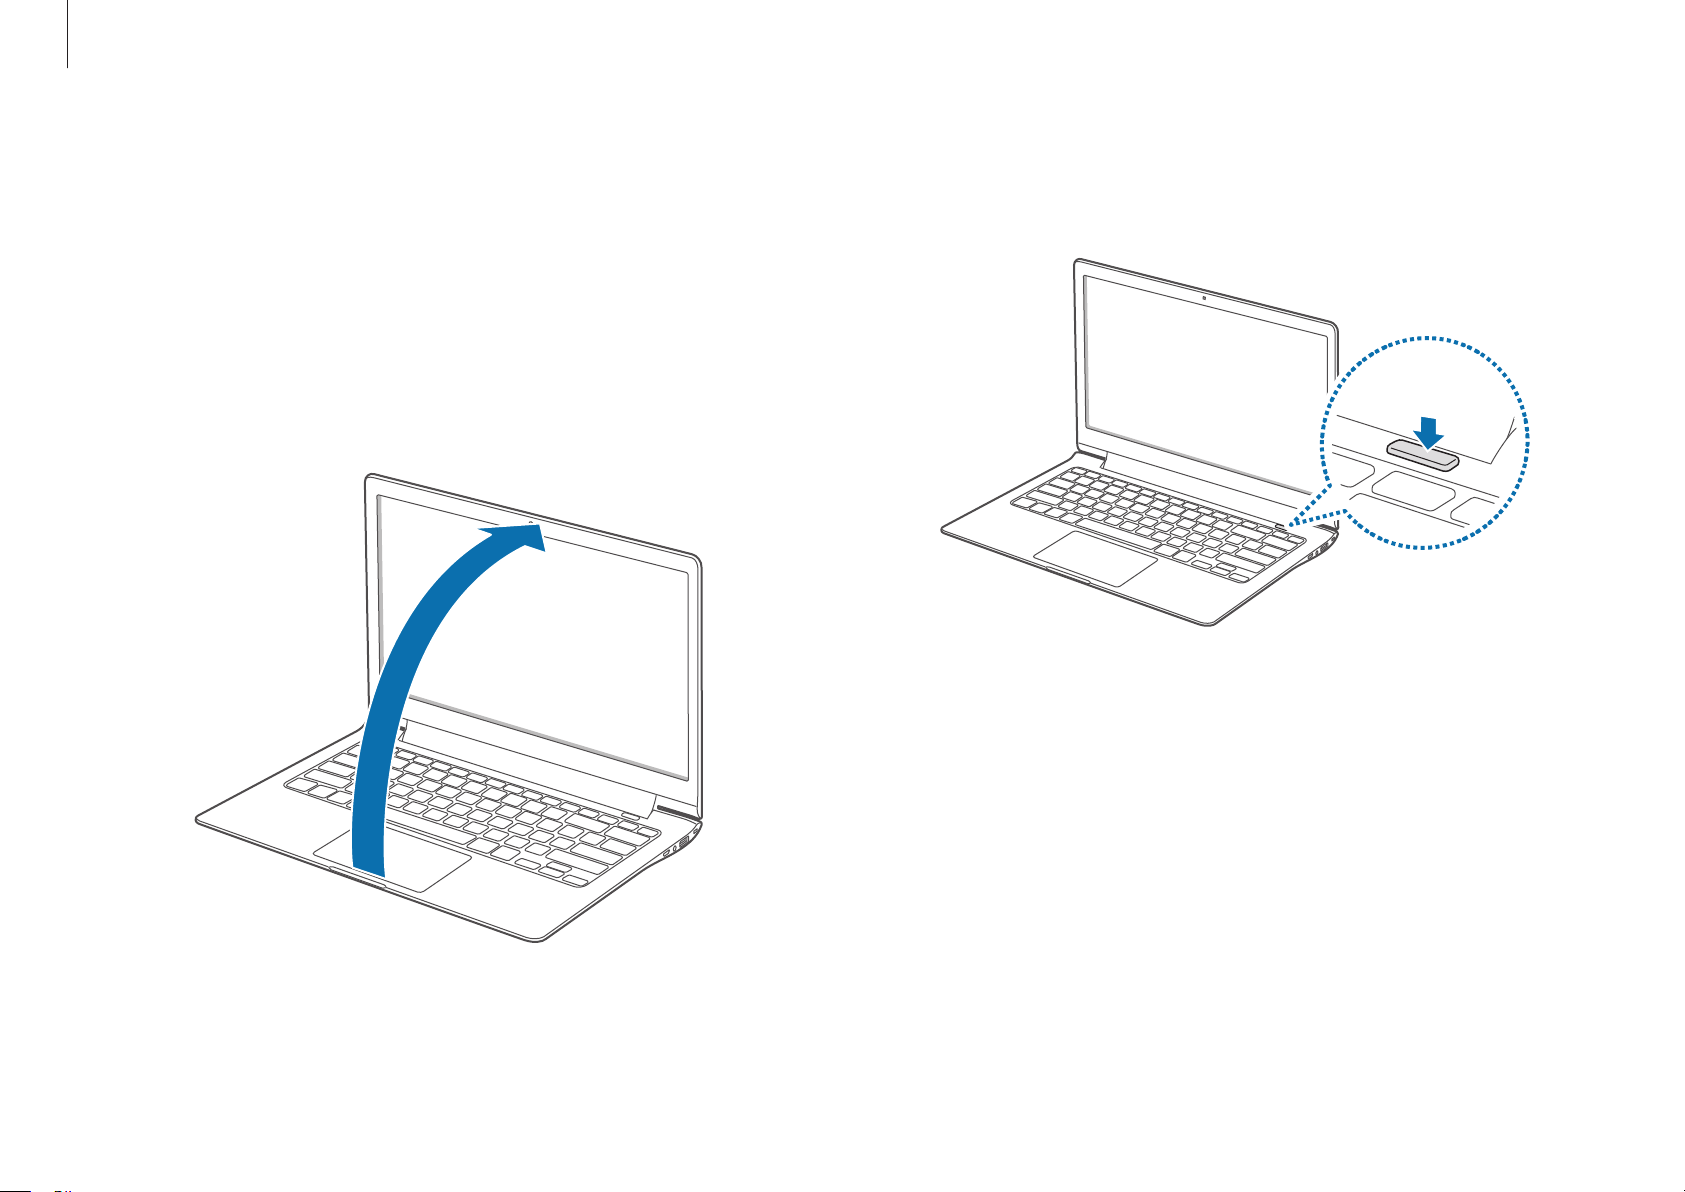
Turning the computer on and off
Turning on
Before turning on the computer, charge the battery.
1
Open the LCD panel.
2
Press the Power button.
3
The Power LED turns on.
16
Getting started
Activate Windows by following the on-screen instructions.
4
•
The Windows activation screen appears only when turning
Turning off
on the computer for the first time.
•
The computer’s date and time may be incorrect when you
turn it on for the first time. They may also be incorrect if the
battery has been fully discharged or removed. To set the
date and time, go to the desktop taskbar and right-click
the clock area. Then, click
current date and time
•
To adjust the brightness of the screen, see LCD
brightness.
•
To adjust the sound, see Volume.
Adjust date/time
and set the
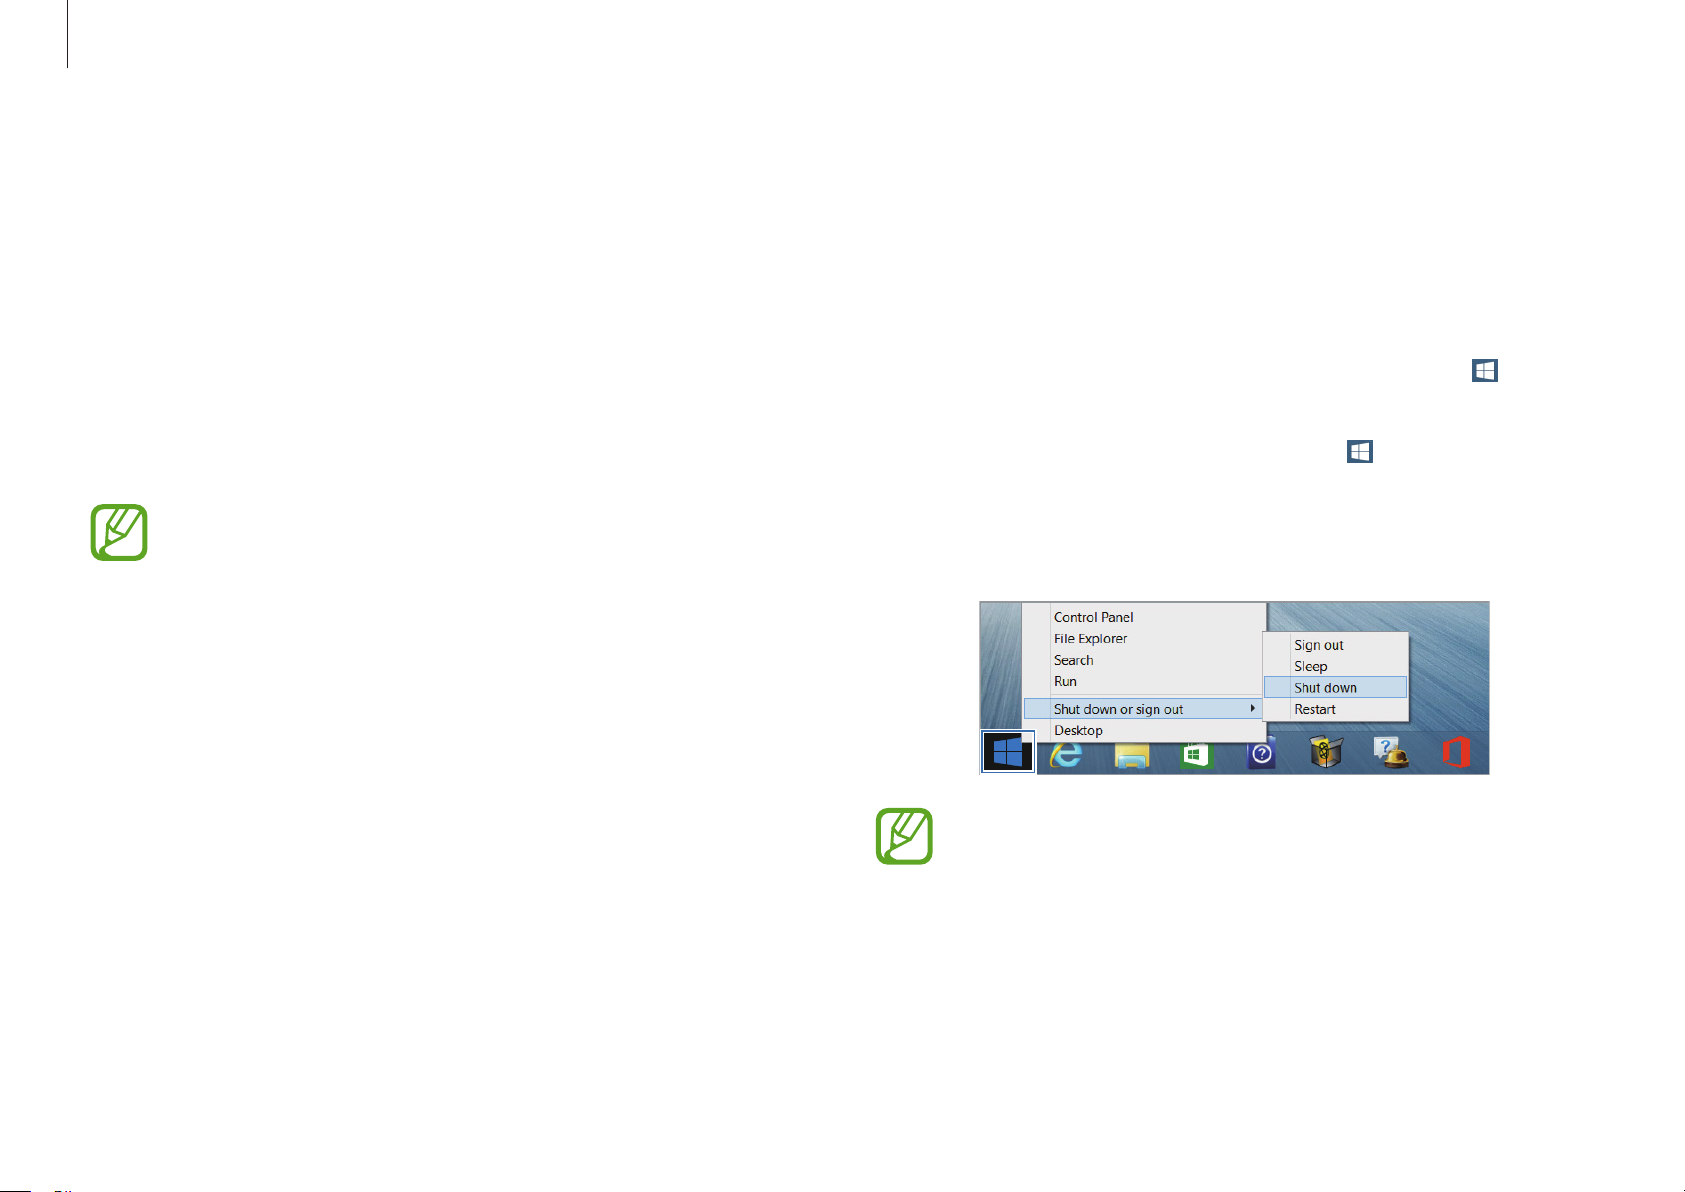
Turning off on the desktop
To select the Start button, do one of the following:
1
•
2
Touch screen
lower-left edge of the desktop.
•
Mouse
edge of the desktop.
Select
•
: Right-click the Start button ( ) at the lower-left
Shut down or sign out→ Shut down
Save all the data before turning off the computer.
: Touch and hold the Start button ( ) at the
.
17
•
Since the procedures to turn the computer off may
differ depending on the installed operating system,
please turn the computer off according to the
procedures for the purchased operating system.
Getting started
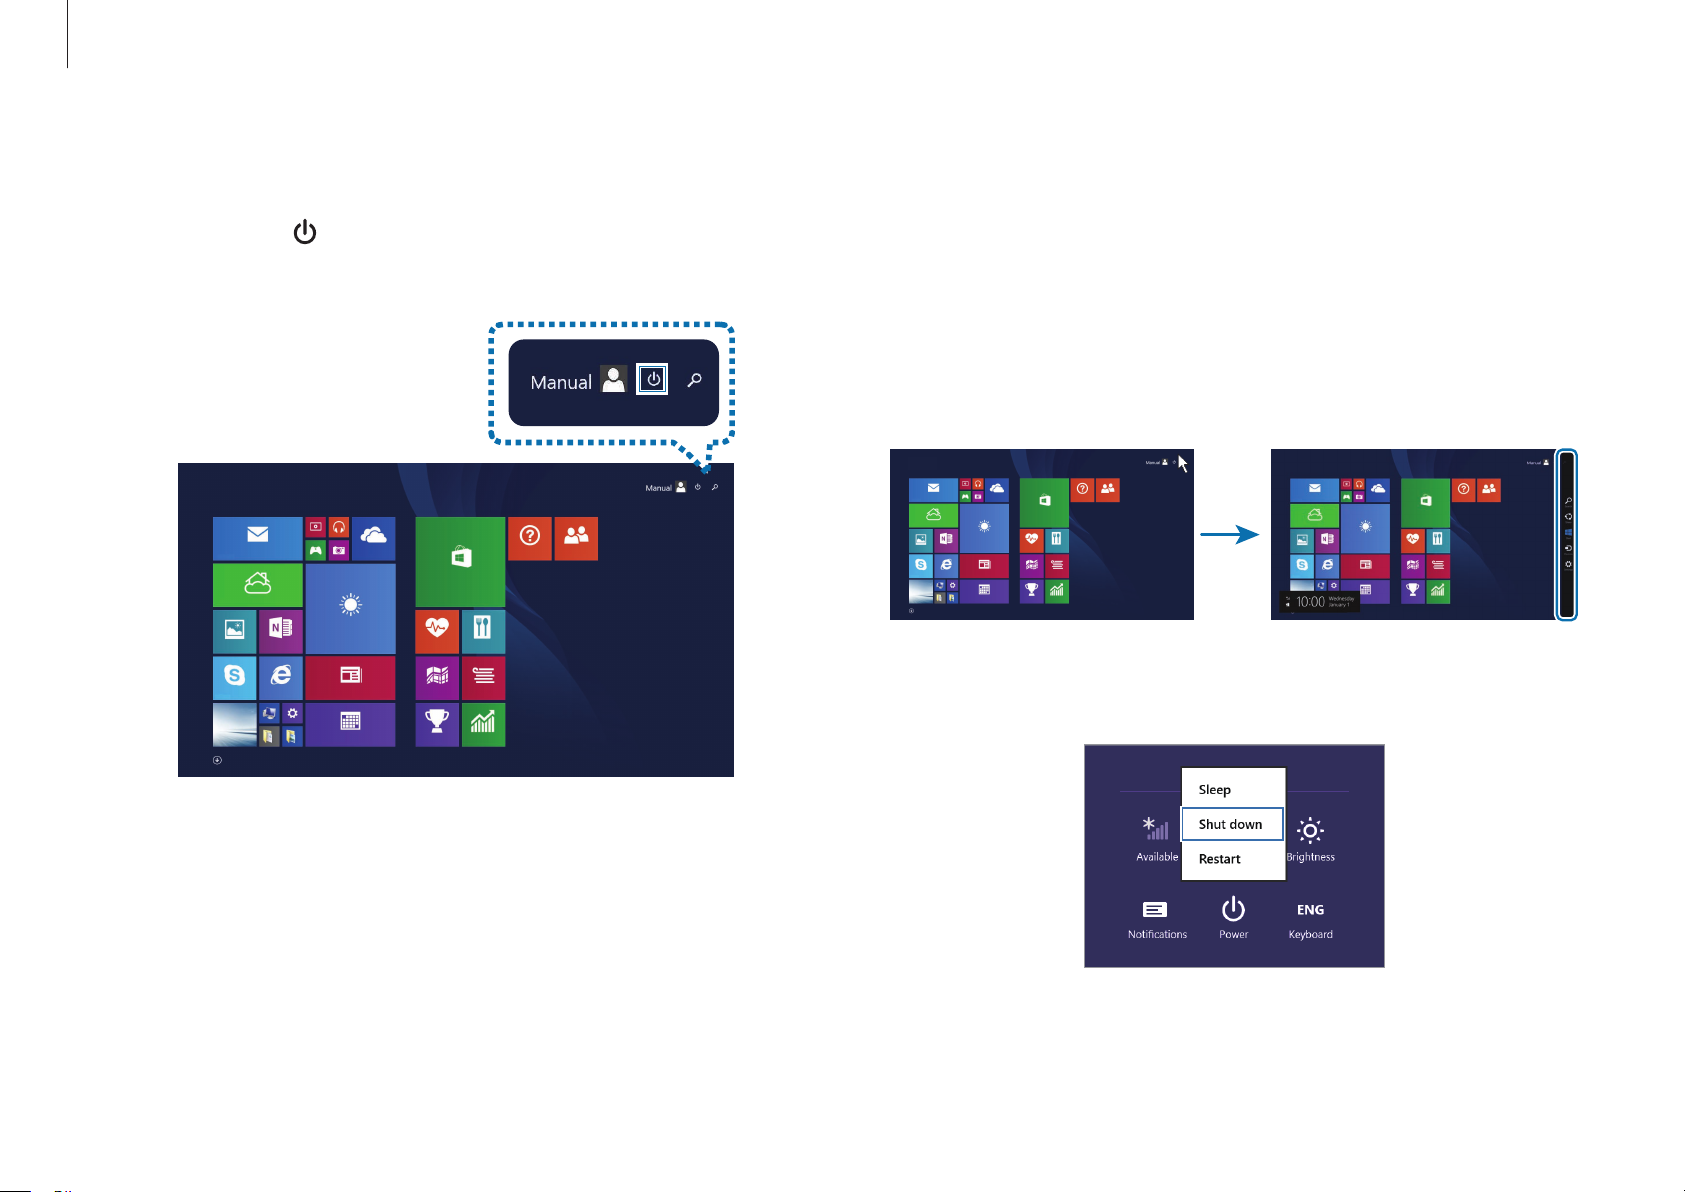
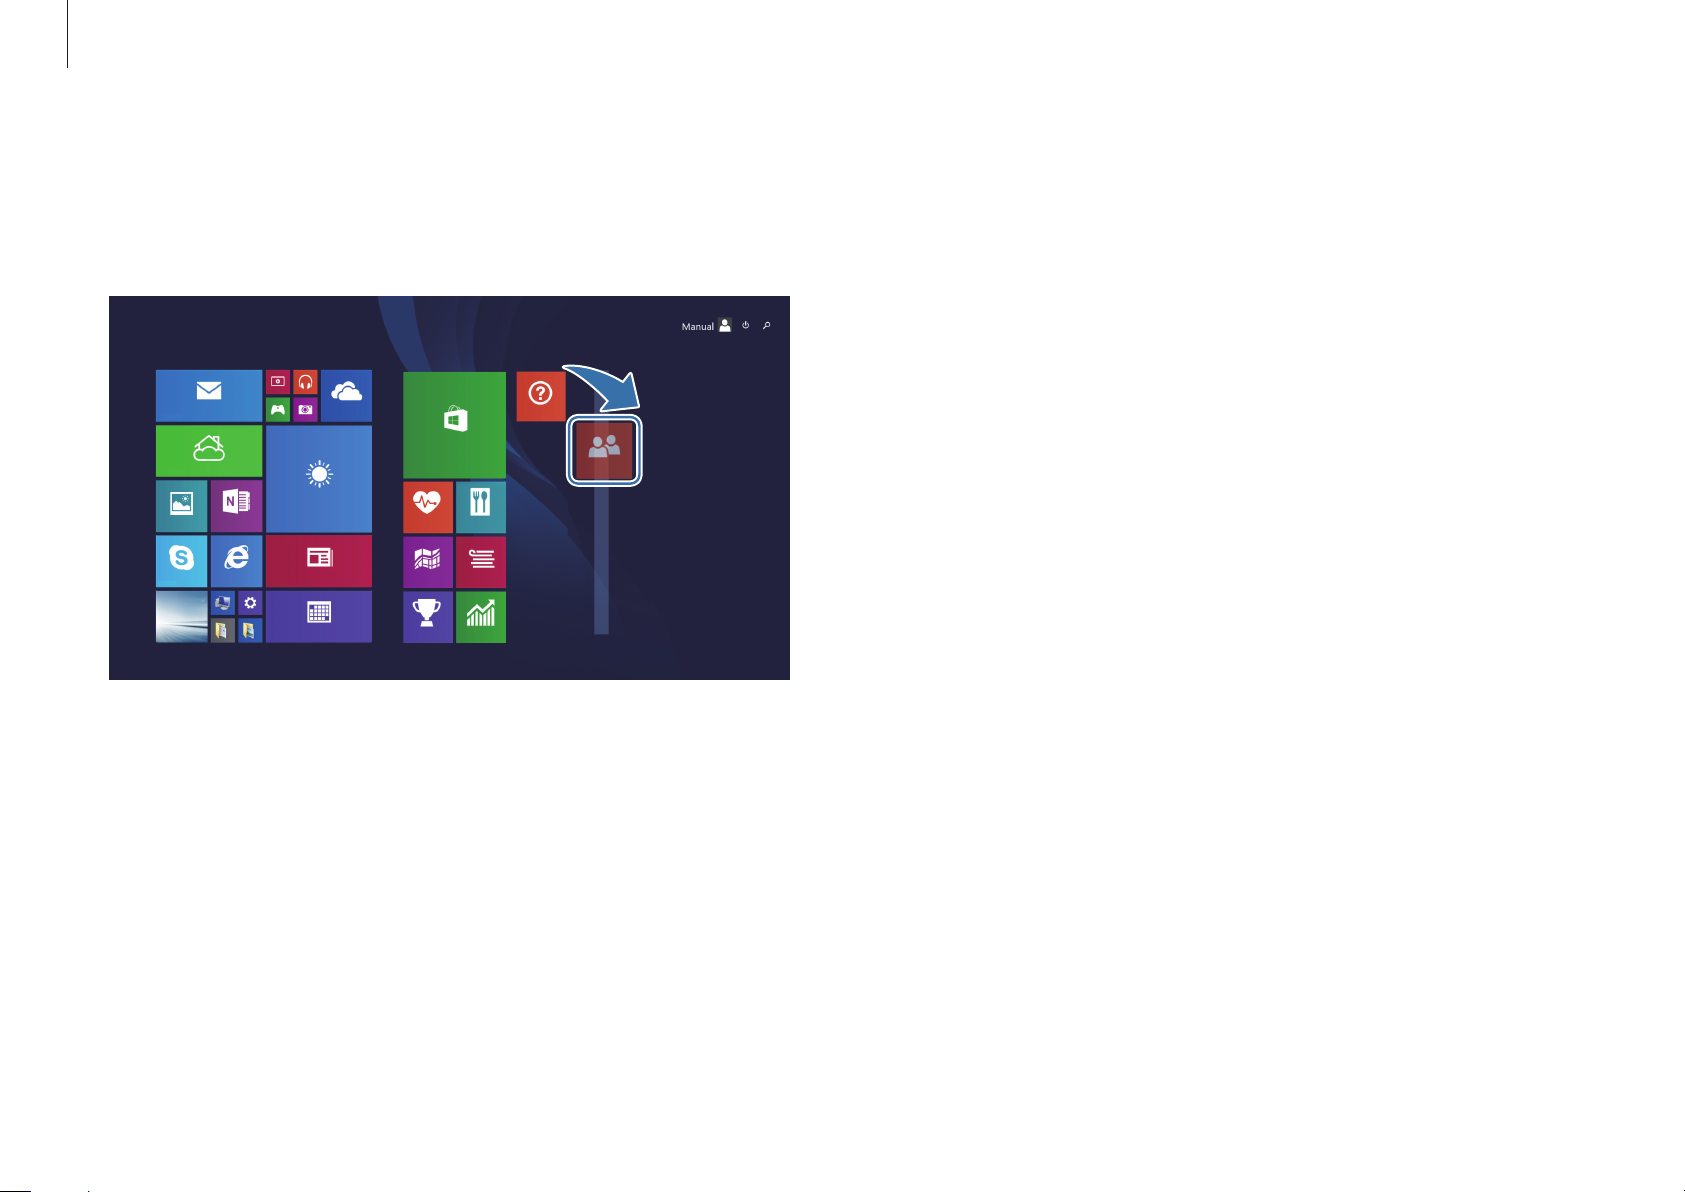
Turning off on the Start screen
1
Select
screen.
Power
Start
( ) at the upper-right corner of the
Start
Turning off on the Charms
To open the Charms, do one of the following:
1
•
•
Start
Select the
2
Touch screen
touch screen.
Touchpad/Mouse
right edge of the screen.
Settings
: Swipe inward from the right edge of the
: Move the cursor to the upper- or lower-
Start
charm →
Power
→
Shut down
.
2
Select
Shut down
.
18

Getting started
Unlocking the screen
To unlock the lock screen, do one of the following:
•
Touch screen
•
Mouse
•
Keyboard
•
Touchpad
: Click the lock screen.
: Swipe the lock screen from bottom to top.
: Press any key.
: Tap the touchpad.
10:00
Wednesday, January 1
If the account has a password, enter the password to log in after
unlocking the screen.
19

Windows
Help
To access the help, do one of the following:
•
Keyboard
•
Touch screen
: Press the F1 key.
: Swipe inward from the right edge of the touch
About Windows
Microsoft Windows is an operating system that is used to control
a computer. For optimal use of the computer, learn how to use the
operating system properly. It is best to learn how to use Windows
by using
•
•
•
Windows Help and Support
Images and available features may differ depending on
the model and operating system.
This manual is designed for Windows 8.1 and content
may differ depending on the OS version.
The image displayed on the desktop screen may differ
between models and OS versions.
, and
Help+Tips
.
screen to open the Charms and select the
Help
.
•
Mouse
the screen to open the Charms and select the
→
: Move the cursor to the upper- or lower-right edge of
Help
.
Settings
Settings
charm →
charm
20
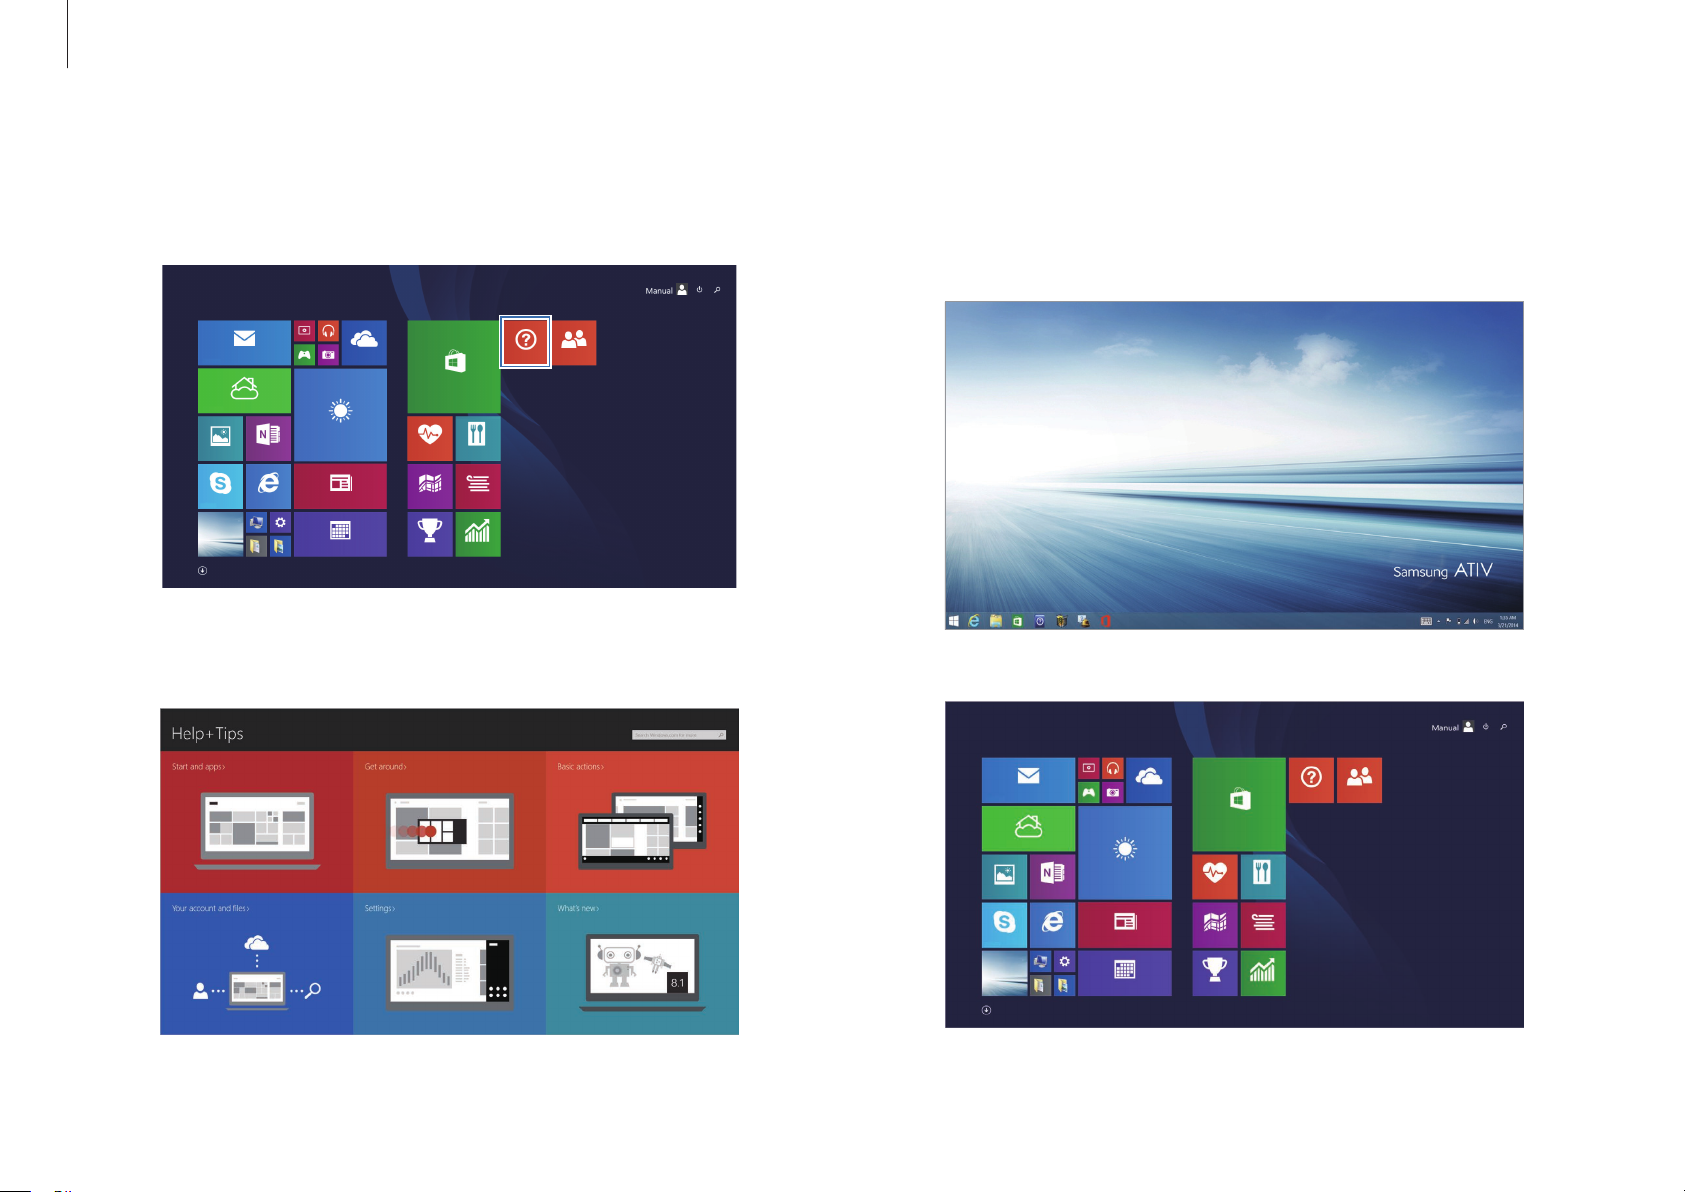
Windows
Help+Tips
On the
You can control Windows menus with the mouse or with gestures.
Start
screen, select
Start
Help+Tips
.
Screens in Windows 8.1
The following two screens are provided: the
desktop.
Desktop
Start
Start
screen and the
21
Start screen
Windows
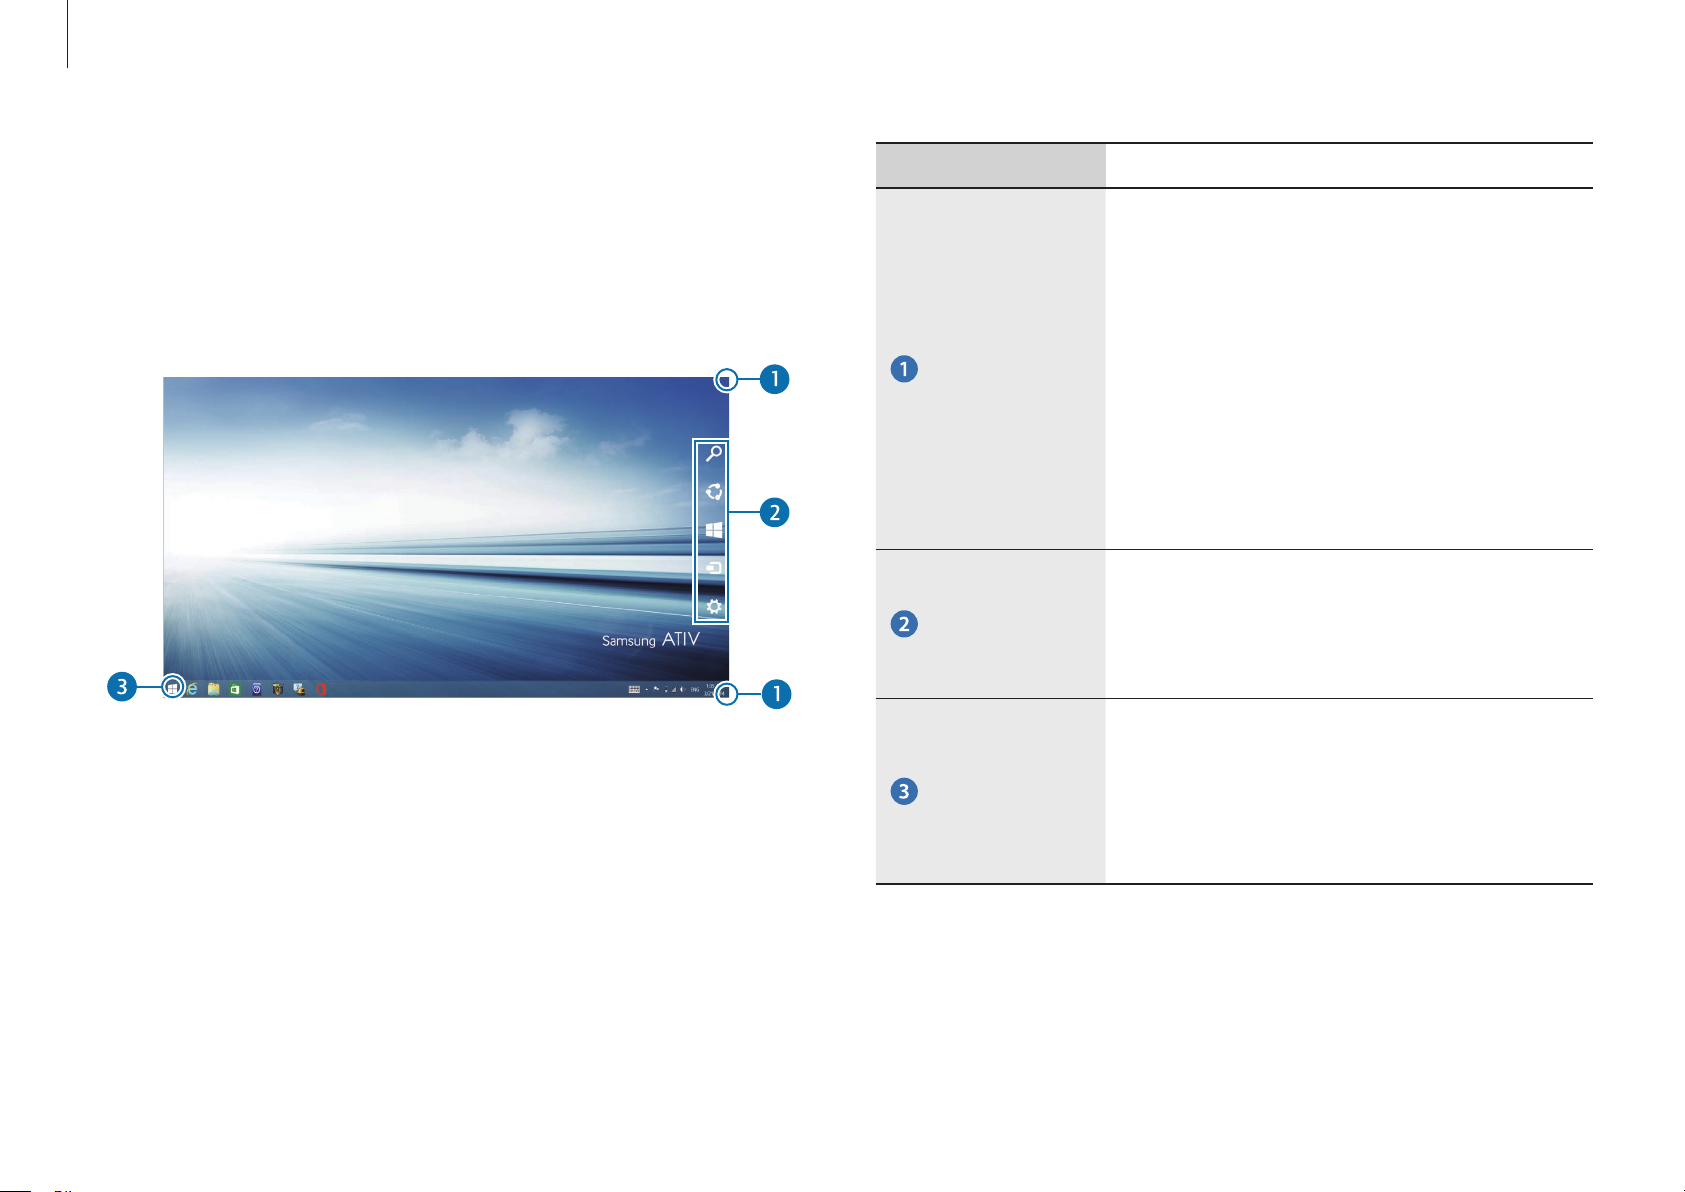
Desktop
The desktop provides a layout that is similar to earlier versions of
Windows.
On the
Start
screen, select
Desktop
from the tiles.
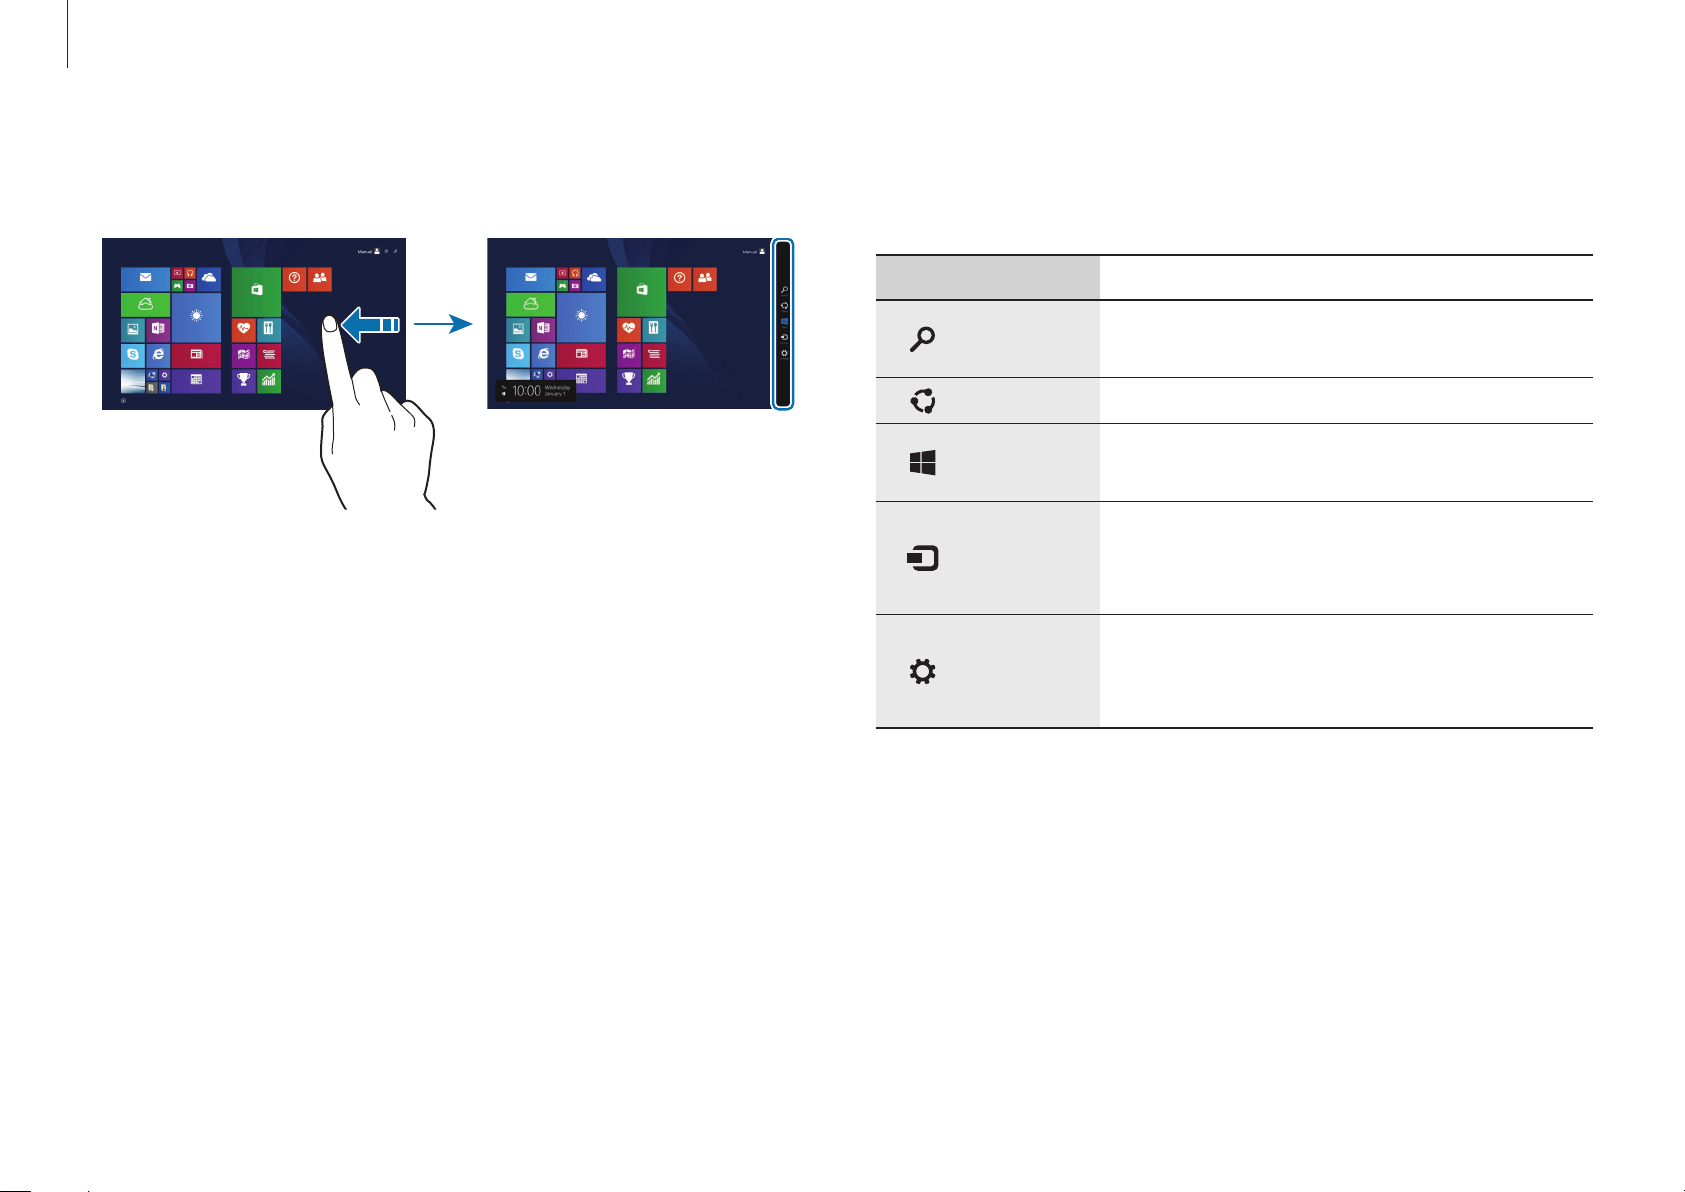
Number/Name Description
•
Opens the Charms that are hidden at
the right of the screen.
•
To open the Charms, do one of the
following:
Open the
–
Charms
•
The Charms
•
Touch screen
the right edge of the touch screen.
–
Touchpad/Mouse
cursor to the upper- or lower-right
edge of the screen.
Refers to the menu that allows you
to search, share, connect to devices,
configure settings or switch to the
Start
screen.
Move to the
: Swipe inward from
: Move the
Start
screen. Right-click or
22
Start button
touch and hold this button to access
Windows features, such as shutting
down the system or opening the
Control Panel.
Windows
Using the Start button
To quickly and conveniently access various features of Windows,
do one of the following:
•
Touch screen
•
Touchpad/Mouse
Number Name
: Touch and hold the Start button ( ).
: Right-click the Start button ( ).
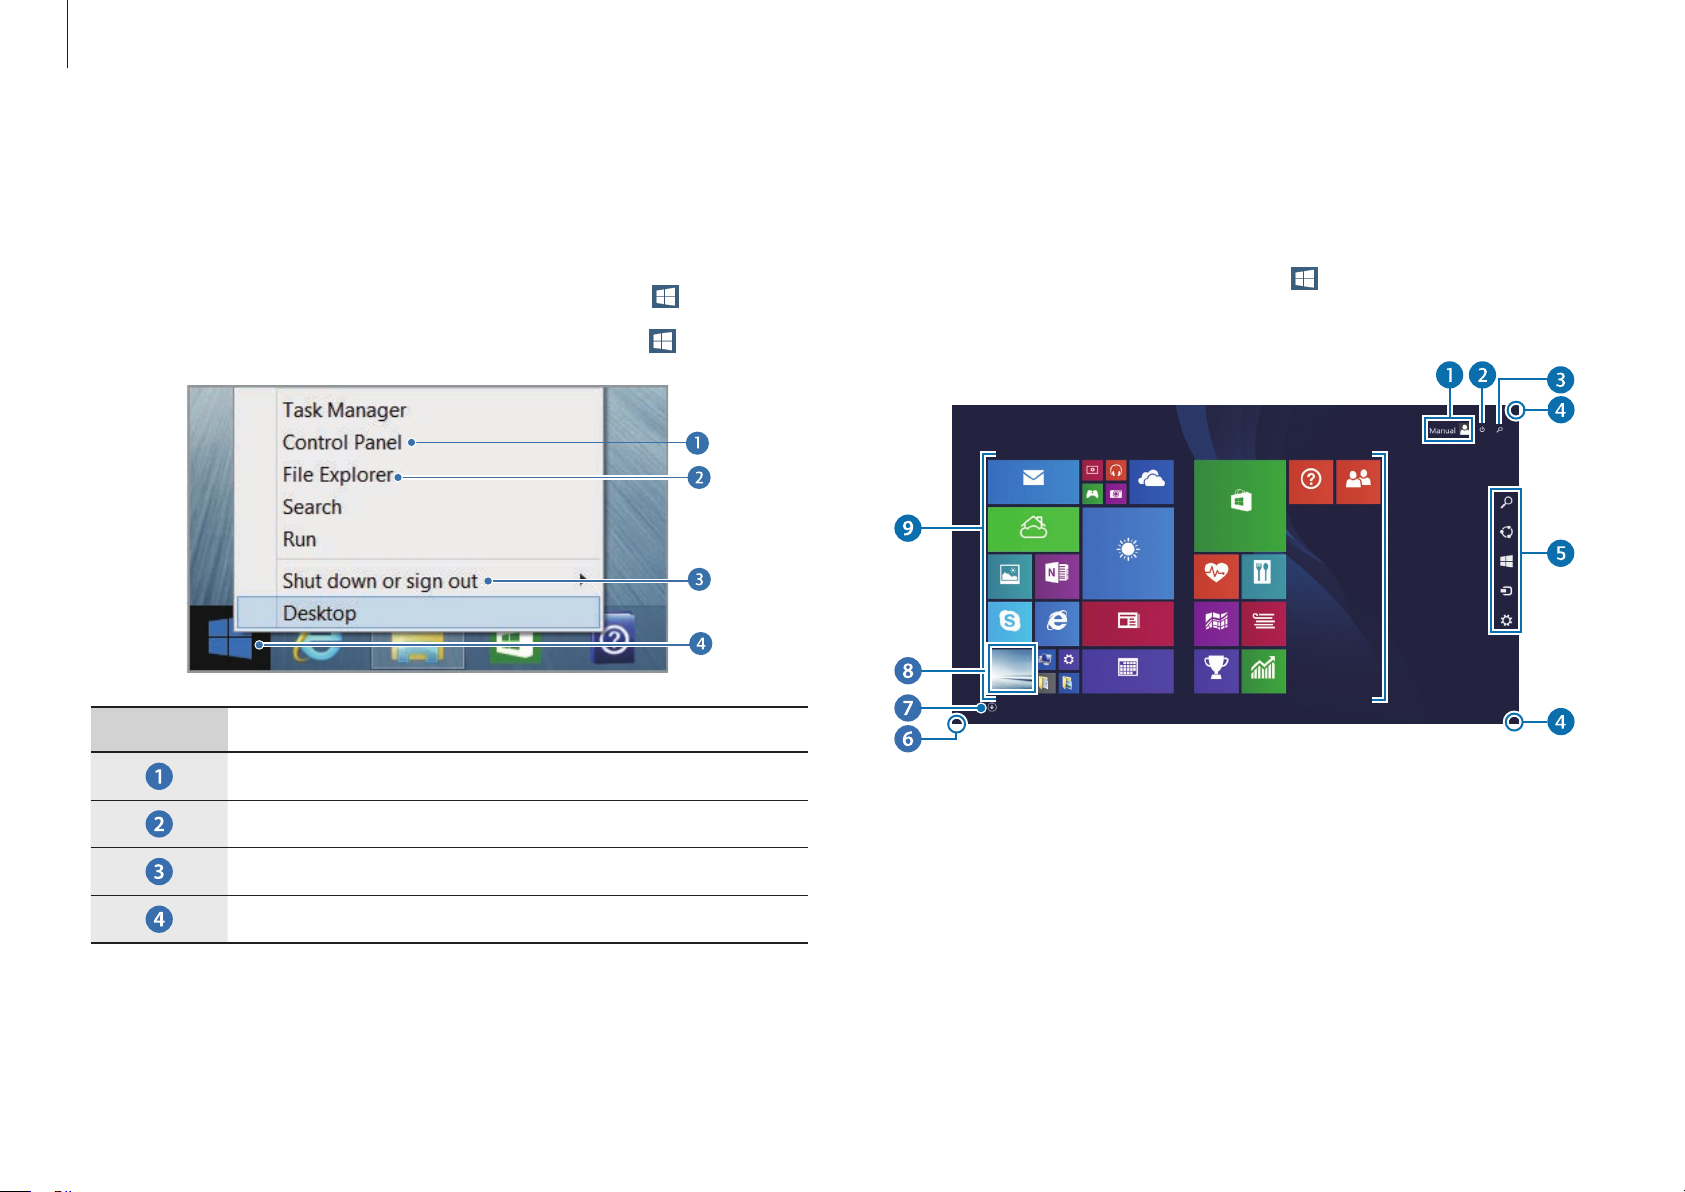
Start screen
Launch applications on the
On the desktop, click the Start button (
Start
select the
charm.
Start
Start
screen.
) or open the Charms and
•
Control Panel
•
File Explorer
•
Power menu
•
Start button
23
Windows
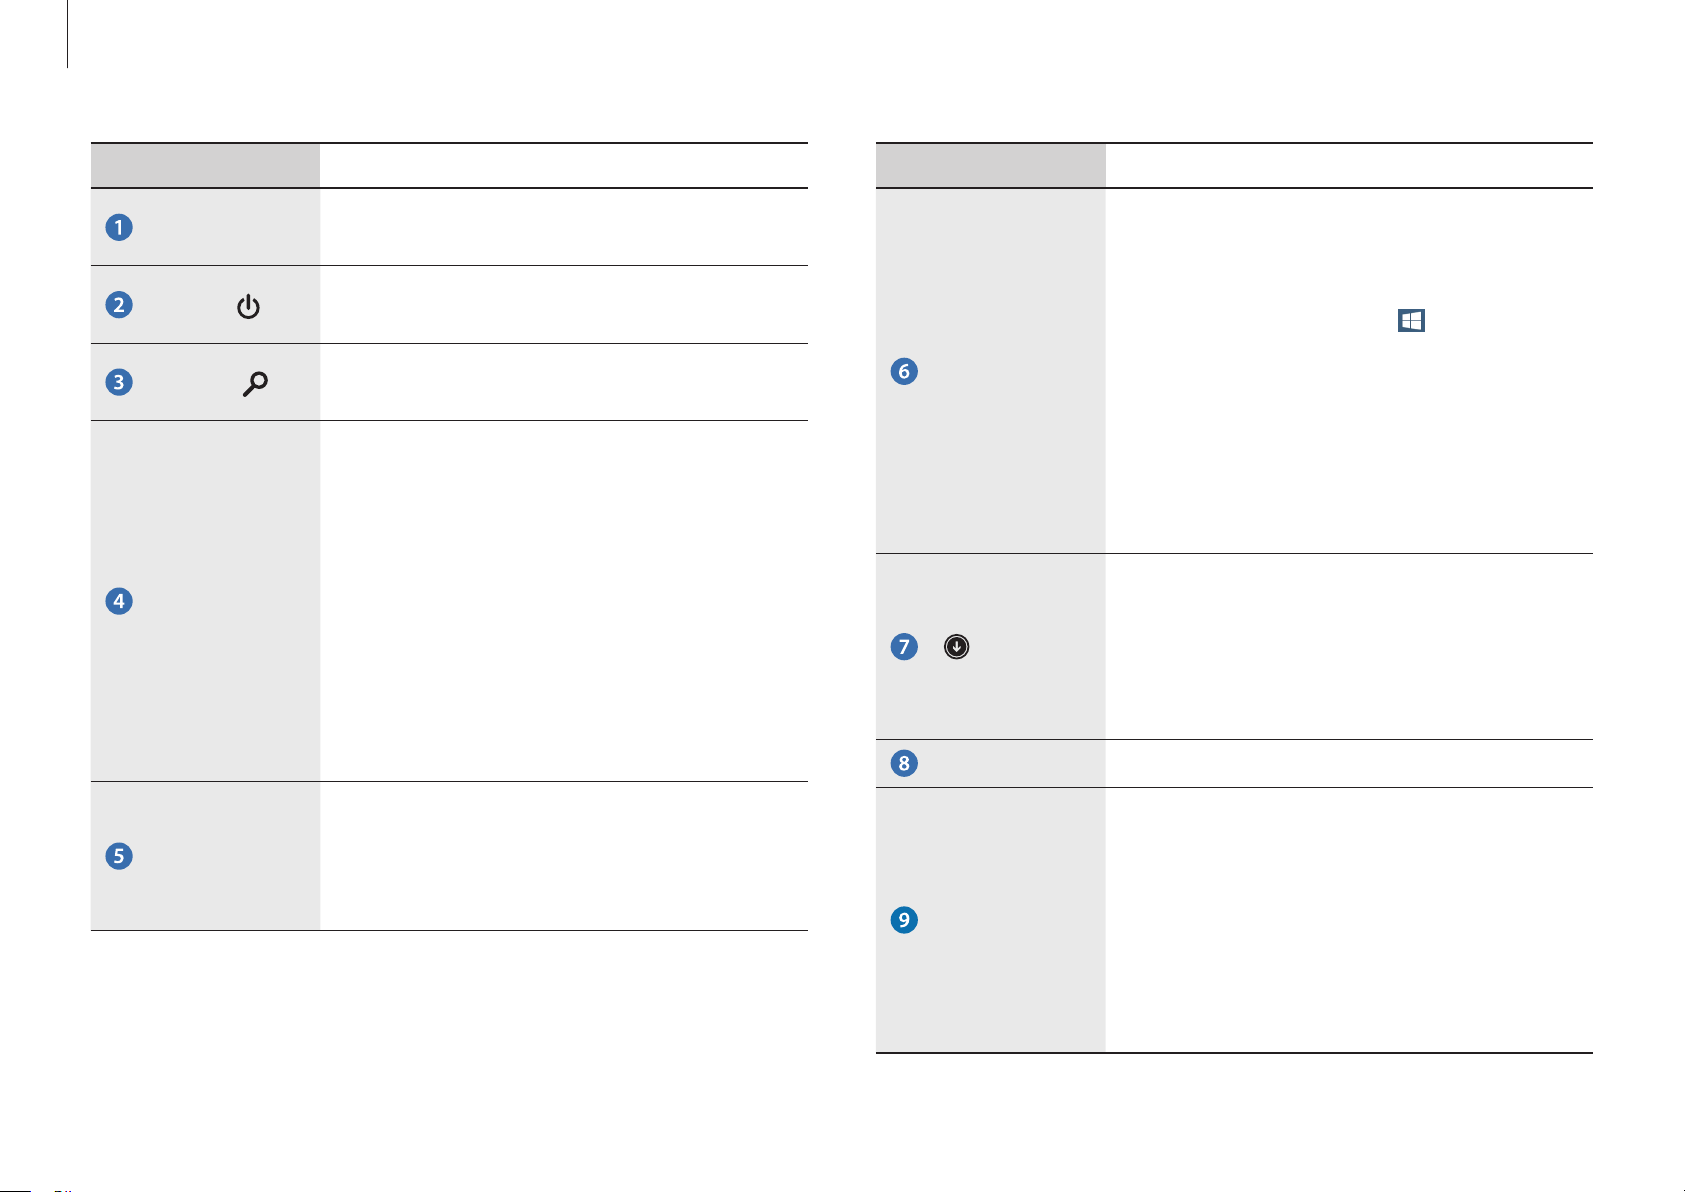
Number/Name Description
•
User account
Power
Search
Open the
Charms
Refers to the currently-used user
account.
•
Turn off the computer or select
mode and
•
Search for applications, files, or
websites by entering keywords.
•
Opens the Charms that are hidden at
the right of the screen.
•
To open the Charms, do one of the
following:
–
Touch screen
the right edge of the touch screen.
–
Touchpad/Mouse
cursor to the upper- or lower-right
Restart
Sleep
.
: Swipe inward from
: Move the
Number/Name Description
•
The Start button can be accessed only
with the mouse. Move the cursor to
Start button
the lower-left edge of the screen to
view the Start button (
button to switch to the most recent
application screen or the desktop.
Right-click this button to access other
Windows features, such as shutting
down the system or opening the
Control Panel.
•
The application screen appears where
the list of applications installed on the
computer is displayed. The application
screen can be accessed only with the
touchpad or mouse.
). Click the
The Charms
edge of the screen.
•
Refers to the menu that allows you
to search, share, connect to devices,
configure settings or switch to the
Start
screen.
24
Desktop
App tiles
•
Switches to the desktop.
•
Refers to the tiles of installed
applications.
•
Samsung Apps supplied with the
original factory product are compatible
with the product’s supported OS.
Changing the OS may result in limited
use of the Apps.
Windows
+
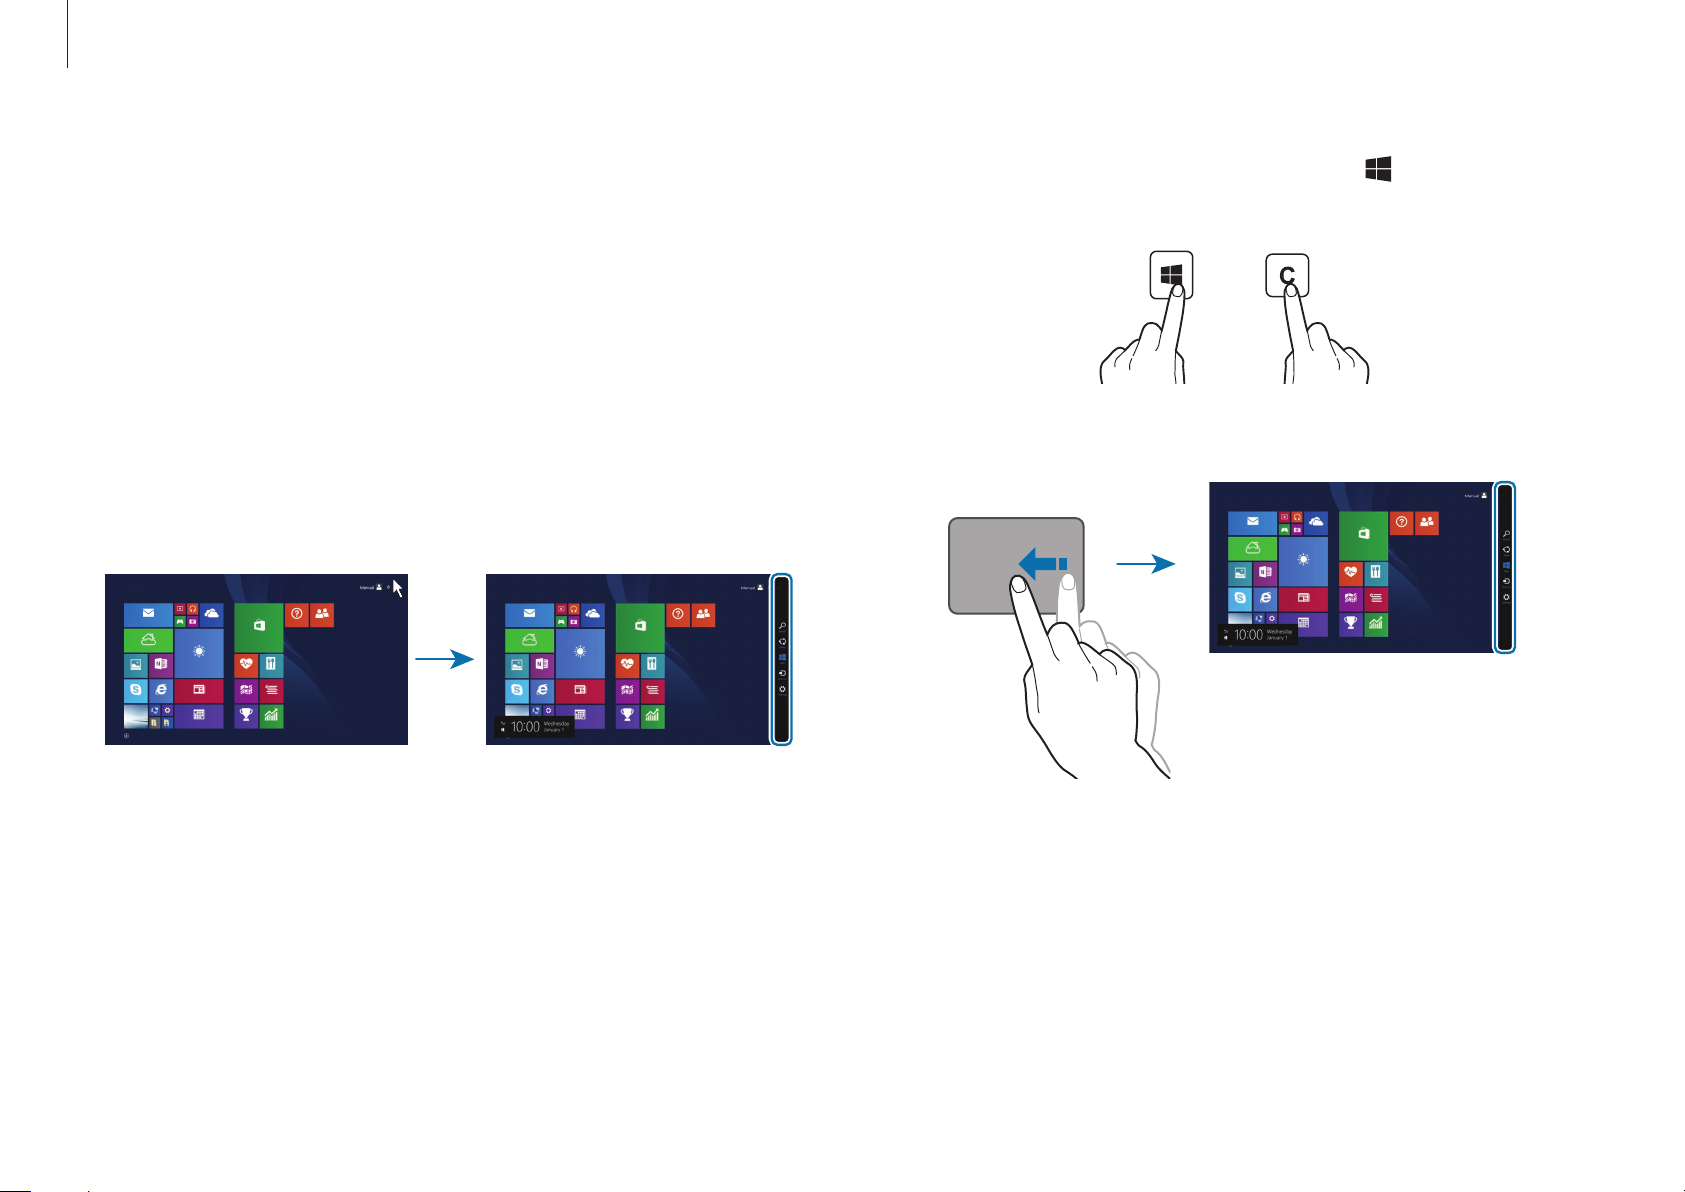
The Charms
The Charms let you search, share links and photos, connect
devices, and change settings. The Charms functions available may
Start
differ between the
Opening the Charms
To open the Charms, do one of the following:
•
Mouse
the screen.
Start Start
: Move the cursor to the upper- or lower-right edge of
screen and the desktop or applications.
•
Keyboard
key.
•
Touchpad
: Hold down the Windows key ( ) and press the C
: Swipe inward from the right edge of the touchpad.
Start
25
Windows
•
Touch screen
: Swipe inward from the right edge of the touch
screen.
Start Start
Learning about the Charms
Use the following Charms to control the computer:
Charm Description
•
Search
Search for applications, files, or
websites by entering keywords.
Share
Start
Devices
Settings
•
Share various files with others.
•
Return to the
Start
screen or open the
most recent application.
•
Connect devices, such as printers or
displays or sync files with a mobile
device.
•
Configure the computer, set application
options, or add accounts. See Settings
charm.
26
Windows
Settings charm
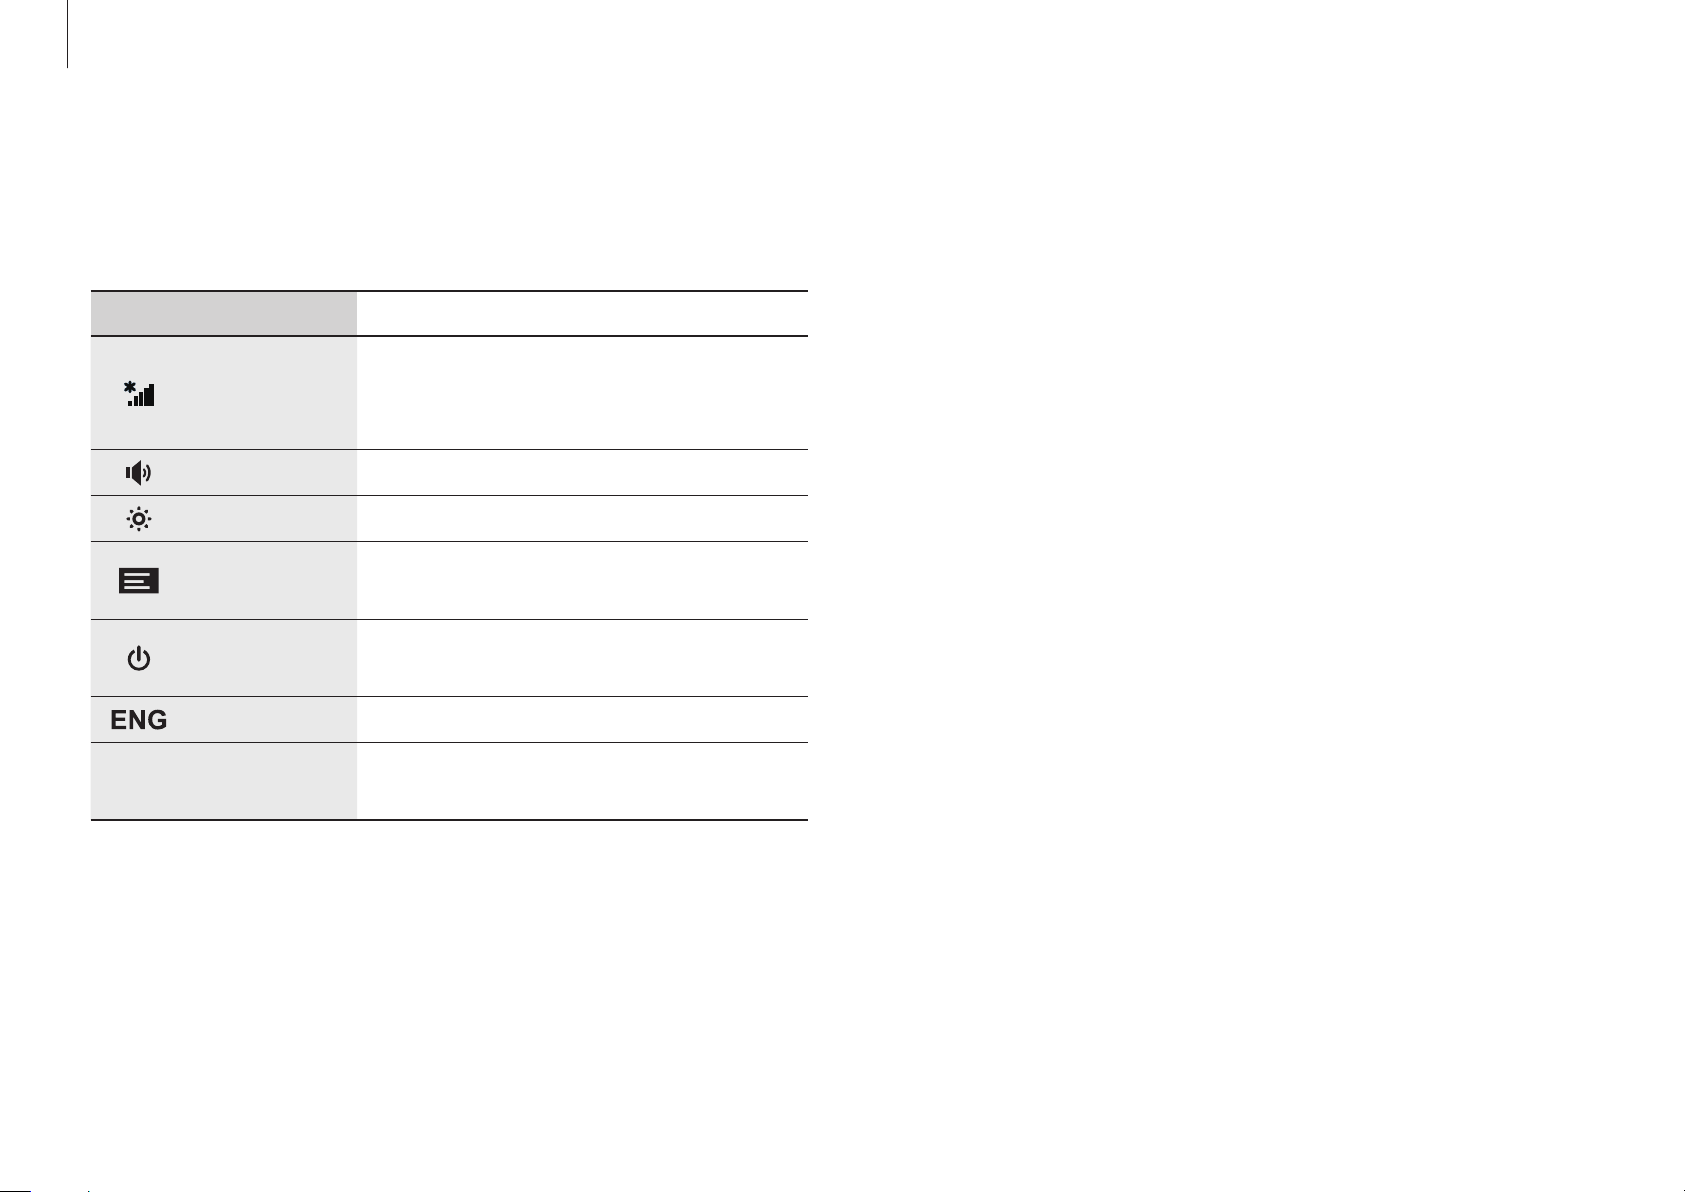
To configure the computer, open the Charms and then select the
Settings
Option Description
charm → an option.
•
Network
Volume
Brightness
Notifications
Power
Keyboard
Change PC
settings
•
•
•
•
•
•
Connect the computer to a
network to use the Internet or
share files with other devices.
Adjust the volume level.
Set the brightness of the screen.
Set the interval at which an
application sends notices.
Turn off the computer or select
Sleep
Set a language to enter text.
Change more settings and
personalize the computer.
mode and
Restart
.
27
Windows
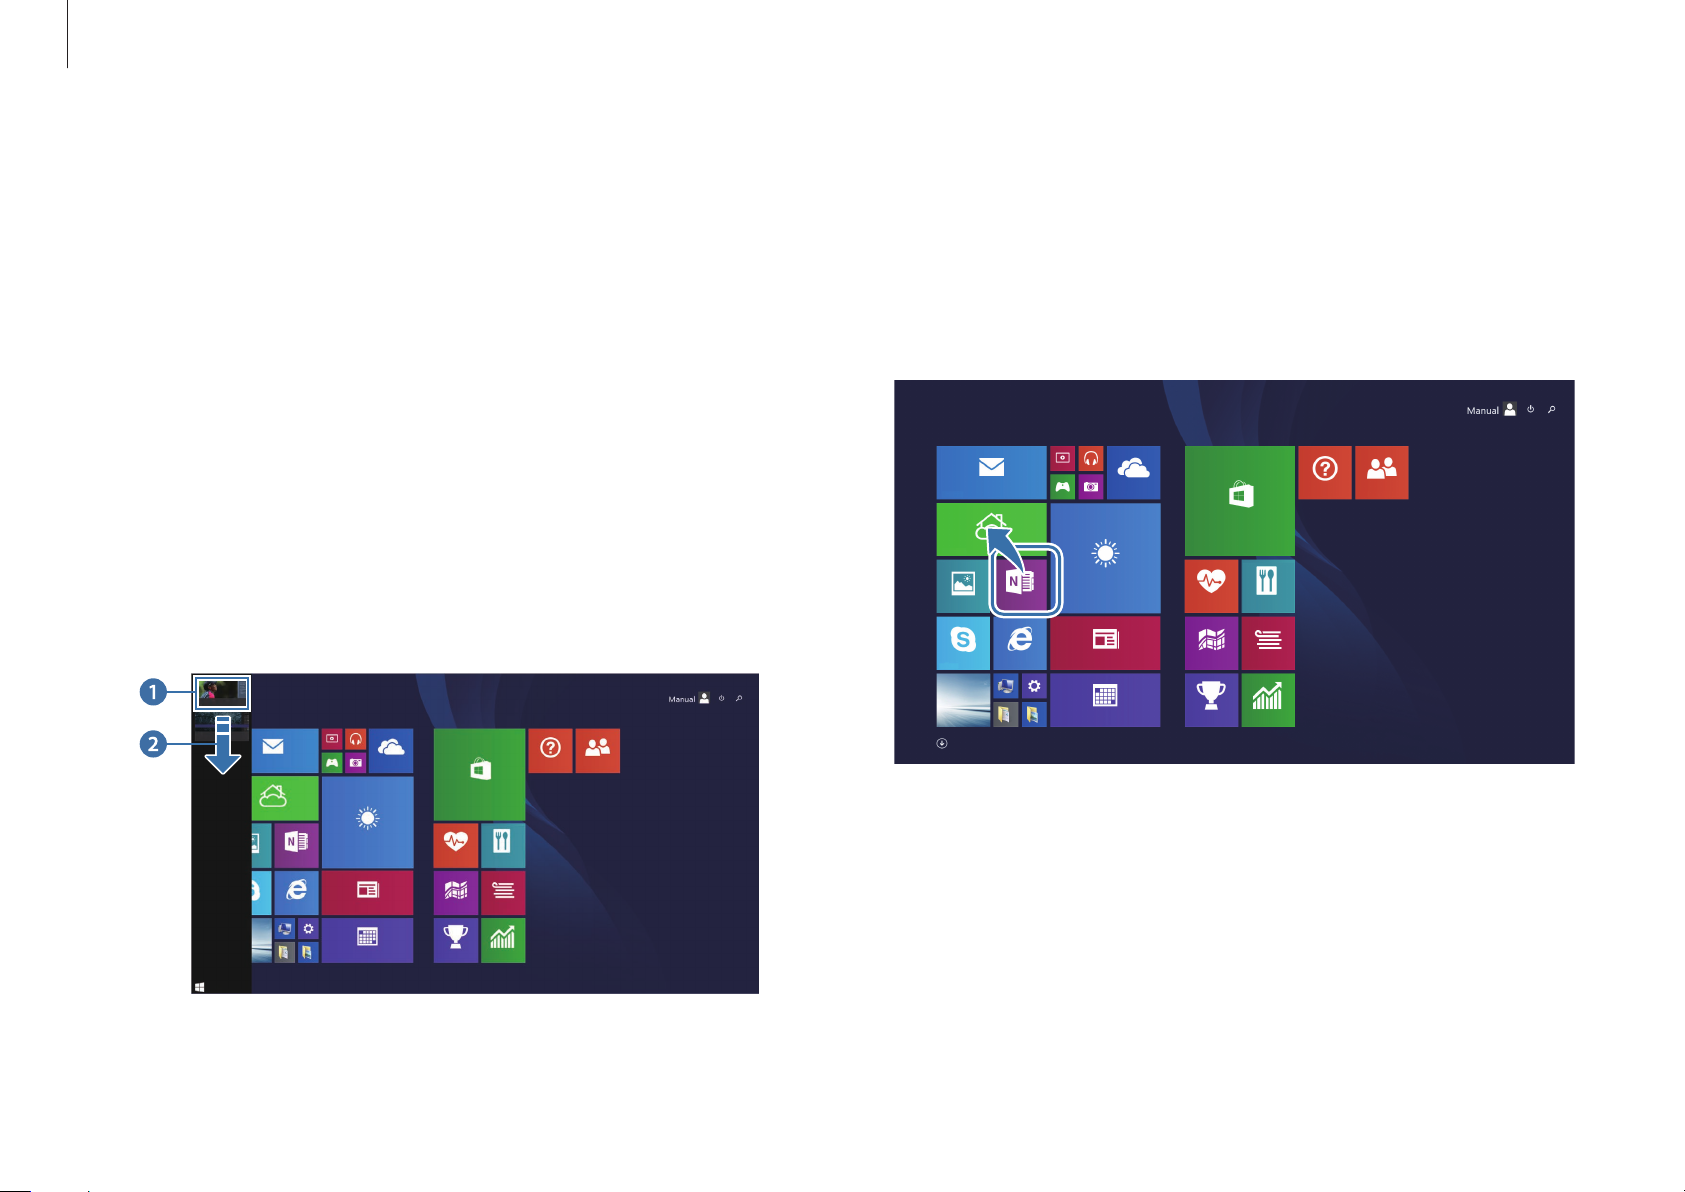
Applications
Opening or closing applications
On the
•
•
Start
screen, select an application icon to open it.
Touchpad/Mouse
desktop to view all applications.
Touch screen
: Select at the lower-left edge of the
: Swipe upwards on the touch screen.
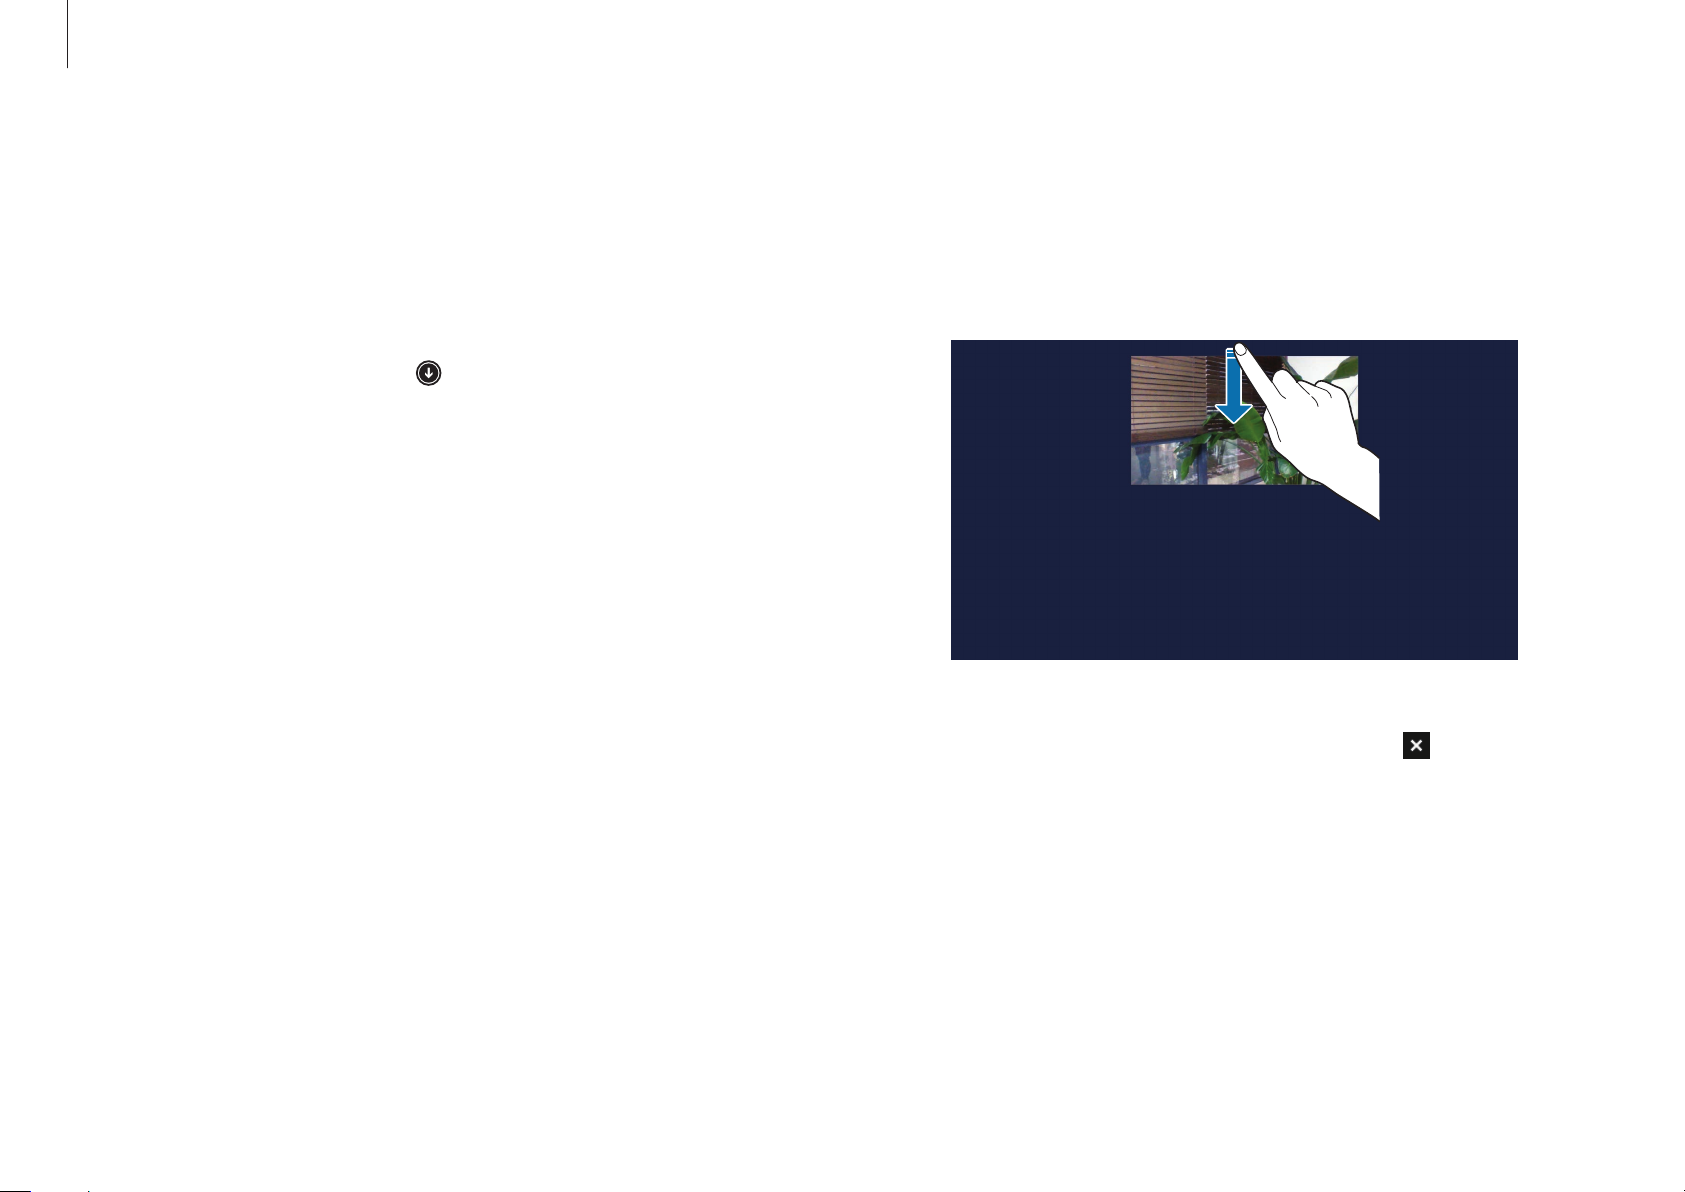
Closing an application
To close an application, do one of the following:
•
Touch screen
screen.
•
Touchpad/Mouse
: Swipe downward from the top edge of the
: Move the cursor to the upper-right
28
edge of the application screen and select
.
Windows
Opening running applications
On the
1
of the screen until a small application image appears.
Swipe from the left edge of the touchpad or screen towards
the middle of the touchpad or screen to show running
applications.
Move the cursor down to display a list of running applications.
2
Select an application to open it.
3
Right-click over an application in the list and click
the application.
Start
screen, place the cursor in the upper-left corner
Close
to exit
App tiles
Tile position
To change the position of an app tile on the
and hold the tile and then drag it to a new position.
Start
Start
screen, select
29
Windows
Grouping tiles
To group tiles, select and hold a tile and drag it to an open space.
Then, drag other tiles to the new group.
Start
Naming a group
To open menu items, do one of the following:
1
•
Touch screen
the bottom edge of the touch screen.
•
Touchpad/Mouse
area.
Select
2
Select
3
Enter a name with the keyboard or the on-screen keyboard,
4
and then press the
Customize
Name group
: On the
.
Enter
Start
: On the
on each group.
key.
screen, swipe upwards from
Start
screen, right-click any
Editing tiles
30
To select a tile and then an option, do one of the following:
1
•
Touch screen
•
Touchpad/Mouse
Select an option.
2
•
Unpin from Start
•
Resize
: Change the size of the tile.
: Press and hold the tile to edit.
: Right-click on the tile to edit.
: Delete the tile from the
Start
screen.