

Page 1

Microwave Oven
Owner’s Manual
MS1070WB/BB/SA
MS1271WA/BB/SB
MS1471WB/BB/SA
One
Help
Popcorn
Minute
+
Frozen
Fresh
Bacon
Handy
Helper
Melt Chocolate
Soften Cream Cheese
Melt Butter
Auto
Defrost
Less
1
4
7
Power
Level
Clock
Pause
Cancel
Dinner
Frozen
Breakfast
Beverage
1.
Chicken Nuggets
2.
Hot Dogs
3.
French Fries
4.
Frozen Sandwich
Pizza
Vegetables
Reheat
Chicken
Shrimp
Breast
Boil
Water
Kids
Snack
Meals
Bar
1.
Nachos
2.
Chicken Wings
3.
Potato Skins
4.
C
heese Sticks
Sensor
Reheat
2
3
5
6
8
9
More
Kitchen
0
Timer
My
Choice
Start
Potato
Frozen
Vegetables
1.
2.
3.
Code No.: DE68-01953A
Page 2

Safety
P
P
RECAUTIONS TO
OSSIBLE
E
XPOSURE TO
A
VOID
I
MPORTANT
When using any electrical appliance, basic safety precautions
should be followed, including the following:
S
AFETY INSTRUCTIONS
XCESSIVE
E
NERGY
E
(a) Do not attempt to operate this oven with the door open
since open-door operation can resul t in harmful ex posure to
microwave energy. It is important not to defeat or tamper
with the safety interlocks.
(b) Do not place any object between the front face of the oven
and the door or allow soil or cleaner residue to accumulate
on sealing surfaces.
(c) Do not operate the oven if it is damaged. It is particularly
important that the oven door close properly an d that there is
no damage to the
1) Door (bent or dented),
2) Hinges and latches (broken or loosened),
3) Door seals and sealing surfaces.
(d) The oven should not be adjusted or repaired by anyone
except properly qualified service personnel.
:
M
ICROWAVE
WARNING
Always observe Safety Precautions when using your
oven. Never try to repair the oven on your own – there
is dangerous voltage inside. If the oven needs to be
repaired, call 1-800-SAMSUNG for the name of an
authorized service center near you.
WARNING
To reduce risk of burns, electric shock, fire, personal
injury or exposure to excessive microwave energy:
• Read all safety instructions before using the appliance.
• Read and follow the specific “
EXPOSURE TO EXCESSIVE MICROWAVE ENERGY
• This appliance must be grounded. Connect only to properly grounded
outlets. See “
4 of this manual.
• Install or place this appliance only in accordance with the installation
instructions provided.
• Some items, like whole eggs and food in sealed containers, may
explode if heated in this oven.
• Use this appliance only for its intended use as described in the
manual. Do not use corrosive chemicals or vapors in this appliance.
This type of oven is specifically designed to heat, cook, or dry food. It
is not designed for industrial or laboratory use.
• As with any appliance, close supervision is necessary when used by
children.
• Do not operate this appliance if it has a damaged cord or plug, if it is
not working properly, or if it has been damaged.
• This appliance should be serviced only by qualified service
personnel. Contact the nearest authorized service facility for
examination, repair, or adjustment.
• Do not cover or block any of the openings on this appliance.
IMPORTANT GROUNDING INSTRUCTIONS
PRECAUTIONS TO AVOID POSSIBLE
” on this page.
” on page
S
AVE
T
HESE INSTRUCTIONS
2
Page 3

Safety
Important Safety Instructions, continued
• Do not store this appliance outdoors. Do not use near water – for
example, near a kitchen sink, in a wet basement, or near a swimming
pool, etc.
• Keep the inside of the oven clean. Food particles or spattered oils
stuck to the oven walls or floor can cause paint damage and reduce
the efficiency of the oven.
• Do not immerse cord or plug in water.
• Keep cord away from heated surfaces.
• Do not let cord hang over edge of table or counter.
• When cleaning door and oven surfaces, use only mild, nonabrasive
soaps or detergents applied with a sponge or soft cloth.
• To reduce the risk of fire in the oven:
a. Do not overcook food. Watch appliance carefully if paper, plastic,
or other combustible materials are inside.
b. Remove wire twist-ties from plastic cooking bags before placing
bags in oven.
c. If materials inside the oven ignite, keep the oven door closed, turn
the oven off, disconnect the power cord, or shut off the power at
the fuse or circuit breaker panel.
d. Do not use the oven compartment for storage purposes. Do not
leave paper products, cooking utensils, or food in the oven when
not in use.
• Do not try to preheat oven or operate while empty.
• Do not cook without the glass tra y in place on the ov en floor. Food will
not cook properly without the tray.
• Do not defrost frozen beverages in narrow-necked bottles. The
containers can break.
• Dishes and containers can become hot. Handle with care.
• Carefully remove container coverings, directing steam away from
hands and face.
• Remove lids from baby food before heating. After heating baby food,
stir well and test temperature by tasting before serving.
• A short power-supply cord is provided to reduce the risk of becoming
entangled in or tripping over a longer cord. Longer cord sets or
extension cords are available and may be used with caution.
• Do not operate any other heating or cooking appliance beneath this
appliance.
• Do not mount unit over or near any portion of a heating or cooking
appliance.
• Do not mount over a sink.
• Do not store anything directly on top of the appliance when it is in
operation.
• If materials inside oven should ignite, keep the oven door closed, turn
the oven off and disconnect the power cord, or shut off power at the
fuse or circuit breaker panel. If the door is opened, the fire may
spread.
S
AVE
T
HESE INSTRUCTIONS
3
Page 4

Safety
I
MPORTANT GROUNDING
NSTRUCTIONS
I
This appliance must be grounded. In the event of an electrical
short circuit, grounding reduces the risk of electric shock by
providing an escape wire for the electrical current. This
appliance is equipped with a cord that includes a grounding wire
and a grounding plug. The plug must be plugged into an outlet
that is properly installed and grounded. Plug the three-prong
power cord into a properly grounded outlet of standard 115-120
voltage, 60 Hz. Your oven should be the only appliance on this
circuit.
WARNING
Improper use of the grounding plug can result in a risk
of electric shock. Consult a qualified electrician or
servicer if you do not understand the grounding
instructions or if you are not sure if the appliance is
properly grounded.
Use of Extension Cords
A short power-supply cord is provided to reduce the risk of
becoming entangled in or tripping over a longer cord. Longer
cord sets or extension cords are available and may be used if
care is exercised in their use. If a long cord or extension cord is
used:
1. The marked electrical rating of the cord set or extension cord should
be at least as great as the electrical rating of the appliance.
2. The extension cord must be a grounding-type 3-wire cord and it must
be plugged into a 3-slot outlet.
3. The longer cord should be arranged so that it will not drape over the
counter top or tabletop where it can be pulled on by children or
tripped over accidentally. If you use an extension cord, the interior
light may flicker and the blower may vary when the microwave oven
is on. Cooking times may be longer, too.
WARNING
Do not cut or remove the third (ground) prong from the
power cord under any circumstances.
S
AVE
Note
Connect the oven to a 20A circuit.
When connecting the oven to a 15A circuit, make
sure that circuit breaker is operable.
T
HESE INSTRUCTIONS
4
Page 5

Your New Microwave oven
Table of Contents
Safety.................................. .................................. ... ... ................. 2
Your New Microwave oven........................................................ 5
Checking Parts.......................................................................... 5
Warranty and Service Information....................................... ...... 6
Thank You for Cooking Samsung..............................................6
Setting Up Your Microwave Oven............................................. 6
Control Panel Buttons............................................................... 7
Operation........................................ ................................. ... ......... 8
Turning on the Power and Selecting a Display Language ........ 8
Using the My Choice feature..................................................... 8
Selecting the Display Weight .................................................... 9
Setting the Clock 12HR/24HR................................................... 9
Setting the Clock...................................................... ................. 9
Setting the Daylight Savings Time adjustment........................ 10
Using the Pause/Cancel Button.............................................. 10
Using the Help Button............................................................. 10
Using the Sensor Cook Buttons.............................................. 10
Using the One Minute + Button............................................... 11
Using the Instant Cook Buttons............................................... 11
Sensor Reheat........................................................................ 12
Defrosting Automatically . ........................................................ 12
Using the Handy Helper Button............................................... 13
Using the Kids Meals Button................................................... 13
Using the Snack Bar Button.................................................... 14
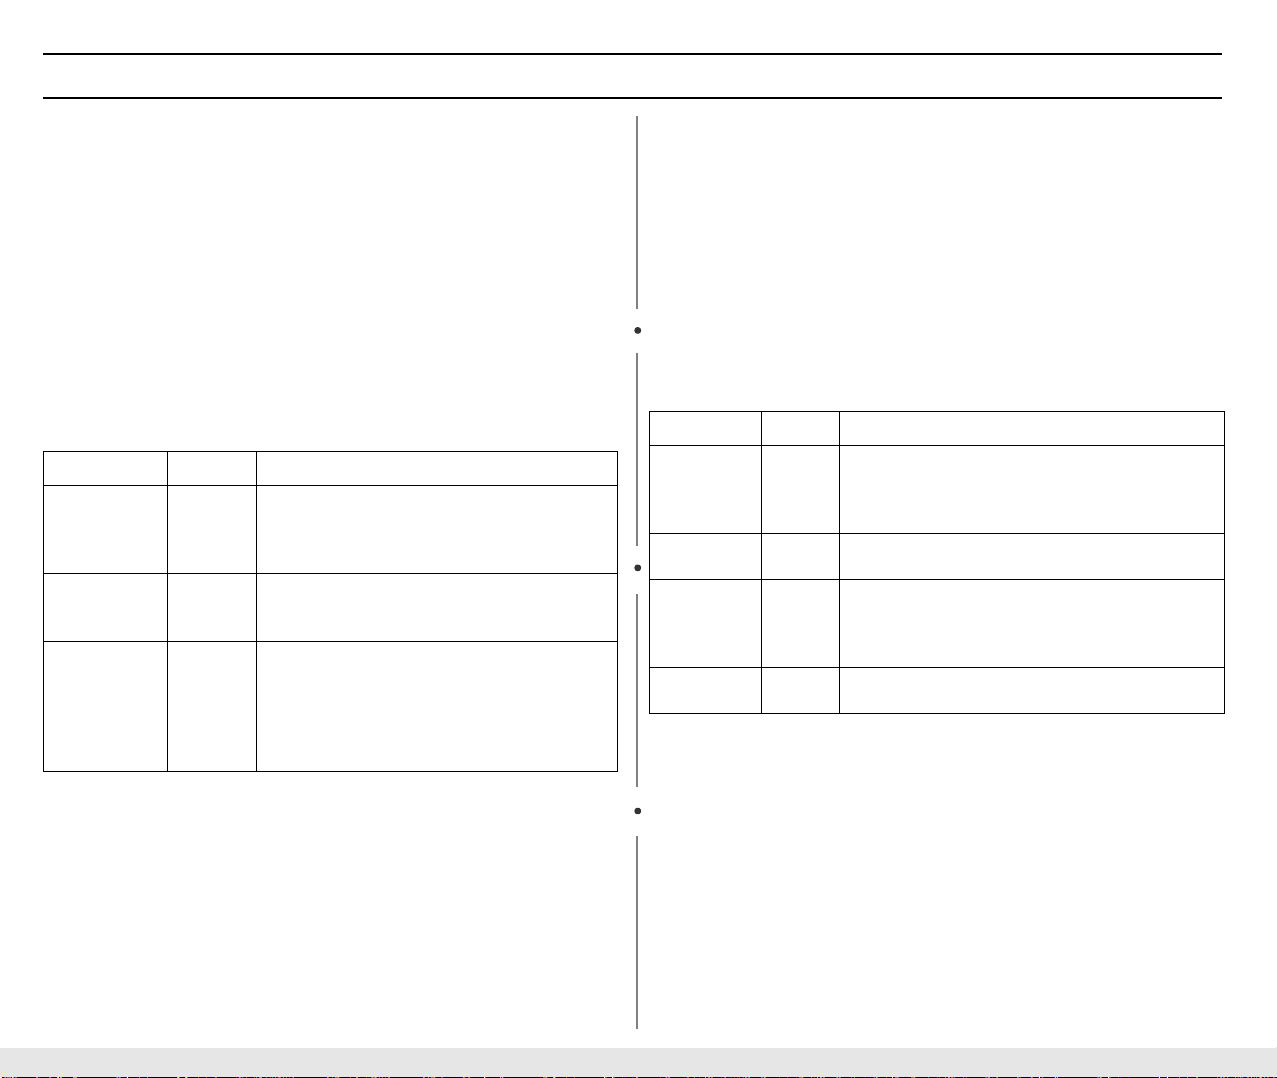
Setting Cooking Times & Power Levels.................................. 14
Using the More/Less Buttons.................................................. 15
Adjusting the Volume.............................................................. 16
Using the Kitchen Timer.......................................................... 16
Setting the Child Protection Lock............................................ 16
Demonstration Mode............................................................... 17
Setting the Remind End Signal............................................... 17
Setting the Word Prompting Speed......................................... 17
Cooking Instructions................................................................ 18
Cooking Utensils..................................................................... 18
Testing Utensils....................................... ... .. ........................... 18
Cooking Techniques ............................................................... 19
General Tips............................................................................ 19
Auto Sensor Cook................................................................... 20
Utensils & Cover For Sensor Cooking .................................... 20
Important................................................................................. 20
Cooking Guide ........................................................................ 21
Auto Defrosting Guide............................................................. 23
Recipes.................................... ... .................................. ... ....... 24
Sensor Cooking Guide............................................ ... ... .......... 26
Sensor Reheat Guide............................................................. 27
Sensor Recipes ...................................................................... 27
Appendix........................................................... ... ..................... 30
Troubleshooting Guide ........................................................... 30
Care and Cleaning....................................... ... ........................ 30
Specifications........................................................................ .. 31
Warranty..................................... .................................. ... .......... 33
Warranty Information.............................................................. 33
Quick Reference....................................................... Back Cover
Checking Parts
Unpack your microwave oven and check to make sure that you have all
the parts shown here. If any part is missing or broken, call your dealer.
One
Help
Popcorn
Minute
+
Fresh
Pizza
Frozen
Potato
Vegetables
Reheat
Dinner
Frozen
Frozen
Chicken
Shrimp
Breakfast
Vegetables
Breast
Boil
Bacon
Beverage
Water
Handy
Kids
Snack
Meals
Helper
Bar
1.
Melt Chocolate
1.
Chicken Nuggets
1.
Nachos
2.
Soften Cream Cheese
2.
Hot Dogs
2.
Chicken Wings
3.
Melt Butter
3.
French Fries
3.
Potato Skins
4.
Frozen Sandwich
4.Cheese Sticks
Auto
Sensor
Defrost
Reheat
Less
3
2
1
6
5
4
9
8
More
7
Power
Kitchen
Level
Timer
0
My
Clock
Choice
Pause
Start
microwave oven
roller guide ring
Cancel
registration card
glass tray
instruction manual
5
Page 6

Your New Micro wave oven
Thank You for Choosing Samsung
Your new oven represents the latest in microwave cooking technology.
This oven is a full-featured, easy-to-use appliance built to strict quality
standards set by Samsung — the highest in the industry. We’re proud to
offer you a product that will provide convenient, dependable service for
years to come.
Please record the serial number from the inside or back of your Samsung microwave oven and the date of purchase in the space provided
below. We recommend that you keep your purchase receipt with this
manual for easy warranty service.
Model Number ________________________________
Serial Number ________________________________
Date Purchased ________________________________
Dealer ________________________________
Setting Up Your Microwave Oven
1 Place the oven on a flat, sturdy surface and plug the cord into a
grounded outlet. Once plugged in, the display on your oven will
show after four seconds:
Make sure there is adequate ventilation for your oven by leaving at
least four inches of space behind, above, and to the sides of the
oven.
2 Open the oven door by pressing the butt on bel ow the co ntrol pa nel.
3 Wipe the inside of the oven with a damp cloth.
4 Place the pre-assembled ring in the indentation in the center of the
oven.
5 Place the glass tray on top of the ring so that the three glass tabs in
the center of the tray fit securely into the tabs on the floor of the
oven.
6
Page 7

Your New Micro wave oven
Control Panel Buttons
1
4
5
6
8
10
12
14
Help
Potato
Frozen
Vegetables
Bacon
Handy
Helper
1.
Melt Chocolate
2.
Soften Cream Cheese
3.
Melt Butter
Auto
Defrost
Less
1
4
7
Power
Level
Clock
Pause
Cancel
Popcorn
Frozen
Dinner
Frozen
Breakfast
Beverage
Meals
1.
Chicken Nuggets
2.
Hot Dogs
3.
French Fries
4.
Frozen Sandwich
Kids
2
5
8
0
One
Minute
+
Fresh
Vegetables
Shrimp
Reheat
Chicken
Boil
Water
Snack
1.
Nachos
2.
Chicken Wings
3.
Potato Skins
4.Cheese Sticks
Sensor
Reheat
9
Kitchen
Choice
Start
Pizza
Breast
Bar
3
6
More
Timer
My
2
3
7
9
11
13
15
1. Help p.10
Press to see help information about the feature you are using.
2. One Minute + p.11
Press once for every minute of cooking at High power.
3. Sensor Cook Buttons p.10
Sensor settings to cook popular foods.
4. Instant Cook Buttons p.11
Instant settings to cook popular foods.
5. Handy Helper, Kids Meals, Snack Bar p.13
Selects type of dish to be reheated.
6. Auto Defrost p.12
Sets weight of food to be defrosted.
7. Sensor Reheat p.12
8. Number Buttons
Set cooking times or amounts and power levels other than high.
9. More/Less p.15
Increase or decrease cooking time.
10. Power Level p.14
Press this pad to set a power level other than high.
11. Kitchen Timer p.16
Sets kitchen or convenience timer.
12. Clock p.9
Sets current time
13. My Choice p.8
Press to set non-cooking feature.
14. Pause/Cancel p.10
Press to pause oven or correct a mistake.
15. Start
Press to start cooking.
7
Page 8

Operation
Turning on the Power and Selecting a Display
Language
The first time you plug the power cord into an outlet, or after there has
been an interruption in power, the display shows after four seconds
“ENJOY YOUR COOKING -- -- -- PRESS MY CHOICE FOR PERSONAL OPTIONS”
1 Press My Choice immediately after plugging in your microwave.
The display will show “PRESS 1-9 TO SELECT VARIOUS
OPTIONS”.
2 Press the “1” button. The display will show:
3 Press My Choice The display will show:
4 Press My Choice repeatedly to select the language you wish to
use:
•ENGLISH
• FRENCH
• SPANISH
If you continue to press My Choice, the settings will cycle in the
order shown here.:
5 Press the “Start” button.
Using the My Choice feature
Your new microwave oven can be customized to suit your personal
tastes. Simply press My Choice to set these options. For your convenience, all the options are summarized in the following table:
My Choice
options
Display Weight Weight options are
Adjusting the
Volume
Remind End
Signal
Child Protection Lock
Clock
12HR/24HR
Word Prompting Speed
Daylight Savings Time
Adjustment
Demonstration
Mode
Description Operation
Press My Choice, 2 and select by
pounds or kilograms.
Volume options
include Off, Low,
Medium, High and
Melody 1~5.
The Remind End
Signal can be
turned On and Off.
This feature prevents use by unsupervised children.
The clock can display either 12HR
or 24HR time
modes.
There are five
speeds, from Level
1(slowest) to Level
5 (fastest). Default
is Level 3.
The time can be
advanced one hour
for DST without
resetting the Clock.
The Demo Mode
can be turned On
and Off.
repeatedly pressing My Choice.
To set, press Start.
Press My Choice, 3 and select by
repeatedly pressing My Choice.
To set, press Start.
Press My Choice, 4 and select by
repeatedly pressing My Choice.
To set, press Start.
Press My Choice, 5 and select by
pressing My Choice. To set,
press Start.
Press My Choice, 6 and select by
repeatedly pressing My Choice.
To set, press Start.
Press My Choice, 7 and select by
repeatedly pressing My Choice.
To set, press Start.
Press My Choice, 8 and select by
repeatedly pressing My Choice.
To set, press Start.
Press My Choice, 9 and select by
repeatedly pressing My Choice.
To set, press Start.
If there is a power interruption, you will need to reset these options.
8
Page 9

Operation
Selecting the Display Weight
You can choose between pounds(LBS) and kilograms(KG).
1 Press My Choice button and then press the 2 button.
The display shows ‘LBS OR KG”.
2 Press the My Choice button repeatedly to select the weight
measurements you wish to use.
3 Press the Start button.
Setting the Clock 12HR/24HR
The time can be displayed in either 24-hour or 12-hour format.
1 Press the My Choice button and then 6.
The display shows “CLOCK 12HR/24HR OPTION”.
2 Press the My Choice button repeatedly to select either 12HR or
24HR.
3 Press the Start button.
Setting the Clock
1 Press the Clock button. The display will show:
2 Use the number buttons to enter the current time.
You must press at least three numbers to set the clock. For
example, if the current time is 5:00, enter 5,0,0.
3 Press Clock again. A colon will appear, indicating that the time is
set.
If there is a power interruption, you will need to reset the clock.
You can check the current time while cooking is in progress by
pressing the Clock button.
9
Page 10

Operation
Setting the Daylight Saving Time adjustment
1 Press the My Choice button and then 8.
The Display shows “DAYLIGHT SAVING TIME ON/OFF”.
2 Press the My Choice button to select ON. Press again to select
OFF.
3 Press the Start button. Time of day will advance one hour.
If OFF is selected, time will go back one hour.
If the clock is set for standard time, this function allows convenient
time changes without needing to reset the clock. Daylight Saving
Time begins for most of the United States at 2 a.m. on the first
Sunday of April, and reverts to Standard time at 2 a.m. on the last
Sunday of October.
Using the Pause/Cancel Button
The Pause/Cancel button allows you to clear instructions you have
entered. It also allows you to pause the oven’s cooking cycle, so that
you can check the food.
• To pause the oven during cooking : press Pause/Cancel once.
To restart, press Start.
• To stop cooking, erase instructions, and return the oven display to
the time of day: Press Pause/Cancel twice.
• To clear instructions you have just entered: press Pause/Cancel
once, then re-enter the instructions.
• To cancel a timer setting: press Pause/Cancel once.
Using the Help Button
Your microwave offers helpful instructions for many procedures.
1 When you need feature information and helpful hints, press the
Help button and then press the button that you want to get
information on. Help information is available in 3 languages
(English, French and Spanish).
Using the Sensor Cook Buttons
By actually sensing the steam that escapes as food heat, this feature
automatically adjusts the oven’s heating time for various types and
amounts of precooked food. All food should be precooked and at refrigerator temperature.
1 Press the Sensor Cook button corresponding to the food you are
cooking (Popcorn, for example). The display shows “POPCORN”
and your microwave oven will begin cooking automatically.
MICRO
When cooking popcorn, wait at least five minutes between each bag to
avoid overheating the glass tray. If you want to adjust the cooking time,
you can use the More/Less buttons. See page 15 for more information.
If you want to check the current time while cooking is in progress, press
the Clock button.
• See page 26 for the Sensor Cooking Guide
10
Page 11

Operation
Using the One Minute + Button
This button offers a convenient way to heat food in one minute increments at the High power level.
1 Press the One Minute+ button once for each minute you wish to
cook the food. For example, press it twice for two minutes.
The time will display, and the oven starts automatica lly.
Add minutes to a program in progress by pressing the
One Minute+ button for each minute you want to add.
Using the Instant Cook Buttons
1 Press the Instant Cook button corresponding to the food you are
cooking (Bacon, for example). The display will show:
(“BACON 2 SLICES”):
2 Press the button repeatedly to select the serving size you want.
The display will cycle through all available serving sizes. Once you
select the correct serving size, the microwave will begin cooking
automatically.
If you don’t need to read all the menu options, simply press the
Start button to begin cooking.
If you want to check the cooking time, press the Instant Cook
button.
When the cooking times are over, the oven will beep. The oven will
then beep every minute.
Instant Cook Chart
Item Weight Remarks
Beverage ½ cup
1 cup
2 cups
Boil water ½ cup
1 cup
2 cups
Bacon 2 Slices
4 Slices
6 Slices
• Use measuring cup or mug; do not cover.
• Place the beverage in the oven.
• After heating, stir well.
• Measure liquid; pour into microwave-safe
container that is 2 times larger than amount of
liquid. Example: For 1 cup liquid use a 2 cup
or larger dish.
• Stir well before and after heating to prevent
boil over.
• Place 2 paper towels on plate and arrange
bacon on towels, do not overlap. Cover with
additional paper towel. Remove paper towel
immediately after cooking.
• Use More or Less button for desired
crispness.
11
Page 12

Operation
Sensor Reheat
Heating leftovers and precooked foods is ea sy w it h your new microwave. By actually sensing the steam that escapes as food heat, this feature automatically adjusts the oven’s heating time for various types and
amounts of precooked food. All food should be precooked and at refrigerator temperature. To use sensor reheating:
1 Press Sensor Reheat. The display will show “REHEAT” and the
oven will start automatically.
MICRO
If you want to adjust the heating time, use the More/Less buttons.
See page 15 for the More/Less buttons. If you want to check the
current time while reheating, press the Clock button.
• See page 27 for the Sensor Reheat Guide
Defrosting Automatically
To thaw frozen food, set the weight of the food and the microwave automatically sets the defrosting time, power level and standing time.
1 Press the Auto Defrost button. The display shows “0.5 LB.”(0.2Kg
if you have set your oven for metric measure).
2 To set the weight of your food, press the Auto Defrost button
repeatedly. This increases the weight by 0.5 lb increments, up to
6.0 lbs. You can also use the number buttons to enter the weight of
the food directly. The oven calculates the defrosting time and starts
automatically. Twice during defrosting, the oven will beep and the
display will read “TURN THE FOOD OVER.
MICRO
3 Press the Pause/Cancel button, open the oven door, and turn the
food over.
4 Press the Start button to resume defrosting.
• See page 23 for the Auto Defrosting Guide
12
Page 13
Operation
Using the Handy Helper Button
1. Press the Handy Helper button corresponding to the food you are
cooking. The display shows “Melt Chocolate”.
Press the Handy Helper button repeatedly to select the item you
want.(Refer to the Handy Helper Chart below)
2. Press the Number button to select the serving size you want. You
can press the “1” or “2” button to select the serving size.
Only the “1” button(serving) is available for Soften Cream Cheese
and Melt Chocolate items.(Refer to the Handy Helper Chart below
for the serving)
3. Press the Start button to begin cooking.
Handy Helper Chart
Item Weight Remarks
Melt
Chocolate
Soften Cream
Cheese
Melt Butter 1 stick
2 squares
or 1 cup
chips
1
package
(8 oz.)
(1/4 lb.)
2 sticks
(1/2 lb.)
• Place chocolate chips or square in a
microwave-safe dish.
• Stir well at half time when the oven
beeps, and re-start the oven.
• Unwrap cream cheese and place on
microwave-safe dish.
• Let stand 1-2 min.
• Remove wrapping and cut butter in half
vertically.
• Place butter in dish, cover with wax
paper.
• Stir well after finishing and let stand 1-2
min.
Using the Kids Meals Button
1. Press the Kids Meals button corresponding to the food you are
cooking. The display shows “Chicken Nuggets”.
Press the Kids Meals button repeatedly to select the item you
want.(Refer to the Kids Meals Chart below)
2. Press the Number button to select the serving size you want.
You can Press the “1” or “2” button to select the serving size.(Refer
to the Kids Meals Chart below for the serving.)
3. Press the Start button to begin cooking.
Kids Meals Chart
Item Weight Remarks
Chicken
Nuggets
Hot Dogs 2 EA
French Fries 4-5 oz
Frozen
Sandwich
4-5 oz
6-7 oz
4 EA
6-7 oz
1 EA
2 EA
• Put a paper towel on top of plate and
arrange nuggets in spoke fashion on paper
towel.
• Do not cover. Let stand 1 min.
• Prick hot dogs, place on plate. When the
oven beeps, add buns and re-start the oven.
• Place 2 paper towels on plate and arrange
french fries on towels, do not overlap.
• Blot with additional paper towel after
removal from oven.
• Place frozen sandwich in susceptor "sleeve"
(which is in package) and put on plate.
Note
Note:
Melt chocolate
Chocolate keeps its shape even when heating time is
over.
- Unless stirred at half time, the
13
Hot Dogs
- For the best texture of buns should be
added to hot dogs when the oven beeps.
Page 14

Operation
Using the Snack Bar Button
1. Press the Snack Bar button corresponding to the food you are
cooking. The display shows “Nachos” .
Press the Snack Bar button repeatedly to select the item you
want.(Refer to the Snack Bar Chart below)
2. Press the Number button to select the serving size you want. You
can press the “1” or “2” button to select the serving size.
Only the “1” button(serving) is available for Nachos.
(Refer to the Snack Bar Chart below for the serving)
3. Press the Start button to begin cooking.
Snack Bar Chart
Item Weight Remarks
Nachos 1 serving • Place tortilla chips on plate without
overlapping.
• Sprinkle evenly with cheese.
• Contents :
- 2 cups tortilla chips
- 1/3 cup grated cheese
Chicken Wings 5-6 oz
7-8 oz
Potato Skins 1 cooked
potato
2 cooked
potatoes
Cheese Sticks 5-6 pcs
7-10 pcs
• Use pre-cooked, refrigerated chicken
wings.
• Place chicken wings around plate in
spoke fashion and cover with wax paper.
• Cut cooked potato into 4 even wedges.
Scoop or cut out potato flesh, leaving
about 1/4" of skin.
• Place skins in spoke fashion around
plate.
• Sprinkle with bacon, onions and cheese.
Do not cover.
• Place cheese sticks on plate in spoke
fashion.
• Do not cover.
Setting Cooking Times & Power Levels
Your microwave allows you to set up to three different stages of cooking,
each with its own time length and power level. The power level lets you
control the heating intensity from Warm (1) to High (0).
One-stage Cooking
For simple one-stage cooking, you only need to set a cooking time.
The power level is automatically set at High. If you want the power set at
any other level, you must set it using the Power Level button.
1 Use the number buttons to set a cooking time. You can set a time
from one second to 99 minutes, 99 seconds. To set a time over one
minute, enter the seconds too.
For example, to set 20 minutes, enter 2, 0, 0, 0 .
2 If you want to set the power level to something other than High,
press the Power Level button, then use the number buttons to
enter a power level.
Power Levels:
1 = Warm 6 = Simmer
2 = Low 7 = Medium High
3 = Defrost 8 = Reheat
4 = Medium Low 9 = Sauté
5 = Medium 0 = High
The display shows “PRESS START OR ENTER NEXT STAGE
COOKING TIME”.
3 Press the Start button to begin cooking. If you want to change the
power level, press Pause/Cancel before you press Start, and
reenter all of the instructions.
14
Page 15

Operation
Setting Cooking Times, continued
Some recipes require different stages of cooking at different temperatures. You can set multiple stages of cooking with your microwave.
Multi-stage Cooking
1 Follow steps 1 and 2 in the “One-Stage Cooking” section on the
previous page. The display shows “PRESS START OR ENTER
NEXT STAGE COOKING TIME”.
When entering more than one cooking stage, the Power Level
button must be pressed before the second cooking stage can be
entered.
To set the power level at High for a stage of cooking, press the
Power Level button twice.
2 Use the Number buttons to set a second cooking time.
3 Press the Power Level button, then use the number buttons to set
the power level of the second stage of cooking.
The display shows the power level you have set and then “PRESS
START OR ENTER NEXT STAGE COOKING TIME.”.
Using the More/Less Buttons
The More/Less buttons allow you to adjust pre-set cooking times.
They only work in the Sensor Reheat, Sensor Cooking, Instant Cook,
Handy Helper, Kids Meals, Snack Bar or Time Cook modes. Use the
More/Less button only after you have already begun cooking with one of
these procedures.
1 To ADD more time to an automatic cooking procedure: Press the
More(9) button.
2 To REDUCE the time of an automatic cooking procedure: Press the
Less(1) button.
If you wish to increase/decrease in Time Cook mode by
10 seconds, press the More(9) or Less(1) button.
4 Press Start to begin cooking, or repeat steps 2 and 3 to set a
cooking time and power level for a third stage of cooking.
When finished, press Start.
15
Page 16
Operation
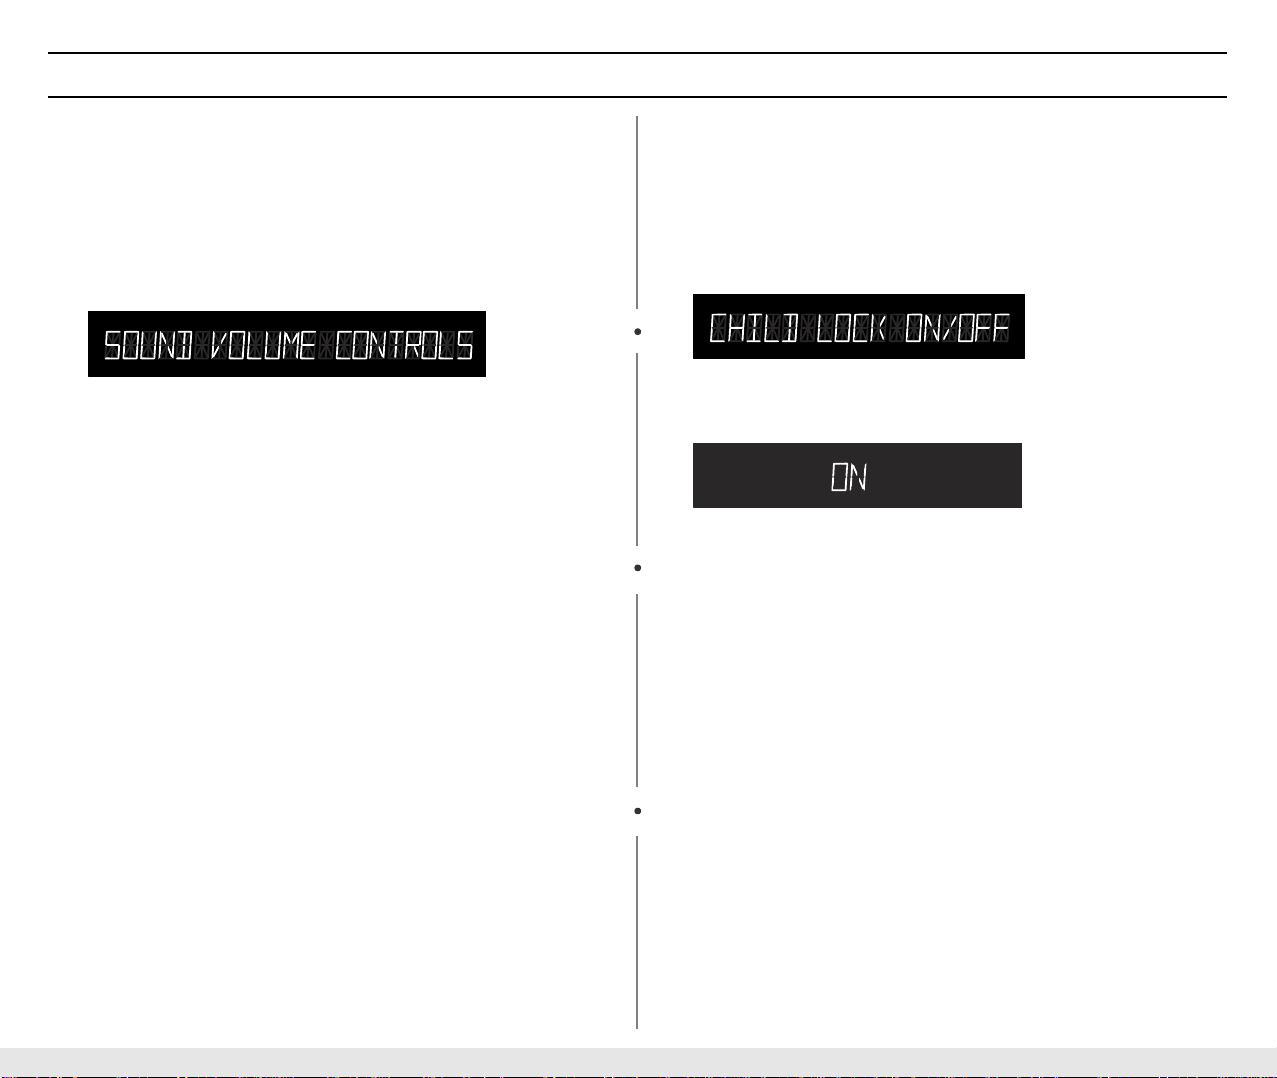
Adjusting the Volume
The Sound function on the microwave allows you to adjust the volume of
the microwave’s chime sound. The sound is initially set to its high setting. To change the volume,
1 Press the My Choice button and then press 3.
The display shows “SOUND VOLUME CONTROLS” .
2 Press the My Choice button repeatedly to select volume.
3 Press Start: The display returns to the time of day.
Using the Kitchen Timer
1 Use the Number buttons to set the length of time you want the
timer to run.
2 Press the Kitchen Timer button.
3 The display counts down and beeps when the time has elapsed.
Setting the Child Protection Lock
You can lock your microwave oven so it can’t be used by unsupervised
children.
1 Press the My Choice Button and then press the 5 button.
The display shows “CHILD LOCK ON/OFF”.
2 Press the My Choice button once to select the ON.
Press again to select OFF.
3 Press the Start button. The display returns to the time of day.
At this point, the microwave oven cannot be used until it is
unlocked. To unlock it, repeat steps 1-3 above.
16
Page 17
Operation
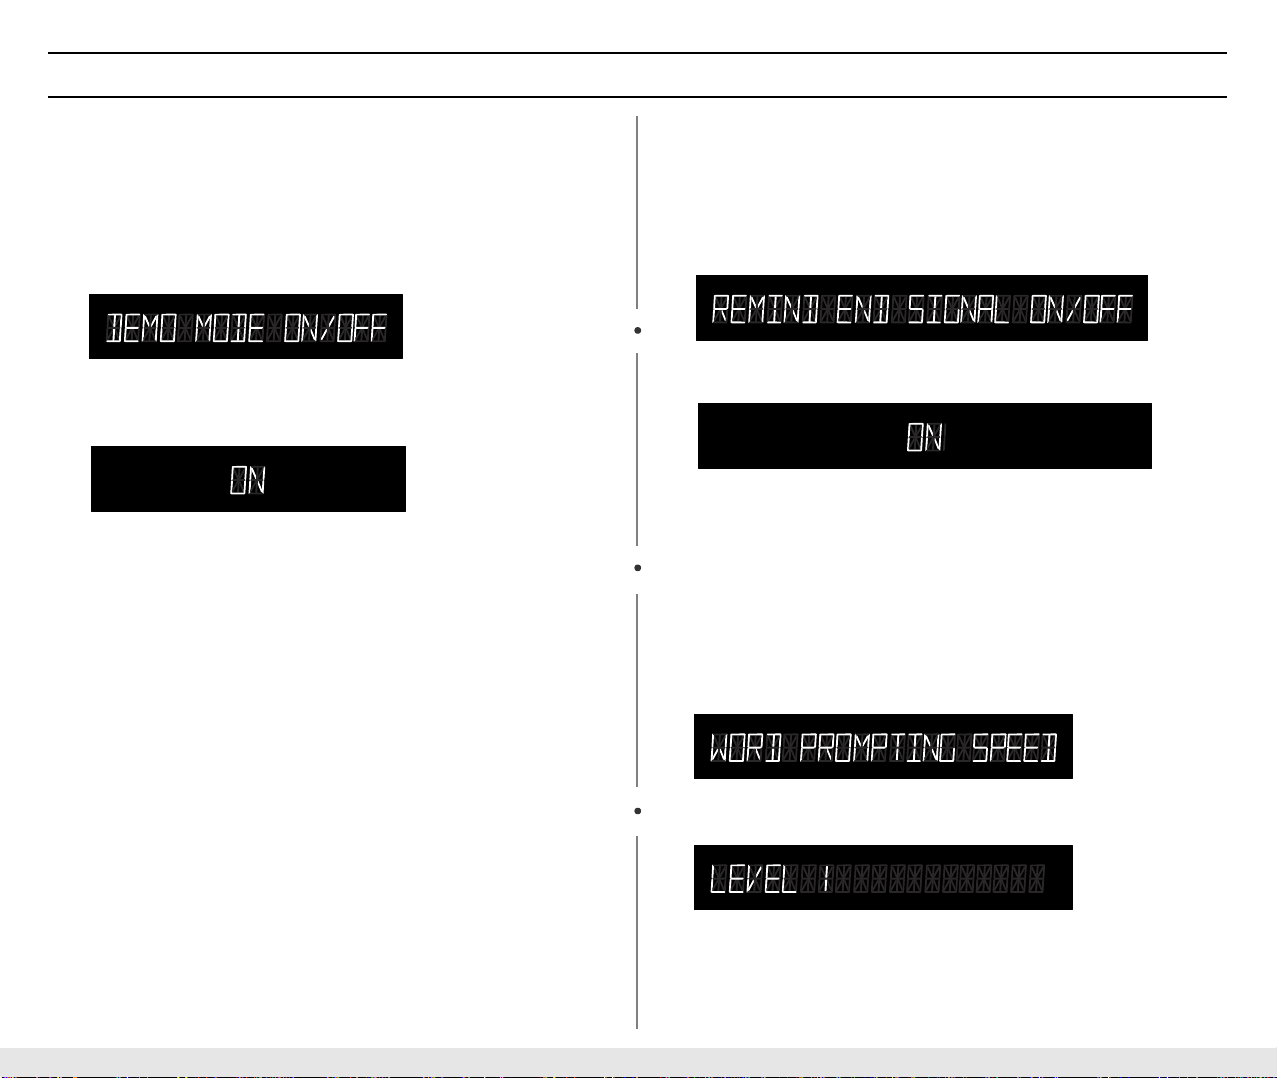
Demonstration Mode
You can use the Demonstration Mode to see how your microwave oven
operates without the oven heating.
1 Press the My Choice button and then Press 9.
The display shows “ DEMO MODE ON/OFF”
2 Press the My Choice button once to select ON.
Press again to select OFF.
3 Press the Start button. The display shows “DEMO”.
To turn demo mode off, repeat steps 1-3 above.
Setting the Remind End Signal
The Remind End Signal can be set On or Off.
1 Press the My Choice button and then press 4.
The display shows “REMIND END SIGNAL ON/OFF”.
2 Press the My Choice button to select ON.
3 Press the Start button. The display returns to the time of day.
To turn Remind End Signal off, repeat steps 1-3 above.
Setting the Word Prompting Speed
1 Press the My Choice button and then press 7.
The display shows”WORD PROMPTING SPEED”.
2 Press the My Choice button to select the appropriate scroll speed.
3 Press the Start button.
The display returns to the time of day.
17
Page 18

Cooking Instructions
Cooking Utensils
Recommended Use
• Glass and glass-ceramic bowls and dishes — Use for heating or
cooking.
• Microwavable browning dish — Use to brown the exterior of small
items such as steaks, chops, or pancakes. Follow the directions
provided with your browning dish.
• Microwavable plastic wrap — Use to retain steam. Leave a small
opening for some steam to escape and avoid placing it directly on
the food.
• Wax paper — Use as a cover to prevent spattering.
• Paper towels and napkins — Use for short-term heating and
covering; they absorb excess moisture and prevent spattering. Do
not use recycled paper towels, which may contain metal and can
catch fire.
• Paper plates and cups — Use for short-term heating at low
temperatures. Do not use recycled paper, which may contain metal
and can catch fire.
• Thermometers — Use only those labeled “Microwave Safe” and
follow all directions. Check the food in several places. Conventional
thermometers may be used once the food has been removed from
the oven.
Limited Use
• Aluminum foil — Use narrow strips of foil to prevent overcooking of
exposed areas. Using too much foil can damage your oven, so be
careful.
• Ceramic, porcelain, and stoneware — Use these if they are
labeled “Microwave Safe”. If they are not labeled, test them to make
sure they can be used safely. Never use dishes with metallic trim.
• Plastic — Use only if labeled “Microwave Safe”. Other plastics can
melt.
• Straw, wicker, and wood — Use only for short-term heating, as
they can be flammable.
Not Recommended
• Glass jars and bottles — Regular glass is too thin to be used in a
microwave, and can shatter.
• Paper bags — These are a fire hazard, except for popcorn bags that
are designed for microwave use.
• Styrofoam plates and cups — These can melt and leave an
unhealthy residue on food.
• Plastic storage and food containers — Containers such as
margarine tubs can melt in the microwave.
• Metal utensils — These can damage your oven. Remove all metal
before cooking.
Testing Utensils
If you are not sure whether a dish is microwave-safe or not, you can perform this test:
1 Fill a 1 cup glass measuring cup with water and put it inside your
oven, next to the dish you want to test.
2 Press the One Minute + button once to heat them for one minute at
High power.
The water should be warm and the dish you are testing should be cool. If
the dish is warm, then it is absorbing microwave energy and is not
acceptable for use in the microwave.
18
Page 19

Cooking Instructions
Cooking Techniques
Stirring
Stir foods such as casseroles and vegetables while cooking to distribute
heat evenly. Food at the outside of the dish absorbs more energy and
heats more quickly, so stir from the outside to the center. The oven will
turn off when you open the door to stir your food.
Arrangement
Arrange unevenly shaped foods, such as chicken pieces or chops, with
the thicker, meatier parts toward the outside of the turntable where they
receive more microwave energy. To prevent overcooking, place thin or
delicate parts toward the center of the turntable.
Shielding
Shield food with narrow strips of alu m inum foil to prevent overcooking.
Areas that need shielding include poultry wing - tips, the ends of poultry
legs, and corners of square baking dishes. Use only small amounts of
aluminum foil. Larger amounts can damage your oven.
Turning
Turn foods over midway through cooking to expose all parts to microwave energy. This is especially important with large items such as
roasts.
Standing
Foods cooked in the microwave build up internal heat and continue to
cook for a few minutes after the oven stops. Let foods stand to complete
cooking, especially foods such as roasts and whole vegetables. Roasts
need this time to complete cooking in the center without overcooking the
outer areas. All liquids, such as soup or hot chocolate, should be shaken
or stirred when cooking is complete. Let liquids stand a moment before
serving. When heating baby food, stir wel l and test the temperature
before serving.
Adding Moisture
Microwave energy is attracted to water molecules. Food that is uneven
in moisture content should be covered or allowed to stand so that the
heat disperses evenly. Add a small amount of water to dry food to help it
cook.
General Tips
• Dense foods, such as potatoes, take longer to heat than lighter
foods. Foods with a delicate texture should be heated at a low power
level to avoid becoming tough.
• Altitude and the type of cookware you are using can affect cooking
time. When using a new recipe, use the minimum cooking time and
check the food occasionally to prevent overcooking.
• Foods with a non-porous skin such as potatoes or hot dogs, should
be pierced to prevent bursting.
• Frying with heating oil or fat is not recommended. Fat and oil can
suddenly boil over and cause severe burns.
• Some ingredients heat faster than others. For example, the jelly
inside a jelly doughnut will be hotter than the dough. Keep this in
mind to avoid burns.
• Home canning in the microwave oven is not recommended because
all harmful bacteria may not be destroyed by the microwave heating
process.
• Although microwaves do not heat the cookware, the heat is often
transferred to the cookware. Always use pot holders when removing
food from the microwave and instruct children to do the same.
• Making candy in the microwave is not recommended as candy can
heat to very high temperatures. Keep this in mind to avoid injury.
19
Page 20

Cooking Instructions
Auto Sensor Cook
The Auto Sensor allows you to cook your food automatically by detecting the amount of gases generated from the food while cooking.
• When cooking food, many kinds of gases are generated. The Auto
Sensor determines the proper time and power level by detecting
these gases from the food, eliminating the need to set the cooking
time and power level.
• When you cover a container with its lid or plastic wrap during Sensor
Cooking, the Auto Sensor will detect the gases generated after the
container has been saturated with steam.
• Shortly before cooking ends, the remaining cooking time will begin
its count down. This will be a good time for you to rotate or stir the
food for even cooking if it is necessary.
• Before auto sensor cooking food may be seasoned with herbs,
spices or browning sauces. A word of caution though, salt or sugar
may cause burn spots on food so these ingredients should be added
after cooking.
• The More/Less function pad is used to increase or decrease cooking
time. You should use this function to adjust the degree of cooking to
suit your personal taste.
Utensils & Cover For Sensor Cooking
• To obtain good cooking results with this function, follow the
directions for selecting appropriate containers and covers in the
charts in this book.
• Always use microwave-safe containers and cover them with their lids
or with plastic wrap. When using plastic wrap, turn back one corner
to allow steam to escape at the proper rate.
• Always cover with the lid intended for the utensil being used. If the
utensil does not have its own lid, use plastic wrap.
• Fill containers at least half full.
• Foods that require stirring or rotating should be stirred or turn ed
toward the end of the Sensor Cook cycle, after the time has started
to count down on the display.
Important
• After installing the oven and plugging into an electrical outlet, do not
unplug the power cord. The gas sensor needs time to stabilize in
order to cook satisfactorily.
• It its not advisable to use the auto sensor cooking feature on a
continuous cooking operation, i.e. one cooking operation
immediately after another.
• Install the oven in a well ventilated location for proper cooling and
airflow and to ensure the sensor will operate accurately.
• To avoid poor results, do not use the Auto sensor when the room
ambient temperature is too high or too low.
• Do not use volatile detergent to clean your oven. Gas resulting from
this detergent may affect the sensor.
• Avoid placing the oven near high moisture or gas emitting
appliances, since this will interfere with the proper performance of
the Auto Sensor.
• Always keep the inside of the oven clean. Wipe all spills with a damp
cloth.
This oven is designed for household use only.
20
Page 21

Cooking Instructions
Cooking Guide
Guide for Cooking Meat in Your Microwave
• Place meat on a microwave-safe roasting rack in a microwave-safe
dish.
• Start meat fat-side down. Use narrow strips of aluminum foil to shield
any bone tips or thin meat areas.
• Check the temperature in several places before letting th e meat
stand the recommended time.
• The following temperatures are removal temperatures. The
temperature of the food will rise during the standing time.
Food Cook Time/Power Level Directions
Roast
Beef
Boneless
Up to 4 lbs.
Pork
Boneless
or bone-in
Up to 4 lbs.
Cooking Time:
7-11 min. / lb. for 115° F Rare
8-12 min. / lb. for 120° F Medium
9-14 min. / lb. for 145° F Well Done
Power Level: High(0) for
first 5 min., then
Medium(5).
Cooking Time:
11-15 min. / lb. for 160° F
Well Done
Power Level: High(0) for
first 5 min., then
Medium(5).
Place roast fat-side down on
roasting rack. Cover with wax
paper. Turn over when
cooking time is half up. Let
stand 10 min.
Place roast fat-side down on
roasting rack. Cover with
vented plastic wrap. Turn
over when cooking time is
half up. Let stand 10 min.
Guide for Cooking Poultry in Your Microwave
• Place poultry on a microwave-safe roasting rack in a microwave-safe
dish.
• Cover poultry with wax paper to prevent spattering.
• Use aluminum foil to shield bone tips, thin meat areas, or areas that
start to overcook.
• Check the temperature in several places before letting the poultry
stand the recommended time.
Food Cook Time/Power Level Directions
Whole
Chicken
Up to 4 lbs.
Chicken
Pieces
Up to 2 lbs.
Cooking Time:
6-9 min. / lb. 180°F
Power Level: Medium
High(7).
Cooking Time:
6-9 min. / lb.
180°F dark meat
170°F light meat
Power Level: Medium
High(7).
Place chicken breast-side
down on roasting rack. Cover
with wax paper. Turn over
when the cooking time is half
up. Cook until juices run clear
and meat near the bone is no
longer pink. Let stand 5-10
min.
Place chicken bone-side
down on dish, with the
thickest portions towards the
outside of the dish. Cover
with wax paper. Turn over
when the cooking time is half
up. Cook until juices run clear
and meat near the bone is no
longer pink. Let stand 5-10
min.
21
Page 22

Cooking Instructions
Guide for Cooking Seafood in Your Microwave
• Cook fish until it flakes easily with a fork.
• Place fish on a microwave-safe roasting rack in a microwave-safe
dish.
• Use a tight cover to steam fish. A lighter cover of wax paper or paper
towel provides less steaming.
• Do not overcook fish; check it at minimum cooking time.
Food
Steaks
Up to 1.5 lbs.
Fillets
Up to 1.5 lbs.
Shrimp
Up to 1.5 lbs.
Cook Time/Power
Level
Cooking Time:
6-10 min. / lb.
Power Level: MediumHigh(7).
Cooking Time:
3-7 min. / lb
Power Level: MediumHigh(7).
Cooking Time:
3-5 ½ min. / lb.
Power Level: MediumHigh(7).
Directions
Arrange steaks on roasting
rack with meaty portions
towards the outside of rack.
Cover with wax paper. Turn
over and rearrange when
cooking time is half up. Cook
until fish flakes easily with a
fork. Let stand 3-5 min.
Arrange fillets in a baking
dish, turning any thin pieces
under Cover with wax paper.
If over ½ inch thick, turn over
and rearrange when cooking
time is half up. Cook until
fish flakes easily with a fork.
Let stand 2-3 min.
Arrange shrimp in a baking
dish without overlapping or
layering. Cover with wax
paper. Cook until firm and
opaque, stirring 2 or 3 times.
Let stand 5 min.
Guide for Cooking Eggs in Your Microwave
• Never cook eggs in the shell, and never warm hard-cooked eggs in
the shell; they can explode.
• Always pierce whole eggs to keep them from bursting.
• Cook eggs just until set; they become tough if overcooked.
Guide for Cooking Vegetables in Your Microwave
• Vegetables should be washed just before cooking. Often, no extra
water is needed. If dense vegetables such as potatoes, carrots and
green beans are being cooked, add about ¼ cup water.
• Small vegetables (sliced carrots, peas, lima beans, etc.) will cook
faster than larger ones.
• Whole vegetables, such as potatoes, acorn squash or corn on the
cob, should be arranged in a circle on the turntable before cooking.
They will cook more evenly if turned over after half the cooking time.
• Always place vegetables like asparagus and broccoli with the stem
ends pointing towards the edge of the dish and the tips toward the
center.
• When cooking cut vegetables, always cover the dish w ith a lid or
vented microwavable plastic wrap.
• Whole, unpeeled vegetables such as potatoes, squash, eggplant,
etc., should have their skin pricked in several spots before cooking to
prevent them from bursting.
• For more even cooking, stir or rearrange whole vegetables halfway
through the cooking time.
• Generally, the denser the food, the longer the standing time.
(Standing time refers to the time necessary for dense, large foods
and vegetables to finish cooking after they come out of the oven.) A
baked potato can stand on the counter for five minutes before
cooking is completed, while a dish of peas can be served
immediately.
22
Page 23

Cooking Instructions
Auto Defrosting Guide
• Follow the instructions below when defrosting different types of food.
Food
Roast
Beef, Pork
Steaks,
Chops,
Fish
Ground
Meat
Whole
Chicken
Chicken
Pieces
Standard
Amount
2.5-6.0 lbs. Start with the food placed fat side down.
After each stage, turn the food over and
shield any warm portions with narrow
strips of aluminum foil.
0.5-3.0 lbs. After each stage, rearrange the food. If
there are any warm or thawed portions of
food, shield them with narrow flat pieces
of aluminum foil. Remove any pieces of
food that are nearly defrosted. Let stand,
covered, for 5-10 minutes.
0.5-3.0 lbs. After each stage, remove any pieces of
food that are nearly defrosted. Let stand,
covered with foil, for 5–10 minutes.
2.5-6.0 lbs. Remove giblets before freezing poultry.
Start defrosting with the breast si de
down. After the first stage, turn the
chicken over and shield any warm
portions with narrow strips of aluminum
foil. After the second stage, again shield
any warm portions with narrow strips of
aluminum foil. Let stand, covered, for
30–60 minutes in the refrigerator.
0.5-3.0 lbs. After each stage, rearrange or remove
any pieces of food that are nearly
defrosted. Let stand for 10-20 minutes.
Procedure
Notes:
Check foods when the oven signals. After the final stage, small sections
may still be icy; let them stand to continue thawing. Do not defrost until
all ice crystals have thawed. Shielding roasts and steaks with small
pieces of foil prevents the edges from cooking before the center of the
food has defrosted. Use narrow, flat, smooth strips of aluminum foil to
cover the edges and thinner sections of the food.
23
Page 24

Cooking Instructions
Recipes
Beef and Barley Stew
1½ lbs. beef stew cubes, cut into ½-inch pieces
½ cup chopped onion
2 Tbs. all-purpose flour
1 Tbs Worcestershire sauce
1 can (13.75-14.5 oz.) beef broth
2 medium carrots, cut into ½-inch slices (about 1 cup)
½ cup barley
1 bay leaf
¼ tsp. pepper
1 pkg. (9-10 oz.) frozen peas, thawed
1. In a 2-quart casserole, combine beef, onion, flour, and
Worcestershire; mix well. Cover with lid. Cook at High for 6 to 8
minutes until beef is no longer pink, stirring once.
2. Stir in beef broth , carrots, barley, bay leaf, and pepper. Cover with
lid. Cook at Medium for 1 to 1½ hours until carrots and beef are
tender, stirring 2 to 3 times.
3. Stir in peas. Cover with lid. Cook at Medium for 10 minutes. Let
stand for 10 minutes. Remove bay leaf before serving.
Makes 6 servings.
Broccoli and Cheese Casserole
¼ cup butter or margarine
¼ cup chopped onion
1½ Tbs. flour
½ tsp. salt
¼ tsp. dry mustard
1/8 tsp. pepper
1½ cups milk
¼ cup chopped red pepper
8 oz. (2 cups) cheddar cheese, shredded
1 pkg. (9-10 oz.) frozen chopped broccoli, thawed
4 cups cooked spiral shaped pasta (8 oz. dry)
1. In a 2-quart casserole, cook butter and onion at High for 1 to 2
minutes until onion is soft, stirring once.
2. Add flour, salt, mustard, and pepper; mix well. Cook at High for 30 to
60 seconds until mixture boils. Stir in milk until smooth.
3. Stir in red pepper. Cook at High for 2 to 3 minutes until mixture boils
and thickens slightly, stirring twice. Stir in cheese until melted.
4. Add broccoli and pasta, mix well. Cover with lid. Cook at High for 4 to
6 minutes until heated through, stirring once. Stir before serving.
Makes 6 servings.
24
Page 25

Cooking Instructions
Warm Potato Salad
2 lbs. small red potatoes, cut into ½-inch pieces
4 slices bacon (uncooked), cut into ½-inch pieces
¼ cup chopped onion
2 tsp. sugar
1 tsp. salt
1 tsp. flour
½ tsp. celery seed
1
/8 tsp. pepper
2½ Tbs. apple cider vinegar
1. In a 2-quart casserole, combine potatoes and ¼ cup water. Cover
with lid. Cook at High until potatoes are tender (7-10 min.); stir twice.
Drain and set aside to cool slightly.
2. In a medium bowl, cook bacon at High until crisp (2½-3½ min.); stir
once. Place bacon on a paper towel. Reserve 1 Tbs. drippings.
3. Combine drippings and onion. Cover with plastic wrap; turn back a
corner to vent steam. Cook at High until tender (1½-2½ min.); stir
once.
4. Stir in sugar, salt, flour, celery seed, and pepper. Cook at High until
mixture boils (30-40 sec.). Stir in vinegar and ½ cup water. Cook at
High until liquid boils and thickens slightly (1-2 min.); stir once. Add
bacon to dressing. Pour dressing over potatoes. Stir well.
Makes 6 servings.
Black Bean Soup
1 cup chopped onion
1 clove garlic, minced
2 cans (15 oz. each) black beans, drained
1 can (14-16 oz.) stewed tomatoes, chopped
1 can (13.75-14.5 oz.) chicken broth
1 can (7-8.5 oz.) corn
1 can (4 oz.) chopped green chilies
1-2 tsp. ground cumin, or to taste
1. Place onion and garlic in a 3-quart casserole. Cover with lid. Cook at
High for 2 to 4 minutes until tender.
2. Add one can of beans, mash beans with a fork. Add remaining
ingredients; mix well.
3. Cook uncovered, at High for 10 minutes; stir. Reduce power to
Medium and cook for 5 minutes. Stir before serving.
Makes about 2 quarts.
25
Page 26

Cooking Instructions
Sensor Cooking Guide
• Follow the instructions below when sensor cooking different types of
food.
Food Amount Procedure
Potatoes 1 to 6 EA. Prick each potato several times with
Fresh
Vegetables
Frozen
Dinner
Pizza
Reheat
Frozen
Vegetables
Frozen
Breakfast
1 to 4 cups Place fresh vegetables in microwave-
7 to 18 oz. Remove food from outer wrapping and
1 to 3 Slices Put 1~3 slices of pizza on a microwave-
1 to 4 cups Place frozen vegetables in microwave-
2 to 8 oz. Follow package instructions for covering
fork. Place on turntabel in spoke-like
fashion. Let stand 3-5 min. Let oven
cool for at least 5 minutes before using
again.
safe ceramic, glass or plastic dish and
add 2-4 Tbs. water. Cover with lid or
vented plastic wrap during cooking and
stir before standing. Let vegetables
stand 2 minutes before serving. Let
oven cool for at least 5 minutes before
using again.
follow box instructions for covering and
standing. Let oven cool for at least 5
minutes before using again.
safe plate with wide end of slice towards
the outside edge of the plate. Do not let
slices overlap. Do not cover. Let oven
cool for at least 5 minutes before using
again.
safe ceramic, glass or plastic dish and
add 2~4 Tbs. water. Cover with lid or
vented plastic wrap during cooking and
stir before standing. Let oven cool for at
least 5 minutes before using again.
and standing. Use this pad for frozen
sandwich, breakfast entree, pancakes,
waffles. etc. Let oven cool for at least 5
minutes before using again.
Food Amount Procedure
Shrimp 0.5 to 1.0 lbs Arrange shrimp in a baking dish without
overlapping or layering. Cover with wax
paper. Let oven cool for at least 5
minutes before using again.
Boneless
Chicken
Breast
Popcorn 3.0 ~ 3.5 oz
0.5 to 1.5 lbs Arrange chicken pieces in a microwave safe dish with the thickest portions to
the outside. Cover with wax paper
tucking sides of wax paper under dish.
In case of thick chicken breast, for the
best result, pound each side lightly with
a mallet before cooking. When the oven
beeps, turn over and rearrange them.
Let oven cool for at least 5 minutes
before using again.
Use only one microwave-only bag of
1 package
popcorn at a time. Use caution when
removing and opening hot bag from
oven. Let oven cool for at least 5
minutes before using again.
Notes:
Temperature of food varies from person to person.
Use the more/less button to fit your temperature preference.
26
Page 27

Cooking Instructions
Sensor Reheat Guide
• Follow the instructions below when sensor reheating different types
of food.
Food Amount Procedure
Plate of
food
Casseroles
Pasta
Reheat
1 serving
(1 plate).
1 to 4
servings.
Use only pre-cooked, refrigerated foods.
Cover plate with vented plastic wrap or
waxed paper, tucked under plate. If food is
not as hot as you prefer after heating with
SENSOR REHEAT, continue heating using
time and power.
• Contents
- 3 ~ 4 oz. meat, poultry or fish(up to 6
oz.with bone)
- 1/2 cup starch (potatoes, pasta, rice,
etc.)
- 1/2 cup vegetables (about 3 ~ 4 oz.)
Use only refrigerated foods. Cover plate
with lid or vented plastic wrap. If food is not
as hot as you prefer after heating with
SENSOR REHEAT, continue heating using
time and power.
Stir foods once before serving.
Sensor Recipes
French Onion Soup (4 servings)
3 tablespoons butter or margarine
3 cups ( about 3 medium ) sliced onions
3 cups beef broth
1 cup water
1 teaspoon Worcestershire sauce
Salt, pepper, croutons, grated parmesan cheese to taste
2 tablespoons brandy (optional)
1. 1 Combine butter and onions in 3-quart casserole. Cover with lid.
Microwave at HIGH (0) for 8 to 9 minutes or use Sensor Fresh
Vegetable.
2. Stir in broth, water, Worcestershire sauce, salt and pepper ; cover.
Microwave at HIGH (0) for 5 minutes, and at MEDIUM (5) for 5
minutes or use Sensor Reheat. Stir in brandy. Let stand, covered, for
5 minutes before serving. Serve with croutons and cheese.
27
Page 28

Cooking Instructions
Snap Crackle Popcorn Balls
(10 to 15 balls)
30 square caramel candies
1 1 / 2 tablespoons water
1 teaspoon butter or magarine
1 pkg.( 3.5 oz.) microwave popcorn
1. 1 Combine caramel, water and butter in 4 cup glass bowl. Microwave
at HIGH (0) for 2 to 3 minutes until melted. Stir until smooth. Set
aside.
2. Place popcorn on turntable. Microwave at HIGH (0) for 2 to 3
minutes or use Sensor Popcorn.
3. Place popcorn in bowl. Pour caramel mixture over popcorn ; toss
until completely coated and cool enough to handle. Using buttered
hands, form into 3-inch balls.
4. Cool on waxed paper. Serve immediately.
Peas With Lettuce (4 servings)
2 cups fresh shelled green peas
1/3 cup thinly sliced celery
2 tablespoons water
3 cups shredded head lettuce
1 tablespoon butter or magarine
1 tablespoon all-purpose flour
1/2 teaspoon sugar
1/4 teaspoon salt
1/4 cup whipping cream
Dash pepper to taste
1. In 1 1 / 2 -quart casserole combine peas, cel-ery and water ; cover.
2. Microwave at HIGH (0) for 5 to 7 1 / 2 minutes or use Sensor Fresh
Vegetable. Stir in lettuce ; recover.
3. In small dish combine butter, flour, sugar, salt and pepper. Blend in
cream. Microwave at HIGH (0) for 1 to 2 minutes or use Sensor
Reheat. Stir until smooth.
4. Drain vegetables. Add sauce to vegetables ; toss to coat.
Stuffed Potatoes (4 servings)
4 medium potatoes, scrubbed
1/2 cup dairy sour cream
1/3 cup milk
2 tablespoons grated parmesan cheese
1 teaspoon chopped chives or parsley flakes
Salt, pepper, paprika to taste
1. 1 Prick potatoes twice with a fork. Arrange potatoes at least 1 inch
apart on paper towel placed on turntable. Microwave at HIGH (0) for
10 to 12 minutes or use Sensor Potato. Let stand 5 minutes.
2. 2 Slice top from each potato ; scoop out center. Mash with sour
cream, milk, cheese, chives, salt and pepper. Spoon into shells.
3. 3 Sprinkle with paprika. Place on plate or on paper towel in oven.
Microwave at HIGH (0) for 2 to 4 minutes or use Sensor Reheat.
28
Page 29

Cooking Instructions
Vegetable Medley(4 to 6 servings)
1 1/2 cups broccoli flowerets, 3/4 to 1 in ch i n diameter
1 1/2 cups cauliflower flowerets, 3/4 to 1 inch in diameter
1 medium yellow squash, cut into 1/4 inch diagonal slices
1 medium zucchini, cut into 1/4 inch diagonal slices
1 medium carrot, cut into 1/8 inch diagonal slices
1/2 small red pepper, slivered
6-7 pitted ripe olives, sliced
2-3 tablespoons butter or margarine
1/2 teaspoon dried oregano
1 teaspoon fresh lemon juice
parmesan cheese, optional to taste
1. Arrange broccoli and cauliflower alternately around the edge of a 10
to 12 inch glass dish with rim. Alternately place yellow squash and
zucchini in circle inside broccoli and cauliflower, place carrots slices
in center and arrange red pepper slivers over top. Sprinkle with 2
tablespoons water. Cover with vented microwave plastic wrap.
2. Microwave at HIGH (0) for 7 to 9 minutes or use Sensor Fresh
Vegetable. Remove wrap immediately, scatter olive slices
attractively over all.
3. Place butter or magarine in 1 cup glass measure and Microwave at
HIGH (0) for 30 seconds to 1 minute to melt. Add oregano and lemon
juice. Pour over vegetables. Sprinkle with parmesan cheese and
serve.
Franks And Beans Casserole(4 to 6 servings)
1/2 cup chopped onions
2 tablespoons butter or margarine
1 pkg.(12 - 16 oz.) frankfurters, cut in quarters
1 can (16 oz) baked beans
1 can (15 - 16 oz.) cannellini (white kidney) beans,drained
1 can (15 - 16 oz.) red kidney beans,drained
1/3 cup brown sugar
1/4 cup catsup
1 teaspoon yellow mustard
Salt, pepper and garlic power to taste
1. 1 Combine onions and butter in 3-quart casserole. Microwave at
HIGH(0) for 1 to 2 minutes or until onions are soft.
2. 2 Stir in all remaining ingredients, pushing frankfurters to the bottom
of dish so they are covered with the beans.
3. 3 Cover and microwave at HIGH (0) for 11 to 13 minutes or use
Sensor Reheat. Stir until smooth.
29
Page 30

Appendix
Troubleshooting Guide
Before you call a repair person for your oven, check this list of possible
problems and solutions.
Neither the oven’s display nor the oven operate.
• Properly insert the plug into a grounded outlet.
• If the outlet is controlled by a wall switch, make sure the wall switch
is turned on.
• Remove the plug from the outlet, wait ten seconds, then plug it in
again.
• Reset the circuit breaker or replace any blown fuse.
• Plug another appliance into the outlet; if the other appliance doesn’t
work, have a qualified electrician repair the outlet.
• Plug the oven into a different outlet.
The oven’s display works, but the power won’t come
on.
• Make sure the door is closed securely.
• Check to see if packing material or other material is stuck to the door
seal.
• Check for door damage.
• Press Cancel twice and re-enter all cooking instructions.
The power goes off before the set time has elapsed.
• If there has not been a power outage, remove the plug from the
outlet, wait ten seconds, then plug it in again. If there was a power
outage, the time indicator will display “ ENJOY YOUR COOKING - - PRESS MY CHOICE FOR PERSONAL OPTIONS” Reset the clock
and any cooking instructions.
• Reset the circuit breaker or replace any blown fuse.
The food is cooking too slowly.
• Make sure the oven is on its own 20 amp circuit line. Operating
another appliance on the same circuit can cause a voltage drop. If
necessary, move the oven to its own circuit.
You see sparks or arcing.
• Remove any metallic utensils, cookware, or metal ties. If using foil,
use only narrow strips and allow at least one inch between the foil
and interior oven walls.
The turntable makes noises or sticks.
• Clean the turntable, roller ring and oven floor.
• Make sure the turntable and roller ring are positioned correctly.
Using your microwave causes TV or radio interference.
• This is similar to the interference caused by other small appliances,
such as hair dryers. Move your microwave further away from other
appliances, like your TV or radio.
Care and Cleaning
Follow these instructions to clean and care for your oven.
• Keep the inside of the oven clean. Food particles and spilled liquids
can stick to the oven walls, causing the oven to work less efficiently.
• Wipe up spills immediately. Use a damp cloth and mild soap. Do not
use harsh detergents or abrasives.
• To help loosen baked on food particles or liquids, heat two cups of
water (add the juice of one lemon if you desire to keep the oven
fresh) in a four-cup measuring glass at High power for five minutes
or until boiling. Let stand in the oven for one or two minutes.
• Remove the glass tray from the oven when cleaning the oven or tray.
To prevent the tray from breaking, handle it carefully and do not put it
in water immediately after cooking. Wash the tray carefully in warm
sudsy water or in the dishwasher.
• Clean the outside surface of the oven with soap and a damp cloth.
Dry with a soft cloth. To prevent damage to the operating parts of the
oven, don’t let water seep into the openings.
• Wash the door window with very mild soap and water. Be sure to use
a soft cloth to avoid scratching.
• If steam accumulates inside or outside the oven door, wipe with a
soft cloth. Steam can accumulate when operating the oven in high
humidity and in no way indicates microwave leakage.
• Never operate the oven without food in it; this can damage the
magnetron tube or glass tray. You may wish to leave a cup of water
in the oven when it is not in use to prevent damage if the oven is
accidentally turned on.
If you have a problem you cannot solve,
please call our service line:
1-800-SAMSUNG
(1-800-726-7864)
30
Page 31

Appendix
Specifications
Model Number MS1070WB/BB/SA
Oven Cavity 1.0cuft
Controls 10 power levels, including defrost
Timer 99 minutes, 99 seconds
Power Source 120 VAC, 60 Hz
Power Output 1100 Watts
Outside Dimensions 20
Oven Cavity Dimensions 13
11/32
7/32
”(W) X 11
”(W) X 9
11/16
3/32
”(H) X 13
”(H) X 14
23/32
29/32
Net/Gross Weight 35.3/38.6 lbs
Model Number MS1271WA/BB/SB
Oven Cavity 1.2cuft
Controls 10 power levels, including defrost
Timer 99 minutes, 99 seconds
Power Source 120 VAC, 60 Hz
Power Output 1100 Watts
Outside Dimensions 20
Oven Cavity Dimensions 14
19/32
31/64
”(W) X 11
”(W) X 9
45/64
1/64
”(H) X 16
”(H) X 15
1/4
27/64
Net/Gross Weight 33/36 lbs
”(D)
”(D)
”(D)
”(D)
Model Number MS1471WB/BB/SA
Oven Cavity 1.4cuft
Controls 10 power levels, including defrost
Timer 99 minutes, 99 seconds
Power Source 120 VAC, 60 Hz
Power Output 1100 Watts
Outside Dimensions 21
Oven Cavity Dimensions 14
7/8
”(W) X 12
3/4
”(W) X 9
5/16
13/16
”(H) X 17
”(H) X 16
9/32
1/16
”(D)
”(D)
Net/Gross Weight 38.5/42 lbs
31
Page 32

Warranty
Warranty Information
Limited Warranty for Original Purchaser
This Samsung product is warranteed by Samsung Electronics Canada,
Inc. (hereafter referred to as SECA) against manufacturing defects in
material or workmanship for the following periods:
Labor: 1 year (carry-in)
Parts: 1 year
Magnetron: 5 years
SECA further warrants that if this product fails to operate properly within
the specified warranty period and the failure is due to improper workmanship or defective material, SECA will repair or replace the product at
its option.
All warranty repairs or part replacements must be performed by a SECA
Authorized Service Center. (To find the nearest SECA Service Center,
call 1-800-SAMSUNG.)
Obligation to the Original Owner
The original dated sales receipt must be retained by the customer and is
the only acceptable proof of purchase. It must be presented to an SECA
Authorized Service Center at the time service is requested before warranty services are rendered. On all carry-in models, transportation to
and from the Authorized Service Center is the responsibility of the customer.
Exclusions of the Warranty
This warranty does not cover damage due to accident, fire, flood, and/or
other Acts of God: misuse, incorrect line voltage, improper installation,
improper or unauthorized repairs, commercial use, or damage that
occurs during shipping. Customer adjustments which are explained in
this owner’s manual are not covered under the terms of this warranty.
This warranty will automatically be voided for any unit found with a missing or altered serial number. This warranty is valid only on products purchased and used in the Canada.
SAMSUNG ELECTRONICS
NORTH AMERICAN LIMITED WARRANTY ADDENDUM
Subject to the requirements, conditions, exclusions and limitations of the
Original Limited Warranty supplied with Samsung Electronics (SAMSUNG) products, and the requirements, conditions, exclusions and limitations contained herein, SAMSUNG will additionally provide Warranty
Repair Service in the United States on SAMSUNG products purchased
in Canada, and in Canada on SAMSUNG products purchased in the
United States, for the warranty period originally specified, and to the
Original Purchaser only.
The above described warranty repairs must be performed by a SAMSUNG Authorized Service Center. Along with this Statement, the Original Limited Warranty Statement and a dated Bill of Sale as Proof of
Purchase must be presented to the Service Center. Transportation to
and from the Service Center is the responsibility of the purchaser.
Conditions covered are limited only to manufacturing defects in material
or workmanship, and only those encountered in normal use of the product.
Excluded, but not limited to, are any original specified provisions for, inhome or on-site services, minimum or maximum repair times,
exchanges or replacements, accessories, options, upgrades, or consumables.
For the locations of a SAMSUNG Authorized Service Center in the
United States and Canada, please contact SAMSUNG at:
1-800-SAMSUNG (1-800-726-7864)
Or on-line at:
WWW.SAMSUNGUSA.COM and WWW.SAMSUNGCANADA.COM
32
Page 33

Note
33
Page 34

Quick Reference
Feature Operation
Set Clock 1. Press CLOCK.
2. Use number buttons to enter the current time.
3. Press CLOCK again.
One Stage
Cooking
One Minute+
Cooking
Instant Cook
Buttons
Auto Defrost 1. Press AUTO DEFROST.
Set Cooking
Time and
Power Levels
Sensor Cook
Buttons
Sensor Reheat 1. Press SENSOR REHEAT.
Handy Helper,
Kids Meals,
Snack Bar
1. Use number buttons to set cooking time.
2. Set power level or leave at High.
3. Press START.
1. Press the ONE MINUTE + button once for each
minute of cooking.
2. The time will display and the oven will start.
1. Press button that corresponds to the food you
are cooking (for example, BACON).
2. Press the button rep eatedly to select serving
size.
2. Enter weight of food by pressing AUTO
DEFROST button repeatedly or using the
number buttons.
3. When the oven beeps, press PAUSE/CANCEL
button and turn food over. Press START to
resume defrosting cycle.
1. Use number buttons to set cooking time.
2. To set power level at other than HIGH, press
POWER LEVEL and use the number buttons to
enter the power level.
3. Press START to begin cooking.
1. Press button that corresponds to the food you
are cooking(for example POTATO).
2. The display will show the food you have chosen
and the oven will start automatically.
2. The display will show “REHEAT” and the oven
will start automatically.
1. Press HANDY HELPER(KIDS MEALS, SNACK
BAR) repeatedly to select type of dish to reheat.
2. To increase serving size, press the
corresponding number button.
3. Press START to begin cooking.
ELECTRONICS
SAMSUNG ELECTRONICS CANADA, INC.
7037 FINANCIAL DRIVE,
MISSISSAUGA,
ONTARIO, L5N 6R3
Samsung Electronics Co., Ltd.
June. 2001
Printed in Korea
Page 35

Four à Micro-Ondes
Manuel du
propriétaire
MS1070WB/BB/SA
MS1271WA/BB/SB
MS1471WB/BB/SA
One
Help
Popcorn
Minute
Potato
Frozen
Vegetables
Bacon
Handy
Helper
1.
Melt Chocolate
2.
Soften Cream Cheese
3.
Melt Butter
Auto
Defrost
Less
1
4
7
Power
Level
Clock
+
Frozen
Fresh
Pizza
Dinner
Vegetables
Reheat
Frozen
Chicken
Shrimp
Breakfast
Breast
Boil
Beverage
Water
Kids
Snack
Meals
Bar
1.
Chicken Nuggets
1.
Nachos
2.
Hot Dogs
2.
Chicken Wings
3.
French Fries
3.
Potato Skins
4.
Frozen Sandwich
4.
C
heese Sticks
Sensor
Reheat
2
3
5
6
8
9
More
Kitchen
0
Timer
My
Choice
Pause
Start
Cancel
Page 36

Sécurité
P
RÉCAUTION DE
POUR
E
XPOSITION EXCESSIVE A
S
É
VITER UNE
ÉCURITÉ
veuillez communiquer avec 1-800-SAMSUNG pour
obtenir le nom du Centre de Service autorisé le plus
près de chez vous.
R
EMARQUES DE SÉCURITÉ
I
MPORTANTES
L’
ÉNERGIE DU
(a) Ne pas tenter de faire fonctionner cet appareil lorsque la
porte est ouverte puisque ceci pourrait résulter en une
exposition à l’énergie excessive et dommageable du microondes. Il est important de ne pas contourner ou modifier le
système de sécurité.
(b) Ne pas placer d’objets entre la façade du four et la porte, et
ne pas laisser s’accumuler des éclaboussures ou résidus
de produits nettoyants sur les parois du four.
(c) Ne pas faire fonctionner le four s’il est endommagé. Il est
très important que la porte se referme complètement et que
celle-ci ne soit pas endommagée soit
1) que la porte soit pliée ou bossée
2) que les gonds et les loquets ne soient pas brisés ou
défaits et
3) que la porte soit bien scellée et le tout bien étanche.
(d) La porte ne devrait pas être ajustée ou réparée par une
autre personne qu’un technicien de service.
M
ICRO-ONDES:
AVERTISSEMENT
Toujours suivre ces précautions de sécurité lorsque
vous vous servez de votre micro-ondes. Ne jamais
tenter de le réparer vous-même - il y a un voltage
dangereux à l’intérieur. Si votre four doit être réparé,
Lorsque vous utilisez des appareils électriques, des
précautions sécuritaires de base devraient être suivies telles
que:
AVERTISSEMENT
Pour réduire le risque de brûlures, chocs électriques,
feux, blessures personnelles ou exposition à l’énergie
excessive du micro-ondes.
• Veuillez lire toutes les instructions avant de vous servir de l’appareil.
• Lire et suivre toutes les “
ÉVITER UNE EXPOSITION À L’ÉNERGIE EXCESSIVE DU MICROONDES"
• Cet appareil doit être mis à la terre. Connecter l’appareil à une prise
secteur bien mise à la terre. Voir
DE MISE À LA TERRE"
• Placer ou installer cet appareil de façon conforme aux instructions
fournies.
• Les oeufs, les contenants scellés peuvent exploser lorsque
réchauffés dans ce four.
• Se servir de cet appareil seulement pour l’usage pour lequel il a été
conçu tel que décrit dans ce manuel. Ne pas utiliser de produits
chimiques corrosifs ou vapeurs dans cet appareil. Ce genre de four a
été conçu dans le but de réchauffer, cuire ou sécher de la nourriture.
Il n’a pas été conçu pour un usage industriel ou de laboratoire.
qui sont sur cette page.
"PRÉCAUTIONS DE SÉCURITÉ POUR
"INSTRUCTIONS IMPORTANTES
à la page 4 de ce manuel.
V
EUILLEZ
C
ONSERVER CES INSTRUCTIONS
2
Page 37

Sécurité
Remarques de sécurité importantes (suite)
• Comme avec n’importe quel appareil électrique, une supervision est
requise lorsqu’utilisé par des enfants.
• N’utilisez pas cet appareil si le cordon électrique ou la prise ont été
endommagés, s’il ne fonctionne pas bien ou s’il a subi des
dommages.
• Seul un personnel de service qualifié devrait effectuer le service de
cet appareil. Contacter votre service autorisé le plus près de chez
vous pour en faire l’examen, la réparation ou un ajustement.
• Ne pas couvrir ni bloquer les ouvertures de cet appareil.
• Ne pas placer l’appareil à l’extérieur. Ne pas utiliser près de l’eau, par
exemple à côté d’un évier de cuisine, dans un sous-sol humide ou
encore près d’une piscine, etc...
• Garder l’intérieur du four propre. Les particules de nourriture ou les
éclaboussures d’huile collées sur les parois du four peuvent causer
des dégats de peinture et réduire l’éfficacité du four.
• Ne pas immerger le cordon ou la fiche dans l’eau.
• Ne pas exposer le cordon à une source de chaleur.
• Ne pas laisser le cordon pendre sur le bord d’une table ou d’un
comptoir.
• Lors du nettoyage de la porte ou des parois intérieures, utiliser des
savons et agents nettoyants très doux et les appliquer avec une
éponge ou un linge doux.
• Pour réduire les risques de feu dans le four:
a. Ne pas trop cuire les aliments. Surveiller l’appareil si vous y placer
du papier, plastique ou tout autre matériel combustible.
b. Toujours enlever les attaches de métal des sacs de cuisson en
plastique avant de les mettre dans le four.
c. Si un plat prend feu à l’intérieur du four, garder la porte fermée,
éteindre le four, débrancher le cordon d’alimentation ou couper le
courant à partir du fusible ou du panneau électrique.
d. Ne pas utiliser l’intérieur du four comme espace de rangement. Ne
pas y laisser du papier, des ustensibles ou de la nourriture lorsqu’il
ne fonctionne pas.
• Ne pas essayer de faire fonctionner le four lorsqu’il est vide.
• Ne pas essayer de faire fonctionner le four sans le plateau de verre.
Les aliments ne cuiront pas bien si le plateau n’y est pas.
• Ne pas dégeler des boissons dans des bouteilles à cou allongé, les
contenants peuvent briser.
• La vaisselle et les contenants peuvent devenir chauds. Prenez-les
avec soin.
• Soulever les couvercles des contenants en dirigeant la vapeur loin
des mains et du visage.
• Enlever les couvercles des pots de nourriture pour bébés avant de
les faire réchauffer. Après les avoir fait réchauffer, brasser le contenu
du pot et vérifier la chaleur avant de servir.
• Un cordon d’alimentation court est fourni pour éviter les risques qu’il
s’emmêle ou que l’on trébuche dessus. Des cordons d’alimentation
plus longs sont disponibles mais doivent être utilisés avec précaution.
• Ne pas faire fonctionner d’autres appareils de cuisson ou un réchaud
sous le four à micro-ondes.
• Ne pas placer le four au-dessus d’un réchaud ou d’un autre appareil
de cuisson
• Ne pas placer au-dessus d’un évier.
• Ne rien ranger au-dessus du four lorsqu’il fonctionne.
• Si par mégarde le feu prenait à l’intérieur, laisser la porte du microondes fermée, éteindre l’appareil, en retirer la prise de courant du
mur et éteindre l’électricité en retirant le fusible ou en désactivant le
dijoncteur. Si la porte est ouverte, le feu peut se propager.
V
EUILLEZ
C
ONSERVER CES INSTRUCTIONS
3
Page 38

Sécurité
I
NSTRUCTIONS DE MISE À LA TERRE
I
MPORTANTES
Cet apareil doit être mis à la terre. Dans le cas d’un court-circuit
électrique, le fait d’être mis à la terre réduit le risque de choc
électrique en déviant le courant électrique. Cet appareil est
muni d’un cordon qui com prend une troi sième lame pour m ise à
la terre. et une fiche polarisée. La fiche doit être branchée dans
une prise secteur qui est installée correctement et mise à la
terre. Brancher sur une prise électrique avec alimentation
standard de maison 115-120 volts, 60Hz. Votre four devrait être
le seul appareil branché à cette prise .
AVERTISSEMENT
Une utilisation incorrecte de la fiche polarisée peut
causer un risque de choc électrique. Consulter un
électricien qualifié ou un centre de service si vous ne
comprenez pas les instructions de mise à la terre ou si
vous n’êtes pas certains que l’appareil est
correctement mis à la terre.
UTILISATION DU CORDON
D’ALIMENTATION
Un cordon d’alimentation court est fourni pour éviter les risques
qu’il s’emmêle ou que l’on trébuche dessus. Des cordons
d’alimentation plus longs sont disponibles mais doivent être
utilisés avec précaution.
1. La puissance d’alimentation du cordon éectrique ou cordon de
ralonge doit être au moins équivalent à la source d’alimentation
indiquée sur la plaque signalétique de l’appareil.
2. Le cordon de rallonge doit avoir une fiche polarisée à trois lames de
courant et doit se brancher dans une prise secteur triple.
3. Le cordon d’alimentation qui serait plus long devrait être installé de
façon à ne pas prendre du comptoir afin d’éviter que les enfants
puissent le tirer ou trébucher dessus. Si vous utilisez une rallonge, le
témoin à l’intérieur pourrait clignoter et la ventilation pourrait varier
lorsque le four fonctionne. Le temps de cuisson peut durer plus
longtemps.
AVERTISSEMENT
Ne jamais, sous aucun prétexte, couper ou enlever la
troisième lame de la fiche polarisée.
V
EUILLEZ
Remarque
Connecter le four à un circuit de 20A. Si la connection
du four est faite à un circuit de 15A, faire en sorte que
le disjoncteur fonctionne.
C
ONSERVER CES INSTRUCTIONS
4
Page 39

VOTRE FOUR À MICRO-ONDES
Table des matières
Sécurité ............................................................................................. 2
VOTRE FOUR À MICRO-ONDES ..................................................... 5
Vérification des pièces.................................................................... 5
Merci d’avoir choisi un produit Samsung ........................................ 6
Installation de otre four à micro-ondes............................................ 6
Touches du panneau de contrôle.................................................... 7
FONCTIONNEMENT.......................................................................... 8
Allumer et Choisir la Langue à Utiliser............................................ 8
Utilisation de la Commande My Choice(Mon Choix)....................... 8
Sélection du poids........................................................................... 9
Mettre l’horloge à l’heure 12HR/24HR ............................................ 9
Mettre l’Horloge à l’Heure ............................................................... 9
Programmation des heures avancées d’été.................................. 10
Utilisation de la touche Pause/Annulation..................................... 10
Utilisation de la touche Help (aide) ............................................... 10
Utilisation de la touche Sensor Cook (programmation cuisson) ... 10
Utilisation de la touche Une Minute +(One Minute +) ................... 11
Utilisation des touches de Cuisson Instantanée ........................... 11
Cuisson automatisée.......................................... ........................... 12
Décongeler automatiquement....................................................... 12
Utilisation de la touche aide pratique(Handy Helper).................... 13
Utilisation de la touche Repas Enfants(Kids Meals) ..................... 13
Utilisation de la touche Snack Bar ................................................ 14
Définir le temps de cuisson et les niveaux de puissance.............. 14
Utilisation des touches Plus/Moins(More/Less) ............................ 15
Ajustement du Volume................................................................ .. 16
Utilisation de la minuterie (Kitchen Timer) .................................... 16
Programmer le système de fermeture de sécurité pour enfants... 16
Mode de Démonstration................................................................ 17
Programmer le signal de rappel de fin de cycle............................ 17
Programmation de “Word Prompting Speed”................................ 17
INSTRUCTIONS POUR LA CUISSON............................................ 18
Les ustensiles de cuisson............................................................. 18
Essais des ustensiles............................................................... ... .. 18
Techniques de cuisson ................................................................. 19
Conseils pratiques......................................................................... 19
Cuisine automatisée (Auto Sensor Cook)..................................... 20
Ustensiles et Couvercles pour la Cuisson Automatisée................ 20
Important................................................................................ ....... 20
Guide de cuisson .......................................................................... 21
Guide de décongélation automatique ........................................... 23
Recettes....................................................... ... .............................. 24
Guide de cuisson automatisée ..................................................... 26
Guide de réchauffement automatisé............................................. 27
Recettes automatisées................................................................. 27
ANNEXE.......................................................................................... 30
Guide de dépannage .................................................................... 30
Nettoyage et entretien .................................................................. 30
Spécifications................................................................................ 31
Garantie........................................................................................... 33
Garantie limitée de l’acheteur initial.............................................. 33
Référence Rapide.......................................................Dos de la page
Vérification des pièces
Déballer votre micro-ondes et vérifier que toutes les pièces ci-dessous
soient en votre possession. Au cas où une pièce manquerait ou serait
cassée veuillez contacter votre fournisseur.
One
Help
Popcorn
Minute
+
Fresh
Pizza
Frozen
Potato
Vegetables
Reheat
Dinner
Frozen
Frozen
Chicken
Shrimp
Breakfast
Vegetables
Breast
Boil
Bacon
Beverage
Water
Handy
Kids
Snack
Meals
Helper
Bar
1.
Melt Chocolate
1.
Chicken Nuggets
1.
Nachos
2.
Soften Cream Cheese
2.
Hot Dogs
2.
Chicken Wings
3.
Melt Butter
3.
French Fries
3.
Potato Skins
4.
Frozen Sandwich
4.Cheese Sticks
Auto
Sensor
Defrost
Reheat
Less
3
2
1
6
5
4
9
8
More
7
Power
Kitchen
Level
Timer
0
My
Clock
Choice
Pause
Start
Four à micro-ondes
Anneau de guidage
sur roues
Cancel
Carte d’utilisation
Plat en verre
Guide d’utilisation
5
Page 40

V OTRE NOUVEA U FOUR À MICR O-ONDES
Merci d’avoir choisi un produit Samsung
Votre nouveau four à micro-ondes fait preuve des dernières percées technologiques dans le domaine de la cuisson par micro-ondes. Ce four a été
conçu avec une gamme complète de fonctions faciles à utiliser. Il répond
aux exigences très rigides établies par Samsung qui sont les plus hautes
dans l’industrie. Nous sommes très fiers de pouvoir vous offrir un produit
dont vous profiterez de l’utilisation commode et fiable pour plusieurs années
à venir.
Veuillez inscrire ci-dessous la date d’achat ainsi que le numéro de modèle
qui se trouve sur le panneau de commande et le numéro de série qui se
trouve soit à l’intérieur ou en arrière. Nous vous conseillons de conserver
votre reçu avec ce guide de l’utilisateur au cas où vous auriez besoin des
services de garantie.
Numéro de modèle ________________________________
Numéro de série _______________________________ _
Date d’achat ________________________________
Concessionnaire ________________________________
Installation de otre four à micro-ondes
1 Placer votre four sur une surface plate et stable et brancher le
cordon à la prise de terre. Une fois branché, votre four indiquera:
Assurez-vous que la ventilation est adéquate en laissant au moins
4 pouces tout le tour et au-dessus du four.
2 Ouvrer la porte du four en pressant le bouton sous le tableau de
commandes.
3 Essuyer l’intérieur du four au moyen d’un linge humide.
4 Placer l’anneau pré-assemblé sur l’encoche au centre du four.
5 Déposer le plateau de verre sur le dessus du cercle de manière à
ce que les les trois encoches de verre s’ajustent de façon
sécuritaire dans celles du centre du four.
6
Page 41

V OTRE NOUVEA U FOUR À MICR O-ONDES
Touches du panneau de contrôle
One
Minute
+
Fresh
Vegetables
Shrimp
Reheat
Chicken
Boil
Water
Snack
1.
Nachos
2.
Chicken Wings
3.
Potato Skins
4.Cheese Sticks
Sensor
Reheat
9
Kitchen
Choice
Start
Pizza
Breast
Bar
3
6
More
Timer
My
1
4
5
6
8
10
12
14
Help
Potato
Frozen
Vegetables
Bacon
Handy
Helper
1.
Melt Chocolate
2.
Soften Cream Cheese
3.
Melt Butter
Auto
Defrost
Less
1
4
7
Power
Level
Clock
Pause
Cancel
Popcorn
Frozen
Dinner
Frozen
Breakfast
Beverage
Meals
1.
Chicken Nuggets
2.
Hot Dogs
3.
French Fries
4.
Frozen Sandwich
Kids
2
5
8
0
2
3
7
9
11
13
15
1. Aide p.10
Appuyer pour voir l’aide-renseignements sur les utilisations
diverses.
2. Une minute + p.11
Appuyer une fois pour chaque minute de cuisson à plus haute
puissance.
3. Touche de cuisson automatisée p.10
Programme la cuisson des plats courants.
4. Touche cuisson immédiate p.11
Temps programmé pour les plats courants.
5. Aide pratique, repas enfants, snack Bar p.13
Détermine la sorte de plat à réchauffer.
6. Décongélation automatique p.12
Établi le poids du plat à décongeler
7. Cuisson automatisée p.12
8. Touches numériques
Établi le temps de cuisson ou la quantité et les niveaux de cuisson
autres que haute puissance.
9. Plus / Moins p.15
Augmente ou diminue le temps de cuisson.
10. Niveau de puissance p.14
Presser cette touche pour établir un niveau de cuisson autre que
haute puissance.
11. Minuterie de cuisine p.16
Met en marche la minuterie pour la cuisine ou pour autre chose.
12. Horloge p.9
Donne l’heure actuelle.
13. Mon Choix p.8
Appuyer pour choisir des options de non-cuisson.
14. Pause/Annulation p.10
Appuyer pour faire une pause ou corriger une faute
15. Démarrage
Appuyer pour démarrer la cuisson.
7
Page 42

FONCTIONNEMENT
Allumer et Choisir la Langue à Utiliser
La première fois que vous enfoncez la fiche dans la prise de courant ou
après une panne de courant, le cadran indique, après 4 secondes: “ENJOY
YOUR COOKING-- -- -- PRESS MY CHOICE FOR PERSONAL OPTIONS “
1 Appuyer sur la touche My Choice(Mon Choix) immédiatement
après avoir banché votre micro-ondes. Le cadran indiquera
“PRESS 1-9 TO SELECT VARIOUS OPTIONS”.
2 Appuyer 1. Le cadran indiquera:
3 Appuyez sur la touche My Choice(Mon Choix).
Le cadran indiquera:
4 Appuyez sur la touche My Choice(Mon Choix) jusqu’à obtention
de la langue désirée.
•ENGLISH
• FRENCH
• SPANISH
Si vous continuez d’appuyer sur la touche My Choice(Mon Choix)
le règlage du cadran changera comme suit:
5 Appuyez sur la touche Start (démarrage)
Utilisation de la Commande My Choice(Mon Choix)
Votre nouveau four à micro-ondes peut-être adapté à votre goût personnel.
Il vous suffit d’appuyer sur “
options. Pour vous faciliter la tâche, toutes les options sont résumées dans
le tableau ci-dessous:
Mon Choice
d’Options
Indication du
poids
Réglage du volume
Signal de fin de
programme
Fermeture de
sécurité pour
enfants
Horloge
12HR/24HR
“Word prompting
Speed”
“Un mot une vitesse”
“Daylight Saving
Time” `”Heure
d’été,
Mode de démonstration
En cas de panne de courant, vous aurez à reprogrammer cette option.
Les options de poids
sont en livres ou kilogrammes.
Les options sont: Éteindre, Volume Bas,
Moyen, Haut et Mélodie
1à 5.
Le signal de fin de programme peut être
allumé ou éteint.
Cette option empêche
l’utilisation non supervisée du micro-ondes
par les enfants.
L’horloge peut afficher
soit 12HR ou 24HR.
Il y a 5 vitesses, de 1 (le
plus lent) à 5 (le plus
rapide). Le réglage est à
3.
On peut avancer l’heure
d’une heure pour (DST)
sans remettre l’horloge à
l’heure.
Le mode démo peut être
allumé ou éteint.
My Choice(Mon Choix)
Description Operation
Appuyer
et choisir en pesant répétitivement sur
Choice(Mon Choix)
mencer, appuyer sur
Appuyer
et choisir en pesant répétitivement sur
Choice(Mon Choix)
mencer, appuyer sur
Appuyer
et choisir en pesant répétitivement sur
Choice(Mon Choix)
mencer, appuyer sur
Appuyer
et choisir en pesant répétitivement sur
Choice(Mon Choix)
mencer, appuyer sur
Appuyer
Choix), 6
ment sur
Pour commencer, appuyer sur
Appuyer
et choisir en pesant répétitivement sur
Choice(Mon Choix)
mencer, appuyer sur
Appuyer
et choisir en pesant répétitivement sur
Choice(Mon Choix)
mencer, appuyer sur
Appuyer
et choisir en pesant répétitivement sur
Choice(Mon Choix)
mencer, appuyer sur
” pour entrer ces
My Choice(Mon Choix), 2
. Pour com-
Start
My Choice(Mon Choix), 3
. Pour com-
Start
My Choice(Mon Choix), 4
. Pour com-
Start
My Choice(Mon Choix), 5
. Pour com-
Start
My Choice(Mon Choix-
et choisir en pesant répétitive-
My Choice(Mon Choix)
My Choice(Mon Choix), 7
. Pour com-
Start
My Choice(Mon Choix), 8
. Pour com-
Start
My Choice(Mon Choix), 9
. Pour com-
Start
.
.
.
.
.
.
.
Start
My
My
My
My
.
.
My
My
My
8
Page 43

FONCTIONNEMENT
Sélection du poids
Vous pouvez choisir entre les livres (LBS) et les kilogrammes (KG).
1 Appuyer sur la touche My Choice(Mon Choix) ensuite sur la
touche 2.
Le cadran indiquera “Livres ou Kilos” (LBS or KG).
2 Appuyer sur la touche My Choice(Mon Choix) à maintes reprises
pour choisir la mesure de poids que vous désirez utiliser.
3 Appuyez sur la touche Start(démarrage).
Mettre l’horloge à l’heure 12HR/24HR
On peut indiquer le temps avec un format de 24-heure ou de 12-heure.
1 Appuyez sur la touche My Choice(Mon Choix) puis sur 6.
Le cadran indique l’option “CLOCK 12HR/24HR OPTION”.
2 Appuyez sur la touche My Choice(Mon Choix) plusieurs fois pour
sélectionner soit 12HR ou 24HR.
3 Appuyez sur la touche Start(démarrage).
Mettre l’Horloge à l’Heure
1 Appuyez sur la touche Clock(Horloge). Le cadran indiquera;
2 Utilisez les touches numériques pour entrer l’heure.
Vous devez appuyez au moins sur 3 numéros pour mettre l’horloge
à l’heure. Par exemple, s’il est 5h00, entrez 5,0,0.
3 Appuyez sur Clock(Horloge) de nouveau. Une virgule va
apparaître, elle indique que l’heure est bien entrée.
En cas de panne de courant, vous aurez à reprogrammer l’horloge.
Vous pourrez voir l’heure pendant la cuisson en appuyant sur la
touche Clock.
9
Page 44

FONCTIONNEMENT
Programmation des heures avancées d’été
1 Apuyez sur la touche My Choice(Mon Choix) et 8 . Le cadran
indiquera: “DAYLIGHT SAVING TIME ON/OFF”.
2 Appuyez sur la touche My Choice(Mon Choix) p o ur c h oi s i r O N .
Appuyez encore pour choisir OFF.
3 Appuyez sur Start. L’heure va avancer d’une heure.
Si OFF est indiquée, l’heure affichera une heure de moins.
Si l’horloge est programmé pour une heure ordinaire, cette fonction
permet alors le changement d’heure dans besoin de reprogrammer
l’horloge. Daylight Saving Time commence pour la plupart des
Etats Unis à 2h00 du matin le premier dimanche d’avril, et
reviendra à l’heure ordinaire à 2h00 du matin le dernier dimanche
d’octobre.
Utilisation de la touche Pause/Annulation
La touche
instructions entrées. Elle vous permet également d’arrêter momentanément
le cycle de cuisson pour vérifier la nourriture.
• Pour faire une pause pendant la cuisson: apuyez sur Pause/Cancel
• Pour arrêter la cuisson, effacer les instructions et revenirà l’heure
• Pour effacer les instructions que vous venez juste d’entrer: appuyer
• Pour annuler l’heure indiquée, appuyer sur Pause/Cancel une fois.
Pause/Cancel
une fois, pour reprendre le cycle appuyer sur Start.
actuelle, appuyer Pause/Cancel deux fois.
sur Pause/Cancel une fois et entrer à nouveau les instructions.
(pause/annulation) vous permet d’effacer les
Utilisation de la touche Help (aide)
Votre micro-ondes vous apporte l’aide nécessaire pour de nombreuses
démarches.
1 Lorsque vous avez besoin d’information et d’aide,appuyer la
touche HELP (aide) et appuyer ensuite la touche pour laquelle
vous désirez de l’informatio. HELP vous donne de l’information en
3 langues (anglais, français et espagnol).
Utilisation de la touche Sensor Cook
(programmation cuisson)
La vapeur dégagée lors de la cuisson indique au four comment ajuster le
temps de cuisson de différents plats ainsi que la quantité des plats pré-cuits.
Tout plat devrait être pré-cuit et à la température du réfrigérateur.
1 Appuyer sur la touche Sensor Cook (programmation cuisson)
correspondant au plat que vous faites chauffer (Popcorn, par
exemple). Le cadran montre “POPCORN” et votre micro-ondes va
en commencer automatiquement la cuisson.
MICRO
Pendant la cuisson du popcorn, attendez au moins cinq minutes avant
chaque sac afin de ne pas trop chauffer le plat de vere. Si vous désirez
ajuster le temps de cuisson, vous pouvez utiliser les touches
More/Less(Plus/Moins)
Si vous désirez vérifier l’heure actuelle lorsque la cuisson se fait, appuyer
sur la touche sur la touche
• Voir page 26 pour le Guide de cuisson
automatisée.
. Voir page 15 pour de plus amples informations.
Clock
(horloge).
10
Page 45

FONCTIONNEMENT
Utilisation de la touche Une Minute +(One
Minute +)
La touche offre un moyen pratique de réchauffer de la nourriture une minute
à la fois au niveau de cuisson “High” (Haute température).
1 Appuyer sur la touche Une Minute +(One Minute +) pour chaque
minute ajouter pour chauffer votre plat. Par exemple, appuyer 2 fois
pour 2 minutes. Le temps va s’inscrire sur le cadran et le four va se
mettre en marche automatiquement.
Ajoutez des minutes au programme en appuyant sur le Une
minute +(One Minute +) pour chaque minute que vous voulez
ajouter.
Utilisation des touches de Cuisson
Instantanée
1 Appuyez sur la touche Cuisson Instantanée correspondant
exemple pour 3 portions, appuyer ci-dessous, la touche “3” au plat
que vous voulez cuire. (Bacon par ex..) Le cadran montrera:
(“BACON 2 SLICES’):
Charte de réchauffage instantané
Article Poids Remarques
Boisson
(Beverage)
Eau
bouillante
(Boil water)
Bacon 2 tranches
½ tasse
1 tasse
2 tasses
½ tasse
1 tasse
2 tasses
4 tranches
6 tranches
• Utiliser une tasse à mesurer ou un mug, ne
pas couvrir.
• Déposer la boisson dans le four.
• Après réchauffement, bien mélanger.
• Mesurer le liquide; verser dans un
contenant pour micro-ondes deux fois plus
grand que la quanitié de liquide. Ex: Pour 1
tasse de liquide, utiliser 2 tasses ou un
contenant plus grand.
• Bien mélanger avant et après la cuisson
pour empêcher le liquide de déborder.
• Placez 2 serviettes de papier sur un plat,
y déposer ls tranches de bacon les unes
à coté des autres. Recouvrir avec
d’autres serviettes de papier. Une fois la
cuison terminée retirer de suite les
serviettes de papier.
• Utilisez la touche Plus ou Moins pour
l’obtention d’un effet croustillant.
2 Appuyez plusieurs fois sur la touche pour sélectionner la taille de la
portion Les différentes portions vont défiler. Une fois choisi, le
micro-ondes commencera alors à cuire le plat automatiquement.
Si vous ne voulez pas lire toutes les options du menu, appuyez
simplement sur Start pour commencer la cuisson.
Si vous désirez vérifier le temps de cuisson, appuyez sur la touche
cuisson instantanée.
Lorsque la cuisson est terminée, le four émettra un bruit et cela
toute les minutes.
11
Page 46

FONCTIONNEMENT
Cuisson automatisée
Il est très facile de réchauffer les restes ou les plats pré-cuits avec votre
nouveau four à micro-ondes. Lorsque les plats sont réchauffés, de la vapeur
s’en échappe, elle est détectée et le four adapte sa température aux différentes portions et plats pré-cuits. Les plats devraient être pré-cuits et à la
température du frigidaire. Pour utiliser la cuisson automatisée:
1 Appuyez sur la touche Sensor Reheat. Le cadran indique:
”REHEAT” et le four se met en marche automatiquement..
MICRO
Si vous voulez ajuster le temps de chauffage, utilisez les touches
Plus/Moins. Voir parge 15 pour les touches de More/Less(Plus/
Moins). Si vous désirez vérifier l’heure actuelle pendant le
réchauffage, appuyez sur la touche Clock(Horloge).
• Voir page 27 pour le guide de cuisson
automatisée.
Décongeler automatiquement
Pour décongeler la nourriture, en établissant le poids du plat, le micro-ondes
définira automatiquement le temps de décongélation, la puissance de cuisson et le temps de repos.
1 Appuyer sur la touche Auto Defrost. Le cadran indique “0.5lbs”.
(0.2 Kg si votre four est mis sur le système métrique.).
2 Pour établir le poids de votre nourriture, appuyer le Auto Defrost à
maintes reprises. Cela augmente le poids par tranche de 0.5 lb, et
ce jusqu’à 6.0 lbs. Vous pouvez aussi utiliser la touche numérique
pour entrer directement le poids requis. Le four calcule le temps de
décongélation et se met en marche automatiquement. Pendant la
décongélation, le four sonnera 2 fois et le cadran indiquera: “TURN
THE FOOD OVER”.
MICRO
3 Appuyer la touche Pause/Cancel, ouvrer la porte du four et
retourner la nourrriture.
4 Appuyer Start pour terminer la décongélation.
• Voir page 23 pour le guide de décongélation
automatique.
12
Page 47

FONCTIONNEMENT
Utilisation de la touche aide pratique(Handy
Helper)
1. Appuyer sur la touche Handy Helper correspondante au plat que
vous faites chauffer. Le cadran montre (Chocolat fondu). Appuyer
sur la touche aide pratique. Appuyer l’aide pratique maintes fois pour
choisir le plat désiré. (Référez-vous à la charte Handy Helper cidessous.)
2. Appuyer sur la touche Numérique pour choisir la portion désirée.
Vous pouvez appuyer 1 ou 2 pour choisir la taille de la portion.
Le 1 sert seulement pour ramolir le fromage à la crème et faire
fondre le chocolat. (Références ci-dessous pour les portions.)
3. Appuyer sur la touche Start pour commencer la cuisson.
Charte d’aide pratique
Article Poids Remarques
Fondre du
chocolat
(Melt
Chocolate)
Fromage à
la crème
(Soften
Cream
Cheese)
Faire fondre
du beurre
(Melt Butter)
2 carrés ou
1 tasse de
chips
1 paquet
(8 onces)
1 bâtonnet
(¼ livre)
2 bâtonnets
(½ livre)
• Déposer les pépites ou carrés de chocolat
dans un plat allant au micro-ondes.
• Bien mélanger à mi-cuisson quand le four
sonne et faire repartir le four.
• Déballer le fromage à la crème et le placer
au centre d’un plat allant au micro-ondes.
• Laisser reposer 1 à 2 minutes.
• Déballer et couper le beurre en deux
verticalement.
• Placer le beurre dans un plat, le recouvrir
de papier ciré.
• Bien mélanger quand terminé. Laisser
reposer 1 à 2 minutes.
Utilisation de la touche Repas Enfants(Kids
Meals)
1. Appuyer sur la touche Kids Meals correspondante au plat que vous
voulez faire chauffer. Le cadran montre l”chicken nuggets” (poitrines
de poulet) Appuyer à maintes reprises la touche Kids Meals pour
choisir l’article désiré. (Références à la charte Kids Meals pour les
portions.)
2. Appuyer la touche Numérique pour choisir la quantité de la portion
désirée. Vous pouvez appuyer sur 1 ou 2 pour choisir la taille de la
portion. (Références à la charte Kids Meals ci-dessous pour les
quantités.)
3. Appuyer sur la touche Start pour commencer la cuisson.
Charte Repas Enfants
Article Poids Remarques
Pépites de
poulet
(Chicken
Nuggets)
Hot Dogs 2 EA
Frites
(French
Fries)
Sandwich
(Frozen
Sandwich)
4-5 onces
6-7 onces
4 EA
4-5 onces
6-7 onces
1 EA
2 EA
• Recouvrir le plat d’une serviette en papier et
placer les pépites dessus.
• Ne pas les recouvrir. Laisser reposer 1
minute.
• Piquer les Hot Dogs, les placer sur un plat.
Quand le four sonne, ajouter les pains et
redémarrer le four.
• Placer 2 serviettes en papier sur un plat et
placer les frites sur les serviettes. Elles ne
doivent pas se chevaucher.
• Les essuyer après les avoir sorties du four.
• Placer le sandwich dans le contenant requis
congelé (dans le paquet) et le mettre sur une
assiette.
Remarque:
Faire fondre du chocolat
mi-temps, le chocolat garde sa forme même une fois
la cuisson terminée.
- À moins qu’on le brasse à
Remarque:
Hot Dogs
les joindre aux hot dogs lorsque le four sonne.
13
- Pour une leilleure texture de petits pains
Page 48

FONCTIONNEMENT
Utilisation de la touche Snack Bar
1. Appuyez sur la tocuhe Snack Bar correspondante au plat que vous
voulez cuisiner. Le cadran montre “Nachos”. Appuyez maintes fois
sur la touche Snack Bar pour choisir le plat désiré. (Vous référez à
la charte ci-dessous).
2. Appuyez sur la touche Numérique pour indiquer la taille du plat
désiré. Vous pouvez indiquer 1 ou 2 pour la quantité désirée.
désirée. Pour les Nachos, seulement le 1 est disponible. (Vous
référez à la charte ci-dessous pour les quantités).
3. Appuyez Start pour commencer la cuisson.
Chart Snack Bar
Article Poids Remarques
Nachos 1 portion
Ailes de
poulet
(Chicken
Wings)
Pelures de
patates
(Potato
Skins)
Bâtonnets
de fromage
(Cheese
Sticks)
5-6 onces
7-8 onces
1 patate
cuite
2 patates
cuites
5-6 morc.
7-10 morc.
• Mettre les tortillas les unes à côté des
autres sur un plat.
• Parsemer de fromage râpé.
• Contenu:
- 2 tasses de chips tortillas
- 1/3 tasse de fromage rapé
• Utiliser des ailes pré-cuites gardées au
réfrigérateur.
• Mettre les ailes de poulet autour d’un plat
façon rayon et les recouvrir de papier ciré.
• Couper une pomme de terre cuite en 4
triangles égaux. Retirer la chair de la
pomme de terre laissant environ ¼ de
pouce de peau.
• Parsemer de bacon, d’oignons et de
fromage. Ne pas couvrir.
• Mettre sur un plat, les bâtonnets de
fromage en de fromage forme de rayon.
• Ne pas couvrir
Définir le temps de cuisson et les niveaux de
puissance
Votre micro-ondes vous permet de programmer jusqu’à trois niveaux de cuisson. Chacun avec son propre temps et niveau de puissance.
Le niveau de puissance vous laisse contrôler l’intensité de chaleur à partir
de Warm (1) à High (0). (chaud (1) à très Haut (0)).
Cuisson Une-Étape
Pour la cuisson Une-Étape vous n’avez qu’à indiquer le temps de cuisson.
Le niveau de puissance se met automatiquement sur Haut.
Si vous désirez un autre niveau de puissance vous devez alors utiliser la
touche
Power Level
(Niveau de puissance).
1 Utiliser les touches numériques pour définir le temps de cuisson.
Vous pouvez définir la durée allant de une seconde à 99 secondes.
Pour indiquer une durée de plus de une minute, entrer les
secondes aussi.
Par ex: pour indiquer 20 minutes, entrer 2,0,0,0.
2 Si vous désirez entrer un niveau de puissance différent de High,
appuyer sur la touche Power Level (Niveau de puissance).
Niveau de Puissance:
1 = Chaud 2 = Low
3 = Defrost (décongélation) 4 = Medium low
5 = Medium 6 = Simmer (Mijoter)
7 = Medium High 8 = Reheat (réchauffer)
9 = Sauté 0 = High
Le cadran indique: “PRESS START OR ENTER NEXT STAGE
COOKING TIME”.
3 Appuyer sur Start pour commencer la cuisson. Si vous désirez de
changer le niveau de puissance, appuyer sur Pause/Cancel
(pause/annulation) avant d’appuyer sur Start et réentrer toutes les
instructions.
14
Page 49

FONCTIONNEMENT
Programmer les temps de cuisson, suite
Quelques recettes demandent différentes étapes de cuisson à des températures différentes. Avec votre micro-ondes, vous pouvez programmer différentes étapes de cuisson.
Multi-stage Cooking (Cuisson à Plusieurs Étapes)
1 Suivre les étapes 1 et 2 dans la section “One Stage Cooking”
Cuisson en une étape se trouvant à la page précédente. Le cadran
indique: “PRESS START OR ENTER NEXT STAGE COOKING
TIME” (APPUYER SUR START OU ENTRER LA PROCHAINE
ÉTAPE DE CUISSON).
Lorsque vous entrerez plus qu’une étape de cuisson, vous devez
appuyer la touche Power Level avant d’entrer la deuxième étape
de cuisson.
Pour programmer Le niveau de puissance de cuisson, appuyer
deux fois sur Power Level.
2 Utiliser les touches Numériques pour programmer la deuxième
étape de la cuisson.
Utilisation des touches Plus/Moins(More/Less)
La touche
définis de cuisson. Ils ne fonctionnent seulement qu’avec le réchauffage
automatisé,
Helper, Kids Meals, Snack Bar or Time Cook modes.
Plus/Moins(More/Less)
Sensor Reheat, Sensor Cooking, Instant Cook, Handy
vous permet d’ajuster les temps pré-
1 Pour AJOUTER plus de temps au mode de cuisson automatique:
Appuyer sur la touche More (9).
2 Pour RÉDUIRE le temps d’un mode de cuisson automatique:
Appuyer sur la touche Less (1).
Si vous désirez augmenter ou réduire le Time Cook (temps de
cuisson) de 10 secondes, appuyer la touche More (9), (Plus) ou
Less (1) (Moins).
3 Appuyer sur Power Level, utiliser ensuite les touches numériques
pour programmer Le niveau de puissance de la 2e étape. Le
cadran indique Le niveau de puissance que vous avez demandé.
Ensuite:
4 Appuyer sur Start pour commencer la cuisson, ou répéter les
étapes 2 et 3 pour établir le temps de cuisson et Le niveau de
puissance pour une 3e étape de cuisson. Lorsque terminé,
appuyer sur Start.
15
Page 50

FONCTIONNEMENT
Ajustement du Volume
Sur le micro-ondes, la fonction du son vous permet d’ajuster le volume de la
sonnerie du micro-ondes. La tonalité est progrmmée à son plus haut niveau.
Pour en changer le volume:
1 Appuyer sur la touche My Choice(Mon Choix) et sur 3. Le cadran
indique: “SOUND VOLUME CONTROLS” .
2 Appuyer sur la touch My Choice(Mon Choix) à maintes reprises
pour choisir le volume.
3 Appuyer sur la touch Start: Le cadran revient à son heure original.
Utilisation de la minuterie (Kitchen Timer)
1 Utiliser les touches Numériques pour programmer la durée voulue
de la minuterie.
2 Appuyer sur la touche Minuterie (Kitchen Timer).
Programmer le système de fermeture de
sécurité pour enfants
Vous pouvez fermer votre four à micro-ondes de manière à ce qu’il ne soit
pas utilisable par des enfants sans supervision.
1 Appuyer sur la touch My Choice(Mon Choix) d’abord,
ensuite sur 5. Le cadran indiquera: “CHILD LOCK ON/OFF”.
2 Appuyer d’abord sur la touch My Choice(Mon Choix) puis sur ON.
Appuyer de nouveau pour choisir OFF.
3 Appuyer sur Start. Le cadran retournera à son heure d’origine.
À cet instant, le four à micro-ondes ne peut-être utilisé jusqu’à ce
qu’il soit de nouveau accessible. Pour cela il faut répéter la
procédure 1 à 3 ci-dessus.
3 Lorsque le temps est écoulé la sonnerie se fera entendre.
16
Page 51

FONCTIONNEMENT
Mode de Démonstration
Vous pouvez utiliser le Mode de Démonstration pour voir comment votre
four à micro-ondes fonctionne sans que le four ne chauffe.
1 Appuyez sur la touche My Choice(Mon Choix) et appuyez sur 9.
L’afficheur indiquera: “ DEMO MODE ON/OFF”
2 Appuyez une fois sur My Choice(Mon Choix) pour choisir ON.
Appuyer encore pour choisir OFF.
3 Appuyez sur la touche Start. Le cadran indiquera: DEMO Pour
éteindre le démo, répétez les étapes ci-dessus de 1 - 3.
Programmer le signal de rappel de fin de cycle
Le signal de fin de cycle peut être sur ON ou OFF.
1 Appuyer sur la touch My Choice(Mon Choix) ensuite sur 4.
Le cadran indiquera: “REMIND END SIGNAL ON/OFF”.
2 Appuyer sur la touch My Choice(Mon Choix) pour choisir ON.
3 Appuyer sur la touch Start. Le cadran retournera à l’heure
d’origine.
Pour éteindre le signal de rappel , répétez les étapes ci-dessus de
de 1-3.
Programmation de “Word Prompting Speed”
1 Appuyer sur la touch My Choice(Mon Choix) ensuite sur 7.
Le cadran indiquera: ”WORD PROMPTING SPEED”.
2 Appuyer sur la touch My Choice(Mon Choix) pour choisir la
vitesse.
3 Appuyer sur la touch Start.
Le cadran retourne à son heure d’origine.
17
Page 52

INSTRUCTIONS POUR LA CUISSON
Les ustensiles de cuisson
Usages recommandés
• Plats et bols en verre ou en verre-céramique à utiliser pour
chauffer ou cuire.
• Plats à gratiner pour micro-ondes. Pour gratiner la surface de
petits plats tels que biftecks, côtelettes ou crêpes. Suivre les
instructions fournies par le fournisseur de ces plats à gratiner.
• Enveloppes de plastique pour micro-ondes. Ces enveloppes
servent à retenir la vapeur. On doit les ouvrir un peu pour laisser
s’échapper un peu de vapeur et éviter de les placer directement sur
les aliments.
• Papiers cirés. On peut s’en servir pour couvrir les aliments et
prévenir les éclaboussures.
• Serviettes de papier. Ne servent à couvrir que pour de courtes
périodes; elles absorbent l’excès d’humidité et préviennent les
éclaboussures. Ne pas utiliser des serviettes faites de matériel
recyclé; elles pourraient contenir du métal et prendre feu.
• Assiettes et tasses de papier. Ne servent que pour de courtes
périodes de cuisson à basse température. Ne pas utiliser de matériel
recyclé, il pourrait contenir du métal et prendre feu.
• Thermomètres. N’utiliser que les thermomètres pour “usage microondes”, et suivre les instructions du manufacturier. Vérifier les
aliments à plusieurs endroits. Les thermomètres classiques peuvent
être utilisés qu’une fois les aliments sortis du four.
Utilisation limitée
• Utilisation d’aluminium. N’utiliser que d’étroites bandes de papier
d’aluminium pour protéger les surfaces exposées de vos aliments à
une trop forte cuisson. Cependant soyez prudent et n’utiliser pas
trop de papier d’aluminium ce qui pourrait endommager votre four.
• Céramique, porcelaine et grès. N’utilisez des contenants faits de
ces matériaux que s’ils sont marqués d’un sceau garantissant leur
capacité à être utilisés dans un four à micro-ondes. S’ils ne sont pas
marqués, vous devez alors les essayer pour vous assurer qu’ils sont
adéquats et sécuritaires. Ne jamais utiliser un plat comportant un
rebord de métal.
• Plastique. N’utiliser que des contenants de plastique marqués du
sceau “adéquat pour usage micro-ondes”. Les contenants non
marqués peuvent fondre.
• Paille, osier et bois. N’utiliser des contenants faits de ces matériaux
que pour de courtes périodes de cuisson car ils pourraient prendre
feu.
Ne sont pas recommandés:
• Les pots et les bouteilles en verre. Le verre standard est trop
mince pour être utilisé dans le micro-ondes car il peut se briser.
• Les sacs de papier. Les sacs de papier peuvent prendre feu, sauf
les sacs de maïs soufflé qui sont conçus pour l’usage du microondes.
• Les assiettes et les tasses de plastique moussé. Ces contenants
peuvent fondre et laisser des résidus nocifs pour la santé sur les
aliments.
• Les contenants de plastique. Certains contenants tels ceux de
margarine peuvent fondre au micro-ondes.
• Les ustensiles de métal. Ceux -ci peuvent endommager votre four.
Enlever tout métal avant de mettre dans le four.
Essais des ustensiles
Pour vérifier la possibilité d’utiliser un plat dans le four à micro-ondes, effectuer le test suivant:
1 Remplir une tasse d’eau et placer la à l’intérieur de votre four à
côté du plat mis à l’essai.
2 Appuyer la touche “One Minute+” une fois pour la réchauffer une
minute à haute température.
L’eau doit être tiède et le plat en essai doit être froid. Si le plat devient tiède,
c’est qu’I absorbe de l’énergie micro-ondes et n’est donc pas adéquat pour
être utilisé dans le four à micro-ondes.
18
Page 53

INSTRUCTIONS POUR LA CUISSON
Techniques de cuisson
Mélange
Remuer les aliments tels que les fricassés ou les légumes pendant la cuisson, afin de mieux distribuer la chaleur. Les aliments à l’extérieur du plat
absorbent plus d’énergie et donc se réchauffent plus rapidement; il faut
donc les remuer pour amener les aliments situés à l’extérieur au centre du
plat. Le four s’éteindra lorsque vous ouvrirez la porte pour remuer les aliments.
Disposition
Disposer les aliments de forme irrégulières, tels que les morceaux de poulet
ou les côtelettes, de sorte que les parties les plus épaisses soient à
l’extérieur de la plaque tournante où ils recevront plus d’énergie. Pour éviter
toute cuisson exagérée, placer les parties délicates ou minces au centre de
la plaque tournante.
Protection.
Protéger vos aliments avec d’étroites bandes de papier d’aluminium pour
prévenir une cuisson exagérée. Les surfaces à protéger sont: les bouts des
ailes de volaille, les coins des plats de forme carrée. N’utiliser que de petites
quantités de papier d’aluminium, de grandes quantités pourraient endommager votre four.
Retourner les aliments
Retourner vos aliemtns à la mi-temps de leur cuisson afin de bien exposer
toutes les parties à l’énergie micro-ondes. Ceci est particulièrement important avec les larges pièces comme les rôtis.
Repos
Les aliments cuits au micro-ondes accumulent une chaleur interne qui continue leur cuisson de quelques minutes après l’arrêt du four. Il faut donc laisser reposer les aliments afin de compléter leur cuisson, surtout s’il s’agit de
rôtis ou de légumes entiers. Les rôtis ont besoin de ce temps de repos pour
terminer leur cuisson à l’intérieur sans que leur extérieur ne soit brûlé. Tous
les liquides tels que les soupes ou les breuvages chauds doivent être
remués ou brassés à leur sortie du four. Laisser reposer quelques instants
avant de servir. Lorsque vous réchauffez des aliments pour bébés, brasser
les bien et vérifier la température avant de les servir.
Humidifier
L’énergie micro-ondes à tendance à se concentrer autour des molécules
d’eau. Les aliments dont le taux d’humidité n’est pas également réparti
doivent être couverts ou laissés à reposer afin de permettre à la chaleur de
se disperser également. Ajouter un peu d’eau aux aliments secs pour aider
la cuisson.
Conseils pratiques
• Les aliments denses tels que les pommes de terre prennent plus de
temps à se réchauffer que les aliments légers. Les aliments à texture
délicate doivent être réchauffés à basse température afin de ne pas
durcir.
• L’altitude et le type de contenants utilisés influencent le temps de
cuisson. Lorsque vous essayez une nouvelle recette, utiliser le
temps de cuisson minimum et vérifier souvent au cours de la cuisson
afin d’éviter de brûler le plat.
• Les aliments offrant une surface étanche tels que les pommes de
terre, les oeufs ou les hot dogs, doivent être piqués pour éviter qu’ils
n’éclatent sous l’effet de la vapeur intérieure.
• La friture à l’aide d’huile à cuisson ou de gras n’est pas
recommandée. Le gras et l’huile peuvent bouillir soudainement et
causer des brûlures graves.
• Certains ingrédients se réchauffent plus vite que d’autres. Par
exemple la gelée à l’intérieur des beignets sera plus chaude que la
pâte. Bien se souvenir de ceci pour éviter de se brûler.
• Il n’est pas recommandé de faire des conserves à l’aide du microondes, car le procédé de chauffage au micro-ondes ne peut garantir
la destruction complète de toutes les bactéries nuisibles.
• Bien que l’énergie micro-ondes ne réchauffe pas les contenants, la
chaleur de ceux-ci peut très bien se communiquer aux contenants. Il
est donc fortement recommandé d’utiliser des mitaines pour
manipuler les plats à leur sortie du four et de bien instruire les
enfants de faire de même.
• Faire le bonbon dans le microwave n’est pas recommandé comme le
bonbon peut chauffer aux tr
pour èviter la blessure.
ès hautes temperature. Faites attention
19
Page 54

INSTRUCTIONS POUR LA CUISSON
Cuisine automatisée (Auto Sensor Cook)
L’Auto Sensor Cook vous permet de cuisiner d’une manière automatisée
par détection des vapeurs générées pendant la cuisson.
• Lors de la cuisson de nombreuses vapeurs s’échappent. L’Auto
Sensor en détermine la durée de la cuisson ainsi le niveau
d’intensité.
• Lorsqu’un couvercle couvre le plat penda nt la cuisson, ce n’est
qu’après que le contenant soit saturé devapeurs que le système en
détectera les vapeurs.
• Juste avant la fin, le compte à rebours se mettra en marche. C’est le
moment de tourner ou mélanger la nourriture à cuire si cela est
nécessaire.
• Avant que l’Auto Sensor Cook se mette à fonctionner, il est bon
d’assaisonner les plats (ou sauce brune). Un conseil: le sel et le
sucre peuvent brûler les plats par endroits. Il serait préférable de les
assaisonner une fois la cuisson terminée.
• La fonction More/Less est utilisée pour augmenter ou réduire le
temps de cuisson. Vous devez utiliser cette fonction pour choisir le
degré de cuisson désiré suivant votre goût.
Ustensiles et Couvercles pour la Cuisson
Automatisée
• Pour obtenir de bons résultats avec cette fonction, suivez les
instructions sur les chartes de ce livret pour choisir les ustensiles et
couvercles pour la Cuisson.
• Il est conseillé de toujours utiliser les conteneurs et couvercles
appropriés ou encore du papier plastique en laissant un coin soulevé
pour laisser la vapeur s’échapper.
• Recouvrir les plats with les couvercles appropriés. Si le plat n’a pas
de couvercle, mettre du papier plastique.
• Remplir les contenants à moitié.
• Ce n’est que vers la fin du cycle de cuisson qu’il est recommendé de
retourner ou mélanger la nourriture.
Important
• Après avoir installé le four et l’avoir branché, ne pas retirer la prise
électrique. Le détecteur de vapeurs a besoin de temps pour se
stabiliser afin de pouvoir donner une cuisson satisfaisante.
• Il n’est pas recommendé d’utiliser la cuisson automatisée de
manière continue.
• Installer le four dans un endroit bien ventilé et frais afin que le
système de cuisson automatisé puisse fonctionner à son meilleur.
• Afin d’éviter de mauvais résultats, il est recommendé de ne pas
utiliser le système de cuisson automatisé lorsque la température de
la pièce est trop chaude ou trop froide.
• Ne pas utiliser de détergents volatiles pour nettoyer votre four. Les
vapeurs résultant pourraient interférer avec le système de cuisson
automatisée.
• Éviter de placer votre micro-ondes près d’une source d’humidité ou
de vapeurs s’échappant d’autres appareils pour ne pas nuire au bon
fonctionnement de votre appareil.
• Garder prpre l’intérieur de votre appareil. Nettoyer les éclaboussures
au moyen d’un linge humide.
Ce four a été conçu seulement pour une usage familiale.
20
Page 55

INSTRUCTIONS POUR LA CUISSON
Guide de cuisson
Guide de cuisson de la viande au micro-ondes
• Placer la viande sur une grille conçue pour le micro-ondes, à
l’intérieur d’un plat, également conçu pour le micro-ondes
• Placer le côté contenant le plus de gras vers le bas. À l’aide
d’étroites bandes de papier aluminium recouvrir tous les os ou les
parties les plus minces de la pièce de viande.
• Vérifier la température en plusieurs points avant de laisser la pièce
de viande au four pour le temps recommandé.
• Le tableau qui suit montre les températures à la sortie du four. Se
rappeler que la température des aliments s’élèvera pendant la
période de repos qui suivra.
Aliment
Rôti de
boeuf
sans os
Jusqu’à 4
livres (lbs)
Porc avec
ou sans
os
Jusqu’à 4
livres (lbs)
Temps de cuisson /
puissance
Temps de cuisson:
7 à 11 min. / lb. à 115°F
saignant
8 à 12 min. / lb. à 120°F
médium
9 à 14 min. / lb. à 145°F
bien cuit
Le niveau de puissance:
Haut “0” pour les 5
premières minutes puis
Médium (5).
Temps de cuisson:
11 à 15 mn. / lb. à 160°F
bien cuit
Le niveau de puissance:
Haut “0” pour les 5
premières minutes puis
Médium (5).
Directives
Placer la partie la plus grasse
du rôti vers le bas sur la
grille. Recouvrir de papier
ciré. Retourner à mi-temps
de la cuisson. Laisser
reposer pendant 10 min.
Placer la partie la plus grasse
du rôti vers le bas sur la
grille. Recouvrir d’une
pellicule de plastique
perforée. Retourner à mitemps de la cuisson. Laisser
reposer pendant 10 min.
La volaille au micro-ondes
• Placer la viande de volaille sur une grille conçue pour le microondes, à l’intérieur d’un plat, également conçu pour le micro-ondes.
• Recouvrir la volaille de papier ciré afin de prévenir les
éclaboussures.
• A l’aide d’étroites bandes de papier d’aluminium, recouvrir tous les
os, les parties les plus minces et celles qui ont tendance à brûler.
• Vérifier la température à des endroits divers avant de laisser la
volaille reposer le temps requis.
Aliment
Poulet
entier
Jusqu’à 4
livres (lbs)
Morceaux
de poulet
Jusqu’à 2
livres (lbs)
Temps de cuisson /
puissance
Temps de cuisson:
6 à 9 min. / lb. à
180° F
Le niveau de puissance:
Medium Haut (7)
Temps de cuisson:
6 à 9 min. / lb.
180°F viande brune
170°F viande brune
Le niveau de puissance:
Medium Haut (7)
Directives
Place chicken breast-side
down on roasting rack. Cover
with wax paper. Turn over
when the cooking time is half
up. Cook until juices run clear
and meat near the bone is no
longer pink. Let stand 5-10
min.
Place chicken bone-side
down on dish, with the
thickest portions towards the
outside of the dish. Cover
with wax paper. Turn over
when the cooking time is half
up. Cook until juices run clear
and meat near the bone is no
longer pink. Let stand 5-10
min.
21
Page 56

INSTRUCTIONS POUR LA CUISSON
Guide de cuisson des poissons et crustacés au
micro-ondes
• Faire cuire le poisson jusqu’à ce que la chaire se défasse bien à
l’aide d’une fourchette.
• Placer le poisson sur une grille à rôtir et dans un plat, tous deux
conçus pour le micro-ondes.
• Utiliser un couvercle étanche pour cuire le poisson à la vapeur.
L’usage d’un couvercle plus léger ou l’utilisation de papier ciré ou de
serviettes de papier retiennent moins la vapeur.
• Ne pas trop cuire le poisson; vérifier le résultat au minimum de sa
cuisson.
Aliment Temps de cuisson Directives
Les steaks
de poisson
Jusqu’à 1.5
livres (lbs)
Les filets
Jusqu’à 1.5
livres (lbs)
Les
crevettes
Jusqu’à 1.5
livres (lbs)
Temps de cuisson:
6 à 10 min. / lb.
Le niveau de puissance:
Medium - Haut (7)
Temps de cuisson:
3 à 7 min. / lb.
Le niveau de puissance:
Medium - Haut (7)
Temps de cuisson:
3 à 5½ min. / lb.
Le niveau de puissance:
Medium - Haut (7)
Placer les steaks avec la
partie la plus épaisse loin du
centre de la grille. Recouvrir
de papier ciré. À mi-cuisson,
retourner et replacer les
steaks. Cuire jusqu’à ce
qu’ils se défassent bien à la
fourchette. Laisser reposer
de 3 à 5 minutes.
Placer les filets dans un plat
en repliant les parties
minces sous le filet.
Recouvrir de papier ciré. Si
le filet a plus de 1 cm
d’épaisseur, le reourner à
mi-cuisson et le replacer.
Cuire jusqu’à ce qu’il se
défasse bien à la fourchette.
Laisser reposer 2 à 3
minutes.
Disposer les crevettes dans
un plat sans qu’elles se
chevauchent ou se
superposent. Recouvrir de
papier ciré. Cuire les
crevettes jusqu’à ce qu’elles.
Guide de cuisson des oeufs au micro-ondes
• Ne jamais faire cuire les oeufs dans leur coquille, ni jamais
réchauffer les oeufs à la coque dans le four à micro-ondes. Ils
pourraient exploser.
• Toujours percer les oeufs afin qu’ils n’éclatent pas.
• Retirer les oeufs un peu avant la fin de leur cuisson. Ils deviennent
trop durs si trop cuits.
Guide de cuisson des légumes au micro-ondes
• Les légumes doivent être lavés immédiatement avant leur cuisson.
En général, il n’est pas nécessaire de leur ajouter de l’eau. Pour les
légumes denses tels que: pommes de terre, carottes ou pois verts, il
faut ajouter 65 ml d’eau.
• Les petits légumes (carottes tranchées, pois, fèves de lima etc...)
cuiront plus rapidement que les autres.
• Les légumes entiers comme les pommes de terre, les courges ou le
maïs sur épis devront être placés en cercle sur le plat tournant avant
leur cuisson. Ils cuiront de tous côtés si retournés à mi-cuisson.
• Disposer toujours les légumes de type asperge, brocoli avec la tige
pointant vers l’extérieur du plateau et les bouts vers le centre.
• Lorsque vous cuisez des légumes coupés, recouvrir toujours le plat
avec un couvercle ou une enveloppe de plastique perforée pour
micro-ondes.
• Avant leur cuisson percer à plusieurs endroits la peau des légumes
entiers et non pelés. Cela empêchera les légumes comme les
pommes de terre, les courges ou les aubergines d’éclater lors de
leur cuisson.
• Pour obtenir une cuisson plus égale, brasser ou retourner les
légumes entiers à mi-cuisson.
• En général, plus le légume est dense, plus long sera le temps de
repos. (Le temps de repos signifie le temps requis pour les légumes
ou les aliments denses d’achever leur cuisson après leur sortie du
four.) Une pomme de terre doit demeurer sur le comptoir pendant
cinq minutes avant de compléter sa cuisson alors qu’un plat de pois,
lui, peut être servi immédiatement.
22
Page 57

INSTRUCTIONS POUR LA CUISSON
Guide de décongélation automatique
• Veuillez suivre les directives suivantes lors de la décongélation de
certains aliments.
Aliment
Rôti
Boeuf,
Porc
Steaks
Côtelettes
Poisson
Viande
Hachée
Poulet
entier
Morceaux
de poulet
Quantité
Standard
2.5-6.0 lbs. Commencer par placé le côté gras de la
viande vers le bas. Après chaque étape,
la retourner et protéger chaque partie qui
est chaude avec des lanières de papier
d’aluminium.
0.5-3.0 lbs. À la fin de chaque étape, arranger de
nouveau la viande ou le poisson. S’il y a
des parties chaudes ou décongelées, les
protéger avec des lanières plates de
papier d’aluminium. Retirer les morceaux
en partie décongelés. Couvrir
d’aluminium et laisser reposer pendant 5
à 10 minutes.
0.5-3.0 lbs. Après chaque étape, retirer chaque
morceau de viande qui est presque
décongelé. Laisser reposer, couvert
d’aluminium pendant 5 à 10 min.
2.5-6.0 lbs. Retirer les bas morceaux avant de
congeler la volaille. Commencer par
décongeler la volaille, poitrine vers le
bas. Après la première étape, retourner
la volaille et protéger chaque partie
chaude avec des lanières de papier
d’aluminium. Après la deuxième étape,
protéger à nouveau les parties chaudes
d’aluminium. Laisser reposer pendant 30
à 60 min. dans le réfrigérateur.
0.5-3.0 lbs. Après chaque étape, replacer ou retirer
les morceaux de viande qui sont presque
décongelés. Laisser reposer pendant 10
à 20 min.
Marche à suivre
Remarques:
Lorsque la minuterie du four se fait entendre, vérifier la viande. Après le signal de la fin de cuisson, il se peut que de petites portions de viande soient
encore congelées, laisser les reposer pour qu’elles décongèlent. Ne pas
décongeler tant que les particules de glace ne soient pas fondues. Afin de
prévenir les coins de cuire, protéger les rôtis et steaks au moyen de petits
morceaux, plats, d’aluminium. Cela empêchera les coins de cuire avant que
le centre ne soit décongelé.
Utiliser de longues lanières, plates, de papier d’aliminium pour recouvrir les
bords et les parties les plus minces de la viande.
23
Page 58

INSTRUCTIONS POUR LA CUISSON
Recettes
Ragoût de boeuf à l’orge
1 ½ lbs de bœuf à ragoût en cube, coupez en morceaux de ½ po
½ tasse d’oignon haché
2 c. à table de farine tout usage
1 c. à table de sauce Worcestershire
1 boîte (13,75 à 14,5 on) de bouillon de bœuf
2 carottes de moyenne taillées en tranches de ½ po (environ 1 tasse)
½ tasse d’orge
1 feuille de laurier
¼ c. à thé de poivre
1 sac (9 à 10 on) de pois surgelés, décongelés
1. Dans une casserole de 2 L, mélanger le boeuf, les oignons, la farine
et la sauce Worcester. Bien mélanger. Recouvrir d’un couvercle.
Cuire à Haut (0) pendant 6 à 8 min.jusqu’à ce que le boeuf ne soit
plus rosé. Remuer une fois encore.
2. Dans le bouillon de boeuf, mélanger les carottes, l’orge, la feuile de
laurier et le poivre. Recouvrir d’un couvercle. Cuire à Medium
pendant 1 à 1 ½ heure, jusqu’à ce que les carottes et le boeuf soient
tendres. Remuer 2 à 3 fois.
3. Mélanger les pois. Recouvrir d’un couvercle. Cuire à Medium
pendant 10 minutes. Laisser reposer 10 minutes. Enlever la feuille
de laurier avant de servir.
Donne 6 portions.
Casserole de brocoli et fromage
¼ tasse de beurre ou margarine
¼ tasse d’oignon haché
1 ½ c. à table de farine
½ c. à thé de sel
¼ c. à thé de moutarde séchée
1
/8 c. à thé de poivre
1 ½ tasses de lait
¼ tasse de piment rouge haché
8 on. (2 tasses) fromage cheddar, râpé
1 sac (9 à 10 on) brocoli haché surgelé, décongelé
4 tasses de pâte alimentaire cuite, en forme de spirale (8 on sec)
1. Dans une casserole de 2 L, faire revenir le beurre et les oignons à
Haut (0) pendant 1 à 2 minutes jusqu’à ce que les oignons soient
mous, mélanger une fois.
2. Ajouter de la farine, du sel,de la moutarde et dupoivre. Bien
mélanger. Cuire à Haut (0) pendant 30 à 60 secondes jusqu’à ce
que le mélange se mette à bouillir. Ajouter le lait et mélanger jusqu’à
consistance crémeuse.
3. Ajouter le poivron rouge. Cuire à Haut (0) pendant 2 à 3 minutes
jusqu’à ce que le mélange se mette à bouillir et épaississe
légèrement. Remuer 2 fois. Mélanger le fromage jusqu’à ce qu’il soit
fondu.
4. Ajouter le brocoli et les pâtes. Bien mélanger. Recouvrir d’un
couvercle. Cuire à Haut (0) pendant 4 à 6 minutes jusqu’à ce que le
tout soit bien chaud. Mélanger une fois. Avant de servir mélanger
encore.
Donne 6 portions.
24
Page 59

INSTRUCTIONS POUR LA CUISSON
Salade de pommes de terre chaudes
2 lb (910gr) de petites pommes de terre rouge coupées en morceaux de 1 2
lbs petites pommes de terre rouge, coupées en morceaux de ½ po
4 tranches de bacon (non-cuit), coupez en morceaux de ½ po
¼ tasse d’oignon haché
2 c. à thé de sucre
1 c. à thé de sel
1 c. à thé de farine
½ c. à thé graines de céleri
1
/8 c. à thé poivre
2 ½ c. à table vinaigre au cidre de pomme
1. Dans une casserole de 2 litres, mélanger les pommes de terre et 65
ml d’eau. Recouvrir d’un couvercle. Cuire à Haut (0) jusqu’à ce que
les pommes de terre soient tendres (7 à 10 min.); mélanger deux
fois. Mettez-les dans une passoire pour enlever l’eau et laisser
reposer pour qu’elles refroidissent un peu.
2. Dans un bol de taille moyenne, cuire le bacon à Haut (0) jusqu’à ce
qu’il devienne croustillant (2 ½ - 3 ½ min.) ; mélanger une fois.
Déposer le bacon sur une serviette de papier. Gardez 1 c. à soupe
du résidu.
3. Mélanger le résidu aux oignons. Recouvrir d’une feuille de plastique;
retourner un coin pour laisser échapper la vapeur. Cuire à Haut (0)
jusqu’à ce qu’ils soient tendres (1 ½ - 2 ½ min.); mélanger une fois.
4. Mélanger le sucre, le sel, la farine, les graines de céleri et le poivre.
Cuire à Haut (0) jusqu’à ébullition (30 - 40 sec.). Mélanger le vinaigre
et ½ tasse d’eau. Cuire à Haut (0) jusqu’à ébullition et léger
épaississement (1-2 min.) ; mélanger une fois. Ajouter le bacon à la
sauce. Verser la sauce sur les pommes de terre. Bien mélanger .
Donne 6 portions.
Soupe aux fèves noires
1 tasse d’oignons hachés
1 gousse d’ail
2 boîtes (de 15 on) de haricots noirs, écoulées
1 boîte (14 à 16 on) de tomates en dés
1 boîte (13,75 à 14,5 on) de bouillon de poulet
1 boîte (7 à 8,5 on) de maïs
1 boîte (4 on) de Chili vert, haché
1 à 2 c. à thé de cumin moulu ou au goût
1. Déposer les oignons et l’ail dans une casserole de 3 l. Recouvrir
avec un couvercle. Réchauffer à Haut (0) de 3 à 5 min. jusqu’à ce
que les oignons deviennent tendres.
2. Ajouter une boîte de fèves, écraser les fèves à l’aide d’une
fourchette. Ajouter les autres ingrédients; bien mélanger.
3. Faire chauffer à Haut (0) pendant 10 min. Remuer. Réduire le degré
de cuisson à Médium et cuire pendant 5 min. Remuer avant de
servir.
Donne environ 2 litres.
25
Page 60

INSTRUCTIONS POUR LA CUISSON
Guide de cuisson automatisée
• Suivez les directives de ce guide pour la cuisson automatisée de
différents aliments.
Aliment Quantité Procédure
Pommes
de terre
Légumes
frais
Dîner
congelé
Réchauffer
de la pizza
Légumes
congelés
1 à 6 Piquer chaque pomme de terre plusieurs
fois avec une fourchette. Placer sur la
table tournante vers l’extérieur. Laisser
reposer 3-5 minutes. Laisser refroidir le
four pour 5 minutes avant de l’utiliser à
nouveau.
1 à 4 tasses Placer les légumes frais dans un
contenant de céramique, verre ou
plastique pour le micro-ondes et ajouter
2 à 4 c à soupe d’eau. Recouvrir avec un
couvercle ou une pellicule de plastique
perforée pendant la cuisson, remuer et
laisser reposer. Attendre 2 minutes avant
de servir. Laisser refroidir le four pour 5
minutes avant de l’utiliser à nouveau.
7 à 18 oz Déballer les aliments et suivre les
directives de cuisson sur l’emballage
pour couvrir et laisser reposer les
aliments. Laisser refroidir le four pour 5
minutes avant de l’utiliser à nouveau.
1 à 3 tranches Placer 1 à 3 tranches de pizza sur une
assiette pour micro-ondes avec la partie
la plus large vers l’extérieur. Ne pas
empiler les tranches. Ne pas recouvrir.
Laisser reposer le four pour 5 minutes
avant de l’utiliser à nouveau.
1 à 4 tasses Placer les légumes congelés dans un
contenant en céramique, verre ou
plastique pour le micro-ondes et ajouter
2 à 4 c d’eau. Recouvrir avec un
couvercle ou une pellicule de plastique
perforée pendant la cuisson, remuer et
laisser reposer. Laisser reposer le four
pour 5 minutes avant de l’utiliser à
nouveau.
Aliment Quantité Procédure
Petitdéjeuner
congelé
Crevettes 0.5 à 1.0 lb Placer les crevettes dans un plat sans
Poitrines
de poulet
désossées
Maïs à
éclater
2 à 8 oz Suivre les directives sur l’emballage pour
0.5 à 1.5 lb Placer les poitrines de poulet dans un
3.0 à 3.5 oz 1
sac
recouvrir et laisser reposer. Utiliser cette
touche pour dégeler un sandwich
congelé, des petits-déjeuners crêpes,
gauffres, etc... Laisser refroidir le four
pour 5 minutes avant de l’utiliser à
nouveau.
qu’elles s’empilent les unes sur les
autres. Couvrir de papier ciré. Laisser
refroidir le four pour 5 minutes avant de
l’utiliser à nouveau.
plat pour micro-ondes en tournant les
parties les plus épaisses vers l’extérieur.
Bien recouvrir avec du papier ciré. S’il
s’agit de poitrines épaisses, les attendrir
avec un maillet avant de les cuire.
Lorsque le four déclenche le signal
avertisseur de cuisson complétée, les
retourner. Laisser refroidir le four pour 5
minutes avant de l’utiliser à nouveau.
N’utiliser qu’un sac de maïs à éclater
pour micro-ondes à la fois. Faites
attention lorsque vous sortirez le sac du
four et que vous l’ouvrirez. Laisser
refroidir le four 5 minutes avant de
l’utiliser à nouveau.
Notes:
La temp
more/less(plue moins) bouton pour ajuster votre preference de temperature.
érature de nourriture varie de la personne à la personne. Utiliser
26
Page 61

INSTRUCTIONS POUR LA CUISSON
Guide de réchauffement automatisé
• Suivez les directives de ce guide pour faire réchauffer différents
aliments.
Aliment Quantité Procédure
Assiette de
nourriture
Casseroles
Réchauffer
les pâtes
alimentaires
1 portion
(1assiette)
1 à 4
portions
N’utilisez que des aliments pré-cuits
réfrigérés. Bien recouvrir de tous les côtés
avec une pellicule de plastique ou de
papier ciré. Si la nourriture n’est pas à la
température que vous désirez, poursuivre
la cuisson en utilisant TIME et POWER.
• Contenu:
- 3 à 4 onces de viande, volaille ou
poisson (jusqu’à 6 onces avec os)
- ½ tasse de féculant (pommes de terre,
pâtes, riz etc.)
- ½ tasse de légumes (3 à 4 onces
environ).
N’utilisez que des aliments pré-cuits
réfrigérés. Recouvrir d’un couvercle ou
d’une pellicule de plastique trouée. Si la
nourriture n’est pas à la température que
vous désirez, poursuivre la cuisson en
utilisant TIME et POWER.
Remuer une fois avant de servir.
Recettes automatisées
Soupe à l’oignon à la Française (4 portions)
3 c. à soupe beurre ou margarine
3 tasses (à peu près 3 oignons moyens) oignons tranchés (750 ml)
3 tasses de bouillon de bœuf (750 ml)
1 tasse d’eau (250 ml)
1 c à thé de sauce Worcestershire (5ml)
Sel, poivre, croûtons, fromage parmesan râpé (au goût)
2 c. à soupe de brandy (optionnel) (30 ml)
1. Combiner le beurre et les oignons dans une casserole de 3 pintes.
Recouvrir. Placer à HAUT (0) pour 8 à 9 minutes ou utiliser la
cuisson automatisée pour légumes frais.
2. Ajouter le bouillon, eau, sauce Worstershire, sel et poivre en
remuant puis recouvrir. Placer dans le micro-ondes à HAUT (0) pour
5 minutes et à MEDIUM (5) pour 5 minutes ou utiliser la cuisson
automatisée pour réchauffer. Ajouter le brandy en remuant. Laisser
reposer, couvert, pour 5 minutes avant de servir. Servir avec les
croûtons et le fromage.
27
Page 62

INSTRUCTIONS POUR LA CUISSON
Boules au maïs à éclater
30 petits carrés au caramel
1½ c. à soupe d’eau (22ml)
1 c. à thé de beurre ou margarine
1 sac (3,5 oz) de maïs à éclater pour micro-ondes
1. Combiner le caramel, l’eau et le beurre dans un contenant en verre
de 4 tasses. Placer au micro-ondes à HAUT (0) pour 2 à 3 minutes
jusqu’à ce que le mélange soit fondu. Laisser reposer.
2. Placer le maïs à éclater sur la table tournante. Placer à HAUT (0)
pour 2 à 3 minutes ou utiliser la cuisson automatisée POPCORN.
3. Placer le maïs à éclater dans un bol. Verser le mélange de caramel
par-dessus. Remuer jusqu’à ce que le mélange soit homogène et
laisser refroidir. En vous servant de vos mains bien beurrées, former
des boules de 3 pouces.
4. Laisser reposer sur un papier ciré. Servir immédiatement.
Pois et laitue (4 portions)
2 tasses de pois verts frais
1/3 tasse céleri haché
2 c. à soupe d’eau (30 ml)
3 tasses de laitue hachée
1 c. à soupe beurre ou margarine
1 c. à soupe de farine tout usage
½ c. à thé de sucre
¼ c. à thé de sel
¼ tasse de crème à fouetter
Set et poivre au goût
3. Placer au micro-ondes à HAUT (0) pour 1 à 2 minutes ou utiliser la
cuisson automatisée pour réchauffer. Remuer jusqu’à consistance
homogène. Égoutter les légumes.
4. Ajouter la sauce aux légumes; remuer pour obtenir un mélange
homogène.
Pommes de terre garnies (4 portions)
4 pommes de terre moyennes, bien lavées
½ tasse de crème sûre (125 ml)
1/3 tasse de lait (83 ml)
2 c. à soupe de fromage parmesan râpé
1 c. à thé de ciboulette hachée ou de persil
Sel, poivre, paprika au goût
1. Piquer les pommes de terre 2 fois avec une fourchette. Placer les
pommes de terre à 1 pouce l’une de l’autre sur un papier absorbant
sur la table tournante. Placer au micro-ondes à HAUT (0) pour 10 à
12 minutes ou utiliser la cuisson automatisée pour pommes de terre.
Laisser reposer pendant 5 minutes.
2. Découper le dessus de chaque pomme de terre; enlever le centre.
Mélanger avec la crème sûre, lait, fromage, ciboulette, sel et poivre.
Replacer dans les pommes de terre. Saupoudrer du paprika sur le
dessus.
3. Placer sur une assiette sur un papier absorbant dans le four. Faire
cuire à HAUT (0) pour 2 à 4 minutes ou utiliser la cuisson
automatisée pour réchauffer.
1. Combiner les pois, le céleri et l’eau dans une casserole de 1½ pinte;
recouvrir.
2. Placer au micro-ondes à HAUT (0) pour 5 à 7 ½ minutes ou utiliser la
cuisson automatisée pour les légumes frais. Ajouter la laitue en
remuant; recouvrir. Dans un petit plat combiner le beurre, farine,
sucre, sel et poivre. Ajouter la crème.
28
Page 63

INSTRUCTIONS POUR LA CUISSON
Mélange de légumes (4 à 6 portions)
1 ½ tasse de morceaux de brocoli d’un diamètre de 3/4 - 1 pouce
1 ½ tasse de morceaux de choux-fleur d’un diamètre de 3/4 - 1 pouce
1 courge jaune moyenne, coupée en morceaux de ¼ pouce à la diagonale
1 zucchini moyen, coupé en morceaux de ¼ pouce à la diagonale
1 carotte moyenne, coupée en morceaux de 1/8 pouce à la diagonale
½ petit piment rouge tranché
6-7 olives dénoyautées tranchées
2-3 c. à soupe beurre ou margarine
½ c. à thé Origan séché
1 c. à thé jus de citron frais
Fromage parmesan au goût (optionnel)
1. Placer les morceaux de brocoli et de choux-fleur de façon alternée
autour d’un plat en verre de 10 à 12 pouces. Placer la courge jaune
et le zucchini autour du brocoli et du choux-fleur. Placer les carottes
au centre et placer les piments rouges sur le dessus. Arroser avec 2
c à table d’eau (30 ml). Recouvrir d’une pellicule de plastique trouée.
2. Placer dans le micro-ondes à HAUT (0) pour 7 à 9 minutes ou utiliser
la cuisson automatisée pour les légumes frais. Enlever la pellicule de
plastique immédiatement, placer les tranches d’olives par-dessus le
tout.
3. Placer le beurre ou la margarine dans une tasse dans le microondes à HAUT (0) pour 30 secondes à une minute pour fondre le
tout. Ajouter l’origan et le jus de citron. Verser sur les légumes.
Parsemer de fromage parmesan et servir.
Casserole de fèves et saucisses (4 à 6 portions)
½ tasse d’oignons hachés
2 c. à soupe de beurre ou margarine
1 paquet (12 à 16 oz) saucisses coupées en morceaux
1 boîte (16 oz) fèves au lard
à
1 boîte (15
1 boîte (15
1/3 tasse de cassonade
¼ tasse de ketchup (62 ml)
1 c à thé de moutarde jaune
Sel, poivre et poudre d’ail au goût
1. Combiner les oignons et le beurre dans une casserole de 3 pintes.
Placer dans le micro-ondes à HAUT (0) pour 1 à 2 minutes ou
jusqu’à ce que les oignons soient mous.
2. Ajouter tous les autres ingrédients en remuant, en poussant les
saucisses vers le bas du plat pour les recouvrir de fèves.
3. Recouvrir et placer au micro-ondes à HAUT (0) pour 11 à 13 minutes
ou utiliser la cuisson automatisée pour réchauffer. Remuer jusqu’à
consistance homogène.
16 oz) de cannellini (fèves blanches), égouttées
à
16 oz) de fèves rouges, égouttées
29
Page 64

ANNEXE
Guide de dépannage
Avant d’appeler un réparateur pour votre four, vérifier la liste ci-après qui
résume les problèmes possibles et leurs solutions.
Le four ne fonctionne pas ni l’afficheur
• Bien brancher la fiche dans une prise comportant une prise à la terre.
• Si la prise est contrôlée par un commutateur, s’assurer que celui-ci est
bien sur “on”.
• Retirer la fiche de la prise, attendre 10 sec. et rebrancher.
• Réactiver le disjoncteur ou remplacer un fusible brûlé.
• Brancher un autre appareil dans la prise; si ce dernier ne fonctionne
pas, appeler alors un électricien qualifié pour réparer la prise.
• Brancher le four dans une autre prise.
L’afficheur fonctionne mais le courant est absent
• Vous assurer que la porte est bien fermée.
• Vérifier si un morceau d’emballage ou tout autre pièce est collée au
scellant de la porte.
• Vérifier si la porte n’est pas endommagée.
• Appuyer deux fois sur “cancel” et refaire toutes les entrées des
instructions de cuisson.
Le courant est débranché avant que le temps
programmé ne soit épuisé.
• S’il y a eu une panne de courant, enlever la fiche de la prise, attendre 10
sec. et rebrancher. Dans le cas d’une panne de courant, L’indicateur de
temps marquera “ENJOY YOUR COOKING - - - PRESS MY CHOICE
FOR PERSONAL OPTIONS”. Remettre alors l’horloge à l’heure et
refaire toutes les entrées des instructions de cuisson.
• Réarmer le disjoncteur ou remplacer le fusible brûlé.
Les aliments cuisent trop lentement
• Assurez-vous que le four est bien alimenté par son propre circuit de 20
A. En utilisant un autre appareil sur le même circuit peut causer une
chute de tension. Si nécessaire, transporter le four pour le brancher à un
circuit sans autre charge.
Si vous voyez des étincelles ou des arcs électriques
• Enlever tout ustensile de métal, chaudron ou attaches de métal. Si vous
utilisez du papier d’aluminium, n’utiliser que d’étroites bandes et laisser
un espace de 2,5 cm entre le papier métallique et les parois intérieures
du four.
Le plateau pivotant est bruyant ou demeure collé
• Nettoyer le plateau, l’anneau à roulettes et le fond du four.
• Vérifier afin que le plateau et l’anneau à roulettes soient bien placés
dans la rainure prévue à cet effet.
L’utilisation de votre four cause de l’interférence à
votre radio ou votre téléviseur
• Cette interférence est similaire à celle causée par d’autres appareils tels
que les séchoirs à cheveux. Déplacer alors votre four micro-ondes afin
de l’éloigner du récepteur radio ou de la télévision.
Nettoyage et entretien
Veuillez suivre ces directives pour bien nettoyer et entretenir votre four.
• Toujours garder l’intérieur du four propre. Des particules d’aliments ou
des éclaboussures de liquides peuvent coller aux parois du four et
causer une perte d’efficacité de votre appareil.
• Essuyer immédiatement les dégouttures. Utiliser pour cela un linge
humide et un savon doux. Éviter les détergents forts et abrasifs.
• Pour aider à détacher les particules de nourriture ou de liquide des
parois du four, réchauffer 500 ml d’eau (y ajouter le jus d’un citron pour
donner une odeur de fraîcheur) dans un contenant de 1 litre à Haut (Hi)
pendant 5 min. amener à ébulittion. Laisser reposer pendant une à deux
minutes.
• Enlever le plateau de verre du four pour les le laver. Afin de ne pas
briser votre plateau, le manipuler avec prudence et ne pas le plonger
dans l’eau immédiatement après une cuisson. Laver avec soin votre
plateau avec de l’eau chaude légèrement savonneuse ou dans le lavevaisselle.
• Laver les surfaces extérieures de votre four avec un linge humide et du
savon. Sécher le avec un linge doux. Afin de prévenir l’endommagement
des parties opérationnelles du four, ne pas laisser l’eau s’infiltrer dans
les ouvertures.
• Laver la fenêtre du four avec un peu d’eau et un savon très doux.
Assurez-vous d’utiliser un linge très doux pour éviter de l’égratigner.
• Si de la vapeur s’accumule à l’intérieur ou à l’extérieur de la fenêtre du
four, l’essuyer avec un linge doux. La vapeur peut s’accumuler dans une
atmosphère très humide, ceci, en aucun cas n’indique une perte
d’étanchéité du four.
• Ne jamais utiliser le four sans aucun aliment à l’intérieur; cette pratique
peut endommager le magnétron ou le plateau de verre. Pour plus de
prudence, vous pouvez laisser un verre d’eau à l’intérieur au cas où le
four serait en marche par accident.
Pour tout problème non résolu,
veuillez appeler notre numéro de service:
1-800-SAMSUNG(1-800-726-7864)
30
Page 65

ANNEXE
Spécifications
Numéro du modèle
Capacité du four
Commandes
Chronomètre
Source d’alimentation
Puissance de sortie
Dimensions extérieures
Dimensions de la cavité
Poids net / brut
Numéro du modèle
Capacité du four
Commandes
Chronomètre
Source d’alimentation
Puissance de sortie
Dimensions extérieures
Dimensions de la cavité
Poids net / brut
MS1070WB/BB/SA
1.0 pi.cu.
10 niveaux de cuisson + décongélation
99 minutes, 99 secondes
120 VAC, 60 Hz
1100 Watts
20
13
11/32
7/32
”(W) X 11
”(W) X 9
11/16
3/32
”(H) X 14
”(H) X 13
23/32
29/32
”(D)
”(D)
35.3/38.6 lbs
MS1271WA/BB/SB
1.2 pi.cu.
10 niveaux de cuisson + décongélation
99 minutes, 99 secondes
120 VAC, 60 Hz
1100 Watts
20
14
19/32
31/64
”(W) X 11
”(W) X 9
45/64
1/64
”(H) X 15
”(H) X 16
27/64
1/4
”(D)
”(D)
33/36 lbs
Numéro du modèle
Capacité du four
Commandes
Chronomètre
Source d’alimentation
Puissance de sortie
Dimensions extérieures
Dimensions de la cavité
Poids net / brut
MS1471WB/BB/SA
1.4 pi.cu.
10 niveaux de cuisson + décongélation
99 minutes, 99 secondes
120 VAC, 60 Hz
1100 Watts
21
14
7/8
”(W) X 12
3/4
”(W) X 9
5/16
13/16
”(H) X 17
”(H) X 17
9/32
1/16
”(D)
”(D)
38.5/42 lbs
31
Page 66

Garantie
Garantie limitée de l’acheteur initial
Ce produit Samsung est garanti par SAMSUNG ELECTRONICS CANADA
INC. (ci-après appelé SECA) contre tous défauts de matériaux ou de fabrication pendant les périodes précisées ci-dessous :
Main d’oeuvre : Un(1) an (au comptoir)
Pièces : Un(1) an
Magnétron : Cinq(5) ans
SECA garantit également que lors du défaut de fonctionnement correct de
ce produit durant la période de la garantie spécifiée, si ce manque de fonctionnement est le résultat d’une erreur de fabrication ou d’un défaut matériel,
SECA réparera ou remplacera, à sa discrétion, cet appareil.
Toutes les réparations sous garantie ou remplacements de pièces doivent
être effectués dans un Centre de service agréé SECA. Pour obtenir le nom
et l’adresse du Centre de service agréé le plus près de chez vous, composez le 1-800-SAMSUNG ou consultez notre site Internet au www.samsungcanada.com.
Obligation de l’acheteur initial
Le reçu de vente initial doit être conservé en tant que preuve d’achat. Il doit
être présenté au Centre de service agréé avant qu’un service de garantie ne
soit effectué.
Pour tous les modèles portatifs, le client est responsable du transport au et
à partir du Centre de service agréé.
Exclusions de la garantie
Cette garantie ne couvre pas les dommages occasionnés par un accident,
un incendie, une inondation ou tout cas de force majeure, ni par une mauvaise utilisation, le branchement à une tension incorrecte, une mauvaise
installation, des réparations impropres ou non autorisées, l’usage à des fins
commerciales ou les dommages survenus lors du transport. Les réglages
décrits dans ce manuel et effectués par le client ne sont pas couverts par
cette garantie. Cette garantie s’annule automatiquement pour tout appareil
dont le numéro de série a été modifié ou est manquant. La présente garantie ne couvre que les appareils achetés et utilisés au Canada.
SAMSUNG ELECTRONICS
ADDENDA À LA GARANTIE LIMITÉE POUR L’AMÉRIQUE DU NORD
Conformément aux exigences, conditions, exclusions et limitations de la
Garantie limitée de l’acheteur d’origine, décernée avec les produits Samsung Electronics (SAMSUNG) ainsi que les exigences, conditions, exclusions et limitations ci-devant définies, SAMSUNG ajoute à sa garantie les
réparations et le service effectués aux États-Unis sur les produits SAMSUNG achetés au Canada et au Canada sur les produits SAMSUNG
achetés aux États-Unis. Ceci pour les périodes de garantie précédemment
spécifiées et ne s’appliquant qu’à l’acheteur d’origine seulement.
Les réparations décrites plus haut dans la garantie doivent être effectuées
par un Centre de Service autorisé de SAMSUNG. Accompagné des
présentes et de la Garantie limitée de l’acheteur d’origine, un reçu dûment
daté comme preuve d’achat doit être présenté au Centre de Service. Le
transport de l’équipement vers le Centre de Service et son retour chez le client demeurent la responsabilité du client.
Les conditions qui s’appliquent sont limitées aux défauts de manufactures
portant sur le matériel ou la main d’oeuvre et dans les limites d’un usage de
l’équipement visé.
Exclues de la présente sans toutefois s’y limiter, sont toutes clauses originales portant sur le service en résidence ou sur les lieux de l’appareil, le temps
de réparation minimum ou maximum, les échanges ou les remplacements,
les accessoires, les options, les améliorations ou les items jetables.
Pour obtenir les coordonnées d’un Centre de Service autorisé SAMSUNG
au Canada ou aux États-Unis, communiquez avec SAMSUNG à:
1-800-SAMSUNG (1-800-726-7864)
ou par courriel à:
WWW.SAMSUNGUSA.COM ou WWW.SAMSUNGCANADA.COM
32
Page 67

Nota
33
Page 68

Référence Rapide
Fonction Opération
Ajuster
l’horloge
Cuisson par
étape
Cuisson Une
Minute +
Touches pour
cuisson
immédiate
Décongélation
automatique
Ajuster le temps
de cuisson, les
nuveaux de
cuisson.
1. Appuyer sur CLOCK.
2. Utiliser les commandes numériques pour
ajuster l’heure.
3. Appuyer sur CLOCK encore une fois.
1. Utiliser les commandes numériques pour établir
le temps de cuisson.
2. Mettre le niveau de cuisson ou laisser à
Haut (0).
3. Appuyer sur START.
1. Appuyer sur ONE MINUTE +, une fois pour
chaque minute de cuisson.
2. Le temps va s’inscrire sur le cadran et le four va
se mettre en marche.
1. Appuyer sur la touche qui correspond au plat
que vous voulez faire chauffer (par exemple:
BACON).
2. Répéter autant de fois que le nombre de
portions.
1. Appuyer sur AUTO DEFROST.
2. Entrer le poids des aliments en appuyant sur
AUTO DEFROST à maintes reprises ou utiliser
les commandes numériques.
3. Lorsque demandé par le cadran du four,
appuyer sur PAUSE / CANCEL et retourner les
aliments. Appuyer sur START pour que le cycle
de décongélation continue jusqu’à la fin.
1. Utiliser les commandes numériques pour établir
le temps de cuisson.
2. Pour indiquer un autre niveau de cuisson que
HIGH, appuyer sur la touche POWER LEVEL et
utiliser les commandes numériques pour entrer
le niveau de cuisson désiré.
3. Appuyer sur START pour commencer la
cuisson.
Ajuster le temps
de cuisson, les
niveaux de
cuisson
Cuisson
programmée
Aide Pratique
Repas Enfants
Snack Bar
SAMSUNG ELECTRONICS CANADA, INC.
1. Appuyer sur la touche correspondante au plat
que vous désirez faire (ex: POTATO).
2. Le cadran indiquera le plat que vous avez
choisi et le four se mettra automatiquement en
marche.
1. Appuyer sur Sensor Reheat.
2. Le cadran indiquera “Réchauffement”, le four se
met automatiquement en marche.
1. Appuyer sur HANDY HELPER (KIDS MEALS,
SNACK BAR) à maintes reprises pour choisir le
plat à réchauffer.
2. Pour augmenter le nombre de portions,
appuyer sur la touche requise des commandes
numériques.
3. Appuyer sur START pour commencer la
cuisson.
ELECTRONICS
7037 FINANCIAL DRIVE,
MISSISSAUGA,
ONTARIO, L5N 6R3
Samsung Electronics Co., Ltd
Juin. 2001
Imprimé en Corée
 Loading...