

Page 1
Samsung ER-290 Electronic Cash Register
Operator's and
Programming Manual
M-ER290 Version 2.0
All specifications are subject to change without notice. 2005, CRS Inc.
Page 2

CRS, Inc.
Limited Warranty and Disclaimers of Warranty
This manual has been developed by CRS, Inc. It is intended for the use of its customers and service personnel and should be read in its
entirety before attempting to install, use or program the product(s).
Nothing contained in this manual shall be deemed to be, and this manual does not constitute, a warranty of, or representation with respect
to, the product or any of the products to which this manual applies. This manual is subject to change without notice and CRS, Inc. has no
obligation to provide any updates or corrections to this manual. Further, CRS, Inc. also reserves the right, without prior notice, to make
changes in equipment design or components as it deems appropriate. No representation is made that this manual is complete or accurate in
all respects and CRS, Inc. shall not be liable for any errors or omissions contained in this manual. In no event shall CRS, Inc. be liable for
any incidental or consequential damages relating to or arising out of the use of this manual. This document contains proprietary
information that is protected by copyright. All rights are reserved. No part of this document may be photocopied or reproduced without
prior written consent of CRS, Inc.
NOTICE
IF ANY WARRANTY IS EXTENDED TO YOU WITH REGARD TO THE PRODUCT(S) TO WHICH THIS MANUAL APPLIES, IT
IS A WARRANTY FROM THE ENTITY OR INDIVIDUAL FROM WHOM YOU DIRECTLY PURCHASED THE PRODUCT(S).
SUBJECT TO THE FOREGOING, UNLESS YOU ARE A DIRECT END USER CUSTOMER OF CRS, INC., CRS, INC. DOES NOT
EXTEND TO YOU ANY EXPRESS WARRANTY OR ANY IMPLIED WARRANTY AND EXPRESSLY DISCLAIMS ANY IMPLIED
WARRANTY OF MERCHANTABILITY, FITNESS FOR USE, OR FITNESS FOR ANY PARTICULAR PURPOSE, OR ANY
WARRANTY OF NON-INFRINGEMENT OF INTELLECTUAL PROPERTY RIGHTS IN CONNECTION WITH THE PRODUCT(S)
OR ANY SOFTWARE, DRIVERS, OR PROGRAMMING PRODUCT, WHETHER EMBEDDED IN PRODUCT(S) OR PROVIDED AS
A SEPARATE PROGRAM, OR USED IN CONJUNCTION WITH THIS/THESE PRODUCT(S). CRS, INC. SPECIFICALLY DOES
NOT WARRANT THAT THE OPERATION OF ANY DRIVERS, SOFTWARE, OR PROGRAMMING PRODUCTS LICENSED
HEREUNDER, WHETHER EMBEDDED IN PRODUCTS OR PROVIDED AS SEPARATE PROGRAMS, SHALL BE
UNINTERRUPTED OR ERROR FREE OR THAT FUNCTIONS CONTAINED IN SUCH DRIVERS, SOFTWARE OR
PROGRAMMING PRODUCTS SHALL OPERATE IN COMBINATION(S) WHICH MAY BE SELECTED FOR USE BY YOU OR
OTHERWISE MEET YOUR REQUIREMENTS.
CRS, Inc. is not responsible for any damages or loss, either direct, indirect, special, incidental or consequential, which you may experience
as a result of your purchase or use of the product(s). Your sole remedy in the event that you encounter any difficulties with the product(s)
is against the entity or individual from whom you purchased the product(s).
Revision 2.0 - April 1, 2005
WARNING - U.S.
THIS EQUIPMENT GENERATES, USES AND CAN RADIATE RADIO FREQUENCY ENERGY, AND IF NOT INSTALLED AND USED
IN ACCORDANCE WITH THE INSTRUCTIONS MANUAL, MAY CAUSE INTERFERENCE TO RADIO COMMUNICATIONS. IT HAS
BEEN TESTED AND FOUND TO COMPLY WITH THE LIMITS FOR A CLASS A COMPUTING DEVICE PURSUANT TO SUBPART J
OF PART 15 OF FCC RULES WHICH ARE DESIGNED TO PROVIDE REASONABLE PROTECTION AGAINST SUCH
INTERFERENCE WHEN OPERATED IN A COMMERCIAL ENVIRONMENT. OPERATIONS OF THE EQUIPMENT IN A
RESIDENTIAL AREA IS LIKELY TO CAUSE INTERFERENCE IN WHICH CASE THE USER, AT HIS OWN EXPENSE, WILL BE
REQUIRED TO TAKE WHATEVER MEASURES MAY BE REQUIRED TO CORRECT THE INTERFERENCE.
NOTICE - CANADA
THIS APPARATUS COMPLIES WITH THE CLASS “A” LIMITS FOR RADIO INTERFERENCE AS SPECIFIED IN THE CANADIAN
DEPARTMENT OF COMMUNICATIONS RADIO INTERFERENCE REGULATIONS.
CET APPAREIL EST CONFORME AUX NORMES CLASS “A” D’INTERFERENCE RADIO TEL QUE SPECIFIER PAR MINISTRE
CANADIEN DES COMMUNICATIONS DANS LES REGLEMENTS D’INTERFERENCE RADIO.
ATTENTION
The product that you have purchased may contain a battery that may be recyclable. At the end of its useful life, under various state
and local laws, it may be illegal to dispose of the battery into the municipal waste system.
Check with your local solid waste officials for details concerning recycling options or proper disposal
.
Page 3

Contents
Introduction 1
Using This Manual.................................................................................................................... 1
Basic Features and Functions....................................................................................................2
Quick Setup 7
Unpacking ................................................................................................................................. 7
Installing the Paper.................................................................................................................... 7
Installing the Ribbon ............................................................................................................... 10
Clearing Memory .................................................................................................................... 11
Basic Programming................................................................................................................. 12
Basic Operations ..................................................................................................................... 16
Using Flowcharts ........................................................................................................ 1
Keyboard..................................................................................................................... 2
Control Lock ............................................................................................................... 4
Display ........................................................................................................................ 5
Setting the Date......................................................................................................... 12
Setting the Time........................................................................................................ 12
Programming Tax ..................................................................................................... 13
Programming a Taxable Department ........................................................................ 15
Registering Items ...................................................................................................... 16
Totaling a Cash Sale ................................................................................................. 17
Tendering a Cash Sale .............................................................................................. 17
Tendering a Check Sale ............................................................................................ 18
Total Charge Sale...................................................................................................... 18
Advanced Operating Instructions 19
Department Registrations........................................................................................................20
Open Department...................................................................................................... 20
Preset Price Department............................................................................................ 20
Department Repeat Entry.......................................................................................... 21
Multiplication............................................................................................................ 21
Department Multiplication With Decimal Point ....................................................... 22
Split Pricing .............................................................................................................. 22
Single Item Department ............................................................................................ 23
PLU (Price Look Up) Registrations ........................................................................................ 24
Open PLU ................................................................................................................. 24
Preset Price PLU ....................................................................................................... 24
PLU Repeat Entry ..................................................................................................... 24
PLU Multiplication ................................................................................................... 25
PLU Multiplication With Decimal Point .................................................................. 25
Split Pricing PLU...................................................................................................... 26
ER-290 Electronic Cash Register i
Page 4

Shifting or Exempting Tax...................................................................................................... 27
Shifting Tax .............................................................................................................. 27
Exempting Tax.......................................................................................................... 28
Percent Key (%1 and %2) Operations..................................................................................... 29
Preset Percent on a Department or PLU Item ........................................................... 29
Enter a Percent on a Department or PLU.................................................................. 29
Percent On Sale Total ............................................................................................... 30
Return Merchandise Registrations .......................................................................................... 30
Voids and Corrections............................................................................................................. 31
Void Last Item .......................................................................................................... 31
Void Previous Item ................................................................................................... 31
Cancel ....................................................................................................................... 32
Void Position Operations.......................................................................................... 32
- (Minus) Key Registrations.................................................................................................... 33
No Sale Operations ................................................................................................................. 34
Open Drawer............................................................................................................. 34
Non Add Number...................................................................................................... 34
Received On Account Operations ........................................................................................... 35
Paid Out Operations ................................................................................................................ 35
Totaling and Tendering ........................................................................................................... 36
Subtotaling a Sale ..................................................................................................... 36
Totaling a Cash Sale ................................................................................................. 36
Tendering a Cash Sale .............................................................................................. 37
Tendering a Check Sale ............................................................................................ 37
Totaling a Charge Sale.............................................................................................. 38
Check Cashing .......................................................................................................... 38
Split Tender............................................................................................................... 39
Post Tender ............................................................................................................... 40
Receipt On/Off and Receipt on Request ................................................................... 41
Advanced Programming Instructions 43
Department Programming....................................................................................................... 43
Programming Department Status.............................................................................. 43
Programming Department Entry Limit or Price........................................................ 46
System Option Programming.................................................................................................. 48
System Option Table................................................................................................. 50
Advanced Tax Programming .................................................................................................. 52
Tax Rate Programming ............................................................................................. 52
Tax Table Programming ........................................................................................... 54
%1 and %2 Key Programming................................................................................................ 56
- (Minus) Key Programming................................................................................................... 58
CANCEL Key Programming .................................................................................................. 60
Programming the CANCEL Key .............................................................................. 60
PLU (Price Look Up) Programming ....................................................................................... 61
Programming PLU Status ......................................................................................... 61
Programming PLU Entry Limit or Price................................................................... 64
Setting a Register Number ...................................................................................................... 66
Setting Receipt/Journal Status................................................................................................. 67
Printing a Programming Report .............................................................................................. 67
ii ER-290 Electronic Cash Register
Page 5

Reports 69
Report Summary ..................................................................................................................... 69
Running a Report ...................................................................................................... 70
Cash-In-Drawer Declaration ................................................................................................... 70
Declaring Cash.......................................................................................................... 70
Report Samples ....................................................................................................................... 71
Financial Report........................................................................................................ 71
Hourly Sales Report.................................................................................................. 74
PLU Report ............................................................................................................... 75
Cash-in-Drawer Report............................................................................................. 76
Check-in-Drawer Report........................................................................................... 76
System Balancing.................................................................................................................... 77
Department Sales Total............................................................................................. 77
Net Total ................................................................................................................... 77
Gross Total................................................................................................................ 77
Grand Total ............................................................................................................... 77
ER-290 Electronic Cash Register iii
Page 6

Page 7

Introduction
Using This Manual
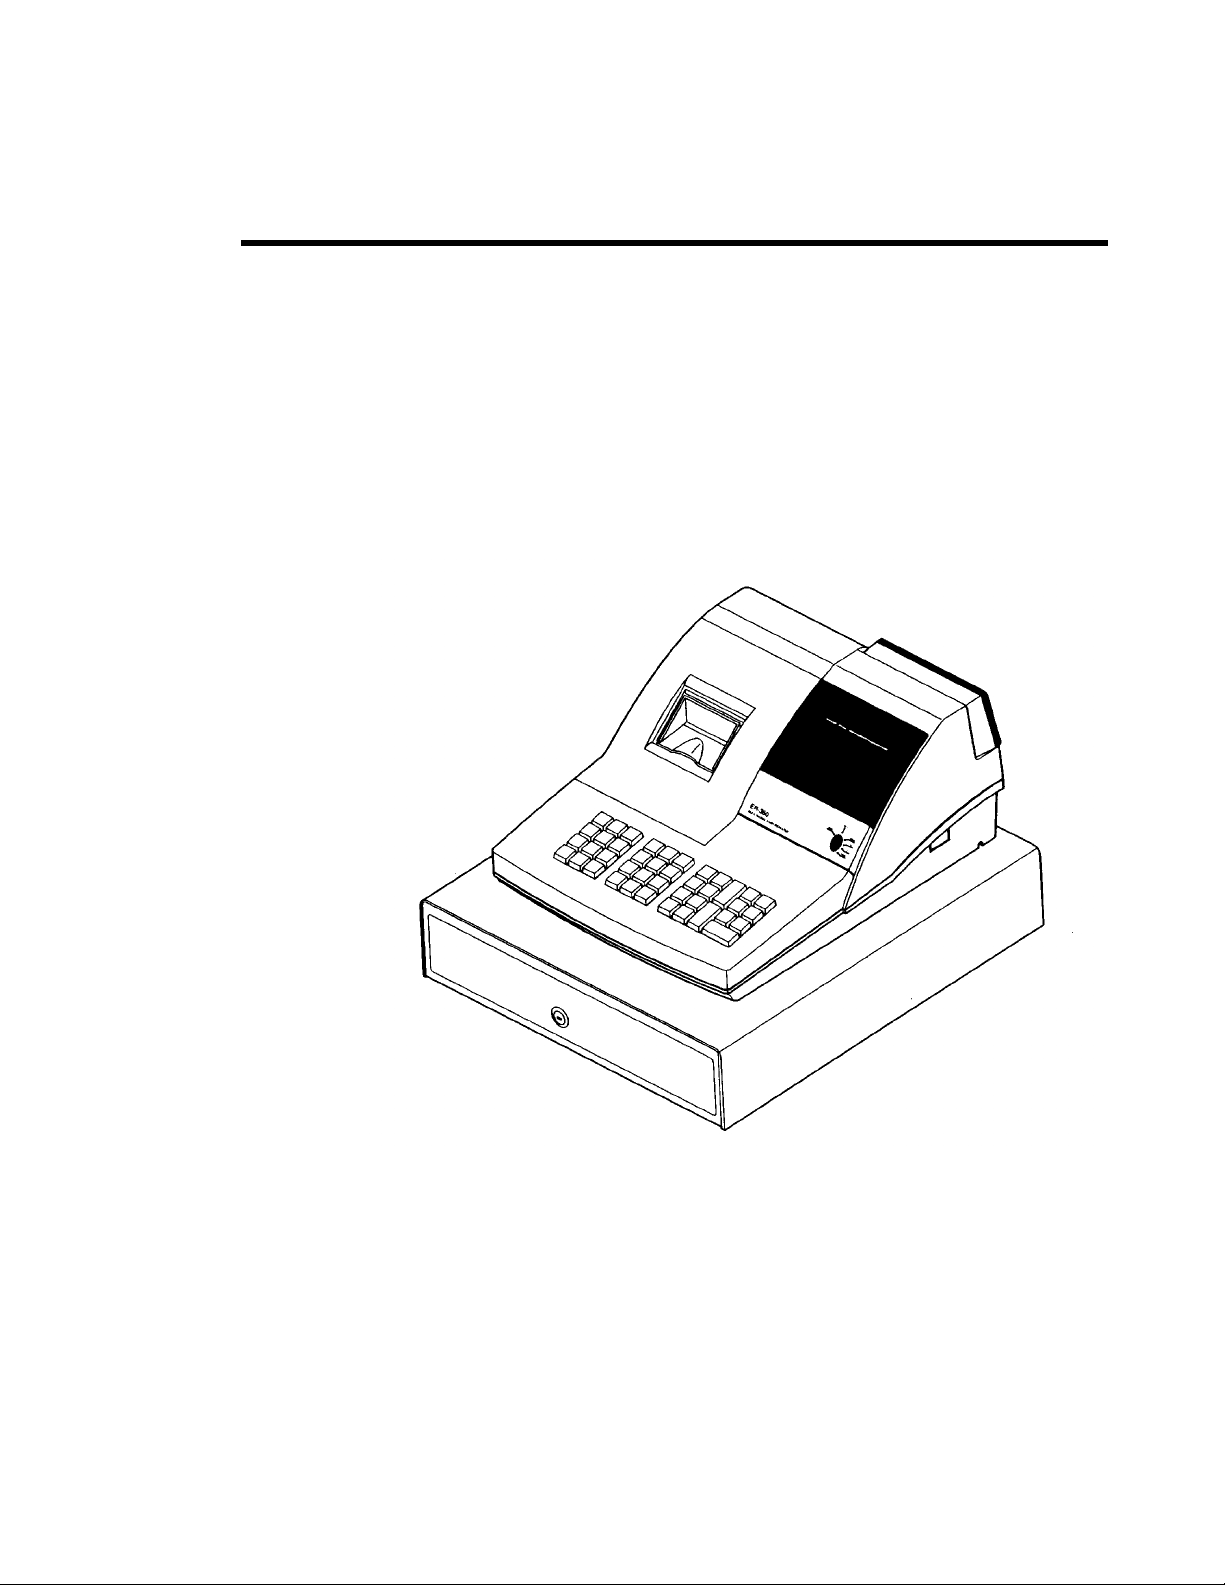
Congratulations! You have selected a very flexible electronic cash register designed for years of reliable
service. The ER-290 will fit many retail stores, shops and restaurants. It provides fast transaction
processing, security, and detailed sales information.
z To Get Started turn to “Quick Setup” on page 7. This section covers unpacking, memory
clearing, a few simple programming steps, and instructions for basic cash register
transactions. All of the features of the ER-290 operate immediately, without additional
programming steps. In most cases, all the programming you need to do is covered in this
section.
z For information about reports and balancing see “Reports” on page 69.
This manual also includes detailed information about many additional features that will
help you solve the special calculation problems or security issues that you might face.
z For detailed programming instructions, see “Advanced Programming” on page 43.
z For detailed operations sequences, see “
z Total Charge Sale
1. Register the items you wish to sell.
2. To display and print the subtotal of the sale
including tax, press SUBTOTAL:
SUB
TOTAL
3. Press CHARGE1:
CHARGE1
4. The display will indicate “=” for total, the
drawer will open and the receipt will print as
in the example on the right.
Note: Charge tendering is not allowed.
z Advanced Operating Instructions” on page 18.
YOUR RECEIPT
THANK YOU
0 3 - 0 1 - 1 9 9 9
1 . . . . . . 2 . 9 9 T 1
1 . . . . . . 2 . 9 9 T 1
* . . . . . . . . . 4 X
@ . . . . . . 1 . 9 9
2 . . . . . . 7 . 9 6
* . . . . . 1 4 . 3 0 S T
* . . . . . . 5 . 9 8 T 1
* . . . . . . 0 . 3 6 T 1
* . . . . . 1 4 . 3 0 C 1
0 0 0 0 0 6
1 5 . 2 7 0 0
ER-290 Electronic Cash Register Introduction • 1
Page 8

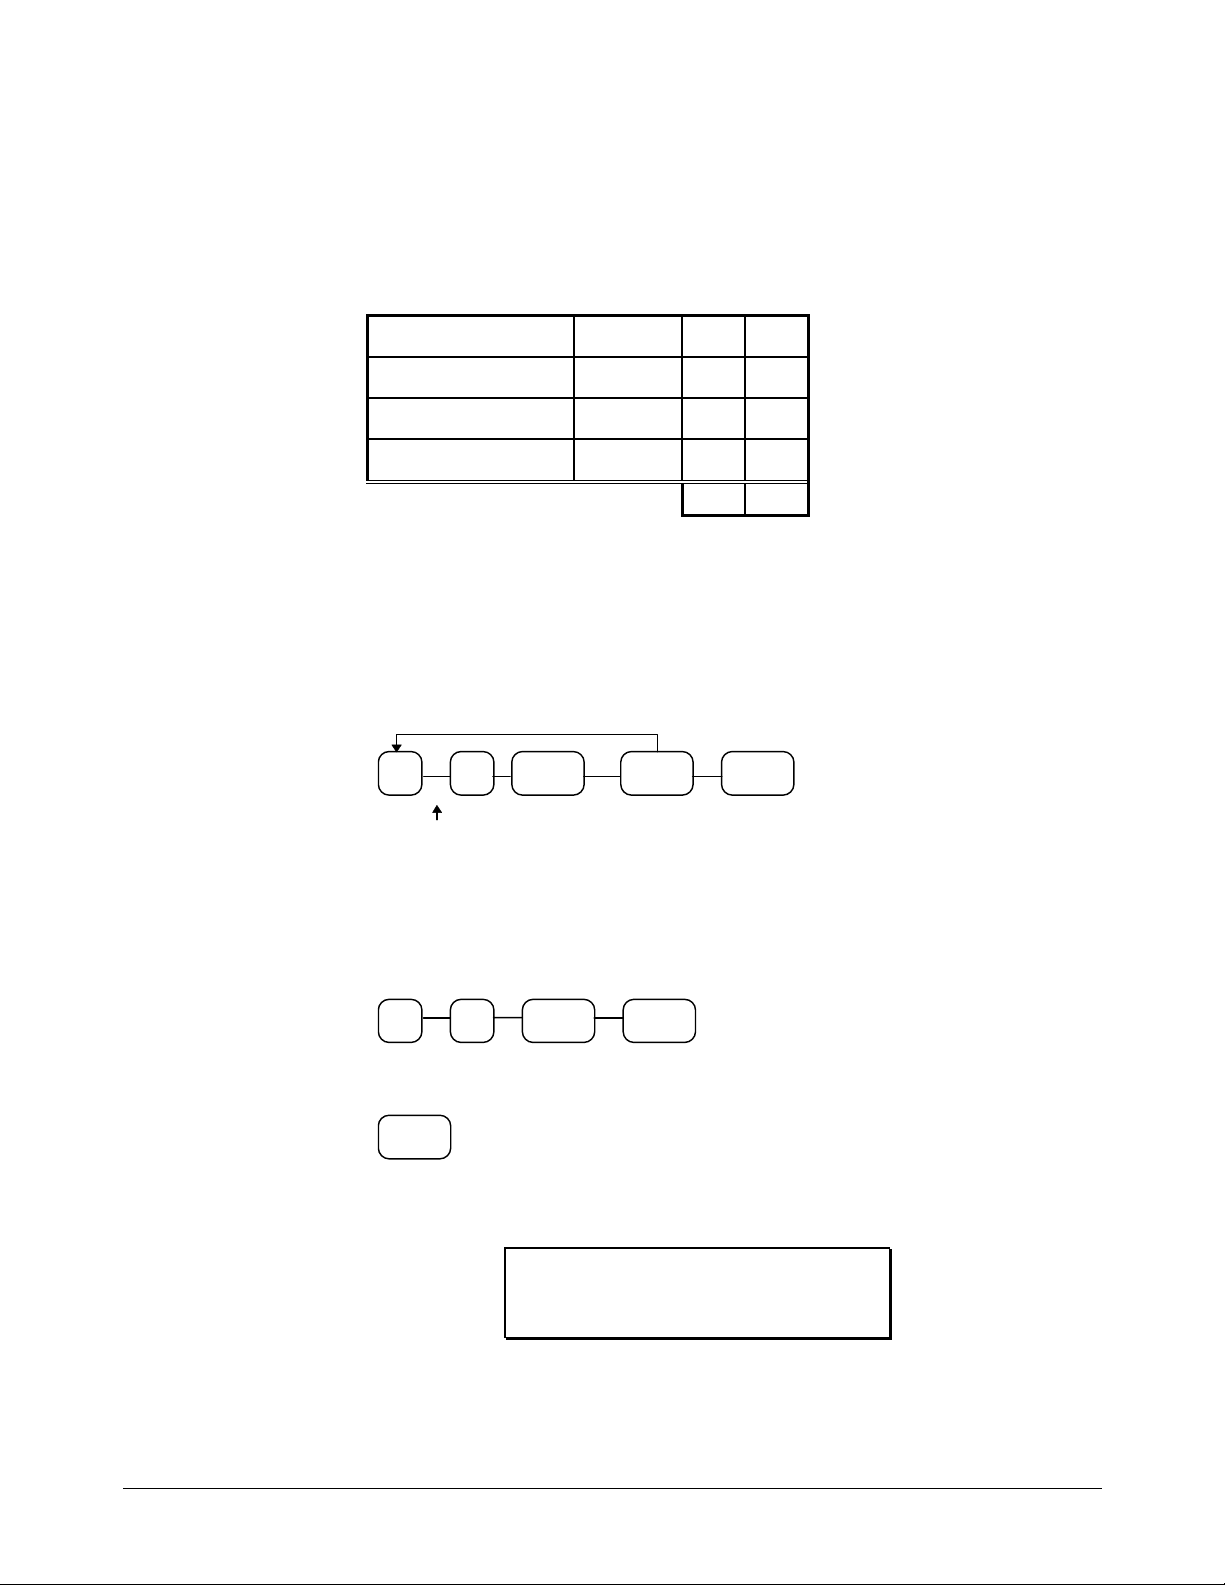
Using Flowcharts
Flowcharts are used to supplement step by step instructions throughout this manual. For example, the
following flowchart describes how to register $1.00 into department 1:
1 0 0
1
This flowchart means:
1. Press numeric key 1.
2. Press numeric key 0.
3. Press numeric key 0.
4. Press department 1.
Follow the flowchart from left to right, pressing the keys in the order they are shown. Numeric keypad
entries are shown as square keys. Department and function keys are shown as rectangular keys.
2 • Introduction ER-290 Electronic Cash Register
Page 9

Basic Features and Functions
L
E
E
Keyboard
PLUPAPER
FEED
-
CANCE
#/NO
SALE
%1
RTRN
MDSE
TAX
SHIFT
Key Descriptions
Key
PAPER FEED
Numeric Keypad:
0-9 and 00
CLEAR
Department Keys
#/NO SALE
@/FOR
VOID
@/
FOR
%2
VOID
CLEAR
7
4
1
0
8
5
2
00
9
4
6
3
3
2
.
1
8
7
6
5
12
11
10
9
PAID
OUT
CHARG
1
SUB
TOTAL
CASH/TEND
RECD
ACCT
CHARG
2
CHECK
TEND
Description
Press to advance the printer paper.
Use the numeric keypad to enter amounts, other numeric values.
Press to clear numeric errors made on keyboard prior to pressing the
registration key. Also press to stop the error alarm when incorrect entries
are made.
There are 12 department keys on the keyboard to register different types of
merchandise. Departments may be used to accept open priced entries, or
may be programmed to register preset prices.
Press to open the cash drawer when you have not already started a
transaction. Also, may be used to print any number (up to 8 digits) on the
printer paper.
Enter a quantity, then press the @/FOR key to enter multiple items. Also
use to enter “split pricing” items, such as 1 item at 3 for $.89.
Press to void (or erase) the last item entered. You can also void an item
previously entered within a transaction by pressing SUBTOTAL, then
VOID then re-entering the item you wish to correct.
ER-290 Electronic Cash Register Introduction • 3
Page 10

RTRN MDSE
If you wish to return or refund an item, press Return Merchandise, then reenter any item you wish.
- (MINUS)
Register a negative amount by entering a price, then pressing the (MINUS) key. For example, you can enter bottle returns or coupons using
the - (MINUS) key.
CANCEL
%1, %2
Press to void (or erase) all items entered thus far in any transaction.
Use the Percent keys to add a percentage surcharge or subtract a percentage
from an item or the subtotal of the sale. You can enter the amount of the
percentage before pressing the %1 or %2 keys, or you can program a
preset percentage if you are consistently using the same percentage. See
“%1 and %2 Key Programming” on page 56 to set a preset percentage.
PLU
RECD ACCT
Use to register a Price Look Up (PLU).
Use to accept cash into the cash drawer when you are not actually selling
merchandise. For example, use the Received on Account key to accept
payments for previously sold merchandise, or record loans to the cash
drawer.
PAID OUT
Use to track cash paid out for merchandise or to record loans from the cash
drawer.
TAX SHIFT
Press to reverse the programmed tax status of a department key. For
example, by using the TAX SHIFT key prior to registering a taxable item,
the item will be sold without sales tax added.
. (Decimal)
Use the Decimal key to enter fractions of percentages. For example to enter
a one third off discount, enter 3 3 . 3 3 before pressing the -% key.
SUB TOTAL
CHARGE1,2
CHECK TEND
Press to see the subtotal of a sale.
Press to total a transaction paid by charge or credit card.
Press to total a transaction paid by check. Also if the check amount is over
the amount purchased, enter the amount of the check, then press the
CHECK TEND key. The drawer will open and the cash change will be
computed.
CASH/TEND
Press to total a transaction paid by cash. Also if the cash amount tendered
is over the amount purchased, enter the amount of the tender, then press the
CASH/TEND key. The drawer will open and the cash change will be
computed.
4 • Introduction ER-290 Electronic Cash Register
Page 11

Control Lock
V
OFF
OID
REG
VOID Use to void (correct) items outside of a sale.
OFF The register is inoperable.
X
Z
REG Use for normal registrations.
X Use to read register reports.
Z Use to read register reports and reset totals to zero.
PGM
PGM Use to program the register.
The ER-290 includes two sets of keys that may be used to access the following key lock positions.
Key
VOID
X
Z
PGM
Positions Accessible
VOID, OFF, REG, X
OFF, REG X
OFF, REG, X, Z
ALL POSITIONS
Note: Keys may be removed from the key lock in the OFF or REG positions.
ER-290 Electronic Cash Register Introduction • 5
Page 12

Display
A
Front Display
MOUNTDPT RPT
DPT
RPT
AMOUNT
Indicates the department number of the registration (1 digits).
Indicates the number of times an item has been repeated.
Displays the amount the amount of the item, subtotal or total.
Display Messages
C
-
E
=
E1
E3
Change Due
Negative entry
Error
Total
Input Error
Printer Error (paper jam)
Rear Display
The rear display may be lifted and turned for easy customer viewing.
6 • Introduction ER-290 Electronic Cash Register
Page 13
Quick Setup
Unpacking
1. Unpack and Unwrap the cash register.
2. Locate in the packing the following items:
z 1 roll of paper
z 1 ribbon
z 1 take up spool
z 1 set of control keys
3. Remove the cardboard protectors from the cash drawer.
4. Plug the register into a grounded outlet (three prong), insert a control key and turn the
key to the REG control lock position.
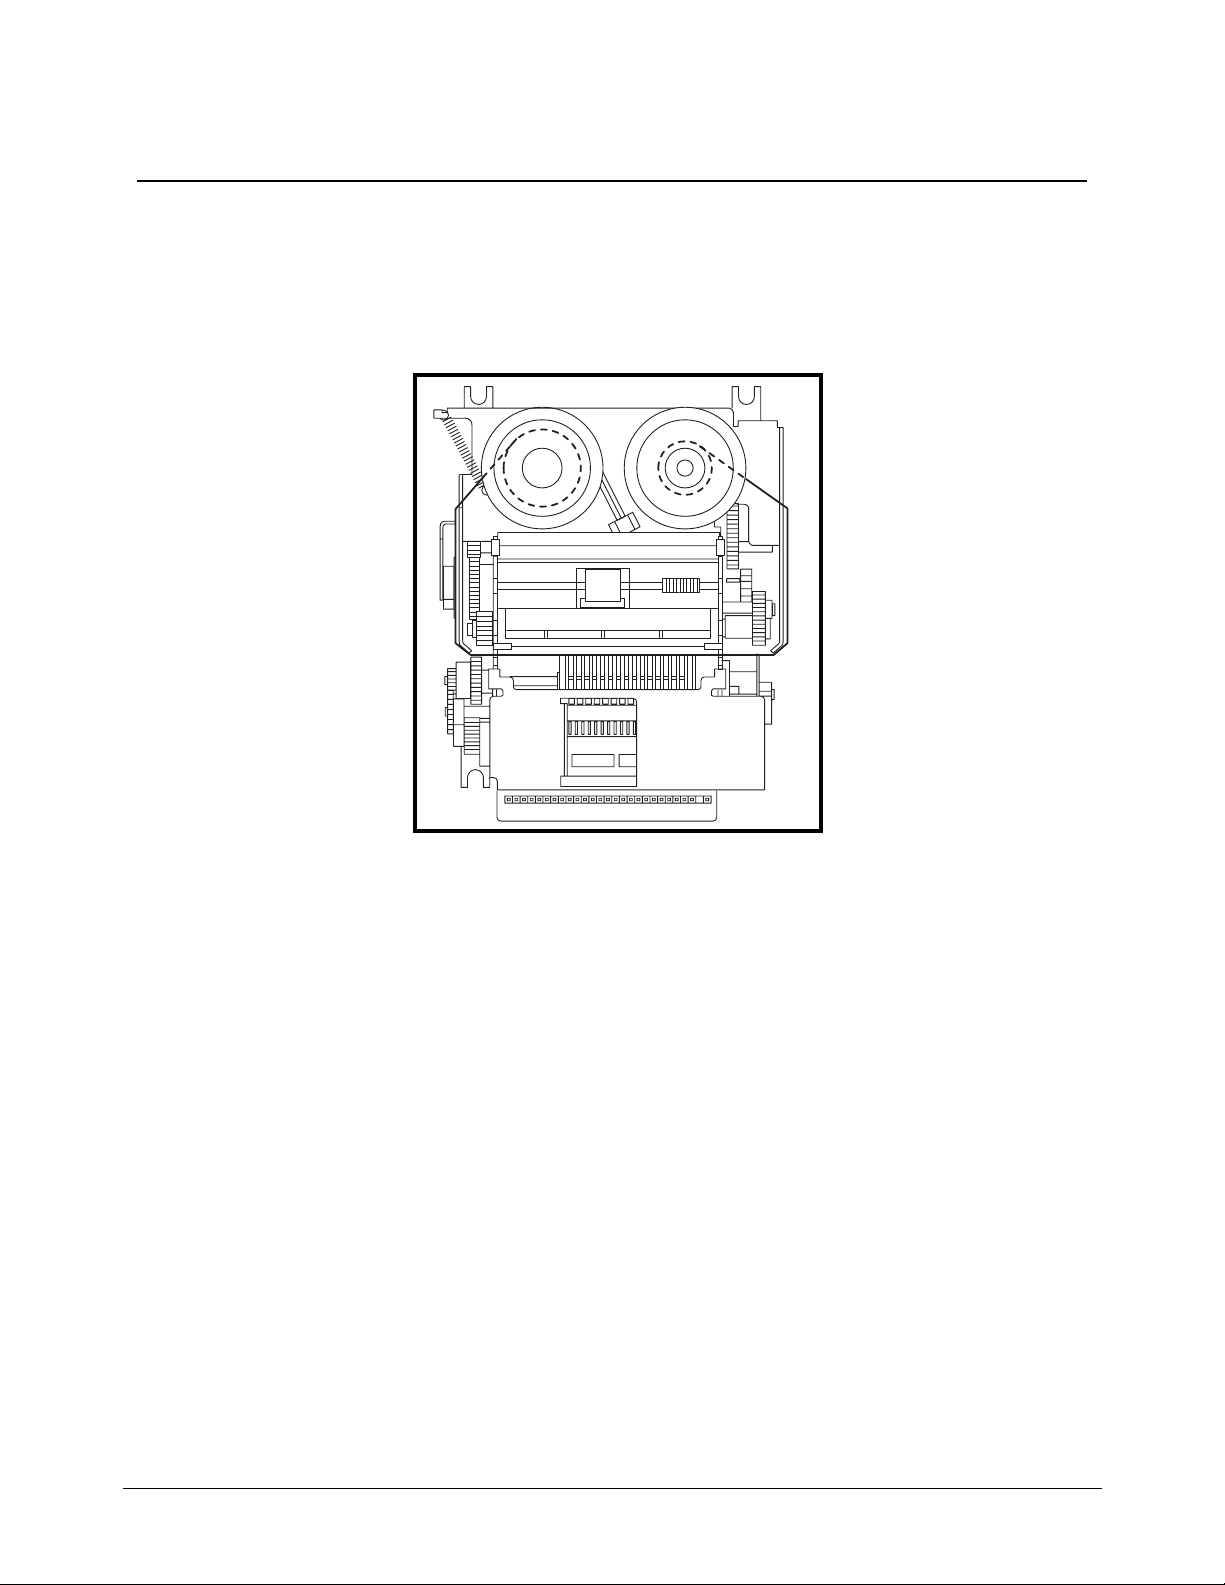
Installing the Paper
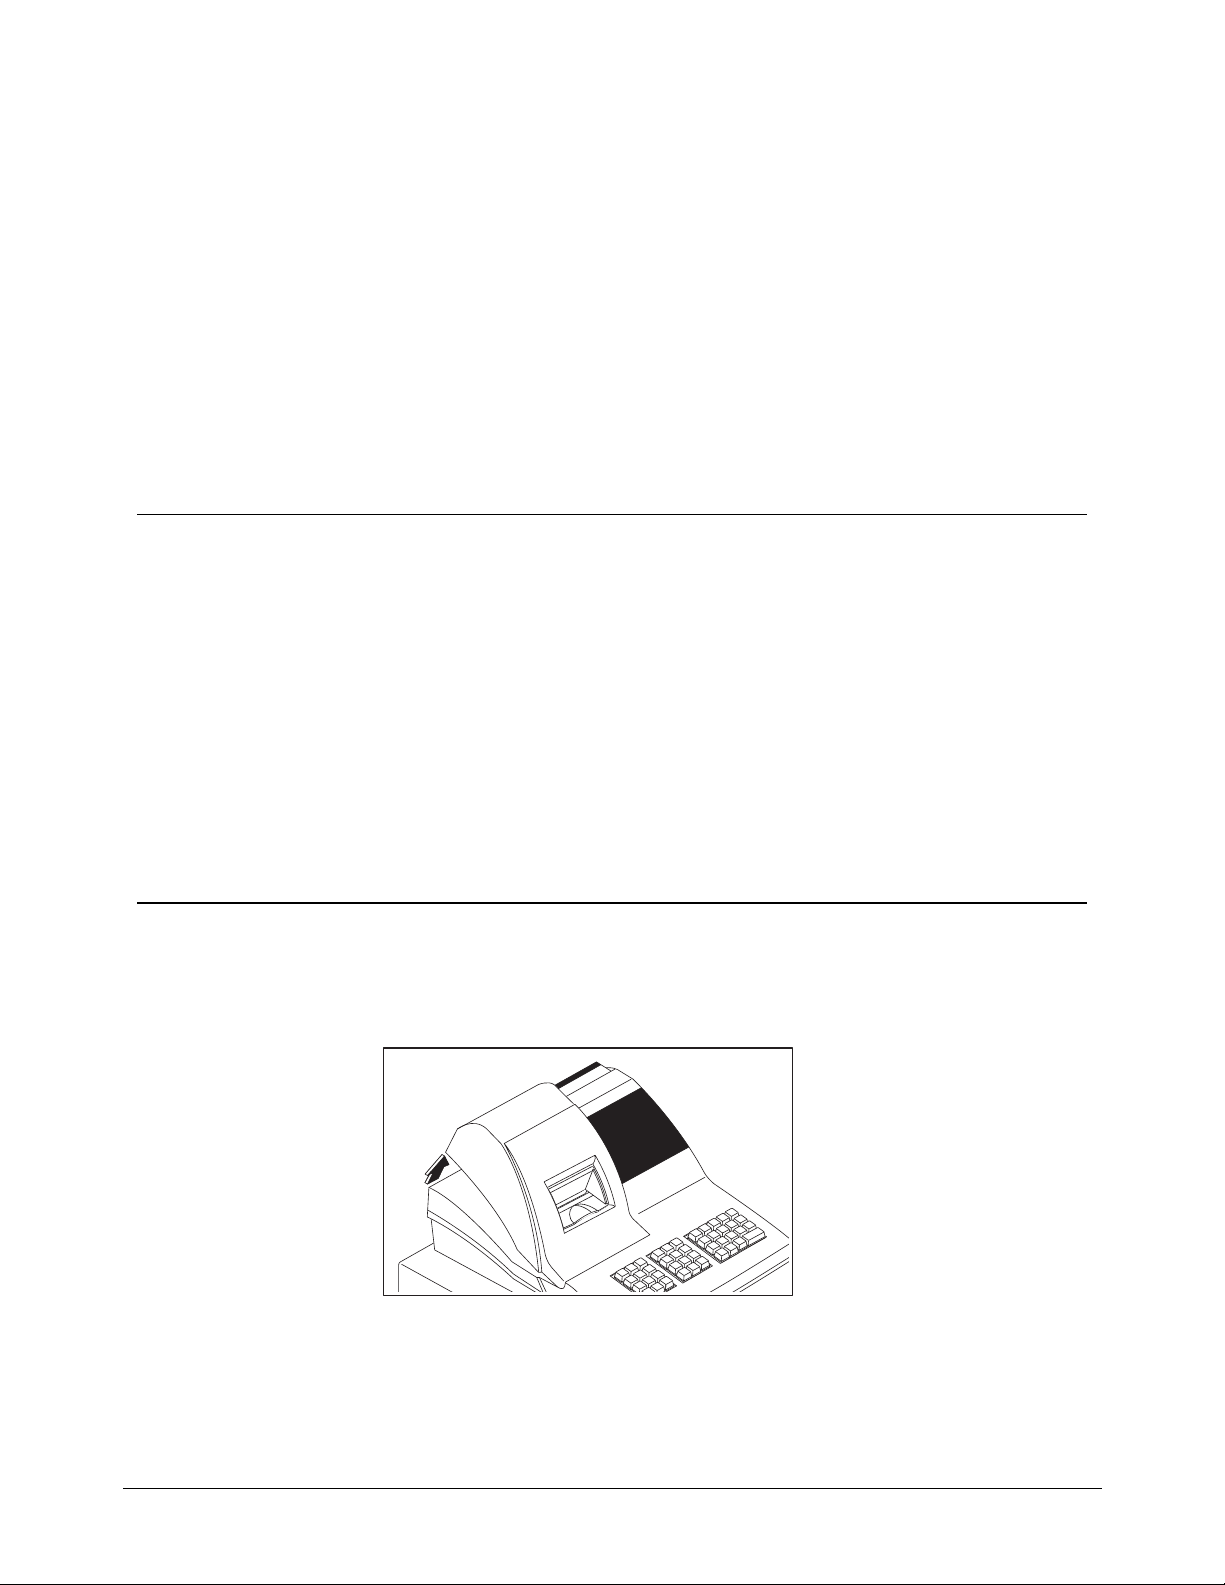
1. Remove the printer cover.
ER-290 Electronic Cash Register Quick Setup • 7
Page 14
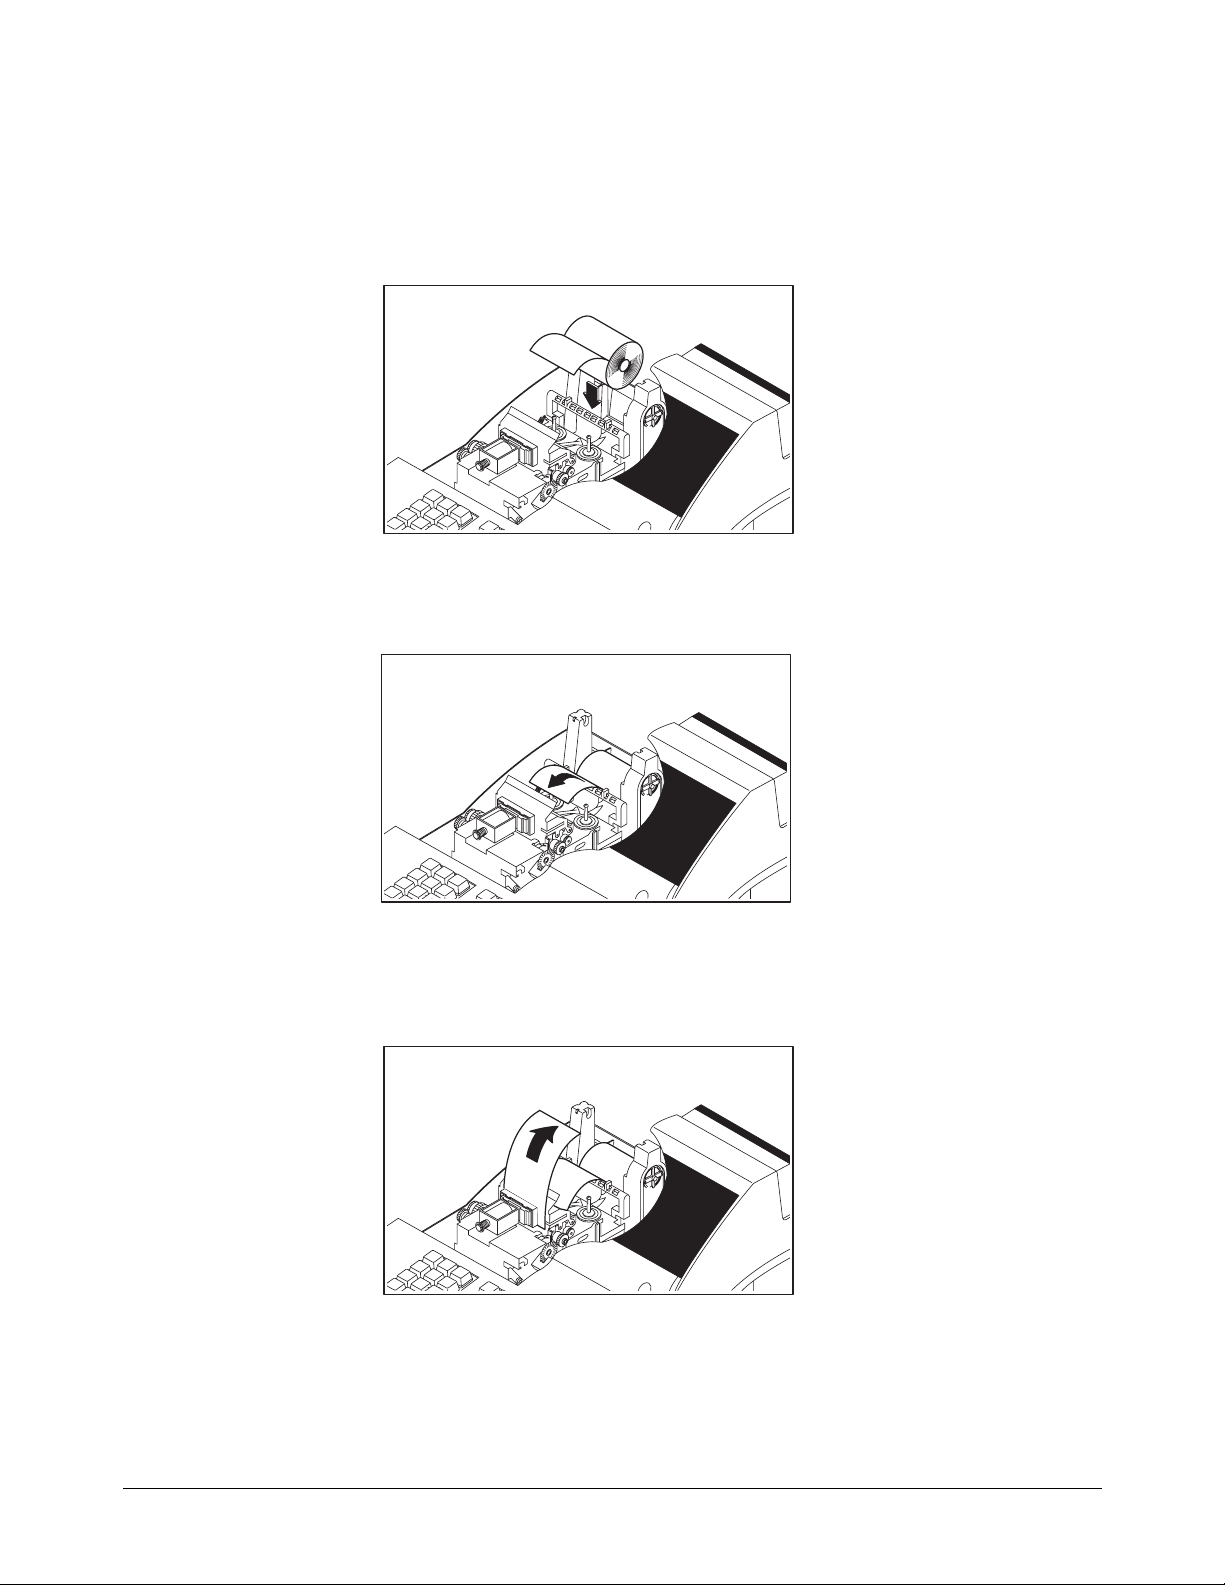
2. For proper feeding through the print head, cut or tear a straight even edge on the end of
the paper roll. Place the paper roll in the paper holder so that the paper will feed from
the bottom of the roll.
3. Insert the end of the paper into the paper slot.
4. Press the PAPER FEED key until the paper comes out about 8 inches.
8 • Quick Setup ER-290 Electronic Cash Register
Page 15
5. If you wish to use the printer to print a sales journal, insert the paper into the paper
take-up spool. Also see “Setting Receipt/Journal Status” on page 67. Wind the paper
two or three turns around the spool shaft and install the spool in the mount.
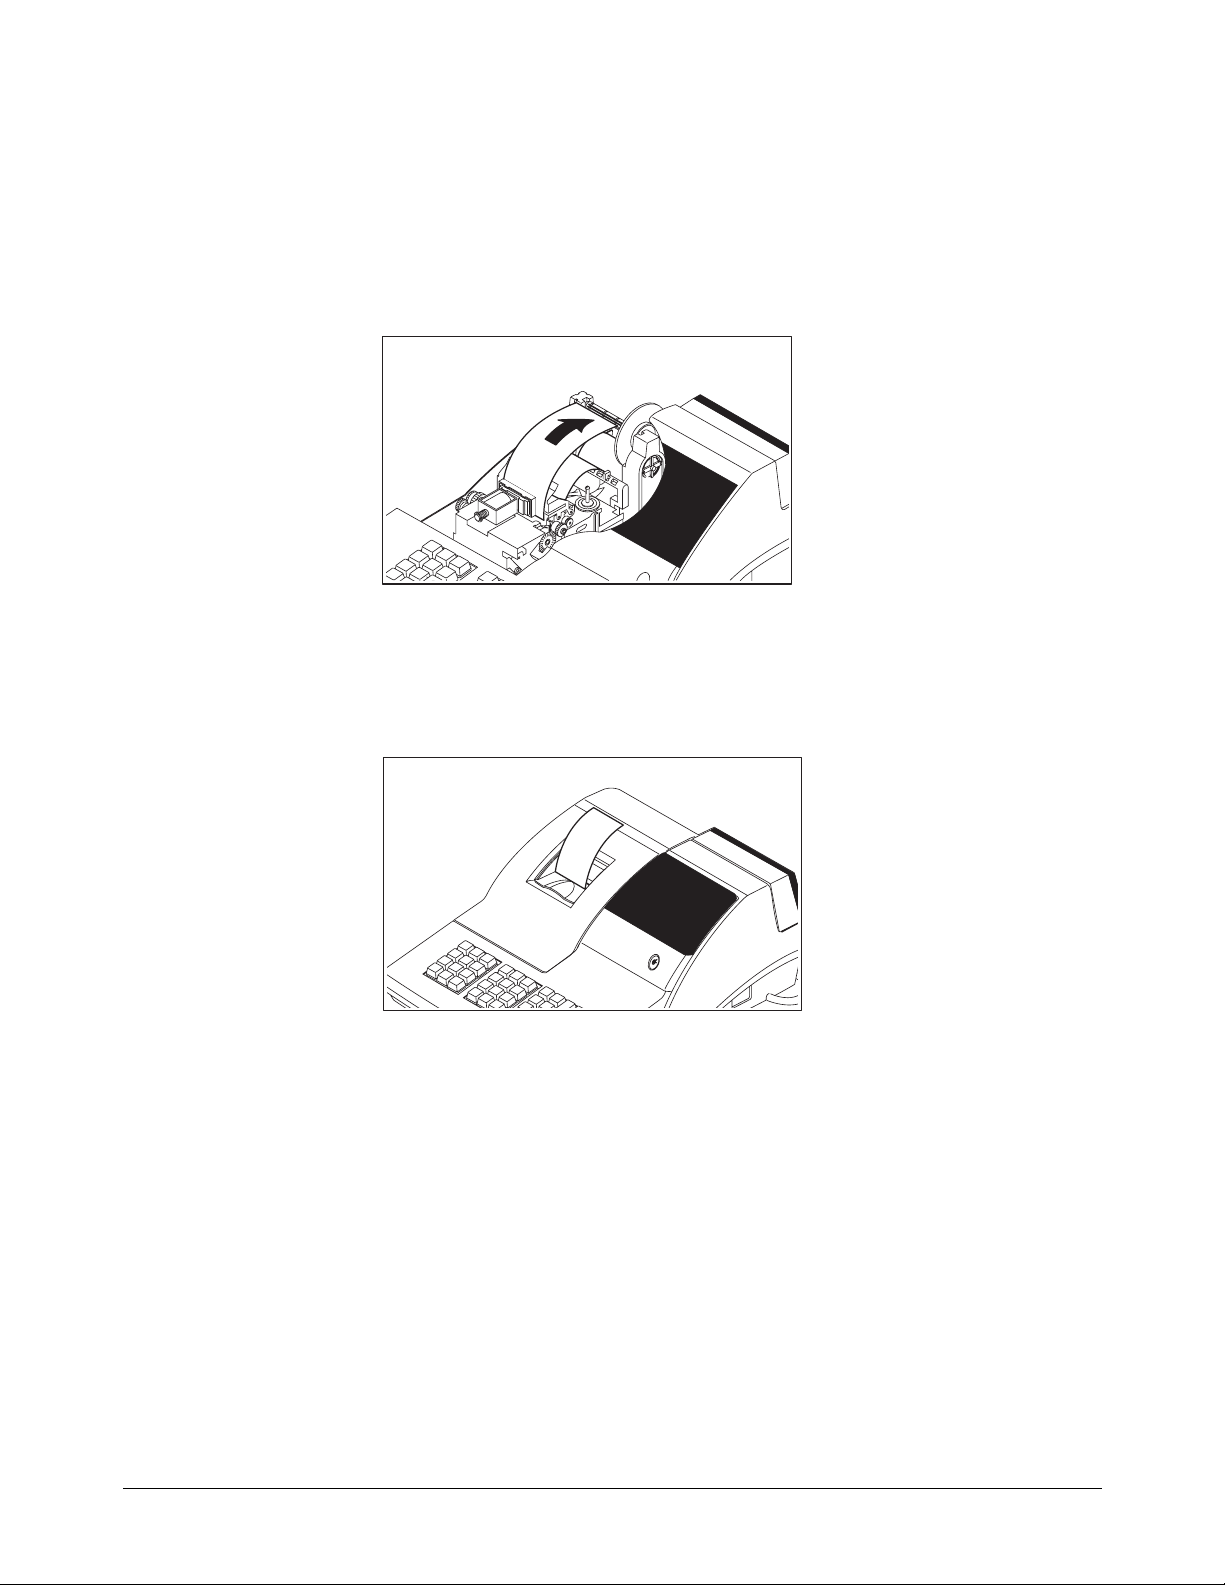
6. If you wish to use the printer to print customer receipts, pass the paper through the
window of the printer cover and replace the printer cover.
ER-290 Electronic Cash Register Quick Setup • 9
Page 16
Installing the Ribbon
1. Remove the printer cover.
2. Insert the new ribbon firmly into place.
3. Replace the printer cover
10 • Quick Setup ER-290 Electronic Cash Register
Page 17

Clearing Memory
This step insures that the cash register is cleared of any totals or programming. After this procedure, the
cash register is ready for programming and operation.
WARNING: This is a one time procedure. Do not repeat this procedure after the
cash register is programmed, it causes all programs and totals to be erased.
1. Unplug the register.
2. Turn the control lock to PGM position.
3. Press and hold the CLEAR key while connecting the AC plug into a power outlet.
CLEAR
4. When memory is cleared, the register prints:
POWER
UP
. . . . . . . . . . C S
ER-290 Electronic Cash Register Quick Setup • 11
Page 18
Basic Programming
This section covers the basic programming necessary to get your cash register running quickly. See
“Advanced Programming” on page 43 for if you wish to program options that are not included in this
section.
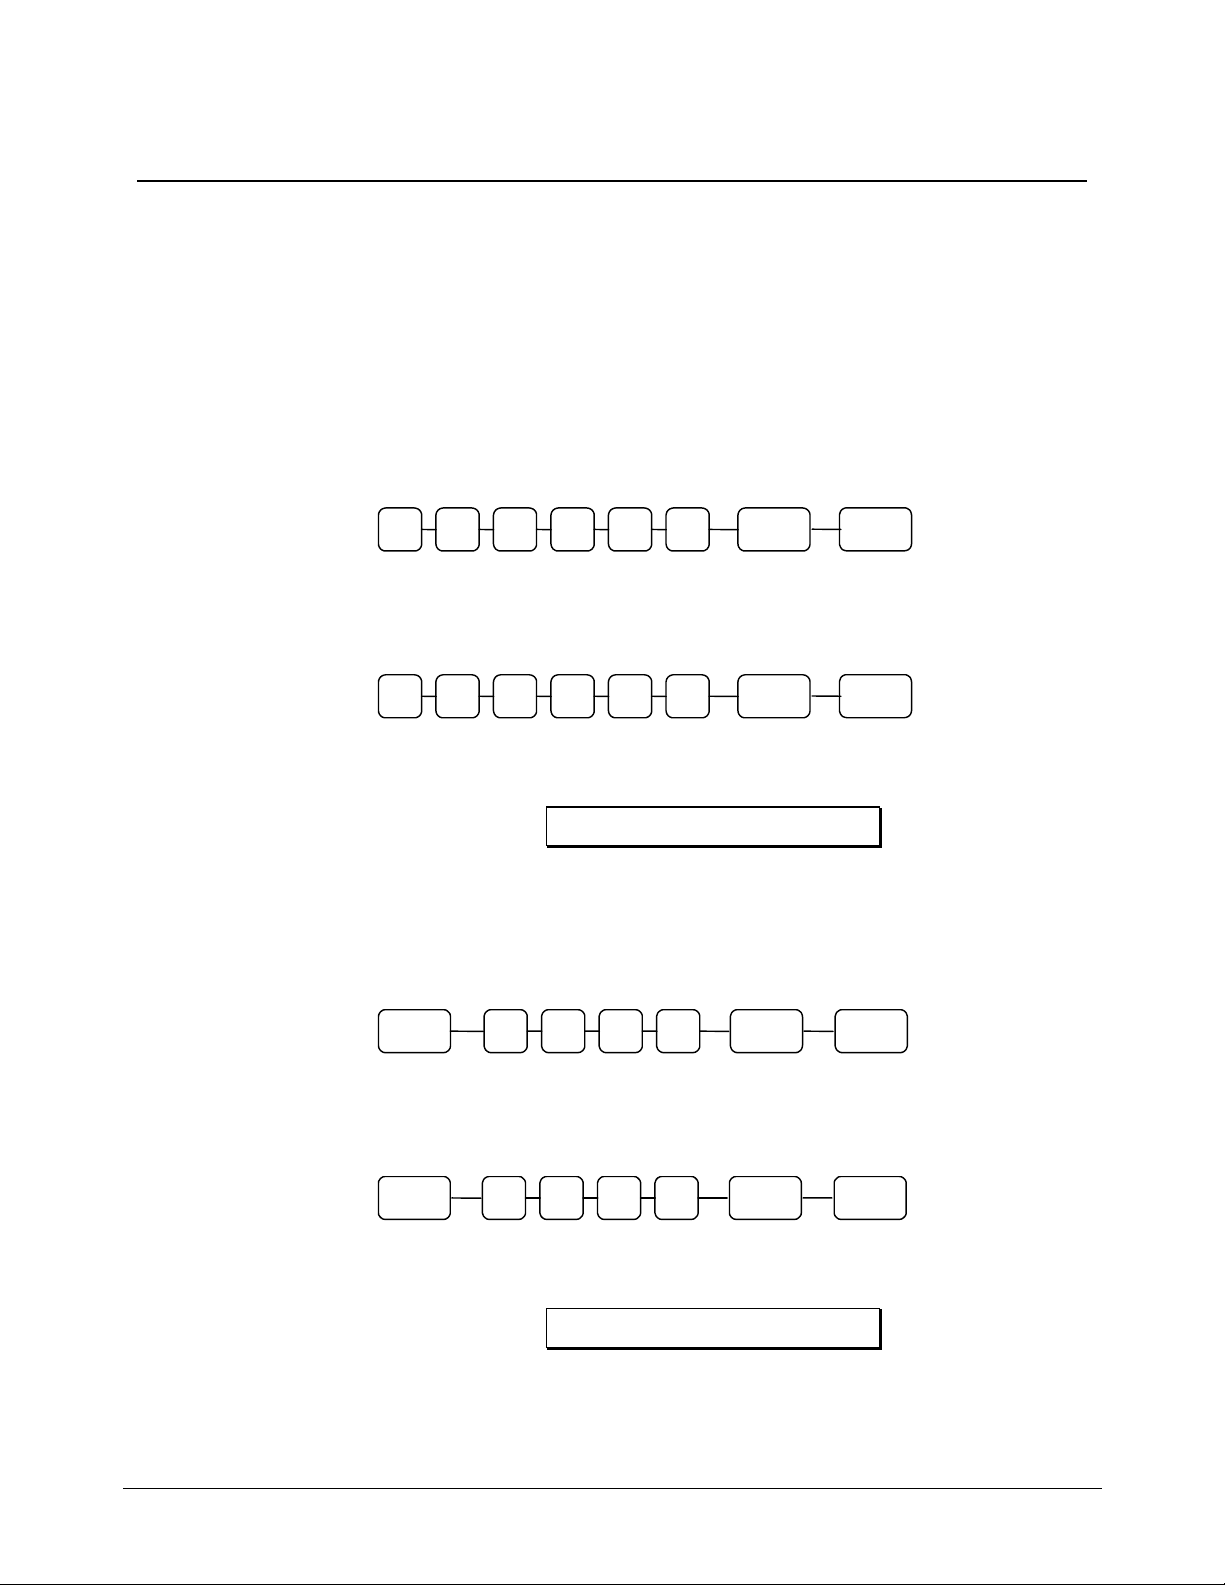
Setting the Date
The date sequence is Month-Day-Year.
1. Turn the control lock to the PGM position.
2. Enter the date in the format you have selected and press the @/FOR key:
M M D D
Y Y
@/
FOR
Date Setting Example
If the date is March 1, 1999, enter:
0 3 0 1
9 9
@/
FOR
The date you have entered will display and print on the printer:
0 3 - 0 1 - 1 9 9 9
Setting the Time
1. Turn the control lock to the PGM position.
2. Enter the hour and minute in military time (24 hour time) and press the @/FOR key:
@/
@/
FOR
H H M M
FOR
CASH/
TEND
CASH/
TEND
CASH/
TEND
Time Setting Example
If the time is 3:25 PM, enter:
@/
FOR
1 5 2 5
The time you have entered will display and print on the printer:
1 5 . 2 5
12 • Quick Setup ER-290 Electronic Cash Register
@/
FOR
CASH/
TEND
Page 19
Programming Tax
Most sales taxes can be programmed by entering a tax percentage rate. However, in some cases you
may find that tax that is entered as a percentage does not follow exactly the tax chart that applies in
your area. If this is the case, you must enter your tax using tax table programming. This method will
match tax collection exactly to the break points of your tax table. See “Tax Table Programming” on
page 54.
Important Note: After you have entered your tax program, test for accuracy
by entering several transactions of different dollar amounts. Carefully check
to make sure the tax charged by the cash register matches the tax amounts on
the printed tax chart for your area. As a merchant, you are responsible for
accurate tax collection. If the cash register is not calculating tax accurately, or
if you cannot program your tax properly from the information in this manual,
contact the CRS, Inc. Service Center at 1-888-333-6776 for assistance.
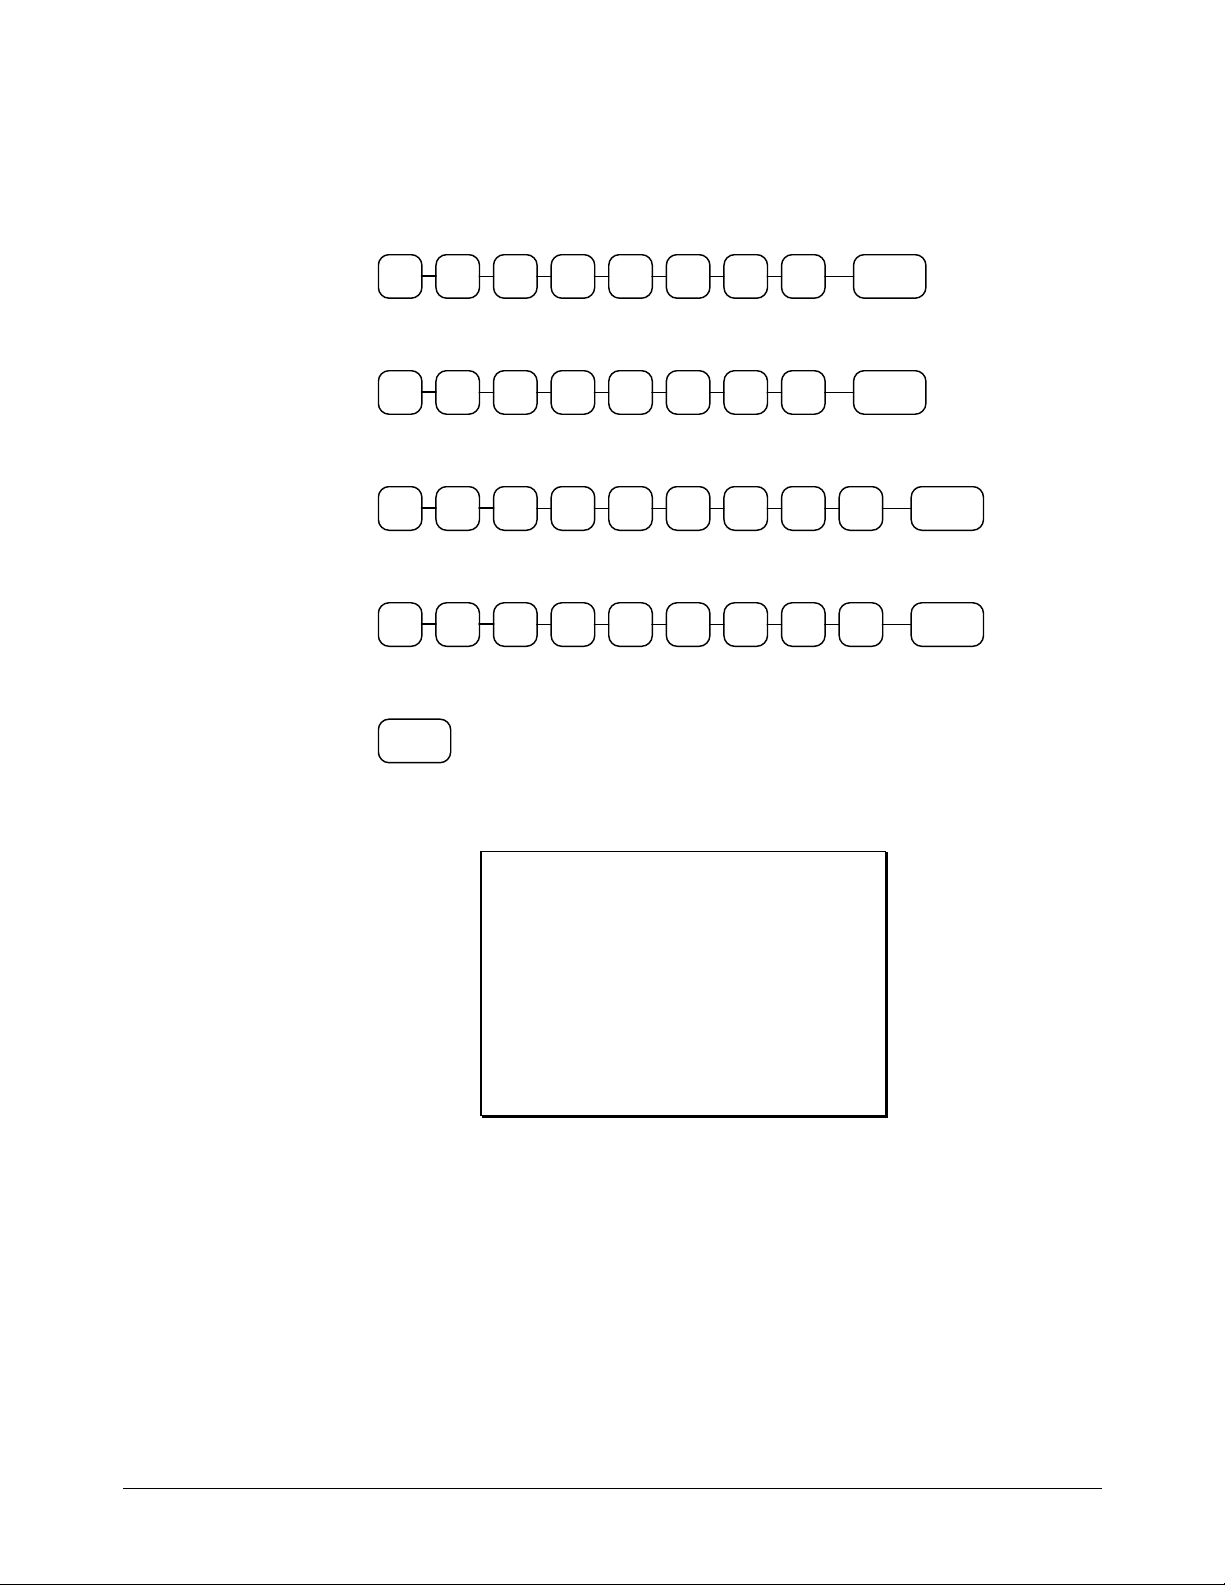
Programming a Tax Rate Percentage
1. Turn the control lock to the PGM position.
2. Enter the rate, with a decimal. 0.000-99.999. It is not necessary to enter proceeding
zeros. For example, for 6%, enter 06.000 or 6.000.)
3. Enter 00.
4. Enter:
to set tax rate 1
1
to set tax rate 2
2
to set tax rate 3
3
to set tax rate 4
4
5. Press the TAX SHIFT key.
6. Press the CASH/TEND key to end programming.
Tax Rate Programming Flowchart
.
Tax Rate
Please Note: After programming the Tax you must program your Department or Departments to
calculate Tax. See page 15 for the programming steps to program a Department
Taxable.
7. See Tax rate programming examples on page 14.
00
Tax #
(1-4)
TAX
SHIFT
CASH/
TEND
ER-290 Electronic Cash Register Quick Setup • 13
Page 20
Tax Rate Programming Example
If tax 1 is 6 percent, enter:
.
0 100 0 06
If tax 2 is 7.5 percent, enter:
.
0 205 0 07
If tax 3 is 10 percent, enter:
0 .
If tax 4 is 15 percent, enter:
5 .
Press the CASH/TEND key to end programming.
CASH/
TEND
The rates you have entered will display and print on the printer:
TAX
SHIFT
TAX
SHIFT
0 300 0 01
0 400 0 01
TAX
SHIFT
TAX
SHIFT
0 0
* . . . . . 6 . 0 0 0 T 1
0 0
* . . . . . 7 . 5 0 0 T 2
0 0
* . . . . 1 0 . 0 0 0 T 3
0 0
* . . . . 1 5 . 0 0 0 T 4
0 0 0 0 0 1
1 5 . 2 6 0 0
14 • Quick Setup ER-290 Electronic Cash Register
Page 21
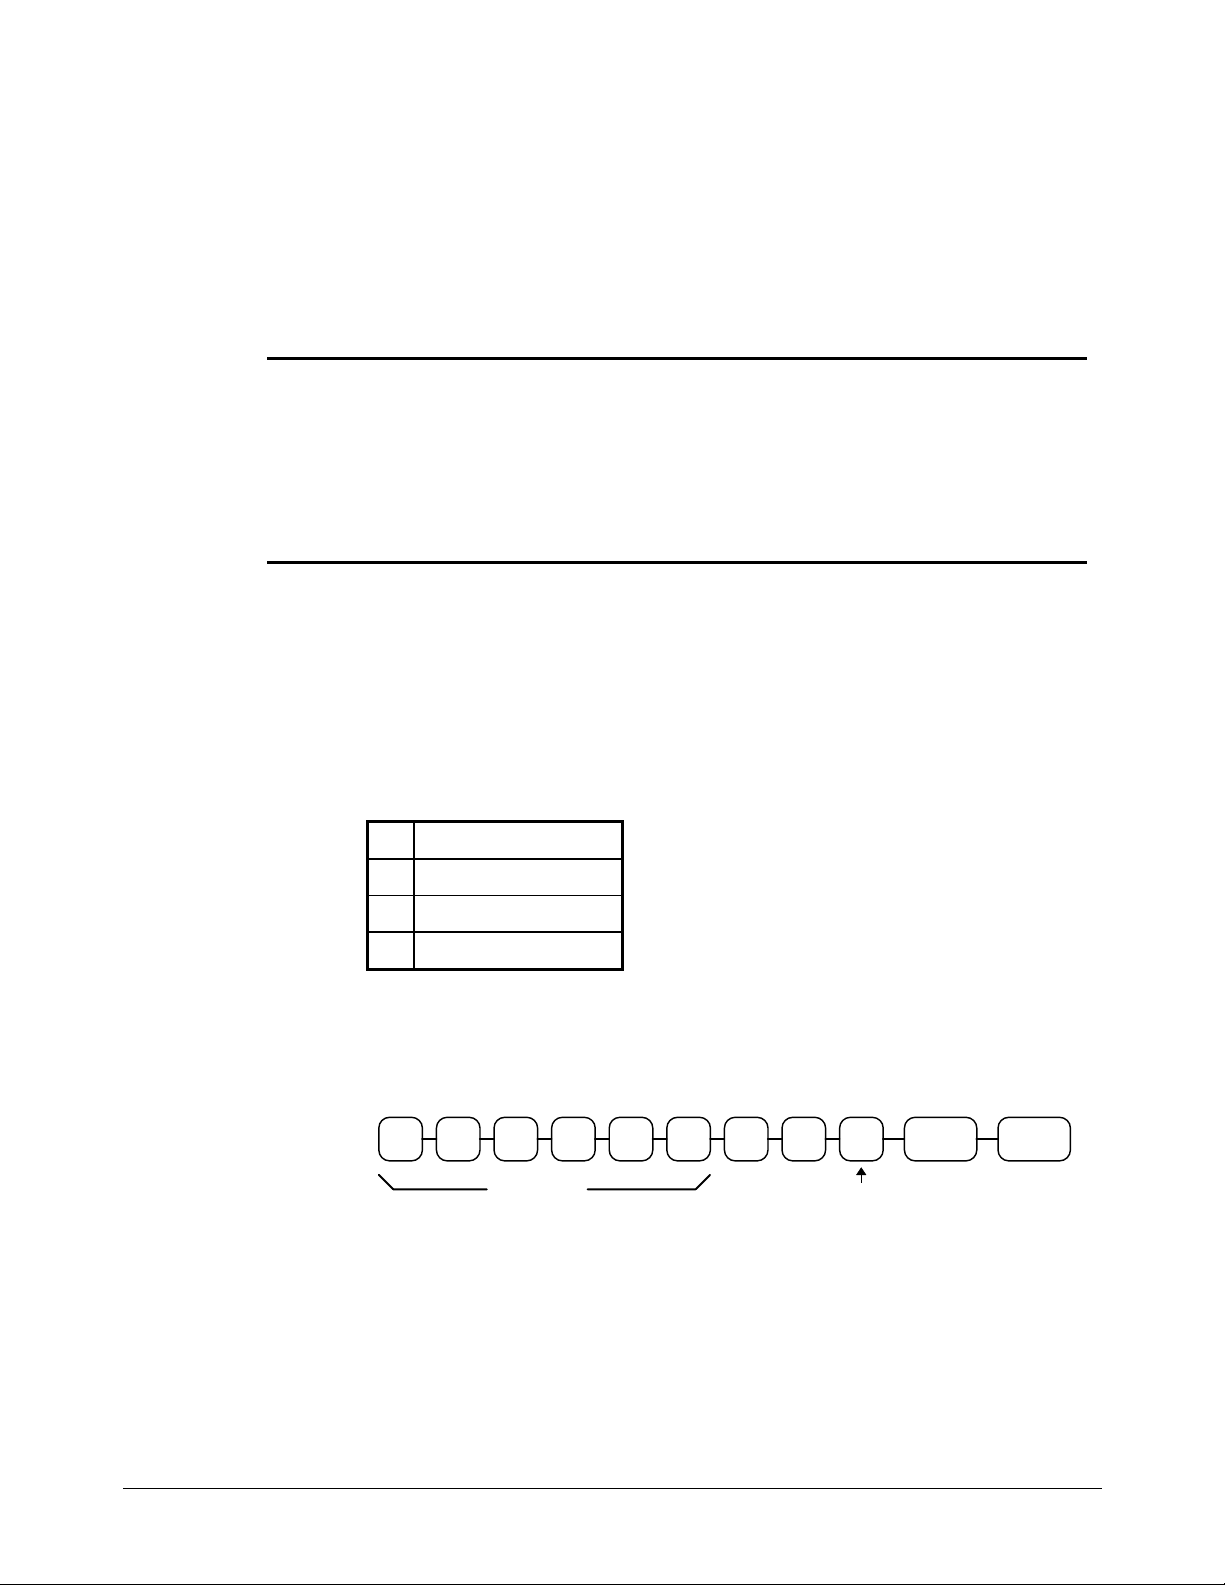
Programming a Taxable Department
1. Turn the control lock to the PGM position.
2. Complete the tax status table below by adding the status digits for each tax. Then enter
the resulting tax status code.
Taxable by Rate 1? Yes = 1
Taxable by Rate 2? Yes = 2
Taxable by Rate 3? Yes = 4
Taxable by Rate 4? Yes = 8
No = 0
No = 0
No = 0
No = 0
3. Press the @/FOR key.
4. Repeat steps 2, 3 and 4 for each department you wish to program.
5. Press the CASH/TEND key to end programming.
Taxable Department Programming Flowchart
Repeat for each
Department
+
+
+
+
=
Tax
Status
Code
@/
FOR
DEPT
KEY
CASH/
TEND
Taxable Department Programming Example
Set department 1 taxable by tax rate 1:
0
1
Press the CASH/TEND key to end programming.
CASH/
TEND
The tax status you have entered will display and print on the printer:
@/
FOR
1
1 . . . . . . . . 1 T 1
0 0 0 0 0 2
1 5 . 2 6 0 0
ER-290 Electronic Cash Register Quick Setup • 15
Page 22

Basic Operations
Registering Items
1. Enter an amount on the ten key pad. Do not use the decimal key. For example, for
$2.99, enter:
2 9 9
2. Press a department key. For example, press department 1:
Repeating an Item
3. To register a second item exactly as the first, press the department key a second time.
For example, press department 1:
Registering Multiple Items
4. Enter the quantity of items being purchase, press the @/FOR key. For example, enter
4 on the numeric key pad and press the @/FOR key:
4
5. Enter an amount on the ten key pad. Do not use the decimal key. For example, for
$1.99, enter:
1 9 9
6. Press a department key. For example, press department 2:
1
1
@/
FOR
2
16 • Quick Setup ER-290 Electronic Cash Register
Page 23

Totaling a Cash Sale
1. Register the items you wish to sell.
2. To display and print the subtotal of the
sale including tax, press SUBTOTAL:
SUB
TOTAL
3. To total a cash sale, press
CASH/TEND:
CASH/
4. The display will indicate “=” for total,
the drawer will open and the receipt will
print as in the example on the right.
TEND
Tendering a Cash Sale
1. Register the items you wish to sell.
2. To display and print the subtotal of the
sale including tax, press SUBTOTAL:
SUB
TOTAL
3. Enter the amount tendered by the
customer. For example, for $20.00
enter:
4. Press CASH/TEND:
CASH/
5. The display will indicate “C” for change,
the drawer will open and the receipt will
print as in the example on the right.
TEND
0 0 02
YOUR RECEIPT
THANK YOU
0 3 - 0 1 - 1 9 9 9
1 . . . . . . 2 . 9 9 T 1
1 . . . . . . 2 ˙9 9 T 1
* . . . . . . . . . 4 X
@ . . . . . . 1 . 9 9
2 . . . . . . 7 . 9 6
* . . . . . . 5 . 9 8 T 1
* . . . . . . 0 . 3 6 T 1
* . . . . . 1 4 . 3 0 C A
0 0 0 0 0 3
1 5 . 2 6 0 0
YOUR RECEIPT
THANK YOU
0 3 - 0 1 - 1 9 9 9
1 . . . . . . 2 . 9 9 T 1
1 . . . . . . 2 . 9 9 T 1
* . . . . . . . . . 4 X
@ . . . . . . 1 . 9 9
2 . . . . . . 7 . 9 6
* . . . . 1 4 . 3 0 S T
* . . . . . 5 . 9 8 T 1
* . . . . . 0 . 3 6 T 1
* . . . . . 1 4 . 3 0 T L
* . . . . . 2 0 . 0 0 C A
* . . . . . . 5 . 7 0 C
0 0 0 0 0 4
1 5 . 2 7 0 0
ER-290 Electronic Cash Register Quick Setup • 17
Page 24

Tendering a Check Sale
1. Register the items you wish to sell.
2. To display and print the subtotal of the sale
including tax, press SUBTOTAL:
SUB
TOTAL
3. Enter the amount of the check tendered by
the customer. For example, for $20.00 enter:
4. Press CHECK TEND:
CHECK
5. The display will indicate “C” for change, the
drawer will open and the receipt will print as
in the example on the right.
TEND
0 0 02
Total Charge Sale
YOUR RECEIPT
THANK YOU
0 3 - 0 1 - 1 9 9 9
1 . . . . . . 2 . 9 9 T 1
1 . . . . . . 2 . 9 9 T 1
* . . . . . . . . . 4 X
@ . . . . . . 1 . 9 9
2 . . . . . . 7 . 9 6
* . . . . 1 4 . 3 0 S T
* . . . . . 5 . 9 8 T 1
* . . . . . 0 . 3 6 T 1
* . . . . 1 4 . 3 0 T L
* . . . . 2 0 . 0 0 C H
* . . . . . 5 . 7 0 C
0 0 0 0 0 5
1 5 . 2 7 0 0
5. Register the items you wish to sell.
6. To display and print the subtotal of the sale
including tax, press SUBTOTAL:
SUB
TOTAL
7. Press CHARGE1:
CHARGE1
8. The display will indicate “=” for total, the
drawer will open and the receipt will print as
in the example on the right.
Note: Charge tendering is not allowed.
YOUR RECEIPT
THANK YOU
0 3 - 0 1 - 1 9 9 9
1 . . . . . . 2 . 9 9 T 1
1 . . . . . . 2 . 9 9 T 1
* . . . . . . . . . 4 X
@ . . . . . . 1 . 9 9
2 . . . . . . 7 . 9 6
* . . . . . 1 4 . 3 0 S T
* . . . . . . 5 . 9 8 T 1
* . . . . . . 0 . 3 6 T 1
* . . . . . 1 4 . 3 0 C 1
0 0 0 0 0 6
1 5 . 2 7 0 0
18 • Quick Setup ER-290 Electronic Cash Register
Page 25

Advanced Operating Instructions
ER-290 Electronic Cash Register Advanced Operating Instructions • 19
Page 26

Department Registrations
As you make department registrations, you can follow your entries by viewing the display. The
digits marked “DPT” indicate the department used. The digit marked “RPT” counts items as they
are repeated.
Open Department
1. Enter an amount on the ten key pad. Do
not use the decimal key. For example, for
$2.99, enter:
2 9 9
2. Press a department key. For example,
press department 1:
1
YOUR RECEIPT
THANK YOU
0 3 - 0 1 - 1 9 9 9
1 . . . . . . 2 . 9 9 T 1
* . . . . . . 2 . 9 9 T 1
* . . . . . . 0 . 1 8 T 1
* . . . . . . 3 . 1 7 C A
0 0 0 0 0 9
1 5 . 2 8 0 0
Preset Price Department
A preset department registers the price that was previously programmed. See “Department
Programming” on page 43 to program preset prices.
1. Press a preset department key. For
example, press department 5:
5
YOUR RECEIPT
THANK YOU
0 3 - 0 1 - 1 9 9 9
5 . . . . . . 1 . 2 9
* . . . . . . 1 . 2 9 C A
0 0 0 0 1 0
1 5 . 2 8 0 0
20 • Advanced Operating Instructions ER-290 Electronic Cash Register
Page 27

Department Repeat Entry
Open or preset price departments may be repeated as many times as necessary by pressing the same
department again. (Likewise open or preset PLUs may be repeated by pressing the PLU key again.)
1. Enter an amount on the ten key pad. Do
not use the decimal key. For example, for
$2.99, enter:
2 9 9
2. Press a department key. For example,
press department 1:
1
3. To register a second item exactly as the
first, press the department key a second
time. For example, press department 1:
1
YOUR RECEIPT
THANK YOU
0 3 - 0 1 - 1 9 9 9
1 . . . . . . 2 . 9 9 T 1
1 . . . . . . 2 . 9 9 T 1
* . . . . . . 5 . 9 8 T 1
* . . . . . . 0 . 3 6 T 1
* . . . . . . 6 . 3 4 C A
0 0 0 0 0 9
1 5 . 2 8 0 0
Multiplication
When several of the same items are to be entered into the same Department, you can use
multiplication. You may enter a quantity up to 4 figures (1 to 9999) using the @/FOR key. You
may multiply open or preset departments.
1. Enter the quantity of items being
purchased, press the @/FOR key. For
example, enter 4 on the numeric key pad
and press the @/FOR key:
4
2. Enter an amount on the ten key pad. Do
not use the decimal key. For example, for
$1.99, enter:
1 9 9
Press a department key. For example,
press department 1:
@/
FOR
YOUR RECEIPT
THANK YOU
0 3 - 0 1 - 1 9 9 9
* . . . . . . . . . 4 X
@ . . . . . . 1 . 9 9
1 . . . . . . 7 . 9 6 T 1
* . . . . . . 7 . 9 6 T 1
* . . . . . . 0 . 4 8 T 1
* . . . . . . 8 . 4 4 C A
0 0 0 0 1 0
1 5 . 2 8 0 0
1
ER-290 Electronic Cash Register Advanced Operating Instructions • 21
Page 28

Department Multiplication With Decimal Point
If you are selling items by weight, or if you are selling yard goods, you can multiply a fraction of a
unit.
1. Enter the with the decimal point, press the
@/FOR key. For example, for 3 ¾ pounds
of produce, enter:
3 . 7
5
@/
FOR
2. Enter an amount on the ten key pad. Do
not use the decimal key. For example, if
the price is $.99 per pound, enter:
9 9
Press a department key. For example, press
department 1:
YOUR RECEIPT
THANK YOU
0 3 - 0 1 - 1 9 9 9
* . . . . 3 . 7 5 0 X
@ . . . . . 0 . 9 9
1 . . . . . 3 . 7 1 T 1
* . . . . . 3 . 7 1 T 1
* . . . . . 0 . 2 2 T 1
* . . . . . 3 . 9 3 C A
0 0 0 0 1 1
1 5 . 2 9 0 0
1
Split Pricing
When items are priced in groups, i.e. 3 for $1.00, you can enter the quantity purchased and let the
register calculate the correct price.
1. Enter the quantity purchased, press the
@/FOR key. For example, enter:
2
@/
FOR
2. Enter the quantity of the group price, press
the @/FOR key. For example, if the items
are priced 3 for $1.00, enter:
3
@/
FOR
3. Enter an amount on the ten key pad. For
example, if the items are priced 3 for
$1.00, enter:
1 0 0
Press a department key. For example, press
department 1:
1
YOUR RECEIPT
THANK YOU
0 3 - 0 1 - 1 9 9 9
* . . . . . . . . 2 X
* . . . . . . . . 3 X
@ . . . . . 1 . 0 0
1 . . . . . 0 . 6 7 T 1
* . . . . . 0 . 6 7 T 1
* . . . . . 0 . 0 4 T 1
* . . . . . 0 . 7 1 C A
0 0 0 0 1 2
1 5 . 2 9 0 0
22 • Advanced Operating Instructions ER-290 Electronic Cash Register
Page 29

Single Item Department
Single item departments automatically total as a cash sale immediately after registration. Use single
item departments for speedy one item sales. For example if you are selling admission tickets, and all
ticket sales are one item sales, you can assign open or preset single item departments for ticket sales.
After each registration, the drawer will immediately open, and a separate receipt is printed. See
“Department Programming” on page 43 to program a single item department.
1. Press a single item preset department key.
(or enter a price and press a single item
open department key.) For example,
press department 6:
6
YOUR RECEIPT
THANK YOU
0 3 - 0 1 - 1 9 9 9
6 . . . . . . 1 . 2 9
* . . . . . . 1 . 2 9 C A
0 0 0 0 1 3
1 5 . 2 9 0 0
ER-290 Electronic Cash Register Advanced Operating Instructions • 23
Page 30

PLU (Price Look Up) Registrations
PLUs must be programmed before they may be operated. See “PLU (Price Look Up) Programming”
on page 61 to program open or preset PLUs.
Open PLU
1. Enter the PLU number, press the PLU
key. For example, enter:
2 PLU
2. Enter an amount on the ten key pad. Do
not use the decimal key. For example, for
$2.99, enter:
2 9 9
3. Press the PLU key again.
PLU
Preset Price PLU
1. Enter the PLU number, press the PLU key.
For example, enter:
1 PLU
YOUR RECEIPT
THANK YOU
0 3 - 0 1 - 1 9 9 9
* 0 0 2
1 . . . . . . 2 . 9 9 T 1
* . . . . . . 2 . 9 9 T 1
* . . . . . . 0 . 1 8 T 1
* . . . . . . 3 . 1 7 C A
0 0 0 0 1 4
1 5 . 3 1 0 0
YOUR RECEIPT
THANK YOU
0 3 - 0 1 - 1 9 9 9
* 0 0 1
1 . . . . . . 1 . 2 9
* . . . . . . 1 . 2 9 C A
0 0 0 0 1 5
1 5 . 3 1 0 0
PLU Repeat Entry
1. Enter the PLU number, press the PLU
key. For example, enter:
1 PLU
2. To register a second item exactly as the
first, press the PLU key a second time:
PLU
24 • Advanced Operating Instructions ER-290 Electronic Cash Register
YOUR RECEIPT
THANK YOU
0 3 - 0 1 - 1 9 9 9
* 0 0 1
1 . . . . . . 2 . 9 9 T 1
* 0 0 1
1 . . . . . . 2 . 9 9 T 1
* . . . . . . 5 . 9 8 T 1
* . . . . . . 0 . 3 6 T 1
* . . . . . . 6 . 3 4 C A
0 0 0 0 1 6
1 5 . 3 1 0 0
Page 31

PLU Multiplication
When several of the same items are to be entered into the same PLU, you can use multiplication.
You may enter a quantity up to 4 figures (1 to 9999) using the @/FOR key. You may multiply open
or preset PLUs.
1. Enter the quantity of items being
purchased, press the @/FOR key. For
example, enter 4 on the numeric key pad
and press the @/FOR key:
4
2. Enter the PLU number, press the PLU key.
For example, enter:
1 PLU
@/
FOR
YOUR RECEIPT
THANK YOU
0 3 - 0 1 - 1 9 9 9
* . . . . . . . . . 4 X
@ . . . . . . 1 . 9 9
* 0 0 1
1 . . . . . . 7 . 9 6 T 1
* . . . . . . 7 . 9 6 T 1
* . . . . . . 0 . 4 8 T 1
* . . . . . . 8 . 4 4 C A
0 0 0 0 1 7
1 5 . 3 1 0 0
PLU Multiplication With Decimal Point
If you are selling items by weight, or if you are selling yard goods, you can multiply a fraction of a
unit.
1. Enter the with the decimal point, press
the @/FOR key. For example, for 3 ¾
pounds of produce, enter:
3 . 7
2. Enter the PLU number, press the PLU
key. For example, enter:
3 PLU
5
@/
FOR
YOUR RECEIPT
THANK YOU
0 3 - 0 1 - 1 9 9 9
* . . . . . 3 . 7 5 0 X
@ . . . . . . 2 . 9 9
* 0 0 3
1 . . . . . 1 1 . 2 1 T 1
* . . . . . 1 1 . 2 1 T 1
* . . . . . . 0 . 6 7 T 1
* . . . . . 1 1 . 8 8 C A
0 0 0 0 1 8
1 5 . 3 2 0 0
ER-290 Electronic Cash Register Advanced Operating Instructions • 25
Page 32

Split Pricing PLU
When items are priced in groups, i.e. 3 for $1.00, you can enter the quantity purchased and let the
register calculate the correct price.
1. Enter the quantity purchased, press the
@/FOR key. For example, enter:
2
@/
FOR
2. Enter the quantity of the group price, press
the @/FOR key. For example, if the items
are priced 3 for $1.00, enter:
3
@/
FOR
3. Enter the PLU number, press the PLU
key. For example, enter:
4 PLU
YOUR RECEIPT
THANK YOU
0 3 - 0 1 - 1 9 9 9
* . . . . . . . . . 2 X
* . . . . . . . . . 3 X
@ . . . . . . 1 . 0 0
* 0 0 4
1 . . . . . . 0 . 6 7 T 1
* . . . . . . 0 . 6 7 T 1
* . . . . . . 0 . 0 4 T 1
* . . . . . . 0 . 7 1 C A
0 0 0 0 1 9
1 5 . 3 2 0 0
26 • Advanced Operating Instructions ER-290 Electronic Cash Register
Page 33

Shifting or Exempting Tax
Shifting Tax
Taxable Departments and PLUs can be programmed to automatically add the appropriate tax or
taxes. Occasionally, you may need to sell a normally taxable item without tax, or a normally nontaxable item with tax. You can perform this tax shifting with the TAX SHIFT key.
1. Enter the number for the tax you wish to
shift. Press 1 to shift tax 1, press 2 to shift
tax 2 or press 3 to shift tax 3, press 4 to shift
tax 4. Press the TAX SHIFT key. For
example, shift tax 1:
2. Enter an amount on the ten key pad. Do not
use the decimal key. For example, for $2.99,
enter:
3. Press a department key. For example, press
department 1:
4. If department 1 is normally taxable by tax 1.
The registration will be non-taxable by tax 1.
TAX
1
SHIFT
2 9 9
1
YOUR RECEIPT
THANK YOU
0 3 - 0 1 - 1 9 9 9
1 . . . . . . 2 . 9 9
* . . . . . . 2 . 9 9 C A
0 0 0 0 2 0
1 5 . 3 3 0 0
ER-290 Electronic Cash Register Advanced Operating Instructions • 27
Page 34

Exempting Tax
Occasionally, you may need to exempt tax from an entire sale. For example, you might remove all
state and local taxes when you sell to a church or charitable institution.
1. Enter an amount on the ten key pad. Do
not use the decimal key. For example, for
$2.99, enter:
2 9 9
2. Press a taxable department key. For
example, press department 1:
1
3. Press Subtotal:
SUB
TOTAL
4. Enter the number for the tax you wish to
exempt. Press 1 to shift tax 1, press 2 to
shift tax 2 or press 3 to shift tax 3. press 4
to shift tax 4, Press the TAX SHIFT key.
For example, exempt tax 1:
TAX
1
SHIFT
5. Total the sale with CASH/TEND,
CHECK TEND, or CHARGE. The sale
will not include tax 1.
YOUR RECEIPT
THANK YOU
0 3 - 0 1 - 1 9 9 9
1 . . . . . . 2 . 9 9 T 1
* . . . . . . 3 . 1 7 S T
* . . . . . . 2 . 9 9 C A
0 0 0 0 2 1
1 5 . 3 3 0 0
28 • Advanced Operating Instructions ER-290 Electronic Cash Register
Page 35

Percent Key (%1 and %2) Operations
Use the Percent keys to add a percentage surcharge or subtract a percentage from an item or the
subtotal of a sale. You can enter the amount of the percentage before pressing the %1 or %2 keys,
or you can program a preset percentage if you are consistently using the same percentage.
Programming determines whether it is possible to enter a percentage when the key is also
programmed with a preset percentage. See “%1 and %2 Key Programming” on page 56 to set a
preset percentage.
Preset Percent on a Department or PLU Item
In this example the %1 key is preset with a rate of %10.00.
1. Register the discounted item.
2. Press the %1 key:
%1
3. The discount is automatically subtracted.
YOUR RECEIPT
THANK YOU
0 3 - 0 1 - 1 9 9 9
2 . . . . . 1 0 . 0 0
* . . . . 1 0 . 0 0 0 %
* . . . . . - 1 . 0 0
* . . . . . . 9 . 0 0 C A
0 0 0 0 2 2
1 5 . 3 3 0 0
Enter a Percent on a Department or PLU
You can also operate the %1 or %2 keys by entering the percentage of the discount or surcharge. If
necessary, you can enter the percentage with a decimal key (up to 3 digits, i.e. 99.999%).
1. Register the discounted item.
2. Enter the percentage. If you are entering
a fraction of a percent, you must use the
decimal key. For example, for
enter:
3 . 33 3 3
3. Press the %1 key:
%1
4. The discount is automatically subtracted.
1
/3 off
YOUR RECEIPT
THANK YOU
0 3 - 0 1 - 1 9 9 9
2 . . . . . 1 0 . 0 0
* . . . . 3 3 . 3 3 3 %
* . . . . . - 3 . 3 3
* . . . . . . 6 . 6 7 C A
0 0 0 0 2 3
1 5 . 3 3 0 0
ER-290 Electronic Cash Register Advanced Operating Instructions • 29
Page 36

Percent On Sale Total
In this example a surcharge of 15% is applied.
1. Register the items you wish to sell.
2. Press SUBTOTAL:
SUB
TOTAL
3. Enter the percentage. For example, for
15% enter:
4. Press the %2 key:
5. The surcharge is automatically added.
51
%2
Return Merchandise Registrations
If you wish to return or refund an item, press Return Merchandise, then re-enter any item you wish.
You can return merchandise as part of a sale, or you can return merchandise as a separate transaction
and return cash to the customer.
YOUR RECEIPT
THANK YOU
0 3 - 0 1 - 1 9 9 9
2 . . . . . 1 0 . 0 0
* . . . . . 1 0 . 0 0 S T
* . . . . 1 5 . 0 0 0 %
* . . . . . . 1 . 5 0
* . . . . . 1 1 . 5 0 C A
0 0 0 0 2 4
1 5 . 3 4 0 0
1. To return an item, press RTRN MDSE:
RTRN
MDSE
2. Enter the price of the item you wish to
return, then press the department key
where it was registered originally.
3. Total the sale with CASH/TEND,
CHECK TEND, or CHARGE1,2.
30 • Advanced Operating Instructions ER-290 Electronic Cash Register
9 92
2
YOUR RECEIPT
THANK YOU
0 3 - 0 1 - 1 9 9 9
- - - - - - - - - - R T
2 . . . . . - 2 . 9 9 T 1
* . . . . . - 2 . 9 9 T 1
* . . . . . - 0 . 1 8 T 1
* . . . . . - 3 . 1 7 C A
0 0 0 0 2 5
1 5 . 3 4 0 0
Page 37

Voids and Corrections
Void Last Item
This function corrects the last item entered.
1. Register the item you wish to sell.
2. Press the VOID key.
VOID
YOUR RECEIPT
THANK YOU
0 3 - 0 1 - 1 9 9 9
1 . . . . . . 2 . 2 9 T 1
2 . . . . . . 1 . 2 9
- - - - - - - - - - V 1
2 . . . . . - 1 . 2 9
* . . . . . . 2 . 2 9 T 1
* . . . . . . 0 . 1 4 T 1
* . . . . . . 2 . 4 3 C A
0 0 0 0 2 6
1 5 ˙3 4 0 0
Void Previous Item
This function allows you to correct an item registered previously in a transaction.
1. Register an item. Then register a second
item.
2. To correct the first item, press CLEAR,
then press VOID:
VOIDCLEAR
3. Enter the price of the first item, then
press the department key where it was
registered originally.
2 91
2
YOUR RECEIPT
THANK YOU
0 3 - 0 1 - 1 9 9 9
2 . . . . . . 1 . 2 9
1 . . . . . . 2 . 2 9 T 1
- - - - - - - - - V 1
2 . . . . . - 1 . 2 9
* . . . . . . 2 . 2 9 T 1
* . . . . . . 0 . 1 4 T 1
* . . . . . . 2 . 4 3 C A
0 0 0 0 2 7
1 5 . 3 5 0 0
ER-290 Electronic Cash Register Advanced Operating Instructions • 31
Page 38

Cancel
The CANCEL key allows you to stop any transaction. Anything registered within the transaction
before the CANCEL key is pressed is automatically corrected. The CANCEL key may be
inactivated through programming, see “CANCEL Key Programming” on page 60.
1. Register the items you wish to sell.
2. Press the CANCEL key.
CANCEL
YOUR RECEIPT
THANK YOU
0 3 - 0 1 - 1 9 9 9
1 . . . . . . 2 . 2 9 T 1
* . . . . . - 0 . 5 0 -
- - - - - - - - - - V 3
0 0 0 0 2 8
1 5 . 3 5 0 0
Void Position Operations
You can use the Void control lock position to correct any complete transaction. To correct a
transaction:
1. Turn the control lock to the VOID
position.
2. Enter the transaction you wish to correct
exactly as it was entered originally in the
REG control lock position. You can
enter discounts, voids, tax exemptions or
any other function.
3. All totals and counters are corrected as if
the original transaction did not take
place.
YOUR RECEIPT
THANK YOU
0 3 - 0 1 - 1 9 9 9
- - - - - - - - - V 2
1 . . . . . - 2 . 2 9 T 1
2 . . . . . - 1 . 0 0
* . . . . . - 3 . 4 3 S T
* . . . . . - 2 . 2 9 T 1
* . . . . . - 0 . 1 4 T 1
* . . . . . - 3 . 4 3 C A
0 0 0 0 2 9
1 5 . 3 5 0 0
32 • Advanced Operating Instructions ER-290 Electronic Cash Register
Page 39

- (Minus) Key Registrations
You can register a negative amount by entering a price, the pressing the - (Minus) key. For
example, you can enter bottle returns or coupons using the - (Minus) key.
Note: You can program the minus key so that tax is charged on the gross
amount, or on the net amount after the subtraction. See “- (Minus) Key
Programming” on page 58.
1. Register the items you wish to sell.
2. Enter the amount you wish to subtract from
the sale, for example for a $.50 coupon,
enter:
05
3. Press the - (Minus) key.
-
YOUR RECEIPT
THANK YOU
0 3 - 0 1 - 1 9 9 9
1 . . . . . . 2 . 2 9 T 1
* . . . . . - 0 . 5 0 -
* . . . . . . 2 . 2 9 T 1
* . . . . . . 0 . 1 4 T 1
* . . . . . . 1 . 9 3 C A
0 0 0 0 3 0
1 5 . 3 5 0 0
ER-290 Electronic Cash Register Advanced Operating Instructions • 33
Page 40

No Sale Operations
Open Drawer
The #/NO SALE key will open the cash drawer when you have not already started a transaction.
1. Press #/NO SALE:
#/NO
SALE
2. The drawer will open and the receipt will
print as in the example on the right.
YOUR RECEIPT
THANK YOU
0 3 - 0 1 - 1 9 9 9
. . . . . . . . . . N S
0 0 0 0 3 1
1 5 . 3 6 0 0
Non Add Number
You can also use the #/NO SALE key to print any number (up to 8 digits) on the printer paper. You
can enter the number any time during a transaction. For example, if you wish to record a charge
account number, enter the number and press the #/NO SALE key before totaling the sale with the
CHARGE key.
1. Register the items you wish to sell.
2. Enter the number you wish to record, for
example enter:
2 3 41
3. Press #/NO SALE:
#/NO
SALE
4. Press CHARGE1:
CHARGE1
5. The display will indicate “=” for total,
the drawer will open and the receipt will
print as in the example on the right.
YOUR RECEIPT
THANK YOU
0 3 - 0 1 - 1 9 9 9
1 . . . . . . 2 . 9 9 T 1
* . . . . . . 1 2 3 4 #
* . . . . . . 2 . 9 9 T 1
* . . . . . . 0 . 1 8 T 1
* . . . . . . 3 . 1 7 C 1
0 0 0 0 3 2
1 5 . 3 6 0 0
34 • Advanced Operating Instructions ER-290 Electronic Cash Register
Page 41

Received On Account Operations
You can use the Received on Account key to accept cash into the cash drawer when you are not
actually selling merchandise. For example, use the Received on Account key to accept payments for
previously sold merchandise, or record loans to the cash drawer.
1. Enter the amount of cash you are receiving,
for example, enter:
0 0 02
2. Press RECD ACCT:
RECD
ACCT
3. The drawer will open and the receipt will
print as in the example on the right.
Paid Out Operations
You can use the PAID OUT key to track cash paid out for merchandise or to record loans from the
cash drawer.
1. Enter the amount of cash you are paying,
for example, enter:
0 0 02
2. Press PAID OUT:
PAID
OUT
3. The drawer will open and the receipt will
print as in the example on the right.
YOUR RECEIPT
THANK YOU
0 3 - 0 1 - 1 9 9 9
* . . . . . 2 0 . 0 0 R A
0 0 0 0 3 3
1 5 . 3 6 0 0
YOUR RECEIPT
THANK YOU
0 3 - 0 1 - 1 9 9 9
* . . . . . 2 0 . 0 0 P O
0 0 0 0 3 4
1 5 . 3 7 0 0
ER-290 Electronic Cash Register Advanced Operating Instructions • 35
Page 42

Totaling and Tendering
Three keys may be used to total a sale: CHECK TEND, CHARGE1,2 , CASH/TEND key. The
CHECK TEND and CASH/TEND keys can also be used for change calculation.
Subtotaling a Sale
1. Register the items you wish to sell.
2. To display and print the subtotal of the sale
including tax, press SUBTOTAL:
SUB
TOTAL
3. The subtotal will display with “=” indicated
in the left digit position of the display.
Totaling a Cash Sale
1. Register the items you wish to sell.
2. To total a cash sale, press CASH/TEND:
CASH/
TEND
3. The display will indicate “=” for total, the
drawer will open and the receipt will print
as in the example on the right.
YOUR RECEIPT
THANK YOU
0 3 - 0 1 - 1 9 9 9
1 . . . . . . 2 . 9 9 T 1
1 . . . . . . 2 . 9 9 T 1
* . . . . . . . . . 4 X
@ . . . . . . 1 . 9 9
2 . . . . . . 7 . 9 6
* . . . . . 1 4 . 3 0 S T
* . . . . . . 5 . 9 8 T 1
* . . . . . . 0 . 3 6 T 1
* . . . . . 1 4 . 3 0 C A
0 0 0 0 3 5
1 5 . 3 8 0 0
36 • Advanced Operating Instructions ER-290 Electronic Cash Register
Page 43

Tendering a Cash Sale
1. Register the items you wish to sell.
2. Enter the amount tendered by the
customer. For example, for $20.00
enter:
0 0 02
3. Press CASH/TEND:
CASH/
TEND
4. The display will indicate “C” for change,
the drawer will open and the receipt will
print as in the example on the right.
Tendering a Check Sale
YOUR RECEIPT
THANK YOU
0 3 - 0 1 - 1 9 9 9
1 . . . . . . 2 . 9 9 T 1
1 . . . . . . 2 . 9 9 T 1
* . . . . . . . . . 4 X
@ . . . . . . 1 . 9 9
2 . . . . . . 7 . 9 6
* . . . . . . 5 . 9 8 T 1
* . . . . . . 0 . 3 6 T 1
* . . . . . 1 4 . 3 0 T L
* . . . . . 2 0 . 0 0 C A
* . . . . . . 5 . 7 0 C
0 0 0 0 3 6
1 5 . 3 8 0 0
1. Register the items you wish to sell.
2. Enter the amount tendered by the
customer. For example, for $20.00
enter:
0 0 02
3. Press CHECK TEND:
CHECK
TEND
4. The display will indicate “C” for change,
the drawer will open and the receipt will
print as in the example on the right.
YOUR RECEIPT
THANK YOU
0 3 - 0 1 - 1 9 9 9
1 . . . . . . 2 . 9 9 T 1
1 . . . . . . 2 . 9 9 T 1
* . . . . . . . . . 4 X
@ . . . . . . 1 . 9 9
2 . . . . . . 7 . 9 6
* . . . . . . 5 . 9 8 T 1
* . . . . . . 0 . 3 6 T 1
* . . . . . 1 4 . 3 0 T L
* . . . . . 2 0 . 0 0 C H
* . . . . . . 5 . 7 0 C
0 0 0 0 3 7
1 5 . 3 8 0 0
ER-290 Electronic Cash Register Advanced Operating Instructions • 37
Page 44

Totaling a Charge Sale
1. Register the items you wish to sell.
2. Press CHARGE1:
CHARGE1
3. The display will indicate “=” for total,
the drawer will open and the receipt will
print as in the example on the right.
Note: Charge tendering is not
allowed.
YOUR RECEIPT
THANK YOU
0 3 - 0 1 - 1 9 9 9
1 . . . . . . 2 . 9 9 T 1
1 . . . . . . 2 . 9 9 T 1
* . . . . . . . . . 4 X
@ . . . . . . 1 . 9 9
2 . . . . . . 7 . 9 6
* . . . . . . 5 . 9 8 T 1
* . . . . . . 0 . 3 6 T 1
* . . . . . 1 4 . 3 0 C 1
0 0 0 0 3 8
1 5 . 3 8 0 0
Check Cashing
Check cashing means exchanging cash for a check. Normally, this function is not allowed. If you
wish to allow check cashing, you must set system option #15 to a value of 1. See “System Option
Programming” on page 48.
1. Enter the amount of the check tendered
by the customer. For example, for
$20.00 enter:
0 0 02
2. Press CHECK TEND:
CHECK
TEND
3. The display will indicate “C” for change,
the drawer will open and the receipt will
print as in the example on the right.
YOUR RECEIPT
THANK YOU
0 3 - 0 1 - 1 9 9 9
* . . . . . 2 0 . 0 0 C H
* . . . . - 2 0 . 0 0 C A
0 0 0 0 3 9
1 5 . 3 9 0 0
38 • Advanced Operating Instructions ER-290 Electronic Cash Register
Page 45

Split Tender
Split tendering means paying for one sale by different payment methods. For example, a $20.00 sale
could be split so $10.00 is paid in cash, and the remaining $10.00 is charged. If necessary, you can
make several different payments.
Note: If a portion of a sale is to be charged, the charge payment must be
entered last.
1. Register the items you wish to sell.
2. Enter the amount of cash tendered by the
customer. For example, enter $10.00 and
press CASH/TEND:
0 01 0
3. The display will indicate “=” and $10.00,
indicating the amount still due. The
drawer will not open. Press CHARGE1 to
charge the remaining amount:
CHARGE1
4. The display will indicate “=” for total, the
drawer will open and the receipt will print
as in the example on the right.
CASH/
TEND
YOUR RECEIPT
THANK YOU
0 3 - 0 1 - 1 9 9 9
2 . . . . . 2 0 . 0 0
* . . . . . 2 0 . 0 0 S T
* . . . . . 2 0 . 0 0 T L
* . . . . . 1 0 . 0 0 C A
* . . . . . 1 0 . 0 0 T L
* . . . . . 1 0 . 0 0 C 1
0 0 0 0 4 0
1 5 . 3 9 0 0
ER-290 Electronic Cash Register Advanced Operating Instructions • 39
Page 46

Post Tender
Post tendering means computing change after the sale has been totaled and the drawer is open. This
feature is useful when a customer changes the amount of the tender or the clerk becomes confused
counting change manually. Normally, this function is not allowed. If you wish to allow post
tendering, you must set system option #14 to a value of 1. See “System Option Programming” on
page 48.
1. Register the items you wish to sell.
2. Press CASH/TEND:
CASH/
TEND
3. The display will indicate “=” for total, the
drawer will open and the receipt will print
as in the example on the right.
4. Enter the amount of the tender, Press
CASH/TEND:
0 02 0
CASH/
TEND
5. The display will indicate “C” for change
and display $17.88 change due.
YOUR RECEIPT
THANK YOU
0 3 - 0 1 - 1 9 9 9
1 . . . . . . 2 . 0 0 T 1
* . . . . . . 2 . 1 2 S T
* . . . . . . 2 . 0 0 T 1
* . . . . . . 0 . 1 2 T 1
* . . . . . . 2 . 1 2 C A
0 0 0 0 4 1
1 5 . 3 9 0 0
40 • Advanced Operating Instructions ER-290 Electronic Cash Register
Page 47

Receipt On/Off and Receipt on Request
If the receipt is off, you can still issue a receipt after the sale has been completed. Normally, this
function is not allowed. If you wish to allow after sale receipts, you must set system option #16 to a
value of 1. See “System Option Programming” on page 48.
To Turn the Receipt Off
♦ With the control lock in the REG position, press PAID OUT:
PAID
OUT
To Turn the Receipt On
♦ With the control lock in the REG position, press PAID OUT again:
PAID
OUT
Printing a Receipt after the Sale
♦ After the sale has been totaled, but before the next transaction is started, press
CASH/TEND:
CASH/
TEND
Note: Because receipt memory is limited, when a sale has more than 30 items
or more than 3 tenders, the receipt after sale can not print all items. A row of
dots is printed indicating the receipt is incomplete.
ER-290 Electronic Cash Register Advanced Operating Instructions • 41
Page 48

42 • Advanced Operating Instructions ER-290 Electronic Cash Register
Page 49

Advanced Programming Instructions
Department Programming
Programming Department Status
There are two parts to department programming. Department status is set here. Depending on
whether you select open or preset department status is this section, you can also program either the
open department entry limit or the preset department price. See “Programming Department Entry
Limit or Price” on page 46.
Use this section to program the following status options:
z Set negative departments that subtract from the sale, rather than normal positive departments
which add to the sale.
z Enforce the entry of a non-adding number before the department entry. See “Non Add
Number” on page 34 for operation sequences.
z Disable the departments, so that entries are not allowed.
z Choose Open or Preset departments. Open departments accept amount entries. Use open
departments to enter different priced items into the same category. Preset departments
automatically register a preprogrammed price when the department key is pressed. Use preset
departments to register an individual item quickly and accurately. For example, cigarette packs
or food items can be assigned to departments as presets.
When you select preset departments, you can also decide if the department can also accept open
entries. This option is referred to as “preset override”.
z Set single item departments which automatically total as a cash sale immediately after the
department entry. Single item departments are used to speed up one item sales.
z Select a tax status to determine whether sales tax is automatically added.
Unless otherwise programmed, departments are positive, open, not taxable, not single item
departments, and accept unlimited amounts (up to 7 digit entry). Therefore, it is not necessary to
program departments you wish to be open, positive, non-taxable, not single item, with no entry limit.
ER-290 Electronic Cash Register Advanced Programming Instructions • 43
Page 50

Programming Department Status
1. Turn the control lock to the PGM position.
2. Decide if you want a negative, enforced non-add entry, or disabled department. If you
do not want any of these department options, enter 0. If you wish to select any of these
options, complete the table below by adding the status digits for each option. Enter the
resulting digit.
Department is
Negative
Enforce Non-Add
Entry
Department is Disabled Yes =4
3. Decide if you want a preset or single item department. If you do not want any of these
department options, enter 0. If you wish to select any of these options, complete the
table below by adding the status digits for each option. Enter the resulting digit.
Department is Preset Yes = 1
Allow Preset Override Yes = 2
Department is Single
Item
Yes = 1
No = 0
Yes = 2
No = 0
No = 0
No = 0
No = 0
Yes = 4
No = 0
+
+
+
=
+
+
+
=
4. Complete the tax status table below by adding the status digits for each tax. Then enter
the resulting tax status code.
Taxable by Rate 1? Yes = 1
No = 0
Taxable by Rate 2? Yes = 2
No = 0
Taxable by Rate 3? Yes = 4
No = 0
Taxable by Rate 4? Yes = 8
No = 0
+
+
+
+
=
5. Press the @/FOR key.
6. Repeat steps 2 through 5 for each department you wish to program.
7. Press the CASH/TEND key to end programming.
44 • Advanced Programming Instructions ER-290 Electronic Cash Register
Page 51

Department Status Programming Flowchart
Repeat for each
Department
@/
FOR
Negative?
Non-Add?
Disabled?
Pres et?
Single
item?
Tax
Status
Code
Department Status Programming Examples
For example, set:
z department 1 open, taxable by rate 1
z department 4 preset, taxable by rate 2
z department 9 negative, preset, taxable by rate 1 & 2
To set Department 1, enter:
0
To set Department 4, enter:
To set Department 9, enter:
10 0
0
20 1
@/
FOR
@/
FOR
DEPT
KEY
1
4
CASH/
TEND
1
1
0
3
Press the CASH/TEND key to end programming.
CASH/
TEND
The status you have entered will print on the printer:
YOUR RECEIPT
THANK YOU
0 3 - 0 1 - 1 9 9 9
1 . . . . . . . . 1 T 1
4 . . . . . . 1 0 2 T 2
9 . . . . . 1 1 0 3 T
0 0 0 0 1 0
0 7 . 0 0 0 0
@/
FOR
9
ER-290 Electronic Cash Register Advanced Programming Instructions • 45
Page 52

Programming Department Entry Limit or Price
Note: Open departments are automatically assigned a 7 digit entry limit. You
do not need to program this section for open departments, unless you wish to
set a different limit.
If you are programming a open department:
z You can limit errors by setting the maximum amount that may be entered into a
department.
If you are programming a preset department:
z You can set the preset price. The price you program here is the amount that is
automatically registered when the department key is pressed.
Programming a Department Entry Limit or Price
1. Turn the control lock to the PGM position.
2. If the department is preset, enter the preset price, up to seven digits (01 to 1234567).
(It is not necessary to enter proceeding zeros. For example enter $1.00 as 100.)
OR,
If the department is open, enter the entry limit you wish to set.
3. Repeat from step 2 above for each department you wish to set.
4. Press the CASH/TEND key to end programming.
46 • Advanced Programming Instructions ER-290 Electronic Cash Register
Page 53

Department Entry Limit or Price Programming Flowchart
Repeat for each Pr eset Department
Pres et Pr ice
High Amount Lock Out
(Leading zeros are not necessary)
or
DEPT
KEY
CASH/
TEND
Department Entry Limit or Price Programming Examples
For example, set:
z department 1 open, with a entry limit of $50.00
z department 4 preset for $2.50
z department 9 preset for $0.99
To set Department 1, enter:
05 0 0
To set Department 4, enter:
02 5
To set Department 9, enter:
1
4
99
9
Press the CASH/TEND key to end programming.
CASH/
TEND
The status you have entered will print on the printer:
YOUR RECEIPT
THANK YOU
0 3 - 0 1 - 1 9 9 9
1 . . . . . 5 0 . 0 0 T 1
4 . . . . . . 2 . 5 0 T 2
9 . . . . . . 0 . 9 9 T
0 0 0 0 1 1
0 7 . 0 1 0 0
ER-290 Electronic Cash Register Advanced Programming Instructions • 47
Page 54

System Option Programming
A
Nineteen system options are provided so that you can configure the ER-290 to your exact
requirements. Refer to the “System Option Table” on page 50 to review the system options. Read
each option carefully to determine if you wish to make any changes.
NOTE: Because after clearing memory all options settings are automatically
set to 0, and because your most likely option selections require a status setting
of 0, you do not need to program this section unless you wish to change the
default status.
Programming a System Option:
1. Turn the control lock to the PGM position.
2. Enter the option number of the system option you wish to change. Press the RECD
ACCT key.
3. Enter the number representing the status you have selected. Press the PAID OUT key.
4. Repeat from step 3 for each system option you wish to change.
5. Press the CASH/TEND key to end programming.
System Option Flowchart
Option #
Repeat for each
System Option
RECD
CCT
Status
PAID
OUT
CASH/
TEND
48 • Advanced Programming Instructions ER-290 Electronic Cash Register
Page 55

System Option Programming Examples
A
A
Set the following options
z Option 15: Allow check cashing.
z Option 17: Enforce cash or check tender at totaling.
To set option 15:
RECT
CCT
151
To set option 17:
RECT
CCT
171
Press the CASH/TEND key to end programming.
CASH/
TEND
PAID
OUT
PAID
OUT
ER-290 Electronic Cash Register Advanced Programming Instructions • 49
Page 56

System Option Table
NOTE: Shaded areas are the default settings, in other words, the shaded area
indicates the way the register is automatically set up.
Option
No.
1
2
3
4
5
6
7
SYSTEM OPTION STATUS
Print the grand total on X,/Z report. YES = 0
NO = 1
Print the gross total on X,/Z report. YES = 0
NO = 1
Reset the consecutive number counter after a Z report. NO = 0
YES = 1
Reset the Z counter after Z report. NO = 0
YES = 1
Skip totals with zero value on X,Z report. YES = 0
NO = 1
Reset the grand total after a Z report. NO = 0
YES = 1
Print the subtotal when pressed. YES = 0
8
9
10
11
NO = 1
Cash must be declared before X/Z report. NO = 0
YES = 1
Allow X reports YES = 0
NO = 1
Decimal point position 0 = none
1 = 1 place
2 = 2 places
3 = 3 places
Select a method for tax printing:
Print Taxable Totals. Print tax amounts separately.0
Print Taxable Totals. Print only total of all taxes. 1
Print Taxable Totals. Do not print tax amounts. 2
50 • Advanced Programming Instructions ER-290 Electronic Cash Register
Page 57

Option
No.
SYSTEM OPTION STATUS
12
13
14
15
16
Do not print Taxable Total. Print tax amounts separately.3
Do not print Taxable Total. Print only total of all taxes. 4
Do not print Taxable Total. Do not print tax amounts. 5
Rounding method for Round up at 0.50 0
percentage key and tax. Always Round up 1
Always Round down 2
Rounding method for decimal Round up at 0.50 0
multiplication and split pricing. Always Round up 1
Always Round down 2
Allow Post Tender. NO = 0
YES = 1
Allow Check Cashing. NO = 0
YES = 1
Allow receipt after sale. NO = 0
Only functional when the receipt is turned off. YES = 1
17
See Receipt On/Off settings on page 41..
Enforce cash or check tender at totaling. NO = 0
YES = 1
ER-290 Electronic Cash Register Advanced Programming Instructions • 51
Page 58

Advanced Tax Programming
Use the instructions in this chapter only if you wish to determine tax program entries yourself. See
“Programming Tax” on page 13 to enter a simple tax rate.
Important Note: After you have entered your tax program, test for accuracy
by entering several transactions of different dollar amounts. Carefully check
to make sure the tax charged by the cash register matches the tax on the
printed tax chart for your area. As a merchant, you are responsible for
accurate tax collection. If the cash register is not calculating tax accurately, or
if you cannot find the correct tax information for your area in the Appendix,
contact the CRS, Inc. Service Center at 1-888-333-6776 for assistance.
Tax Rate Programming
You can program up to three separate taxes on the ER-290. Set tax rate(s) here.
z If you are entering a tax table, see “Tax Table Programming” on page 54 to enter the
tax break points.
z If you are entering a Canadian Goods and Services Tax (GST), use tax rate 4 for the
GST tax, and use tax rates 1 and/or 2,3 for any other provincial tax or taxes.
Programming Tax Rates and Status
1. Turn the control lock to the PGM position.
2. If the tax is a percentage rate, with a decimal. (0.000-99.999). It is not necessary to
enter proceeding zeros. For example, for 6%, enter 06.000 or 6.000.
3. For the type of tax, enter:
if the tax is a percentage added to the sale (normal add on tax)
0
if the tax is a percentage value added tax
1
(VAT; calculated as part of the sale)
4. Enter 0 here for all taxes, unless if you are programming tax 4 as a Canadian GST. If
the tax is a Canadian GST. Enter:
GST (tax 4) taxable by rate
1.
GST (tax 4) taxable by rate 2 Yes = 2
GST (tax 4) taxable by rate 3 Yes = 4
Yes = 1
No = 0
No = 0
No = 0
+
+
+
=
5. Enter:
52 • Advanced Programming Instructions ER-290 Electronic Cash Register
Page 59

to set tax rate 1
GST
1
to set tax rate 2
2
to set tax rate 3
3
to set tax rate 4
4
6. Press the TAX SHIFT key.
7. Press the CASH/TEND key to end programming.
Tax Rate Programming Flowchart
.
Tax Rate
Tax
type
tax
Info
Tax #
(1-4)
Tax Rate Examples
If tax 1 is 6 percent, enter:
If tax 4 is 8 percent Canadian GST and the GST is taxable, enter:
Press the CASH/TEND key to end programming.
CASH/
TEND
The rates you have entered will display and print on the printer:
.
.
0 1 0 0 0 0 6
7 400 0 08
TAX
SHIFT
TAX
SHIFT
TAX
SHIFT
CASH/
TEND
YOUR RECEIPT
THANK YOU
0 3 - 0 1 - 1 9 9 9
0 0
* . . . . . 6 . 0 0 0 T 1
0 7
* . . . . . 8 . 0 0 0 T 4
0 0 0 0 1 2
0 7 . 1 5 0 0
ER-290 Electronic Cash Register Advanced Programming Instructions • 53
Page 60

Tax Table Programming
In some cases, a tax that is entered as a percentage does not follow exactly the tax charts that apply
in your area (even if the tax chart is based on a percentage). In these cases, we recommend that you
enter your tax using tax table programming. This method will match tax collection exactly to the
break points of your tax table.
Before programming, obtain a copy of the tax table you wish to program. You will need the printed
tax table if you wish to determine the break point entries yourself.
Note: You can enter up to 47 break points.
Determining Break Point Entries
1. Refer to the “Tax Table Programming Example - Illinois 6% Tax Table” on page 55 to
help with this exercise.
2. Calculate the break point differences by subtracting the high side of the previous range
from the high side of the dollar range.
3. Examine the pattern of break point differences to determine when the break points
begin to repeat. Mark the beginning break points that do not fit a pattern as “nonrepeat breaks.” Mark the break points that are repeating in a pattern as “repeat breaks.”
Programming a Tax Table
1. Turn the control lock to the PGM position.
2. Enter the number of the tax you are programming (1, 2, or 3, 4), press the TAX SHIFT
key.
3. Enter the maximum amount that is not taxed, press the TAX SHIFT key.
4. Enter the first tax amount charged, press the TAX SHIFT key.
5. For each non-repeat break point, enter the high side from the sale dollar range and press
the TAX SHIFT key.
6. Press the CHECK TEND key.
7. For each repeat break point, enter the high side from the sale dollar range and press the
TAX SHIFT key.
8. Press the CASH/TEND key to end the tax table program.
54 • Advanced Programming Instructions ER-290 Electronic Cash Register
Page 61

Tax Table Programming Example - Illinois 6% Tax Table
Tax Charged
$0.00 $0.00 - $0.10
$0.01 $0.11 - $0.21 11
$0.02 $0.22 - $0.38 17
$0.03 $0.39 - $0.56 18 Non-Repeat
$0.04 $0.57 - $0.73 17
$0.05 $0.74 - $0.91 18
$0.06 $0.92 - $1.08 17
$0.07 $1.09 - $1.24 16 Repeat
$0.08 $1.25 - $1.41 17
$0.09 $1.42 - $1.58 17
$0.10 $1.59 - $1.74 16
$0.11 $1.75 - $1.91 17
$0.12 $1.92 - $2.08 17
$0.13 $2.09 - $2.24 16
$0.14 $2.25 - $2.41 17
Sale Dollar Range
Break point
Differences
To enter the program for the Illinois 6% tax table:
1. Enter 1 (for tax #1), press the TAX SHIFT key.
2. Enter 1 0 (the maximum amount that is not taxed), press the TAX SHIFT key.
3. Enter 1 (the first tax amount charged), press the TAX SHIFT key.
4. Enter 2 1 (non-repeat break point),press the TAX SHIFT key.
5. Enter 3 8 (non-repeat break point),press the TAX SHIFT key
6. Enter 5 6 (non-repeat break point),press the TAX SHIFT key.
7. Enter 7 3 (non-repeat break point),press the TAX SHIFT key.
8. Enter 9 1 (non-repeat break point),press the TAX SHIFT key.
9. Press the CHECK TEND key.
10. Enter 1 0 8 (repeat break point), press the TAX SHIFT key.
11. Enter 1 2 4 (repeat break point), press the TAX SHIFT key.
12. Enter 1 4 1 (repeat break point), press the TAX SHIFT key.
13. Press the CASH/TEND key to complete the tax program.
ER-290 Electronic Cash Register Advanced Programming Instructions • 55
Page 62

%1 and %2 Key Programming
There are two percentage keys on the keyboard: %1 and %2. The %1 key applies a surcharge.
The %2 key applies a discount. Without any further programming, you can apply a discount or
surcharge to an individual item or to the subtotal of a sale by entering a percentage and pressing
the %1 or %2 key. This program allows you to:
z decide to calculate any taxes before or after the percentage is applied
z set a preset percentage for the %1 or %2 key
z if a preset percentage is set, decide if you wish to also allow a percentage to be entered
z inactivate the key
Programming the %1 or %2 Key
1. Turn the control lock to the PGM position.
2. Enter the percentage rate you wish to preset, or 0 if you only wish to enter the
percentage. Press the %1 or %2key, depending on which key you are programming.
Be sure to enter the decimal point if you are setting a rate that is not an even
percentage, i.e. enter 33
not necessary to enter the decimal point, i.e. enter 50 % as 5 0.
3. To decide if tax is calculated before or after the percentage is applied, complete the
table below by adding the status digits for each tax. Then enter the resulting tax status
code.
Calculate Rate 1 after the
discount/surcharge?
Calculate Rate 2 after the
discount/surcharge?
Calculate Rate 3 after the
discount/surcharge?
Calculate Rate 4 after the
discount/surcharge?
1
/3 % as 3 3 . 3 3 3. If you are setting an even percentage, it is
Yes = 1
No = 0
Yes = 2
No = 0
Yes = 4
No = 0
Yes = 8
No = 0
+
+
+
+
=
4. Enter:
If you wish to allow the operator to also enter a percentage (override).
0
If you do not wish to allow the operator to also enter a percentage
1
(override).
If you wish the key to be inactive.
2
5. Enter:
-% (default)
0
+%
1
6. Press the CASH/TEND key to end programming.
56 • Advanced Programming Instructions ER-290 Electronic Cash Register
Page 63

%1or %2Key Programming Flowchart
Preset Percentage
Tax
Status
Code
Over-
ride?
Inactive?
-%/+%
%1 or
%2
CASH/
TEND
%1 or %2 Key Programming Example
Set the %1 (discount) Key preset for 50% and so that tax 1 is calculated after the discount is applied
and override is allowed. Enter:
%10 005 0 0 1 11
CASH/
TEND
ER-290 Electronic Cash Register Advanced Programming Instructions • 57
Page 64

- (Minus) Key Programming
The - (Minus) key is used to enter the amount of a coupon that is subtracted from the sale.
z The - (Minus) key can programmed to be taxable or non-taxable. In other words,
when you are subtracting a coupon, you can calculate sales tax on the net or the gross
cost of the item. If the - (Minus) key is taxable, you will calculate sales tax on the net
cost of the item. If the - (Minus) key is -non-taxable, you will calculate sales tax on
the gross cost of the item.
z You can also program limit errors by setting the maximum amount that may be
entered into the - (Minus) key. For example, setting a 3 digit limit means the
maximum you can enter is $9.99. This is referred to as the High Digit Lock Out, or
HDLO.
Programming the - (Minus) Key
1. Turn the control lock to the PGM position.
2. Enter the High Digit Lock Out (entry limit) digit from the table below. (Enter 0 for no
limit.)
HDLO Limits
1 .01 - .09
2 .01 - .99
3 .01 - 9.99
4 .01 - 99.99
5 .01 - 999.99
6 .01 - 9999.99
7 or 0 .01 - 99999.99
3. To decide if tax is calculated before or after the percentage is applied, complete the
table below by adding the status digits for each tax. Then enter the resulting tax status
code.
Calculate Rate 1 after the
Minus (-) key entry?
Calculate Rate 2 after the
Minus (-) key entry?
Calculate Rate 3 after the
Minus (-) key entry?
Calculate Rate 4 after the
Minus (-) key entry?
Yes = 1
No = 0
Yes = 2
No = 0
Yes = 4
No = 0
Yes = 8
No = 0
+
+
+
+
=
4. Enter:
for active minus key
0
for inactive minus key
1
5. Press the - (Minus) key.
58 • Advanced Programming Instructions ER-290 Electronic Cash Register
Page 65

6. Press the CASH/TEND key to end programming.
Minus (-) Key Programming Flowchart
CASH/
TEND
HDLO
Tax
Status
Code
-
Inactive?
Minus (-) Key Programming Example
Set the Minus (-) key with a three digit HDLO ($9.99) and so that tax 1 is calculated after the Minus
(-) key amount is entered. (In other words, tax is calculated on the net cost of the item.) Enter:
-0103
CASH/
TEND
ER-290 Electronic Cash Register Advanced Programming Instructions • 59
Page 66

CANCEL Key Programming
The CANCEL key can be made inactive. Normally the key is active, however, you may wish to
inactivate it for security reasons.
Programming the CANCEL Key
1. Enter:
0
to activate the CANCEL key
1
to inactivate the CANCEL key
2. Press the CANCEL key.
3. Press the CASH/TEND key to end programming.
Cancel Key Programming Flowchart
CANCEL
Inactive?
CASH/
TEND
Cancel Key Programming Example
To inactivate the CANCEL key, enter:
CANCEL1
CASH/
TEND
60 • Advanced Programming Instructions ER-290 Electronic Cash Register
Page 67

PLU (Price Look Up) Programming
The ER-290 offers 200 PLUs (Price Look Ups) as a standard feature. Like departments PLUs (Price
Look Ups) may be open or preset.
z Preset PLUs are used to register preset items. The most significant difference between
a preset department and a preset PLU is the method of registration. While preset
departments are registered by simply pressing the department key, preset PLUs are
registered by entering the PLU number and pressing the PLU key.
There are many possible uses for preset PLUs. Since there are many more PLUs than
departments, you may use PLUs when you wish to accurately price and count a larger
group of items. Possible uses include: menu items in a restaurant or items (such as
cigarettes) that you wish to inventory.
z Use open PLUs when you wish enter different priced items into a larger number of
categories.
Programming PLU Status
There are two parts to PLU programming. PLU status is set here. Depending on whether you select
open or preset PLU status is this section, you can also program either the open PLU entry limit or the
preset PLU price. See “Programming PLU Entry Limit or Price” on page 64.
Use this section to program the following status options:
z Set negative PLUs that subtract from the sale, rather than normal positive PLUs which
add to the sale.
z Enforce the entry of a non-adding number before the PLU entry. See “Non Add
Number” on page 34 for operation sequences.
z Disable the PLUs, so that entries are not allowed.
z Choose Open or Preset PLUs.
z Set single item PLUs which automatically total as a cash sale immediately after the
PLUs entry. Single item departments are used to speed up one item sales.
z Select a tax status to determine whether sales tax is automatically added.
ER-290 Electronic Cash Register Advanced Programming Instructions • 61
Page 68

Programming PLU Status
1. Turn the control lock to the PGM position.
2. Enter the number of the PLU you wish to program (1-200), press the PLU key.
3. Decide if you want a negative, enforced non-add entry, or disabled PLU. If you do not
want any of these options, enter 0. If you wish to select any of these options, complete
the table below by adding the status digits for each option. Enter the resulting digit.
PLU is Negative Yes = 1
Enforce Non-Add
Entry
PLU is Disabled Yes = 4
4. Decide if you want a preset or single item PLU. If you do not want any of these
options, enter 0. If you wish to select any of these options, complete the table below by
adding the status digits for each option. Enter the resulting digit.
PLU is Preset Yes = 1
PLU is Single Item Yes = 2
No = 0
Yes = 2
No = 0
No = 0
No = 0
No = 0
+
+
+
=
+
+
=
5. Complete the tax status table below by adding the status digits for each tax. Then enter
the resulting tax status code.
Taxable by Rate 1? Yes = 1
No = 0
Taxable by Rate 2? Yes = 2
No = 0
Taxable by Rate 3? Yes = 4
No = 0
Taxable by Rate 4? Yes = 8
No = 0
+
+
+
+
=
6. Repeat steps 2 through 5 for each PLU you wish to program.
7. Press the CASH/TEND key to end programming.
62 • Advanced Programming Instructions ER-290 Electronic Cash Register
Page 69

PLU Status Programming Flowchart
Repeat for each
PLU
DEPT
KEY
PLU #
PLU
Negative?
Non-Add?
Disabled?
Pres et?
Single
item?
Tax
Status
Code
PLU Status Programming Examples
For example, set:
z PLU#1 preset, not single item, taxable by rate 1, with sales reported to department 2.
z PLU #30 preset, single item, taxable by rate 2, with sales reported to department 4.
z PLU #6 open, not single item, non-taxable, with sales reported to department 9.
To set PLU 1, enter:
001 PLU 1
To set PLU 30, enter:
To set PLU 6, enter:
1
000 PLU3 3
2
2
4
CASH/
TEND
0
0006 PLU
Press the CASH/TEND key to end programming.
CASH/
TEND
The status you have entered will display and print on the printer:
YOUR RECEIPT
THANK YOU
0 3 - 0 1 - 1 9 9 9
* 0 0 1
2 . . . . . . . 1 0 1 T 1
* 0 3 0
4 . . . . . . . 3 0 2 T 2
* 0 0 6
9 . . . . . . . . . 0
0 0 0 0 1 3
0 7 . 2 0 0 0
9
ER-290 Electronic Cash Register Advanced Programming Instructions • 63
Page 70

Programming PLU Entry Limit or Price
Note: Open PLUs are automatically assigned a 7 digit entry limit. You do not
need to program this section for open PLUs, unless you wish to set a different
limit.
If you are programming a open PLU:
z You can limit errors by setting the maximum amount that may be entered into a PLU.
If you are programming a preset PLU:
z You can set the preset price. The price you program here is the amount that is
automatically registered when the PLU is entered.
Programming a PLU Entry Limit or Price
1. Turn the control lock to the PGM position.
2. Enter the number of the PLU you wish to program (1-200), press the PLU key.
3. If the PLU is preset, enter the preset price, up to seven digits (01 to 9999999). (It is not
necessary to enter proceeding zeros. For example enter $1.00 as 100.)
OR
If the PLU is open, enter the highest amount that may be entered into the PLU.
4. Press the @/FOR key.
5. Repeat from step 2 above for each PLU you wish to program.
6. Press the CASH/TEND key to end programming.
64 • Advanced Programming Instructions ER-290 Electronic Cash Register
Page 71

PLU Entry Limit or Price Programming Flowchart
g
Repeat for each Pr eset PLU
PLU
PLU #
(Leading zeros are not nec essary)
Pres et Pr ice
or
h Amount Lock Out
Hi
PLU Entry Limit or Price Programming Examples
For example, set:
z PLU 1 with a preset price of $1.99
z PLU 30 with a preset price of $10.00
z PLU 6 with a entry limit of $5.00
To set PLU 1, enter:
0
@/
FOR
To set PLU 30, enter:
To set PLU 6, enter:
911 PLU
9
0 1 0 PLU 3 0
@/
FOR
@/
FOR
CASH/
TEND
56 PLU
00
Press the CASH/TEND key to end programming.
CASH/
TEND
The status you have entered will print on the printer:
YOUR RECEIPT
THANK YOU
0 3 - 0 1 - 1 9 9 9
* 0 0 1
2 . . . . . . 1 . 9 9 T 1
* 0 3 0
4 . . . . . 1 0 . 0 0 T 2
* 0 0 6
9 . . . . . . 5 . 0 0
0 0 0 0 1 4
0 7 . 2 0 0 0
@/
FOR
ER-290 Electronic Cash Register Advanced Programming Instructions • 65
Page 72

Setting a Register Number
You can program a two digit register number that will print on the lower right corner of each
transaction. If you are using more than one cash register, the register number can be used to identify
the register where the transaction was entered.
YOUR RECEIPT
0 3 - 0 1 - 1 9 9 9
* . . . . . . . . . 9 9 #
0 0 0 0 1 5
0 7 . 2 5 9 9
Register Number
To set a register identification number:
1. Turn the control lock to the PGM position.
2. Enter register number and press the #/NS key:
#/NS9 9
THANK YOU
3. Press the CASH/TEND key to end programming.
CASH/
TEND
66 • Advanced Programming Instructions ER-290 Electronic Cash Register
Page 73

Setting Receipt/Journal Status
The printer can be set to generate customer receipts, or print a sales journal. In the receipt mode, the
printer will print the logo and feed the paper a sufficient length so that a receipt can be torn off. In
the journal mode, there is no additional paper feeding between transactions. The default state of this
program is the RECEIPT status.
To change the printer status from receipt to journal, or from journal to receipt:
1. Turn the control lock to the X position.
2. Enter 9999 on the numeric keypad and press the PAID OUT key.
9 9
9 9
PAID
OUT
Printing a Programming Report
You can generate a printed report of all the programming options.
1. Turn the control lock to the PGM position.
2. Press the CASH/TEND key to print the program report.
ER-290 Electronic Cash Register Advanced Programming Instructions • 67
Page 74

Program Report Example:
>
>
Department Status ->
Department Price or Limit ->
(Department Status and Price/Limit is
listed for each department)
Tax 1 Status ->
Tax 1 Rate ->
Tax 2 Status ->
Tax 2 Rate ->
Tax 3 Status ->
Tax 3 Rate ->
Tax 4 Status ->
Tax 4 Rate Percentage Discount Key Status ->
Percentage Discount Key Rate ->
Percentage Surcharge Key Status ->
Percentage Surcharge Key Rate ->
Minus (-) Key Status ->
Cancel -
System Option Value ->
System Option Value ->
System Option Value ->
(System Option Value is listed for
each option)
System Option Value ->
PLU ->
Department & Status ->
PLU Price ->
(PLU Status and Price is listed
for each PLU that is programmed)
Transaction Counter ->
Time / Register number ->
YOUR RECEIPT
THANK YOU
0 3 - 0 1 - 1 9 9 9
1 . . . . . . . . . 1 T 1
* . . . . . 5 0 . 0 0
2 . . . . . . . . . 0
* . . . . . . 0 . 0 0
.
.
.
1 2 . . . . . . . . 0
* . . . . . . 0 . 0 0
0 0
* . . . . . 6 . 0 0 0 T 1
0 0
* . . . . . 0 . 0 0 0 T 2
0 7
* . . . . . 8 . 0 0 0 T 3
0 0
* . . . . . 0 . 0 0 0 T 4
1 . . . . . . . 1 1 1 %
* . . . . 5 0 . 0 0 0 %
2 . . . . . . . . . 0 %
* . . . . . 0 . 0 0 0 %
* . . . . . . 3 0 1 0 -
* . . . . . . . . . 1 V 3
@ 0 1 0 S O
@ 0 2 0 S O
@ 0 3 0 S O
.
.
@ 1 7 0 S O
* 0 0 1
2 0 1 0 1
* . . . . . . 1 . 9 9 T 1
.
.
0 0 0 0 1 6
0 7 . 3 0 0 0
68 • Advanced Programming Instructions ER-290 Electronic Cash Register
Page 75

Reports
Report Summary
There are two basic types of reports: "X", or read-only and "Z", or read & reset to zero. Some
reports are available in both types.
The following table summaries the reports available on the ER-290:
Report
Control Lock
Position
Key
Financial
Period-to-Date Financial
Hourly Sales
All PLU
String Report (Financial,
PLU and Time reports in
sequence)
From/To PLU
Cash in Drawer
Check in Drawer
X or Z
X or Z
X or Z
X or Z
Z
X
X
X
CASH/
CHARGE2
TOTAL
First PLU
Last PLU
TOTAL
CHECK
TEND
TEND
@/
FOR
PLU
SUB
SUB
PLU
PLU
ER-290 Electronic Cash Register Reports • 69
Page 76

Running a Report
1. Find the report you wish to run from the table on the previous page.
2. Turn the control lock to the X or the Z position.
3. Press the appropriate key for the report you wish to run.
Cash-In-Drawer Declaration
Cash-In-Drawer Declaration is an optional feature that forces you to count the drawer and declare
the drawer count before a report can be run. By forcing the operator to declare, without knowledge
of the expected drawer totals, you are assured that all cash will be deposited. System option #8 must
be set to a value of 1 to enforce cash declaration. See “System Option Programming” on page 48 to
program system options.
Declaring Cash
1. Turn the control lock to the X position.
2. Enter the amount of the cash counted,
press the SUBTOTAL key:
7 99 8
3. The printer will print the declared amount,
the cash-in-drawer total from the cash
register and compute the difference
4. Proceed to run the report you wish to print.
SUB
TOTAL
Note: You must run a report after
declaring cash before registering any
new transactions.
YOUR RECEIPT
THANK YOU
0 3 - 0 1 - 1 9 9 9
* . . . . . 9 8 . 7 9 C A
* . . . . . 8 1 . 5 8 C D
* . . . . . 1 7 . 2 1 T D
0 0 0 0 1 7
0 7 . 3 1 9 9
70 • Reports ER-290 Electronic Cash Register
Page 77

Report Samples
Financial Report
Note: This sample report is shown with items of zero value listed on the report.
Your report may only show totals with values other than zero, depending on
the setting for system option #5.
Report Type/Reset (Z) Counter ->
Department Activity Counter ->
(Department Counters and Totals are
listed for each department)
Department Sales Total ->
YOUR RECEIPT
THANK YOU
0 3 - 0 1 - 1 9 9 9
@ . . . . . . . . . 1 X 1
1 . . . . . . . . 1 8
* . . . . . 3 3 . 0 3
2 . . . . . . . . . 1
* . . . . . . 0 . 0 7
3 . . . . . . . . . 4
* . . . . . 5 0 . 9 9
4 . . . . . . . . . 2
* . . . . . . 3 . 5 0
5 . . . . . . . . . 0
* . . . . . . 0 . 0 0
6 . . . . . . . . . 0
* . . . . . . 0 . 0 0
7 . . . . . . . . . 1
* . . . . . 2 0 . 9 9
.
.
.
1 2 . . . . . . . . 0
* . . . . . . 0 . 0 0
- - - - - - - - -
@ . . . . . . . . 2 6
* . . . . 1 0 8 . 5 8 + D
@ . . . . . . . . . 0
* . . . . . . 0 . 0 0 - D
@ . . . . . . . . 2 6
* . . . . 1 0 8 . 5 8 # T
- - - - - - - - -
Continued on the next page . . .
ER-290 Electronic Cash Register Reports • 71
Page 78

Total of non-taxable sales ->
Taxable sales for tax rate 1 ->
Tax 1 amount collected ->
:
Taxable sales for tax rate 4 ->
Tax 4 amount collected ->
Activity count for discount key ->
Dollar amount of discounts ->
Activity count for surcharge key ->
Dollar amount of surcharges ->
Activity count for -(MINUS) key ->
Dollar amount of -(MINUS) ->
Net Sales total ->
TAX1 credited on negative sales ->
TAX2 credited on negative sales ->
TAX3 credited on negative sales ->
TAX4 credited on negative sales ->
Count of Return Merchandise items ->
Total of Return Merchandise ->
Count of VOID key activity ->
Total of VOID key activity ->
# of VOID key position transactions ->
Dollar amount of VOID key position ->
# of canceled transactions ->
Amount of canceled transactions ->
Gross Sales Total ->
# of Cash sales ->
Dollar amount of Cash sales ->
# of Check sales ->
Dollar amount of Check sales ->
# of Charge1 sales ->
Dollar amount of Charge1 sales ->
# of Charge2 sales ->
Dollar amount of Charge2 sales ->
# of Rec’d on Account transactions->
Total of Rec’d on Accounts ->
* . . . . . 7 5 . 5 5
* . . . . . 3 3 . 0 4 T 1
* . . . . . . 1 . 9 8 T 1
:
* . . . . . . 0 . 0 0 T 4
* . . . . . . 0 . 0 0 T 4
@ . . . . . . . . . 0
* . . . . . . 0 . 0 0 %
@ . . . . . . . . . 0
* . . . . . . 0 . 0 0 %
* . . . . . . 0 . 0 0 -
* . . . . 1 1 0 . 5 7 N T
* . . . . . . 0 . 0 0 P 1
* . . . . . . 0 . 0 0 P 2
* . . . . . . 0 . 0 0 P 3
* . . . . . . 0 . 0 0 P 4
@ . . . . . . . . . 1
* . . . . - 1 0 . 0 0 R T
@ . . . . . . . . . 0
* . . . . . . 0 . 0 0 V 1
@ . . . . . . . . . 0
* . . . . . . 0 . 0 0 V 2
@ . . . . . . . . . 0
* . . . . . . 0 . 0 0 V 3
* . . . . 1 2 0 . 5 7 T L
@ . . . . . . . . . 6
* . . . . . 6 0 . 5 9 C A
@ . . . . . . . . . 2
* . . . . . 1 9 . 9 9 C H
@ . . . . . . . . . 1
* . . . . . 2 9 . 9 9 C 1
@ . . . . . . . . . 0
* . . . . . . 0 . 0 0 C 2
@ . . . . . . . . . 2
* . . . . . 3 0 . 9 9 R A
Continued on the next page . . .
72 • Reports ER-290 Electronic Cash Register
Page 79

# of Paid Out transactions ->
Total of Paid Out transactions ->
Cash in drawer amount ->
Check in drawer amount ->
Count of no sales ->
Customer Count ->
Non-reset table Grand Total ->
Transaction Counter ->
Time/Register Number ->
@ . . . . . . . . . 1
* . . . . . 1 0 . 0 0 P O
* . . . . . 8 1 . 5 8 C D
* . . . . . 1 9 . 9 9 C T
@ . . . . . . . . . 0 N S
@ . . . . . . . . . 9 C S
- - - - - - - - -
* . . . . 4 7 4 . 8 3 # 3
0 0 0 0 1 8
0 7 . 3 3 0 0
ER-290 Electronic Cash Register Reports • 73
Page 80

Hourly Sales Report
>
The Hourly sales report lists the number of transaction and their dollar total for each hour of the day.
YOUR RECEIPT
THANK YOU
0 3 - 0 1 - 1 9 9 9
Report Type/Reset (Z) Counter ->
Time ->
Time Period Activity Counter -
Time Period Sales Total ->
(Counters and Totals are
listed for each time period)
Activity count of all time periods ->
Total of all time periods ->
Transaction Counter ->
Time/Register Number ->
@ . . . . . . . . . 1 X 1
1 0 . 0 0
@ . . . . . . . . . 7
* . . . . . . 7 . 5 9
1 1 . 0 0
@ . . . . . . . . . 1
* . . . . 3 4 6 . 6 7
1 2 . 0 0
@ . . . . . . . . . 9
* . . . . 1 1 0 . 5 7
- - - - - - - - -
@ . . . . . . . . 1 7
* . . . . 4 7 4 . 8 3 T L
0 0 0 0 1 9
0 7 . 3 4 0 0
74 • Reports ER-290 Electronic Cash Register
Page 81

PLU Report
The PLU report lists the activity and sale total for each PLU.
Report Type/Reset (Z) Counter ->
PLU Activity Counter ->
DEPT/PLU price or limit/tax status - >
PLU Sales Total ->
(PLU Counters and Totals are
listed for each PLU)
Activity count of all PLUs ->
Total of all PLUs ->
Transaction Counter ->
Time/Register Number ->
YOUR RECEIPT
THANK YOU
0 3 - 0 1 - 1 9 9 9
@ . . . . . . . . . 1 X 1
* 0 0 1 . . . . . . 1
1 . . . . . . 1 . 9 9 T 1
* . . . . . . 1 . 9 9
* 0 3 0 . . . . . . 1
3 . . . . . 1 0 . 0 0
* . . . . . 1 0 . 0 0
- - - - - - - - -
@ . . . . . . . . . 2
* . . . . . 1 1 . 9 9 T L
0 0 0 0 2 0
0 7 . 3 5 0 0
ER-290 Electronic Cash Register Reports • 75
Page 82

Cash-in-Drawer Report
Run a Cash-in-Drawer report to quickly verify the amount of cash that should be in the cash drawer.
YOUR RECEIPT
THANK YOU
0 3 - 0 1 - 1 9 9 9
Cash in drawer amount ->
Transaction Counter ->
Time/Register Number ->
* . . . . . 8 1 . 5 8 C D
0 0 0 0 2 1
0 7 . 4 0 0 0
Check-in-Drawer Report
Run a Check-in-Drawer report to quickly verify the amount of cash that should be in the cash
drawer.
YOUR RECEIPT
THANK YOU
0 3 - 0 1 - 1 9 9 9
Check in drawer amount ->
Transaction Counter ->
Time/Register Number ->
* . . . . . 1 9 . 9 9 C T
0 0 0 0 2 2
0 7 . 4 0 0 0
76 • Reports ER-290 Electronic Cash Register
Page 83

System Balancing
Department Sales Total
+DEPT TTL (Add All Positive Departments)
+
-DEPT TTL (Add All Negative Departments)
-
ADJST DEPT TTL
=
Net Total
ADJST DEPT TTL
+
TAX1 AMOUNT
+
TAX2 AMOUNT
+
TAX3 AMOUNT
+
TAX4 AMOUNT
+
+% (Surcharge Total)
+
-% (Discount Total)
-
- (Minus Key Total)
-
NET TTL
=
Gross Total
NET TTL
+
RETURN MDSE
+
VOID KEY
+
+% (Surcharge Total)
-
-% (Discount Total)
+
- (Minus Key Total)
+
GROSS TTL
=
Grand Total
Yesterdays Grand Total
+
Gross Total
+
GRAND TOTAL
=
ER-290 Electronic Cash Register Reports • 77
Page 84

JK68-6015A(Rev.02)
 Loading...