

Page 1

Contact SAMSUNG WORLDWIDE
If you have any questions or comments relating to Samsung products,
please contact the SAMSUNG customer care centre.
Country
AUSTRIA 0800-SAMSUNG (726-7864) www.samsung.com/at
BELGIUM 0032 (0)2 201 24 18 www.samsung.com/be
CZECH REPUBLIC
DENMARK 70 70 19 70 www.samsung.com/dk
EIRE 0818 717 100 www.samsung.com/ie
FINLAND 030-6227 515 www.samsung.com/
FRANCE
GERMANY 01805 - SAMSUNG (726-7864) (€ 0,14/Min) www.samsung.com
HUNGARY 06-80-SAMSUNG (726-7864) www.samsung.com
ITALIA 800-SAMSUNG (726-7864) www.samsung.com
LUXEMBURG 0035 (0)2 261 03 710 www.samsung.com/be
NETHERLANDS 0900-SAMSUNG (726-7864) (€ 0,10/Min) www.samsung.com/nl
NORWAY 815-56 480 www.samsung.com/no
POLAND
PORTUGAL 80820-SAMSUNG (726-7864) www.samsung.com/pt
SLOVAKIA 0800-SAMSUNG (726-7864) www.samsung.com/sk
SPAIN 902 10 11 30 www.samsung.com
SWEDEN 0771-400 200 www.samsung.com/se
SWITZERLAND 0800-SAMSUNG (726-7864) www.samsung.com/ch
U.K 0845 SAMSUNG (7267864) www.samsung.com
TURKEY 444 77 11 www.samsung.com
ESTONIA 800-7267 www.samsung.ee
LATVIA 800-7267 www.samsung.com/lv
LITHUANIA 8-800-77777 www.samsung.lt
KAZAHSTAN 8-10-800-500-55-500 www.samsung.kz
KYRGYZSTAN 00-800-500-55-500 RUSSIA 8-800-555-55-55 www.samsung.com
TADJIKISTAN 8-10-800-500-55-500 UKRAINE 8-800-502-0000 www.samsung.com
UZBEKISTAN 8-10-800-500-55-500 www.samsung.uz
Customer Care Centre
844 000 844 www.samsung.com/cz
Distributor pro Českou republiku:
Samsung Zrt., česka organizační složka Vyskočilova 4, 14000 Praha 4
3260 SAMSUNG (€ 0,15/Min)
08 25 08 65 65 (€ 0,15/Min)
0 801 801 881
022-607-93-33
Web Site
www.samsung.com
www.samsung.com/pl
LCD TV
user manual
BN68-01424C-00
imagine the possibilities
Thank you for purchasing this Samsung product.
To receive more complete service, please register
your product at
www.samsung.com/global/register
Model Serial No.
Page 2

Contact SAMSUNG WORLDWIDE
If you have any questions or comments relating to Samsung products, please contact the SAMSUNG
customer care centre.(See back cover for more information)
Precautions When Displaying a Still Image
A still image may cause permanent damage to the TV screen.
• Do not display a still image on the LCD panel for more than 2 hours as it can cause screen
image retention.
This image retention is also known as "screen burn".
To avoid such image retention, reduce the degree of brightness and contrast of the screen when
displaying a still image.
• Watching the LCD TV in 4:3 format for a long period of time may leave traces of
effect to the screen. Damages caused by the above effect are not covered by the Warranty.
• Displaying still images from Video games and PC for longer than a certain period of time may
produce partial after-images.
To prevent this effect, reduce the ‘brightness’ and ‘contrast’ when displaying still images.
© 2008 Samsung Electronics Co., Ltd. All rights reserved.
borders displayed on the left, right and center of the screen caused by the difference
of light emission on the screen. Playing a DVD or a game console may cause a similar
Page 3

Contents
CONNECTING AND PREPARING YOUR TV
List of Parts ........................................................ 2
Installing the Stand
Installing the Wall Mount Kit
Viewing the Control Panel
Viewing the Connection Panel
Viewing the Remote Control
Installing Batteries in the Remote Control
Switching On and Off
Placing Your Television in Standby Mode........... 8
Viewing the Menus
Using the TOOLS Button
Plug & Play
SETTING THE CHANNELS
Storing Channels Automatically ........................11
Storing Channels Manually
Adding / Locking Channels
Sorting the Stored Channels
Assigning Channels Names
Fine Tuning Channel Reception
LNA (Low Noise Amplier)
SETTING THE PICTURE
Changing the Picture Standard ........................ 16
Adjusting the Custom Picture
Conguring Detailed Settings on the Picture
Resetting the Picture Settings to the
Factory Defaults ............................................... 18
Changing the Picture Options
SETTING THE SOUND
Sound Features ................................................ 21
Selecting the Sound Mode
Connecting Headphones (Sold separately)
SETTING THE TIME
Setting and Displaying the Current Time .......... 23
Setting the Sleep Timer
Switching the Television On and Off
Automatically .................................................... 24
FUNCTION DESCRIPTION
Choosing Your Language ................................. 24
Melody / Entertainment / Energy Saving
Selecting the Source
Editing the Input Source Names
Symbol Press Note One-Touch
............................................. 2
............................... 2
.................................. 3
........................... 4
............................... 7
.......... 8
......................................... 8
............................................. 9
.................................... 9
....................................................... 10
.............................. 12
.............................. 13
............................ 14
............................. 14
....................... 15
............................... 15
........................... 17
... 17
.......................... 19
............................... 22
..... 22
.................................... 23
......... 25
........................................ 26
...................... 27
Button
USING THE DTV FEATURE
Previewing the DTV Menu System .................. 28
Updating the Channel List Automatically
Updating the Channel List Manually
Editing Your Favourite Channels
Selecting Channel List
Displaying Programme Information
Viewing the EPG (Electronic Programme
Guide) Information ........................................... 33
Using the Scheduled List
Setting the Default Guide
Viewing All Channels and Favourite Channels
Adjusting the Menu Transparency
Setting up the Parental Lock
Setting the Subtitle
Setting the Subtitle Mode
Selecting the Audio Format
Selecting the Audio Description
Selecting the Digital Text (UK only)
Selecting the Time Zone (Spain only)
Viewing Product Information
Checking the Signal Information
Upgrading the Software
Viewing Common Interface
Selecting the CI (Common Interface) Menu
Resetting
Selecting the Preferred Language
(Subtitle, Audio or Teletext) .............................. 42
Preference ........................................................... 43
.......................................................... 42
..................................... 32
................................. 34
................................. 34
............................ 36
........................................... 37
................................. 37
.............................. 37
............................ 39
................................... 40
.............................. 41
.......... 29
................ 29
...................... 30
.................. 32
.... 35
.................... 35
....................... 38
.................. 38
.............. 39
...................... 40
..... 41
SETTING THE PC
Setting up Your PC Software
(Based on Windows XP) .................................. 44
Display Modes
Setting up the TV with your PC
ABOUT ANYNET
What is Anynet+? ............................................ 46
Connecting Anynet+ Devices
Setting Up Anynet
Scanning and Switching between Anynet+
Devices ............................................................ 48
Recording
Listening through a Receiver
Check Points before Requesting Service
.................................................. 44
........................ 45
+
+
..........................................
......................................................... 50
........................... 46
47
........................... 50
......... 51
RECOMMENDATIONS FOR USE
Teletext Feature ............................................... 52
Wall-Mount Adjustment (Sold separately)
(depending on the model) ................................ 54
Using the Anti-Theft Kensington Lock
(depending on the model) ................................ 55
Troubleshooting: Before Contacting
Service Personnel ............................................ 56
Technical and Environmental Specications
... 57
English
English - 1
Page 4

List of Parts
Please make sure the following items are included with your LCD TV.
If any items are missing, contact your dealer.
M4XL16
Remote Control
& Batteries
(AAA x 2)
Owner’s Instructions Warranty card Safety Guide Registration Cards
Warranty card / Safety Guide /
➣
➣
The stand and stand screw may not be included depending on the model.
Power Cord Cover-Bottom
Registration Cards (Not available in all locations)
Stand Screw
X 4
Stand Cleaning Cloth
Installing the Stand
2
1
1. Connect your LCD TV and the stand.
Two or more people should carry the TV.
➣
Make sure to distinguish between the front and back of the stand when assembling them.
➣
2. Fasten two screws at position 1 and then fasten two screw at position 2.
Stand the product up and fasten the screws. If you fasten the screws with the LCD TV placed
➣
down, it may lean to one side.
The stand is installed for models with the screen size of 37 inch and above.
➣
Installing the Wall Mount Kit
Wall mount items (sold separately) allow you to mount the TV on
the wall.
For detailed information on installing the wall mount, see the
instructions provided with the Wall Mount items. Contact a
technician for assistance when installing the wall mounted bracket.
Samsung Electronics is not responsible for any damage to the
product or injury to yourself or others if you elect to install the TV on
your own.
Do not install your Wall Mount Kit while your TV is turned
on. It may result in personal injury due to electric shock.
Remove the stand and cover the bottom hole with a
➣
cap and fasten with two screws.
English - 2
Page 5

Viewing the Control Panel
Side Panel buttons
1
2
3
4
5
6
The product colour and shape may vary depending on the model.
1 SOURCE
Toggles between all the available input
sources (TV, Ext.1, Ext.2, AV, S-Video,
Component, PC, HDMI1, HDMI2, HDMI3,
DTV). In the on-screen menu, use this button
as you use the ENTER button on the
remote control.
2 MENU
Press to see an on-screen menu of your TV’s
features.
3
Press to decrease or increase the volume.
In the on-screen menu, use the
buttons as you use the ◄ and ► buttons on
the remote control.
4
Press to change channels. In the on-screen
menu, use the buttons as you use
the ▲ and ▼ buttons on the remote control.
(Without the Remote Control, you can turn on
the TV by using the Channel buttons.)
(Power)
5
Press to turn the TV on and off.
6 Remote Control Sensor
Aim the remote control towards this spot on
the TV.
7 Power Indicator
Blinks and turns off when the power is on and
lights up in stand-by mode.
8 Speakers
88
7
English - 3
Page 6
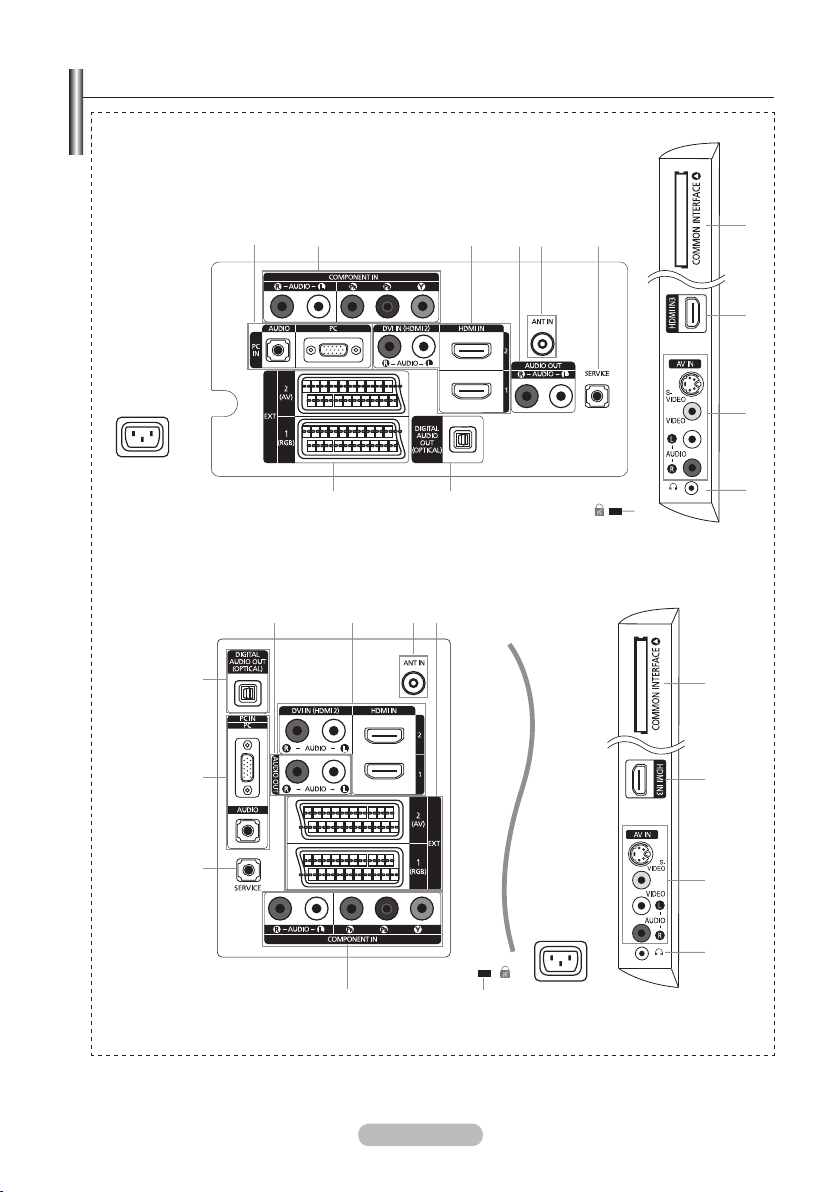
Viewing the Connection Panel
LE40A456, LE40A457, LE40A455
[TV Rear Panel]
2 3 54 61
Power Input
!@
LE26A456, LE26A457, LE32A456, LE32A457, LE32A455, LE37A456, LE37A457
[TV Rear Panel]
4 3 5 @
!
[TV Side Panel]
[TV Side Panel]
7
3
8
9
0
7
1
6
2
The product colour and shape may vary depending on the model.
➣
Whenever you connect an external device to your TV, make sure that power on the unit is turned off.
➣
➣
When connecting an external device, match the colour of the connection terminal to the cable.
English - 4
Power Input
0
3
8
9
Page 7

1 PC IN [PC] / [AUDIO]
-
Connect to the video and audio output jack on your PC.
2 COMPONENT IN
-
Connect component video cables (optional) to component connector ("PR", "PB", "Y") on the rear of
your set and the other ends to corresponding component video out connectors on the DTV or DVD.
-
If you wish to connect both the Set-Top Box and DTV (or DVD), you should connect the Set-Top Box to
the DTV (or DVD) and connect the DTV (or DVD) to component connector ("P
-
The P
R, PB and Y connectors on your component devices (DTV or DVD) are sometimes labeled Y, B-Y
R", "PB", "Y") on your set.
and R-Y or Y, Cb and Cr.
-
Connect RCA audio cables (optional) to "R - AUDIO - L" on the rear of your set and the other ends
to corresponding audio out connectors on the DTV or DVD.
3 HDMI IN 1, HDMI IN 2, HDMI IN 3
Supports connections between HDMI-connection-enabled AV devices (Set-Top Boxes, DVD
-
players)
No additional Audio connection is needed for an HDMI to HDMI connection.
-
When using an HDMI/DVI cable connection, you must use the HDMI IN 2 jack.
-
➣
What is HDMI?
-
“High Denition Multimedia interface” allows the transmission of high denition digital video data
and multiple channels of digital audio.
-
The HDMI/DVI terminal supports DVI connection to an extended device with the appropriate cable
(not supplied). The difference between HDMI and DVI is that the HDMI device is smaller in size, has
the HDCP (High Bandwidth Digital Copy Protection) coding feature installed, and supports
multi - channel digital audio.
DVI IN(HDMI2) [R-AUDIO-L]
-
DVI audio outputs for external devices.
Supported modes for HDMI/DVI and Component
➣
HDMI/DVI 50Hz
HDMI/DVI 60Hz
Component O O O O O O
480i 480p 576i 576p 720p 1080i
X X X O O O
X O X X O O
4 AUDIO OUT [R-AUDIO-L]
-
Connect RCA audio cables to AUDIO OUT [R-AUDIO-L] on the rear of your set and the other ends
to corresponding audio in connectors on the Amplier or DVD Home Theatre.
5 ANT IN
To view television channels correctly, a signal must be received by the set from one of the following
sources:
An outdoor aerial / A cable television network / A satellite network
-
6 SERVICE
LE26A456, LE26A457
-
Connector for SERVICE only.
-
LE32A456, LE32A457, LE32A455, LE37A456, LE37A457, LE40A456, LE40A457, LE40A455
Connect this to the jack on the optional wall mount bracket. This will allow you to adjust the TV viewing
angle using your remote control.
English - 5
Page 8

7 COMMON INTERFACE Slot
When CI Card isn’t inserted in some channels, "Scrambled
-
Signal" is displayed on the screen.
The pairing information containing a telephone number, CI
-
Card ID, Host ID and other information will be displayed in
about 2~3 minutes. If an error message is displayed, please
contact your service provider.
-
When the channel information conguration has nished, the
message "Updating Completed" is displayed, indicating that
the channel list is now updated.
You must obtain a CI Card from a local cable service provider.
➣
Remove the CI Card by carefully pulling it out with your hands since dropping the CI Card may
cause damage to it.
➣
Insert the CI-Card in the direction marked on it.
➣
The place of the COMMON INTERFACE Slot may be different depending on its model.
S-VIDEO or VIDEO / R-AUDIO-L
8
Connect RCA or S-VIDEO cable to an appropriate external A/V device such as VCR, DVD or
-
Camcorder.
Connect RCA audio cables to "R-AUDIO-L" on your set and the other ends to corresponding audio
-
out connectors on the A/V device.
9 Headphones jack
-
Headphone may be connected to the headphone output on your set. While the head phone is
connected, the sound from the built-in speakers will be disabled.
0 Kensington Lock (depending on the model)
The Kensington lock (optional) is a device used to physically x the system when used in a public
-
place.
If you want to use a locking device, contact the dealer where you purchased the TV.
-
The location of the kensington lock may be different depending on its model.
-
DIGITAL AUDIO OUT (OPTICAL)
!
Connect to a Digital Audio Component.
-
When the HDMI IN jacks are connected, the DIGITAL AUDIO OUT (OPTICAL) jack on the TV
➣
outputs 2 channel audio only. If you want to hear 5.1 channel audio, connect the Optical jack on
the DVD player or Cable/Satellite Box directly to an Amplier or Home Theater, not the TV.
@ EXT 1, EXT 2
Connector
EXT 1
EXT 2
-Inputs or outputs for external devices, such as VCR, DVD, video game device or video disc players.
Video Audio (L/R) RGB Video + Audio (L/R)
Input Output
O O O
O O
Only TV or DTV output is available.
Output you can choose.
English - 6
Page 9
TOOLS
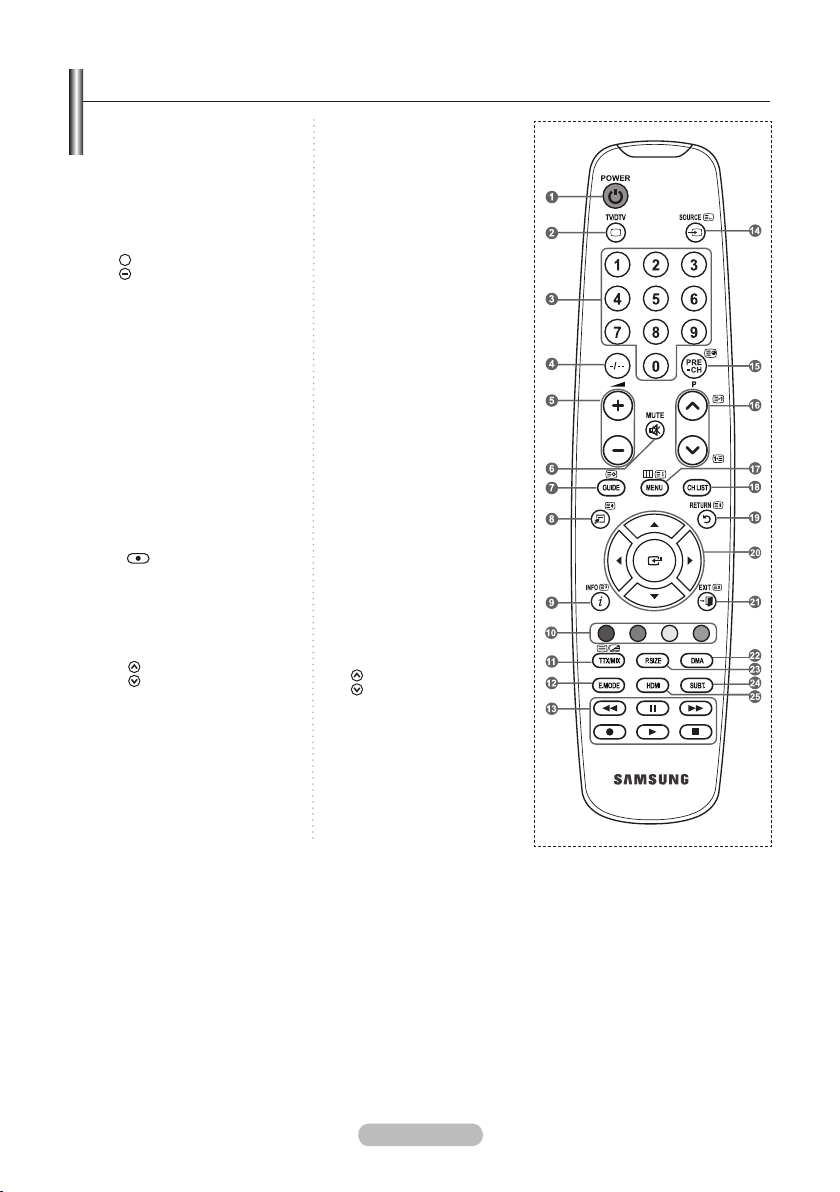
Viewing the Remote Control
1 Television Standby button
2
Selects the TV and DTV
mode directly
3 Number buttons for direct
channel access
4
One/Two-digit channel
selection
5 +: Volume increase
: Volume decrease
6 Temporary sound switch-off
7
Electronic Program Guide
(EPG) display
8 Use to quickly select
frequently used functions.
9
Use to see information on
the current broadcast
0 Colour buttons :
Use these buttons in the
Channel list, etc.
@
Press to select the optional
display and sound modes for
sports, cinema and games.
# Use these buttons in the
DMA, and Anynet+.
(
: This remote can be
used to control recording on
Samsung recorders with the
Anynet+ feature)
$ Available source selection
% Previous channel
^ P
: Next channel
P : Previous channel
&
Displays the main on-screen
menu
*
Displays the Channel List on
screen
(
Returns to the previous
menu
) Control the cursor in the
menu
a Exit the on-screen menu
b Use this when connecting
a SAMSUNG DMA (Digital
Media Adapter) device
through an HDMI interface
and switching to DMA
mode.(The DMA button is
optional.)
For more information on the
operating procedures, refer to
the user manual of the DMA.
This button is available when
+
“Anynet
(HDMI-CEC)" is “On”
(see page 47)
c Picture size selection
d
Digital subtitle display
e
Selects the HDMI mode
directly.
Teletext Functions
2 Exit from the teletext display
7 Teletext store
8 Teletext size selection
9 Teletext reveal
0 Fastext topic selection
!
Alternately select Teletext,
Double, or Mix.
$ Teletext mode selection
(LIST/FLOF)
% Teletext sub page
^
P : Teletext next page
P : Teletext previous page
& Teletext index
( Teletext hold
a Teletext cancel
The performance of the remote control may be affected by bright light.
➣
English - 7
Page 10
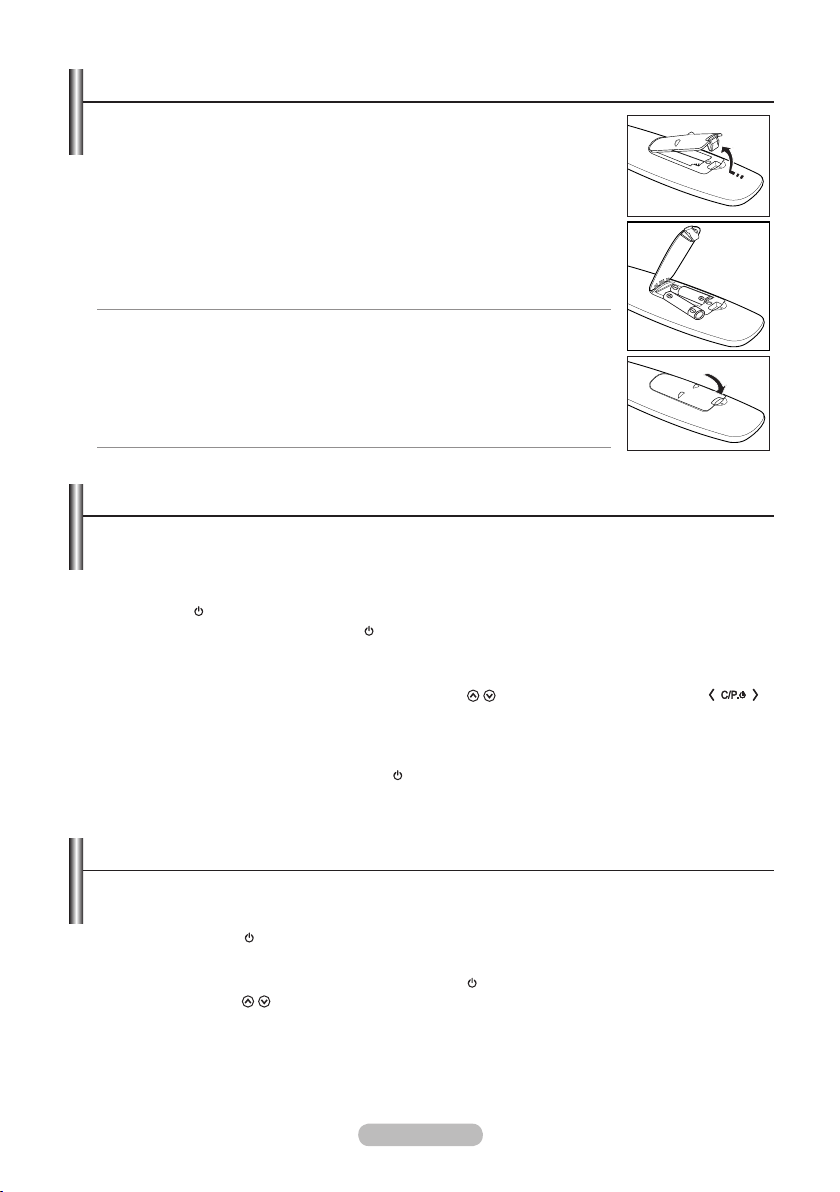
Installing Batteries in the Remote Control
1. Lift the cover at the back of the remote control upward as shown in the
figure.
2. Install two AAA size batteries.
Make sure to match the "+" and "–" ends of the batteries with the
➣
diagram inside the compartment.
3. Replace the cover.
➣
Remove the batteries and store them in a cool, dry place if you won’t
be using the remote control for a long time.
If the remote control doesn’t work, check the following:
➣
1. Is the TV power on?
2. Are the plus and minus ends of the batteries reversed?
3. Are the batteries drained?
4. Is there a power outage, or is the power cord unplugged?
5. Is there a special uorescent light or neon sign nearby?
Switching On and Off
The mains lead is attached to the rear of your set.
1. Plug the mains lead into an appropriate socket.
The standby indicator lights up on your set.
➣
2. Press the button on your set.
You also can press the POWER
➣
the TV on.
The channel that you were watching last is reselected automatically.
➣
3. Press the numeric button (0~9) or channel up/down ( / ) button on the remote control or
button on your set.
When you switch the set on for the very rst time, you will be asked to choose language in which the
➣
menus are to be displayed.
4. To switch your set off, press the POWER button again.
button or the TV/DTV button on the remote control to turn
Placing Your Television in Standby Mode
Your set can be placed in standby mode in order to reduce the power consumption. The standby
mode can be useful when you wish to interrupt viewing temporarily (during a meal, for example).
1.
Press the POWER button on the remote control.
The screen is turned off and a red standby indicator appears on your set.
➣
2. To switch your set back on, simply press the POWER , numeric buttons (0~9), TV/DTV button or
channel up/down ( / ) button again.
➣
Do not leave your set in standby mode for long periods of time (when you are away on holiday,
for example).
It is best to unplug the set from the mains and aerial.
English - 8
Page 11

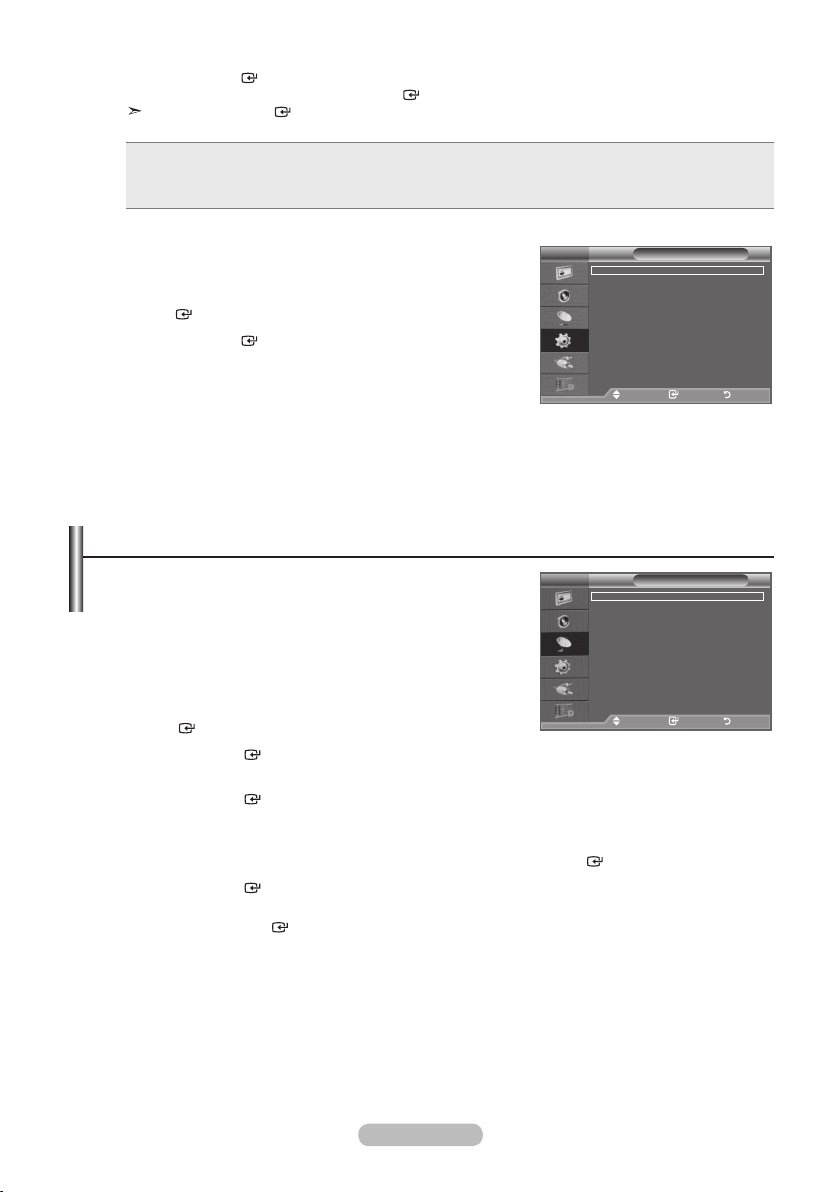
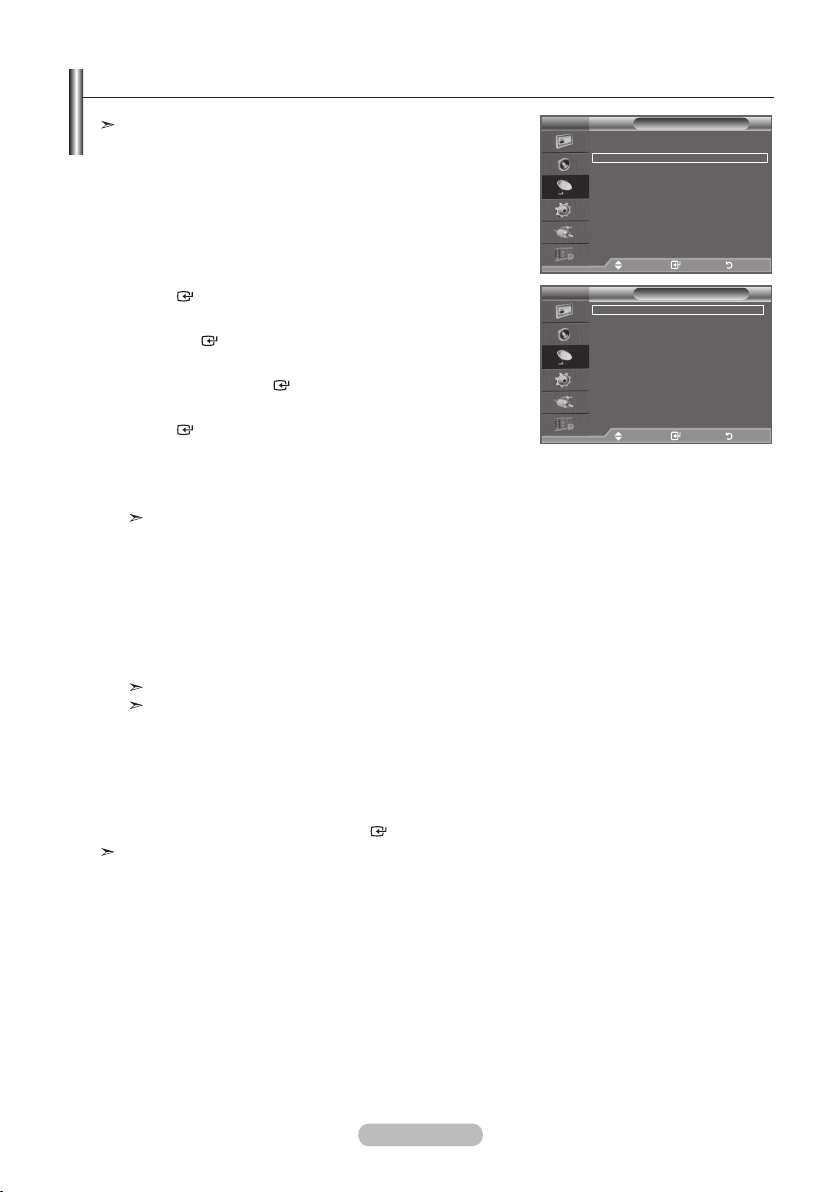
Viewing the Menus
1. With the power on, press the MENU button.
The main menu appears on the screen. The menu’ s left side
has icons: Picture, Sound, Channel, Setup, Input, Digital Menu.
2. Press the ▲ or ▼ button to select one of the icons.
Then press the ENTER button to access the icon’s sub-
menu.
3. Press the EXIT button to exit.
The on-screen menus disappear from the screen after about
one minute.
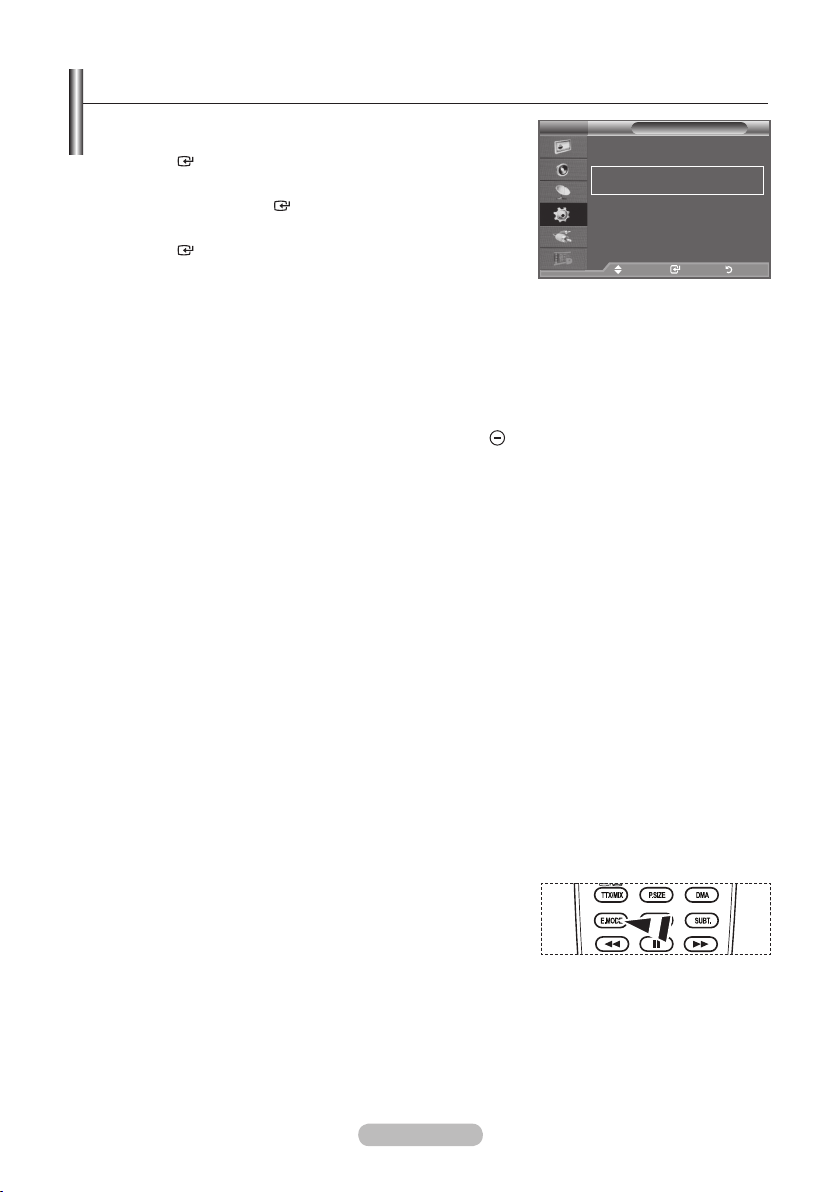
Using the TOOLS Button
You can use the TOOLS button to select your frequently used
functions quickly and easily. The “Tools” menu change depending on
which external input mode you are viewing.
1.
Press the TOOLS button.
The “Tools” menu will appear.
2. Press the ▲ or ▼ button to select a menu.
3. Press the ▲/▼/◄/►/ENTER buttons to display, change, or
use the selected items. For a more detailed description of each
function, refer to the corresponding page.
• Anynet+ (HDMI-CEC), see page 47
• Picture Mode, see page 16
• Sound Mode, see page 21
• Sleep Timer, see page 23
• SRS TS XT, see page 21
• Energy Saving, see page 26
• Dual l-ll, see page 22
• Auto Adjustment, see page 45
TV
Mode : Standard
Backlight 7
Contrast 95
Brightness 45
Sharpness 50
Colour 50
Tint G 50 R 50
Detailed Settings
Picture Options
Reset : OK
Move Enter Return
Anynet+ (HDMI-CEC)
Picture Mode : Standard
Sound Mode : Custom
Sleep Timer : Off
SRS TS XT : Off
Energy Saving : Off
Dual l-ll : Mono
Move Enter Exit
Picture
Tools
English - 9
Page 12

Plug & Play
When the TV is initially powered on, several basic settings
proceed automatically and subsequently. The following
settings are available.
Any functions related to Digital TV (DVB) will only work in
countries or areas where DVB-T (MPEG2) digital terrestrial
signals are broadcasted. Please confirm with your local
dealer if you can receive DVB-T signals. Although this TV set
follows the DVB-T specification, maintaining compatibility with
the future coming DVB-T digital terrestrial broadcasts is not
guaranteed. Several functions may not be available in some countries.
1.
Press the POWER button on the remote control.
The message "Start Plug & Play." is displayed with "OK" selected.
2. Select the appropriate language by pressing the ▲ or ▼ button.
Press the ENTER button to confirm your choice.
3. Press the ◄ or ► button to select “Store Demo” or “Home Use”, then the ENTER button.
We recommend setting the TV to "Home Use" mode for the best picture in your home
environment.
"Store Demo" mode is only intended for use in retail environments.
If the unit is accidentally set to “Store Demo” mode and you want to return to “Home Use”
(Standard): Press the Volume button on the TV. When the volume OSD is displayed, press and
hold the MENU button on the TV for 5 seconds
4. The message "Check antenna input." is displayed with "OK" selected.
Press the ENTER button.
Please check that the antenna cable is connected correctly.
5. Select the appropriate country by pressing the ▲ or ▼ button.
Press the ENTER button to confirm your choice.
6. The message “Some DTV functions may not be available. Digital Scan?” is displayed.
Press the ◄ or ► button to select “Yes” or “No”, then press the
ENTER button.
Plug & Play
Start Plug & Play.
OK
Enter
Yes
:
First an Analogue TV search is performed and then a Digital TV ch. auto search is performed.
No:
Only an Analogue TV search is performed.
This function is supported for all countries except for the following countries: France, Germany,
Italy, Netherlands, Spain, Switzerland, United Kingdom, Austria.
7.
The "Auto Store" menu is displayed with the "Start" selected. Press the
ENTER button.
The channel search will start and end automatically.
The DTV channel scan menu appears and the DTV channel is automatically updated.
If the DTV channel is updated, the Source in the source list of the Input menu is automatically
changed to DTV.
After all the available channels are stored, the "Clock Set" menu appears.
Press the ENTER button at any time to interrupt the memorization process.
For detailed descriptions about DTV channel update, refer to page 29 of this manual.
After all the available digital channels are stored, the screen to select a time zone is displayed
depending on the country.
8. Press the ENTER button.
Select the "Month", "Day", "Year", "Hour", or "Min" by pressing the ◄ or ► button.
Set the "Month", "Day", "Year", "Hour", or "Min" by pressing the ▲ or ▼ button.
You can also set the “Month”, “Day”, “Year”, “Hour” and "Min" by pressing the number buttons on
the remote control.
English - 10
Page 13
9. Press the ENTER button to confirm your setting. The message “Enjoy your viewing” is displayed.
When you have finished, press the
ENTER button.
Even if the ENTER button is not pressed, the message will automatically disappear after
several seconds.
Language
Country
Auto Store
Clock Set
: Select your language.
: Select your country.
: Automatically scans for and stores channels available in the local area.
: Sets the current time for the TV clock.
If you want to reset this feature...
Press the MENU button to display the menu.
1.
Press the ▲ or ▼ button to select "Setup" then press the
ENTER button.
TV
Plug & Play
Language : English
Time
Melody : Off
Entertainment : Off
Energy Saving : Off
Setup
2. Press the ENTER button again, to select "Plug & Play".
For further details on setting up options, refer to the page 10.
The “Plug & Play” feature is only available in the TV mode.
➣
Move Enter Return
Storing Channels Automatically
You can scan for the frequency ranges available to you (and
availability depends on your country).
Automatically allocated programme numbers may not correspond
to actual or desired programme numbers. However, you can sort
numbers manually and clear any channels you do not wish to
watch.
TV
Country : United Kingdom
Auto Store
Manual Store
Channel Manager
Sort
Name
Fine Tune
LNA : Off
1. Press the MENU button to display the menu.
Press the ▲ or ▼ button to select "Channel", then press the
ENTER button.
Move Enter Return
2. Press the ENTER button to select "Country".
3. Select the appropriate country by pressing the ▲ or ▼ button.
Press the ENTER button to confirm your choice.
➣
Even though you have changed the country setting in this menu, the country setting for DTV is
not changed. (Refer to page 29)
4. Press the ▲ or ▼ button to select "Auto Store", then press the ENTER button.
5.
Press the ENTER button.
The TV will begin memorizing all of the available channels.
➣
Press the
➣
ENTER button at any time to interrupt the memorization process and return to the
"Channel" menu.
After all the available channels are stored, the "Sort" menu appears. (refer to page 14)
6.
Channel
English - 11
Page 14
Storing Channels Manually
Not available in DTV or external input mode.
You can store television channels, including those received
via cable networks.
When storing channels manually, you can choose:
♦ Whether or not to store each of the channels found.
♦ The programme number of each stored channel which you wish
TV
Country : United Kingdom
Auto Store
Manual Store
Channel Manager
Sort
Name
Fine Tune
LNA : Off
Channel
to identify.
Press the MENU button to display the menu.
1.
Press the ▲ or ▼ button to select "Channel", then press the
ENTER button.
2. Press the ▲ or ▼ button to select "Manual Store", then press
the ENTER button.
3. Select the required option by pressing the ▲ or ▼ button,
Move Enter Return
TV
Programme : P 1
Colour System : Auto
Sound System : BG
Channel : S 6
Search : 140 MHz
Store : ?
Manual Store
then press the ENTER button.
4. When you are satisfied with your setting, press the
ENTER button.
Press the EXIT button to exit.
5.
Move Enter Return
♦ Programme (Programme number to be assigned to a channel)
− Press the ▲ or ▼ button until you find the correct number.
You can also select the channel number directly by pressing the numeric buttons (0~9).
Colour System: Auto/PAL/SECAM/NTSC4.43
♦
− Press the ▲ or ▼ button to select the required colour standard.
♦
Sound System: BG/DK/I/L
− Press the ▲ or ▼ button to select the required sound standard.
Channel (When you know the number of the channel to be stored)
♦
− Press the ▲ or ▼ button to select C (Air channel) or S (Cable channel).
− Press the ► button, then press the ▲ or ▼ button to select the required number.
You can also select the channel number directly by pressing the numeric buttons (0~9).
If there is abnormal sound or no sound, re-select the sound standard required.
Search (When you do not know the channel numbers)
♦
− Press the ▲ or ▼ button to start the search.
− The tuner scans the frequency range until the first channel or the channel that you selected is
received on the screen.
♦
Store (When you store the channel and associated programme number)
− Set to "OK" by pressing the ENTER button.
Channel mode
− P (Programme mode): When completing tuning, the broadcasting stations in your area have been
assigned to position numbers from P00 to P99. You can select a channel by entering the position
number in this mode.
− C (Air channel mode): You can select a channel by entering the assigned number to each air
broadcasting station in this mode.
− S (Cable channel mode): You can select a channel by entering the assigned number for each
cable channel in this mode.
English - 12
Page 15

Adding / Locking Channels
Not available in DTV or external input mode.
➣
Using the Channel Manager, you can conveniently lock or add
channels.
1.
Press the MENU button to display the menu.
Press the ▲ or ▼ button to select "Channel", then press the
ENTER button.
2. Press the ▲ or ▼ button to select "Channel Manager",
then press the ENTER button.
♦ Adding channels
Using the Channel List, you can add channels.
3. Select "Channel List" by pressing the ENTER button.
4. Move to the ( ) field by pressing the ▲, ▼, ◄ or ►
button, select a channel to be added, and press the
ENTER button to add the channel.
If you press the
➣
next to the channel disappears and the channel is not
added.
"
" is active when "Child Lock" is selected to "On".
➣
♦ Locking channels
This feature allows you to prevent unauthorized users, such
as children, from watching unsuitable programmes by muting
out video and audio.
5.
Press the ▲ or ▼ button to select "Child Lock", then press
the ENTER button.
6.
Select "On" by pressing the ▲ or ▼ button, then press the
ENTER button.
7.
Press the ▲ or ▼ button to select "Channel List",
then press the ENTER button.
8. Move to the " " field by pressing the ▲, ▼, ◄ or ► button,
select a channel to be locked, and press the ENTER
button.
If you press the
➣
next to the channel disappears and the channel lock is
cancelled.
A blue screen is displayed when "Child Lock" is activated.
➣
9.
Press the EXIT button to exit.
Select "On" or "Off" in "Child Lock" to easily turn the
➣
channels which selected on " " to be active or inactive.
ENTER button again, the ( ) symbol
ENTER button again, the ( ) symbol
TV
Country : United Kingdom
Auto Store
Manual Store
Channel Manager
Sort
Name
Fine Tune
LNA : Off
Move Enter Return
TV
Channel List
Child Lock : Off
Move Enter Return
P 1 C3
Prog.
0 C-1 C3
2 BBC 1
3 C74
4 C75
5 C76
6 S3
7 S4
8 S6
9 S7
Add Lock
Move Enter
Page Return
Channel
Channel Manager
Channel List
1 / 10
You can select these options by simply pressing the CH LIST
button on the remote control.
English - 13
Page 16
Sorting the Stored Channels
This operation allows you to change the programme numbers
of the stored channels.
This operation may be necessary after using the auto store.
Not available in DTV or external input mode.
➣
Press the MENU button to display the menu.
1.
Press the ▲ or ▼ button to select "Channel", then press the
ENTER button.
2. Press the ▲ or ▼ button to select "Sort", then press the
ENTER button.
3. Select the channel number that you wish to change by
pressing the ▲ or ▼ button repeatedly.
Press the ENTER button.
The selected channel number and name are moved to
➣
right side.
4. Press the ▲ or ▼ button to move to the position in which you
would like to change and then press the ENTER button.
➣
The selected channel is exchanged with the one
previously stored to the chosen number.
5.
Repeat steps 3 to 4 for another channel to be sorted.
6.
Press the EXIT button to exit.
Assigning Channels Names
Channel names will be assigned automatically when channel
information is broadcast. These names can be changed,
allowing you to assign new names.
Not available in DTV or external input mode.
➣
1. Press the MENU button to display the menu.
Press the ▲ or ▼ button to select "Channel", then press the
ENTER button.
2. Press the ▲ or ▼ button to select "Name", then press the
ENTER button.
3. If necessary, select the channel to be assigned to a new
name by pressing the ▲ or ▼ button. Press the ENTER
button.
➣
The selection bar is displayed around the name box.
4.
To...
Select a letter, number or symbol
Move on the next letter
Move back the previous letter
Confirm the name
➣
The following characters are available: Letters of the alphabet (A~Z) / Numbers
(0~9) / Special characters (+, -, *, /, space)
Repeat steps 3 to 4 for each channel to be assigned to a new name.
5.
Press the EXIT button to exit.
6.
Then...
Press the ▲ or ▼ button
Press the ► button
Press the ◄ button
ENTER button
Press the
TV
Country : United Kingdom
Auto Store
Manual Store
Channel Manager
Sort
Name
Fine Tune
LNA : Off
Move Enter Return
TV
Prog. Ch. Name
0 C-- ---- 1 C23 -----
2 S06 ---- 3 S07 ---- 4 S09 ---- 5 S12 ---- 6 S13 ---- 7 S14 ---- 8 S17 ---- 9 C21 -----
Move Enter Return
TV
Country : United Kingdom
Auto Store
Manual Store
Channel Manager
Sort
Name
Fine Tune
LNA : Off
Move Enter Return
TV
Prog. Ch. Name
0 C-- -----
1 C23 -----
2 S06 ---- 3 S07 ---- 4 S09 ---- 5 S12 ---- 6 S13 ---- 7 S14 ---- 8 S17 ---- 9 C21 -----
Move Enter Return
Channel
Channel
Sort
Name
English - 14
Page 17
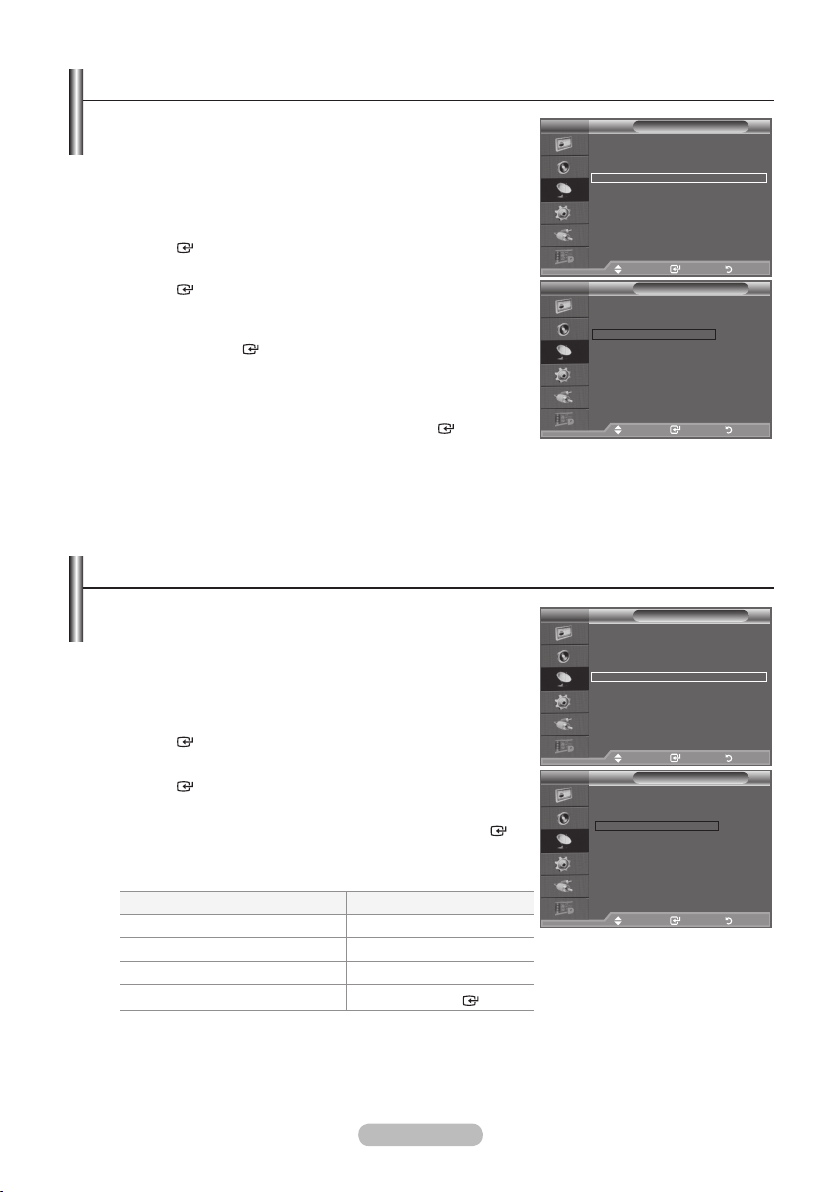
Fine Tuning Channel Reception
Use fine tuning to manually adjust a particular channel for
optimal reception.
Not available in DTV or external input mode.
➣
Use the number buttons to directly select the channel that
1.
you want to fine tune.
2. Press the MENU button to display the menu.
Press the ▲ or ▼ button to select "Channel", then press the
ENTER button.
3. Press the ▲ or ▼ button to select "Fine Tune", then press
the ENTER button.
4. Press the ◄ or ► button to adjust the fine tuning.
Press the ENTER button.
5.
Press the EXIT button to exit.
Fine tuned channels that have been saved are marked
➣
with an asterisk "
number in the channel banner. And the channel number
" on the right-hand side of the channel
*
turns red.
To reset the ne-tuning, select "Reset" by pressing the
➣
▲
or ▼ button and then press the ENTER button.
LNA (Low Noise Amplier)
If the TV is operating in a weak-signal area, the LNA function
can improve the reception (a low-noise preamplifier boosts
the incoming signal).
➣
Not available in DTV or external input mode.
Press the MENU button to display the menu.
1.
Press the ▲ or ▼ button to select "Channel", then press the
ENTER button.
2. Press the ▲ or ▼ button to select "LNA", then press the
ENTER button.
3. Press the ▲ or ▼ button to select "Off" or "On".
Press the ENTER button.
4. Press the EXIT button to exit.
TV
Country : United Kingdom
Auto Store
Manual Store
Channel Manager
Sort
Name
Fine Tune
LNA : Off
Move Enter Return
P 1
Adjust Save Return
TV
Country : United Kingdom
Auto Store
Manual Store
Channel Manager
Sort
Name
Fine Tune
LNA : Off
Move Enter Return
TV
Country : United Kingdom
Auto Store
Manual Store
Channel Manager
Sort
Name
Fine Tune
LNA : Off
Channel
Fine Tune
Reset
Channel
Channel
0
Off
On
English - 15
Move Enter Return
Page 18
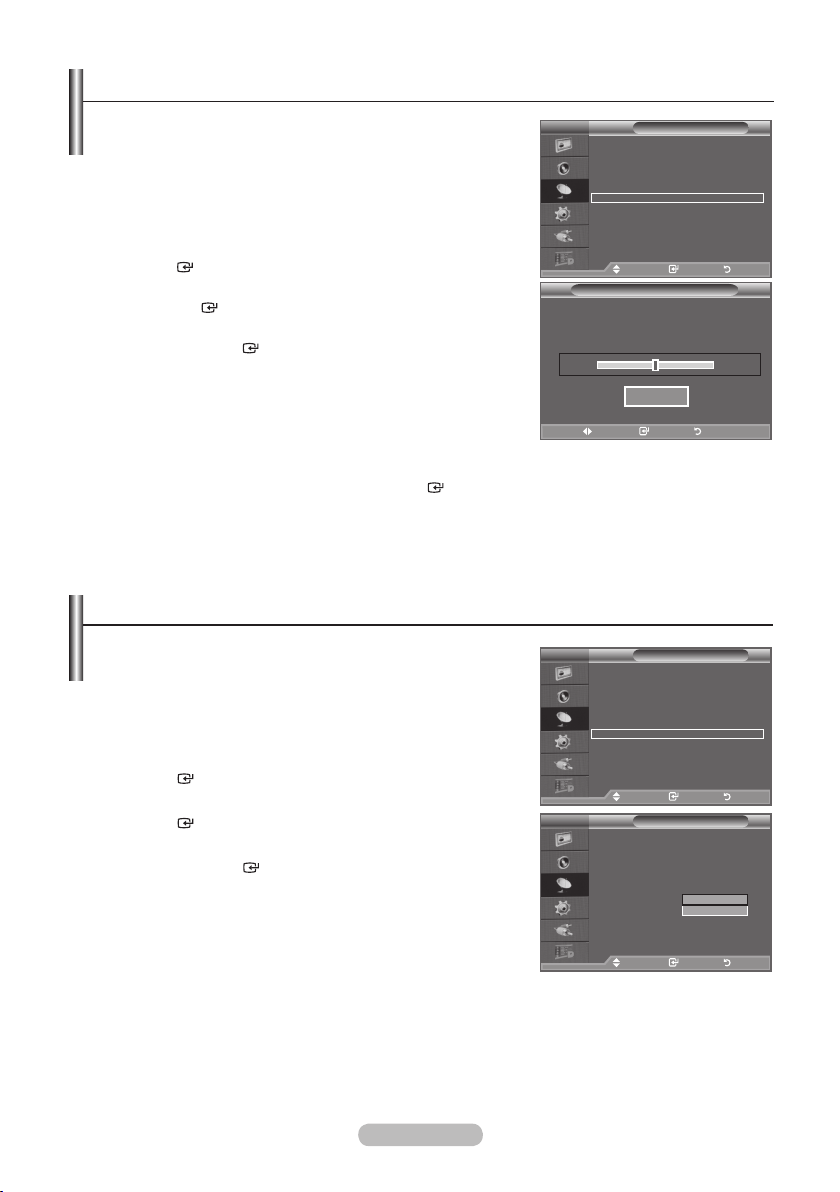
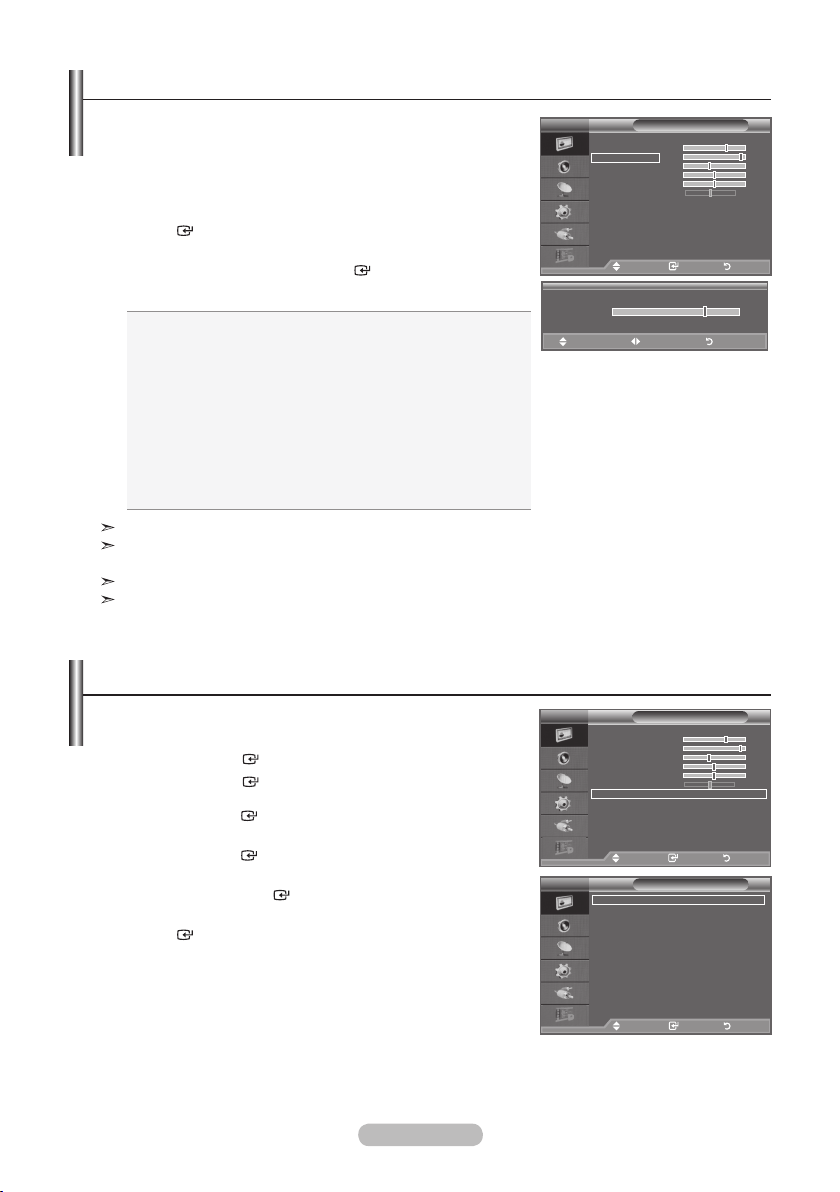
Changing the Picture Standard
You can select the type of picture which best corresponds to
your viewing requirements.
Press the MENU button to display the menu.
1.
Press the ENTER button, to select "Picture".
2. Press the ENTER button again, to select "Mode".
3. Press the ▲ or ▼ button to select the desired picture effect.
Press the ENTER button.
4. Press the EXIT button to exit.
♦ Dynamic: Selects the picture for high-definition in a bright
♦ Standard:
♦ Movie:
The Picture mode must be adjusted separately for each
input source.
room.
Selects the picture for optimum display in a
normal environment.
Selects the picture for comfortable display in a
dark room.
TV
Mode : Standard
Backlight 7
Contrast 95
Brightness 45
Sharpness 50
Colour 50
Tint G 50 R 50
Detailed Settings
Picture Options
Reset : OK
Move Enter Return
TV
Mode : Standard
Backlight 7
Contrast 95
Brightness 45
Sharpness 50
Colour 50
Tint G 50 R 50
Detailed Settings
Picture Options
Reset : OK
Move Enter Return
Picture
Picture
Dynamic
Standard
Movie
Easy Setting
Press the TOOLS button on the remote control.
1.
2. Press the ▲ or ▼ button to select "Picture Mode".
3. Press the ◄ or ► button to select the required option.
4. Press the EXIT or TOOLS button to exit.
Tools
Anynet+ (HDMI-CEC)
Picture Mode ◄ Standard ►
Sound Mode : Custom
Sleep Timer : Off
SRS TS XT : Off
Energy Saving : Off
Dual l-ll : Mono
Move Adjust Exit
English - 16
Page 19
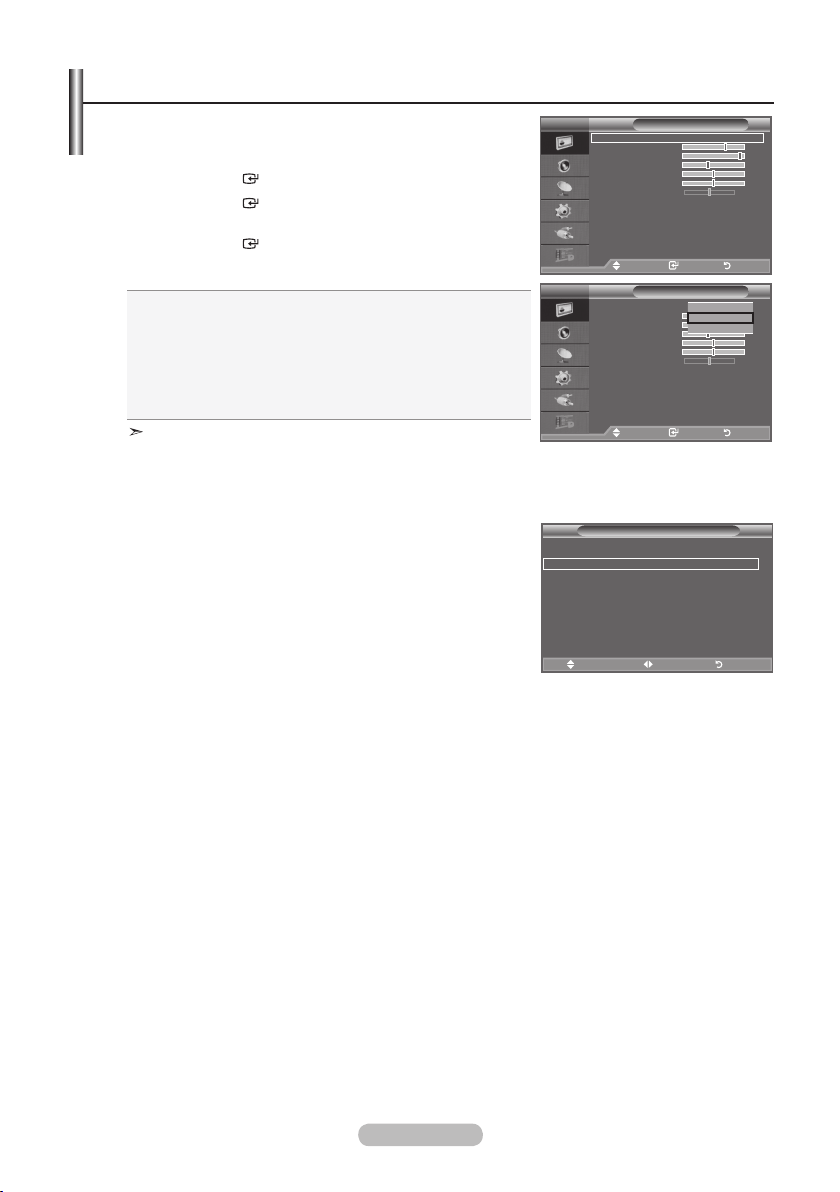
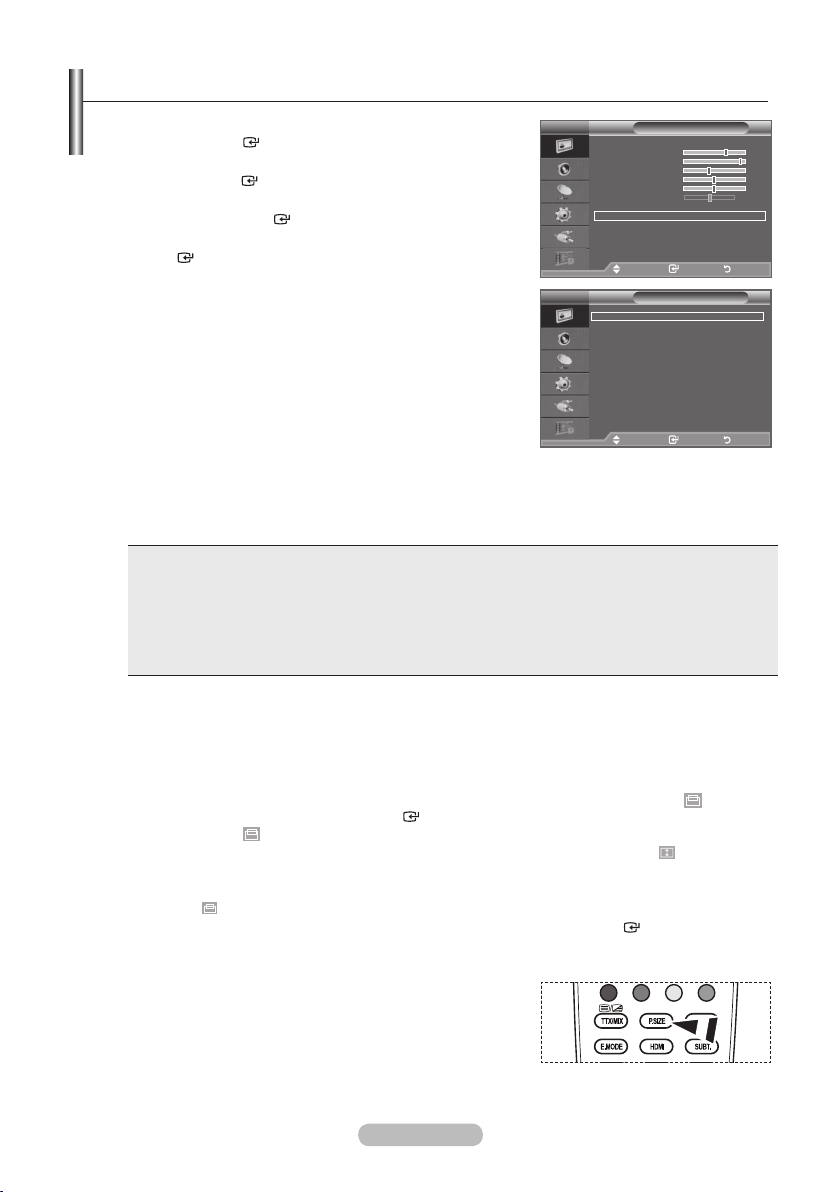
Adjusting the Custom Picture
Your set has several settings which allow you to control
picture quality.
1.
To select the desired picture effect, follow the
"Changing the Picture Standard" instructions number 1 to 3.
(On page 16)
2. Press the ▲ or ▼ button to select a particular item. Press the
ENTER button.
3. Press the ◄ or ► button to decrease or increase the value of
a particular item. Press the ENTER button.
4. Press the EXIT button to exit.
♦ Backlight: Adjusts the screen brightness by adjusting the
LCD backlight brightness. (0~10)
♦ Contrast:
Adjusts the lightness and darkness between
objects and the background.
♦
Brightness: Adjusts the brightness of the whole screen.
♦ Sharpness:
Adjusts the outline of objects to either
sharpen them or make them more dull.
♦
Colour: Adjusts the colours, making them lighter or
darker.
♦ Tint:
Adjusts the colour of objects, making them more red or
green for a more natural look.
The adjusted values are stored according to the selected Picture mode.
In PC mode, you can only make changes to "Backlight", "Contrast" and "Brightness". (26, 32, 37 inch)
In PC mode, you can only make changes to "Contrast" and "Brightness".
In Analogue TV, Ext., AV, S-Video modes of the PAL system, you cannot use the "Tint" Function.
You can return to the factory defaults picture settings by selecting the "Reset".
(Refer to "Resetting the Picture Settings to the Factory Defaults" on page 18)
TV
Mode : Standard
Backlight 7
Contrast 95
Brightness 45
Sharpness 50
Colour 50
Tint G 50 R 50
Detailed Settings
Picture Options
Reset : OK
Move Enter Return
▲
Backlight
▼
Move Adjust Return
(40 inch)
Picture
7
Conguring Detailed Settings on the Picture
You can set detailed picture settings.
1. Press the MENU button to display the menu.
Press the
ENTER button, to select "Picture".
2. Press the ENTER button to select “Mode”.
Press the ▲ or ▼ button to select “Standard” or “Movie”, then
press the
ENTER button.
3. Press the ▲ or ▼ button to select "Detailed Settings", then
press the ENTER button.
4. Select the required option by pressing the ▲ or ▼ button,
then press the ENTER button.
When you are satisfied with your setting, press the
5.
ENTER button.
Press the EXIT button to exit.
6.
"Detailed Settings" is available in "Standard" or "Movie"
➣
mode.
In PC mode, you can only make changes to
➣
“Dynamic Contrast”, “Gamma” and “White Balance” from
among the “Detailed Settings” items.
English - 17
TV
Mode : Standard
Backlight 7
Contrast 95
Brightness 45
Sharpness 50
Colour 50
Tint G 50 R 50
Detailed Settings
Picture Options
Reset : OK
Move Enter Return
TV
Black Adjust : Off
Dynamic Contrast
Gamma : 0
Colour Space
White Balance
Flesh Tone : 0
Edge Enhancement : On
Move Enter Return
Picture
Detailed Settings
: Medium
: Native
Page 20

♦ Black Adjust: Off/Low/Medium/High
You can directly select the black level on the screen to adjust the screen depth.
♦ Dynamic Contrast: Off/Low/Medium/High
You can adjust the screen contrast so that the optimal contrast is provided.
♦ Gamma: -3 ~ +3
You can adjust the Primary Colour (Red, Green, Blue) Intensity.
Press the ◄ or ► button until you reach the optimal setting.
♦ Colour Space: Auto/Native/Custom
Colour space is a Colour matrix composed of red, green and blue colours.
Select your favourite Colour space to experience the most natural Colour.
♦ Auto: Auto Color Space automatically adjusts to the most natural color tone based on program
sources.
♦ Native: Native Color Space offers deep and rich color tone.
♦ Custom: Adjusts the color range to suit your preference.
Customizing the Colour Space
Colour: Red/Green/Blue/Yellow/Cyan/Magenta
Adjusts the Colour range to suit your preference.
“Colour” is available when “Colour Space” is set to “Custom”.
Press the ▲ or ▼ button to select “Red”, “Green”, “Blue”, “Yellow”, “Cyan” or “Magenta”.
Press the
ENTER button.
Red/Green/Blue: In "Colour", you can adjust the RGB values for the selected colour.
Press the ▲ or ▼ button to select "Red", "Green" or "Blue" to change it. Press the
button.
ENTER
Press the ◄ or ► button to decrease or increase the value of a particular item.
Press the
ENTER button.
Reset: Resets the colour space to the default values.
♦ White Balance: R-Offset/G-Offset/B-Offset/R-Gain/G-Gain/B-Gain/Reset
You can adjust the colour temperature for more natural picture colours.
R-Offset/G-Offset/B-Offset/R-Gain/G-Gain/B-Gain: Changing the adjustment value will refresh the
adjusted screen.
Select the required option by pressing the ▲ or ▼ button, then press the ENTER button.
Press the ◄ or ► button until you reach the optimal setting.
Reset: The previously adjusted white balance will be reset to the factory defaults.
Flesh Tone: -15 ~ +15
♦
You can emphasize the pink 'flesh tone' in the picture.
Press the ◄ or ► button until you reach the optimal setting.
Changing the adjustment value will refresh the adjusted screen.
Edge Enhancement: Off/On
♦
You can emphasize object boundaries in the picture.
Resetting the Picture Settings to the Factory Defaults
You can return to the factory defaults picture settings.
To select the desired picture effect, follow the
1.
"Changing the Picture Standard" instructions number 1 to 3
on page 16.
2. Press the ▲ or ▼ button to select "Reset", then press the
ENTER button.
3. Press the ▲ or ▼ button to select "OK" or "Cancel".
Press the ENTER button.
4. Press the EXIT button to exit.
The "Reset" will be set for each Picture mode.
English - 18
TV
Mode : Standard
Backlight 7
Contrast 95
Brightness 45
Sharpness 50
Colour 50
Tint G 50 R 50
Detailed Settings
Picture Options
Reset : OK
Move Enter Return
Picture
OK
Cancel
Page 21
Changing the Picture Options
1. Press the MENU button to display the menu.
Press the ENTER button, to select "Picture".
2. Press the ▲ or ▼ button to select “Picture Options”, then
press the ENTER button.
3. Select the required option by pressing the ▲ or ▼ button,
then press the ENTER button.
TV
Mode : Standard
Backlight 7
Contrast 95
Brightness 45
Sharpness 50
Colour 50
Tint G 50 R 50
Detailed Settings
Picture Options
Reset : OK
Picture
4. When you are satisfied with your setting, press the
ENTER button.
5.
Press the EXIT button to exit.
➣
In PC mode, you can only make changes to the
“Colour Tone” and “Size” from among the items in “Picture
Options”.
Colour Tone: Cool2/Cool1/Normal/Warm1/Warm2
♦
Move Enter Return
TV
Picture Options
Colour Tone : Normal
Size : Auto Wide
Screen Mode : 16:9
Digital NR : Auto
DNle : Off
HDMI Black Level
Blue Only Mode : Off
You can select the most comfortable colour tone to your eyes.
The adjusted values are stored according to the selected
➣
Picture mode.
“Warm1” or “Warm2” is only activated when the picture mode is "Movie".
➣
Size: Auto Wide/16:9/Wide Zoom/Zoom/4:3/Just Scan
♦
Move Enter Return
You can select the picture size which best corresponds to your viewing requirements.
♦ Auto Wide: Automatically adjusts the picture size to the "16:9" aspect ratio.
♦ 16:9: Adjusts the picture size to 16:9 appropriate for DVDs or wide broadcasting.
♦ Wide Zoom: Magnify the size of the picture more than 4:3.
♦ Zoom
: Magnifies the 16:9 wide picture (in the vertical direction) to fit the screen size.
♦ 4:3: This is the default setting for a video movie or normal broadcasting.
♦ Just Scan: Use the function to see the full image without any cutoff when HDMI (720p/1080i) or
Component (1080i) signals are input.
"Auto Wide" function is available only in "TV", "DTV", "Ext.1", "Ext.2", "AV", and "S-Video" mode.
➣
In PC Mode, only "16:9" and "4:3" mode can be adjusted.
➣
Settings can be adjusted and stored for each external device you have connected to an input of
➣
the TV.
Temporary image retention may occur when viewing a static image on the set for more than two
➣
hours.
Wide Zoom
➣
: Move the screen up/down using the ▲ or ▼ button after selecting the by
pressing the ► or ENTER button.
Zoom
➣
: Select by pressing the ◄ or ►button.
Use the ▲ or ▼button to move the picture up and down. After selecting
,
use the ▲ or ▼ button to magnify or reduce the picture size in the vertical direction.
➣
After selecting “Just Scan” in HDMI (1080i) or Component (1080i) mode:
Select by pressing the ◄ or ►button. Use the ▲, ▼, ◄ or ► button to move the picture.
Reset: Press the ◄ or ► button to select “Reset”, then press the ENTER button.
You can initialize the setting.
: Normal
O You can select these options by simply pressing the P.SIZE
button on the remote control.
English - 19
Page 22

♦ Screen Mode
: 16:9/ Wide Zoom/Zoom/4:3
When setting the picture size to "Auto Wide" in a 16:9 wide TV, you can determine the picture size
you want to see the 4:3 WSS (Wide Screen Service) image or nothing. Each individual European
country requires different picture size so this function is intended for users to select it.
♦ 16:9: Sets the picture to 16:9 wide mode
♦ Wide Zoom: Magnify the size of the picture more than 4:3.
♦ Zoom
: Magnify the size of the picture vertically on screen.
♦ 4:3: Sets the picture to 4:3 normal mode.
This function is available in "Auto Wide" mode.
This function is not available in "Component" or "HDMI" mode.
♦
Digital NR: Off/Low/Medium/High/Auto
If the broadcast signal received by your TV is weak, you can activate the Digital Noise Reduction
feature to help reduce any static and ghosting that may appear on the screen.
When the signal is weak, select one of the other options until the best picture is displayed.
♦
DNIe: Off/Demo/On
This TV includes the DNIe function so as to provide a high visual quality. If you set DNIe to on, you
can view the screen with the DNIe feature activated. If you set the DNIe to Demo, you can view the
applied DNIe and normal pictures on the screen, for demonstration purposes. Using this function,
you can view the difference in the visual quality.
DNIe™ (Digital Natural Image engine)
This feature brings you more detailed image with 3D noise reduction, detail enhancement,
contrast enhancement and white enhancement. New image compensation Algorithm gives
brighter, clearer, more detailed image to you. DNIe™ technology will fit every signal into your eyes.
“DNIe” is only available in “Dynamic” mode.
♦ HDMI Black Level: Normal/Low
You can select the black level on the screen to adjust the screen depth.
This function is active only when the external input connects to HDMI(RGB signals).
♦ Blue Only Mode: Off/On
This function is for AV device measurement experts. This function displays the blue signal only by
removing the red and green signals from the video signal so as to provide a Blue Filter effect that is
used to adjust the Colour and Tint of video equipment such as DVD players, Home Theaters, etc.
Using this function, you can adjust the Colour and Tint to preferred values appropriate to the signal
level of each video device using the Red/Green/Blue/Cyan/Magenta/Yellow Colour Bar Patterns,
without using an additional Blue Filter.
“Blue Only Mode” is available when the picture mode is set to “Movie” or “Standard”.
English - 20
Page 23

Sound Features
1. Press the MENU button to display the menu.
Press the ▲ or ▼ button to select "Sound", then press the
ENTER button.
2. Select the required option by pressing the ▲ or ▼ button,
TV
Mode : Custom
Equalizer
SRS TS XT : Off
Auto Volume : Off
TV Speaker : On
Sound
then press the ENTER button.
3. When you are satisfied with your setting, press the ENTER
button.
4. Press the EXIT button to exit.
♦ Mode: Standard/Music/Movie/Speech/Custom
You can select the type of special sound effect to be used
when watching a given broadcast.
Easy Setting
1. Press the
TOOLS button on the remote control.
2. Press the ▲ or ▼ button to select "Sound Mode".
3. Press the ◄ or ► button to select the desired sound mode.
4. Press the EXIT or TOOLS button to exit.
♦ Equalizer: Balance/100Hz/300Hz/1kHz/3kHz/10kHz
The sound settings can be adjusted to suit your personal
Move Enter Return
Tools
Anynet+ (HDMI-CEC)
Picture Mode : Standard
Sound Mode ◄ Custom ►
Sleep Timer : Off
SRS TS XT : Off
Energy Saving : Off
Dual l-ll : Mono
Move Adjust Exit
TV
R
Equalizer
preferences.
➣
If you make any changes to these settings, the sound
mode is automatically switched to "Custom".
L
Balance 100Hz 300Hz 1kHz 3kHz 10kHz
Move Adjust Return
♦ SRS TS XT: Off/On
TruSurround XT is a patented SRS technology that solves the problem of playing 5.1 multichannel
content over two speakers. TruSurround delivers a compelling, virtual surround sound experience
through any two-speaker playback system, including internal television speakers. It is fully
compatible with all multichannel formats.
Easy Setting
Press the TOOLS button on the remote control.
1.
2. Press the ▲ or ▼ button to select "SRS TS XT".
3. Press the ◄ or ► button to select the "Off" or "On".
4. Press the EXIT or TOOLS button to exit.
Anynet+ (HDMI-CEC)
Picture Mode : Standard
Sound Mode : Custom
Sleep Timer : Off
SRS TS XT ◄ Off ►
Energy Saving : Off
Dual l-ll : Mono
Tools
Move Adjust Exit
TruSurround XT, SRS and Symbol are trademarks of SRS Labs,
Inc.TruSurround XT technology is incorporated under license from
SRS Labs, Inc.
English - 21
Page 24
♦ Auto Volume: Off/On
Each broadcasting station has its own signal conditions, and so it is not easy to adjust the volume
every time the channel is changed. This feature lets you automatically adjust the volume of the
desired channel by lowering the sound output when the modulation signal is high or by raising the
sound output when the modulation signal is low.
♦ TV Speaker: Off/On
If you want to hear the sound through separate speakers, cancel the internal amplifier.
The +, - and MUTE buttons do not operate when the "TV Speaker" is set to "Off".
➣
➣
When "TV Speaker" is set to "Off", the Sound menus cannot be adjusted.
Manufactured under license from Dolby Laboratories. Dolby and the
double-D symbol are trademarks of Dolby Laboratories.
Selecting the Sound Mode
You can set the sound mode in the "Tools" menu.
When you set to "Dual I-II", the current sound mode is
displayed on the screen.
Press the TOOLS button on the remote control.
1.
2. Press the ▲ or ▼ button to select “Dual I-II".
3. Press the ◄ or ► button to select required option.
4. Press the ENTER button.
A2
Stereo
NICAM
Stereo
Audio Type Dual
Mono MONO
Stereo STEREO
Dual DUAL
Mono MONO
Stereo MONO
Dual
MONO
↔
1 ↔
↔
↔
DUAL
1/2
MONO
DUAL
2
STEREO
DUAL
1
2
Default
Automatic
change
DUAL 1
Automatic
change
DUAL 1
If the stereo signal is weak and an automatic switching occurs,
then switch to the Mono.
This function is only activated in stereo sound signal. It is
deactivated in mono sound signal.
This function is only available in Analogue TV mode.
Anynet+ (HDMI-CEC)
Picture Mode : Standard
Sound Mode : Custom
Sleep Timer : Off
SRS TS XT : Off
Energy Saving : Off
Dual l-ll ◄ Mono ►
Move Adjust Exit
Tools
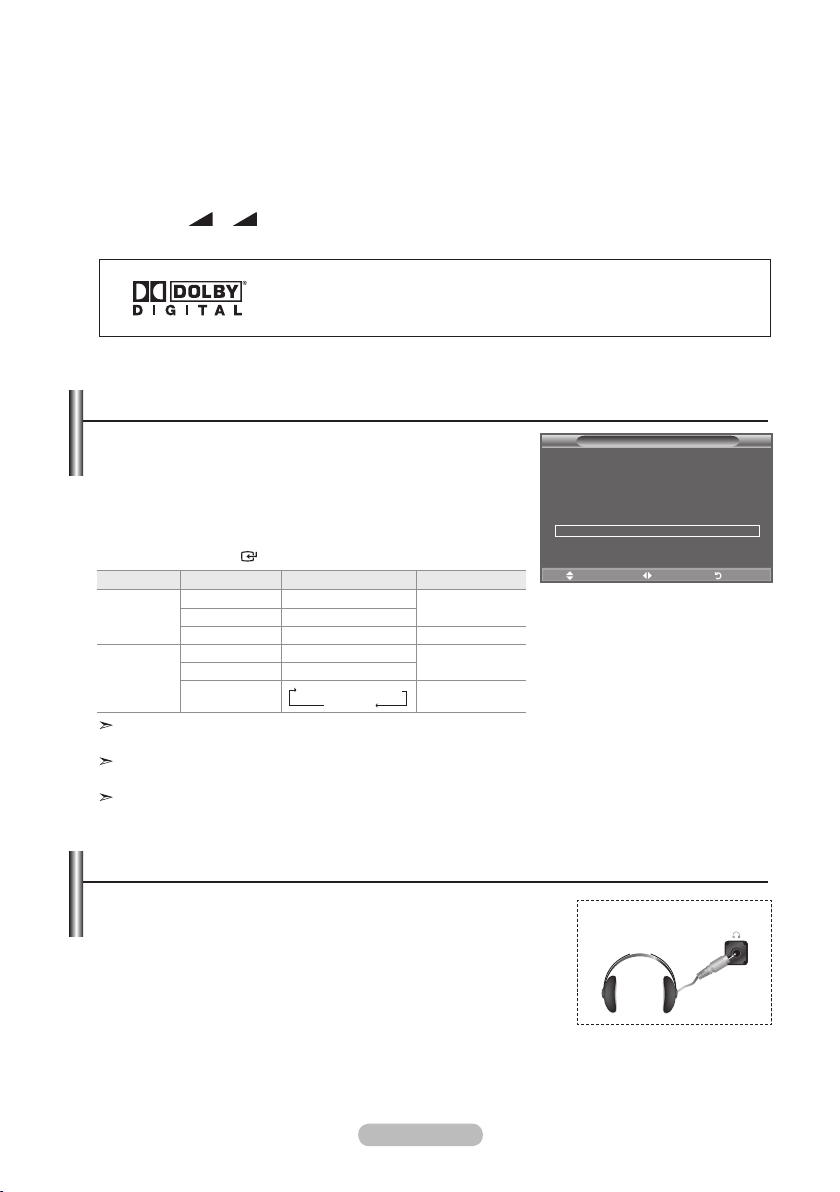
Connecting Headphones (Sold separately)
You can connect a set of headphones to your set if you wish to
watch a TV programme without disturbing the other people in the
room.
When you insert the head set jack into the corresponding port, you
➣
can operate only "Auto Volume" in Sound menu.
Prolonged use of headphones at a high volume may damage your
➣
hearing.
You will not receive sound from the speakers when you connect headphones to the system.
➣
The headphone volume and TV volume are adjusted differently.
➣
English - 22
TV Side Panel
Page 25
Setting and Displaying the Current Time
You can set the TV’s clock so that the current time is
displayed when you press the INFO button. You must also set
the time if you wish to use the automatic On/Off timers.
1.
Press the MENU button to display the menu.
Press the ▲ or ▼ button to select "Setup", then press the
ENTER button.
2. Press the ▲ or ▼ button to select "Time", then press the
ENTER button.
3. Press the ENTER button to select "Clock Set".
4.
To... Press the...
Move to "Month", "Day", "Year", "Hour" or
"Minute"
Set the "Month", "Day", "Year", "Hour" or
"Minute"
Confirm the setting
◄ or ► button.
▲ or ▼ button.
ENTER button.
5. Press the EXIT button to exit.
If you disconnect the power cord, you have to set the clock again.
You can also set "Year", "Month", "Day", "Hour" and "Minute" by pressing the number buttons on
the remote control.
TV
Plug & Play
Language : English
Time
Melody : Off
Entertainment : Off
Energy Saving : Off
Move Enter Return
TV
Month01Day
p
01
q
Hour00Minute
00
Move Adjust Return
Setting the Sleep Timer
Setup
Clock Set
Year
2008
You can select a time period of between 30 and 180 minutes
after which the television automatically switches to standby
mode.
1.
Press the MENU button to display the menu.
Press the ▲ or ▼ button to select "Setup", then press the
ENTER button.
2. Press the ▲ or ▼ button to select "Time", then press the
ENTER button.
3. Press the ▲ or ▼ button to select "Sleep Timer", then press
the ENTER button.
4. Press the ▲ or ▼ button repeatedly until the desired time
appears (Off, 30, 60, 90, 120, 150, 180).
Press the ENTER button.
5.
Press the EXIT button to exit.
The TV automatically switches to standby mode when the
timer reaches 0.
Easy Setting
1.
Press the TOOLS button on the remote control.
2. Press the ▲ or ▼ button to select “Sleep Timer”.
3. Press the ◄ or ► button to select the minute.
4. Press the EXIT or TOOLS button to exit.
English - 23
TV
Plug & Play
Language : English
Time
Melody : Off
Entertainment : Off
Energy Saving : Off
Move Enter Return
TV
Clock Set : 00 : 00
Sleep Timer :
Timer 1 :
Timer 2 :
Timer 3 :
Move Enter Return
Anynet+ (HDMI-CEC)
Picture Mode : Standard
Sound Mode : Custom
Sleep Timer ◄ Off ►
SRS TS XT : Off
Energy Saving : Off
Dual l-ll : Mono
Move Adjust Exit
Tools
Setup
Time
Off
30
60
90
120
150
180
Page 26

Switching the Television On and Off Automatically
1. Press the MENU button to display the menu.
Press the ▲ or ▼ button to select "Setup", then press the
ENTER button.
2. Press the ▲ or ▼ button to select "Time", then press the
ENTER button.
TV
Plug & Play
Language : English
Time
Melody : Off
Entertainment : Off
Energy Saving : Off
3. Press the ▲ or ▼ button to select "Timer 1", "Timer 2",
"Timer 3", then press the ENTER button.
Three different On/Off Timer Settings can be made.
You must set the clock first.
➣
4. Press the ◄ or ► button to select the required item below.
Press the ▲ or ▼ button to adjust to the setting satisfied.
♦ On Time: Select hour, minute, and "On"/"Off". (To activate
timer with the setting satisfied, set to "On".)
♦ Off Time: Select hour, minute, and "On"/"Off". (To activate
timer with the setting satisfied, set to "On".)
♦ Repeat: Select "Once", "Everyday", "Mon~Fri", "Mon~Sat",
Move Enter Return
TV
On Time
5
:
00 00 Off
6
Off Time
:
00 Off
00
Repeat
Once
Volume
10
► Move Adjust Return
Timer 1
or "Sat~Sun".
♦ Volume: Select the desired turn on volume level.
You can set the hour and minute directly by pressing the number buttons on the remote control.
Auto Power Off
When you set the timer On, the TV will eventually turn off, if no controls are operated for 3 hours
after the TV was turned on by timer. This function is only available in timer On mode and prevents
overheating, which may occur if a TV is on for too long time.
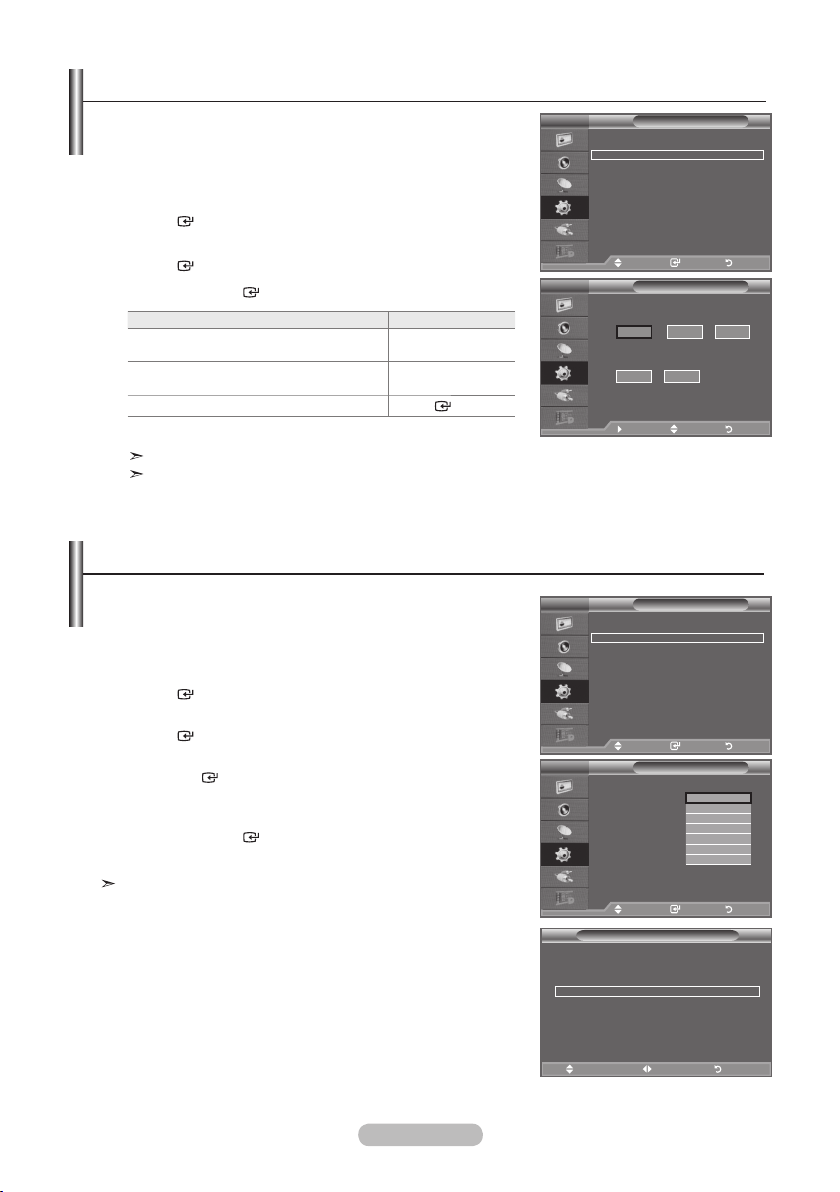
Choosing Your Language
Setup
When you start using your set for the first time, you must
select the language which will be used for displaying menus
and indications.
Press the MENU button to display the on-screen menu.
1.
Press the ▲ or ▼ button to select "Setup", then press the
ENTER button.
2. Press the ▲ or ▼ button to select "Language", then press
the ENTER button.
3. Select a particular language by pressing the ▲ or ▼ button
repeatedly.
Press the ENTER button.
4. Press the EXIT button to exit.
English - 24
TV
Plug & Play
Language : English
Time
Melody : Off
Entertainment : Off
Energy Saving : Off
Move Enter Return
Setup
Page 27
Melody / Entertainment / Energy Saving
1. Press the MENU button to display the menu.
Press the ▲ or ▼ button to select "Setup", then press the
ENTER button.
2. Select the required option by pressing the ▲ or ▼ button,
TV
Plug & Play
Language : English
Time
Melody : Off
Entertainment : Off
Energy Saving : Off
Setup
then press the ENTER button.
3. When you are satisfied with your setting, press the
ENTER button.
4. Press the EXIT button to exit.
Move Enter Return
♦ Melody: Off/Low/Medium/High
The TV power on/off melody sound can be adjusted.
The Melody does not play
➣
- When no sound is output from the TV because the MUTE button has been pressed.
- When no sound is output from the TV because the (Volume) button has been pressed.
- When the TV is turned off by Sleep Timer function.
♦ Entertainment: Off/Sports/Cinema/Game
The “Entertainment” mode enables you to select the optimal display and sound for sports, cinema
and games.
- Off: Switch the "Entertainment" function off.
- Sports: Provides the optimal picture and sound quality for sports. You can enjoy more thrilling
Colour and sound.
- Cinema: Provides the optimal picture and sound quality for cinema. You can experience a richer
picture and enhanced sound.
- Game: Provides the optimal picture and sound quality for games. This mode accelerates the
playing speed when using an external game console connected to the TV.
If you set any of the three “Entertainment” modes to On, the settings will be locked and can not
➣
be adjusted. If you want to make Picture and Sound mode adjustments, the “Entertainment”
mode must be turned off.
➣
The “Entertainment” settings are saved for each input source.
➣
If you set any of the three “Entertainment” modes to On, “SRS TS XT” function is not available.
O You can press the E.MODE button on the remote control
repeatedly to change the “Entertainment” setting.
English - 25
Page 28

♦ Energy Saving: Off/Low/Medium/High/Auto
This feature adjusts the screen brightness depending on the surrounding lighting conditions.
− Off: Turns off the energy saving function.
− Low: Sets the TV to low energy saving mode.
− Medium: Sets the TV to medium energy saving mode.
− High: Sets the TV to high energy saving mode.
− Auto: Automatically adjusts the brightness of the TV screen in accordance with the scenes.
Easy Setting
1. Press the
TOOLS button on the remote control.
2. Press the ▲ or ▼ button to select “Energy Saving”.
3. Press the ◄ or ► button to select the "Off","Low",
"Medium", "High" or "Auto".
4. Press the EXIT or TOOLS button to exit.
This function is not available in “PC” mode.(40 inch)
Selecting the Source
You can select among external sources connected to your
TV’s input jacks.
1. Press the MENU button to display the menu.
Press the ▲ or ▼ button to select "Input", then press the
ENTER button.
2. Press the ENTER button again, to select "Source List".
Available signal sources: TV, Ext.1, Ext.2, AV, S-Video,
Component, PC, HDMI1, HDMI2, HDMI3, DTV.
You can choose only those external devices that are
connected to the TV.
3. Select the required device by pressing the ▲ or ▼ button.
Press the ENTER button.
Press the SOURCE button on the remote control to toggle
O
between all the available source.
TV mode can be selected by pressing the TV/DTV button,
number buttons(0~9), and the P / button on the remote
control.
Tools
Anynet+ (HDMI-CEC)
Picture Mode : Standard
Sound Mode : Custom
Sleep Timer : Off
SRS TS XT : Off
Energy Saving ◄ Off ►
Dual l-ll : Mono
Move Adjust Exit
TV
Source List : TV
Edit Name
Anynet+(HDMI-CEC)
Move Enter Return
TV
TV
Ext.1 : ---Ext.2 : ----
AV : ---S-Video : ---Component : ---PC : ---HDMI1 : ---HDMI2 : ---HDMI3 : ----
DTV
Move Enter Return
Input
Source List
O
You can also watch HDMI mode simply by pressing the HDMI
button on the remote control.
English - 26
Page 29

Editing the Input Source Names
Name the device connected to the input jacks to make your
input source selection easier.
Press the MENU button to display the menu.
1.
Press the ▲ or ▼ button to select "Input", then press the
ENTER button.
2. Press the ▲ or ▼ button to select "Edit Name", then press
the ENTER button.
3. Press the ▲ or ▼ button to select the device that you wish to
edit.
Press the ENTER button.
4. Press the ▲ or ▼ button to select the required device.
Press the ENTER button.
Press the EXIT button to exit.
5.
TV
Source List : TV
Edit Name
Anynet+(HDMI-CEC)
Move Enter Return
TV
Ext.1 : ----
Ext.2 : ----
AV : ----
S-Video : ----
Component : ----
PC : ----
HDMI1 : ----
HDMI2 : ----
HDMI3 : ----
Edit Name
Move Enter Return
Input
----
VCR
DVD
Cable STB
Satellite STB
PVR STB
AV Receiver
Game
q
English - 27
Page 30

Previewing the DTV Menu System
♦ The company does not guarantee the normal operation of the
DTV menu for countries other than the supported countries
(France, Germany, Italy, Netherlands, Spain, Switzerland, United
Kingdom, Austria) because only these country standards are
supported.
In addition, when the country of the broadcast stream differs from
the country selected by the current user, the string appearing in
the channel banner, Info, Guide, Channel Manager, etc. may not
be displayed properly.
Available in DTV mode. Preset to the DTV mode by using the
♦
TV/DTV button on your remote control. To help you navigate
around the on-screen menu system and adjust the various
DTV
settings available, refer to the following illustration.
Press the MENU button to display the menu.
Press the ▲ or ▼ button to select "Digital Menu", then press the
ENTER button.
Guide
Now & Next Guide
Full Guide
Scheduled List
Default Guide
Now/Next, Full Guide
DTV
Channel
Country
Auto Store
Manual Store
Edit Favourite Channels
Channel List
Setup
Menu Transparency
All, Favourites, Default
High, Medium, Low, Opaque
DTV
Change PIN
Parental Lock
Subtitle
Subtitle Mode
Audio Format
Audio Description
Digital Text
Time Zone
Common Interface
System
Off, On
Normal, Hard of hearing
PCM, Dolby Digital
Audio Description Off, On
Volume
Disable, Enable
Application Info, CI Menu
Product Information
DTV
Signal Information
Software Upgrade
Reset
Language
Audio Language
Subtitle Language
Teletext Language
Preference
Primary Audio Language
Secondary Audio Language
Primary Subtitle Language
Secondary Subtitle Language
Primary Teletext Language
Secondary Teletext Language (depending on the country)
The sub-items of the CI Menu may vary depending on the CAM model.
➣
TV
Guide
Digital Channel
Setup
Language
Now & Next Guide
Full Guide
Scheduled List
Default Guide : Full Guide
Country :
Auto Store
Manual Store
Edit Favourite Channels
Channel List
Menu Transparency
Change PIN
Parental Lock
Subtitle : Off
Subtitle Mode
Audio Language
Subtitle Language
Teletext Language
Preference
Digital Menu
Move Enter Return
Guide
Move Enter Return
Channel
Move Enter Return
Setup
: Medium
Move Enter Return
Language
Move Enter Return
United Kingdom
English - 28
Page 31

Updating the Channel List Automatically
You can update the channel list when the broadcaster adds new
Services or if you move the TV to a new location.
1. Press the MENU button to display the menu.
Press the ▲ or ▼ button to select "Digital Menu", then press
the
ENTER button.
2. Press the
▲ or ▼
button to select "Channel", then press the
ENTER button.
3. Press the ENTER button again, to select "Country".
4. Select the appropriate country by pressing the ▲ or ▼ button.
Press the ENTER button to conrm your choice.
Even though you have changed the country setting in this
➣
menu, the country setting for Analogue TV is not changed.
(Refer to page 11)
5. Press the
▲ or ▼
button again, to select "Auto Store".
Press the ENTER button.
➣
When it has nished, the number of scanned services will
be displayed.
The existing favourite channel list will not be deleted when the channel list is updated.
➣
To stop the scan before it has nished, press the
➣
ENTER button with "STOP" selected.
6. Press the EXIT button to exit.
➣
If the signal status is poor, the "No Service found! Check the aerial connection" message is
displayed.
DTV
Country :
Auto Store
Manual Store
Edit Favourite Channels
Channel List
Move Enter Return
Mode : Custom
DTV
Equalizer
SRS TS XT : Off
Auto Volume : Off
Scanning for digital services...
Internal Mute : Off
Reset
Services found: 24 Channel: 38
Move Enter Return
Return
Updating the Channel List Manually
You can specify the channel for a fast channel search.
1. Press the MENU button to display the menu.
Press the ▲ or ▼ button to select "Digital Menu", then press
the ENTER button.
2. Press the
▲ or ▼
button to select "Channel", then press the
ENTER button.
3. Press the
▲ or ▼
button to select "Manual Store", then press
the ENTER button.
4. Press the
➣
▲ or ▼
button to select the required option, then press the ENTER button.
− Channel : Channel "5" to "69" in sequence are displayed (depending on the country)
− Frequency : The frequency available in the Channel group is displayed.
− Bandwidth : The available bandwidths are 7 and 8 MHz.
➣
Press the red button to start the scan for digital services.
When it has finished, channels are updated in the channel list.
5.
When it has nished, the number of scanned services will be displayed.
6. Press the EXIT button to exit.
DTV
Channel
▲
5
▼
Search
Adjust Return
Channel
United Kingdom
Auto Store
35%
Stop
Manual Store
Frequency Bandwidth
KHz MHz
177500
7
English - 29
Page 32

Editing Your Favourite Channels
You can edit your favourite channels using the four colour
buttons.
1. Press the MENU button to display the menu.
Press the ▲ or ▼ button to select "Digital Menu", then press the
ENTER button.
2. Press the ▲ or ▼ button to select "Channel", then press the
ENTER button.
3. Press the ▲ or ▼ button to select "Edit Favourite Channels",
then press the ENTER button.
4. Press the red button to display all currently stored channels.
5. Press the ▲ or ▼ button to select a channel you want.
Press the ENTER button.
A "" icon is shown next to the selected channel and the
➣
channel will be added to the favourite channel list.
➣
•
To undo, press the
•
Select All: Select all channels currently displayed.
•
Select None: Deselect all selected channels.
•
Preview: Displays (a) currently selected channel(s).
The Favourite Channels settings have been completed.
➣
6. Press the EXIT button to exit.
ENTER button again.
♦ Add
You can use this function when one or more favourite channels
have been selected.
1. Press the MENU button to display the menu.
Press the ▲ or ▼ button to select "Digital Menu", then press the
ENTER button.
2. Press the ▲ or ▼ button to select "Channel", then press the
ENTER button.
3. Press the ▲ or ▼ button to select "Edit Favourite Channels",
then press the ENTER button.
4. Press the red button in the "Edit Favourite Channels" menu.
To add more channels, refer to the step 5 on the previous description.
5.
If you want to check the channel to be stored, press RETURN
button.
Press the
➣
EXIT button to exit.
• To add all channels to the favourite channel list, press theTo add all channels to the favourite channel list, press the
red button.
• To remove all channels, press the green button.To remove all channels, press the green button.
• Preview : Displays (a) currently selected channel(s).
• Press thePress the CH LIST button to display the favourite channel
manager.
DTV
(no channels)
DTV
5
2 BBC TWO
5 Five
7 BBC THREE
15 abc1
16 QVC
6
DTV
2 BBC TWO ★
7 BBC THREE ★
15 abc1 ★
DTV
5
2 BBC TWO ★
5 Five
7 BBC THREE ★
15 abc1 ★
16 QVC
6
Edit Favourite Channels
Move Enter Return
Add Channels
Return
Edit Favourite Channels
Move Enter Return
Select All Select None Preview
Move Select Return
Edit Favourite Channels
Move Enter Return
Add
Renumber
Preview Delete
Move Return
Edit Favourite Channels
Move Enter Return
Select All Select None Preview
Move Select Return
English - 30
Page 33

♦ Renumber (depending on the country)
1. Press the MENU button to display the menu.
Press the ▲ or ▼ button to select "Digital Menu", then press the
ENTER button.
2. Press the ▲ or ▼ button to select "Channel", then press the
ENTER button.
3. Press the ▲ or ▼ button to select "Edit Favourite Channels",
then press the ENTER button.
4. Select the required channel using the ▲ or ▼ button.
5. Press the green button.
The space for entering the number is a blank.
➣
6. Enter the new channel number. Press ENTER button to store
or RETURN button to cancel.
Press the ◄ button to delete an entered digit.
➣
If you enter a number already assigned to another channel,
➣
the number is assigned to the selected channel and the
previous number assigned to the selected channel is
assigned to the other channel.
That is, the two numbers are exchanged.
The Favourite
➣
Channels are automatically sorted in
ascending order of channel numbers.
7.
Press the EXIT button to exit.
DTV
Edit Favourite Channels
2 BBC TWO ★
BBC THREE ★
-- 15 abc1 ★
Move Enter Return
Edit Return Conrm
♦ Preview
1. In the "Edit Favourite Channels" menu, select the channel to be
previewed by pressing the ▲ or ▼ button.
2. Press the yellow button.
The selected channel is displayed on the screen.
➣
♦ Delete
1. In the "Edit Favourite Channels" menu, select the channel to be
deleted from the favourite channels list by pressing the
▲ or ▼ button.
2. Press the blue button.
The selected channel and number will be deleted.
➣
➣
To add a deleted channel back in to the favourite channel
list, see "Add" on page 30.
English - 31
DTV
DTV
Edit Favourite Channels
2 BBC TWO ★
7 BBC THREE ★
15 abc1 ★
Add
Renumber
Move Return
Edit Favourite Channels
2 BBC TWO ★
7 BBC THREE ★
Add
Move Return
Preview Delete
Renumber
Preview Delete
Page 34

Selecting Channel List
You can exclude the channels you have chosen from the
channels you have scanned.When you scan through the
stored channels, those you have chosen to skip are not
displayed. All channels that you do not specifically choose to
skip are displayed during scanning.
1. Press the MENU button to display the menu.
Press the ▲ or ▼ button to select "Digital Menu", then press
the ENTER button.
2. Press the ▲ or ▼ button to select "Channel", then press the
Test Card M' v2.0
1 Test Card M' v2.0
3 Vida003b
4 Vida004b
5 vida005b
6 vida006b
15 Ch 15
16 QVC
17 UKTV Gold
Previous Page Next/Page Favourites TV
ENTER button.
3. Press the ▲ or ▼ button to select "Channel List".
Press the ENTER button.
4.
Press the ▲ or ▼ button to select "All", "Favourites" or "Default".
Press the ENTER button.
5. Press the yellow button to toggle between your favourite channels
It can be displayed simply by
pressing the CH LIST button.
and all channels.
Your favourite channels are only displayed if they were
➣
previously set in the "Editing Your Favourite Channels" menu
(refer to page 30).
6. Press the red or green button to display the previous or next channel List page.
7. Press the ▲ or ▼ button to select a channel to be tuned.
Press the ENTER button.
The channel number, name and an icon are displayed in the top left corner while changing the
➣
channel. The channel number and name are displayed if the channel is one of the all channels,
and a icon if the channel is one of the favourite channels.
8. Press the blue button to toggle between your "TV", "Radio", "Data/Other" and "All".
9. Press the CH LIST button to exit from the channel List.
Channel List
23 bid-up.tv
25 TCM
26 UKTV Style
27 Discovery
28 DiscoveryH&L
15 Cartoon Nwk
33 Boomerang
55 Ttext Holidays
Move Watch Return
All Channels-All
60 Television X
70 BBC Radio 1
72 BBC Radio 2
73 BBC Radio 3
74 BBC Radio 4
84 heat
91 MOJO
800 ARD-MHP-Data
6 More
1/2
Displaying Programme Information
While viewing a channel, additional information about the current programme may be displayed.
1. While viewing a programme, press the INFO button.
The programme information is displayed.
➣
2. To exit from banner information, press the INFO button.
The information is displayed:
➣
− Parental Rating
− Video Type: SD, HD, Radio
− Audio Type: Mono, Stereo, Dual, Dolby Digital
− Existence of Teletext or DVB Subtitle
− Audio Language
English - 32
1 AFDO,16:9
AFDO 16:9
No Block
SD
Stereo
Subtitle
English
Exit
14:30 Sat 1 Sep
AII Channels
14:30~14:33
Contains video with AFD O; coded frame
is 16:9
Move Enter Return
A
Page 35

Viewing the EPG (Electronic Programme Guide) Information
The EPG (Electronic Programme Guide) information is provided
by the broadcasters. Programme entries may appear blank or
out of date as a result of the information broadcast on a given
channel. The display will dynamically update as soon as new
information becomes available.
♦ Now & Next Guide
For the six channels indicated in the left-hand column,
displays the Current programme and the Next programme
information.
♦ Full Guide
Displays the programme information as time ordered One
hour segments. Two hours of programme information is
displayed which may be scrolled forwards or backwards in
time.
1. Press the MENU button to display the menu.
Press the ▲ or ▼ button to select "Digital Menu", then press the
ENTER button.
2. Press the ENTER button, to select "Guide".
3. Press the ▲ or ▼ button to select "Now & Next Guide" or
"Full Guide".
Press the ENTER button.
You can also display the guide menu simply by pressing
➣
the GUIDE button.
4.
To... Then...
Watch a programme in the EPG list
If the next programme is selected, it is scheduled with the clock icon
displayed. If the
cancelled with the clock icon gone. For details about scheduling
programmes, refer to the next page.
View programme information
Toggle between the "Now & Next
Guide" or "Full Guide"
Display the "Favourites" and the "All
Channels" list
Scrolls backwards quickly (24 hours). • Press the yellow button repeatedly.
Scrolls forward quickly (24 hours). • Press the blue button repeatedly.
Exit the guide • Press the
ENTER button is pressed again, the scheduling is
• Select a programme by pressing
the ▲, ▼, ◄, ► button.
ENTER button.
• Press the
• Select a programme of your choice by
pressing the ▲, ▼, ◄, ► button.
• Press the INFO button when the
programme of your choice is
highlighted.
• Press the red button repeatedly.
• Press the green button repeatedly.
EXIT button.
All Channels
Watch
Watch
Now/Next Favourites -24Hours +24Hours Exit
Now & Next Guide
Full Guide
13:28 Wed 16 Feb
13:28 Wed 16 Feb
INFO
27 Discovery
Extreme Machines: Armoured Cars
Now Next
Full Guide Favourites Exit
27 Discovery
Extreme Machines: Armoured Cars
13:00 14:00Today
INFO
➣
The programme title is on the upper part of the screen center. Please click on INFO button for
the detailed information. Channel Number, Running Time, Status Bar, Parental Level, Video Quality
Information(HD/SD), Sound Modes, Subtitle or Teletext, Languages of Subtitle or Teletext, and
brief summary of the highlighted programme are included on the detailed information. "..." will be
appeared if the summary is long.
➣
Six channels are displayed. To scroll between channels, move to a channel using the ▲ or ▼ button.
To display page by page, use the P
<
or P> button.
English - 33
Page 36

Using the Scheduled List
If you make a scheduled viewing list of programs you may like to
see, the channel will be automatically switched to the scheduled
programme at the scheduled time even if you are watching another
programme.
1. Press the MENU button to display the menu.
Press the ▲ or ▼ button to select "Digital Menu", then press the
ENTER button.
2. Press the ENTER button, to select "Guide".
3. Press the ▲ or ▼ button to select "Scheduled List", then press
the ENTER button.
4. Press the red button.
The channel will be switched to the scheduled programme.
5. Press the ENTER button to select an item and adjust with the
▲ or ▼ button .
You can also set hour and minute by pressing the number
➣
buttons on the remote control.
•
Channel: Set the channel.
•
Time: Set the time.
•
Date: Set Year, Month and Day.
•
Frequency: Set the frequency.
6. After setting the schedule, Press the red button.
7. Press the EXIT button to exit.
•
➣
Save: Save the adjusted schedule.
•
Cancel: Cancel the adjusted schedule.
•
Add Programme: Add a new schedule.
•
Edit: Readjust the selected schedule.
•
Delete: Delete the selected schedule.
("Once", "Daily", or "Weekly")
DTV
(No programmes)
Add Programme
Return
DTV
Tuesday 22 Apr 15:30 ~ 16:00 Once
801 RaiTre
Add Programme Edit Delete
Move Return
DTV
Channel
Time
Date
Frequency
Save Cancel
Adjust Move Return
Scheduled List
Scheduled List
Scheduled List
802 RaiUno
15 : 20 to -- : --
Tue 22 Apr 2007
Once
Setting the Default Guide
You can preset the default guide style.
1. Press the MENU button to display the menu.
Press the ▲ or ▼ button to select "Digital Menu", then press the
ENTER button.
2. Press the ENTER button, to select "Guide".
3. Press the ▲ or ▼ button to select "Default Guide", then press
the ENTER button.
4. Select "Now/Next" or "Full Guide" using the ▲ or ▼ button,
and press the
5. Press the EXIT button to exit.
ENTER button.
English - 34
DTV
Now & Next Guide
Full Guide
Scheduled List
Default Guide : Full Guide
Guide
Now/Next
Full Guide
Move Enter Return
Move Enter Return
You can select these options
by simply pressing the GUIDE
button on the remote control.
Page 37

Viewing All Channels and Favourite Channels
In the EPG menu, you can display all channels or favourite
channels.
Press the MENU button to display the menu.
1.
Press the ▲ or ▼ button to select "Digital Menu", then press the
ENTER button.
2. Press the ENTER button again, to select "Guide".
3. Select the your required guide ("Now & Next Guide" or "Full
All Channels
Guide") by pressing the ▲ or ▼ button.
4. Press the ENTER button.
5. Press the green button.
All the channel lists and the Favourite Channel lists will be
toggled.
6.
Select a programme of your choice by pressing the ▲, ▼, ◄, or
Watch
► button.
7.
Press the INFO button to display information about the
highlighted programme.
8. When the Edit Favourite Channels list has not been set up:
•
"The favourites list is empty.
Would you like to choose your favourites now?" message is
Today
displayed.
•
Select "Yes".
The "Edit Favourite Channels" menu is displayed.
If you select "No", all channels will remain unchanged.
• To edit the favourite channels, refer to pageTo edit the favourite channels, refer to page 30 for more
Watch
Now/Next Favourites -24Hours +24Hours Exit
details.
9 . Press the EXIT button to exit.
All Channels" is the list of channels that have been scanned by the channel list update.
➣
"
All channels are displayed in the all channel mode.
Favourites" (favourite channels) is the list of channels that has been set in the "Edit Favourite Channels"
➣
"
menu (refer to page 30).
Now & Next Guide
27 Discovery
Extreme Machines: Armoured Cars
Now Next
Full Guide Favourites Exit
27 Discovery
Extreme Machines: Armoured Cars
The favourites list is empty.
Would you like to choose your
favourites now?
Yes No
Full Guide
13:28 Wed 16 Feb
INFO
13:28 Wed 16 Feb
INFO
Adjusting the Menu Transparency
You can set the Transparency of the menu.
Press the MENU button to display the menu.
1.
Press the ▲ or ▼ button to select "Digital Menu", then press the
ENTER button.
2. Press the ▲ or ▼ button to select "Setup", then press the
ENTER button.
3. Press the ▲ or ▼ button to select "Menu Transparency" then
press the ENTER button.
4. Select the required option ("High", "Medium", "Low", or
"Opaque") by pressing the ▲ or ▼ button, and press the
ENTER button to change the setting.
5.
Press the EXIT button to exit.
English - 35
DTV
Menu Transparency
Change PIN
Parental Lock
Subtitle : On
Subtitle Mode
Move Enter Return
Setup
: Medium
High
Medium
Low
Opaque
Page 38

Setting up the Parental Lock
This feature allows you to prevent unauthorized users, such
as children, from watching unsuitable programmes by a 4-digit
PIN (Personal Identification Number) code that is defined by the
user. The on-screen menu will instruct you to assign a PIN code
(you can change it later, if necessary).
1. Press the MENU button to display the menu.
Press the ▲ or ▼ button to select "Digital Menu", then press the
ENTER button.
2. Press the ▲ or ▼ button to select "Setup", then press
the ENTER button.
3. Press the ▲ or ▼ button to select "Parental Lock.", then
press the ENTER button.
4.
The "Enter PIN" is displayed.
5. Enter your current 4-digit PIN code by using the numeric
buttons (0~9).
The default PIN code for a new TV set is 0000.
➣
➣
If you enter an invalid PIN code,the "Invalid PIN code.
Please try again." message is displayed.
6. Press the ENTER button.
7. Press the ▲ or ▼ button to select the age rating you want to
lock out.
Press the
ENTER button.
♦ Change PIN
1. Press the MENU button to display the menu.
Press the ▲ or ▼ button to select "Digital Menu", then press the
ENTER button.
2. Press the ▲ or ▼ button to select "Setup", then press
the ENTER button.
3. Press the ▲ or ▼ button to select "Change PIN", then
press the ENTER button.
➣
The "Enter PIN" is displayed.
4. Enter your current 4-digit PIN code by using the numeric
buttons (0~9).
➣
The “Enter New PIN” is displayed.
5. Enter your new PIN code by using the numeric buttons (0~9)
The "Conrm New PIN" is displayed.
➣
6. Re-enter your new PIN code to conrm by using the numeric
buttons (0~9).
The Your PIN code has been changed successfully message
➣
is displayed.
7. Press the ENTER button.
8. Press the EXIT button to exit.
If you forget the PIN code, press the remote control buttons in the following sequence, which
➣
resets the PIN to 0-0-0-0: POWER (Off), MUTE, 8, 2, 4, POWER (On).
DTV
Menu Transparency
Change PIN
Parental Lock
Subtitle : Off
Subtitle Mode
DTV
Enter PIN
DTV
Parental Rating: No Block
DTV
Menu Transparency
Change PIN
Parental Lock
Subtitle : Off
Subtitle Mode
DTV
Confirm New PIN
Your PIN code has been changed successfully.
Setup
: Medium
Move Enter Return
Move Enter Return
Parental Lock
Enter PIN Return
Parental Lock
▲
No Block
No Block
3
4
5
6
7
Setup
: Medium
Change PIN
OK
▼
Move Enter Return
Move Enter Return
Move Enter Return
Move Enter Return
Enter PIN Return
English - 36
Page 39

Setting the Subtitle
You can activate and deactivate the subtitles.
1. Press the MENU button to display the menu.
Press the ▲ or ▼ button to select "Digital Menu", then press the
ENTER button.
2. Press the ▲ or ▼ button to select "Setup", then press the
ENTER button.
3. Press the ▲ or ▼ button to select "Subtitle ", then press the
ENTER button.
4. Select "On" by pressing the ▲ or ▼ button. Press the ENTER
button.
5. Press the EXIT button to exit.
You can select these options simply by pressing the
SUBT. button on the remote control.
DTV
Menu Transparency
Change PIN
Parental Lock
Subtitle : On
Subtitle Mode : Normal
Move Enter Return
Move Enter Return
Setup
: Medium
Off
On
Setting the Subtitle Mode
Use this menu to set the Subtitle Mode. "Normal" under the
menu is the basic subtitle and "Hard of hearing" is the subtitle
for a hearing-impaired person.
1. Press the MENU button to display the menu.
Press the ▲ or ▼ button to select "Digital Menu", then press the
ENTER button.
2. Press the ▲ or ▼ button to select "Setup", then press the
ENTER button.
3. Press the ▲ or ▼ button to select "Subtitle Mode", then press
the ENTER button.
4. Press the ▲ or ▼ button to select "Normal" or "Hard of hearing". Press the ENTER button.
5. Press the EXIT button to exit.
If the programme you are watching does not support the "Hard of hearing" function, "Normal"
➣
automatically activates even though "Hard of hearing" mode is selected.
DTV
Menu Transparency
Change PIN
Parental Lock
Subtitle : On
Subtitle Mode : Normal
Move Enter Return
Move Enter Return
Setup
: Medium
Normal
Hard of hearing
Selecting the Audio Format
You can only hear Dolby Digital sound through the audio
receiver connected through an optical cable. You can only hear
PCM sound through the main speaker.
When sound is emitted from both the main speaker and the
audio receiver, a sound echo may occur due to the decoding
speed difference between the main speaker and the audio
receiver. In this case, use the internal mute function.
1. Press the MENU button to display the menu.
Press the ▲ or ▼ button to select "Digital Menu", then press the
ENTER button.
2. Press the ▲ or ▼ button to select "Setup", then press the ENTER button.
3. Press the ▲ or ▼ button to select "Audio Format", then press the ENTER button.
4. Press the ▲ or ▼ button to select "PCM" or "Dolby Digital". Press the ENTER button.
5. Press the EXIT button to exit.
The Audio Format appears according to the broadcasting signal.
➣
Dolby digital sound is only available when the TV is connected with an external speaker using an
optical cable.
English - 37
DTV
Audio Format : PCM
Audio Description
Digital Text : Enable
Time Zone
Common Interfece
Move Enter Return
Setup
Page 40

Selecting the Audio Description
This is an auxiliary audio function that provides an additional
audio track for visually challenged persons. This function
handles the Audio Stream for the AD (Audio Description),
when it is sent along with the Main audio from the broadcaster.
Users can turn the Audio Description On or Off and control the
volume.
1. Press the MENU button to display the menu.
Press the ▲ or ▼ button to select "Digital Menu", then press the
ENTER button.
2. Press the ▲ or ▼ button to select "Setup", then press the
ENTER button.
3. Press the ▲ or ▼ button to select "Audio Description", then
press the ENTER button.
4. Press the ▲ or ▼ button to select "On", then press the
ENTER button.
5. Press the ▲ or ▼ button to select "Volume", then press the
ENTER button.
"Volume" is active when "Audio Description" is set to "On".
➣
6.
Press the ◄ or ► button until you reach the optimal setting.
Press the ENTER button.
7. Press the EXIT button to exit.
DTV
DTV
Audio Format : PCM
Audio Description
Digital Text : Enable
Time Zone
Common Interfece
Move Enter Return
DTV
DTV
Audio Description
Audio Description
Volume
Move Enter Return
Audio Description
Audio Description
Volume
Move Enter Return
Setup
: On
Off
On
: On
Selecting the Digital Text (UK only)
If the programme is broadcast with digital text, this feature is
enabled.
1. Press the MENU button to display the menu.
Press the ▲ or ▼ button to select "Digital Menu", then press the
ENTER button.
2. Press the ▲ or ▼ button to select "Setup", then press the
DTV
Audio Format : PCM
Audio Description
Digital Text : Enable
Time Zone
Common Interfece
ENTER button.
3. Press the ▲ or ▼ button to select "Digital Text", then press
the ENTER button.
4. Press the ▲ or ▼ button to select "Disable" or "Enable". Press the ENTER button.
5. Press the EXIT button to exit.
MHEG(Multimedia and Hypermedia Information Coding Experts Group) An International standard for data
➣
encoding systems used in multimedia and hypermedia. This is at a higher level than the MPEG system
which includes data-linking hypermedia such as still images, character service, animation, graphic and video
files as well as multimedia data. MHEG is user runtime interaction technology and is being applied to various
fields including VOD (Video-On-Demand), ITV (Interactive TV), EC (Electronic Commerce), tele-education,
tele-conferencing, digital libraries and network games.
Setup
Disable
Enable
Move Enter Return
100
100
English - 38
Page 41

Selecting the Time Zone (Spain only)
Select the local time zone.
1.
Press the MENU button to display the menu.
Press the ▲ or ▼ button to select "Digital Menu", then press the
ENTER button.
2. Press the ▲ or ▼ button to select "Setup", then press the▲ or ▼ button to select "Setup", then press the button to select "Setup", then press the
ENTER button.
3. Press the ▲ or ▼ button to select "Time �one", then press the▲ or ▼ button to select "Time �one", then press the button to select "Time Zone", then press the
ENTER button.
4. Select the time zone where you locate by pressing the
▲ or ▼
button.
Press the ENTER button.
The following options are available
➣
The Iberian Peninsula and Balearic Islands -
Canary Islands
5. Press the EXIT button to exit.
Viewing Product Information
You can view your product information. For service or repair,
please contact a Samsung approved dealer.
1.
Press the MENU button to display the menu.
Press the ▲ or ▼ button to select "Digital Menu", then press the
ENTER button.
2.
Press the ▲ or ▼ button to select "Setup", then press the
ENTER button.
3. Press the
the ENTER button.
4. Press the ENTER button again, to select "Product
Information".
➣
5. Press the EXIT button to exit.
▲ or ▼
button to select "System", then press
The Product Information menu is selected.
- Software Version, Firmware Version
DTV
Audio Format : PCM
Audio Description
Digital Text : Enable
Time Zone
Common Interfece
Move Enter Return
DTV
The Iberian Peninsula and Balearic Islands
Canary Islands
DTV
Software Version: T-PERLDEUC-0010
Firmware Version: T-EMMA2DEUB-0105
Time Zone
Adjust Enter Return
Product Information
Return
Setup
English - 39
Page 42

Checking the Signal Information
You can get information about the signal status.
1. Press the MENU button to display the menu.
Press the ▲ or ▼ button to select "Digital Menu", then press the
ENTER button.
2.
Press the ▲ or ▼ button to select "Setup", then press the
ENTER button.
3. Press the ▲ or ▼ button to select "System", then press the
ENTER button.
4. Press the ▲ or ▼ button to select "Signal Information", then press the ENTER button.
5. Press the EXIT button to exit.
If the signal status is poor, the "No signal." message is displayed.
➣
DTV
Signal Information
Service: ?
Service ID:0000
Multiplex: ? (TSID 0000, ONID 0000)
Network: ? (ID 0000)
Bit error level: 10
Signal Strength: 0
Move Enter Return
Return
Upgrading the Software
To keep your product up-to-date with new Digital Television
features then software upgrades are periodically broadcast as
part of the normal Television signal.
It will automatically detect these signals and display the
software upgrade banner. You are given the option to install the
upgrade.
1. Press the MENU button to display the menu.
Press the ▲ or ▼ button to select "Digital Menu", then press the
ENTER button.
2. Press the ▲ or ▼ button to select "Setup", then press the
ENTER button.
3. Press the ▲ or ▼ button to select "System", then press the
ENTER button.
4. Press the ▲ or ▼ button to select "Software Upgrade",
then press the ENTER button.
5.
Press the
▲ or ▼
button to select “Software Information”,
“Manual Upgrade” or “Standby Mode upgrade”.
Press the ENTER button.
♦ Software Information
Press the ENTER button, then the current software version is shown. To display the software
version information, press the ENTER button again.
To switch to an alternative version, press the red button.
Press the blue button to reset, activate the upgrade and restart.
♦
Manual Upgrade
Press the ENTER button to search for new software from the currently broadcasting channels.
♦ Standby Mode Upgrade: On / Off
Press the ENTER button. To continue software upgrade with master power on, Select On
by pressing the ▲ or ▼ button. 45 minutes after entering standby mode, a manual upgrade is
automatically conducted. Since the power of the unit is turned on internally, the screen may be on
slightly for the LCD product. This phenomenon may continue for more than 1 hour until the software
upgrade is completed.
6. Press the EXIT button to exit.
DTV
Product Information
Signal Information
Software Upgrade
Reset
DTV
Software Information
Manual Upgrade
Standby Mode upgrade : On
System
Move Enter Return
Software Upgrade
Move Enter Return
English - 40
Page 43

Viewing Common Interface
This contains information on CAM inserted in the CI slot and
displays it.
1. Press the MENU button to display the menu.
Press the ▲ or ▼ button to select "Digital Menu", then press the
ENTER button.
2. Press the ▲ or ▼ button to select "Setup", then press the
ENTER button.
3. Press the ▲ or ▼ button to select "Common Interface", then
press the ENTER button.
4. Press the ENTER button to display the information for
your application.
5. Press the EXIT button to exit.
The Application Info inserting is about the CI CARD.
➣
You can install the CAM anytime whether the TV is ON or
OFF.
1. Purchase the CI CAM module by visiting your nearest dealer
or by phone.
2. Insert the CI CARD into the CAM in the direction of the
arrow until it fits.
3. Insert the CAM with the CI CARD installed into the common
interface slot.
(Insert the CAM in the direction of the arrow, right up to the
end so that it is parallel with the slot.)
4. Check if you can see a picture on a scrambled signal channel.
DTV
Type : CA
Manufacturer : Channel Plus
Info : Top Up TV
Return
Application Info
Selecting the CI (Common Interface) Menu
This enables the user to select from the CAM-provided menu.
1. Press the MENU button to display the menu.
Press the ▲ or ▼ button to select "Digital Menu", then press the
ENTER button.
2. Press the ▲ or ▼ button to select "Setup", then press the
ENTER button.
3. Press the ▲ or ▼ button to select "Common Interface",
then press the ENTER button.
Main menu
Module informa tion
Smart card inf ormation
Language
Software Downl oad
Press OK to select, or Exit to quit
Move Enter Exit
4. Select to "CI Menu" by pressing the ▲ or ▼ button, and press the
ENTER button.
5. Select the required option by pressing the ▲ or ▼ button, and press the ENTER button.
6. Press the EXIT button to exit.
Select the CI Menu based on the menu PC Card.
➣
CI Menu
English - 41
Page 44

Resetting
You can reset the values stored to the factory default values.
The Reset operation deletes all channel information and
➣
user preferences returning all values to their default factory
state.
1.
Press the MENU button to display the menu.
Press the ▲ or ▼ button to select "Digital Menu", then press the
ENTER button.
2. Press the ▲ or ▼ button to select "Setup", then press the
ENTER button.
3. Press the
▲ or ▼
button to select "System", then press
the ENTER button.
4. Press the
▲ or ▼
button to select "Reset", then press the
ENTER button.
5. The "Enter PIN" screen will appear.
6. Enter your current 4-digit PIN code by using the numeric
buttons (0~9).
The warning message is displayed. All values will be reset
➣
by pressing the coloured buttons (red, green, yellow, and
blue) in turn.
7. Press the EXIT button to exit.
DTV
Enter PIN
DTV
WARNING: All channel settings and user
preferences will be lost and returned to the factory
defaults. It is recommended that a reset is performed
only when serious problems are experienced.
Reset
Enter PIN Return
Reset
Return
Selecting the Preferred Language (Subtitle, Audio or Teletext)
You can change the default value for subtitle, audio teletext
languages.
Displays the language information for the incoming stream.
1. Press the MENU button to display the menu.
Press the ▲ or ▼ button to select "Digital Menu", then press the
ENTER button.
2. Press the ▲ or ▼ button to select "Language", then press
the ENTER button.
3.
Press the
▲ or ▼
button to select "Audio Language",
"Subtitle Language" or "Teletext Language".
Press the ENTER button.
4. Select a particular language by pressing the ▲ or ▼ button
repeatedly.
Press the ENTER button.
English is the default in cases where the selected
➣
language is unavailable in the broadcast.
5. Press the EXIT button to exit.
While viewing a programme, the subtitle can be selected
➣
While viewing a programme, audio languages can be
selected.
DTV
Audio Language
Subtitle Language
Teletext Language
Preference
Move Enter Return
DTV
Audio Language
Subtitle Language
Teletext Language
Preference
Move Enter Return
DTV
Audio Language
Subtitle Language
Teletext Language
Preference
Language
Language
Language
English - 42
Move Enter Return
Page 45

Preference
This menu consists of 6 sub-menus:
Primary Audio Language, Secondary Audio Language, Primary
Subtitle Language, Secondary Subtitle Language, Primary
Teletext Language, Secondary Teletext Language.
Using this feature, users can select one of the languages
(English, German, Italian, Swedish, French, Welsh, Gaelic, Irish,
Danish, Finnish, Spanish, Dutch). The language selected here is the
default when the user selects a channel.
♦ Press the ▲ or ▼ button to select required menu (Primary
Audio Language, Secondary Audio Language, Primary Subtitle Language, Secondary Subtitle
Language, Primary Teletext Language, Secondary Teletext Language), then press the ENTER
button. The options of the selected menu are displayed.
♦ Select the appropriate language by pressing the ▲ or ▼ button.
Press the ENTER button to confirm your choice.
If you change the language setting, the Subtitle Language, Audio Language, and the Teletext
➣
Language of the Language menu (refer to page 42) are automatically changed to the selected
language.
The Subtitle Language, Audio Language, and the Teletext Language of the Language menu show a
➣
list of languages supported by the current channel and the selection is highlighted. If you change this
language setting, the new selection is only valid for the current channel. The changed setting does not
change the setting of the Primary Subtitle Language, Primary Audio Language, or the Primary Teletext
Language of the Preference menu.
DTV
Audio Language
Subtitle Language
Teletext Language
Preference
Move Enter Return
Move Enter Return
Language
English - 43
Page 46

Setting up Your PC Software (Based on Windows XP)
The Windows display-settings for a typical computer are shown below. The
actual screens on your PC may be different depending upon your particular
version of Windows and your particular video card. Even if your actual
screens look different, the same, basic set-up information will apply in almost
all cases. (If not, contact your computer manufacturer or Samsung Dealer.)
1.
First, click on "Control Panel" on the Windows start menu.
2. When the control panel window appears, click on "Appearance and Themes"
and a display dialog-box will appear.
3. When the control panel window appears, click on "Display" and a display
dialog-box will appear.
4. Navigate to the "Settings" tab on the display dialog-box.
The correct size setting (resolution): Optimum- 1360 X 768
If a vertical-frequency option exists on your display settings dialog box, the correct value is
"60" or "60 Hz". Otherwise, just click "OK" and exit the dialog box.
Display Modes
Both screen position and size will vary depending on the type of PC monitor and its resolution.
The resolutions in the table are recommended.
D-Sub Input
Mode
IBM
VESA
HDMI/DVI Input
Mode
VESA
Resolution
640x350
720×400
640×480
640×480
640×480
800×600
800×600
800×600
1024×768
1024×768
1024×768
1360 x 768
Resolution
640×480
800×600
1024×768
1360 x 768
Horizontal
Frequency (kHz)
31.469
31.469
31.469
37.861
37.500
37.879
48.077
46.875
48.363
56.476
60.023
47.712
Horizontal
Frequency (kHz)
31.469
37.879
48.363
47.712
Vertical
Frequency (Hz)
70.086
70.087
59.940
72.809
75.000
60.317
72.188
75.000
60.004
70.069
75.029
60.015
Vertical
Frequency (Hz)
59.940
60.317
60.004
60.015
Pixel Clock
Frequency (MHz)
25.175
28.322
25.175
31.500
31.500
40.000
50.000
49.500
65.000
75.000
78.750
85.500
Pixel Clock
Frequency (MHz)
25.175
40.000
65.000
85.500
Sync Polarity
Sync Polarity
(H/V)
+/-
-/+
-/-
-/-
-/+/+
+/+
+/+
-/-
-/+/+
+/+
(H/V)
-/-
+/+
-/-
+/+
When using an HDMI/DVI cable connection, you must use the HDMI IN 2 jack.
➣
➣
The interlace mode is not supported.
➣
The set might operate abnormally if a non-standard video format is selected.
➣
Separate and Composite modes are supported. SOG is not supported.
English - 44
Page 47

Setting up the TV with your PC
Preset: Press the SOURCE button to select PC mode.
1.
Press the MENU button to display the menu.
Press the
ENTER button, to select "Picture".
2. Select the required option by pressing the ▲ or ▼ button,
then press the ENTER button.
3. When you are satisfied with your setting, press the
ENTER button.
4. Press the EXIT button to exit.
♦
Auto Adjustment
Auto adjustment allows the PC screen of set to self-adjust to
the incoming PC video signal. The values of fine, coarse and
position are adjusted automatically.
Easy Setting
1. Press the
TOOLS button on the remote control.
2. Press the ▲ or ▼ button to select “Auto Adjustment”, then
press the ENTER button.
♦ Screen Adjustment:
Coarse/Fine
The purpose of picture quality adjustment is to remove or
reduce picture noise. If the noise is not removed by Finetuning alone, then adjust the frequency as best as possible
(coarse) and Fine-tune again. After the noise has been
reduced, re-adjust the picture so that it is aligned on the
center of screen.
Press the ▲ or ▼ button to select "Coarse" or "Fine", then
press the ENTER button.
Press the ◄ or ► button to adjust the screen quality.
Press the ENTER button.
TV
Mode : Standard
Backlight 7
Contrast 95
Brightness 45
Sharpness 50
Auto Adjustment
Screen Adjustment
Detailed Settings
Picture Options
Reset : OK
Move Enter Return
Auto Adjustment in progress
Anynet+ (HDMI-CEC)
Picture Mode : Standard
Sound Mode : Custom
Sleep Timer : Off
SRS TS XT : Off
Energy Saving : Off
Auto Adjustment
Move Enter Exit
TV
Coarse 50
Fine 34
Position
Image Reset
Move Enter Return
TV
Picture
Please wait.
Tools
Screen Adjustment
Position
Position
Adjust the PC’s screen positioning if it does not fit the TV
screen.
Press the ▲ or ▼ button to adjusting the Vertical-Position.
Press the ◄ or ► button to adjust the Horizontal-Position.
Press the ENTER button.
Image Reset
You can replace all image settings with the factory default
values.
English - 45
Move Enter Return
TV
Screen Adjustment
Coarse 50
Fine 34
Position
Image Reset
Move Enter Return
Page 48

What is Anynet+?
Anynet+ is an AV network system that enables an easy-to-use AV interface for users by controlling
all connected AV devices through the Anynet+ menu when Samsung Electronics AV devices are
connected.
Connecting Anynet+ Devices
The Anynet+ system supports AV devices supporting Anynet+ only.
Check if there is an Anynet+ mark on the AV device to be connected to the TV.
TV
Anynet+ Device 1 Anynet+ Device 2 Anynet+ Device 3
To directly connect to TV
Connect the [HDMI 1], [HDMI
2] or [HDMI 3] jack on the TV
and the HDMI OUT jack of the
corresponding Anynet+ device
using the HDMI cable.
HDMI Cable
TV
HDMI Cable
HDMI Cable
To connect to Home Theater
1. Connect the [HDMI 1],
[HDMI 2] or [HDMI 3]
Anynet+ Device 1 Anynet+ Device 2
jack on the TV and the
HDMI OUT jack of the
corresponding Anynet+
device using the HDMI
cable.
HDMI Cable
Home Theatre
HDMI Cable
Anynet+ Device 3
2. Connect the HDMI IN jack
of the home theatre and
the HDMI OUT jack of the
corresponding Anynet+
device using the HDMI
cable.
Optical Cable
HDMI Cable
HDMI Cable
Connect only the optical cable between [Digital Audio Out (Optical)] on your TV and Digital Audio
➣
Input on the receiver.
Connect only one receiver.
➣
You can listen to 5.1 channel sound through the home theatre’s speakers. Otherwise, you can only
➣
listen to 2 channel stereo sound in other cases. Make sure to connect the Digital Audio IN (Optical) of
the home theatre and the TV correctly to listen to TV sound through the home theatre. However, you
cannot listen to sound from the BD recorder that is sent to the home theatre via the TV in 5.1 channel
sound because the TV outputs only 2 channel stereo sound. Please see the manual for the home
theatre.
You can connect an Anynet+ device using the HDMI cable. Some HDMI cables may not support
➣
Anynet+ functions.
Anynet+ works when the AV device supporting Anynet+ is in the Standby or On status.
➣
Anynet+ supports up to 8 AV devices in total.
➣
English - 46
Page 49

Setting Up Anynet
+
The following settings are to use Anynet+ functions.
Using the Anynet+ Function
Press The TOOLS button. Then Press the ENTER button
1.
to select "Anynet+(HDMI-CEC)".
Press the ▲ or ▼ button to select "Setup", then press the
ENTER button.
Anynet+ (HDMI-CEC)
Picture Mode : Standard
Sound Mode : Custom
Sleep Timer : Off
SRS TS XT : Off
Energy Saving : Off
Dual l-ll : Mono
2. Press the ENTER button to select "Anynet+ (HDMI-CEC)",
then press the
3. Press the ▲ or ▼ button to select "On", then press the
ENTER button.
➣
The "Anynet+ (HDMI-CEC)" function is enabled.
➣
If you select "Off", "Anynet+ (HDMI-CEC)" is disabled.
➣
When the "Anynet+ (HDMI-CEC)" function is disabled, all the
Anynet+ related operations are deactivated.
ENTER button.
Move Enter Exit
TV P9
View TV
Select Device
Record
Menu on Device
Device Operation
Receiver :Off
Setup
Move Enter
Return
Anynet+ (HDMI-CEC)
Auto Turn Off
Searching Connections
Move Enter Return
Turning an Anynet+ Device Off Automatically when the TV is Turned Off
1. Press the ▲ or ▼ button to select "Auto Turn Off", then press
the
ENTER button.
2. Press the ▲ or ▼ button to select "Yes", then press the
ENTER button.
➣
The Auto turn off function is enabled.
➣
If you select "No", the Auto turn off function is cancelled.
Press the EXIT button to exit.
➣
The Select Device setting of the TV remote control is to be set
Anynet+ (HDMI-CEC)
Auto Turn Off
Searching Connections
Move Enter Return
to TV to use the Anynet+ function.
➣
If you set "Auto Turn Off" to "No", connected external devices
are also turned off when the TV is turned off. However, if the
device is recording, it may not be turned off.
Tools
Setup
: Off
: Off
Setup
: On
: Off
Off
On
No
Yes
English - 47
Page 50

Scanning and Switching between Anynet+ Devices
1. Press the TOOLS button. Then press the ENTER button to
select "Anynet+(HDMI-CEC)".
2. Press the ▲ or ▼ button to select "Select Device", then press
the ENTER button.
3. Press the ▲ or ▼ button to select to a particular device and
press the ENTER button. It is switched to the selected
device.
4. If you cannot find a device you want, press the ▲ or ▼ button
to select "Setup", then press the ENTER button.
5. Press the ▲ or ▼ button to select "Searching Connections",
then press the ENTER button.
The message "Configuring Anynet+ connection..." is displayed.
When searching devices completes, the connected devices are
listed in the Anynet+ menu.
Switching to the selected devices may take up to 2 minutes.
➣
You cannot cancel the operation during the switching operation.
The time required to scan for devices is determined by the
➣
number of connected devices.
When the device scan is complete, the number of found
➣
devices is not displayed.
Although the TV automatically scans devices when it is turned on using the POWER button, devices
➣
connected when the TV is on or under a specic circumstance are not displayed in the device list.
Therefore select "Searching Connections" menu to search devices.
If you have selected external input mode by pressing the SOURCE button, you cannot use the
➣
Anynet+ function. Make sure to switch to an Anynet+ device by using the
TV P9
View TV
Select Device
Record
Menu on Device
Device Operation
Receiver :Off
Setup
Move Enter
Move Enter Return
Return
Setup
Anynet+ (HDMI-CEC)
Auto Turn Off
Searching Connections
Move Enter Return
: On
: Yes
TOOLS button.
English - 48
Page 51

Anynet+ Menu
The Anynet+ menu changes depending on the type and status of the Anynet+ devices connected
to the TV.
Anynet+ Menu Description
View TV Switches from Anynet+ to TV broadcast mode.
Select Device Your TV connects to the corresponding device.
Record Starts a recording. (This menu works only for a device supporting
Menu on Device Shows the menu of the connected device.
Device Operation Shows the play control menu of the connected device.
Receiver Sound is output through the receiver.
Setup You can set the environment for using Anynet+.
TV Remote Control Buttons Available in Anynet+ Mode
Device Type Operating Status Available Buttons
Anynet+ Device
Device with built-in Tuner
Audio Device When Receiver is activated
➣
The Anynet+ function only works when the remote control is set to TV.
➣
The
➣
You cannot control Anynet+ devices using the buttons on the TV. You can control Anynet+ devices
only using the TV remote control.
The TV remote control may not work under certain conditions. In this case, re-select the Anynet+
➣
device.
The Anynet+ functions don’t operate for the products from other manufacturers.
➣
In Anynet+ mode, the colour buttons may not work properly.
➣
The
➣
button works only while in the recordable state.
, operations may differ depending on the device.
recording.)
Example. When a DVD Recorder is connected, the DVD Recorder’s
title menu appears.
Example. When a DVD Recorder is connected, the play control
menu of the DVD Recorder appears.
After switching to the
device, when the menu of
the corresponding device is
displayed on the screen.
After switching to the device,
while playing a file
After switching to the device,
when you are watching a TV
programme
Numeric buttons
▲/▼/◄/►/
Colour buttons EXIT button
P</>button
MUTE button
ENTER buttons
(Backward search)/
(Forward search)/
(Stop)/ (Play)
(Pause)
+/- button/
English - 49
Page 52

Recording
You can make a recording of a TV programme using a recorder.
Press the button.
Recording begins. (Only when the Anynet+ enabled recording device is connected.)
The current TV programme is recorded in the Watching TV status. If you are watching video from
➣
another device, the video from the device is recorded.
You can also record the source streams by selecting "Record" after pressing the
➣
Before recording, check whether the antenna jack is properly connected to the recording device. For
➣
the antenna connection to the recording device, refer to its user manual.
TOOLS button.
Listening through a Receiver
You can listen to sound through a receiver instead of the TV speaker.
1. Press The TOOLS button. Then Press the ENTER button
to select "Anynet+(HDMI-CEC)".
Press the ▲ or ▼ button to select "Receiver", then press the
ENTER button.
2. Press the ◄ or ► button to select to "On", then press the
ENTER button.
Now you can listen to sound through the receiver.
3. Press the EXIT button to exit.
➣
When the receiver is set to On, you can listen to the TV sound
through the 2-channel receiver.
If the receiver is exclusively for a home theatre only
➣
(supporting audio only), it may not appear in the device list.
Only when you have connected the optical jack of the TV and the receiver properly, does Receiver
➣
work.
In case of a content with copyright problem, listening through the receiver may not properly operate.
➣
If there is a power interruption to the TV when the “Receiver” is set to “On” (by disconnecting the
➣
power cord or a power failure), the “TV Speaker” may be set to “Off” when you turn the
(see page 22)
TV P9
View TV
Select Device
Record
Menu on Device
Device Operation
Receiver :Off
Setup
Move Enter
Return
TV on again.
English - 50
Page 53

Check Points before Requesting Service
Symptom Solution
Anynet+ does not
work.
I want to start
Anynet+.
I want to exit Anynet+.
The Configuring
Anynet+ connection
message appears on
the screen.
The Anynet+ device
does not play.
The connected device
is not displayed.
The TV programme
cannot be recorded.
The TV sound is not
output through the
receiver.
■ Check if the device is an Anynet+ device. The Anynet+ system supports Anynet+
devices only.
■ Connect only one receiver.
■ Check if the Anynet+ device power cord is properly connected.
■ Check the Anynet+ device’s Video/Audio/HDMI cable connections.
■ Check whether Anynet+ (HDMI-CEC) is set to On in the Anynet+ setup menu.
■ Check whether the TV remote control is in TV mode.
■ Check whether it is Anynet+ exclusive remote control.
■ Anynet+ doesn’t work at a certain condition. (Searching channels, Plug & Play,
etc.)
■ When connecting or removing the HDMI cable, please make sure to search
devices again or restart your TV.
■ Check if the Anynet+ Function of Anynet+ device is set on.
■ Check if the Anynet+ device is properly connected to the TV and check if the
Anynet+ (HDMI-CEC) is set to On in the Anynet+ Setup menu.
■ Press the TV/DTV button on the TV remote control to switch to TV. Then press
TOOLS button to show the Anynet+ menu and select a menu you want.
the
■ Select View TV in Anynet+ menu.
■ Press the SOURCE button on the TV remote control and select a device other
than Anynet+ devices.
■ Press any of P / , CH LIST, PRE-CH, and such to change to the
TV mode. (Note that the channel button operates only when a tuner-embedded
Anynet+ device is not connected.)
■ You cannot use the remote control when you are configuring Anynet+ or
switching to a view mode.
■ Use the remote control when the Anynet+ setting or switching to view mode is
complete.
You cannot use the play function when Plug & Play is in progress.
■ Check whether or not the device supports Anynet+ functions.
■ Check whether or not the HDMI cable is properly connected.
■ Check whether Anynet+ (HDMI-CEC) is set to On in the Anynet+ setup menu.
■ Search Anynet+ devices again.
■ You can connect an Anynet+ device using the HDMI cable only. Some HDMI
cables may not support Anynet+ functions.
■ If it is terminated by an abnormal situation such as disconnecting the HDMI cable
or power cord or a power failure, please repeat the device scan.
Check whether the antenna jack on the recording device is properly connected.
Connect the optical cable between TV and the receiver.
English - 51
Page 54

Teletext Feature
Most television stations provide written information services via Teletext. The index page of
the teletext service gives you information on how to use the service. In addition, you can select
various options to suit your requirements by using the remote control buttons.
For teletext information to be displayed correctly, channel reception must be stable. Otherwise,
information may be missing or some pages may not be displayed.
1. (exit)
Exit from the teletext display
2
6 (index)
Used to display the index (contents) page at any time while you
are viewing teletext.
3
8 (store)
Used to store the teletext pages.
4
4 (size)
Press to display the double-size letters in the upper half of the
screen. For lower half of the screen, press it again. To display
normal screen, press it once again.
5
5 (reveal)
Used to display the hidden text (answers to quiz games, for
example). To display normal screen, press it again.
6
/ (teletext on/mix)
Press to activate teletext mode after selecting the channel
providing the teletext service. Press it twice to overlap the teletext
with the current broadcasting screen.
7
0 (mode)
Press to select the teletext mode (LIST/FLOF). If you press it
in the LIST mode, it switches into the List save mode. In the
List save mode, you can save teletext page into list using the
8(store) button.
8
1 (sub-page)
Used to display the available sub-page.
9
2 (page up)
Used to display the next teletext page.
0
3 (page down)
Used to display the previous teletext page.
!
9 (hold)
Used to hold the display on a given page if the selected page is linked with several secondary
pages which follow on automatically. To resume, press it again.
@
7 (cancel)
Used to display the broadcast when searching for a page.
#
Colour buttons (red/green/yellow/blue)
If the FASTEXT system is used by a broadcasting company, the different topics covered on a
teletext page are colour-coded and can be selected by pressing the coloured buttons. Press one
of them corresponding to the required. The page is displayed with other coloured information that
can be selected in the same way. To display the previous or next page, press the corresponding
coloured button.
1
2
3
4
5
6
7
8
9
0
!
@
#
You can change teletext pages by pressing the numeric buttons on
the remote control.
English - 52
Page 55

The teletext pages are organized according to six categories:
Part Contents
A Selected page number.
B Broadcasting station identity.
C Current page number or search status.
D Date and time.
E Text.
F Status information.
FASTEXT information.
Teletext information is often divided between several pages displayed in sequence, which can be
accessed by:
♦ Entering the page number
♦ Selecting a title in a list
♦ Selecting a coloured heading (FASTEXT system)
Press the TV/DTV button to exit from the teletext display.
English - 53
Page 56

Wall-Mount Adjustment (Sold separately) (depending on the model)
Once the auto wall mount is installed, your TV’s position can be easily adjusted.
TV Rear Panel Auto Wall-Mount
SERVICE Cable (Not supplied)
Entering the menu
1. Press the ▲, ▼, ◄ or ► button on your remote control.
The Wall Mount Adjustment screen is displayed.
➣
If the Wall Mount Adjustment screen is not displayed when
➣
clicking on a direction button while watching your TV, use
the menu to display that screen.
• Press the MENU butt on to display the menu.
Press the ▲ or ▼ button to select “Setup”, then press the
ENTER button.
• Press the ▲ or ▼ button to select “Wall-Mount Adjustment”,
then press the ENTER button.
TV
Plug & Play
Language : English
Time
Wall-Mount Adjustment
Melody : Off
Entertainment : Off
Energy Saving : Off
Move Enter Return
Setup
Remembering the Position
2. Adjust to the desired position using the ▲,▼,◄,► buttons.
If you press an arrow button when no OSD is displayed on
➣
the TV screen, the Adjustment screen appears.
Press the INFO button to reset. Press the ◄ or ► button to
➣
select “Yes”, then press the
ENTER button.
The position is initialized to the default setting.
3. Press the blue button.
Press the ▲ and ▼ buttons to select a save mode from either
Position 1, Position 2 or Position 3 in order to save the current
position.
To not save the current position, press the
➣
When selecting a save mode, you cannot use the Colour
➣
RETURN button.
buttons.
4. Press the ENTER button to save.
When Position1 is selected, the message "Current position
➣
saved as Position1" is displayed.
5. Press the ENTER button.
The saved Position appears on the left side of the OSD.
➣
English - 54
Wall-Mount Adjustment
Position 1 2 3
Adjust Save Center
Select a mode to Save.
Position1
Position2
Position3
Adjust Enter Return
INFO
Save
Page 57

Moving to the remembered position
1. Complete Step 1 of “Entering the menu”.
2. Pressing a Colour (Red, Green, Yellow) button moves the auto
wall mount to the saved position.
You can move the wall mount to one of the 3 pre-set
➣
positions by pressing the Red (Position 1),
Green (Position 2) or Yellow (Position 3) buttons.
If you adjust the Position after moving to a pre-set position,
➣
the position display will disappear.
For installation, refer to the Installation Manual provided with the wall mount.
➣
For product installation and the installation and moving of the wall mount, make sure to consult a
➣
specialized installation company.
This installation manual is to be used when attaching the wall mount to a wall. When attaching to
➣
other building materials, please contact your nearest dealer.
The auto wall mount will not work when Anynet+ is operating.
➣
37 and 40 inch models are not compatible with the old electrically powered wall mount model
➣
(WMN5090A*).
Wall-Mount Adjusment
Position1
Position 1 2 3
Adjust Save Center
INFO
Using the Anti-Theft Kensington Lock (depending on the model)
The Kensington lock is a device used to physically fix the system when using it in a public place.
The appearance and locking method may differ from the illustration depending on the manufacturer.
Refer to the manual provided with the Kensington lock for proper use. The locking device has to be
purchased separately.
1. Insert the locking device into the Kensington
slot on the LCD TV (Figure 1), and turn it in the
locking direction (Figure 2).
2. Connect the Kensington lock cable.
3. Fix the Kensington lock to a desk or a heavy
stationary object.
The location of the Kensington Lock may be
➣
different depending on its model.
Cable
Figure 2
Figure 1
<Optional>
English - 55
Page 58

Troubleshooting: Before Contacting Service Personnel
No sound or picture.
Normal picture but no
sound.
Screen is black and power
indicator light blinks steadily.
No picture or black and
white picture.
Sound and picture
interference.
Blurred or snowy picture,
distorted sound.
Remote control malfunctions.
'Check signal cable.'
message is displayed.
On PC mode, 'Not Supported
Mode.' message is displayed.
The damaged picture appears
in the corner of the screen.
The 'Resets all settings to
the default values' message
appears.
The TFT LCD panel uses a panel consisting of sub pixels (3 133 440) which require sophisticated
technology to produce. However, there may be few bright or dark pixels on the screen. These pixels will
have no impact on the performance of the product.
Check that the mains lead has been connected to a wall socket.
Check that you have pressed the
Check the picture contrast and brightness settings.
Check the volume.
Check the volume.
Check whether the MUTE button has been pressed on the remote control.
Check if "TV Speaker" is on.
On your computer check; Power, Signal Cable.
The TV is using its power management system.
Move the computer’s mouse or press any key on the keyboard.
Adjust the colour settings.
Check that the broadcast system selected is correct.
Try to identify the electrical appliance that is affecting the set and move it
further away.
Plug your set into a different mains socket.
Check the direction, location and connections of your aerial.
This interference is often due to the use of an indoor aerial.
Replace the remote control batteries.
Clean the upper edge of the remote control (transmission window).
Check the battery terminals.
Check that the signal cable is firmly connected to the PC or video sources.
Check that the PC or video sources are turned on.
Check the maximum resolution and the frequency of the video adaptor.
Compare these values with the data in the Display Modes.
If "Just Scan" is selected in some external devices, the damaged picture
may appear in the corner of the screen. This symptom is caused by external
devices, not TV.
This appears when you press and hold the
The product settings are reset to the factory defaults.
button on your set.
EXIT button for a while.
English - 56
Page 59

Technical and Environmental Specications
Model Name
Screen Size (Diagonal)
PC Resolution
Sound
Output
Dimensions (WxDxH)
Body
With stand
Weight
With stand
Environmental Considerations
Operating Temperature
Operating Humidity
Storage Temperature
Storage Humidity
Stand Swivel
(Left / Right)
Model Name
Screen Size (Diagonal)
PC Resolution
Sound
Output
Dimensions (WxDxH)
Body
With stand
Weight
With stand
Environmental Considerations
Operating Temperature
Operating Humidity
Storage Temperature
Storage Humidity
Stand Swivel
(Left / Right)
LE26A456 LE32A456
26 inch 32 inch
1360 X 768 @ 60 Hz 1360 X 768 @ 60 Hz
5W x 2 10W x 2
670 X 75 X 446 mm
670 X 216 X 500 mm
10 kg 13 kg
10 °C to 40 °C (50 °F to 104 °F)
10 % to 80 %, non-condensing
-20 °C to 45 °C (-4 °F to 113 °F)
5 % to 95 %, non-condensing
1360 X 768 @ 60 Hz 1360 X 768 @ 60 Hz
916 X 82 X 598 mm
916 X 300 X 658 mm
0
˚
LE37A456 LE40A456
37 inch 40 inch
10W x 2 10W x 2
18 kg 21 kg
10 °C to 40 °C (50 °F to 104 °F)
10 % to 80 %, non-condensing
-20 °C to 45 °C (-4 °F to 113 °F)
5 % to 95 %, non-condensing
-20˚ ~ 20˚
800 X 79 X 522 mm
800 X 252 X 577 mm
10 °C to 40 °C (50 °F to 104 °F)
10 % to 80 %, non-condensing
-20 °C to 45 °C (-4 °F to 113 °F)
5 % to 95 %, non-condensing
-20˚ ~ 20˚
990 X 82 X 636 mm
990 X 300 X 694 mm
English - 57
Page 60

Model Name
Screen Size (Diagonal)
PC Resolution
Sound
Output
Dimensions (WxDxH)
Body
With stand
Weight
With stand
Environmental Considerations
Operating Temperature
Operating Humidity
Storage Temperature
Storage Humidity
Stand Swivel
(Left / Right)
LE26A457 LE32A457, LE32A455
26 inch 32 inch
1360 X 768 @ 60 Hz 1360 X 768 @ 60 Hz
5W x 2 10W x 2
670 X 75 X 451 mm
670 X 216 X 500 mm
800 X 79 X 525 mm
800 X 252 X 577 mm
10 kg 13 kg
10 °C to 40 °C (50 °F to 104 °F)
10 % to 80 %, non-condensing
-20 °C to 45 °C (-4 °F to 113 °F)
5 % to 95 %, non-condensing
0
˚
10 °C to 40 °C (50 °F to 104 °F)
10 % to 80 %, non-condensing
-20 °C to 45 °C (-4 °F to 113 °F)
5 % to 95 %, non-condensing
-20˚ ~ 20˚
Model Name
Screen Size (Diagonal)
PC Resolution
LE37A457 LE40A457, LE40A455
37 inch 40 inch
1360 X 768 @ 60 Hz 1360 X 768 @ 60 Hz
Sound
Output
10W x 2 10W x 2
Dimensions (WxDxH)
Body
With stand
916 X 82 X 601 mm
916 X 300 X 658 mm
990 X 82 X 641 mm
990 X 300 X 694 mm
Weight
With stand
Environmental Considerations
Operating Temperature
Operating Humidity
Storage Temperature
Storage Humidity
18 kg 21 kg
10 °C to 40 °C (50 °F to 104 °F)
10 % to 80 %, non-condensing
-20 °C to 45 °C (-4 °F to 113 °F)
5 % to 95 %, non-condensing
Stand Swivel
(Left / Right)
Design and specifications are subject to change without prior notice.
This device is a Class B digital apparatus.
For the power supply and Power Consumption, refer to the label attached to the product.
-20˚ ~ 20˚
English - 58
Page 61

This page is intentionally
left blank.
Page 62

Kapcsolatfelvétel: SAMSUNG WORLDWIDE
Bármilyen észrevétele, vagy kérdése van Samsung termékekkel kapcsolatban, forduljon a
SAMSUNG ügyfélszolgálathoz. (További információ a hátoldalon)
Elővigyázatosság az állóképek megjelenítésével kapcsolatban.
Az állóképek a TV-képernyő maradandó károsodását okozhatják.
• Ne jelenítsen meg állóképeket az LCD-képernyőn 2 órát meghaladó időn túl, mert ilyenkor a
megjelenített képek a képernyő „beégését” okozhatják.
Ezt a jelenséget „képernyőbeégésnek” is nevezik.
A képernyőbeégés elkerülése érdekében állókép megjelenítésekor csökkentse a kép
fényerejét és kontrasztját.
• Az LCD TV huzamosabb ideig tartó, 4:3 képarányú módban történő használata
használata is hasonló jelenséget okozhat. A garancia az ilyen esetekben keletkezett károkra
nem terjed ki.
• Videojátékok vagy számítógépek állóképeinek bizonyos időt meghaladó megjelenítése
következtében a képernyőn részleges utókép jelenhet meg. A jelenség megelőzése
érdekében állóképek megjelenítése esetén csökkentse a fényerőt és kontrasztot.
© 2008 Samsung Electronics Co., Ltd. All rights reserved.
esetén a kibocsátott fényerősség eltérése miatt a képernyő közepén, valamint bal
és jobb oldalán sávok alakulhatnak ki. DVD-filmek lejátszása és játékprogramok
Page 63

Tartalom
TELEVÍZIÓ CSATLAKOZTATÁSA ÉS FELKÉSZÍTÉSE
Tartozékok .......................................................... 2
Az állvány felszerelése ....................................... 2
A fali konzol felszerelése .................................... 2
A vezérlőpanel áttekintése ................................. 3
A csatlakoztató panel áttekintése ....................... 4
A távvezérlő áttekintése ..................................... 7
Elemek behelyezése a távirányítóba ................. 8
A készülék be- és kikapcsolása ......................... 8
A televízió készenléti üzemmódba helyezése .... 8
A menü megtekintése ......................................... 9
A TOOLS gomb használata ................................ 9
Plug & Play ....................................................... 10
CSATORNABEÁLLÍTÁS
Csatornák automatikus tárolása ........................11
Csatornák kézi tárolása .................................... 12
Csatornák hozzáadása / zárolása .................... 13
Tárolt csatornák rendezése .............................. 14
Csatornanevek hozzárendelése ....................... 14
Csatornák nomhangolása .............................. 15
LNA (Low Noise Amplier - kis zajú erősítő) .... 15
KÉPBEÁLLÍTÁS
Képtípus módosítása ....................................... 16
Az egyedi képbeállítások módosítása .............. 17
A kép részletes beállításainak kongurálása ... 17
Képbeállítások visszaállítása gyári alapbeállításra
A képopció beállítása ....................................... 19
ANGBEÁLLÍTÁS
Hangbeállítások ............................................... 21
A hangmód kiválasztása .................................. 22
Fejhallgató csatlakoztatása
(külön megvásárolható)
IDŐ BEÁLLÍTÁSA
Az aktuális idő beállítása és megjelenítése ..... 23
Az automatikus kikapcsolás beállítása ............. 23
A televízió automatikus be- és kikapcsolása .... 24
FUNKCIÓLEÍRÁS
A nyelv kiválasztása ......................................... 24
Dallam/Szórakoztatás/Energiagazd. ................ 25
Forrás kiválasztása .......................................... 26
A bemeneti forrásnevek szerkesztése ............. 27
Használati útmutató
Kérjük, hogy a készülék működtetése előtt
gondosan olvassa végig a kezelési útmutatót
és őrizze meg, mert később szüksége lehet rá.
18
22
A DTV FUNKCIÓ HASZNÁLATA
A DTV menürendszer áttekintése .................... 28
A csatornalista automatikus frissítése
A csatornalista manuális frissítése
A Kedvenc csatornák szerkesztése
Csatornalista választása
Programinformáció megjelenítése
Az elektronikus műsorújság (EPG) megtekintése
A Beütemezett lista használata
Az Alapértelmezett útmutató beállítása
Az összes csatorna, illetve a kedvenc
csatornák megtekintése ................................... 35
A menü átlátszóságának beállítása
Szülői zár beállítása
Felirat beállítása
A Felirat mód beállítása
Az Audioformátum kiválasztása
A Hangismertetés funkció kiválasztása
Digitális szöveg választása (Csak Egyesült Királyság)
Az időzóna választása (Csak Spanyolország)
Termékinformáció megtekintése
A Jelinformáció ellenőrzése
A szoftver frissítése
A Közös felület csatlakozásának megtekintése
A CI
(Common Interface - Közös felület )
Visszaállítás
A felirat, a hang és a teletext nyelvének kiválasztása
Beállítás
..................................................... 42
........................................................... 43
.................................. 32
......................................... 36
............................................... 37
.................................... 37
............................. 40
.......................................... 40
.............. 29
................... 29
................. 30
................... 32
. 33
........................ 34
............ 34
.................. 35
....................... 37
............ 38
.. 38
. 39
...................... 39
41
menü választása 41
42
PC BEÁLLÍTÁSA
A
(Windows XP alapú)
Képernyőmódok
A TV beállítása számítógéppel
számítógépes szoftver beállítása
............................................... 44
......................... 45
44
AZ ANYNET+
Az Anynet+ fogalma ......................................... 46
Anynet+ eszközök csatlakoztatása
Az Anynet+ beállítása
Váltás és keresés az Anynet+ eszközök között
Felvétel
következő pontokat: ......................................... 51
............................................................. 50
Hallgatás vevő egységen keresztül
Szervizelés igénylése előtt olvassa el a
....................................... 47
.................. 46
. 48
.................. 50
TANÁCSOK A KÉSZÜLÉK HASZNÁLATÁVAL KAPCSOLATBAN
A Teletext funkció ............................................. 52
Fali konzol állítása (a fali konzol külön kapható)
(a modelltől függően)
A számítógép beállítása
Hibaelhárítás: Mielőtt szakemberhez fordulna
Műszaki és környezeti jellemzők
Jelek Gomb Megjegyzés Nyomógomb
......................................................
(a modelltől függően) 55
..................... 57
54
. 56
Magyar
Magyar - 1Magyar - 1
Page 64

Tartozékok
Győződjön meg róla, hogy az LCD-televízió következő tartozékai rendelkezésre állnak.
Ha bármelyik tartozék hiányzik, forduljon a márkakereskedőhöz.
M4XL16
Távvezérlő
és elemek
(AAA x 2)
Használati utasítás
•
➣
Garanciakártya / Biztonsági útmutató / Regisztrációs lapok (nem minden régióban)
Típustól függően előfordulhat, hogy az állvány és a csavar nincs felszerelve.
➣
Tápkábel Takarólemez
Garanciakártya
•
Csavar az
állványhoz
(4 db.)
Biztonsági útmutató•Regisztrációs lapok
Állvány Törlőkendő
•
Az állvány felszerelése
2
1
1. Helyezze az LCD TV-t az állványra.
A TV mozgatásához legalább két ember szükséges.
➣
Összeszereléskor ügyeljen az állvány elejének és hátuljának megkülönböztetésére.
➣
2. Helyezzen két csavart az 1 pozícióba, majd kettőt a 2 pozícióba.
Állítsa fel a készüléket, és húzza meg a csavarokat. Ha az LCD TV felállítása előtt húzza meg a
➣
csavarokat, előfordulhat, hogy a készülék ferdén áll.
Az állvány 37 hüvelykes és nagyobb képernyőméretű típusokhoz szerelhető fel.
➣
A fali konzol felszerelése
A falra szerelést biztosító elemek (külön megvásárolhatók)
segítségével a TV falra is rögzíthető.
A falra szerelést biztosító elemek felszerelésével kapcsolatban
olvassa el az elemekhez mellékelt tájékoztatót. A fali konzol
felszereléséhez kérje szakember segítségét.
A Samsung Electronics nem vállal felelősséget semmilyen tárgyi
vagy személyi sérülésért, ha Ön úgy dönt, hogy saját maga szereli
fel a televíziót.
Ne szerelje fel a falikart, ha a TV be van kapcsolva. Ez
áramütés miatti sérülést okozhat.
Távolítsa el az állványt, takarja le sapkával az alsó nyílást és
➣
rögzítse két csavarral.
Magyar - 2
Page 65

A vezérlőpanel áttekintése
Az oldallapon lévő
gombok
1
2
3
4
5
6
A termék színe és formája típusonként különbözhet.
➣
SOURCE
1
Váltogat az összes hozzáférhető beviteli forrás
között (TV, 1. Külső, 2. Külső, AV, S-Video,
Komponens, PC, HDMI1, HDMI2, HDMI3, DTV).
A képernyőn megjelenő menüben úgy használja
ezt a gombot, ahogy a távirányítón az
gombot szokás.
MENU
2
Nyomja meg, ha a képernyőmenüt kívánja
megjeleníteni.
3
A hangerő csökkentésére vagy növelésére
használható. A képernyőn megjelenő menüben
a gombokat úgy használja, ahogy a
távirányítón a és a gombokat szokás.
4
Csatornaváltáshoz.
A képernyőn megjelenő menüben a
gombokat úgy használja, ahogy a távirányítón a
p és a q gombokat szokás.
(A televíziót a távvezérlő nélkül a csatornaváltó
gombbal is bekapcsolhatja.)
ENTER
88
(Tápellátás)
5
A televízió be- és kikapcsolásához nyomja
meg.
Tápfeszültségjelző
6
Villog és elalszik, ha a készülék be van
kapcsolva, készenléti állapotban pedig
folyamatosan világít.
Távirányító érzékelője
7
A távvezérlőt a TV-nek erre a pontjára kell
irányítani.
Hangszórók
8
7
Magyar - 3
Page 66

A csatlakoztató panel áttekintése
LE40A456, LE40A457, LE40A455
[
A TV hátoldala
Hálózati bemenet
]
2 3 54 61
!@
LE26A456, LE26A457, LE32A456, LE32A457, LE32A455, LE37A456, LE37A457
[
A TV hátoldala
!
]
4 3 5 @
[TV oldalsó panel]
[TV oldalsó panel]
7
3
8
9
0
7
1
6
2
A termék színe és formája típusonként különbözhet.
➣
Ha külső eszközt csatlakoztat a TV-hez, győződjön meg róla, hogy az egység ki van kapcsolva.
➣
➣
Külső eszköz csatlakoztatása esetén ügyeljen a csatlakozó és a kábel színének egyeztetésére.
Magyar - 4
0
Hálózati bemenet
3
8
9
Page 67

1 PC IN [PC]/[AUDIO]
A számítógép video- és audiokimenetét lehet rá csatlakoztatni.
-
2 COMPONENT IN
A komponens videokábel (opcionális) egyik végét csatlakoztassa a készülék hátoldalán található
-
komponensbemenethez („PR”, „PB”, „Y”), a másik végét pedig a DTV vagy DVD megfelelő
videokimenetéhez.
Ha a beltéri egységet és a DTV-t (vagy DVD-t) egyaránt csatlakoztatni kívánja, akkor
-
először a beltéri egységet kösse össze a DTV-vel (vagy a DVD-vel), majd ezután készüléke
komponensbemenetével („P
-
A komponenseszközökön (DTV-n vagy DVD-n) a PR, a PB és az Y csatlakozót néha Y, B-Y és R-Y
R”, „PB”, „Y”).
vagy Y, Cb és Cr jelzéssel látják el.
-
Az RCA audiokábeleket (opcionális) a készüléke hátsó oldalán található [R - AUDIO - L] bemenethez
csatlakoztassa, a kábel másik végét pedig a DTV-n vagy DVD-n található audiokimenethez.
3 HDMI IN 1, HDMI IN 2, HDMI IN 3
-
A HDMI-csatlakozóval ellátott AV-készülékek (beltéri egységek, DVD-lejátszók) közötti kapcsolatot
támogatja.
-
HDMI–HDMI összeköttetés esetén nincs szükség kiegészítő hangkapcsolatra.
-
HDMI/DVI csatlakoztatás esetén HDMI IN2 csatlakozót kell használni.
Mi az a HDMI?
➣
A „High Denition Multimedia interface” (nagy felbontású multimédiás interfész) nagy felbontású
-
digitális videoanyag és digitális audiofelvételek többcsatornás átvitelét teszi lehetővé.
A HDMI/DVI-csatlakozó támogatja a DVI-kapcsolatot egy kiterjesztett eszközre, a megfelelő kábelen
-
keresztül (nincs mellékelve). A HDMI és a DVI között az a különbség, hogy a HDMI-eszköz mérete
kisebb, telepítve van rá a HDCP (Nagy sávszélességű digitális másolásvédelem) kódolási funkció,
valamint támogatja a többcsatornás digitális hangátvitelt.
DVI IN (HDMI2) [R-AUDIO-L]
-
DVI audiokimenetek külső eszközökhöz.
➣
A HDMI/DVI és a komponens csatlakoztató támogatása
HDMI/DVI 50Hz X X X O O O
HDMI/DVI 60Hz X O X X O O
Komponens O O O O O O
480i 480p 576i 576p 720p 1080i
4 AUDIO OUT[R-AUDIO-L]
Az RCA audiokábeleket a készüléke hátsó oldalán található [R- AUDIO-L] bemenethez
-
csatlakoztassa,
a kábel másik végét pedig az erősítőn vagy a DVD házimozin található audiobemenethez.
5 ANT IN
A televízió-csatornák megfelelő megtekintéséhez az alábbi források valamelyikén át biztosítani kell a
készülék jelvételét:
-
kültéri antenna, kábeltelevíziós hálózat vagy műholdas hálózat.
6
SERVICE
-
LE26A456, LE26A457
Kizárólag JAVÍTÁSI CÉLOKRA szolgáló csatlakozó.
-
LE32A456, LE32A457, LE32A455, LE37A456, LE37A457, LE40A456, LE40A457, LE40A455
A Kensington zár helye a típustól függően változhat. Így a távvezérlőn keresztül állíthatja a TV
helyzetének szögét.
Magyar - 5
Page 68

7
COMMON INTERFACE nyílás
Ha CI kártya nincs behelyezve, bizonyos csatornáknál a
-
„Kódolt jel” üzenet jelenik meg a képernyőn.
Körülbelül 2~3 perc múlva megjelenik a telefonszámot, a
-
kártya azonosítóját, a készülék azonosítóját és egyéb adatot
tartalmazó egyeztetési információ. Ha hibaüzenet jelenik meg,
lépjen kapcsolatba a szolgáltatóval.
Ha a csatornaadatok kongurálása befejeződött, megjelenik
-
a „Frissítés kész” üzenet jelölve, hogy a csatornák listájának
módosítása megtörtént.
CI kártyát a helyi kábelszolgáltatótól igényelhet. A CI kártyát óvatosan távolítsa el, mert ha leesik,
➣
megsérülhet.
Helyezze be a CI-kártyát a jelzett irányban.
➣
A COMMON INTERFACE nyílás elhelyezkedése típustól függően különbözhet.
➣
8 S-VIDEO vagy a VIDEO / R-AUDIO-L
Csatlakoztassa az RCA- vagy az S-VIDEO-kábelt a megfelelő külső A/V készülékhez, pl. VCR-hez,
-
DVD-hez vagy kamerához.
Csatlakoztassa az RCA audiokábeleket a készüléken található „R-AUDIO-L”csatlakozóhoz, a másik
-
végét pedig az A/V készülék megfelelő audiokimeneti csatlakozójához.
9
Fejhallgató csatlakozója
-
Fejhallgatót a készüléken található fejhallgató kimenethez csatlakoztathat. Amíg a fejhallgató
csatlakoztatva van, a beépített hangszórók inaktívak.
0 Kensington Lock (a modelltől függően)
-
A Kensington-zár (opcionális) olyan eszköz, amellyel a rendszer zikailag rögzíthető, ha a
készüléket nyilvános helyen használják.
-
Ha zárszerkezetet szeretne használni, forduljon segítségért a tv-készülék eladójához.
-
A Kensington zár helye a típustól függően változhat.
! DIGITAL AUDIO OUT (OPTICAL)
-
Csatlakoztatás digitális audiokomponenshez.
➣
Ha a HDMI IN csatlakozók csatlakoztatva vannak, a DIGITAL AUDIO OUT (OPTICAL) csatlakozó a
televízión csak kétcsatornás hangot szolgáltat. Ha 5.1 csatornás hangot szeretne hallgatni, a DVD-
lejátszó vagy a kábeles/műholdvevő készülék optikai csatlakozóját csatlakoztassa közvetlenül egy
erősítőhöz vagy házimozihoz a televízió helyett.
@ EXT 1, EXT 2
Csatlakozó
1. Külső O O O Csak TV- vagy DVD-kimenet van.
2. Külső O O Választható kimenet.
Bemenetek és kimenetek külső berendezések, például videomagnó, DVD-, videojáték- vagy
-
Videó Audió (bal/jobb) RGB Videó + Audió (bal/jobb)
Bevitel Kimenet
videolemez-lejátszó számára.
Magyar - 6
Page 69

A távvezérlő áttekintése
TOOLS
Televízió készenléti gombja
1
Közvetlenül kiválasztja a TV,
2
illetve a DTV üzemmódot
Számgombok közvetlen
3
csatornaeléréshez
Egyjegyű/kétjegyű
4
csatornaválasztás
+: Hangerő növelése
5
-: Hangerő csökkentése
Hang ideiglenes kikapcsolása
6
Az elektronikus műsorújság
7
(EPG) megjelenítése
A gyakran használt funkciók
8
kiválasztásához használható.
A sugárzott műsor információinak
9
megtekintésére szolgál
Színes gombok:
0
Ezek a gombok a Csatornalista,
stb. kezelésére használhatók.
Megnyomásával kiválasztható
@
a kép- és hangmód a
sportközvetítésekhez, a lmekhez
és a játékokhoz.
Ezek a gombok a DMA és
#
az Anynet+ kezeléséhez
használhatók.
: Ezzel a távvezérlővel
(
vezérelhető az Anynet+ funkcióval
rendelkező Samsung felvevőkkel
készített felvétel)
Elérhető forrás kiválasztása
$
Előző csatorna
%
P<: Következő csatorna
^
P>: Előző csatorna
A fő képernyőmenü
&
megjelenítése
A Csatornalista megjelenítése a
*
képernyőn
Visszatérés az előző menühöz
(
A menü kurzorát vezérli
)
Kilépés a képernyőmenüből
a
Akkor használja, ha SAMSUNG
b
DMA (digitális médiaadapter)
eszközt csatlakoztat HDMIinterfészen keresztül, és DMAüzemmódra vált. (A DMA gomb
opcionális.)
Működéséről további információt
talál a DMA használati
útmutatójában.
Ez a gomb akkor használható,
ha az „Anynet+ (HDMI-CEC)”
állása „Be” (lásd a 47. oldalt).
Képméret kiválasztása
c
Digitális felirat kijelzése
d
Közvetlenül kiválasztja a HDMI-
e
üzemmódot.
Teletext funkciók
Kilépés a teletext megjelenítési
2
módból
Teletext tárolása
7
Teletext méretének kiválasztása
8
Teletext megjelenítése
9
Fastext témaválasztás
0
Válasszon a Teletext, Dupla és
!
Mix opciók közül.
Teletext mód kiválasztása
$
(LIST vagy FLOF)
Teletext aloldal
%
P<: Teletext következő oldala
^
Teletext előző oldala
P>:
Teletext tartalomjegyzék
&
Teletext kimerevítése
(
Teletext törlése
a
Az éles fény befolyásolhatja a távvezérlő teljesítményét.
➣
Magyar - 7
Page 70

Elemek behelyezése a távirányítóba
1. Az ábrán látható módon tolja felfelé a távvezérlő hátlapját.
2. Tegyen be két AAA méretű elemet.
Az elemek „+” és „–” pólusát az elemtartóban látható ábrával egyezően
➣
kell elhelyezni.
3. Tegye vissza a fedelet.
➣
Ha hosszabb ideig nem használja a távvezérlőt, vegye ki az elemeket, és
tárolja őket hűvös, száraz helyen.
➣
Ha a távvezérlő nem működik, ellenőrizze a következőket:
1. Be van kapcsolva a TV?
2. Felcserélődött az elemek plusz és mínusz pólusa?
3. Kifogytak az elemek?
4. Áramkimaradás van, vagy nincs csatlakoztatva a tápkábel?
5. Van a közelben uoreszkáló fény vagy neonfényjel?
A készülék be- és kikapcsolása
A tápfeszültség vezetéke a készülék hátoldalához van csatlakoztatva.
1.
Helyezze a tápfeszültség-vezeték csatlakozóját a megfelelő aljzatba.
➣
A készenléti állapotot jelző fény világít a készüléken.
2. Nyomja meg a készülék P gombját.
➣
A távirányító POWER
➣
A készülék automatikusan a legutoljára nézett csatornát választja ki.
3. Nyomja meg a számgombot (0~9) vagy a csatornaváltó gombot (</>) a távvezérlőn vagy a készülék
4. A készülék a POWER gomb ismételt megnyomásával kapcsolható ki.
gombját.
➣
A készülék első használatakor ki kell választania, hogy melyik nyelvet szeretné használni a menük
és üzenetek megjelenítéséhez.
vagy TV/DTV gombjával is bekapcsolhatja a TV-készüléket.
A televízió készenléti üzemmódba helyezése
A televízió készenléti üzemmódba kapcsolásával a készülék áramfogyasztása csökkenthető.
A készenléti üzemmód a tévénézés átmeneti megszakításakor (például étkezések alkalmával) lehet
hasznos.
1.
Nyomja meg a távvezérlő POWER gombját.
➣
A képernyő elsötétül, és a vörös készenléti jelzőfény világítani kezd a készüléken.
2. A készülék visszakapcsolásához nyomja meg újra a POWER gombot, a számgombokat (0~9), a
TV/DTV gombot vagy a csatornaváltó (</>) gombot.
➣
A televíziót ne hagyja hosszabb ideig (például amíg szabadságra utazik) készenléti állapotban.
Érdemes a televízió táp- és antennacsatlakoztatását is megszüntetnie.
Magyar - 8
Page 71

A menü megtekintése
1. Kapcsolja be a készüléket, majd nyomja meg a MENU gombot.
A főmenü megjelenik a képernyőn. A menü bal oldalán látható
ikonok jelentése: Kép, Hang, Csatorna, Beállítás, Bemenet,
Digitális menü.
2. A p vagy a q gombbal válassza ki az egyik ikont.
Az ikon almenüjébe az
ENTER
gomb megnyomásával
léphet be.
3. A kilépéshez nyomja meg az EXIT gombot.
Körülbelül egy perc múlva a képernyőmenü eltűnik.
➣
A TOOLS gomb használata
A TOOLS gombbal gyorsan és könnyen kiválaszthatja a
leggyakrabban használt funkciókat. A „Eszközök” menü a
megtekintés külső bemeneti módjától függően változik.
1.
Nyomja meg az TOOLS gombot.
Megjelenik a „Eszközök” menü.
2. A p vagy a q gombbal választhat menüt.
3. A p/q///
módosíthatja és használhatja a kiválasztott elemeket. Az egyes
funkciók részletesebb ismertetését a megfelelő oldalon találja.
Anynet+ (HDMI-CEC),
♦
Kép Üzemmód,
♦
Hang üzemmód,
♦
Auto kikapcs.,
♦
SRS TS XT,
♦
Energiagazd.,
♦
Kettős I/II,
♦
Autom. beállítás,
♦
ENTER
gombokkal jelenítheti meg,
(lásd az 47. oldalt)
(lásd az 16. oldalt)
(lásd az 21. oldalt)
(lásd az 23. oldalt)
(lásd az 21. oldalt)
(lásd az 26. oldalt)
(lásd az 22. oldalt)
(lásd az 45. oldalt)
Eszközök
Kép
Belépés
Vissza
TV
Üzemmód : Normál
Háttérvilágítás 7
Kontraszt 95
Fényerő 45
Élesség 50
Szín 50
Árnyalat Z 50 V 50
Részletbeállítások
Képopciók
Visszaállítás : OK
Mozgatá
Anynet+ (HDMI-CEC)
Kép Üzemmód : Normál
Hang üzemmód : Egyedi
Auto kikapcs. : Ki
SRS TS XT : Ki
Energiagazd. : Ki
Kettős l/ll : Monó
Mozgatás Belépés Kilépés
Magyar - 9
Page 72

Plug & Play
A TV-készülék legelső bekapcsolásakor több alapvető
felhasználói beállítás végezhető el egymás után automatikusan.
A lehetőségek az alábbiak.
➣
A digitális televíziózásra (DVB) szolgáló funkciók csak azokban
az országokban használhatók, ahol a DVB-T (MPEG2)
szabványú földfelszíni sugárzás működik. Tájékozódjon a helyi
forgalmazónál foghat-e DVB-T jeleket. Bár ez a TV-készülék
követi a DVB-T előírásait, a jövőben megjelenő földfelszíni
digitális DVB-T adásokkal való kompatibilitása nem garantált.
Lehet, hogy bizonyos funkciók egyes országokban nem használhatók.
Nyomja meg a távvezérlő POWER gombját.
1.
Megjelenik a „Start Plug & Play” üzenet az „OK” gombbal.
2. Válassza ki a megfelelő nyelvet a p vagy q gomb lenyomásával.
Az
ENTER
3. Az „Üzlet mód” vagy az „Otthon” mód kiválasztásához nyomja meg a vagy a gombot, majd
nyomja meg az
Javasoljuk, hogy TV-készülékét állítsa „Otthon” módra, hogy otthonában a legkiválóbb
➣
képminőséget élvezhesse.
Az „Üzlet mód” mód használata kereskedelmi környezetben javasolt.
➣
Ha a készüléket véletlenül „Üzlet mód” módba állította, és szeretne visszatérni a (Normál) „Otthon”
➣
beállításba: Nyomja meg a TV hangerőszabályzó gombját. Amikor a hangerő képernyőmenüje
megjelenik, tartsa lenyomva 5 másodpercig a MENU gombot.
4. Megjelenik az „Ellenőrizze az antennabemenetet” üzenet az „OK” gombbal.
Nyomja meg az
➣
Ellenőrizze az antennakábel megfelelő csatlakoztatását.
5.
A megfelelő ország kiválasztásához nyomja meg a p vagy a q gombot,
majd az
6. Megjelenik a „Bizonyos DTV funkciók esetleg nem elérhetők. Digitális pásztázás?” üzenet.
A vagy gombok megnyomásával válassza az „Igen” vagy a „Nem” lehetőséget, majd nyomja meg
az
ENTER
Igen: Először analóg, majd digitális TV-csatorna keresése.
Nem: Csak analóg TV-csatorna keresése.
➣
Ez a funkció minden országban támogatott, az alábbiak kivételével: Franciaország, Németország,
Olaszország, Hollandia, Spanyolország, Svájc, Egyesült Kir., Ausztria.
7.
Az „Automata tárolás” menü a „Start” választásával jelenik meg. Nyomja meg az
A csatornakeresés automatikusan indul el és áll le.
➣
Megjelenik a DTV csatornakeresés menüje, és a DTV csatorna automatikusan frissül.
Ha a DTV csatorna frissítve lett, Bemenet menü Forráslistájában a forrás DTV-re változik.
➣
Miután az összes csatorna tárolása megtörtént, megjelenik az „Órabeállítás” menü.
Az
➣
A DTV csatornára történő átállításra vonatkozó további részletek a 29. oldalon találhatók.
➣
Miután minden analóg csatorna tárolása megtörtént, egyes országoknál megjelenik az időzóna
választására szolgáló képernyő.
8. Nyomja meg az
Válassza ki a vagy a gombbal az „Hónap”, „Nap”, „Év”, „Óra”, vagy a „perc”.
Állítsa be az „Hónap”, „Nap”, „Év”, „Óra”, vagy a „perc” a p vagy a q gombbal.
A távvezérlőn található számgombok segítségével is beállíthatja az órát, napot, hónapot, évet és a
➣
perc.
gombbal hagyja jóvá választását.
ENTER
ENTER
ENTER
gombot.
ENTER
ENTER
gombot.
gombot.
gombot.
gomb lenyomásával bármikor megszakíthatja a memóriába tárolás folyamatát.
gombot.
Plug & Play
Start Plug & Play.
OK
Enter
ENTER
gombot.
Magyar - 10
Page 73

9. Az
ENTER
nyomja meg az
Akkor is, ha nem nyomta meg az
➣
gombbal hagyja jóvá a választását. Megjelenik a „Jó szórakozást!” üzenet. Ha végzett,
ENTER
gombot.
automatikusan eltűnik.
Nyelv: A nyelv kiválasztása.
Ország: Az ország kiválasztása.
Automata tárolás:
Az adott területen elérhető csatornák automatikus megkeresése és tárolása.
Órabeállítás: A TV órájának beállítása.
ENTER
gombot, az üzenet néhány másodperc múlva
Ha vissza kívánja állítani ezt a funkciót...
1.
A menü megjelenítéséhez nyomja meg a MENU gombot.
Nyomja meg a p vagy a q gombot a „Beállítás”
kiválasztásához, majd az
ENTER
gombot.
TV
Plug & Play
Nyelv : Magyar
Idő
Dallam : Ki
Szórakoztatás : Ki
Energiagazd. : Ki
Beállítás
2. A „Plug & Play” opció kiválasztáshoz ismételten nyomja meg az
ENTER
gombot.
A beállításra vonatkozó további részletek a 10. oldalon
találhatóak.
A „Plug & Play” funkció csak TV üzemmódban áll
➣
Mozgatá
Belépés
rendelkezésre.
Csatornák automatikus tárolása
Végigpásztázhatja a rendelkezésre álló frekvenciatartományt (a
lehetőségek országonként eltérőek).
Elképzelhető, hogy a csatornákhoz automatikusan hozzárendelt
programszámok nem egyeznek az aktuális vagy a kívánt
programszámokkal. Azonban kézzel is megválaszthatja a
programszámokat, és bármely nem kívánt csatornát törölhet.
A menü megjelenítéséhez nyomja meg a MENU gombot.
1.
A p vagy a q gombbal válassza ki a „Csatorna” opciót, majd
nyomja meg az
2. Az „Ország” opció kiválasztásához nyomja meg az
ENTER
gombot.
ENTER
gombot.
TV
Ország : Egyesült Kir.
Automata tárolás
Kézi tárolás
Csatornakezelő
Sorrend
Név
Finomhangolás
LNA : Ki
Mozgatá
3. Válassza ki a megfelelő országot a p vagy a q gombbal, majd nyomja meg az
➣
Még ha módosította is az országbeállítást ebben a menüben, a DTV-hez megadott országbeállítás
nem módosul. (Lásd a 29. oldalt)
4.
A p vagy a q gombbal válassza ki az „Automata tárolás” opciót, majd nyomja meg az ENTER gombot.
5. Nyomja meg az
➣
A készülék elkezdi az elérhető csatornák letárolását.
➣
Az
ENTER
ENTER
gombot.
gomb megnyomásával bármikor megszakíthatja a memóriába tárolási folyamatot,
és visszatérhet a „Csatorna” menühöz.
6.
Az összes elérhető csatorna tárolása után megjelenik a „Sorrend” menü. (Lásd a 14. oldalt)
ENTER
Csatorna
Belépés
gombot.
Vissza
Vissza
Magyar - 11
Page 74

Csatornák kézi tárolása
DTV vagy külső bemenet üzemelésekor nem elérhető.
Tárolhatja a kívánt televíziós csatornákat, beleértve a
kábeltévés hálózaton fogadott csatornákat is.
A csatornák kézi tárolásakor:
♦ Eldöntheti, hogy kívánja-e tárolni mindegyik talált csatornát.
♦ Kiválaszthatja az egyes tárolt csatornák azonosítására szolgáló
TV
Ország : Egyesült Kir.
Automata tárolás
Kézi tárolás
Csatornakezelő
Sorrend
Név
Finomhangolás
LNA : Ki
programszámot.
1.
A menü megjelenítéséhez nyomja meg a MENU gombot.
A p vagy a q gombbal válassza ki a „Csatorna” menüpontot,
majd nyomja meg az
ENTER
gombot.
2. A p vagy a q gombbal válassza ki a „Kézi tárolás”
menüpontot, majd nyomja meg az
ENTER
gombot.
3. Válassza ki a megfelelő beállítást a p vagy a q gombbal, majd
nyomja meg az
ENTER
gombot.
Mozgatá
TV
Program : P 1
Színrendszer : Auto.
Hangrendszer : BG
Csatorna : S 6
Keresés : 140 MHz
Tárolás : ?
4. Ha megfelelőnek találja a beállítást, nyomja meg az
ENTER
5.
A menüből történő kilépéshez az EXIT gombot kell megnyomni.
gombot.
Mozgatá
♦ Program (a csatornához rendelni kívánt program száma)
− A p vagy a q gombbal választható ki a megfelelő szám.
A számot a távirányítón a (0~9) számgombbal közvetlenül is ki lehet választhatni.
♦ Színrendszer: Auto./PAL/SECAM/NTSC4.43
− Válassza ki a kívánt színnormát a p vagy a q gombbal.
♦ Hangrendszer: BG/DK/I/L
− Válassza ki a kívánt hangnormát a p vagy a q gombbal.
Csatorna (Ha tudja a tárolni kívánt csatorna számát)
♦
− A p vagy a q gombbal válassza a C (antenna) vagy az S (kábel) csatornatípust.
− Nyomja meg a gombot, majd a p vagy q gombbal válassza ki a kívánt számot.
A számot a távirányítón a (0~9) számgombbal közvetlenül is ki lehet választhatni.
Ha nincs vagy nem megfelelő a hang, válasszon ki másik hangnormát.
♦ Keresés (Ha nem ismeri a csatorna számát)
− A p vagy a q gombbal indítsa el a keresést.
− A hangolóegység addig pásztázza a frekvenciatartományt, amíg az első csatorna vagy a
kiválasztott csatorna meg nem jelenik a képernyőn.
♦ Tárolás (Store – a csatorna és a hozzá társított programszám tárolásakor)
− Válassza az „OK” beállítást az
ENTER
gombbal.
Csatorna mód
− P (Program mód): A hangolás befejezésekor a térségben fogható műsorszóró állomásokat a
készülék a P00 és P99 pozíciószámhoz rendeli. A csatornát a pozíciószám megadásával
választhatja ki.
− C (Antennás csatorna mód): Ha ebben az üzemmódban megadja az adott csatornához tartozó
számot, előhívhatja a kívánt (antennán keresztül sugárzott) csatornát.
− S (Kábeltelevíziós mód): Ha ebben az üzemmódban megadja az adott csatornához tartozó
számot, előhívhatja a kívánt (kábel)csatornát.
Csatorna
Belépés
Kézi tárolás
Belépés
Vissza
Vissza
Magyar - 12
Page 75

Csatornák hozzáadása / zárolása
DTV vagy külső bemenet üzemelésekor nem elérhető.
➣
A Csatornakezelő elemmel kényelmesen zárolhat vagy
hozzáadhat csatornákat.
A menü megjelenítéséhez nyomja meg a MENU gombot.
1.
A p vagy a q gombbal válassza ki a „Csatorna” menüpontot,
majd nyomja meg az
2. A p vagy a q gombbal válassza ki a „Csatornakezelő”
menüpontot, majd nyomja meg az
♦ Csatornák hozzáadása
A Csatornalista kényelmesen bővíthető csatornákkal.
3. A „Csatornalista” kiválasztásához nyomja meg az
gombot.
4. Lépjen a ( ) mezőre a p,q, vagy a gombbal, válassza
ki a hozzáadni kívánt csatornát, és az
megnyomásával adja hozzá.
➣
Ha újra megnyomja az
eltűnik a csatorna mellől, és a csatorna nem adódik hozzá.
➣
Ha a „Gyermekzár” „Be” van kapcsolva, a „
♦ Csatornák zárolása
A kép eltüntetését és a hang némítását lehetővé tévő funkció
segítségével megakadályozhatja, hogy illetéktelen személyek,
például gyermekek nézhessék a számukra nem megfelelő
műsorokat.
5.
A p vagy a q gombbal válassza ki a „Gyermekzár”„Gyermekzár”Gyermekzár”
menüpontot, majd nyomja meg az
6. A p vagy a q gombbal válassza ki a „Be” beállítást, majd
nyomja meg az
7. A p vagy a q gombbal válassza ki a „Csatornalista”
menüpontot, majd nyomja meg az
8. Lépjen a „„ ” mezőre a mezőre a p,q, vagy a gombbal, válassza ki
a zárolni kívánt csatornát, és az
megnyomásával zárolja.
➣
Ha újra megnyomja az
eltűnik a csatorna mellől, és a csatorna nem lesz zárolt.
➣
Ha a „Gyermekzár” be van kapcsolva, egy kék képernyő
jelenik meg.
A menüből történő kilépéshez az EXIT gombot kell megnyomni.
9.
A „Gyermekzár” „Be” vagy „Ki” kapcsolójával könnyedén válthatA „Gyermekzár” „Be” vagy „Ki” kapcsolójával könnyedén válthat
a „ ” helyen kiválasztott csatornák aktív és inaktív állapota
között.
ENTER
ENTER
gombot.
ENTER
gombot.
ENTER
ENTER
ENTER
gombot.
ENTER
ENTER
gomb
gombot, a ( ) jelzés
” aktív.
ENTER
ENTER
gombot.
gombot.
gomb
gombot, a ( ) jelölés
TV
Ország : Egyesült Kir.
Automata tárolás
Kézi tárolás
Csatornakezelő
Sorrend
Név
Finomhangolás
LNA : Ki
Mozgatá
TV
Csatornalista
Gyermekzár : Ki
Mozgatá
P 1 C3
Prog.
0 C-1 C3
2 BBC 1
3 C74
4 C75
5 C76
6 S3
7 S4
8 S6
9 S7
Hozzáadás Zárol
Mozgatás Belépés
Oldal Vissza
Csatorna
Csatornakezelő
Csatornalista
Belépés
Belépés
1 / 10
Vissza
Vissza
Ezeket az opciókat könnyedén kiválaszthatja a távvezérlőEzeket az opciókat könnyedén kiválaszthatja a távvezérlő
CH LIST gombjával is.
Magyar - 13
Page 76

Tárolt csatornák rendezése
Ezzel a művelettel módosíthatja a tárolt csatornák
programszámát.
Erre a műveletre az automatikus mentés használata után lehet
szüksége.
DTV vagy külső bemenet üzemelésekor nem elérhető.
➣
1.
A menü megjelenítéséhez nyomja meg a MENU gombot.
A p vagy a q gombbal válassza ki a „Csatorna” menüpontot,
majd nyomja meg az
ENTER
gombot.
2. A p vagy a q gombbal válassza ki a „Sorrend” menüpontot,
majd nyomja meg az
ENTER
gombot.
3. A p vagy a q gomb lenyomásával válassza ki sorban a
módosítani kívánt csatornaszámot. Nyomja meg az
ENTER
gombot.
A kiválasztott csatorna száma és neve a jobb oldalra kerül.
➣
4. A p vagy a q gombbal lépjen a módosítani kívánt helyre, és
nyomja meg az
➣
A kiválasztott csatornát kicserélte a kiválasztott számon
ENTER
gombot.
előzőleg tárolt csatornára.
5.
A többi csatorna elhelyezéséhez ismételje meg a 3 – 4. lépést.
6.
A kilépéshez nyomja meg az EXIT gombot.
Csatornanevek hozzárendelése
A csatornainformációk sugárzásakor a készülék a
csatornaneveket automatikusan hozzárendeli a csatornákhoz.
Ezek a nevek azonban módosíthatók, tehát a csatornákhoz új
neveket is hozzárendelhet.
➣
DTV vagy külső bemenet üzemelésekor nem elérhető.
A menü megjelenítéséhez nyomja meg a MENU gombot.
1.
Nyomja meg a p vagy a q gombot a „Csatorna” menü
kiválasztásához, majd az
2. A p vagy a q gombbal válassza ki a „Név” menüpontot, majd
nyomja meg az
ENTER
3. Ha szükséges, a p vagy a q gombbal válassza ki az
átnevezendő csatornát. Nyomja meg az
➣
A névmező körül megjelenik a kiválasztási sor.
4.
Következőhöz... Művelet…
Betű, szám vagy szimbólum
kijelölése
A következő betűre lépés
Az előző betűre lépés
Név jóváhagyása
ENTER
gombot.
gombot.
ENTER
Nyomja meg a
gombot
Nyomja meg a gombot.
Nyomja meg a gombot.
Nyomja meg az
gombot.
gombot.
p vagy a q
ENTER
TV
Ország : Egyesült Kir.
Automata tárolás
Kézi tárolás
Csatornakezelő
Sorrend
Név
Finomhangolás
LNA : Ki
Mozgatá
TV
Prog. Cs. Név
0 C-- ---- 1 C23 -----
2 S06 ---- 3 S07 ---- 4 S09 ---- 5 S12 ---- 6 S13 ---- 7 S14 ---- 8 S17 ---- 9 C21 -----
Mozgatá
TV
Ország : Egyesült Kir.
Automata tárolás
Kézi tárolás
Csatornakezelő
Sorrend
Név
Finomhangolás
LNA : Ki
TV
Prog. Cs. Név
0 C-- -----
1 C23 -----
2 S06 ---- 3 S07 ---- 4 S09 ---- 5 S12 ---- 6 S13 ---- 7 S14 ---- 8 S17 ---- 9 C21 -----
Csatorna
Sorrend
Csatorna
Mozgatá
Mozgatá
Belépés
Belépés
Belépés
Név
Belépés
Vissza
Vissza
Vissza
Vissza
➣
A következő karakterek használhatók: Az ábécé betűi (A–�), számok (0–9) és speciális karakterek
(+, -, *, /, szóköz)
5.
Valamennyi átnevezendő csatorna esetén ismételje meg a 3. és 4. lépést.
6.
A kilépéshez nyomja meg az EXIT gombot.
Magyar - 14
Page 77

Csatornák nomhangolása
Kézi nomhangolással igazíthatja be egy adott csatorna
optimális vételét.
DTV vagy külső bemenet üzemelésekor nem elérhető.
➣
1.
A nomhangolni kívánt csatorna közvetlen kiválasztásához
nyomja meg a megfelelő számgombot.
2. A menü megjelenítéséhez nyomja meg a MENU gombot.
Nyomja meg a p vagy a q gombot a „Csatorna” menü
kiválasztásához, majd az
ENTER
gombot.
3. A p vagy a q gombbal válassza ki a „Finomhangolás”
menüpontot, majd nyomja meg az
ENTER
gombot.
4. A vagy a gombbal nomhangolhatja a képet.
Nyomja meg az
ENTER
gombot.
5. A kilépéshez nyomja meg az EXIT gombot.
➣
A már mentett nomhangolt csatornák száma mellett, a
csatornacímben, a jobb oldalon egy csillag „*” szerepel.
Ezután a csatorna száma vörös lesz.
Ha a nomhangolást „Vissza” szeretné állítani, nyomja meg a
➣
p vagy q gombot, majd az
ENTER
gombot.
TV
P 1
Beállítás Mentés Vissza
LNA (Low Noise Amplier - kis zajú erősítő)
Az LNA funkció a gyenge vételi körzetben javíthatja a vételt (ez
a kis zajú erősítő ugyanis erősíti a bejövő jeleket).
DTV vagy külső bemenet üzemelésekor nem elérhető.
➣
A menü megjelenítéséhez nyomja meg a MENU gombot.
1.
Nyomja meg a p vagy a q gombot a „Csatorna” menü
kiválasztásához, majd az
ENTER
gombot.
2. A p vagy a q gombbal válassza ki az „LNA” menüpontot, majd
nyomja meg az
ENTER
gombot.
3. A p vagy a q gombbal állítsa a kapcsolót „Ki” vagy „Be” állásba,
majd nyomja meg az
ENTER
gombot.
4. A kilépéshez nyomja meg az EXIT gombot.
TV
TV
Ország : Egyesült Kir.
Automata tárolás
Kézi tárolás
Csatornakezelő
Sorrend
Név
Finomhangolás
LNA : Ki
Mozgatá
Ország : Egyesült Kir.
Automata tárolás
Kézi tárolás
Csatornakezelő
Sorrend
Név
Finomhangolás
LNA : Ki
Mozgatá
Ország : Egyesült Kir.
Automata tárolás
Kézi tárolás
Csatornakezelő
Sorrend
Név
Finomhangolás
LNA : Off
Csatorna
Finomhangolás
Vissza
Csatorna
Csatorna
Belépés
Belépés
Vissza
0
Vissza
Ki
Be
Magyar - 15
Mozgatá
Belépés
Vissza
Page 78

Képtípus módosítása
Kiválaszthatja az elvárásainak leginkább megfelelő képtípust.
1.
A menü megjelenítéséhez nyomja meg a MENU gombot.
A „Kép” menüpont kiválasztásához nyomja meg az
gombot.
2. Az
ENTER
gomb ismételt megnyomásával válassza az
„Üzemmód” menüpontot.
3. Válassza ki a kívánt képhatást a p vagy a q gombbal. Nyomja
meg az
ENTER
gombot.
4. A kilépéshez nyomja meg az EXIT gombot.
Kiemelt: Nagy felbontású kép megjelenítése világos
szobában.
Normál: Kép optimális megjelenítése normál környezetben.
Film: Kép kellemes megjelenítése sötét szobában.
➣
A Kép módot minden egyes bemeneti forrásra külön be kell
állítani.
ENTER
TV
Üzemmód : Normál
Háttérvilágítás 7
Kontraszt 95
Fényerő 45
Élesség 50
Szín 50
Árnyalat Z 50 V 50
Részletbeállítások
Képopciók
Visszaállítás : OK
Mozgatá
TV
Üzemmód : Normál
Háttérvilágítás 7
Kontraszt 95
Fényerő 45
Élesség 50
Szín 50
Árnyalat Z 50 V 50
Részletbeállítások
Képopciók
Visszaállítás : OK
Mozgatá
Kép
Kép
Belépés
Kiemelt
Normál
Belépés
Film
Vissza
Vissza
Egyszerű beállítás
Nyomja meg a távvezérlő TOOLS gombját.
1.
2. A p vagy a q gombbal válassza ki a „Kép Üzemmód”.
3. A ◄ vagy a ► gombbal választhatja ki a megfelelő lehetőséget.
4. Az EXIT vagy a TOOLS gomb megnyomásával léphet ki.
Anynet+ (HDMI-CEC)
Kép Üzemmód ◄ Normál ►
Hang üzemmód : Egyedi
Auto kikapcs. : Ki
SRS TS XT : Ki
Energiagazd. : Ki
Kettős l/ll : Monó
Eszközök
Mozgatás
Beállítás Kilépés
Magyar - 16
Page 79

Az egyedi képbeállítások módosítása
A készülék számos olyan beállítással rendelkezik, mellyel
szabályozhatja a képminőséget.
1.
A megfelelő képhatás kiválasztásához végezze el a „Képtípus
módosítása” című rész 1 - 3. (utasítását. utasítását a 16. oldalon.)
2. A p vagy a q gombbal válassza ki a kívánt elemet. Nyomja
meg az
ENTER
gombot.
3. A vagy a gombbal válassza ki a kívánt elemet. Nyomja meg
az
ENTER
gombot.
4. A kilépéshez nyomja meg az EXIT gombot.
Háttérvilágítás: A képernyő fényerejét az LCD
háttérvilágítás fényerejének beállításával szabályozhatja.
(0~10)
Kontraszt: A tárgyak és a háttér világosságának és
sötétségének beállítása.
Fényerő: A teljes képernyő fényerejének beállítása.
Élesség: A tárgyak kontúrjának élesítése, illetve
elmosódottabbá tétele.
Szín: A színek világosabbá vagy sötétebbé tétele.
Árnyalat: A tárgyak színének beállítása, pirosabbá vagy
zöldebbé téve azokat a természetesebb hatás elérése
érdekében.
A beállított értékeket a rendszer a kiválasztott képmódtól függően tárolja.
➣
PC üzemmódban csak a „Háttérvilágítás”, a „Kontraszt” és a „Fényerő” beállítását módosíthatja. (26,
➣
32, 37 hüvelyk)
PC üzemmódban csak a „Kontraszt” és a „Fényerő” beállítását módosíthatja. (40 hüvelyk)
A PAL-rendszer Analog TV, Külső, AV és S-Video üzemmódjánál a „Árnyalat” funkció nem használható.
➣
A „Visszaállítás” gomb megnyomásával visszatérhet a gyári képbeállítási alapértékekre.
➣
(Lásd a „Képbeállítás visszaállítása a gyári alapértékekre” című részt a 18. oldalon.)
TV
Üzemmód : Normál
Háttérvilágítás 7
Kontraszt 95
Fényerő 45
Élesség 50
Szín 50
Árnyalat Z 50 V 50
Részletbeállítások
Képopciók
Visszaállítás : OK
Mozgatá
▲
Háttérvilágítás
▼
Mozgatás Beállítás Vissza
Kép
Belépés
Vissza
7
A kép részletes beállításainak kongurálása
Beállíthatja a szemének legkellemesebb színtónust is.
1.
A menü megjelenítéséhez nyomja meg a MENU gombot.
A „Kép” menüpont kiválasztásához nyomja meg az
ENTER
gombot.
2. A „Üzemmód” menüpont kiválasztásához nyomja meg az
ENTER
„Normál” vagy „Film” menüpontot, majd nyomja meg az
gombot. A p vagy a q gombbal válassza ki az
ENTER
gombot.
3. A ▲ vagy a ▼ gombbal válassza ki a „Részletbeállítások”
menüpontot, majd nyomja meg az
ENTER
gombot.
4. Válassza ki a kívánt beállítást a p vagy a q gombbal, majd
nyomja meg az
5. Ha megfelelőnek találja a beállítást, nyomja meg az
ENTER
gombot.
ENTER
gombot.
6.
A kilépéshez nyomja meg az EXIT gombot.
A „Részletbeállítások” funkció használatára „Normál” vagy
➣
„Film” üzemmódban van lehetőség.
PC üzemmódban a „Részletes beállítások” elemei közül csak a „Dinamikus kontraszt”, a „Gamma” és
➣
a „Fehéregyensúly” értékét módosíthatja.
Magyar - 17
TV
Üzemmód : Normál
Háttérvilágítás 7
Kontraszt 95
Fényerő 45
Élesség 50
Szín 50
Árnyalat Z 50 V 50
Részletbeállítások
Képopciók
Visszaállítás : OK
Mozgatá
TV
Fekete beállítás : Ki
Dinamikus kontraszt
Gamma : 0
Színköz
Fehéregyensúly
Flesh hang : 0
Éljavítás : Be
Mozgatá
Kép
Belépés
Részletbeállítások
: Közepes
: Természetes
Belépés
Vissza
Vissza
Page 80

Fekete beállítás: Ki/Alacsony/Közepes/Magas
A feketeség szintje a képernyőn a képmélység szabályozása érdekében közvetlenül is megválasztható.
Dinamikus kontraszt: Ki/Alacsony/Közepes/Magas
A képernyőn a kontraszt állítható, hogy a legjobb kiemelést biztosítsa.
Gamma: -3 ~ +3
Beállíthatja az elsődleges színek (piros, zöld, kék) erősségét.
Nyomja a vagy a gombot addig, amíg el nem éri az optimális beállítást.
Színköz: Auto./Természetes/Egyedi
A színskála vörös, zöld és kék színekből álló mátrix.
Kedvenc színterének kiválasztásával fedezze fel a legtermészetesebb színeket.
♦ Auto.: Az Automatikus színskála automatikusan beállítja a legtermészetesebb színtónust a
programforrások alapján.
♦ Természetes: A Természetes színskála mély és színgazdag tónust jelent.
♦ Egyedi: A színtartomány egyéni ízlésnek megfelelő beállítása.
A színskála testreszabása
➣
Szín: Vörös/Zöld/Kék/Sárga/Cián/Bíbor
A színtartományt egyéni ízlésének megfelelően állíthatja be.
A „Szín” akkor áll rendelkezésre, ha a „Színköz” beállítása „Egyéni”.
A
p vagy a q gombbal választhat a „Vörös”, „�öld”, „Kék”, „Sárga”, „Cián” és „Bíbor” szín közül.
Nyomja meg az
ENTER
gombot.
Vörös/zöld/kék: A „Szín” menüben beállíthatja a kiválasztott szín RGB (vörös/zöld/kék) értékeit.
A p vagy a q gombbal választhatja ki a „Vörös”, „�öld” vagy „Kék” színt módosításra.
Nyomja meg az
ENTER
gombot.
A vagy a gomb lenyomásával növelheti, illetve csökkentheti az egyes elemek értékét. Nyomja
meg az
ENTER
gombot.
Visszaállítás: A színtér visszaállítása az alapértelmezett értékekre.
Fehéregyensúly: P-eltolás/Z-eltolás/K-eltolás/P-nyereség/Z-nyereség/K-nyereség/Visszaállítás
A természetesebb képszínezés érdekében a színhőmérséklet beállítható.
P-eltolás/Z-eltolás/K-eltolás/P-nyereség/Z-nyereség/K-nyereség: A módosított értékeknek
megfelelően változik a módosított képernyő.
Válassza ki a megfelelő beállítást a
p vagy a q gombbal, majd nyomja meg az
ENTER
gombot.
Nyomja a vagy a gombot addig, amíg el nem éri az optimális beállítást.
Visszaállítás: A korábban beállított fehéregyensúly visszaáll a gyári alapértékre.
Bőrszín tónus: -15 ~ +15
Hangsúlyozhatja a képen a bőrtónus árnyalatát.
Nyomja a vagy a gombot, amíg el nem éri az optimális beállítást.
A módosított értékek megjelennek a módosított képernyőn.
➣
Éljavítás: Ki/Be
Hangsúlyozhatja az objektumok határait a képen.
Képbeállítások visszaállítása gyári alapbeállításra
Visszatérhet a gyári képbeállítási alapértékekre.
1.
A megfelelő képhatás kiválasztásához végezze el a „Képtípus
módosítása” című rész 1 - 3. utasítását a 16. oldalon.
2. A p vagy a q gombbal válassza ki a „Visszaállítás” menüpontot,
majd nyomja meg az
ENTER
gombot.
3. A p vagy a q gombbal válassza ki az „OK” vagy a „Kilépés”
feliratot. Nyomja meg az
ENTER
gombot.
4. A kilépéshez nyomja meg az EXIT gombot.
A „Visszaállítás” mindegyik képmódra használandó.
➣
Magyar - 18
TV
Üzemmód : Normál
Háttérvilágítás 7
Kontraszt 95
Fényerő 45
Élesség 50
Szín 50
Árnyalat Z 50 V 50
Részletbeállítások
Képopciók
Visszaállítás : OK
Mozgatá
Kép
Belépés
OK
Kilépés
Vissza
Page 81

A képopció beállítása
1. A menü megjelenítéséhez nyomja meg a MENU gombot.
A „Kép” menüpont kiválasztásához nyomja meg az
ENTER
gombot.
2. A p vagy a q gombbal válassza ki a „Kép” menüpontot, majd
nyomja meg az
ENTER
gombot.
3. Válassza ki a kívánt beállítást a p vagy a q gombbal, majd
nyomja meg az
4. Ha megfelelőnek találja a beállítást, nyomja meg az
ENTER
gombot.
ENTER
gombot.
5.
A kilépéshez nyomja meg az EXIT gombot.
PC üzemmódban a „Képopciók” elemei közül csak a
➣
„Színtónus” és a „Méret” módosítható.
Színtónus: Hideg2/Hideg1/Normál/Meleg1/Meleg2
Beállíthatja a szemének legkellemesebb színtónust is.
A beállított értékeket a rendszer a kiválasztott Kép függően
➣
tárolja.
A „Meleg1” és a „Meleg2” csak akkor használható, ha a
➣
képmód beállítása „Film”.
Méret: Auto széles/16:9/Széles nagyítás/Nagyítás/4:3/ Csak pásztázás
Beállíthatja az igényeinek legjobban megfelelő képméretet.
Auto széles: A kép méretének automatikus beállítása „16:9” oldalarányra.
16 :9: A kép méretét a DVD-hez vagy szélesvásznú tévéadásokhoz megfelelő 16:9 oldalarányra
igazítja.
Széles nagyítás: A 4:3-as aránynál jobban megnagyítja a képet.
Nagyítás: A 16:9 szélességű képet (függőleges irányban) nagyítja, hogy kitöltse a képernyőt.
4:3: Ez az alapértelmezett beállítás videó vagy normál tévéadás megtekintéséhez.
Csak pásztázás: Ennek a funkciónak a használata teljes, levágás nélküli képet biztosít, ha a
bejövő jelsorozat HDMI (720p/1080i) vagy Komponens (1080i).
Az „Auto széles” funkció csak „TV”, „DTV” „1. Külső”, „2. Külső”, „AV”, és „S-Video” módban elérhető.
➣
PC üzemmódban csak a „16:9” és a „4:3” mód állítható be.
➣
A TV bemenetéhez csatlakoztatott minden külső eszköz beállításai módosíthatók és tárolhatók.
➣
Ha az eszközön több mint két órán keresztül állókép jelenik meg, időleges képernyőbeégés fordulhat elő.
➣
Széles nagyítás: A szimbólumnak a vagy az
➣
ENTER
kijelölését követően használja a p vagy a q gombot a kép függőleges irányú
eltolásához.
Nagyítás
➣
: A vagy a gombbal válassza ki a szimbólumot. A kép felfelé vagy lefelé tolásához
használja a p vagy q gombot. A kiválasztását követően használja a p vagy a q
gombot a képméret függőleges irányú növeléséhez, illetve csökkentéséhez.
A „Csak pásztázás” kiválasztása után HDMI (1080i) vagy Komponens (1080i) üzemmódban:
➣
Válassza ki az
elemet a ◄ vagy a ► gomb megnyomásával. A képet a ▲, ▼, ◄ vagy ► gombbal
mozgathatja.
Hang: A ◄ vagy a ► gombbal válassza a „Hang” elemet, majd nyomja meg az
A beállítás alaphelyzetbe állítható.
Ezeket a beállításokat a távvezérlő P.SIZE gombjával is
kiválaszthatja
TV
Üzemmód : Normál
Háttérvilágítás 7
Kontraszt 95
Fényerő 45
Élesség 50
Szín 50
Árnyalat Z 50 V 50
Részletbeállítások
Képopciók
Visszaállítás : OK
Mozgatá
TV
Színtónus : Normál
Méret : Auto széles
Képernyő mód : 16:9
Dig. Zajcsökk. : Auto.
DNle : Be
HDMI feketeszint
Csak kék üzemmód : Ki
Mozgatá
Kép
Belépés
Képopciók
: Normál
Belépés
gomb megnyomásával történő
ENTER
gombot.
Vissza
Vissza
Magyar - 19
Page 82

Képernyő mód: 16:9/Széles nagyítás/Nagyítás/4:3
Ha a 16:9 oldalarányú készüléken az automatikus szélességű képméretet választja, a látni kívánt
képméretnek csak a 4:3 WSS (széles képernyős mód) beállítást választhatja, mást semmit. Az egyes
európai országok eltérő képméretet használnak, ezt a funkciót tehát ezeknek a felhasználóknak
szántuk.
♦ 16:9:
A képet 16:9 arányú, szélesvásznú módba állítja.
♦
Széles nagyítás: A 4:3-as aránynál jobban megnagyítja a képet.
♦
Nagyítás: Vízszintesen felnagyítja a képet a képernyőn.
♦
4:3: A képet 4:3 arányú normál módba állítja.
Ez a funkció csak „Auto széles” módban használható.
➣
Ez a funkció a „Komponens” vagy „HDMI” módban nem használható.
➣
Dig. Zajcsökk.: Ki/Alacsony/Közepes/Magas/ Auto.
Ha gyenge a készülék által fogott jel, akkor aktiválhatja ezt a funkciót, hogy csökkentse a statikus és
szellemképet, amely megjelenhet a képernyőn.
➣
Ha gyenge a jel, válasszon másik opciót a jobb képminőség elérése érdekében.
DNIe: Ki/Bemutató/Be
A kiváló képminőség érdekében a televízió DNIe-funkcióval rendelkezik. Ez a funkció akkor működik,
ha a DNIe „Be” van kacsolva. Ha a DNIe funkciót a Bemutató állapotra váltotta, a képernyőn
demonstrációs céllal láthatja a normál és a DNIe-funkciót alkalmazó képet. Így megláthatja a
különbséget a kép minőségében.
DNIeTM (a Samsung digitális képminőség-javító technológiája)
➣
Ez a szolgáltatás a 3D zajszűréssel, részletkiemeléssel, kontraszterősítéssel és fehérerősítéssel
még részletgazdagabb képet varázsol Ön elé. Az új képkompenzáló algoritmus világosabb,
tisztább, részletesebb képet biztosít. A DNIe™ technológia minden jelet a néző szeméhez igazít.
A „DNIe” csak „Kiemelt” módban érhető el.
➣
HDMI feketeszint: Normál/Alacsony
A képernyő mélységét a képernyő feketeszintjének kiválasztásával állíthatja.
➣
Ez a funkció csak akkor aktív, ha a kívülről származó bemenet a HDMI csatlakozón érkezik
(RGB jelsorozat)
Csak kék üzemmód: Ki/Be
Ez a funkció AV készülékek bemérésével foglalkozó szakemberek számára hasznos. Ez a funkció
csak a kék jelet jeleníti meg, eltávolítva a vörös és a zöld jeleket a videojelből, így kék szűrő hatást
biztosít, amely a videoberendezések (pl. DVD-lejátszók, házimozirendszerek stb.) Szín és Árnyalat
beállításának módosításához használatos.
E funkcióval a Szín és Árnyalat értékét az egyes videoeszközök jelszintjének megfelelő értékre
állíthatja a vörös, zöld, kék, cián, bíbor és sárga színoszlop-mintával, további kék szűrő használata
nélkül.
➣
A „Csak kék üzemmód” akkor használható, ha a képmód beállítása „Film” vagy „Normál”.
Magyar - 20
Page 83

Hangbeállítások
1. A menü megjelenítéséhez nyomja meg a MENU gombot.
A p vagy a q gombbal válassza ki a „Hang” menüpontot, majd
nyomja meg az
2. Válassza ki a megfelelő beállítást a p vagy a q gombbal,
majd nyomja meg az
3. Ha megfelelőnek találja a beállítást, nyomja meg az
ENTER
4. A kilépéshez nyomja meg azA kilépéshez nyomja meg az EXIT gombot.
ENTER
gombot.
gombot.
ENTER
gombot.
TV
TV
Üzemmód : Egyedi
Hangszínszabályzó
SRS TS XT : Ki
Autom. hangerő : Ki
TV hangszóró : Be
Mozgatá
Hang
Belépés
Vissza
Üzemmód: Normál/Zene/Film/Beszéd/Egyedi
♦
Kiválaszthatja az adott műsor megtekintéséhez használni
kívánt speciális hanghatásokat.
Egyszerű beállítás
1. Nyomja meg a távvezérlő
TOOLS gombját.
2. A p vagy a q gombbal válassza ki a „Hang üzemmód”.
3. A ◄ vagy a ► gombbal válassza ki a kívánt hangmódot.
Anynet+ (HDMI-CEC)
Kép Üzemmód : Normál
Hang üzemmód ◄ Egyedi ►
Auto kikapcs. : Ki
SRS TS XT : Ki
Energiagazd. : Ki
Kettős l/ll : Monó
Eszközök
Mozgatás
Beállítás Kilépés
4. Az EXIT vagy a TOOLS gomb megnyomásával léphet ki.
♦
Hangszínszabályzó: Balansz/100Hz/300Hz/1kHz/3kHz/10kHz
A TV-készülék számos olyan beállítással rendelkezik,
TV
Hangszínszabályzó
J
amelyekkel szabályozni lehet a hangminőséget.
Ha ezeknek a beállításoknak valamelyikét módosítja, a
➣
hangmód automatikusan az „Egyedi” beállításra vált.
B
Balansz
100Hz 300Hz 1kHz 3kHz 10kHz
♦
SRS TS XT: Ki/Be
Mozgatá
Belépés
A TruSurround XT szabadalmaztatott SRS technológia, amely megoldja az 5.1 többcsatornás
tartalmak két hangsugárzón keresztül történő lejátszásának problémáját. A TruSurround lenyűgöző
virtuális térhatás élményét kínálja bármely két hangszórós lejátszó rendszerrel, akár a televízió belső
hangszóróin keresztül. A rendszer teljesen kompatibilis az összes többcsatornás formátummal.
Egyszerű beállítás
1. Nyomja meg a távvezérlő
TOOLS gombját.
2. A p vagy a q gombbal válassza ki a „SRS TS XT”.
3. A vagy a gombbal válassza ki a „Ki” vagy a „Be”.
4. Az EXIT vagy a TOOLS gomb megnyomásával léphet ki.
Anynet+ (HDMI-CEC)
Kép Üzemmód : Normál
Hang üzemmód : Egyedi
Auto kikapcs. : Ki
SRS TS XT ◄ Ki ►
Energiagazd. : Ki
Kettős l/ll : Monó
Eszközök
Vissza
Mozgatás
Beállítás Kilépés
A TruSurround XT, az SRS és a szimbólum az SRS Labs, Inc. védjegye.
A TruSurround XT technológia beépítését az SRS Labs, Inc. licenceli
Magyar - 21
Page 84

♦ Autom. hangerő: Ki/Be
Valamennyi műsorszóró állomás saját jelviszonyokkal rendelkezik, ezért nem egyszerű és nem
kényelmes, ha minden egyes csatornaváltáskor be kell állítania a hangerőt. Ezzel a funkcióval
automatikusan beállíthatja a kívánt csatorna hangerejét: magas moduláló jel esetén a hangkimenet
csökkentésével, alacsony moduláló jel esetén pedig a hangkimenet növelésével.
♦
TV hangszóró: Ki/Be
Ha külön hangszórókból szeretné hallgatni a hangokat, kapcsolja ki a belső erősítőt.
A +, - és MUTE gomb nem használható, ha a „TV hangszóró” ki van kapcsolva.
➣
A „TV hangszóró” lehetőség „Ki” állásában a Hang menük nem módosíthatók.
➣
A Dolby Laboratories licence alapján készült.
A Dolby és a dupla D szimbólum a Dolby Laboratories védjegye.
A hangmód kiválasztása
A hangmódot a „Eszközök” menüben állíthatja be.
„Kettős I/II” beállításnál az aktuális hangmód megjelenik a
képernyőn.
1.
Nyomja meg a távvezérlő TOOLS gombját.
2. A p vagy a q gombbal válassza ki a „Kettős I/II”.
Anynet+ (HDMI-CEC)
Kép Üzemmód : Normál
Hang üzemmód : Egyedi
Auto kikapcs. : Ki
SRS TS XT : Ki
Energiagazd. : Ki
Kettős l/ll ◄ Monó ►
3. A vagy a gombbal választhatja ki a megfelelő lehetőséget.
4. Nyomja meg az
A2 Sztereó
NICAM Stereo
Gyenge sztereojel és automatikus váltás esetén állítsa a készüléket Mono módba.
➣
Ez a funkció csak sztereó hangjel esetén aktív. Monó hangjel esetén kikapcsol.
➣
Ez a funkció csak Analog TV módban használható.
➣
ENTER
Audió típusa Kettős 1/2 Alap
Mono MONO
Stereo
Kettős
Mono MONO
Stereo
Kettős
gombot.
STEREO MONO
Kettős 1 Kettős 2
MONO STEREO
MONO Kettős 1
Kettős 2
Automatikus
váltás
Kettős 1
Automatikus
váltás
Kettős 1
Mozgatás Beállítás Kilépés
Eszközök
Fejhallgató csatlakoztatása (külön megvásárolható)
A TV-készülékhez fejhallgatót csatlakoztathat, így a helyiségben
tartózkodók zavarása nélkül nézheti a TV-műsort.
Ha csatlakoztatja a fejhallgató csatlakozóját a megfelelő helyre,
➣
csak az „Autom. hangerő” értékét állíthatja a Hang menüben.
A nagy hangerővel és hosszantartóan használt fejhallgató
➣
halláskárosodást okozhat.
Amikor fejhallgatót csatlakoztat a rendszerhez, akkor a hangszórók
➣
nem szólnak.
A TV és a fejhallgató hangerejének beállítása eltérő.
➣
Magyar - 22
TV oldalsó panel
Page 85

Az aktuális idő beállítása és megjelenítése
Beállíthatja a TV-készülék óráját úgy, hogy az INFO gomb
megnyomásakor megjelenjen az aktuális idő. Akkor is be kell
állítania az időt, amikor az automatikus be-/kikapcsolás időzítőt
szeretné használni.
A menü megjelenítéséhez nyomja meg a MENU gombot.
1.
TV
Plug & Play
Nyelv : Magyar
Idő
Dallam : Ki
Szórakoztatás : Ki
Energiagazd. : Ki
A p vagy a q gombbal válassza ki a „Beállítás” menüpontot,
majd nyomja meg az
2. A p vagy a q gombbal válassza ki az „Idő” menüpontot, majd
nyomja meg az
ENTER
ENTER
gombot.
gombot.
Mozgatá
TV
3. Az „Órabeállítás” menüpont kiválasztásához nyomja meg az
ENTER
4
Következőhöz... Gomb
Az „Hónap”, „Nap”, „Év”, „Óra”, vagy
gombot.
vagy a gomb
a „Perc” lépés
Az „Hónap”, „Nap”, „Év”, „Óra”, vagy
p vagy a q gomb
Mozgatá
a „Perc” beállítása
Beállítás megerősítése.
ENTER
gomb.
5. A kilépéshez nyomja meg az EXIT gombot.
Ne húzza ki a tápkábelt a fali aljzatból, mert az órát újból be kell állítania.
➣
A távvezérlőn található számgombok segítségével is beállíthatja az évet, a hónapot, a dátumot, az
➣
órát és a percet.
Beállítás
Órabeállítás
Hónap01Nap
p
01
q
Óra00Perc
00
Belépés
Belépés
Az automatikus kikapcsolás beállítása
Megadhat egy olyan – 30 és 180 perc közötti – időtartamot,
amelynek letelte után a televízió automatikusan készenléti
üzemmódba kapcsol.
1.
A menü megjelenítéséhez nyomja meg a MENU gombot.
A
p vagy a q gombbal válassza ki a „Beállítás” menüpontot,
majd nyomja meg az
ENTER
gombot.
2. A p vagy a q gombbal válassza ki az „Idő” menüpontot, majd
nyomja meg az
ENTER
gombot.
3. A p vagy a q gombbal válassza ki az „Auto kikapcs.”
menüpontot, majd nyomja meg az
ENTER
gombot.
4. Nyomja meg annyiszor a p vagy a q gombot, míg meg nem
jelenik a kívánt idő (Ki, 30, 60, 90, 120, 150, 180).
Nyomja meg az
ENTER
gombot.
5. A kilépéshez nyomja meg az EXIT gombot.
Amikor az időzítő 0-hoz ér, a TV-készülék automatikusan
➣
készenléti üzemmódba kapcsol.
Egyszerű beállítás
1.
Nyomja meg a távvezérlő TOOLS gombját.
2. AA p vagy a q gombbal válassza ki a „Auto kikapcs.”.
3. A vagy a gombbal választhatja ki a perc értékét.
4. Az EXIT vagy a TOOLS gomb megnyomásával léphet ki.
Magyar - 23
TV
Plug & Play
Nyelv : Magyar
Idő
Dallam : Ki
Szórakoztatás : Ki
Energiagazd. : Ki
Mozgatá
TV
Órabeállítás : 00 : 00
Auto kikapcs. :
1. időzítő :
2. időzítő :
3. időzítő :
Mozgatá
Anynet+ (HDMI-CEC)
Kép Üzemmód : Normál
Hang üzemmód : Egyedi
Auto kikapcs. ◄ Ki ►
SRS TS XT : Ki
Energiagazd. : Ki
Kettős l/ll : Monó
Mozgatás Beállítás Kilépés
Beállítás
Belépés
Idő
Belépés
Eszközök
Vissza
Év
2008
Vissza
Vissza
Ki
30
60
90
120
150
180
Vissza
Page 86

A televízió automatikus be- és kikapcsolása
1. A menü megjelenítéséhez nyomja meg a MENU gombot.
A p vagy a q gombbal válassza ki a „Beállítás” menüpontot,
majd nyomja meg az
ENTER
gombot.
2. A p vagy a q gombbal válassza ki az „Idő” menüpontot, majd
nyomja meg az
ENTER
gombot.
TV
Plug & Play
Nyelv : Magyar
Idő
Dallam : Ki
Szórakoztatás : Ki
Energiagazd. : Ki
3. A p vagy a q gombbal válassza ki az „1. időzítő”, a „2. időzítő”
vagy a „3. időzítő” menüpontot, majd nyomja meg az
gombot.
Az időzítő be- és kikapcsolásához három különböző beállítása
➣
adható meg.
4. Válassza ki a beállítási mezőket a vagy a gombbal.
A beállítást végezze a p vagy a q gombbal.
♦ Bekapcsolási idő: Állítsa be az órát, a percet és válasszon
az „Be”/„Ki” beállítás közül. (Az
időzítésnek a megadott beállítással
történő aktiválásához válassza ki az „Be”
opciót.)
♦ Kikapcsolási idő:
Állítsa be az órát, a percet és válasszon az „Be”/„Ki” beállítás közül. (Az
ENTER
Mozgatá
TV
Bekapcsolási idő
5
6
Kikapcsolási idő
Repeat
Hangerő
Mozgatá
időzítésnek a megadott beállítással történő aktiválásához válassza ki az „Be”
opciót.)
♦ Ismétlés:
Választható az „Egyszer”, „Minden nap”, „Hétfő~Péntek”, „Hétfő~Szombat”, illetve a
„Szombat~Vasárnap” beállítás.
♦ Hangerő: Válassza ki a megfelelő bekapcsolási hangerő szintjét.
➣
A távvezérlőn található számgombok segítségével közvetlenül beállíthatja az órát és a percet.
➣
Automatikus kikapcsolás
Az időzítő bekapcsolt állapotában a TV végül kikapcsol, ha az időzítő kapcsolta be a készüléket, és
3 órán keresztül nem működtetik a kezelőszerveket. Ez a funkció kizárólag az időzítő bekapcsolt
állapotában működik és megakadályozza, hogy a TV a túlságosan hosszú használat során
felmelegedjen.
00
00
10
:
:
Egyszer
Beállítás
Belépés
1. időzítő
00 Ki
00 Ki
Belépés
Vissza
Vissza
A nyelv kiválasztása
A készülék első használatakor meg kell adnia, hogy milyen
nyelven jelenjenek meg a menük és utasítások.
A menü megjelenítéséhez nyomja meg a MENU gombot.
1.
A p vagy a q gombbal válassza ki a „Beállítás” menüpontot,
majd nyomja meg az
2. A p vagy a q gombbal válassza ki a „Nyelv” menüpontot, majd
nyomja meg az
3. A p vagy a q gombbal válassza ki a kívánt nyelvet.
Nyomja meg az
4. A kilépéshez nyomja meg az EXIT gombot.
ENTER
ENTER
ENTER
gombot.
gombot.
gombot.
Magyar - 24
TV
Plug & Play
Nyelv : Magyar
Idő
Dallam : Ki
Szórakoztatás : Ki
Energiagazd. : Ki
Mozgatá
Beállítás
Belépés
Vissza
Page 87

Dallam/Szórakoztatás/Energiagazd.
1. A menü megjelenítéséhez nyomja meg a MENU gombot.
A p vagy a q gombbal válassza ki a „Beállítás” menüpontot,„Beállítás” menüpontot,” menüpontot,
majd nyomja meg az
ENTER
gombot.
2. Válassza ki a megfelelő beállítást a p vagy a q gombbal, majd
nyomja meg az
ENTER
gombot.
3. Ha megfelelőnek találja a beállítást, nyomja meg az
ENTER
gombot.
4. A kilépéshez nyomja meg az EXIT gombot.
Dallam: Ki/Alacsony/Közepes/Magas
♦
A TV be- és kikapcsolásakor hallható dallam beállítására szolgál.
Nem hallható a dallam
➣
− A TV-ről nem érkezik hang, mert megnyomta a MUTE gombot.
− A TV-ről nem érkezik hang, mert megnyomta a - (Hangerő) gombot.
− Ha az Alváskapcsoló funkció kikapcsolta a TV-t.
♦ Szórakoztatás: Ki/Sport/Mozi/Játék
Az „Szórakoztatás” módban kiválaszthatja a legjobb megjelenítést és hangot a sportközvetítésekhez,
filmekhez és játékokhoz.
− Ki: Az „Szórakoztatás” funkció kikapcsolása.
− Sport: Optimális kép- és hangminőség sportközvetítéshez. Még mozgalmasabb kép és hang.
− Mozi: Optimális kép- és hangminőség filmekhez. Gazdagabb kép és tovább javított hang.
− Játék: Optimális kép- és hangminőség játékokhoz. A TV-hez külső játékkonzol csatlakoztatásakor ez
a mód megnöveli a játék sebességét.
➣
Ha a három „Szórakoztatás” üzemmód bármelyikét bekapcsolja, a készülék lezárja a
beállításokat, és azok tovább nem módosíthatók. Ha szeretne további beállításokat végezni a
kép- vagy a hangmódban, akkor ki kell kapcsolnia az „Szórakoztatás” üzemmódot.
Az „Szórakoztatás” beállításait minden bemeneti forráshoz elmenti a készülék.
➣
➣
Ha a három „Szórakoztatás” mód bármelyike be van kapcsolva, az „SRS TS XT”
használható.
TV
Plug & Play
Nyelv : Magyar
Idő
Dallam : Ki
Szórakoztatás : Ki
Energiagazd. : Ki
Mozgatá
Beállítás
funkció nem
Belépés
Vissza
Az „Szórakoztatás” beállítás módosításához nyomja meg
többször a távvezérlő E.MODE gombját.
Magyar - 25
Page 88

♦ Energiagazd.: Ki/Alacsony/Közepes/Magas/Auto.
Ezafunkcióautomatikusanbeállítjaaképernyőfényerejétakörnyezetifényviszonyoknakmegfelelően.
−Ki:Azenergiatakarékosfunkciókikapcsolásáraszolgál.
−Alacsony:CsökkentettenergiatakarékosmódbaállítjaaTV-készüléket.
−Közepes:KözepesenergiatakarékosmódbaállítjaaTV-készüléket.
−Magas:KiemeltenergiatakarékosmódbaállítjaaTV-készüléket.
−Auto.:AutomatikusanbeállítjaaTV-képernyőfényerejétajelenetnekmegfelelően.
Egyszerű beállítás
1. NyomjamegatávvezérlőTOOLSgombját.
2. Avagyagombbalválasszakia„Energiagazd.”.
3. Avagyagombbalválasszakia„Ki”,„Alacsony”
„Közepes”,„Magas”,„Auto.”.
4. AzEXITvagyaTOOLSgombmegnyomásávalléphetki.
Ezafunkcióa„PC”módbannemhasználható.(40hüvelyk)
➣
Anynet+ (HDMI-CEC)
Kép Üzemmód : Normál
Hang üzemmód : Egyedi
Auto kikapcs. : Ki
SRS TS XT : Ki
Energiagazd. ◄ Ki ►
Kettős l/ll : Monó
Mozgatás Beállítás Kilépés
Eszközök
Forrás kiválasztása
Választhat a TV kimeneti csatlakozóihoz csatlakoztatott külső
jelforrások közül.
1. AmenümegjelenítéséheznyomjamegaMENUgombot.
Avagyagombbalválasszakia„Bemenet”menüpontot,
majdnyomjamegaz
ENTER
gombot.
2. A„Forráslista”menüpontkiválasztásáhoznyomjamegismétaz
ENTER
➣
gombot.
Elérhetőjelforrás:TV,1.Külső,2.Külső,AV,S-Video,
Komponens,PC,HDMI1,HDMI2,HDMI3,DTV.
CsakaTV-készülékhezcsatlakoztatottkülsőeszközök
➣
választhatók.
3. Avagyagombbalválasszakiakívánteszközt.
Nyomjamegaz
ENTER
gombot.
TV
Forráslista : TV
Névszerkesztés
Anynet+(HDMI-CEC)
Mozgatá
TV
TV
1. Külső : ----
2. Külső : ----
AV : ---S-Video : ----
Komponens : ----
PC : ---HDMI1 : ---HDMI2 : ---HDMI3 : ----
DTV
Bemenet
Belépés
Forráslista
Vissza
AtávirányítónlévőSOURCEgombmegnyomásávalválthataz
elérhetőforrásokközött.ATVmódatávirányítóTV/DTVgombja,
aszámgombok(0~9),ésaP</> gombsegítségévelis
kiválasztható.
AtelevíziótnézhetiHDMIüzemmódbanis,haatávvezérlőn
megnyomjaaHDMIgombot.
Magyar - 26
Mozgatá
Belépés
Vissza
Page 89

A bemeneti forrásnevek szerkesztése
A bemeneti csatlakozókhoz csatlakoztatott eszközök nevének
megadásával a bemeneti forrásválasztás megkönnyíthető.
1.
A menü megjelenítéséhez nyomja meg a MENU gombot.
A p vagy a q gombbal válassza ki a „Bemenet” menüpontot,
majd nyomja meg az
2. A p vagy a q gombbal válassza ki a „Névszerkesztés”
menüpontot, majd nyomja meg az
3. A szerkeszteni kívánt eszközt az p vagy a q gombbal
választhatja ki. Nyomja meg az
4. A p vagy a q gombbal válassza ki a kívánt eszközt.
Nyomja meg az
5. A kilépéshez nyomja meg az EXIT gombot.
ENTER
ENTER
gombot.
ENTER
gombot.
ENTER
gombot.
gombot.
TV
Forráslista : TV
Névszerkesztés
Anynet+(HDMI-CEC)
Mozgatá
TV
1. Külső : ----
2. Külső : ----
AV : ----
S-Video : ----
Komponens : ----
PC : ----
HDMI1 : ----
HDMI2 : ----
HDMI3 : ----
Bemenet
Névszerkesztés
Belépés
Vissza
----
Videomagnó
DVD
Kábelvevő egység
Műholdvevő
PVR-vevő
AV-vevő egység
Játék
q
Mozgatá
Belépés
Vissza
Magyar - 27
Page 90

A DTV menürendszer áttekintése
♦ A gyártó a támogatott országokon kívül (Franciaország,
Németország, Olaszország, Hollandia, Spanyolország, Svájc,
Egyesült Kir., Ausztria) nem garantálja a DTV-menü normális
működését, ugyanis csak ezeknek az országoknak a szabványa
támogatott. Probléma lehet ezen kívül a csatornasáv, az
Információ, az Útmutató, a Csatornakezelő stb. szövegének
megfelelő megjelenítésével is, ha a műsorszórás országa nem
azonos a készüléken beállítottal.
♦
DTV módban használható. A DTV módra a TV/DTV gombbal
lehet váltani. A tájékozódást a menürendszerben és az igénybe
vehető beállítások között megkönnyíti a következő ábrán látható
menüstruktúra.
A menü megjelenítéséhez nyomja meg a MENU gombot.
p vagy a q gombbal válassza ki a „Digitális menü” menüpontot,
A
majd nyomja meg az
ENTER
gombot.
Útmutató
Mai és holnapi műsor
Teljes útmutató
Beütemezett lista
Alapértelmezett útmutató
Ma/Holnap, Teljes útmutató
Csatorna
Ország
Automata tárolás
Kézi tárolás
Kedvenc csatornák szerk.
Csatornalista
Összes, Kedvencek, Alapértelmezett
Beállítás
Menü átlátszósága
Magas, Közepes, Alacsony, Opál
PIN módosítás
Szülői zár
Felirat
Felirat mód
Audioformátum
Hangjellemzők
Ki, Be
Normál, Nagyothalló
PCM, Dolby Digital
Hangjellemzők Ki, Be
Hangerő
Digitális szöveg
Idözóna
Közös felület
Rendsz.
Tiltás, Engedélyezés
Alkalmazási info., CI menü
Termékinformáció
Jelinformáció
Szoftver frissítés
Visszaállítás
Nyelv
Szinkronhangnyelv
Felirat nyelve
Teletext nyelv
Beállítás
Elsődleges nyelv - audio
Másodlagos nyelv - audio
Elsődleges felirat nyelv
Másodlagos felirat nyelv
Első teletext nyelv
Második teletext nyelv
A CI menü menüpontjai a CAM modelltől függően különbözőek lehetnek.
➣
(országfüggő)
Magyar - 28
TV
DTV
DTV
DTV
DTV
Mode : Custom
Digitális menü
Equalizer
Útmutató
SRS TS XT : Off
Digitális csatorna
Auto Volume : Off
Internal Mute : Off
Beállítás
Reset
Nyelv
Move Enter Return
Mozgatás
Belépés Kilépés
Mozgatás
Belépés Vissza
Mode : Custom
Equalizer
Mai és holnapi műsor
SRS TS XT : Off
Teljes útmutató
Auto Volume : Off
Beütemezett lista
Internal Mute : Off
Alapértelmezett útmutató : Teljes útmutató
Reset
Ország :
Automata tárolás
Kézi tárolás
Kedvenc csatornák szerk.
Csatornalista
Menü átlátszósága
PIN módosítás
Szülői zár
Felirat : Ki
Felirat mód
Szinkronhangnyelv
Felirat nyelve
Teletext nyelv
Beállítás
Útmutató
Move Enter Return
Mozgatás
Belépés Vissza
Csatorna
Egyesült Királyság
Move Enter Return
Mozgatás
Belépés Vissza
Beállítás
: Közepes
Move Enter Return
Mozgatás
Belépés Vissza
Nyelv
Mozgatás
Belépés Vissza
Page 91

A csatornalista automatikus frissítése
A csatornalista frissíthető, amikor a műsorszóró bővíti a
szolgáltatásait, vagy a készülékkel más helyre költözik.
1.
A menü megjelenítéséhez nyomja meg aA menü megjelenítéséhez nyomja meg a MENU gombot.
A p vagy a q gombbal válassza ki a „Digitális menü”
menüpontot, majd nyomja meg az
ENTER
gombot.
2. A p vagy a q gombbal válassza ki az „Csatorna” menüpontot,
majd nyomja meg az
3. Az „Ország” opció kiválasztásához nyomja meg az
ENTER
gombot.
ENTER
gombot.
4. Válassza a megfelelő országot a p vagy a q gomb
megnyomásával.
Az
ENTER
Még ha módosította is az országbeállítást ebben a menüben,
➣
gombbal hagyja jóvá választását.
az analóg TV-hez megadott országbeállítás nem módosul.
(Lásd a 11. oldalt)
5.
Az „Automata tárolás” menüpont kiválasztásához nyomja meg
ismét az p vagy a q gombot.
Nyomja meg az
Amint ez befejeződött, megjelennek a talált szolgáltatások.
➣
A csatornalista frissítésekor a kedvenc csatornák már összeállított listája nem törlődik.
➣
Ha a vége előtt kívánja befejezni a keresést, nyomja meg együtt az
➣
ENTER
gombot.
gombot.
6.
A kilépéshez nyomja meg az EXIT gombot.
Ha gyenge a jelerősség, a „Nem található szolgáltatás! Ellenőrizze az antennacsatlakozást” üzenet
➣
jelenik meg.
DTV
Ország :
Automata tárolás
Kézi tárolás
Kedvenc csatornák szerk.
Csatornalista
Mode : Custom
DTV
Equalizer
SRS TS XT : Off
Auto Volume : Off
Digitális csatornák keresése…
Internal Mute : Off
Reset
Talált szolg : 24
ENTER
Csatorna
Egyesült Királyság
Move Enter Return
DTV
Mozgatás
Belépés Visszalépés
Automata tárolás
Csatorna
Stop
Move Enter Return
Visszalépés
és a „STOP”
35%
: 38
A csatornalista manuális frissítése
Megadhat egy csatornát a gyors csatornakereséshez.
1.
A menü megjelenítéséhez nyomja meg aA menü megjelenítéséhez nyomja meg a MENU gombot.
A p vagy a q gombbal válassza ki a „Digitális menü”
menüpontot, majd nyomja meg az
ENTER
gombot.
DTV
Csatorna
2. A p vagy a q gombbal válassza ki az „Csatorna” menüpontot,
majd nyomja meg az
ENTER
gombot.
3. A p vagy a q gombbal válassza ki a „Kézi tárolás” opciót, majd
nyomja meg az
ENTER
gombot.
4. A p vagy q gombbal jelölje ki a beállítani kívánt opciót,
majd nyomja meg az
− Csatorna: Nagy-Britanniában például sorban megjeleníti a „5” – „69” számú csatornát.
➣
ENTER gombot.
(Egyes országoknál)
− Frekvencia: A képernyőn megjelenik a Csatorna csoportban elérhető frekvencia.
− Sávszélesség: A használható sávszélesség a 7 és a 8 MHz.
➣
A piros gombbal indítsa el a digitális szolgáltatások
keresését. Miután kész, a csatornák frissítődnek a csatornalistában.
Amint ez befejeződött, megjelennek a talált szolgáltatások.
5.
6. A kilépéshez nyomja meg az EXIT gombot.
Magyar - 29
Kézi tárolás
Frekvencia Sávszélesség
▲
177500 7
5
▼
search
Keresés
Beállítás Visszalépés
KHz
MHz
Page 92

A Kedvenc csatornák szerkesztése
A kedvenc csatornák szerkesztése a színes gombokkal történik.
1.
A menü megjelenítéséhez nyomja meg aA menü megjelenítéséhez nyomja meg a MENU gombot.
A p vagy a q gombbal válassza ki a „Digitális menü”
menüpontot, majd nyomja meg az
ENTER
gombot.
2. A p vagy a q gombbal válassza ki az „Csatorna” menüpontot,
majd nyomja meg az
ENTER
gombot.
3. A p vagy a q gombbal válassza ki a „Kedvenc csatornák
szerk.” menüpontot, majd nyomja meg az
ENTER
gombot.
4. A tárolt csatornák megjelenítéséhez nyomja meg a piros gombot.
5. A p vagy a q gombbal válassza ki a kívánt csatornát. Nyomja
meg az
ENTER
➣
A választott csatorna mellett a „” ikon látható, és a
gombot.
csatorna felkerül a kedvenc csatornák listájára.
Visszavonáshoz nyomja meg ismét az
➣
ENTER
gombot.
Mind kivál.: Kijelöli az összes megjelenített csatornát.
Kivál. törl.: Megszünteti a csatornák kijelölését.
Előnézet: Megjeleníti a kijelölt csatorná(ka)t.
A Kedvenc csatornák beállítása befejeződött.
➣
6.
A kilépéshez nyomja meg az EXIT gombot.
Hozzáadás
Akkor használhatja ezt a funkciót, ha egy vagy több csatorna ki
lett jelölve.
A menü megjelenítéséhez nyomja meg aA menü megjelenítéséhez nyomja meg a MENU gombot.
1.
A p vagy a q gombbal válassza ki a „Digitális menü”
menüpontot,
majd nyomja meg az
ENTER
gombot.
2. A p vagy a q gombbal válassza ki az „Csatorna” menüpontot,
majd nyomja meg az
ENTER
gombot.
3. A p vagy a q gombbal válassza ki a „Kedvenc csatornák szerk.”
menüpontot, majd nyomja meg az
ENTER
gombot.
4. Nyomja meg a piros gombot a „Kedvenc csatornák szerk.”
menüben. A további csatornákat az előző rész 5 lépésében
leírtak szerint vehet fel.
5.
Ha ellenőrizni akarja a tárolni kívánt csatatornát, nyomja meg a
RETURN gombot. A kilépéshez nyomja meg az EXIT gombot.
➣
Az összes csatornát a piros gomb megnyomásával veheti fel
a kedvencek közé.
Az összes csatornát a zöld gomb megnyomásával
távolíthatja el.
Előnézet: Megjeleníti a kijelölt csatorná(ka)t.
A kedvenc csatornák kezelőjének a megjelenítéséhez nyomja meg a CH LIST gombot.
DTV
(Nincs csatorna)
DTV
5
2 BBC TWO
5 Five
7 BBC THREE
15 abc1
16 QVC
6
Mozgatás Választás Visszalépés
DTV
2 BBC TWO ★
7 BBC THREE ★
15 abc1 ★
Hozzáadás
DTV
5
2 BBC TWO ★
5 Five
7 BBC THREE ★
15 abc1 ★
16 QVC
6
Move Enter Return
Mozgatás Választás Visszalépés
Kedvenc csatornák szerk.
Cs. hozzáad.
Visszalépés
Kedvenc csatornák szerk.
Kedvenc csatornák szerk.
Mind kivál.
Kivál. törl.
Kedvenc csatornák szerk.
Újraszámozás
Kivál. törl.
Előnézet
Mozgatás Visszalépés
Kedvenc csatornák szerk.
Mind kivál.
Előnézet
Előnézet
Törlés
Magyar - 30
Page 93

Újraszámozás (Egyes országoknál)
1.
A menü megjelenítéséhez nyomja meg aA menü megjelenítéséhez nyomja meg a MENU gombot.
A p vagy a q gombbal válassza ki a „Digitális menü”
menüpontot, majd nyomja meg az
ENTER
gombot..
DTV
Kedvenc csatornák szerk.
2 BBC TWO ★
BBC THREE ★
---
15 abc1 ★
2. A p vagy a q gombbal válassza ki az „Csatorna” menüpontot,
majd nyomja meg az
ENTER
gombot.
3. A p vagy a q gombbal válassza ki a „Kedvenc csatornák
Szerk.
szerk.” menüpontot, majd nyomja meg az
ENTER
gombot.
Visszalépés Megerősítés
4. A p vagy a q gombbal válassza ki a kívánt csatornát.
5.
Nyomja meg a zöld gombot.
A szám megadására szolgáló hely üresen áll.
➣
6.
Adja meg az új csatornaszámot. Nyomja meg az
ENTER
gombot a tároláshoz, vagy a RETURN
gombot a visszavonáshoz.
Nyomja meg a gombot egy megadott szám törléséhez.
➣
Ha egy olyan számot ad meg, amelyet egy másik csatornához már hozzárendelt, a szám a
➣
kiválasztott csatornához lesz hozzárendelve, és a kiválasztott csatornához hozzárendelt korábbi
szám lesz a másik csatornához hozzárendelve. Vagyis, a két szám fel lesz cserélve.
A kedvenc csatornák automatikusan a csatornaszámok növekvő sorrendjében kerülnek eltárolásra.
➣
7.
A kilépéshez nyomja meg az EXIT gombot.
Előnézet
1.
A p vagy a q gombbal válassza ki a „Kedvenc csatornák
szerk.” menüben a megtekinteni kívánt csatornát.
2. Nyomja meg a sárga gombot.
A kijelölt csatorna megjelenik a képernyőn.
➣
DTV
Kedvenc csatornák szerk.
2 BBC TWO ★
7 BBC THREE ★
15 abc1 ★
Törlés
1.
A p vagy a q gombbal válassza ki a „Kedvenc csatornák szerk.”
menüben a kedvencek listájából törölni kívánt csatornát.
2. Nyomja meg a kék gombot.
A kijelölt csatorna és szám törlődik.
➣
A törölt csatornát visszahelyezheti a kedvenc csatornák
➣
listájába a 30. oldalon lévő „Hozzáadás” cím alattiak szerint.
Magyar - 31
Move Enter Return
Hozzáadás
Mozgatás Visszalépés
DTV
Kedvenc csatornák szerk.
2 BBC TWO ★
7 BBC THREE ★
Move Enter Return
Hozzáadás
Mozgatás Visszalépés
Újraszámozás
Újraszámozás
Előnézet
Előnézet
Törlés
Törlés
Page 94

Csatornalista választása
Az átnézett csatornák közül bármely csatornát kiiktathatja. A
tárolt csatornák pásztázása közben az átugrásra kijelöltek nem
jelennek meg. Azok a csatornák azonban, amelyeket nem kívánt
kihagyni a pásztázásból, megjelennek.
A menü megjelenítéséhez nyomja meg aA menü megjelenítéséhez nyomja meg a MENU gombot.
1.
A p vagy a q gombbal válassza ki a „Digitális menü”
menüpontot, majd nyomja meg az
ENTER
gombot.
Test Card M' v2.0
1 Test Card M’ v2.0
3 Vida003b
4 Vida004b
5 vida005b
6 vida006b
15 Ch 15
16 QVC
17 UKTV Gold
Előző oldal Köv. old.
2. A p vagy a q gombbal válassza ki az „Csatorna” menüpontot,
majd nyomja meg az
ENTER
gombot.
3. A p vagy a q gombbal válassza ki az „Csatornalista”
menüpontot.
Nyomja meg az
4. A p vagy a q gombbal válassza ki az „Összes”, „Kedvencek”
vagy a „Alapértelmezett” menüpontot.
Nyomja meg az
ENTER
ENTER
gombot.
gombot.
A csatornalista a CH LIST gomb
megnyomásával egyszerűen
megjeleníthető.
5. Nyomja meg a sárga gombot, hogy váltson a kedvenc
csatornákra, illetve az összes csatornára.
A kedvenc csatornák csak akkor jelennek meg, ha előzőleg beállította azokat a „Kedvenc
➣
csatornák szerk.” menüben (lásd a 30. oldalon).
6.
A csatornalista előző vagy következő oldalának megjelenítéséhez nyomja meg a piros, illetve a zöld
gombot.
7.
A p vagy a q gombbal válassza ki az hangolni kívánt csatornát.
Nyomja meg az
➣
Csatornaváltáskor a csatorna száma, neve és ikonja megjelenik a képernyő bal felső sarkában.
ENTER
gombot.
A csatorna száma és neve akkor jelenik meg, ha a csatorna az összes csatorna egyike, az ikon
pedig akkor, ha a csatorna a kedvenc csatornák egyike.
8. A kék gombot lenyomva válthat a „TV”, „Rádió”, „Adat/egyéb” és „Mind” lehetőségek között.
9. A csatornalistából a CH LIST gombbal léphet ki.
Csatornalista
23 bid-up.tv
25 TCM
26 UKTV Style
27 Discovery
28 DiscoveryH&L
15 Cartoon Nwk
33 Boomerang
55 Ttext Holidays
Mozgatás Megnéz Visszalépés
Minden csat.-Összes
60 Television X
70 BBC Radio 1
72 BBC Radio 2
73 BBC Radio 3
74 BBC Radio 4
84 heat
91 MOJO
800 ARD-MHP-Data
6
További menüpontok
Kedvencek
TV
1/2
Programinformáció megjelenítése
Műsor nézése közben megjeleníthetők az adott műsorra
vonatkozó információk.
1.
A program nézése közben nyomja meg az INFO gombot.
➣
A program adatai megjelennek.
2. Az információs sáv elhagyásához nyomja meg az INFO gombot.
➣
A megjelenített adatok:
− Szülői értékelés
− Videotípus: SD, HD, Rádió
− Audio típusa: Mono, Stereo, Dupla, Dolby Digital
− Teletext vagy DVB felirat léte
− Szinkronhangnyelv
Magyar - 32
1 AFDO,16:9
AFDO 16:9
Nincs blokk
SD
Stereo
Felirat
Magyar
Kilépés
14:30 Szo 1 Sze
Minden csat.
A
14:30~14:33
Contains video with AFD O; coded frame
is 16:9
Move Enter Return
Page 95

Az elektronikus műsorújság (EPG) megtekintése.
Az elektronikus műsorújság (EPG) információit a műsorgazdák
szolgáltatják. A programra vonatkozó bejegyzések üresek vagy
elavultak lehetnek az adott csatornán sugárzott információnak
All Channels
megfelelően. A megjelenítés dinamikusan azonnal frissül, amint
az új információ rendelkezésre áll.
Mai és holnapi műsor
Megjeleníti a bal oldali oszlopban jelzett hat csatorna aznapi
és másnapi műsorát.
Teljes útmutató
Megnéz Teljes útmutató Kedvencek Kilépés
A műsoradatokat sorrendben, óránkénti bontásban jeleníti
meg. Egyszerre két órányi műsoradat látható, de lehet
görgetni előre és vissza.
1.
A menü megjelenítéséhez nyomja meg aA menü megjelenítéséhez nyomja meg a MENU gombot.
A p vagy a q gombbal válassza ki a „Digitális menü”
menüpontot, majd nyomja meg az
2. Az „Útmutató” menüpont kiválasztásához nyomja meg az
ENTER
gombot.
ENTER
gombot.
Megnéz
3. A p vagy a q gombbal válassza ki az „Mai és holnapi műsor”
vagy a „Teljes útmutató” menüpontot. Nyomja meg az
ENTER
gombot.
Az útmutató menüjét a GUIDE gomb megnyomásával is
➣
megjelenítheti.
4.
Következőhöz... Művelet…
•
Válasszon műsort a
Műsor megtekintése a műsorlistából
Ha még el nem kezdődött műsort választ, az bekerül az ütemezésbe, amit az óra
➣
ikonja is jelez. Ha az
és az óra ikonja eltűnik. Az ütemezés további részleteivel kapcsolatban lásd a
következő oldalt.
A műsorra vonatkozó információk
megtekintése
Válassza a „Mai és holnapi műsor” vagy a
„Teljes útmutató” menüpontot
A kedvencek, illetve az öszzes csatorna
listájának megjelenítése
Gyors visszagörgetés (24 órányi).
Gyors előre görgetés (24 órányi). Nyomja meg többször a kék gombot.
Kilépés az útmutatóból Nyomja meg az EXIT gombot.
ENTER
gombbal.
Nyomja meg az
•
gombot ismét megnyomja, az ütemezés törlődik
•
Válassza ki a kívánt műsort a
, gombbal.
A műsornál nyomja meg az INFO
•
gombot
Nyomja meg többször a piros gombot.
•
Nyomja meg többször a zöld gombot.
•
Nyomja meg többször a sárga
•
gombot.
•
•
p, q, ,
ENTER gombot.
p, q,
Ma/Holnap Kedvencek -24óra +24óra Kilépés
Mai és holnapi műsor
27 Discovery
Extreme Machines: Armoured Cars
Ma Következő
Teljes útmutató
27 Discovery
Extreme Machines: Armoured Cars
13:00 14:00Ma
13:28 Sze 16 Feb
INFO
13:28 Sze 16 Feb
INFO
➣
A program címe a képernyőn fent középen látható. Az INFO gomb megnyomásával megjelenik a
részletes információ. A részletes adatok közzé tartozik a csatornaszám, a pontos idő, az állapotsáv,
a szülői értékelés, a képminőség (HD/SD), a hang mód, a felirat vagy teletext, a felirat vagy teletext
nyelve, valamint a kijelölt műsor rövid összefoglalója. „...” látható, ha az összefoglaló hosszú.
➣
Hat csatorna látható. A
p vagy a q gombbal válassza ki a kívánt csatornát.
A P < vagy a P > gombbal lapozhat.
Magyar - 33
Page 96

A Beütemezett lista használata
Ha elkészíti a látni kívánt műsorok ütemtervét, a beütemezett
időpontban bekövetkezik a csatorna átváltása a beütemezett
műsorra még akkor is, ha közben másik műsort néz.
A menü megjelenítéséhez nyomja meg aA menü megjelenítéséhez nyomja meg a MENU gombot.
1.
A p vagy a q gombbal válassza ki a „Digitális menü”
menüpontot, majd nyomja meg az
2. Az „Útmutató” menüpont kiválasztásához nyomja meg az
ENTER
gombot.
3. A p vagy a q gombbal válassza ki a „Beütemezett lista”
menüpontot, majd nyomja meg az
4. Nyomja meg a piros gombot. A csatorna a beütemezett műsorra
vált.
5.
A kiválasztáshoz az
ENTER
módosításhoz pedig használja a p vagy a q gombot.
A távvezérlőn található számgombok segítségével is
➣
beállíthatja az órát és a percet.
Csatorna: A csatorna beállítása.
Idő: Az időpont beállítása.
Dátum: Az év, hónap és nap beállítása.
Gyakoriság:
A gyakoriság beállítása.
(„Egyszer”, „Hetente” vagy „Hetente”)
6.
Az ütemezés után nyomja meg a piros gombot.
7. A kilépéshez nyomja meg az EXIT gombot.
Mentés: A beállított ütemezés mentése.
➣
Kilépés: A beállított ütemezés elvetése.
Prog. hozzáad.: Új ütemezés létrehozása.
Szerk.: A választott ütemezés módosítása.
Törlés: A választott ütemezés törlése.
ENTER
ENTER
gombot.
gombot.
gombot nyomja meg, a
DTV
(Nincs program)
Prog. hozzáad.
Visszalépés
DTV
Kedd 22 Apr 15:30 ~ 16:00 Egyszeri
801 RaiTre
Prog. hozzáad. Szerk. Törlés
Mozgatás Visszalépés
DTV
Csatorna
Dátum
Gyakoriság
Mentés Kilépés
Beállítás Mozgatás Visszalépés
Beütemezett lista
Beütemezett lista
Beütemezett lista
802 RaiUno
Idő
15 : 20 -- -- : --
Tue 22 Apr 2008
Egyszer
Az Alapértelmezett útmutató beállítása
Meghatározhatja az útmutató alapstílusát.
1.
A menü megjelenítéséhez nyomja meg aA menü megjelenítéséhez nyomja meg a MENU gombot.
A p vagy a q gombbal válassza ki a „Digitális menü”
menüpontot, majd nyomja meg az
2. Az „Útmutató” menüpont kiválasztásához nyomja meg az
ENTER
gombot.
3. A p vagy a q gombbal válassza ki az „Alapértelmezett
útmutató” menüpontot, majd nyomja meg az
4. A p vagy a q gombbal válassza ki a „Ma/Holnap” vagy a „Teljes
útmutató” menüpontot, majd nyomja meg az
5. A kilépéshez nyomja meg az EXIT gombot.
ENTER
gombot.
ENTER
ENTER
Magyar - 34
gombot.
gombot.
DTV
Mai és holnapi műsor
Teljes útmutató
Beütemezett lista
Alapértelmezett útmutató
Útmutató
:
Full Guide
Ma/Holnap
Teljes útmutató
Move Enter Return
Mozgatás Belépés Visszalépés
Ezeket az opciókat könnyedén
kiválaszthatja a távvezérlő
GUIDE gombjával is.
Page 97

Az összes csatorna, illetve a kedvenc csatornák megtekintése
Az EPG menüben megjeleníthető az összes csatorna, illetve a
kedvenc csatornák.
1.
A menü megjelenítéséhez nyomja meg aA menü megjelenítéséhez nyomja meg a MENU gombot.
A p vagy a q gombbal válassza ki a „Digitális menü”
menüpontot, majd nyomja meg az
2. Az „Útmutató” menüpont kiválasztásához nyomja meg az
ENTER
gombot.
ENTER
gombot.
All Channels
3. A p vagy a q gombbal válassza ki a kívánt útmutatót („Mai és
holnapi műsor” vagy „Teljes útmutató”).
4. Nyomja meg az
5. Nyomja meg a zöld gombot. Bekapcsolhatók a kedvenc
ENTER
gombot.
Megnéz Teljes útmutató Kedvencek Kilépés
csatornák, illetve az összes is.
6.
Válassza ki a kívánt műsort a p, q, vagy a gombbal.
7.
A kijelölt műsorra vonatkozó információ megtekintéséhez nyomja
meg az INFO gombot.
8. Ha nem lett beállítva a kedvenc csatornák listája:
Megjelenik a „A kedvencek listája üres. Kiválasztja most a
kedvenceit?” üzenet.
Válassza az „Igen”-t.
Megjelenik a „Kedvenc csatornák szerk.” menü. „Nem”
választása esetén minden csatorna változatlan marad.
További részletek a kedvenc csatornák szerkesztéséről a 30.
Megnéz
Ma/Holnap Kedvencek -24óra +24óra Kilépés
oldalon találhatók.
9.
A kilépéshez nyomja meg az EXIT gombot.
A „Minden csat.” azoknak a csatornáknak a listája, amelyeket a csatornafrissítés észlelt. Az összes
➣
csatorna a Minden csatorna módban jelenik meg.
A „Kedvencek” (a kedvenc csatornák) az a csatornalista, amit előzőleg beállított a „Kedvenc csatornák
➣
szerk.” menüben (lásd a 30. oldalon).
Mai és holnapi műsor
Teljes útmutató
13:28 Sze 16 Feb
13:28 Sze 16 Feb
27 Discovery
Extreme Machines: Armoured Cars
Ma Következő
27 Discovery
Extreme Machines: Armoured Cars
13:00 14:00Ma
A kedvencek listája üres.
Kiválasztja most a kedvenceit?
Igen Nem
INFO
INFO
A menü átlátszóságának beállítása
A menük átlátszósága beállítható.
A menü megjelenítéséhez nyomja meg aA menü megjelenítéséhez nyomja meg a MENU gombot.
1.
A p vagy a q gombbal válassza ki a „Digitális menü”
menüpontot, majd nyomja meg az
2. A p vagy a q gombbal válassza ki az „Beállítás” menüpontot,
majd nyomja meg az
ENTER
3. A p vagy a q gombbal válassza ki az „Menü átlátszósága”
menüpontot, majd nyomja meg az
4. Válassza ki a kívánt beállítást („Magas”, „Közepes”, „Alacsony”,
„Opál”) a p vagy a q gombbal, majd nyomja meg az
gombot.
5.
A kilépéshez nyomja meg az EXIT gombot.
ENTER
gombot.
ENTER
gombot.
gombot.
Magyar - 35
ENTER
DTV
Menü átlátszósága
PIN módosítás
Szülői zár
Felirat : On
Felirat mód
Mozgatás Belépés Visszalépés
Beállítás
: Medium
Magas
Közepes
Alacsony
Opál
Page 98

Szülői zár beállítása
Ez a funkció a felhasználó által választott 4 számjegyű PIN-kód
segítségével megakadályozza, hogy illetéktelen személyek,
például gyermekek nézhessék a számukra nem megfelelő
műsorokat. A képernyőmenü felkéri, hogy adjon meg egy PINkódot. (Ezt később megváltoztathatja.)
A menü megjelenítéséhez nyomja meg aA menü megjelenítéséhez nyomja meg a MENU gombot.
1.
A p vagy a q gombbal válassza ki a „Digitális menü”
menüpontot, majd nyomja meg az
ENTER
gombot.
2. A p vagy a q gombbal válassza ki az „Beállítás” menüpontot,
majd nyomja meg az
ENTER
K gombot.
3. A p vagy a q gombbal válassza ki a „Szülői zár” menüpontot,
majd nyomja meg az
ENTER
gombot.
4. Megjelenik a „PIN megadása” menü.
5. Írja be a 4 számjegyű PIN-kódot a távvezérlő számgombjaival
(0-9).
Az új készülék alapértelmezett PIN-kódja a 0000.
➣
Ha érvénytelen PIN-kódot ír be, megjelenik az „Érvénytelen
➣
PIN-kód. Próbálja újra.” üzenet.
6.
Nyomja meg az
ENTER
gombot.
7. A p vagy a q gombbal válassza ki a kizárni kívánt korosztályt.
Nyomja meg az
PIN módosítás
1.
A menü megjelenítéséhez nyomja meg aA menü megjelenítéséhez nyomja meg a MENU gombot.
ENTER
gombot.
A p vagy a q gombbal válassza ki a „Digitális menü”
menüpontot, majd nyomja meg az
ENTER
gombot.
2. A p vagy a q gombbal válassza ki az „Beállítás” menüpontot,
majd nyomja meg az
ENTER
gombot.
3. A p vagy a q gombbal válassza ki a „PIN módosítás”
menüpontot, majd nyomja meg az
➣
Megjelenik a „PIN megadása” menü.
ENTER
gombot.
4. Írja be a 4 számjegyű PIN-kódot a távvezérlő számgombjaival
(0-9).
➣
Megjelenik az „Új PIN megadása” menüpont.
5.
Írja be az új PIN-kódot a távvezérlő számgombjaival (0-9).
Megjelenik az „Új PIN megerősítése” menü.
➣
6.
Írja be ismét az új PIN-kódot a távvezérlő számgombjaival (0-9).
Megjelenik az A PIN-kódot sikeresen megváltoztatta üzenet.
➣
7.
Nyomja meg az
ENTER
gombot.
8. A kilépéshez nyomja meg az EXIT gombot.
Ha elfelejtette a PIN-kódot, az alapértelmezett 0-0-0-0 kódra a távvezérlőn meg kell nyomni a
➣
gombokat a következő sorrendben:
POWER (Ki), MUTE, 8, 2, 4, POWER (Be).
DTV
Menü átlátszósága
PIN módosítás
Szülői zár
Felirat : Be
Felirat mód
Move Enter Return
Mozgatás Belépés Visszalépés
DTV
PIN megadása
PIN megadás Visszalépés
DTV
Szülői értékelés
Move Enter Return
Mozgatás Belépés Visszalépés
DTV
Menü átlátszósága
PIN módosítás
Szülői zár
Felirat : Be
Felirat mód
Move Enter Return
Mozgatás Belépés Visszalépés
DTV
PIN módosítás
Új PIN megerősítése
A PIN-kódot sikeresen megváltoztatta.
OK
PIN megadása Visszalépés
Beállítás
: Közepes
Szülői zár
Szülői zár
▲
: No Block
Nincs blokk
3
4
5
6
7
▼
Beállítás
: Közepes
Magyar - 36
Page 99

Felirat beállítása
A feliratok aktiválhatók és inaktiválhatók.
1.
A menü megjelenítéséhez nyomja meg aA menü megjelenítéséhez nyomja meg a MENU gombot.
A p vagy a q gombbal válassza ki a „Digitális menü”
menüpontot, majd nyomja meg az
ENTER
gombot.
2. A p vagy a q gombbal válassza ki az „Beállítás” menüpontot,
majd nyomja meg az
ENTER
gombot.
3. A p vagy a q gombbal válassza ki az „Felirat” menüpontot,
majd nyomja meg az
ENTER
gombot.
4. A p vagy a q gombbal állítsa a kapcsolót „Be” állásba.
Nyomja meg az
ENTER
gombot.
5. A kilépéshez nyomja meg az EXIT gombot.
Ezeket az opciókat egyszerűen kiválaszthatja a távvezérlő
SUBT. gombjával is.
DTV
Menü átlátszósága
PIN módosítás
Szülői zár
Felirat : On
Felirat mód : Normal
Move Enter Return
Mozgatás Belépés Visszalépés
Beállítás
: Közepes
Ki
Be
A Felirat mód beállítása
Ez a menü használható a Felirat mód beállításához. A „Normál”
menüpont a szokásos beállítást jelenti, a „Nagyothalló” pedig a
halláskárosultak részére szólót.
1.
A menü megjelenítéséhez nyomja meg aA menü megjelenítéséhez nyomja meg a MENU gombot.
A p vagy a q gombbal válassza ki a „Digitális menü”
menüpontot, majd nyomja meg az
ENTER
gombot.
2. A p vagy a q gombbal válassza ki az „Beállítás” menüpontot,
majd nyomja meg az
3. A p vagy a q gombbal válassza ki az „
majd nyomja meg az
ENTER
ENTER
gombot.
gombot.
Felirat mód
” menüpontot,
4. A p vagy a q gombbal válassza a „Normál” vagy a „Nagyothalló” menüpontot. Nyomja meg az
ENTER
gombot.
5. A kilépéshez nyomja meg az EXIT gombot.
Ha a nézett műsor nem támogatja a „Nagyothalló” funkciót, automatikusan a „Normál” aktiválódik,
➣
akkor is, ha a „Nagyothalló” lett választva.
DTV
Menü átlátszósága
PIN módosítás
Szülői zár
Felirat : Be
Felirat mód : Normal
Move Enter Return
Mozgatás Belépés Visszalépés
Beállítás
: Közepes
Normál
Nagyothalló
Az Audioformátum kiválasztása
A Dolby Digital hangot csak olyan hangosító berendezéssel
hallgathatja, amelyik optikai kábellel csatlakozik. A PCM
(pulzusmodulált) hang csak a fő hangszóróból hallható.
Ha a hangkibocsátás egyszerre történik a fő hangszóróból és
a hangosító berendezésből, visszhangosság is előfordulhat
a fő hangszóró és a hangosító berendezés eltérő dekódolási
gyorsasága miatt. Ilyenkor célszerű a belső némítás használata.
1.
A menü megjelenítéséhez nyomja meg aA menü megjelenítéséhez nyomja meg a MENU gombot.
A p vagy a q gombbal válassza ki a „Digitális menü”
menüpontot, majd nyomja meg az
2.
A p vagy a q gombbal válassza ki az „Beállítás” menüpontot, majd nyomja meg az ENTER gombot.
ENTER
gombot.
3. A p vagy a q gombbal válassza ki az „Audioformátum” menüpontot, majd nyomja meg az
gombot.
4. A p vagy a q gombbal válassza ki az „PCM” vagy a „Dolby Digital” menüpontot. Nyomja meg az
ENTER
gombot.
5. A kilépéshez nyomja meg az EXIT gombot.
Az audioformátum a sugárzott jelnek megfelelően jelenik meg. A Dolby digital hang csak akkor
➣
használható, ha a TV a külső hangszóróhoz optikai kábellel csatlakozik.
Magyar - 37
DTV
Audioformátum : PCM
Hangjellemzők
Digitális szöveg :
Idözóna
Közös felület
Beállítás
Move Enter Return
Mozgatás Belépés Visszalépés
Engedélyezés
ENTER
Page 100

A Hangismertetés funkció kiválasztása
Ez a kiegészítő hangfunkció a gyengén látók számára nyújt
segítséget egy további hangsáv biztosításával. A funkció
lényege, hogy műsorszórótól érkező fő hang mellett a
hangismertetés hangsávja is hallható. A Hangismertetés
funkció be- és kikapcsolható, hangereje pedig állítható.
A menü megjelenítéséhez nyomja meg aA menü megjelenítéséhez nyomja meg a MENU gombot.
1.
A p vagy a q gombbal válassza ki a „Digitális menü”
menüpontot, majd nyomja meg az
ENTER
gombot.
2. A p vagy a q gombbal válassza ki az „Beállítás” menüpontot,
majd nyomja meg az
3. A p vagy a q gombbal válassza ki az „
menüpontot, majd nyomja meg az
ENTER
gombot.
ENTER
Hangjellemzők
gombot.
”
4. A p vagy a q gombbal válassza ki az „Be” menüpontot, majd
nyomja meg az
ENTER
gombot.
5. A p vagy a q gombbal válassza ki az „Hangerő” menüpontot,
majd nyomja meg az
Ha az „Hangjellemzők” be van kapcsolva, a „Hangerő” aktív.
➣
6.
Nyomja a vagy a gombot, amíg el nem éri az optimális
ENTER
gombot.
beállítást.
7.
A kilépéshez nyomja meg az EXIT gombot.
DTV
Audioformátum : PCM
Hangjellemzők
Digitális szöveg :
Idözóna
Közös felület
DTV
Hangjellemzők
Hangerő
DTV
Hangjellemzők
Hangerő
Beállítás
Move Enter Return
Mozgatás Belépés Visszalépés
Hangjellemzők
: On
Mozgatás Belépés Visszalépés
Hangjellemzők
: Be
Mozgatás Belépés Visszalépés
Engedélyezés
Ki
Be
Digitális szöveg választása (Csak Egyesült Királyság)
Ha a műsor szórása a digitális szöveggel történik, ez a funkció
engedélyezett.
A menü megjelenítéséhez nyomja meg aA menü megjelenítéséhez nyomja meg a MENU gombot.
1.
A p vagy a q gombbal válassza ki a „Digitális menü”
menüpontot, majd nyomja meg az
ENTER
gombot.
2. A p vagy a q gombbal válassza ki az „Beállítás” menüpontot,
majd nyomja meg az
ENTER
gombot.
3. A p vagy a q gombbal válassza ki a „Digitális szöveg”
menüpontot, majd nyomja meg az
ENTER
gombot.
4. A p vagy a q gombbal válassza a „Tiltás” vagy az „Engedélyezés” állapotot.
Nyomja meg az
ENTER
gombot.
5. A kilépéshez nyomja meg az EXIT gombot.
➣
MHEG(Multimedia and Hypermedia Information Coding Experts Group) Multimédiás és hipermédiás
adatkódolási rendszerének egyik nemzetközi szabványa. Az MPEG rendszernél magasabb szintű,
és olyan adatcsatolt hipermédiás anyagokat tartalmaz, mint állókép, szerepjáték, animáció, grakus
és videofájlok, valamint multimédiás adatok. Az MHEG a felhasználói interaktivitást valós időben
támogató technológia, és különböző területeken használható, például a VOD (videó lekérésre), ITV
(interaktív TV), EC (elektronikus kereskedelem), távoktatás, távkonferencia, digitális könyvtárak és
hálózatos játékok.
DTV
Audioformátum : PCM
Hangjellemzők Digitális
szöveg :
Idözóna
Közös felület
Move Enter Return
Mozgatás Belépés Visszalépés
Beállítás
Engedélyezés
Tiltás
Engedélyezés
100
100
Magyar - 38
 Loading...