

Page 1
Contact SAMSUNG WORLDWIDE
If you have any questions or comments relating to Samsung products, please contact the SAMSUNG customer care centre.
Country
AUSTRIA 0810 - SAMSUNG (7267864, € 0.07/min) www.samsung.com/at
BELGIUM 02 201 2418 www.samsung.com/be
CZECH REPUBLIC
DENMARK 8 - SAMSUNG (7267864) www.samsung.com/dk
EIRE 0818 717 100 www.samsung.com/ie
FINLAND 30 - 6227 515 www.samsung.com/
FRANCE
GERMANY 01805 - SAMSUNG (7267864, € 0.14/Min) www.samsung.de
HUNGARY 06 - 80 - SAMSUNG (7267864) www.samsung.com/hu
ITALIA 800 - SAMSUNG (7267864) www.samsung.com/it
LUXEMBURG 02 261 03 710 www.samsung.com/lu
NETHERLANDS 0900 - SAMSUNG (7267864, € 0.10/Min) www.samsung.com/nl
NORWAY 3 - SAMSUNG (7267864) www.samsung.com/no
POLAND
PORTUGAL 808 20 - SAMSUNG (7267864) www.samsung.com/pt
SLOVAKIA 0800 - SAMSUNG (7267864) www.samsung.com/sk
SPAIN 902 - 1 - SAMSUNG (902 172 678) www.samsung.com/es
SWEDEN 075 - SAMSUNG (726 78 64) www.samsung.com/se
SWITZERLAND 0848 - SAMSUNG (7267864, CHF 0.08/min) www.samsung.com/ch
U.K 0845 SAMSUNG (7267864) www.samsung.com/uk
TURKEY 444 77 11 www.samsung.com/tr
ESTONIA 800-7267 www.samsung.ee
LATVIA 8000-7267 www.samsung.com/lv
LITHUANIA 8-800-77777 www.samsung.lt
KAZAHSTAN 8-10-800-500-55-500 www.samsung.com/kz_ru
KYRGYZSTAN 00-800-500-55-500 RUSSIA 8-800-555-55-55 www.samsung.ru
TADJIKISTAN 8-10-800-500-55-500 UKRAINE 8-800-502-0000 www.samsung.ua
UZBEKISTAN 8-10-800-500-55-500 www.samsung.com/kz_ru
Customer Care Centre
800 - SAMSUNG (800-726786) www.samsung.com/cz
Distributor pro Českou republiku:
Samsung Zrt., česká organizační složka, Oasis Florenc, Sokolovská394/17, 180 00, Praha 8
3260 'dites' SAMSUNG (€ 0,15/Min)
0825 08 65 65 (€ 0.15/Min)
0 - 801 - 1SAMSUNG (172678)
022 - 607 - 93 - 33
Web Site
www.samsung.com/fr
www.samsung.com/pl
LCD TV
user manual
BN68-01702J-00
imagine the possibilities
Thank you for purchasing this Samsung product.
To receive more complete service, please register
your product at
www.samsung.com/global/register
Model Serial No.
Page 2
Digital TV (DVB-T) Notice
1. FUNCTIONALITIES RELATED TO DIGITAL TV (DVB) ARE ONLY AVAILABLE IN COUNTRIES OR AREAS WHERE DVB-T
(MPEG2 AND MPEG4 AVC) DIGITAL TERRESTRIAL SIGNALS ARE BROADCAST. DVB-T is the European consortium
standard for the broadcast transmission of digital terrestrial television. Please check with your local dealer about the availability
of DVB-T service in your area.
2. Although this TV set meets the current DVB-T standards as of [August, 2008], compatibility with future DVB-T digital terrestrial
broadcast cannot be guaranteed.
3. Some Digital TV functions may not be available or operate correctly in some countries or regions.
4. For more information, please contact your local SAMSUNG customer care centre.
Contact SAMSUNG WORLDWIDE
If you have any questions or comments relating to Samsung products, please contact the SAMSUNG customer care centre.
(See back cover for more informations.)
Precautions When Displaying a Still Image
A still image may cause permanent damage to the TV screen
Do not display a still image on the LCD panel for more than 2 hours as it can cause screen image retention. This image
•
retention is also known as “screen burn”. To avoid such image retention, reduce the degree of brightness and contrast of the
screen when displaying a still image.
•
•
Displaying still images from Video games and PC for longer than a certain period of time may produce partial after-images.
To prevent this effect, reduce the ‘brightness’ and ‘contrast’ when displaying still images.
Watching the LCD TV in 4:3 format for a long period of time may leave traces of borders displayed on the left,
right and center of the screen caused by the difference of light emission on the screen.
Playing a DVD or a game console may cause a similar effect to the screen.
Damages caused by the above effect are not covered by the Warranty.
© 2008 Samsung Electronics Co., Ltd. All rights reserved.
Page 3

Contents
English
Connecting and Preparing Your TV
List of Parts ........................................................................2
■
Installing the Stand ............................................................2
■
Installing the Wall Mount Kit ..............................................2
■
Viewing the Control Panel .................................................3
■
Viewing the Connection Panel ...........................................4
■
Remote Control .................................................................7
■
Installing Batteries in the Remote Control .........................8
■
Switching On and Off .........................................................8
■
Placing Your Television in Standby Mode ..........................8
■
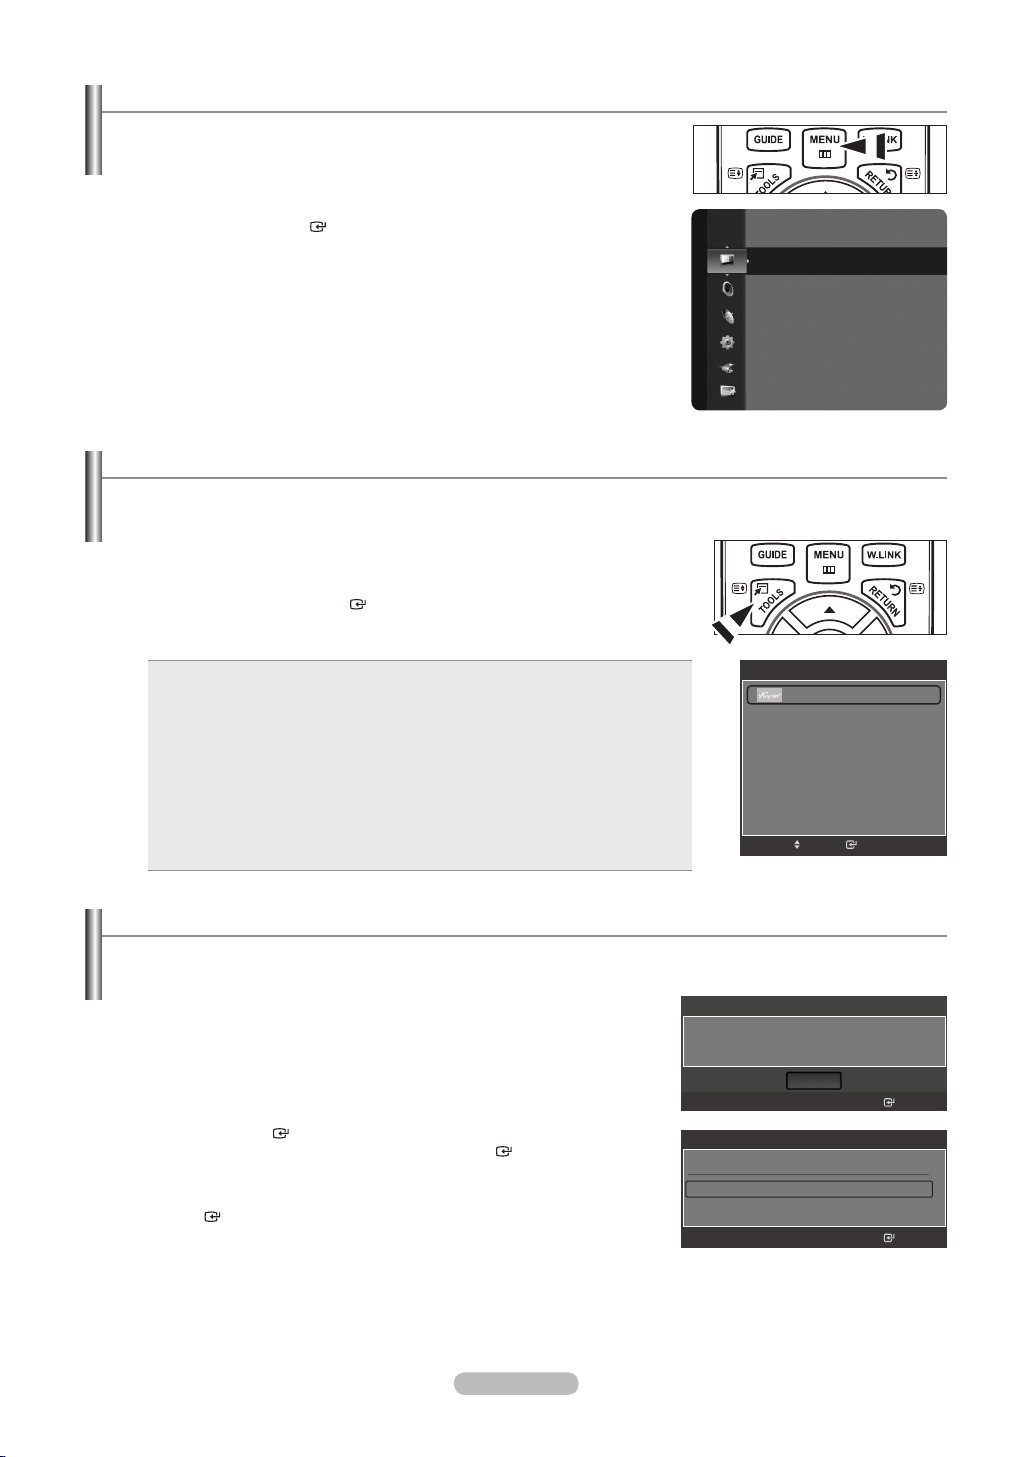
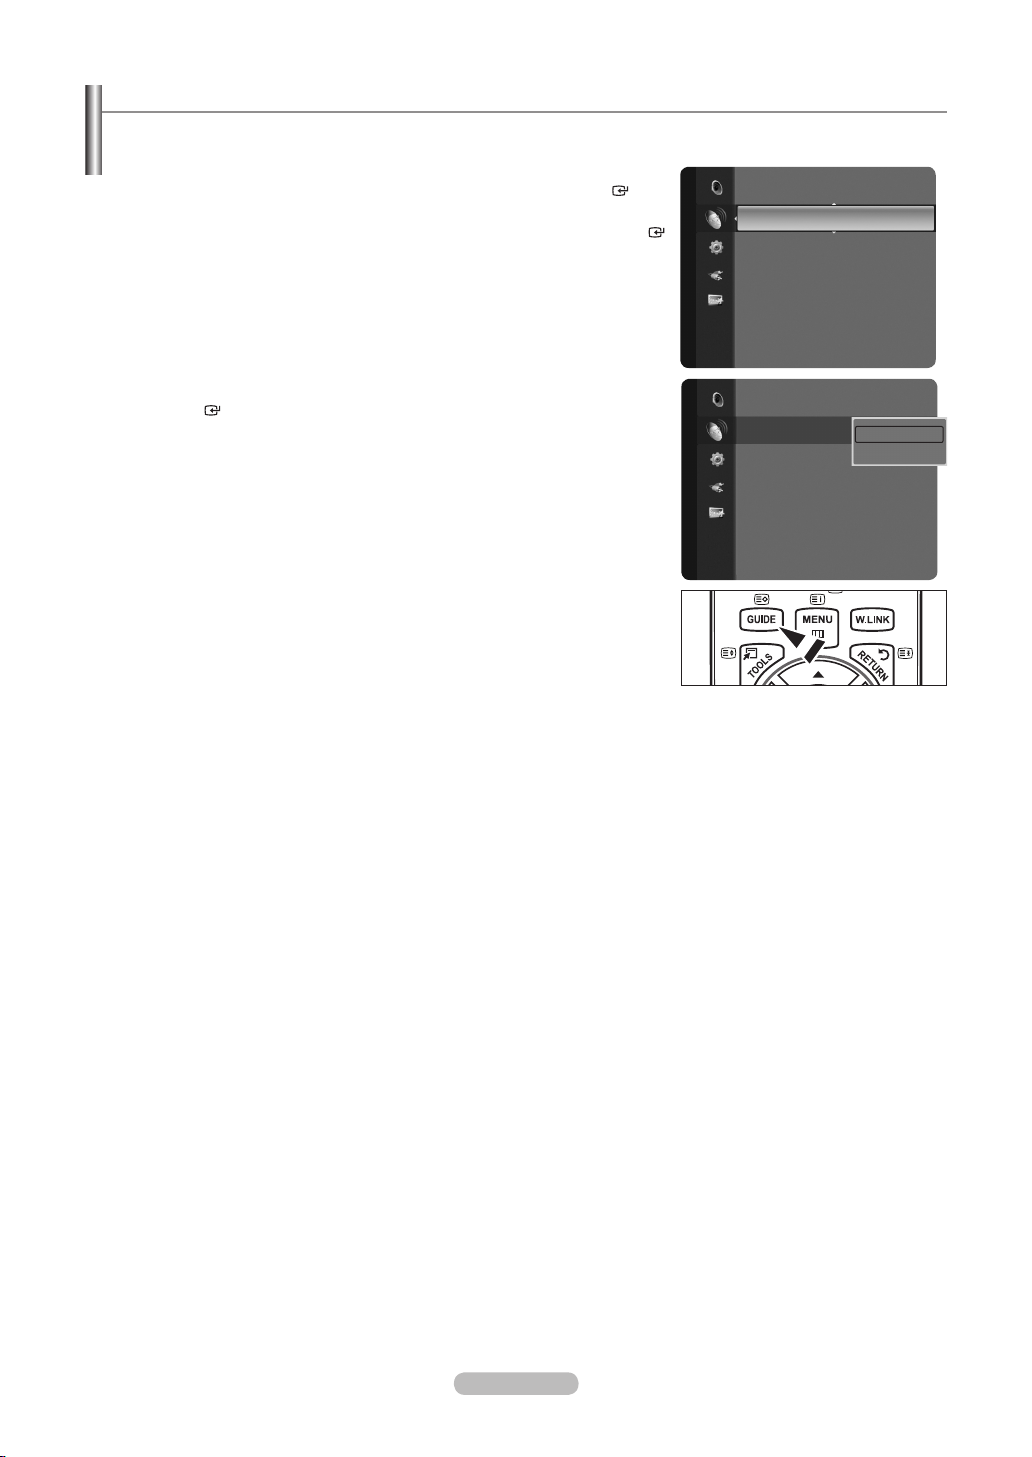
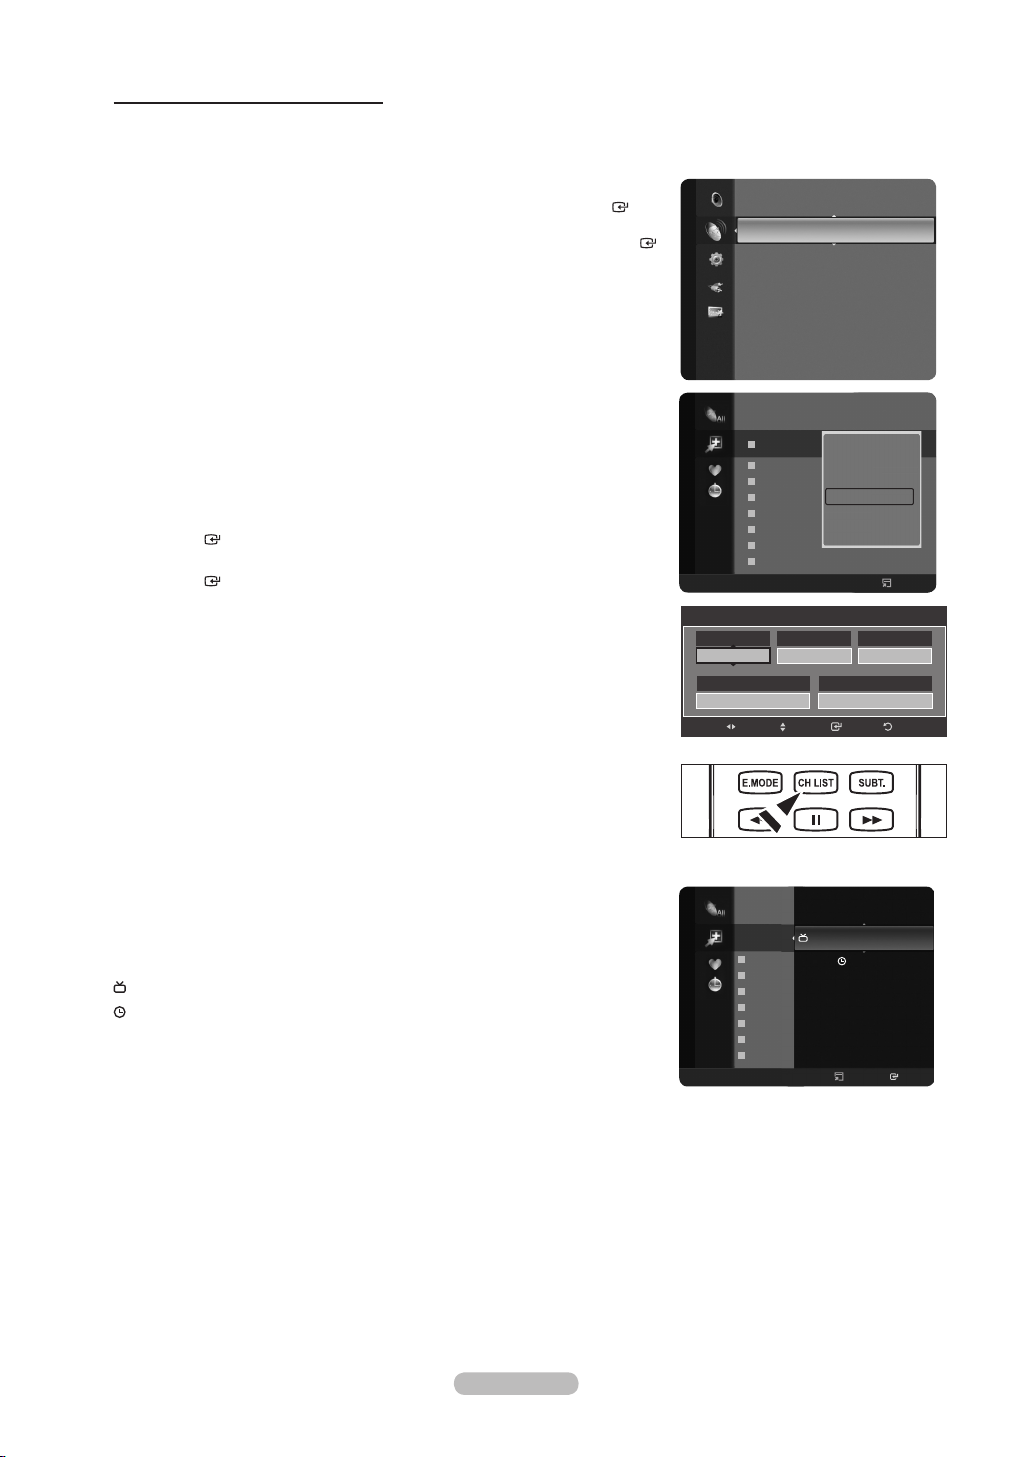
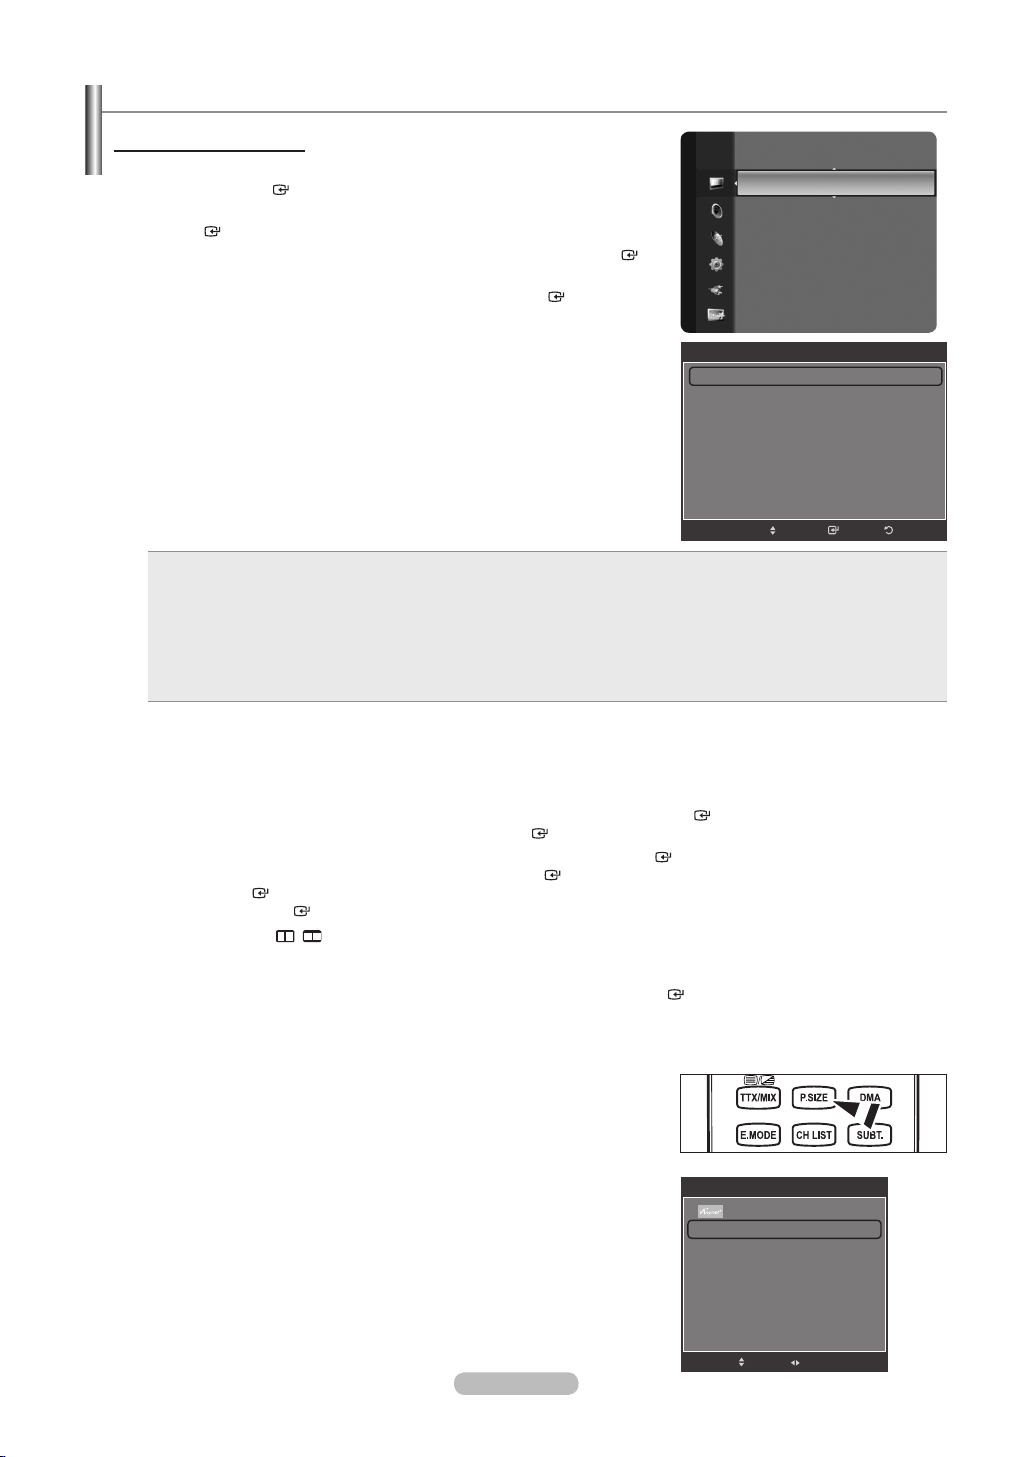
Viewing the Menus ............................................................9
■
Using the TOOLS Button ...................................................9
■
Plug & Play Feature ...........................................................9
■
Channel Control
Storing Channels Automatically .......................................11
■
Storing Channels Manually ..............................................12
■
Viewing the EPG (Electronic Programme Guide)
■
Information .......................................................................14
Setting the Default Guide ................................................15
■
Managing Channels .........................................................16
■
Setting the Channel Mode ...............................................23
■
Fine Tuning Analogue Channels ......................................23
■
Checking the Digital-Signal Information ..........................24
■
Picture Control
Changing the Picture Standard .......................................25
■
Customizing the Picture Settings .....................................25
■
Adjusting the Detailed Settings ........................................26
■
Conguring Picture Options .............................................27
■
Resetting the Picture Settings to the Factory Defaults ....29
■
Viewing Picture-in-Picture ...............................................30
■
Sound Control
Changing the Sound Standard ........................................31
■
Selecting the Sound Mode ..............................................33
■
Connecting Headphones (Sold separately) .....................33
■
Time Setting
Setting the Clock .............................................................34
■
Setting the Sleep Timer ...................................................35
■
Switching the Television On and Off Automatically ..........36
■
Function Description
Selecting a Menu Language ............................................37
■
Activating the Child Lock .................................................37
■
Setting Up Your Personal ID Number (PIN) .....................38
■
Setting up the Parental Lock ...........................................39
■
Setting the Subtitle ..........................................................40
■
Selecting a Teletext Language ........................................41
■
Selecting a Preference Language ...................................41
■
Melody/Entertainment/Energy Saving .............................42
■
Upgrading the Software ...................................................43
■
Viewing Common Interface .............................................44
■
Selecting the CI (Common Interface) Menu ....................44
■
To Select the Source .......................................................45
■
To Edit the Input Source Name ........................................45
■
PC Display
Using Your TV as a Computer (PC) Display ....................46
■
Display Modes .................................................................46
■
Setting up the TV with your PC .......................................47
■
WISELINK
Using the WISELINK Function ........................................48
■
Using the Photo List ........................................................49
■
Sorting Photo List ............................................................51
■
Viewing a Photo or Slide Show .......................................55
■
Using the Music List ........................................................59
■
Sorting Music List ............................................................60
■
Playing a Music File .........................................................64
■
Using the Setup Menu .....................................................66
■
About Anynet
What is Anynet+?.............................................................67
■
Connecting Anynet+ Devices...........................................67
■
Setting Up Anynet
■
Scanning and Switching between Anynet+ Devices ........68
■
Recording ........................................................................69
■
Listening through a Receiver (Home theater) ..................70
■
Troubleshooting for Anynet+ ............................................
■
+
+ ..........................................................68
Recommendations for Use
Teletext Feature ...............................................................71
■
Auto Wall-Mount Adjustment (Sold separately) ..............72
■
Using the Anti-Theft Kensington Lock (depending on the
■
model) ..............................................................................74
Securing the TV to the Wall .............................................75
■
Troubleshooting: Before Contacting Service Personnel ..76
■
Specications ..................................................................77
■
70
Symbol Press Note One-Touch Button
English - 1
Page 4
Connecting and Preparing Your TV
List of Parts
Please make sure the following items are included with your LCD TV. If any items are missing, contact your dealer.
M4xL 16
Remote Control &
Batteries (AAA x 2)
Owner’s Instructions
•
Warranty card / Safety Guide (Not available in all locations)
➣
Power Cord Cover-Bottom
Warranty card
•
Stand Screw
X 4
Installing the Stand
1. Connect your LCD TV and the stand.
Two or more people should carry the TV.
➣
Make sure to distinguish between the front and back of the stand when assembling them.
➣
2. Fasten two screws at position 1 and then fasten two screw at position 2.
Stand the product up and fasten the screws. If you fasten the screws with the LCD
➣
one side.
Stand Cleaning Cloth
Safety Guide
•
TV placed down, it may lean to
Installing the Wall Mount Kit
Wall mount items (sold separately) allow you to mount the TV on the wall.
For detailed information on installing the wall mount, see the instructions
provided with the Wall Mount items. Contact a technician for assistance when
installing the wall mounted bracket.
Samsung Electronics is not responsible for any damage to the product or injury
to yourself or others if you elect to install the TV on your own.
➣
Do not install your Wall Mount Kit while your TV is turned on. It may
result in personal injury due to electric shock.
Remove the stand and cover the bottom hole with a cap and fasten with
two screws.
English - 2
Page 5
English - 3
Viewing the Control Panel
Front Panel buttons
Touch each button to
operate.
The product colour and shape may vary depending on the model.
➣
1
SOURCE
Toggles between all the available input sources
(
HDMI2/DVI, HDMI3, HDMI4
use this button as you use the
remote control.
2 MENU
Press to see an on-screen menu of your TV’s features.
3
– +
Press to decrease or increase the volume. In the onscreen menu, use the
the ◄ and ► buttons on the remote control.
TV, Ext.1, Ext.2, AV, S-Video, Component, PC, HDMI1,
). In the on-screen menu,
ENTER
– +
buttons as you use
button on the
C/P.
4
Press to change channels.
In the on-screen menu, use the C/P. buttons as
you use the ▼ and ▲ buttons on the remote control.
5 POWER INDICATOR
Blinks and turns off when the power is on and
lights up in stand-by mode.
6 POWER
Press to turn the TV on and off.
7 R
EMOTE CONTROL SENSOR
Aim the remote control towards this spot on the TV.
8 SPEAKERS
Page 6
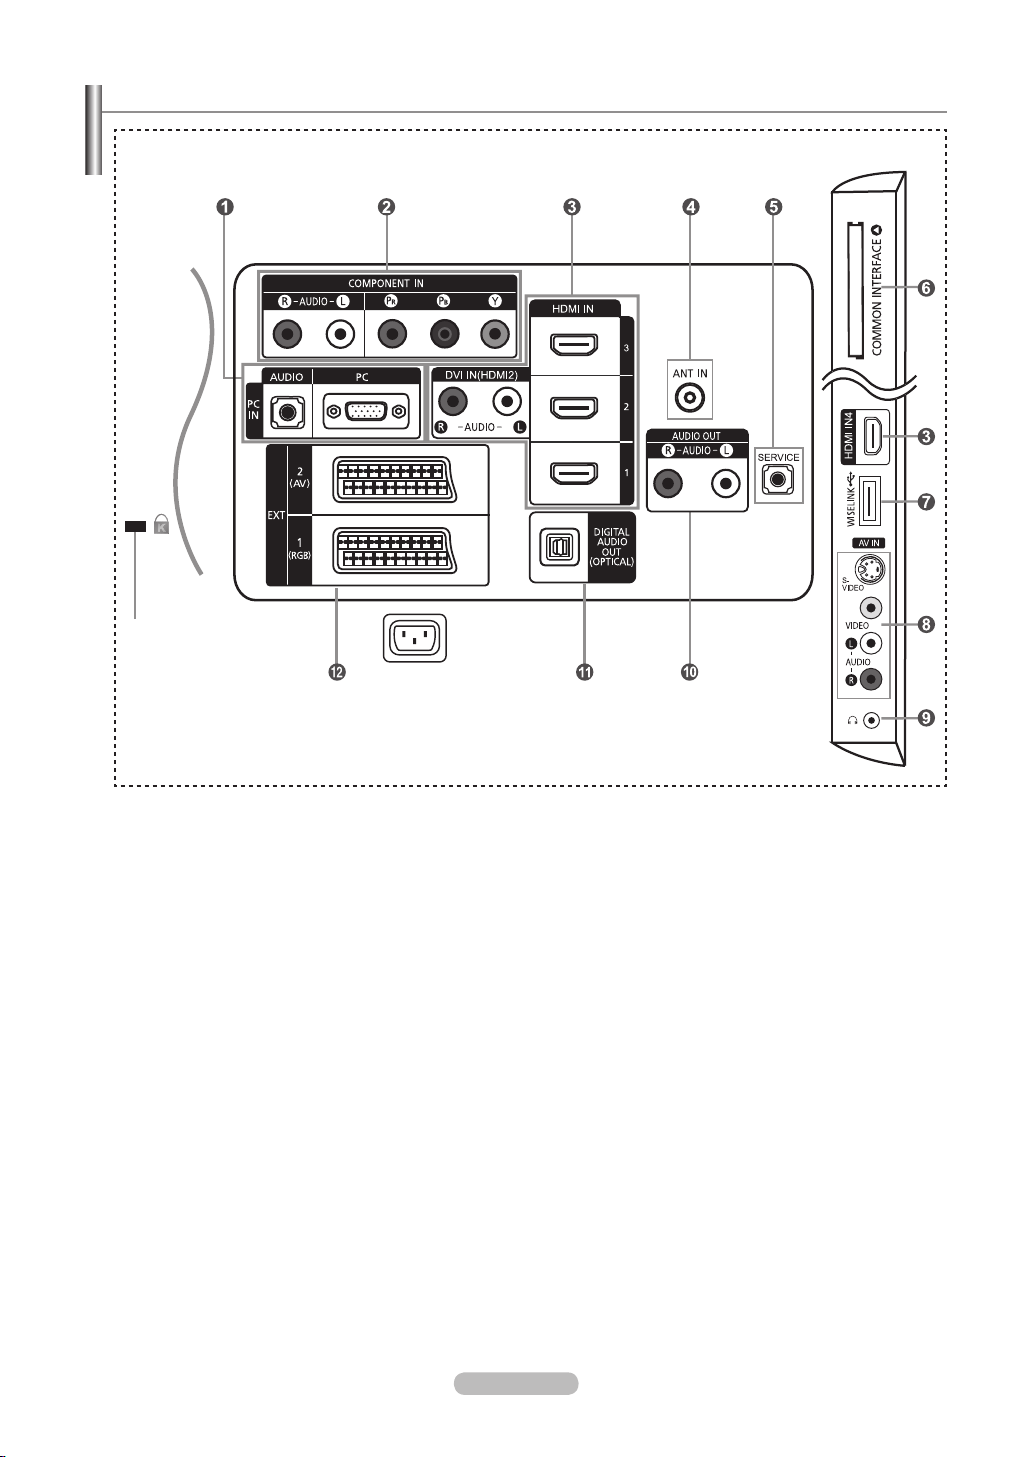
Viewing the Connection Panel
#
Power Input
[TV Side Panel][TV Rear Panel]
The product colour and shape may vary depending on the model.
➣
Whenever you connect an external device to your TV, make sure that power on the unit is turned off.
➣
When connecting an external device, match the colour of the connection terminal to the cable.
➣
1
PC IN [PC] / [AUDIO]
Connect to the video and audio output jack on your PC.
2
COMPONENT IN
- Connect component video cables (optional) to component connector (“P
R”, “PB”, “Y”) on the rear of your set and the
other ends to corresponding component video out connectors on the DTV or DVD.
- If you wish to connect both the Set-Top Box and DTV (or DVD), you should connect the Set-Top Box to the DTV
(or DVD) and connect the DTV (or DVD) to component connector (“P
- The P
R, PB and Y connectors on your component devices (DTV or DVD) are sometimes labeled Y, B-Y and R-Y or Y,
R”, “PB”, “Y”) on your set.
Cb and Cr.
- Connect RCA audio cables (optional) to “R - AUDIO - L” on the rear of your set and the other ends to corresponding
audio out connectors on the DTV or DVD.
3
HDMI IN 1, HDMI IN 2, HDMI IN 3, HDMI IN 4
- Supports connections between HDMI-connection-enabled AV devices (Set-Top Boxes, DVD players)
- No additional Audio connection is needed for an HDMI to HDMI connection.
- When using an HDMI/DVI cable connection, you must use the HDMI IN 2 jack.
English - 4
Page 7
English - 5
What is HDMI?
➣
- “High Denition Multimedia interface” allows the transmission of high denition digital video data and multiple channels
of digital audio.
- The HDMI/DVI terminal supports DVI connection to an extended device with the appropriate cable (not supplied).
The difference between HDMI and DVI is that the HDMI device is smaller in size, has the HDCP (High Bandwidth
Digital Copy Protection) coding feature installed, and supports multi - channel digital audio.
The TV may not output sound and pictures may be displayed with abnormal colour when DVD players/Cable Boxes/
➣
Satellite receivers supporting HDMI versions older than 1.3 are connected. When connecting an older HDMI cable
and there is no sound, connect the HDMI cable to the HDMI IN 2 jack and the audio cables to the DVI IN (HDMI2)
[R-AUDIO-L] jacks on the back of the TV. If this happens, contact the company that provided the DVD player/Cable
Box/Satellite receiver to conrm the HDMI version, then request a rmware update. HDMI cables that are not 1.3 may
cause annoying icker or no screen display.
DVI IN(HDMI2) [R-AUDIO-L]
-
DVI audio outputs for external devices.
Supported modes for HDMI/DVI and Component.
➣
480i 480p 576i 576p 720p 1080i 1080p
HDMI/DVI 50Hz X X X O O O O
HDMI/DVI 60Hz X O X X O O O
Component O O O O O O O
4
ANT IN
To view television channels correctly, a signal must be received by the set from one of the following sources:
- An outdoor aerial / A cable television network / A satellite network
5
SERVICE
- Connector for SERVICE only.
-
Connect this to the jack on the optional wall mount bracket. This will allow you to adjust the TV viewing angle using
your remote control.
6
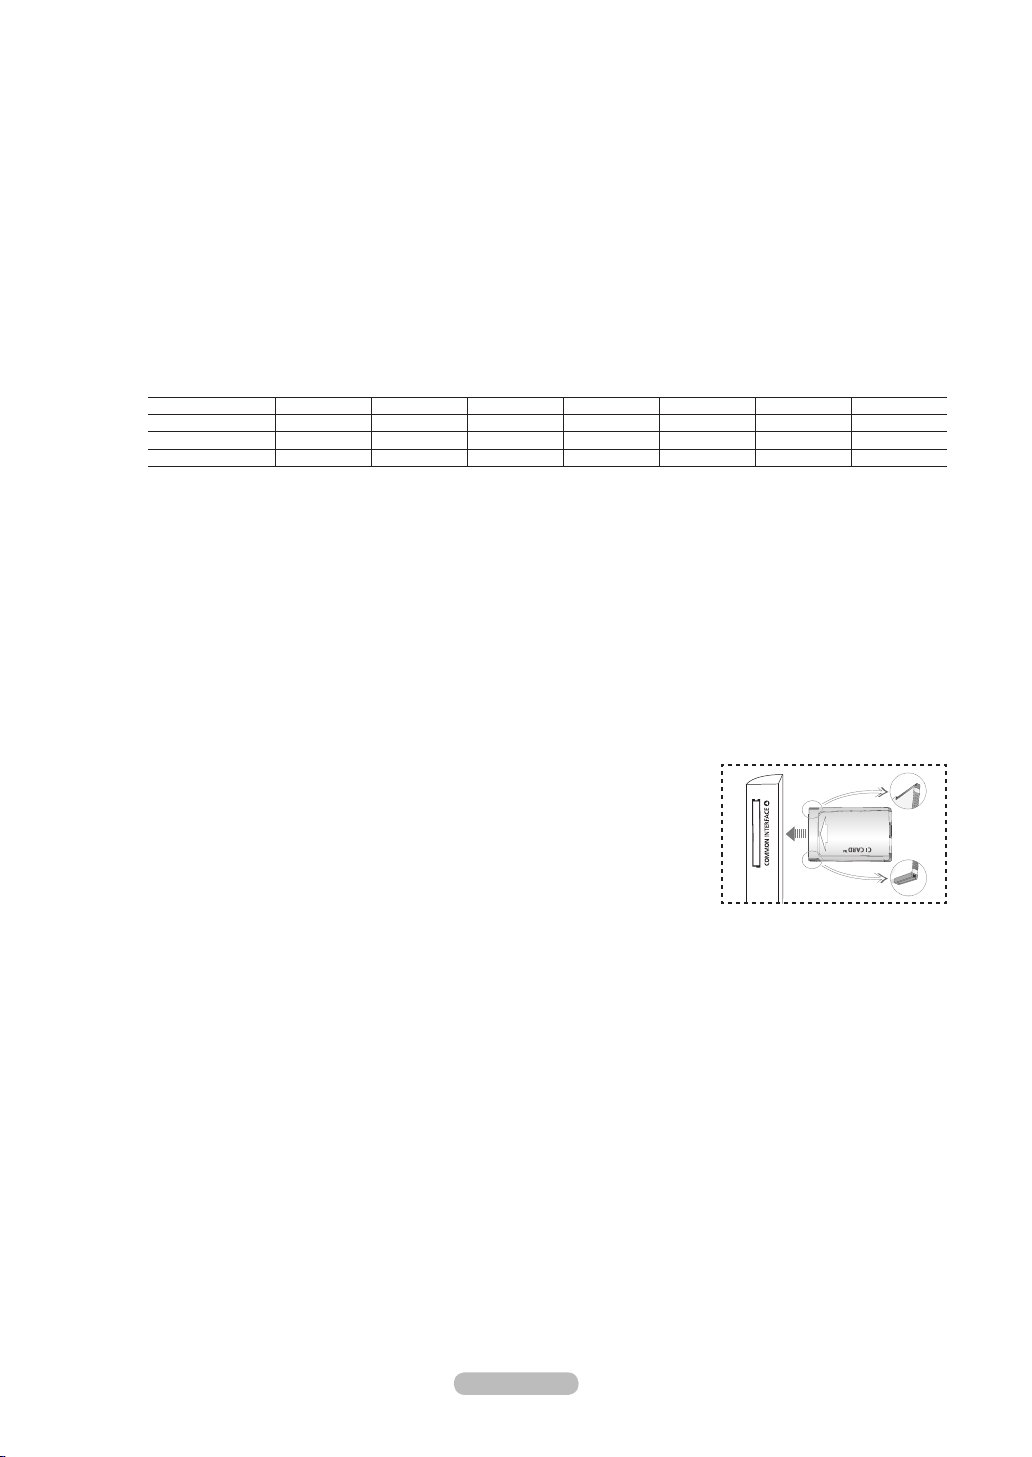
COMMON INTERFACE Slot
- When not inserting “CI CARD” in some channels, “Scrambled Signal” is displayed on the screen.
- The pairing information containing a telephone number
about 2~3 minutes. If an error message is displayed, please contact your service provider
, CI CARD ID, Host ID and other information will be displayed in
.
- When the channel information conguration has nished, the message “Updating Completed” is displayed, indicating
that the channel list is now updated.
You must obtain a CI CARD from a local cable service provider. Remove the CI
➣
CARD by carefully pulling it out with your hands since dropping the CI CARD
may cause damage to it.
Insert the CI-Card in the direction marked on it.
➣
The place of the COMMON INTERFACE Slot may be different depending on its
➣
model.
7
WISELINK
Connect a USB mass storage device to view photo les (JPEG) and play audio les (MP3).
8
S-VIDEO or VIDEO / R-AUDIO-L
- Connect RCA or S-VIDEO cable to an appropriate external A/V device such as VCR, DVD or Camcorder.
-
Connect RCA audio cables to “R-AUDIO-L” on your set and the other ends to corresponding audio out connectors on
the A/V device.
9
HEADPHONES JACK
Headphone may be connected to the headphone output on your set. While the head phone is connected, the sound
from the built-in speakers will be disabled.
0
AUDIO OUT [R-AUDIO-L]
Connect RCA audio cables to AUDIO OUT [R-AUDIO-L] on the rear of your set and the other ends to corresponding
audio in connectors on the Amplier or DVD Home Theatre.
Page 8

!
DIGITAL AUDIO OUT (OPTICAL)
- Connect to a Digital Audio Component.
When the HDMI IN jacks are connected, the DIGITAL AUDIO OUT (OPTICAL) jack on the TV outputs 2 channel
➣
audio only. If you want to hear 5.1 channel audio, connect the Optical jack on the DVD player or Cable/Satellite Box
directly to an Amplier or Home Theater, not the TV.
@
EXT 1, EXT 2
Connector
Video Audio (L/R) RGB Video + Audio (L/R)
Input Output
EXT 1 O O O Only TV or DTV output is available.
EXT 2 O O Output you can choose.
- Inputs or outputs for external devices, such as VCR, DVD, video game device or video disc players.
#
KENSINGTON LOCK (depending on the model)
- The Kensington Lock (optional) is a device used to physically x the system when used in a public place.
- If you want to use a locking device, contact the dealer where you purchased the
TV.
- The location of the Kensington Lock may be different depending on its model.
English - 6
Page 9
English - 7
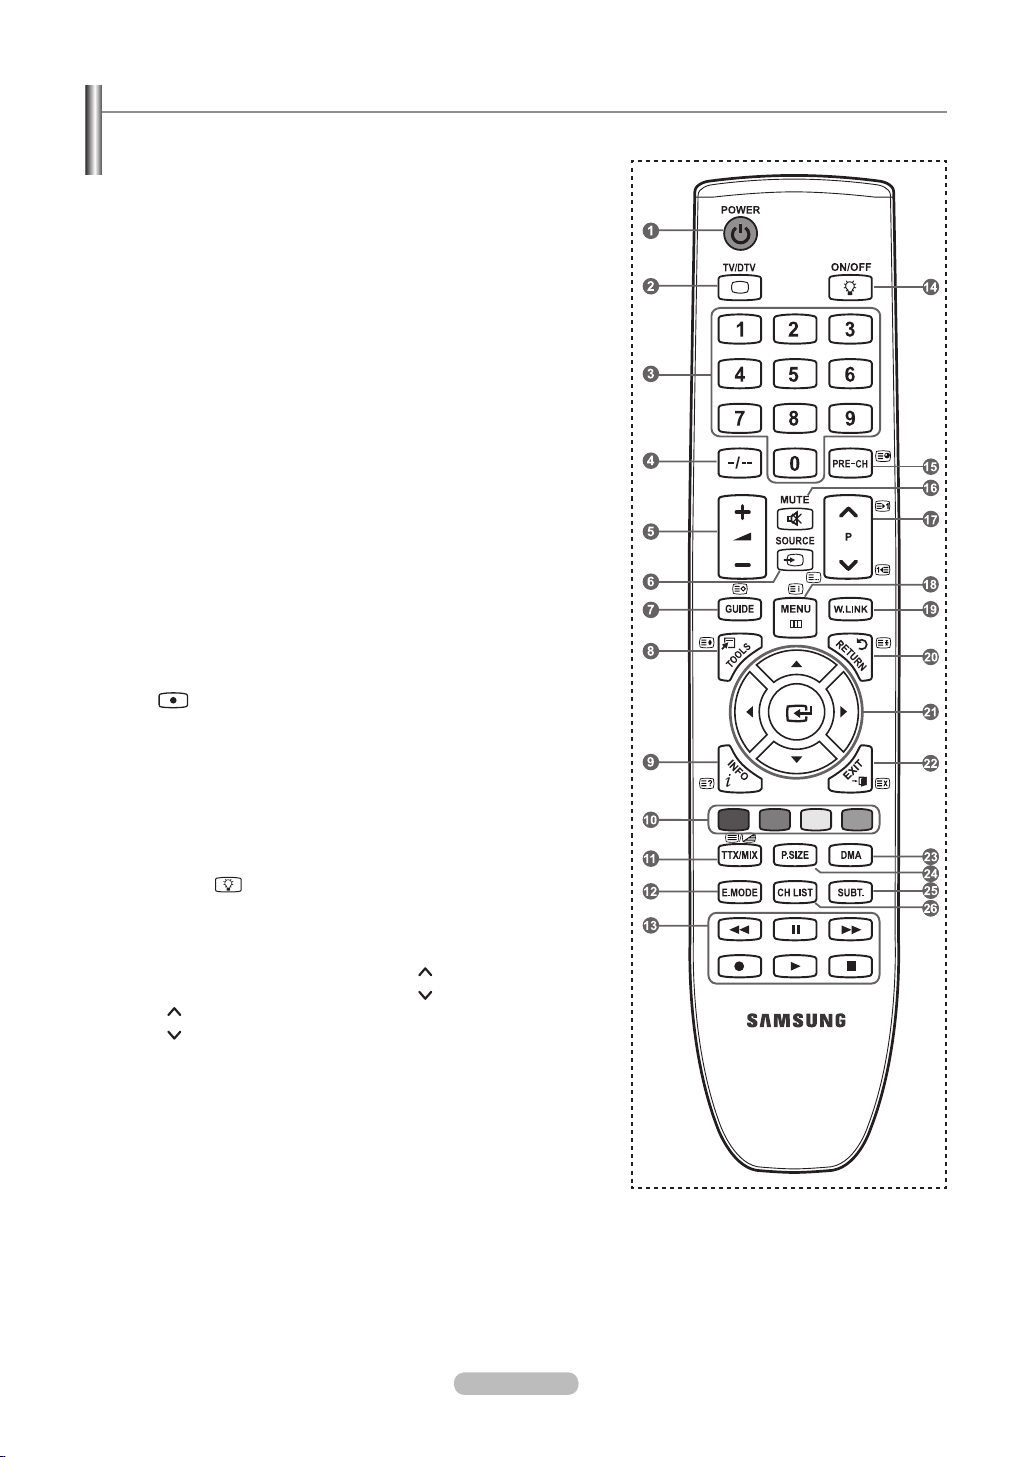
Remote Control
You can use the remote control up to a distance of about 23 feet from the TV.
1
Television Standby button.
2
Selects the TV mode
directly.
3
Number buttons for direct
channel access
4
One/Two-digit channel
selection
5
+: Volume increase
–: Volume decrease
6
Available source selection
7
Electronic Program Guide
(EPG) display
8
Use to quickly select
frequently used functions.
9
Use to see information on
the current broadcast
0
Colour buttons: Use these
buttons in the Channel list
and WISELINK, etc.
@
Press to select the optional
display and sound modes
for sports, cinema and
games.
#
Use these buttons in the
DMA, WISELINK and
Anynet+.
( : This remote can be
used to control recording
on Samsung recorders
with the Anynet+ feature)
$
Press to backlight the
buttons on the remote.
This function is convenient
for using at night or when
the room is dark. (Using
the remote control with the
ON/OFF light button
set to On will reduce the
battery usage time.)
%
Previous channel
^
Temporary sound switch-
off
&
P : Next channel
P
*
: Previous channel
Displays the main on-
screen menu
(
This function enables you
to view and play photo
and music les from an
external device.
)
Returns to the previous
menu
a
Control the cursor in the
menu
b
Exit the on-screen menu
c
Use this when connecting
a SAMSUNG DMA
(Digital Media Adapter)
device through an HDMI
interface and switching
to DMA mode. (The DMA
button is optional.) For
more information on the
operating procedures,
refer to the user manual
of the DMA. This button
is available when
“Anynet+(HDMI-CEC)” is
“On” (see page 68)
d
Picture size selection
e
Digital subtitle display
f
It display “Channel List” on
the screen.
Teletext Functions
2
Exit from the teletext
display
6
Teletext mode selection
(LIST/FLOF)
7
Teletext store
8
Teletext size selection
9
Teletext reveal
0
Fastext topic selection
!
Alternately select Teletext,
Double, or Mix.
%
Teletext sub page
&
P : Teletext next page
P
*
)
b
: Teletext previous
page
Teletext index
Teletext hold
Teletext cancel
➣
The performance of the remote control may be affected by bright light.
Page 10
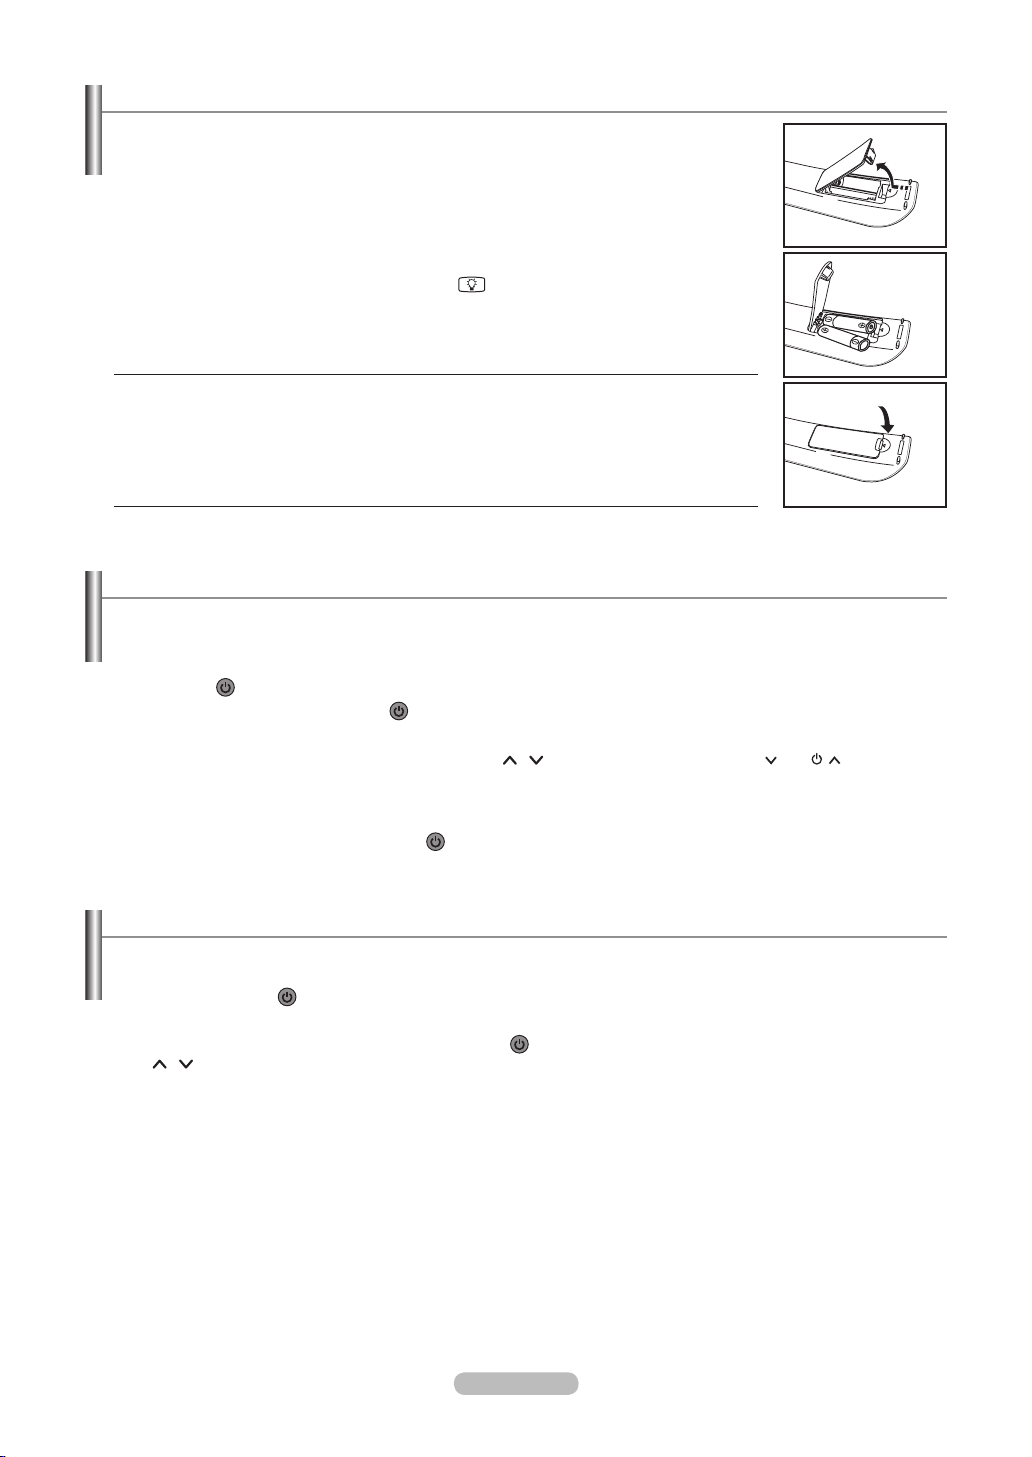
Installing Batteries in the Remote Control
1. Lift the cover at the back of the remote control upward as shown in the gure.
2. Install two
➣
3. Replace the cover
➣
➣
If the remote control doesn’t work, check the following:
➣
1. Is the TV power on?
2. Are the plus and minus ends of the batteries reversed?
3. Are the batteries drained?
4. Is there a power outage or is the power cord unplugged?
5. Is there a special uorescent light or neon sign nearby?
AAA size batteries.
Make sure to match the “+” and “–” ends of the batteries with the diagram inside the
compartment.
.
Remove the batteries and store them in a cool, dry place if you won’t be using the
remote control for a long time.
Using the remote control with the ON/OFF
battery usage time.
light button set to On will reduce the
Switching On and Off
The mains lead is attached to the rear of your set.
1. Plug the mains lead into an appropriate socket.
The standby indicator lights up on your set.
➣
2. Press the
You also can press the POWER
➣
The programme that you were watching last is reselected automatically.
➣
3.
Press the numeric button (0~9) or channel up/down ( / ) button on the remote control or C/P. button on your
set.
When you switch the set on for the very rst time, you will be asked to choose language in which the menus are to
➣
be displayed.
4.
To switch your set off, press the POWER button again.
button on your set.
button or the TV/DTV button on the remote control to turn the TV on.
Placing Your Television in Standby Mode
Your set can be placed in standby mode in order to reduce the power consumption. The standby mode can be useful when
you wish to interrupt viewing temporarily (during a meal, for example).
1. Press the POWER
The screen is turned off and a red standby indicator appears on your set.
➣
2.
To switch your set back on, simply press the POWER , numeric buttons (0~9), TV/DTV button or channel up/down
( / ) button again.
Do not leave your set in standby mode for long periods of time (when you are away on holiday
➣
best to unplug the set from the mains and aerial.
button on the remote control.
, for example). It is
English - 8
Page 11
English - 9
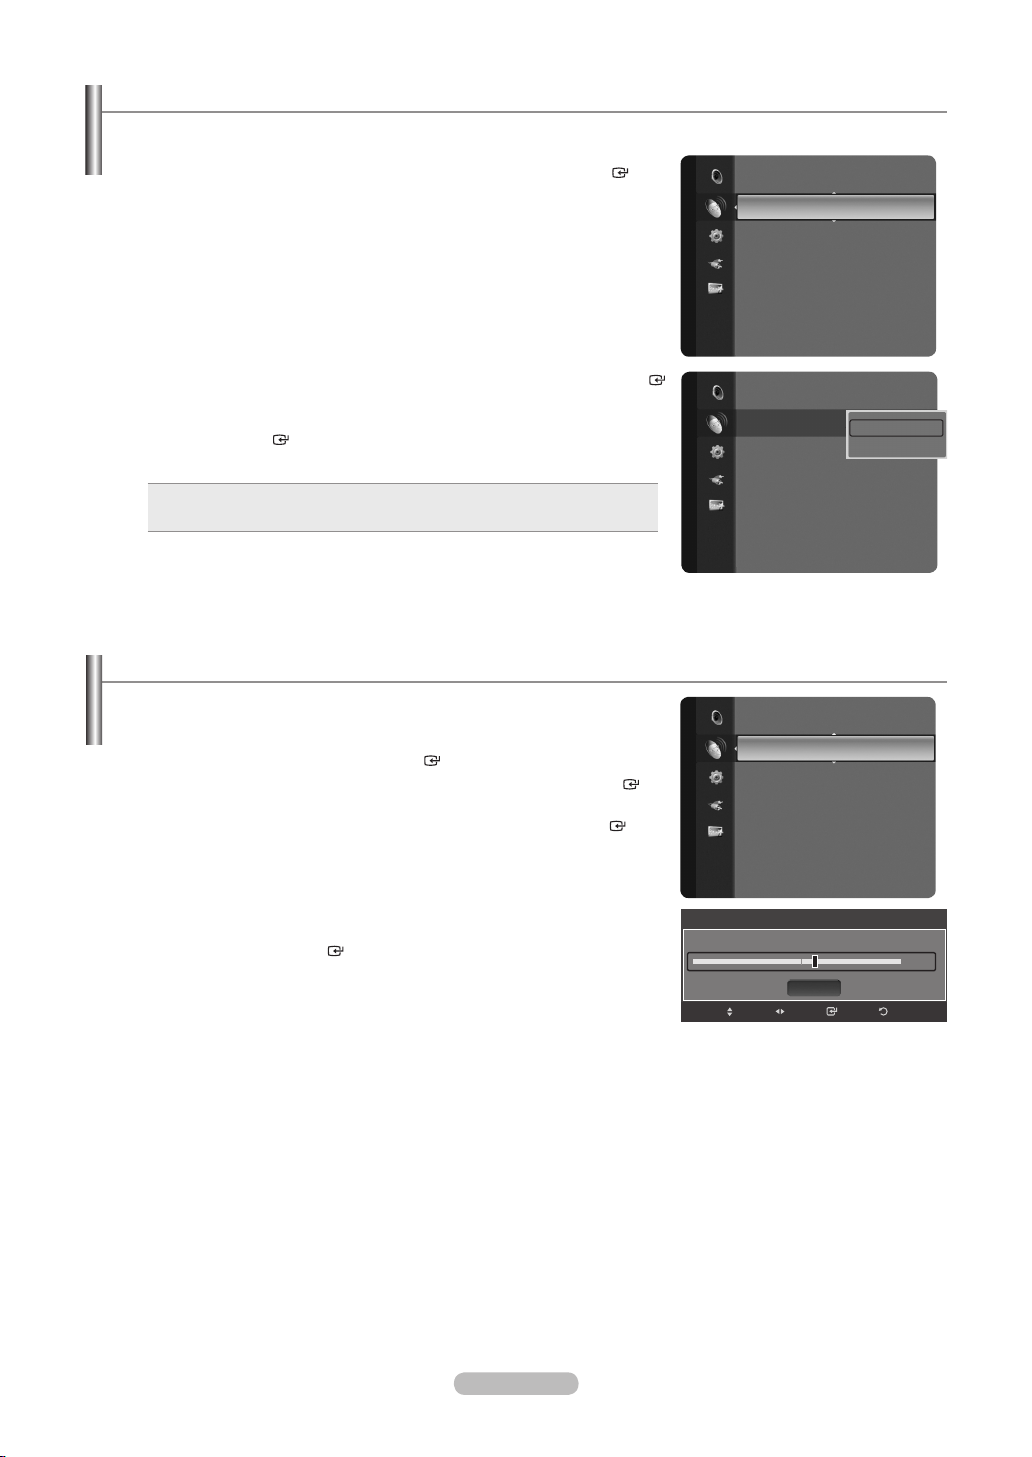
Viewing the Menus
1. With the power on, press the MENU button.
The main menu appears on the screen.
The menu’s left side has icons: Picture, Sound, Channel, Setup, Input,
Application.
2.
Press the ▲ or ▼ button to select one of the icons.
Then press the ENTER button to access the icon’s sub-menu.
3.
Press the EXIT button to exit.
The on-screen menus disappear from the screen after about one minute.
➣
Picture
Mode
Backlight : 7
Contrast : 95
Brightness : 45
Sharpness : 50
Colour : 50
Tint (G/R) : G50/R50
Detailed Settings
:
Standard
Using the TOOLS Button
You can use the TOOLS button to select your frequently used functions quickly and easily. The “Tools” menu changes
depending on which external input mode you are viewing.
1.
Press the TOOLS button.
The “Tools” menu will appear.
2. Press the ▲ or ▼ button to select a menu.
3.
Press the ▲/▼/◄/►/ENTER buttons to display, change, or use the
selected items. For a more detailed description of each function, refer to the
corresponding page.
Anynet+ (HDMI-CEC): see page 68
•
Picture Size: see page 27
•
Picture Mode: see page 25
•
Sound Mode: see page 31
•
Sleep Timer: see page 35
•
SRS TS XT: see page 31
•
Energy Saving: see page 42
•
Dual l ll: see page 33
•
PIP: see page 30
•
Auto Adjustment: see page 47
•
Picture Size : Auto Wide
Picture Mode : Standard
Sound Mode : Custom
Sleep Timer : Off
SRS TS XT : Off
Energy Saving : Off
Dual l ll : Mono
Tools
Anynet+ (HDMI-CEC)
EnterMove
e
Exit
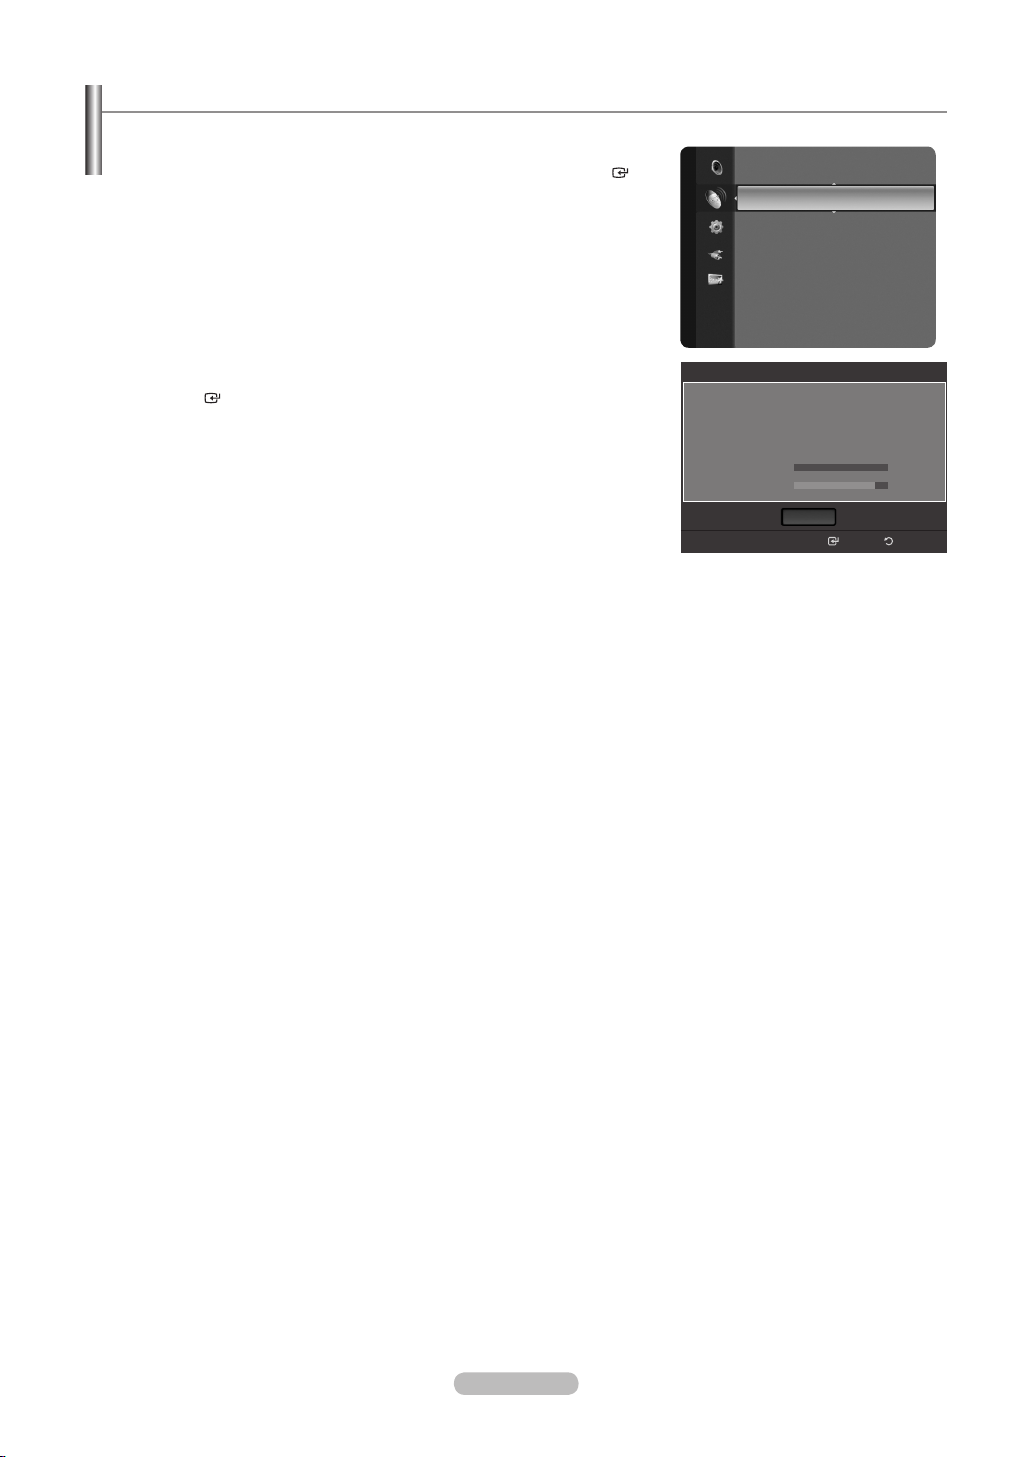
Plug & Play Feature
When the TV is initially powered on, basic settings proceed automatically and subsequently.
Press the POWER button on the remote control.
1.
The message “Menüsprache, Shop-Demo, Sender und Uhrzeit werden
eingestellt.” is displayed.
2.
Press the ENTER button, then “Sprache des Bildschirmmenüs wählen.”
menu is automatically displayed. Press the ENTER button.
Select the appropriate language by pressing the ▲ or ▼ button. Press the
3.
ENTER button to conrm your choice.
Menüsprache, Shop-Demo, Sender und Uhrzeit werden
eingestellt.
Sprache des Bildschirmmenüs wählen.
Sprache : Deutsch ►
Plug & Play
OK
Eingabe
Plug & Play
Eingabe
Page 12

4. Press the ◄ or ► button to select “Store Demo” or “Home Use”, then the
ENTER button.
We recommend setting the TV to “Home Use” mode for the best picture in
➣
your home environment.
“Store Demo” mode is only intended for use in retail environments.
➣
If the unit is accidentally set to “Store Demo” mode and you want to return
➣
to “Home Use” (Standard): Press the Volume button on the TV. When the
volume OSD is displayed, press and hold the MENU button on the TV for
5 seconds.
5.
Press the ▲ or ▼ button to select the channel source to memorize. Press the
ENTER button to select “Start”. For more details, refer to pages 11~13.
Digital & Analogue: “Digital” and “Analogue” channels.
➣
Digital: “Digital” channels.
Analogue: “Analogue” channels.
The channel search will start and end automatically.
➣
Press the ENTER
➣
button at any time to interrupt the memorization
process.
➣
After all the available channels are stored, the message “Set the Clock
Mode.” is displayed.
6.
Press the ENTER button to select the “Clock Mode”.
Press the ▲ or ▼ button to select “Manual”, then Press the ENTER
button.
➣
If you select “Auto”, The message “Enjoy your viewing” is displayed.
If you have received a digital signal, the time will be set automatically.
Select the “Day”, “Month”, “Year”, “Hour”, or “Minute” by pressing the ◄ or ►
7.
button. Set the “Day”, “Month”, “Year”, “Hour”, or “Minute” by pressing the
▲ or ▼ button.
➣
You can also set the “Day”, “Month”, “Year”, “Hour” and “Minute” by
pressing the number buttons on the remote control.
8. The message “Enjoy your viewing” is displayed.
When you have nished, press the ENTER button.
If you want to reset this feature...
Press the MENU button to display the menu.
1.
Press the ▲ or ▼ button to select “Setup”, then press the ENTER button.
2.
Press the ENTER button again to select “Plug & Play”.
3.
Enter your 4 digit PIN number. The default PIN number of a new TV set is
“0-0-0-0”.
➣
If you want to change PIN number, refer to page 38.
➣
For further details on setting up options, refer to the pages 9~10.
➣
The “Plug & Play” feature is only available in the TV mode.
English - 10
Plug & Play
Select ‘Home Use’ when installing this TV in your home.
Store Demo
Select the Antenna source to memorize.
Digital & Analogue
Digital
Analogue
Select the Antenna source to memorize.
Cable
Air
Auto Store in progress.
Digital Channels: 29
Analogue Channels: 0
Auto Store is completed.
Digital Channels : 45
Analogue Channels : 32
Set the Clock Mode.
Clock Mode : Auto
Set current date and time
Day
01
Hour
00
Move
Enjoy your viewing
Setup
Plug & Play
Language : English
Time
Child
Lock : On
Change PIN
Parental Lock
Subtitle
T
eletext Language : ----
If you enter PIN, ‘Plug & Play’ will be started. All channel
settings and user preferences will be lost.
Home Use
EnterMove
Plug & Play
Start
Start
Start
Move
Plug & Play
Move
Plug & Play
Plug & Play
Plug & Play
Plug & Play
Plug & Play
Plug & Play
Enter
Start
Start
Enter
Channel 69
20%
Stop
Enter
OK
Enter
Manual
Auto
EnterMove Skip
Month
01
Minute
00
Adjust
OK
►
Year
20 08
Enter
Skip
Skip
Skip
Skip
Skip
0~9
Enter PIN
Return
Page 13
English - 11
Channel Control
Storing Channels Automatically
You can scan for the frequency ranges available to you. Automatically allocated programme numbers may not correspond to
actual or desired programme numbers. However, you can sort numbers manually and clear any channels you do not wish to
watch.
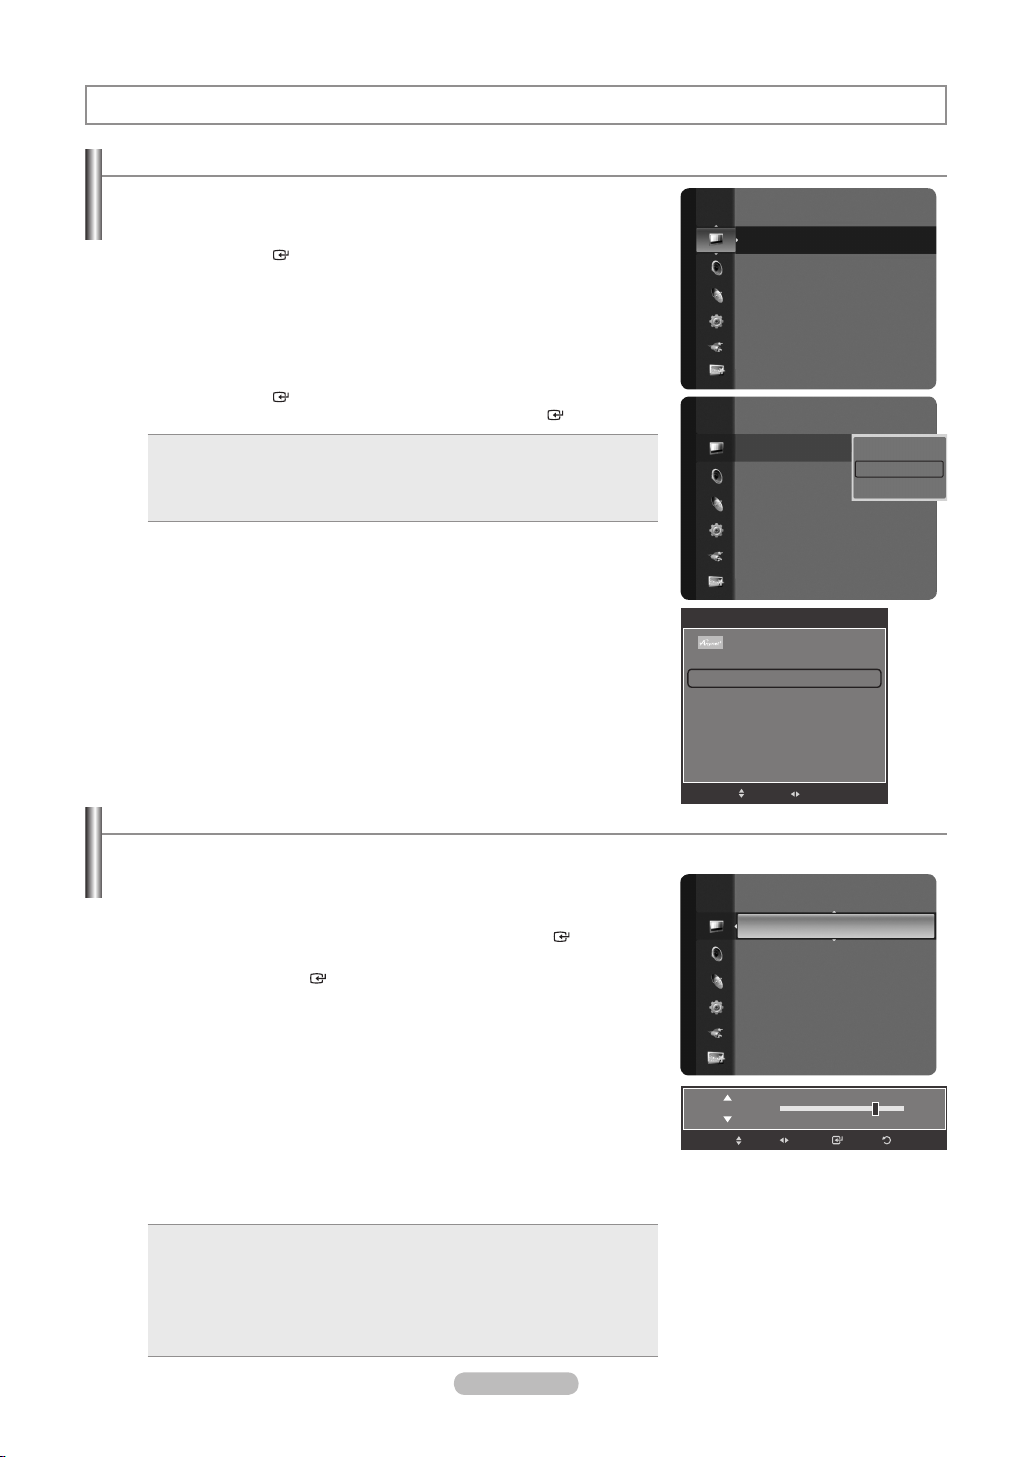
1.
Press the MENU button to display the menu.
Press the ▲ or ▼ button to select “Channel”, then press the ENTER
button.
2.
Press the ▲ or ▼ button to select “Auto Store”, then press the ENTER
button.
If a channel is locked using the “Child Lock” function, the PIN input
➣
window appears (refer to page 37). Enter your 4 digit PIN number.
3.
Press the ▲ or ▼ button to select the channel source to memorize.
Digital & Analogue: “Digital” and “Analogue” channels.
➣
Digital: “Digital” channels.
Analogue: “Analogue” channels.
Scans for all channels with active broadcast stations and stores them in
➣
the TV’s memory.
Channel
Auto Store
Manual Store
Full Guide
Mini Guide
Default
Guide : Mini Guide
Channel List
Mode : Added Ch.
Channel
Fine Tune
Auto Store
Select the Antenna source to memorize.
Digital & Analogue
Digital
Analogue
Move
►
Start
Start
Start
Return
Enter
Digital & Analogue / Digital
4. Press the ▲ or ▼ button to select “Cable” or “Air”. Press the ENTER
button.
5. Press the ENTER
button to select “Start”.
- Cable: Scans cable channels.
-
Air: Scans aerial channels.
This product cannot scan both cable and aerial channels at the same
➣
time.
When it has nished, the number of scanned services will be displayed.
➣
The existing favourite channel list will not be deleted when the channel list
➣
is updated.
Cable channels may not be available depending on the broadcasting stations.
➣
Analogue
4.
Press the ENTER button to select “Start”.
If you want to stop Auto Store, press the ENTER
➣
button.
The “Stop Auto Store?” message will be displayed.
Select “Yes” by pressing the ◄ or ► button, then press the ENTER
button.
Select the Antenna source to memorize.
Cable
Air
Auto Store in progress.
172MHz
Analogue Channels: 0
Auto Store
Move
Auto Store
Stop
Enter
Enter
Start
Start
Return
S3
20%
Return
Page 14
Storing Channels Manually
You can store television channels, including those received via cable networks. When storing channels manually, you can
choose:
Whether or not to store each of the channels found.
•
The programme number of each stored channel which you wish to identify.
•
1.
Press the MENU button to display the menu.
Press the ▲ or ▼ button to select “Channel”, then press the ENTER
button.
2.
Press the ▲ or ▼ button to select “Manual Store”, then press the ENTER
button.
Digital Channel
3.
Press the ▲ or ▼ button to select “Digital Channel”, then press the
ENTER button.
➣
If a channel is locked using the “Child Lock” function, the PIN input
window appears (refer to page 37). Enter your 4 digit PIN number.
4.
Press the ▲ or ▼ button to select “Cable” or “Air”, then press the
ENTER .
Select the Antenna source to memorize.
Auto Store
Channel
Manual Store ►
Full Guide
Mini Guide
Default
Guide : Mini Guide
Channel List
Mode : Added Ch.
Channel
Fine Tune
Signal Information
Auto Store
Channel
ManualStore ►
Full Guide
Mini Guide
Default
Guide : Mini Guide
Channel List
Mode : Added Ch.
Channel
Fine Tune
Signal Information
Auto Store
Cable
Air
Digital Channel
Analogue Channel
Start
Start
When
selecting “Cable”
- Frequency: Displays the frequency for the channel.
- Modulation: Displays available modulation values.
- Symbol Rate: Displays available symbol rates.
Press the ENTER
When
selecting “Air”
button to start the scan for digital services.
- Channel: Channel is displayed.
- Frequency: The frequency available in the Channel group is displayed.
- Bandwidth: The available bandwidths are 8 MHz.
Press the ENTER
When it has nished, channels are updated in the channel list.
5.
6.
Press the EXIT button to exit.
button to start the scan for digital services.
English - 12
Frequency
17 70 00kHz
Channel
31
Move
Manual Store
Modulation
QAM 16
Move
Manual Store
Frequency
554000 KHz
Move
Enter
Symbol Rate
4000 kS/s
Bandwidth
8MHz
Return
ReturnSearch
ReturnSearch
Page 15

English - 13
Analogue Channel
Press the ▲ or ▼ button to select “Analogue Channel”, then press the
3.
ENTER button.
If a channel is locked using the “Child Lock” function, the PIN input
➣
window appears (refer to page 37).
4. Press the ◄ or ► button to select the required item below
.
Press the ▲ or ▼ button to adjust to the setting satised.
5. Press the EXIT button to exit.
Programme (Programme number to be assigned to a channel)
Press the ▲ or ▼ button until you nd the correct number.
➣
You can also select the channel number directly by pressing the numeric
buttons (0~9).
Colour System:
Auto/PAL/SECAM/NTSC4.43
Press the ▲ or ▼ button to select the required colour standard.
Sound System: BG/DK/I/L
Press the ▲ or ▼ button to select the required sound standard.
Channel (When you know the number of the channel to be stored)
Press the ▲ or ▼ button to select C (Air channel) or S (Cable channel).
Press the ► button, then press the ▲ or ▼ button to select the required
number.
➣
You can also select the channel number directly by pressing the numeric
buttons (0~9).
➣
If there is abnormal sound or no sound, reselect the sound standard
required.
Auto Store
Channel
ManualStore ►
Full Guide
Mini Guide
Default
Guide : Mini Guide
Channel List
Mode : Added Ch.
Channel
Fine Tune
Signal Information
Manual Store
Programme
Channel
C
Colour SystemBGSound System
1
Search
--
62 MHz
Move
Au to
Digital Channel
Analogue Channel
Store
?
Adjust
Return
Search (When you do not know the channel numbers)
Press the ▲ or ▼ button to start the search.
The tuner scans the frequency range until the rst channel or the channel
that you selected is received on the screen.
Store (When you store the channel and associated programme number)
Set to OK by pressing the ENTER
Channel mode
➣
P (Programme mode): When completing tuning, the broadcasting stations
-
button.
in your area have been assigned to position numbers from P00 to P99. Y
can select a channel by entering the position number in this mode.
- C (Air channel mode): You can select a channel by entering the assigned
number to each air broadcasting station in this mode.
-
S (Cable channel mode): You can select a channel by entering the assigned
number for each cable channel in this mode.
ou
Page 16
Viewing the EPG (Electronic Programme Guide) Information
The EPG (Electronic Programme Guide) information is provided by the broadcasters. Programme entries may appear blank
or out of date as a result of the information broadcast on a given channel. The display will dynamically update as soon as
new information becomes available.
1.
Press the MENU button to display the menu.
2.
Press the ▲ or ▼ button to select “Channel”, then press the ENTER
button.
3.
Press the ▲ or ▼ button to select “Full Guide” or “Mini Guide” then press the
ENTER button.
Mini Guide
The information of each program is displayed by each line on the current
channel Mini Guide screen from the current program onwards according to
the program starting time order.
Full Guide
Displays the programme information as time ordered One hour segments.
Two hours of programme information is displayed which may be scrolled
forwards or backwards in time.
To... Then...
Watch a programme in the
EPG list
Select a programme by pressing the
▲, ▼, ◄, ► button.
Exit the guide Press the blue button
If the next program is selected, it is scheduled with the clock icon
➣
displayed. If the ENTER
button is pressed again, press the
◄, ► button to select Cancel Schedules, the scheduling is
canceled with the clock icon gone.
View programme
information
Select a programme of your choice by
•
pressing the ▲, ▼, ◄, ► button.
Then press the INFO button when the
•
programme of your choice is highlighted.
The programme title is on the upper part
•
of the screen center.
Please click on INFO button for the detailed information. Channel
➣
Number, Running Time, Status Bar, Parental Level, Video
Quality Information (HD/SD), Sound Modes, Subtitle or Teletext,
languages of Subtitle or Teletext and brief summary of the
highlighted programme are included on the detailed information.
“...” will be appeared if the summary is long.
Toggle between the “Mini
Press the red button repeatedly.
Guide” or “Full Guide”
In Full Guide
Scrolls backwards
•
Press the green button repeatedly.
•
quickly (24 hours).
Scrolls forwards quickly
•
Press the yellow button repeatedly.
•
(24 hours).
In Mini Guide
Display next page
•
Press the yellow button.
•
quickly.
Display previous page
•
Press the green button.
•
quickly.
You can also display the guide menu simply by pressing the GUIDE button.
O
(To congure the “Default Guide”, refer to the descriptions on page 15.)
Auto Store
Manual Store
Channel
Full Guide
Mini Guide
Default Guide : Mini Guide
Channel List
Mode : Added Ch.
Channel
Fine Tune
Signal Information
Full Guide
50 f tn
51 ITV Play
52 Kerrang!
53 Kiss
54 oneword
55 Smash Hits!
▼
Watch
Channel
Mini Guide DTV Cable 53 f tn
2:00
2:30
▼
5:00
Watch
DTV Cable 900 f tn 2:10 Tue 1 Jun
Freshmen On Campus
2:00 - 2:30
No Detailed Information
Today 2:00 - 3:00 3:00 - 4:00
Freshmen O..
Street Hypn..
Mint Extra
Loaded
Fresh 40 with Dynamite MC
The Distillery
Smash Hits! Sunday
Information
Information
Mini Guide +24 Hours Exit
Manual Store
Full Guide
Mini Guide
Default Guide : Mini Guide
Channel List
Channel
Mode : Added Ch.
Fine Tune
Signal Information
Freshmen On Campus
Street Hypnosis
Booze Britain
Full Guide Next Page Exit
No Information
No Information
Kisstory
No Information
English - 14
Page 17
English - 15
Setting the Default Guide
You can decide whether to display either the “Mini Guide” or the “Full Guide” when the GUIDE button on the remote control
is pressed.
1.
Press the MENU button to display the menu.
Press the ▲ or ▼ button to select “Channel”, then press the ENTER
button.
2.
Press the ▲ or ▼ button to select “Default Guide”, then press the ENTER
button.
Full Guide
Mini Guide
Channel
Default Guide : Mini Guide ►
Channel List
Channel Mode : Added Ch.
Fine Tune
Signal Information
3. Select “Mini Guide” or “Full Guide” using the ▲ or ▼ button, and press the
ENTER button.
4. Press the EXIT button to exit.
You can select these options by simply pressing the GUIDE button on the
O
remote control.
Full Guide
Mini Guide
Channel
DefaultGuide :MiniGuide ►
Channel List
Channel Mode : Added Ch.
Fine Tune
Signal Information
Mini Guide
Full Guide
Page 18
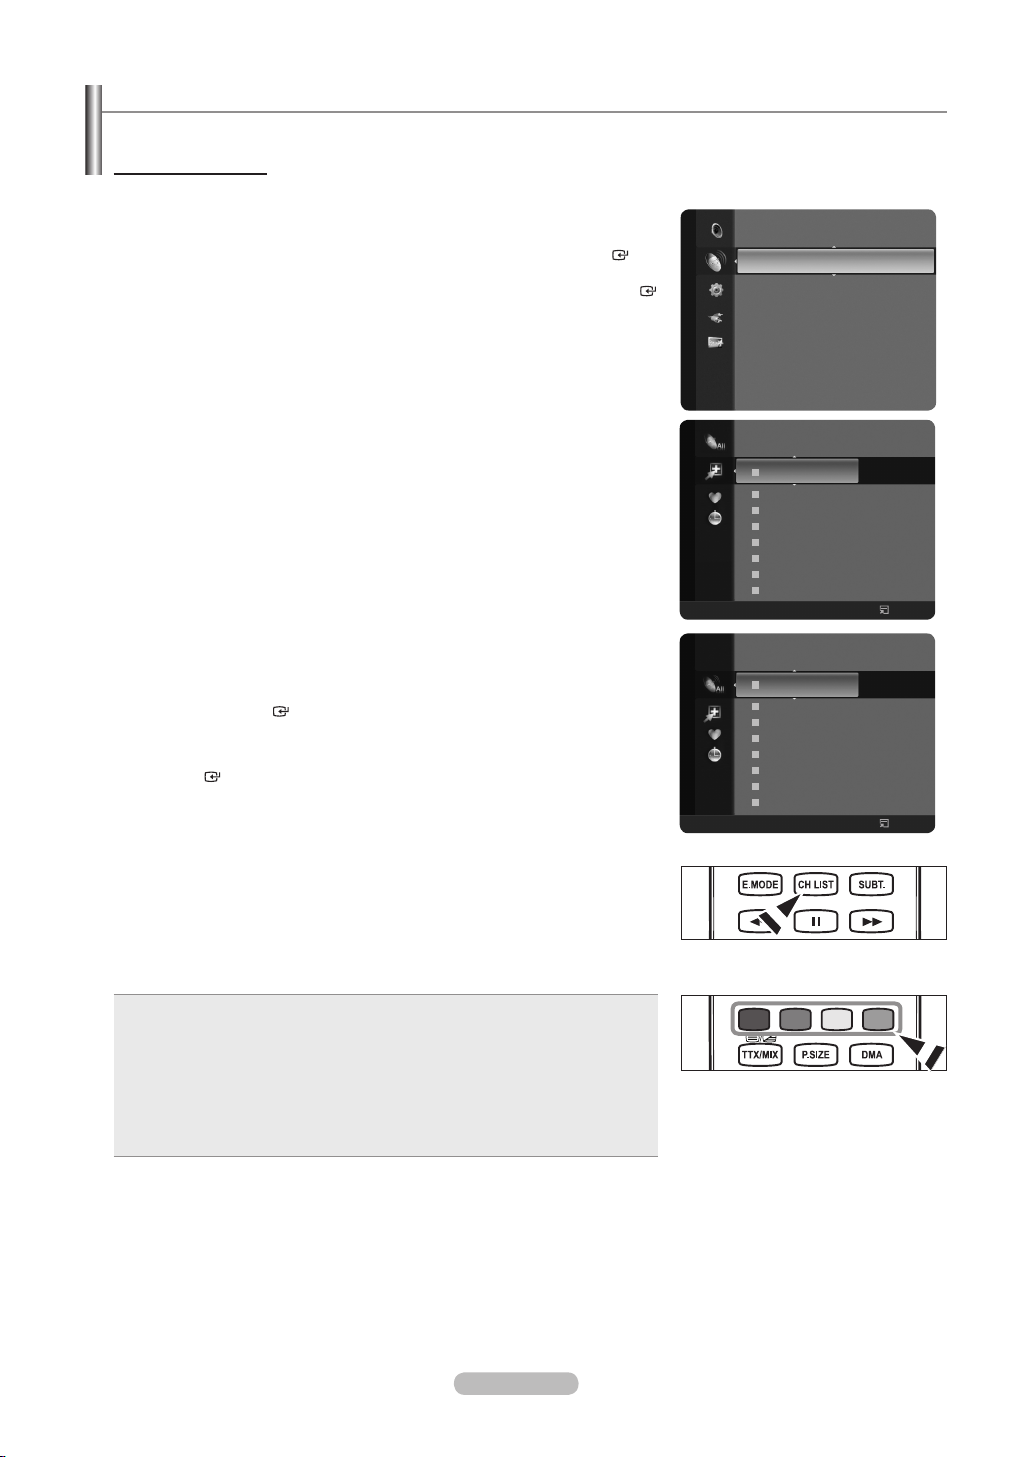
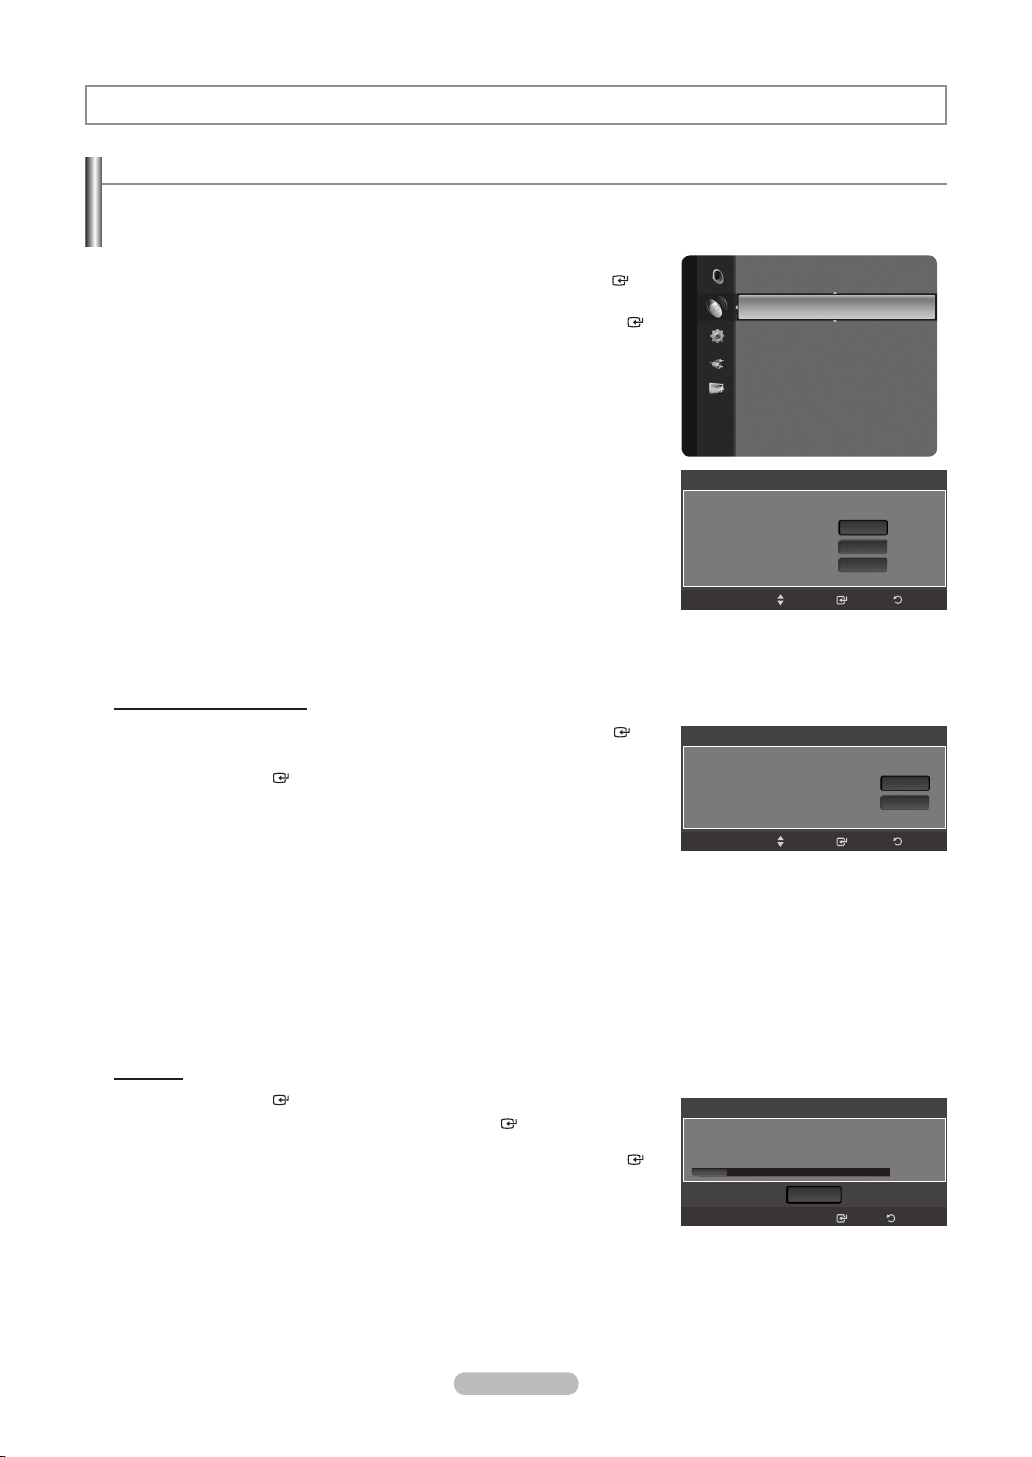
Managing Channels
Using this menu, you can Add/Delete or set Favourite channels and use the program guide for digital broadcasts.
Viewing All Channels
Show all currently available channels.
To use the Channel List function, operate the “Auto Store” rst.
Press the MENU button.
1.
Press the ▲ or ▼ button to select “Channel”, then press the ENTER
button.
Press the ▲ or ▼ button to select “Channel List”, then press the ENTER
button.
2. Press the ◄ button to select “Added Channels”.
Press the ▲ or ▼ button to select “All Channels”.
3.
Shows all currently available channels.
➣
Press the ENTER
Press the ▲ or ▼ button to select a channel to view, then press the
4.
button.
ENTER button. You can watch the selected channel.
Added Channels
All Channels
Mini Guide
Default Guide : Mini Guide
Channel
Channel List
Channel Mode : Added Ch.
Fine Tune
Signal Information
57 Vida006b
58 VIDEOTIME B
A
1 C --
A
2 C
A 3 ♥ C
A 4 C
A 5 C
A 6 C
A 7 C
A 8 C
All
Channel Type Zoom Select
57 Vida006b
58 VIDEOTIME B
A
1 C --
A
2 C
A 3 ♥ C
A 4 C
A 5 C
A 6 C
A 7 C
A 8 C
All
Channel Type Zoom Select
--
--
--
--
--
--
--
--
--
--
--
--
--
--
Option
Option
Press the CH LIST button on the remote control to bring up the channel lists.
O
Using the Colour buttons on the Remote with the Channel List
Red (Channel Type): Toggle between your “TV”, “Radio”, “Data/Other” and
•
“All”.
Green (Zoom): Enlarges or shrinks a channel number.
•
Yellow (Select): Selects multiple channel lists.
•
TOOLS (Option): Displays the “Delete”(or “Add”), “Add to Favourite”(or
•
“Delete from Favourite”), “Lock”, “Timer Viewing”, “Edit Channel Name”,
“Edit Channel Number”, “Sort”, “Select All”, “Deselect All” or “Auto Store”
menu. (The Options menus may differ depending on the situation.)
A gray-coloured channel indicates the channel has been deleted.
➣
The “Add” menu only appears for deleted channels.
A channel marked with the “♥” mark means the channel has been set as a Favourite.
➣
The “Delete from Favourite” menu only appears for channels with the “♥” mark.
English - 16
Page 19
English - 17
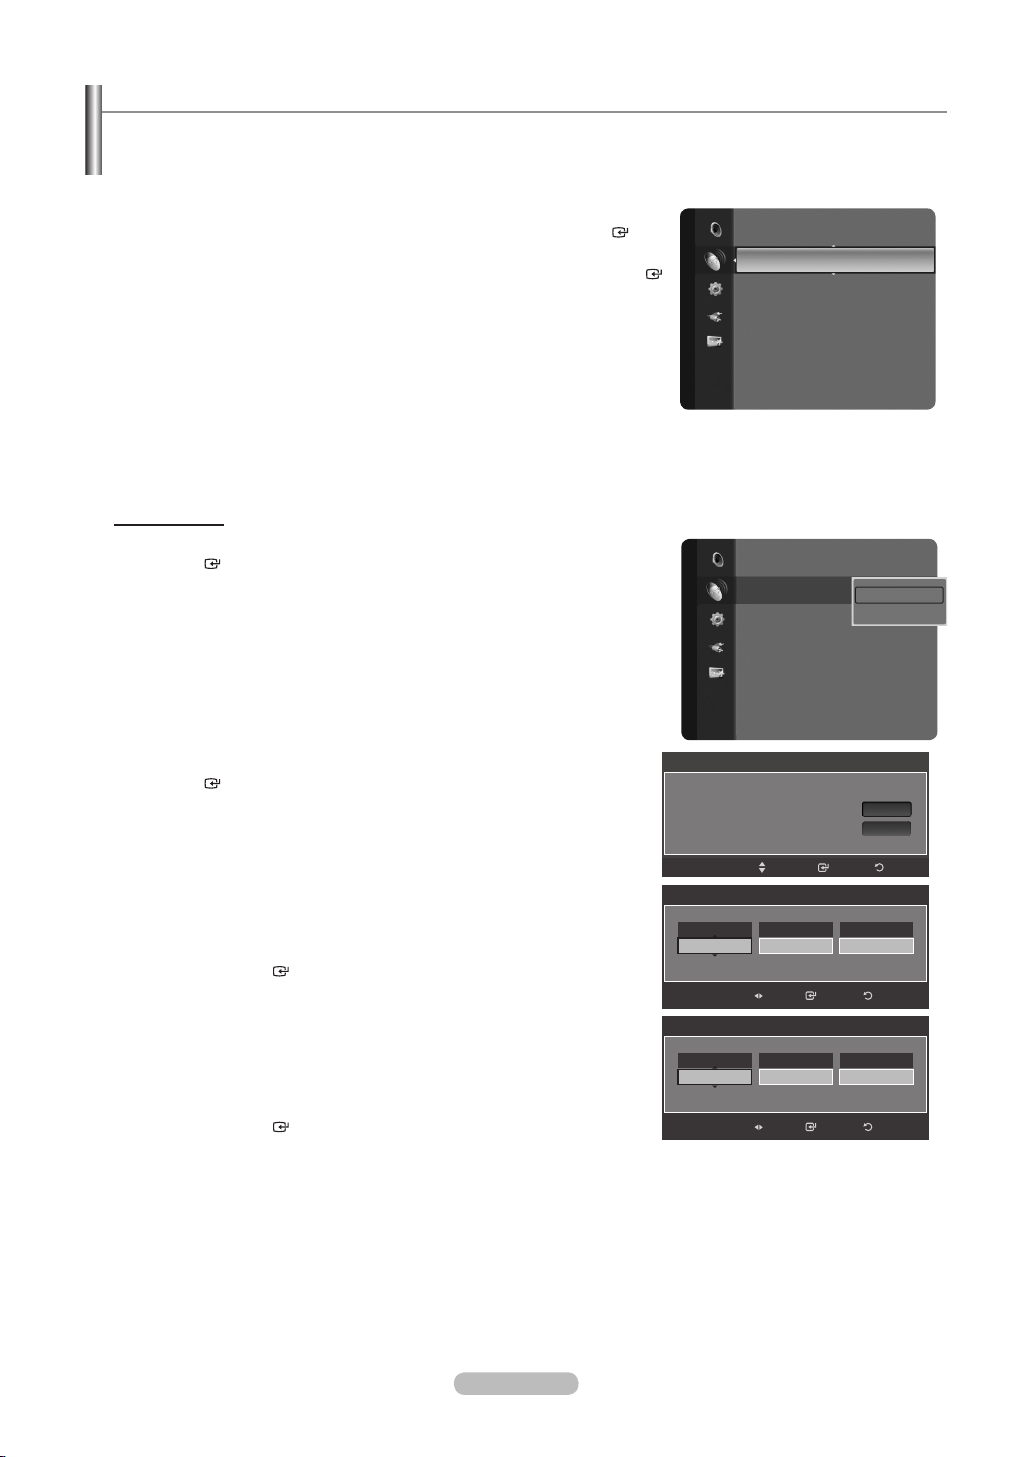
Erasing and Adding Channels
You can delete or add a channel to display the channels you want.
1.
Press the MENU button.
Press the ▲ or ▼ button to select “Channel”, then press the ENTER
button. Press the ▲ or ▼ button to select “Channel List”, then press the
ENTER button.
2. Press the ◄ button to select “Added Channels”.
3.
Press the ▲ or ▼ button to select “All Channels”.
Shows all currently available channels.
➣
Press the ENTER
4.
Press the ▲ or ▼ button to select a channel to delete, then press the
button.
TOOLS button.
5.
Press the ENTER button to select “Delete”.
All deleted channels will be shown on “All Channels” menu.
➣
6. Press the EXIT button to exit.
You can also delete a channel to the “Added Channels” menu in the same
➣
manner.
To Add (Restore) a channel back to the Added Channel List, follow steps
➣
1-3 above, press the ▲ or ▼ button to select a channel to add, the press
the TOOLS button. Press the ENTER
Press the CH LIST button on the remote control to bring up the channel
O
button to select Add.
lists.
Setting Your Favourite Channels
You can set channels you watch frequently as favourites.
1.
Press the MENU button.
Press the ▲ or ▼ button to select “Channel”, then press the ENTER
button. Press the ▲ or ▼ button to select “Channel List”, then press the
ENTER button.
2. Press the ◄ button to select “Added Channels”.
3.
Press the ▲ or ▼ button to select “All Channels”.
Shows all currently available channels.
➣
Press the ENTER
4.
Press the ▲ or ▼ button to select a channel as a favourite channel.
Adding multiple channels to Favourites
➣
button.
Press the ▲ or ▼ button to select the desired channel in the channel
list. Then press the yellow button. Repeat the above operation to select
multiple channels. The
mark appears to the left of the selected
channels.
5. Press the TOOLS button.
6.
Press the ▲ or ▼ button to select “Add to Favourite”, then press the
ENTER button. The “♥” symbol will be displayed and the channel will be
set as a favourite.
7.
To cancel your favourite channel selection, press the TOOLS button when a
favourite channel is selected.
Press the ▲ or ▼ button to select “Delete from Favourite”, then press the
ENTER
button.
The channel is deleted from “Favourites” and the “♥” mark also disappears.
Press the
➣
You can also Add or Delete a channel from Favourites in the “Added
EXIT button to exit.
Channels” menu in the same manner.
➣
All favourite channels will be shown on “Favourite” menu.
Mini Guide
Default Guide : Mini Guide
Channel
Channel List
Channel Mode : Added Ch.
Fine Tune
Signal Information
57 Vida006b
All Channels
58 VIDEOTIME B
A
1 C --
A
2 C
A 3 C
A 4 C
A 5 C
A 6 C
A 7 C
A 8 C
All
Channel Type Zoom Select
Mini Guide
Default Guide : Mini Guide
Channel
Channel List
Channel Mode : Added Ch.
Fine Tune
Signal Information
57 Vida006b
All Channels
58 VIDEOTIME B
A
1 C --
A
2 C
A 3 ♥ C
A 4 C
A 5 C
A 6 C
A 7 C
A 8 C
All
Channel Type Zoom Select
--
--
--
--
--
--
--
--
--
--
--
--
--
--
Delete
Add to Favourite
Lock
Timer Viewing
Edit Channel Name
Sort
▼
Option
Delete
Add to Favourite
Lock
Timer Viewing
Edit Channel Name
Sort
▼
Option
O
Press the CH LIST button on the remote control to bring up the channel
lists.
Page 20
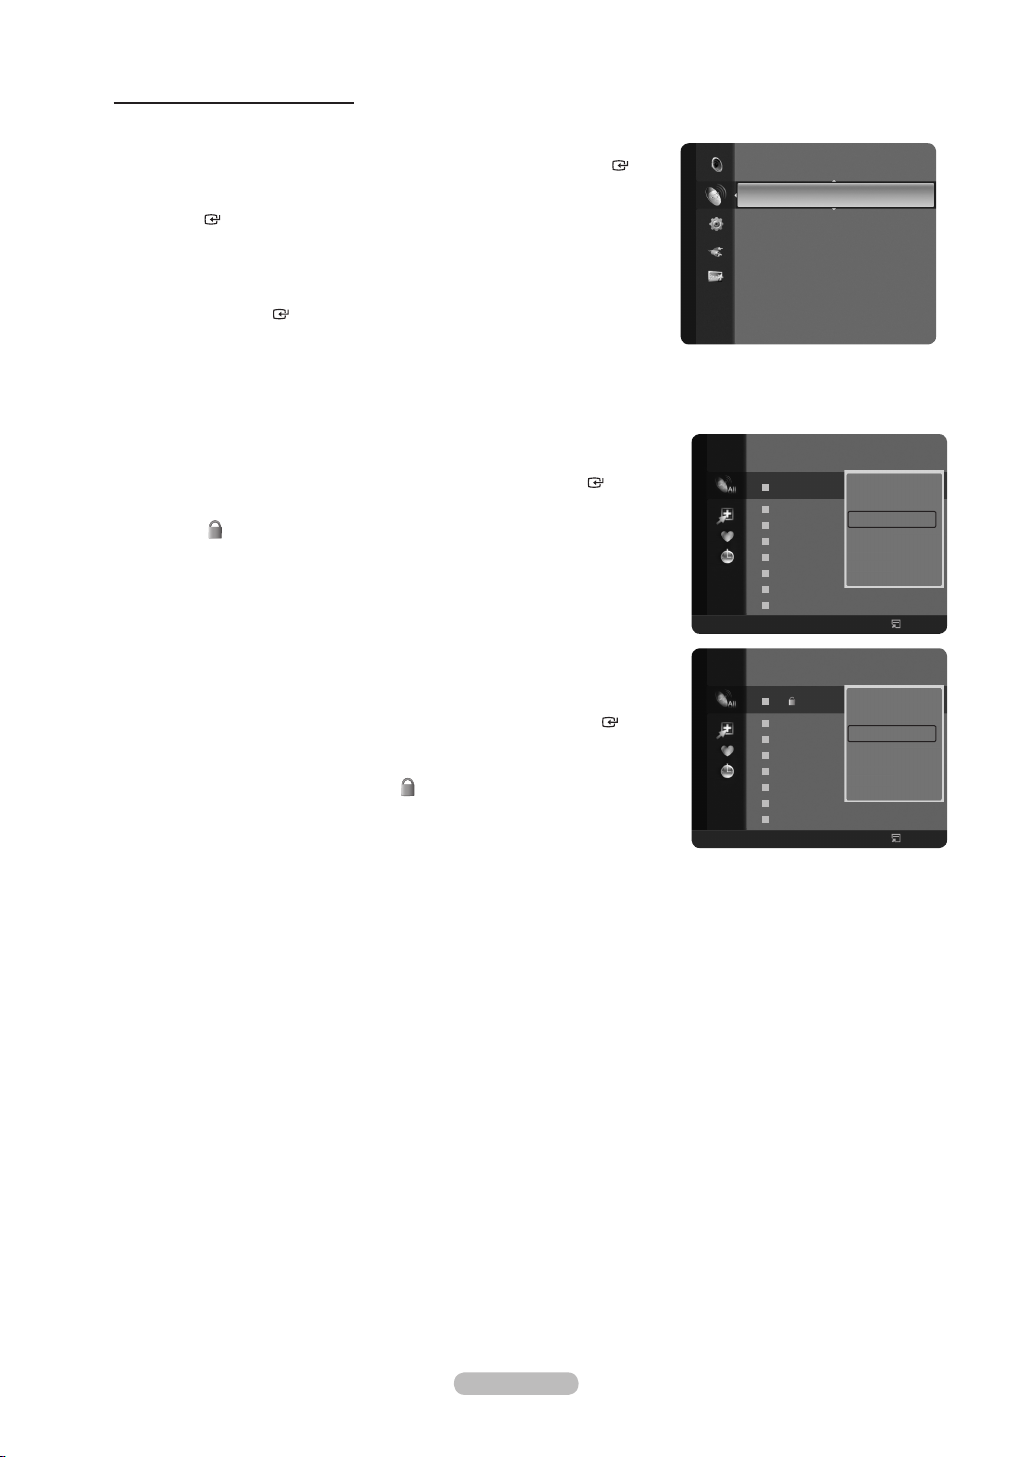
Locking and Unlocking Channels
This function is available only when the “Child Lock” is set to “on”. (see page 37)
1.
Press the MENU button.
Press the ▲ or ▼ button to select “Channel”, then press the ENTER
button.
Press the ▲ or ▼ button to select “Channel List”, then press the
ENTER button.
2. Press the ◄ button to select “Added Channels”.
3.
Press the ▲ or ▼ button to select “All Channels”.
Shows all currently available channels.
➣
Press the ENTER
button.
Locking channels
4.
Press the ▲ or ▼ button to select the channels you want to lock, then
press the TOOLS button.
5.
Press the ▲ or ▼ button to select “Lock”, then press the ENTER button.
6.
Enter your 4 digit PIN number.
➣
The “
” symbol will be displayed and the channel will be locked.
➣
The default PIN number of a new TV set is “0-0-0-0”.
➣
If you want to change PIN number, refer to page 38.
7.
Press the EXIT button to exit.
Mini Guide
Default Guide : Mini Guide
Channel
Channel List
Channel Mode : Added Ch.
Fine Tune
Signal Information
57 Vida006b
All Channels
58 VIDEOTIME B
A
1 C --
A
2 C
A 3 C
A 4 C
A 5 C
A 6 C
A 7 C
A 8 C
All
Channel Type Zoom Select
--
--
--
--
--
--
--
Delete
Add to Favourite
Lock
Timer Viewing
Edit Channel Name
Sort
▼
Option
Unlocking channels
4.
Press the ▲ or ▼ button to select the channels you want to Unlock, then
press the TOOLS button.
5.
Press the ▲ or ▼ button to select “Unlock”, then press the ENTER
button.
6.
Enter your 4 digit PIN number.
➣
The channel is unlocked and the “
➣
The default PIN number of a new TV set is “0-0-0-0”.
➣
If you want to change PIN number, refer to page 38.
7.
Press the EXIT button to exit.
” mark also disappears.
57 Vida006b
All Channels
58 VIDEOTIME B
A
1 C --
A
2 C
A 3 C
A 4 C
A 5 C
A 6 C
A 7 C
A 8 C
All
Channel Type Zoom Select
--
--
--
--
--
--
--
Delete
Add to Favourite
Unlock
Timer Viewing
Edit Channel Name
Sort
▼
Option
English - 18
Page 21
English - 19
Reserving a Program (Timer Viewing)
If you reserve a program you want to watch, the channel is automatically switched to the reserved channel in the Channel
List; even when you are watching another channel. To reserve a program, set the current time rst. See pages 34~35.
Press the MENU button.
1.
Press the ▲ or ▼ button to select “Channel”, then press the ENTER
button.
Press the ▲ or ▼ button to select “Channel List”, then press the ENTER
button.
Press the ▲ or ▼ button to select a channel, then press the TOOLS button.
2.
Press the ▲ or ▼ button to select “Timer Viewing”, then press the
3.
ENTER button. The Reserve a Program (Timer Viewing) screen appears.
4.
Press the ▲/▼/◄/► buttons to reserve a program and then press the
ENTER button. Reserving a program has been completed.
Press the EXIT button to exit.
You can also reserve a program in the “All Channels” or “Favourite” menus
➣
using the same procedures.
For information on how to conrm a viewing reservation, refer to page 20.
➣
Only memorized channels can be reserved.
You can set the channel, day, month, year, hour and minute directly by
➣
pressing the number buttons on the remote control.
Mini Guide
Default Guide : Mini Guide
Channel
Channel List
Channel Mode : Added Ch.
Fine Tune
Signal Information
57 Vida006b
Added Channels
58 VIDEOTIME B
A
1 C --
A
2 C
A 3 ♥ C
A 4 C
A 5 C
A 6 C
A 7 C
A 8 C
All
Channel Type Zoom Select
Antenna
ATV
Date
01 - 01 - 20 08
Move
Delete
Add to Favourite
--
Lock
--
Timer Viewing
--
Edit Channel Name
--
--
Sort
--
--
Timer Viewing
Channel
80 0
Adjust
▼
Repeat
On ce
Start Time
10 :0 0
Option
ReturnEnter
Press the CH LIST button on the remote control to bring up the channel lists.
O
Digital Program Guide and Viewing Reservation
When a digital channel is selected, and you press the ► button, the Program
Guide for the channel appears. You can reserve a program according to the
procedures described above.
: A program currently being broadcast.
: A reserved program
824
Added Channels
825
908
A
2 C
A
3 ♥ C
A
4 C
A
5 C
A
6 C
A
7 C
A
8 C
All
Channel Type Zoom
1/1/2008
1:59 LA ROSE DES ....
--
2:59 WS MUSIC
--
3:21
--
--
--
--
--
Gralness de stars
Option Watch
Page 22
ConrmingaViewingReservation
You can view, modify or delete a reservation.
1.
Press the MENU button.
Press the ▲ or ▼ button to select “Channel”, then press the ENTER
button. Press the ▲ or ▼ button to select “Channel List”, then press the
ENTER button.
Mini Guide
Default Guide : Mini Guide
Channel
Channel List
Channel Mode : Added Ch.
Fine Tune
Signal Information
2. Press the ◄ button to select “Added Channels”.
Press the ▲ or ▼ button to select “Programmed”.
3.
Shows all current reserved programs.
➣
Press the ENTER
button.
Modifying a viewing reservation
4.
To select a reservation item to be modied, press the ▲ or ▼ button and
then press the TOOLS button.
5.
Press the ENTER button to select “Change Info”.
6.
Press the ▲/▼/◄/► buttons to change a reservation setting and then
press the ENTER button. The reservation modication is applied.
Canceling a reservation
4.
To select a reservation item to be canceled, press the ▲ or ▼ button, and
then press the TOOLS button.
5.
Press the ▲ or ▼ button to select “Cancel Schedules”, then press the
ENTER button.
6.
Press the ◄ or ► button to select “OK”, then press the ENTER button.
The viewing reservation has been canceled.
Press the EXIT button to exit.
Programmed Option
Change Info: Select to change a viewing reservation.
•
Cancel Schedules: Select to cancel a viewing reservation.
•
Information: Select to view a viewing reservation.
•
Select All: Select all reserved programs.
•
Programmed
1/1/2008
13:59 5 TV1 Quincy, M.E
18:59 2 TV3 The Equalizer
20:59 2 TV3 McMillan & Wife
21:59 2 TV3 M.Spillane’s mike Hammer
All
Channel Type Zoom Select
Programmed
1/1/2008
13:59 5 TV1 Quincy, M.E
18:59 2 TV3 The Equalizer
20:59 2 TV3 McMillan & Wife
21:59 2 TV3 M.Spillane’s mike Hammer
All
Channel Type Zoom Select
Option Information
Change Info
Cancel Schedules
Information
Select All
Option Information
Press the CH LIST button on the remote control to bring up the channel
O
lists.
English - 20
Page 23
English - 21
Edit Channel Name-Analogue
Channels can labeled so that their call letters appear whenever the channel is
selected.
1.
Press the MENU button.
Press the ▲ or ▼ button to select “Channel”, then press the ENTER
button.
Press the ▲ or ▼ button to select “Channel List”, then press the ENTER
button.
2. Press the ▲ or ▼ button to select the channel to be assigned a new name,
then press the TOOLS button.
3.
Press the ▲ or ▼ button to select “Edit Channel Name”, then press the
ENTER button.
4.
Press the ▲/▼/◄/► button to select a letter, then press the ENTER
button.
Numeric buttons: You can enter numbers.
•
Red button: You can switch between English and Characters.
•
Green button: You can delete an already entered character.
•
Yellow button: You can enter a blank space.
•
Blue button: You can nish renaming a channel.
•
5. When you have nished, press the blue button to assign the new name.
Press the EXIT button to exit.
The names of digital broadcasting channels are automatically assigned
➣
and cannot be labelled.
Mini Guide
Default Guide : Mini Guide
Channel
Channel List
Channel Mode : Added Ch.
Fine Tune
Signal Information
57 Vida006b
Added Channels
58 VIDEOTIME B
A
1 C --
A
2 C
A 3 ♥ C
A 4 C
A 5 C
A 6 C
A 7 C
A 8 C
All
Channel Type Zoom Select
1
_
B C D E F G
A
I J K L M NH
P Q R S T UO
W X Y ZV
Delete
Add to Favourite
--
Lock
--
Timer Viewing
--
Edit Channel Name
--
--
Sort
--
--
Edit Channel Name
▼
Option
0~9
0~9
Number
Character
Delete
Blank
Done
Enter ReturnMove
Sorting the Stored Channels-Analogue
This operation allows you to change the programme numbers of the stored
channels. This operation may be necessary after using the auto store.
1.
Press the MENU button.
Press the ▲ or ▼ button to select “Channel”, then press the ENTER
button.
Press the ▲ or ▼ button to select “Channel List”, then press the ENTER
button.
2.
Press the ▲ or ▼ button to select a channel, then press the TOOLS button.
3.
Press the ▲ or ▼ button to select “Sort”, then press the ENTER button.
4.
Press the ▲ or ▼ button to move to the position in which you would like to
change and then press the ENTER button.
5.
Repeat steps 2 to 4 for another channel to be sorted.
6.
Press the EXIT button to exit.
Mini Guide
Default Guide : Mini Guide
Channel
Channel List
Channel Mode : Added Ch.
Fine Tune
Signal Information
57 Vida006b
Added Channels
58 VIDEOTIME B
A
1 C --
A
2 C
A 3 ♥ C
A 4 C
A 5 C
A 6 C
A 7 C
A 8 C
All
Channel Type Zoom Select
1 C -2 C --
3 C --
4 C --
5 C --
6 C --
--
--
--
--
--
--
--
Move
Add to Favourite
Lock
Timer Viewing
Edit Channel Name
Sort
Select All
Sort
▲
▼
Option
▼
ReturnEnter
Page 24
Editing the Channel Number-Digital
Press the MENU button.
1.
Press the ▲ or ▼ button to select “Channel”, then press the ENTER
button.
Press the ▲ or ▼ button to select “Channel List”, then press the ENTER
button.
2.
Select the channel number that you wish to edit by pressing the ▲ or ▼
button repeatedly, then press the TOOLS button.
3.
Press the ▲ or ▼ button to select “Edit Channel Number”, then press the
ENTER button.
4.
Then you can edit the Channel Number pressing the ▲ or ▼ button
repeatedly. You can also edit the channel number by pressing the number
buttons on the remote control.
56 Vida006b
Added Channels
57 Vida006b
58 VIDEOTIME
A
2 C
A 3 ♥ C
A 4 C
A 5 C
A 6 C
A 7 C
A 8 C
All
Channel Type Zoom Select
Edit Channel Number
Channel
55
Delete
Add to Favourite
--
Lock
--
Timer Viewing
--
Edit Channel Number
--
Select All
--
--
--
B
▼
Name
Vida 004 b
Option
Selecting and Deselecting All Channels
1.
Press the MENU button.
Press the ▲ or ▼ button to select “Channel”, then press the ENTER
button.
Press the ▲ or ▼ button to select “Channel List”, then press the ENTER
button.
2.
Press the ▲ or ▼ button to select the channel, then press the TOOLS
button.
3.
Press the ▲ or ▼ button to select “Select All” or “Deselect All”, then press
the ENTER button.
You can only select “Deselect All” when there is a selected channel.
➣
You can select(or Deselect) all channel in the channel list.
➣
The
➣
mark appears to the left of the selected channels.
Storing Channels in Memory (Auto Store)
1.
Press the MENU button.
Press the ▲ or ▼ button to select “Channel”, then press the ENTER
button.
Press the ▲ or ▼ button to select “Channel List”, then press the ENTER
button.
2.
Press the ▲ or ▼ button to select the channel to be assigned a new name,
then press the TOOLS button.
3.
Press the ▲ or ▼ button to select “Auto Store”, then press the ENTER
button.
➣
For further details on setting up options, refer to page 11.
➣
If a channel is locked using the “Child Lock” function, the PIN input window
appears (refer to page 37).
57 Vida006b
Added Channels
58 VIDEOTIME B
A
1 C --
A
2 C
A 3 ♥ C
A 4 C
A 5 C
A 6 C
A 7 C
A 8 C
All
Channel Type Zoom Select
57 Vida006b
Added Channels
58 VIDEOTIME B
A
1 C --
A
2 C
A 3 ♥ C
A 4 C
A 5 C
A 6 C
A 7 C
A 8 C
All
Channel Type Zoom Select
Move
--
--
--
--
--
--
--
--
--
--
--
--
--
--
Delete
Add to Favourite
Lock
Deselect All
Select All
Auto Store
Option
▲
Lock
Timer Viewing
Edit Channel Name
Sort
Select All
Auto Store
Option
ReturnEnter
English - 22
Page 25
English - 23
Setting the Channel Mode
When press the P >/< button, Channels will be switched within the selected channel list.
1.
Press the MENU button to display the menu.
Press the ▲ or ▼ button to select “Channel”, then press the ENTER
button.
Channel
Default Guide : Mini Guide
Channel List
Channel Mode : Added Ch. ►
Fine Tune
Signal Information
Press the ▲ or ▼ button to select “Channel Mode”, then press the ENTER
2.
button.
3. Press the ▲ or ▼ button to select “Added Ch.” or “Favourite Ch.”.
Press the ENTER button.
4. Press the EXIT button to exit.
Added Ch.: Channels will be switched within the memorized channel list.
•
Favourite Ch.: Channels will be switched within the favourite channel list.
•
Fine Tuning Analogue Channels
1. Use the number buttons to directly select the channel that you want to ne
tune.
2.
Press the MENU button to display the menu. Press the ▲ or ▼ button to
select “Channel”, then press the ENTER button.
3.
Press the ▲ or ▼ button to select “Fine Tune”, then press the ENTER
button.
4.
Press the ◄ or ► button to adjust the ne tuning. Press the ENTER
button.
5.
Press the EXIT button to exit.
Fine tuned channels that have been saved are marked with an asterisk “*”
➣
on the right-hand side of the channel number in the channel banner.
To reset the ne-tuning, select “Reset” by pressing the ▲ or ▼ button and
➣
then press the ENTER
➣
Only Analogue TV channels can be ne tuned.
button.
Default Guide : Mini Guide
Channel List
Channel
Channel Mode : Added Ch.►
Fine Tune
Signal Information
Channel List
Channel Mode : Added Ch.
Channel
FineTune ►
Signal Information
Fine Tune
ATV 6 *
Move
Adjust
Added Ch.
Favourite Ch.
+ 3
Reset
ReturnSave
Page 26
Checking the Digital-Signal Information
You can get information about the signal status.
1.
Press the MENU button to display the menu.
Press the ▲ or ▼ button to select “Channel”, then press the ENTER
button.
Channel Mode : Added Ch.
Fine Tune
Channel
Signal Information ►
Press the ▲ or ▼ button to select “Signal Information”, then press the
2.
ENTER button.
3.
Press the EXIT button to exit.
If the signal status is poor, the “Weak or No Signal” message is displayed.
➣
While viewing a Digital channel, this function can be selected.
➣
Signal Information
Frequency : 482000 KHz
Service ID : 0401
Multiplex : (TSID 0004, ONID 20fa)
Network : (ID 20fa)
Bit error level
Signal Strength
OK
0
88
ReturnEnter
English - 24
Page 27
English - 25
Picture Control
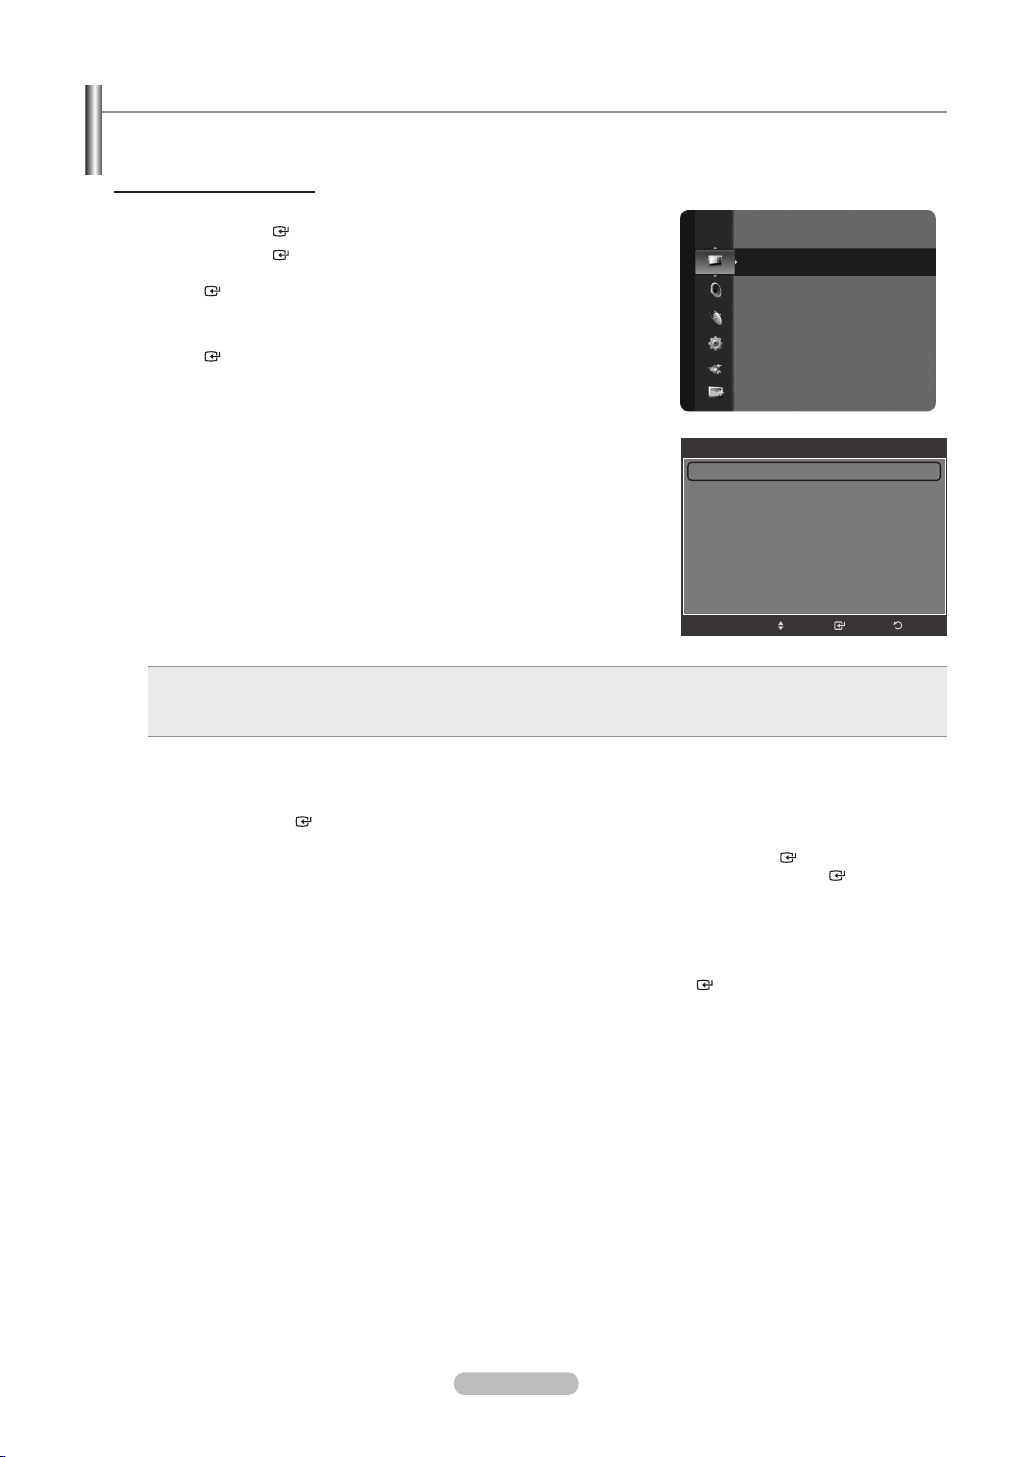
Changing the Picture Standard
You can select the type of picture which best corresponds to your viewing
requirements.
1.
Press the MENU button to display the menu.
Press the ENTER button to select “Picture”.
Press the ENTER button to select “Mode”. Press the ▲ or ▼ button to
2.
select “Dynamic”, “Standard” or “Movie”. Press the ENTER button.
Dynamic: Selects the picture for high-denition in a bright room.
•
Standard: Selects the picture for the optimum display in a normal
•
environment.
Movie: Selects the picture for viewing movies in a dark room.
•
3. Press the EXIT button to exit.
Easy Setting
1.
Press the TOOLS button on the remote control.
2. Press the ▲ or ▼ button to select “Picture Mode”.
3. Press the ◄ or ► button to select the required option.
4. Press the EXIT or TOOLS button to exit.
Customizing the Picture Settings
Your television has several setting options that allow you to control the picture quality.
1.
To select the desired picture mode, follow the “Changing the Picture
Standard” instructions numbers 1 and 2.
2.
Press the ▲ or ▼ button to select “Backlight”, “Contrast”, “Brightness”,
“Sharpness”, “Colour” or “Tint(G/R)”, then press the ENTER button.
3.
Press the ◄ or ► button to decrease or increase the value of a particular
item. Press the ENTER button. Press the EXIT button to exit.
➣
When you make changes to “Backlight”, “Contrast”, “Brightness”,
“Sharpness”, “Colour” or “Tint(G/R)”, the OSD will be adjusted accordingly.
➣
In TV, Ext., AV, S-Video modes of the PAL system, you cannot use the
“Tint” Function.
➣
In PC mode, you can only make changes to “Backlight”, “Contrast” and
“Brightness”.
➣
Settings can be adjusted and stored for each external device you have
connected to an input of the TV.
➣
The energy consumed during use can be signicantly reduced if the level
of brightness of the picture is reduced, and that this will reduce the overall
running cost.
Backlight: Adjusts the brightness of LCD back light.
•
Contrast: Adjusts the contrast level of the picture.
•
Brightness: Adjusts the brightness level of the picture.
•
Sharpness: Adjusts the edge denition of the picture.
•
Colour: Adjusts colour saturation of the picture.
•
Tint(G/R): Adjusts the colour tint of the picture.
•
Picture
Mode
:
Backlight : 7
Contrast : 95
Brightness : 45
Sharpness : 50
Colour : 50
Tint (G/R) : G50/R50
Detailed Settings
Picture
Mode
:
Backlight : 7
Contrast : 95
Brightness : 45
Sharpness : 50
Colour : 50
Tint (G/R) : G50/R50
Detailed Settings
Tools
Anynet+ (HDMI-CEC)
Picture Size : Auto Wide
Picture Mode ◄ Standard ►
Sound Mode : Custom
Sleep Timer : Off
SRS TS XT : Off
Energy Saving : Off
Dual l ll : Mono
Move Adjust e Exit
Mode : Standard
Picture
Backlight : 7
Contrast : 95
Brightness : 45
Sharpness : 50
Colour : 50
Tint (G/R) : G50/R50
Detailed Settings
Picture Options
AdjustMove
Standard
Dynamic
Dynamic
Standard
Movie
Enter Return
►
►
7Backlight
Page 28
Adjusting the Detailed Settings
Samsung’s new TVs allow you to make even more precise picture settings than previous models. See below to adjust
detailed picture settings.
Activating Detailed Settings
Press the MENU button to display the menu.
1.
Press the ENTER button to select “Picture”.
2.
Press the ENTER button to select “Mode”.
Press the ▲ or ▼ button to select “Standard” or “Movie”, then press the
ENTER button.
“Detailed Settings” is available in “Standard” or “Movie” mode.
➣
3.
Press the ▲ or ▼ button to select “Detailed Settings”, then press the
ENTER button.
In PC mode, you can only make changes to “Dynamic Contrast”,
➣
“Gamma” and “White Balance” from among the “Detailed Settings” items.
Picture
Mode
Backlight : 7
Contrast : 95
Brightness : 45
Sharpness : 50
Colour : 50
Tint (G/R) : G50/R50
Detailed Settings
:
Standard
Black adjust: Off/Low/Medium/High
You can select the black level on the screen to adjust the screen depth.
Dynamic Contrast: Off/Low/Medium/High
You can adjust the screen contrast so that the optimal contrast is provided.
Gamma: -
3 ~ +3
You can adjust the Primary Colour (Red, Green, Blue) Intensity.
Colour Space: Auto/Native/Custom
Colour Space is a colour matrix composed of red, green and blue colours.
Black Adjust : Off ►
Dynamic Contrast : Low
Gamma : 0
Colour Space : Native
White Balance
Flesh Tone : 0
Edge Enhancement : On
Detailed Settings
EnterMove
Select your favourite Colour Space to experience the most natural colour.
Auto: Auto Colour Space automatically adjusts to the most natural colour tone based on programme sources.
•
Native: Native Colour Space offers deep and rich colour tone.
•
Custom: Adjusts the colour range to suit your preference.
•
Customizing the Colour Space
➣
Colour: Red/Green/Blue/Yellow/Cyan/Magenta
Adjusts the Colour range to suit your preference. “Colour” is available when “Colour Space” is set to “Custom”.
Press the ▲ or ▼ button to select “Red”, “Green”, “Blue”, “Yellow”, “Cyan” or “Magenta”.
Press the ENTER
button.
Red/Green/Blue: In “Colour”, you can adjust the RGB values for the selected colour.
Press the ▲ or ▼ button to select “Red”, “Green” or “Blue” to change it. Press the ENTER
button.
Press the ◄ or ► button to decrease or increase the value of a particular item. Press the ENTER button.
Reset: Resets the colour space to the default values.
White Balance: R-Offset/G-Offset/B-Offset/R-Gain/G-Gain/B-Gain/Reset
You can adjust the colour temperature for more natural picture colours.
R-Offset/G-Offset/B-Offset/R-Gain/G-Gain/B-Gain: Changing the adjustment value will refresh the adjusted screen.
Select the required option by pressing the ▲ or ▼ button, then press the ENTER
button.
Press the ◄ or ► button until you reach the optimal setting.
Reset: The previously adjusted white balance will be reset to the factory defaults.
Flesh Tone: -15 ~ +15
You can emphasize the pink ‘esh tone’ in the picture.
Press the ◄ or ► button until you reach the optimal setting.
Changing the adjustment value will refresh the adjusted screen.
➣
Return
Edge Enhancement: Off/On
You can emphasize object boundaries in the picture.
xvYCC: Off/On
Setting the xvYCC mode to On increases detail and colour space when watching movies from an external device (ie.
DVD player) connected to the HDMI or Component IN jacks. You must set the Picture Mode to Movie to enjoy this
feature.
“xvYCC” is available when the picture mode is set to “Movie”, and the external input is set to “HDMI” or
➣
“Component” mode.
If xvYCC function is active, PIP cannot be selected.
➣
English - 26
Page 29
English - 27
ConguringPictureOptions
Activating Picture Options
Press the MENU button to display the menu.
1.
Press the ENTER button to select “Picture”.
2.
Press the ▲ or ▼ button to select “Picture Options”, then press the
Tint (G/R) : G50/R50
Detailed Settings
Picture
PictureOptions ►
Picture Reset
ENTER button.
Press the ▲ or ▼ button to select a particular item. Press the ENTER
➣
button.
When you are satised with your setting, press the ENTER
➣
➣
In PC mode, you can only make changes to the “Colour Tone” and “Size”
from among the items in “Picture Options”.
Colour T
one: Cool2/Cool1/Normal/Warm1/Warm2
You can select the most comfortable colour tone to your eyes.
➣
The adjusted values are stored according to the selected “Picture” mode.
➣
“Warm1” or “Warm2” is only activated when the picture mode is “Movie”.
Size:
Auto Wide/16:9/Wide Zoom/Zoom/4:3/Just Scan
You can select the picture size which best corresponds to your viewing
requirements.
Auto Wide: Automatically adjusts the picture size to the “16:9” aspect ratio.
•
16:9: Adjusts the picture size to 16:9 appropriate for DVDs or wide broadcasting.
•
Wide Zoom: Magnify the size of the picture more than 4:3.
•
Zoom: Magnies the 16:9 wide picture (in the vertical direction) to t the screen size.
•
4:
•
3: This is the default setting for a video movie or normal broadcasting.
•
J
ust Scan: Use the function to see the full image without any cutoff when HDMI (720p/1080i/1080p) or Component
button.
Picture Options
Colour Tone : Normal ►
Size : Auto Wide
Screen Mode : 16:9
Digital NR : Auto
DNle : Off
HDMI Black Level : Medium
Movie Plus : Off
▼
Move
(1080i/1080p) signals are input.
➣
“Auto Wide” function is available only in “TV”, “Ext.1”, “Ext.2”, “AV”, and “S-Video” mode.
➣
In PC Mode, only “16:9” and “4:3” mode can be adjusted.
➣
Settings can be adjusted and stored for each external device you have connected to an input of the
➣
Temporary image retention may occur when viewing a static image on the set for more than two hours.
➣
“Wide Zoom”: Press the ► button to Select “Position”, then press the ENTER
button. Press the ▲ or ▼ button
to move the screen up/down. Then press the ENTER button.
➣
“Zoom”: Press the ► button to Select “Position”, then press the ENTER
button. Press the ▲ or ▼ button to
move the picture up and down. Then press the ENTER button. Press the ► button to Select “Size”, then press
the ENTER button. Press the ▲ or ▼ button to magnify or reduce the picture size in the vertical direction. Then
press the ENTER button.
➣
When Double (
➣
After selecting “Just Scan” in HDMI (1080i/1080p) or Component (1080i/1080p) mode:
, ) mode has been set in PIP, the Picture Size cannot be set.
Select “Position” by pressing the ◄ or ►button. Use the ▲, ▼, ◄ or ► button to move the picture.
Reset: Press the ◄ or ► button to select “Reset”, then press the ENTER
➣
If you use the “Just Scan” function with HDMI 720p input, 1 line will be cut at the top, bottom, left and right as in the
button. You can initialize the setting.
overscan function.
ReturnEnter
TV.
You can select these options by simply pressing the P.SIZE button on the
O
remote control.
Easy Setting
1.
Press the TOOLS button on the remote control.
2. Press the ▲ or ▼ button to select “Picture Size”.
3. Press the ◄ or ► button to select the required option.
4. Press the EXIT or TOOLS button to exit.
Tools
Anynet+ (HDMI-CEC)
Picture Size ◄ Auto Wide ►
Picture Mode : Standard
Sound Mode : Custom
Sleep Timer : Off
SRS TS XT : Off
Energy Saving : Off
Dual l ll : Mono
Move Adjust e Exit
Page 30

Screen Mode: 16:9/Wide Zoom/Zoom/4:3
When setting the picture size to “Auto Wide” in a 16:9 wide TV, you can determine the picture size you want to see the
4:3 WSS (Wide Screen Service) image or nothing. Each individual European country requires different picture size so
this function is intended for users to select it.
16:9: Sets the picture to 16:9 wide mode.
•
Wide Zoom: Magnify the size of the picture more than 4:3.
•
Zoom: Magnify the size of the picture vertically on screen.
•
4:
•
3: Sets the picture to 4:3 normal mode.
➣
This function is available in “Auto Wide” mode.
➣
This function is not available in “PC”, “Component” or “HDMI” mode.
Digital NR: Off/Low/Medium/High/Auto
If the broadcast signal received by your TV is weak, you can activate the Digital Noise Reduction feature to help
reduce any static and ghosting that may appear on the screen.
➣
When the signal is weak, select one of the other options until the best picture is displayed.
DNIe: Off/Demo/On
This TV includes the DNIe function so as to provide a high visual quality. If you set DNIe to on, you can view the screen
with the DNIe feature activated. If you set the DNIe to Demo, you can view the applied DNIe and normal pictures on
the screen, for demonstration purposes. Using this function, you can view the difference in the visual quality.
➣
DNIe™ (Digital Natural Image engine)
DNIe™
This feature brings you more detailed image with 3D noise reduction, detail enhancement, contrast enhancement
and white enhancement. New image compensation Algorithm gives brighter, clearer, more detailed image to you.
DNIe™ technology will t every signal into your eyes.
➣
This function is not available in “Movie” and “Standard” mode.
HDMI Black Level: Normal/Low
You can directly select the black level on the screen to adjust the screen depth.
➣
This function is active only when the external input connects to HDMI (RGB signals).
Movie Plus: Off/Low/Medium/High/Demo
You can view more natural skin and clear text even in fast moving scenes.
➣
Use this function when watching movies.
➣
This function is not available in “Wide Zoom” and “Zoom” modes.
➣
This function is not available when “PIP” is set to “On”.
➣
It is not supported in HDMI 1080p/24Hz, 25Hz, 30Hz mode.
Blue Only Mode: Off/On
This function is for AV device measurement experts. This function displays the blue signal only by removing the red
and green signals from the video signal so as to provide a Blue Filter effect that is used to adjust the Colour and
video equipment such as DVD players, Home Theaters, etc.
Using this function, you can adjust the Colour and Tint to preferred values appropriate to the signal level of each video
device using the Red/Green/Blue/ Cyan/Magenta/Yellow Colour Bar Patterns, without using an additional Blue Filter.
➣
“Blue Only Mode” is available when the picture mode is set to “Movie” or “Standard”.
Tint of
English - 28
Page 31

English - 29
Resetting the Picture Settings to the Factory Defaults
1. To select the desired picture mode, follow the “Changing the Picture
Standard” instructions numbers 1 and 2. (see page 25)
2.
Press the ▲ or ▼ button to select “Picture Reset”, then press the
ENTER button.
Picture
Detailed Settings
Picture Options
PictureReset ►
3.
Press the ◄ or ► button to select “Reset Picture Mode” or “Cancel”, then
press the ENTER button.
Press the EXIT button to exit.
Each mode can be reset.
➣
Picture Reset
Does not perform a screen reset.
Reset Picture Mode
Move
Cancel
Enter Return
Page 32

Viewing Picture-in-Picture
You can display a sub picture within the main picture of set programme or video input. In this way, you can watch the picture
of set programme or video input from any connected equipment while watching the main picture.
Press the MENU button to display the menu.
1.
Press the ▲ or ▼ button to select “Setup”, then press the ENTER button.
2. Press the ▲ or ▼ button to select “PIP”, then press the ENTER
3. Press the ENTER
button.
button.
Press the ▲ or ▼ button to select “On”, then press the ENTER button.
4.
Select the required option by pressing the ▲ or ▼ button, then press the
ENTER button.
5.
When you are satised with your setting, press the ENTER button.
6.
Press the EXIT button to exit.
You may notice that the picture in the PIP window becomes slightly unnatural
➣
when you use the main screen to view a game or karaoke.
PIP: On/Off
You can activate or deactivate the PIP function.
Main picture Sub picture
Component
HDMI 1, HDMI/DVI 2, HDMI 3, HDMI 4PCTV, Ext.1, Ext.2, AV
Entertainment : Off
Energy Saving : Off
Setup
PIP ►
Software Upgrade
Common Interface
PIP
PIP : On
Source : TV
Size :
Position :
Channel : ATV 11
Easy Setting
Press the TOOLS button on the remote control.
1.
2. Press the ▲ or ▼ button to select “PIP”, then press the ENTER
button.
3. Press the ◄ or ► button to select “On”.
4. Press the ▲ or ▼ button to select a particular item.
5. Press the ◄ or ► button to select the required option.
6. Press the EXIT or TOOLS button to exit.
Source
You can select a source of the sub-picture.
Size:
/ /
You can select a size of the sub-picture.
If main picture is in “HDMI” mode, “Size” is available.
➣
Position:
/ / /
You can select a position of the sub-picture.
In Double (
➣
Channel
, ) mode, “Position” cannot be selected.
You can select a channel of the sub-picture only when the “Source” is set to
“TV”.
Sound Select: Main/Sub
When the PIP feature is activated, you can listen to the sound of the sub
(PIP) picture.
Move
Tools
Anynet+ (HDMI-CEC)
Picture Size : Auto Wide
Picture Mode : Standard
Sound Mode : Custom
Sleep Timer : Off
SRS TS XT : Off
PIP
Energy
Saving : Off
Move Enter e Exit
PIP
PIP ◄ Off ►
Source : TV
Size :
Posion :
Channel : ATV 11
Sound Select : Main
Adjust
ReturnEnter
Return
English - 30
Page 33

English - 31
Sound Control
Changing the Sound Standard
You can select the sound mode to best suit the programming you’re watching.
1.
Press the MENU button to display the menu.
Press the ▲ or ▼ button to select “Sound”, then press the ENTER button.
2.
Select the required option by pressing the ▲ or ▼ button, then press the
ENTER button.
3. When you are satised with your setting, press the ENTER
4. Press the EXIT button to exit.
Mode: Standard/Music/Movie/Speech/Custom
You can select the type of special sound effect to be used when watching a
given broadcast.
Easy Setting
1.
Press the TOOLS button on the remote control.
2. Press the ▲ or ▼ button to select “Sound Mode”.
3. Press the ◄ or ► button to select the required option.
4. Press the EXIT or TOOLS button to exit.
Equalizer: Mode/Balance/100Hz/300Hz/1kHz/3kHz/10kHz/Reset
The sound settings can be adjusted to suit your personal preferences.
The adjusted values are stored according to the selected “Sound” mode.
➣
Reset: Resets the equalizer settings to the default values.
➣
SRS TruSurround XT: Off/On
TruSurround XT is a patented SRS technology that solves the problem of
playing 5.1 multichannel content over two speakers. TruSurround delivers
a compelling, virtual surround sound experience through any two-speaker
playback system, including internal television speakers. It is fully compatible
with all multichannel formats.
Easy Setting
1.
Press the TOOLS button on the remote control.
2. Press the ▲ or ▼ button to select “SRS TS XT”.
3. Press the ◄ or ► button to select the “Off” or “On”.
4. Press the EXIT or TOOLS button to exit.
button.
Sound
Mode :Custom ►
Equalizer
SRS TruSurround XT : Off
Audio Language : ---Audio Format : ----
Audio Description
Auto
Volume : Off
Select Speaker : TV Speaker
Tools
Anynet+ (HDMI-CEC)
Picture Size : Auto Wide
Picture Mode : Standard
Sound Mode ◄ Custom ►
Sleep Timer : Off
SRS TS XT : Off
Energy Saving : Off
Dual l ll : Mono
Move Adjust e Exit
Equalizer
Mode : Custom
Balance L R
100Hz - +
300Hz - +
1kHz - +
3kHz - +
10kHz - +
Move
Adjust
Tools
Anynet+ (HDMI-CEC)
Picture Size : Auto Wide
Picture Mode : Standard
Sound Mode : Custom
Sleep Timer : Off
SRS TS XT ◄ Off ►
Energy Saving : Off
Dual l ll : Mono
Move Adjust e Exit
▼
ReturnEnter
TruSurround XT, SRS and Symbol are trademarks of SRS Labs, Inc.
TruSurround XT technology is incorporated under license from SRS Labs, Inc.
Audio Language
You can change the default value for audio languages. Displays the language information for the incoming stream.
➣
While viewing a Digital channel, this function can be selected.
➣
You can only select the language among the actual languages being broadcast.
Page 34

Audio Format: MPEG/Dolby Digital
When sound is emitted from both the main speaker and the audio receiver, a around echo may occur due to the
decoding speed difference between the main speaker and the audio receiver. In this case, use the TV Speaker
function.
While viewing a Digital channel, this function can be selected.
➣
The “Audio Format” appears according to the broadcasting signal.
➣
Manufactured under license from Dolby Laboratories. Dolby and the double-D symbol are
trademarks of Dolby Laboratories.
Audio Description
This is an auxiliary audio function that provides an additional audio track for visually challenged persons.
This
function handles the Audio Stream for the AD (Audio Description), when it is sent along with the Main audio from the
broadcaster. Users can turn the Audio Description On or Off and control the volume.
− Audio Description : On/Off
− Volume : 0~100
➣
“Volume” is active when “Audio Description” is set to “On”.
➣
While viewing a Digital channel, this function can be selected.
Auto Volume: Off/On
Each broadcasting station has its own signal conditions, and so it is not easy to adjust the volume every time the
channel is changed. This feature lets you automatically adjust the volume of the desired channel by lowering the sound
output when the modulation signal is high or by raising the sound output when the modulation signal is low
Select Speaker: External Speaker/TV Speaker
If you want to hear the sound through separate speakers, cancel the internal amplier
➣
The
+, – and MUTE buttons do not operate when the “Select Speaker” is set to “External Speaker”.
➣
If you select “External Speaker” in the “Select Speaker” menu, the sound settings will be limited.
TV's Internal Speakers Audio Out (Optical, L/R Out) to Sound System
TV Speaker
External Speaker
Video No Signal
RF AV, S-Video
Speaker Output Speaker Output Speaker Output Sound Output Sound Output Sound Output
Mute Mute Mute Sound Output Sound Output Sound Output
Mute Mute Mute Mute Mute Mute
Component, PC, HDMI
RF AV, S-Video
.
.
Component, PC, HDMI
Sound Select: Main/Sub
When the PIP feature is activated, you can listen to the sound of the sub (PIP) picture.
− Main: Used to listen to the sound of the main picture.
− Sub: Used to listen to the sound of the sub picture.
Sound Reset: Reset All/Reset Sound Mode/Cancel
You can restore the Sound settings to the factory defaults.
English - 32
Page 35

English - 33
Selecting the Sound Mode
You can set the sound mode in the “Tools” menu. When you set to “Dual I II”, the current
sound mode is displayed on the screen.
1.
Press the TOOLS button on the remote control.
2.
Press the ▲ or ▼ button to select “Dual I II”.
3.
Press the ◄ or ► button to select required option.
4.
Press the ENTER button.
Audio Type Dual 1/2 Default
Mono MONO
A2 Stereo
NICAM
Stereo
If the stereo signal is weak and an automatic switching occurs, then switch to the Mono.
➣
This function is only activated in stereo sound signal. It is deactivated in mono sound signal.
➣
This function is only available in TV mode.
➣
Stereo STEREO ↔ MONO
Dual DUAL 1 ↔ DUAL 2 DUAL 1
Mono MONO
Stereo MONO ↔ STEREO
Dual
MONO ↔ DUAL 1
DUAL 2
Automatic change
Automatic change
DUAL 1
Picture Size : Auto Wide
Picture Mode : Standard
Sound Mode : Custom
Sleep Timer : Off
SRS TS XT : Off
Energy Saving : Off
Dual l ll ◄ Mono ►
Tools
Anynet+ (HDMI-CEC)
Move Adjust e Exit
Connecting Headphones (Sold separately)
You can connect a set of headphones to your set if you wish to watch a TV program without disturbing other people in the
room.
Using the sound function is restricted when connecting headphones to the TV
➣
Prolonged use of headphones at a high volume may damage your hearing.
➣
You will not hear sound from the speakers when you connect headphones to
➣
the TV.
The headphone volume and TV volume are adjusted separately.
➣
.
TV Side Panel
15
Page 36
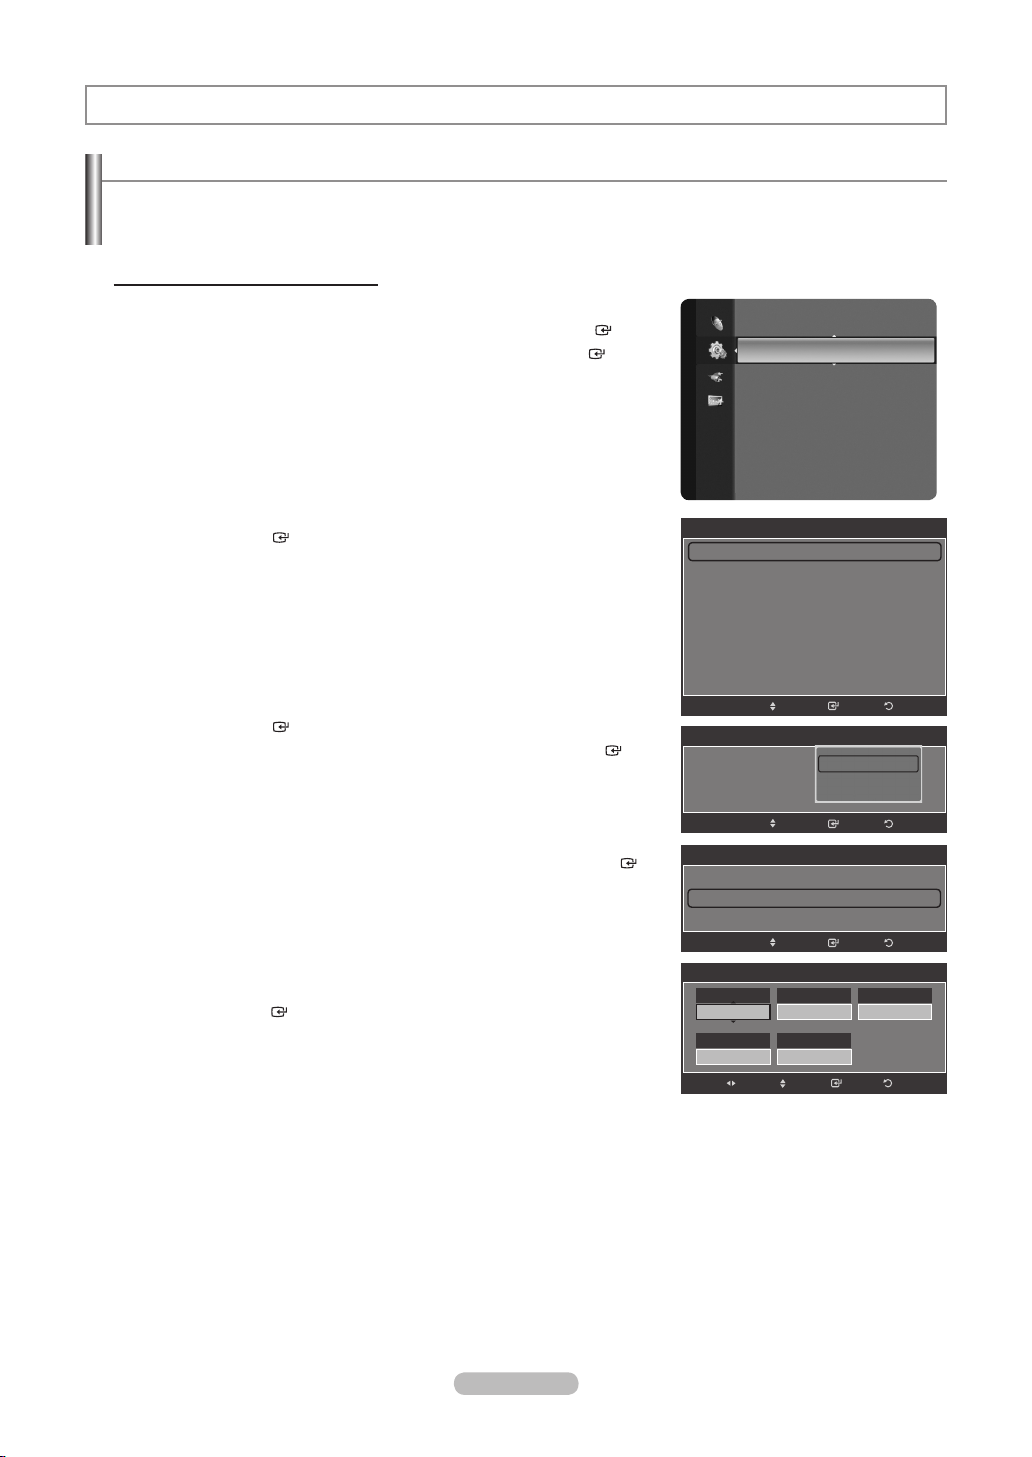
Time Setting
Setting the Clock
Setting the clock is necessary in order to use the various timer features of the TV. Also, you can check the time while
watching the TV. (Just press the INFO button.)
If you disconnect the power cord, you have to set the clock again.
➣
Option
1: Setting the Clock Manually
Press the MENU button to display the menu.
1.
Press the ▲ or ▼ button to select “Setup”, then press the ENTER
Press the ▲ or ▼ button to select “Time”, then press the ENTER
button.
button.
Plug & Play
Language : English
Setup
Time ►
Child Lock : On
Change PIN
Parental Lock
Subtitle
T
eletext Language : ----
Preference
Wall-Mount Adjustment
2. Press the ENTER
3. Press the ENTER
button to select “Clock”.
button to select “Clock Mode”.
Press the ▲ or ▼ button to select “Manual”, then press the ENTER
button.
4.
Press the ▲ or ▼ button to select “Clock Set”, then press the ENTER
button.
5.
Press the ◄ or ► button to move to “Day”, “Month”, “Year”, “Hour” or
“Minute”. Set the date and time you want by pressing the ▲ or ▼ button, then
press the ENTER button.
Press the EXIT button to exit.
The current time will appear every time you press the INFO button.
➣
You can set the day, month, year, hour and minute directly by pressing the
➣
number buttons on the remote control.
Time
Clock : -- : -- ►
Sleep
Timer : Off
Timer 1 : Inactivated
Timer 2 : Inactivated
Timer 3 : Inactivated
Move
Move
Move
Clock Set
Adjust
Clock
Auto
Clock
Month
01
Minute
00
Manual
Auto
Clock Mode :
Clock Set
Clock Mode : Manual
Clock Set ►
Day
01
Hour
00
Move
ReturnEnter
ReturnEnter
ReturnEnter
Year
20 08
ReturnEnter
English - 34
Page 37

English - 35
Option 2: Setting the Clock Automatically
The Clock can be set automatically if you are receiving a digital signal.
1.
Press the MENU button to display the menu.
Press the ▲ or ▼ button to select “Setup”, then press the ENTER
Press the ▲ or ▼ button to select “Time”, then press the ENTER
button.
button.
Plug & Play
Language : English
Setup
Time ►
Child Lock : On
Change PIN
Parental Lock
Subtitle
T
eletext Language : ----
Preference
Wall-Mount Adjustment
Move
Move
Time
Clock
Auto
Manual
Auto
ReturnEnter
ReturnEnter
2. Press the ENTER
3. Press the ENTER
button to select “Clock”.
button to select “Clock Mode”.
Press the ▲ or ▼ button to select “Auto”, then press the ENTER
4. Press the EXIT button to exit.
Clock : 10 : 00 ►
Sleep Timer : Off
Timer 1 : Inactivated
Timer 2 : Inactivated
Timer 3 : Inactivated
button.
Clock Mode :
Clock Set
Setting the Sleep Timer
You can select a time period of between 30 and 180 minutes after which the television automatically switches to standby
mode.
1.
Press the MENU button to display the menu.
Press the ▲ or ▼ button to select “Setup”, then press the ENTER button.
2. Press the ▲ or ▼ button to select “T
ime”, then press the ENTER button.
Plug & Play
Language : English
Setup
Time ►
Child Lock : On
Change PIN
Parental Lock
Subtitle
T
eletext Language : ----
Preference
Wall-Mount Adjustment
3.
Press the ▲ or ▼ button to select “Sleep Timer”, then press the ENTER
button.
4.
Press the ▲ or ▼ button repeatedly until the desired time appears
(Off, 30, 60, 90, 120, 150, 180). Press the ENTER button.
5.
Press the EXIT button to exit.
The TV automatically switches to standby mode when the timer
➣
reaches 0.
Easy Setting
1.
Press the TOOLS button on the remote control.
2.
Press the ▲ or ▼ button to select “Sleep Timer”.
3.
Press the ◄ or ► button to select the minute.
4.
Press the EXIT or TOOLS button to exit.
Time
Clock : -- : -- --
Sleep Timer :
Timer 1 :
Timer 2 : Inactivated
Timer 3 : Inactivated
Anynet+ (HDMI-CEC)
Picture Size : Auto Wide
Picture Mode : Standard
Sound Mode : Custom
Sleep Timer ◄ Off ►
SRS TS XT : Off
Energy Saving : Off
Dual l ll : Mono
Move Adjust e Exit
Move
Tools
Off
Off
30 min
Inactivated
60 min
90 min
120 min
150 min
▼
ReturnEnter
Page 38

Switching the Television On and Off Automatically
1. Press the MENU button to display the menu.
Press the ▲ or ▼ button to select “Setup”, then press the ENTER button.
2.
Press the ▲ or ▼ button to select “Time”, then press the ENTER button.
3.
Press the ▲ or ▼ button to select “Timer 1”, “Timer 2” or “Timer 3”, then
press the ENTER button. Three different On/Off Timer Settings can be
made.
You must set the clock rst.
➣
Press the ◄ or ► button to select the desired item below.
4.
Press the ▲ or ▼ button to adjust to the setting satised.
On Time: Set the Hour, Minute, and Activate/Inactivate.
•
(To activate timer with the setting you’ve chosen, set to “Activate”.)
Off Time: Set the Hour, Minute, and Activate/Inactivate.
•
(To activate timer with the setting you’ve chosen, set to “Activate”.)
Volume: Set the required volume level.
•
Contents: When the “On Timer” is active, you can turn on a specic
•
channel or play back contents such as photo or audio les.
TV/USB: Select TV or USB. (Make sure that an USB device is
–
connected to your TV.)
Antenna: Select “ATV” or “DTV”.
–
Channel: Select the desired channel.
–
Music: Select the folder containing MP3 les on the USB device.
–
Photo: Select the folder containing JPEG les on the USB device.
–
Repeat: Select “Once”, “Everyday”, “Mon~Fri”, “Mon~Sat”, “Sat~Sun”,
•
or “Manual”.
When “Manual” is selected, press the ► button to select the
➣
desired day of the week. Press the ENTER
desired day and the mark will appear.
Press the EXIT button to exit.
You can set the hour, minute and channel by pressing the number buttons
➣
on the remote control.
Auto Power Off
➣
When you set the timer On, the television will eventually turn off, if no
controls are operated for 3 hours after the TV was turned on by the timer.
This function is only available in timer On mode and prevents overheating,
which may occur if a TV is on for too long time.
button over the
Plug & Play
Language : English
Setup
Time ►
Child Lock : On
Change PIN
Parental Lock
Subtitle
T
eletext Language : ----
Preference
Wall-Mount Adjustment
Time
Clock : 10 : 00
Sleep Timer : Off
Timer 1 : Inactivated
T
imer 2 : Inactivated
Timer 3 : Inactivated
Move
Timer 1
On Time
Off Time
00
Volume
10
Repeat
Once
TV/USB
00
Move
TV
Move
00
00
Contents
TV ATV 3
Sun Mon Tue Wed Thu Fri Sat
Adjust
Contents
Antenna3Channel
ATV
Music
None
Photo
None
Adjust
►
ReturnEnter
Inactivate
Inactivate
ReturnEnter
Channel
am
ReturnEnter
English - 36
Page 39

English - 37
Function Description
Selecting a Menu Language
1. Press the MENU button to display the menu.
Press the ▲ or ▼ button to select “Setup”, then press the ENTER button.
Press the ▲ or ▼ button to select “Language”, then press the ENTER
button.
Select a particular language by pressing the ▲ or ▼ button repeatedly.
2.
Press the ENTER button.
3. Press the EXIT button to exit.
Plug & Play
Setup
Language : English ►
Time
Child Lock : On
Change PIN
Parental Lock
Subtitle
T
eletext Language : ----
Preference
Activating the Child Lock
This feature allows you to prevent unauthorized users, such as children, from watching unsuitable programmes by muting
out video and audio.
1.
Press the MENU button to display the menu.
Press the ▲ or ▼ button to select “Setup”, then press the ENTER button.
2. Press the ▲ or ▼ button to select “Child Lock”. Press the ENTER
button.
Language : English
Time
Setup
ChildLock :On ►
Change PIN
Parental Lock
Subtitle
T
eletext Language : ----
Preference
Wall-Mount Adjustment
Melody
: Off
Child Lock
Enter your 4 digit PIN number.
3.
The default PIN number of a new TV set is “0-0-0-0”.
➣
If you want to change PIN number, refer to page 38.
➣
4.
Press the ▲ or ▼ button to select “On”. Press the ENTER button.
5.
Press the EXIT button to exit.
You can lock some channels in Channel List. (refer to page 18)
➣
“Child Lock” is available only in TV mode.
➣
If a channel is locked using the “Child Lock” function, the PIN input
➣
window appears when “Auto Store” or “Plug & Play” is selected.
Enter PIN
* *
*
0~9
Language : English
Time
Setup
ChildLock :On ►
Change PIN
Parental Lock
Subtitle
T
eletext Language : ----
Preference
Wall-Mount Adjustment
Melody
: Off
Enter PIN
Return
Off
On
Page 40

Setting Up Your Personal ID Number (PIN)
1. Press the MENU button to display the menu.
2. Press the ▲ or ▼ button to select “Setup”, then press the ENTER
Press the ▲ or ▼ button to select “Change PIN”, then press the ENTER
3.
button. The “Enter PIN” is displayed.
button.
Time
Child Lock : On
Setup
ChangePIN ►
Parental Lock
Subtitle
T
eletext Language : ----
Preference
Wall-Mount Adjustment
Melody
: Off
Entertainment : Off
Change PIN
Enter your current 4-digit PIN code by using the numeric buttons (0~9).
4.
The “Enter New PIN” is displayed.
➣
5. Enter your new PIN code by using the numeric buttons (0~9)
The “Conrm New PIN” is displayed.
➣
6. Re-enter your new PIN code to conrm by using the numeric buttons (0~9).
The “PIN is changed successfully” message is displayed.
➣
7. Press the EXIT button to exit.
If you forget the PIN code, press the remote control buttons in the
➣
following sequence, which resets the PIN to 0-0-0-0: POWER (Off),
MUTE, 8, 2, 4, POWER (On).
Enter PIN
*
Enter New PIN
Confirm New PIN
* *
Enter PIN
0~9
Change PIN
Enter PIN
0~9
Return
Return
English - 38
Page 41

English - 39
Setting up the Parental Lock
This feature allows you to prevent unauthorized users, such as children, from watching unsuitable programmes by a 4-digit
PIN (Personal Identication Number) code that is dened by the user.
1. Press the MENU button to display the menu.
2. Press the ▲ or ▼ button to select “Setup”, then press the ENTER
Press the ▲ or ▼ button to select “Parental Lock”, then press the
3.
button.
ENTER button.
The “Enter PIN” is displayed.
➣
4. Enter your current 4-digit PIN code by using the numeric buttons (0~9).
The default PIN code for a new TV set is 0000. If you want to change PIN
➣
number, refer to page 38.
5. Press the ENTER
6.
Press the ▲ or ▼ button to select the age rating you want to lock out. Press
button.
the ENTER button.
The “
➣
➣
” symbol will be displayed.
Allow All: Press to unlock all TV ratings.
Block All: Press to lock all TV ratings.
7. Press the EXIT button to exit.
Child Lock : On
Change PIN
Setup
ParentalLock ►
Subtitle
Teletext Language : ----
Preference
Wall-Mount Adjustment
Melody
: Off
Entertainment : Off
Energy Saving : Off
Parental Lock
Enter PIN
* *
*
Enter PIN
0~9
Parental Lock
Parental Rating ►
Parental Rating
3
4
5
6
7
8
9
▼
Move
Return
ReturnEnter
Allow All
Block All
ReturnEnter
Page 42

Setting the Subtitle
You can activate and deactivate the subtitles. Use this menu to set the Subtitle Mode. “Normal” under the menu is the basic
subtitle and “Hard of hearing” is the subtitle for a hearing-impaired person.
1. Press the MENU button to display the menu.
2. Press the ▲ or ▼ button to select “Setup”, then press the ENTER
3.
Press the ▲ or ▼ button to select “Subtitle”, then press the ENTER
button.
button.
Change PIN
Parental Lock
Setup
Subtitle ►
Teletext Language : ----
Preference
Wall-Mount Adjustment
: Off
Melody
Entertainment : Off
Energy Saving : Off
PIP
Press the ENTER button again, then press the ▲ or ▼ button to select
4.
“On”. Press the ENTER button.
Press the ▲ or ▼ button to select “Mode”, then press the ENTER button.
5.
6.
Press the ▲ or ▼ button to select “Normal” or “Hard of hearing”.
Press the ENTER button.
If the programme you are watching does not support the “Hard of hearing”
➣
function, “Normal” automatically activates even though “Hard of hearing”
mode is selected.
Press the ▲ or ▼ button to select “Subtitle Language”, then press the
7.
ENTER button.
8.
Select the appropriate language by pressing the ▲ or ▼ button. Press the
ENTER button to conrm your choice.
English is the default in cases where the selected language is unavailable
➣
in the broadcast.
9.
Press the EXIT button to exit.
You can select these options simply by pressing the SUBT. button on the
O
remote control.
Subtitle
Subtitle : Off ►
Mode
: Normal
Subtitle Language : ----
Move
ReturnEnter
English - 40
Page 43

Selecting a Teletext Language
You can set the Teletext language by selecting the language type.
1.
Press the MENU button to display the menu.
Press the ▲ or ▼ button to select “Setup”, then press the ENTER button.
2.
Press the ▲ or ▼ button to select “Teletext Language”, then press the
ENTER button.
3.
Select a particular language by pressing the ▲ or ▼ button repeatedly.
Press the ENTER button.
English is the default in cases where the selected language is unavailable
➣
in the broadcast.
4. Press the EXIT button to exit.
Parental Lock
Subtitle
Setup
TeletextLanguage :---- ►
Preference
Wall-Mount Adjustment
Melody
: Off
Entertainment : Off
Energy Saving : Off
PIP
Software Upgrade
Selecting a Preference Language
This menu consists of 6 sub-menus: Primary Audio Language, Secondary Audio Language, Primary Subtitle Language,
Secondary Subtitle Language, Primary Teletext Language, Secondary Teletext Language.
Using this feature, users can select one of the languages. The language selected here is the default when the user selects
a channel.
Press the MENU button to display the menu.
1.
Press the ▲ or ▼ button to select “Setup”, then press the ENTER button.
2.
Press the ▲ or ▼ button to select “Preference”, then press the ENTER
button.
3.
Press the ▲ or ▼ button to select required menu (Primary Audio Language,
Secondary Audio Language, Primary Subtitle Language, Secondary Subtitle
Language, Primary Teletext Language, Secondary Teletext Language).
Press the ENTER
4.
Select the appropriate language by pressing the ▲ or ▼ button. Press the
button.
ENTER button to conrm your choice.
5.
Press the EXIT button to exit.
➣
If you change the language setting, the Subtitle Language, Audio Language, and the Teletext Language of the
Subtitle
Teletext Language : ----
Setup
Preference ►
Wall-Mount Adjustment
Melody : Off
Entertainment : Off
Energy Saving : Off
PIP
Software Upgrade
Common Interface
Language menu are automatically changed to the selected language.
➣
The Subtitle Language, Audio Language, and the Teletext Language of the Language menu show a list of languages
supported by the current channel and the selection is highlighted. If you change this language setting, the new
selection is only valid for the current channel. The changed setting does not change the setting of the Primary Subtitle
Language, Primary Audio Language, or the Primary Teletext Language of the Preference menu.
English - 41
Page 44

Melody/Entertainment/Energy Saving
1. Press the MENU button to display the menu.
Press the ▲ or ▼ button to select “Setup”, then press the ENTER button.
2.
Select the required option by pressing the ▲ or ▼ button, then press the
ENTER button.
3.
When you are satised with your setting, press the ENTER button.
4. Press the EXIT button to exit.
Melody: Off/Low/Medium/High
The TV power on/off melody sound can be adjusted.
The Melody does not play
➣
− When no sound is output from the TV because the MUTE button has been pressed.
− When no sound is output from the TV because the volume (–) button has been pressed.
−
When the TV is turned off by Sleep Timer function.
Entertainment: Off/Sports/Cinema/Game
The “Entertainment” mode enables you to select the optimal display and sound for sports, cinema and games.
Off: Switches the “Entertainment” function off.
•
Sports: Provides the optimal picture and sound quality for sports.
•
Cinema: Provides the optimal picture and sound quality for movie watching. Y
•
and enhanced sound.
•
Game: Provides the optimal picture and sound quality for games. This mode accelerates the playing speed when
using an external game console connected to the TV.
If you set any of the three “Entertainment” modes to On, the settings will be locked and can not be adjusted. If you
➣
want to make Picture and Sound mode adjustments, the “Entertainment” mode must be turned off.
If you set any of the three “Entertainment” modes to On, “SRS TruSurround XT” function is not available.
➣
The “Entertainment” settings are saved for each input source.
➣
This function is not available in PC mode.
➣
Preference
Wall-Mount Adjustment
Setup
Melody
: Off
Entertainment : Off
Energy Saving : Off
PIP
Software Upgrade
Common Interface
ou can experience a richer picture
►
You can press the E.MODE button on the remote control repeatedly to
O
change the “Entertainment” setting.
Energy Saving: Off/Low/Medium/High/Auto
This feature adjusts the brightness of the TV in order to reduce power consumption. When watching TV at night, set
the “Energy Saving” mode option to “High” to reduce eye fatigue as well as power consumption.
Off: Turns off the energy saving function.
•
Low: Sets the TV to low energy saving mode.
•
Medium: Sets the TV to medium energy saving mode.
•
High: Sets the TV to high energy saving mode.
•
Auto: Automatically adjusts the brightness of the TV screen in accordance with the scenes.
•
Easy Setting
1. Press the TOOLS button on the remote control.
2. Press the ▲ or ▼ button to select “Energy Saving”.
3. Press the ◄ or ► button to select the “Off”, “Low”, “Medium”, “High” or “Auto”.
4. Press the EXIT or TOOLS button to exit.
Picture Size : Auto Wide
Picture Mode : Standard
Sound Mode : Custom
Sleep Timer : Off
SRS TS XT : Off
Energy Saving ◄ Off ►
Dual l ll : Mono
Tools
Anynet+ (HDMI-CEC)
Move Adjust e Exit
English - 42
English - 42
Page 45

English - 43
Upgrading the Software
To keep your product up-to-date with new Digital Television features then software upgrades are periodically broadcast as
part of the normal Television signal. It will automatically detect these signals and display the software upgrade banner. You
are given the option to install the upgrade.
1.
Insert a USB drive containing the rmware upgrade into the WISELINK port
on the side of the TV.
Press the MENU button to display the menu.
2.
Press the ▲ or ▼ button to select “Setup”, then press the ENTER button.
Press the ▲ or ▼ button to select “Software Upgrade”, then press the
3.
ENTER button.
4. Press the ▲ or ▼ button to select “BY USB”, “BY Channel” or “Standby
Mode Upgrade”. Press the ENTER button.
BY USB :
- Preset : Insert a USB drive containing the rmware upgrade into TV.
Please be careful to not disconnect the power or remove the USB
➣
drive while upgrades are being applied. The TV will turn off and turn on
automatically after completing the rmware upgrade. Please check the
rmware version after the upgrades are complete. When software is
upgraded, video and audio settings you have made will return to their
default (factory) settings. We recommend you write down your settings so
that you can easily reset them after the upgrade.
BY Channel :
Upgrades the software using the broadcasting signal.
Standby Mode Upgrade :
To continue software upgrade with master power on, Select On by pressing
the ▲ or ▼ button. 45 minutes after entering standby mode, a manual
upgrade is automatically conducted. Since the power of the unit is turned
on internally, the screen may be on slightly for the LCD product. This
phenomenon may continue for more than 1 hour until the software upgrade is
completed.
Alternative Software :
To display the software version information.
Setup
Current Version 2008/01/01_000075
BY USB ►
BY Channel
Standby Mode Upgrade : On
Alternative Software ----/--/--_--------
TV Side Panel
USB Drive
Energy Saving : Off
PIP
SoftwareUpgrade ►
Common Interface
Software Upgrade
Move
ReturnEnter
Page 46

Viewing Common Interface
This contains information on CAM inserted in the CI slot and displays it.
1.
Press the MENU button to display the menu.
Press the ▲ or ▼ button to select “Setup”, then press the ENTER button.
2.
Press the ▲ or ▼ button to select “Common Interface”, then press the
ENTER button.
3. Press the ▲ or ▼ button to select “Application Info.”
Press the ENTER
4. Press the EXIT button to exit.
The Application Info inserting is about the CI CARD. You can install the CAM
➣
anytime whether the TV is ON or OFF.
1. Purchase the CI CAM module by visiting your nearest dealer or by phone.
2. Insert the CI CARD into the CAM in the direction of the arrow until it ts.
3.
Insert the CAM with the CI CARD installed into the common interface slot.
(Insert the CAM in the direction of the arrow, right up to the end so that it is
parallel with the slot.)
4. Check if you can see a picture on a scrambled signal channel.
button to display the information for your application.
PIP
Software Upgrade
Setup
CommonInterface ►
Common Interface
CI Menu ►
Application Info.
U Move
E
Enter e Exit
Selecting the CI (Common Interface) Menu
This enables the user to select from the CAM-provided menu.
1.
Press the MENU button to display the menu.
Press the ▲ or ▼ button to select “Setup”, then press the ENTER button.
2.
Press the ▲ or ▼ button to select “Common Interface”, then press the
ENTER button.
3.
Press the ▲ or ▼ button to select “CI Menu”, then press the ENTER
button.
4.
Press the ▲ or ▼ button to select the required option, then press the
ENTER button.
5. Press the EXIT button to exit.
Select the CI Menu based on the menu PC Card.
➣
PIP
Software Upgrade
Setup
CommonInterface ►
Common Interface
CI Menu ►
Application Info.
U Move
E
Enter e Exit
CI Menu
Main menu
Module information
Smart card information
Language
Software Download
Ok to select, or Exit to quit.
Press
U Move
E
Enter e Exit
English - 44
Page 47

English - 45
To Select the Source
Use to select TV or other external input sources such as DVD players or Cable
Box/Satellite receivers (Set-Top Box) connected to the TV. Use to select the input
source of your choice.
1.
Press the MENU button to display the menu.
Press the ▲ or ▼ button to select “Input”, then press the ENTER button.
2.
Press the ENTER button to select “Source List”.
Press the ▲ or ▼ button to select signal source, then press the ENTER
button.
Available signal sources: TV, Ext.1, Ext.2, AV, S-Video, Component, PC,
➣
HDMI1, HDMI2/DVI, HDMI3, HDMI4, USB.
You can choose only those external devices that are connected to the TV.
➣
In the “Source List”, connected inputs will be highlighted and sorted to the
top. Inputs that are not connected will be sorted to the bottom.
Using the Colour buttons on the remote with the Source list
➣
Red (Refresh): Refreshes the connecting external devices.
•
TOOLS (Option):
•
Press the SOURCE button on the remote control to view an external signal
O
source. TV mode can be selected by pressing the TV/DTV button, number
buttons(0~9), and the P / button on the remote control.
Displays the “Edit Name” and “Information” menus.
Input
Source List
Edit Name
Source List
TV
Ext.1 ---Ext.2 ----
AV ---S-Video ----
Component ----
Refresh Option
To Edit the Input Source Name
Name the device connected to the input jacks to make your input source selection
easier.
1.
Press the MENU button to display the menu.
Press the ▲ or ▼ button to select “Input”, then press the ENTER button.
Press the ▲ or ▼ button to select “Edit Name”, then press the ENTER
button.
Press the ▲ or ▼ button to select “Ext.1”, “Ext.2”, “AV”, “S-Video”,
2.
“Component”, “PC”, “HDMI1”, “HDMI2/DVI”, “HDMI3” or “HDMI4” input jack,
then press the ENTER button.
Press the ▲ or ▼ button to select “VCR”, “DVD”, “Cable STB”,
3.
“Satellite STB”, “PVR STB”, “AV Receiver”, “Game”, “Camcorder”, “PC”,
“TV”, “IPTV”, “Blu-Ray”, “HD DVD” or “DMA” input source, then press the
ENTER button.
Press the EXIT button to exit.
When a PC with a resolution of 1920 x 1080@60Hz is connected to the
➣
HDMI IN 2 port, you should set the “HDMI2/DVI” mode to “PC” in the “Edit
Name” of the “Input” mode.
Source List
Input
Edit Name ►
Edit Name
Ext.1 : ---- ►
Ext.2 : ---AV : ---S-Video : ---Component : ---PC : ---HDMI1 : ----
Ext.1 : ----
Ext.2 :
AV : ----
S-Video : ----
Component : ----
PC : ----
HDMI1 : ----
▼
Edit Name
----
Enter ReturnMove
----
VCR
DVD
Cable STB
Satellite STB
PVR STB
Enter ReturnMove
Page 48

PC Display
Using Your TV as a Computer (PC) Display
Setting Up Your PC Software (Based on Windows XP)
The Windows display-settings for a typical computer are shown below.
different, depending upon your particular version of Windows and your particular video card. However, even if your actual
screens look different, the same basic set-up information will apply in almost all cases. (If not, contact your computer
manufacturer or Samsung Dealer.)
1. First, click on “Control Panel” on the Windows start menu.
2.
When the control panel window appears, click on “Appearance and Themes” and
a display dialog-box will appear.
3.
When the control panel window appears, click on “Display” and a display dialogbox will appear.
4.
Navigate to the “Settings” tab on the display dialog-box.
The correct size setting (resolution)
Optimum: 1920 X 1080 pixels
If a vertical-frequency option exists on your display settings dialog box, the
correct value is “60” or “60 Hz”. Otherwise, just click “OK” and exit the dialog box.
The actual screens on your PC will probably be
Display Modes
Both screen position and size will vary depending on the type of PC monitor and its resolution. The resolutions in the table
are recommended.
D-Sub Input
Mode Resolution
IBM
VESA
CVT 1920 x 1080RB 66.587 59.934 138.500 + / -
640 x 350
720 x 400
640 x 480
640 x 480
640 x 480
800 x 600
800 x 600
800 x 600
1024 x 768
1024 x 768
1024 x 768
1280 x 1024
1280 x 1024
1360 x 768
1600 x 1200
Horizontal
Frequency (kHz)
31.469
31.469
31.469
37.861
37.500
37.879
48.077
46.875
48.363
56.476
60.023
63.981
79.976
47.712
75.000
Vertical
Frequency (Hz)
70.086
70.087
59.940
72.809
75.000
60.317
72.188
75.000
60.004
70.069
75.029
60.020
75.025
60.015
60.000
Pixel Clock
Frequency (MHz)
25.175
28.322
25.175
31.500
31.500
40.000
50.000
49.500
65.000
75.000
78.750
108.000
135.000
85.500
162.000
Sync Polarity
(H/V)
+ / -
- / +
- / -
- / -
- / + / +
+ / +
+ / +
- / -
- / + / +
+ / +
+ / +
+ / +
+ / +
HDMI/DVI Input
Mode Resolution
640 x 480
800 x 600
VESA
CEA 1920 x 1080p 67.500 60.000 148.500 + / +
When using an HDMI/DVI cable connection, you must use the HDMI IN 2 jack.
➣
The interlace mode is not supported.
➣
The set might operate abnormally if a non-standard video format is selected.
➣
Separate and Composite modes are supported. SOG is not supported.
➣
Too long or low quality VGA cable can cause picture noise at high resolution modes (1920x1080 or 1600x1200).
➣
1024 x 768
1280 x 1024
1360 x 768
1600 x 1200
Horizontal
Frequency (kHz)
31.469
37.879
48.363
63.981
47.712
75.000
English - 46
Vertical
Frequency (Hz)
59.940
60.317
60.004
60.020
60.015
60.000
Pixel Clock
Frequency (MHz)
25.175
40.000
65.000
108.000
85.500
162.000
Sync Polarity
(H/V)
- / + / +
- / + / +
+ / +
+ / +
Page 49

English - 47
Setting up the TV with your PC
Preset: Press the SOURCE button to select PC mode.
➣
1.
Press the MENU button to display the menu.
Press the ▲ or ▼ button to select “Picture”, then press the ENTER
button.
2.
Select the required option by pressing the ▲ or ▼ button, then press the
ENTER button.
3. When you are satised with your setting, press the ENTER
4. Press the EXIT button to exit.
How to Auto Adjust
Auto Adjustment allows the PC screen of set to self-adjust to the incoming PC
video signal. The values of ne, coarse and position are adjusted automatically.
This function does not work in DVI-HDMI mode.
➣
Easy Setting
1.
Press the TOOLS button on the remote control.
2.
Press the ▲ or ▼ button to select “Auto Adjustment”, then press the
ENTER button.
Adjusting the Screen Quality
Coarse/Fine
The purpose of picture quality adjustment is to remove or reduce picture noise.
If the noise is not removed by Fine-tuning alone, then adjust the frequency as
best as possible (coarse) and Fine-tune again. After the noise has been reduced,
readjust the picture so that it is aligned on the center of screen.
Press the ▲ or ▼ button to select “Coarse” or “Fine”, then press the ENTER
button.
Press the ◄ or ► button to adjust the screen quality.
Press the ENTER
button.
button.
Brightness : 45
Sharpness : 50
Picture
Auto Adjustment
Screen
Detailed Settings
Picture Options
Picture Reset
Auto Adjustment in progress. Please Wait.
Tools
Anynet+ (HDMI-CEC)
Picture Size : 16:9
Picture Mode : Standard
Sound Mode : Custom
Sleep Timer : Off
SRS TS XT : Off
PIP
Energy
Saving : Off
Auto Adjustment
Move Enter e Exit
Screen
Coarse 52
Fine 24
PC Position
Image Reset
►
PC Position
Adjust the PC’s screen positioning if it does not t the TV screen.
Press the ▲ or ▼ button to adjusting the Vertical-Position.
Press the ◄ or ► button to adjust the Horizontal-Position.
Press the ENTER
button.
Image Reset
You can replace all image settings with the factory default values.
Return
EnterMove
PC Position
Adjust
Screen
Coarse 52
Fine 24
PC Position
Image Reset
Return
EnterMove
Image Reset is completed.
ReturnEnter
►
Page 50

WISELINK
Using the WISELINK Function
Connecting a USB Device
This function enables you to view and listen to photo (JPEG) and audio les (MP3)
saved on a USB Mass Storage Class
1. Press the POWER button on the remote control or front panel.
The TV is powered on.
➣
2.
Connect a USB device containing JPEG and/or MP3 les to the WISELINK
jack (USB jack) on the side of the TV.
If you enter the WISELINK mode with no USB device connected the message ‘No external storage device found.
➣
Check the connection status.’ will appear. In this case, insert the USB device, exit the screen by pressing the W.LINK
button on the remote control and enter the WISELINK screen again.
MTP (Media Transfer Protocol) is not supported.
➣
The le system only supports FAT16/32 (The NTFS le system is not supported).
➣
Certain types of USB Digital camera and audio devices may not be compatible with this
➣
➣
Wiselink only supports USB Mass Storage Class devices (MSC). MSC is a Mass Storage Class Bulk-Only
device. Examples of MSC are Thumb drives and Flash Card Readers (Both USB HDD and HUB are not supported.)
➣
Please connect directly to the USB port of your TV. If you are using a separate cable connection, there may be a USB
Compatibility problem.
➣
Before connecting your device to the TV, please back up your les to prevent them from damage or loss of data.
SAMSUNG is not responsible for any data le damage or data loss.
➣
Do not disconnect the USB device while it is loading.
➣
MSC supports MP3 and JPEG les, while a PTP device supports JPEG les only.
➣
The sequential jpeg format is supported.
➣
The higher the resolution of the image, the longer it takes to display on the screen.
➣
The maximum supported JPEG resolution is 15360x8640 pixels.
➣
For unsupported or corrupted les, the “Not Supported File Format” message is displayed.
➣
MP3 les with DRM that have been downloaded from a non-free site cannot be played. Digital Rights Management
(DRM) is a technology that supports the creation of content, the distribution and management of the content in an
integrated and comprehensive way, including the protection of the rights and interests of the content providers, the
prevention of the illegal copying of contents, as well as managing billings and settlements.
Using the Remote Control Button in WISELINK Menu
(MSC) device.
TV Side Panel
USB Drive
TV.
Transport
Button Operations
(▲/▼/◄/►) Move the cursor and select an item.
Select the currently selected item.
During a Slide Show or Music Play:
ENTER
RETURN Return to the previous menu.
TOOLS Run various functions from the Photo and Music menus.
W.LINK Exit WISELINK mode.
/ , PRE-CH Stop WISELINK mode and Returns to TV mode.
P
- Pressing the ENTER
- Pressing the ENTER button during pause resumes the play.
/
/
INFO Show le information.
EXIT Stop the current function and return to the WISELINK main menu.
Play or pause the Slide Show or Music le.
Pause the Slide Show / Stop the Playing Music le.
Jump to previous group / Jump to next group.
button during play pauses the play.
English - 48
Page 51

English - 49
Using the WISELINK Menu
Press the MENU button. Press the ▲ or ▼ button to select “Application”,
1.
then press the ENTER button.
2.
Press the ▲ or ▼ button to select “WISELINK”, then press the ENTER
button.
The “WISELINK” menu is displayed.
➣
WISELINK
PHOTO
SUM
851.98MB/995.00MB Free
Press the W.LINK button on the remote control to display the “WISELINK”
O
Photo
SUM
Music Setup
Device Return
menu.
Press the SOURCE button on the remote control to select “USB”, then
O
press the ENTER
3.
Press the Red button, then press the ▲ or ▼ button to select the corresponding USB Memory Device (i.e. if connected
button.
through a hub). Press the ENTER button.
This function differs depending on the USB Memory Device connected to TV.
➣
The selected USB device name appears at the bottom left of the screen.
➣
4.
Press the ◄ or ► button to select an icon (Photo, Music, Setup), then press the ENTER button.
To exit “WISELINK” mode, press the W.LINK button on the remote control.
➣
Using the Photo List
This menu shows Photo les saved on an USB memory device.
Photo List
★ ★ ★
SUM
▲
Select
851.98MB/995.00MB Free
Press the W.LINK button on the remote control to display the “WISELINK”
1.
menu.
2.
Press the ◄ or ► button to select “Photo”, then press the ENTER
button.
Photo les are displayed.
➣
This menu only shows les whose le extension is jpg. Files of other
➣
formats such as bmp or tiff will not be displayed.
Press the
➣
➣
To move to the previous / next group, press the
(Play) / ENTER button to start the Slide Show.
(REW) or
(FF) button.
➣
When moving to a photo, loading may take a few seconds. At this
point, the loading icon will appear at the screen.
➣
It may take some time to load photo les as Thumbnail images.
➣
Photos without EXIF information may not be displayed as thumbnail
images in the Photo List depending on the picture quality and
resolution.
WISELINK
Photo
SUM
Photo
Preference
Monthly
Timeline
SUM
PHOTO
Music Setup
image_1.jpg
Month : Jan
Date :
Jan.01.2008
Color : Gray
Composition :
Folder : P-other
Favourites :
Jan Nov
Device
Favourites Settings
Device e Exit
Jump
Option
Page 52

Screen Display
Photo
image_1.jpg
Month : Jan
Date :
Color : Gray
Composition :
Folder : P-other
Favourites :
Jan.01.2008
★ ★ ★
2
1File(s) Selected
6
1
Preference
Monthly
Timeline
5
SUM
1
Currently selected photo
Shows the currently selected photo.
2
Photo Information Window
Shows information about the currently selected photo. You can change the “Color”, “Composition”, and “Favourites”.
3
Current Sort Standard
Press the ▲ or ▼ button to change the standard for sorting photos.
(“Monthly”, “Timeline”, “Color”, “Composition”, “Folder”, “Preference”)
The item that is selected as the sorting standard is highlighted in the Photo Information Window
4
View Groups
Shows the sorting groups. The sorting group including the currently selected photo is highlighted.
5
Current Device
Shows the currently selected device name. Press the Red button to select a device.
6
Item Selection Information
Shows the number of photos that are selected by pressing the Yellow button.
7
Help Items
Red(Device) button: Selects a connected device.
•
Green(Favourites Settings) button: Changes the favourites setting for the selected photo. Press this button
•
repeatedly until the desired value appears. (Refer to page 53)
Yellow(Select) button: Selects photos from the photo list. Selected photos are marked with a symbol
•
•
(Jump) button: Jumps to the previous sorting group / Jumps to the next sorting group.
•
TOOLS(Option) button: Displays the “Slide Show”, “Play Current Group”, “Delete”, “Change Group” (in “Color” or
“Composition” group), “Information” or “Remove Safely” menus.
3 4
Jan Nov
7
Device
Favourites Settings
▲
Select
Jump
Option
.
on the left.
English - 50
Page 53

English - 51
Sorting Photo List
You can sort photos in the Photo List by a particular standard.
1.
Press the W.LINK button on the remote control to display the
“WISELINK” menu.
2.
Press the ◄ or ► button to select “Photo”, then press the ENTER
button.
Photo les are displayed.
➣
3.
Press the ▲ or ▼ button to select a sorting standard.
(“Monthly”, “Timeline”, “Color”, “Composition”, “Folder”, “Preference”)
The photos are sorted according to the newly selected sorting
➣
standard.
4.
Press the ENTER button to start the Slide Show in the order selected
by the user.
Wiselink identies the color and composition of images and groups
➣
them accordingly by analyzing the images on the USB device.
The “Composition” and “Color” information extracted from a photo le
➣
may be different from what you selected.
Photo information is automatically set. You can change the “Color”,
➣
“Composition”, and “Favourites”.
Photos for which information cannot be displayed are set as
➣
“Unclassied”.
PTP does not support folder sort mode.
➣
Monthly
Sorts photos by month.
It sorts and shows photos in the le by month. It sorts only by month
➣
(from January to December) regardless of year.
1. Select “Monthly” as the sorting standard in the Photo List.
2.
Press the ◄ or ► button to select from the sublist of les grouped by
Month.
To move to the previous / next group, press the
➣
(FF) button.
3.
Press the TOOLS button. Press the ▲ or ▼ button to select “Play
Current Group”.
4.
Press ENTER to play the selected group of photo les from the
sublist.
(REW) or
WISELINK
Photo
SUM
Photo
Preference
Monthly
Timeline
SUM
Photo
Preference
Monthly
Timeline
SUM
851.98MB/995.00MB Free
SUM
PHOTO
Music Setup
Device e Exit
image_1.jpg
Month : Jan
Date :
Jan.01.2008
Color : Gray
Composition :
Folder : P-other
Favourites :
★ ★ ★
Jan Nov
Device
Favourites Settings
Month : Jan
Date :
Color : Gray
Composition :
Folder : P-other
Favourites :
Jan Nov
Device
Favourites Settings
image_1.jpg
Jan.01.2008
★ ★ ★
▲
Select
Jump
Slide Show
Play Current Group
Delete
Information
▼
▲
Select
Jump
Option
Option
Timeline
Sorts photos by time.
It sorts and shows photos by date. It sorts by year and month from the
➣
earliest photo.
1. Select “T
2.
Press the ◄ or ► button to select from the sublist of les grouped by
imeline” as the sorting standard in the Photo List.
Timeline.
To move to the previous / next group, press the
➣
(REW) or
(FF) button.
3.
Press the TOOLS button. Press the ▲ or ▼ button to select “Play
Current Group”.
4.
Press ENTER to play the selected group of photo les from the
sublist.
Photo
Timeline
SUM
image_1.jpg
Month : Jan
Date :
Jan.01.2008
Color :
Gray
Composition :
Folder : P-other
Favourites :
★ ★ ★
Monthly
Jan Nov
Color
2008 2008
Device
Favourites Settings
Slide Show
Play Current Group
Delete
Information
▼
▲
Select
Jump
Option
Page 54

Color
Sorts photos by color.
You can change the photo color information.
➣
1. Select “Color” as the sorting standard in the Photo List.
2.
Press the ◄ or ► button to select from the sublist of les grouped by
color.
To move to the previous / next group, press the
➣
(REW) or
(FF) button.
3.
Press the TOOLS button. Press the ▲ or ▼ button to select “Play
Current Group”.
4.
Press ENTER to play the selected group of photo les from the
sublist.
Changing the color information
1.
Select “Color” as the sorting standard in the Photo List and press the ◄
or ► button to select a photo.
Changingtheinformationofmultipleles
➣
Press the ◄ or ► button to select the desired photo in the Photo list.
Then press the yellow button.
Repeat the above operation to select multiple photos.
The
mark appears to the left of the selected photo.
2. Press the TOOLS button.
3.
Press the ▲ or ▼ button to select “Change Group”.
Press the ENTER button.
4.
Press the ◄ or ► button to select the desired option, then press the
ENTER button.
➣
The group information of the current le is updated and the le is
moved to the new group.
➣
“Color” options: Red, Yellow, Green, Blue, Magenta, Black, Gray,
Unclassied.
Composition
Sorts photos by composition.
➣
You can change the compositional information of photos.
1. Select “Composition” as the sorting standard in the Photo List.
2.
Press the ◄ or ► button to select from the sublist of les grouped by
compositon.
➣
To move to the previous / next group, press the
(REW) or
(FF) button.
3.
Press the TOOLS button. Press the ▲ or ▼ button to select “Play
Current Group”.
4.
Press ENTER to play the selected group of photo les from the
sublist.
Changing the composition information
1.
Select “Composition” as the sorting standard in the Photo List and press
the ◄ or ► button to select a photo.
➣
Changingtheinformationofmultipleles
Press the ◄ or ► button to select the desired photo in the Photo list.
Then press the yellow button.
Repeat the above operation to select multiple photos.
The
mark appears to the left of the selected photo.
2. Press the TOOLS button.
3.
Press the ▲ or ▼ button to select “Change Group”.
Press the ENTER button.
4.
Press the ◄ or ► button to select the desired option, then press the
ENTER button.
➣
The group information of the current le is updated and the le is
moved to the new group.
➣
“Composition” options:
(horizontal), (vertical), (object),
(perspective), (pattern), Unclassied
Photo
Timeline
Color
Composition
SUM
Photo
Timeline
Color
Composition
SUM
Photo
Color
Composition
Folder
SUM
Photo
Color
Composition
Folder
SUM
image_1.jpg
Month : Jan
Date : Jan.01.2008
Color :
Composition :
Folder : P-other
Favourites :
Device
Favourites Settings
Month : Jan
Date : Jan.01.2008
Color :
Composition :
Folder : P-other
Favourites :
Device
Favourites Settings
Month : Jan
Date : Jan.01.2008
Color : Gray
Composition :
Folder : P-other
Favourites :
Unclassified
▲
Device
Favourites Settings
Month : Jan
Date : Jan.01.2008
Color : Gray
Composition :
Folder : P-other
Favourites :
Unclassified
▲
Device
Favourites Settings
Gray
★ ★ ★
▲
image_1.jpg
Gray
★ ★ ★
▲
image_1.jpg
★ ★ ★
image_1.jpg
★ ★ ★
Slide Show
Play Current Group
Delete
Change Group
▼
Select
Jump
Select
Jump
Slide Show
Play Current Group
Delete
Change Group
▼
Select
Jump
Unclassified
Select
Jump
Option
Option
Option
Option
English - 52
Page 55

English - 53
Folder
Sorts photos by folder.
If there are many folders in USB, the photos les are shown in order
➣
in each folder. The photo le in the Root folder is shown rst and the
others are shown in alphabetical order by name.
1. Select “Folder” as the sorting standard in the Photo List.
2.
Press the ◄ or ► button to select from the sublist of les grouped by
folder.
To move to the previous / next group, press the
➣
(REW) or
(FF) button.
3.
Press the TOOLS button. Press the ▲ or ▼ button to select “Play
Current Group”.
4.
Press ENTER to play the selected group of photo les from the
sublist.
Preference
Sorts photos by preference. (Favourites)
You can change the photo preferences.
➣
1. Select “Preference” as the sorting standard in the Photo List.
2.
Press the ◄ or ► button to select from the sublist of les grouped by
preference.
To move to the previous / next group, press the
➣
(REW) or
(FF) button.
3.
Press the TOOLS button. Press the ▲ or ▼ button to select “Play
Current Group”.
4.
Press ENTER to play the selected group of photo les from the
sublist.
Photo
Composition
Preference
SUM
Photo
Preference
SUM
image_1.jpg
Month : Jan
Date : Jan.01.2008
Color : Gray
Composition :
Folder : P-other
Favourites :
★ ★ ★
P-other Photo-1
Folder
Device
Favourites Settings
Month : Jan
Date : Jan.01.2008
Color : Gray
Composition :
Folder : P-other
Favourites :
Folder
★ ★ ★ ★ ★ ★ ★ ★ ★ ★ ★ ★
▲
Monthly
Device
Favourites Settings
▲
image_1.jpg
★ ★ ★
Slide Show
Play Current Group
Delete
Information
▼
Select
Jump
Slide Show
Play Current Group
Delete
Information
▼
Select
Jump
Option
Option
Changing the Favourites setting
1. Press the ◄ or ► button to select the desired photo in the Photo list.
2. Press the Green button repeatedly until the desired setting appears.
Favourites settings change completed.
➣
“Favourites” options:
➣
➣
Users can select the number of stars (up to 3) according to their
★ ★ ★, ★ ★ ★, ★ ★ ★, ★ ★ ★
preference.
Page 56

DeletingthePhotole
1. Press the ◄ or ► button to select the desired photo in the Photo list.
2. Press the TOOLS button.
3.
Press the ▲ or ▼ button to select “Delete”, then press the ENTER
button.
The “Delete this le?” message appear.
➣
4.
Press the ◄ or ►button to select “OK”, then press the ENTER button.
The photo is deleted.
➣
When a read-only le is deleted, the “This File is read-only le. Delete
➣
it?” message appear.
If you select “Cancel”, the deletion is cancelled.
➣
5.
To exit “WISELINK” mode, press the W.LINK button on the remote
control.
You cannot remove the PTP-connected digital camera picture les.
➣
While removing les, don’t remove the USB memory device.
➣
You cannot recover a deleted photo le.
➣
Deleting Multiple Photos
1.
Press the ◄ or ► button to select the desired photo in the Photo list.
Then press the yellow button.
➣
Repeat the above operation to select multiple photos.
➣
The
mark appears to the left of the selected photo.
2. Press the TOOLS button.
3.
Press the ▲ or ▼ button to select “Delete selected File”, then press the
ENTER button.
➣
The “Delete the selected les?” message appear.
4.
Press the ◄ or ► button to select “OK”, then press the ENTER button.
➣
The selected photos are deleted.
➣
If you select “Cancel”, the deletion is cancelled.
5.
To exit “WISELINK” mode, press the W.LINK button on the remote
control.
➣
You cannot remove the read-only les from the selected ones.
➣
You cannot recover a deleted photo le.
Photo
Preference
Monthly
Timeline
SUM
Selected File(s) : image... 1 File(s)
Photo
Preference
Monthly
Timeline
SUM
Selected File(s) : image... 2 File(s)
Delete the selected files?
image_1.jpg
Month : Jan
Date :
Color : Gray
Composition :
Folder : P-other
Favourites :
Jan Nov
Device
Favourites Settings
Delete
Delete this file?
OK
Cancel
image_1.jpg
Month : Jan
Date :
Color : Gray
Composition :
Folder : P-other
Favourites :
Jan Nov
Device
Favourites Settings
Delete
OK
Cancel
Slide Show
Jan.01.2008
Play Current Group
Delete
Information
★ ★ ★
▲
Select
Jan.01.2008
Slide Show
Delete selected File
Deselect All
★ ★ ★
Remove Safely
▲
Select
▼
Jump
2File(s) Selected
Jump
Option
Option
Viewing the Photo Information
The photo le information including the order of the le in the current directory,
the name, the size, the resolution, the date modied and the path is displayed.
1. Press the ◄ or ► button to select the desired photo in the Photo list.
2. Press the TOOLS button.
3.
Press the ▲ or ▼ button to select “Information”, then press the ENTER
button.
➣
The information on the selected photo appears.
Press the INFO button to viewing the information.
O
English - 54
Photo
Preference
Monthly
Timeline
SUM
Name : image_1.jpg
Size : 2.0MB
Resolution : 440x440
Date : Jan.1.2008
Path : /Photo/
Month : Jan
Date :
Color : Gray
Composition :
Folder : P-other
Favourites :
Jan Nov
Device
Favourites Settings
Photo Info
OK
image_1.jpg
Jan.01.2008
★ ★ ★
▲
Play Current Group
Delete
Information
Remove Safely
▲
Select
Jump
Option
Page 57

English - 55
Viewing a Photo or Slide Show
Viewing a Slide Show
Press the W.LINK button on the remote control to display the “WISELINK”
1.
menu.
2.
Press the ◄ or ► button to move to “Photo”, then press the ENTER
button.
Photo les are displayed.
➣
3. Press the ◄ or ► button to select the desired photo in the Photo list.
4. Press the TOOLS button.
5.
Press the ▲ or ▼ button to select “Slide Show”, then press the ENTER
button.
➣
All les in the photo list will be used for the Slide Show.
During the slide show, les are displayed in order from the currently
➣
shown le.
The Slide Show progresses in the order sorted in the Photo list.
➣
Music les can be automatically played during the Slide Show if the
➣
“Background Music” is set to “On”.
(Refer to page 57).
Photo
Preference
Monthly
Timeline
SUM
►
Normal20/22 image_1.jpg 440x440 2.0KB 2008/1/1
SUM
image_1.jpg
Month : Jan
Date :
Jan.01.2008
Color : Gray
Composition :
Folder : P-other
Favourites :
★ ★ ★
Jan Nov
Device
Favourites Settings
E Pause Previous Next Option Return
Slide Show
Play Current Group
Delete
Information
▼
▲
Select
Jump
Option
While a photo list is displayed, press the
O
(Play) / ENTER
button on the remote control to start slide show.
ToperformaSlideShowwithonlytheselectedles
1.
Press the ◄ or ► button to select the desired photo in the Photo list.
Then press the yellow button. Repeat the above operation to select multiple photos.
The
➣
➣
2. Press the
➣
➣
mark appears to the left of the selected photo.
If you select one le, the SlideShow will not be performed.
(Play) / ENTER button.
The selected les will be used for the Slide Show.
If you have selected les, only the selected les will be used for the Slide Show
Playing current group
Press the ▲ or ▼ button to select a sorting standard.
1.
(“Monthly”, “Timeline”, “Color”, “Composition”, “Folder”, “Preference”)
2.
Press the ◄ or ► button to select the desired photo in the Photo list.
To move to the previous / next group, press the
➣
(REW) or
(FF) button.
3. Press the TOOLS button.
4.
Press the ▲ or ▼ button to select “Play Current Group”, then press the
ENTER button. Only the photos in the sorting group including the
selected les will be used for the Slide Show.
5.
To exit “WISELINK” mode, press the W.LINK button on the remote control.
Photo
Preference
Monthly
SUM
.
image_1.jpg
Month : Jan
Date :
Jan.01.2008
Color : Gray
Composition :
Folder : P-other
Favourites :
★ ★ ★
Jan Nov
Timeline
Device
Favourites Settings
Slide Show
Play Current Group
Delete
Information
▼
▲
Select
Jump
Option
Slide show function information icon (Displayed at the top left of the screen)
Icon Current OSD Function
► (Photo) SlideShow Photo Slide Show is in progress.
You can pause a Slide Show by pressing the
❙❙
Photo Pause
on the remote control during a Slide Show.
To resume the Slide Show, press the
remote control again.
(Pause)/ENTER button
(Play)/ENTER button on the
Page 58

Viewing a photo
Press the W.LINK button on the remote control to display the “WISELINK”
1.
menu.
2.
Press the ◄ or ► button to move to “Photo”, then press the ENTER
button.
Photo les are displayed.
➣
3.
Press the ◄ or ► button to select the desired photo in the Photo list.
Then Press the Yellow button to select only one le.
4. Press the ENTER
The currently selected photo is displayed in full screen.
➣
button over a photo icon.
Using the option menu during a slide show (or Viewing a Photo)
1.
During a slide show(or viewing a photo), Press the TOOLS button to set the option.
2.
Press the ▲ or ▼ button to select the desired option. Then press the ENTER button.
Start Slide Show (or Stop Slide Show)
You can start or stop a Slide Show.
Press the ▲ or ▼ button to select “Start Slide Show” (or “Stop Slide Show”),
then press the ENTER
You can select the SlideShow speed only during a slide show.
➣
You can also change the speed of the Slide Show by pressing the
➣
button.
(REW) or (FF) button during the Slide Show.
Rotate
You can rotate images in full screen mode.
Press the ▲ or ▼ button to select “Rotate”, then press the ENTER
button.
Press the ◄ or ► button repeatedly to rotate the photo by the desired amount.
➣
Whenever you press the ◄ button, it rotates by 270˚, 180˚, 90˚, and 0˚.
➣
Whenever you press the ► button, it rotates by 90˚, 180˚, 270˚, and 0˚.
➣
If you have select “Zoom”, the “Rotate” deactivated.
➣
The Rotating function information icon is displayed at the screen.
Icon Current OSD Function
0˚
0°
90˚
90° This rotates a photo by 90 degrees
180˚
180° This rotates a photo by 180 degrees
270˚
270° This rotates a photo by 270 degrees
This rotates a photo to its original
position
SUM
20/22 image_1.jpg 440x440 2.0KB 2008/1/1
E Slide Show Previous Next Option Return
Tools
Stop Slide Show
Rotate
Zoom
Slide Show Speed : Normal
Background Music : Off
Background Music Setting
Picture Mode : Standard
Sound Mode : Custom
Information
EnterMove
90˚
e
Exit
English - 56
Page 59

English - 57
Zoom
You can zoom into images in full screen mode.
Press the ▲ or ▼ button to select “Zoom”, then press the ENTER
button.
Press the ◄ or ► button repeatedly to increase or decrease the Zoom effect.
(x1 → x2 → x4)
To move the enlarged photo image, press the ENTER
button, then press
the ▲/▼/◄/► buttons.
Note that when the enlarged picture is smaller than the original screen
➣
size, the location change function doesn’t work.
The enlarged le is not saved.
➣
Zoom function information icon is displayed at the top right of the screen.
➣
Icon Current OSD Function
Zoom (x 2) Zoom-into a photo at 2x.
x2
Zoom (x 4) Zoom-into a photo at 4x.
x4
Zoom (x 1) Restore a photo to its original size.
x1
Pan Down
Pan Up
Pan Right
Pan Left
Pan down to view the lower part of a
zoomed-in photo.
Pan up to view the upper part of a
zoomed-in photo.
Pan right to view the right side of a
zoomed-in photo.
Pan left to view the left side of a
zoomed-in photo.
Slide Show Speed
You can select the slide show speed.
Press the ▲ or ▼ button to select “Slide Show Speed”.
Press the ◄ or ► button to select the desired option. (Fast → Slow → Normal)
➣
You can select the SlideShow speed only during a slide show.
Background Music
If you set “Background Music” to On, the background music will be played
when viewing photos one by one or in a Slide Show.
Press the ▲ or ▼ button to select “Background Music”.
Press the ◄ or ► button to select “On” or “Off”.
If you set “Background Music” to On, a screen appears immediately where
➣
you can set the Background Music.
On: When the background music is available, if you select On, the music
•
is played back. To use this feature, there must be music and photo les
stored on the USB device.
Off: Background music is not played.
•
x 2
x 2
n
Move
Enter Return
Tools
Stop Slide Show
Rotate
Zoom
Slide Show Speed ◄ Normal ►
Background Music : Off
Background Music Setting
Picture Mode : Movie
Sound Mode : Custom
Information
Adjust
Move
Stop Slide Show
Rotate
Zoom
Slide Show Speed : Normal
Background Music ◄ Off ►
Background Music Setting
Picture Mode : Movie
Sound Mode : Custom
Information
Move
Tools
Adjust
e
Exit
e
Exit
Page 60

Background Music Setting
You can set the background music.
Press the ▲ or ▼ button to select “Background Music Setting”, then press the
ENTER
➣
button.
If you turn off the “Background Music”, even if the “Background Music
Settings” have been set up, the background music will not be played.
Loading music les is needed to change BGM mode. Play music les in
➣
music category to load.
“Background Music setting” menu is displayed.
➣
Press the ◄ or ► button to select the desired BGM (Background music)
mode. (Shufe, Selected le, Mood)
Shufe: Plays music les in random order.
•
Selectedle: Plays a selected music le.
•
Mood: Plays music les of a particular mood only.
•
➣
Selectigthebackgroundmusicle
Press the ◄ or ► button to set “BGM Mode” to “Selected le”.
Press the ▲ or ▼ button to select “Select Music File”, then press the
ENTER button.
Press the ▲ or ▼ button to select a music le, then press the yellow
button.
The mark appears to the left of the selected music.
Repeat the above operation to select multiple music les.
Press the ENTER button.
➣
Selectingthebackgroundmusiclemood
Press the ◄ or ► button to set “BGM Mode” to “Mood”.
Press the ▲ or ▼ button to select “BGM Mood”. Then press ◄ or ►
button to select the desired BGM mood. Press the ENTER
button.
BGM mode option: Energetic, Rhythmical, Sad, Exciting, Calm
➣
WISELINK identies the mood of the music les and groups them
accordingly by analyzing the music les on the USB device.
Tools
Stop Slide Show
Rotate
Zoom
Slide Show Speed : Normal
Background Music : Off
Background Music Setting
Picture Mode : Standard
Sound Mode : Custom
Information
EnterMove
e
Background Music setting
BGM Mode ◄ Shuffle ►
BGM Mood : Calm
Select Music File
Move
Adjust
Background Music setting
BGM Mode ◄ Selected file ►
BGM Mood : Calm
Select Music File
Move
Background Music setting
../Music/ 2 File(s) Selected
Music
Thanks
I Love You
Better than yesterday
Select
BGM Mode : Mood
BGM Mood ◄ Calm ►
Select Music File
Move
Background Music setting
Enter
ReturnEnter
ReturnEnter
Return
Exit
▼
Picture Mode
Move
Adjust
ReturnEnter
You can set the Picture mode. (Refer to page 25)
Sound Mode
You can set the Sound mode. (Refer to page 31)
Information
The photo le information including the order of the le in the current directory, the name, the size, the resolution, the date
modied and the path is displayed. (Refer to page 54)
Remove Safely
You can remove the device safely from the TV.
Press the ▲ or ▼ button to select “Remove Safely”, then press the ENTER
button.
Remove the USB device from the TV.
English - 58
Page 61

English - 59
Using the Music List
This menu shows MP3 les from among the les saved on a USB memory device.
1.
Press the W.LINK button on the remote control to display the “WISELINK”
menu.
WISELINK
MUSIC
SUM
851.98MB/995.00MB Free
Press the ◄ or ► button to select “Music”, then press the ENTER
2.
button.
Music les are displayed.
➣
Press the
➣
(Play) / ENTER button over a music icon to play
the music.
➣
To move to the previous / next group, press the
(REW) or
(FF) button.
Screen Display
Music
Thanks
Jee
Album 1
2005
Blues
Energetic ★ ★ ★
I Love You
Sad ★ ★ ★
Darby
Album 2
2005
Pop
Photo
SUM
Music
Thanks
Jee
Album 1
2005
Pop
Energetic ★ ★ ★
Preference
Title
Artist
SUM
1File(s) Selected
1
Better than yesterday
Catherine
Album 3
2005
Pop
Calm ★ ★ ★
Music Setup
Device e Exit
I Love You
Darby
Album 2
2005
Pop
Sad ★ ★ ★
F G H I J L P S T V
▲
Device
Favourites Settings
Better than yesterday
Calm ★ ★ ★
Select
Jump
Catherine
Album 3
2005
Pop
Option
5
1
Currently selected music
SUM
Preference
Title
Artist
4
2 3
G H I J
▲
6
Device
Favourites Settings
L P S T V
Select
Jump
Option
Shows the currently selected music.
2
Current Sort Standard
Press the ▲ or ▼ button to change the standard for sorting music les.
(“Title”, “Artist”, “Mood”, “Genre”, “Folder”, “Preference”)
3
View Groups
Shows the sorting groups. The sorting group including the currently selected music le is highlighted.
4
Current Device
Shows the currently selected device name. Press the Red button to select a device.
Page 62

5
Item Selection Information
Shows the number of music les that are selected by pressing the Y
6
Help Items
Red(Device) button: Selects a connected device.
•
Green(Favourites Settings) button: Changes the favourites setting for the selected music. Press this button
•
ellow button.
repeatedly until the desired value appears. (Refer to page 62)
Yellow(Select) button: Selects music les from the music list. Selected music les are marked with a symbol
•
the left.
•
(Jump) button: Jumps to the previous sorting group / Jumps to the next sorting group.
•
TOOLS(Option) button: Displays the “Play Current Group”, “Delete”, “Change Group” (in “Mood” group),
“Information” or “Remove Safely” menus.
Sorting Music List
You can sort music les in the Music List by a particular standard.
1.
Press the W.LINK button on the remote control to display the WISELINK
menu.
2.
Press the ◄ or ► button to select “Music”, then press the ENTER
button.
Music les are displayed.
➣
3.
Press the ▲ or ▼ button to select a sorting standard.
(“Title”, “Artist”, “Mood”, “Genre”, “Folder”, “Preference”)
Music les are sorted according to the newly selected sorting
➣
standard.
4.
Press the ENTER button to start playing music in the order selected by
the user.
Music information is set automatically and you can change the
➣
Favourite information.
Music les for which information cannot be displayed are set to
➣
“Unclassied”.
If there is no title information for a music le, the lename is displayed.
➣
If no information is available for the Genre, Artist, Album, or Year, the
➣
corresponding item is displayed as blank.
If the sound is odd when playing MP3 les, exit WISELINK mode and
➣
adjust the “Equalizer” and “SRS TruSurround XT” in the Sound menu.
(An over-modulated MP3 le may cause a sound problem.)
WISELINK
Photo
SUM
Music
Thanks
Jee
Album 1
2005
Pop
Energetic ★ ★ ★
Preference
Title
Artist
SUM
MUSIC
Music Setup
I Love You
Darby
Album 2
2005
Pop
Sad ★ ★ ★
F G H I J L P S T V
▲
Device
Favourites Settings
SUM
Calm ★ ★ ★
Select
on
851.98MB/995.00MB Free
Device e Exit
Better than yesterday
Catherine
Album 3
2005
Pop
Jump
Option
Title
Sorts music les by the title.
It sorts the Music titles in alphabetical order, and shows the music le.
➣
1. Select “T
2.
Press the ◄ or ► button to select from the sublist of les grouped in
itle” as the sorting standard in the Music List.
alphabetical order.
➣
To move to the previous / next group, press the
(REW) or
(FF) button.
3. Press the TOOLS button.
4.
Press the ▲ or ▼ button to select “Play Current Group”.
5.
Press ENTER to play the selected group of music les from the
sublist.
English - 60
Music
Thanks
Jee
Album 1
2005
Pop
Energetic ★ ★ ★
Preference
Title
Artist
SUM
I Love You
Darby
Album 2
2005
Pop
Sad ★ ★ ★
F G H I J L P S T V
▲
Device
Favourites Settings
Better than yesterday
Play Current Group
Delete
Information
Remove Safely
Calm ★ ★ ★
Select
Jump
Catherine
Album 3
2005
Pop
Option
Page 63

English - 61
Artist
Sorts music les by the artist.
It sorts the music le by artist in alphabetical order.
➣
1. Select
2.
“Artist” as the sorting standard in the Music List.
Press the ◄ or ► button to select from the sublist of les grouped in
alphabetical order.
➣
To move to the previous / next group, press the
(REW) or
(FF) button.
3. Press the TOOLS button.
4.
Press the ▲ or ▼ button to select “Play Current Group”.
5.
Press ENTER to play the selected group of music les from the
sublist.
Mood
Sorts music les by the mood.
➣
You can change the music mood information.
1. Select
2.
“Mood” as the sorting standard in the Music List.
Press the ◄ or ► button to select from the sublist of les grouped by
mood.
➣
To move to the previous / next group, press the
(REW) or
(FF) button.
3. Press the TOOLS button.
4.
Press the ▲ or ▼ button to select “Play Current Group”.
5.
Press ENTER to play the selected group of music les from the
sublist.
Changing the Mood information
1.
Select “Mood” as the sorting standard in the Music List and press the ◄
or ► button to select a music le.
2. Press the TOOLS button.
3.
Press the ▲ or ▼ button to select “Change Group”. Press the ENTER
button.
➣
Wiselink identies the mood of the music les and groups them
accordingly by analyzing the music les on the USB device.
➣
“Mood” information extracted from a music le may not always match
the Mood option. For example, a le you think is “Energetic” may be
extracted to the “Exciting” mood option.
4.
Press the ◄ or ► button to select the desired option, then press the
ENTER button.
➣
The group information of the current le is updated and the le is
moved to the new group.
➣
“Mood” options: Energetic, Rhythmical, Sad, Exciting, Calm,
Unclassied
Music
Thanks
Jee
Album 1
2005
Pop
Energetic ★ ★ ★
Title
Artist
Mood
SUM
Catherine Darby Darby Darby Darby Jee Jee
▲
Sad ★ ★ ★
Device
Favourites Settings
I Love You
Darby
Album 2
2005
Pop
Music
Thanks
Jee
Album 1
2005
Pop
Energetic ★ ★ ★
Artist
Mood
Genre
SUM
Rhythmical Sad Exciting Calm ...
▲
Sad ★ ★ ★
Device
Favourites Settings
I Love You
Darby
Album 2
2005
Pop
Music
Thanks
Jee
Album 1
2005
Pop
Energetic ★ ★ ★
Energetic Rhythmical Sad Exciting Calm Unclassified
Artist
Rhythmical Sad Exciting Calm ...
Mood
▲
Genre
SUM
Sad ★ ★ ★
Device
Favourites Settings
I Love You
Darby
Album 2
2005
Pop
Better than yesterday
Play Current Group
Delete
Information
Remove Safely
Calm ★ ★ ★
Select
Jump
Better than yesterday
Play Current Group
Delete
Change Group
Information
Calm ★ ★ ★
Select
Jump
Better than yesterday
Calm ★ ★ ★
Select
Jump
Catherine
Album 3
2005
Pop
Option
Catherine
Album 3
2005
Pop
▼
Option
Catherine
Album 3
2005
Pop
Option
Page 64

Genre
Sorts music les by the genre.
1. Select “Genre” as the sorting standard in the Music List.
2.
Press the ◄ or ► button to select from the sublist of les grouped by
Genre.
To move to the previous / next group, press the
➣
(REW) or
(FF) button.
3. Press the TOOLS button.
4.
Press the ▲ or ▼ button to select “Play Current Group”.
5.
Press ENTER to play the selected group of music les from the
sublist.
Folder
Sorts music les by the folder.
If there are many folders in USB, the les are shown in order in each
➣
folder. The music le in the Root folder is shown rst and the others are
shown in alphabetical order by name.
1. Select “Folder” as the sorting standard in the Music List.
2.
Press the ◄ or ► button to select from the sublist of les grouped by
Folder.
To move to the previous / next group, press the
➣
(REW) or
(FF) button.
3. Press the TOOLS button.
4.
Press the ▲ or ▼ button to select “Play Current Group”.
5.
Press ENTER to play the selected group of music les from the
sublist.
Music
Thanks
Jee
Album 1
2005
Pop
Energetic ★ ★ ★
Mood
Genre
Folder
SUM
Music
Thanks
Jee
Album 1
2005
Pop
Energetic ★ ★ ★
Genre
Folder
Preference
SUM
I Love You
Darby
Album 2
2005
Pop
Sad ★ ★ ★
Other Pop R&B Soundtr... Top 40 Acid Jazz Ball..
▲
Device
Favourites Settings
I Love You
Darby
Album 2
2005
Pop
Sad ★ ★ ★
Other Music Other2
▲
Device
Favourites Settings
Better than yesterday
Play Current Group
Delete
Information
Remove Safely
Calm ★ ★ ★
Select
Jump
Better than yesterday
Play Current Group
Delete
Information
Remove Safely
Calm ★ ★ ★
Select
Jump
Catherine
Album 3
2005
Pop
Option
Catherine
Album 3
2005
Pop
Option
Preference
Sorts music les by preference. (Favourites)
➣
You can change the music les preferences.
1. Select “Preference” as the sorting standard in the Music List.
2.
Press the ◄ or ► button to select from the sublist of les grouped by
Preference.
➣
To move to the previous / next group, press the
(REW) or
(FF) button.
3. Press the TOOLS button.
4.
Press the ▲ or ▼ button to select “Play Current Group”.
5.
Press ENTER to play the selected group of music les from the
sublist.
Changing the Favourites setting
1. Press the ◄ or ► button to select the desired music in the music list.
2. Press the Green button repeatedly until the desired setting appears.
Favourites settings change completed.
➣
“Favourites” options:
➣
➣
Users can select the number of stars (up to 3) according to their
★ ★ ★, ★ ★ ★, ★ ★ ★, ★ ★ ★
preference.
3. Press the ENTER
button to start playing music.
Music
Thanks
Jee
Album 1
2005
Pop
Energetic ★ ★ ★
Folder
Preference
Title
SUM
I Love You
Darby
Album 2
2005
Pop
Sad ★ ★ ★
★ ★ ★ ★ ★ ★ ★ ★ ★ ★ ★ ★
▲
Device
Favourites Settings
Better than yesterday
Play Current Group
Delete
Information
Remove Safely
Calm ★ ★ ★
Select
Jump
Catherine
Album 3
2005
Pop
Option
English - 62
Page 65

English - 63
DeletingtheMusicle
1. Press the ◄ or ► button to select the desired music le in the music list.
2. Press the TOOLS button.
3.
Press the ▲ or ▼ button to select “Delete”, then press the ENTER
button.
The “Delete this le?” message appear.
➣
4.
Press the ◄ or ► button to select “OK”, then press the ENTER button.
The music is deleted.
➣
When a read-only le is deleted, the “This File is read-only le. Delete
➣
it?” message appear.
If you select “Cancel”, the deletion is cancelled.
➣
5.
To exit “WISELINK” mode, press the W.LINK button on the remote
control.
While removing les, don’t remove the USB memory device.
➣
You cannot recover deleted music les.
➣
Deleting
MultipleMusicles
Press the ◄ or ► button to select the desired music in the music list.
1.
Then press the yellow button.
➣
Repeat the above operation to select multiple music les.
➣
The
mark appears to the left of the selected music les.
2. Press the TOOLS button.
3.
Press the ▲ or ▼ button to select “Delete selected File”, then press the
ENTER button.
➣
The “Delete the selected les?” message appear.
4.
Press the ◄ or ► button to select “OK”, then press the ENTER button.
➣
The selected music les are deleted.
➣
If you select “Cancel”, the deletion is cancelled.
5.
To exit “WISELINK” mode, press the W.LINK button on the remote
control.
➣
You cannot remove the read-only les from the selected ones.
➣
You cannot restore the deleted music les.
Music
Thanks
Jee
Album 1
2005
Pop
Energetic ★ ★ ★
Preference
F G H I J L P S T V
Title
▲
Artist
SUM
Selected File(s) :I Love Y... 1 File(s)
Sad ★ ★ ★
Device
Favourites Settings
Delete
Delete this file?
OK
I Love You
Darby
Album 2
2005
Pop
Cancel
Music
Thanks
Jee
Album 1
2005
Pop
Energetic ★ ★ ★
Preference
F G H I J L P S T V
Title
▲
Artist
SUM
Selected File(s) :I Love Y... 2 File(s)
Delete the selected files?
Device
Delete
OK
I Love You
Darby
Album 2
2005
Pop
Sad ★ ★ ★
Favourites Settings
Cancel
Better than yesterday
Play Current Group
Delete
Information
Remove Safely
Calm ★ ★ ★
Select
Jump
2File(s) Selected
Better than yesterday
Delete selected File
Deselect All
Remove Safely
Calm ★ ★ ★
Select
Jump
Catherine
Album 3
2005
Pop
Option
Catherine
Album 3
2005
Pop
Option
Viewing the Information
The music le information including the order of the le in the current directory,
the name, the size, the date modied and the path is displayed.
1. Press the ◄ or ► button to select the desired music in the music list.
2. Press the TOOLS button.
3.
Press the ▲ or ▼ button to select “Information”, then press the ENTER
button.
➣
The information on the selected le appears.
O
Press the INFO button to viewing the information.
Music
Thanks
Jee
Album 1
2005
Pop
Energetic ★ ★ ★
Preference
F G H I J L P S T V
Title
▲
Artist
SUM
Name : I Love You.mp3
Size : 5.2MB
Date : Jan.1.2008
Path : /Music/
Device
Music Info
I Love You
Darby
Album 2
2005
Pop
Sad ★ ★ ★
Favourites Settings
OK
Better than yesterday
Play Current Group
Delete
Information
Remove Safely
Calm ★ ★ ★
Select
Jump
Catherine
Album 3
2005
Pop
Option
Page 66

Playing a Music File
Playingamusicle
Press the W.LINK button on the remote control to display the “WISELINK”
1.
menu.
2.
Press the ◄ or ► button to select “Music”, then press the ENTER
button.
Music les are displayed.
➣
3.
Pressing the ◄ or ► button to select a music le to be played, then press
the ENTER button.
This menu only shows les with the MP3 le extension. Files with
➣
other le extensions are not displayed, even if they are saved on the
same USB device.
Press the
➣
the music.
➣
(REW) or (FF) buttons do not function during play.
➣
Press the
to pause the le. Press the (Stop) button to exit Play mode.
➣
The selected le is displayed at the top with its playing time.
➣
To adjust the music volume, press the VOL – or VOL + button on the
remote control. To mute the sound, press the MUTE button on the
remote control.
➣
The playing duration of a music le may be displayed as ‘00:00:00’ if
its playing time information is not found at the start of the le.
4. T
o exit “WISELINK” mode, press the W.LINK button on the remote control.
(Play) / ENTER button over a music icon to play
(Pause) / ENTER button while playing a music le
Music
Thanks
Jee
Album 1
2005
Pop
Energetic ★ ★ ★
Preference
F G H I J L P S T V
Title
▲
Artist
SUM
7/14 00:01:15 00:05:41
I Love You
SUM
I Love You
Darby
Album 2
2005
Pop
Sad ★ ★ ★
Device
Favourites Settings
Pause Previous Next Option Return
Better than yesterday
Calm ★ ★ ★
Select
Jump
Catherine
Album 3
2005
Pop
Option
Playing the music group
Press the W.LINK button on the remote control to display the WISELINK
1.
menu.
2.
Press the ◄ or ► button to select “Music”, then press the ENTER
button.
➣
To move to the previous / next group, press the
(REW) or
(FF) button.
3. Press the ◄ or ► button to select the desired music le.
4. Press the TOOLS button.
5.
Press the ▲ or ▼ button to select “Play Current Group”, then press the
ENTER button.
➣
The music les in the sorting group including the selected le are played.
6.
To exit “WISELINK” mode, press the W.LINK button on the remote control.
Music
Thanks
Jee
Album 1
2005
Pop
Energetic ★ ★ ★
Preference
Title
Artist
SUM
I Love You
Darby
Album 2
2005
Pop
Sad ★ ★ ★
F G H I J L P S T V
▲
Device
Favourites Settings
Better than yesterday
Play Current Group
Delete
Information
Remove Safely
Calm ★ ★ ★
Select
Jump
Catherine
Album 3
2005
Pop
Option
English - 64
Page 67

English - 65
Playingtheselectedmusicles
Press the W.LINK button on the remote control to display the WISELINK
1.
menu.
2.
Press the ◄ or ► button to select “Music”, then press the ENTER
button.
3.
Press the ◄ or ► button to select the desired music le, then press the
yellow button. Repeat the above operation to select multiple music les.
The
➣
Press the (Play) / ENTER button.
4.
➣
➣
mark appears to the left of the selected music le.
Only the selected le is played.
Press the
(Stop) button while playing to stop the current item and
to return to the music list.
5.
To exit “WISELINK” mode, press the W.LINK button on the remote
control.
Music function information icon (Displayed at the top left of the screen)
Icon Current OSD Function
(Music) Repeat
(Music) Once
► / ❙❙ (Music) Play/Pause
When all music les in the folder(or the selected le) are repeated.
“Repeat Mode” is “On”.
When all music les in the folder(or the selected le) are played once.
“Repeat Mode” is “Off”.
When pressing the
(Play)/ (Pause)/ENTER button on the
remote control while music is playing.
Music
Thanks
Jee
Album 1
2005
Pop
Energetic ★ ★ ★
Preference
F G H I J L P S T V
Title
▲
Artist
SUM
7/14 00:01:15 00:05:41
I Love You
SUM
I Love You
Darby
Album 2
2005
Pop
Sad ★ ★ ★
Device
Favourites Settings
Pause Previous Next Option Return
Better than yesterday
Calm ★ ★ ★
Select
Jump
2File(s) Selected
Catherine
Album 3
2005
Pop
Option
Repeating Music Play
1. While a Music le is playing, press the TOOLS button.
2. Press the ▲ or ▼ button to select “Repeat Mode”.
3. Press the ◄ or ► button to select “On” or “Of
On: Plays back all music les in the folder(or the selected le)
•
f”.
repeatedly.
Off: Doesn’t play back repeatedly.
•
4. To exit “WISELINK” mode, press the W.LINK button on the remote
control.
Tools
Repeat Mode
◄ On ►
Picture Mode : Standard
Sound Mode : Custom
Information
Remove Safely
Adjust
Move
e
Exit
Page 68

Using the Setup Menu
Setup displays the user settings of the WISELINK menu.
1.
Press the W.LINK button on the remote control to display the WISELINK
menu.
2.
Press the ◄ or ► button to select “Setup”, then press the ENTER
button.
3.
Press the ▲ or ▼ button to select the desired option.
(Slide Show Speed, Music Repeat Mode, Screen Saver Run Time,
Information, Remove Safely)
4.
Press the ◄ or ► button to select the option, then press the ENTER
button.
WISELINK
Photo
SUM
SUM
SETUP
Music Setup
851.98MB/995.00MB Free
Device e Exit
Slide Show Speed
Select to control the slide show speed.
Press the ▲ or ▼ button to select “Slide Show Speed”.
Press the ◄ or ► button to select “Fast”, “Normal” or “Slow”.
Music Repeat Mode
Select to repeatedly play music les.
Press the ▲ or ▼ button to select “Music Repeat Mode”.
Press the ◄ or ► button to select “On” or “Off”.
Screen Saver Run Time
Select to set the waiting time before the screen saver appears.
Press the ▲ or ▼ button to select “Screen Saver Run Time”.
Press the ◄ or ► button to select “1 min”, “3 min” or “5 min”.
Setup
Slide Show Speed ◄ Normal ►
Music Repeat Mode : On
Screen Saver Run Time : 3 min
Information
Remove Safely
SUM
Device Move Adjust Return
Setup
Slide Show Speed : Normal
Music Repeat Mode ◄ On ►
Screen Saver Run Time : 3 min
Information
Remove Safely
SUM
Device Move Adjust Return
Setup
Slide Show Speed : Normal
Music Repeat Mode : On
Screen Saver Run Time ◄ 3 min ►
Information
Remove Safely
Information
Select to viewing the information of the connected device.
Press the ▲ or ▼ button to select “Information”, then press the ENTER
button.
Remove Safely
You can remove the device safely from the TV. (Refer to page 58)
To exit WISELINK mode, press the W.LINK button on the remote control.
English - 66
SUM
Device Type : USB
Device : SUM
Available Memory : 852.90MB
Total Memory : 995.00MB
Device Move Adjust Return
Device Info
OK
Page 69

About Anynet
+
What is Anynet+?
Anynet+ is a function that enables you to control all connected Samsung devices that support Anynet+ with your Samsung
TV’s remote.
Connecting Anynet+ Devices
The Anynet+ system can be used only with Samsung devices that have the Anynet+ feature. To be sure your Samsung
device has this feature, check if there is an Anynet+ logo on it.
To connect to a TV
TV
HDMI 1.3
Cable
To connect to Home Theater
Anynet+
Device 1
HDMI
Cable
TV
Anynet+ Device 2 Anynet+ Device
1.3
HDMI
Cable
Anynet+
Device 2
1.3
Optical
Cable
HDMI 1.3 Cable
HDMI 1.3 Cable
HDMI
1.3
Cable
Home Theater
Anynet+
Device 3
HDMI
Cable
HDMI 1.3 Cable
3 Anynet+ Device 4
HDMI 1.3 Cable
Anynet+
Device 4
1.3
Anynet+ Device 1
Connect the [HDMI 1],
[HDMI 2], [HDMI 3]
or [HDMI 4] jack on
the TV and the HDMI
OUT jack of the
corresponding Anynet+
device using an HDMI
cable.
1. Connect the
[HDMI 1], [HDMI
2], [HDMI 3] or
[HDMI 4] jack on
the TV and the
HDMI OUT jack of
the corresponding
Anynet+ device
using an HDMI
cable.
2. Connect the
HDMI IN jack of
the home theater
and the HDMI
OUT jack of the
corresponding
Anynet+ device
using an HDMI
cable.
Connect the Optical cable between the Digital Audio Out (Optical) jack on your TV and the Digital Audio Input on the
➣
Home Theater.
When following the connection above, the Optical jack only outputs 2 channel audio.
➣
You will only hear sound from
the Home Theater’s Front Left and Right speakers and the subwoofer. If you want to hear 5.1 channel audio, connect
the Digital Audio Out (Optical) jack on the DVD player or Cable/Satellite Box (ie Anynet Device 1 or 2) directly to the
Amplier or Home Theater, not the TV.
➣
Connect only one Home Theater.
➣
You can connect an Anynet+ device using the HDMI 1.3 cable. Some HDMI cables may not support Anynet+ functions.
➣
Anynet+ works when the AV device supporting Anynet+ is in the Standby or On status.
➣
Anynet+ supports up to 12 AV devices in total. Note that you can connect up to 3 devices of the same type.
English - 67
Page 70

Setting Up Anynet
+
1. Press the MENU button to display the menu.
Press the ▲ or ▼ button to select “Application”, then press the ENTER
button.
2.
Press the ▲ or ▼ button to select “Anynet+(HDMI-CEC)”, then press the
ENTER button.
3.
Select the required option by pressing the ▲ or ▼ button, then press the
ENTER button.
4.
When you are satised with your setting, press the ENTER button.
5.
Press the EXIT button to exit.
Anynet+(HDMI-CEC)
To use the Anynet+ Function, “Anynet+(HDMI-CEC)”must be set to On.
When the “Anynet+ (HDMI-CEC)”function is disabled, all the Anynet+ related
➣
operations are deactivated.
Auto Turn Off
Setting an Anynet+ Device to turn Off Automatically when the TV is Turned Off.
The active source on the TV remote must be set to TV to use the Anynet+
➣
function.
If you set “Auto Turn Off” to “Yes”, connected external devices are also turned
➣
off when the TV is turned off. If an external device is still recording, it may or
may not turn off.
Application
WISELINK
Anynet+(HDMI-CEC) ►
Device List
Setup
U
Move E Enter R Return
Setup
Anynet+ (HDMI-CEC) : Off
Auto Turn Off : Yes
U
Move E Enter R Return
Scanning and Switching between Anynet+ Devices
1. Press the TOOLS button. Press the ENTER button to select “Anynet+
(HDMI-CEC)”.
2.
Press the ▲ or ▼ button to select “Device List”, then press the ENTER
button
Anynet+ devices connected to the TV are listed. If you cannot nd a
➣
device you want, press the red button to scan for devices.
Only when you set “Anynet+ (HDMI-CEC)” to On in the “Setup” menu,
➣
the “Device List” menu appears.
3.
Press the ▲ or ▼ button to select to a particular device and press the
ENTER button. It is switched to the selected device.
➣
Switching to the selected devices may take up to 2 minutes. You cannot cancel the operation during the switching
operation.
➣
The time required to scan for devices is determined by the number of connected devices.
➣
When the device scan is complete, the number of devices found are not displayed.
➣
Although the TV automatically searches the device list when the TV is turned on via the power button, devices
connected to the TV when the TV is on or under some conditions are not automatically displayed in the device list.
Press the red button to search for the connected device.
➣
If you have selected external input mode by pressing the SOURCE button, you cannot use the Anynet+ function. Make
sure to switch to an Anynet+ device by using the “Device List”.
View TV
Device List
Recording
: DVDR
DVDR Operation
Receiver :
Setup
On
U
Move E Enter R Return
English - 68
Page 71

English - 69
Anynet+ Menu
The Anynet+ menu changes depending on the type and status of the Anynet+ devices connected to the TV.
Anynet+ Menu Description
View TV
Device List
(device_name) Menu
(device_name) Operation
Record: (*recorder)
Stop Recording: (*recorder)
Receiver
If more than one recording device is connected, they are displayed as (*recorder) and if only one recording device is
➣
Anynet+ mode changes to TV broadcast mode.
Shows the Anynet+ device list.
Shows the connected device menus.
E.g. If a DVD recorder is connected, the disc menu of the DVD recorder will appear.
Shows the play menu of the connected device.
E.g. If a DVD recorder is connected, the play menu of the DVD recorder will appear.
Starts recording immediately using the recorder. (This is only available for devices that
support the recording function.)
Stops recording.
Sound is played through the receiver.
connected, it will be represented as (*device_name).
TV Remote Control Buttons Available in Anynet+ Mode
Device Type Operating Status Available Buttons
Numeric buttons
▲/▼/◄/►/ENTER
buttons
Colour buttons / EXIT button
(Backward search) / (Forward search)
(Stop) / (Play) / (Pause)
/ P button
P
Anynet+ Device
Device with built-in Tuner
After switching to the device, when the
menu of the corresponding device is
displayed on the screen.
After switching to the device, while
playing a le
After switching to the device, when you
are watching a TV program
Audio Device When Receiver is activated Volume / MUTE button
The Anynet+ function only works when the active source on the TV remote control is set to TV.
➣
The
➣
You cannot control Anynet+ devices using the buttons on the TV. You can control Anynet+ devices only using the TV
➣
button works only while in the recordable state.
remote control.
The TV remote control may not work under certain conditions. In this case, reselect the Anynet+ device.
➣
The Anynet+ functions do not operate with other manufacturers’ products.
➣
The
➣
, operations may differ depending on the device.
Recording
You can make a recording of a TV program using a Samsung recorder.
1.
Press the TOOLS button.
Press the ENTER button to select “Anynet+ (HDMI-CEC)”.
2.
Press the ▲ or ▼ button to select “Recording: (device_name)”, then press
the ENTER button. Recording begins.
When there is more than one recording device
When multiple recording devices are connected, the recording devices are
listed. Press the ▲ or ▼ button to select a recording device and press the
ENTER
button. Recording begins.
When the recording device is not displayed
Select “Device List” and press the red button to search devices.
Press the EXIT button to exit.
You can record the source streams by selecting “Recording: (device_name)”.
➣
Pressing the
➣
button will record whatever you are currently watching. If you are watching video from another
device, the video from the device is recorded.
➣
Before recording, check whether the antenna jack is properly connected to the recording device.
an antenna to a recording device, refer to the recording device’s users manual.
View TV
Device List
Recording
DVDR Operation
Receiver :
Setup
: DVDR
On
U
Move E Enter R Return
To properly connect
Page 72

Listening through a Receiver (Home theater)
You can listen to sound through a receiver instead of the TV speaker.
1.
Press the TOOLS button. Press the ENTER button to select “Anynet+
(HDMI-CEC)”.
2.
Press the ▲ or ▼ button to select “Receiver”. Press the ◄ or ► button to
select “On” or “Off”.
3. Press the EXIT button to exit.
If your receiver supports audio only, it may not appear in the device list.
➣
The receiver will work when you have properly connected the Optical IN
➣
View TV
Device List
Recording
: DVDR
DVDR Operation
Receiver ◄
Setup
U
On ►
Move L Adjust R Return
jack of the receiver to the Optical Out jack of the TV.
When the receiver (home theater) is set to On, you can hear sound output from the
➣
TV’s Optical jack. When the TV is
displaying a DTV(air) signal, the TV will send out 5.1 channel sound to the Home theater receiver. When the source is
a digital component such as a DVD and is connected to the TV via HDMI, only 2 channel sound will be heard from the
Home Theater receiver.
➣
When using the WISELINK feature, sound may not output properly through the receiver
➣
When listening through the receiver, there are restrictions for using the PIP and audio-related menus.
➣
If there is a power interruption to the TV when the “Receiver” is set to “On” (by disconnecting the power cord or a
power failure), the “Select Speaker” may be set to “External Speaker” when you turn the
.
TV on again. (see page 32)
Troubleshooting for Anynet+
Symptom Solution
Anynet+ does not work. Check if the device is an Anynet+ device. The Anynet+ system supports Anynet+
I want to start Anynet+. Check if the Anynet+ device is properly connected to the TV and check if the
I want to exit Anynet+. Select View TV in the Anynet+ menu.
The message Connecting to
Anynet+ device... appears on the
screen.
The Anynet+ device does not play. You cannot use the play function when Plug & Play is in progress.
The connected device is not
displayed.
The TV program cannot be
recorded.
The TV sound is not output
through the receiver.
•
devices only.
Connect only one receiver (home theater).
•
Check if the Anynet+ device power cord is properly connected.
•
Check the Anynet+ device’s Video/Audio/HDMI 1.3 cable connections.
•
Check whether Anynet+ (HDMI-CEC) is set to On in the Anynet+ setup menu.
•
Check whether the TV remote control is in TV mode.
•
Check whether it is Anynet+ exclusive remote control.
•
Anynet+ doesn’t work in certain situations. (Searching channels, Operating
•
WISELINK, Plug & Play, etc.)
When connecting or removing the HDMI 1.3 cable, please make sure to search
•
devices again or turn your TV off and on again.
Check if the Anynet+ Function of Anynet+ device is set on.
•
•
Anynet+ (HDMI-CEC) is set to On in the Anynet+ Setup menu.
Press the TV/DTV button on the TV remote control to switch to TV. Then press
•
the TOOLS button to show the Anynet+ menu and select a menu you want.
•
Press the SOURCE button on the TV remote control and select a device other
•
than Anynet+ devices.
Press P
•
/ and PRE-CH to change the TV mode.
(Note that the channel button operates only when a tuner-embedded Anynet+
device is not connected.)
You cannot use the remote control when you are conguring Anynet+ or
•
switching to a view mode.
Use the remote control when the Anynet+ setting or switching to view mode is
•
complete.
Check whether or not the device supports Anynet+ functions.
•
Check whether or not the HDMI 1.3 cable is properly connected.
•
Check whether Anynet+ (HDMI-CEC) is set to On in the Anynet+ setup menu.
•
Search Anynet+ devices again.
•
You can connect an Anynet+ device using the HDMI 1.3 cable only. Some HDMI
•
cables may not support Anynet+ functions.
If it is terminated by an abnormal situation such as disconnecting the HDMI cable
•
or power cord or a power failure, please repeat the device scan.
Check whether the antenna jack on the recording device is properly connected.
Connect the optical cable between TV and the receiver.
English - 70
Page 73

English - 71
Recommendations for Use
Teletext Feature
Most television stations provide written information services via Teletext. The index page of the teletext service gives you
information on how to use the service. In addition, you can select various options to suit your requirements by using the
remote control buttons.
For teletext information to be displayed correctly, channel reception must be stable. Otherwise, information may be
➣
missing or some pages may not be displayed.
1
(exit)
Exit from the teletext display.
2
6 (index)
Used to display the index (contents) page at any time while you are
viewing teletext.
3
8 (store)
Used to store the teletext pages.
4
4 (size)
Press to display the double-size letters in the upper half of the screen.
For lower half of the screen, press it again. To display normal screen,
press it once again.
5
5 (reveal)
Used to display the hidden text (answers to quiz games, for example).
To display normal screen, press it again.
6
/ (teletext on/mix)
Press to activate teletext mode after selecting the channel providing the
teletext service. Press it twice to overlap the teletext with the current
broadcasting screen.
7
1 (sub-page)
Used to display the available sub-page.
8
2 (page up)
Used to display the next teletext page.
9
3 (page down)
Used to display the previous teletext page.
0
0 (mode)
Press to select the teletext mode (LIST/FLOF). If you press it in the LIST
mode, it switches into the List save mode. In the List save mode, you can
save teletext page into list using the 8(store) button.
!
9 (hold)
Used to hold the display on a given page if the selected page is linked
with several secondary pages which follow on automatically. To resume,
press it again.
@
7 (cancel)
Used to display the broadcast when searching for a page.
#
Colour buttons (red/green/yellow/blue)
If the FASTEXT system is used by a broadcasting company, the different
topics covered on a teletext page are colour-coded and can be selected
by pressing the coloured buttons. Press one of them corresponding to
the required. The page is displayed with other coloured information that
can be selected in the same way. To display the previous or next page,
press the corresponding coloured button.
1
2
3
4
5
6
7
8
9
0
!
@
#
➣
You can change teletext pages by pressing the numeric buttons on the
remote control.
Page 74

The teletext pages are organized according to six categories:
Part Contents
A Selected page number.
B Broadcasting channel identity.
C Current page number or search indications.
D Date and time.
E Text.
F Status information.
FASTEXT information.
➣
Teletext information is often divided between several pages displayed
in sequence, which can be accessed by:
- Entering the page number
- Selecting a title in a list
- Selecting a coloured heading (FASTEXT system)
➣
Press the TV/DTV button to exit from the teletext display.
Auto Wall-Mount Adjustment (Sold separately)
Once the auto wall mount is installed, your TV’s position can be easily adjusted.
This function is optional and may not be supported.
➣
TV Rear Panel Auto Wall-Mount
SERVICE Cable (Not supplied)
Entering the menu
1.
Press the ▲, ▼, ◄ or ► button on your remote control.
The Wall Mount Adjustment screen is displayed.
➣
If the Auto Wall-Mount screen is not displayed when clicking on a direction
➣
button while watching your TV, use the menu to display that screen.
Press the MENU button to display the menu. Press the ▲ or ▼ button to
•
select “Setup”, then press the ENTER
•
Press the ▲ or ▼ button to select “Wall-Mount Adjustment”, then press
the ENTER
button.
button.
English - 72
Setup
Teletext Language : ----
Preference
Wall-Mount Adjustment
Melody : Off
Entertainment : Off
Energy Saving : Off
PIP
Software Upgrade
Common Interface
►
Page 75

English - 73
Remembering the Position
Adjust to the desired position using the ▲,▼,◄,► buttons.
2.
If you press an arrow button when no OSD is displayed on the TV
➣
screen, the Adjustment screen appears.
Press the INFO button to reset. Press the ◄ or ► button to select
➣
“Yes”, then press the ENTER
button. The position is initialized to
the default setting.
3.
Press the blue button.
Press the ▲ and ▼ buttons to select a save mode from either Position 1,
Position 2 or Position 3 in order to save the current position.
To not save the current position, press the RETURN button.
➣
When selecting a save mode, you cannot use the Colour buttons.
➣
4.
Press the ENTER button to save.
When Position1 is selected, the message “Current position saved as
➣
Position1” is displayed.
5.
Press the ENTER button.
The saved Position appears on the left side of the OSD.
➣
Moving to the remembered position
1.
Complete Step 1 of “Entering the menu”.
2.
Pressing a Colour (Red, Green, Yellow) button moves the auto wall mount
to the saved position.
You can move the wall mount to one of the 3 pre-set positions by
➣
pressing the Red (Position 1), Green (Position 2) or Yellow (Position
3) buttons.
If you adjust the Position after moving to a pre-set position, the
➣
position display will disappear.
For installation, refer to the Installation Manual provided with the wall
➣
mount.
For product installation and the installation and moving of the wall mount,
➣
make sure to consult a specialized installation company.
This installation manual is to be used when attaching the wall mount to
➣
a wall. When attaching to other building materials, please contact your
nearest dealer.
The auto wall mount will not work when Anynet+ or WISELINK is operating.
➣
37, 40 and 46 models are not compatible with the older wall mount model
➣
(WMN5090A).
Wall-Mount Adjustment
Position 1 2 3
Position1
Position 1 2 3
Adjust Save Centre
Save
Select a mode to save.
Position1
Position2
Position3
Move Enter Return
Wall-Mount Adjustment
Adjust Save Centre
Page 76

Using the Anti-Theft Kensington Lock (depending on the model)
The Kensington Lock is a device used to physically x the system when using it in a public place. The appearance and
locking method may differ from the illustration depending on the manufacturer. Refer to the manual provided with the
Kensington Lock for proper use. The locking device has to be purchased separately.
Cable
Figure 2
Figure 1
<Optional>
The location of the Kensington Lock may be different depending on its model.
➣
1.
Insert the locking device into the Kensington slot on the LCD TV (Figure 1) and turn it in the locking direction (Figure 2).
2. Connect the Kensington Lock cable.
3. Fix the Kensington Lock to a desk or a heavy stationary object.
English - 74
Page 77

English - 75
Securing the TV to the Wall
주의
Caution: Pulling, pushing, or climbing on the TV may cause the TV to fall. In particular, ensure your children do
not hang over or destabilize the TV; doing so may cause the TV to tip over, causing serious injuries or death.
Follow all safety precautions provided on the included Safety Flyer. For added stability, install the anti-fall
device for safety purposes, as follows.
To avoid the TV from falling:
1.
Put the screws into the clamps and rmly fasten them onto the wall. Conrm that the
screws have been rmly installed onto the wall.
You may need additional material such a s an anchor depending on the type of
➣
wall.
Since the necessary clamps, screws, and string are not supplied, please
➣
purchase these additionally.
2.
Remove the screws from the center back of the TV, put the screws into the clamps,
and then fasten the screws onto the TV again.
Screws may not be supplied with the product. In this case, please purchase the
➣
screws of the following specications.
Screw Specications
- For a 17 ~ 29 Inch LCD TV: M4 X 15
- For a 32 ~ 40 Inch LCD TV: M6 X 15
Wall
3.
Connect the clamps xed onto the TV and the clamps xed onto the wall with a
strong string and then tie the string tightly.
Install the TV near to the wall so that it does not fall backwards.
➣
It is safe to connect the string so that the clamps xed on the wall are equal to
➣
or lower than the clamps xed on the TV.
Untie the string before moving the TV.
➣
4.
Verify all connections are properly secured. Periodically check connections for
any sign of fatigue for failure. If you have any doubt about the security of your
connections,contact a professional installer.
Wall
Page 78

Troubleshooting: Before Contacting Service Personnel
No sound or picture Check that the mains lead has been connected to a wall socket.
Normal picture but no sound Check the volume.
Screen is black and power indicator
light blinks steadily
No picture or black and white picture Adjust the colour settings.
Sound and picture interference Try to identify the electrical appliance that is affecting the set and move it
Blurred or snowy picture, distorted
sound
Remote control malfunctions Replace the remote control batteries.
‘Check signal cable.’ message is
displayed
On PC mode, ‘Not Supported Mode.’
message is displayed
The damaged picture appears in the
corner of the screen
The ‘Resets all settings to the default
values.’ message appears.
You may see small particles if you
look closely at the edge of the bezel
surrounding the TV screen.
The TFT LCD panel uses a panel consisting of sub pixels (6 220 800) which require sophisticated technology to produce.
However, there may be few bright or dark pixels on the screen. These pixels will have no impact on the performance of
the product.
•
Check that you have pressed the button on your set.
•
Check the picture contrast and brightness settings.
•
Check the volume.
•
•
Check whether the MUTE
•
•
Check the “Select Speaker” settings.
On your computer check; Power, Signal Cable.
•
The TV is using its power management system.
•
Move the computer’s mouse or press any key on the keyboard.
•
•
Check that the broadcast system selected is correct.
•
•
further away.
Plug your set into a different mains socket.
•
Check the direction, location and connections of your aerial.
•
This interference is often due to the use of an indoor aerial.
•
•
Clean the upper edge of the remote control (transmission window).
•
Check the battery terminals.
•
Check that the signal cable is rmly connected to the PC or video sources.
•
Check that the PC or video sources are turned on.
•
Check the maximum resolution and the frequency of the video adaptor.
•
Compare these values with the data in the Display Modes.
•
If “Just Scan” is selected in some external devices, the damaged picture
may appear in the corner of the screen. This symptom is caused by external
devices, not TV.
This appears when you press and hold the EXIT button for a while. The product
settings are reset to the factory defaults.
This is part of the product’s design and is not a defect.
button has been pressed on the remote control.
English - 76
Page 79

English - 77
Specications
Model Name LE32A769
Screen Size
(Diagonal) 32 inch
PC Resolution
(Optimum) 1920 x 1080 @ 60 Hz
Sound
Output
Dimensions (WxDxH)
Body
With stand
Weight
With Stand 16 kg
Environmental Considerations
Operating Temperature
Operating Humidity
Storage Temperature
Storage Humidity
Stand Swivel
(Left / Right) 0˚
Design and specications are subject to change without prior notice.
➣
This device is a Class B digital apparatus.
➣
For the power supply and Power Consumption, refer to the label attached to the product.
➣
826 x 81 x 530 mm
826 x 230 x 575 mm
10°C to 40°C (50°F to 104°F)
10% to 80%, non-condensing
-20°C to 45°C (-4°F to 113°F)
5% to 95%, non-condensing
10W x 2
Page 80

Hinweis zu Digitalfernsehgeräten (DVB-T)
1. FUNKTIONEN FÜR DIGITALFERNSEHEN (DVB) SIND NUR IN LÄNDERN UND REGIONEN VERFÜGBAR, IN DENEN
DIGITALE DVB-T-SIGNALE (MPEG2 UND MPEG4 AVC) TERRESTRISCH GESENDET WERDEN. DVB-T ist der Standard
des Europäischen Konsortiums für terrestrisches Digitalfernsehen. Fragen Sie Ihren örtlichen Händler, wenn Sie Informationen
über die Verfügbarkeit von DVB-T in Ihrer Gegend benötigen.
2. Zwar hält dieses Fernsehgerät die Vorgaben der DVB-T-Spezikation [August 2008] ein, aber es kann nicht garantiert werden,
dass die Kompatibilität mit zukünftigen digitalen terrestrischen DVB-T-Signalen gewahrt bleibt.
3. Manche Funktionen des Digitalfernsehens stehen möglicherweise nicht zur Verfügung oder arbeiten in bestimmten Ländern
und Regionen möglicherweise nicht korrekt.
4. Für weitere Informationen setzen Sie sich bitte mit dem SAMSUNG-Kundendienstzentrum in Verbindung.
Kontakt zu Samsung
Falls Sie Fragen oder Anregungen zu Samsung-Produkten haben, wenden Sie sich bitte an den Samsung-Kundendienst.
(Weitere Informationen auf der Rückseite)
Vorsichtsmaßnahmen beim Anzeigen von Standbildern
Ein Standbild kann zu einer dauerhaften Beschädigung des Fernsehbildschirms führen.
Zeigen Sie kein Standbild länger als 2 Stunden auf dem LCD-Monitor an, da das Bild auf diese Weise einbrennen kann. Das
•
Einbrennen von Standbildern wird auch als “Bildkonservierung” bezeichnet. Sie können das Einbrennen vermeiden, indem
Sie die Helligkeit und den Kontrast des Monitors beim Anzeigen von Standbildern verringern.
•
•
Die kontinuierliche Anzeige von Standbildern von Videospielen oder vom PC über einen gewissen Zeitraum hinaus
kann partielle Nachbilder verursachen. Um diesen Effekt zu verhindern, verringern Sie Helligkeit und Kontrast, wenn Sie
Standbilder anzeigen möchten.
Bei Wiedergabe im Format 4:3 über einen längeren Zeitraum können bedingt durch die unterschiedliche
Lichtemission Nachbilder der Ränder links, rechts und in der Mitte des Bildschirms auftreten. DVD- oder
Spielekonsole-Wiedergabe können einen ähnlichen Effekt verursachen. Schäden, die durch die o. g. Effekte
verursacht wurden, unterliegen nicht der Garantie.
© 2008 Samsung Electronics Co., Ltd. All rights reserved.
Page 81

Inhalt
AnschlieFen und Vorbereiten des ßrnsehgeräts
Lieferumfang ......................................................................2
■
Anbringen des Standfußes ................................................2
■
Anbringen der Wandhalterung ...........................................2
■
Bedienfeld ..........................................................................3
■
Anschlussfeld ....................................................................4
■
Fernbedienung ..................................................................7
■
Batterien in die Fernbedienung einsetzen .........................8
■
Ein- und Ausschalten .........................................................8
■
Fernsehgerät in den Standby-Modus schalten ..................8
■
Menüs anzeigen ................................................................9
■
Verwenden der Taste TOOLS ............................................9
■
Plug & Play-Funktion .........................................................9
■
Kanalsteuerung
Sender automatisch speichern ........................................11
■
Sender manuell speichern ...............................................12
■
EPG-Informationen (Elektronischer Programmführer)
■
anzeigen ..........................................................................14
Einstellen des Standardführers .......................................15
■
Verwalten von Kanälen ....................................................16
■
Einstellen des Kanalmodus .............................................23
■
Feinabstimmung analoger Kanäle ...................................23
■
Überprüfen der Signalinformationen – Digital ..................24
■
Bildeinstellungen
Bildstandard ändern ........................................................25
■
Bildeinstellungen anpassen .............................................25
■
Anpassen der Detaileinstellungen ...................................26
■
Kongurieren der Bildoptionen ........................................27
■
Zurücksetzen der Bildeinstellungen auf die werkseitig
■
festgelegten Standardwerte .............................................29
Verwenden der Bild-in-Bild-Funktion (PIP) ......................30
■
Toneinstellungen
Tonstandard wählen ........................................................31
■
Tonmodus wählen ............................................................33
■
Anschließen von Kopfhörern (separat erhältlich) ............33
■
Einstellen der Zeit
Uhrzeit einstellen .............................................................34
■
Sleep-Timer einstellen .....................................................35
■
Fernsehgerät automatisch ein- und ausschalten .............36
■
Funktionsbeschreibung
Auswählen der Menüsprache ..........................................37
■
Aktivieren der Kindersicherung ........................................37
■
Einrichten der persönlichen ID (PIN) ...............................38
■
Einstellen der Kindersicherung ........................................39
■
Einrichten von Untertiteln ................................................40
■
Auswählen der Videotextsprache ....................................41
■
Auswählen der bevorzugten Sprache ..............................41
■
Melodie/Unterhaltung/Energiesparmodus .......................42
■
Software aktualisieren .....................................................43
■
Anzeigen der CI-Schnittstelle ..........................................44
■
Auswählen des CI-Menüs (Common Interface) ...............44
■
Signalquelle auswählen ...................................................45
■
Bezeichnung der Signalquelle bearbeiten .......................45
■
PC-Anzeige
Verwenden Ihres Computers als Computerbildschirm (PC) .....46
■
Anzeigemodi ....................................................................46
■
Fernsehgerät mithilfe des PCs einstellen ........................47
■
WISELINK
Verwenden der WISELINK-Funktion ...............................48
■
Verwenden der Fotoliste ..................................................49
■
Sortieren der Fotoliste .....................................................51
■
Anzeigen eines Fotos oder einer Diashow ......................55
■
Verwenden der Musikliste ................................................59
■
Musikliste sortieren ..........................................................60
■
Wiedergeben einer Musikdatei ........................................64
■
Verwenden des Menüs Einstellungen .............................66
■
Informationen zu Anynet
Was ist Anynet+? .............................................................67
■
Anschließen von Anynet+-Geräten ..................................67
■
Einrichten von Anynet
■
Suchen von Anynet+-Geräten und Umschalten
■
zwischen diesen Geräten ................................................68
Aufnahme ........................................................................69
■
Abspielen über einen Receiver (Heimkinosystem) ..........70
■
Fehlerbehebung für Anynet+ ..........................................70
■
+ ....................................................68
+
Empfehlungen für den Betrieb
Videotextfunktion .............................................................71
■
Justieren der automatischen Wandhalterung
■
(gesondert lieferbar) ........................................................72
Verwenden des Kensington-Schlosses (modellabhängig) .....
■
Befestigen des Fernsehgeräts an der Wand ...................75
■
Fehlerbehebung: Vor der Kontaktaufnahme mit dem
■
Kundendienst ...................................................................76
Technische Daten ............................................................77
■
Deutsch
74
Symbol Drücken Hinweis Zielwahltaste
Deutsch - 1
Page 82

AnschlieFen und Vorbereiten des ßrnsehgeräts
Lieferumfang
Überprüfen Sie die Verpackung Ihres LCD-Fernsehgeräts auf Vollständigkeit. Falls Komponenten fehlen sollten, setzen Sie
sich bitte mit Ihrem Händler in Verbindung.
M4xL 16
Fernbedienung &
Batterien (AAA x 2)
Bedienungsanleitung
•
Garantiekarte/Handbuch mit Sicherheitshinweisen (nicht überall verfügbar)
➣
Netzkabel
Untere
Abdeckung
Garantiekarte
•
4 Schrauben für
Standfuß
Fuß Reinigungstuch
Handbuch mit Sicherheitshinweisen
•
Anbringen des Standfußes
1. Schließen Sie Ihren LCD-Fernseher und den Standfuß an.
Der LCD-Fernseher sollte von mindestens zwei Personen getragen werden.
➣
Verwechseln Sie beim Zusammenbauen nicht die Vorder- und Rückseiten des Standfußes.
➣
2. Ziehen Sie zuerst die zwei Schrauben an Position 1 und dann die zwei Schrauben an Position 2 fest.
Stellen Sie das Gerät aufrecht hin und ziehen Sie die Schrauben fest. Wenn Sie die Schrauben festziehen,
➣
während der LCD-Fernseher liegt, kann es passieren, dass er seitlich geneigt ist.
Anbringen der Wandhalterung
Mit der separat erhältlichen Wandhalterung können Sie das Fernsehgerät
an einer Wand befestigen. Detaillierte Informationen zum Montieren der
Wandhalterung nden Sie in den Anweisungen, die im Lieferumfang
der Wandhalterung enthalten sind. Lassen Sie sich beim Anbringen der
Wandhalterung von einem Techniker helfen. Samsung Electronics haftet nicht
für Schäden an Gerät oder Personen, wenn die Montage vom Kunden selbst
durchgeführt wird.
Installieren Sie die Wandhalterung nicht bei angeschaltetem
➣
Entfernen Sie den Fuß, decken Sie die Aussparung an der Unterseite des
Fernsehgeräts mit einer Abdeckung ab und befestigen Sie diese mit zwei
Schrauben.
Fernsehgerät. Sie könnten dabei einen Stromschlag erhalten und sich
verletzen.
Deutsch - 2
Page 83

Deutsch - 3
Bedienfeld
Tasten auf der Vorderseite
Berühren Sie die verschiedenen
Tasten, um die gewünschten
Funktionen zu nutzen.
Die Produktfarbe und -form kann je nach Modell unterschiedlich sein.
➣
1
SOURCE
Schaltet zwischen allen verfügbaren Signalquellen um
(
HDMI2/DVI, HDMI3, HDMI4
können Sie diese Schaltäche wie
Fernbedienung verwenden.
2 MENU
Drücken Sie diese Taste, um ein Bildschirmmenü zu den
Funktionen des Fernsehgeräts einzublenden.
3
– +
Drücken Sie diese Tasten, um die Lautstärke zu erhöhen
oder zu verringern. Im Bildschirmmenü können Sie die
Schaltächen
Fernbedienung verwenden.
TV, Ext.1, Ext.2, AV, S-Video, Komp., PC, HDMI1,
– + wie die Tasten
). Im Bildschirmmenü
ENTER auf der
◄ und ► auf der
C/P.
4
Sender wechseln.
Im Bildschirmmenü können Sie die Schaltächen
C/P. wie die Tasten ▼ und ▲ auf der
Fernbedienung verwenden.
5 STROMVERSORGUNGSANZEIGE
Blinkt und schaltet sich aus bei eingeschalteter
Stromversorgung. Leuchtet auf im Standbymodus.
6
NETZTASTE
Drücken Sie diese Taste, um das Fernsehgerät ein- und
auszuschalten.
7 F
ERNBEDIENUNGSSENSOR
Richten Sie die Fernbedienung auf diesen Sensor am
Fernsehgerät.
8 L
AUTSPRECHER
Page 84

Anschlussfeld
#
[Seitenverkleidung des Fernsehgeräts][Rückseite des Fernsehgeräts]
Netzanschluss
Die Produktfarbe und -form kann je nach Modell unterschiedlich sein.
➣
Wenn Sie ein externes Gerät an das Fernsehgerät anschließen möchten, muss das Gerät unbedingt ausgeschaltet
➣
sein.
Achten Sie beim Anschließen eines externen Geräts auf die Farbcodierung: Stecker und Buchse müssen die gleiche
➣
Farbe aufweisen.
1
PC IN [PC] / [AUDIO]
Zum Anschließen an den Video- und Audioausgang eines Computers.
2
COMPONENT IN
- V
erbinden Sie die Komponentenanschlüsse (“PR”, “PB”, “Y”) auf der Rückseite des Fernsehgeräts über Komponenten-
Videokabel (optional) mit den entsprechenden Komponenten-Videoausgängen des DTV- oder DVD-Geräts.
- Wenn Sie sowohl die Set-Top-Box als auch ein DTV- oder DVD-Gerät anschließen möchten, verbinden Sie die
Set-Top-Box mit dem DTV- oder DVD-Gerät, und verbinden Sie das DTV- oder DVD-Gerät mit dem ComponentAnschluss (“P
- Die P
R”, “PB”, “Y”) des Fernsehgeräts.
R-, PB- und Y-Anschlüsse von Component-Geräten (DTV oder DVD) sind manchmal mit Y, B-Y und R-Y bzw. Y,
Cb und Cr beschriftet.
- Verbinden Sie den Audioausgang “R – AUDIO – L” auf der Rückseite des Fernsehgeräts über Cinch-Audiokabel
(optional) mit dem entsprechenden Audioausgang des DTV- oder DVD-Geräts.
3
HDMI IN 1, HDMI IN 2, HDMI IN 3, HDMI IN 4
- Unterstützt V
erbindungen zwischen AV-Geräten (Set-Top-Boxen, DVD-Playern), die für HDMI-Schnittstellen geeignet
sind.
- Beim Anschluss von Geräten über eine HDMI-Schnittstelle ist keine zusätzliche Audioverbindung erforderlich.
- Eine Verbindung über HDMI/DVI-Kabel kann nur über HDMI IN 2 erfolgen.
Deutsch - 4
Page 85

Deutsch - 5
Was ist HDMI?
➣
- HDMI, die hochauösende Multimediaschnittstelle, ermöglicht die Übertragung von hochauösenden digitalen
Videodaten und mehreren Kanälen mit Digitalaudio.
-
Mit dem entsprechenden Kabel ermöglicht der HDMI/DVI-Anschluss DVI-Verbindungen zu einem erweiterten Gerät
(nicht mitgeliefert). Der Unterschied zwischen HDMI und DVI besteht darin, dass ein Gerät mit HDMI kleiner ist,
mit dem Kopierschutz HDCP (High Bandwidth Digital Copy Protection/ digitaler Kopierschutz) ausgestattet ist und
digitalen Mehrkanalton unterstützt.
Bei dem Fernsehgerät erfolgt u. U. keine Tonausgabe und das Fernsehbild weist evtl. anormale Farben auf, wenn
➣
DVD-Player/Kabelboxen/Satellitenempfänger angeschlossen werden, die ältere HDMI-Versionen als 1.3 unterstützen.
Beim Anschluss eines älteren HDMI-Kabels und bei fehlender Tonausgabe schließen Sie das HDMIKabel an den
Eingang HDMI IN 2 und die Audiokabel an die Eingänge DVI IN (HDMI2) [R-AUDIO-L] auf der Rückseite des
Fernsehgeräts an. Wenn dies eintritt, wenden Sie sich an die Firma, von der Sie den DVD-Player bzw. den Kabeloder Satellitenreceiver bezogen haben, und lassen Sie sich die HDMI-Version bestätigen. Anschließend fordern
Sie ein Firmwareupdate an. HDMI-Kabel für andere Versionen als 1.3 können störendes Flackern des Bildschirms
verursachen oder zum völligen Ausfall des Fernsehgeräts führen.
DVI IN(HDMI2) [R-AUDIO-L]
-
DVI-Audioausgänge für externe Geräte.
Unterstützte Modi für HDMI/DVI und Component-Video
➣
480i 480p 576i 576p 720p 1080i 1080p
HDMI/DVI 50Hz X X X O O O O
HDMI/DVI 60Hz X O X X O O O
Component-Video O O O O O O O
4
ANT IN
Damit die Fernsehkanäle korrekt empfangen werden, muss das Fernsehgerät an eine der folgenden Signalquellen
angeschlossen sein:
- Außenantenne / Kabelfernsehanschluss / Satellitenempfänger
5
SERVICE
- Anschluss nur für Servicezwecke
-
Schließen Sie diesen Stecker an die optionale Wandhalterung an. Hiermit können Sie den Betrachtungswinkel des
Fernsehgeräts mit der Fernbedienung einstellen.
6
Steckplatz für COMM ON INTERFACE
- Ohne eingelegte “CI-Karte” zeigt das Fernsehgerät auf einigen Kanälen ein
“gestörtes Signal” an.
- Die Verbindungsinformationen mit Telefonnummer, Kennung der CI-Karte,
Hostkennung und anderen Angaben wird in ungefähr 2 bis 3 Minuten angezeigt.
Wenn eine Fehlermeldung angezeigt wird, wenden Sie sich bitte an Ihren
Dienstanbieter.
-
Wenn die Kanalinformationskonguration abgeschlossen ist, wird die Meldung
“Aktualisierung abgeschlossen” angezeigt. Dies bedeutet, dass die Senderliste
jetzt aktualisiert ist.
Sie müssen sich die CI-Karte bei einem der örtlichen Kabelnetzbetreiber beschaffen. Entfernen Sie die CI-Karte,
➣
indem Sie sie vorsichtig mit Ihren Händen herausziehen, da die CI-Karte beim Herunterfallen beschädigt werden
kann.
Die Richtung, in der Sie die Karte einlegen müssen, ist darauf mit einem Pfeil markiert.
➣
Die Position des CI-Schachts (Common Interface) ist modellabhängig.
➣
7
WISELINK
Schließen Sie ein USB-Massenspeichergerät an, um Fotodateien (JPEG) anzuzeigen und Audiodateien (MP3)
abzuspielen.
8
S-VIDEO oder VIDEO / R-AUDIO-L
- Schließen Sie ein Cinch- oder ein S-VIDEO-Kabel an ein geeignetes
Audio/Video-Gerät an (z. B. Videorecorder,
DVDPlayer oder Camcorder).
- Verbinden Sie das eine Ende der Cinch-Audiokabel mit dem Anschluss “R - AUDIO - L” Ihres Geräts und das andere
Ende mit den entsprechenden Audioausgängen des Audio/Video-Geräts.
9
KOPFHÖRERBUCHSE
Kopfhörer können an den Kopfhörer-ausgang des Geräts angeschlossen werden. Wenn Kopfhörer angeschlossen sind,
ist die Tonwiedergabe über die eingebauten Lautsprecher abgeschaltet.
0
AUDIO OUT [R-AUDIO-L]
Verbinden Sie das eine Ende der RCA-Audiokabel mit dem Anschluss AUDIO OUT [R-AUDIO-L] auf der Rückseite des
Geräts und das andere Ende mit den entsprechenden Audioeingängen des DVD-Heimkinosystems.
Page 86

!
DIGITAL AUDIO OUT (OPTICAL)
- Ausgang an ein digitales Audiogerät anschließen.
Wenn die HDMI IN-Anschlüsse verbunden sind, wird über den Anschluss DIGITAL AUDIO OUT (OPTICAL) am
➣
Fernseher nur 2-Kanalton ausgegeben. Wenn Sie 5.1-Kanalton wünschen, müssen Sie den optischen Ausgang am
DVD-Player oder an der Kabel-/Sat-Box direkt an einen Verstärker oder ein Heimkinosystem anschließen und nicht
an das Fernsehgerät.
@
EXT 1, EXT 2
Anschluss
Video Audio (L/R) RGB Video + Audio (L/R)
Eingang Ausgang
EXT 1 O O O Nur TV- oder DTV-Ausgang verfügbar.
EXT 2 O O Ausgang frei wählbar.
- Ein- und Ausgänge für externe Geräte wie z. B. Videorecorder, DVD-Player, Spielekonsolen oder Video-Disc-Player.
#
KENSINGTON-SCHLOSS (modellabhängig)
- Das Kensington-Schloss (optional) dient zur Sicherung des Fernsehgeräts bei Verwendung an einem öffentlichen Ort.
-
Wenn Sie ein Schloss verwenden möchten, wenden Sie sich an den Händler, bei dem Sie das Fernsehgerät
erworben haben.
- Die Position des Kensington-Schlosses ist modellabhängig.
Deutsch - 6
Page 87

Deutsch - 7
Fernbedienung
Die Reichweite der Fernbedienung beträgt ca. 7 m.
1
Standby-Taste des
Fernsehgeräts.
2
TV-Modus direkt aufrufen.
3
Zifferntasten für direkte
Programmplatzeingabe
4
Taste zum Auswählen
von ein- /mehrstelligen
Programmplätzen
5
+: Lauter
–: Leiser
6
Verfügbare Signalquelle
auswählen
7
Anzeige des elektronischen
Programmführers (EPG).
8
Hiermit können Sie häug
verwendete Funktionen
mithilfe von Symbolen
schnell ausführen.
9
Anzeigen von Informationen
zur aktuellen Sendung
0
Farbtasten: Verwenden
Sie diese Tasten bei der
Arbeit mit der Kanalliste
und in WISELINK usw.
@
Drücken Sie diese Taste,
um den optionalen
Anzeige- und Audiomodus
für Sport, Kinolme und
Spiele auszuwählen.
#
Verwenden Sie diese
Tasten bei der Arbeit mit
DMA, WISELINK Pro und
Anynet+.
( : Mit dieser
Fernbedienung können
Sie die Aufnahmen von
Samsung-Rekordern mit
der Anynet+-Funktion
fernsteuern.)
$
Drücken Sie diese Taste,
um die Beleuchtung
für die Tasten auf
der Fernbedienung
zu aktivieren. Diese
Funktion ist in der Nacht
oder in einem dunklen
Zimmer hilfreich. (Wenn
Sie die Fernbedienung
mit angeschalteter
Hintergrundbeleuchtung
(ON/OFF ) liist An)
verwenden, verkürzt dies
die Lebensdauer der
Batterie.)
%
Vorheriger Kanal
^
Ton vorübergehend
ausschalten
&
P : Nächster Kanal
P
: Vorheriger Kanal
*
Bildschirm-Hauptmenü
anzeigen
(
Mit dieser Funktion können
Sie Fotound Musikdateien
von einem externen
Gerät anzeigen bzw.
wiedergeben.
)
Zurück zum vorherigen
Menü
a
Dient zum Steuern des
Cursors im Menü
b
Bildschirmmenü
ausblenden
c
Verwenden Sie dies, wenn
Sie ein DMA-Gerät von
Samsung (DMA = Digitaler
Medienadapter) über
eine HDMI-Schnittstelle
anschließen und in den
DMA-Modus wechseln.
(Die DMA-Taste ist
optional.) Weitere
Informationen zu den
Betriebsabläufen nden
Sie im Benutzerhandbuch
des DMA-Geräts. Diese
Schaltäche ist verfügbar,
wenn “Anynet (HDMICEC)” auf “Ein” (siehe
Seite 68)
d
Auswahl der Bildgröße.
e
Untertitel anzeigen.
f
Anzeige der “Senderliste”
auf dem Bildschirm.
Videotextfunktionen
2
Videotextanzeige
beenden.
6
Videotextmodus
auswählen. (LIST/FLOF)
7
Videotextseite speichern
8
Videotextgröße auswählen
9
Verborgenen Inhalt
einblenden.
0
Fastext-Thema auswählen
!
Alternativ wählen Sie
Videotext, Double oder Mix.
%
Untergeordnete
Videotextseite
&
P : Nächste
Vieotextseite.
P
*
)
b
: Vorherige
Videotextseite
Videotextindex
Videotextseite weiter
anzeigen (nicht
umblättern).
Videotext abbrechen.
➣
Die Leistungsfähigkeit der Fernbedienung kann durch starke Lichteinstrahlung beeinträchtigt werden.
Page 88

Batterien in die Fernbedienung einsetzen
1. Heben Sie die Abdeckung auf der Rückseite der Fernbedienung an, wie in der Abbildung
dargestellt.
2. Legen Sie zwei
Achten Sie darauf, dass die Pole der Batterien “+” und “–” wie im Batteriefach
➣
angezeigt ausgerichtet sind.
3. Schieben Sie die
Wenn die Fernbedienung für einen längeren Zeitraum nicht verwendet wird, nehmen
➣
Sie die Batterien heraus, und lagern Sie sie an einem kühlen, trockenen Ort.
Wenn Sie die Fernbedienung mit angeschalteter Hintergrundbeleuchtung
➣
(ON/OFF
Sollte die Fernbedienung nicht funktionieren, überprüfen Sie Folgendes:
➣
1. Ist das Fernsehgerät eingeschaltet?
2. Wurden Plus- und Minuspol der Batterien vertauscht?
3. Sind die Batterien leer?
4. Liegt ein Stromausfall vor oder ist das Netzkabel des Fernsehgeräts nicht eingesteckt?
5. Bendet sich eine Leuchtstoffröhre oder eine Neonsreklame in der Nähe?
AAA-Batterien ein.
Abdeckung wieder auf die Fernbedienung
ist An) verwenden, verkürzt dies die Lebensdauer der Batterie.
Ein- und Ausschalten
Das Netzkabel wird auf der Rückseite des Fernsehgeräts angeschlossen.
1. Schließen Sie das Netzkabel an eine geeignete Netzsteckdose an.
Am Gerät leuchtet die Standby-Anzeige auf.
➣
2. Drücken Sie auf der Fernbedienung die
Zum Einschalten des Fernsehgeräts können Sie auch die Taste POWER
➣
Fernbedienung drücken.
Der Sender, den Sie zuletzt gesehen haben, wird automatisch wieder aufgerufen.
➣
3.
Drücken Sie auf der Fernbedienung die Zifferntasten (0 ~ 9) oder eine der Programmwahltasten ( / ), oder drücken
Sie die Taste C/P. am Gerät.
Wenn Sie das Gerät zum ersten Mal einschalten, können Sie die Sprache auswählen, in der die Menüs angezeigt
➣
werden.
4.
Zum Ausschalten des Fernsehgeräts drücken Sie erneut die Taste POWER .
Taste .
oder die Taste TV/DTV auf der
Fernsehgerät in den Standby-Modus schalten
Zur Verringerung des Stromverbrauchs kann das Gerät in den Standby-Modus geschaltet werden. Der Standby-Modus ist
nützlich, wenn Sie das Gerät vorübergehend ausschalten möchten (z. B. während einer Mahlzeit).
1. Drücken Sie die
Der Bildschirm wird ausgeschaltet, und auf der Vorderseite des Fernsehgeräts leuchtet die rote Standby-Anzeige
➣
auf.
2.
Drücken Sie einfach erneut die Taste POWER , eine Zifferntaste (0-9) oder eine TV/DTV- oder ProgrammplatzWahltaste ( / ), um das Gerät wieder einzuschalten.
Der Standby-Modus ist nicht für längere Phasen der Abwesenheit gedacht (z. B. wenn Sie verreist sind). Ziehen
➣
Sie dann sicherheitshalber den Netzstecker und das Antennenkabel.
Taste POWER auf der Fernbedienung.
Deutsch - 8
Page 89

Deutsch - 9
Menüs anzeigen
1. Drücken Sie die Taste MENU bei angeschaltetem Gerät.
Das Hauptmenü wird auf dem Bildschirm angezeigt.
Links im Menü sind Symbole zu sehen für Bild, Ton, Kanal, Einstellungen,
Eingang, Anwendung.
2.
Wählen Sie mit den Tasten ▲ oder ▼ eines der Symbole aus.
Drücken Sie die Taste ENTER , um in das Untermenü des Symbols zu
wechseln.
3.
Zum Beenden drücken Sie die Taste EXIT.
Das Bildschirmmenü wird nach etwa einer Minute vom Bildschirm gelöscht.
➣
Bild
Modus
Hinter.Licht : 7
Kontrast : 95
Helligkeit : 45
Schärfe : 50
Farbe : 50
Farbton (G/R) : G50/R50
Detaileinstellungen
:
Standard
Verwenden der Taste TOOLS
Sie können die Taste TOOLS verwenden, um häug verwendete Funktionen schnell und einfach auszuwählen. Der Inhalt
des Menüs “Extras” hängt davon ab, welche externe Signalquelle Sie für die Anzeige verwenden.
1.
Drücken Sie die Taste TOOLS.
Das Menü “Extras” wird geöffnet.
2. Wählen Sie die Menüoptionen mit den
3.
Drücken Sie die Tasten ▲/▼/◄/►/ENTER , um die markierten Elemente
anzuzeigen, zu ändern oder zu verwenden. Ausführliche Beschreibungen der
einzelnen Funktionen nden Sie auf der jeweiligen Seite.
Anynet+ (HDMI-CEC): siehe Seite 68
•
Bildformat: siehe Seite 27
•
Bildmodus: siehe Seite 25
•
Tonmodus: siehe Seite 31
•
Sleep-Timer: siehe Seite 35
•
SRS TS XT: siehe Seite 31
•
Energiesparmod.: siehe Seite 42
•
Dual l ll: siehe Seite 33
•
PIP: siehe Seite 30
•
Autom. Einstellung: siehe Seite 47
•
Tasten ▲ oder ▼.
Extras
Anynet+ (HDMI-CEC)
Bildformat : Auto Breit
Bildmodus : Standard
Tonmodus : Benutzerd
Sleep-Timer : Aus
SRS TS XT : Aus
Energiesparmod. : Aus
Dual l ll : Mono
EingabeNavig.
e
Beenden
Plug & Play-Funktion
Wenn das Fernsehgerät zum ersten Mal eingeschaltet wird, werden automatisch die Grundeinstellungen vorgenommen.
Drücken Sie die Taste POWER auf der Fernbedienung.
1.
Die Meldung “Menüsprache, Shop-Demo, Sender und Uhrzeit werden
eingestellt.” wird angezeigt.
2.
Wenn Sie auf ENTER drücken, wird das Menü “Sprache des
Bildschirmmenüs wählen.” angezeigt. Drücken Sie die Taste ENTER .
Wählen Sie die gewünschte Sprache mit den Tasten ▲ oder ▼ aus. Drücken
3.
Sie die Taste ENTER , um Ihre Auswahl zu bestätigen.
Menüsprache, Shop-Demo, Sender und Uhrzeit werden
eingestellt.
Sprache des Bildschirmmenüs wählen.
Sprache : Deutsch ►
Plug & Play
OK
Eingabe
Plug & Play
Eingabe
Page 90

4. Wählen Sie durch Drücken der Tasten ◄ oder ► die Option “Shop Demo”
oder “Privatgebrauch”, und drücken Sie dann auf ENTER .
Wir empfehlen Ihnen, das Fernsehgerät im Modus “Privatgebrauch” zu
➣
verwenden, um das optimale Bild für den Privatgebrauch zu erzielen.
Der Modus “Shop Demo” ist nur geeignet, wenn das Gerät in einem
➣
Verkaufsbereich verwendet wird.
Wenn das Gerät versehentlich auf den Modus “Shop Demo” eingestellt
➣
ist, und Sie möchten wieder zurück zu “Privatgebrauch” (Standard)
wechseln, gehen Sie so vor: Drücken Sie die Lautstärketaste am
Fernsehgerät. Wenn das Menü Lautstärke angezeigt wird, halten Sie die
Taste MENU am Fernsehgerät 5 Sekunden lang gedrückt.
5.
Wählen Sie durch Drücken der Tasten ▲ oder ▼ die Signalquelle aus,
die gespeichert werden soll. Drücken Sie die Taste ENTER , um “Start”
auszuwählen. Weitere Informationen nden Sie auf den Seiten 11~13.
Digital und Analogue: “Digital” und “Analog” Kanäle.
➣
Digital: “Digital” Kanäle.
Analog: “Analog” Kanäle.
Die Kanalsuche wird automatisch gestartet und beendet.
➣
Zum Unterbrechen des Speichervorgangs zu einem beliebigen Zeitpunkt
➣
drücken Sie die Taste ENTER
➣
Wenn Sie alle verfügbaren Kanäle gespeichert haben, wird die Meldung
.
“Uhrmodus einstellen” angezeigt.
6.
Drücken Sie die Taste ENTER , um “Uhr-Modus” auszuwählen.
Wählen Sie durch Drücken der Tasten ▲ oder ▼ die Option “Manuell”, und
drücken Sie dann die Taste ENTER .
➣
Wenn Sie “Auto” wählen, wird die Meldung “Wir wünschen gute
Unterhaltung!” angezeigt.
Wenn Sie ein digitales Signal empfangen, wird die Zeit automatisch
eingestellt.
Drücken Sie die Taste ◄ oder ►, und wählen Sie “Tag”, “Monat”, “Jahr”,
7.
“Stunde” oder “Minute” aus. Drücken Sie die Taste ▲ oder ▼, und legen Sie
“Tag”, “Monat”, “Jahr”, “Stunde” oder “Minute” fest.
➣
Sie können “Tag”, “Monat”, “Jahr”, “Stunde” und “Minute” auch einstellen,
indem Sie die Zifferntasten auf der Fernbedienung drücken.
8. Die Meldung “Wir wünschen gute Unterhaltung!” wird angezeigt.
Drücken Sie abschließend die Taste ENTER .
Plug & Play
Wählen Sie ‘Privatgebrauch’, ween Sie diesen Fernseher
in einem Privathaushalt Verwenden.
Shop Demo
Sendertyp zum Speichern auswählen.
Digital und Analog
Digital
Analog
Sendertyp zum Speichern auswählen.
Kabel
Terrestrisch
Autom. Prog. Iäuft
Digitale Sender: 29
Analoge Sender: 0
Autom. Prog. ist abgeschlossen.
Digitale Sender : 45
Analoge Sender : 32
Uhrmodus einstellen
Uhr-Modus : Auto
Datum und Uhrzeit einstellen.
Tag
01
Stunde
00
Navig.
Wir wünschen gute Unterhaltung!
Plug & Play
Navig.
Plug & Play
Navig.
Plug & Play
Stopp
Plug & Play
OK
Plug & Play
Manuell
Auto
Navig.
Plug & Play
Monat
01
Minute
00
Einst.
Plug & Play
Privatgebrauch
Start
Start
Start
Eingabe
Start
Start
Eingabe
Sender 69
Eingabe
Eingabe
Eingabe
Jahr
20 08
Eingabe
EingabeNavig.
Überspr.
Überspr.
20%
Überspr.
Überspr.
Überspr.
Überspr.
So setzen Sie diese Funktion zurück:
1.
Drücken Sie die Taste MENU, um das Menü anzuzeigen.
Wählen Sie durch Drücken der Tasten ▲ oder ▼ die Option “Einstellungen”,
und drücken Sie dann die Taste ENTER .
2.
Drücken Sie die Taste ENTER erneut, um “Plug & Play” auszuwählen.
3.
Geben Sie nun Ihre vierstellige PIN ein. Der Standard-PIN-Code eines neuen
Fernsehgeräts lautet “0-0-0-0”.
➣
Informationen zum Ändern der PIN erhalten Sie auf Seite 38.
➣
Weitere Informationen zum Einstellen der Optionen nden Sie auf Seite
9~10.
➣
Die “Plug & Play”-Funktion gibt es nur im TV-Modus.
Deutsch - 10
OK
Einstellungen
►
Plug & Play
Sprache : Deutsch
Zeit
Kindersicherung
PIN ändern
Sicherungsstufe
Untertitel
V
ideotext-Sprache : ----
Menüsparache, Shop-Demo, Sender und Uhrzeit werden
eingestellt.
: Ein
Plug & Play
PIN eingeben
0~9
Zurück
Page 91

Deutsch - 11
Kanalsteuerung
Sender automatisch speichern
Sie können den verfügbaren Frequenzbereich nach Sendern durchsuchen. Die automatisch zugewiesenen Programmplätze
entsprechen unter Umständen nicht den gewünschten Programmplätzen. Sie können jedoch die Programmplätze manuell
sortieren und nicht gewünschte Sender wieder löschen.
1.
Drücken Sie die Taste MENU, um das Menü anzuzeigen.
Wählen Sie durch Drücken der Tasten ▲ oder ▼ die Option “Kanal”, und
drücken Sie dann die Taste ENTER .
2.
Wählen Sie durch Drücken der Tasten ▲ oder ▼ die Option “Autom.
speichern”, und drücken Sie dann die Taste ENTER .
Wenn ein Kanal mit der Funktion “Kindersicherung” gesperrt wurde, wird
➣
das Eingabefenster für die PIN geöffnet (Informationen hierzu nden Sie
auf Seite 37). Geben Sie nun Ihre vierstellige PIN ein.
3.
Wählen Sie durch Drücken der Tasten ▲ oder ▼ die Signalquelle aus, die
gespeichert werden soll.
Digital und Analogue: “Digital” und “Analog” Kanäle.
➣
Digital: “Digital” Kanäle.
Analog: “Analog” Kanäle.
Das Fernsehgerät durchsucht automatisch alle Kanäle mit aktiven
➣
Sendern und speichert sie im Speicher des Fernsehgeräts.
Kanal
Autom. speichern ►
Manuell speichern
Ausführlich
Übersicht
Standard
: Übersicht
Senderliste
Kanalmodus :
Feinabstimmung
Autom. speichern
Sendertyp zum Speichern auswählen.
Digital und Analog
Digital
Analog
Navig.
Eingabe
Hinzugef. Sender
Start
Start
Start
Zurück
Digital und Analog / Digital
4. Wählen Sie mit den Tasten ▲ oder ▼ die Option “Kabel” oder “Terrestrisch”.
Drücken Sie die Taste ENTER
5. Drücken Sie die
Taste ENTER , um “Start” auszuwählen.
.
- Kabel: Hiermit führen Sie einen Suchlauf für die Kabelkanäle durch.
-
Terrestrisch: Hiermit führen Sie einen Suchlauf für die terrestrischen
Kanäle durch.
Dieses Gerät kann Kabelkanäle und terrestrische Kanäle nicht gleichzeitig
➣
durchsuchen.
Anschließend wird die Anzahl der durchsuchten Sender angezeigt.
➣
Die vorhandene Liste der bevorzugten Kanäle wird nicht gelöscht, wenn
➣
die Kanalliste aktualisiert wird.
Je nach Sender sind Kabelkanäle möglicherweise nicht verfügbar.
➣
Analog
4.
Drücken Sie die Taste ENTER , um “Start” auszuwählen.
➣
Wenn Sie “Autom. speichern” anhalten möchten, drücken Sie auf
ENTER
.
Die Meldung “Automatische Senderspeicherung beenden?” wird
angezeigt.
Drücken Sie die Taste ◄ oder ►, um “Ja” auszuwählen, und drücken Sie
dann die Taste ENTER .
Autom. speichern
Sendertyp zum Speichern auswählen.
Kabel
Terrestrisch
Navig.
Autom. speichern
Autom. Prog. Iäuft
172MHz
Analoge Sender: 0
Stopp
Eingabe
Eingabe
Start
Start
Zurück
20%
Zurück
S3
Page 92

Sender manuell speichern
Sie können Fernsehsender (einschließlich Kabelsender) speichern. Bei der manuellen Senderspeicherung sind folgende
Optionen verfügbar:
Gefundene Sender speichern.
•
Die Programmnummer der einzelnen Sender, die Sie festlegen möchten.
•
1.
Drücken Sie die Taste MENU, um das Menü anzuzeigen.
Wählen Sie durch Drücken der Tasten ▲ oder ▼ die Option “Kanal”, und
drücken Sie dann die Taste ENTER .
2.
Wählen Sie durch Drücken der Tasten ▲ oder ▼ die Option “Manuell
speichern”, und drücken Sie dann die Taste ENTER .
Digitaler Sender
3.
Wählen Sie durch Drücken der Tasten ▲ oder ▼ die Option “Digitaler
Sender”, und drücken Sie dann die Taste ENTER .
➣
Wenn ein Kanal mit der Funktion “Kindersicherung” gesperrt wurde, wird
das Eingabefenster für die PIN geöffnet (Informationen hierzu nden Sie
auf Seite 37). Geben Sie nun Ihre vierstellige PIN ein.
4.
Wählen Sie durch Drücken der Tasten ▲ oder ▼ die Option “Kabel” oder
“Terrestrisch”, und drücken Sie dann die Taste ENTER .
Bei Auswahl von “Kabel”
- Senderfrequenz: Hiermit zeigen Sie die Frequenz des Kanals an.
- Modulation: Hiermit zeigen Sie die verfügbaren Modulationswerte an.
- Symbol Rate: Hiermit zeigen Sie die verfügbaren Symbolraten an.
Drücken Sie zum Starten des Suchlaufs für Digitalsender die Taste ENTER .
Bei Auswahl von “Terrestrisch”
- Kanal: Der Kanal wird angezeigt.
- Senderfrequenz: Die in der Kanalgruppe zur Verfügung stehenden
Frequenzen werden angezeigt.
- Bandbreite: Es ist die Bandbreite 8 MHz verfügbar.
Drücken Sie zum Starten des Suchlaufs für Digitalsender die Taste ENTER .
5. Nach Abschluss des Suchlaufs werden die Kanäle in der Kanalliste
aktualisiert.
6.
Zum Beenden drücken Sie die Taste EXIT.
Autom. speichern
Kanal
Manuell speichern ►
Ausführlich
Übersicht
Standard
: Übersicht
Senderliste
Kanalmodus :
Feinabstimmung
Signalinformation
Autom. speichern
Kanal
Manuellspeichern ►
Ausführlich
Übersicht
Standard
: Übersicht
Senderliste
Kanalmodus :
Feinabstimmung
Signalinformation
Autom. speichern
Sendertyp zum Speichern auswählen.
Kabel
Terrestrisch
Navig.
Manuell speichern
31
Modulation
QAM 16
Navig.
Manuell speichern
Senderfrequenz
554000 KHz
Senderfrequenz
17 70 00kHz
Kanal
Hinzugef. Sender
Digitaler Sender
Analog Sender
Hinzugef. Sender
Start
Start
Eingabe
Symbolrate
4000 kS/s
ZurückSuchlauf
Bandbreite
8MHz
Return
Deutsch - 12
Navig.
ZurückSuchlauf
Page 93

Deutsch - 13
Analog Sender
Wählen Sie durch Drücken der Tasten ▲ oder ▼ die Option “Analog
3.
Sender”, und drücken Sie dann die Taste ENTER .
Wenn ein Kanal mit der Funktion “Kindersicherung” gesperrt wurde, wird
➣
das Eingabefenster für die PIN geöffnet (Informationen hierzu nden Sie
auf Seite 37).
4. Wählen Sie mit den
Tasten ◄ oder ► die gewünschte Option aus.
Drücken Sie zum Ändern der Einstellung die Taste ▲ oder ▼.
5. Zum Beenden drücken Sie die
Programm (der Programmplatz, der dem Kanal zugewiesen werden soll)
Taste EXIT.
Drücken Sie die Tasten ▲ oder ▼, um die gewünschte Nummer zu wählen.
Die Kanalnummer können Sie auch direkt durch Drücken der Zifferntasten
➣
(0~9) auswählen.
Fernsehnorm:
Auto/PAL/SECAM/NTSC4.43
Wählen Sie mit den Tasten ▲ oder ▼ die gewünschte Farbnorm aus.
Tonsystem: BG/DK/I/L
Wählen Sie mit den Tasten ▲ oder ▼ die gewünschte Farbnorm aus.
Kanal (Wenn Ihnen die Nummer des zu speichernden Senders bekannt ist)
Wählen Sie mit den Tasten ▲ oder ▼ die Option C (Terrestrischer Kanal)
oder S (Kabelkanal) aus.
Drücken Sie zuerst die Taste ► und dann die Tasten ▲ oder ▼, um die
gewünschte Nummer auszuwählen.
Die Kanalnummer können Sie auch direkt durch Drücken der Zifferntasten
➣
(0~9) auswählen.
Falls kein oder nur schlechter Ton zu hören sein sollte, wählen Sie einen
➣
anderen Audiostandard aus.
Autom. speichern
Kanal
Manuellspeichern ►
Ausführlich
Übersicht
Standard
: Übersicht
Senderliste
Kanalmodus :
Feinabstimmung
Signalinformation
Manuell speichern
Programm
Kanal
C
FernsehnormBGTonsystem
1
Suchlauf?Speichern
--
62 MHz
Navig.
Au to
Digitaler Sender
Analog Sender
Hinzugef. Sender
Einst.
Zurück
Suchlauf (Wenn Ihnen die Kanalnummern nicht bekannt sind)
Drücken Sie zum Starten des Suchlaufs die Taste ▲ oder ▼. Der Tuner
durchsucht den Frequenzbereich, bis der erste Sender bzw. der ausgewählte
Sender empfangen wird.
Speichern (zum Speichern des Kanals und des zugehörigen
Programmplatzes)
Drücken Sie die Taste ENTER
Kanalmodus
➣
P (Programm-Modus): Nach Abschluss der Einstellungen sind den Sendern
-
, um OK zu wählen.
Ihrer Region Plätze mit den Nummern von P00 bis P99 zugewiesen
worden. In diesem Modus können Sie Sender durch Eingabe des
Programmplatzes auswählen.
-
C (Antennenempfangsmodus): In diesem Modus können Sie Kanäle durch
Eingabe der Nummer anwählen, die jedem Antennensender zugeordnet ist.
-
S (Kabelkanalmodus): In diesem Modus können Sie Sender durch Eingabe
der Nummer anwählen, die jedem Kabelsender zugeordnet ist.
Page 94

EPG-Informationen (Elektronischer Programmführer) anzeigen
Die Informationen des elektronischen Programmführers werden von den Sendern zur Verfügung gestellt. Es kann sein,
dass Programmeinträge leer oder veraltet sind. Dies ist auf die für einen bestimmten Kanal übertragenen Informationen
zurückzuführen. Die Anzeige wird dynamisch aktualisiert, sobald neue Informationen verfügbar sind.
1.
Drücken Sie die Taste MENU, um das Menü anzuzeigen.
2.
Wählen Sie durch Drücken der Tasten ▲ oder ▼ die Option “Kanal”, und
drücken Sie dann die Taste ENTER .
3.
Wählen Sie mit den Tasten ▲ oder ▼ eine der Optionen “Ausführlich” oder
“Übersicht”, und drücken Sie dann die Taste ENTER .
Übersicht
Die Informationen für die einzelnen Programme werden im Fenster für den
Mini-Programmführer in chronologischer Reihenfolge des Programmstarts
zeilenweise ab dem aktuell laufenden Programm angezeigt.
Ausführlich
Hier werden die Programminformationen in einem Zeitplan mit einer
Unterteilung von jeweils 1 Stunde angezeigt. Es wird ein Zeitfenster von 2
Stunden mit Programminformationen angezeigt. Dieses Fenster kann jedoch
in der Zeit nach vorne oder nach hinten verschoben werden.
Sie möchten... Dann...
Programm aus der Liste des
Programmführers anzeigen
Wählen Sie mit den Tasten ▲, ▼, ◄, ►
das Programm aus.
Programmführer beenden Drücken Sie die blaue Taste.
Sobald Sie ein Programm gewählt haben, wird es zusammen mit
➣
einem Uhr-Symbol angezeigt. Wenn Sie erneut ENTER
gedrückt haben, drücken Sie auf ◄ oder ►, um die Option
“Programmierung abbrechen” zu wählen. Danach wird die
Programmwahl aufgehoben und das Uhr-Symbol wird entfernt.
Programminformationen
anzeigen
Wählen Sie mit den Tasten ▲, ▼, ◄, ►
•
das gewünschte Programm aus.
Drücken Sie die Taste INFO, wenn das
•
Programm Ihrer Wahl markiert ist.
Der Programmtitel wird oben in der Mitte
•
des Bildschirms angezeigt.
Klicken Sie auf INFO, um detailliertere Informationen zu erhalten.
➣
Zu diesen Informationen gehören: Kanalnummer, Programmdauer,
Statusleiste, Kindersicherungsstufe, Bildqualität (HD/SD), Tonmodus,
Untertitel oder Teletext, Sprache für Untertitel oder Teletext sowie
Kurzzusammenfassung des markierten Programms. “...” wird
angezeigt, wenn die Informationen zu umfangreich sind.
Schalten Sie zwischen
Drücken Sie wiederholt die rote Taste.
“Übersicht” und “Ausführlich”
Im ausführlichen
Programmführer
Schnell zurückblättern
•
Drücken Sie mehrmals die grüne Taste.
•
(24 Stunden).
Schnell weiterblättern
•
Drücken Sie mehrmals die gelbe Taste.
•
(24 Stunden).
Im kurzen Programmführer
Schnell zurückblättern.
•
Schnell weiterblättern.
•
Sie können das Programmführermenü auch durch Drücken der Taste GUIDE
O
Drücken Sie die gelbe Taste.
•
Drücken Sie die grüne Taste.
•
aufrufen.
(Weitere Informationen zum Kongurieren des “Standard” nden Sie bei den
Beschreibungen auf Seite 15.)
Autom. speichern
Manuell speichern
Kanal
Ausführlich
Übersicht
Standard : Übersicht
Senderliste
: Hinzugef. Sender
Kanalmodus
Feinabstimmung
Signalinformation
Ausführlich
50 f tn
51 ITV Play
52 Kerrang!
53 Kiss
54 oneword
55 Smash Hits!
▼
Ansehen
Kanal
Übersicht DTV Cable 53 f tn
2:00
2:30
▼
5:00
Ansehen
DTV Cable 900 f tn 2:10 Tue 1 Jun
Freshmen On Campus
2:00 - 2:30
Keine detaillierten Information.
Heute 2:00 - 3:00 3:00 - 4:00
Freshmen O..
Street Hypn..
Mint Extra
Loaded
Fresh 40 with Dynamite MC
The Distillery
Smash Hits! Sunday
Information
Manuell speichern
Ausführlich
Übersicht
Standard : Übersicht
Senderliste
Kanalmodus
Feinabstimmung
Signalinformation
Information
Übersicht +24 Std. Beenden
: Hinzugef. Sender
Freshmen On Campus
Street Hypnosis
Booze Britain
Ausführlich Nächste Seite Beenden
No Information
No Information
Kisstory
No Information
Deutsch - 14
Page 95

Deutsch - 15
Einstellen des Standardführers
Mit der Taste GUIDE auf der Fernbedienung können Sie einstellen, ob der “Übersicht” oder der “Ausführlich” angezeigt
werden soll.
1.
Drücken Sie die Taste MENU, um das Menü anzuzeigen.
Wählen Sie durch Drücken der Tasten ▲ oder ▼ die Option “Kanal”, und
drücken Sie dann die Taste ENTER .
2.
Wählen Sie durch Drücken der Tasten ▲ oder ▼ die Option “Standard”, und
drücken Sie dann die Taste ENTER .
Ausführlich
Übersicht
Kanal
Standard : Übersicht ►
Senderliste
Kanalmodus : Hinzugef. Sender
Feinabstimmung
Signalinformation
3. Wählen Sie mit den Tasten ▲ oder ▼ eine der Optionen “Übersicht” oder
“Ausführlich”, und drücken Sie dann die Taste ENTER .
4. Zum Beenden drücken Sie die
Diese Optionen können Sie auch durch Drücken der Taste GUIDE auf der
O
Taste EXIT.
Fernbedienung aufrufen.
Ausführlich
Übersicht
Kanal
Standard :Übersicht ►
Senderliste
Kanalmodus : Hinzugef. Sender
Feinabstimmung
Signalinformation
Übersicht
Ausführlich
Page 96
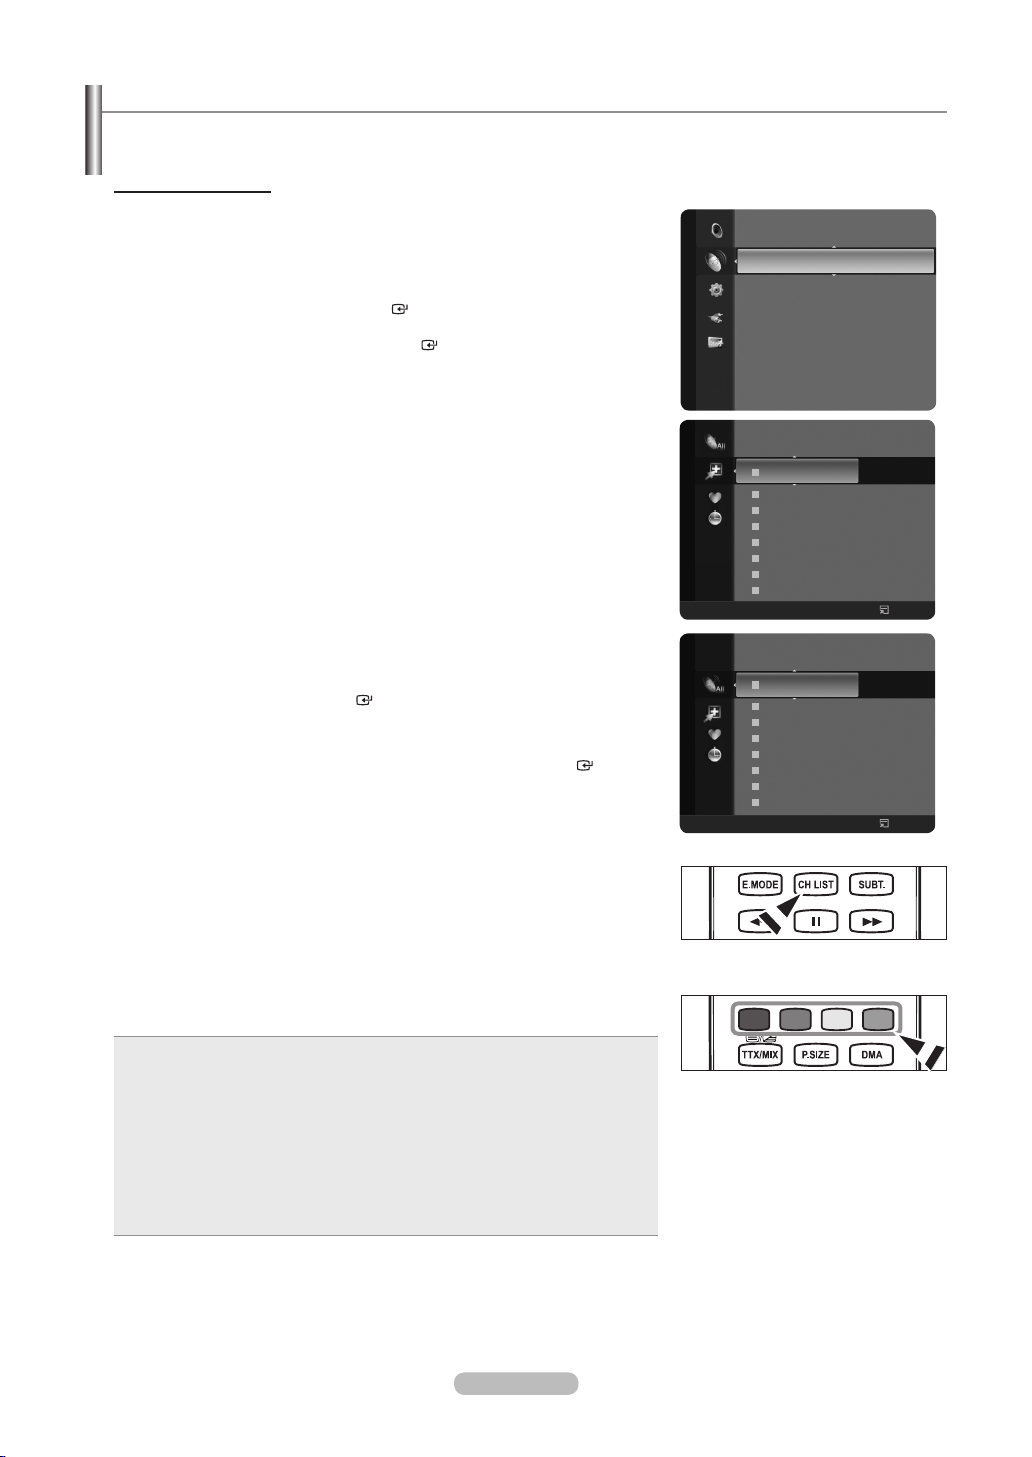
Verwalten von Kanälen
Mit diesem Menü können Sie Favoriten hinzufügen, löschen oder einstellen und den digitalen Programmführer für
Digitalsendungen verwenden.
Anzeigen aller Kanäle
Hiermit zeigen Sie alle verfügbaren Kanäle an.
Um die Funktion für Kanallisten zu verwenden, müssen Sie zuerst
“Autom. speichern” ausführen.
Drücken Sie die Taste MENU.
1.
Wählen Sie durch Drücken der Tasten ▲ oder ▼ die Option “Kanal”, und
drücken Sie dann die Taste ENTER .
Wählen Sie durch Drücken der Tasten ▲ oder ▼ die Option “Senderliste”,
und drücken Sie dann die Taste ENTER .
2. Drücken Sie die
Wählen Sie mit den Tasten ▲ oder ▼ die Option “Alle Sender” aus.
3.
Hiermit zeigen Sie alle verfügbaren Kanäle an.
➣
Drücken Sie die
Drücken Sie die Tasten ▲ oder ▼, um den Kanal auszuwählen, der
4.
Taste ◄, um “Hinzugefügte Sender” auszuwählen.
Taste ENTER
.
angezeigt werden soll, und drücken Sie dann die Taste ENTER .
Sie können den gewählten Kanal ansehen.
Hinzugefügte Sender
Alle Sender
Übersicht
Standard : Übersicht
Kanal
Senderliste
Kanalmodus : Hinzugef. Sender
Feinabstimmung
Signalinformation
57 Vida006b
58 VIDEOTIME B
A
1 C --
A
2 C
--
A 3 ♥ C
--
A 4 C
--
A 5 C
--
A 6 C
--
A 7 C
--
A 8 C
Alle
Sendertyp Zoom Wählen
Alle
Sendertyp Zoom Wählen
--
57 Vida006b
58 VIDEOTIME B
A
1 C --
A
2 C
--
A 3 ♥ C
--
A 4 C
--
A 5 C
--
A 6 C
--
A 7 C
--
A 8 C
--
Option
Option
Sie öffnen die Kanalliste durch Drücken der Taste CH LIST auf der
O
Fernbedienung.
Verwenden der Farbtasten auf der Fernbedienung in Verbindung mit der
Kanalliste.
Rot (Sendertyp): Schalten Sie zwischen “TV”, “Radio”, “Daten / And.” und
•
“Alle” um.
Grün (Zoom): Hiermit vergrößern oder verkleinern Sie die Kanalnummer.
•
Gelb (Wählen): Hiermit wählen Sie mehrere Kanallisten aus.
•
TOOLS (Option): Hiermit zeigen Sie die Menüs “Löschen” (oder
•
“Hinzufügen”), “Zu Favoriten hinzufügen” (oder “Aus Favoriten löschen”),
“Sperren”, “Timer-Wiedergabe”, “Sendernamen bearbeiten”, “Programmplatz
bearbeiten”, “Sortieren”, “Alle wählen”, “Alle abwählen” oder “Autom.
speichern” an. (Der Inhalt des Menüs Optionen hängt von der jeweiligen
Situation ab.)
Wenn der Kanal in grauer Farbe dargestellt wird, wurde er gelöscht.
➣
Das Menü “Hinzufügen” wird nur für gelöschte Kanäle angezeigt.
Wenn ein Kanal mit dem Symbol “♥” gekennzeichnet ist, so wurde er als Favorit eingestellt.
➣
Der Befehl “DeAus Favoriten löschen” erscheint nur für Kanäle mit dem Symbol “♥”.
Deutsch - 16
Page 97

Deutsch - 17
Löschen und Hinzufügen von Kanälen
Sie können Kanäle löschen oder hinzufügen, damit nur die gewünschten Kanäle
angezeigt werden.
1.
Drücken Sie die Taste MENU.
Wählen Sie durch Drücken der Tasten ▲ oder ▼ die Option “Kanal”, und
drücken Sie dann die Taste ENTER . Wählen Sie durch Drücken der Tasten
▲ oder ▼ die Option “Senderliste”, und drücken Sie dann die Taste ENTER .
2. Drücken Sie die Taste ◄, um “Hinzugefügte Sender” auszuwählen.
3.
Wählen Sie mit den Tasten ▲ oder ▼ die Option “Alle Sender”.
Hiermit zeigen Sie alle verfügbaren Kanäle an.
➣
Drücken Sie die
4.
Drücken Sie die Taste ▲ oder ▼, um einen Kanal zum Löschen
Taste ENTER
.
auszuwählen, und drücken Sie dann die Taste TOOLS.
5. Drücken Sie die
Alle gelöschten Kanäle werden im Menü “Alle Sender” angezeigt.
➣
6. Zum Beenden drücken Sie die
Sie können einen Kanal aus dem Menü “Hinzugefügte Sender” in gleicher
➣
Taste ENTER , um “Löschen” auszuwählen.
Taste EXIT.
Weise löschen.
Um einen Kanal wieder zur Liste der hinzugefügten Kanäle hinzuzufügen
➣
(wiederzuherstellen), führen Sie die Schritte 1 bis 3 aus. Drücken Sie
danach die Taste ▲ oder ▼, um den Kanal auszuwählen, den Sie
hinzufügen möchten, und drücken Sie dann die Taste TOOLS. Mit der Taste
ENTER
O
Sie öffnen die Kanalliste durch Drücken der Taste CH LIST auf der
wählen Sie die Option Add.
Fernbedienung.
Bevorzugte Kanäle einstellen
Sie können Kanäle, die Sie häug sehen, als Favorit festlegen.
1.
Drücken Sie die Taste MENU.
Wählen Sie durch Drücken der Tasten ▲ oder ▼ die Option “Kanal”, und
drücken Sie dann die Taste ENTER . Wählen Sie durch Drücken der Tasten
▲ oder ▼ die Option “Senderliste”, und drücken Sie dann die Taste ENTER .
2. Drücken Sie die Taste ◄, um “Hinzugefügte Sender” auszuwählen.
3.
Wählen Sie mit den Tasten ▲ oder ▼ die Option “Alle Sender”.
Hiermit zeigen Sie alle verfügbaren Kanäle an.
➣
Drücken Sie die
4.
Wählen Sie den Kanal, den Sie zu den Favoriten hinzufügen möchten, mit
Taste ENTER
.
der Taste ▲ oder ▼ aus.
Hinzufügen mehrere Kanäle zu den Favoriten
➣
Wählen Sie den gewünschten Kanal mit den Tasten ▲ oder ▼ aus der
Kanalliste aus. Drücken Sie dann die gelbe Taste. Wiederholen Sie den
obigen Vorgang, um mehrere Kanäle auszuwählen. Links neben dem
Namen des gewählten Kanals wird das Symbol
5. Drücken Sie die
6.
Wählen Sie durch Drücken der Tasten ▲ oder ▼ die Option “Zu Favoriten
Taste TOOLS.
angezeigt.
hinzufügen”, und drücken Sie dann die Taste ENTER . Das Symbol “♥”
wird angezeigt, und der Kanal wird als Favorit festgelegt.
7.
Um die Auswahl eines Favoriten aufzuheben, drücken Sie die Taste
TOOLS, während ein Favoritenkanal ausgewählt ist.
Wählen Sie durch Drücken der Tasten ▲ oder ▼ die Option “Aus Favoriten
löschen”, und drücken Sie dann die Taste ENTER
.
Der Kanal wird aus den “Favorit” gelöscht, und das Symbol “♥”
verschwindet ebenfalls.
Zum Beenden drücken Sie die
Sie können einen Kanal zu den Favoriten hinzufügen oder daraus löschen,
➣
Taste EXIT.
in dem Sie im Menü “Hinzugefügte Sender” in gleicher Weise vorgehen.
Alle Favoritenkanäle werden im Menü “Favorit” angezeigt.
➣
Übersicht
Standard : Übersicht
Kanal
Senderliste
Kanalmodus : Hinzugef. Sender
Feinabstimmung
Signalinformation
57 Vida006b
58 VIDEOTIME B
Alle Sender
A
1 C --
A
2 C
--
A 3 C
--
A 4 C
--
A 5 C
--
A 6 C
--
A 7 C
--
A 8 C
--
Alle
Sendertyp Zoom Wählen
Übersicht
Standard : Übersicht
Kanal
Senderliste
Kanalmodus : Hinzugef. Sender
Feinabstimmung
Signalinformation
57 Vida006b
Alle Sender
58 VIDEOTIME B
A
1 C --
A
2 C
--
A 3 ♥ C
--
A 4 C
--
A 5 C
--
A 6 C
--
A 7 C
--
A 8 C
Alle
Sendertyp Zoom Wählen
--
Löschen
Zu Favoriten hinzufügen
Sperren
Timer-Wiedergabe
Sendernamen bearbeiten
Sortieren
▼
Option
Löschen
Zu Favoriten hinzufügen
Sperren
Timer-Wiedergabe
Sendernamen bearbeiten
Sortieren
▼
Option
Sie öffnen die Kanalliste durch Drücken der Taste CH LIST auf der
O
Fernbedienung.
Page 98

Sperren und Freigeben von Kanälen
Diese Funktion ist nur verfügbar, wenn die “Kindersicherung” aktiviert ist “Ein”.
(siehe Seite 37)
1.
Drücken Sie die Taste MENU.
Wählen Sie durch Drücken der Tasten ▲ oder ▼ die Option “Kanal”, und
drücken Sie dann die Taste ENTER .
Wählen Sie durch Drücken der Tasten ▲ oder ▼ die Option “Senderliste”,
und drücken Sie dann die Taste ENTER .
2. Drücken Sie die
3.
Wählen Sie mit den Tasten ▲ oder ▼ die Option “Alle Sender”.
Hiermit zeigen Sie alle verfügbaren Kanäle an.
➣
Drücken Sie die
Taste ◄, um “Hinzugefügte Sender” auszuwählen.
Taste ENTER
.
Kanäle sperren
4.
Drücken Sie die Taste ▲ oder ▼, um die zu sperrenden Kanäle
auszuwählen, und drücken Sie dann die Taste TOOLS.
5.
Wählen Sie durch Drücken der Tasten ▲ oder ▼ die Option “Sperren”, und
drücken Sie dann die Taste ENTER .
6.
Geben Sie nun Ihre vierstellige PIN ein.
➣
Das Symbol “\” wird angezeigt, und der Kanal wird gesperrt.
➣
Der Standard-PIN-Code eines neuen Fernsehgeräts lautet “0-0-0-0”.
➣
Informationen zum Ändern der PIN erhalten Sie auf Seite 38.
7.
Zum Beenden drücken Sie die Taste EXIT.
Übersicht
Standard : Übersicht
Kanal
Senderliste
Kanalmodus : Hinzugef. Sender
Feinabstimmung
Signalinformation
57 Vida006b
Alle Sender
58 VIDEOTIME B
A
1 C --
A
2 C
A 3 C
A 4 C
A 5 C
A 6 C
A 7 C
A 8 C
Alle
Sendertyp Zoom Wählen
Löschen
Zu Favoriten hinzufügen
--
Sperren
--
Timer-Wiedergabe
--
Sendernamen bearbeiten
--
Sortieren
--
--
--
▼
Option
Kanäle freigeben
4.
Drücken Sie die Taste ▲ oder ▼, um die gesperrten Kanäle auszuwählen,
die Sie wieder freigeben möchten, und drücken Sie dann die Taste TOOLS.
5.
Wählen Sie durch Drücken der Tasten ▲ oder ▼ die Option “Freigabe”,
und drücken Sie dann die Taste ENTER .
6.
Geben Sie nun Ihre vierstellige PIN ein.
➣
Der Kanal wird freigegeben und das Symbol “\” verschwindet ebenfalls.
➣
Der Standard-PIN-Code eines neuen Fernsehgeräts lautet “0-0-0-0”.
➣
Informationen zum Ändern der PIN erhalten Sie auf Seite 38.
7.
Zum Beenden drücken Sie die Taste EXIT.
57 Vida006b
Alle Sender
58 VIDEOTIME B
A
1 C --
A
2 C
A 3 C
A 4 C
A 5 C
A 6 C
A 7 C
A 8 C
Alle
Sendertyp Zoom Wählen
Löschen
Zu Favoriten hinzufügen
--
Freigabe
--
Timer-Wiedergabe
--
Sendernamen bearbeiten
--
Sortieren
--
--
--
▼
Option
Deutsch - 18
Page 99
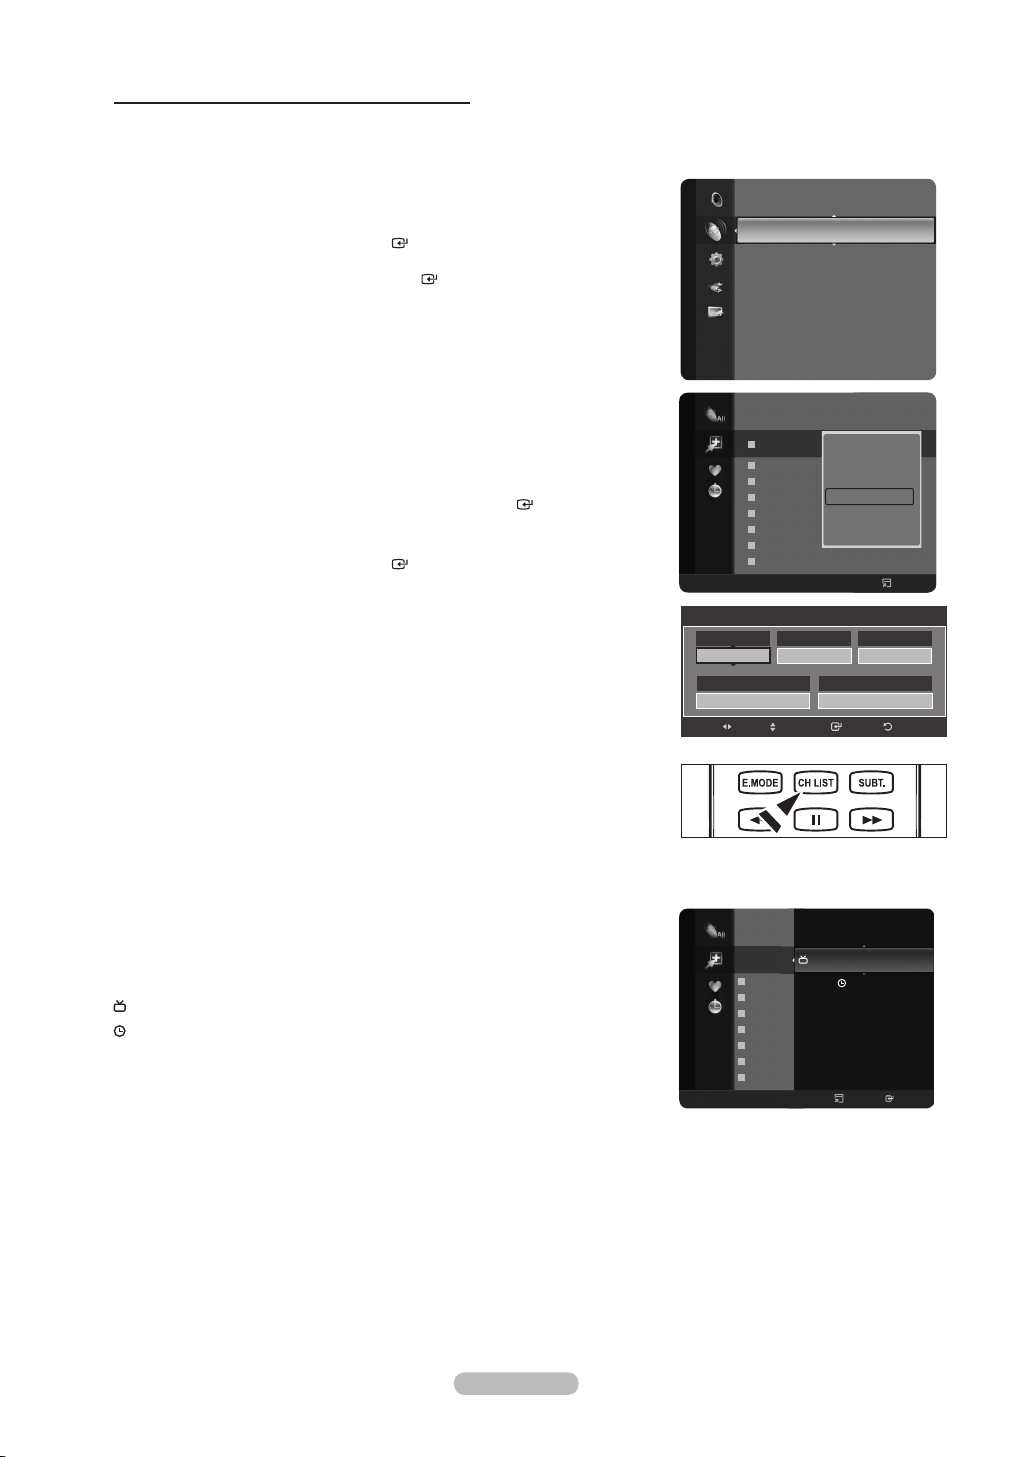
Deutsch - 19
Vormerken eines Programms (Timer-Wiedergabe)
Wenn Sie ein Programm zum Anschauen vorgemerkt haben, wechselt das Fernsehgerät automatisch zum vorgemerkten
Kanal in der Kanalliste, auch wenn Sie gerade einen anderen Kanal anschauen. Um ein Programm vorzumerken, müssen
Sie zuerst die Uhrzeit einstellen. Siehe Seite 34~35.
Übersicht
Standard : Übersicht
Drücken Sie die Taste MENU.
1.
Wählen Sie durch Drücken der Tasten ▲ oder ▼ die Option “Kanal”, und
drücken Sie dann die Taste ENTER .
Wählen Sie durch Drücken der Tasten ▲ oder ▼ die Option “Senderliste”,
und drücken Sie dann die Taste ENTER .
Drücken Sie die Taste ▲ oder ▼, um einen Kanal auszuwählen, und drücken
2.
Sie dann die Taste TOOLS.
Wählen Sie durch Drücken der Tasten ▲ oder ▼ die Option “Timer-
3.
Wiedergabe”, und drücken Sie dann die Taste ENTER . Das Fenster zum
Vormerken eines Programms (Timer-Wiedergabe) wird geöffnet.
4.
Drücken Sie die Tasten ▲/▼/◄/►, um ein Programm vorzumerken, und
drücken Sie dann die Taste ENTER . Das Vormerken des Programms
wurde abgeschlossen.
Zum Beenden drücken Sie die Taste EXIT.
In gleicher Weise können Sie ein Programm in den Menüs “Alle Sender” oder
➣
“Favorit” vormerken.
➣
Weitere Informationen zum Bestätigen einer Vormerkung nden Sie auf Seite 20.
Sie können nur gespeicherte Kanäle vormerken.
➣
Sie können Kanal, Tag, Monat, Jahr, Stunde und Minute auch direkt über die
Zifferntasten auf der Fernbedienung einstellen.
Kanal
Senderliste
Kanalmodus : Hinzugef. Sender
Feinabstimmung
Signalinformation
57 Vida006b
Hinzugefügte Sender
58 VIDEOTIME B
A
1 C --
A
2 C
A 3 ♥ C
A 4 C
A 5 C
A 6 C
A 7 C
A 8 C
Alle
Sendertyp Zoom Wählen
Timer-Wiedergabe
TV-Empfang
ATV
Datum
01 - 01 - 20 08
Navig.
--
--
--
--
--
--
--
Sender
80 0
Einst.
Löschen
Zu Favoriten hinzufügen
Sperren
Timer-Wiedergabe
Sendernamen bearbeiten
Sortieren
▼
Option
Wiederholmodus
Ei nm al
Startzeit
10 :0 0
ZurückEingabe
Sie öffnen die Kanalliste durch Drücken der Taste CH LIST auf der
O
Fernbedienung.
Digitaler Programmführer und Vormerken von Sendungen
Wenn Sie einen digitalen Kanal gewählt haben und die Taste ► drücken,
wird der Programmführer für diesen Kanal angezeigt. Gehen Sie in der oben
beschriebenen Weise vor, wenn Sie ein Programm vormerken möchten.
: Ein Programm, das gerade gesendet wird.
: Ein vorgemerktes Programm
824
Hinzugefügte Sender
825
908
A
2 C
A
3 ♥ C
A
4 C
A
5 C
A
6 C
A
7 C
A
8 C
Alle
Sendertyp Zoom
1/1/2008
1:59 LA ROSE DES ....
--
2:59 WS MUSIC
--
3:21
--
--
--
--
--
Gralness de stars
Option Ansehen
Page 100

Bestätigen einer Vormerkung von Sendungen
Mit dieser Menüoption können Sie eine Vormerkung anzeigen, ändern oder
löschen.
1.
Drücken Sie die Taste MENU.
Wählen Sie durch Drücken der Tasten ▲ oder ▼ die Option “Kanal”, und
drücken Sie dann die Taste ENTER . Wählen Sie durch Drücken der
Tasten ▲ oder ▼ die Option “Senderliste”, und drücken Sie dann die Taste
ENTER .
2. Drücken Sie die
Wählen Sie mit den Tasten ▲ oder ▼ die Option “Programmiert”.
3.
Hiermit zeigen Sie alle vorgemerkten Programme an.
➣
Drücken Sie die
Taste ◄, um “Hinzugefügte Sender” auszuwählen.
Taste ENTER
.
Übersicht
Standard : Übersicht
Kanal
Senderliste
Kanalmodus : Hinzugef. Sender
Feinabstimmung
Signalinformation
Programmiert
1/1/2008
13:59 5 TV1 Quincy, M.E
18:59 2 TV3 The Equalizer
20:59 2 TV3 McMillan & Wife
21:59 2 TV3 M.Spillane’s mike Hammer
Ändern einer Vormerkung von Sendungen
4.
Wählen Sie mit den Tasten ▲ oder ▼ die Vormerkung aus, die Sie ändern
möchten, und drücken Sie dann die Taste TOOLS.
5. Drücken Sie die
6.
Drücken Sie die Tasten ▲/▼/◄/►, um die eingestellte Vormerkung zu
Taste ENTER , um “Info ändern” auszuwählen.
ändern, und drücken Sie dann die Taste ENTER . Die Änderung der
Vormerkung wird übernommen.
Stornieren einer Vormerkung
4.
Wählen Sie mit den Tasten ▲ oder ▼ die Vormerkung aus, die Sie
stornieren möchten, und drücken Sie dann die Taste TOOLS.
5.
Wählen Sie durch Drücken der Tasten ▲ oder ▼ die Option
“Programmierung abbrechen”, und drücken Sie dann die Taste ENTER .
6.
Wählen Sie durch Drücken der Tasten ◄ oder ► die Option “OK”, und
drücken Sie dann die Taste ENTER .
Die Vormerkung der Sendung wurde storniert.
Zum Beenden drücken Sie die Taste EXIT.
Programmierte Option
Info ändern: Wählen Sie diese Option, um eine Vormerkung zu ändern.
•
Programmierung abbrechen: Wählen Sie diese Option, um eine
•
Vormerkung zu stornieren.
Information: Wählen Sie diese Option, um eine Vormerkung
•
anzuzeigen.
Alle wählen: Wählen Sie alle vorgemerkten Programme.
•
Alle
Sendertyp Zoom Wählen
Programmiert
1/1/2008
13:59 5 TV1 Quincy, M.E
18:59 2 TV3 The Equalizer
20:59 2 TV3 McMillan & Wife
21:59 2 TV3 M.Spillane’s mike Hammer
Alle
Sendertyp Zoom Wählen
Option Information
Info ändern
Programmierung abbrechen
Information
Alle wählen
Option Information
Sie öffnen die Kanalliste durch Drücken der Taste CH LIST auf der
O
Fernbedienung.
Deutsch - 20
 Loading...