

Samsung I8, I8B, I8 BLUE User Manual

EN-1
Microsoft, Windows and Windows logo are registered trademarks of
Microsoft Corporation incorporated in the United States and/or other
countries
All brand and product names appearing in this manual are registered
trademarks of their respective companies.
The contents and illustrations of this manual are subject to change without
prior notice for upgrading the camera functions.
Refer to the user manual included on the Software CD for more
information.
PDF documents of user manual are included in the Software CD-ROM
supplied with this camera. Search the PDF files with Windows explorer.
Before opening the PDF files, you must install the Adobe Reader included
in the Software CD-ROM.
is a trademark of SRS Labs, Inc.
WOW HD technology is incorporated under license from SRS Labs, Inc.
Contents
Getting to know your camera
FCC notice
NOTE :
This equipment has been tested and found to comply with the limits for a Class
B digital device, pursuant to part 15 of the FCC Rules. These limits are designed
to provide reasonable protection against harmful interference in a residential
installation. This equipment generates, uses and can radiate radio frequency
energy and, if not installed and used in accordance with the instructions, may
cause harmful interference to radio communications. However, there is no
guarantee that interference will not occur in a particular installation. If this
equipment does cause harmful interference to radio or television reception, which
can be determined by turning the equipment off and on, the user is encouraged to
try to correct the interference by one or more of the following measures:
– Reorient or relocate the receiving antenna.
– Increase the distance between the equipment and receiver.
– Connect the equipment into an outlet on a circuit different from that to which
the receiver is connected.
– Consult the dealer or an experienced radio / TV technician for help.
CAUTION :
Changes or modifications not expressly approved by the manufacturer responsible
for compliance could void the user’s authority to operate the equipment.
Declaration of Conformity
Trade Name : SAMSUNG TECHWIN
Model No. : Samsung i8
Responsible Party : SAMSUNG ELECTRONICS AMERICA INC.
Address : 105 Challenger Road Ridgefield Park NJ
Telephone No. : 1-800-SAMSUNG(726-7864)
This device complies with Part 15 of the FCC Rules. Operation is subject to the
following two conditions: (1) This device may not cause harmful interference, and (2)
this device must accept any interference received, including interference that may
cause undesired operation.
Getting to know your camera 1
Identification of features / Contents of camera 4
Battery life & Number of shot (Recording time) 5
When Using the Camera for the First Time 6
LCD monitor indicator 7
Mode Button 8
Taking a picture 9
Playingback, Deleting and Protecting Images 10
MULTIMEDIA mode 11
Downloading images 14
Specifications 15
English
EN-2
Getting to know your camera
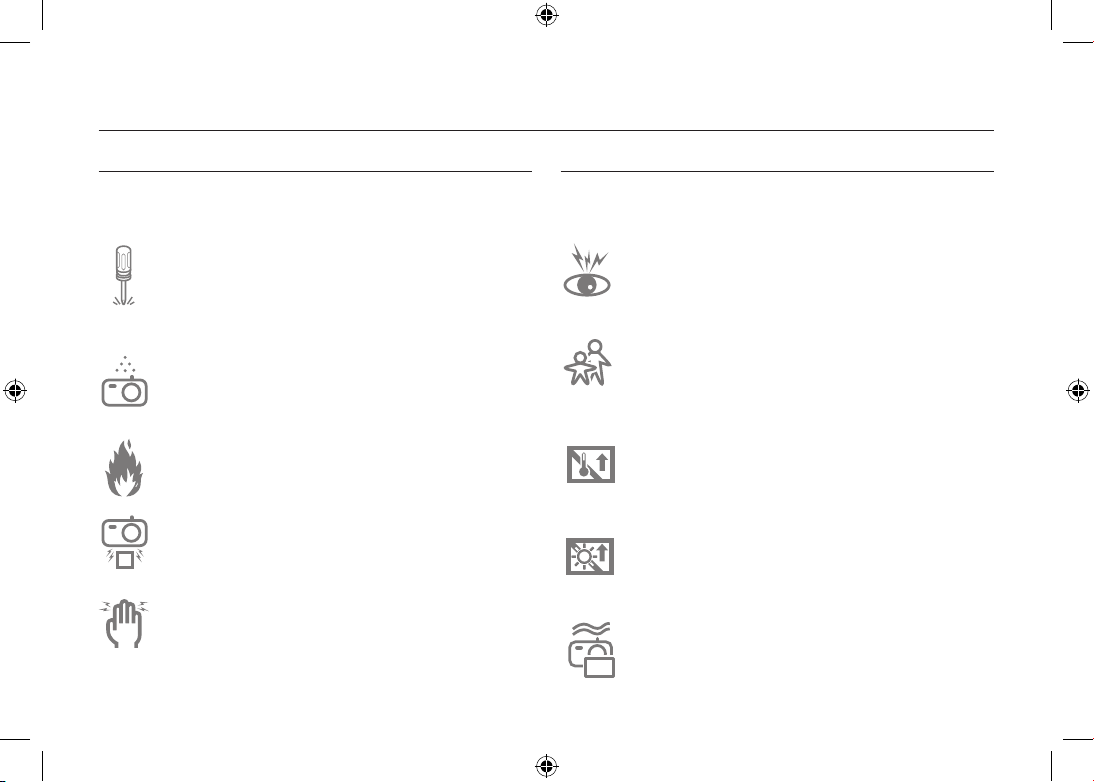
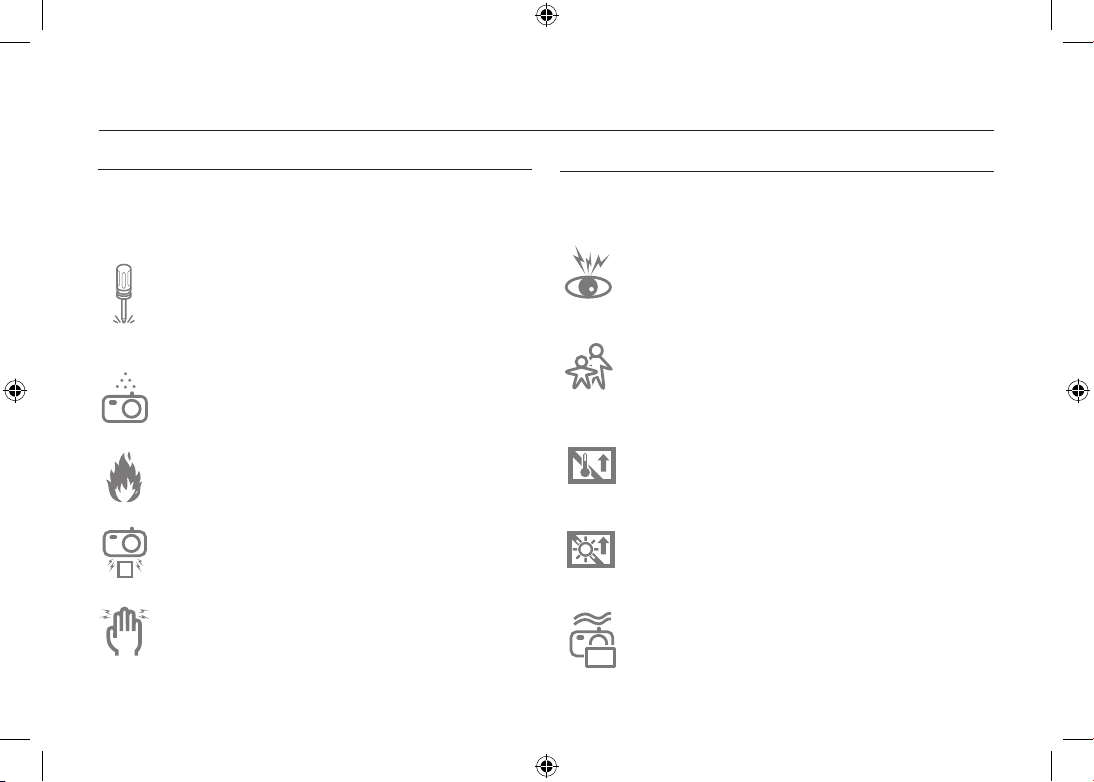
DANGER
DANGER indicates an imminently hazardous situation which, if not
avoided, will result in death or serious injury.
Do not attempt to modify this camera in any way. To do so
may result in fire, injury, electric shock or severe damage to
you or your camera. Internal inspection, maintenance and
repairs should only be carried out by your dealer or Samsung
Camera Service centre.
Should any form of liquid or a foreign object enter the camera,
do not use it. Switch off the camera, and then disconnect the
power source. You must contact your dealer or Samsung
Camera Service centre. Do not continue to use the camera as
this may cause a fire or electric shock.
Please do not use this product in close proximity to flammable
or explosive gases, as this could increase the risk of explosion.
Do not insert or drop metallic or inflammable foreign objects
into the camera through access points e.g. the memory card
slot and battery chamber. This may cause a fire or electric
shock.
Do not operate this camera with wet hands. This could pose a
risk of electric shock.
WARNING
WARNING indicates a potentially hazardous situation which, if not
avoided, could result in death or serious injury.
Do not use the flash in close proximity to people or animals.
Positioning the flash too close to your subject’s eyes may
cause eyesight damage.
For safety reasons keep this product and accessories out of
reach of children or animals to prevent accidents e.g.:
- Swallowing battery or small camera accessories. If an
accident should occur, please consult a doctor immediately.
- There is the possibility of injury from the camera’s moving
parts.
Battery and camera may become hot during prolonged use
and it may result in camera malfunction. Should this be the
case, allow the camera to sit idle for a few minutes to allow it
time to cool.
Do not leave this camera in places subject to extremely high
temperatures, such as a sealed vehicle, direct sunlight or
other places of extreme variances in temperature. Exposure
to extreme temperatures may adversely affect the camera’s
internal components and could cause a fire.
When in use, do not cover the camera or Charger. This may
cause heat to build up and distort the camera body or cause
a fire. Always use the camera and its accessories in a wellventilated area.
EN-3
Getting to know your camera
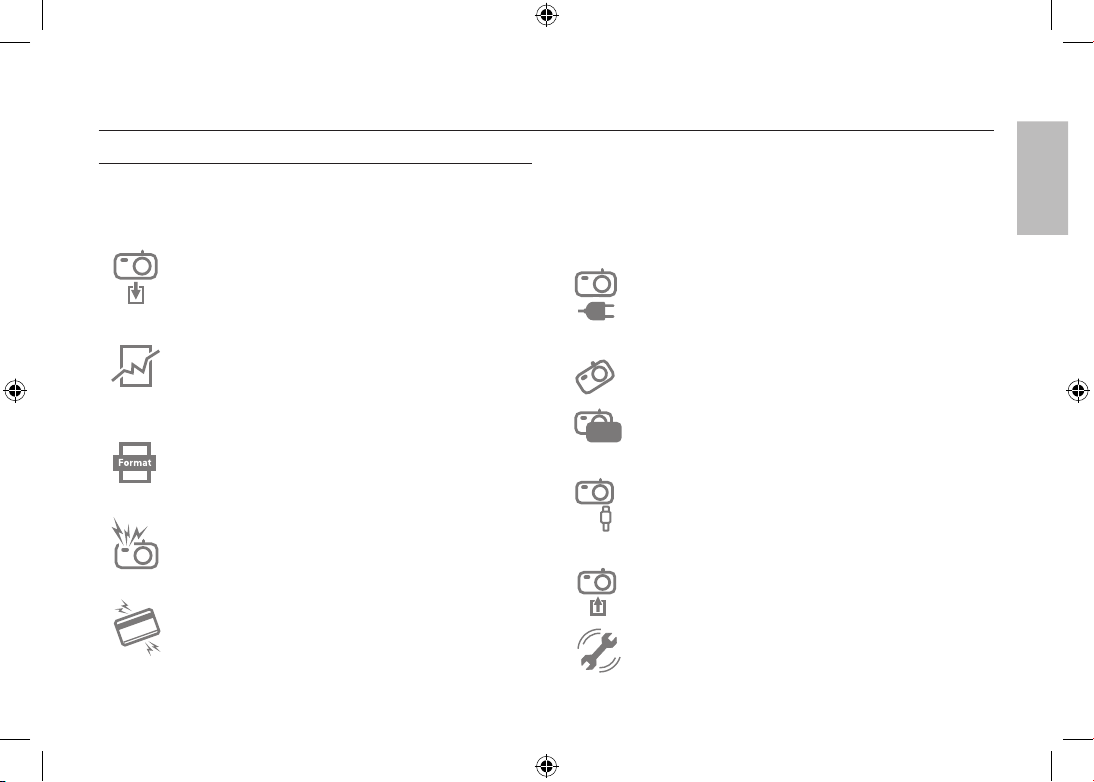
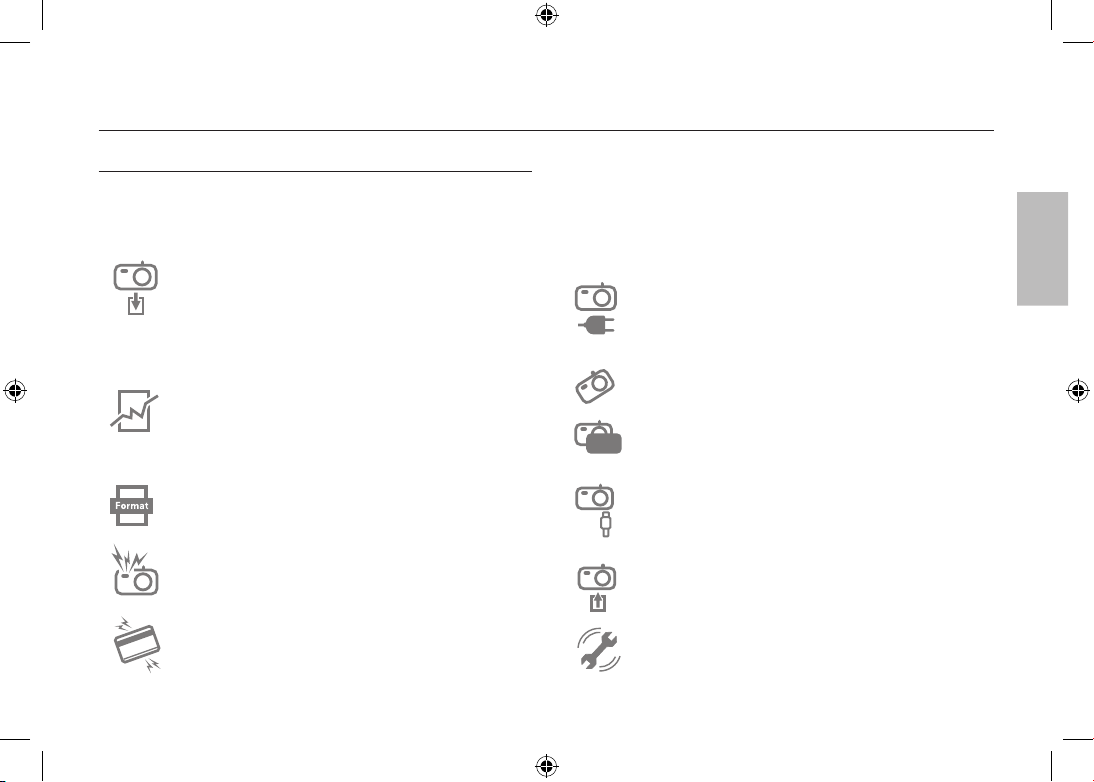
CAUTION
CAUTION indicates a potentially hazardous situation which, if not
avoided, may result in a minor or moderate injury.
Remove the battery when not planning to use the camera for a
long period of time.
Otherwise the battery may leak corrosive electrolyte and
permanently damage the camera’s components.
Leaking, overheating, or damaged battery could result in fire
or injury.
– Use battery with the correct specification for the camera.
– Do not short circuit, heat or dispose of battery in fire.
– Do not insert the battery with the polarities reversed.
Be sure to format the memory card if you are using a newly
purchased memory for the first time, if it contains data that the
camera cannot recognise, or if it contains images captured
with a different camera.
Do not fire the flash while it is in contact with hands or objects.
Do not touch the flash after using it continuously. It may cause
burns.
Credit cards may be demagnetized if left near a camera case.
Avoid leaving magnetic strip cards near the case.
Do not move the camera while it is switched on when you are
using the AC Charger. After use, always switch off the camera
before unplugging the cable from the wall socket. Then make
sure that any connector cords or cables to other devices are
disconnected before moving the camera. Failure to do so may
damage the cords or cables and cause a fire or electric shock.
Take care not to touch the lens or lens cover to avoid taking
an unclear image and possibly causing camera malfunction.
Avoid obstructing the lens or the flash when you capture an
image.
Before inserting any cables or AC adapter, check the
directions and do not insert by force. It may cause breakage of
cable or camera.
It is highly likely to result in computer malfunctions when the
20 pin connector is connected to the USB port of a PC. Never
connect the 20 pin connector to USB port of a PC.
Do not insert the memory card the wrong way round.
Doing so may cause damage to the camera.
Before an important event or going on a trip, you should check
the camera condition. Samsung cannot be held responsible
for camera malfunctions.
English
EN-4
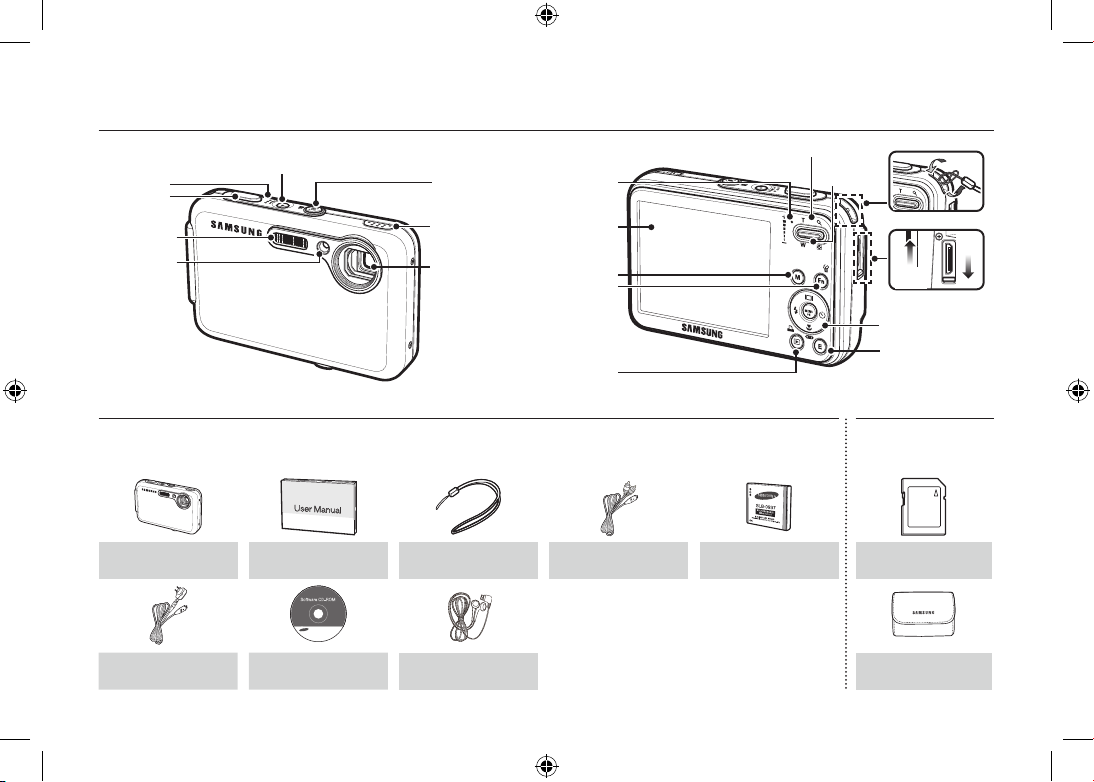
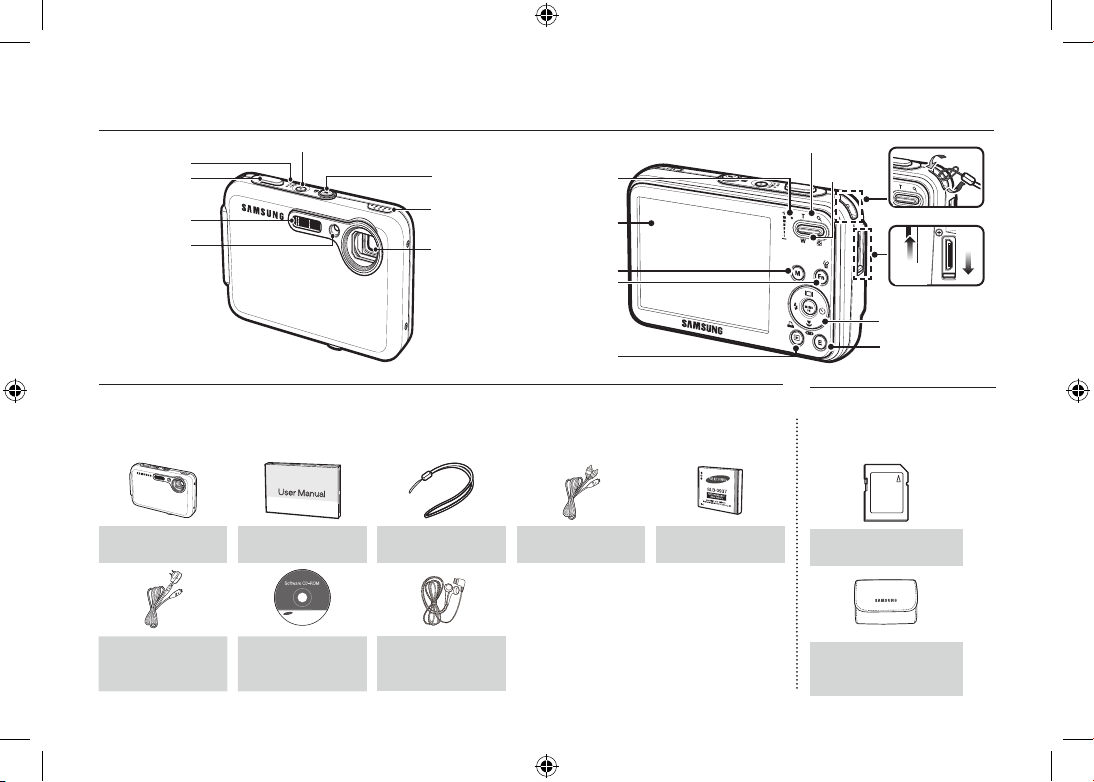
Identification of features / Contents of camera
Contents Package
Please check that you have the correct contents before using this product. The contents can vary depending on the sales region. To buy the
optional equipment, contact your nearest Samsung dealer or Samsung service centre.
Camera
User manual,
Product warranty
Camera strap AV cable
Rechargeable battery
(SLB-0937)
AC adapter (SAC-47)/
USB cable (SUC-C3)
Software CD Earphones
Sold Separately
SD/SDHC memory
card/MMC
Camera case
Flash
AF sensor/
Self-timer lamp
Lens
Speaker
FD (Face Detection)
button /
MP3, PMP hold button
Camera
status lamp
LCD monitor
Fn / Delete button
M (Mode) button
Play mode /
Print button
Camera strap
Open
Close
E (Effect) button
5-function button
Zoom T button (Digital zoom)
Zoom W button
(Thumbnail)
USB / AV / DC / Earphones
connection terminal
Shutter
button
POWER button
Microphone
EN-5
Battery life & Number of shot (Recording time)
Number of images and battery life: Using the SLB-0937
Battery life
/Number of
images
Conditions
Still image
Approx. 120
MIN/
Approx. 240
shots
Using the fully charged battery, Auto
mode, 8M image size, Fine image
quality, Shot to shot interval: 30Sec.
Changing the zoom position between
the Wide and the Tele after every shot.
Using the flash on every second shot.
Using the camera for 5 minutes and
then Powering it off for 1 minute.
Movie
Approx. 120
MIN
Using the fully charged battery 640x480
image size 30fps frame rate
Multimedia
MP3
Approx. 300
MIN
Using the fully charged battery LCD Off.
PMP
Approx. 220
MIN
Using the fully charged battery
These figures are measured under Samsung’s standard conditions and
shooting conditions and may vary depending on the user’s methods.
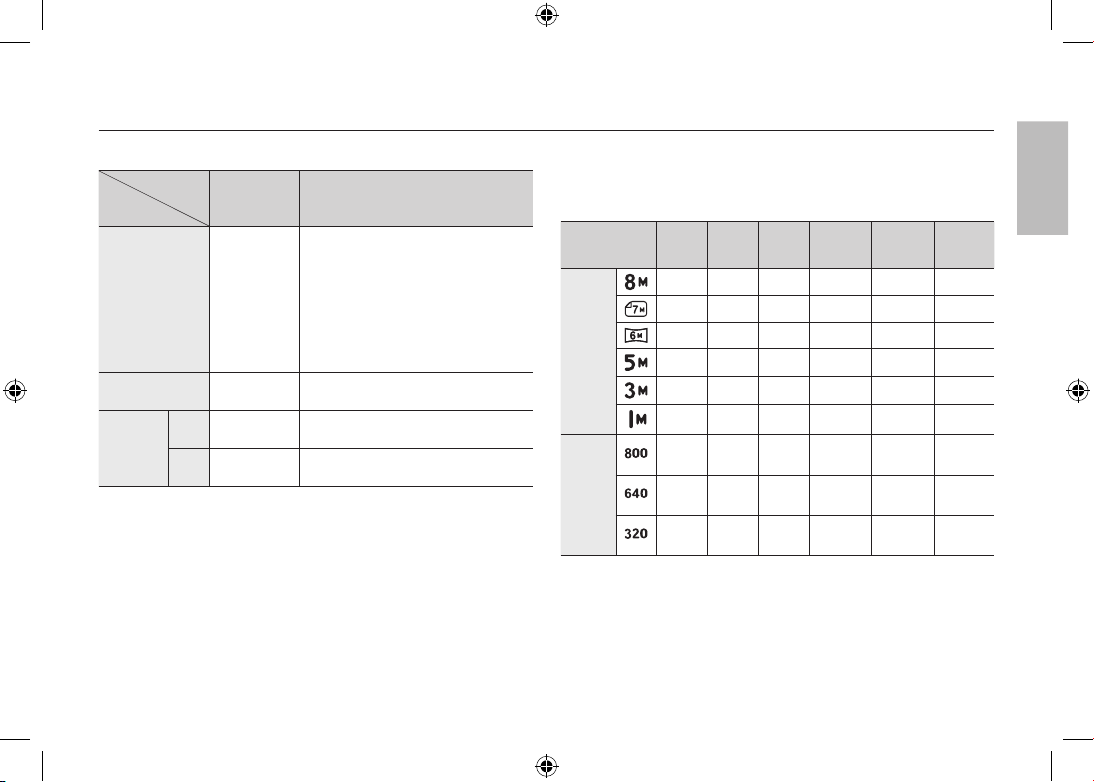
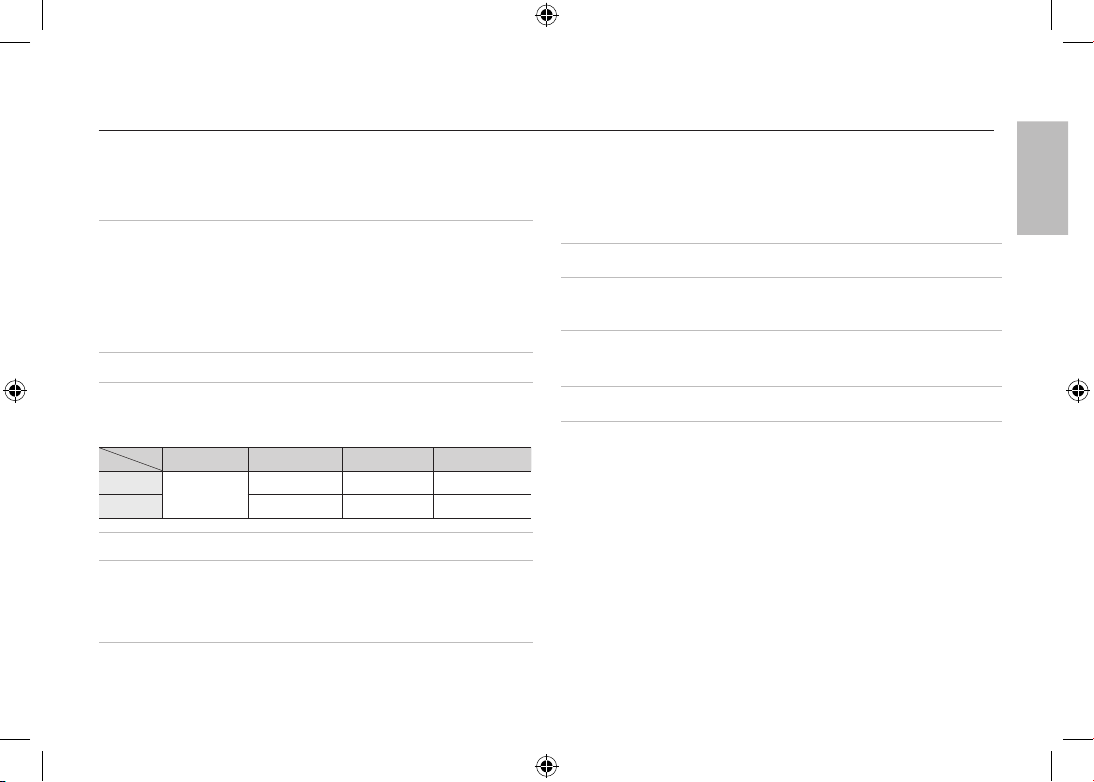
When using a 256MB MMC memory, the specified shooting
capacity will be as follows. These figures are approximate as
image capacities can be affected by variables such as subject
matter and memory card type.
Recorded
image size
Super
Fine
Fine Normal 30FPS 20FPS 15FPS
Still
image
53 94 135 – – –
60 107 171 – – –
71 133 202 – – –
86 161 220 – – –
134 226 306 – – –
434 520 600 – – –
* Movie
clip
– – – –
About
8’31”
–
– – –
About
8’58”
–
About
16’59”
– – –
About
28’56”
–
About
53’31”
*
The recording times can be changed by the zoom operation.
The zoom button doesn’t function during the movie recording.
English
EN-6
When Using the Camera for the First Time
Charge the rechargeable battery fully before using the camera for the first
time.
When the camera is turned on for the first time, a menu will be displayed
to set date/time, language and battery type in the LCD monitor. This menu
will not be displayed after setting up. Set up the date/time, language and
battery type before using this camera.
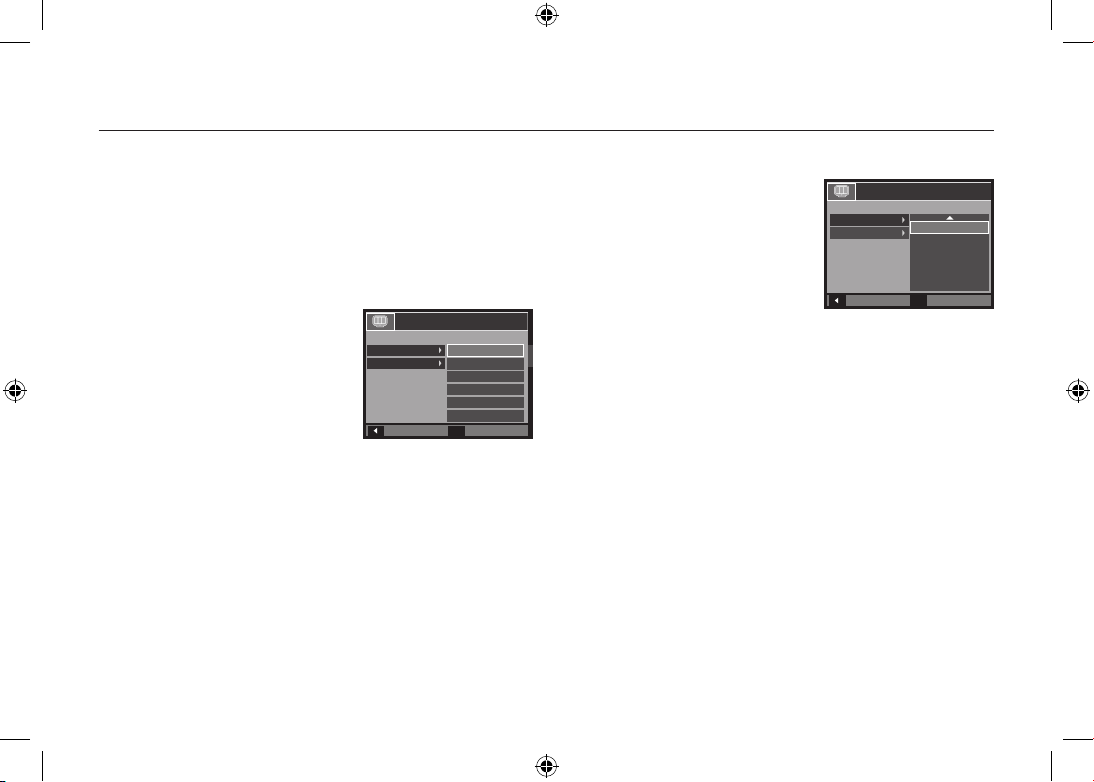
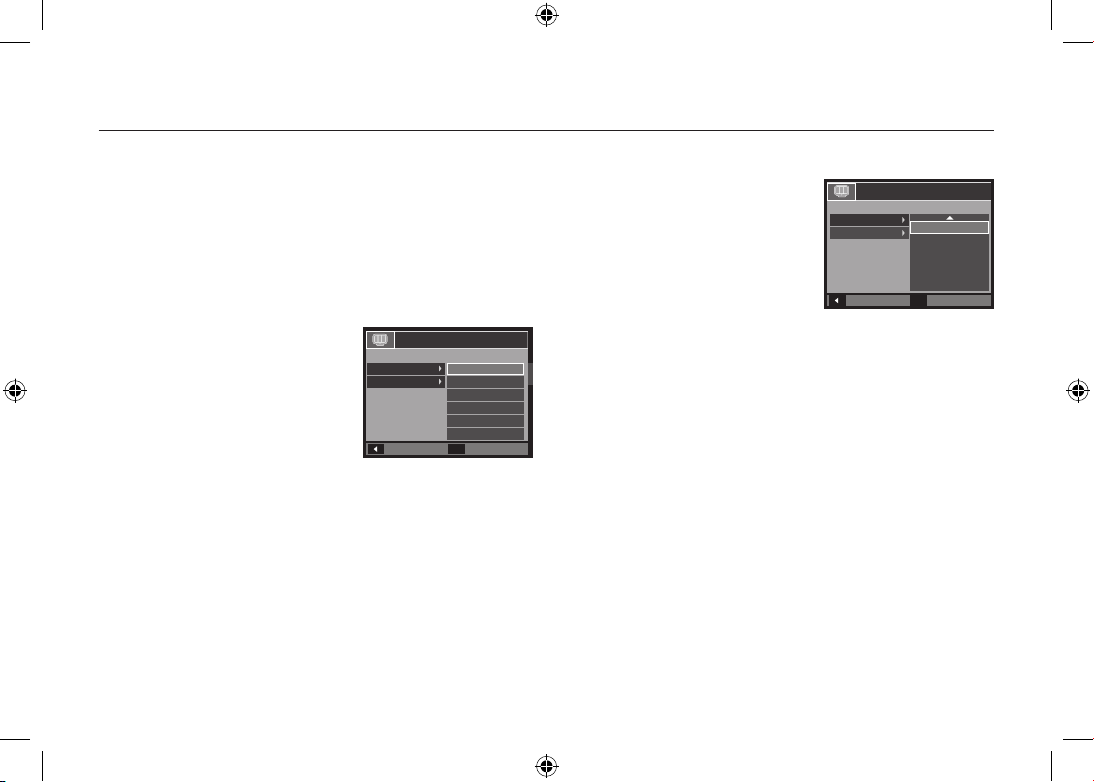
Setting up the language
1. Select the [Language] menu by pressing
the Up/Down button and press the
Right button.
2. Select the desired sub menu by
pressing the Up/Down button and press
the OK button.
– You can select one of 22 languages.
These are listed below:
English, Korean, French, German, Spanish, Italian, S.Chinese,
T.Chinese, Japanese, Russian, Portuguese, Dutch, Danish,
Swedish, Finnish, Thai, Bahasa (Malay / Indonesian), Arabic, Czech,
Polish, Hungarian and Turkish.
Setting up the date, time and date type
1. Select the [Date&Time] menu by
pressing the Up/Down button and press
the Right button.
2. Select the desired sub menu by
pressing the Up
/Down/Left/Right
button and press the OK button.
Right button: Selects world
time/year/ month/
day/hour/minute/date type
Left button: Moves the cursor to the [Date&Time] main menu
if the cursor is at the first item of the date and time
setup. In all other instances, the cursor will be
shifted to the left of its current position.
Up/Down button: Changes the value of each item.
For more information on setting World Time, please refer to the
documentation included with the software CD.
Back
Set
OK
ENGLISH
한국어
FRANÇAIS
DEUTSCH
ESPAÑOL
ITALIANO
SETUP1
Language
Date&Time
Back
Set
OK
SETUP1
Language
Date&Time
London
2008 / 01 / 01
12 : 00
yy/mm/dd
EN-7
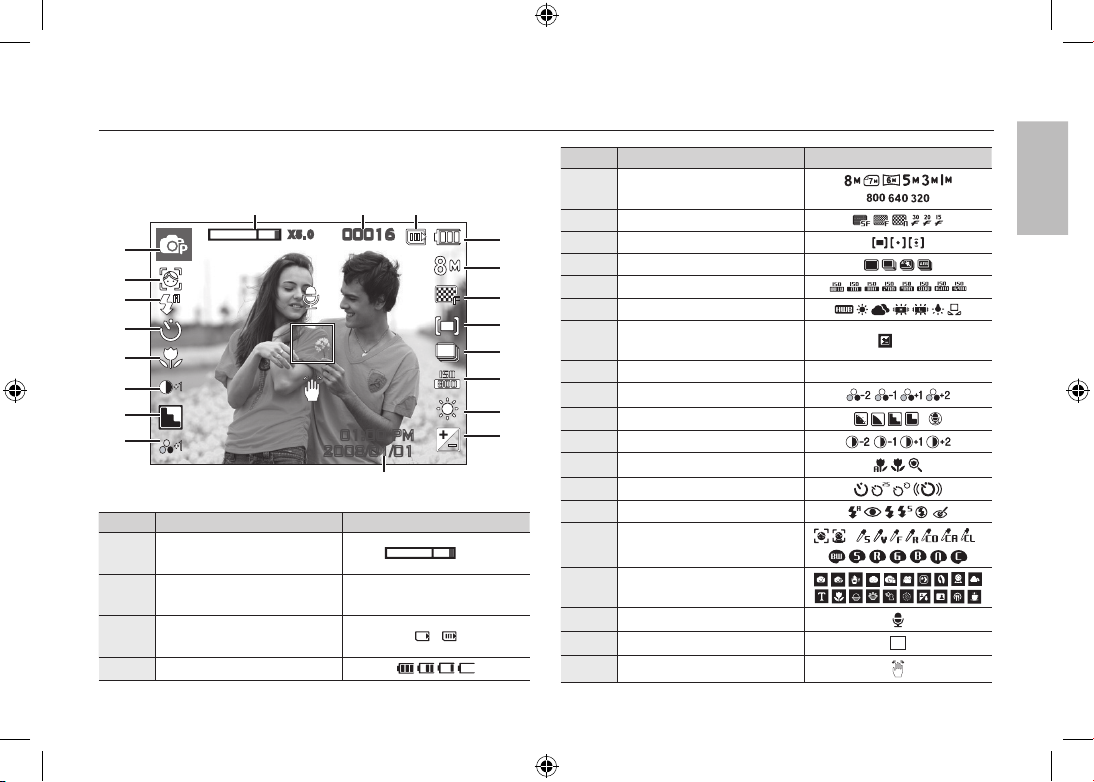
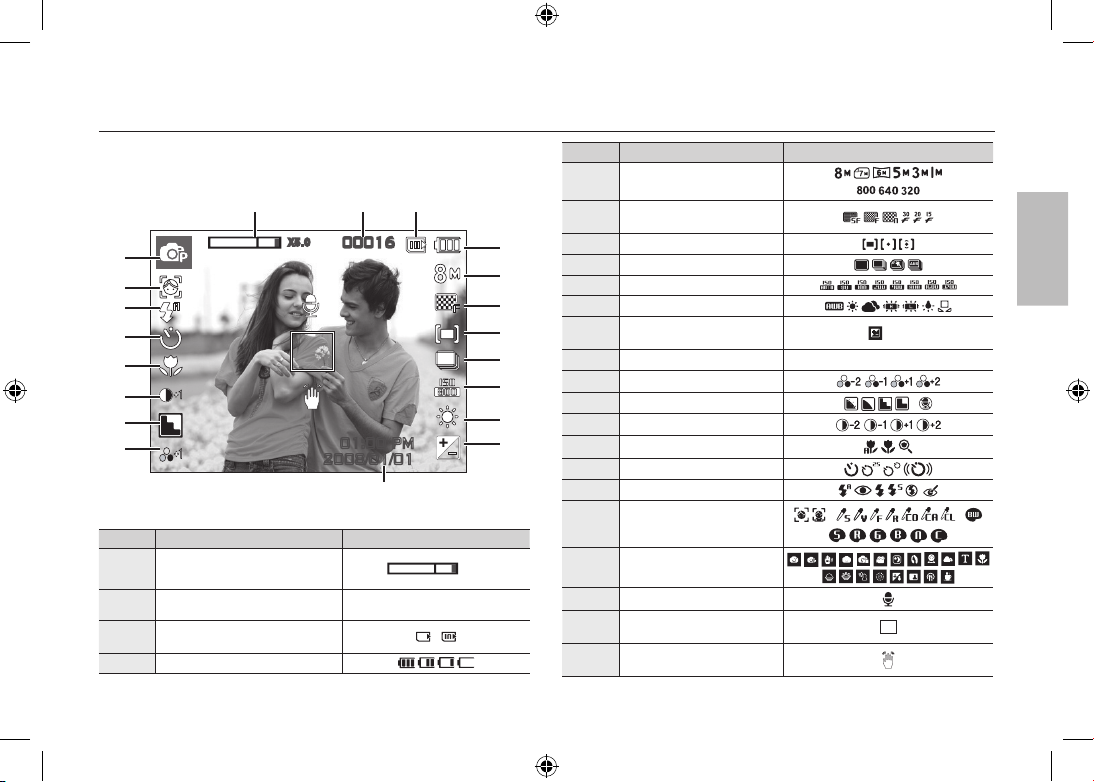
LCD monitor indicator
The LCD monitor displays information about the shooting functions and
selections. Refer to the user manual included on the Software CD for
more information.
<Image & Full Status>
No. Description Icons
1
Optical/Digital Zoom bar/
Digital Zoom rate
x 5.0
2
Number of available shots
remaining/Remaining time
00016/00:00:00
3
Memory card icon/
Internal memory icon
/
4 Battery
No. Description Icons
5 Image Size
6 Image Quality/Frame Rate
7 Metering
8 Drive mode
9 ISO
10 White Balance
11
Exposure compensation
/LongTime Shutter
/ LT
12 Date/Time 2008/01/01 01:00 PM
13 Saturation
14 Sharpness/Mic. off
/
15 Contrast
16 Macro
17 Self-timer
18 Flash
19
Face Detection · Self Portrait/
Photo Style Selector/Colour
/ /
20 Recording mode
21 Voice Memo
22 Auto Focus Frame
23 Camera shake Warning
00016
01:00 PM
2008/01/01
㉑
㉒
㉓
① ② ③
⑤
⑥
⑦
⑧
⑨
⑩
⑪
④
⑫
⑯
⑮
⑭
⑬
⑰
⑱
⑳
⑲
X5 .0
English
EN-8
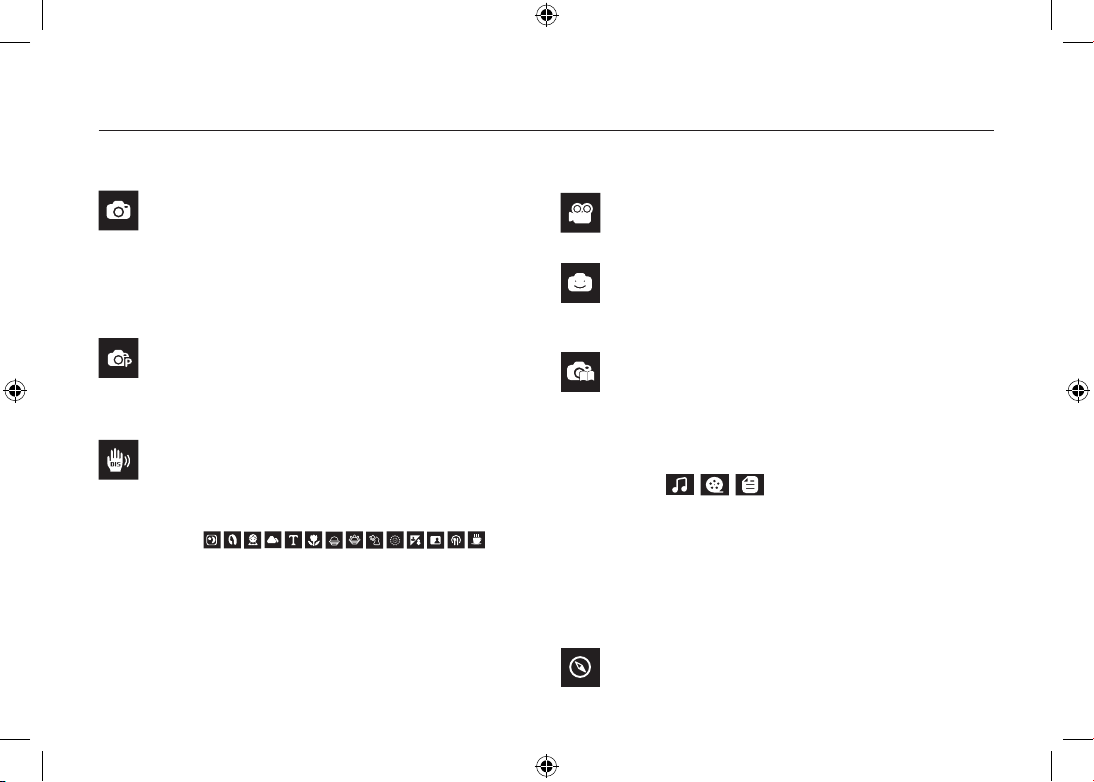
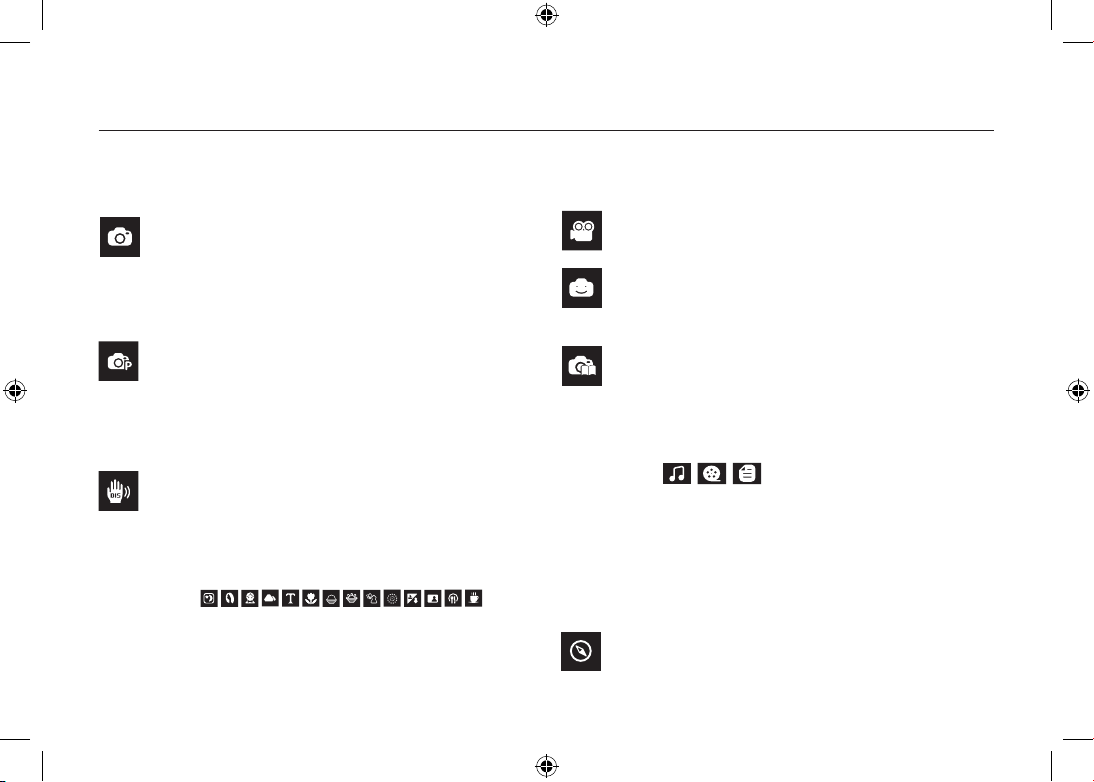
Mode Button
Auto
Selects this mode for quick and easy picture taking with
minimal user interaction.
In this mode, you can select the basic menus.
To select an advanced menu, select the other camera
mode.
Program
Selecting the automatic mode will configure the camera
with optimal settings. You can still manually configure all
functions except the aperture value and shutter speed.
DIS
This mode will reduce the effect of camera shake and help
you get a well-exposed image in dim conditions.
Use the menu to easily configure optimal settings for a
variety of shooting situations.
Movie
For taking a movie
FUN
In this mode, you can take pictures with various effects
easily and simply.
Photo Help Guide
Helps the user learn the correct picture taking method and
includes solutions for potential problems that may occur.
This also enables the user to practice the best way to take
the pictures.
This camera has an embedded MP3, TEXT VIEWER &
Portable Media Player program. You can take a picture,
listen to the MP3 files and watch the movie clip (Movie and
Video clip) whenever you want. You can listen to the MP3
music with reading the text on the LCD monitor or taking a
picture.
Travel Guide
You can get the useful travel information around the world.
SCENE
MULTIMEDIA
You can select a desired camera mode by using the M (Mode) button on the back of the camera
EN-9
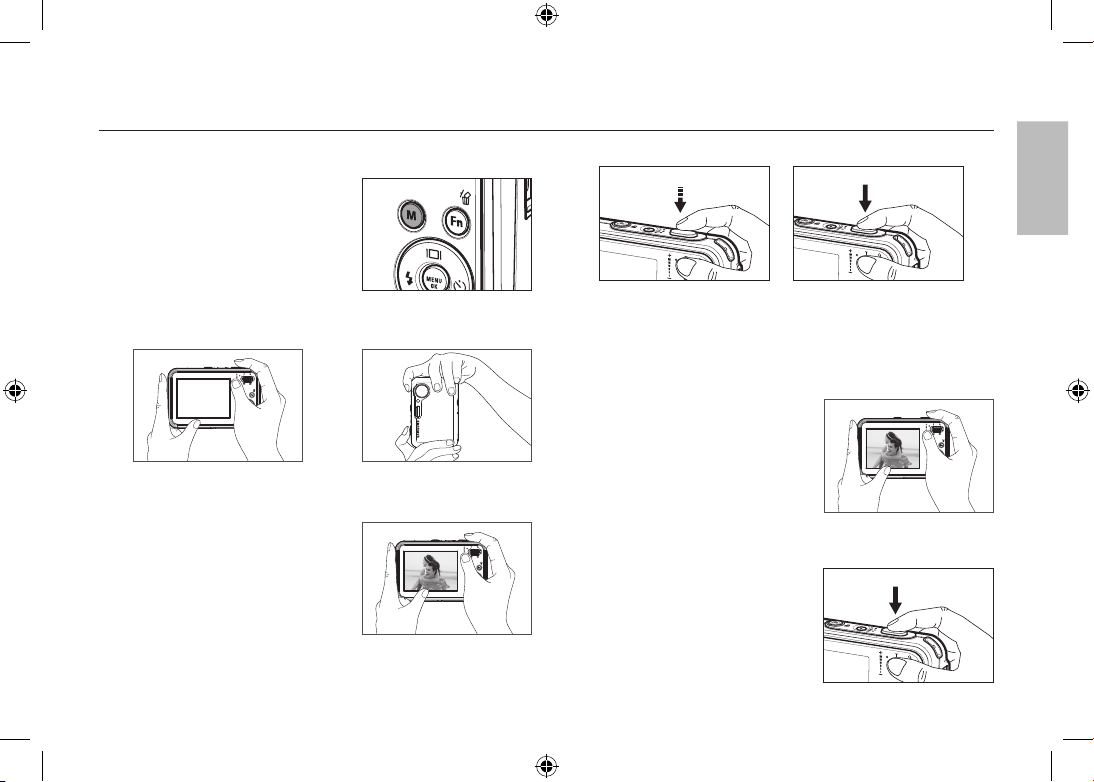
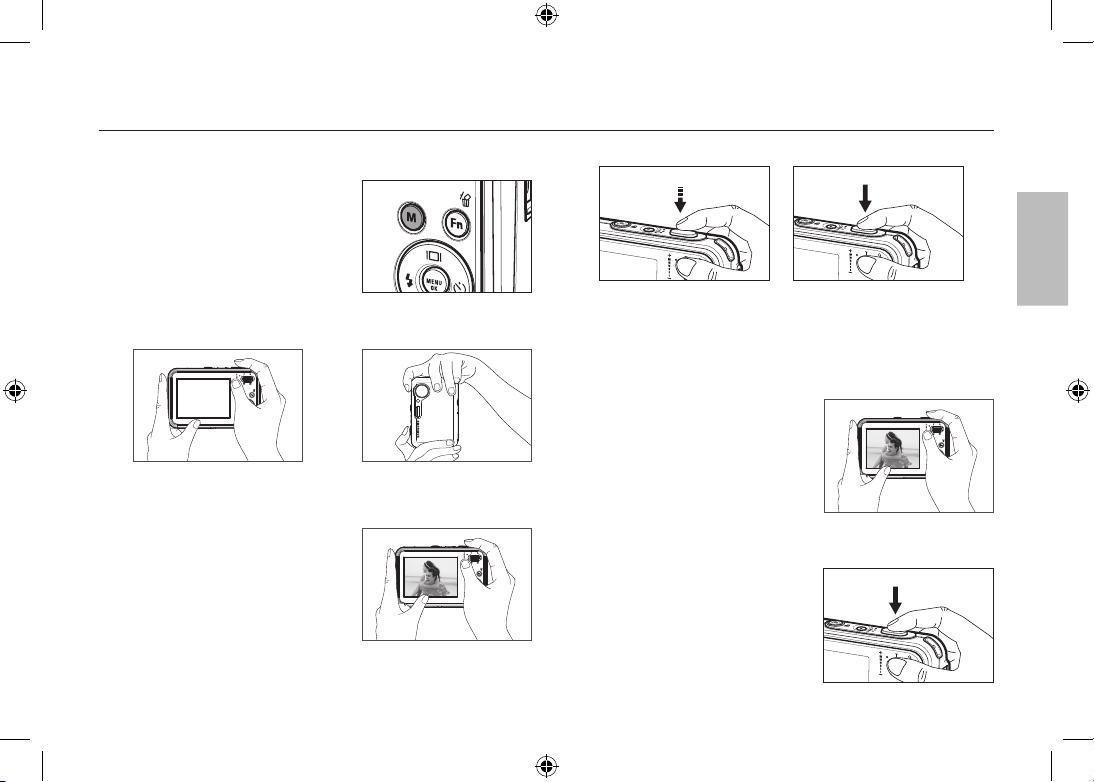
Taking a picture
How to take a picture
1. Turn on the camera and select a
camera mode by using the M (Mode)
button.
2. Hold the camera as shown.
3. Confirm the composition.
4. Take a picture
How to record a movie.
Select the Scene mode by pressing the
M (Mode) button
1. Confirm the composition.
2. Start the recording.
Press the Shutter button and the
recording starts and press the
Shutter button again to stop the
recording
Pressing halfway down Focus
and Flash status are checked.
Pressing fully Image is taken.
English
EN-10
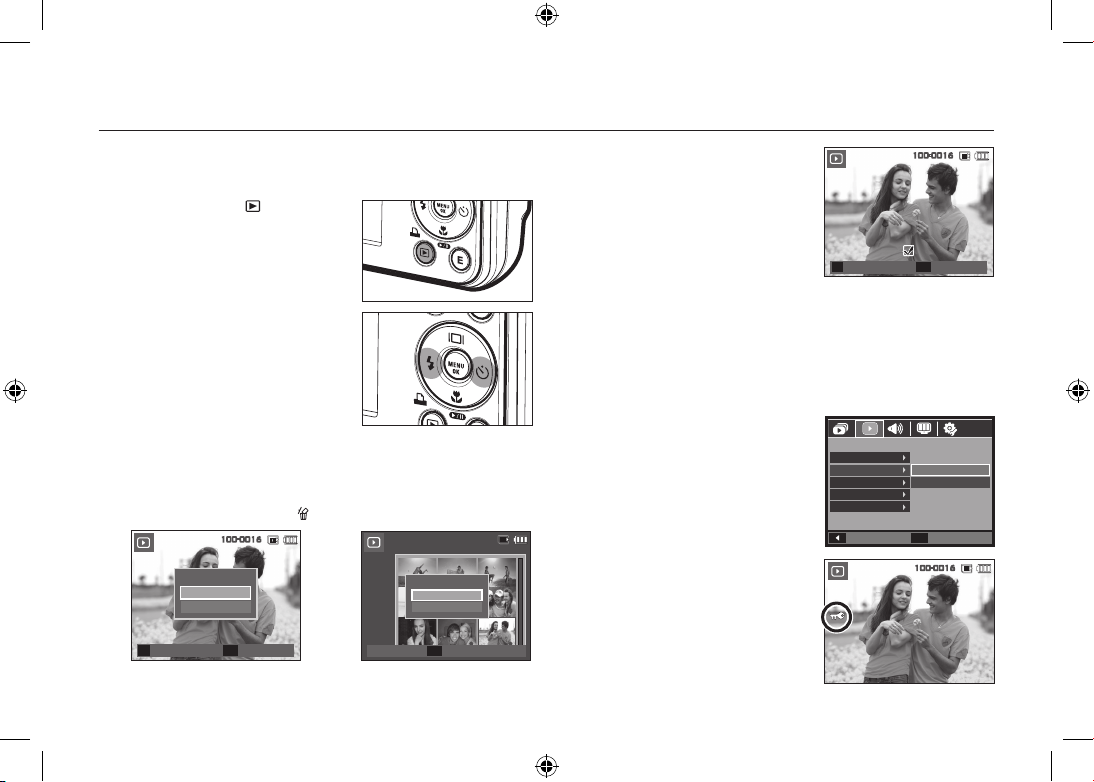
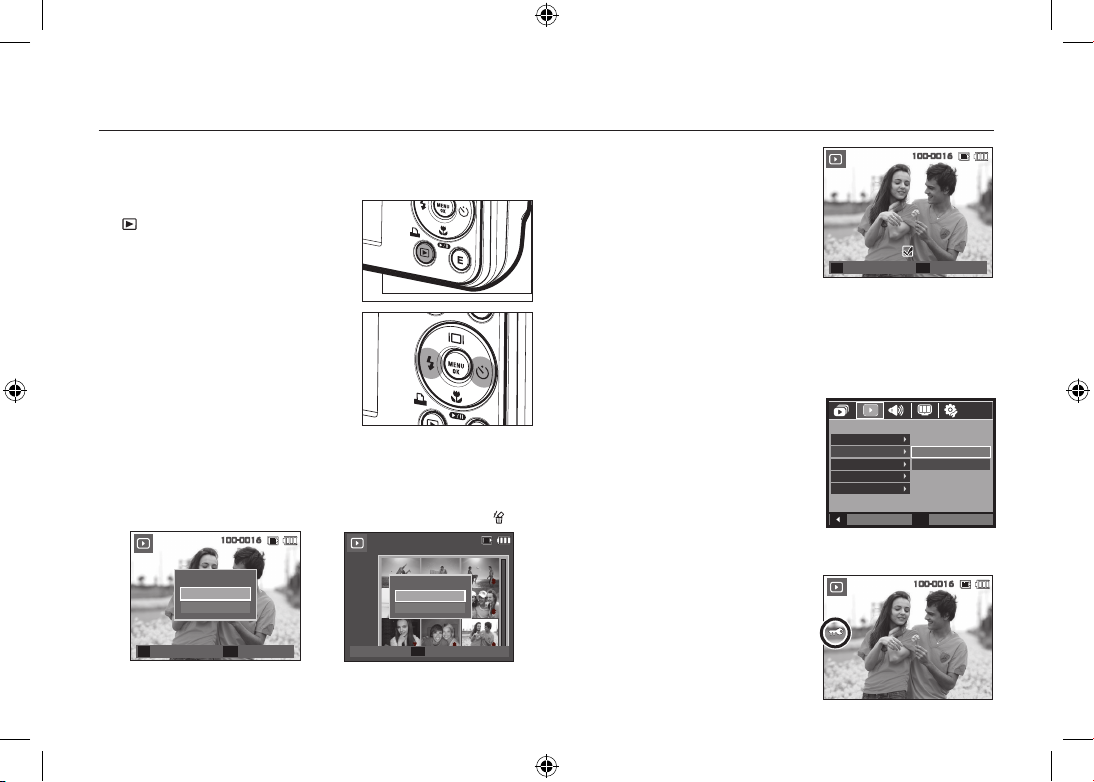
Playingback, Deleting and Protecting Images
2. To add images to delete, press the T
button.
– Left
/Right button: Selects images
–
T button: Checks for deletion
– OK button: Deletes the selection
3. Select the submenu values by pressing the Up/Down button and then
press the OK button.
– If [No] is selected: Cancels “Delete Image”.
– If [Yes] is selected: Deletes the selected images.
Protecting images
This is used to protect specific shots from
being accidentally erased.
[Select]: Selected images are protected
or unprotected.
[All]: All stored images are protected
or unprotected.
If you protect an image, the protect icon
will be displayed on the LCD monitor.
An image in LOCK mode will be
protected from the delete function, but
will NOT be protected from the [Format]
function.
Playingback the images
The last image stored on the memory is displayed.
Press the Play mode (
) button.
Select an image that you want to play back
by pressing the Left
/Right button
Delete button
This deletes images stored on the memory card.
1. Select an image that you want to delete by pressing the Left
/Right
button and press the Delete (
) button.
<Single Image> <Thumbnail Image>
Confirm
OK
Delete image?
No
Yes
Select
T
100-0016
1 2 3
4 5 6
7 8 9
Delete image?
No
Yes
100-0016
Confirm
OK
Delete
OK
Select
T
Prev ◀ ▶ Next
100-0016
Back
Set
OK
PLAYBACK
Voice Memo
Protect
Delete
DPOF
Copy To Card
Select
All
100-0016
EN-11
This camera has an embedded MP3, TEXT VIEWER & Portable Media
Player program. You can take a picture, listen to the MP3 files and watch
the movie clip (Movie and Video clip) whenever you want. To use the PMP
mode, you must convert the multimedia file with the Samsung Converter.
In the TEXT VIEWER mode you can see the text on the LCD monitor with
listening MP3 music.
If the file or folder name is over 120 (Including 1 Byte/2 Byte language,
Korean, Chinese, etc.) characters, the file or folder name doesn’t appear
on the play list.
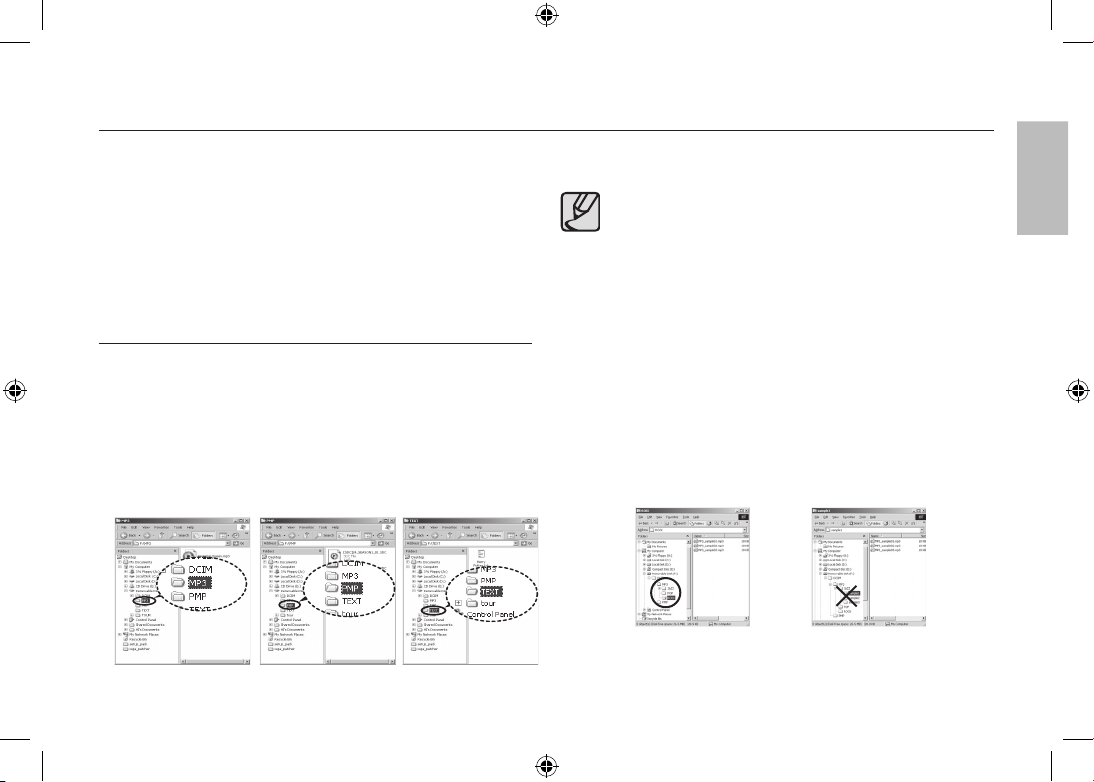
Downloading files
To use MP3, PMP and TEXT VIEWER functions, MP3, PMP
(multimedia files) and TEXT files must be saved in the internal memory
or memory card of this camera.
1. Save the desired files on your PC.
2. Connect the camera to your PC with the USB cable and turn on the
camera.
3. Open Window’s EXPLORER and search for Removable Disk.
4. Make a folder under the Removable Disk.
MP3 Mode : [MP3]
PMP Mode : [PMP]
TEXT VIEWER mode : [TEXT]
5. Select files that you want to save and copy them to the desired folder.
Take care of the illegal duplication of MP3 & multimedia files. It
violates various copyright laws.
Without permission of Samsung, you cannot copy, modify
and/or distribute any part or all of MP3, PMP file provided in
the internal memory.
This camera can only play back MP3 files in the MP3 mode
and SDC files (modified XviD MPEG4 video / MPEG Layer2
audio type) in the PMP mode.
If a file can not be played back on this camera, convert it into
the supported file format by using the Samsung Converter.
Up to 200 files and 100 sub folders can be saved in a folder.
It is limited to save the files and sub folders up to 200 in total at
the same time.
New folders can be created within the MP3, PMP and TEXT
folders. Otherwise any files in other folders that you create
cannot be played back.
MULTIMEDIA mode
English

EN-12
MULTIMEDIA mode
Insert the memory card that holds MP3, PMP and TEXT files. As this
camera has a 190MB internal memory, you can save the files on the
internal memory too.
1. Select a desired Multi media mode.
2. A menu will display as shown.
[Resume]: Memorizes the latest
stopped frame.
MP3 mode: Plays back from the
beginning of the file.
PMP mode: Plays back from the latest
stopped frame.
TEXT VIEWER mode:
Plays back from
the latest stopped
frame.
[Open]: The browsing menu will be
displayed to select a desired
file.
3. Select a desired file and press the OK
button. And then the file will play back.
<MP3 mode>
<PMP mode>
<TEXT VIEWER mode>
Confirm
OK
Resume
Open
SCENE
MULTIMEDIA
SHOOTING
MP3
In this mode you can play MP3 files.
TEST.TXT
Move OK Select
03-Audio Track 03.mp3
01-Audio Track 01.mp3
Move OK Select
[SDC]-move sample.sdc
Move OK Select
Who bent my camera?
Thank you for buying a Samsung Camera.
This manual will guide you through using the
camera, includin capturing images, downloading
images and using the application software.
Please read this manual carefully before using your
new camera.
TEST.TXT
EN-13
MULTIMEDIA mode
Encoding Type: ANSI (American National Standards Institute) Type,
Uni (Unicode) Type
– When the ANSI encoding type is displayed:
You should set the Language of the TEXT VIEWER menu to view the
text. Set the Language menu as one that is the same as the Operating
System language that the text was created.
– When the UNI encoding type is displayed:
The text file will be displayed with any language menu.
If the text file size is over 10MB, it may take a long time or even be
impossible to view the text file. In this case, please divide the text file.
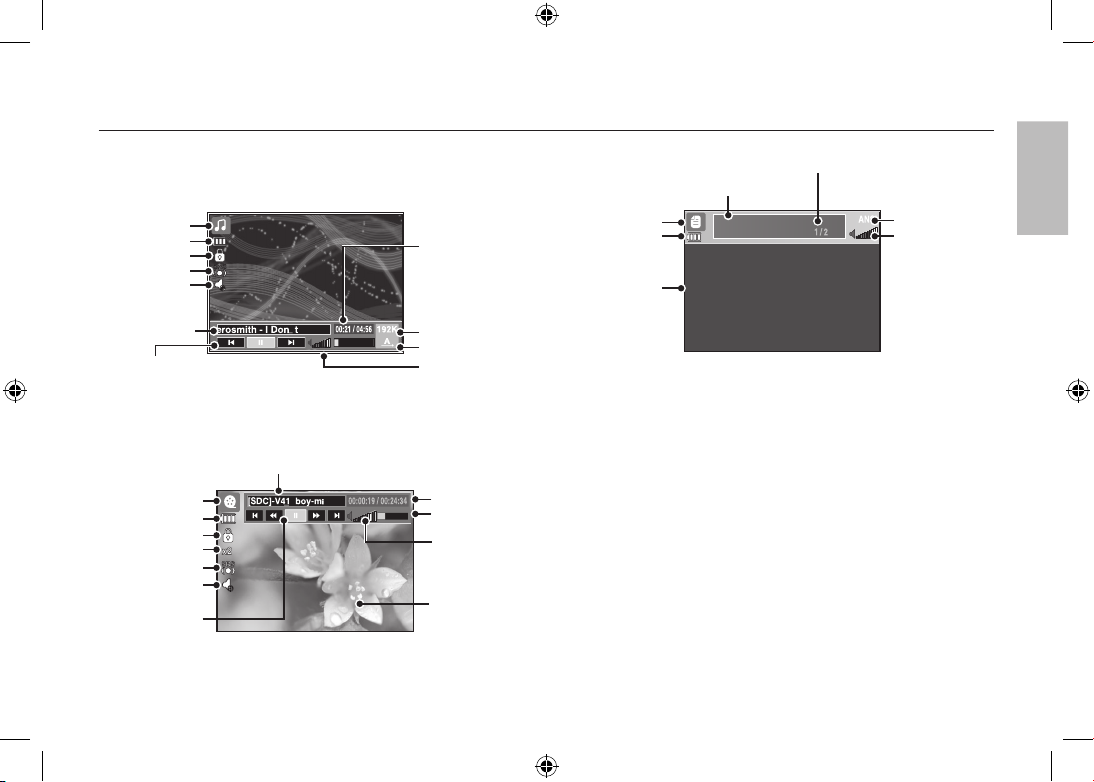
The LCD monitor displays information about the MP3, multimedia and
Text file.
Thank you for buying a Samsung Camera.
This manual will guide you through using the camera,
including capturing images, downloading images and
using the application software.
Please read this manual carefully before using your
new camera.
TEST.TXT
Who bent my camera?
Battery
Lock
Mute
Title of file
MP3 mode
Play & Pause /
Control button
Volume
Playing time
Bit rate
Volume
Playback mode
PMP mode
Mute
Play & Pause/
Seeking button
Title of file
Status bar
Time line
Caption
Lock
Battery
TEXT VIEWER mode
Battery
TEXT Contents
Indication of present TEXT
<TEXT VIEWER mode>
Volume Indication
Encoding Type
(ANSI, Uni)
Current page/Whole page
<MP3 mode>
<PMP mode>
Equalizer
Search speed
Equalizer
English
EN-14
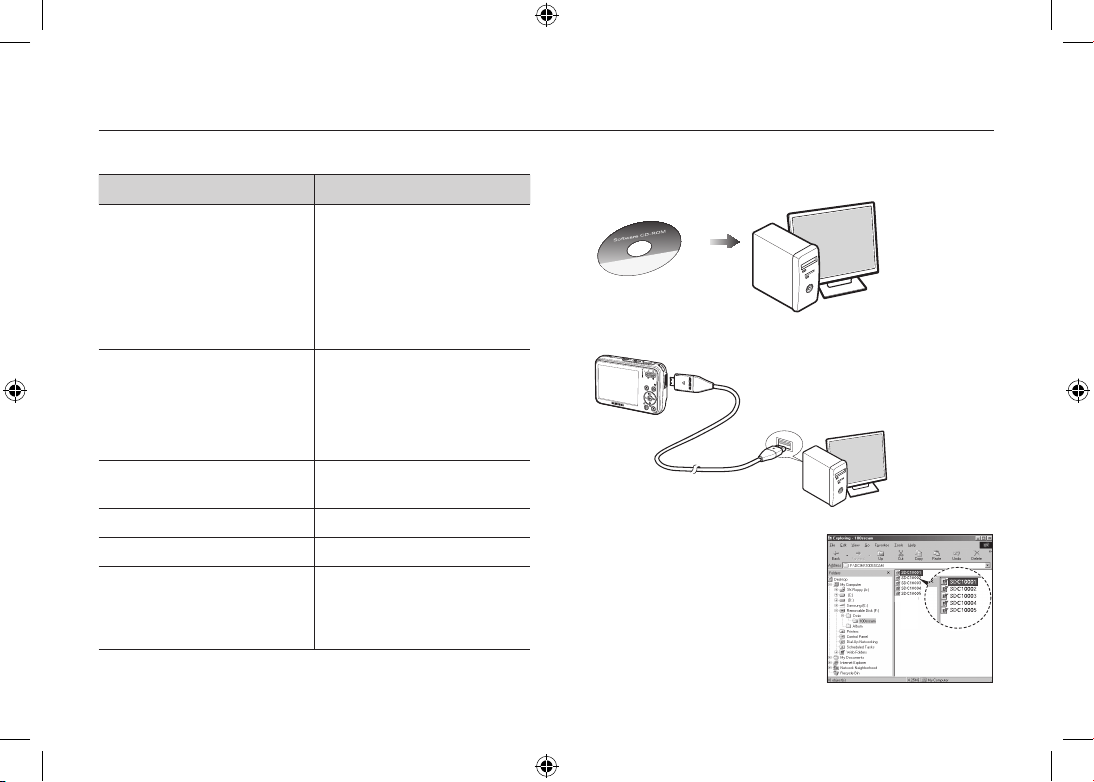
Downloading images
System Requirements
For Windows For Macintosh
PC with processor better than
Pentium 450MHz
(Pentium 800MHz recommended)
* Samsung Converter
PC with processor better than
Pentium 500MHz (Pentium IV
recommended)
Power Mac G3 or later, or Intel
Processor
Windows 98SE / 2000 / ME /
XP/Vista
* Samsung Converter
Windows 2000 or later
recommended
Mac OS 10.1 ~ 10.4
Minimum 128MB RAM
(Over 512MB recommended)
Minimum 256MB RAM
110MB of available hard-disk space
USB port USB port
CD-ROM drive CD-ROM drive
1024×768 pixels, 16-bit color
display compatible monitor
(24-bit color display recommended)
Microsoft DirectX 9.0 or later
MPlayer (For movie clip)
PC connection mode
1. Install the supplied Software.
2. Download the images
– Connect the camera and Computer
with supplied USB cable and
download the image on your
computer to save them.
EN-15
Specifications
Flash
–
Modes: Auto, Auto & Red-eye reduction, Fill-in flash,
Slow sync, Flash off, Red-eye Fix
–
Range: Wide: 3.3m, Tele: 2.4m (ISO Auto)
–
Recharging Time:
Approx. under 4 seconds (new battery)
Sharpness
–
Soft+, Soft, Normal, Vivid, Vivid+
White Balance
–
Auto, Daylight, Cloudy, Fluorescent_H, Fluorescent_L,
Tungsten, Custom
Voice Recording
–
Voice Recording (max 10 hours)
–
Voice Memo in Still Image (max. 10 sec.)
Date Imprinting
–
Date, Date & Time, Off (user selectable)
Shooting
–
Still Image
•
Modes:
Auto, Program, DIS, Fun, Photo Heip Guide,
Movie, Multimedia (MP3,PMP,TextViewer)
Scene: Night, Portrait, Children, Landscape, Text,
Close-up, Sunset, Dawn, Backlight, Fireworks,
Beach & Snow, Cafe, Food, Self Shot (Total
14 modes)
• Shooting: Single, Continuous, AEB(0.3 step unto
3cut), Motion Capture
• Self-timer: 2 sec., 10 sec., Double(10 sec, 2 sec),
Motion Timer
Image Sensor
–
Type: 1/2.5” CCD
–
Effective Pixel: Approx. 8.2 Mega-pixel
–
Total Pixel: Approx. 8.3 Mega-pixel
Lens
–
Focal Length: Samsung Lens f = 6.3 ~ 18.9mm
(35mm film equivalent: 38 ~ 114mm)
–
F No.: F3.5(W) ~ F4.5(T)
–
Digital Zoom:
Still Image mode: 1.0X ~ 5.0X
Play mode: 1.0X ~ 10.2X (depends on image size)
LCD Monitor
–
2.7” colour TFT LCD (230,000 pixel)
Focusing
–
Type: TTL auto focus, Multi AF, Center AF, Face
Detection AF
–
Range
Normal Macro Super Macro Auto Macro
Wide
80cm ~ Infinity
5cm ~ 80cm 1cm ~ 5cm 5cm ~ Infinity
Tele
40cm ~ 80cm - 40cm ~ Infinity
Shutter
–
Speed 1 ~ 1/2,000 sec. (Night: 16 ~ 1/2,000 sec.)
Exposure
–
Control: Program AE
–
Metering: Multi, Spot, Center Weighted, Face Detection
–
Compensation: ±2EV (1/3EV steps)
–
ISO: Auto, 80, 100, 200, 400, 800, 1600, 3200(3M)
English
EN-16
Specifications
–
Movie Clip
• With Audio or without Audio (user selectable,
recording time : memory capacity dependent, max
2hours)
• Size: 800x592, 640x480, 320x240
• Optical Zoom with sound recording
•
Frame rate: 30 fps, 20 fps, 15 fps (20 fps for
800x592)
• Optical Zoom up to 3.0X
• Movie Editing (Embedded): Pause during recording,
Still Image Capture Time Trimming
Storage
–
Media
• Internal memory: 256MB (User Memory: 190MB)
• External Memory (Optional)
MMC Plus (Up to 2GB, guaranteed)
SD/SDHC Card (up to 4GB guaranteed)
* Internal memory capacity is subject to change
without prior notice.
–
File Format
• Still Image: JPEG (DCF), EXIF 2.2, DPOF 1.1,
PictBridge 1.0
• Movie Clip: AVI (MPEG-4)
• Audio: WAV
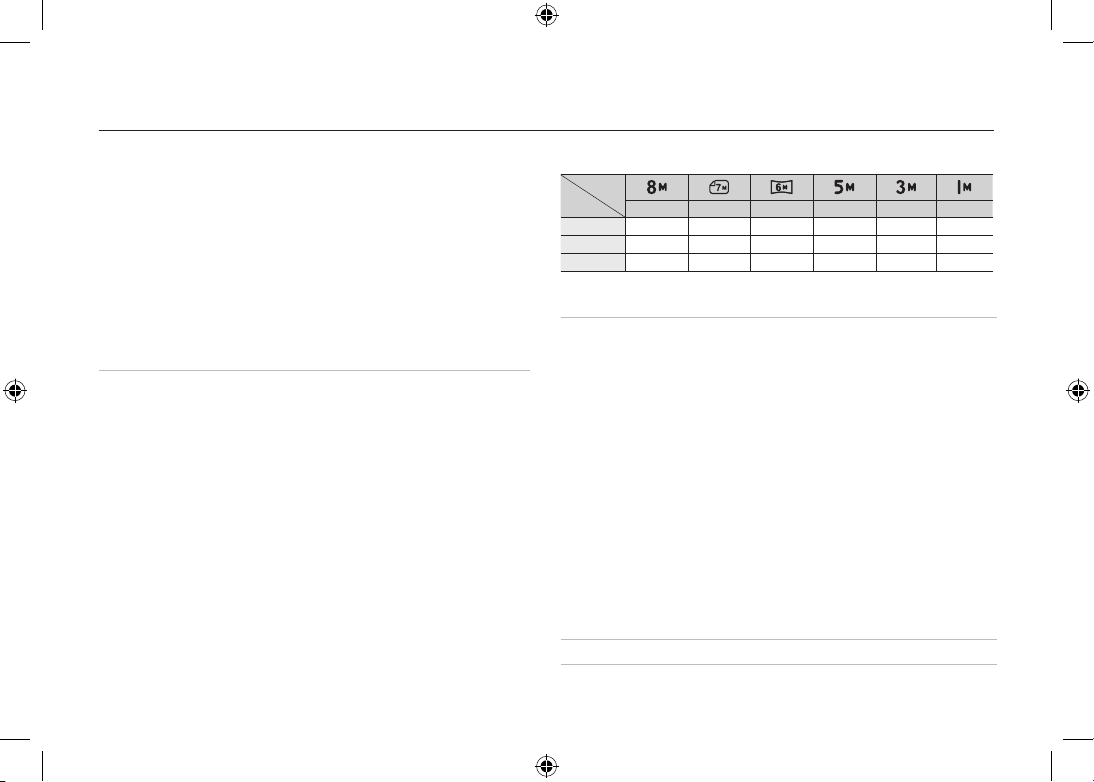
–
Image Size
and Capacity (256 MB Size)
These figures are measured under Samsung standard conditions and
may vary depending on shooting conditions and camera settings.
Special “E” Button– Recording Effect:
Photo Style Selector: Normal, Vivid, Soft, Forest, Retro,
Cool, Calm, Classic
Color Effect: Normal, B&W, Sepia, Red, Blue, Green,
Negative, Custom Color
Image Adjust: Saturation, Contrast, Sharpness
Fun: Cartoon, Photo Frame, High Light, Composite,
Color Mask
– Playback Effect:
Image Edit: Resize, Rotate
Color: Normal, B&W, Sepia, Red, Blue, Green, Negative,
Custom Color
Image Adjust: ACB, Red Eye Fix, Brightness, Contrast,
Saturation, Add Noise
Fun: Cartoon, Photo Frame, High Light, Composite,
Sticker, Color Filter, Color Mask
Image Play
– Single image, Thumbnails, Slide show
3264x2448 3264x2176 3264x1836 2592x1944 2048x1536 1024x768
Super Fine
53 60 71 86 134 434
Fine
94 107 133 161 226 520
Normal
135 171 202 220 306 600

EN-17
Specifications
Multi function
–
MP3, PMP, World Tour Guide, Text Viewer, Portable
Memory, Voice Recorder
Interface
–
Digital output connector: USB 2.0 High Speed
–
Audio: Mono
–
Video output: NTSC, PAL (user selectable)
–
DC Adapter: 4.2V, 20 pin connector
Power Source
–
Rechargeable battery: SLB-0937, 3.7V (900mAh)
–
Adaptor: SAC-47(DC 4.2V, 400mA)
Included battery may vary depending on sales region.
Dimensions
(WxHxD)
–
90.7 X 58 X 19.9mm (excluding protrusions)
Weight
–
116g (without batteries and card)
Operating
Temperature
–
0 ~ 40°C
Operating Humidity– 5 ~ 85%
Software
–
Application: Samsung Master, Samsung Converter,
Adobe Reader
MP3 Specification
Audio
– Frequency: 20Hz ~ 20KHz
– Earphone Port: 20Pin Port (Stereo Type)
– Output:
Maximum Volume Left 40mW + Right 40mW (16Ω)
– Noise Ratio: 88 dB with 20 KHz LPF
File
–
File Format: MP3 (MPEG-1/2/2.5 Layer 3)
–
Bit Rate: 48 ~ 320kbps (Including VBR)
Sound Effect
–
SRS, Normal, Classic, Dance, Jazz, Live, Rock
Play Mode
–
All, Repeat One, Repeat All, Random, Random Repeat
–
Skipping in Play, Auto Skipping
–
Slide Show On/Off (User Selectable)
–
MP3&Capturing (Capturing Mode is Auto Default, 3M)
–
Auto reload function (Remember both the last played
file and frame)
–
Background skin of MP3 playback using user images
PMP Specification
PMP Decoder
– Movie: Modified Xvid MPEG4 (Other video files
have to use Samsung Converter S/W)
– Audio: MPEG Layer 2 (Samsung Convert S/W)
Play Mode
–
Fast Forward/Rewind(Max 32x)
–
Seeking in Play, Skipping in Play
(Normal, 30sec, 1min, 3min, 5min, 10min)
–
Auto skipping after one file played
–
Auto reload function (Remember last played frame)
–
Support Full Screen in Converting S/W
Subtitle
–
Support SMI file (Using Samsung Converter S/W)
English
EN-18
Specifications
Text Specification
File
–
TXT extension name, up to 99999 pages
File format
– Window: ANSI (Windows 98 or later), Unicode /
Unicode (Big-Endian) / UTF-8 (Windows 2000/XP)
– Mac: ANSI, Unicode (UTF-16)
Function
–
Auto Scroll (0.8 sec ~ 2.3 sec)
–
Skipping by 1 page / 10 pages
–
Auto reload function (Remember last page)
–
Support MP3 BGM during displaying text file
Language
–
English, Korean, French, German, Spanish, Italian,
Chinese, Taiwanese, Japanese, Russian, Portuguese,
Dutch, Danish, Swedish, Finnish, Bahasa, Polish,
Hungarian, Czech, Turkish.
* Supportable language is subject to change without prior
notice.
Specifications are subject to change without prior notice.
All trademarks are the property of their respective owners.
Correct Disposal of This Product (Waste Electrical
& Electronic Equipment)
(Applicable in the European Union and other European
countries with separate collection systems) This marking
shown on the product or its literature, indicates that it should
not be disposed of with other household wastes at the end
of its working life.
To prevent possible harm to the environment or human health from
uncontrolled waste disposal, please separate this from other types of wastes
and recycle it responsibly to promote the sustainable reuse of material
resources. Household users should contact either the retailer where they
purchased this product, or their local government office, for details of where
and how they can take this item for environmentally safe recycling. Business
users should contact their supplier and check the terms and conditions of the
purchase contract. This product should not be mixed with other commercial
wastes for disposal.
Samsung Techwin cares for the environment at
all product manufacturing stages to preserve the
environment, and is taking a number of steps to
provide customers with more environment-friendly
products. The Eco mark represents Samsung
Techwin’s will to create environment-friendly
products, and indicates that the product satisfies the
EU RoHS Directive.
Correct Disposal of This Product
EN-19
(Applicable in the European Union and other
European countries with separate battery return
systems.)
This marking on the battery, manual or packaging indicates that the batteries
in this product should not be disposed of with other household waste at the
end of their working life. Where marked, the chemical symbols Hg, Cd or
Pb indicate that the battery contains mercury, cadmium or lead above the
reference levels in EC Directive 2006/66. If batteries are not properly disposed
of, these substances can cause harm to human health or the environment.
To protect natural resources and to promote material reuse, please separate
batteries from other types of waste and recycle them through your local, free
battery return system.
The rechargeable battery incorporated in this product is not user replaceable.
For information on its replacement, please contact your service provider.
Correct disposal of batteries in
this product
English

EN-20
MEMO
FR-1
Microsoft Windows et le logo Windows sont des marques déposées
appartenant à Microsoft Corporation incorporated aux États Unis et/ou
dans d’autres pays.
Tous les noms de marque et de produits qui apparaissent dans ce manuel
sont des marques déposées appartenant aux sociétés respectives
.
Le contenu et les illustrations de ce manuel sont susceptibles d’être
modifiés sans avertissement préalable
.
Reportez-vous au manuel d’utilisation se trouvant sur le CD de logiciels
pour davantage d’informations.
Les documents PDF du manuel d’utilisation sont fournis sur le CDROM fourni avec cet appareil photo. Recherchez les fichiers PDF avec l’
explorateur Windows. Avant d’ouvrir les fichiers PDF, vous devez installer
Adobe Reader fourni sur le CD-ROM.
est une marque de commerce de SRS Labs, Inc. Technologie WOW
HD incorporée sous licence de SRS Labs, Inc
.
Table des matières
Découvrir votre appareil photo
Découvrir votre appareil photo 1
Caractéristiques / Accessoires de l’appareil photo 4
Durée de vie de la pile et Nombre de prises de vue 5
(durée d’enregistrement)
Lorsque vous utilisez l’appareil photo pour la 6
première fois
Indicateur de l’écran LCD 7
Touche de mode 8
Prendre une photo 9
Lecture, Suppression et Protection des images 10
Mode MULTIMEDIA 11
Télécharger des images 14
Caractéristiques 15
Comment éliminer ce produit
(déchets d’ équipements électriques et électroniques)
(Applicable dans les pays de l’Union Européen et aux
autres pays européens disposant de systémes de collecte
sélective) Ce symbole sur le produit ou sa documentation
indique qu’il ne doit pas être éliminé en fin de vie avec les
autres déchets ménagers. L’élimination incontrôlée des
déchets pouvant porter préjudice à l’environnement ou à la santé humaine,
veuillez le séparer des autres types de déchets et le recycler de façon
responsable. Vous favoriserez ainsi la réutilisation durable des ressources
matérielles. Les particuliers sont invités à contacter le distributeur leur ayant
vendu le produit ou à se renseigner auprès de leur mairie pour savoir où et
comment ils peuvent se débarrasser de ce produit afin qu’il soit recyclé en
respectant l’environnement. Les entreprises sont invitées à contacter leurs
fournisseurs et à consulter les conditions de leur contrat de vente. Ce produit
ne doit pas être éliminé avec les autres déchets commerciaux.
Pour Samsung Techwin, le respect de
l'environnement à tous les sites de fabrication est
important ; Samsung Techwin met tout en œuvre
pour fournir aux clients, des produits respectant
l'environnement. La marque Eco représente la
volonté de Samsung Techwin de créer des produits
respectant l'environnement, et indique que le produit
répond aux normes EU Ro HS.
Élimination de ce produit
Français
FR-2
Découvrir votre appareil photo
Le symbole AVERTISSEMENT indique un danger éventuel qui, si vous
ne suivez pas les consignes de sécurité, peut entraîner des blessures
graves, voire mortelles.
N’utilisez pas le flash à proximité des personnes ni des animaux.
Le positionnement du flash trop près des yeux du sujet peut
causer des dommages à la vue.
Pour des raisons de sécurité, rangez cet appareil et ses
accessoires dans un endroit hors de la portée des enfants et des
animaux afin de prévenir tout accident et notamment :
– L’ingestion des piles ou de petits accessoires. En cas d’accident,
veuillez consulter un médecin immédiatement.
– Les pièces mobiles de l’appareil photo peuvent provoquer des
blessures.
Il se peut que la pile et l’appareil chauffent lors d’une utilisation
prolongée. Cela peut provoquer un mauvais fonctionnement de
l’appareil. Si cela devait se produire, laissez l’appareil au repos
quelques minutes afin qu’il refroidisse.
Ne laissez pas cet appareil dans des endroits très chauds, tels que
les véhicules fermés, en exposition à la lumière directe du soleil ou
exposés à des variations extrêmes de température. L’exposition à
des températures extrêmes risque d’endommager les composants
internes de l’appareil photo et provoquer un incendie.
En cours d’utilisation, ne couvrez pas l’appareil photo ou le chargeur.
Cela risque de provoquer un réchauffement et la déformation du
boîtier ou provoquer un incendie. Utilisez toujours votre appareil
photo et ses accessoires dans un endroit bien ventilé.
Le symbole DANGER avertit d’un danger imminent qui, si vous ne
suivez pas les consignes de sécurité, peut entraîner des blessures
graves, voire mortelles.
N’essayez pas de faire une quelconque modification sur
votre appareil photo. Toute modification pourrait causer un
choc électrique, un incendie, des blessures corporelle ou des
dommages à l’appareil photo. L’inspection interne de l’appareil,
l’entretien et les reparations doivent être réalisées par votre
revendeur ou le Centre de service après-vente de Samsung.
Si un liquide ou un objet pénètre dans l’appareil, prenez garde de
ne pas utiliser ce dernier. Éteignez l’appareil photo, puis coupez
l’alimentation (batteries ou adaptateur CA). Prenez contact avec
votre revendeur ou le Centre de service après-vente de Samsung.
D’ici là, n’utilisez en aucun cas l’appareil pour éviter tout incendie
et toute électrocution.
Veillez à ne pas utiliser cet appareil à proximité de produits
inflammables ou de gaz explosifs, car cela pourrait augmenter les
risques d’explosion.
N’insérez pas et ne laissez pas tomber d’objets métalliques ou
inflammables dans l’appareil photo par les points d’accès, par
exemple le logement de la carte mémoire et le compartiment de
piles. Cela peut provoquer un incendie ou un choc électrique.
Ne manipulez pas cet appareil avec des mains humides. Cela
pourrait causer un incendie ou un choc électrique
.
DANGER
AVERTISSEMENT
FR-3
Découvrir votre appareil photo
MISE EN GARDE
Le symbole MISE EN GARDE avertit d’un danger éventuel qui, si vous ne suivez
pas les consignes de sécurité, peut entraîner des blessures légères ou assez
graves
.
Retirez les piles lorsque vous prévoyez de ne pas utiliser l’appareil
photo pendant une longue période.
Il se peut qu’il y ait une fuite d’électrolyte corrosive au niveau des
piles ce qui peut endommager les composants de l’appareil photo
de manière permanente
Les fuites, la surchauffe ou l’explosion des piles pourraient causer
des blessures ou un incendie.
– Assurez-vous d’utiliser uniquement des batteries comportant les
caractéristiques qui conviennent à votre appareil photo.
– Ne mettez pas la batterie en court-circuit, ne les chauffez pas et
ne les jetez pas au feu.
– N’insérez pas la batterie en inversant les polarités.
Assurez-vous de formater la carte mémoire si vous l’utilisez pour la
première fois ou si elle contient des données que l’appareil photo
ne peut pas reconnaître ou encore, si elle contient des photos
prises avec un appareil photo différent.
Ne déclenchez jamais le flash tant que vous le touchez ou qu’il est en
contact avec un objet. Ne pas toucher le flash après l’utilisation. Cela
causerait un incendie
.
Les cartes de crédit risquent d’être démagnétisées lorsqu’elles se
trouvent à proximité de l’appareil photo. Évitez donc de laisser des
cartes magnétiques près de l’appareil photo
.
Ne déplacez pas l’appareil photo lorsqu’il est allumé, quand
vous utilisez le chargeur CA. Après utilisation, éteignez toujours
l’appareil photo avant de débrancher l’adaptateur de la prise
murale. Assurez-vous ensuite que les cordons ou les câbles des
connecteurs vers d’autres appareils sont débranchés avant de
déplacer l’appareil photo. Si vous ne prenez pas cette précaution,
vous risquez d’endommager les cordons ou câbles, ce qui peut
causer un choc électrique ou un incendie.
Faites attention à ne pas toucher l’objectif ou le couvercle de
l'objectif afin d’éviter de prendre des images floues et de provoquer
un mauvais fonctionnement de l’appareil.
Évitez d’obstruer l'objectif ou le flash lorsque vous capturez une
image.
Avant de brancher un câble ou un adaptateur secteur, examinez le
sens et ne forcez pas sur les prises. Vous risqueriez d’endommager
le câble ou l’appareil photo.
L’ordinateur risque fortement de rencontrer des problèmes lorsque
la fiche 20 broches est branché sur le port USB de celui-ci. Ne
jamais brancher la fiche 20 broches sur le port USB d’un PC.
Vérifiez le sens d‘insertion de la carte mémoire et insérez-la ensuite
correctement.
Cela risque d’endommager l’appareil photo.
Avant un événement important ou un voyage, vérifiez l’état de
l’appareil photo. Samsung ne saurait être tenu responsable des
conséquences en cas de mauvais fonctionnement de
l’appareil photo.
Français
FR-4
Caractéristiques / Accessoires de l’appareil photo
Contenu de l'emballage
Veuillez contrôler que vous avez tous les accessoires avant d'utiliser cet appareil. Il est possible que le contenu
varie selon la région de vente. Pour acheter l’équipement en option, contactez votre revendeur Samsung le plus
proche ou un centre de service Samsung.
Appareil photo
Manuel de l'utilisateur,
Garantie du produit
Dragonne Câble AV
Batterie rechargeable
(SLB-0937 )
Adaptateur secteur
(SAC-47)/câble USB
(SUC-C3)
CD logiciel Écouteurs
Vendu séparément
Carte mémoire
SD/SDHC/MMC
Étui
Déclencheur
Flash
Capteur AF/Voyant
Retardateur
Objectif
Touche POWER
Microphone
Haut-parleur
Touche FD (DÉTECT.
VISAGE) / MP3, Touche
verrouillage PMP
Voyant d'état
de l'appareil
photo
Écran LCD
Touche
Fn/EFFACE
Touche M (Mode)
Mode Lecture/
Touche Impression
Dragonne
Ouvrir
Fermer
Touche E (Effet)
Touche multi-fonction
Touche zoom T (Zoom numérique)
Touche zoom W
(Vignette)
Borne de branchement
USB / AV / DC / Écouteurs

FR-5
Durée de vie de la pile et Nombre de prises de vue (durée d’enregistrement)
Nombre d’images et durée de vie de la batterie : Utilisation du
SLB-0937
Durée de
vie de la
pile/Nombre
d'images
Conditions
Image fixe
Environ 120
MIN/
Environ 240
prises de vue
Avec la batterie entièrement chargée,
Mode Auto, Taille de l’image 8M,
Qualité d’image fine, Intervalle
prise à prise : 30Sec.Changer la
position du zoom entre Grand angle
et Téléobjectif à chaque prise de
vue. Utiliser le flash toutes les deux
prises de vue Utiliser l’appareil photo
pendant 5 minutes puis le mettre
hors tension pendant 1 minute.
VIDÉO
Environ 120
MIN
Avec la batterie entièrement chargée
Taille de l’image 640X480 Vitesse 30
ips
Multimédia
MP3
Environ
300 MIN
Utiliser la batterie entièrement
chargée LCD éteint.
PMP
Environ
220 MIN
Utiliser la batterie entièrement
chargée
Ces données sont mesurées d'après les conditions standard et les
conditions de prises de vue de Samsung ; ces données peuvent varier
suivant les méthodes de l'utilisateur.
Lors de l’utilisation d’une mémoire MMC de 256 Mo, la capacité de
prise de vue indiquée est la suivante. Ces chiffres sont approximatifs
étant donné que les capacités de l’image peuvent être modifiées par
des variables telles que le sujet et le type de carte mémoire.
Taille d'image
enregistrée
TRÈS
FINE
FINE
NORMAL
30 IPS 20 IPS 15 IPS
Image
fixe
53 94 135 – – –
60 107 171 – – –
71 133 202 – – –
86 161 220 – – –
134 226 306 – – –
434 520 600 – – –
* Clip
vidéo
– – – –
Environ
8’31”
–
– – –
Environ
8’58”
–
Environ
16’59”
– – –
Environ
21’36”
–
Environ
42’39”
Les durées d’enregistrement peuvent être modifiées par le fonctionnement
du zoom.Les touches zoom ne fonctionnent pas pendant l'enregistrement
du film.
Français
FR-6
Lorsque vous utilisez l’appareil photo pour la première fois
Chargez entièrement la batterie rechargeable avant d’utiliser l’appareil
photo la première fois.
Lorsque vous allumez l’appareil photo pour la première fois, un menu vous
permettant de paramétrer la date, l’heure, la langue ainsi que le type de
batterie s’affiche sur l’écran LCD. Ce menu ne s'affichera pas après la
configuration. Paramétrez la date/l’heure, la langue ainsi que le type de
batterie avant d’utiliser cet appareil photo.
Paramétrage de la langue
1. Sélectionnez le menu [Language] en
appuyant sur la touche Haut/Bas et
appuyez sur la touche Droite
2. Sélectionnez le sous-menu voulu en
appuyant sur la touche Haut/Bas, puis
appuyez sur la touche OK
– Vous pouvez sélectionner parmi 22
langues. Anglais, Coréen, Français,
Allemand, Espagnol, Italien, Chinois simplifié, Chinois traditionnel,
Japonais, Russe, Portugais, Hollandais, Danois, Suédois, Finnois,
Thaï, Bahasa (Malais/Indonésien), Arabe, Hongrois, Tchèque,
Polonais et Turc.
Paramétrage de la date, de l’heure et du type de date
1. Sélectionnez le menu [Date&Time] on
appuyant sur la touche Haut/Bas et
appuyez sur la touche Droite
.
2. Sélectionnez le sous-menu souhaité
en appuyant sur la touche Haut
/Bas/
Gauche
/Droite, puis appuyez sur la
touche OK
.
Droite : permet de sélectionner
les paramètres heure mondiale/année/mois/jour/heure/
minute/type de la date.
Gauche : Permet de déplacer le curseur au menu principal
[Date&Time] si le curseur est placé sur le premier élément
du paramétrage de la date et de l’heure. Dans tous les
autres cas, le curseur sera déplacé vers la gauche par
rapport à sa position actuelle.
Haut/Bas : Permet de modifier la valeur de chaque élément.
*
Pour plus d’informations sur la configuration de l’heure mondiale,
reportez-vous à la documentation fournie sur le CD logiciel.
Back
Set
OK
ENGLISH
한국어
FRANÇAIS
DEUTSCH
ESPAÑOL
ITALIANO
SETUP1
Language
Date&Time
Back
Set
OK
SETUP1
Language
Date&Time
London
2008 / 01 / 01
12 : 00
yy/mm/dd
FR-7
Indicateur de l'écran LCD
L'écran à cristaux liquides affiche les informations pour les fonctions
et sélections de prise de vue.Reportez-vous au manuel d’utilisation se
trouvant sur le CD de logiciels pour davantage d’informations.
<Image et état plein>
N° Description Icônes
1
Barre du zoom optique/numérique/
Taux du zoom numérique
x 5.0
2
Nombres de prises disponibles
restantes/Durée restante
00016/00:00:00
3
Icône Carte mémoire/
Icône Mémoire interne
/
4 Taux de charge de la batterie
N° Description Icônes
5
Dimensions d’image
6
Qualité de l’image/Nombre d’
images par seconde
7
Mesure d’exposition
8
Mode Conduite
9
ISO
10
Équilibrage des blancs
11
Compenser la valeur d’exposition/
Obturateur longue durée
/ LT
12
Date/Heure
2008/01/01 01:00 PM
13
SATURATION
14
Finesse/Micro éteint
/
15
Contraste
16
Macro
17
Retardateur
18
Flash
19
DÉTECT. VISAGE - AUTO
PORTRAIT/SÉLECTEUR
STYLE PHOTO/COULEUR
/ /
20
Mode d’enregistrement
21
Mémo vocal
22
Cadre de mise au point
automatique
23
Avertissement de mouvement de
l’appareil
00016
01:00 PM
2008/01/01
㉑
㉒
㉓
① ② ③
⑤
⑥
⑦
⑧
⑨
⑩
⑪
④
⑫
⑯
⑮
⑭
⑬
⑰
⑱
⑳
⑲
X5 .0
Français
FR-8
AUTO
Sélectionnez ce mode pour une prise de photo rapide et
facile avec un minimum d’interaction de l’utilisateur.
Ce mode vous permet de sélectionner les menus de base.
Pour sélectionner un menu avancé, sélectionnez l’autre
mode de l’appareil photo.
PROGRAMME
Le fait de sélectionner le mode automatique permet de
configurer l’appareil photo avec des paramètres optimaux.
Vous pouvez encore configurer toutes les fonctions
manuellement à l’exception du diaphragme et de la vitesse
d’obturation.
DIS
Ce mode permet de réduire les effets de tremblement et
vous aide à obtenir une image bien exposée dans des
conditions d’éclairage faible.
Utilisez simplement le menu pour configurer les meilleurs
paramètres pour une variété de situations de prises de vue.
Touche de mode
Vous pouvez sélectionner le mode de fonctionnement que vous souhaitez à l’aide de la touche M (Mode) située à l’arrière de
l’appareil photo.
SCENE
VIDÉO
Pour la réalisation d’un film
FUN
Dans ce mode, vous pouvez facilement prendre des photos
et y ajouter divers effets.
AIDE PHOTO
Permet à l’utilisateur d’apprendre la meilleure façon de
prendre des photos et propose des solutions aux problèmes
susceptibles de survenir. Ce mode permet également à l’
utilisateur de s’entraîner à prendre des photos.
Cet appareil photo dispose d’un programme de lecteur
MP3, VISU. TXT et du lecteur multimédia portable
incorporé. Vous pouvez prendre une image, écouter des
fichiers MP3 et regarder un clip vidéo (film et clip vidéo)
lorsque vous le souhaitez. Vous pouvez écouter de la
musique MP3 tout en lisant le texte sur l’écran LCD ou en
prenant une photo.
GUIDE
Vous pouvez obtenir des informations de voyage utiles sur
les villes principales du monde.
MULTIMEDIA
FR-9
Prendre une photo
Comment prendre une photo
1. Mettez l’appareil photo sous tension
et sélectionnez un mode à l’aide de la
touche M (Mode)
.
2. Tenez la caméra comme l’indique l’illustration.
3. Assurez-vous que la composition de
l’image vous convient.
4. Prenez la photo
Comment enregistrer un film.
Sélectionnez le mode Scène en
appuyant sur la touche M (Mode)
.
1. Assurez-vous que la composition de
l’image vous convient.
2. Démarrez l’enregistrement.
Appuyez sur le déclencheur pour
démarrer
l’enregistrement ; appuyez de nouveau
Le déclencheur pour interrompre
l’enregistrement.
Enfoncer à mi course, la mise
au point et le flash sont vérifiés.
Enfoncer complètement
L’image est prise.
Français
FR-10
Lecture, Suppression et Protection des images
2. Pour ajouter des images à supprimer,
appuyez sur la touche
T.
– Touche Gauche/Droite
: Permet de
sélectionner des images
– Touche T : Permet de vérifier les
éléments à supprimer
– Touche OK : Permet de confirmer la
sélection
3. Sélectionnez la valeur du sous-menu en appuyant sur la touche Haut/
Bas et appuyez ensuite sur la touche OK
.
– Si [NON] est sélectionné : permet d’annuler “SUPP. IMAGE?”.
– Si [OUI] est sélectionné : Permet d’effacer les images sélectionnées.
Protection des images
Cela permet d’éviter d’effacer
accidentellement des prises de vue
particulières.
[SELECT.] Les images
sélectionnées
sont protégées ou
déprotégées.
[TOUTES IM.]: Toutes les images
mémorisées sont
protégées ou déprotégées
Lorsque vous protégez une image
contre un effacement inopiné, l’icône
de protection s’affiche à l’écran LCD.
Une image en mode [VERROUIL.]
est protégée de la fonction Supprimer
mais n’est PAS protégée de la fonction
[FORMAT].
Lecture des images
La dernière image enregistrée sur la mémoire s’affiche.
Appuyer sur la touche Mode Lecture
( ).
Sélectionnez l’image que vous souhaitez
lire à l’aide de la touche Gauche/Droite
.
Touche Supprimer
Cela permet de supprimer des images enregistrées sur la carte mémoire.
1. Sélectionnez une image que vous souhaitez supprimer en appuyant sur
la touche Gauche /Droite et appuyez sur la touche Supprimer (
).
<Image unique> <Aperçu image>
RETOUR
PARAM.
OK
LECTURE
MÉMO VOCAL
PROTÉGER
SUPPRIMER
DPOF
COPIER
SÉLECT.
TOUTES IM.
CONFIR. OK
SUPP. IMAGE?
NON
OUI
SELECT.T
100-0016
1 2 3
4 5 6
7 8 9
SUPP. IMAGE?
NON
OUI
100-0016
CONFIR. OK
SUPPR.OKSELECT.T
Prev ◀ ▶ Next
100-0016
100-0016
 Loading...