

Page 1

HT-F4500
HT-F4550
5.1CH Blu-ray™
Home Entertainment System
user manual
imagine the possibilities
Thank you for purchasing this Samsung product.
To receive more complete service,
please register your product at
www.samsung.com/register
Page 2

Safety Information
Warning
TO REDUCE THE RISK OF ELECTRIC SHOCK, DO NOT REMOVE THE COVER (OR BACK).
NO USER-SERVICEABLE PARTS ARE INSIDE. REFER SERVICING TO QUALIFIED SERVICE PERSONNEL.
CAUTION
RISK OF ELECTRIC SHOCK
DO NOT OPEN
The lighting flash and Arrowhead
within the triangle is a warning sign
alerting you of dangerous voltage
inside the product.
CAUTION:
ELECTRIC SHOCK, DO NOT REMOVE COVER
(OR BACK) NO USER SERVICEABLE PARTS
INSIDE. REFER SERVICING TO QUALIFIED
SERVICE PERSONNEL.
TO REDUCE THE RISK OF
The explanation point within the
triangle is a warning s
important instructions accompanying
the product.
ign al
erting you of
WARNING
• To reduce the risk of fire or electric shock, do not
expose this appliance to rain or moisture.
CLASS 1 LASER PRODUCT
This Compact Disc player is classified as a CLASS
1 LASER product. Use of controls, adjustments or
performance of procedures other than those specified
herein may result in hazardous radiation exposure.
Complies with 21CFR 1040.10 except for deviations
pursuant to Laser Notice No. 50, dated June 24, 2007.
DANGER :
• VISIBLE AND INVISIBLE LASER RADIATION WHEN
OPEN. AVOID DIRECT EXPOSURE TO BEAM. (FDA
21 CFR)
CAUTION :
• CLASS 3B VISIBLE AND INVISIBLE LASER
RADIATION WHEN OPEN. AVOID EXPOSURE TO THE
BEAM (IEC 60825-1)
• THIS PRODUCT UTILIZES A LASER. USE OF
CONTROLS OR ADJUSTMENTS OR PERFORMANCE
OF PROCEDURES OTHER THAN THOSE SPECIFIED
HEREIN MAY RESULT IN HAZARDOUS RADIATION
EXPOSURE. DO NOT OPEN COVER AND DO
NOT REPAIR YOURSELF. REFER SERVICING TO
QUALIFIED PERSONNEL.
CLASS 1 LASER PRODUCT
KLASSE 1 LASER PRODUKT
LUOKAN 1 LASER LAITE
KLASS 1 LASER APPARAT
PRODUCTO LÁSER CLASE 1
|
2 English
Page 3

Disc Storage & Management
• Holding Discs
- Fingerprints or scratches on
a disc may reduce sound and picture
quality or cause skipping.
- Avoid touching the surface of a disc where data has
been recorded.
- Hold the disc by the edges so that fingerprints will
not get on the surface.
- Do not stick paper or tape on the disc.
• Cleaning Discs
- If you get fingerprints or dirt on a disc,
clean it with a mild detergent diluted in
water and wipe with a soft cloth.
- When cleaning, wipe gently from the
inside to the outside of the disc.
- Disc Storage
Do not keep in direct sunlight.
Keep in a cool ventilated area.
Keep in a clean protection jacket and store
vertically.
Handling Cautions
• Do not expose this apparatus to dripping or splashing.
Do not put objects filled with liquids, such as vases, on
the apparatus.
• To turn this apparatus off completely, you must pull the
power plug out of the wall socket. Consequently, the
power plug must be easily and readily accessible at all
times.
• Do not touch the power plug with a wet hand.
It can cause an electric shock.
• Do not plug multiple electric devices into the same wall
socket. Overloading a socket can cause it to overheat,
resulting in a fire.
• Maintenance of the Cabinet
- Before connecting other components to this
product, be sure to turn them off.
- If you move your product suddenly from a cold place
to a warm place, condensation may occur on the
operating parts and lens and cause abnormal disc
playback. If this occurs, unplug the product, wait for
two hours, and then connect the plug to the power
outlet. Then, insert the disc, and try to play back
again.
• If the product makes an abnormal noise or produces
a burning smell or smoke, turn off the power switch
immediately and disconnect the power plug from
the wall outlet. Then, contact the nearest customer
service centre for technical assistance. Do not use the
product. Using the product as it is may cause a fire or
an electric shock.
• To turn this apparatus off completely, you must pull the
power plug out of the wall socket. Consequently, the
power plug must be easily and readily accessible at all
times.
Licence
Manufactured under licence
from Dolby Laboratories.
Dolby, Pro Logic, and
the double-D symbol are
trademarks of Dolby Laboratories.
Manufactured
under licence under
U.S. Patent Nos:
5,956,674; 5,974,380;
6,226,616; 6,487,535; 7,392,195; 7,272,567;
7,333,929; 7,212,872 & other U.S. and worldwide
patents issued & pending. DTS-HD, the Symbol,
& DTS-HD and the Symbol together are registered
trademarks & DTS-HD Master Audio | Essential is a
trademark of DTS, Inc. Product includes software.
© DTS, Inc. All Rights Reserved.
ABOUT DIVX VIDEO: DivX® is
a digital video format created
by DivX, LLC, a subsidiary of
Rovi Corporation. This is an
official DivX Certified® device that plays DivX video.
Visit divx.com for more information and software tools
to convert your files into DivX videos.
ABOUT DIVX VIDEO-ON-DEMAND: This DivX
Certified® device must be registered in order to play
purchased DivX Video-on-Demand (VOD) movies. To
obtain your registration code, locate the DivX VOD
section in your device setup menu. Go to vod.divx.
com for more information on how to complete your
registration.
DivX Certified® to play DivX® video up to HD 1080p,
including premium content.
DivX®, DivX Certified® and associated logos are
trademarks of Rovi Corporation or its subsidiaries and
are used under licence.
Covered by one or more of the following U.S. patents
: 7,295,673; 7,460,668; 7,515,710; 7,519,274
01 Safety Information
English 3
|
Page 4
Safety Information
The terms HDMI and HDMI
High-Definition Multimedia
Interface, and the HDMI
Logo are trademarks or registered trademarks of
HDMI Licencing LLC in the United States and other
countries.
DLNA®, the DLNA Logo
and DLNA CERTIFIED® are
trademarks, service marks,
or certification marks of the Digital Living Network
Alliance.
Oracle and Java are registered trademarks
of Oracle and/or its affiliates. Other names
may be trademarks of their respective
owners.
This item incorporates copy protection technology
that is protected by U.S. patents and other intellectual
property rights of Rovi Corporation. Reverse engineering
and disassembly are prohibited.
Blu-ray Disc™, Blu-ray™, and the logos are trademarks
of Blu-ray Disc Association.
This product uses Cinavia technology to limit the
use of unauthorized copies of some commerciallyproduced film and videos and their soundtracks. When
a prohibited use of an unauthorized copy is detected, a
message will be displayed and playback or copying will
be interrupted.
More information about Cinavia technology is provided
at the Cinavia Online Consumer Information Centre
at http://www.cinavia.com. To request additional
information about Cinavia by mail, send a postcard with
your mailing address to: Cinavia Consumer Information
Centre, P.O. Box 86851, San Diego, CA, 92138, USA.”
This product incorporates proprietary technology
under licence from Verance Corporation and is
protected by U.S. Patent 7,369,677 and other U.S.
and worldwide patents issued and pending as well
as copyright and trade secret protection for certain
aspects of such technology. Cinavia is a trademark of
Verance Corporation. Copyright 2004-2010 Verance
Corporation. All rights reserved by Verance. Reverse
engineering or disassembly is prohibited.
- Open Source Licence Notice
In the case of using open source software, Open
Source Licences are available on the product menu.
Using the 3D Function
IMPORTANT HEALTH AND SAFETY INFORMATION FOR
3D PICTURES.
Read and understand the following safety information
before using the 3D function.
• Some viewers may experience discomfort while viewing
3D TV such as dizziness, nausea, and headaches.
If you experience any such symptom, stop viewing 3D
TV, remove the 3D Active Glasses, and rest.
• Watching 3D images for an extended period of time
may cause eye strain. If you feel eye strain, stop
viewing 3D TV, remove your 3D Active Glasses, and
rest.
• A responsible adult should frequently check on children
who are using the 3D function.
If there are any reports of tired eyes, headaches,
dizziness, or nausea, have the child stop viewing 3D
TV and rest.
• Do not use the 3D Active Glasses for other purposes
(such as general eyeglasses, sunglasses, protective
goggles, etc.)
• Do not use the 3D function or 3D Active Glasses while
walking or moving around. Using the 3D function or 3D
Active Glasses while moving around may cause you to
bump into objects, trip, and/or fall, and cause serious
injury.
• If you want to enjoy 3D content, connect a 3D device
(3D compliant AV receiver or TV) to the product’s HDMI
OUT port using a high-speed HDMI cable. Put on 3D
glasses before playing the 3D content.
• The product outputs 3D signals only through HDMI
cable connected to the HDMI OUT port.
• As the video resolution in 3D play mode is fixed
according to the resolution of the original 3D video, you
can not change the resolution to your preference.
• Some functions such as BD Wise, screen size
adjustment, and resolution adjustment may not operate
properly in 3D play mode.
• You must use a high-speed HDMI cable for proper
output of the 3D signal.
• Stay at least three times the width of the screen from
the TV when watching 3D images. For example, if
you have a 46 inch screen, stay 3.5 meters from the
screen.
- Place the 3D video screen at eye level for the best
3D picture.
• When the product is connected to some 3D devices,
the 3D effect may not function properly.
• This product does not convert 2D content into 3D.
• “Blu-ray 3D” and “Blu-ray 3D” logo are trademarks of
the Blu-ray Disc Association.
|
4 English
Page 5

Copyright
© 2013 Samsung Electronics Co.,Ltd.
All rights reserved; No part or whole of this user’s manual
may be reproduced or copied without the prior written
permission of Samsung Electronics Co.,Ltd.
Contents
SAFETY INFORMATION
2 Warning
3 Disc Storage & Management
3 Handling Cautions
3 Licence
4 Using the 3D Function
5 Copyright
GETTING STARTED
6 Disk and Format Compatibility
7 Logos of Discs the product can play
9 Accessories
10 Front Panel
10 Rear Panel
11 Remote Control
CONNECTIONS
12 Connecting the Speakers
14 Connecting to a Network Router
15 Connecting to a TV/External Devices
SETTINGS
16 The Initial Settings Procedure
17 The Home Screen
17 Accessing the Settings Screen
18 Settings Menu Functions
20 Networks and the Internet
21 Upgrading Software
22 Setting Up DLNA
MEDIA PLAY
23 Playing Files on a USB Device
23 Playing a Disc with User Recorded Content
24 Playing a Commercial Video Disc
24 Controlling Video Playback
25 Playing a Pre-Recorded Commercial Audio Disc
25 Controlling Music Playback
26 Controlling Photo Playback
27 Listening to Radio
27 Using the TV Sound Button on the Remote Control
NETWORK SERVICES
28 Using BD-LIVE™
28 Using DLNA
APPENDIX
29 Additional Information
32 Troubleshooting
35 Specifications
Figures and illustrations in this User Manual are
provided for reference only and may differ from
actual product appearance.
An administration fee may be charged if either
a. an engineer is called out at your request and
there is no defect in the product (i.e. where
you have failed to read this user manual)
b. you bring the unit to a repair centre and
there is no defect in the product (i.e. where
you have failed to read this user manual).
The amount of such administration charge will
be advised to you before any work or home
visit is carried out.
01 Safety Information
English 5
|
Page 6

Getting Started
Disk and Format Compatibility
Disc Types and Contents Your Product Can Play
Media Disc Type Details
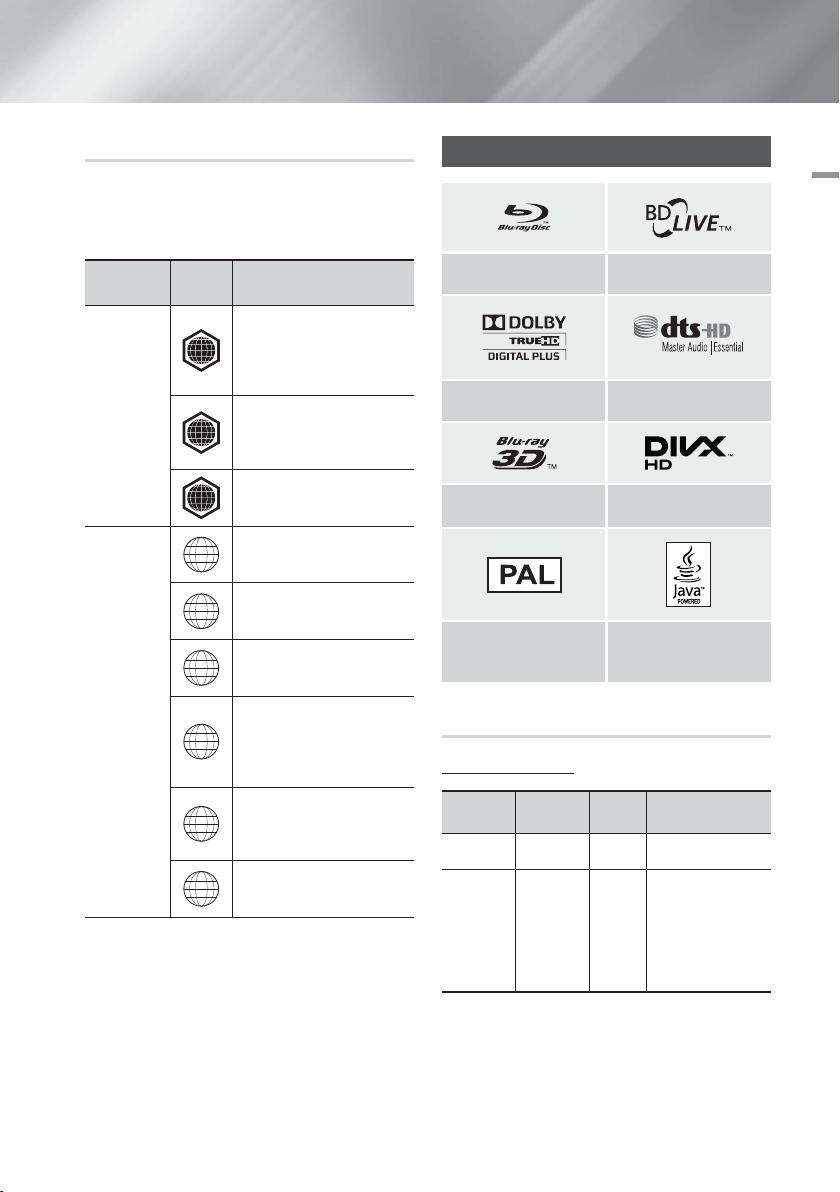
Blu-ray Disc
3D Blu-ray Disc
VIDEO
MUSIC
PHOTO
| NOTES |
The product may not play certain CD-RW/-R and DVD-R because of the disc type or recording conditions.
If a DVD-RW/-R disc has not been recorded properly in DVD video format, it will not be playable.
Your product will not play content that has been recorded on a DVD-R at a bit rate that exceeds 10 Mbps.
Your product will not play content that has been recorded on a BD-R or USB device at a bit rate that exceeds 30
Mbps.
Playback may not work for some types of discs, or when you use specific operations, such as angle change
and aspect ratio adjustment. Information about the discs is written in detail on the disc box. Please refer to this if
necessary.
When you play a BD-J title, loading may take longer than a normal title or some functions may perform slowly.
DVD-VIDEO, DVD-RW,
DVD-R, DVD+RW,
DVD+R
CD-RW/-R,
DVD-RW/-R,
BD-RE/-R
CD-RW/-R,
DVD-RW/-R,
BD-RE/-R
Disc Types Your Product Cannot Play
BD-ROM or BD-RE/-R disc recorded in the BD-RE format.
DVD-VIDEO, recorded DVD+RW/DVD-RW(V)/DVDR/+R discs that have
been recorded and finalised, or a USB storage media containing DivX,
MKV, MP4 contents.
Music recorded on CD-RW/-R, DVD-RW/-R, BD-RE/-R discs or a USB
storage media containing MP3 or WMA contents.
Photos recorded on CD-RW/-R, DVD-RW/-R, BD-RE/-R discs or a USB
storage media containing JPEG contents.
• HD DVD
• DVD-ROM/PD/MV-Disc,
etc
| NOTES |
This product may not respond to all operating commands because some Blu-ray Disc, DVD, and CD discs allow
specific or limited operation and provide only certain features during playback.
Please note that this is not a defect in the product.
Samsung cannot guarantee that this product will play every disc bearing the Blu-ray Disc, DVD or CD logo because
disc formats evolve, and problems and errors may occur during the creation of Blu-ray Disc, DVD, and CD software
and/or the manufacture of discs.
Please contact the SAMSUNG Customer Care Centre at, if you have questions or encounter difficulty when playing
Blu-ray Disc, DVD, or CD discs in this product. Also, refer to rest of this user manual for additional information on
playback restrictions.
Some commercial discs and DVD discs purchased outside your region may not play on this product.
|
6 English
• DVD-RAM
• Super Audio CD
(except CD layer)
• DVD-RW(VR mode)
• CVD/CD-ROM/CDV/
CD-G/CD-I/LD
(CD-Gs play audio only,
not graphics.)
• 3.9 GB DVD-R Disc for
Authoring.
Page 7
Region Code
Both products and discs are coded by region. These
regional codes must match for a disc to play. If the codes
do not match, the disc will not play.
The Region Number for this product is displayed on the
rear panel of the product.
Logos of Discs the product can play
02 Getting Started
Disc Type
Blu-ray Disc
DVD-VIDEO
Region
Code
North America, Central
A
B
C
1
2
3
4
5
America, South America,
Korea, Japan, Taiwan, Hong
Kong and South East Asia.
Europe, Greenland, French
territories, Middle East, Africa,
Australia and New Zealand.
India, China, Russia, Central
and South Asia.
The U.S., U.S. territories and
Europe, Japan, the Middle
East, Egypt, Africa, Greenland
Taiwan, Korea, the Philippines,
Indonesia, Hong Kong
Mexico, South America,
Central America, Australia,
New Zealand, Pacific Islands,
Russia, Eastern Europe, India,
North Korea, Mongolia
Area
Canada
Caribbean
Blu-ray Disc BD-LIVE
Dolby DTS
3D Blu-ray Disc
PAL broadcast system in
U.K, France, Germany, etc.
Supported Formats
Music File Support
File
Extension
*.mp3
Container
MP3
Audio
Codec
DivX
Java
Support Range
MP3 -
6
| NOTES |
If the Region number of a Blu-ray Disc/DVDs does not
correspond to the Region number of this product, the
product cannot play the disc.
China
*.wma
WMA
* Sampling rates (in
kHz) - 8, 11, 16, 22,
32, 44.1, 48
WMA
* Bit Rates - All bit
rates from 5kbps to
384kbps
English 7
|
Page 8

Getting Started
Picture File Support
File Extension Type Resolution
*.jpg
*.jpeg
*.jpe
*.png
Video File Support
File Extension Container Video Codec Audio Codec Resolution
*.avi
*.mkv
*.wmv
*.mp4
*.mpg
*.mpeg
AVI
MKV
WMV
(wmv9)
MP4
PS
JPEG
PNG
DivX 3.11/4/5/6
MP4v3
H.264 BP/MP/HP
VC-1 AP
DivX 5/6
H.264 BP/MP/HP
VC-1 AP
VC-1 SM
MP4 (mp4v)
H.264 BP/MP/HP
MPEG1
MPEG2
H.264 BP/MP/HP
15360x8640
MP3, Dolby Digital, DTS,
WMA, PCM
MP3, Dolby Digital, DTS
WMA
AAC
MP1, 2
Dolby Digital, DTS
1920x1080
Limitations
- Even when a file is encoded by a supported codec listed above, the file might not be played if its content has a
problem.
- Normal playback is not guaranteed if the file’s container information is wrong or the file itself is corrupted.
- Files having a higher bit rate/frame rate than standard may stutter during sound/video playback.
- The Seek (skip) function is not available if the file’s index table is damaged.
Video decoder
- Supports up to H.264 Level 4.1 and AVCHD
- Does not support H.264 FMO/ASO/RS and VC1 SP/MP/AP L4
- MPEG4 SP, ASP :
Below 1280 x 720 : 60 frames max
Above 1280 x 720 : 30 frames max
- Does not support GMC 2 or higher
Audio decoder
- Supports WMA 7, 8, 9 and STD
- Does not support WMA sampling rate of 22050Hz mono.
- AAC: Max sampling rate: 96Khz (8, 11, 12, 16, 22,24, 32,44.1, 48, 64, 88.2, 96) Max bit rate: 320kbps
Supported DivX subtitle file formats
*.ttxt, *.smi, *.srt, *.sub, *.txt
|
8 English
Page 9

AVCHD (Advanced Video Codec High Definition)
• This product can play back AVCHD format discs. These discs are normally recorded and used in camcorders.
• The AVCHD format is a high definition digital video camera format.
• The MPEG-4 AVC/H.264 format compresses images with greater efficiency than the conventional image compressing
format.
• Some AVCHD discs use the “x.v.Color” format. This product can play back AVCHD discs that use “x.v.Color” format.
• “x.v.Color” is a trademark of Sony Corporation.
• “AVCHD” and the AVCHD logo are trademarks of Matsushita Electronic Industrial Co., Ltd. and Sony Corporation.
| NOTES |
Some AVCHD format discs may not play, depending on the recording conditions.
AVCHD format discs need to be finalised.
“x.v.Color” offers a wider colour range than normal DVD camcorder discs.
Some DivX, MKV and MP4 format discs may not play, depending on their video resolution and frame rate.
Notes on the USB connection
• Your product supports USB storage media, MP3 players, digital cameras, and USB card readers.
• The product does not support folder or file names longer than 128 characters.
• Some USB/External HDD/digital camera devices may not be compatible with the product.
• Your product supports the FAT 16, FAT 32, and NTFS files systems.
• Connect USB devices directly to the product’s USB port. Connecting through a USB cable may cause compatibility
problems.
• Inserting more than one memory device into a multi-card reader may cause the reader to operate improperly.
• The product does not support the PTP protocol.
• Do not disconnect a USB device during a “loading” process.
• The bigger the image resolution, the longer the image takes to display.
• This product cannot play MP3 files with DRM (Digital Rights Management) downloaded from commercial sites.
• Your product only supports video that is under 30fps (frame rate).
• You must remove the USB storage device safely (by performing the “Safely Remove USB” function) to prevent
possible damage to the USB memory.
Press the HOME button to move to the home menu, press the YELLOW (C) button, and then press the E button.
• SAMSUNG is not responsible for any data file damage or data loss.
02 Getting Started
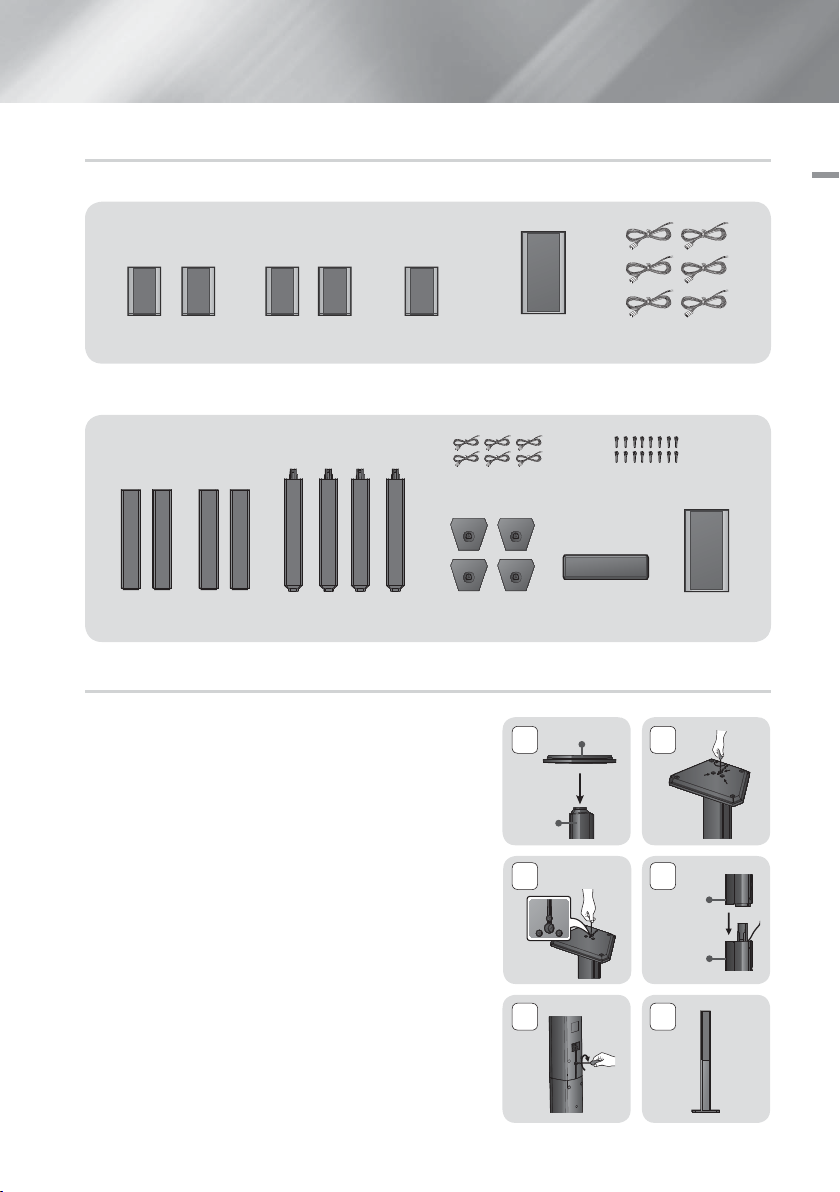
Accessories
Check for the supplied accessories below.
HDMI Cable Power Cable FM Antenna User Manual
FUNCTION
VOLUME
MUTE
-
+
123
4
56
89
7
DISC MENU TITLE MENU
POPUP
0
SUBTITLE HOME REPEAT
INFO
TOOLS
RETURN
EXIT
TUNER
MO/ST
MEMORY
ABCD
TUNING
DSP/EQTV SOUND
UP
DOWN
Remote Control
Batteries (AAA size)
English 9
|
Page 10
Getting Started
5V 500mA
HDMI OUT
LAN
POWER
SPEAKERS OUT
CENTER
SUBWOOFER
FRONT
L
SURROUND
L
FRONT
R
SURROUND
R
SPEAKER IMPEDANCE : 3
AUX
IN
FM ANT
OPTICAL
DIGITAL
AUDIO IN
L
R
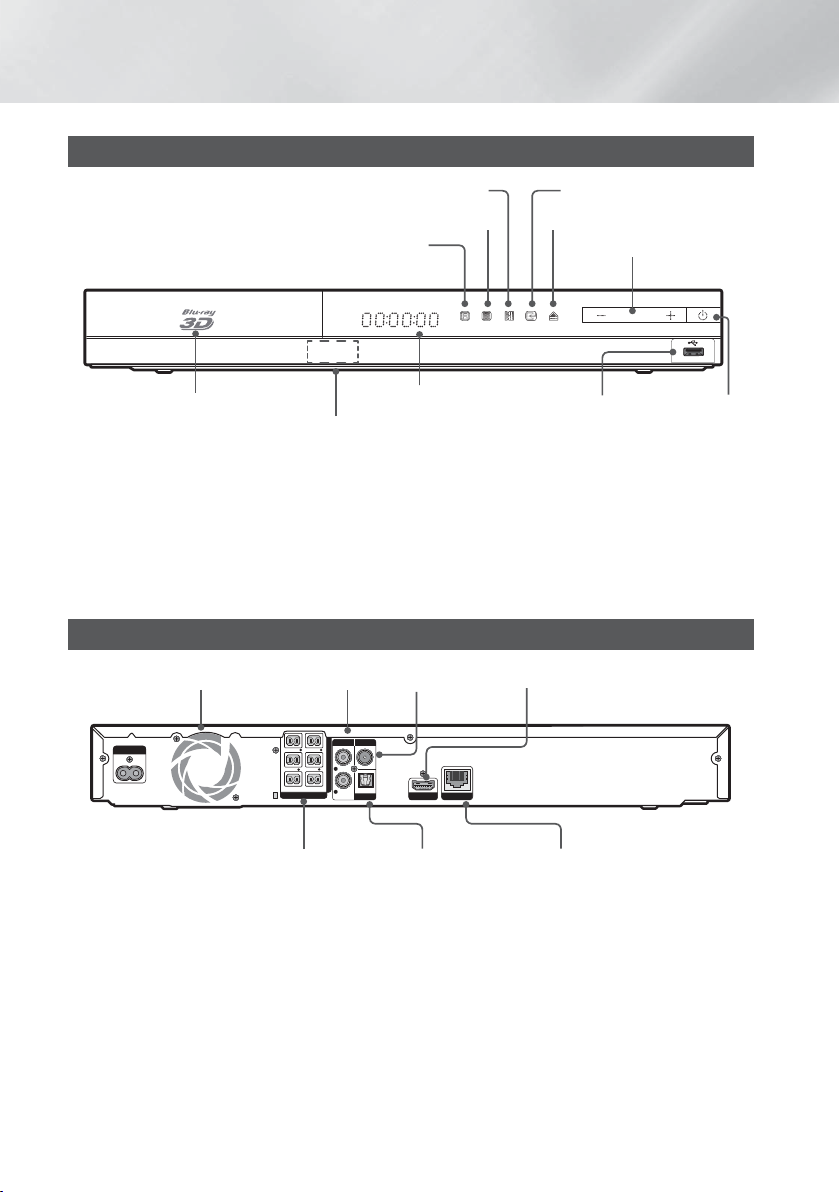
Front Panel
PLAY/PAUSE ENTER
STOP OPEN/CLOSE
FUNCTION
VOLUME CONTROL
DISC TRAY
DISPLAY
USB HOST
POWER
REMOTE CONTROL
SENSOR
| NOTES |
To upgrade the product's software through the USB Host jack, you must use a USB memory stick.
When the product displays the Blu-ray menu, you cannot start the movie by pressing the 6 button on the product
or the remote. To play the movie, you must select Play Movie or Start in the disc menu, and then press the
E
button.
If you use the Internet service or play the USB device contents on the TV, you cannot select the BD/DVD mode with
the FUNCTION button. Stop the playing contents on the TV first to select the BD/DVD mode.
Rear Panel
COOLING FAN
CONNECTORS
* Connecting the FM Antenna
Connect the FM antenna supplied to the FM ANTENNA Jack.
1.
Slowly move the antenna wire around until you find a location where reception is good, then fasten it to a wall or
2.
other rigid surface.
AUX IN *FM ANT HDMI OUT
EXTERNAL DIGITAL AUDIO
LANSPEAKER OUTPUT
IN (OPTICAL)
| NOTES |
Ensure a minimum of 10 cm of clear space on all sides of the home cinema to ensure adequate ventilation.
Do not obstruct the cooling fan or ventilation holes.
This product does not receive AM broadcasts.
|
10 English
Page 11

Remote Control
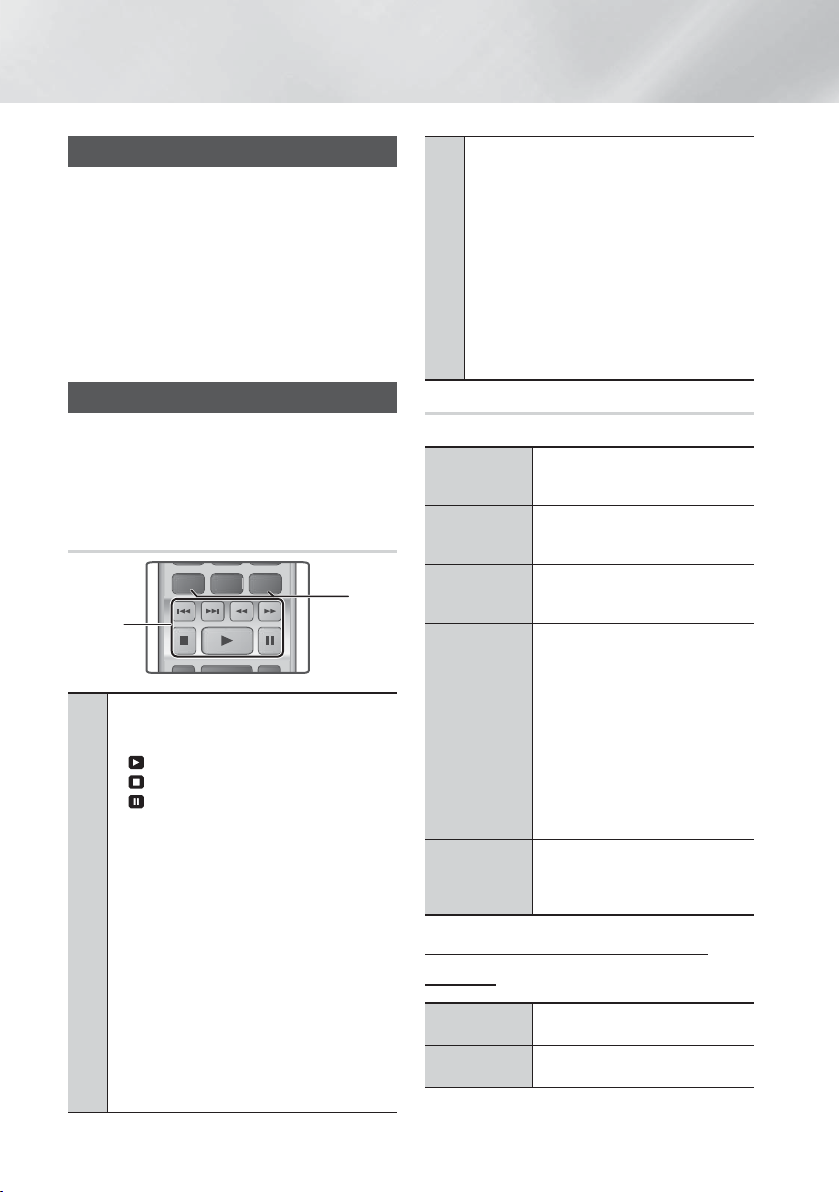
Tour of the Remote Control
02 Getting Started
Turn the product on and off.
Adjust the volume.
Press numeric buttons to operate
options.
Press to view the disc menu.
Press to skip backwards or forwards.
Press to play a disc.
Press to stop a disc.
Selects the disc subtitle language.
Press to move to the Home screen.
Press to use the Tools menu.
Select on-screen menu items and
change menu value.
Return to the previous menu.
These buttons are used both for
menus on the product and also
several Blu-ray Disc functions.
Audio signal can output to home
cinema speaker or TV speaker.
(See page 27)
Select the desired DSP/EQ audio
mode.
FUNCTION
VOLUME
-
1
4
7
DISC MENU TITLE MENU
SUBTITLE HOME REPEAT
TOOLS
RETURN
ABCD
DSP/EQTV SOUND
MUTE
+
2
3
56
89
POPUP
0
INFO
EXIT
TUNER
MO/ST
MEMORY
TUNING
UP
DOWN
Press to select Blu-ray's mode.
(BD/DVD, D. IN, AUX, etc.).
To open and close the disc tray.
Cut off the sound temporarily.
Use to enter the Popup menu/
Title menu.
Press to search backwards or
forwards.
Press to pause a disc.
Allows you to repeat a title,
chapter, track or disc.
Use to display the playback
information when playing
a Blu-ray/DVD disc.
Press to exit the menu.
Use to set a preset radio frequency.
Select MONO or STEREO for radio
broadcasts.
Search for active FM stations and to
change channels.
Installing batteries in the Remote Control
Make sure to match the “+” and “–” ends of the batteries with the
diagram inside the compartment.
Assuming typical TV usage, the batteries last for about one year.
The remote control can be used up to approximately7 meters
from the product in a straight line.
Do not dispose of batteries in a fire.
Do not short circuit, disassemble or overheat the batteries.
Danger of explosion if battery is incorrectly replaced. Replace only
with the same or equivalent type.
Battery size: AAA
English 11
|
Page 12
Connections
This section describes various methods of connecting the product to other external components.
Before moving or installing the product, be sure to turn off the power and disconnect the power cord.
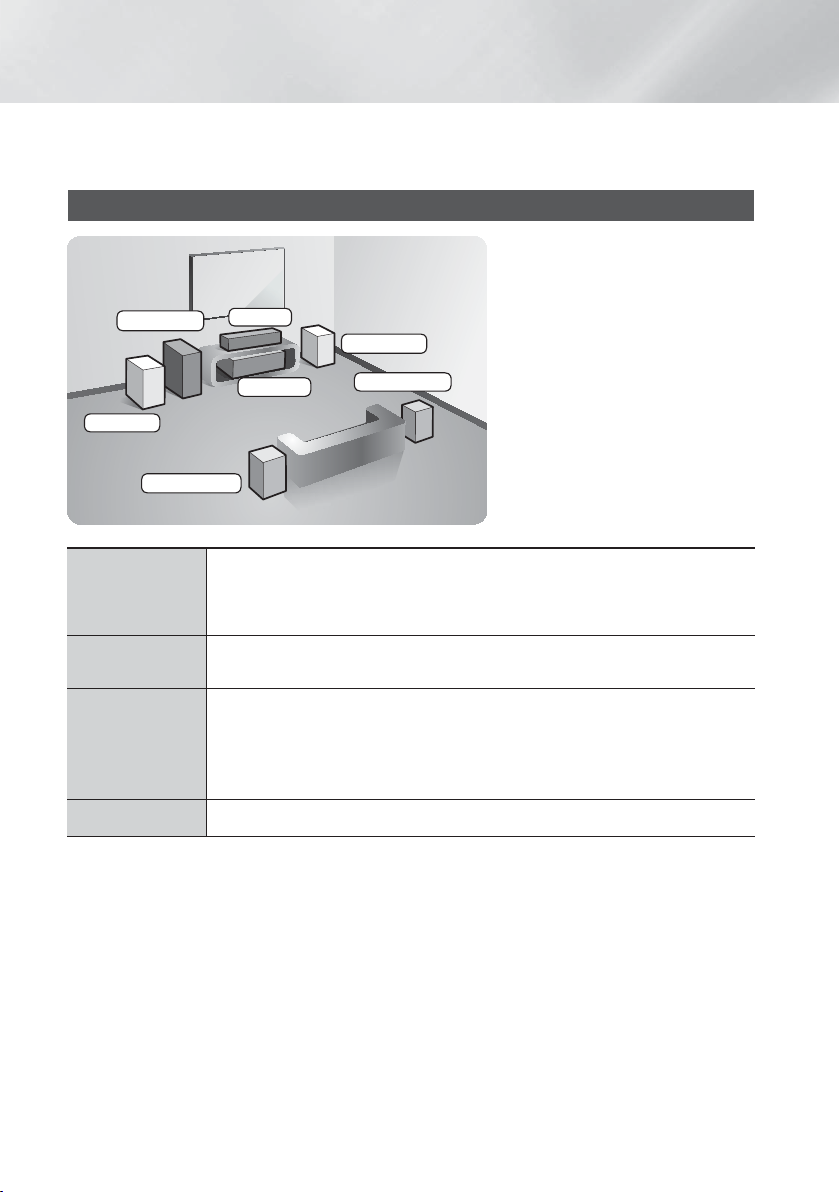
Connecting the Speakers
Position of the product
Place it on a stand or cabinet shelf, or
under the TV stand.
Subwoofer
Front (L)
Surround (L)
Front Speakers
Centre
Front (R)
Product
Place these speakers in front of your listening position, facing inwards (about 45°) toward
you. Place the front speakers so that their tweeters will be at the same height as your ear.
Align the front face of the front speakers with the front face of the centre speaker or place
them slightly in front of the centre speakers.
Surround (R)
Selecting the Listening Position
The listening position should be located
about 2.5 to 3 times the distance of the
TV's screen size away from the TV. For
example, if you have a 46 inch screen,
locate the listening position 2.92 to 3.50
meters from the screen.
Centre Speaker
Surround
Speakers
Subwoofer
|
12 English
It is best to install the Centre Speaker at the same height as the front speakers. You can
also install it directly over or under the TV.
Place these speakers to the side of your listening position. If there isn't enough room, place
these speakers so they face each other. Position them about 60 to 90cm above your ear,
facing slightly downward.
* Unlike the front and centre speakers, the surround speakers are used mainly for sound
effects. Sound will not come from them all the time.
The position of the subwoofer is not so critical. Place it anywhere you like.
Page 13
Speaker Components
HT-F4500
03 Connections
(L) (R)
FRONT
(L) (R)
SURROUND
CENTRE SUBWOOFER
HT-F4550
(L) (L)(R) (R)
FRONT / SURROUND
Installing the Speakers on the Tallboy Stand
* HT-F4550 only - Front/Surround Speakers
Turn the Stand Base upside-down and connect it to the Stand.
1.
Use the driver to combine the screws on the 3 marked holes.
2.
Straighten a supplied speaker wire to the gravity direction and put
3.
in the hole on the centre of Stand Base.
Connect the upper Speaker to the assembled Stand.
4.
Insert a screw clockwise into the hole on the rear of the speaker
5.
using a screwdriver.
And then connect a speaker cable.
This is the appearance after the speaker is installed.
6.
Follow this steps to install other speaker.
SPEAKER CABLE
STAND BASE
1
Stand
3 4
SPEAKER CABLE
SCREW (5x20): 16EA
CENTRE
Stand Base
SUBWOOFERSTAND
2
Speaker
Stand
5 6
English 13
|
Page 14
Connections
SPEAKERS OUT
CENTER
SUBWOOFER
FRONT
L
SURROUND
L
FRONT
R
SURROUND
R
SPEAKER IMPEDANCE : 3
AUX
IN
FM ANT
OPTICAL
DIGITAL
AUDIO IN
L
R
SPEAKERS OUT
CENTER
SUBWOOFER
FRONT
L
SURROUND
L
FRONT
R
SURROUND
R
SPEAKER IMPEDANCE : 3
HDMI OUT
LAN
POWER
AUX
IN
FM ANT
OPTICAL
DIGITAL
AUDIO IN
L
R
SPEAKERS OUT
CENTER
SUBWOOFER
FRONT
L
SURROUND
L
FRONT
R
SURROUND
R
SPEAKER IMPEDANCE : 3
Connecting The Speakers
Match each speaker cable bundle to the correct speaker by matching the colour
1.
coded plug on each bundle to the coloured sticker on the bottom of each speaker.
To attach speaker wire to each speaker:
2.
a. Press down the red tab on the back of the speaker, insert the red wire, and
then release the tab.
b. Press down the black tab on the back of the speaker, insert the black wire, and
then release the tab.
Connect the speaker wire plugs from each speaker to the back of the product by
3.
matching the colours of the speaker plugs to the colours of the speaker jacks.
In case of HT-F4500
Black
Red
Surround Speaker (R)
Front Speaker (R)
Surround Speaker (L)
Front Speaker (L)
Centre Speaker
Subwoofer
| CAUTION |
If you want to install the product on the wall, fasten the screws or nails on the wall firmly and use the holes on the
rear of speaker to install. However, when you install it, accessories (nails or screws) and installation is not provided by
the company.
Do not let children play with or near the speakers. They could get hurt if a speaker falls.
When connecting the speaker wires to the speakers, make sure that the polarity (+/ –) is correct.
Keep the subwoofer speaker out of reach of children to prevent children from inserting their hands or alien
substances into the duct (hole) of the subwoofer speaker.
Do not hang the subwoofer on the wall through the duct (hole).
| NOTES |
If you place a speaker near your TV set, the screen colour may be distorted because of the magnetic field.
Connecting to a Network Router
Broadband
modem
Or
Broadband modem (with integrated router)
Broadband
service
Router
Broadband
service
|
14 English
Page 15
| NOTES |
Internet access to Samsung’s software update server may not be allowed, depending on the router you use or your
ISP’s policy. For more information, contact your ISP (Internet Service Provider).
DSL users, please use a router to make a network connection.
To use the DLNA function, you must connect a PC to the network as shown in the figure. The connection can be
wired or wireless.
C
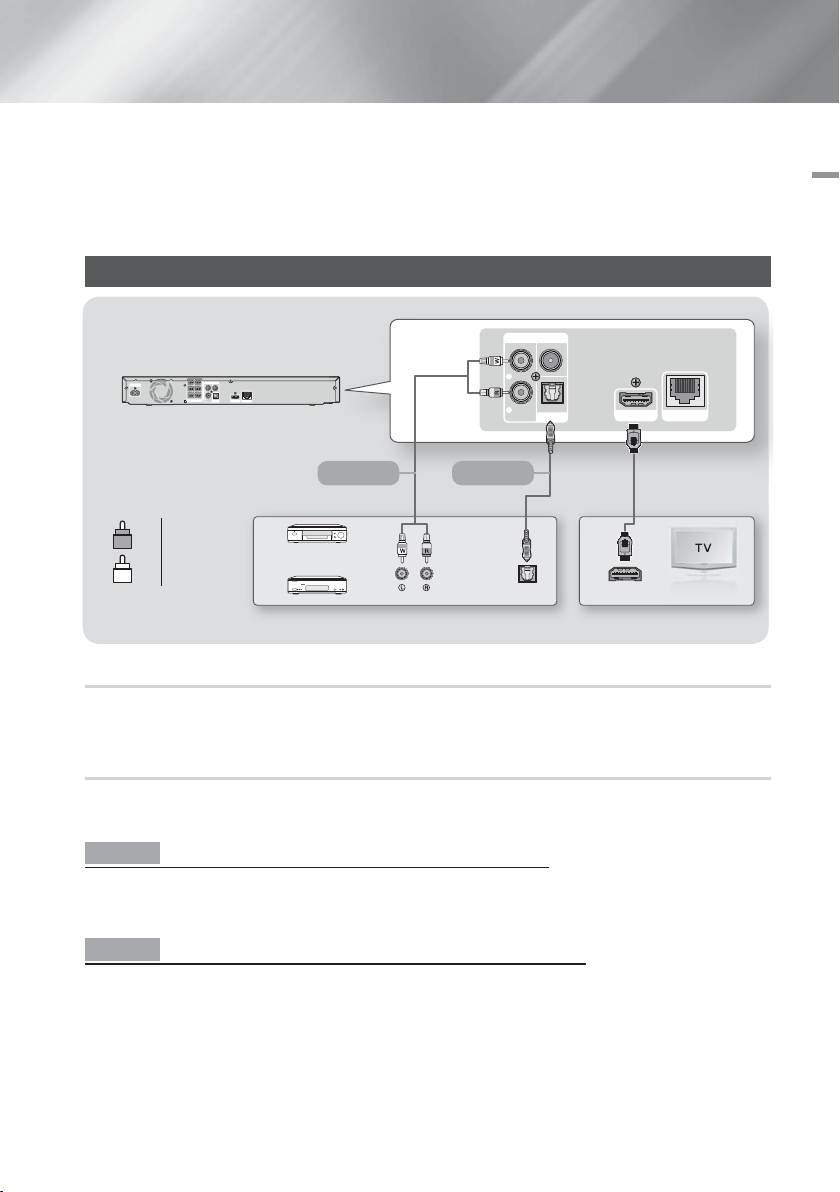
Connecting to a TV/External Devices
AUX
FM ANT
IN
03 Connections
AUX
FM ANT
IN
L
R
SURROUND
POWER
SURROUND
L
FRONT
FRONT
R
L
SPEAKER IMPEDANCE : 3
CENTER
SUBWOOFER
OPTICAL
R
SPEAKERS OUT
DIGITAL
HDMI OUT
LAN
AUDIO IN
L
OPTICAL
R
DIGITAL
AUDIO IN
HDMI OUT
LAN
Method 1 Method 2
Red
R
White
W
External Devices
OPTICAL OUT
HDMI IN
Connecting to a TV
Connect an HDMI cable (not supplied) from the HDMI OUT jack on the back of the product to the HDMI IN jack on
your TV. If the TV supports ARC, you can hear the audio from your TV through the home cinema with only this cable
connected. See page 19 in this manual and the section on ARC in your TV's user's manual for details.
Connecting to External Devices
To select the correct mode for an external device, press the FUNCTION button. Each time you press the button, the
mode changes in this order : BD/DVD
Two methods of connecting external devices to your home cinema are explained below.
Method 1 AUX IN : Connecting an External Analogue Component
Using an RCA audio cable (not supplied), connect the AUDIO In jack on the product to the AUDIO Out jack on the
external analogue component. Select the AUX mode.
• Be sure to match the colours on the cable plugs to the colours on the input and output jacks.
Method 2 OPTICAL : Connecting an External Digital Audio Component
To connect the digital audio output of digital signal components such as Cable Boxes and Satellite Receivers (Set-TopBoxes).
Using a digital optical cable (not supplied), connect the Optical Digital Audio In jack on the product to the Digital Optical
Out jack of the external digital device using a digital optical cable. Select the D. IN mode.
| NOTES |
To see video from your Cable Box/Satellite receiver, you must connect its video output directly to your TV.
This system supports Digital sampling frequencies of 32 kHz or higher from external digital components.
This system supports only DTS and Dolby Digital audio. MPEG audio, a bitstream format, is not supported.
D. IN AUX FM
English 15
|
Page 16
Settings
p
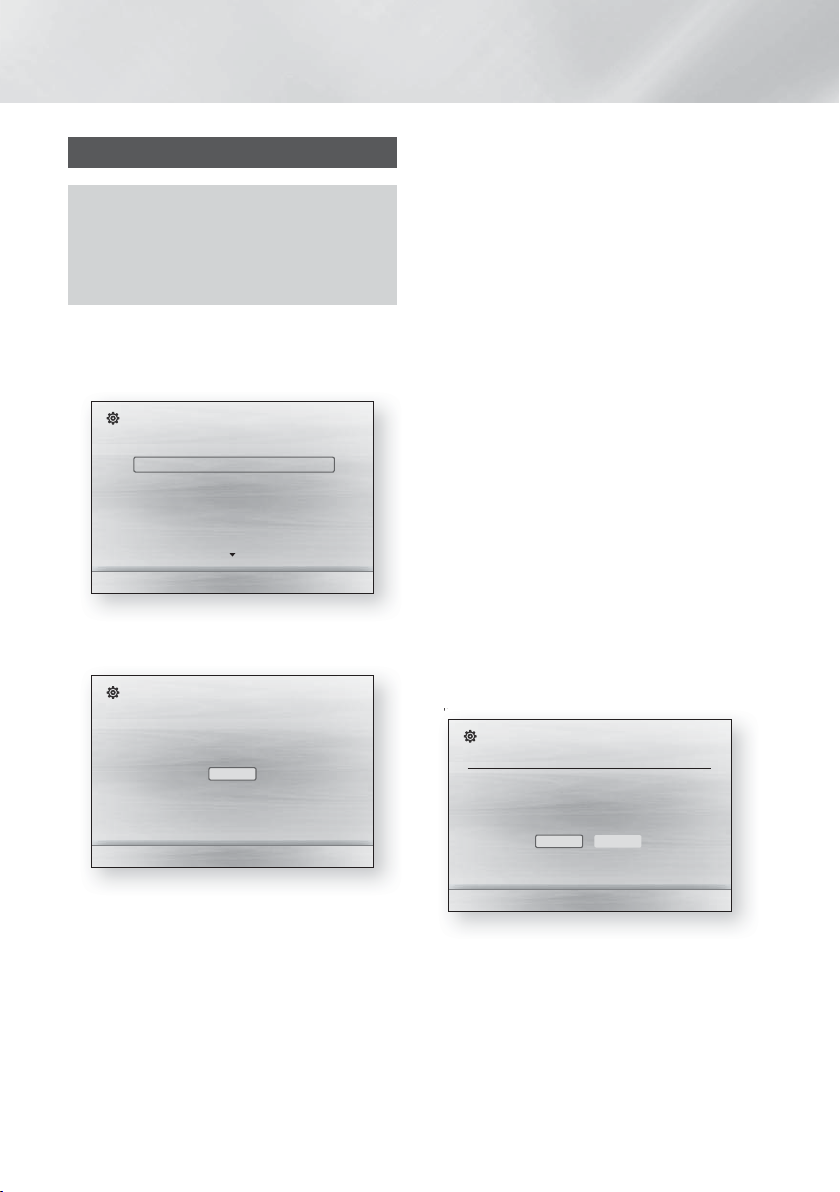
The Initial Settings Procedure
• The Home menu will not appear if you do not
configure the initial settings.
• The OSD (On Screen Display) may change in this
product after you upgrade the software version.
• The access steps may differ depending on the
menu you selected.
Turn on your TV after connecting the product, and
1.
then turn on the product. When you turn on the
product for the first time, the product automatically
displays the Initial Settings Language screen.
Initial Settings I On-Screen Language
Select a language for the on-screen displays.
English
Français
Deutsch
Español
Italiano
Nederlands
>
Press the ▲▼ buttons to select the desired
2.
language, and then press the E button.
Press the E button to start function setup.
3.
Initial Settings
TV Aspect and Network will be set.
Each setting may be changed later under "Settings".
Start
Move "
Select
pictures to fill the 16:9 screen.
4:3 Letter Box - For older, standard screen
analogue TVs. Displays 4:3 pictures in full screen
and 16:9 pictures in letter box format that retains
the 16:9 aspect ratio but puts black bars above and
below the picture.
4:3 Pan-Scan - For older, standard screen analogue
TVs. Displays 4:3 pictures in full screen and 16:9
pictures in Pan-Scan format that fills the screen, but
cuts off the left and right sides of the picture and
enlarges the middle vertically.
The Network - Wired screen appears.
5 .
- If you have a network with dynamic IP addresses
- and most people do - select Auto, press the
button, and then go to Step 6.
E
- If you have a network with static IP addresses,
we suggest you select Skip by pressing the
BLUE (D) button, and then go to "Configuring
Your Network Connection" on page 20 after you
have completed the initial setup. "Configuring
Your Network Connection" provides a full
explanation of how to configure your network
connection manually.
- If you have no network, select Skip by pressing
the BLUE (D) button. The Initial Settings
Complete screen appears, and then the Home
screen appears.
| NOTES |
If you skip network setup here or the setup does
not work correctly, you can go to "Configuring Your
Network Connection" on page 20 to set up the
product's network connection later.
Initial Settings I Network - Wired
Choose the method to configure Internet Protocol (IP).
Please make sure that the Ethernet cable is connected.
Auto : Configure IP automatically.
Manual
a Previous
The TV Aspect screen appears. Press the ▲▼
4.
" Select
buttons to select desired a TV Aspect ratio, and
then press the E button.
You have four choices:
16:9 Original - For widescreen TVs. Displays
widescreen pictures in their original 16:9 format and
4:3 pictures (the old, standard format) in 4:3 pillar
box format with black bars on the left and right.
The product verifies the network connection and
6.
then connects to the network. When it is done,
press the E button. The Initial Settings Complete
screen appears, and then the Home screen
appears.
Auto
a Previous d Skip
< Move "
Select
16:9 Full - For widescreen TVs. Displays widescreen
pictures in their original 16:9 format and expands 4:3
|
16 English
Page 17
Initial Settings I Network - Wired
TOOLS
RETURN
EXIT
INFO
SUBTITLE HOME REPEAT
MAC Address (d0:66:7b:dc:28:fc)
IP Address, Subnet Mask, Gateway, DNS Server
Gateway Ping
Internet Service Test
Your network is operating properly.
If you still have a network problem, contact your network service provider.
OK
" Select
To select an option on the Home screen, move the
1.
cursor using the
buttons until it highlights
▲▼◄►
the option of your choice, and then press the E
button.
| NOTES |
To play or view video, photo, music files located on
your PC, you must connect your home cinema and
PC to a home network and you must download,
install, and configure the DLNA software on your PC.
(See page 23.)
04 Settings
| NOTES |
If you want to display the Initial Setting screen again
and make changes, select the Reset option. (See
page 20)
If you use a HDMI cable to connect the product to
an Anynet+ (HDMI-CEC)-compliant Samsung TV and
1.) You have set the Anynet+ (HDMI-CEC) feature to
ON in both the TV and the product and 2.) You have
set the TV to a language supported by the product,
the product will select that language as the preferred
language automatically.
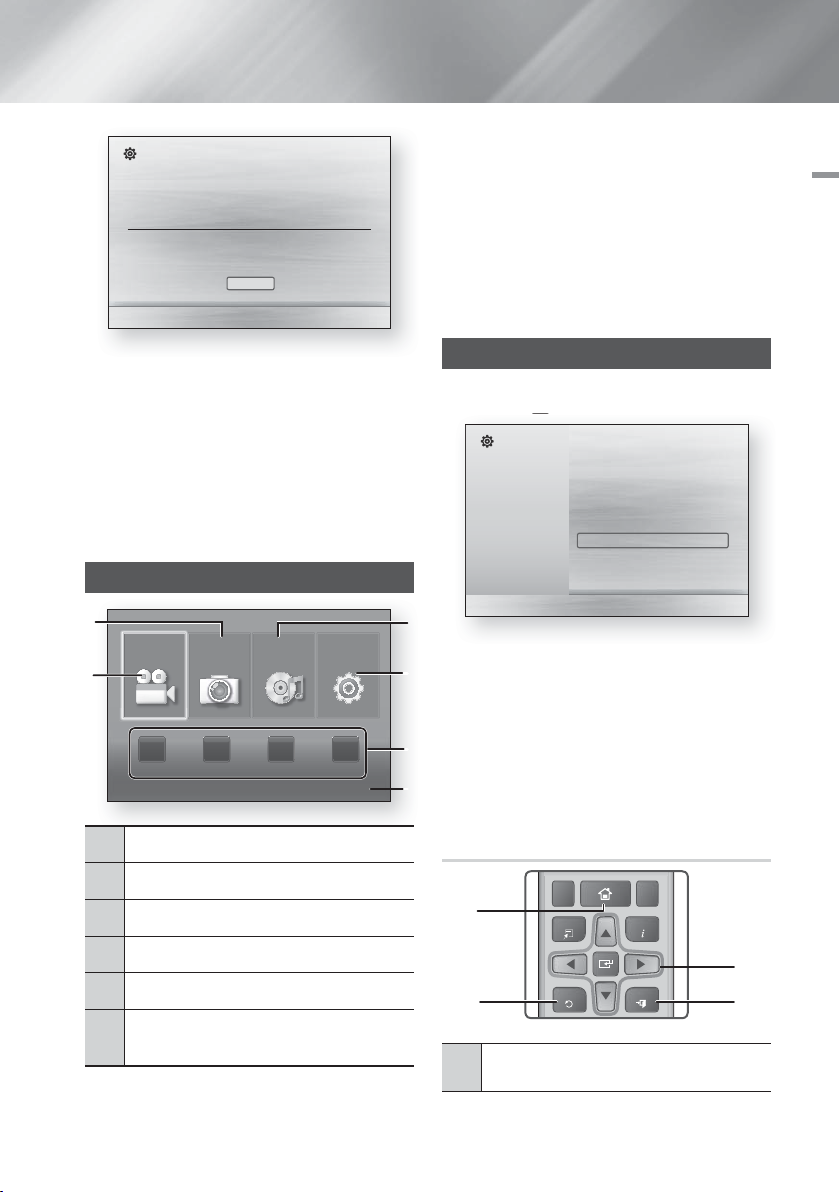
The Home Screen
13
Videos
2
Photos Music Settings
Accessing the Settings Screen
Select Settings on the Home screen, and then
1.
press the E button. The Settings screen appears.
Settings
Display 3D Settings
Audio TV Aspect Ratio : 16:9 Original
4
Network
System Resolution : Auto
Language
Security HDMI Color Format : Auto
General HDMI Deep Color : Off
Support Progressive Mode : Auto
To access the menus, sub-menus, and options
2.
on the Settings screen, please refer to the remote
control illustration below.
BD Wise : Off
Movie Frame (24 Fs) : Off
| NOTES |
If you leave the product in the stop mode for more
than 5 minutes without using it, a screen saver will
5
App 1 App 2 App 3 App 4
No Disc a Change Device
d View Devices "
Enter
appears on your TV. If the product is left in the screen
saver mode for more than 20 minutes, the power will
6
automatically turns off.
Buttons on the Remote Control Used
Selects Photos.
1
2
3
Selects Videos.
Selects Music.
for the Settings Menu
1
►
4
5
6
Selects Settings.
Selects applications.
Displays the buttons you can use on the
remote to access functions.
3
24
HOME Button : Press to move to the Home
1
screen.
English 17
|
Page 18

Settings
RETURN (') Button : Return to the previous
2
menu.
E
(Enter) / DIRECTION Button :
• Press
item.
3
• Press the E button to activate the currently
selected item or confirm a setting.
EXIT Button : Press to exit the current menu.
4
| NOTES |
The E button on the product's front panel can be
used for same purpose as the E button on the
remote control.
to move the cursor or select an
▲▼◄►
Detailed Function Information
Each Settings function, menu item, and individual option
is explained in detail on-screen. To view an explanation,
use the
item, or option.
The explanation will usually appear on the bottom of the
screen. A short description of each Settings function
starts on this page. Additional information on some of the
functions is also in the Appendix of this manual.
buttons to select the function, menu
▲▼◄►
Settings Menu Functions
Display
Set up the 3D related functions.
3
D Blu-ray Playback Mode:
Select whether to play a Bluray Disc with 3D contents in 3D
Mode. If you move to the Home
or Smart Hub Home menu while
3D Settings
TV Aspect
Ratio
in 3D mode, the product will
switch to 2D automatically.
S
creen Size: Enter the size of
the TV attached to the product.
The product will automatically
adjust the 3D output to the
screen size of the TV.
Lets you adjust the output of the
product to the screen size of your
TV. See page 16.
BD Wise
Resolution
Movie Frame
(24 Fs)
HDMI Color
Format
HDMI Deep
Color
Progressive
Mode
BD Wise is Samsung’s latest interconnectivity feature.
When you connect a Samsung
product and a Samsung TV
with BD Wise to each other via
HDMI, and BD Wise is on in
both the product and TV, the
product outputs video at the video
resolution and frame rate of the
Blu-ray/DVD Disc.
Lets you set the output resolution
of the HDMI video signal to
BD Wise, Auto, 1080p, 1080i,
720p, 576p/480p. The number
indicates the number of lines
of video per frame. The i and p
indicate interlaced and progressive
scan, respectively. The more lines,
the higher quality.
Setting the Movie Frame (24 Fs)
feature to Auto lets the product
adjust its HDMI output to 24
frames per second automatically
for improved picture quality if
attached to a 24Fs compatible TV.
• You can enjoy the Movie Frame
(24 Fs) feature only on a TV
supporting this frame rate.
• Movie Frame is only available
when the product is in the HDMI
1080i or 1080p output resolution
modes.
Lets you set the colour space
format for the HDMI output to
match the capabilities of the
connected device (TV, monitor,
etc).
Lets you set the product to output
video from the HDMI OUT jack with
deep colour. Deep colour provides
more accurate colour reproduction
with greater colour depth.
Lets you improve picture quality
when viewing DVDs.
|
18 English
Speaker
Settings
Audio
Lets you set adjust the following
speaker settings and turn the test
tone on and off so you can test the
speakers.
Page 19

Speaker
Selection
Audio Return
Channel
Digital Output
Dynamic Range
Control
Audio Sync
Level: Lets you adjust the relative
loudness of each speaker from 6db
to -6db. For example, if you like deep
bass, you can increase the loudness
of the subwoofer by 6db.
Distance: Lets you adjust the relative
distance of each speaker from the
listening position up to 30 feet. The
farther the distance, the louder the
speaker will be.
Test Tone: Lets you run the test
tone function so you can test your
adjustments. Setting Test Tone to On
turns the Test Tone on. Setting it to
Off turns it off.
Lets you select which speakers you
want active, either the TV's speakers
or the home cinema's speakers.
Lets you direct the sound from the
TV to the Home Cinema speakers.
Requires a HDMI connection and
an Audio Return Channel (ARC)
compatible TV.
• When Audio Return Channel is
set to Auto, the home cinema
automatically selects either ARC or
optical input as the audio source,
depending on your connections.
If Audio Return Channel is active,
optical input does not work.
Lets you set the Digital Output to
match the capabilities of the AV
receiver you’ve connected to the
product. For more details, please refer
to the digital output selection table.
(See page 31)
Lets you apply dynamic range control
to Dolby Digital, Dolby Digital Plus,
and Dolby TrueHD audio.
Auto: Automatically controls the
dynamic range of Dolby TrueHD
audio, based on information in the
Dolby TrueHD soundtrack. Also turns
dynamic range control off for Dolby
Digital and Dolby Digital Plus.
Off: Leaves the dynamic range
uncompressed, letting you hear the
original sound.
On: Turns dynamic range control on
for all three Dolby formats. Quieter
sounds are made louder and the
volume of loud sounds is reduced.
When the product is attached to a
digital TV, lets you adjust the audio
delay so that the audio syncs with the
video. You can set the delay between
0 and 300 milliseconds.
Lets you select the multi-channel
Downmixing
Mode
Wired Network
Settings
Network Test
Network Status
BD-Live Internet
Connection
Initial Settings
Anynet+
(HDMI-CEC)
BD Data
Management
DivX® Video
On Demand
You can select the language you prefer for the OnScreen Menu, disc menu, etc.
• The selected language will only appear if it is
supported on the disc.
downmix method that is compatible
with your stereo system. You can
choose to have the product downmix
to normal stereo or to surround
compatible stereo.
Network
For more information about Network
Settings and network functions, see
"Networks and the Internet" starting
on page 20.
Lets you test the Internet Protocol
setup to see if it is working correctly.
Lets you check whether a connection
to the network and the Internet have
been established.
Lets you allow or prohibit an Internet
connection for the BD-Live service.
System
Lets you re-run the Initial Settings
procedure. See page 16 for details.
Anynet+ is a convenient function that
offers linked operations with other
Samsung products that have the
Anynet+ feature and lets you control
those products with one Samsung
TV remote. To operate this function,
you must connect this product to an
Anynet+ Samsung TV using a HDMI
cable.
Lets you manage the contents you
downloaded through a Blu-ray disc
that supports the BD-Live service.
You can view the information about
the USB device you are using for
BD Live data storage including the
storage space. You can also delete
BD Live data and change the device.
View DivX® VOD Registration
Codes to purchase and play
DivX® VOD contents.
Language
English 19
04 Settings
|
Page 20
Settings
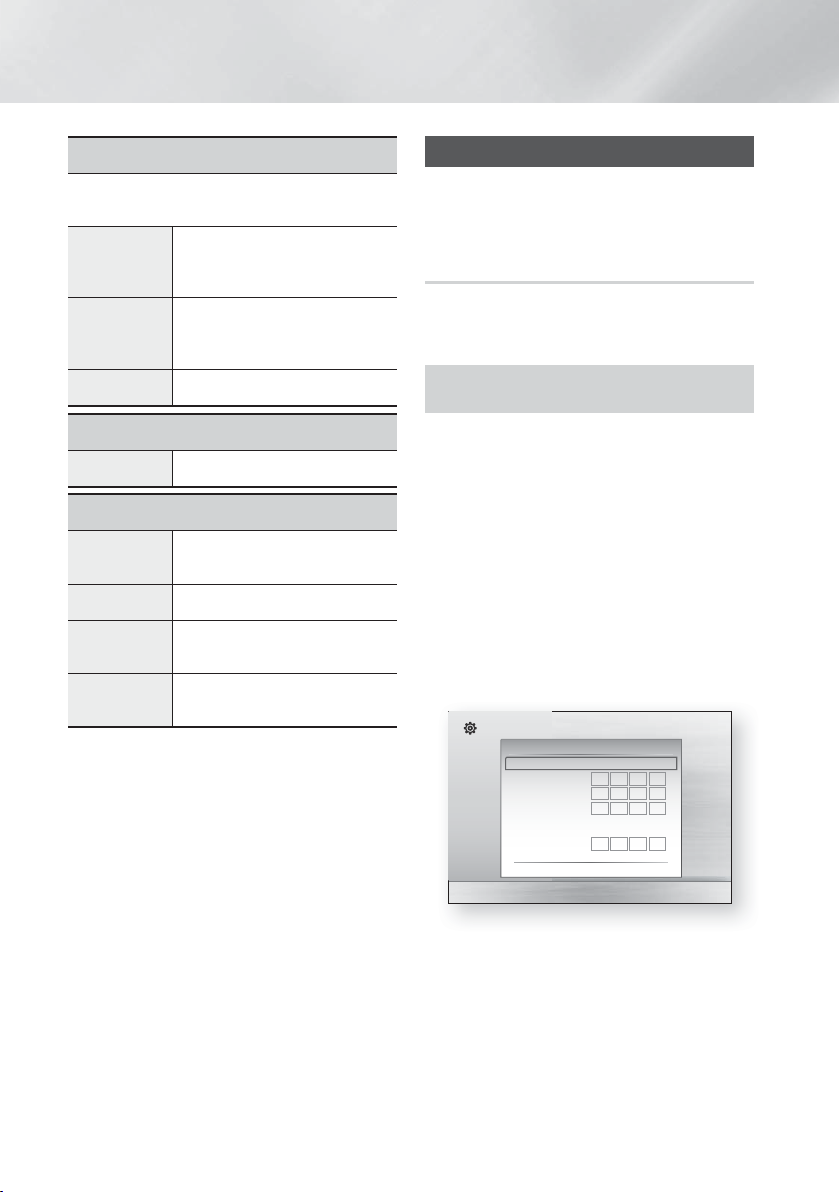
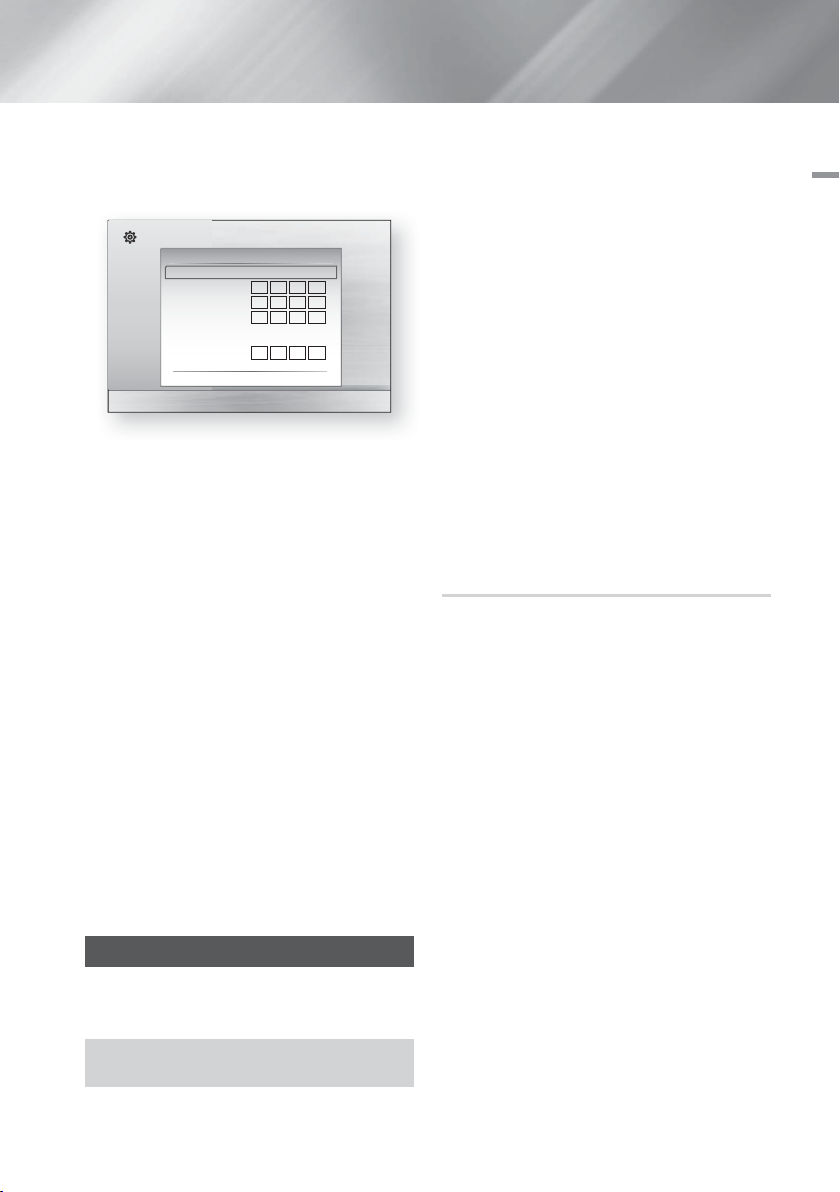
Security
The default PIN is 0000. Enter the default PIN to access
the security function if you haven't created your own
PIN.
Prevents playback of Blu-ray Discs
BD Parental
Rating
with a rating equal to or above a
specific age ratings unless the PIN is
entered.
Prevents playback of DVDs with a
DVD Parental
Rating
rating above a specific
numerical ratings unless the PIN is
entered.
Change PIN
Change the 4-digit PIN used to
access security functions.
General
Time Zone
You can specify the time zone that is
applicable to your area.
Support
Software
Upgrade
Contact
Samsung
Terms of
Service
Agreement
For more information about the
Software Upgrade function, see
"Upgrading Software" on page 21.
Provides contact information for
assistance with your product.
View the general disclaimer regarding
third party contents and services.
All settings will revert to the default
Reset
except for the network settings. The
default security password is 0000.
Networks and the Internet
When you connect this product to a network, you can
use network based applications and functions such as
BD-LIVE and upgrade the product's software through the
network connection.
Configuring Your Network Connection
Before you begin, contact your ISP to find out if your
IP address is static or dynamic. If it is dynamic, we
recommend you use the Automatic procedure below. If it
is static, you must use the Manual procedure that follows.
• Before you begin, confirm that the product is
connected to your router with a network cable.
Automatic
To start the configuration process, follow these steps:
In the Home menu, select Settings, and then press
1.
the E button.
Select Network, and then press the E button.
2.
Select Wired Network Settings, and then press
3.
the E button.
The Wired Network Settings screen appears.
Press the ► button on the Internet Protocol Setup
4.
menu.
Use
button to select Auto, and then press the
▲▼
button.
E
Settings
Display
Audio
Network
System
Language
Security
General
Support
Wired Network Settings
Internet Protocol Setup : Auto
IP Address : 0 0 0 0
Subnet Mask :
Gateway :
DNS : Auto
DNS Server : 0 0 0 0
> Move "
0
0 0 0
0
0 0 0
Select
Return
'
|
20 English
The Network function acquires and fills in the values
5.
for IP Address, Subnet Mask, etc., automatically.
After the Network function has acquired the network
6.
values, press the RETURN (') button.
Select Network Test, and then press E. The home
7.
cinema validates the network connection. When it is
done, press the RETURN (') button.
Page 21
Manual
If you have a static IP address or the Automatic
procedure does not work, you’ll need to set the Network
Settings values manually.
Settings
Display
Audio
Network
System
Language
Security
General
Support
Follow the first four steps in the Automatic
1.
Wired Network Settings
Internet Protocol Setup : Manual
IP Address : 0 0 0 0
Subnet Mask :
Gateway :
DNS : Manual
DNS Server :
255
> Move "
255 255 0
0
0 0 0
0
0 0 0
Select
Return
'
procedure, but select Manual instead of Auto in
Step 4.
Press the ▼ button to go to the first entry field (IP
2.
Address).
Use the number buttons on your remote to enter
3.
numbers.
When done with each field, use the ► button to
4.
move successively to the next field.
You can also use the other arrow buttons to move
up, down, and back.
Enter the IP Address, Subnet Mask, and Gateway
5.
values.
Press the ▼ button to go to DNS.
6.
Press the ▼ button to go to the first DNS entry field.
7.
Enter the numbers as above.
Press the RETURN (') button on your remote.
8.
Select Network Test, and then press E. When
9.
the test is completed, press RETURN (') button to
exit to the previous screen.
Select Network Status, and then press E.
10.
The Network Status screen appears.
11.
The product verifies the network connection and
then connects to the network. When it is done,
highlight OK, and then press
E
.
Upgrading Software
The Software Upgrade menu allows you to upgrade the
product’s software for performance improvements or
additional services.
• Never turn the product off or back on manually
during the update process.
In the Home menu, select Settings, and then press
1.
the E button.
Select Support, and then press the E button.
2.
Select Software Upgrade, and then press the E
3.
button.
Select one of the following methods:
4.
• By Online
• By USB
• Auto Upgrade Notification
Press the E button.
5.
Directions for each method begin below.
| NOTES |
The update is complete when the product turns off
after restarting. Press the POWER button to turn
on the updated product for your use. Never turn the
product on or off manually during the update process.
Samsung Electronics takes no legal responsibility for
product malfunction caused by an unstable Internet
connection or consumer negligence during a software
upgrade.
If you want to cancel the upgrade while the upgrade
software is downloading, press the E button.
By Online
Your product must be connected to the Internet to use
the By Online function. Remove all discs before you
begin.
Select By Online, and then press the E button.
1.
The Connecting to Server message appears.
If an update is available, a popup message appears
2.
asking if you want to upgrade. If you select Yes, the
product turns off automatically, turns on, and then
begins the upgrade.
| IMPORTANT |
Never turn the home cinema on or off manually during
a software upgrade.
The update progress popup appears. When
3.
the update is completed, the product turns off
automatically again.
Press the POWER button to turn on the product.
4.
| NOTES |
The update is complete when the product turns off
after restarting. Press the POWER button to turn on
the updated product for your use.
Never turn the product off or on manually during the
update process.
Samsung Electronics takes no legal responsibility for
a product malfunction caused by an unstable internet
connection or consumer negligence during software
upgrade.
04 Settings
English 21
|
Page 22

Settings
By USB
Visit www.samsung.com.
1.
Click SUPPORT on the top right of the page.
2.
Enter the product's model number into the search
3.
field. As you enter the model number, a drop down
will display products that match the model number.
Left click your product's model number in the drop
4.
down list.
On the page that appears, scroll down to and then
5.
click Firmware Manuals & Downloads.
Click Firmware in the centre of the page.
6.
Click the ZIP icon in the File column on the right
7.
side of the page.
Click Send in the first pop-up that appears. Click
8.
OK in the second pop-up to download and save the
firmware file to your PC.
Unzip the zip archive to your computer. You should
9.
have a single folder with the same name as the zip
file.
Copy the folder to a USB flash drive.
10.
Make sure no disc is inserted in the product, and
11.
then insert the USB flash drive into the USB port of
the product.
In the product’s menu, go to Settings > Support >
12.
Software Upgrade.
Select By USB.
13.
| NOTES |
There should be no disc in the product when you
upgrade the software using the USB Host jack.
Never turn the product off or on manually during the
update process.
When the software upgrade is done, check the
software details in the Software Upgrade menu.
Auto Upgrade Notification
If your product is connected to the network and you
set Auto Upgrade Notification on, the product will notify
you if a new software version is available with a pop-up
message.
Turn on the product.
1.
In the Software Upgrade menu, set Auto Upgrade
2.
Notification to On.
If there is a new software version available, the
product will notify you with a pop-up message.
To upgrade the firmware, select Ye s. The product
3.
turns off automatically, turns on, and then begins
the upgrade.
The update progress popup will appear. When
4.
the update is complete, the product will turn off
automatically again.
Press the POWER button to turn on the product.
5.
|
22 English
| NOTES |
The update is complete when the product turns off
after restarting. Press the POWER button to turn
on the updated product for your use. Never turn the
product on or off manually during the update process.
Samsung Electronics shall take no legal responsibility
for product malfunction caused by unstable of Internet
connection or consumer negligence during software
upgrade.
Setting Up DLNA
DLNA enables you to play music, video and photo files
in your PC using this product. To use DLNA, you must
connect the product to your PC via the network (See
page 14) and install the SAMSUNG PC Share Manager
on the PC.
To Download the DLNA Software
To use DLNA with your PC, you must install DLNA
software on your PC. You can download the PC software
and get detailed instructions for using DLNA from the
Samsung.com website.
Go to www.samsung.com.
1.
Click SUPPORT at the top of the page.
2.
Enter the product's model number into the search
3.
field. As you enter the model number, a drop down
will display products that match the model number.
Left click your product's model number in the drop
4.
down list.
On the page that appears, scroll down to and then
5.
click Firmware Manuals & Downloads.
Click the Software tab.
6.
On the software tab, click the EXE icon on the right
7.
side of the DLNA line.
In the first pop-up that appears, click Send. In the
8.
second pop-up, click Save File.
Find the DLNA install file on your disk, and then
9.
double click the file.
In the pop-up that appears, click Run, and then
10.
follow the directions that appear on your screen.
Download the DLNA Installation/Instruction manual from
the same Software Tab by clicking the corresponding
PDF file symbol in the File column on the right. The
file, in PDF format, will download and open. Follow the
directions to install and setup DLNA. You can view and/or
save the file.
| NOTES |
To use DLNA with your smartphone, you need to
connect your set & smartphone to the same router.
Page 23
Media Play
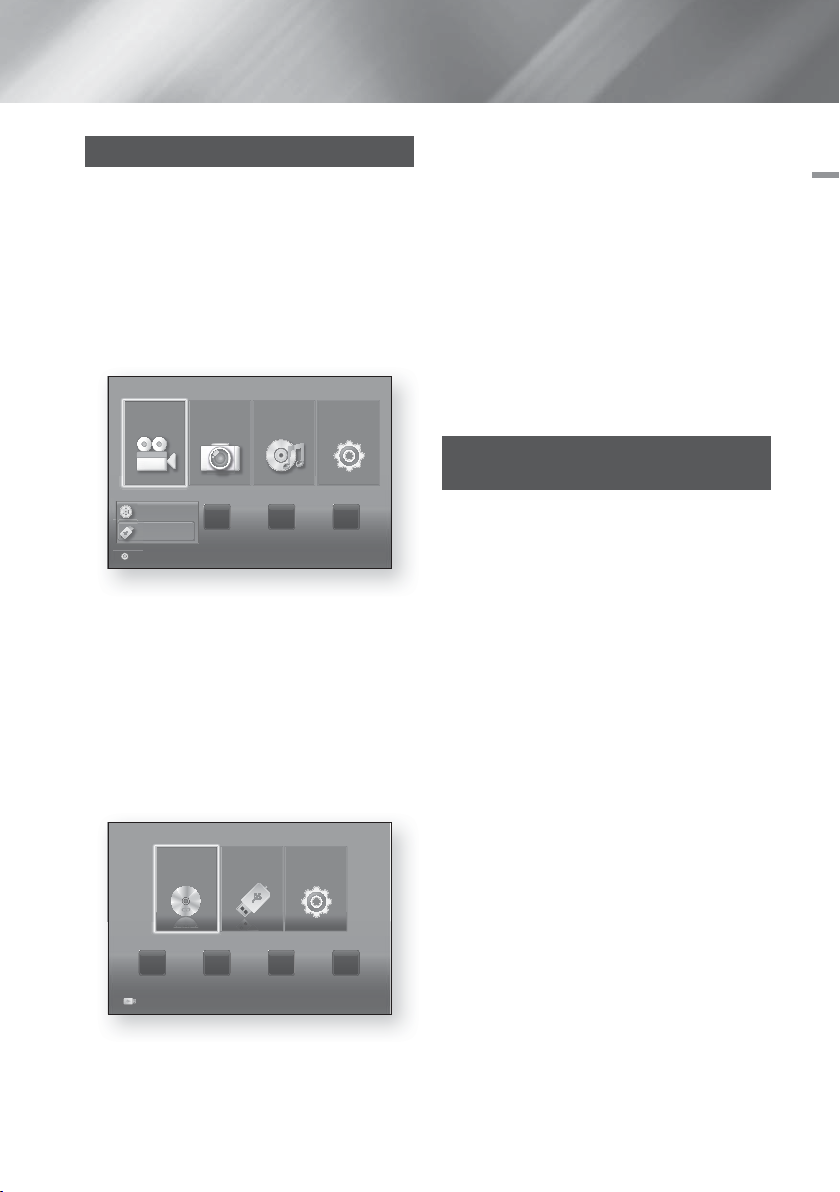
Playing Files on a USB Device
You can play multimedia files located on a connected
USB device.
Move to the Home menu.
1.
In Stop mode, connect the USB storage device to
2.
the USB port on the front panel of the product. The
message “Do you want to access the device?”
will be displayed.
Press the ◄► button to select Yes , then press the
3.
E
button.
Press the RED (A) button.
4.
Videos Photos Music
CD
USB DISK 2.0
CD a Change Device
Press the ▲▼ buttons to select USB Flash Memory
5.
App 2 App 3 App 4
d View Devices "
or USB Flash Disc, and then press the E button.
Press the ▲▼◄► buttons to select Videos,
6.
Photos or Music, then press the E button.
If files appear on the screen go to Step 8. If file
7.
folders appear on the screen, use the ▲▼◄►
buttons to select a folder, press E, and then go to
Step 8.
Use the ▲▼◄► buttons to select a file to play or
8.
view, and then press the E button.
OR
-1
4
. Press the BLUE (D) button.
CD
App 1 App 2 App 3 App 4
USB DISK 2.0
d Home "
5-1. Press the ◄► buttons to select USB Flash Memory
or USB Flash Disc, and then press the E button.
Settings
Enter
Settings
Enter USB DISK 2.0
6-1. Press the ▲▼ buttons to select Videos, Photos or
Music, then press the E button.
-1
. If files appear on the screen go to Step 8-1. If file
7
folders appear on the screen, use the ▲▼◄►
buttons to select a folder, press E, and then go to
-1
Step 8
-1
. Use the ▲▼◄► buttons to select a file to play or
8
.
view, and then press the E button.
| NOTES |
3D file playback is not supported.
To prevent possible damage to the USB memory,
you must remove the USB storage device safely
using the “Safely Remove USB” function. Press the
HOME button to move to the Home menu, select the
YELLOW (C) button, and then press the E button.
Playing a Disc with User Recorded
Content
You can play multimedia files you have recorded on DVD
or CD discs.
Turn on the home cinema.
1.
Open the disc tray, place a user recorded disc into the
2.
disc tray with the disc’s label facing up, and then close
the tray.
After the disc loads, press the RED (A) button.
3.
Press the ▲▼◄► buttons to select CD or DVD,
4.
and then press the E button.
Press the ▲▼ buttons to select Videos, Photos or
5.
Music, then press the E button.
If files appear on the screen, go to Step 7. If file
6.
folders appear on the screen, use the ▲▼◄►
buttons to select a folder, press E, and then go to
Step 7.
Use the ▲▼◄► buttons to select a file to play or
7.
view, and then press the E button.
OR
-1
3
. After the disc loads, press the BLUE (D) button.
4-1. Press the ◄► buttons to select
then press the E button.
-1
. Press the ▲▼ buttons to select Videos, Photos or
5
Music, and then press the E button.
6-1. If files appear on the screen go to Step 7-1. If file
folders appear on the screen, use the ▲▼◄►
buttons to select a folder, press E, and then go to
Step 7-1.
-1
. Use the ▲▼◄► buttons to select a file to play or
7
view, and then press the E button.
CD or DVD
, and
05 Media Play
English 23
|
Page 24
Media Play
SUBTITLE HOME REPEAT
DISC MENU TITLE MENU
0
POPUP
Playing a Commercial Video Disc
Place a disc into the disc tray with the disc’s label
facing up and then close the disc tray. Playback starts
automatically. If it does not playback automatically, move
to Videos in the Home menu and press the E button.
In most cases, commercial videos will display a disc
menu. To play the movie on the disc, select Play on the
disc menu, and then press E.
| NOTES |
For more information about playing videos, go to
"Controlling Video Playback" on this page.
Controlling Video Playback
You can control the playback of video files located
on Blu-ray, DVD, and CD discs, and on USB storage
devices. Depending on the media, some of the functions
described in this manual may not be available.
Buttons on the Remote Control used
for Video Playback
1
Playback related buttons
The product does not play sound in Search,
Slow, or Step mode.
• : Starts playback.
•
: Stops playback.
•
: Pauses playback.
• Fast Motion Play : During playback, press
the 3 or button.
Each time you press the 3 or button, the
playback speed will change.
• Slow Motion Play : In pause mode, press the
1
button.
Each time you press the button, the
playback speed will change.
• Step Motion Play : In pause mode, press the
7
button.
Each time you press the 7 button, a new
frame appears.
• Skip Motion Play : During playback, press
the 1 or 2 button.
Each time you press 1 or 2 button, the
disc moves to the previous or next chapter or
file.
2
Using the disc menu, title menu, popup menu
and title list
• DISC MENU : During playback, press this
button to display the Disc menu.
• TITLE MENU : During playback, press this
button to display the Title menu.
- If your disc has a playlist, press the GREEN
2
(B) button to go to the playlist.
• POPUP MENU : During playback, press this
button to display the Pop-up menu.
• DISC MENU or TITLE MENU : During
playback, press this button to display the title
list.
Using the TOOLS Menu
During playback, press the TOOLS button.
Title
Playing Time
Repeat Mode
Picture
Settings
Audio Sync
Menu that appears only when a BD/DVD
disc plays
Chapter
Audio
If the movie or video have more than
one title, move to or select a desired
title.
Select to move to the specific
playback point. Use the numeric
buttons to input the playback point.
Select to repeat a specific title,
chapter (BD/DVD discs only) or
marked section.
Select to set the picture mode.
- Mode
User : Lets you adjust the
Brightness, Contrast, Color
and Sharpness function
respectively.
Dynamic : Choose this setting
to increase Sharpness.
Normal : Choose this setting
for most viewing applications.
Movie : This is the best setting
for watching movies.
Lets you adjust the audio delay so
that the audio syncs with the video.
You can set the delay between 0
and 300 milliseconds.
Select to move to a chapter that you
desire to watch.
Select to set the desired audio
language.
|
24 English
Page 25
Subtitle
001
2
003
t
1
2
3
7
89
DISC MENU TITLE MENU
0
POPUP
4
56
Angle
BONUSVIEW
Video /
BONUSVIEW
Audio
Menu that appears only when a file plays
Full Screen
Information Check the video file's information.
| NOTES |
Depending on the disc or storage device, the Tools
menu may differ. All options may not be displayed.
Creating a Video Playlist
You can create a playlist of video files in a way that is
nearly identical to the way you create a playlist of music
files. For instructions, see "Creating a Music Playlist" on
page 26.
Playing a Pre-Recorded
Commercial Audio Disc
Insert an Audio CD (CD-DA) or an MP3 Disc into the
1.
disc tray.
• For an Audio CD (CD-DA), the first track will be
•
+
Select to set the desired subtitle
language.
To view a scene from another angle.
The Angle option displays the
number of angles available to view
(1/1, 1/2, 1/3, etc.).
Select to set the desired bonusview
option.
Select to set the desired full screen
size. You can select Original,
Mode1 (larger), and Mode2 (largest).
played automatically. Tracks on a disc are played
in the order in which they were recorded on the
disc.
For an MP3 disc, press the ▲▼ buttons to select
Music, then press the E button.
Playlist
laylis
Select '
Return
Return
1/12
05:57
04:27
:27
04:07
4:07
03:41
03:17
03:35
00:08 / 05:57
CD
TRACK 001
TRACK 001
Repeat Mode _ One +
< Adjust "
TRACK 002
TRACK 00
TRACK 003
TRACK
TRACK 004
TRACK 005
TRACK 006
Pause Tools '
"
Tools
To play a particular track, use the ▲▼ buttons on the
2.
remote to select the track, and then press the
button.
E
| NOTES |
For more information about playing music, go to
"Controlling Music Playback" on this page.
Controlling Music Playback
You can control the playback of music content located on
DVDs, CDs, and USB storage devices.
Buttons on the Remote Control used
for Music Playback
1
4
2
5
3
NUMBER buttons : During Playlist playback,
press the desired track number. The selected
1
track is played.
Skip : During playback, press the 1 or 2
button to move to the previous or next music
2
track.
5
button : Stops a track.
3
Fast Play (Audio CD (CD-DA) only) :
During playback, press the 3 or button.
4
Each time you press the 3 or button, the
playback speed will change.
7
button : Pauses a track.
5
6
button : Plays the currently selected track.
6
6
English 25
|
05 Media Play
Page 26
Media Play
002
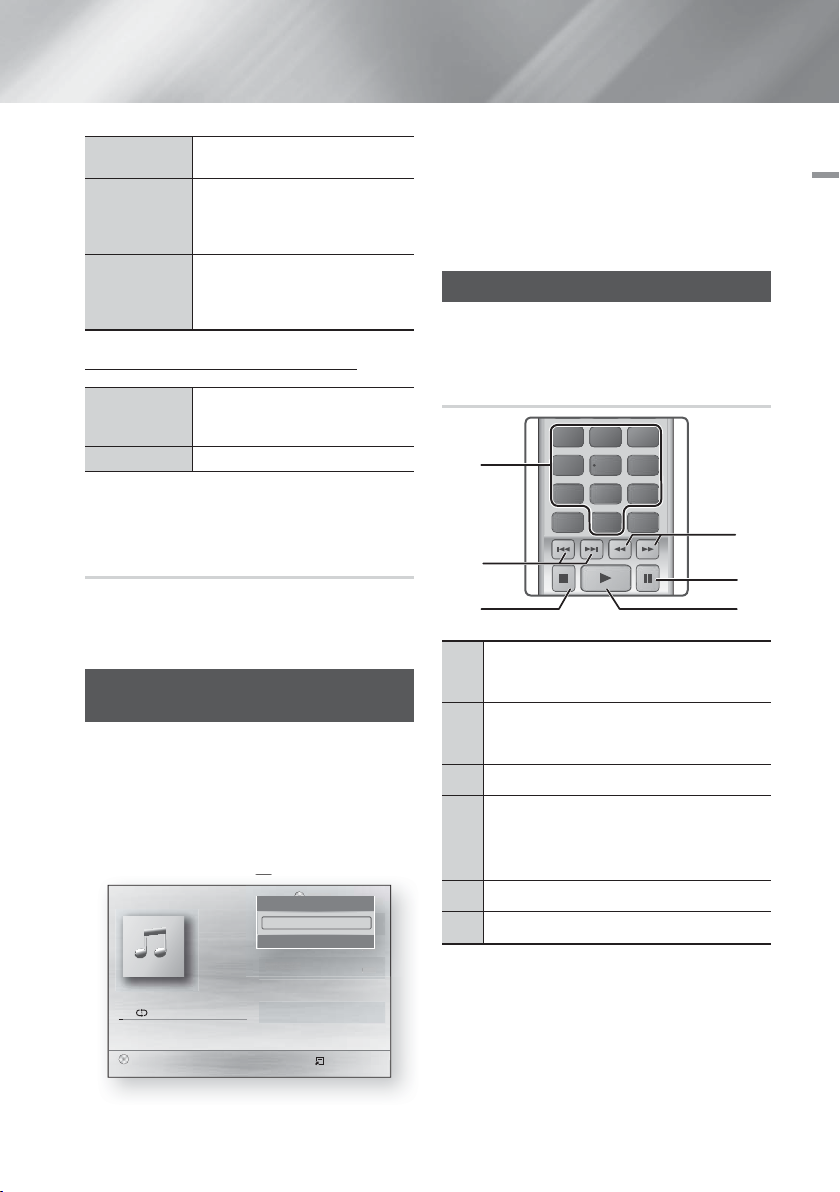
Repeating Tracks
You can set the product to repeat tracks.
During music playback, press the TOOLS button.
1.
Use ◄► button to select Off, Track or One, All or
2.
Shuffle in Repeat Mode, and then press the E
button.
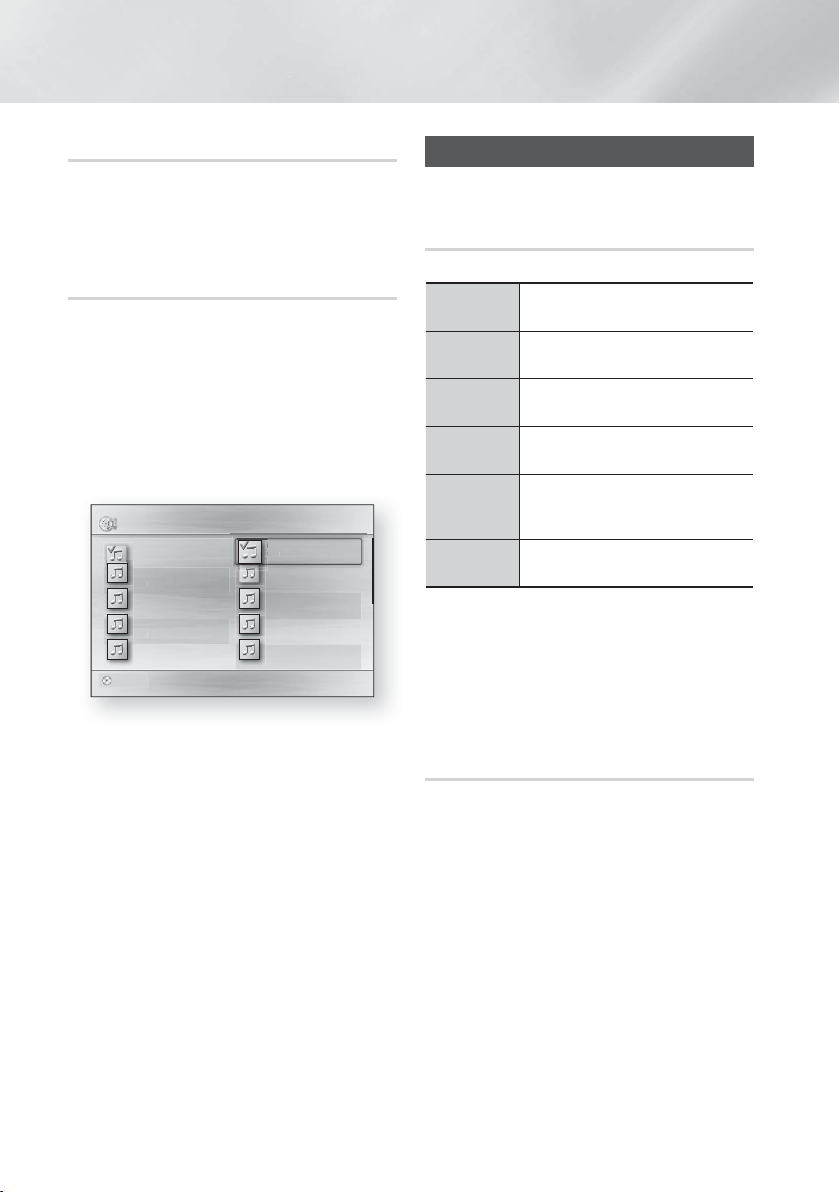
Creating a Music Playlist
If playing music from a commercial CD or DVD,
1.
2.
3.
4.
5.
6.
| NOTES |
You can create a playlist with up to 99 tracks on Audio
CDs (CD-DA).
If you go to the Music List from the Playlist, and then
return to the Playlist, the Playlist will start playing again
from the beginning.
5
press the
or RETURN (') button. The Music
List Screen appears. If you are creating a playlist
from music on a user created disk or USB device,
access the Music list as described in "Playing Files
on a USB Device" on page 23 or "Playing a Disc
with User Recorded Content" on page 23.
Press the ▲▼◄► buttons to move to the desired
file, and then press the YELLOW (C) button to
select it. Repeat this procedure to select additional
files.
Music TRACK 002 2 files selected 1/2 Page
TRACK 001
05:57
TRACK 003
04:07
TRACK 005
03:17
TRACK 007
03:47
TRACK 009
03:53
CD
TRACK 002
04:27
TRACK 004
03:41
TRACK 006
03:35
TRACK 008
03:49
TRACK 010
03:45
Select
◄◄►►
Jump Page '
Return
To remove a file from the Playlist, move to the file,
and then press the YELLOW (C) button.
Press the E button to play the selected files. The
Playlist screen appears.
To go to the Music List, press the 5 or RETURN (')
button.
To go back to the Playlist, press the E button.
Controlling Photo Playback
You can control the playback of photos located on
DVDs, CDs, and USB storage devices.
Using the Tools Menu
During playback, press the TOOLS button.
Start / Stop
Slide Show
Slide Show
Speed
Background
Music
Zoom
Select to play/pause the slide show.
Select to adjust the slide show speed.
Select to listen to music while viewing
a slide show.
Select to enlarge the current picture.
(Enlarge up to 4 times)
Select to rotate a picture. (This will
Rotate
rotate the picture either clockwise or
counter clockwise.)
Information
Shows the picture information including
the name and size, etc.
| NOTES |
Depending on the disc or storage device, the Tools
menu may differ. All options may not be displayed.
To enable the background music function, the photo
file must be in the same storage media as the music
file. However, the sound quality can be affected by the
bit rate of the MP3 file, the size of the photo, and the
encoding method.
Creating a Photo Playlist
You can create a playlist of photos in a way that is nearly
identical to the way you create a playlist of music files. For
instructions, see "Creating a Music Playlist" on this page.
|
26 English
Page 27

Listening to Radio
Using Buttons on the Remote Control
Press the FUNCTION button to select FM.
1.
Tune in to the desired station.
2.
• Preset Tuning 1 : Press the 5 button to select
PRESET and then press the TUNING UP,
DOWN button to select the preset station.
- Before you can tune to preset stations, you
must add preset stations to the product's
memory. See Presetting Stations below.
• Manual Tuning : Press the 5 button to select
MANUAL and then press the TUNING UP,
DOWN button to tune in to a lower or higher
frequency.
• Automatic Tuning : Press the 5 button to select
MANUAL and then press and hold the TUNING
UP, DOWN button to automatically search the
band.
Setting Mono/Stereo
Press the MO/ST button.
• Each time the button is pressed, the sound switches
between STEREO and MONO.
• In a poor reception area, select MONO for a clear,
interference-free broadcast.
Presetting Stations
Example : Presetting FM 89.10 into memory.
Press the FUNCTION button to select FM.
1.
Press the TUNING UP, DOWN button to select
2.
<89.10>.
Press the TUNER MEMORY button.
3.
• NUMBER flashes on the display.
Press the TUNER MEMORY button again.
4.
• Press the TUNER MEMORY button before
NUMBER disappears from the display on its own.
• After you press the TUNER MEMORY button,
NUMBER disappears from the display and the
station is stored in memory.
To preset another station, repeat steps 2 to 4.
5.
• To tune in to a preset station, press the TUNING
UP, DOWN button.
Using the TV Sound Button on the
Remote Control
TV Sound
If you have a TV that supports Anynet+ (HDMI-CEC), the
TV SOUND button lets you direct the TV's audio to the
home cinema speakers or the TV speakers. To use, follow
these steps:
Connect an HDMI cable to the TV and home
1.
cinema. (See page 15.)
Set Anynet+ (HDMI-CEC) On in the home cinema
2.
and TV.
Press the TV SOUND button on the remote control.
3.
TV SOUND ON flashes on the display on the front
panel, and then changes to D. IN.
• When TV SOUND is on, TV audio outputs through
the home cinema speakers.
Press the TV SOUND button again to turn TV
4.
SOUND off.
• When TV SOUND is off, TV audio outputs through
the speakers of the connected Anynet+ TV.
Use TV SOUND:
1) When you want to listen to the TV's audio through
the home cinema speakers.
2) When you want to listen to the audio from a USB
device plugged into the TV through the home
cinema speakers.
TV SOUND ON/OFF support specification
Connected TV
Anynet+
(HDMI-CEC)
supported TV
Anynet+
(HDMI-CEC) not
supported TV
Anynet+
(HDMI-CEC)
Setting
ON O O
OFF O X
No operation O X
TV SOUND
TV
Sound
ON
TV
Sound
OFF
05 Media Play
English 27
|
Page 28

Network Services
Using BD-LIVE™
Connect the product to the network.
1.
(See page 14)
Configure the network settings.
2.
(See pages 20~21)
Once the product is connected to your network, you can
enjoy various movie-related service contents available on
BD-LIVE compliant discs.
Attach a USB memory stick to the USB jack on
1.
the front of the product, and then use BD Data
Management to check its remaining memory. The
memory device must have at least 1GB of free
space to accommodate the BD-LIVE services.
Select Settings on the Home screen, and then
2.
press the E button.
Select System, and then press the E button.
3.
Select BD Data management, and then press the
4.
button.
E
Select Change Device, and then press the E
5.
button.
Select USB Flash Disk, and then press the E
6.
button.
Insert a Blu-ray Disc that supports BD-LIVE.
7.
Select an item from the list of BD-LIVE service
8.
contents provided by the disc manufacturer.
| NOTES |
The way you use BD-LIVE and the provided contents
may differ, depending on the disc manufacturer.
Using DLNA
DLNA lets you access and play files located on your PC
through your home cinema.
Follow the directions in the DLNA user's guide to setup
DLNA on your PC and to tag folders and files you want to
share with the home cinema.
To access and play files located on your PC after you
have setup DLNA, follow these steps:
Turn on your PC, your TV, and the home cinema.
1.
Make sure the DLNA Shared server is running on
2.
your PC.
On your home cinema, press the BLUE (D) button
3.
(View Devices).
Use the ◄► button to select your PC in the Device
4.
List.
Select the kind of file you want to view or play,
5.
Videos, Photos, or Music, and then press E.
▲
Use the
6.
kind of files you selected, and then press E. The
File List is displayed.
Select the file you want to view or play, and then
7.
press E.
| NOTES |
You can create Playlists from files on your PC in the
same way you create playlists from files on USB
devices and discs.
With a few exceptions, you can control the playback
of files on your PC in the same fashion you control the
playback of files on USB devices and discs.
You can also access files on your PC by first selecting
Videos, Photos, or Music on the Home screen,
and then selecting your PC from the device list that
appears.
%
◄► button to select the folder with the
|
28 English
Page 29

Appendix
Additional Information
Notes
Connections
HDMI OUT
• Certain HDMI output resolutions may not work,
depending on your TV.
• You must have an HDMI connection to enjoy videos
with 3D technology.
• A long HDMI cable may cause screen noise. If this
occurs, set HDMI Deep Color to Off in the menu.
Settings
3D Settings
• For some 3D discs, to stop a movie during 3D
playback, press the 5 button once. The movie
stops and the 3D mode option is de-activated.
To change a 3D option selection when you are
playing a 3D movie, press the 5 button once.
The Blu-ray menu appears. Press the 5 button
again, then select 3D Settings in the Blu-ray menu.
• Depending on the content and the position of the
picture on your TV screen, you may see vertical black
bars on the left side, right side, or both sides.
TV Aspect
• Depending on the disc type, some aspect ratios may
not be available.
• If you select an aspect ratio and option which is
different than the aspect ratio of your TV screen, then
the picture might appear to be distorted.
• If you select the 16:9 Original, your TV may display
4:3 Pillarbox (black bars on sides of picture).
BD Wise (Samsung Products only)
• When BD Wise is on, the Resolution setting
automatically defaults to BD Wise and BD Wise
appears in the Resolution menu.
• If the product is connected to a device that does
not support BD Wise, you can not use the BD Wise
function.
• For proper operation of BD Wise, set the BD Wise
option in both the product and the TV to On.
Digital Output
• Be sure to select the correct Digital Output or you will
hear no sound or just loud noise.
• If the HDMI device (AV receiver, TV) is not compatible
with compressed formats (Dolby Digital, DTS), the
audio signal outputs as PCM.
• Regular DVDs do not have BONUSVIEW audio and
Navigation Sound Effects.
• Some Blu-ray Discs do not have BONUSVIEW audio
and Navigation Sound Effects.
• This Digital Output setup does not affect the
analogue (L/R) audio or HDMI audio output to your
TV.
It affects the optical and HDMI audio output when
your product is connected to an AV receiver.
• If you play MPEG audio soundtracks, the audio signal
outputs as PCM regardless of your Digital Output
selections (PCM or Bitstream).
• Digital Output can be activated when Speaker
Selection is selected to TV Speaker.
BD-LIVE Internet Connection
• The Internet connection may be restricted while you
are using BD-LIVE contents.
Anynet+ (HDMI-CEC)
• Depending on your TV, certain HDMI output
resolutions may not work. Please refer to the user
manual of your TV.
• This function is not available if the HDMI cable does
not support CEC.
• If your Samsung TV has an Anynet+ logo, then it
supports the Anynet+ function.
BD Data Management
• In the external memory mode, disc playback may
be stopped if you disconnect the USB device in the
middle of playback.
• Only those USB devices formatted in the FAT file
system (DOS 8.3 volume label) are supported.
We recommend you use USB devices that support
USB 2.0 protocol with 4 MB/sec or faster read/write
speed.
• The Resume Play function may not work after you
format the storage device.
• The total memory available to BD Data Management
may differ, depending on the conditions.
DivX® Video On Demand
• For more information about DivX(R) VOD, visit “http://
vod.divx.com”.
Speaker Settings
• When Speaker Selection is set to TV Speaker,
audio is produced through the TV speakers.
07 Appendix
English 29
|
Page 30

Appendix
HDMI audio
• When HDMI audio is outputted to the TV speaker, it
is automatically down-mixed to 2 channels.
Audio Return Channel
• When Anynet+ (HDMI-CEC) is Off, the Audio Return
Channel function is not available.
• Using a HDMI cable not certified for ARC (Audio
Return Channel) may cause a compatibility problem.
• The ARC function is only available if an ARCcompliant TV is connected.
Playback
Playing a Video files
• Video files with high bit rates of 20Mbps or more
strain the product’s capabilities and may stop playing
during playback.
Selecting the Audio Language
• The ◄► indicator will not appear on the screen
if the BONUSVIEW section does not contain any
BONUSVIEW audio settings.
• The languages available through the Audio Language
function depend on the languages that are encoded
on the disc. This function or certain languages may
not be available.
• Some Blu-ray Discs may allow you to select either
the PCM or Dolby Digital audio soundtrack in English.
Selecting the Subtitle Language
• Depending on the Blu-ray Disc / DVD, you may be
able to change the subtitle language in the Disc
Menu. Press the DISC MENU button.
• This function depends on the selection of subtitles
that are encoded on the disc and may not be
available on all Blu-ray Discs/DVDs.
• Information about the main feature BONUSVIEW
mode will also appear if the Blu-ray Disc has a
BONUSVIEW section.
• This function changes both the primary and
secondary subtitles at the same time.
• The total number of primary and secondary subtitles
are displayed respectively.
Playing a JPEG files
• You can’t enlarge the subtitle and PG graphic in the
full screen mode.
Media Play
Using the TOOLS button while playing pictures
• If the system is connected to a BD Wise compliant
TV that has set BD Wise to On, the Picture Settings
menu will not appear.
• The Background Music function will not work unless
the music file and the photo file are located on the
same storage media. Also, sound quality can be
impacted by the bit rate of the MP3 music file, the
size of the photos, and the encoding method.
Playing back a USB Storage Device
• You must remove the USB storage device safely by
performing the “Safely Remove USB” function to
prevent possible damage to the USB memory. Press
the HOME button to move to the Home menu, select
the YELLOW (C) button, and then press the E
button.
|
30 English
Page 31

Digital Output Selection
Setup PCM
Connection HDMI supported AV receiver
PCM Up to PCM 7.1ch PCM
Dolby Digital Up to PCM 5.1ch Dolby Digital
Dolby Digital
Plus
Audio
Stream on
Blu-ray Disc
Audio
Stream on
DVD
Definition for
Blu-ray Disc
Dolby TrueHD Up to PCM 5.1ch Dolby TrueHD
DTS Up to PCM 5.1ch DTS
DTS-HD High
Resolution
Audio
DTS-HD Master
Audio
PCM PCM 2ch PCM 2ch PCM 2ch PCM 2ch
Dolby Digital Up to PCM 5.1ch Dolby Digital Dolby Digital Dolby Digital
DTS Up to PCM 5.1ch DTS DTS DTS
Any
Bitstream
(Unprocessed)
Up to PCM 5.1ch Dolby Digital Plus
Up to PCM 7.1ch
Up to PCM 7.1ch
Decodes the main
feature audio and
BONUSVIEW audio
stream together
into PCM audio and
adds Navigation
Sound Effects.
DTS-HD High
Resolution Audio
DTS-HD Master
Audio
Outputs only the
main feature audio
stream so that your
AV receiver can
decode the audio
bitstream.
You will not hear
BONUSVIEW audio
or Navigation Sound
Effects.
Bitstream
(Re-encoded DTS)
DTS re-encoded
Decodes the main
Decodes the main
feature audio and
BONUSVIEW audio
stream together into
PCM audio and adds
Navigation Sound
Effects, then re-encodes
the PCM audio into DTS
bitstream.
feature audio and
together into PCM
Navigation Sound
encodes the PCM
audio into Dolby
Bitstream
(Re-encoded
Dolby D)
Re-encoded
Dolby Digital *
BONUSVIEW
audio stream
audio and adds
Effects, then re-
Digital bitstream
or PCM.
07 Appendix
If the Source Stream is 2ch or mono, “Re-encoded Dolby D” Setting are not applied. Output will be PCM 2ch.
Blu-ray Discs may include three audio streams :
- Main Feature Audio : The audio soundtrack of the main feature.
- BONUSVIEW audio : An additional soundtrack such as the director or actor’s commentary.
- Navigation Sound Effects: Sound effects that occur when you navigate the disc's or movie's menu. Navigation Sound
Effects are different on each Blu-ray disc.
English 31
|
Page 32

Appendix
Resolution according to the output mode
Blu-ray Disc/E-contents/Digital Contents playback DVD playback
Disc
HDMI Mode
E-contents/
Digital contents
1080p@60F 480i
HDMI Mode
Setup
BD Wise
Auto Max. Resolution of TV input Max. Resolution of TV input
1080p@60F 1080p@60F -
1080p - 1080p
Movie Frame : Auto (24Fs) 1080p@24F -
1080i 1080i 1080i
720p 720p 720p
576p/480p 576p/480p 576p/480p
Output
Blu-ray Disc
Resolution of Blu-ray
Troubleshooting
Refer to the table below when this product does not function properly. If the problem you are experiencing is not listed
below or if the instructions below do not help, turn off the product, disconnect the power cord and contact the nearest
authorized dealer or Samsung Electronics Service Centre.
Symptom Check/Remedy
I cannot eject the disc.
Playback does not start.
Playback does not start
immediately when the
Play/Pause button is
pressed.
Sound is not produced. • The home cinema does not play sound during fast playback, slow playback, and
• Is the power cord plugged securely into the outlet?
• Turn off the power and then turn it back on.
• Check the region number of the Blu-ray/DVD disc.
A Blu-ray/DVD disc purchased from abroad may not be playable.
• CD-ROMs and DVD-ROMs cannot be played on this product.
• Make sure that the rating level is correct.
• Are you using a deformed disc or a disc with scratches on the surface?
• Wipe the disc clean.
step motion playback.
• Are the speakers connected properly? Is the speaker setup correctly customized?
• Is the disc severely damaged?
Sound can be heard only
from a few speakers and
not all 6.
|
32 English
• On certain Blu-ray/DVD discs, sound is output from the front speakers only.
• Check if the speakers are connected properly.
• Adjust the volume.
• When playing audio from a CD, the radio, or a TV, the unit outputs sound to the
front speakers only.
Page 33

Symptom Check/Remedy
Dolby Digital 5.1 CH
Surround Sound is not
produced.
The remote control does
not work.
• The disc is rotating but
no picture is produced.
• Picture quality is poor
and picture is shaking.
Audio language and
subtitles do not work.
The menu screen does
not appear even when the
menu function is selected.
The aspect ratio cannot be
changed.
• The product is not
working.
You have forgotten the
rating level password.
Can't receive radio
broadcasts.
While listening to TV audio
through the Product, no
sound is heard.
"Not Available" appears
on screen.
If the HDMI output is set to
a resolution your TV cannot
support (for example,
1080p), you may not see a
picture on your TV.
• Is there "Dolby Digital 5.1 CH" mark on the disc? Dolby Digital 5.1 CH Surround
Sound is produced only if the disc is recorded with 5.1 channel sound.
• Is the audio language correctly set to Dolby Digital 5.1-CH in the information
display?
• Are you operating the remote within its operational range and within the proper
angle relative to the sensor?
• Are the batteries drained?
• Is the TV power on?
• Are the video cables connected properly?
• Is the disc dirty or damaged?
• A poorly manufactured disc may not be playable.
• Audio language and subtitles will not work if the disc does not contain them.
• Are you using a disc that does not contain menus?
• You can play 16:9 Blu-ray/DVD discs in 16:9 Full mode, 4:3 Letter Box mode, or
4:3 Pan-Scan mode, but 4:3 Blu-ray/DVD discs are played in 4:3 ratio only. Refer to
the Blu-ray Disc jacket and then select the appropriate function.
• Press and hold the remote control's 5 button for 5 seconds in NO DISC mode.
This will reset the unit.
- Using the RESET function will erase all stored settings.
Do not use this unless necessary.
• With no disc in the product, press and hold the product's 5 button for longer
than 5 seconds. INIT appears on the display and all settings will return to the
default values.
Then, press the POWER button.
- Using the RESET function will erase all stored settings.
Do not use this unless necessary.
• Is the antenna connected properly?
• If the antenna's input signal is weak, install an external FM antenna in an area with
good reception.
• If the OPEN/CLOSE ^ button is pressed while listening to TV audio using the
D. IN or AUX functions, the Blu-ray/DVD disc functions are turned on and the TV
audio is muted.
• The features or action cannot be completed at this time because:
1. The Blu-ray/DVD disc's software restricts it.
2. The Blu-ray/DVD disc's software doesn’t support the feature (e.g., angles)
3. The feature is not available at the moment.
4. You’ve requested a title or chapter number or search time that is out of range.
• Press and hold the 5 button on front panel for more than 5 seconds with no disc
inserted. All settings will revert to the factory settings.
07 Appendix
English 33
|
Page 34

Appendix
Symptom Check/Remedy
No HDMI output. • Check the connection between the TV and the HDMI jack of the product.
Abnormal HDMI output
screen.
DLNA function
I can see folders shared
through DLNA, but I
cannot see the files.
Video is played
intermittently.
The DLNA connection
between the TV and PC is
unstable.
BD-LIVE
I cannot connect to the
BD-LIVE server.
When using the BD-LIVE
service, an error occurs.
| NOTES |
When the factory default settings are restored, all stored user BD data is deleted.
• Check if your TV supports 576p/480p/720p/1080i/1080p HDMI input resolution.
• If random noise appears on the screen, it means that TV does not support HDCP
(High-bandwidth Digital Content Protection).
• DLNA shows only files corresponding to the Photo, Music, and Movie files. Files
that do not correspond to these categories may not be displayed.
• Check if the network is stable.
• Check if the network cable is properly connected and if the network is not
overloaded.
• IP addresses under the same subnetwork should be unique, otherwise IP collision
can results in such a phenomenon.
• Check if you have a firewall enabled.
If so, disable the firewall function.
• Test whether the network connection is active by using the Network Status
function.
• Check whether a USB memory device is connected to the product.
• The memory device must have at least 1GB of free space to accommodate the
BD-LIVE service.
You can check the available size in BD Data Management. (See page 29)
• See if the BD-LIVE Internet Connection option is set to Allow(All).
• If all above fails, contact the contents provider or update to the latest firmware.
•
The USB memory device must have at least 1GB of free space to accommodate the
BD-LIVE service.
You can check the available size in BD Data Management. (See page 29)
HT-F4500/HT-F4550
Hereby, Samsung Electronics, declares that this equipment is in compliance with the essential
requirements and other relevant provisions of Directive 1999/5/EC.
The original Declaration of Conformity may be found at http://www.samsung.com,
go to Support > Search Product Support and enter the model name.
This equipment may be operated in Jordan.
|
34 English
Page 35

Specifications
Weight 2.3 kg
General
FM Tuner
HDMI
Amplifier
Speaker
• Network speeds equal to or below 10Mbps are not supported.
• Samsung Electronics Co., Ltd reserves the right to change the specifications without notice.
• Weight and dimensions are approximate.
• Design and specifications are subject to change without prior notice.
• For the power supply and Power Consumption, refer to the label attached to the product.
Dimensions 430 (W) x 55 (H) x 250 (D) mm
Operating Temperature Range +5°C to +35°C
Operating Humidity Range 10 % to 75 %
Signal/noise ratio 55 dB
Usable sensitivity 12 dB
Total harmonic distortion 0.5 %
Video 1080p, 1080i, 720p, 576p/480p
Audio
Front speaker output 80W x 2 (3)
Centre speaker output 80W (3)
Surround speaker output 80W x 2 (3)
Subwoofer speaker output 100W (3)
Frequency response
S/N Ratio 70dB
Channel separation 60dB
Input sensitivity (AUX) 500mV
Speaker system
Impedance 3 3 3 3
Frequency range 140Hz~20kHz 140Hz~20kHz 140Hz~20kHz 40Hz ~ 160Hz
Output sound pressure level 87dB/W/M 87dB/W/M 87dB/W/M 88dB/W/M
Rated input 80W 80W 80W 100W
Maximum input 160W 160W 160W 200W
Dimensions
(W x H x D)
(Unit : mm)
Weights
(Unit : kg)
PCM multichannel audio, Bitstream audio, PCM audio
Analogue input : 20Hz~20kHz (±3dB)
Digital input : 20Hz~40kHz (±4dB)
5.1ch speaker system
Front Surround Center Subwoofer
HT-F4500
95 x 116 x 74 95 x 116 x 74 95 x 116 x 74 155 x 300 x 285.5
HT-F4550
95 x 1112 x 74.5
(stand base)
276 x 189
0.347 0.347 0.347 3.763
2.7 2.7 0.51 3.763
95 x 1112 x 74.5
(stand base)
276 x 189
HT-F4500
HT-F4550
227 x 95 x 74 155 x 300 x 285.5
07 Appendix
English 35
|
Page 36

Contact SAMSUNG WORLD WIDE
If you have any questions or comments relating to Samsung products, please contact the SAMSUNG customer care
centre.
Area
`
Asia Pacific
AUSTRALIA 1300 362 603 www.samsung.com/au/support
NEW ZEALAND 0800 SAMSUNG (0800 726 786) www.samsung.com/nz/support
CHINA 400-810-5858 www.samsung.com/cn/support
HONG KONG (852) 3698 4698
INDIA
INDONESIA
JAPAN 0120-327-527 www.samsung.com/jp/support
MALAYSIA 1800-88-9999 www.samsung.com/my/support
PHILIPPINES
SINGAPORE 1800-SAMSUNG (726-7864) www.samsung.com/sg/support
THAILAND
TAIWAN 0800-32-9999 www.samsung.com/tw/support
VIETNAM 1800 588 889 www.samsung.com/vn/support
MENA
`
U.A.E 800-SAMSUNG (726-7864)
OMAN 800-SAMSUNG (726-7864)
KUWAIT 183-2255 (183-CALL)
BAHRAIN 8000-4726
QATAR 800-2255 (800-CALL)
EGYPT
ALGERIA 021 36 11 00 www.samsung.com/n_africa/support
PAKISTAN 0800-Samsung (72678) www.samsung.com/pk/support
TUNISIA 80-1000-12 www.samsung.com/n_africa/support
JORDAN
SYRIA 18252273 www.samsung.com/Levant/support (English)
IRAN 021-8255 www.samsung.com/iran/support
MOROCCO 080 100 2255 www.samsung.com/n_africa/support
SAUDI ARABIA 920021230
TURKEY 444 77 11 www.samsung.com/tr/support
Africa
`
NIGERIA 0800-726-7864
Ghana
Cote D’ Ivoire 8000 0077
CAMEROON 7095- 0077
KENYA 0800 545 545
UGANDA 0800 300 300
TANZANIA 0685 88 99 00
RWANDA 9999
BURUNDI 200
DRC 499999
SUDAN 1969
SOUTH AFRICA 0860 SAMSUNG (726 7864)
BOTSWANA 8007260000
NAMIBIA 08 197 267 864
ZAMBIA 0211 350370
MOZAMBIQUE 847267864 / 827267864
1800 3000 8282 - Toll Free
1800 266 8282 - Toll Free
30308282 - Non Toll Free
0800112888
021-56997777
1-800-10-7267864 [PLDT]
1-800-8-7267864 [Globe landline and Mobile]
02-4222111 [Other landline]
0-2689-3232,
1800-29-3232
08000-726786
16580
0800-22273
06 5777444
0800-10077
0302-200077
Contact Centre
www.samsung.com/hk/support (Chinese)
www.samsung.com/hk_en/support (English)
www.samsung.com/in/support
www.samsung.com/id/support
www.samsung.com/ph/support
www.samsung.com/th/support
www.samsung.com/ae/support (English)
www.samsung.com/ae_ar/support (Arabic)
www.samsung.com/eg/support
www.samsung.com/Levant/support (English)
www.samsung.com/sa/support
www.samsung.com/sa_en/support (English)
www.samsung.com/africa_en/support
www.samsung.com/africa_fr/support SENEGAL 800-00-0077
www.samsung.com/support
www.samsung.com/support
Web Site
Page 37

HT-F4500
HT-F4550
ﻲﻟﺯﻧﻣﻟﺍ ﻪﻳﻓﺭﺗﻟﺍ ﻡﺎﻅﻧ
™5.1CH Blu-ray
ﻡﺩﺧﺗﺳﻣﻟﺍ ﻝﻳﻟﺩ
ﺕﺎﻳﻧﺎﻛﻣﻹﺍ ﻝﻳﺧﺗ
.Samsung ﻥﻣ ﺞﺗﻧﻣﻟﺍ ﺍﺫﻫ ءﺍﺭﺷ ﻰﻠﻋ ﻡﻛﺭﻛﺷﻧ
www.samsung.com/register
،ًﻼﻣﺎﻛﺗ ﺭﺛﻛﺃ ﺔﻣﺩﺧ ﻰﻠﻋ ﻝﻭﺻﺣﻠﻟ
ﻊﻗﻭﻣﻟﺍ ﻰﻠﻋ ﺞﺗﻧﻣﻟﺍ ﻝﻳﺟﺳﺗ ءﺎﺟﺭﻟﺍ
Page 38

ﺔﻣﻼﻋ ﻥﻋ ﺙﻠﺛﻣﻟﺍ ﻝﺧﺍﺩﺑ ﺏﺟﻌﺗﻟﺍ ﺔﻣﻼﻋ ﺭﺑﻌﺗ
.ﺞﺗﻧﻣﻠﻟ ﺔﺑﺣﺎﺻﻣﻟﺍ ﺔﻣﺎﻬﻟﺍ ﺕﺎﻣﻳﻠﻌﺗﻟﺎﺑ ﻙﻬﺑﻧﺗ ﺭﻳﺫﺣﺗ
ﺔﻣﻼﺳﻟﺍ ﺕﺎﻣﻭﻠﻌﻣ
.(ﻲﻔﻠﺧﻟﺍ ءﺯﺟﻟﺍ ﻭﺃ) ءﺎﻁﻐﻟﺍ ﺔﻟﺍﺯﺈﺑ ﻡﻘﺗ ﻻ ،ﺔﻳﺋﺎﺑﺭﻬﻛﻟﺍ ﺔﻣﺩﺻﻠﻟ ﺽﺭﻌﺗﻟﺍ ﺭﻁﺧ ﻥﻣ ﻝﻳﻠﻘﺗﻠﻟ
.ﻥﻳﻠﻫﺅﻣﻟﺍ ﻥﻳﻳﻧﻔﻠﻟ ﺔﻧﺎﻳﺻﻟﺍ ﻝﺎﻣﻋﺃ ﻙﺭﺗﺍ .ﻝﺧﺍﺩﻟﺍ ﻲﻓ ﺎﻬﺗﻣﺩﺧﺑ ﻡﺩﺧﺗﺳﻣﻟﺍ ﻡﻭﻘﻳ ﻥﺃ ﻥﻛﻣﻳ ءﺍﺯﺟﺃ ﺩﺟﻭﺗ ﻻ
ﻪﻳﺑﻧﺗ
ﺔﻳﺋﺎﺑﺭﻬﻛ ﺔﻣﺩﺻﻟ ﺽﺭﻌﺗﻟﺍ ﺭﻁﺧ
ﻥﺎﻛﻣﻟﺍ ﺍﺫﻫ ﺢﺗﻔﺗ ﻻ
ﻻ ،ﺔﻳﺑﺭﻬﻛ ﺔﻣﺩﺻﻟ ﺽﺭﻌﺗﻟﺍ ﺭﻁﺎﺧﻣ ﻝﻳﻠﻘﺗﻟ : ﻪﻳﺑﻧﺗ
ﺩﺟﻭﺗ ﻼﻓ .(ﻲﻔﻠﺧﻟﺍ ءﺎﻁﻐﻟﺍ ﻭﺃ) ءﺎﻁﻐﻟﺍ ﺔﻟﺍﺯﺈﺑ ﻡﻘﺗ
ﺎﻣﻧﺇﻭ .ﻝﺧﺍﺩﻟﺎﺑ ﺎﻬﺗﻧﺎﻳﺻ ﻡﺩﺧﺗﺳﻣﻠﻟ ﻥﻛﻣﻳ ءﺍﺯﺟﺃ
ﺔﻧﺎﻳﺻﻟﺍ ﻲﻔﻅﻭﻣﻟ ﺔﻧﺎﻳﺻﻟﺍ ﺔﻳﻠﻣﻋ ﻙﺭﺗ ﻰﺟﺭُﻳ
.ﻥﻳﻠﻫﺅﻣﻟﺍ
ﺙﻠﺛﻣﻟﺍ ﻝﺧﺍﺩ ﻡﻬﺳﻟﺍ ﺱﺃﺭﻭ ءﻲﺿﻣﻟﺍ ﺵﻼﻔﻟﺍ ﻝﺛﻣﻳ
ﻝﺧﺍﺩﺑ ﺭﻳﻁﺧﻟﺍ ﻲﺑﺭﻬﻛﻟﺍ ﺩﻬﺟﻟﺎﺑ ﻙﻬﺑﻧﺗ ﺭﻳﺫﺣﺗ ﺔﻣﻼﻋ
ﺭﻳﺫﺣﺗ
.ﺞﺗﻧﻣﻟﺍ
ﻰﻟﻭﻷﺍ ﺔﺋﻔﻟﺍ ﻥﻣ ﺭﺯﻳﻟ ﺞﺗﻧﻣ
ﺔﺋﻔﻟﺍ ﻥﻣ ﺭﺯﻳﻟ ﺞﺗﻧﻣ ﻪﻧﺃ ﻰﻠﻋ ﺍﺫﻫ ﺔﺟﻣﺩﻣﻟﺍ ﺹﺍﺭﻗﻷﺍ ﻝﻐﺷﻣ ﻑﻳﻧﺻﺗ ﻡﺗ
ﺫﻳﻔﻧﺗ ﻭﺃ ﻝﻳﺩﻌﺗﻟﺍ ﺕﺍءﺍﺭﺟﺇ ﻭﺃ ﻡﻛﺣﺗ ﺭﺻﺎﻧﻋ ﻡﺍﺩﺧﺗﺳﺍ ﻱﺩﺅﻳ ﺩﻗﻭ
ﺽﺭﻌﺗﻟﺍ ﻰﻟﺇ ﻝﻳﻟﺩﻟﺍ ﺍﺫﻫ ﻲﻓ ﺓﺩﺩﺣﻣﻟﺍ ﻙﻠﺗ ﻑﻼﺧﺑ ءﺍﺩﻷﺍ ﺕﺍءﺍﺭﺟﺇ
ﺭﺎﻁﺧﻹ ﺎًﻘﺑﻁ ﺕﺎﻓﻼﺗﺧﻻﺍ ءﺎﻧﺛﺗﺳﺎﺑ 21CFR 1040.10 ﻊﻣ ﻕﻓﺍﻭﺗﻣ
.2007 ،ﻭﻳﻧﻭﻳ 24 ﺦﻳﺭﺎﺗﺑ ،50 ﻡﻗﺭ ﺭﺯﻳﻠﻟﺍ
(FDA 21 CFR) .ﻉﺎﻌﺷﻠﻟ
(IEC 60825-1) ﻉﺎﻌﺷﻠﻟ ﺽﺭﻌﺗﻟﺍ
ﺓﺩﺩﺣﻣﻟﺍ ﺭﻳﻏ ﺕﺍءﺍﺭﺟﺇ ﺫﻳﻔﻧﺗ ﻭﺃ ﻁﺑﺿ ﺕﺍﻭﺩﺃ ﻭﺃ ﻡﻛﺣﺗ ﺕﺍﻭﺩﺃ ﻡﺍﺩﺧﺗﺳﺍ ﻰﻠﻋ
ءﺍﺭﺟﺇ ﻭﺃ ءﺎﻁﻐﻟﺍ ﺢﺗﻔﺑ ﻡﻘﺗ ﻻ .ﺭﻳﻁﺧ ﻉﺎﻌﺷﻹ ﺽﺭﻌﺗﻟﺍ ﺩﻧﺗﺳﻣﻟﺍ ﺍﺫﻫ ﻲﻓ
.ﻥﻳﻠﻫﺅﻣﻟﺍ ﻥﻳﻔﻅﻭﻣﻠﻟ ﺔﻧﺎﻳﺻﻟﺍ ﺔﻳﻠﻣﻋ ﻙﺭﺗ ﻰﺟﺭ
LASER PRODUKT KLASSE 1
LASER LAITE LUOKAN 1
LASER APPARAT KLASS 1
LÁSER CLASE 1 PRODUCTO
ُ
ﻳ ﺎﻣﻧﺇﻭ .ﻙﺳﻔﻧﺑ ﺡﻼﺻﻹﺍ
ﺭﺯﻳﻟ ﺞﺗﻧﻣ ﻰﻟﻭﻷﺍ ﺔﺋﻔﻟﺍ
.ﻰﻟﻭﻷﺍ
.ﻉﺎﻌﺷﻹﺍ ﺭﻁﺧﻟ
:ﺭﻁﺧ
:ﻪﻳﺑﻧﺗ
ﺭﻳﺫﺣﺗ
• ﺯﺎﻬﺟﻟﺍ ﺍﺫﻫ ﺽﺭﻌﺗ ﻻ ،ﺔﻳﺋﺎﺑﺭﻬﻛ ﺔﻣﺩﺻ ﺙﻭﺩﺣ ﻭﺃ ﻕﻳﺭﺣ ﺏﻭﺷﻧ ﺭﻁﺧ ﻝﻳﻠﻘﺗﻟ
.ﺔﺑﻭﻁﺭﻟﺍ ﻭﺃ ﺭﻁﻣﻠﻟ
• ﺭﺷﺎﺑﻣﻟﺍ ﺽﺭﻌﺗﻟﺍ ﺏﻧﺟﺗ .ﺢﺗﻔﻟﺍ ﺩﻧﻋ ﻲﺋﺭﻣ ﺭﻳﻏﻭ ﻲﺋﺭﻣ ﺭﺯﻳﻟ ﻉﺎﻌﺷﺇ ﺙﻌﺑﻧﻳ
• ﺏﻧﺟﺗ .ﺢﺗﻔﻟﺍ ﺩﻧﻋ 3B ﺔﺋﻔﻟﺍ ﻥﻣ ﻲﺋﺭﻣ ﺭﻳﻏﻭ ﻲﺋﺭﻣ ﺭﺯﻳﻟ ﻉﺎﻌﺷﺇ ﺙﻌﺑﻧﻳ
• ﺏﺗﺭﺗﻳ ﺩﻗ USE OF CONTROLS OR .ﺭﺯﻳﻠﻟﺍ ﻡﺩﺧﺗﺳﻳ ﺞﺗﻧﻣﻟﺍ ﺍﺫﻫ
ﺔﻳﺑﺭﻌﻟﺍ ٢
|
Page 39

ﺔﺣﺋﺍﺭ ﻪﻧﻣ ﺕﺭﺩﺻ ﺍﺫﺇ ﻭﺃ ﺔﻳﻌﻳﺑﻁ ﺭﻳﻏ ًءﺎﺿﻭﺿ ﺞﺗﻧﻣﻟﺍ ﺭﺩﺻﺃ ﺍﺫﺇ
ﻡﻗﻭ ﺭﻭﻔﻟﺍ ﻰﻠﻋ ﺔﻗﺎﻁﻟﺍ ﺡﺎﺗﻔﻣ ﻥﻣ ﺞﺗﻧﻣﻟﺍ ﻝﻳﻐﺷﺗ ﻑﻗﻭﺄﻓ ،ﻥﺎﺧﺩ ﻭﺃ ﻕﺍﺭﺗﺣﺍ
۰۱ﺔﻣﻼﺳﻟﺍ ﺕﺎﻣﻭﻠﻌﻣ
ﺔﻣﺩﺧ ﺯﻛﺭﻣ ﺏﺭﻗﺄﺑ ﻝﺻﺗﺍ ﻡﺛ .ﻱﺭﺍﺩﺟﻟﺍ ﺫﻔﻧﻣﻟﺍ ﻥﻣ ﺔﻗﺎﻁﻟﺍ ﺱﺑﺎﻗ ﻝﺻﻔﺑ
ﻥﺃ ﻥﻛﻣﻳ .ﺞﺗﻧﻣﻟﺍ ﻡﺩﺧﺗﺳﺗ ﻻﻭ .ﺔﻳﻧﻔﻟﺍ ﺓﺩﻋﺎﺳﻣﻟﺍ ﻰﻠﻋ ﻝﻭﺻﺣﻠﻟ ءﻼﻣﻋ
ﺙﻭﺩﺣ ﻭﺃ ﻕﻳﺭﺣ ﺏﻭﺷﻧ ﻰﻟﺇ ﺎﻬﻳﻠﻋ
ﻥﻣ ﺔﻗﺎﻁﻟﺍ ﺱﺑﺎﻗ ﺏﺣﺳﺗ ﻥﺃ ﺏﺟﻳ ،ﻡﺎﺗ ﻝﻛﺷﺑ ﺞﺗﻧﻣﻟﺍ ﺍﺫﻫ ﻝﻳﻐﺷﺗ ﻑﺎﻘﻳﻹ
ﺱﺑﺎﻗ ﻰﻟﺇ ﻝﻭﺻﻭﻟﺍ ﻝﻬﺳﻟﺍ ﻥﻣ ﻥﻭﻛﻳ ﻥﺃ ﺏﺟﻳ ،ﻙﻟﺫﻟﻭ .ﻱﺭﺍﺩﺟﻟﺍ ﺱﺑﻘﻣﻟﺍ
Dolby ﻝﻣﺎﻌﻣ ﻥﻣ ﺹﻳﺧﺭﺗﺑ ﺔﻌﻧﺻﻣ
.Digital Laboratories
ﻥﺎﺗﻣﻼﻋ ﺝﻭﺩﺯﻣﻟﺍ D ﺯﻣﺭﻭ Dolby ﺩﻌﺗ
ﺔﻛﺭﺷﻟ ﻥﺎﺗﻛﻭﻠﻣﻣ ﻥﺎﺗﻠﺟﺳﻣ ﻥﺎﺗﻳﺭﺎﺟﺗ
.Dolby Laboratories
ﺯﺎﻬﺟﻟﺍ ﺍﺫﻫ ﻊﻳﻧﺻﺗ ﻡﺗ
ﺏﺳﺣ ﺹﻳﺧﺭﺗ ﺏﺟﻭﻣﺑ
ﻉﺍﺭﺗﺧﻻﺍ ﺕﺍءﺍﺭﺑ ﻡﺎﻗﺭﺃ
:ﺔﻳﻟﺎﺗﻟﺍ ﺔﻳﻛﻳﺭﻣﻷﺍ
،6,487,535 ،6,226,616 ،5,974,380 ،5,956,674
ﺕﺍءﺍﺭﺑﻭ 7,212,872 ،7,333,929 ،7,272,567 ،7,392,195
ﺭﻅﺗﻧﺗ ﻲﺗﻟﺍ ﻭﺃ ﺎﻫﺭﺍﺩﺻﺇ ﻡﺗ ﻲﺗﻟﺍ ﻯﺭﺧﻷﺍ ﺔﻳﻣﻟﺎﻌﻟﺍﻭ ﺔﻳﻛﻳﺭﻣﻷﺍ ﻉﺍﺭﺗﺧﻻﺍ
DTS-HDﻭ ﺎﻫﺯﻣﺭﻭ DTS-HD ﺩﻌﺗ .ﻉﺍﺭﺗﺧﻻﺍ ﺓءﺍﺭﺑ ﻰﻠﻋ ﻝﻭﺻﺣﻟﺍ
DTS-HD Masterﻭ ﺔﻠﺟﺳﻣ ﺔﻳﺭﺎﺟﺗ ﺕﺎﻣﻼﻋ ﻥﻋ ﺓﺭﺎﺑﻋ ﺎًﻌﻣ ﺎﻫﺯﻣﺭﻭ
.DTS, Inc ﺔﻛﺭﺷﻟ ﺔﻳﺭﺎﺟﺗ ﺔﻣﻼﻋ ﻥﻋ ﺓﺭﺎﺑﻋ Audio | Essential
ﺔﻛﺭﺷﻟ ﺔﻅﻭﻔﺣﻣ © ﺭﺷﻧﻟﺍﻭ ﻊﺑﻁﻟﺍ ﻕﻭﻘﺣ .ﺞﻣﺍﺭﺑ ﻰﻠﻋ ﺞﺗﻧﻣﻟﺍ ﻝﻣﺗﺷﻳﻭ
ﺭﺑﺗﻌﻳ :DIVX VIDEO ﻥﻋ ﺓﺫﺑﻧ
ﻪﺗﺄﺷﻧﺃ ﻲﻣﻗﺭ ﻭﻳﺩﻳﻓ ﻕﻳﺳﻧﺗ ®DivX
ﺔﻌﺑﺎﺗ ﺔﻛﺭﺷ ﻲﻫﻭ ،DivX, LLC ﺔﻛﺭﺷ
ﺍﺫﻫ .Rovi Corporation ﺔﻛﺭﺷﻟ
ﻭﻳﺩﻳﻓ ﻝﻳﻐﺷﺗﺑ ﻡﻭﻘﻳﻭ ،®DivX Certified ﻥﻣ ﺩﻣﺗﻌﻣ ﺯﺎﻬﺟ ﻭﻫ ﺯﺎﻬﺟﻟﺍ
ﺩﻳﺯﻣ ﻰﻠﻋ ﻝﻭﺻﺣﻠﻟ divx.com ﻊﻗﻭﻣﻟﺍ ﺓﺭﺎﻳﺯﺑ ﻝﺿﻔﺗ .DivX ﻕﻳﺳﻧﺗﺑ
ﻭﻳﺩﻳﻓ ﻰﻟﺇ ﻙﺗﺎﻔﻠﻣ ﻝﻳﻭﺣﺗﻟ ﺔﺑﻭﻠﻁﻣﻟﺍ ﺞﻣﺍﺭﺑﻟﺍ ﺕﺍﻭﺩﺃﻭ ﺕﺎﻣﻭﻠﻌﻣﻟﺍ ﻥﻣ
ﺹﺧﺭﻣﻟﺍ ﺯﺎﻬﺟﻟﺍ ﺍﺫﻫ :DIVX VIDEO-ON-DEMAND ﻥﻋ ﺓﺫﺑﻧ
ﻡﻼﻓﺃ ﺕﺎﻳﻭﺗﺣﻣ ﻝﻳﻐﺷﺗﻟ ﻪﻠﻳﺟﺳﺗ ﺏﺟﻳ ®DivX Certified ﻝﺑﻗ ﻥﻣ ﻪﺑ
ﻰﻠﻋ ﻝﻭﺻﺣﻠﻟ .ﺎﻫﺅﺍﺭﺷ ﻡﺗﻳ ﻲﺗﻟﺍ (VOD) ﺏﻠﻁﻟﺍ ﺩﻧﻋ DivX ﺽﺭﻋ
ﺏﻫﺫﺍ .ﺯﺎﻬﺟﻟﺍ ﺩﺍﺩﻋﺇ ﺔﻣﺋﺎﻗ ﻲﻓ DivX VOD ﻡﺳﻗ ﺩﺩﺣ ،ﻝﻳﺟﺳﺗﻟﺍ ﺯﻣﺭ
ﻝﺎﻣﻛﺗﺳﺍ ﺔﻘﻳﺭﻁ ﻝﻭﺣ ﺕﺎﻣﻭﻠﻌﻣﻟﺍ ﻥﻣ ﺩﻳﺯﻣﻟ vod.divx.com ﻰﻟﺇ
®DivX ﻭﻳﺩﻳﻓ ﻝﻳﻐﺷﺗﻟ ®DivX Certified ﻥﻣ ﺩﻣﺗﻌﻣ ﺯﺎﻬﺟﻟﺍ ﺍﺫﻫ
.ﺓﺯﻳﻣﻣﻟﺍ ﺕﺎﻳﻭﺗﺣﻣﻟﺍ ﻙﻟﺫ ﻲﻓ ﺎﻣﺑ ،ﻝﺳﻛﺑ 1080 ﻰﺗﺣ ﻝﺻﺗ ﺔﻳﻟﺎﻋ ﺔﻗﺩﺑ
ﺕﺎﻣﻼﻋ ﺔﻁﺑﺗﺭﻣﻟﺍ ﺕﺍﺭﺎﻌﺷﻟﺍﻭ ®DivX Certifiedﻭ ®DivX ﺭﺑﺗﻌﺗ
ﺔﻌﺑﺎﺗﻟﺍ ﺕﺎﻛﺭﺷﻟﺍ ﻭﺃ Rovi Corporation ﺔﻛﺭﺷﻟ ﺔﻳﺭﺎﺟﺗ
ﻡﺗﻳﻭ ﺎﻬﻟ
ﺔﻳﻛﻳﺭﻣﻷﺍ ﻉﺍﺭﺗﺧﻻﺍ ﺕﺍءﺍﺭﺑ ﻥﻣ ﺭﺛﻛﺃ ﻭﺃ ﺩﺣﺍﻭﻟ ﻊﺿﺧﻳ ﺞﺗﻧﻣﻟﺍ ﺍﺫﻫﻭ
7,519,274 ;7,515,710 ;7,460,668 ;7,295,673 :ﺔﻳﻟﺎﺗﻟﺍ
ﻭﻫ ﻲﺗﻟﺍ ﺔﻟﺎﺣﻟﺎﺑ ﺞﺗﻧﻣﻟﺍ ﻡﺍﺩﺧﺗﺳﺍ ﻱﺩﺅﻳ
.ﺔﻅﻭﻔﺣﻣ ﻕﻭﻘﺣﻟﺍ ﻊﻳﻣﺟ ،DTS, Inc
.ﺹﻳﺧﺭﺗﻟﺍ ﺏﺟﻭﻣﺑ ﺎﻬﻣﺍﺩﺧﺗﺳﺍ
.ﺔﻳﺑﺭﻬﻛ ﺔﻣﺩﺻ
.ﺕﻗﻭ ﻱﺃ ﻲﻓ ﺔﻗﺎﻁﻟﺍ
ﺹﻳﺧﺭﺗﻟﺍ
.DivX
.ﻙﻠﻳﺟﺳﺗ
•
ﻭﺃ ﺓﺭﻭﺻﻟﺍﻭ ﺕﻭﺻﻟﺍ ﺓﺩﻭﺟ ﺽﻔﺧ ﻰﻟﺇ ﺹﺭﻘﻟﺍ
•
،ﻩﺎﻳﻣﻟﺍ ﻲﻓ ﻑﻳﻔﺧ ﻑﻅﻧﻣ ﻥﻣ ﻑﻔﺧﻣ ﻝﺋﺎﺳﺑ ﻪﻔﻳﻅﻧﺗﺑ
ﻝﻛﺷﺑ ﺎﻬﻧﻳﺯﺧﺗﺑ ﻡﻗﻭ ﺔﻔﻳﻅﻧ ﺔﻳﺎﻣﺣ ﺔﺑﻳﻘﺣ ﻲﻓ ﺹﺍﺭﻗﻷﺎﺑ ﻅﻔﺗﺣﺍ
ﺎﻬﺗﺭﺍﺩﺇﻭ ﺹﺍﺭﻗﻷﺍ ﻥﻳﺯﺧﺗ
.ﺕﺍﺭﺎﺳﻣﻟﺍ ﻲﻁﺧﺗ ﻰﻟﺇ ﻱﺩﺅﺗ ﺩﻗ
.ﺔﻣﻋﺎﻧ ﺵﺎﻣﻗ ﺔﻌﻁﻗ ﻡﺍﺩﺧﺗﺳﺎﺑ ﻪﺣﺳﻣﺍﻭ
.ﺓﺭﺷﺎﺑﻣﻟﺍ ﺱﻣﺷﻟﺍ ﺔﻌﺷﺃ ﻲﻓ ﻪﻛﺭﺗﺗ ﻻ
.ﺔﻳﻭﻬﺗﻟﺍ ﺓﺩﻳﺟﻭ ﺓﺩﺭﺎﺑ ﺔﻘﻁﻧﻣ ﻲﻓ ﻪﻛﺭﺗﺍ
ﺞﺗﻧﻣﻟﺍ ﻊﻣ ﻝﻣﺎﻌﺗﻟﺍ ﺕﺎﻁﺎﻳﺗﺣﺍ
ﺓءﻭﻠﻣﻣﻟﺍ ءﺎﻳﺷﻷﺍ ﻊﺿﺗ ﻻ .ﻩﺎﻳﻣﻟﺍ ﺫﺍﺫﺭ ﻭﺃ ﺕﺍﺭﻁﻘﻟ ﺯﺎﻬﺟﻟﺍ ﺍﺫﻫ ﺽﺭﻌﺗ ﻻ
ﻥﻣ ﺔﻗﺎﻁﻟﺍ ﺱﺑﺎﻗ ﺏﺣﺳﺗ ﻥﺃ ﺏﺟﻳ ،ﻡﺎﺗ ﻝﻛﺷﺑ ﺞﺗﻧﻣﻟﺍ ﺍﺫﻫ ﻝﻳﻐﺷﺗ ﻑﺎﻘﻳﻹ
ﺱﺑﺎﻗ ﻰﻟﺇ ﻝﻭﺻﻭﻟﺍ ﻝﻬﺳﻟﺍ ﻥﻣ ﻥﻭﻛﻳ ﻥﺃ ﺏﺟﻳ ،ﻙﻟﺫﻟﻭ .ﻱﺭﺍﺩﺟﻟﺍ ﺱﺑﻘﻣﻟﺍ
ﺩﻘﻓ .ﻱﺭﺍﺩﺟﻟﺍ ﺱﺑﻘﻣﻟﺍ ﺱﻔﻧ ﻲﻓ ﺓﺩﺩﻌﺗﻣ ﺔﻳﺑﺭﻬﻛ ﺓﺯﻬﺟﺃ ﻝﻳﺻﻭﺗﺑ ﻡﻭﻘﺗ ﻻ
ﺩﻗ ﺎﻣﻣ ،ﻪﺗﺭﺍﺭﺣ ﺔﺟﺭﺩ ﻉﺎﻔﺗﺭﺍ ﻰﻟﺇ ﺱﺑﺎﻘﻣﻟﺍ ﺩﺣﺃ ﻰﻠﻋ ﺩﺋﺍﺯﻟﺍ ﻝﻣﺣﻟﺍ ﻱﺩﺅﻳ
ﻝﻳﻐﺷﺗ ﻰﻟﺇ ﻱﺩﺅﻳ ﺎﻣﻣ ﺕﺎﺳﺩﻌﻟﺍﻭ ﻝﻳﻐﺷﺗﻟﺍ ءﺍﺯﺟﺃ ﻰﻠﻋ ﻑﺛﺎﻛﺗ ﺙﺩﺣﻳ
ﻥﻋ ﺞﺗﻧﻣﻟﺍ ﻝﺻﻓﺎﻓ ،ﻙﻟﺫ ﺙﺩﺣ ﺍﺫﺇ .ﻱﺩﺎﻋ ﺭﻳﻏ ﻝﻛﺷﺑ ﺹﺭﻘﻟﺍ
ﺭﺎﻳﺗﻟﺍ ﺫﻔﻧﻣﺑ ﺱﺑﺎﻘﻟﺍ ﻝﻳﺻﻭﺗﺑ ﻡﻗ ﻡﺛ ،ﻥﻳﺗﻋﺎﺳ ﺓﺩﻣﻟ ﺭﻅﺗﻧﺍﻭ ،ءﺎﺑﺭﻬﻛﻟﺍ
.ﻯﺭﺧﺃ ﺓﺭﻣ ﻝﻳﻐﺷﺗﻟﺍ ﻝﻭﺎﺣﻭ ﺹﺭﻘﻟﺍ ﻝﺧﺩﺃ ﻡﺛ .ﻲﺋﺎﺑﺭﻬﻛﻟﺍ
.ﺯﺎﻬﺟﻟﺍ ﻰﻠﻋ ،ﺕﺎﻳﺭﻫﺯﻣﻟﺍ ﻝﺛﻣ ،ﻝﺋﺍﻭﺳﻟﺎﺑ
.ﺔﻠﻠﺑﻣ ٍﺩﻳﺄﺑ ﺔﻗﺎﻁﻟﺍ ﺱﺑﺎﻗ ﺱﻣﻠﺗ ﻻ
.ﺔﻳﺋﺎﺑﺭﻬﻛ ﺔﻣﺩﺻ ﺙﻭﺩﺣ ﻰﻟﺇ ﻙﻟﺫ ﻱﺩﺅﻳ ﺩﻘﻓ
ﺹﺍﺭﻗﻷﺎﺑ ﻙﺎﺳﻣﻹﺍ
.ﻪﺣﻁﺳ
ﺹﺍﺭﻗﻷﺍ ﻑﻳﻅﻧﺗ
.ﺝﺭﺎﺧﻟﺍ
.ﻲﺳﺃﺭ
.ﺕﻗﻭ ﻱﺃ ﻲﻓ ﺔﻗﺎﻁﻟﺍ
.ﻕﻳﺭﺣ ﺏﻭﺷﻧ ﻰﻟﺇ ﻱﺩﺅﻳ
ﺔﻧﺍﺯﺧﻟﺍ ﺔﻧﺎﻳﺻ
.ﺓﺯﻬﺟﻷﺍ
•
-ﻲﻓ ﺵﻭﺩﺧﻟﺍ ﻭﺃ ﻊﺑﺎﺻﻷﺍ ﺕﺎﻣﺻﺑ ﻱﺩﺅﺗ ﺩﻗ
-.ﻪﻳﻠﻋ ﺕﺎﻧﺎﻳﺑﻟﺍ ﻝﻳﺟﺳﺗ ﻡﺗ ﻱﺫﻟﺍ ﺹﺭﻘﻟﺍ ﺢﻁﺳ ﺔﺳﻣﻼﻣ ﺏﻧﺟﺗ
- ﻰﻠﻋ ﻊﺑﺎﺻﺃ ﺕﺎﻣﺻﺑ ﻙﺭﺗﺗ ﻻ ﺙﻳﺣﺑ ﻑﺍﻭﺣﻟﺍ ﻥﻣ ﺹﺭﻘﻟﺍ ﻙﺳﻣﺍ
-.ﺹﺭﻘﻟﺍ ﻰﻠﻋ ﺔﻁﺭﺷﻷﺍ ﻭﺃ ﻕﺭﻭﻟﺍ ﻕﺻﻠﺑ ﻡﻘﺗ ﻻ
•
- ﻡﻘﻓ ،ﺹﺭﻘﻟﺍ ﻰﻠﻋ ﺕﺍﺭﻭﺫﺎﻗ ﺕﺭﻬﻅ ﺍﺫﺇ ﻭﺃ ﻊﺑﺎﺻﺃ ﺕﺎﻣﺻﺑ ﺕﻛﺭﺗ ﺍﺫﺇ
- ﻰﻟﺇ ﻝﺧﺍﺩﻟﺍ ﻥﻣ ﻕﻓﺭﺑ ﺹﺭﻘﻟﺍ ﺢﺳﻣﺍ ،ﻑﻳﻅﻧﺗﻟﺍ ﺩﻧﻋ
-ﺹﺭﻘﻟﺍ ﻰﻠﻋ ﻥﻳﺯﺧﺗﻟﺍ
•
•
•
•
•
- ﻊﻳﻣﺟ ﻝﻳﻐﺷﺗ ﻑﺎﻘﻳﺇ ﻥﻣ ﺩﻛﺄﺗ ،ﺞﺗﻧﻣﻟﺍ ﺍﺫﻬﺑ ﻯﺭﺧﺃ ﺕﺎﻧﻭﻛﻣ ﻝﻳﺻﻭﺗ ﻝﺑﻗ
- ﺩﻘﻓ ،ﺊﻓﺍﺩ ﻥﺎﻛﻣ ﻰﻟﺇ ﺩﺭﺎﺑ ﻥﺎﻛﻣ ﻥﻣ ﺊﺟﺎﻔﻣ ﻝﻛﺷﺑ ﺞﺗﻧﻣﻟﺍ ﻝﻘﻧﺑ ﺕﻣﻗ ﺍﺫﺇ
|
٣ ﺔﻳﺑﺭﻌﻟﺍ
Page 40

ﺔﻣﻼﺳﻟﺍ ﺕﺎﻣﻭﻠﻌﻣ
ﺩﺎﻌﺑﻷﺍ ﻲﺛﻼﺛ ﺔﻔﻳﻅﻭ ﻡﺍﺩﺧﺗﺳﺍ
.ﺩﺎﻌﺑﻷﺍ ﺔﻳﺛﻼﺛ ﺭﻭﺻﻠﻟ ﺔﻣﻼﺳﻟﺍﻭ ﺔﺣﺻﻟﺍ ﻝﻭﺣ ﺔﻣﺎﻫ ﺕﺎﻣﻭﻠﻌﻣ
.ﺔﻳﺛﻼﺛﻟﺍ ﺩﺎﻌﺑﻷﺍ ﺔﻔﻳﻅﻭ ﻡﺍﺩﺧﺗﺳﺍ ﻝﺑﻗ ﺔﻳﻟﺎﺗﻟﺍ ﺔﻣﻼﺳﻟﺍ ﺕﺎﻣﻭﻠﻌﻣ ﻡﻬﻓﺍﻭ ﺃﺭﻗﺍ
ﻲﺛﻼﺛ ﺯﺎﻔﻠﺗﻟﺍ ﺓﺩﻫﺎﺷﻣ ءﺎﻧﺛﺃ ﺡﺎﻳﺗﺭﻻﺍ ﻡﺩﻌﻟ ﻥﻭﺿﺭﻌﺗﻳ ﺩﻗ ﻥﻳﺩﻫﺎﺷﻣﻟﺍ ﺽﻌﺑ
.ﻉﺍﺩﺻﻟﺍﻭ ﻥﺎﻳﺛﻐﻟﺍﻭ ﺭﺍﻭﺩﻟﺍ ﻝﺛﻣ ﺩﺎﻌﺑﻷﺍ
ﻲﺛﻼﺛ ﺯﺎﻔﻠﺗﻟﺍ ﺓﺩﻫﺎﺷﻣ ﻥﻋ ﻑﻗﻭﺗﻓ ،ﺽﺍﺭﻋﻷﺍ ﻩﺫﻫ ﻥﻣ ﻱﺄﺑ ﺕﺭﻌﺷ ﺍﺫﺇ
.ﺔﺣﺍﺭﻟﺍ ﻥﻣ ﺎًﻁﺳﻗ ﺫﺧﻭ ،ﺔﻁﺷﻧﻟﺍ ﺩﺎﻌﺑﻷﺍ ﺔﻳﺛﻼﺛ ﺕﺍﺭﺎﻅﻧﻟﺍ ﻉﺯﻧﺍﻭ ،ﺩﺎﻌﺑﻷﺍ
ﺍﺫﺇ .ﻥﻳﻌﻟﺍ ﺩﺎﻬﺟﺇ ﻲﻓ ﺔﻠﻳﻭﻁ ﺓﺭﺗﻔﻟ ﺩﺎﻌﺑﻷﺍ ﺔﻳﺛﻼﺛ ﺭﻭﺻﻟﺍ ﺓﺩﻫﺎﺷﻣ ﺏﺑﺳﺗﺗ ﺩﻗ
،ﺩﺎﻌﺑﻷﺍ ﻲﺛﻼﺛ ﺯﺎﻔﻠﺗﻟﺍ ﺓﺩﻫﺎﺷﻣ ﻥﻋ ﻑﻗﻭﺗﻓ ،ﻥﻳﻌﻠﻟ ﺩﺎﻬﺟﺇ ﻱﺄﺑ ﺕﺭﻌﺷ
.ﺔﺣﺍﺭﻟﺍ ﻥﻣ ﺎًﻁﺳﻗ ﺫﺧﻭ ،ﺩﺎﻌﺑﻷﺍ ﺔﻳﺛﻼﺛ ﺕﺍﺭﺎﻅﻧﻟﺍ ﻉﺯﻧﺍﻭ
ﺔﻔﻳﻅﻭ ﻥﻭﻣﺩﺧﺗﺳﻳ ﻥﻳﺫﻟﺍ ﻝﺎﻔﻁﻷﺍ ﻥﻳﻟﻭﺋﺳﻣﻟﺍ ﻥﻳﻐﻟﺎﺑﻟﺍ ﺩﺣﺃ ﺏﻗﺍﺭﻳ ﻥﺃ ﺩﺑﻻ
.ﺭﻣﺗﺳﻣ ﻝﻛﺷﺑ ﺔﻳﺛﻼﺛﻟﺍ ﺩﺎﻌﺑﻷﺍ
،ﺭﺍﻭﺩﻟﺍ ﻭﺃ ،ﻉﺍﺩﺻﻟﺍ ﻭﺃ ،ﻥﻭﻳﻌﻟﺍ ﺩﺎﻬﺟﺇ ﻝﻭﺣ ﺕﺎﻅﺣﻼﻣ ﺔﻳﺃ ﻙﺎﻧﻫ ﺕﻧﺎﻛ ﺍﺫﺇ
ﺩﺎﻌﺑﻷﺍ ﻲﺛﻼﺛ ﺯﺎﻔﻠﺗﻟﺍ ﺓﺩﻫﺎﺷﻣ ﻥﻋ ﻑﻗﻭﺗﻳ ﻥﺃ ﻝﻔﻁﻟﺍ ﻥﻣ ﺏﻠﻁﺎﻓ ،ﻥﺎﻳﺛﻐﻟﺍ ﻭﺃ
.ﺔﺣﺍﺭﻟﺍ ﻥﻣ ﺎًﻁﺳﻗ ﺫﺧﺄﻳ ﻪﻠﻌﺟﺍﻭ
ﻝﺛﻣ) ﻯﺭﺧﺃ ﺽﺍﺭﻏﻷ ﺩﺎﻌﺑﻷﺍ ﺔﻳﺛﻼﺛ ﺔﻁﺷﻧﻟﺍ ﺕﺍﺭﺎﻅﻧﻟﺍ ﻡﺩﺧﺗﺳﺗ ﻻ
(ﺦﻟﺇ ،ﺔﻳﻗﺍﻭﻟﺍ ﺕﺍﺭﺎﻅﻧﻟﺍ ﻭﺃ ،ﺱﻣﺷﻟﺍ ﺕﺍﺭﺎﻅﻧ ﻭﺃ ،ﺔﻣﺎﻌﻟﺍ ﺕﺍﺭﺎﻅﻧﻟﺍ
"ﺩﺎﻌﺑﻷﺍ ﺔﻳﺛﻼﺛ ﺔﻁﺷﻧﻟﺍ ﺕﺍﺭﺎﻅﻧﻟﺍ" ﻭﺃ "ﺩﺎﻌﺑﻷﺍ ﻲﺛﻼﺛ" ﺔﻔﻳﻅﻭﻟﺍ ﻡﺩﺧﺗﺳﺗ ﻻ
ﻭﺃ "ﺩﺎﻌﺑﻷﺍ ﻲﺛﻼﺛ" ﺔﻔﻳﻅﻭﻟﺍ ﻡﺍﺩﺧﺗﺳﺍ ﻱﺩﺅﻳ ﺩﻗ .ﻙﺭﺣﺗﻟﺍ ﻭﺃ ﺭﻳﺳﻟﺍ ءﺎﻧﺛﺃ
ءﺎﻳﺷﻷﺎﺑ ﻡﺍﺩﻁﺻﻻﺍ ﻰﻟﺇ ﻙﺭﺣﺗﻟﺍ ءﺎﻧﺛﺃ "ﺩﺎﻌﺑﻷﺍ ﺔﻳﺛﻼﺛ ﺔﻁﺷﻧﻟﺍ ﺕﺍﺭﺎﻅﻧﻟﺍ"
C.ﺓﺭﻳﻁﺧ ﺕﺎﺑﺎﺻﺇ ﻰﻟﺇ ﻱﺩﺅﻳ ﺩﻗ ﺎﻣﻣ ،ﻁﻭﻘﺳﻟﺍ ﻭﺃ/ﻭ ﺭﺛﻌﺗﻟﺍ ﻭﺃ/ﻭ
ﻝﻳﺻﻭﺗﺑ ﻡﻘﻓ ،ﺩﺎﻌﺑﻷﺍ ﻲﺛﻼﺛ ﻯﻭﺗﺣﻣﻟﺎﺑ ﻉﺎﺗﻣﺗﺳﻻﺍ ﻲﻓ ﺏﻏﺭﺗ ﺕﻧﻛ ﺍﺫﺇ
ﺯﺎﻔﻠﺗ ﺯﺎﻬﺟ ﻭﺃ ﺓﺭﻭﺻﻭ ﺕﻭﺻ ﻝﺎﺑﻘﺗﺳﺍ ﺯﺎﻬﺟ) ﺩﺎﻌﺑﻷﺍ ﻲﺛﻼﺛ ﺯﺎﻬﺟ
ﺞﺗﻧﻣﻟﺎﺑ HDMI OUT ﺫﻔﻧﻣﺑ (ﺩﺎﻌﺑﻷﺍ ﻲﺛﻼﺛ ﺽﺭﻌﻟﺍ ﻊﻣ ﻕﻓﺍﻭﺗﻣ
ﺩﺎﻌﺑﻷﺍ ﺔﻳﺛﻼﺛ ﺔﻳﺅﺭﻟﺍ ﺕﺍﺭﺎﻅﻧ ﻊﺿ .ﺔﻋﺭﺳﻟﺍ ﻲﻟﺎﻋ HDMI ﻝﺑﻛ ﻡﺍﺩﺧﺗﺳﺎﺑ
.ﺩﺎﻌﺑﻷﺍ ﻲﺛﻼﺛ ﻯﻭﺗﺣﻣﻟﺍ ﻝﻳﻐﺷﺗ ﻝﺑﻗ
HDMI ﻝﺑﻛ ﺭﺑﻋ ﻁﻘﻓ ﺩﺎﻌﺑﻷﺍ ﺔﻳﺛﻼﺛ ﺕﺍﺭﺎﺷﻹﺍ ﺝﺍﺭﺧﺈﺑ ﺞﺗﻧﻣﻟﺍ ﻡﻭﻘﻳ
.HDMI OUT ﺫﻔﻧﻣﺑ ﻝﺻﺗﻣﻟﺍ
ﺔﻗﺩ ﺔﺟﺭﺩﻟ ﺎًﻘﻓﻭ ﺔﺗﺑﺎﺛ ﺩﺎﻌﺑﻷﺍ ﻲﺛﻼﺛ ﻝﻳﻐﺷﺗﻟﺍ ﻊﺿﻭ ﻲﻓ ﻭﻳﺩﻳﻔﻟﺍ ﺔﻗﺩ ﻥﺇ ﺙﻳﺣ
.ﻙﻠﻳﺿﻔﺗ ﺏﺳﺣ ﺔﻗﺩﻟﺍ ﺭﻳﻳﻐﺗ ﻙﻧﻛﻣﻳ ﻻ ،ﻲﻠﺻﻷﺍ ﺩﺎﻌﺑﻷﺍ ﻲﺛﻼﺛ ﻭﻳﺩﻳﻔﻟﺍ
،ﺔﺷﺎﺷﻟﺍ ﻡﺟﺣ ﻁﺑﺿﻭ ،BD Wise ﻝﺛﻣ ﻑﺋﺎﻅﻭﻟﺍ ﺽﻌﺑ ﻝﻣﻌﺗ ﻻ ﺩﻗ
.ﺩﺎﻌﺑﻷﺍ ﻲﺛﻼﺛ ﻝﻳﻐﺷﺗﻟﺍ ﻊﺿﻭ ﻲﻓ ﺩﻳﺟ ﻝﻛﺷﺑ ﺔﻗﺩﻟﺍ ﺔﺟﺭﺩ ﻁﺑﺿﻭ
ﺔﻳﺛﻼﺛ ﺓﺭﺎﺷﻹﺍ ﺝﺍﺭﺧﻹ ﺔﻋﺭﺳﻟﺍ ﻕﺋﺎﻓ HDMI ﻝﺑﻛ ﻡﺩﺧﺗﺳﺗ ﻥﺃ ﺏﺟﻳ
.ﺢﻳﺣﺻ ﻝﻛﺷﺑ ﺩﺎﻌﺑﻷﺍ
ﻰﻠﻋ ﺎﻬﺿﺭﻋ ﻑﺎﻌﺿﺃ ﺙﻼﺛ ﻱﻭﺎﺳﺗ ﺔﻓﺎﺳﻣ ﻰﻠﻋ ﺔﺷﺎﺷﻟﺍ ﻥﻋ ﺍًﺩﻳﻌﺑ ﻕﺑﺍ
ﺕﻧﺎﻛ ﺍﺫﺇ ،ﻝﺎﺛﻣﻟﺍ ﻝﻳﺑﺳ ﻰﻠﻋ .ﺩﺎﻌﺑﻷﺍ ﺔﻳﺛﻼﺛ ﺭﻭﺻﻟﺍ ﺓﺩﻫﺎﺷﻣ ﺩﻧﻋ ﻝﻗﻷﺍ
ﻥﻋ ﺭﺗﻣ 3.5 ﺔﻓﺎﺳﻣ ﻰﻠﻋ ﺍًﺩﻳﻌﺑ ﻕﺑﺎﻓ ،ﺔﺻﻭﺑ 46 ﺱﺎﻘﻣ ﺔﺷﺎﺷ ﻙﻳﺩﻟ
.ﺔﺷﺎﺷﻟﺍ
.ﺩﺎﻌﺑﻷﺍ ﺔﻳﺛﻼﺛ ﺓﺭﻭﺻ ﻝﺿﻓﺃ
ﻝﻣﻌﻳ ﻻ ﺩﻗ ،ﺩﺎﻌﺑﻷﺍ ﺔﻳﺛﻼﺛ ﺓﺯﻬﺟﻷﺍ ﺽﻌﺑﺑ ﺞﺗﻧﻣﻟﺍ ﻝﻳﺻﻭﺗ ﻡﺗﻳ ﺎﻣﺩﻧﻋ
.ﺩﻳﺟ ﻝﻛﺷﺑ ﺩﺎﻌﺑﻷﺍ ﻲﺛﻼﺛ ﺭﻳﺛﺄﺗﻟﺍ
.ﺩﺎﻌﺑﻷﺍ ﻲﺛﻼﺛ ﻰﻟﺇ ﺩﺎﻌﺑﻷﺍ ﻲﺋﺎﻧﺛ ﻯﻭﺗﺣﻣﻟﺍ ﻝﻭﺣﻳ ﻻ ﺞﺗﻧﻣﻟﺍ ﺍﺫﻫ
ﻥﺎﺗﻳﺭﺎﺟﺗ ﻥﺎﺗﻣﻼﻋ "Blu-ray 3D" ﺭﺎﻌﺷﻭ "Blu-ray 3D" ﺩﻌﻳ
.Blu-ray Disc Association ﺔﻛﺭﺷﻟ
ﻭ HDMI ﺭﺎﻌﺷﻭ HDMI ﺭﺑﺗﻌﺗ
High-Definition
Multimedia Interface
HDMI ﺔﻛﺭﺷﻟ ﺔﻠﺟﺳﻣ ﺔﻳﺭﺎﺟﺗ ﺕﺎﻣﻼﻋ ﻭﺃ ﺔﻳﺭﺎﺟﺗ ﺕﺎﻣﻼﻋ
•
•
•
.ﻯﺭﺧﺃ ﻥﺍﺩﻠﺑﻭ ﺓﺩﺣﺗﻣﻟﺍ ﺕﺎﻳﻻﻭﻟﺍ ﻲﻓ Licencing LLC
ﻭDLNAﺭﺎﻌﺷﻭ ®DLNA ﺭﺑﺗﻌﺗ
ﺕﺎﻣﻼﻋ ®DLNA CERTIFIED
ﺕﺎﻣﻼﻋ ﻭﺃ ﺔﻣﺩﺧ ﺕﺎﻣﻼﻋ ﻭﺃ ﺔﻳﺭﺎﺟﺗ
.Digital Living Network Alliance ﺔﻛﺭﺷﻟ ﺓﺩﻣﺗﻌﻣ
ﻥﺎﺗﻳﺭﺎﺟﺗ ﻥﺎﺗﻣﻼﻋ Javaﻭ Oracle ﺭﺑﺗﻌﺗ
ﺕﺎﻛﺭﺷﻟﺍ ﻭﺃ/ﻭ Oracle ﺔﻛﺭﺷﻟ ﻥﺎﺗﻠﺟﺳﻣ
ﻥﻭﻛﺗ ﺩﻗ ﻯﺭﺧﺃ ءﺎﻣﺳﺃ ﺔﻣﺛﻭ .ﺎﻬﻟ ﺔﻌﺑﺎﺗﻟﺍ
•
•
•
•
•
•
•
•
- ﻰﻠﻋ ﻝﻭﺻﺣﻠﻟ ﻥﻳﻌﻟﺍ ﻯﻭﺗﺳﻣ ﻲﻓ ﺩﺎﻌﺑﻷﺍ ﺔﻳﺛﻼﺛ ﻭﻳﺩﻳﻔﻟﺍ ﺔﺷﺎﺷ ﻊﺿ
•
•
•
ﻝﺑﻗ ﻥﻣ ﺔﻳﻣﺣﻣﻟﺍﻭ ﻊﺑﻁﻟﺍ ﻕﻭﻘﺣ ﺔﻳﺎﻣﺣ ﺔﻳﻧﻘﺗ ﻰﻠﻋ ﻱﻭﺗﺣﻳ ﺞﺗﻧﻣﻟﺍ ﺍﺫﻫ
ﺔﺻﺎﺧﻟﺍ ﻯﺭﺧﻷﺍ ﺔﻳﺭﻛﻔﻟﺍ ﺔﻳﻛﻠﻣﻟﺍ ﻕﻭﻘﺣﻭ ﺔﻳﻛﻳﺭﻣﻷﺍ ﻉﺍﺭﺗﺧﻻﺍ ﺕﺍءﺍﺭﺑ
ﻙﻳﻛﻔﺗﻭ ﺔﻳﺳﻛﻌﻟﺍ ﺔﺳﺩﻧﻬﻟﺍ ءﺍﺭﺟﺇ ﺭﻅﺣﻳ .Rovi Corporation ﺔﻛﺭﺷﺑ
ﺔﻳﺭﺎﺟﺗ ﺕﺎﻣﻼﻋ ﺕﺍﺭﺎﻌﺷﻟﺍﻭ ™Blu-rayﻭ ™Blu-ray Disc ﺭﺑﺗﻌﺗ
ﺭﻳﻏ ﺦﺳﻧﻟﺍ ﻡﺍﺩﺧﺗﺳﺍ ﻥﻣ ﺩﺣﻠﻟ Cinavia ﺔﻳﻧﻘﺗ ﺞﺗﻧﻣﻟﺍ ﺍﺫﻫ ﻡﺩﺧﺗﺳﻳ
ﺽﺍﺭﻏﻸﻟ ﺎﻬﺟﺎﺗﻧﺇ ﻡﺗﻳ ﻲﺗﻟﺍ ﻭﻳﺩﻳﻔﻟﺍ ﻊﻁﺎﻘﻣﻭ ﻡﻼﻓﻷﺍ ﺽﻌﺑ
ﺭﻭﻅﺣﻣ ﻡﺍﺩﺧﺗﺳﺍ ﻑﺎﺷﺗﻛﺍ ﺩﻧﻋﻭ .ﺎﻬﺑ ﺔﺣﺎﺗﻣﻟﺍ ﺕﻭﺻﻟﺍ ﺕﺍﺭﺎﺳﻣﻭ ﺔﻳﺭﺎﺟﺗﻟﺍ
.ﺦﺳﻧﻟﺍ ﻭﺃ ﻝﻳﻐﺷﺗﻟﺍ ﺔﻌﻁﺎﻘﻣ ﻡﺗﺗﺳﻭ ﺔﻟﺎﺳﺭ ﺽﺭﻋ ﻡﺗﻳ ،ﺓﺩﻣﺗﻌﻣ ﺭﻳﻏ ﺔﺧﺳﻧﻟ
ﺯﻛﺭﻣ ﻲﻓ Cinavia ﺔﻳﻧﻘﺗ ﻝﻭﺣ ﺕﺎﻣﻭﻠﻌﻣﻟﺍ ﻥﻣ ﺩﻳﺯﻣﻟﺍ ﺭﻳﻓﻭﺗ ﻡﺗﻳ
http://www. ﻊﻗﻭﻣﻟﺍ ﻰﻠﻋ ﺕﻧﺭﺗﻧﻹﺍ ﻰﻠﻋ Cinavia ءﻼﻣﻋ ﺕﺎﻣﻭﻠﻌﻣ
ﺭﺑﻋ Cinavia ﻝﻭﺣ ﺕﺎﻣﻭﻠﻌﻣﻟﺍ ﻥﻣ ﺩﻳﺯﻣﻟﺍ ﺏﻠﻁﻟ .cinavia.com
Cinavia :ﻰﻟﺇ ﻱﺩﻳﺭﺑﻟﺍ ﻙﻧﺍﻭﻧﻋ ﻊﻣ ﺔﻳﺩﻳﺭﺑ ﺔﻗﺎﻁﺑ ﻝﺎﺳﺭﺈﺑ ﻡﻗ ،ﺩﻳﺭﺑﻟﺍ
Consumer Information Centre, P.O. Box 86851,
ﻥﻣ ﺹﻳﺧﺭﺗ ﺏﺟﻭﻣﺑ ﺔﻛﺭﺷﻠﻟ ﺔﻛﻭﻠﻣﻣ ﺔﻳﻧﻘﺗ ﻰﻠﻋ ﺞﺗﻧﻣﻟﺍ ﺍﺫﻫ ﻝﻣﺗﺷﻳ
ﺓءﺍﺭﺑ ﺔﻳﺎﻣﺣﻟ ﺔﻌﺿﺎﺧ ﻲﻫﻭ Verance Corporation ﺔﻛﺭﺷ
ﻉﺍﺭﺗﺧﻻﺍ ﺕﺍءﺍﺭﺑ ﻥﻣ ﺎﻫﺭﻳﻏﻭ 7,369,677 ﻡﻗﺭ ﺔﻳﻛﻳﺭﻣﻷﺍ ﻉﺍﺭﺗﺧﻻﺍ
ﻰﻟﺇ ﺔﻓﺎﺿﻹﺎﺑ ﺔﻘﻠﻌﻣﻟﺍﻭ ﺎﻫﺭﺍﺩﺻﺇ ﻡﺗ ﻲﺗﻟﺍ ﻯﺭﺧﻷﺍ ﺔﻳﻣﻟﺎﻌﻟﺍﻭ ﺔﻳﻛﻳﺭﻣﻷﺍ
.ﺔﻳﻧﻘﺗﻟﺍ ﻩﺫﻬﻟ ﺔﻧﻳﻌﻣ ﻪﺟﻭﻷ ﺔﻳﺭﺎﺟﺗﻟﺍ ﺭﺍﺭﺳﻷﺍﻭ ﺭﺷﻧﻟﺍﻭ ﻊﺑﻁﻟﺍ ﻕﻭﻘﺣ ﺔﻳﺎﻣﺣ
2010
ﻰﻟﺇ 2004 ﻥﻣ ﻡﺍﻭﻋﻸﻟ ﺭﺷﻧﻟﺍﻭ ﻊﺑﻁﻟﺍ ﻕﻭﻘﺣ .Corporation
ﻕﻭﻘﺣﻟﺍ ﻝﻛ ﻅﻔﺣ ﻡﺗﻳ .Verance Corporation ﺔﻛﺭﺷﻟ ﺔﻅﻭﻔﺣﻣ
.ﺞﺗﻧﻣﻟﺍ ﺍﺫﻫ ﻙﻳﻛﻔﺗ ﻭﺃ ﺔﻳﺳﻛﻌﻟﺍ ﺔﺳﺩﻧﻬﻟﺍ ءﺍﺭﺟﺇ ﺭﻅﺣﻳ .Verance ﺢﻟﺎﺻﻟ
ﺭﺩﺻﻣﻟﺍ ﺹﻳﺧﺍﺭﺗ ﻥﻭﻛﺗ ،ﺡﻭﺗﻔﻣﻟﺍ ﺭﺩﺻﻣﻟﺍ ﺞﻣﺍﺭﺑ ﻡﺍﺩﺧﺗﺳﺍ ﺔﻟﺎﺣ ﻲﻓ -
.ﺎﻬﻳﻛﻟﺎﻣﻟ ﺔﻳﺭﺎﺟﺗ ﺕﺎﻣﻼﻋ
Verance ﺔﻛﺭﺷﻟ ﺔﺻﺎﺧ ﺔﻳﺭﺎﺟﺗ ﺔﻣﻼﻋ Cinavia ﺩﻌﺗ
.ﺞﺗﻧﻣﻟﺍ ﺍﺫﻫ
.Blu-ray Disc Association ﺔﻛﺭﺷﻟ
ﻥﻣ ﺎﻬﺑ ﺹﺧﺭﻣﻟﺍ
“.San Diego, CA, 92138, USA
ﺡﻭﺗﻔﻣﻟﺍ ﺭﺩﺻﻣﻟﺍ ﺹﻳﺧﺭﺗ ﺭﺎﻌﺷﺇ
.ﺞﺗﻧﻣﻟﺍ ﺔﻣﺋﺎﻗ ﻲﻓ ﺔﺣﺎﺗﻣ ﺡﻭﺗﻔﻣﻟﺍ
ﺔﻳﺑﺭﻌﻟﺍ ٤
|
Page 41

۰۱ﺔﻣﻼﺳﻟﺍ ﺕﺎﻣﻭﻠﻌﻣ
ﺕﺍﺩﺍﺩﻋﻹﺍ
ﺔﻳﻟﻭﻷﺍ ﺕﺍﺩﺍﺩﻋﻹﺍ ءﺍﺭﺟﺇ ۱٦
ﺔﻳﺳﻳﺋﺭﻟﺍ ﺔﺷﺎﺷﻟﺍ ۱۷
ﺕﺍﺩﺍﺩﻋﻹﺍ ﺔﺷﺎﺷ ﻰﻟﺇ ﻝﻭﺻﻭﻟﺍ ۱۷
ﺕﺍﺩﺍﺩﻋﻹﺍ ﺔﻣﺋﺎﻗ ﻑﺋﺎﻅﻭ ۱۸
ﺕﻧﺭﺗﻧﻹﺍﻭ ﺕﺎﻛﺑﺷﻟﺍ ۲۰
ﺞﻣﺎﻧﺭﺑﻟﺍ ﺙﻳﺩﺣﺗ ۲۱
DLNA ﺩﺍﺩﻋﺇ ۲۲
ﻁﺋﺎﺳﻭﻟﺍ ﻝﻳﻐﺷﺗ
ﻊﺑﻁﻟﺍ ﻕﻭﻘﺣ
Samsung ﺔﻛﺭﺷﻟ ﺔﻅﻭﻔﺣﻣ 2012 ﻡﺎﻌﻟ © ﺭﺷﻧﻟﺍﻭ ﻊﺑﻁﻟﺍ ﻕﻭﻘﺣ
.Electronics Co.,Ltd
ﻡﺩﺧﺗﺳﻣﻟﺍ ﻝﻳﻟﺩ ﻥﻣ ءﺯﺟ ﻱﺃ ﺝﺎﺗﻧﺇ ﺓﺩﺎﻋﺇ ﺯﻭﺟﻳ ﻻ ،ﺔﻅﻭﻔﺣﻣ ﻕﻭﻘﺣﻟﺍ ﻊﻳﻣﺟ
Samsung ﺔﻛﺭﺷ ﻥﻣ ﻕﺑﺳﻣ ﻱﺭﻳﺭﺣﺗ ﻥﺫﺇ ﻥﻭﺩﺑ ﻪﺧﺳﻧ ﻭﺃ ﻪﻠﻛ ﻭﺃ ﺍﺫﻫ
.Electronics Co., Ltd.Co.,Ltd
ﻡﺩﺧﺗﺳﻣﻟﺍ ﻝﺑﻗ ﻥﻣ ﺔﻠﺟﺳﻣ ﺕﺎﻳﻭﺗﺣﻣ ﻰﻠﻋ ﻱﻭﺗﺣﻳ ﺹﺭﻗ ﻝﻳﻐﺷﺗ ۲۳
ﺩﻌُﺑﻧﻌﻣﻛﺣﺗﻟﺍﺯﺎﻬﺟﻳﻓ (ﺯﺎﻔﻠﺗﻟﺎﺗﻭﺻ) TV Sound ﺭﺯ ﻡﺍﺩﺧﺗﺳﺍ ۲۷
ﻡﺩﺧﺗﺳﻣﻟﺍ ﻝﻳﻟﺩ ﻲﻓ ﺔﻣﺩﺧﺗﺳﻣﻟﺍ ﺔﻳﺣﻳﺿﻭﺗﻟﺍ ﺕﺎﻣﻭﺳﺭﻟﺍﻭ ﻝﺎﻛﺷﻷﺍ
.ﻲﻘﻳﻘﺣﻟﺍ ﺞﺗﻧﻣﻟﺍ ﺭﻬﻅﻣ ﻥﻋ ﻑﻠﺗﺧﺗ ﺩﻗﻭ ﻁﻘﻓ ﻉﻭﺟﺭﻠﻟ ﻲﻫ ﺍﺫﻫ
ﻙﺎﻧﻫ ﺱﻳﻟﻭ ﻙﺑﻠﻁ ﻰﻠﻋ ًءﺎﻧﺑ ﻙﺑﻠﻁ ﺏﺳﺣ ﺱﺩﻧﻬﻣ ءﺎﻋﺩﺗﺳﺍ .ﺃ
(ﺍﺫﻫ ﻡﺩﺧﺗﺳﻣﻟﺍ ﻝﻳﻟﺩ ﺓءﺍﺭﻗ ﻥﻋ ﺕﺯﺟﻋ ﻱﺃ) ﺞﺗﻧﻣﻟﺍ ﻲﻓ ﺏﻳﻋ
ﻲﻓ ﺏﻳﻋ ﻙﺎﻧﻫ ﻥﻭﻛﻳ ﻡﻟﻭ ﺡﻼﺻﺇ ﺯﻛﺭﻣ ﻰﻟﺇ ﺓﺩﺣﻭﻟﺍ ﺭﺎﺿﺣﺇ .ﺏ
.(ﺍﺫﻫ ﻡﺩﺧﺗﺳﻣﻟﺍ ﻝﻳﻟﺩ ﺓءﺍﺭﻗ ﻥﻋ ﺕﺯﺟﻋ ﻱﺃ) ﺞﺗﻧﻣﻟﺍ
ﻭﺃ ﻝﻣﻋ ﻱﺃ ﺫﻳﻔﻧﺗ ﻝﺑﻗ ﺔﻳﺭﺍﺩﻹﺍ ﻡﻭﺳﺭﻟﺍ ﻩﺫﻫ ﻎﻠﺑﻣﺑ ﻙﺭﺎﺑﺧﺇ ﻡﺗﻳﺳ
USB ﺯﺎﻬﺟ ﻰﻠﻋ ﺕﺎﻔﻠﻣ ﻝﻳﻐﺷﺗ ۲۳
ﺔﻳﺭﺎﺟﺗﻟﺍ ﻭﻳﺩﻳﻔﻟﺍ ﺹﺍﺭﻗﺃ ﻝﻳﻐﺷﺗ ۲٤
ﺎًﻘﺑﺳﻣ ﻝﺟﺳﻣ ﻱﺭﺎﺟﺗ ﺕﻭﺻ ﺹﺭﻗ ﻝﻳﻐﺷﺗ ۲٥
ﻥﻳﺗﻟﺎﺣﻟﺍ ﻥﻣ ﻱﺃ ﻲﻓ ﺔﻳﺭﺍﺩﺇ ﻡﻭﺳﺭ ﺽﺭﻓ ﻡﺗﻳ ﺩﻗ
ﻭﻳﺩﻳﻔﻟﺍ ﻝﻳﻐﺷﺗ ﻲﻓ ﻡﻛﺣﺗﻟﺍ ۲٤
ﻰﻘﻳﺳﻭﻣﻟﺍ ﻝﻳﻐﺷﺗ ﻲﻓ
ﺭﻭﺻﻟﺍ ﻝﻳﻐﺷﺗ ﻲﻓ ﻡﻛﺣﺗﻟﺍ ۲٦
ﺔﻛﺑﺷﻟﺍ ﺕﺎﻣﺩﺧ
BD-LIVE™ ﻡﺍﺩﺧﺗﺳﺍ ۲۸
ﻕﺣﻠﻣﻟﺍ
ﺎﻬﺣﻼﺻﺇﻭ ءﺎﻁﺧﻷﺍ ﻑﺎﺷﻛﺗﺳﺍ ۳۲
.ﻝﺯﻧﻣﻟﺍ ﻰﻟﺇ ﺓﺭﺎﻳﺯ ﺔﻳﺄﺑ ﻡﺎﻳﻘﻟﺍ
ﻡﻛﺣﺗﻟﺍ ۲٥
ﻭﻳﺩﺍﺭﻟﺍ ﻰﻟﺇ ﻉﺎﻣﺗﺳﻻﺍ ۲۷
DLNA ﻡﺍﺩﺧﺗﺳﺍ ۲۸
ﺔﻳﻓﺎﺿﻹﺍ ﺕﺎﻣﻭﻠﻌﻣﻟﺍ ۲۹
ﺕﺎﻔﺻﺍﻭﻣﻟﺍ ۳٥
ﺕﺎﻳﻭﺗﺣﻣﻟﺍ
ﺔﻣﻼﺳﻟﺍ ﺕﺎﻣﻭﻠﻌﻣ
ﺎﻬﺗﺭﺍﺩﺇﻭ ﺹﺍﺭﻗﻷﺍ ﻥﻳﺯﺧﺗ ۳
ﺞﺗﻧﻣﻟﺍ ﻊﻣ ﻝﻣﺎﻌﺗﻟﺍ ﺕﺎﻁﺎﻳﺗﺣﺍ ۳
ﺩﺎﻌﺑﻷﺍ ﻲﺛﻼﺛ ﺔﻔﻳﻅﻭ ﻡﺍﺩﺧﺗﺳﺍ ٤
ﻡﺍﺩﺧﺗﺳﻻﺍ ءﺩﺑ
ﻕﻳﺳﻧﺗﻟﺍﻭ ﺹﺍﺭﻗﻷﺍ ﻕﻓﺍﻭﺗ ٦
ﺎﻬﻠﻳﻐﺷﺗ ﺞﺗﻧﻣﻠﻟ ﻥﻛﻣﻳ ﻲﺗﻟﺍ ﺹﺍﺭﻗﻷﺍ ﺕﺍﺭﺎﻌﺷ ۷
ﺩﻌﺑ ﻥﻋ ﻡﻛﺣﺗﻟﺍ ﺓﺩﺣﻭ ۱۱
ﺕﻼﻳﺻﻭﺗﻟﺍ
ﺔﻛﺑﺷ ﻪﺟﻭﻣﺑ ﻝﻳﺻﻭﺗﻟﺍ ۱٤
ﺔﻳﺟﺭﺎﺧ ﺓﺯﻬﺟﺄﺑ / ﺯﺎﻔﻠﺗﺑ ﻝﻳﺻﻭﺗﻟﺍ ۱٥
ﺭﻳﺫﺣﺗ ۲
ﺹﻳﺧﺭﺗﻟﺍ ۳
ﻊﺑﻁﻟﺍ ﻕﻭﻘﺣ ٥
ﺕﺎﻘﺣﻠﻣﻟﺍ ۹
ﺔﻳﻣﺎﻣﻷﺍ ﺔﺣﻭﻠﻟﺍ ۱۰
ﺔﻳﻔﻠﺧﻟﺍ ﺔﺣﻭﻠﻟﺍ ۱۰
ﺕﺎﻋﺎﻣﺳﻟﺍ ﻝﻳﺻﻭﺗ ۱۲
|
٥ ﺔﻳﺑﺭﻌﻟﺍ
Page 42

ﻡﺍﺩﺧﺗﺳﻻﺍ ءﺩﺑ
ﻕﻳﺳﻧﺗﻟﺍﻭ ﺹﺍﺭﻗﻷﺍ ﻕﻓﺍﻭﺗ
ﺎﻬﻠﻳﻐﺷﺗ ﺞﺗﻧﻣﻠﻟ ﻥﻛﻣﻳ ﻲﺗﻟﺍ ﺕﺎﻳﻭﺗﺣﻣﻟﺍﻭ ﺹﺍﺭﻗﻷﺍ ﻉﺍﻭﻧﺃ
ﻁﺋﺎﺳﻭﻟﺍﺹﺭﻘﻟﺍ ﻉﻭﻧﻝﻳﺻﺎﻔﺗﻟﺍ
.BD-RE ﻕﻳﺳﻧﺗﺑ ﻝﺟﺳﻣﻟﺍ BD-RE/-R ﻭﺃ BD-ROM ﺹﺭﻗ
ﻡﺗ ﻲﺗﻟﺍ ﺔﻠﺟﺳﻣﻟﺍ DVD+RW/DVD-RW(V)/DVDR/+R ﻭﺃ DVD-VIDEO ﺹﺍﺭﻗﺃ
ﻭﺃ MKV ﻕﻳﺳﻧﺗﺑ ﺕﺎﻳﻭﺗﺣﻣ ﻰﻠﻋ ﻱﻭﺗﺣﺗ ﻲﺗﻟﺍ USB ﻥﻳﺯﺧﺗ ﻁﺋﺎﺳﻭ ﻭﺃ ﺎﻫﺅﺎﻬﻧﺇﻭ ﺎﻬﻠﻳﺟﺳﺗ
.MP4
ﻭﺃ BD-RE/-R ﻭﺃ ،DVD-RW/-R ﻭﺃ CD-RW/-R ﺹﺍﺭﻗﺃ ﻰﻠﻋ ﺔﻠﺟﺳﻣﻟﺍ ﻰﻘﻳﺳﻭﻣﻟﺍ
.WMA ﻭﺃ MP3 ﺕﺎﻳﻭﺗﺣﻣ ﻰﻠﻋ ﻱﻭﺗﺣﺗ ﻲﺗﻟﺍ USB ﻥﻳﺯﺧﺗ ﻁﺋﺎﺳﻭ
ﻭﺃ BD-RE/-R ﻭﺃ DVD-RW/-R ﻭﺃ CD-RW/-R ﺹﺍﺭﻗﺃ ﻰﻠﻋ ﺔﻠﺟﺳﻣﻟﺍ ﺭﻭﺻﻟﺍ
.JPEG ﺕﺎﻳﻭﺗﺣﻣ ﻰﻠﻋ ﻱﻭﺗﺣﺗ ﻲﺗﻟﺍ USB ﻥﻳﺯﺧﺗ ﻁﺋﺎﺳﻭ
.ﻝﻳﺟﺳﺗﻟﺍ ﻑﻭﺭﻅ ﻭﺃ ﺹﺭﻘﻟﺍ ﻉﻭﻧ ﺏﺑﺳﺑ ﺔﻧﻳﻌﻣ DVD-Rﻭ CD-RW/-R ﺹﺍﺭﻗﺃ ﻝﻳﻐﺷﺗ ﻥﻣ ﺞﺗﻧﻣﻟﺍ ﻥﻛﻣﺗﻳ ﻻ ﺩﻗ
.ﻪﻠﻳﻐﺷﺗ ﻥﻛﻣﻳ ﻥﻠﻓ ،ﻭﻳﺩﻳﻔﻟﺍ DVD ﻕﻳﺳﻧﺗﺑ ﺔﻣﻳﻠﺳ ﺔﻘﻳﺭﻁﺑ DVD-RW/-R ﺹﺭﻗ ﻝﻳﺟﺳﺗ ﻡﺗﻳ ﻡﻟ ﺍﺫﺇ
.ﺔﻳﻧﺎﺛﻟﺍ ﻲﻓ ﺕﺑ ﺎﺟﻳﻣ 10 ﻯﺩﻌﺗﻳ ﺕﺑ ﻝﺩﻌﻣﺑ DVD-R ﺹﺭﻗ ﻰﻠﻋ ﻪﻠﻳﺟﺳﺗ ﻡﺗ ﻱﺫﻟﺍ ﻯﻭﺗﺣﻣﻟﺍ ﻝﻳﻐﺷﺗﺑ ﺞﺗﻧﻣﻟﺍ ﻡﻭﻘﻳ ﻥﻟ
.ﺔﻳﻧﺎﺛﻟﺍ ﻲﻓ ﺕﺑ ﺎﺟﻳﻣ 30 ﻯﺩﻌﺗﻳ ﺕﺑ ﻝﺩﻌﻣﺑ USB ﻭﺃ BD-R ﺯﺎﻬﺟ ﻰﻠﻋ ﻪﻠﻳﺟﺳﺗ ﻡﺗ ﻱﺫﻟﺍ ﻯﻭﺗﺣﻣﻟﺍ ﻝﻳﻐﺷﺗﺑ ﻙﺑ ﺹﺎﺧﻟﺍ ﺞﺗﻧﻣﻟﺍ ﻡﻭﻘﻳ ﻥﻟ
ﺕﺎﻣﻭﻠﻌﻣ ﺭﻳﻓﻭﺗ ﻡﺗﻳ .ﻉﺎﻔﺗﺭﻻﺍ ﻰﻟﺇ ﺽﺭﻌﻟﺍ ﺔﺑﺳﻧ ﻝﻳﺩﻌﺗ ﻭﺃ ﺔﻳﻭﺍﺯﻟﺍ ﺭﻳﻳﻐﺗ ﻝﺛﻣ ،ﺓﺩﺩﺣﻣ ﺕﺎﻳﻠﻣﻋ ﻡﺩﺧﺗﺳﺗ ﺎﻣﺩﻧﻋ ﻭﺃ ،ﺹﺍﺭﻗﻷﺍ ﻉﺍﻭﻧﺃ ﺽﻌﺑ ﻝﻳﻐﺷﺗ ﻡﺗﻳ ﻻ ﺩﻗ
.ﺭﻣﻷﺍ ﻡﺯﻟ ﺍﺫﺇ ﺕﺎﻣﻭﻠﻌﻣﻟﺍ ﻙﻠﺗ ﻰﻟﺇ ﻉﻭﺟﺭﻟﺍ ﻰﺟﺭﻳ .ﺹﺭﻘﻟﺍ ﺔﺑﻠﻋ ﻰﻠﻋ ﻝﻳﺻﻔﺗﻟﺎﺑ ﺔﺑﻭﺗﻛﻣ ﻥﻭﻛﺗ ﺹﺍﺭﻗﻷﺍ ﻝﻭﺣ
.ءﻁﺑﺑ ﻑﺋﺎﻅﻭﻟﺍ ﺽﻌﺑ ﻝﻣﻌﺗ ﺩﻗ ﻭﺃ ،ﻱﺩﺎﻌﻟﺍ ﻥﺍﻭﻧﻌﻟﺍ ﻥﻣ ﻝﻭﻁﺃ ﺎًﺗﻗﻭ ﻝﻳﻣﺣﺗﻟﺍ ﻕﺭﻐﺗﺳﻳ ﺩﻘﻓ ،BD-J ﻥﺍﻭﻧﻋ ﻝﻳﻐﺷﺗﺑ ﻡﻭﻘﺗ ﺎﻣﺩﻧﻋ
Blu-ray ﺹﺭﻗ
3D Blu-ray Disc ﺹﺭﻗ
ﺩﺎﻌﺑﻷﺍ ﻲﺛﻼﺛ
DVD-VIDEO،
DVD-RW، DVD-R،
DVD+RW، DVD+R
CD-RW/-R، DVD-
RW/-R، BD-RE/-R
CD-RW/-R، DVD-
RW/-R، BD-RE/-R
ﻭﻳﺩﻳﻔﻟﺍ
ﻰﻘﻳﺳﻭﻣ
ﺭﻭﺻﻟﺍ
|
ﺔﻅﺣﻼﻣ |
ﺎﻬﻠﻳﻐﺷﺗ ﺞﺗﻧﻣﻠﻟ ﻥﻛﻣﻳ ﻻ ﻲﺗﻟﺍ ﺹﺍﺭﻗﻷﺍ ﻉﺍﻭﻧﺃ
(VR ﻊﺿﻭ) DVD-RW
3.9 ﺔﺣﺎﺳﻣﺑ DVD-R ﺹﺭﻗ
.ﺦﺳﻧﻠﻟ ﺕﻳﺎﺑ ﺎﺟﻳﺟ
ﻭﺃ ﻥﻳﻌﻣ ﻝﻳﻐﺷﺗﺑ ﺢﻣﺳﺗ ﺔﻁﻭﻐﺿﻣﻟﺍ ﺹﺍﺭﻗﻷﺍﻭ ﺔﻳﻣﻗﺭﻟﺍ ﻭﻳﺩﻳﻔﻟﺍ ﺹﺍﺭﻗﺃﻭ Blu-ray ﺹﺍﺭﻗﺃ ﺽﻌﺑ ﻥﻷ ﻝﻳﻐﺷﺗﻟﺍ ﺭﻣﺍﻭﺃ ﻊﻳﻣﺟﻟ ﺞﺗﻧﻣﻟﺍ ﺍﺫﻫ ﺏﻳﺟﺗﺳﻳ ﻻ ﺩﻗ
ﺹﺍﺭﻗﻷﺍ ﺕﺎﻘﻳﺳﻧﺗ ﻥﻷ ،CD ﻭﺃ DVD ﻭﺃ Blu-ray Disc ﺹﺍﺭﻗﺃ ﺭﺎﻌﺷ ﻝﻣﺣﻳ ﺹﺭﻗ ﻝﻛ ﻝﻳﻐﺷﺗﺑ ﺞﺗﻧﻣﻟﺍ ﺍﺫﻫ ﻡﺎﻳﻗ Samsung ﺔﻛﺭﺷ ﻥﻣﺿﺗ ﻻ
ﻭﺃ DVD ﻭﺃ Blu-ray ﺹﺍﺭﻗﺃ ﻝﻳﻐﺷﺗ ﻲﻓ ﺔﺑﻭﻌﺻ ﻙﺗﻬﺟﺍﻭ ﺍﺫﺇ ﻭﺃ ﺕﺍﺭﺎﺳﻔﺗﺳﺍ ﻙﻳﺩﻟ ﺕﻧﺎﻛ ﺍﺫﺇ SAMSUNG ﺔﻛﺭﺷ ءﻼﻣﻋ ﺔﻳﺎﻋ ﺯﻛﺭﻣﺑ ﻝﺎﺻﺗﻻﺍ ءﺎﺟﺭﻟﺍ
•
CVD/CD-ROM/CDV/
CD-G/CD-I/LD
ﺕﻭﺻﻟﺍ ﻝﻐﺷﺗ CD-G ﺹﺍﺭﻗﺃ)
(.ﺕﺎﻣﻭﺳﺭﻟﺍ ﺱﻳﻟﻭ ،ﻁﻘﻓ
.ﺹﺍﺭﻗﻷﺍ ﻊﻳﻧﺻﺗ ءﺎﻧﺛﺃ ﻭﺃ/ﻭ CD ﻭﺃ DVD ﻭﺃ Blu-ray ﺹﺍﺭﻗﺃ ﺞﻣﺍﺭﺑ ءﺎﺷﻧﺇ ءﺎﻧﺛﺃ ءﺎﻁﺧﺃﻭ ﺕﻼﻛﺷﻣ ﺙﺩﺣﺗ ﺩﻗﻭ ،ﺭﻭﻁﺗﺗ
.ﻝﻳﻐﺷﺗﻟﺍ ﺩﻭﻳﻗ ﻝﻭﺣ ﺕﺎﻣﻭﻠﻌﻣﻟﺍ ﻥﻣ ﺩﻳﺯﻣﻟﺍ ﻰﻠﻋ ﻝﻭﺻﺣﻠﻟ ﻝﻳﻟﺩﻟﺍ ﺍﺫﻫ ﻲﻗﺎﺑ ﻰﻟﺇ ﻊﺟﺭﺍ ،ﺎًﺿﻳﺃ .ﺞﺗﻧﻣﻟﺍ ﺍﺫﻫ ﻲﻓ CD
.ﺞﺗﻧﻣﻟﺍ ﺍﺫﻫ ﻰﻠﻋ ﺎﻬﻠﻳﻐﺷﺗ ﻥﻛﻣﻳ ﻻ ﺩﻗ ﺎﻬﺑ ﻡﻳﻘﺗ ﻲﺗﻟﺍ ﺔﻘﻁﻧﻣﻟﺍ ﺝﺭﺎﺧ ﻥﻣ ﺎﻫﺅﺍﺭﺷ ﻡﺗﻳ ﻲﺗﻟﺍ DVD ﺹﺍﺭﻗﺃﻭ ﺔﻳﺭﺎﺟﺗﻟﺍ ﺹﺍﺭﻗﻷﺍ ﺽﻌﺑ
•
ﺔﻘﺋﺎﻔﻟﺍ ﺔﻳﺗﻭﺻﻟﺍ ﺔﺟﻣﺩﻣﻟﺍ ﺹﺍﺭﻗﻷﺍ
•
DVD-RAM
(CD ﺔﻘﺑﻁ ءﺎﻧﺛﺗﺳﺎﺑ)
.ﻝﻳﻐﺷﺗﻟﺍ ءﺎﻧﺛﺃ ﻁﻘﻓ ﺔﻧﻳﻌﻣﻟﺍ ﺕﺎﻣﺳﻟﺍ ﺽﻌﺑ ﺭﻓﻭﺗﻭ ﺩﻭﺩﺣﻣ
.ﺞﺗﻧﻣﻟﺍ ﻲﻓ ﺎًﺑﻳﻋ ﻝﺛﻣﻳ ﻻ ﺭﻣﻷﺍ ﺍﺫﻫ ﻥﺃ ﺔﻅﺣﻼﻣ ءﺎﺟﺭﻟﺍ
•
،DVD-ROM/PD/MV ﺹﺭﻗ
•
HD DVD
ﻙﻟﺫ ﻰﻟﺇ ﺎﻣﻭ
|
ﺔﻅﺣﻼﻣ |
◄
◄
◄
◄
◄
◄
•
•
◄
◄
◄
◄
ﺔﻳﺑﺭﻌﻟﺍ ٦
|
Page 43

۰۲ﻡﺍﺩﺧﺗﺳﻻﺍ ءﺩﺑ
ﺎﻬﻠﻳ
ﻎﺷﺗ ﺞﺗﻧﻣﻠﻟ ﻥﻛﻣﻳ ﻲﺗﻟﺍ ﺹﺍﺭﻗﻷﺍ ﺕﺍﺭﺎﻌﺷ
ﺔﻘﻁﻧﻣﻟﺍ ﺯﻣﺭ
ﻕﻔﺗﺗ ﻥﺃ ﺏﺟﻳﻭ .ﺔﻘﻁﻧﻣﻟﺍ ﺏﺳﺣ ﺹﺍﺭﻗﻷﺍﻭ Blu-ray ﺕﻼﻐﺷﻣ ﺯﻳﻣﺭﺗ ﻡﺗﻳ
ﻥﻠﻓ ،ﺯﻭﻣﺭﻟﺍ ﻕﺑﺎﻁﺗﺗ ﻡﻟ ﺍﺫﺇ .ﺹﺭﻘﻟﺍ ﻝﻳﻐﺷﺗ ﻥﻛﻣﻳ ﻰﺗﺣ ﺔﻳﻣﻳﻠﻗﻹﺍ ﺯﻭﻣﺭﻟﺍ ﻩﺫﻫ
.ﺹﺭﻘﻟﺍ ﺍﺫﻫ ﻝﻳﻐﺷﺗ ﻡﺗﻳ
.ﺞﺗﻧﻣﻠﻟ ﺔﻳﻔﻠﺧﻟﺍ ﺔﺣﻭﻠﻟﺍ ﻰﻠﻋ ﺞﺗﻧﻣﻟﺍ ﺍﺫﻬﻟ ﺔﻘﻁﻧﻣﻟﺍ ﻡﻗﺭ ﺽﺭﻋ ﻡﺗﻳ
DivX
Java
ﻡﻋﺩﻟﺍ ﻕﺎﻁﻧ
(ﺯﺗﺭﻫ ﻭﻠﻳﻛﻟﺎﺑ) ﺔﻧﻳﻌﻟﺍ ﺕﻻﺩﻌﻣ *
،32 ،22 ،16 ،11 ،8 –
48 ،44.1
ﺕﻻﺩﻌﻣ ﻝﻛ – ﺕﺑﻟﺍ ﺕﻻﺩﻌﻣ *
5 ﻥﻳﺑ ﺡﻭﺍﺭﺗﻳ ﻕﺎﻁﻧ ﻲﻓ ﺕﺑﻟﺍ
384 ﻰﻟﺇ ﺔﻳﻧﺎﺛﻟﺍ ﻲﻓ ﺕﺑ ﻭﻠﻳﻛ
ﺔﻳﻧﺎﺛﻟﺍ ﻲﻓ ﺕﺑ ﻭﻠﻳﻛ
Blu-ray ﺹﺭﻗBD-LIVE
DolbyDTS
ﻲﺛﻼﺛ 3D Blu-ray Disc ﺹﺭﻗ
ﺓﺩﺣﺗﻣﻟﺍ ﺔﻛﻠﻣﻣﻟﺍ ﻲﻓ PAL ﺙﺑ ﻡﺎﻅﻧ
ﺩﺎﻌﺑﻷﺍ
.ﺦﻟﺇ ،ﺎﻳﻧﺎﻣﻟﺃﻭ ﺎﺳﻧﺭﻓﻭ
ﺔﻣﻭﻋﺩﻣﻟﺍ ﺕﺎﻘﻳﺳﻧﺗﻟﺍ
ﺕﻭﺻﻟﺍ ﺕﺎﻔﻠﻣ ﻡﻋﺩ
ﺔﻳﻭﺎﺣﻟﺍ
MP3
WMA
ﺩﺍﺩﺗﻣﺍ
ﻑﻠﻣﻟﺍ
mp3.*
wma.*
ﺯﻳﻣﺭﺗ
ﺕﻭﺻﻟﺍ
MP3-
WMA
ﺔﻘﻁﻧﻣﻟﺍ
،ﻰﻁﺳﻭﻟﺍ ﺎﻛﻳﺭﻣﺃﻭ ،ﺔﻳﻟﺎﻣﺷﻟﺍ ﺎﻛﻳﺭﻣﺃ
،ﻥﺎﺑﺎﻳﻟﺍﻭ ،ﺎﻳﺭﻭﻛﻭ ،ﺔﻳﺑﻭﻧﺟﻟﺍ ﺎﻛﻳﺭﻣﺃﻭ
ﻕﺭﺷ ﺏﻭﻧﺟﻭ ،ﺞﻧﻭﻛ ﺞﻧﻭﻫﻭ ،ﻥﺍﻭﻳﺎﺗﻭ
ﺎﻳﺳﺁ
ﺔﻌﺑﺎﺗﻟﺍ ﻡﻳﻟﺎﻗﻷﺍﻭ ،ﺩﻧﻼﻧﻳﺭﺟﻭ ،ﺎﺑﻭﺭﻭﺃ
،ﺎﻳﻘﻳﺭﻓﺇﻭ ،ﻁﺳﻭﻷﺍ ﻕﺭﺷﻟﺍﻭ ،ﺎﺳﻧﺭﻔﻟ
.ﺍﺩﻧﻼﻳﺯﻭﻳﻧﻭ ،ﺎﻳﻟﺍﺭﺗﺳﺃﻭ
ﻁﺳﻭﻭ ،ﺎﻳﺳﻭﺭﻭ ،ﻥﻳﺻﻟﺍﻭ ،ﺩﻧﻬﻟﺍ
.ﺎﻳﺳﺁ ﺏﻭﻧﺟﻭ
ﺔﻌﺑﺎﺗﻟﺍ ﻡﻳﻟﺎﻗﻷﺍﻭ ،ﺓﺩﺣﺗﻣﻟﺍ ﺕﺎﻳﻻﻭﻟﺍ
ﺍﺩﻧﻛﻭ ،ﺓﺩﺣﺗﻣﻟﺍ ﺕﺎﻳﻻﻭﻠﻟ
،ﻁﺳﻭﻷﺍ ﻕﺭﺷﻟﺍﻭ ،ﻥﺎﺑﺎﻳﻟﺍﻭ ،ﺎﺑﻭﺭﻭﺃ
ﺩﻧﻼﻧﻳﺭﺟﻭ ،ﺎﻳﻘﻳﺭﻓﺇ ،ﺭﺻﻣﻭ
،ﺎﻳﺳﻳﻧﻭﺩﻧﺇﻭ ،ﻥﻳﺑﻠﻔﻟﺍﻭ ،ﺎﻳﺭﻭﻛﻭ ،ﻥﺍﻭﻳﺎﺗ
ﺞﻧﻭﻛ ﺞﻧﻭﻫﻭ
ﺎﻛﻳﺭﻣﺃﻭ ،ﺔﻳﺑﻭﻧﺟﻟﺍ ﺎﻛﻳﺭﻣﺃﻭ ،ﻙﻳﺳﻛﻣﻟﺍ
،ﺍﺩﻧﻼﻳﺯﻭﻳﻧﻭ ،ﺎﻳﻟﺍﺭﺗﺳﺃﻭ ،ﻰﻁﺳﻭﻟﺍ
ﻲﺑﻳﺭﺎﻛﻟﺍﻭ ،ﻱﺩﺎﻬﻟﺍ ﻁﻳﺣﻣﻟﺍ ﺭﺯﺟﻭ
،ﺩﻧﻬﻟﺍﻭ ،ﺔﻳﻗﺭﺷﻟﺍ ﺎﺑﻭﺭﻭﺃﻭ ،ﺎﻳﺳﻭﺭ
ﺎﻳﻟﻭﻐﻧﻣﻭ ،ﺔﻳﻟﺎﻣﺷﻟﺍ ﺎﻳﺭﻭﻛﻭ
ﻥﻳﺻﻟﺍ
ﻻ Blu-ray Disc/DVD ﺹﺍﺭﻗﺄﺑ ﺹﺎﺧﻟﺍ ﺔﻘﻁﻧﻣﻟﺍ ﻡﻗﺭ ﻥﺎﻛ ﺍﺫﺇ
ﻝﻳﻐﺷﺗ ﻥﻣ ﺞﺗﻧﻣﻟﺍ ﻥﻛﻣﺗﻳ ﻥﻠﻓ ،ﺞﺗﻧﻣﻟﺍ ﺍﺫﻬﺑ ﺹﺎﺧﻟﺍ ﺔﻘﻁﻧﻣﻟﺍ ﻡﻗﺭ ﻕﺑﺎﻁﻳ
ﺯﻣﺭ
ﺔﻘﻁﻧﻣﻟﺍ
1
2
3
4
5
6
A
B
C
ﺹﺭﻘﻟﺍ ﻉﻭﻧ
ﺹﺭﻗ
Blu-ray
DVD-
VIDEO
|
.ﺹﺭﻘﻟﺍ
ﺔﻅﺣﻼﻣ |
◄
|
٧ ﺔﻳﺑﺭﻌﻟﺍ
Page 44

15360x8640
JPEG
PNG
ﻡﺍﺩﺧﺗﺳﻻﺍ ءﺩﺑ
ﺓﺭﻭﺻﻟﺍ ﻑﻠﻣ ﻡﻋﺩ
ﻑﻠﻣﻟﺍ ﺩﺍﺩﺗﻣﺍﻉﻭﻧﺔﻗﺩﻟﺍ
jpg.*
jpeg.*
jpe.*
png.*
ﻭﻳﺩﻳﻔﻟﺍ ﺕﺎﻔﻠﻣ ﻡﻋﺩ
ﻑﻠﻣﻟﺍ ﺩﺍﺩﺗﻣﺍﺔﻳﻭﺎﺣﻟﺍﻭﻳﺩﻳﻔﻟﺍ ﺯﻳﻣﺭﺗﺕﻭﺻﻟﺍ ﺯﻳﻣﺭﺗﺔﻗﺩﻟﺍ
1920x1080
,MP3, Dolby Digital, DTS
WMA, PCM
MP3, Dolby Digital, DTS
WMA
AAC
MP1, 2
Dolby Digital, DTS
ً
ﻔﻟﺎﺗ ﻪﺗﺍﺫ ﻑﻠﻣﻟﺍ ﻥﺎﻛ ﺍﺫﺇ ﻭﺃ ﺔﺋﻁﺎﺧ ﻑﻠﻣﻟﺍ ﺔﻳﻭﺎﺣ ﺕﺎﻣﻭﻠﻌﻣ ﻥﻭﻛ ﺔﻟﺎﺣ ﻲﻓ ﻱﺩﺎﻌﻟﺍ ﻝﻳﻐﺷﺗﻟﺍ ﻥﻣﺿﻧ ﻻﻭ
ﻭﺃ 44.1 ﻭﺃ 32 ﻭﺃ 24 ﻭﺃ 22 ﻭﺃ 16 ﻭﺃ 12 ﻭﺃ 11 ﻭﺃ 8) ﺯﺗﺭﻫﻭﻠﻳﻛ 96:ﻥﺎﻳﺗﻋﻹﺍ ﻝﺩﻌﻣﻟ ﻰﺻﻗﻷﺍ ﺩﺣﻟﺍ:(AAC) ﻡﺩﻘﺗﻣﻟﺎﻳﻌﻣﺳﻟﺍﺯﻳﻣﺭﺗﻟﺍ
DivX 3.11/4/5/6
MP4v3
H.264 BP/MP/HP
VC-1 AP
DivX 5/6
H.264 BP/MP/HP
VC-1 AP
VC-1 SM
MP4 (mp4v)
H.264 BP/MP/HP
MPEG1
MPEG2
H.264 BP/MP/HP
ﺔﻳﻧﺎﺛ/ﺕﺑﻭﻠﻳﻛ 320:ﺕﺑﻟﺍ ﻝﺩﻌﻣﻟ ﻰﺻﻗﻷﺍ ﺩﺣﻟﺍ (96 ﻭﺃ 88.2
AVI
MKV
WMV
(wmv9)
MP4
PS
ﻰﺻﻗﺃ ﺩﺣﺑ ﺍًﺭﺎﻁﺇ 60 :720 × 1280 ﻥﻣ ﻝﻗﺃ
ﻰﺻﻗﺃ ﺩﺣﺑ ﺍًﺭﺎﻁﺇ 30 :720 × 1280 ﻥﻣ ﻰﻠﻋﺃ
DivX ﺔﻣﺟﺭﺗﻔﻠﻣﻟﺔﻣﻭﻋﺩﻣﻟﺎﺗﺎﻘﻳﺳﻧﺗﻟﺍ
avi.*
mkv.*
wmv.*
mp4.*
mpg.*
mpeg.*
*.txt ,*.sub,*.srt ,*.smi ,*.ttxt
ﺔﻳﺑﺭﻌﻟﺍ ٨
-.ﻩﺍﻭﺗﺣﻣ ﻲﻓ ﺔﻠﻛﺷﻣ ﻙﺎﻧﻫ ﺕﻧﺎﻛ ﺍﺫﺇ ﻑﻠﻣﻟﺍ ﻝﻳﻐﺷﺗ ﻡﺗﻳ ﻻ ﺩﻘﻓ ،ﻩﻼﻋﺃ ﺓﺭﻭﻛﺫﻣﻟﺍ ﺯﻳﻣﺭﺗﻟﺍ ﺞﻣﺍﺭﺑ ﻥﻣ ﻡﻭﻋﺩﻣ ﺯﻳﻣﺭﺗ ﺞﻣﺎﻧﺭﺑ ﻡﺍﺩﺧﺗﺳﺎﺑ ﻑﻠﻣ ﺯﻳﻣﺭﺗ ﻡﺗ ﺍﺫﺇ ﻰﺗﺣ
-.ﺎ
-.ﻭﻳﺩﻳﻔﻟﺍ/ﺕﻭﺻﻟﺍ ﻝﻳﻐﺷﺗ ءﺎﻧﺛﺃ ﻲﺳﺎﻳﻘﻟﺍ ﻝﺩﻌﻣﻟﺍ ﻥﻣ ﻰﻠﻋﺃ ﺕﺍﺭﺎﻁﺇ ﻝﺩﻌﻣ ﻭﺃ ﺕﺑ ﻝﺩﻌﻣ ﻰﻠﻋ ﻱﻭﺗﺣﺗ ﻲﺗﻟﺍ ﺕﺎﻔﻠﻣﻟﺍ ﻝﻳﻐﺷﺗ ﺭﺛﻌﺗﻳ ﺩﻗ
-.ﺎًﻔﻟﺎﺗ ﻑﻠﻣﻟﺍ ﺱﺭﻬﻓ ﻝﻭﺩﺟ ﻥﺎﻛ ﺍﺫﺇ (ﻲﻁﺧﺗﻟﺍ) ﺙﺣﺑﻟﺍ ﺔﻔﻳﻅﻭ ﺭﻓﺍﻭﺗﺗ ﻻ
ﻭﻱﺩﻳﻔﻟﺍ ﺭﻳﻔﺷﺗ ﻙﻓ ﺯﺎﻬﺟ
-4.1 ﻯﻭﺗﺳﻣﻟﺍ H.264 ﻰﺗﺣ ﻡﻋﺩﻳ
-VC1 SP/MP/AP L4ﻭ H.264 FMO/ASO/RS ﻡﻋﺩﻳ ﻻ
-:ASPﻭ MPEG4 SP
-ﻰﻠﻋﺃ ﻭﺃ GMC 2 ﻡﻋﺩﻳ ﻻ
-STDﻭ ،9ﻭ ,8ﻭ ،WMA 7 ﻡﻋﺩﻳ
-ﻱﺩﺎﺣﺃ ﺯﺗﺭﻫ 22050 ﻎﻠﺑﺗ ﻲﺗﻟﺍ WMA ﺕﺎﻧﻳﻋ ﻝﺩﻌﻣ ﻡﻋﺩﻳ ﻻ
- ﻭﺃ 64 ﻭﺃ 48
|
ﺩﻭﻳﻘﻟﺍ
ﺕﻭﺻﻟﺍ ﺭﻳﻔﺷﺗ ﻙﻓ ﺯﺎﻬﺟ
Page 45

۰۲ﻡﺍﺩﺧﺗﺳﻻﺍ ءﺩﺑ
(AVCHD) ﺡﻭﺿﻭﻟﺍ ﻲﻟﺎﻋ ﻡﺩﻘﺗﻣﻟﺍ ﻭﻳﺩﻳﻔﻟﺍ ﺯﻳﻣﺭﺗ
.ﺔﻳﻣﻗﺭﻟﺍ ﻭﻳﺩﻳﻔﻟﺍ ﺕﺍﺭﻳﻣﺎﻛ ﻲﻓ ﻲﻌﻳﺑﻁ ﻝﻛﺷﺑ ﺎﻬﻣﺍﺩﺧﺗﺳﺍﻭ ﺹﺍﺭﻗﻷﺍ ﻩﺫﻫ ﻝﻳﺟﺳﺗ ﻡﺗﻳﻭ .AVCHD ﻕﻳﺳﻧﺗ ﺕﺍﺫ ﺹﺍﺭﻗﻷﺍ ﻝﻳﻐﺷﺗﺑ ﺞﺗﻧﻣﻟﺍ ﺍﺫﻫ ﻡﻭﻘﻳ ﻥﺃ ﻥﻛﻣﻳ
.ﺔﻳﻣﻗﺭﻟﺍ ﻭﻳﺩﻳﻔﻟﺍ ﺕﺍﺭﻳﻣﺎﻛﻟ ﻑﻳﺭﻌﺗﻟﺍ ﻲﻟﺎﻋ ﻕﻳﺳﻧﺗ ﻭﻫ AVCHD ﻕﻳﺳﻧﺗ
.ﻱﺩﻳﻠﻘﺗﻟﺍ ﺭﻭﺻﻟﺍ ﻁﻐﺿ ﻕﻳﺳﻧﺗ ﻥﻣ ﻰﻠﻋﺃ ﺓءﺎﻔﻛﺑ ﺭﻭﺻﻟﺍ ﻁﻐﺿﻳ MPEG-4 AVC/H.264 ﻕﻳﺳﻧﺗ
ﻕﻳﺳﻧﺗ ﻡﺩﺧﺗﺳﺗ ﻲﺗﻟﺍ AVCHD ﻕﻳﺳﻧﺗ ﺕﺍﺫ ﺹﺍﺭﻗﻷﺍ ﻝﻳﻐﺷﺗﺑ ﺞﺗﻧﻣﻟﺍ ﺍﺫﻫ ﻡﻭﻘﻳ ﻥﺃ ﻥﻛﻣﻳ ."x.v.Colour" ﻕﻳﺳﻧﺗ AVCHD ﺹﺍﺭﻗﺃ ﺽﻌﺑ ﻡﺩﺧﺗﺳﺗ
."x.v.Colour"
.Sony Corporation ﺔﻛﺭﺷﻟ ﺔﻳﺭﺎﺟﺗ ﺔﻣﻼﻋ ﻲﻫ "x.v.Colour"
Sony ﺔﻛﺭﺷﻭ .Matsushita Electronic Industrial Co., Ltd ﺔﻛﺭﺷﻟ ﻥﺎﺗﻳﺭﺎﺟﺗ ﻥﺎﺗﻣﻼﻋ AVCHD ﺭﺎﻌﺷﻭ "AVCHD" ﺩﻌﺗ
.Corporation
|
ﺔﻅﺣﻼﻣ |
.ﻝﻳﺟﺳﺗﻟﺍ ﻑﻭﺭﻅ ﻰﻠﻋ ًءﺎﻧﺑ ،AVCHD ﻕﻳﺳﻧﺗﺑ ﺹﺍﺭﻗﻷﺍ ﺽﻌﺑ ﻝﻳﻐﺷﺗ ﻡﺗﻳ ﻻ ﺩﻗ
.AVCHD ﻕﻳﺳﻧﺗﺑ ﺹﺍﺭﻗﻷﺍ ءﺎﻬﻧﺇ ﺭﻣﻷﺍ ﺏﻠﻁﺗﻳ
.ﺔﻳﺩﺎﻌﻟﺍ ﺔﻳﻣﻗﺭﻟﺍ ﻭﻳﺩﻳﻔﻟﺍ ﺕﺍﺭﻳﻣﺎﻛﻟ DVD ﺹﺍﺭﻗﺃ ﻥﻣ ﻊﺳﻭﺃ ﻥﺍﻭﻟﺃ ﻕﺎﻁﻧ "x.v.Colour" ﺭﻓﻭﺗ
.ﺕﺍﺭﺎﻁﻹﺍ ﻝﺩﻌﻣﻭ ﻭﻳﺩﻳﻔﻟﺍ ﺔﻗﺩ ﻰﻠﻋ ًءﺎﻧﺑ ،MP4ﻭ ،MKVﻭ ﺕﺎﻘﻳﺳﻧﺗﺑ ﺹﺍﺭﻗﻷﺍ ﺽﻌﺑ ﻝﻳﻐﺷﺗ ﻡﺗﻳ ﻻ ﺩﻗ
USB ﻝﺎﺻﺗﺍ ﻝﻭﺣ ﺕﺎﻅﺣﻼﻣ
.USB ﺕﺎﻗﺎﻁﺑ ﺓءﺍﺭﻗ ﺓﺯﻬﺟﺃﻭ ﺔﻳﻣﻗﺭﻟﺍ ﺕﺍﺭﻳﻣﺎﻛﻟﺍﻭ MP3 ﺕﻼﻐﺷﻣﻭ USB ﻥﻳﺯﺧﺗ ﻁﺋﺎﺳﻭ ﻙﺟﺗﻧﻣ ﻡﻋﺩﻳ
.ﻕﻓﺍﻭﺗ ﺕﻼﻛﺷﻣ ﺙﻭﺩﺣ ﻲﻓ USB ﻝﺑﻛ ﺭﺑﻋ ﻝﻳﺻﻭﺗﻟﺍ ﺏﺑﺳﺗﻳ ﻥﺃ ﻥﻛﻣﻳ .ﺞﺗﻧﻣﻟﺎﺑ USB ﺫﻔﻧﻣﺑ ﺓﺭﺷﺎﺑﻣ USB ﺓﺯﻬﺟﺃ ﻝﻳﺻﻭﺗﺑ ﻡﻗ
.ﺢﻳﺣﺻﻟﺍ ﻝﻛﺷﻟﺎﺑ ﺉﺭﺎﻘﻟﺍ ﻝﻣﻌﻳ ﻻ ﺩﻘﻓ ﺓﺩﺩﻌﺗﻣ ﺕﺎﻗﺎﻁﺑ ﺉﺭﺎﻗ ﻲﻓ ﺓﺩﺣﺍﻭ ﺓﺭﻛﺍﺫ ﺓﺩﺣﻭ ﻥﻣ ﺭﺛﻛﺃ ﻝﺎﺧﺩﺇ ﺔﻟﺎﺣ ﻲﻓ
.ﺔﻳﺭﺎﺟﺗﻟﺍ ﻊﻗﺍﻭﻣﻟﺍ ﻥﻣ ﺎﻬﻠﻳﺯﻧﺗ ﻡﺗﻳ ﻲﺗﻟﺍ (DRM) ﺔﻳﻣﻗﺭﻟﺍ ﻕﻭﻘﺣﻟﺍ ﺓﺭﺍﺩﺇ ﺓﺯﻳﻣﺑ ﺓﺩﻭﺯﻣﻟﺍ MP3 ﺕﺎﻔﻠﻣ ﻝﻳﻐﺷﺗ ﺞﺗﻧﻣﻟﺍ ﺍﺫﻬﻟ ﻥﻛﻣﻳ ﻻ
.USB ﺓﺭﻛﺍﺫﻟ ﻥﻛﻣﻣ ﻑﻠﺗ ﻱﺃ ﻊﻧﻣﻟ (ﻥﺎﻣﺄﺑ USB ﺔﻟﺍﺯﺇ ﺔﻔﻳﻅﻭ ﺫﻳﻔﻧﺗﺑ) ﻥﺎﻣﺄﺑ USB ﻥﻳﺯﺧﺗ ﺯﺎﻬﺟ ﺔﻟﺍﺯﺇ ﻙﻳﻠﻋ ﺏﺟﻳ
.E ﺭﺯﻟﺍ ﻰﻠﻋ ﻁﻐﺿﺍ ﻡﺛ ،(ﺝ) ﺭﻔﺻﺃ ﺭﺯﻟﺍ ﻰﻠﻋ ﻁﻐﺿﺍ ﻡﺛ ،ﺔﻳﺳﻳﺋﺭﻟﺍ ﺔﺷﺎﺷﻟﺍ ﻰﻟﺇ ﻝﺎﻘﺗﻧﻼﻟ ﺔﻳﺳﻳﺋﺭﻟﺍ ﺭﺯﻟﺍ ﻰﻠﻋ ﻁﻐﺿﺍ
ً
ﻓﺭﺣ
.ﺎ
128 ﻥﻣ ﻝﻭﻁﻷﺍ ﺕﺎﻔﻠﻣﻟﺍ ﻭﺃ ﺕﺍﺩﻠﺟﻣﻟﺍ ءﺎﻣﺳﺃ ﺞﺗﻧﻣﻟﺍ ﻡﻋﺩﻳ ﻻ
.ﺞﺗﻧﻣﻟﺍ ﻊﻣ USB/ﺔﻳﻣﻗﺭﻟﺍ ﺕﺍﺭﻳﻣﺎﻛﻟﺍ ﺓﺯﻬﺟﺃ ﺽﻌﺑ ﻕﻓﺍﻭﺗﺗ ﻻ ﺩﻗ
.NTFSﻭ FAT32ﻭ FAT16 ﺕﺎﻔﻠﻣ ﻡﻅﻧ ﺞﺗﻧﻣﻟﺍ ﻡﻋﺩﻳ
.PTP ﻝﻭﻛﻭﺗﺭﺑ ﺞﺗﻧﻣﻟﺍ ﻡﻋﺩﻳ ﻻ
."ﻝﻳﻣﺣﺗﻟﺍ" ﺔﻳﻠﻣﻋ ءﺎﻧﺛﺃ USB ﺯﺎﻬﺟ ﻝﺻﻔﺗ ﻻ
.ﺽﺭﻌﻠﻟ ﻝﻭﻁﺃ ﺎًﺗﻗﻭ ﺭﻭﺻﻟﺍ ﺕﻗﺭﻐﺗﺳﺍ ،ﺭﺑﻛﺃ ﺓﺭﻭﺻﻟﺍ ﺔﻗﺩ ﺕﻧﺎﻛ ﺎﻣﻠﻛ
.(ﺕﺍﺭﺎﻁﻹﺍ ﻝﺩﻌﻣ) ﺔﻳﻧﺎﺛﻟﺍ ﻲﻓ ﺍ
ً
30 ﻥﻣ ﻝﻗﻷﺍ ﻭﻳﺩﻳﻔﻟﺍ ﻻﺇ ﻙﺟﺗﻧﻣ ﻡﻋﺩﻳ ﻻ
ﺭﺎﻁﺇ
.ﺕﺎﻧﺎﻳﺑﻠﻟ ﺩﻘﻓ ﻭﺃ ﻑﻠﺗ ﻱﺃ ﻥﻋ ﺔﻟﻭﺋﺳﻣ SAMSUNG ﺔﻛﺭﺷ ﻥﻭﻛﺗ ﻻ
•
•
•
•
•
•
◄
◄
◄
◄
•
•
•
•
•
•
•
•
•
•
•
•
•
FUNCTION
VOLUME
MUTE
-
+
123
4
56
89
7
DISC MENU TITLE MENU
POPUP
0
SUBTITLE HOME REPEAT
INFO
TOOLS
RETURN
EXIT
TUNER
MO/ST
MEMORY
ABCD
TUNING
DSP/EQTV SOUND
UP
DOWN
/ﺩﻌﺑ ﻥﻋ ﻡﻛﺣﺗﻟﺍ ﺓﺩﺣﻭ
(AAA ﺱﺎﻘﻣ) ﺕﺎﻳﺭﺎﻁﺑ
|
٩ ﺔﻳﺑﺭﻌﻟﺍ
ﺕﺎﻘﺣﻠﻣﻟﺍ
.ﻩﺎﻧﺩﺃ ﺓﺭﻭﻛﺫﻣﻟﺍ ﺔﻘﻓﺭﻣﻟﺍ ﺕﺎﻘﺣﻠﻣﻟﺍ ﻥﻋ ﺙﺣﺑﺍ
FM ﻲﺋﺍﻭﻫﻡﺩﺧﺗﺳﻣﻟﺍ ﻝﻳﻟﺩ
ﺔﻗﺎﻁﻟﺍ ﻝﺑﺎﻛ
HDMI ﻝﺑﺎﻛ
Page 46

5V 500mA
ﺕﻗﺅﻣ ﻑﺎﻘﻳﺇ / ﻝﻳﻐﺷﺗ ﻝﺎﺧﺩﺇ
HDMI OUT
LAN
POWER
SPEAKERS OUT
CENTER
SUBWOOFER
FRONT
L
SURROUND
L
FRONT
R
SURROUND
R
SPEAKER IMPEDANCE : 3
AUX
IN
FM ANT
OPTICAL
DIGITAL
AUDIO IN
L
R
ﻑﺎﻘﻳﺇ ﻕﻼﻏﺇ/ﺢﺗﻓ
ﺔﻔﻳﻅﻭ
ﻡﺍﺩﺧﺗﺳﻻﺍ ءﺩﺑ
ﺔﻳﻣﺎﻣﻷﺍ ﺔﺣﻭﻠﻟﺍ
ﻡﻛﺣﺗﻟﺍ ﺕﻭﺻ ﻯﻭﺗﺳﻣ
ﺹﺍﺭﻗﻷﺍ ﺝﺭﺩ
ﺔﺷﺎﺷﻟﺍ
USB ﻑﻳﺿﻣ
ﺓﺩﺣﻭ ﺭﻌﺷﺗﺳﻣ
ﺩﻌﺑ ﻥﻋ ﻡﻛﺣﺗﻟﺍ
.USB ﺓﺭﻛﺍﺫ ﺔﺣﻳﺭﺷ ﻡﺍﺩﺧﺗﺳﺍ ﺏﺟﻳ ،USB ﻑﻳﺿﻣ ﺱﺑﻘﻣ ﻝﻼﺧ ﻥﻣ ﺞﺗﻧﻣﻟﺍ ﺞﻣﺎﻧﺭﺑ ﺔﻳﻗﺭﺗﻟ
ﺏﺟﻳ ،ﻡﻠﻳﻔﻟﺍ ﻝﻳﻐﺷﺗﻟ .ﺩﻌﺑ ﻥﻋ ﻡﻛﺣﺗﻟﺍ ﺓﺩﺣﻭ ﻲﻓ ﻭﺃ ﺞﺗﻧﻣﻟﺍ ﻲﻓ ﺭﺯﻟﺍ ﻰﻠﻋ ﻁﻐﺿﻟﺎﺑ ﻡﻠﻳﻔﻟﺍ ﺃﺩﺑﺗ ﻥﺃ ﻙﻧﻛﻣﻳ ﻻ ،Blu-ray ﺹﺭﻗ ﺔﻣﺋﺎﻗ ﺞﺗﻧﻣﻟﺍ ﺽﺭﻌﻳ ﺎﻣﺩﻧﻋ
.E ﺭﺯﻟﺍ ﻰﻠﻋ ﻁﻐﺿﺍ ﻡﺛ ،ﺹﺭﻘﻟﺍ ﺔﻣﺋﺎﻗ ﻲﻓ "ءﺩﺑ" ﻭﺃ "ﻡﻠﻳﻔﻟﺍ ﻝﻳﻐﺷﺗ" ﺭﺎﻳﺗﺧﺍ
.FUNCTION ﺭﺯ ﻝﻼﺧ ﻥﻣ BD/DVD ﻊﺿﻭ ﺩﻳﺩﺣﺗ ﻙﻧﻛﻣﻳ ﻻ ،ﻥﻭﻳﺯﻔﻠﺗﻟﺍ ﻰﻠﻋ USB ﺯﺎﻬﺟ ﻯﻭﺗﺣﻣ ﻝﻳﻐﺷﺗ ﻭﺃ ﺕﻧﺭﺗﻧﻹﺍ ﺔﻣﺩﺧ ﻡﺩﺧﺗﺳﺗ ﺕﻧﻛ ﺍﺫﺇ
.BD/DVD ﻊﺿﻭ ﺩﻳﺩﺣﺗﻟ ًﻻﻭﺃ ﻥﻭﻳﺯﻔﻠﺗﻟﺍ ﻰﻠﻋ ﻪﻠﻳﻐﺷﺗ ﻱﺭﺎﺟﻟﺍ ﻯﻭﺗﺣﻣﻟﺍ ﻑﺎﻘﻳﺈﺑ ﻡﻗ
ﺩﻳﺭﺑﺗﻟﺍ ﺔﺣﻭﺭﻣ
ﺔﻋﺎﻣﺳﻟﺍ ﺝﺍﺭﺧﺇ ﺕﻼﺻﻭﻣ
AUX IN
FM ﻲﺋﺍﻭﻫ *
ﻲﺟﺭﺎﺧﻟﺍ ﻲﻣﻗﺭﻟﺍ ﺕﻭﺻﻟﺍ ﻝﺧﺩﻣ
(ﻱﺭﺻﺑ)
HDMI OUT
ﺔﻛﺑﺷ ﻝﻳﺻﻭﺗ ﻑﺭﻁ
LAN
.FM ﻲﺋﺍﻭﻫ ﺱﺑﺎﻗ ﻊﻣ ﻕﻓﺭﻣﻟﺍ FM ﻲﺋﺍﻭﻫ ﻝﻳﺻﻭﺗﺑ ﻡﻗ
ً
.ﺭﺧﺁ ﺏﻠﺻ ﺢﻁﺳ ﻭﺃ ﻁﺋﺎﺣﺑ ﻪﺗﺑﺛ ﻡﺛ ،ﺩﻳﺟ ﻝﻛﺷﺑ ﻝﺎﺑﻘﺗﺳﻻﺍ ﻪﻳﻓ ﻡﺗﻳ ﺎ
ﻧﺎﻛﻣ ﺩﺟﺗ ﻰﺗﺣ ءﻁﺑﺑ ﻲﺋﺍﻭﻬﻟﺍ ﻙﻠﺳ ﻙﻳﺭﺣﺗﺑ ﻡﻗ
ﺕﺎﺣﺗﻓ ﻻﻭ ﺩﻳﺭﺑﺗﻟﺍ ﺔﺣﻭﺭﻣ ﺩﺳ ﻡﺗﻳ ﻻﺃ ﺏﺟﻳ.ﺔﻳﻭﻬﺗﻟﺍ ﺔﻳﺎﻔﻛ ﻥﺎﻣﺿﻟ ﺔﻳﻟﺯﻧﻣﻟﺍ ﺎﻣﻧﻳﺳﻟﺍ ﺏﻧﺍﻭﺟ ﻥﻣ ﺏﻧﺎﺟ ﻝﻛ ﻲﻓ ﻡﺳ 10 ﻰﻧﺩﺃ ﺩﺣﺑ ﻍﺍﺭﻓ ﺩﻭﺟﻭ ﻰﻠﻋ ﺹﺭﺣﺍ
.AM ﺙﺑ ﺞﺗﻧﻣﻟﺍ ﺍﺫﻫ ﻝﺑﻘﺗﺳﻳ ﻻ
ﻝﻳﻐﺷﺗ
| ﺔﻅﺣﻼﻣ |
ﺔﻳﻔﻠﺧﻟﺍ ﺔﺣﻭﻠﻟﺍ
FM ﻲﺋﺍﻭﻫ ﻝﻳﺻﻭﺗ *
ﺔﻅﺣﻼﻣ |
|
.ﺩﻳﺭﺑﺗﻟﺍ
ﺔﻳﺑﺭﻌﻟﺍ ١٠
◄
◄
◄
١ .
٢ .
◄
◄
|
Page 47

۰۲ﻡﺍﺩﺧﺗﺳﻻﺍ ءﺩﺑ
ﺩﻌﺑ ﻥﻋ ﻡﻛﺣﺗﻟﺍ ﺓﺩﺣﻭ
ﺩﻌﺑ ﻥﻋ ﻡﻛﺣﺗﻟﺍ ﺓﺩﺣﻭ ﻲﻓ ﺔﻟﻭﺟ
.ﻪﻠﻳﻐﺷﺗ ﻑﺎﻘﻳﺇﻭ ﺞﺗﻧﻣﻟﺍ ﻝﻳﻐﺷﺗ
.ﺕﻭﺻﻟﺍ ﻯﻭﺗﺳﻣ ﻁﺑﺿﺑ ﻡﻗ
ﻰﻠﻋ ﻝﻭﺻﺣﻠﻟ ﻡﺎﻗﺭﻷﺍ ﺭﺍﺭﺯﺃ ﻰﻠﻋ ﻁﻐﺿﺍ
ﻑﻠﺧﻟﺍ ﻰﻟﺇ ﻝﺎﻘﺗﻧﻼﻟ ﻥﻳﺭﺯﻟﺍ ﻥﻳﺫﻫ ﻰﻠﻋ ﻁﻐﺿﺍ
.ﺹﺭﻘﻟﺎﺑ ﺔﺻﺎﺧﻟﺍ ﺔﻣﺟﺭﺗﻟﺍ ﺔﻐﻟ ﺩﻳﺩﺣﺗﻟ
.ﺔﻳﺳﻳﺋﺭﻟﺍ ﺔﺷﺎﺷﻟﺍ ﻰﻟﺇ ﻝﺎﻘﺗﻧﻼﻟ ﻪﻳﻠﻋ ﻁﻐﺿﺍ
ﺔﻣﺋﺎﻗ ﻡﺍﺩﺧﺗﺳﻻ ﺭﺯﻟﺍ ﺍﺫﻫ ﻰﻠﻋ ﻁﻐﺿﺍ
ﺔﺷﺎﺷﻟﺍ ﻰﻠﻋ ﺔﺿﻭﺭﻌﻣﻟﺍ ﺔﻣﺋﺎﻘﻟﺍ ﺭﺻﺎﻧﻋ ﺩﺩﺣ
ﺔﺻﺎﺧﻟﺍ ﻡﺋﺍﻭﻘﻠﻟ ﺭﺍﺭﺯﻷﺍ ﻩﺫﻫ ﻡﺩﺧﺗﺳ
ﺍﺫﻬﺑ
ﺓﺩﺩﻌﺗﻣ ﻑﺋﺎﻅﻭ ءﺍﺭﺟﺇ ﻰﻟﺇ ﺔﻓﺎﺿﻹﺎﺑ ﺞﺗﻧﻣﻟﺍ
ﺕﻭﺻ ﺭﺑﻛﻣ ﻰﻟﺇ ﺔﻳﺗﻭﺻﻟﺍ ﺓﺭﺎﺷﻹﺍ ﺝﺍﺭﺧﺇ ﻥﻛﻣﻳ
.ﺯﺎﻔﻠﺗﻟﺍ ﺕﻭﺻ ﺭﺑﻛﻣ ﻭﺃ ﺔﻳﻟﺯﻧﻣﻟﺍ ﺎﻣﻧﻳﺳﻟﺍ
/ﺔﻳﻣﻗﺭﻟﺍ ﺓﺭﺎﺷﻹﺍ ﺞﻟﺎﻌﻣ ﺕﻭﺻ ﻊﺿﻭ ﺩﻳﺩﺣﺗ
.ﻝﻳﻐﺷﺗﻟﺍ ﺕﺍﺭﺎﻳﺧ
.ﺹﺭﻘﻟﺍ ﺔﻣﺋﺎﻗ ﺽﺭﻌﻟ ﻁﻐﺿﺍ
.ﻡﺎﻣﻷﺍ ﻭﺃ
.ﺹﺭﻘﻟﺍ ﻝﻳﻐﺷﺗﻟ ﻁﻐﺿﺍ
.ﺹﺭﻘﻟﺍ ﻑﺎﻘﻳﻹ ﻁﻐﺿﺍ
.(ﺕﺍﻭﺩﻷﺍ) Tools
.ﺔﻣﺋﺎﻘﻟﺍ ﺔﻣﻳﻗ ﺭﻳﻳﻐﺗﺑ ﻡﻗﻭ
.ﺔﻘﺑﺎﺳﻟﺍ ﺔﻣﺋﺎﻘﻠﻟ ﺓﺩﻭﻌﻟﺍ
.Blu-ray ﺹﺍﺭﻗﺃ ﻰﻠﻋ
(27 ﺔﺣﻔﺻ ﻊﺟﺍﺭ)
.ﺏﻭﻠﻁﻣﻟﺍ EQ
.Blu-ray
ﻊﺿﻭ ﺩﻳﺩﺣﺗﻟ ﻁﻐﺿﺍ
FUNCTION
VOLUME
-
1
4
7
DISC MENU TITLE MENU
SUBTITLE HOME REPEAT
TOOLS
RETURN
ُ
ﺗ
ABCD
DSP/EQTV SOUND
MUTE
+
2
3
56
89
POPUP
0
INFO
EXIT
TUNER
MO/ST
MEMORY
TUNING
UP
DOWN
(.ﺦﻟﺇ ,AUX, BD/DVD)
.ﺹﺭﻘﻟﺍ ﺝﺍﺭﺧﻹ
.ﺕﻗﺅﻣ ﻝﻛﺷﺑ ﺕﻭﺻﻟﺍ ﻊﻁﻗ
/ ﺔﻘﺛﺑﻧﻣﻟﺍ ﺔﻣﺋﺎﻘﻟﺍ ﻰﻟﺇ ﻝﻭﺧﺩﻠﻟ ﺭﺯﻟﺍ ﺍﺫﻫ ﻡﺩﺧﺗﺳﺍ
.ﻥﺍﻭﻧﻌﻟﺍ ﺔﻣﺋﺎﻗ
ﻑﻠﺧﻟﺍ ﻰﻟﺇ ﺙﺣﺑﻠﻟ ﻥﻳﺭﺯﻟﺍ ﻥﻳﺫﻫ ﻰﻠﻋ ﻁﻐﺿﺍ
.ﻡﺎﻣﻷﺍ ﻭﺃ
ﺹﺭﻘﻟﺍ ﻝﻳﻐﺷﺗ ﻑﺎﻘﻳﻹ ﺭﺯﻟﺍ ﺍﺫﻫ ﻰﻠﻋ ﻁﻐﺿﺍ
.ﺕﻗﺅﻣ ﻝﻛﺷﺑ
ﺭﺎﺳﻣ ﻭﺃ ﻝﺻﻓ ﻭﺃ ﻥﺍﻭﻧﻋ ﺭﺍﺭﻛﺗﺑ ﻙﻟ ﺡﺎﻣﺳﻠﻟ
.ﺹﺭﻗ ﻭﺃ
ﻝﻳﻐﺷﺗﻟﺍ ﺕﺎﻣﻭﻠﻌﻣ ﺽﺭﻌﻟ ﺭﺯﻟﺍ ﺍﺫﻫ ﻡﺩﺧﺗﺳﺍ
.Blu-ray/DVD ﺹﺭﻗ ﻝﻳﻐﺷﺗ ءﺎﻧﺛﺃ
.ﺔﻣﺋﺎﻘﻟﺍ ﻥﻣ ﺝﻭﺭﺧﻠﻟ ﺭﺯﻟﺍ ﺍﺫﻫ ﻰﻠﻋ ﻁﻐﺿﺍ
ً
ﻘﺑﺳﻣ ﺩﺩﺣﻣ ﻭﻳﺩﺍﺭ ﺩﺩﺭﺗ ﻁﺑﺿﻟ ﻡﺩﺧﺗﺳﻳ
.ﺎ
.ﻭﻳﺩﺍﺭﻟﺍ ﺙﺑﻟ "ﻭﻳﺭﺗﺳﺍ" ﻭﺃ "ﻱﺩﺎﺣﺃ" ﺩﺩﺣ
.ﺕﺍﻭﻧﻘﻟﺍ ﺭﻳﻳﻐﺗﻭ ﺔﻁﺷﻧﻟﺍ FM
ﺕﺎﻁﺣﻣ ﻥﻋ ﺙﺣﺑﻠﻟ
AAA : ﺔﻳﺭﺎﻁﺑﻟﺍ ﻡﺟﺣ
|
١١ ﺔﻳﺑﺭﻌﻟﺍ
.ﺩﻌﺑ ﻥﻋ ﻡﻛﺣﺗﻟﺍ ﺓﺩﺣﻭ ﻲﻓ ﺕﺎﻳﺭﺎﻁﺑﻟﺍ ﺏﻳﻛﺭﺗ
.ﻑﻳﻭﺟﺗﻟﺍ ﻝﺧﺍﺩﺑ ﻲﻧﺎﻳﺑﻟﺍ ﻁﻁﺧﻣﻟﺍ ﻊﻣ ﻥﻳﺗﻳﺭﺎﻁﺑﻠﻟ "-"ﻭ "+" ﻥﺎﺗﻳﺎﻬﻧﻟﺍ ﺔﻘﺑﺎﻁﻣ ﻥﻣ ﺩﻛﺄﺗ
.ﺩﺣﺍﻭ ﻡﺎﻋ ﺓﺩﻣﻟ ﻝﻣﻌﻟﺍ ﻲﻓ ﺕﺎﻳﺭﺎﻁﺑﻟﺍ ﺭﻣﺗﺳﺗ ،ﺩﺎﺗﻌﻣﻟﺍ ﺯﺎﻔﻠﺗﻟﺍ ﻡﺍﺩﺧﺗﺳﺍ ﺽﺍﺭﺗﻓﺎﺑ
ﻰﻟﺇ ﻝﺻﻳ ﺩﻌﺑ ﻰﻠﻋ ﻥﻣ ﺩﻌﺑ ﻥﻋ ﻡﻛﺣﺗﻟﺍ ﺓﺩﺣﻭ ﻡﺍﺩﺧﺗﺳﺍ ﻥﻛﻣﻳ
.ﻡﻳﻘﺗﺳﻣ ﻁﺧﺑ ﺞﺗﻧﻣﻟﺍ ﻥﻋ ﺎًﺑﻳﺭﻘﺗ ﺭﺎﺗﻣﺃ ۷
.ﺎﻬﻗﺭﺣ ﻕﻳﺭﻁ ﻥﻋ ﺕﺎﻳﺭﺎﻁﺑﻟﺍ ﻥﻣ ﺹﻠﺧﺗﻟﺍ ﺭﻅﺣﻳ
.ﺓﺩﺋﺍﺯﻟﺍ ﺔﻧﻭﺧﺳﻠﻟ ﺎﻬﺿﻳﺭﻌﺗ ﻭﺃ ﺎﻬﻛﻳﻛﻔﺗ ﻭﺃ ﺕﺎﻳﺭﺎﻁﺑﻟﺍ ﺓﺭﺋﺍﺩ .ﺭﻳﺳﻛﺗ ﻡﺩﻋ ﻲﻐﺑﻧﻳ
ﻡﻗ .ﺔﺣﻳﺣﺻ ﺭﻳﻏ ﺔﻘﻳﺭﻁﺑ ﺔﻳﺭﺎﻁﺑﻟﺍ ﻝﺍﺩﺑﺗﺳﺍ ﻡﺗ ﺍﺫﺇ ﺭﺎﺟﻔﻧﺍ ﺙﻭﺩﺣﺑ ﻝﺎﻣﺗﺣﺍ ﻙﺎﻧﻫ
.ﻝﺛﺎﻣﻣ ﻉﻭﻧ ﻥﻣ ﻭﺃ ﻉﻭﻧﻟﺍ ﺱﻔﻧ ﻥﻣ ﺕﺎﻳﺭﺎﻁﺑﺑ ﺎﻬﻟﺍﺩﺑﺗﺳﺎﺑ
◄
◄
◄
◄
◄
◄
Page 48

ﺞﺗﻧﻣﻟﺍ ﻊﺿﻭ
.ﺯﺎﻔﻠﺗﻟﺍ ﻝﻣﺎﺣ ﻝﻔﺳﺃ ﻭﺃ ﺔﻧﺍﺯﺧﻟﺍ ﻑﺭ ﻭﺃ ﻝﻣﺎﺣ ﻰﻠﻋ
3 ﻰﻟﺇ 2.5 ﺔﻓﺎﺳﻣ ﻰﻠﻋ ﻉﺎﻣﺗﺳﻻﺍ ﻊﺿﻭﻣ ﻥﻭﻛﻳ ﻥﺃ ﺏﺟﻳ
ﻝﻳﺑﺳ ﻰﻠﻌﻓ .ﺯﺎﻔﻠﺗﻟﺍ ﻥﻋ ﺍًﺩﻳﻌﺑ ﺯﺎﻔﻠﺗﻟﺍ ﺔﺷﺎﺷ ﻡﺟﺣ ﻥﻣ ﻑﺎﻌﺿﺃ
ﻊﺿﻭﻣ ﻝﻌﺟﺎﻓ ،ﺔﺻﻭﺑ 46 ﺔﺷﺎﺷ ﻙﻳﺩﻟ ﺕﻧﺎﻛ ﺍﺫﺇ ،ﻝﺎﺛﻣﻟﺍ
.ﺔﺷﺎﺷﻟﺍ ﻥﻋ ﺔﺻﻭﺑ 138 ﻰﻟﺇ 115 ﺔﻓﺎﺳﻣ ﻰﻠﻋ ﻉﺎﻣﺗﺳﻻﺍ
ﺞﺗﻧﻣﻟﺍ ﻊﺿ
ﻉﺎﻣﺗﺳﻻﺍ ﻊﺿﻭ ﺩﻳﺩﺣﺗ
ﺕﻼﻳﺻﻭﺗﻟﺍ
ً
.ﻯﺭﺧﻷﺍ ﺔﻳﺟﺭﺎﺧﻟﺍ ﺕﺎﻧﻭﻛﻣﻟﺎﺑ ﺞﺗﻧﻣﻟﺍ ﻝﻳﺻﻭﺗﻟ ﺓﺩﺩﻌﺗﻣ ﺎ
.ﺔﻗﺎﻁﻟﺍ ﻙﻠﺳ ﻝﺻﻓﻭ ﺔﻗﺎﻁﻟﺍ ﻝﻳﻐﺷﺗ ﻑﺎﻘﻳﺇ ﻥﻣ ﺩﻛﺄﺗ ،ﻪﺑﻳﻛﺭﺗ ﻭﺃ ﺞﺗﻧﻣﻟﺍ ﻝﻘﻧ ﻝﺑﻗ
ﺕﻭﺻﻟﺍ ﻡﺧﺿﻣ
(ﻯﺭﺳﻳ) ﺞﺗﻧﻣﻟﺍ
(ﻯﺭﺳﻳ) ﺔﻳﻁﻳﺣﻣ ﺔﻋﺎﻣﺳ
ﻰﻁﺳﻭﻟﺍ
ﺞﺗﻧﻣﻟﺍ
ﻗﺭﻁ ﻡﺳﻘﻟﺍ ﺍﺫﻫ ﻑﺻﻳ
ﺕﺎﻋﺎﻣﺳﻟﺍ ﻝﻳﺻﻭﺗ
(ﻥﻳﻣﻳ) ﺞﺗﻧﻣﻟﺍ
(ﻥﻳﻣﻳ) ﺔﻳﻁﻳﺣﻣ ﺔﻋﺎﻣﺳ
ﻊﺿ .ﻙﻫﺎﺟﺗﺎﺑ (ﺎًﺑﻳﺭﻘﺗ ﺔﺟﺭﺩ ٤٥) ﻝﺧﺍﺩﻠﻟ ﺔﻬﺟﻭﻣ ﻥﻭﻛﺗ ﺙﻳﺣﺑ ،ﻙﺑ ﺹﺎﺧﻟﺍ ﻉﺎﻣﺗﺳﻻﺍ ﻊﺿﻭﻣ ﻡﺎﻣﺃ ﺕﺎﻋﺎﻣﺳﻟﺍ ﻩﺫﻫ ﻊﺿ
ﺕﺎﻋﺎﻣﺳﻠﻟ ﺔﻳﻣﺎﻣﻷﺍ ﺔﻬﺟﺍﻭﻟﺍ ﺓﺍﺫﺎﺣﻣﺑ ﻡﻗ .ﻙﻧﺫﺃ ﻉﺎﻔﺗﺭﺍ ﺱﻔﻧﺑ ﺎﻬﻳﻓ ﺓﺩﻭﺟﻭﻣﻟﺍ ﺕﻭﺻﻟﺍ ﺕﺍﺭﺑﻛﻣ ﻥﻭﻛﺗ ﺙﻳﺣﺑ ﺔﻳﻣﺎﻣﻷﺍ ﺕﺎﻋﺎﻣﺳﻟﺍ
ﻭﺃ ﺯﺎﻔﻠﺗﻟﺍ ﻕﻭﻓ
ﻥﻳﺗﻬﺟﻭﻣ ﻥﺎﻧﻭﻛﺗ ﺙﻳﺣﺑ ﺎﻣﻬﻌﺿﻓ ،ﺔﻳﻓﺎﻛ ﺔﺣﺎﺳﻣ ﺩﻭﺟﻭ ﻡﺩﻋ ﺔﻟﺎﺣ ﻲﻓ .ﻉﺎﻣﺗﺳﻻﺍ ﻊﺿﻭﻣ ﺏﻧﺎﺟ ﻰﻠﻋ ﻥﻳﺗﻋﺎﻣﺳﻟﺍ ﻥﻳﺗﺎﻫ ﻊﺿ
.ﻝﻔﺳﻷﺍ ﻰﻟﺇ ًﻼﻳﻠﻗ ﻥﻳﺗﻬﺟﻭﻣ ﻥﺎﻧﻭﻛﺗ ﺙﻳﺣﺑ ،ﻡﺳ ۹۰ ﻰﻟﺇ ٦۰ ﻲﻟﺍﻭﺣﺑ ﻙﻧﺫﺃ
ﻥﻟ .ﺕﻭﺻﻟﺍ ﺕﺍﺭﻳﺛﺄﺗﻟ ﻲﺳﺎﺳﺃ ﻝﻛﺷﺑ ﺔﻳﻁﻳﺣﻣﻟﺍ ﺕﺎﻋﺎﻣﺳﻟﺍ ﻡﺩﺧﺗﺳﺗ ،ﺔﻳﺯﻛﺭﻣﻟﺍ ﺕﺎﻋﺎﻣﺳﻟﺍﻭ ﺔﻳﻣﺎﻣﻷﺍ ﺕﺎﻋﺎﻣﺳﻟﺍ ﺱﻛﻋ ﻰﻠﻋ *
.ﺔﻳﺯﻛﺭﻣﻟﺍ ﺕﺎﻋﺎﻣﺳﻟﺍ ﻡﺎﻣﺃ ﻕﻓﺭﺑ ﺎﻬﻌﺿ ﻭﺃ ﺔﻳﺯﻛﺭﻣﻟﺍ ﺔﻋﺎﻣﺳﻠﻟ ﺔﻳﻣﺎﻣﻷﺍ ﺔﻬﺟﺍﻭﻟﺍ ﻊﻣ ﺔﻳﻣﺎﻣﻷﺍ
ً
ﺓﺭﺷﺎﺑﻣ ﺎﻬﺑﻳﻛﺭﺗ ﺎًﺿﻳﺃ ﻙﻧﻛﻣﻳ .ﺔﻳﻣﺎﻣﻷﺍ ﺕﺎﻋﺎﻣﺳﻟﺍ ﻉﺎﻔﺗﺭﺍ ﺱﻔﻧﺑ ﻰﻁﺳﻭﻟﺍ ﺔﻋﺎﻣﺳﻟﺍ ﺏﻳﻛﺭﺗ ﻝﺿﻓﻷﺍ ﻥﻣ
ﻕﻭﻓ ﺎﻣﻬﻌﺿ .ﺽﻌﺑﻟﺍ ﺎﻣﻬﺿﻌﺑﻟ
.ﺍًﺩﺑﺃ ﺎﻣﻬﻧﻣ ﺕﻭﺻ ﺭﺩﺻﻳ
ﺔﻳﻣﺎﻣﻷﺍ ﺔﻋﺎﻣﺳﻟﺍ
ﻰﻁﺳﻭﻟﺍ ﺔﻋﺎﻣﺳﻟﺍ.ﻪﺗﺣﺗ
ﺕﻭﺻﻟﺍ ﺕﺎﻋﺎﻣﺳ
ﻲﻁﻳﺣﻣﻟﺍ
ﺕﻭﺻﻟﺍ ﻡﺧﺿﻣ.ﺩﻳﺭﺗ ﻥﺎﻛﻣ ﻱﺃ ﻲﻓ ﻪﻌﺿﻭ ﻙﻧﻛﻣﻳﻓ .ﺎًﻣﺎﻫ ﺍًﺭﻣﺃ ﺕﻭﺻﻟﺍ ﻡﺧﺿﻣ ﻊﺿﻭﻣ ﺩﻌﻳ ﻻ
ﺔﻳﺑﺭﻌﻟﺍ ١٢
|
Page 49

۰۳ﺕﻼﻳﺻﻭﺗﻟﺍ
ﺔﻋﺎﻣﺳﻟﺍ ﺕﺎﻧﻭﻛﻣ
HT-F4500
ﺔﻋﺎﻣﺳﻟﺍ ﻝﺑﻛ
16EA :(٥X۲۰) ﻲﺑﻟﻭﻟ ﺭﺎﻣﺳﻣ
ﺕﻭﺻﻟﺍ ﻡﺧﺿﻣ ﻝﻣﺎﺣ
۲
ﻰﻁﺳﻭﻟﺍ
۱
ﻝﻣﺎﺣﻟﺍ ﺓﺩﻋﺎﻗ
ﻝﻣﺎﺣ
ﺔﻋﺎﻣﺳﻟﺍ ﻝﺑﻛ
ﻝﻣﺎﺣﻟﺍ ﺓﺩﻋﺎﻗ
ﻰﻁﺳﻭﻟﺍﺕﻭﺻﻟﺍ ﻡﺧﺿﻣ
.ﻝﻣﺣﻟﺍ ﺓﺩﻋﺎﻗ ﻲﻓ ﺓﺩﻭﺟﻭﻣﻟﺍ ﺔﺣﺗﻔﻟﺍ ﻲﻓ ﻪﻌﺿﻭ ﺔﻋﺎﻣﺳﻟﺍ ﻝﺑﻛ ﺩﻣﺑ ﻡﻗ
.ﺓﺯﻳﻣﻣﻟﺍ ﺔﺛﻼﺛﻟﺍ ﺕﺎﺣﺗﻔﻟﺍ ﻲﻓ ﺓﺩﻭﺟﻭﻣﻟﺍ ﻲﻏﺍﺭﺑﻟﺍ ﻊﻳﻣﺟﺗﻟ ﻙﻔﻣﻟﺍ ﻡﺩﺧﺗﺳﺍ
(ﻯﺭﺳﻳ)(ﻥﻳﻣﻳ)
ﻲﻁﻳﺣﻣﻟﺍ ﺕﻭﺻﻟﺍ ﺔﻋﺎﻣﺳ
(ﻯﺭﺳﻳ)(ﻥﻳﻣﻳ)
(ﻯﺭﺳﻳ)(ﻯﺭﺳﻳ)(ﻥﻳﻣﻳ)(ﻥﻳﻣﻳ)
ﻲﻁﻳﺣﻣﻟﺍ ﺕﻭﺻﻟﺍ ﺔﻋﺎﻣﺳ
ﻲﺳﺃﺭ ﻝﻣﺎﺣ ﻰﻠﻋ ﺕﺎﻋﺎﻣﺳﻟﺍ ﺕﻳﺑﺛﺗ
ﺔﻣﺳﺟﻣﻟﺍ/ﺔﻳﻣﺎﻣﻷﺍ ﺕﺎﻋﺎﻣﺳﻟﺍ - ﻁﻘﻓ HT-F4550 *
ﺔﻳﻣﺎﻣﺃ
HT-F4550
/
ﺔﻳﻣﺎﻣﺃ
١ .
٢ .
ﺔﻋﺎﻣﺳﻟﺍ
ﻝﻣﺎﺣ
|
١٣ ﺔﻳﺑﺭﻌﻟﺍ
۳٤
٥٦
.ﻝﻣﺎﺣﻟﺍ ﺓﺩﻋﺎﻗ ﻑﺻﺗﻧﻣﺑ ﺔﺣﺗﻔﻟﺍ ﻲﻓ ﻪﻠﺧﺩﺃﻭ ﺔﻋﺎﻣﺳﻟﺍ ﻙﻠﺳ ﺩﺭﻔﺑ ﻡﻗ
.ﺏﻛﺭﻣﻟﺍ ﻝﻣﺎﺣﻟﺎﺑ ﺔﻳﻭﻠﻌﻟﺍ ﺔﻋﺎﻣﺳﻟﺍ ﻝﻳﺻﻭﺗﺑ ﻡﻗ
ءﺯﺟﻟﺎﺑ ﺓﺩﻭﺟﻭﻣﻟﺍ ﺔﺣﺗﻔﻟﺍ ﻝﺧﺍﺩ ﺔﻋﺎﺳﻟﺍ ﺏﺭﺎﻘﻋ ﻩﺎﺟﺗﺍ ﻲﻓ ﺎًﻳﻏﺭﺑ ﻝﺧﺩﺃ
.ﺔﻋﺎﻣﺳﻟﺍ ﻝﺑﺎﻛ ﻝﻳﺻﻭﺗﺑ ﻡﻗ ﻡﺛ .ﻙﻔﻣﻟﺍ ﻡﺍﺩﺧﺗﺳﺎﺑ ﺔﻋﺎﻣﺳﻟﺍ ﻥﻣ ﻲﻔﻠﺧﻟﺍ
.ﺔﻋﺎﻣﺳﻟﺍ ﺏﻳﻛﺭﺗ ﺩﻌﺑ ﻝﻛﺷﻟﺍ ﻭﻫ ﺍﺫﻫ
.ﻯﺭﺧﻷﺍ ﺔﻋﺎﻣﺳﻟﺍ ﺏﻳﻛﺭﺗﻟ ﺕﺍﻭﻁﺧﻟﺍ ﻩﺫﻫ ﻊﺑﺗﺍ
٣ .
٤ .
٥ .
٦ .
Page 50

SPEAKERS OUT
CENTER
SUBWOOFER
FRONT
L
SURROUND
L
FRONT
R
SURROUND
R
SPEAKER IMPEDANCE : 3
AUX
IN
FM ANT
OPTICAL
DIGITAL
AUDIO IN
L
R
SPEAKERS OUT
CENTER
SUBWOOFER
FRONT
L
SURROUND
L
FRONT
R
SURROUND
R
SPEAKER IMPEDANCE : 3
HDMI OUT
LAN
POWER
AUX
IN
FM ANT
OPTICAL
DIGITAL
AUDIO IN
L
R
SPEAKERS OUT
CENTER
SUBWOOFER
FRONT
L
SURROUND
L
FRONT
R
SURROUND
R
SPEAKER IMPEDANCE : 3
ﺩﻭﺳﺃ
ﺭﻣﺣﺃ
ﺕﻼﻳﺻﻭﺗﻟﺍ
ﺕﺎﻋﺎﻣﺳﻟﺍ ﻝﻳﺻﻭﺗ
ﻥﺍﻭﻟﺄﺑ ﺯﻳﻣﻣﻟﺍ ﺱﺑﺎﻘﻟﺍ ﺔﻘﺑﺎﻁﻣ ﻝﻼﺧ ﻥﻣ ﺕﻭﺻﻟﺍ ﻡﺧﺿﻣﺑ ﺕﻭﺻﻟﺍ ﻡﺧﺿﻣ ﺕﻼﺑﺎﻛ ﺔﻣﺯﺣ ﺔﻘﺑﺎﻁﻣﺑ ﻡﻗ
.ﺕﻭﺻﻟﺍ ﻡﺧﺿﻣ ﻝﻔﺳﺃ ﻥﻭﻠﻣﻟﺍ ﻕﺻﻠﻣﻟﺎﺑ ﺔﻣﺯﺣﻟﺍ ﻲﻓ
:ﺔﻋﺎﻣﺳ ﻝﻛﺑ ﺔﻋﺎﻣﺳﻟﺍ ﻙﻠﺳ ﺏﻳﻛﺭﺗﻟ
.ﻥﺎﺳﻠﻟﺍ ﺭﺭﺣﻭ ،ﺭﻣﺣﻷﺍ ﻙﻠﺳﻟﺍ ﻝﺧﺩﺃ ﻡﺛ ،ﺔﻋﺎﻣﺳﻟﺍ ﺭﻬﻅ ﻲﻓ ﺩﻭﺟﻭﻣﻟﺍ ﺭﻣﺣﻷﺍ ﻥﺎﺳﻠﻟﺍ ﻰﻠﻋ ﻁﻐﺿﺍ .ﺃ
.ﻥﺎﺳﻠﻟﺍ ﺭﺭﺣﻭ ،ﺩﻭﺳﻷﺍ ﻙﻠﺳﻟﺍ ﻝﺧﺩﺃ ﻡﺛ ،ﺔﻋﺎﻣﺳﻟﺍ ﺭﻬﻅ ﻲﻓ ﺩﻭﺟﻭﻣﻟﺍ ﺩﻭﺳﻷﺍ ﻥﺎﺳﻠﻟﺍ ﻰﻠﻋ ﻁﻐﺿﺍ .ﺏ
.ﺔﻋﺎﻣﺳﻟﺍ ﺱﺑﺎﻘﻣ ﻥﺍﻭﻟﺄﺑ ﺔﻋﺎﻣﺳﻟﺍ ﺱﺑﺍﻭﻗ ﻥﺍﻭﻟﺃ ﺔﻘﺑﺎﻁﻣﺑ ﺞﺗﻧﻣﻟﺍ ﺭﻬﻅﺑ ﺔﻋﺎﻣﺳﻟﺍ ﻙﻠﺳ ﺱﺑﺍﻭﻗ ﻝﻳﺻﻭﺗﺑ ﻡﻗ
HT-F4500 ﺔﻟﺎﺣ ﻲﻓ
١ .
٢ .
٣ .
(ﻥﻳﻣﻳ) ﺔﻳﻁﻳﺣﻣﻟﺍ ﺔﻋﺎﻣﺳﻟﺍ
(ﻥﻳﻣﻳ) ﺔﻳﻣﺎﻣﻷﺍ ﺔﻋﺎﻣﺳﻟﺍ
(ﻯﺭﺳﻳ) ﺔﻳﻁﻳﺣﻣﻟﺍ ﺔﻋﺎﻣﺳﻟﺍ
(ﻯﺭﺳﻳ) ﺔﻳﻣﺎﻣﻷﺍ ﺔﻋﺎﻣﺳﻟﺍ
ﻰﻁﺳﻭﻟﺍ ﺔﻋﺎﻣﺳﻟﺍ
ﺕﻭﺻﻟﺍ ﻡﺧﺿﻣ
|
ﺭﻳﺫﺣﺗ |
ﺭﺑﻛﻣ ﻥﻣ ﻲﻔﻠﺧﻟﺍ ءﺯﺟﻟﺍ ﻰﻠﻋ ﺓﺩﻭﺟﻭﻣﻟﺍ ﺕﺎﺣﺗﻔﻟﺍ ﻡﺩﺧﺗﺳﺍﻭ ﻡﺎﻛﺣﺈﺑ ﻁﺋﺎﺣﻟﺍ ﻰﻠﻋ ﺭﻳﻣﺎﺳﻣﻟﺍ ﻭﺃ ﻲﻏﺍﺭﺑﻟﺍ ﺕﻳﺑﺛﺗﺑ ﻡﻘﻓ ،ﻁﺋﺎﺣﻟﺍ ﻰﻠﻋ ﺞﺗﻧﻣﻟﺍ ﺕﻳﺑﺛﺗ ﺩﻳﺭﺗ ﺕﻧﻛ ﺍﺫﺇ
◄
.(ﻲﻏﺍﺭﺑﻟﺍ ﻭﺃ ﺭﻳﻣﺎﺳﻣﻟﺍ) ﺕﺎﻘﺣﻠﻣﻟﺍ ﺭﻳﻓﻭﺗ ﻻﻭ ﺏﻳﻛﺭﺗﻟﺍ ﺔﻳﻠﻣﻌﺑ ﺔﻛﺭﺷﻟﺍ ﻡﻭﻘﺗ ﻥﻠﻓ ،ﺞﺗﻧﻣﻟﺍ ﺕﻳﺑﺛﺗ ﺩﻧﻌﻓ ،ﻙﻟﺫ ﻥﻣ ﻡﻏﺭﻟﺍ ﻰﻠﻋﻭ.ﺕﻳﺑﺛﺗﻠﻟ ﺕﻭﺻﻟﺍ
.ﺕﺎﻋﺎﻣﺳﻟﺍ ﻯﺩﺣﺇ ﺕﻁﻘﺳ ﺎﻣ ﺍﺫﺇ ﻯﺫﺃ ﻡﻬﺑﻳﺻﻳ ﺩﻘﻓ .ﺎﻬﻧﻣ ﺏﺭﻘﻟﺎﺑ ﻭﺃ ﺕﺎﻋﺎﻣﺳﻟﺎﺑ ﺏﻌﻠﻟﺎﺑ ﻝﺎﻔﻁﻸﻟ ﺢﻣﺳﺗ ﻻ
.(– /+) ﺔﻳﺑﻁﻘﻟﺍ ﺔﺣﺻ ﻥﻣ ﺩﻛﺄﺗ ،ﺕﺎﻋﺎﻣﺳﻟﺎﺑ ﺔﻋﺎﻣﺳﻟﺍ ﻙﻼﺳﺃ ﻝﻳﺻﻭﺗ ﺩﻧﻋ
ﻡﺧﺿﻣ ﺔﻋﺎﻣﺳ (ﺔﺣﺗﻓ) ﺏﻭﺑﻧﺃ ﻝﺧﺍﺩ ﺔﺑﻳﺭﻏ ﻡﺎﺳﺟﺃ ﻝﺎﺧﺩﺇ ﻭﺃ ﺎﻬﻳﻓ ﻡﻬﻳﺩﻳﺃ ﻝﺎﻔﻁﻷﺍ ﻝﺎﺧﺩﺇ ﻱﺩﺎﻔﺗﻟ ﻝﺎﻔﻁﻷﺍ ﻥﻋ ﺍًﺩﻳﻌﺑ ﺕﻭﺻﻟﺍ ﻡﺧﺿﻣ ﺔﻋﺎﻣﺳ ﻰﻠﻋ ﻅﻓﺎﺣ
◄
◄
◄
.ﺕﻭﺻﻟﺍ
ﺔﻅﺣﻼﻣ |
|
◄
◄
.(ﺔﺣﺗﻔﻟﺍ) ﺏﻭﺑﻧﻷﺍ ﻝﻼﺧ ﻥﻣ ﻁﺋﺎﺣﻟﺍ ﻰﻠﻋ ﺕﻭﺻﻟﺍ ﻡﺧﺿﻣ ﻕﻳﻠﻌﺗﺑ ﻡﻘﺗ ﻻ
.ﻲﺳﻳﻁﺎﻧﻐﻣﻟﺍ ﻝﺎﺟﻣﻠﻟ ﺔﺟﻳﺗﻧ ﺔﺷﺎﺷﻟﺍ ﻥﻭﻠﻟ ﺵﻳﻭﺷﺗ ﺙﺩﺣﻳ ﺩﻘﻓ ،ﺯﺎﻔﻠﺗﻟﺍ ﺯﺎﻬﺟ ﻥﻣ ﺏﺭﻘﻟﺎﺑ ﺔﻋﺎﻣﺳ ﺕﻌﺿﻭ ﺍﺫﺇ
ﺔﻛﺑﺷ ﻪﺟﻭﻣﺑ ﻝﻳﺻﻭﺗﻟﺍ
ﻕﺎﻁﻧﻟﺍ ﻡﺩﻭﻣ
ﺽﻳﺭﻌﻟﺍ ﻱﺩﺩﺭﺗﻟﺍ
ﻭﺃ
(ﺞﻣﺩﻣ ﻪﻳﺟﻭﺗ ﺯﺎﻬﺟ ﻊﻣ) ﺽﻳﺭﻌﻟﺍ ﻕﺎﻁﻧﻟﺍ ﻡﺩﻭﻣ
ﻕﺎﻁﻧﻟﺍ ﺔﻣﺩﺧ
ﺽﻳﺭﻌﻟﺍ
ﻪﻳﺟﻭﺗ ﺯﺎﻬﺟ
ﻕﺎﻁﻧﻟﺍ ﺔﻣﺩﺧ
ﺽﻳﺭﻌﻟﺍ
ﺔﻳﺑﺭﻌﻟﺍ ١٤
|
Page 51

۰۳ﺕﻼﻳﺻﻭﺗﻟﺍ
ً
ﺔﻣﺩﺧ ﺭﻓﻭﻣ ﺔﺳﺎﻳﺳ ﻭﺃ ﻪﻣﺩﺧﺗﺳﺗ ﻱﺫﻟﺍ ﻪﺟﻭﻣﻠﻟ ﺎ
ﻘﻓﻭ ،Samsung ﺔﻛﺭﺷﺑ ﺹﺎﺧﻟﺍ ﺞﻣﺍﺭﺑﻟﺍ ﺙﻳﺩﺣﺗ ﻡﺩﺎﺧ ﻰﻟﺇ ﺕﻧﺭﺗﻧﻹﺍ ﺭﺑﻋ ﻝﻭﺻﻭﻟﺎﺑ ﺢﻣﺳُﻳ ﺩﻗ
.(ISP) ﺕﻧﺭﺗﻧﻹﺍ ﺔﻣﺩﺧ ﺭﻓﻭﻣﺑ ﻝﺻﺗﺍ ،ﺕﺎﻣﻭﻠﻌﻣﻟﺍ ﻥﻣ ﺩﻳﺯﻣﻠﻟ .ﺕﻧﺭﺗﻧﻹﺍ
.ﺔﻛﺑﺷ ﻝﺎﺻﺗﺍ ءﺎﺷﻧﻹ ﻪﻳﺟﻭﺗ ﺯﺎﻬﺟ ﻡﺍﺩﺧﺗﺳﺍ ءﺎﺟﺭﻟﺍ ،DSL ﻲﻣﺩﺧﺗﺳﻣﺑ ﻕﻠﻌﺗﻳ ﺎﻣﻳﻓ
.ﺎًﻳﻛﻠﺳﻻ ﻭﺃ ﺎًﻳﻛﻠﺳ ﻝﺎﺻﺗﻻﺍ ﻥﻭﻛﻳ ﻥﺃ ﻥﻛﻣﻳ.ﻝﻛﺷﻟﺎﺑ ﺢﺿﻭﻣ ﻭﻫ ﺎﻣﻛ ﺔﻛﺑﺷﻟﺎﺑ ﺭﺗﻭﻳﺑﻣﻛ ﺯﺎﻬﺟ ﻝﻳﺻﻭﺗ ﻙﻳﻠﻋ ﺏﺟﻳ ،DLNA ﺔﻔﻳﻅﻭ ﻡﺍﺩﺧﺗﺳﻻ
ﺔﻳﺟﺭﺎﺧ ﺓﺯﻬﺟﺄﺑ / ﺯﺎﻔﻠﺗﺑ ﻝﻳﺻﻭﺗﻟﺍ
AUX
FM ANT
IN
| ﺔﻅﺣﻼﻣ |
◄
◄
◄
AUX
FM ANT
IN
L
R
SURROUND
POWER
SURROUND
L
FRONT
FRONT
R
L
SPEAKER IMPEDANCE : 3
CENTER
SUBWOOFER
OPTICAL
R
SPEAKERS OUT
DIGITAL
HDMI OUT
LAN
AUDIO IN
L
OPTICAL
R
DIGITAL
AUDIO IN
HDMI OUT
LAN
۱ ﺔﻘﻳﺭﻁﻟﺍ ۲ ﺔﻘﻳﺭﻁﻟﺍ
ﺭﻣﺣﺃ
R
ﺽﻳﺑﺃ
W
ﺔﻳﺟﺭﺎﺧ ﺓﺯﻬﺟﺃ
OPTICAL OUT
HDMI IN
ﺯﺎﻔﻠﺗﺑ ﻝﻳﺻﻭﺗﻟﺍ
،ARC ﻡﻋﺩﻳ ﻥﻭﻳﺯﻔﻠﺗﻟﺍ ﻥﺎﻛ ﺍﺫﺇ .ﻙﺑ ﺹﺎﺧﻟﺍ ﺯﺎﻔﻠﺗﻟﺎﺑ (HDMI ﺕﻼﺧﺩﻣ) HDMI IN ﺱﺑﺎﻘﺑ ﺞﺗﻧﻣﻟﺍ ﻑﻠﺧ HDMI OUT ﺱﺑﺎﻗ ﻥﻣ HDMI ﻝﺑﻛ ﻝﻳﺻﻭﺗﺑ ﻡﻗ
ﻼﻟﺯﺎﻔﻠﺗﻟﺎﻣﺩﺧﺗﺳﻣﻠﻳﻟﺩﻳﻓARC ﻡﺳﻘﻟﺍﻭ ﻝﻳﻟﺩﻟﺍ ﺍﺫﻫ ﻲﻓ 19 ﺔﺣﻔﺻ ﻊﺟﺍﺭ .ﻝﺑﺎﻛﻟﺍ ﺍﺫﻫ ﻝﻳﺻﻭﺗ ﺩﻌﺑ ﻻﺇ ﻲﻟﺯﻧﻣﻟﺍ ﺡﺭﺳﻣﻟﺍ ﻡﺎﻅﻧ ﻥﻣ ﻥﻭﻳﺯﻔﻳﻠﺗﻟﺍ ﺕﻭﺻ ﻉﺎﻣﺳ ﻙﻧﻛﻣﻳ ﻼﻓ
.ﻝﻳﺻﺎﻔﺗﻟﺎﯩﻠﻌﻋﻼﻁ
ﺔﻳﺟﺭﺎﺧ ﺓﺯﻬﺟﺄﺑ ﻝﻳﺻﻭﺗﻟﺍ
:ﻲﻟﺎﺗﻟﺍ ﺏﻳﺗﺭﺗﻟﺎﺑ ﻊﺿﻭﻟﺍ ﺭﻳﻐﺗﻳ ،ﺭﺯﻟﺍ ﻰﻠﻋ ﻁﻐﺿﻟﺍ ﺎﻬﻳﻓ ﻡﺗﻳ ﺓﺭﻣ ﻝﻛ ﻲﻓ .ﺔﻔﻳﻅﻭ ﺭﺯﻟﺍ ﻰﻠﻋ ﻁﻐﺿﺍ ،ﻲﺟﺭﺎﺧ ﺯﺎﻬﺟﻟ ﺢﻳﺣﺻﻟﺍ ﻊﺿﻭﻟﺍ ﺩﻳﺩﺣﺗﻟ
.ﺔﻳﻟﺯﻧﻣﻟﺍ ﺎﻣﻧﻳﺳﻟﺎﺑ ﺔﻳﺟﺭﺎﺧﻟﺍ ﺓﺯﻬﺟﻷﺍ ﻝﻳﺻﻭﺗﻟ ﻥﻳﺗﻘﻳﺭﻁﻟ ﺡﺭﺷ ﻲﻠﻳ ﺎﻣﻳﻓ
ﻥﻭﻛﻣﻟﺍ ﻲﻓ AUDIO Out ﺕﻭﺻﻟﺍ ﺝﺭﺧﻣ ﺱﺑﺎﻘﺑ ﺞﺗﻧﻣﻟﺍ ﻲﻓ AUDIO In ﺕﻭﺻﻟﺍ
ﻝﺧﺩ ﺱﺑﺎﻗ ﻝﻳﺻﻭﺗﺑ ﻡﻗ ،(ﻕﻓﺭﻣ ﺭﻳﻏ) RCA ﺕﻭﺻ ﻝﺑﻛ ﻡﺍﺩﺧﺗﺳﺎﺑ
.(ﺭﻳﻔﺷﺗﻟﺍ ﻙﻓ ﺓﺯﻬﺟﺃ) ﺔﻳﻋﺎﻧﺻﻟﺍ ﺭﺎﻣﻗﻷﺍ ﻝﺎﺑﻘﺗﺳﺍ ﺓﺯﻬﺟﺃﻭ ﻝﺑﻛﻟﺍ ﻕﻳﺩﺎﻧﺻ ﻝﺛﻣ ،ﺔﻳﻣﻗﺭﻟﺍ ﺓﺭﺎﺷﻹﺍ ﺕﺎﻧﻭﻛﻣﺑ ﺹﺎﺧﻟﺍ ﻲﻣﻗﺭﻟﺍ ﺕﻭﺻﻟﺍ ﺝﺭﺧﻣ ﻝﻳﺻﻭﺗﻟ
ﻲﻣﻗﺭﻟﺍ ﺯﺎﻬﺟﻟﺍ ﻲﻓ ﻱﺭﺻﺑﻟﺍ ﻲﻣﻗﺭﻟﺍ ﺝﺭﺧﻣﻟﺍ ﺱﺑﺎﻘﺑ ﺞﺗﻧﻣﻟﺍ ﻲﻓ ﻱﺭﺻﺑﻟﺍ ﻲﻣﻗﺭﻟﺍ ﺕﻭﺻﻟﺍ ﻝﺧﺩ ﺱﺑﺎﻗ ﻝﻳﺻﻭﺗﺑ ﻡﻗ ،(ﻕﻓﺭﻣ ﺭﻳﻏ) ﻲﻣﻗﺭ ﻱﺭﺻﺑ ﻝﺑﻛ ﻡﺍﺩﺧﺗﺳﺎﺑ
.D. IN ﻊﺿﻭﻟﺍ ﺩﺩﺣ .ﻲﻣﻗﺭ ﻱﺭﺻﺑ ﻝﺑﻛ ﻡﺍﺩﺧﺗﺳﺎﺑ ﻲﺟﺭﺎﺧﻟﺍ
.ﻙﻳﺩﻟ ﺯﺎﻔﻠﺗﻟﺎﺑ ﺓﺭﺷﺎﺑﻣ ﻪﺑ ﺩﻭﺟﻭﻣﻟﺍ ﻭﻳﺩﻳﻔﻟﺍ ﺝﺭﺧﻣ ﻝﻳﺻﻭﺗ ﻙﻳﻠﻋ ﺏﺟﻳ ،ﺔﻳﻋﺎﻧﺻ ﺭﺎﻣﻗﺃ ﻝﺎﺑﻘﺗﺳﺍ ﺯﺎﻬﺟ/ﻝﺑﻛ ﻕﻭﺩﻧﺻ ﻥﻣ ﻭﻳﺩﻳﻓ ﺓﺩﻫﺎﺷﻣﻟ
.ﺔﻳﺟﺭﺎﺧﻟﺍ ﺔﻳﻣﻗﺭﻟﺍ ﺕﺎﻧﻭﻛﻣﻟﺍ ﻥﻣ ﻰﻠﻋﺃ ﻭﺃ ﺯﺗﺭﻩ ﻭﻠﻳﻛ ۳۲ ﺔﻐﻟﺎﺑﻟﺍ ﺔﻳﻣﻗﺭﻟﺍ ﺕﺎﻧﻳﻌﻟﺍ ﺕﺍﺩﺩﺭﺗ ﻡﺎﻅﻧﻟﺍ ﺍﺫﻫ ﻡﻋﺩﻳ
.ﻡﻭﻋﺩﻣ ﺭﻳﻏ ،ﺕﺑ ﻕﻓﺩﺗ ﻕﻳﺳﻧﺗ ،MPEG ﺕﻭﺻ .DTSﻭ Dolby Digital ﺕﻭﺻ ﻯﻭﺳ ﻡﺎﻅﻧﻟﺍ ﺍﺫﻫ ﻡﻋﺩﻳ ﻻ
|
١٥ ﺔﻳﺑﺭﻌﻟﺍ
FM AUX D. IN BD/DVD
ﻲﺟﺭﺎﺧ ﻱﺭﻅﺎﻧﺗ ﻥﻭﻛﻣ ﻝﻳﺻﻭﺗ :AUX IN ۱ ﺔﻘﻳﺭﻁﻟﺍ
.AUX ﻊﺿﻭﻟﺍ ﺩﺩﺣ .ﻲﺟﺭﺎﺧﻟﺍ ﻱﺭﻅﺎﻧﺗﻟﺍ
ﻲﺟﺭﺎﺧ ﻲﻣﻗﺭ ﺕﻭﺻ ﻥﻭﻛﻣ ﻝﻳﺻﻭﺗ :ﻱﺭﺻﺑ ۲ ﺓﻕﻳﺭﻁﻟﺍ
ﺔﻅﺣﻼﻣ |
|
•.ﺝﺭﺧﻟﺍﻭ ﻝﺧﺩﻟﺍ ﺱﺑﺍﻭﻗ ﻲﻓ ﺓﺩﻭﺟﻭﻣﻟﺍ ﻥﺍﻭﻟﻷﺍ ﻊﻣ ﻝﺑﻛﻟﺍ ﺱﺑﺎﻘﻣ ﻲﻓ ﺓﺩﻭﺟﻭﻣﻟﺍ ﻥﺍﻭﻟﻷﺍ ﺔﻘﺑﺎﻁﻣ ﻥﻣ ﺩﻛﺄﺗ
◄
◄
◄
Page 52

ﺕﺍﺩﺍﺩﻋﻹﺍ
ﻹ
ﻲ ﺞ
ﺕﺍﺩﺍﺩﻋﻹﺍ
ﺔﻳﺳﺎﻳﻘﻟﺍ ﺔﺷﺎﺷﻟﺍ ﺕﺍﺫ ﺔﻳﺭﻅﺎﻧﺗﻟﺍ ﺯﺎﻔﻠﺗﻟﺍ ﺓﺯﻬﺟﻷ - ﺔﻳﺿﺭﻋ ﺔﺷﺎﺷ 4:3
ﻲﻓ 16:9 ﺭﻭﺻﻭ ﺔﻠﻣﺎﻛ ﺔﺷﺎﺷ ﻲﻓ 4:3 ﺭﻭﺻ ﺽﺭﻌﻟ .ﺔﻣﻳﺩﻘﻟﺍ
16:9 ﻉﺎﻔﺗﺭﻻﺍ ﻰﻟﺇ ﺽﺭﻌﻟﺍ ﺔﺑﺳﻧﺑ ﻅﻔﺗﺣﻳ ﺔﻳﺿﺭﻋ ﺔﺷﺎﺷ ﻕﻳﺳﻧﺗ
.ﺎﻬﻠﻔﺳﺃﻭ ﺓﺭﻭﺻﻟﺍ ﻕﻭﻓ ءﺍﺩﻭﺳ ﺔﻁﺭﺷﺃ ﻊﺿﻳ ﻥﻛﻟﻭ
ﺔﻳﺳﺎﻳﻘﻟﺍ ﺔﺷﺎﺷﻟﺍ ﺕﺍﺫ ﺔﻳﺭﻅﺎﻧﺗﻟﺍ ﺯﺎﻔﻠﺗﻟﺍ ﺓﺯﻬﺟﻷ - ﺔﻳﺩﺎﻋ
ﺔﺷﺎﺷ 4:3
ﻕﻳﺳﻧﺗﺑ 16:9 ﺭﻭﺻﻭ ﺔﻠﻣﺎﻛ ﺔﺷﺎﺷ ﻲﻓ 4:3 ﺭﻭﺻ ﺽﺭﻌﻟ .ﺔﻣﻳﺩﻘﻟﺍ
ﺹﺗﻘﻳ ﻪﻧﻛﻟﻭ ،ﺔﺷﺎﺷﻟﺍ ﻸﻣﻳ ﻱﺫﻟﺍ Pan-Scan ﺔﻳﺩﺎﻌﻟﺍ ﺔﺷﺎﺷﻟﺍ
.ﺎًﻳﺩﻭﻣﻋ ﻁﺳﻭﻟﺍ ﺭﻳﺑﻛﺗﺑ ﻡﻭﻘﻳﻭ ﺔﺷﺎﺷﻟﺍ ﻥﻣ ﻯﺭﺳﻳﻟﺍﻭ ﻰﻧﻣﻳﻟﺍ ﺏﻧﺍﻭﺟﻟﺍ
.(ﺔﻳﻛﻠﺳ - ﺔﻛﺑﺷﻟﺍ) Network – Wired ﺔﺷﺎﺷ ﺭﻬﻅﺗ
ﺹﺎﺧﺷﻷﺍ ﻡﻅﻌﻣﻭ – ﻲﻛﻳﻣﺎﻧﻳﺩ IP ﻥﺍﻭﻧﻋ ﺎﻬﺑ ﺔﻛﺑﺷ ﻙﻳﺩﻟ ﺕﻧﺎﻛ ﺍﺫﺇ -
Enter ﺭﺯﻟﺍ ﻰﻠﻋ ﻁﻐﺿﺍﻭ (ﻲﺋﺎﻘﻠﺗ) Auto ﺩﺩﺣﻓ – ﻙﻟﺫﻛ
.6 ﺓﻭﻁﺧﻟﺍ ﻰﻟﺇ ﻝﻘﺗﻧﺍ ﻡﺛ ،E (ﻝﺎﺧﺩﺇ)
Skip ﺩﺩﺣﺗ ﻥﺃ ﺡﺭﺗﻘﻧﻓ ،ﺔﺗﺑﺎﺛ IP ﻥﻳﻭﺎﻧﻋ ﺎﻬﺑ ﺔﻛﺑﺷ ﻙﻳﺩﻟ ﺕﻧﺎﻛ ﺍﺫﺇ -
ﻝﻘﺗﻧﺍ ﻡﺛ ،(D) (ﻕﺭﺯﺃ) BLUE ﺭﺯﻟﺍ ﻰﻠﻋ ﻁﻐﺿﻟﺎﺑ (ﻲﻁﺧﺗ)
.ﻲﻟﻭﻷﺍ ﺩﺍﺩﻋﻹﺍ ﻡﺎﻣﺗﺇ ﺩﻌﺑ 20 ﺔﺣﻔﺻ "ﺔﻛﺑﺷﻟﺍ ﻝﺎﺻﺗﺍ ﺔﺋﻳﻬﺗ" ﻰﻟﺇ
ﻝﺎﺻﺗﺍ ﺔﺋﻳﻬﺗ ﺔﻳﻔﻳﻛﻟ ًﻼﻣﺎﻛ ﺎًﺣﺭﺷ "ﺔﻛﺑﺷﻟﺍ ﻝﺎﺻﺗﺍ ﺔﺋﻳﻬﺗ" ﺭﻓﻭﺗ
.ﺎًﻳﻭﺩﻳ ﺔﻛﺑﺷﻟﺍ
ﻰﻠﻋ ﻁﻐﺿﻟﺎﺑ (ﻲﻁﺧﺗ) Skip ﺩﺩﺣﻓ ،ﺔﻛﺑﺷ ﻙﻳﺩﻟ ﻥﻛﺗ ﻡﻟ ﺍﺫﺇ -
Initial Settings ﺔﺷﺎﺷ ﺭﻬﻅﺗ .(D) (ﻕﺭﺯﺃ) BLUE ﺭﺯﻟﺍ
ﺔﺷﺎﺷﻟﺍ ﺭﻬﻅﺗ ﻡﺛ ،(ﺔﻳﻟﻭﻷﺍ ﺕﺍﺩﺍﺩﻋﻹﺍ ﺕﻠﻣﺗﻛﺍ) Complete
.ﺔﻳﺳﻳﺋﺭﻟﺍ
|
،ﺢﻳﺣﺻ ﻝﻛﺷﺑ ﺩﺍﺩﻋﻹﺍ ﻝﻣﻌﻳ ﻡﻟ ﻭﺃ ﺎﻧﻫ ﺔﻛﺑﺷﻟﺍ ﺩﺍﺩﻋﺇ ﻲﻁﺧﺗ ﻡﺗ ﺍﺫﺇ
ﻝﺎﺻﺗﺍ ﺩﺍﺩﻋﻹ 20 ﺔﺣﻔﺻ "ﺔﻛﺑﺷﻟﺍ ﻝﺎﺻﺗﺍ ﺔﺋﻳﻬﺗ" ﻰﻟﺇ ﻝﺎﻘﺗﻧﻻﺍ ﻙﻧﻛﻣﻳﻓ
.ﻕﺣﻻ ﺕﻗﻭ ﻲﻓ ﺞﺗﻧﻣﻟﺎﺑ ﺔﻛﺑﺷﻟﺍ
Initial Settings I Network - Wired
Choose the method to configure Internet Protocol (IP).
Please make sure that the Ethernet cable is connected.
Auto : Configure IP automatically.
Manual
Auto
ﺔﻅﺣﻼﻣ |
ﺔﻳﻟﻭﻷﺍ ﺕﺍﺩﺍﺩﻋﻹﺍ ءﺍﺭﺟﺇ
.ﺔﻳﻟﻭﻷﺍ ﺕﺍﺩﺍﺩﻋﻹﺍ ﺔﺋﻳﻬﺗ ﻡﺩﻋ ﺔﻟﺎﺣ ﻲﻓ ﺔﻳﺳﻳﺋﺭﻟﺍ ﺔﻣﺋﺎﻘﻟﺍ ﺭﻬﻅﺗ ﻥﻟ
ﺙﻳﺩﺣﺗ ﺩﻌﺑ ﺞﺗﻧﻣﻟﺍ ﺍﺫﻫ ﻲﻓ (OSD) ﺔﺷﺎﺷﻟﺍ ﻰﻠﻋ ﺽﺭﻌﻟﺍ ﺭﻳﻐﺗﻳ ﺩﻗ
ً
.ﺎﻫﺩﻳﺩﺣﺗﺑ ﺕﻣﻗ ﻲﺗﻟﺍ ﺔﻣﺋﺎﻘﻠﻟ ﺎ
٥ .
ﻝﻳﻐﺷﺗﺑ ﻡﻗ ﻡﺛ ،ﺞﺗﻧﻣﻟﺍ ﻝﻳﺻﻭﺗ ﺩﻌﺑ ﻙﺑ ﺹﺎﺧﻟﺍ ﺯﺎﻔﻠﺗﻟﺍ ﻝﻳﻐﺷﺗﺑ ﻡﻗ
ﺽﺭﻌﺑ ﺎًﻳﺋﺎﻘﻠﺗ ﺞﺗﻧﻣﻟﺍ ﻡﻭﻘﻳﺳﻓ ،ﺓﺭﻣ ﻝﻭﻷ ﺞﺗﻧﻣﻟﺍ ﻝﻳﻐﺷﺗ ﺩﻧﻋ .ﺞﺗﻧﻣﻟﺍ
Initial Settings I On-Screen Language
Select a language for the on-screen displays.
English
Français
Deutsch
Español
Italiano
Nederlands
◄
ﺔﻐﻠﻟﺍ ﺩﻳﺩﺣﺗﻟ ﺩﻌﺑ ﻥﻋ ﻡﻛﺣﺗﻟﺍ ﺓﺩﺣﻭﺑ ﺓﺩﻭﺟﻭﻣﻟﺍ ▼▲ ﺭﺍﺭﺯﻷﺍ ﻡﺩﺧﺗﺳﺍ
.ﻥﻳﺗﺭﻣ E ﺭﺯﻟﺍ ﻰﻠﻋ ﻁﻐﺿﺍ ﻡﺛ ،ﺔﺑﻭﻠﻁﻣﻟﺍ
Initial Settings
TV Aspect and Network will be set.
Each setting may be changed later under "Settings".
ﻘﻓﻭ ﻝﻭﺻﻭﻟﺍ ﺕﺍﻭﻁﺧ ﻑﻠﺗﺧﺗ ﺩﻗ
.ﺔﻳﻟﻭﻷﺍ ﺕﺍﺩﺍﺩﻋﻹﺍ ﺔﻐﻟ ﺔﺷﺎﺷ
>
.ﺩﺍﺩﻋﻹﺍ ءﺩﺑﻟ E ﺭﺯﻟﺍ ﻰﻠﻋ ﻁﻐﺿﺍ
Start
.ﺞﻣﺍﺭﺑﻟﺍ ﺭﺍﺩﺻﺇ
Move "
•
•
•
١ .
Select
٢ .
٣ .
a Previous d Skip
< Move "
ﻥﻣ ءﺎﻬﺗﻧﻻﺍ ﺩﻧﻋ .ﺔﻛﺑﺷﻟﺎﺑ ﻝﺻﺗﻳ ﻡﺛ ﺔﻛﺑﺷﻟﺍ ﻝﺎﺻﺗﺍ ﻥﻣ ﺞﺗﻧﻣﻟﺍ ﻕﻘﺣﺗﻳ
.E ﺭﺯﻟﺍ ﻰﻠﻋ ﻁﻐﺿﺍ ،ﻙﻟﺫ
ﺕﺍﺩﺍﺩﻋﻹﺍ ﺕﻠﻣﺗﻛﺍ) Initial Settings Complete ﺔﺷﺎﺷ ﺭﻬﻅﺗ
.ﺔﻳﺳﻳﺋﺭﻟﺍ ﺔﺷﺎﺷﻟﺍ ﺭﻬﻅﺗ ﻡﺛ ،(ﺔﻳﻟﻭﻷﺍ
Select
٦ .
a Previous
ﻥﻳﺭﺯﻟﺍ ﻰﻠﻋ ﻁﻐﺿﺍ .(ﻥﻭﻳﺯﻔﻠﺗﻟﺍ ﺏﺳﻧ) TV Aspect ﺔﺷﺎﺷ ﺭﻬﻅﺗ
ﻰﻠﻋ ﻁﻐﺿﺍ ﻡﺛ ﻥﻭﻳﺯﻔﻠﺗﻠﻟ ﻉﺎﻔﺗﺭﻻﺍ ﻰﻟﺇ ﺽﺭﻌﻟﺍ ﺔﺑﺳﻧ ﺩﻳﺩﺣﺗﻟ ▼▲
.E ﺭﺯﻟﺍ
ﺭﻭﺻ ﺽﺭﻌﻟ .ﺔﺷﺎﺷﻟﺍ ﺔﺿﻳﺭﻋ ﺯﺎﻔﻠﺗﻟﺍ ﺓﺯﻬﺟﻷ - ﻲﻠﺻﺃ 16:9
ﻕﻳﺳﻧﺗﻟﺍ) 4:3 ﺭﻭﺻﻭ 16:9 ﻲﻠﺻﻷﺍ ﺎﻬﻘﻳﺳﻧﺗﺑ ﺔﺿﻳﺭﻋ ﺔﺷﺎﺷ
ﻰﻠﻋ ءﺍﺩﻭﺳ ﺔﻁﺭﺷﺄﺑ 4:3 ﻡﺋﺎﻗ ﻊﺑﺭﻣ ﻕﻳﺳﻧﺗ ﻲﻓ (ﻡﻳﺩﻘﻟﺍ ،ﻲﺳﺎﻳﻘﻟﺍ
ﺔﺷﺎﺷ ﺭﻭﺻ ﺽﺭﻌﻟ .ﺔﺷﺎﺷﻟﺍ
ﺔﺿﻳﺭﻋ ﺯﺎﻔﻠﺗﻟﺍ ﺓﺯﻬﺟﻷ - ﻝﻣﺎﻛ 16:9
ﺔﺷﺎﺷﻟﺍ ءﻝﻣﻟ 4:3 ﺭﻭﺻ ﺭﻳﺑﻛﺗﻭ 16:9 ﻲﻠﺻﻷﺍ ﺎﻬﻘﻳﺳﻧﺗﺑ ﺔﺿﻳﺭﻋ
" Select
:ﺕﺍﺭﺎﻳﺧ ﺔﻌﺑﺭﺃ ﻙﻳﺩﻟ
.ﻥﻳﻣﻳﻟﺍﻭ ﺭﺎﺳﻳﻟﺍ
.16:9
ﺔﻳﺑﺭﻌﻟﺍ ١٦
٤ .
|
Page 53

ﻡﺍﺩﺧﺗﺳﺎﺑ ﺭﺷﺅﻣﻟﺍ ﻙﻳﺭﺣﺗﺑ ﻡﻗ ،ﺔﻳﺳﻳﺋﺭﻟﺍ ﺔﺷﺎﺷﻟﺍ ﻲﻓ ﺭﺎﻳﺧ ﺩﻳﺩﺣﺗﻟ
TOOLS
RETURN
EXIT
INFO
SUBTITLE HOME REPEAT
ﻁﻐﺿﺍ ﻡﺛ ،ﻩﺩﻳﺭﺗ ﻱﺫﻟﺍ ﺭﺎﻳﺧﻟﺍ ﺯﻳﻳﻣﺗ ﻡﺗﻳ ﻥﺃ ﻰﻟﺇ ◄►▼▲ ﻥﻳﺭﺯﻟﺍ
۰٤ﺕﺍﺩﺍﺩﻋﻹﺍ
ﺭﺗﻭﻳﺑﻣﻛﻟﺍ ﻰﻠﻋ ﺓﺩﻭﺟﻭﻣﻟﺍ ﺭﻭﺻﻟﺍ ﻭﺃ ﻰﻘﻳﺳﻭﻣﻟﺍ ﻭﺃ ﻭﻳﺩﻳﻔﻟﺍ ﺕﺎﻔﻠﻣ ﻝﻳﻐﺷﺗﻟ
ﺔﻛﺑﺷﻟﺎﺑ ﺭﺗﻭﻳﺑﻣﻛﻟﺍﻭ ﻲﻟﺯﻧﻣﻟﺍ ﺡﺭﺳﻣﻟﺍ ﻡﺎﻅﻧ ﻝﻳﺻﻭﺗ ﺏﺟﻳ ،ﺎﻬﺿﺭﻋ ﻭﺃ
.ﺭﺗﻭﻳﺑﻣﻛﻟﺍ ﻰﻠﻋ ﻪﺗﺋﻳﻬﺗﻭ ﻪﺗﻳﺑﺛﺗﻭ DLNA ﺞﻣﺎﻧﺭﺑ ﻝﻳﺯﻧﺗ ﺏﺟﻳﻭ ﺔﻳﻟﺯﻧﻣﻟﺍ
ﺕﺍﺩﺍﺩﻋﻹﺍ ﺔﺷﺎﺷ ﻰﻟﺇ ﻝﻭﺻﻭﻟﺍ
.E ﺭﺯﻟﺍ ﻰﻠﻋ ﻁﻐﺿﺍ ﻡﺛ ،ﺔﻳﺳﻳﺋﺭﻟﺍ ﺔﺷﺎﺷﻟﺍ ﻲﻓ ﺕﺍﺩﺍﺩﻋﻹﺍ ﺩﺩﺣ
Settings
Display 3D Settings
Audio TV Aspect Ratio : 16:9 Original
Network
System Resolution : Auto
Language
Security HDMI Color Format : Auto
General HDMI Deep Color : Off
Support Progressive Mode : Auto
.(ﺕﺍﺩﺍﺩﻋﻹﺍ) Settings ﺔﺷﺎﺷ ﺭﻬﻅﺗ
BD Wise : Off
Movie Frame (24 Fs) : Off
.E ﺭﺯﻟﺍ ﻰﻠﻋ
ﺔﻅﺣﻼﻣ |
|
(23 ﺔﺣﻔﺻﻟﺍ ﺭﻅﻧﺍ)
►
١ .
◄
Initial Settings I Network - Wired
MAC Address (d0:66:7b:dc:28:fc)
IP Address, Subnet Mask, Gateway, DNS Server
Gateway Ping
Internet Service Test
Your network is operating properly.
If you still have a network problem, contact your network service provider.
OK
١ .
ءﺍﺭﺟﺇﻭ ﻯﺭﺧﺃ ﺓﺭﻣ ﻲﻟﻭﻷﺍ ﺩﺍﺩﻋﻹﺍ ﺔﺷﺎﺷ ﺽﺭﻋ ﻲﻓ ﺏﻏﺭﺗ ﺕﻧﻛ ﺍﺫﺇ
(20 ﺔﺣﻔﺻﻟﺍ ﺭﻅﻧﺍ) ."ﻁﺑﺿﻟﺍ ﺓﺩﺎﻋﺇ" ﺭﺎﻳﺧﻟﺍ ﺩﺩﺣﻓ ،ﺕﺍﺭﻳﻳﻐﺗﻟﺍ
Samsung ﺯﺎﻔﻠﺗﺑ ﺞﺗﻧﻣﻟﺍ ﻝﻳﺻﻭﺗﻟ HDMI ﻝﺑﻛ ﻡﺩﺧﺗﺳﺗ ﺕﻧﻛ ﺍﺫﺇ
ﺓﺯﻳﻣ ﺩﺍﺩﻋﺈﺑ ﺕﻣﻗ (.۱ﻭ Anynet+(HDMI-CEC) ﻊﻣ ﻕﻓﺍﻭﺗﻣ
(.۲ﻭ ﺞﺗﻧﻣﻟﺍﻭ ﺯﺎﻔﻠﺗﻟﺍ ﻲﻓ ﻝﻳﻐﺷﺗ ﻰﻠﻋ Anynet+(HDMI-CEC)
ﺞﺗﻧﻣﻟﺍ ﻡﻭﻘﻳﺳﻓ ،ﺞﺗﻧﻣﻟﺍ ﻝﺑﻗ ﻥﻣ ﺔﻣﻭﻋﺩﻣ ﺔﻐﻟ ﻰﻠﻋ ﺯﺎﻔﻠﺗﻟﺍ ﺩﺍﺩﻋﺈﺑ ﺕﻣﻗ
ً
.ﺎ
ﻳﺋﺎﻘﻠﺗ ﺔﻠﺿﻔﻣﻟﺍ ﺔﻐﻠﻟﺍ ﻲﻫ ﻥﻭﻛﺗ ﺙﻳﺣﺑ ﺔﻐﻠﻟﺍ ﻩﺫﻫ ﺩﻳﺩﺣﺗﺑ
" Select
| ﺔﻅﺣﻼﻣ |
◄
◄
ﺔﻳﺳﻳﺋﺭﻟﺍ ﺔﺷﺎﺷﻟﺍ
ﺔﻳﻋﺭﻔﻟﺍ ﺎﻬﻣﺋﺍﻭﻗﻭ (ﺕﺍﺩﺍﺩﻋﻹﺍ) Settings ﺔﻣﺋﺎﻗ ﻰﻟﺇ ﻝﻭﺻﻭﻠﻟ
.ﻩﺎﻧﺩﺃ ﺩﻌﺑ ﻥﻋ ﻡﻛﺣﺗﻟﺎﺑ ﺹﺎﺧﻟﺍ ﻝﻛﺷﻟﺍ ﻰﻟﺇ ﻉﻭﺟﺭﻟﺍ ﻰﺟﺭﻳ ،ﺎﻬﺗﺍﺭﺎﻳﺧﻭ
،ﻡﺍﺩﺧﺗﺳﺍ ﻥﻭﺩﺑ ﻕﺋﺎﻗﺩ ٥ ﻥﻣ ﺭﺛﻛﻷ ﻑﺎﻘﻳﻹﺍ ﻊﺿﻭ ﻲﻓ ﺞﺗﻧﻣﻟﺍ ﺕﻛﺭﺗ ﺍﺫﺇ
ﻊﺿﻭ ﻲﻓ ﺞﺗﻧﻣﻟﺍ ﻙﺭ
ُ
ﺗ ﺍﺫﺇ .ﻙﺑ ﺹﺎﺧﻟﺍ ﺯﺎﻔﻠﺗﻟﺍ ﻰﻠﻋ ﻑﻗﻭﺗ ﺔﺷﺎﺷ ﺭﻬﻅﺗﺳﻓ
.ﺎًﻳﺋﺎﻘﻠﺗ ﻝﻳﻐﺷﺗﻟﺍ ﻑﺎﻘﻳﺇ ﻡﺗﻳﺳﻓ ،ﺔﻘﻳﻗﺩ ۲۰ ﻥﻣ ﺭﺛﻛﻷ ﺔﺗﻗﺅﻣﻟﺍ ﺔﺷﺎﺷﻟﺍ
ﺩﻌﺑ ﻥﻋ ﻡﻛﺣﺗﻟﺍ ﺓﺩﺣﻭ ﻲﻓ ﺓﺩﻭﺟﻭﻣﻟﺍ ﺭﺍﺭﺯﻷﺍ
(ﺕﺍﺩﺍﺩﻋﻹﺍ) Settings ﺔﻣﺋﺎﻘﻟ ﺔﻣﺩﺧﺗﺳﻣﻟﺍﻭ
۱
۲ ٤
.ﺔﻳﺳﻳﺋﺭﻟﺍ ﺔﺷﺎﺷﻟﺍ ﻰﻟﺇ ﻝﺎﻘﺗﻧﻼﻟ ﻪﻳﻠﻋ ﻁﻐﺿﺍ :ﻲﺳﻳﺋﺭ ﺭﺯﻟﺍ
|
١٧ ﺔﻳﺑﺭﻌﻟﺍ
ﺔﻅﺣﻼﻣ |
|
۱
۱
Videos
٢ .
۲
Photos Music Settings
◄
App 1 App 2 App 3 App 4
No Disc a Change Device
d
۳
ﻹﻭﺻﻭﻠﻟﺩﻌُﺑﻧﻌﻣﻛﺣﺗﻟﺍﺯﺎﻬﺟﻳﻓﺎﻬﻣﺍﺩﺧﺗﺳﺎﻧﻛﻣﻳﻳﺗﻟﺍﺭﺍﺭﺯﻷﺎﺿﺭﻌﻳ
View Devices "
.ﺭﻭﺻﻟﺍﺩﺩﺣﻳ
.ﻭﻳﺩﻳﻔﻟﺎﻌﻁﺎﻘﻣﺩﺩﺣﻳ
.ﻰﻘﻳﺳﻭﻣﻟﺍﺩﺩﺣﻳ
.ﺕﺍﺩﺍﺩﻋﻹﺍﺩﺩﺣﻳ
.ﺕﺎﻘﻳﺑﻁﺗﻟﺍﺩﺩﺣﻳ
.ﻑﺋﺎﻅﻭﻟﺎﯩﻟ
Enter
۳
٤
٥
٦
۱
۲
۳
٤
٥
٦
Page 54

ﺕﺍﺩﺍﺩﻋﻹﺍ
ﻝﺎﺻﺗﺍ ﺓﺯﻳﻣ ﺙﺩﺣﺃ ﻲﻫ BD Wise ﺓﺯﻳﻣ
.Samsung ﺔﻛﺭﺷ ﻥﻣ ﻝﺩﺎﺑﺗﻣ
ﻥﻣ ﺯﺎﻔﻠﺗﻭ ﺞﺗﻧﻣ ﻝﻳﺻﻭﺗﺑ ﻡﻭﻘﺗ ﺎﻣﺩﻧﻋ
BD Wise ﺓﺯﻳﻣﺑ ﻥﻳﺩﻭﺯﻣ Samsung
BD ﺓﺯﻳﻣ ﻥﻭﻛﺗﻭ ،HDMI ﺭﺑﻋ ﺎﻣﻬﺿﻌﺑﺑ
ﺞﺗﻧﻣﻟﺍ ﻥﻣ
ﻝﻛ ﻲﻓ ﻝﻳﻐﺷﺗﻟﺍ ﺩﻳﻗ Wise
ﺔﻗﺩﺑ ﻭﻳﺩﻳﻔﻟﺍ ﺝﺍﺭﺧﺈﺑ ﺞﺗﻧﻣﻟﺍ ﻡﻭﻘﻳ ،ﺯﺎﻔﻠﺗﻟﺍﻭ
ﺹﺍﺭﻗﺄﺑ ﻥﻳﺻﺎﺧﻟﺍ ﺕﺍﺭﺎﻁﻹﺍ ﻝﺩﻌﻣﻭ ﻭﻳﺩﻳﻔﻟﺍ
ﺓﺭﺎﺷﺈﺑ ﺔﺻﺎﺧﻟﺍ ﺕﺎﺟﺭﺧﻣﻟﺍ ﺔﻗﺩ ﻁﺑﺿ ﻙﻟ ﺢﻳﺗﺗ
ﻭﺃ ﻲﺋﺎﻘﻠﺗ
ﻁﻭﻁﺧ ﺩﺩﻋ ﻰﻟﺇ ﻡﻗﺭﻟﺍ ﺭﻳﺷﻳ .576p/480p
ﺔﻐﻠﻟﺎﺑ ﻲﻣﺩﻘﺗﻭ ﻙﺑﺎﺷﺗﻣ ﻲﺗﻣﻠﻛﻟ ﻥﺍﺭﺎﺻﺗﺧﺍ
،ﻁﻭﻁﺧﻟﺍ ﺕﺩﺍﺯ ﺎﻣﻠﻛ .ﻲﻟﺍﻭﺗﻟﺍ ﻰﻠﻋ ،ﺔﻳﺯﻳﻠﺟﻧﻹﺍ
ﻲﻓ ﺍًﺭﺎﻁﺇ ۲٤) "ﻡﻠﻳﻔﻟﺍ ﺕﺍﺭﺎﻁﺇ" ﺓﺯﻳﻣ ﻁﺑﺿ ﻥﺇ
ﻝﻳﺩﻌﺗﺑ ﺞﺗﻧﻣﻠﻟ
ﺍًﺭﺎﻁﺇ ۲٤ ﻰﻠﻋ ﻪﺑ ﺔﺻﺎﺧﻟﺍ HDMI ﺕﺎﺟﺭﺧﻣ
ﺓﺭﻭﺻﻟﺍ ﺓﺩﻭﺟ ﻥﻳﺳﺣﺗﻟ ﻲﺋﺎﻘﻠﺗ ﻝﻛﺷﺑ ﺔﻳﻧﺎﺛﻟﺍ ﻲﻓ
ﺍًﺭﺎﻁﺇ ۲٤ ﻊﻣ ﻕﻓﺍﻭﺗﻣ ﺯﺎﻔﻠﺗﺑ ﺏﻳﻛﺭﺗﻟﺍ ﺔﻟﺎﺣ ﻲﻓ
ﻡﻼﻓﻷﺍ ﺕﺍﺭﺎﻁﺇ ﺓﺯﻳﻣﺑ ﻊﺗﻣﺗﺳﺗ ﻥﺃ ﻙﻧﺎﻛﻣﺈﺑ
ﻡﻋﺩﻳ ﺯﺎﻔﻠﺗ ﻰﻠﻋ (ﺔﻳﻧﺎﺛﻟﺍ ﻲﻓ ﺍًﺭﺎﻁﺇ ۲٤)
ﻥﻭﻛﻳ ﺎﻣﺩﻧﻋ ﻁﻘﻓ ﻡﻼﻓﻷﺍ ﺕﺍﺭﺎﻁﺇ ﺡﺎﺗﺗ
HDMI ﺕﺎﺟﺭﺧﻣ ﺔﻗﺩ ﻉﺎﺿﻭﺃ ﻲﻓ ﺞﺗﻧﻣﻟﺍ
ﺕﺎﺟﺭﺧﻣﻟ ﻥﻭﻠﻟﺍ ﺔﺣﺎﺳﻣ ﻕﻳﺳﻧﺗ ﺩﺍﺩﻋﺇ ﻙﻟ ﺢﻳﺗﻳ
ﺯﺎﻬﺟﻟﺍ ﺕﺎﻳﻧﺎﻛﻣﺇ ﻊﻣ ﻕﻓﺍﻭﺗﻳ ﺎﻣﺑ HDMI
ﻥﻣ ﻭﻳﺩﻳﻔﻟﺍ ﺝﺍﺭﺧﺇ ﻰﻠﻋ ﺞﺗﻧﻣﻟﺍ ﻁﺑﺿ ﻙﻟ ﺢﻳﺗﻳ
ﺢﻣﺳﻳ .ﺔﻘﻣﺎﻏ ﻥﺍﻭﻟﺄﺑ HDMI OUT ﺱﺑﻘﻣ
ﻝﻛﺷﺑ ﻥﺍﻭﻟﻷﺍ ﺝﺎﺗﻧﺇ
ٍ
.Blu-ray Disc/DVD
ﻭﺃ BD Wise ﻰﻠﻋ HDMI ﻭﻳﺩﻳﻓ
ﻭﺃ 720p ﻭﺃ 1080i ﻭﺃ 1080p
ﺎﻣﻬﻓ pﻭ i ﺎﻓﺭﺣ ﺎﻣﺃ .ﺭﺎﻁﺇ ﻝﻛﻟ ﻭﻳﺩﻳﻔﻟﺍ
.ﺓﺩﻭﺟﻟﺍ ﺕﺩﺍﺯ
ﺢﻣﺳﻳ "ﻲﺋﺎﻘﻠﺗ" ﻰﻠﻋ (ﺔﻳﻧﺎﺛﻟﺍ
.ﺔﻳﻧﺎﺛﻟﺍ ﻲﻓ
.ﺏﺳﺣﻓ ﺍﺫﻫ ﺕﺍﺭﺎﻁﻹﺍ ﻝﺩﻌﻣ
.1080p ﻭﺃ 1080i
.(ﻙﻟﺫ ﻰﻟﺇ ﺎﻣﻭ ،ﺔﺷﺎﺷ ،ﺯﺎﻔﻠﺗ) ﻝﺻﻭﻣﻟﺍ
ﺓﺩﺎﻋﺈﺑ ﻕﻳﻣﻌﻟﺍ ﻥﻭﻠﻟﺍ ﻙﻟ
.ﻥﺍﻭﻟﻸﻟ ﺭﺑﻛﺃ ﻕﻣﻌﺑﻭ ﺔﻗﺩ ﺭﺛﻛﺃ
•
•
BD Wise
ﺔﻗﺩﻟﺍ
ﻡﻼﻓﻷﺍ ﺭﺎﻁﺇ
ﻲﻓ ﺍ
ﺭﺎﻁﺇ 24)
ً
(ﺔﻳﻧﺎﺛﻟﺍ
ﻥﺍﻭﻟﺃ ﻕﻳﺳﻧﺗ
HDMI
HDMI ﻥﻭﻟ
ﻕﻣﺎﻐﻟﺍ
.ﺔﻘﺑﺎﺳﻟﺍ ﺔﻣﺋﺎﻘﻠﻟ ﺓﺩﻭﻌﻟﺍ :(') ﺓﺩﻭﻋ ﺭﺯﻟﺍ
:ﻩﺎﺟﺗﻻﺍ / (ﻝﺎﺧﺩﺇ) E ﺭﺯﻟﺍ
.ﺩﺍﺩﻋﺇ ﺩﻳﻛﺄﺗﻟ
.ﺔﻳﻟﺎﺣﻟﺍ ﺔﻣﺋﺎﻘﻟﺍ ﻥﻣ ﺝﻭﺭﺧﻠﻟ ﻁﻐﺿﺍ :ﺝﻭﺭﺧ ﺭﺯﻟﺍ
ﺱﻔﻧﻟ ﺔﻳﻣﺎﻣﻷﺍ ﺞﺗﻧﻣﻟﺍ ﺔﺣﻭﻟ ﻲﻓ ﺩﻭﺟﻭﻣﻟﺍ E ﺭﺯﻟﺍ ﻡﺍﺩﺧﺗﺳﺍ ﻥﻛﻣﻳ
.ﺩﻌﺑ ﻥﻋ ﻡﻛﺣﺗﻟﺍ ﺓﺩﺣﻭ ﻲﻓ ﺩﻭﺟﻭﻣﻟﺍ E ﺭﺯﻟﺍ ﺽﺭﻏ
ﺔﻔﻳﻅﻭﻠﻟ ﺔﻳﻠﻳﺻﻔﺗﻟﺍ ﺕﺎﻣﻭﻠﻌﻣﻟﺍ
ﺭﺍﺭﺯﻷﺍ ﻡﺩﺧﺗﺳﺍ ،ﺡﺭﺷﻟﺍ ﺽﺭﻌﻟ .ﺔﺷﺎﺷﻟﺍ ﻝﻔﺳﺃ
.ﺭﺎﻳﺧﻟﺍ ﻭﺃ ﺔﻣﺋﺎﻘﻟﺍ ﺭﺻﻧﻋ ﻭﺃ ﺔﻔﻳﻅﻭﻟﺍ ﺩﻳﺩﺣﺗﻟ ◄►▼▲
ﻥﻣ ﺔﻔﻳﻅﻭ ﻝﻛﻟ ﺍًﺭﻳﺻﻗ ﺎًﻔﺻﻭ ﺭﻬﻅﻳ .ﺔﺷﺎﺷﻟﺍ ﻥﻳﻣﻳ ﻰﻠﻋ ﺎ
ﻝﻭﺣ ﺔﻳﻓﺎﺿﺇ ﺕﺎﻣﻭﻠﻌﻣ ﺭﻬﻅﺗ ﺎﻣﻛ .ﺔﻳﻟﺎﺗﻟﺍ ﺔﺣﻔﺻﻟﺍ ﻲﻓ ﺕﺍﺩﺍﺩﻋﻹﺍ ﻑﺋﺎﻅﻭ
.ﻝﻳﻟﺩﻟﺍ ﺍﺫﻬﺑ ﺹﺎﺧﻟﺍ ﻕﺣﻠﻣﻟﺍ ﻲﻓ ﻑﺋﺎﻅﻭﻟﺍ ﺽﻌﺑ
~ ﺭﺎﻳﺗﺧﻻ ﻭﺃ ﺭﺷﺅﻣﻟﺍ ﻙﻳﺭﺣﺗﻟ ◄►▼▲ ﻰﻠﻋ ﻁﻐﺿﺍ
.ﺭﺻﻧﻋ
~ ﻭﺃ ﺎًﻳﻟﺎﺣ ﺩﺩﺣﻣﻟﺍ ﺭﺻﻧﻌﻟﺍ ﻁﻳﺷﻧﺗﻟ E ﺭﺯﻟﺍ ﻰﻠﻋ ﻁﻐﺿﺍ
|
ﺔﻅﺣﻼﻣ |
ً
ﺓﺩﺎﻋ ﺢﻳﺿﻭﺗﻟﺍ ﺭﻬﻅﻳﺳ
ً
ﺑﻟﺎﻏ ﺡﺭﺷﻟﺍ ﺭﻬﻅﻳﺳ
ﺕﺍﺩﺍﺩﻋﻹﺍ ﺔﻣﺋﺎﻗ ﻑﺋﺎﻅﻭ
ﺽﺭﻋ
.ﺔﻳﺛﻼﺛﻟﺍ ﺩﺎﻌﺑﻷﺎﺑ ﺔﻘﻠﻌﺗﻣﻟﺍ ﻑﺋﺎﻅﻭﻟﺍ ﺩﺍﺩﻋﺇ
:ﺩﺎﻌﺑﻷﺍ ﻲﺛﻼﺛ Blu-ray ﻝﻳﻐﺷﺗ ﻊﺿﻭ
ﺹﺭﻗ ﻝﻳﻐﺷﺗ ﺩﻳﺭﺗ ﺕﻧﻛ ﺍﺫﺇ ﺎﻣ ﺩﺩﺣ
ﺔﻳﺛﻼﺛ ﺕﺎﻳﻭﺗﺣﻣ ﻰﻠﻋ ﻱﻭﺗﺣﻣﻟﺍ Blu-ray
ﺍﺫﺇ .ﻻ ﻡﺃ ﺩﺎﻌﺑﻷﺍ ﻲﺛﻼﺛ ﻊﺿﻭﻟﺍ ﻲﻓ ﺩﺎﻌﺑﻷﺍ
ﺔﻣﺋﺎﻗ ﻭﺃ ﺔﻳﺳﻳﺋﺭﻟﺍ ﺔﺷﺎﺷﻟﺍ ﻰﻟﺇ ﺕﻠﻘﺗﻧﺍ
ﻲﻓ ﺩﺟﺍﻭﺗﻟﺍ ءﺎﻧﺛﺃ ﺔﻳﺳﻳﺋﺭﻟﺍ Smart Hub
ﻰﻟﺇ ﺞﺗﻧﻣﻟﺍ ﻝﻘﺗﻧﻳﺳﻓ ،ﺩﺎﻌﺑﻷﺍ ﻲﺛﻼﺛ ﻊﺿﻭﻟﺍ
.ﻲﺋﺎﻘﻠﺗ ﻝﻛﺷﺑ ﺩﺎﻌﺑﻷﺍ ﻲﺋﺎﻧﺛ ﻊﺿﻭﻟﺍ
ﻕﻓﺭﻣﻟﺍ ﺯﺎﻔﻠﺗﻟﺍ ﻡﺟﺣ ﻝﺧﺩﺃ :ﺔﺷﺎﺷﻟﺍ ﻡﺟﺣ
ﺝﺭﺧﻟﺍ ﻁﺑﺿﺑ ﺎًﻳﺋﺎﻘﻠﺗ ﺞﺗﻧﻣﻟﺍ ﻡﻭﻘﻳﺳ .ﺞﺗﻧﻣﻟﺎﺑ
.ﺯﺎﻔﻠﺗﻟﺍ ﺔﺷﺎﺷ ﻡﺟﺣ ﻰﻠﻋ ﺩﺎﻌﺑﻷﺍ ﻲﺛﻼﺛ
ﺔﻳﺛﻼﺛ ﺕﺍﺩﺍﺩﻋﻹﺍ
ﺩﺎﻌﺑﻷﺍ
۲
۳
٤
◄
ﺓﺩﻫﺎﺷﻣ ﺩﻧﻋ ﺓﺭﻭﺻﻟﺍ ﺓﺩﻭﺟ ﻥﻳﺳﺣﺗ ﻙﻟ ﺢﻳﺗﻳ
.DVD ﺹﺍﺭﻗﺃ
ﺕﻭﺻ
ﺔﻳﻟﺎﺗﻟﺍ ﺕﻭﺻﻟﺍ ﺭﺑﻛﻣ ﺕﺍﺩﺍﺩﻋﺇ ﻝﻳﺩﻌﺗ ﻙﻟ ﺢﻳﺗُﻳ
ﻰﺗﺣ ﺎﻬﻠﻳﻐﺷﺗ ﻑﺎﻘﻳﺇﻭ ﺭﺎﺑﺗﺧﻻﺍ ﺔﻣﻐﻧ ﻝﻳﻐﺷﺗﻭ
.ﺕﻭﺻﻟﺍ ﺕﺍﺭﺑﻛﻣ ﺭﺎﺑﺗﺧﺍ ﻙﻧﻛﻣﻳ
ﺝﺭﺩﺗﻣﻟﺍ ﻊﺿﻭﻟﺍ
ﺔﻋﺎﻣﺳﻟﺍ ﺕﺍﺩﺍﺩﻋﺇ
ﻡﺟﺣ ﺏﺳﺣ ﺞﺗﻧﻣﻟﺍ ﺝﺭﺧﻣ ﻁﺑﺿﺑ ﻙﻟ ﺢﻣﺳﻳ
.۱٦ ﺔﺣﻔﺻﻟﺍ ﺭﻅﻧﺍ .ﻙﺑ ﺹﺎﺧﻟﺍ ﺯﺎﻔﻠﺗﻟﺍ ﺔﺷﺎﺷ
ﻰﻟﺇ ﺽﺭﻋ ﺔﺑﺳﻧ
ﺯﺎﻔﻠﺗﻟﺍ ﻉﺎﻔﺗﺭﺍ
ﺔﻳﺑﺭﻌﻟﺍ ١٨
|
Page 55

ﻙﻟ ﺢﻳﺗﻳ ،ﻲﻣﻗﺭ ﺯﺎﻔﻠﺗﺑ ﺞﺗﻧﻣﻟﺍ ﺏﻳﻛﺭﺗ ﺩﻧﻋ
.ﻭﻳﺩﻳﻔﻟﺍ ﺕﻭﺻﻟﺍ ﻥﻣﺍﺯﻳﻟ ﺕﻭﺻﻟﺍ ﺭﻳﺧﺄﺗ ﻁﺑﺿ
۰٤ﺕﺍﺩﺍﺩﻋﻹﺍ
.ﺔﻳﻧﺎﺛ ﻲﻠﻠﻣ ۳۰۰ﻭ ۰ ﻥﻳﺑ ﺭﻳﺧﺄﺗﻟﺍ ﻁﺑﺿ ﻙﻧﻛﻣﻳ
ﺓﺩﺩﻌﺗﻣﻟﺍ ﺓﺎﻧﻘﻟﺍ ﺭﻳﻐﺻﺗ ﺔﻘﻳﺭﻁ ﺩﻳﺩﺣﺗ ﻙﻟ ﺢﻳﺗﻳ
ﺹﺎﺧﻟﺍ ﻭﻳﺭﺗﺳﻻﺍ ﻡﺎﻅﻧ ﻊﻣ ﻕﻓﺍﻭﺗﺗ ﻲﺗﻟﺍ
ﺭﻐﺻﻣ ﻝﻛﺷﺑ ﺞﺗﻧﻣﻟﺍ ﺝﺯﻣ ﺭﺎﻳﺗﺧﺍ ﻙﻧﻛﻣﻳ.ﻙﺑ
.ﺞﻣﺩﻣ ﻭﻳﺭﺗﺳﺎﺑ ﺔﻁﺎﺣﻹﺍ ﻭﺃ ﻱﺩﺎﻋ
ﻝﻭﺣ ﺕﺎﻣﻭﻠﻌﻣﻟﺍ ﻥﻣ ﺩﻳﺯﻣ ﻰﻠﻋ ﻝﻭﺻﺣﻠﻟ
ءﺩﺑ ﺭﻅﻧﺍ ،ﺔﻛﺑﺷﻟﺍ ﻑﺋﺎﻅﻭﻭ ﺔﻛﺑﺷﻟﺍ ﺕﺍﺩﺍﺩﻋﺇ
.20 ﺔﺣﻔﺻﻟﺍ ﻲﻓ "ﺕﻧﺭﺗﻧﻹﺍﻭ ﺕﺎﻛﺑﺷﻟﺍ"
Internet Protocol ﺩﺍﺩﻋﺇ ﺭﺎﺑﺗﺧﺍ ﻙﻟ ﺢﻳﺗﻳ
ﻝﻣﻌﻳ ﻥﺎﻛ ﺍﺫﺇ ﺎﻣ ﺔﻓﺭﻌﻣﻟ (ﺕﻧﺭﺗﻧﻹﺍ ﻝﻭﻛﻭﺗﻭﺭﺑ)
ﻝﺎﺻﺗﺍ ﻙﺎﻧﻫ ﻥﺎﻛ ﺍﺫﺇ ﺎﻣﻣ ﻕﻘﺣﺗﻟﺍ ﻙﻟ ﺢﻳﺗﻳ
.ﺕﻧﺭﺗﻧﻹﺎﺑ ﻝﺎﺻﺗﻻﺍ ءﺍﺭﺟﺇ ﻡﺗ ﻪﻧﺃﻭ ﺔﻛﺑﺷﻟﺎﺑ
ﺔﻣﺩﺧﻟ ﺕﻧﺭﺗﻧﺇ ﻝﺎﺻﺗﺍ ءﺍﺭﺟﺈﺑ ﺡﺎﻣﺳﻟﺍ ﻙﻟ ﺢﻳﺗﻳ
.ﺔﻳﻟﻭﻷﺍ ﺕﺍﺩﺍﺩﻋﻹﺍ ﺕﺍءﺍﺭﺟﺇ ﻝﻳﻐﺷﺗﺑ ﻙﻟ ﺢﻣﺳﻳ
.16 ﺔﺣﻔﺻﻟﺍ ﺭﻅﻧﺍ ،ﻝﻳﺻﺎﻔﺗﻟﺍ ﻰﻠﻋ ﻝﻭﺻﺣﻠﻟ
ﺔﻣﺋﻼﻣ ﺔﻔﻳﻅﻭ ﻲﻫ +Anynet ﺔﻳﺻﺎﺧ
ﺕﺎﺟﺗﻧﻣﺑ ﺔﻁﺑﺗﺭﻣ ﻝﻳﻐﺷﺗ ﺕﺎﻳﻠﻣﻋ ﺽﺭﻌﺗ
ﺓﺯﻳﻣ ﻰﻠﻋ ﻱﻭﺗﺣﺗ ﻲﺗﻟﺍ ﻯﺭﺧﻷﺍ Samsung
ﻩﺫﻫ ﻲﻓ ﻡﻛﺣﺗﻟﺍ ﻙﻟ ﺢﻳﺗﺗﻭ +Anynet
ﺓﺩﺣﺍﻭ ﺩﻌﺑ ﻥﻋ ﻡﻛﺣﺗ ﺓﺩﺣﻭ ﻝﻼﺧ ﻥﻣ ﺕﺎﺟﺗﻧﻣﻟﺍ
ﻩﺫﻫ ﻝﻳﻐﺷﺗﻟﻭ .Samsung ﺯﺎﻔﻠﺗﺑ ﺔﺻﺎﺧ
ﺯﺎﻔﻠﺗ ﺯﺎﻬﺟﺑ ﺞﺗﻧﻣﻟﺍ ﺍﺫﻫ ﻝﻳﺻﻭﺗ
ﻝﺑﻛ ﻡﺍﺩﺧﺗﺳﺎﺑ Anynet+ Samsung
ﺎﻬﻠﻳﺯﻧﺗﺑ ﺕﻣﻗ ﻲﺗﻟﺍ ﺕﺎﻳﻭﺗﺣﻣﻟﺍ ﺓﺭﺍﺩﺇ ﻙﻟ ﺢﻳﺗﻳ
ﺔﻣﺩﺧ ﻡﻋﺩﻳ ﻱﺫﻟﺍ Bluray ﺹﺭﻗ ﻝﻼﺧ ﻥﻣ
ﻝﻭﺣ ﺕﺎﻣﻭﻠﻌﻣ ﺽﺭﻋ ﻙﻧﻛﻣﻳ .BD-Live
ﺕﺎﻧﺎﻳﺑ ﻥﻳﺯﺧﺗﻟ ﻪﻣﺩﺧﺗﺳﺗ ﻱﺫﻟﺍ USB ﺯﺎﻬﺟ
.ﻥﻳﺯﺧﺗﻟﺍ ﺔﺣﺎﺳﻣ ﻙﻟﺫ ﻲﻓ ﺎﻣﺑ BD Live
ﺭﻳﻳﻐﺗﻭ BD Live ﺕﺎﻧﺎﻳﺑ ﻑﺫﺣ ﺎًﺿﻳﺃ ﻙﻧﻛﻣﻳ
|
١٩ ﺔﻳﺑﺭﻌﻟﺍ
ﻭﻳﺭﺗﺳﺍ ﻰﻟﺇ
ﺔﻛﺑﺷﻟﺍ
.ﺢﻳﺣﺻ ﻝﻛﺷﺑ
.ﻩﺭﻅﺣ ﻭﺃ BDLive
ﻡﺎﻅﻧﻟﺍ
ﺏﺟﻳ ،ﺔﻔﻳﻅﻭﻟﺍ
.HDMI
.ﺯﺎﻬﺟﻟﺍ
ﺔﻳﺗﻭﺻ ﺔﻧﻣﺍﺯﻣ
ﻊﺿﻭ
Downmixing
(ﻱﺭﻳﻐﺻﺗﻟﺎﺟﺯﻣﻟﺍ)
ﺔﻛﺑﺷﻟﺍ ﺕﺍﺩﺍﺩﻋﺇ
ﺔﻳﻛﻠﺳﻟﺍ
ﺔﻛﺑﺷﻟﺍ ﺭﺎﺑﺗﺧﺍ
ﺔﻛﺑﺷﻟﺍ ﺔﻟﺎﺣ
ﺕﻧﺭﺗﻧﻹﺍ
ﻝﺎﺻﺗﺍ
BD-Live
ﺔﻳﻟﻭﻷﺍ ﺕﺍﺩﺍﺩﻋﻹﺍ
+Anynet
(HDMI-CEC)
BD ﺕﺎﻧﺎﻳﺑ ﺓﺭﺍﺩﺇ
ﻉﺎﻔﺗﺭﺍ ﻁﺑﺿ ﻙﻟ ﺢﻳﺗﻳ :(ﻯﻭﺗﺳﻣﻟﺍ) Level
ﻝﺑﻳﺳﻳﺩ 6 ﻥﻣ ﺔﻋﺎﻣﺳ ﻝﻛﻟ ﻲﺑﺳﻧﻟﺍ ﺕﻭﺻﻟﺍ
ﺕﻧﻛ ﺍﺫﺇ ،ﻝﺎﺛﻣﻟﺍ ﻝﻳﺑﺳ ﻰﻠﻋ .ﻝﺑﻳﺳﻳﺩ -6 ﻰﻟﺇ
ﻊﻓﺭ ﻙﻧﻛﻣﻳﻓ ،ﻕﻳﻣﻌﻟﺍ ﺭﻳﻬﺟﻟﺍ ﺕﻭﺻ ﺏﺣﺗ
.ﻝﺑﻳﺳﻳﺩ 6 ﻝﺩﻌﻣﺑ ﺕﻭﺻﻟﺍ ﻡﺧﺿﻣ ﺕﻭﺻ
ﻁﺑﺿ ﻙﻟ ﺢﻳﺗﻳ :(ﺔﻓﺎﺳﻣﻟﺍ) Distance
ﻊﺿﻭﻣ ﻥﻣ ﺔﻋﺎﻣﺳ ﻝﻛﻟ ﺔﻳﺑﺳﻧﻟﺍ ﺔﻓﺎﺳﻣﻟﺍ
ﺕﺩﻌﺑ ﺎﻣﻠﻛﻭ .ﺎًﻣﺩﻗ 30 ﻰﺗﺣ ﻉﺎﻣﺗﺳﻻﺍ
.ﺭﺑﻛﺃ ﺔﻋﺎﻣﺳﻟﺍ ﺕﻭﺻ ﻥﺎﻛ ،ﺔﻓﺎﺳﻣﻟﺍ
ﻙﻟ ﺢﻳﺗﺗ :(ﺭﺎﺑﺗﺧﻻﺍ ﺔﻣﻐﻧ) Test Tone
ﻙﻧﻛﻣﻳ ﻰﺗﺣ ﺭﺎﺑﺗﺧﻻﺍ ﺔﻣﻐﻧ ﺔﻔﻳﻅﻭ ﻝﻳﻐﺷﺗ
Test ﻁﺑﺿ ﻱﺩﺅﻳ .ﺕﻼﻳﺩﻌﺗﻟﺍ ﺭﺎﺑﺗﺧﺍ
(ﻝﻳﻐﺷﺗ) On ﻰﻠﻋ (ﺭﺎﺑﺗﺧﻻﺍ ﺔﻣﻐﻧ) Tone
ﺎﻬﻁﺑﺿ ﻱﺩﺅﻳﻭ .ﺭﺎﺑﺗﺧﻻﺍ ﺔﻣﻐﻧ ﻝﻳﻐﺷﺗ ﻰﻟﺇ
.ﺎﻬﻓﺎﻘﻳﺇ ﻰﻟﺇ (ﻑﺎﻘﻳﺇ) Off ﻰﻠﻋ
،ﺎﻬﻁﻳﺷﻧﺗ ﺩﻳﺭﺗ ﻲﺗﻟﺍ ﺕﺎﻋﺎﻣﺳﻟﺍ ﺩﻳﺩﺣﺗ ﻙﻟ ﺢﻳﺗﻳ
ﺕﺎﻋﺎﻣﺳ ﻡﺃ ﺯﺎﻔﻠﺗﻟﺍ ﺕﺎﻋﺎﻣﺳ ﺕﻧﺎﻛ ءﺍﻭﺳ
ﺕﺎﻋﺎﻣﺳ ﻰﻟﺇ
ﺯﺎﻔﻠﺗﻟﺍ ﻥﻣ ﺕﻭﺻﻟﺍ ﻪﻳﺟﻭﺗ ﻙﻟ ﺢﻳﺗﺗ
ﺯﺎﻔﻠﺗﻭ HDMI ﻝﺎﺻﺗﺍ ﺏﻠﻁﺗﺗ .ﺔﻳﻟﺯﻧﻣﻟﺍ ﺎﻣﻧﻳﺳﻟﺍ
.(ARC) ﺕﻭﺻ ﻉﺎﺟﺭﺇ ﺓﺎﻧﻗ ﻊﻣ ﻕﻓﺍﻭﺗﻣ
Audio Return Channel ﻁﺑﺿ ﺩﻧﻋ
،(ﻲﺋﺎﻘﻠﺗ) Auto ﻰﻠﻋ (ﺕﻭﺻﻟﺍ ﻉﺎﺟﺭﺇ ﺓﺎﻧﻗ)
ﻭﺃ ARC ﻲﻟﺯﻧﻣﻟﺍ ﺡﺭﺳﻣﻟﺍ ﻡﺎﻅﻧ ﺩﺩﺣﻳ
،ﺕﻭﺻ ﺭﺩﺻﻣﻛ ﺎًﻳﺋﺎﻘﻠﺗ ﻲﺋﻭﺿﻟﺍ ﻝﺎﺧﺩﻹﺍ
Audio ﺕﻧﺎﻛ ﺍﺫﺇ .ﻙﺗﻻﺎﺻﺗﻻ ﺎ
ﻉﺎﺟﺭﺇ ﺓﺎﻧﻗ) Return Channel
ﻝﺎﺧﺩﻹﺍ ﻝﻣﻌﻳ ﻥﻠﻓ ،ﺔﻁﺷﻧ (ﺕﻭﺻﻟﺍ
ﺔﻘﺑﺎﻁﻣﻟ ﻲﻣﻗﺭﻟﺍ ﺝﺍﺭﺧﻹﺍ ﻁﺑﺿ ﻙﻟ ﺢﻳﺗﻳ
ﻱﺫﻟﺍ ﻭﻳﺩﻳﻔﻟﺍﻭ ﺕﻭﺻﻟﺍ ﻝﺎﺑﻘﺗﺳﺍ ﺯﺎﻬﺟ ﺕﺎﻳﻧﺎﻛﻣﺇ
،ﻝﻳﺻﺎﻔﺗﻟﺍ ﻥﻣ ﺩﻳﺯﻣﻟ .ﺞﺗﻧﻣﻟﺎﺑ
ﺕﺎﺟﺭﺧﻣﻟﺍ ﺩﻳﺩﺣﺗ ﻝﻭﺩﺟ ﻰﻟﺇ ﻉﻭﺟﺭﻟﺍ ﻰﺟﺭﻳ
ﻲﻛﻳﻣﺎﻧﻳﺩﻟﺍ ﻯﺩﻣﻟﺍ ﻲﻓ ﻡﻛﺣﺗﻟﺍ ﻕﻳﺑﻁﺗﺑ ﻙﻟ ﺢﻣﺳﻳ
Dolbyﻭ ،Dolby Digital ﺕﻭﺻﻟ
.Dolby TrueHDﻭ ،Digital Plus
ﻯﺩﻣﻟﺍ ﻲﻓ ﻡﻛﺣﺗﻠﻟ :(ﻲﺋﺎﻘﻠﺗ) Auto
Dolby ﺕﻭﺻﻟ ﻲﺋﺎﻘﻠﺗ ﻝﻛﺷﺑ ﻲﻛﻳﻣﺎﻧﻳﺩﻟﺍ
ﺕﺎﻣﻭﻠﻌﻣﻟﺍ ﻰﻠﻋ ﺍًﺩﺎﻣﺗﻋﺍ ،TrueHD
Dolby ﺕﻭﺻ ﺭﺎﺳﻣ ﻲﻓ ﺓﺩﻭﺟﻭﻣﻟﺍ
ﻝﻳﻐﺷﺗﺑ ﻙﻟﺫﻛ ﻡﻭﻘﻳ ﻪﻧﺃ ﺎﻣﻛ .TrueHD
Dolby ﺕﻭﺻﻟ ﻲﻛﻳﻣﺎﻧﻳﺩﻟﺍ ﻯﺩﻣﻟﺍ ﻲﻓ ﻡﻛﺣﺗﻟﺍ
.Dolby Digital Plusﻭ Digital
ﻯﺩﻣﻟﺍ ﻙﺭﺗﻳ :(ﻝﻳﻐﺷﺗ ﻑﺎﻘﻳﺇ) Off
ﻙﻟ ﺢﻳﺗﻳ ﺎﻣﻣ ،ﻁﻐﺿ ﻥﻭﺩﺑ ﻲﻛﻳﻣﺎﻧﻳﺩﻟﺍ
.ﻲﻠﺻﻷﺍ ﺕﻭﺻﻟﺍ ﻰﻟﺇ ﻉﺎﻣﺗﺳﻻﺍ
ﻯﺩﻣﻟﺍ ﻲﻓ ﻡﻛﺣﺗﻟﺍ ﻝﻳﻐﺷﺗﻟ :(ﻝﻳﻐﺷﺗ) On
.ﺔﺛﻼﺛﻟﺍ Dolby ﺕﺎﻘﻳﺳﻧﺗ ﻝﻛﻟ ﻲﻛﻳﻣﺎﻧﻳﺩﻟﺍ
ﻝﻳﻠﻘﺗ ﻡﺗﻳﻭ ﺔﺋﺩﺎﻬﻟﺍ ﺕﺍﻭﺻﻷﺍ ﺓﻭﻗ ﺓﺩﺎﻳﺯ ﻡﺗﻳ
.ﺔﻌﻔﺗﺭﻣﻟﺍ ﺕﺍﻭﺻﻷﺍ ﺕﻭﺻ ﻯﻭﺗﺳﻣ
.ﻲﻟﺯﻧﻣﻟﺍ ﺡﺭﺳﻣﻟﺍ
ً
ﻘﻓﻭ
.ﻲﺋﻭﺿﻟﺍ
ﻪﻠﻳﺻﻭﺗﺑ ﺕﻣﻗ
(31 ﺔﺣﻔﺻﻟﺍ ﺭﻅﻧﺍ) .ﺔﻳﻣﻗﺭﻟﺍ
ﺔﻋﺎﻣﺳﻟﺍ ﺩﻳﺩﺣﺗ
•
ﻉﺎﺟﺭﺇ ﺓﺎﻧﻗ
ﺕﻭﺻﻟﺍ
ﻲﻣﻗﺭﻟﺍ ﺝﺭﺧﻟﺍ
ﻯﺩﻣﻟﺍ ﻲﻓ ﻡﻛﺣﺗﻟﺍ
ﻲﻛﻳﻣﺎﻧﻳﺩﻟﺍ
Page 56

ﺕﺍﺩﺍﺩﻋﻹﺍ
ﺕﻧﺭﺗﻧﻹﺍﻭ ﺕﺎﻛﺑﺷﻟﺍ
ﻑﺋﺎﻅﻭﻟﺍﻭ ﺕﺎﻘﻳﺑﻁﺗﻟﺍ ﻡﺍﺩﺧﺗﺳﺍ ﻙﻧﻛﻣﻳ ،ﺔﻛﺑﺷﺑ ﺞﺗﻧﻣﻟﺍ ﺍﺫﻫ ﻝﻳﺻﻭﺗ ﺩﻧﻋ
ﻝﻼﺧ ﻥﻣ ﺞﺗﻧﻣﻟﺍ ﺞﻣﺎﻧﺭﺑ ﺔﻳﻗﺭﺗﻭ BD-LIVE ﻝﺛﻣ ﺔﻛﺑﺷﻟﺍ ﻰﻠﻋ ﺓﺩﻣﺗﻌﻣﻟﺍ
.ﺔﻛﺑﺷﻟﺍ ﻝﺎﺻﺗﺍ
ﻙﺑ ﺹﺎﺧﻟﺍ ﺔﻛﺑﺷﻟﺍ ﻝﺎﺻﺗﺍ ﺔﺋﻳﻬﺗ
ﺎًﺗﺑﺎﺛ IP ﻥﺍﻭﻧﻋ ﻥﺎﻛ ﺍﺫﺇ ﺎﻣ ﺔﻓﺭﻌﻣﻟ ﺕﻧﺭﺗﻧﻹﺍ ﺔﻣﺩﺧ ﺭﻓﻭﻣﺑ ﻝﺻﺗﺍ ،ءﺩﺑﻟﺍ ﻝﺑﻗ
Automatic ءﺍﺭﺟﻹﺍ ﻡﺍﺩﺧﺗﺳﺎﺑ ﻙﻳﺻﻭﻧﻓ ،ﺎًﻳﻛﻳﻣﺎﻧﻳﺩ ﻥﺎﻛ ﺍﺫﺇ .ﺎًﻳﻛﻳﻣﺎﻧﻳﺩ ﻭﺃ
Manual ءﺍﺭﺟﻹﺍ ﻡﺍﺩﺧﺗﺳﺍ ﺏﺟﻳﻓ ،ﺎًﺗﺑﺎﺛ ﻥﺎﻛ ﺍﺫﺇ .ﻩﺎﻧﺩﺃ ﺩﺭﺍﻭﻟﺍ (ﻲﺋﺎﻘﻠﺗ)
.ﺔﻛﺑﺷ ﻝﺑﺎﻛ ﻡﺍﺩﺧﺗﺳﺎﺑ ﻪﺟﻭﻣﻟﺎﺑ ﻝﺻﺗﻣ ﺞﺗﻧﻣﻟﺍ ﻥﺃ ﺩﻛﺄﺗ ،ﺃﺩﺑﺗ ﻥﺃ ﻝﺑﻗ
.ﺕﺍﻭﻁﺧﻟﺍ ﻩﺫﻫ ﻊﺑﺗﺍ ،ﺔﺋﻳﻬﺗﻟﺍ ﺔﻳﻠﻣﻋ ءﺩﺑ
ﻰﻠﻋ ﻁﻐﺿﺍ ﻡﺛ ,(ﺕﺍﺩﺍﺩﻋﻹﺍ) Settings ﺩﺩﺣ ،ﺔﻳﺳﻳﺋﺭﻟﺍ ﺔﺷﺎﺷﻟﺍ ﻲﻓ
.E ﺭﺯﻟﺍ ﻰﻠﻋ ﻁﻐﺿﺍ ﻡﺛ ،(ﺔﻛﺑﺷﻟﺍ) Network ﺩﺩﺣ
ﺔﻛﺑﺷﻟﺍ ﺕﺍﺩﺍﺩﻋﺇ) Wired Network Settings ﺩﺩﺣ
.E ﺭﺯﻟﺍ ﻰﻠﻋ ﻁﻐﺿﺍ ﻡﺛ ،(ﺔﻳﻛﻠﺳﻟﺍ
ﺔﻛﺑﺷﻟﺍ ﺕﺍﺩﺍﺩﻋﺇ) Wired Network Settings ﺔﺷﺎﺷ ﺭﻬﻅﺗ
Internet Protocol Setup ﺔﻣﺋﺎﻗ ﻲﻓ ► ﺭﺯﻟﺍ ﻰﻠﻋ ﻁﻐﺿﺍ
.(ﺕﻧﺭﺗﻧﻹﺍ ﻝﻭﻛﻭﺗﻭﺭﺑ ﺩﺍﺩﻋﺇ)
ﺭﺯﻟﺍ ﻰﻠﻋ ﻁﻐﺿﺍ ﻡﺛ (ﻲﺋﺎﻘﻠﺗ) Auto ﺩﻳﺩﺣﺗﻟ ▼▲ ﺭﺯﻟﺍ ﻡﺩﺧﺗﺳﺍ
Settings
Display
Audio
Network
System
Language
Security
General
Support
Wired Network Settings
Internet Protocol Setup : Auto
IP Address : 0 0 0 0
Subnet Mask :
Gateway :
DNS : Auto
DNS Server : 0 0 0 0
> Move "
0
0 0 0
0
0 0 0
Select
ﻉﺎﻧﻗﻭ IP ﻥﺍﻭﻧﻋ ﻡﻳﻗ ﻰﻠﻋ (ﺔﻛﺑﺷﻟﺍ) Network ﺔﻔﻳﻅﻭ ﻝﺻﺣﺗ
.ﺎًﻳﺋﺎﻘﻠﺗ ﺎﻫﺭﻳﻏﻭ ﺔﻳﻋﺭﻔﻟﺍ ﺔﻛﺑﺷﻟﺍ
ﻁﻐﺿﺍ ،ﺔﻛﺑﺷﻟﺍ ﻡﻳﻗ ﻰﻠﻋ (ﺔﻛﺑﺷﻟﺍ) Network ﺔﻔﻳﻅﻭ ﻝﺻﺣﺗ ﻥﺃ ﺩﻌﺑ
.(') (ﻉﻭﺟﺭ) RETURN ﺭﺯﻟﺍ ﻰﻠﻋ
.E ﻰﻠﻋ ﻁﻐﺿﺍ ﻡﺛ ،Network Test ﺩﺩﺣ
ﻥﻣ ءﺎﻬﺗﻧﻻﺍ ﺩﻧﻋ .ﺔﻛﺑﺷﻟﺍ ﻝﺎﺻﺗﺍ ﻥﻣ ﻲﻟﺯﻧﻣﻟﺍ ﺡﺭﺳﻣﻟﺍ ﻡﺎﻅﻧ ﻕﻘﺣﺗﻳ
.(') (ﻉﻭﺟﺭ) RETURN ﺭﺯﻟﺍ ﻰﻠﻋ ﻁﻐﺿﺍ ،ﻙﻟﺫ
.ﻪﻳﻠﻳ ﻱﺫﻟﺍ (ﻱﻭﺩﻳ)
(ﻲﺋﺎﻘﻠﺗ) Automatic
.E ﺭﺯﻟﺍ
.(ﺔﻳﻛﻠﺳﻟﺍ
.
E
Return
'
DivX® VOD ﻝﻳﺟﺳﺗ ﺯﻭﻣﺭ ﺽﺭﻋﺍ
.ﺎﻬﻠﻳﻐﺷﺗﻭDivX® VODﺕﺎﻳﻭﺗﺣﻣءﺍﺭﺷﻟ
ﺔﻐﻠﻟﺍ
ﺔﻣﺋﺎﻗﻭ ،ﺔﺷﺎﺷﻟﺍ ﻰﻠﻋ ﺭﻬﻅﺗ ﻲﺗﻟﺍ ﺔﻣﺋﺎﻘﻠﻟ ﺎﻬﻠﺿﻔﺗ ﻲﺗﻟﺍ ﺔﻐﻠﻟﺍ ﺩﻳﺩﺣﺗ ﻙﻧﻛﻣﻳ
.ﺹﺭﻘﻟﺍ ﻰﻠﻋ ﺔﻣﻭﻋﺩﻣ ﻥﻛﺗ ﻡﻟ ﺎﻣ ﺎﻫﺩﻳﺩﺣﺗ ﻡﺗ ﻲﺗﻟﺍ ﺔﻐﻠﻟﺍ ﺭﻬﻅﺗ ﻥﻟ
•
ﻥﺎﻣﻷﺍ
ﻲﺿﺍﺭﺗﻓﻻﺍ PIN ﻡﻗﺭ ﻝِﺧﺩﺃ .0000 ﻭﻫ ﻲﺿﺍﺭﺗﻓﻻﺍ PIN ﻡﻗﺭ
❏
.ﻙﺑ ﺹﺎﺧﻟﺍ PIN ﻡﻗﺭ ءﺎﺷﻧﺈﺑ ﻡﻘﺗ ﻡﻟ ﺍﺫﺇ ﻥﺎﻣﻷﺍ ﺔﻔﻳﻅﻭ ﻰﻟﺇ ﻝﻭﺻﻭﻠﻟ
ﻝﻣﺗﺷﺗ ﻲﺗﻟﺍ Blu-ray ﺹﺍﺭﻗﺃ ﻝﻳﻐﺷﺗ ﻊﻧﻣﻟ
ﺕﺎﻔﻳﻧﺻﺗﻟﺍ ﻥﻣ ﻰﻠﻋﺃ ﻭﺃ ٍﻭﺎﺳﻣ ﻑﻳﻧﺻﺗ ﻰﻠﻋ
١ .
٢ .
٣ .
.PIN ﻡﻗﺭ ﻝﺎﺧﺩﺇ ﻡﺗﻳ ﻡﻟ ﺎﻣ ﺓﺩﺩﺣﻣﻟﺍ ﺔﻳﺭﻣﻌﻟﺍ
ﻰﻠﻋ ﻝﻣﺗﺷﺗ ﻲﺗﻟﺍ DVD ﺹﺍﺭﻗﺃ ﻝﻳﻐﺷﺗ ﻊﻧﻣﻟ
ﺓﺩﺩﺣﻣﻟﺍ ﺔﻳﻣﻗﺭﻟﺍ ﺕﺎﻔﻳﻧﺻﺗﻟﺍ ﻥﻣ
ﻰﻠﻋﺃ ﻑﻳﻧﺻﺗ
.PIN ﻡﻗﺭ ﻝﺎﺧﺩﺇ ﻡﺗﻳ ﻡﻟ ﺎﻣ
ﻡﺎﻗﺭﺃ 4 ﻥﻣ ﻥﻭﻛﻣﻟﺍ PIN ﻡﻗﺭ ﺭﻳﻳﻐﺗﺑ ﻡﻗ
.ﻝﻭﺻﻭﻟﺎﺑ ﺔﺻﺎﺧﻟﺍ ﻥﺎﻣﻷﺍ ﻑﺋﺎﻅﻭ ﻡﺍﺩﺧﺗﺳﻻ
٤ .
ﻡﺎﻋ
ﺔﻘﺑﺎﻁﻣﻟﺍ ﺔﻳﻧﻣﺯﻟﺍ ﺔﻘﻁﻧﻣﻟﺍ ﺩﻳﺩﺣﺗ ﻙﻧﻛﻣﻳ
.ﻙﺗﻘﻁﻧﻣﻟ
ﻡﻋﺩﻟﺍ
ﻝﻭﺣ ﺕﺎﻣﻭﻠﻌﻣﻟﺍ ﻥﻣ ﺩﻳﺯﻣ ﻰﻠﻋ ﻝﻭﺻﺣﻠﻟ
ﺔﻳﻗﺭﺗ" ﺭﻅﻧﺍ ،ﺞﻣﺍﺭﺑﻟﺍ ﺙﻳﺩﺣﺗ ﺔﻔﻳﻅﻭ
.21 ﺔﺣﻔﺻﻟﺍ ﻲﻓ "ﺞﻣﺍﺭﺑﻟﺍ
ﻰﻠﻋ ﻝﻭﺻﺣﻠﻟ ﻝﺎﺻﺗﻻﺍ ﺕﺎﻣﻭﻠﻌﻣ ﺭﻓﻭﻳ
.ﺞﺗﻧﻣﻟﺎﺑ ﻕﻠﻌﺗﻳ ﺎﻣﻳﻓ ﺓﺩﻋﺎﺳﻣﻟﺍ
٥ .
ﻕﻠﻌﺗﻳ ﺎﻣﻳﻓ ﻡﺎﻌﻟﺍ ﺔﻳﻟﻭﺋﺳﻣﻟﺍ ءﻼﺧﺇ ﺽﺭﻌﻟ
٦ .
.ﺔﻳﺟﺭﺎﺧﻟﺍ ﺕﺎﻬﺟﻟﺍ ﺕﺎﻣﺩﺧﻭ ﺕﺎﻳﻭﺗﺣﻣﺑ
ﺔﻳﺿﺍﺭﺗﻓﻻﺍ ﺕﺍﺩﺍﺩﻋﻹﺍ ﻊﻳﻣﺟ ﺓﺩﺎﻌﺗﺳﺍ ﻡﺗﺗﺳ
٧ .
ﺭﻭﺭﻣ ﺔﻣﻠﻛ .ﺔﻛﺑﺷﻟﺍ ﺕﺍﺩﺍﺩﻋﺇ
ءﺎﻧﺛﺗﺳﺎﺑ
.۰۰۰۰ ﻲﻫ ﺔﻳﺿﺍﺭﺗﻓﻻﺍ ﻥﺎﻣﻷﺍ
®DivXﻭﻳﺩﻳﻓ
ﺏﻠﻁﻟﺎﺑﺳﺣ
.ﺎﻫﺭﻳﻏﻭ ،ﺹﺍﺭﻗﻷﺍ
•
BD ﻑﻳﻧﺻﺗ
ﻱﻭﺑﻷﺍ
DVD ﻑﻳﻧﺻﺗ
ﻱﻭﺑﻷﺍ
ﺯﻣﺭ ﺭﻳﻳﻐﺗ
ﻲﺻﺧﺷﻟﺍ ﻑﻳﺭﻌﺗﻟﺍ
ﺔﻳﻧﻣﺯﻟﺍ ﺔﻘﻁﻧﻣﻟﺍ
ﺞﻣﺍﺭﺑﻟﺍ ﺔﻳﻗﺭﺗ
ﺔﻛﺭﺷﺑ ﻝﺎﺻﺗﻻﺍ
Samsung
ﺔﻳﻗﺎﻔﺗﺍ ﺩﻭﻧﺑ
ﺔﻣﺩﺧﻟﺍ
ﺽ .ﻉﺇ
ﺔﻳﺑﺭﻌﻟﺍ ٢٠
|
Page 57

.E ﺭﺯﻟﺍ ﻰﻠﻋ ﻁﻐﺿﺍ ﻡﺛ ،ﺕﺍﺩﺍﺩﻋﻹﺍ ﺩﺩﺣ ،ﺔﻳﺳﻳﺋﺭﻟﺍ ﺔﻣﺋﺎﻘﻟﺍ ﻲﻓ
.E ﺭﺯﻟﺍ ﻰﻠﻋ ﻁﻐﺿﺍ ﻡﺛ ،(ﻡﻋﺩﻟﺍ) Support ﺩﺩﺣ
۰٤ﺕﺍﺩﺍﺩﻋﻹﺍ
.E ﺭﺯﻟﺍ ﻰﻠﻋ ﻁﻐﺿﺍ ﻡﺛ ،ﺞﻣﺍﺭﺑﻟﺍ ﺔﻳﻗﺭﺗ ﺩﺩﺣ
:ﺔﻳﻟﺎﺗﻟﺍ ﺏﻳﻟﺎﺳﻷﺍ ﺩﺣﺃ ﺩﺩﺣ
(USB ﻡﺍﺩﺧﺗﺳﺎﺑ) By USB
(ﺔﻳﺋﺎﻘﻠﺗﻟﺍ ﺔﻳﻗﺭﺗﻟﺍ ﺭﺎﻁﺧﺇ) Auto Upgrade Notification
.E ﺭﺯﻟﺍ ﻲﻠﻋ ﻁﻐﺿﺍ
.ﻩﺎﻧﺩﺃ ﺃﺩﺑﺗ ﻕﺭﻁﻟﺍ ﻥﻣ ﺔﻘﻳﺭﻁ ﻝﻛﻟ ﺕﺎﻬﻳﺟﻭﺗ
.ﻪﻠﻳﻐﺷﺗ ﺓﺩﺎﻋﺇ ﺩﻌﺑ ﺞﺗﻧﻣﻟﺍ ﻝﻳﻐﺷﺗ ﻑﺎﻘﻳﺇ ﻡﺗﻳ ﺎﻣﺩﻧﻋ ﺙﻳﺩﺣﺗﻟﺍ ﻝﻣﺗﻛﻳ
ﻪﺛﻳﺩﺣﺗ ﻡﺗ ﻱﺫﻟﺍ ﺞﺗﻧﻣﻟﺍ ﻝﻳﻐﺷﺗﻟ (ﻝﻳﻐﺷﺗ) POWER ﺭﺯﻟﺍ ﻰﻠﻋ ﻁﻐﺿﺍ
ﺔﻳﻠﻣﻋ ءﺎﻧﺛﺃ ﺎًﻳﻭﺩﻳ ﻪﻠﻳﻐﺷﺗ ﻑﺎﻘﻳﺇ ﻭﺃ ﺞﺗﻧﻣﻟﺍ ﻝﻳﻐﺷﺗﺑ ﺍًﺩﺑﺃ ﻡﻘﺗ ﻻ .ﻙﻣﺍﺩﺧﺗﺳﻻ
ﻥﻋ ﺔﻳﻧﻭﻧﺎﻗ ﺔﻳﻟﻭﺋﺳﻣ ﺔﻳﺃ Samsung Electronics ﺔﻛﺭﺷ ﻝﻣﺣﺗﺗ ﻻ
ﻝﺎﻣﻫﺇ ﻭﺃ ﺕﻧﺭﺗﻧﻹﺎﺑ ﻝﺎﺻﺗﻻﺍ ﺭﺍﺭﻘﺗﺳﺍ ﻡﺩﻋ ﺔﺟﻳﺗﻧ ﺞﺗﻧﻣﻟﺍ ﻲﻓ ﺭﻭﺻﻗ ﻱﺃ
.ﺞﻣﺎﻧﺭﺑﻟﺍ ﺔﻳﻗﺭﺗ ءﺎﻧﺛﺃ ﻙﻠﻬﺗﺳﻣﻟﺍ
ﻁﻐﺿﺎﻓ ،ﺔﻳﻗﺭﺗﻟﺍ ﺞﻣﺍﺭﺑ ﻝﻳﺯﻧﺗ ءﺎﻧﺛﺃ ﺔﻳﻗﺭﺗﻟﺍ ءﺎﻐﻟﺇ ﻲﻓ ﺏﻏﺭﺗ ﺕﻧﻛ ﺍﺫﺇ
ﺭﺑﻋ) By Online ﺔﻔﻳﻅﻭ ﻡﺍﺩﺧﺗﺳﻻ ﺕﻧﺭﺗﻧﻹﺎﺑ ﺞﺗﻧﻣﻟﺍ ﻝﻳﺻﻭﺗ ﺏﺟﻳ
.ﺃﺩﺑﺗ ﻥﺃ ﻝﺑﻗ ﺹﺍﺭﻗﻷﺍ ﻊﻳﻣﺟ ﺔﻟﺍﺯﺈﺑ ﻡﻗ .(ﺕﻧﺭﺗﻧﻹﺍ
ﺔﻟﺎﺳﺭ ﺭﻬﻅﺗ .E ﺭﺯﻟﺍ ﻰﻠﻋ ﻁﻐﺿﺍ ﻡﺛ ،ﺕﻧﺭﺗﻧﻹﺍ ﺩﺩﺣ
.Connecting to Server
ﺕﻧﻛ ﺍﺫﺇ ﺎﻣﻋ ﻙﻟﺄﺳﺗ ﺔﻘﺛﺑﻧﻣ ﺔﻟﺎﺳﺭ ﺭﻬﻅﺗ ،ﺙﻳﺩﺣﺗﻟﺍ ﺭﻓﻭﺗ ﺔﻟﺎﺣ ﻲﻓ
،ﻪﻠﻳﻐﺷﺗﻭ ﺎًﻳﺋﺎﻘﻠﺗ ﺞﺗﻧﻣﻟﺍ ﻝﻳﻐﺷﺗ ﻑﺎﻘﻳﺇ ﻡﺗﻳ ،(ﻡﻌﻧ) Yes ﺩﻳﺩﺣﺗ ﺔﻟﺎﺣ ﻲﻓ
ﺔﻳﻗﺭﺗ ءﺎﻧﺛﺃ ﺎًﻳﻭﺩﻳ ﻪﻠﻳﻐﺷﺗ ﻑﺎﻘﻳﺇ ﻭﺃ ﻲﻟﺯﻧﻣﻟﺍ ﺡﺭﺳﻣﻟﺍ ﻝﻳﻐﺷﺗﺑ ﺍًﺩﺑﺃ ﻡﻘﺗ ﻻ
ﻑﺎﻘﻳﺇ ﻡﺗﻳ ،ﺙﻳﺩﺣﺗﻟﺍ ﻝﺎﻣﺗﻛﺍ ﺩﻧﻋﻭ .ﻕﺛﺑﻧﻣﻟﺍ ﺙﻳﺩﺣﺗﻟﺍ ﻡﺩﻘﺗ ﺭﺎﻁﺇ ﺭﻬﻅﻳ
.ﺎًﻳﺋﺎﻘﻠﺗ ﻯﺭﺧﺃ ﺓﺭﻣ ﺞﺗﻧﻣﻟﺍ ﻝﻳﻐﺷﺗ
.ﺞﺗﻧﻣﻟﺍ ﻝﻳﻐﺷﺗﻟ (ﻝﻳﻐﺷﺗ) POWER ﺭﺯﻟﺍ ﻰﻠﻋ ﻁﻐﺿﺍ
.ﻪﻠﻳﻐﺷﺗ ﺓﺩﺎﻋﺇ ﺩﻌﺑ ﺞﺗﻧﻣﻟﺍ ﻝﻳﻐﺷﺗ ﻑﺎﻘﻳﺇ ﻡﺗﻳ ﺎﻣﺩﻧﻋ ﺙﻳﺩﺣﺗﻟﺍ ﻝﻣﺗﻛﻳ
ﻪﺛﻳﺩﺣﺗ ﻡﺗ ﻱﺫﻟﺍ ﺞﺗﻧﻣﻟﺍ ﻝﻳﻐﺷﺗﻟ (ﻝﻳﻐﺷﺗ) POWER ﺭﺯﻟﺍ ﻰﻠﻋ ﻁﻐﺿﺍ
.ﺙﻳﺩﺣﺗﻟﺍ ﺔﻳﻠﻣﻋ ءﺎﻧﺛﺃ ﺎًﻳﻭﺩﻳ ﻪﻠﻳﻐﺷﺗ ﻭﺃ ﺞﺗﻧﻣﻟﺍ ﻝﻳﻐﺷﺗ ﻑﺎﻘﻳﺈﺑ ﺍًﺩﺑﺃ ﻡﻘﺗ ﻻ
ﺔﻳﻧﻭﻧﺎﻗ ﺔﻳﻟﻭﺋﺳﻣ ﻱﺃ Samsung Electronics ﺔﻛﺭﺷ ﻝﻣﺣﺗﺗ ﻻ
ﻝﺎﻣﻫﺇ ﻭﺃ ﺕﻧﺭﺗﻧﻹﺍ ﻝﺎﺻﺗﺍ ﺭﺍﺭﻘﺗﺳﺍ ﻡﺩﻋ ﺏﺑﺳﺑ ﺞﺗﻧﻣﻟﺎﺑ ﻝﻁﻋ ﺩﻭﺟﻭ ﻥﻋ
.ﺞﻣﺎﻧﺭﺑﻟﺍ ﺔﻳﻗﺭﺗ ءﺎﻧﺛﺃ ﻡﺩﺧﺗﺳﻣﻟﺍ
ﺕﻧﺭﺗﻧﻻﺍ ﺭﺑﻋ
.ﺙﻳﺩﺣﺗﻟﺍ
.E ﺭﺯﻟﺍ ﻰﻠﻋ
ﺕﻧﺭﺗﻧﻻﺍ ﺭﺑﻋ
.ﺔﻳﻗﺭﺗﻟﺍ ﺩﻳﺭﺗ
.ﺔﻳﻗﺭﺗﻟﺍ ﺃﺩﺑﺗ ﻡﺛ
.ﺞﻣﺎﻧﺭﺑﻟﺍ
.ﻙﻣﺍﺩﺧﺗﺳﻻ
•
•
•
|
ﺔﻅﺣﻼﻣ |
|
ﻡﺎﻫ |
ﺔﻅﺣﻼﻣ |
|
١٢ .
١٣ .
١٤ .
١٥ .
١٦ .
ﺕﻧﺄﻓ ،ﺔﻳﺋﺎﻘﻠﺗﻟﺍ ﺕﺍءﺍﺭﺟﻹﺍ ﻝﻣﻌﺗ ﻡﻟ ﺍﺫﺇ ﻭﺃ ﺎًﺗﺑﺎﺛ IP ﻥﺍﻭﻧﻋ ﻙﻳﺩﻟ ﻥﺎﻛ ﺍﺫﺇ
.ﺎًﻳﻭﺩﻳ ﺔﻛﺑﺷﻟﺍ ﺕﺍﺩﺍﺩﻋﺇ ﻡﻳﻗ ﻝﺎﺧﺩﺇ ﻰﻟﺇ ﺝﺎﺗﺣﺗ
Settings
Display
Audio
Network
System
Language
Security
General
Support
Wired Network Settings
Internet Protocol Setup : Manual
IP Address : 0 0 0 0
Subnet Mask :
Gateway :
DNS : Manual
DNS Server :
255
> Move "
255 255 0
0
0 0 0
0
0 0 0
Select
'
◄
،(ﻲﺋﺎﻘﻠﺗ) Automatic ءﺍﺭﺟﻹﺍ ﻲﻓ ﻰﻟﻭﻷﺍ ﻊﺑﺭﻷﺍ ﺕﺍﻭﻁﺧﻟﺍ ﻊﺑﺗﺍ
.4 ﺓﻭﻁﺧﻟﺍ ﻲﻓ (ﻲﺋﺎﻘﻠﺗ) Auto ﻥﻣ ًﻻﺩﺑ (ﻱﻭﺩﻳ) Manual ﺩﺩﺣﻭ
◄
IP) ﻝﻭﻷﺍ ﻝﺎﺧﺩﻹﺍ ﻝﻘﺣ ﻰﻟﺇ ﻝﺎﻘﺗﻧﻼﻟ ▼ ﻡﻬﺳﻟﺍ ﺭﺯ ﻰﻠﻋ ﻁﻐﺿﺍ
◄
.ﻡﺎﻗﺭﻷﺍ ﻝﺎﺧﺩﻹ ﺩﻌُﺑ ﻥﻋ ﻡﻛﺣﺗﻟﺍ ﺓﺩﺣﻭﺑ ﻡﺎﻗﺭﻷﺍ ﺭﺍﺭﺯﺃ ﻡﺩﺧﺗﺳﺍ
ﻲﻟﺎﺗﻟﺍ ﻝﻘﺣﻟﺍ ﻰﻟﺇ ﻝﺎﻘﺗﻧﻼﻟ ► ﺭﺯﻟﺍ ﻡﺩﺧﺗﺳﺍ ،ﻝﻘﺣ ﻝﻛ ﻥﻣ ءﺎﻬﺗﻧﻻﺍ ﺩﻧﻋ
ﻝﺎﻘﺗﻧﻼﻟ ﻯﺭﺧﻷﺍ ﻡﻬﺳﻷﺍ ﺭﺍﺭﺯﺃ ﻡﺍﺩﺧﺗﺳﺍ ﺎًﺿﻳﺃ ﻙﻧﻛﻣﻳ .ﻲﻟﺍﻭﺗﻟﺍ ﻰﻠﻋ
Subnetﻭ (IP ﻥﺍﻭﻧﻋ) IP Address ﻥﺍﻭﻧﻋ ﻡﻳﻗ ﻝﺧﺩﺃ
.(ﺔﺑﺍﻭﺑﻟﺍ) Gatewayﻭ (ﺔﻳﻋﺭﻔﻟﺍ ﺔﻛﺑﺷﻟﺍ ﻉﺎﻧﻗ) Mask
١ .
.DNS ﻰﻟﺇ ﻝﺎﻘﺗﻧﻼﻟ ▼ ﺭﺯﻟﺍ ﻰﻠﻋ ﻁﻐﺿﺍ
ﻝﺧﺩﺃ .ﻝﻭﻷﺍ DNS ﻝﺎﺧﺩﺇ ﻝﻘﺣ ﻰﻟﺇ ﻝﺎﻘﺗﻧﻼﻟ ▼ ﺭﺯﻟﺍ ﻰﻠﻋ ﻁﻐﺿﺍ
٢ .
ﻥﻋ ﻡﻛﺣﺗﻟﺍ ﺓﺩﺣﻭﺑ (') (ﻉﻭﺟﺭ) RETURN ﺭﺯﻟﺍ ﻰﻠﻋ ﻁﻐﺿﺍ
.E ﻰﻠﻋ ﻁﻐﺿﺍ ﻡﺛ (ﺔﻛﺑﺷﻟﺍ ﺭﺎﺑﺗﺧﺍ) Network Test ﺩﺩﺣ
(') (ﻉﻭﺟﺭ) RETURN ﺭﺯﻟﺍ ﻰﻠﻋ ﻁﻐﺿﺍ ،ﺭﺎﺑﺗﺧﻻﺍ ﻝﺎﻣﻛﺇ ﺩﻧﻋ
◄
.E ﻰﻠﻋ ﻁﻐﺿﺍ ﻡﺛ (ﺔﻛﺑﺷﻟﺍ ﺔﻟﺎﺣ) Network Status ﺩﺩﺣ
٣ .
ﻥﻣ ءﺎﻬﺗﻧﻻﺍ ﺩﻧﻋ .ﺔﻛﺑﺷﻟﺎﺑ ﻝﺻﺗﻳ ﻡﺛ ﺔﻛﺑﺷﻟﺍ ﻝﺎﺻﺗﺍ ﻥﻣ ﺞﺗﻧﻣﻟﺍ ﻕﻘﺣﺗﻳ
٤ .
.(ﺔﻛﺑﺷﻟﺍ ﺔﻟﺎﺣ) Network Status ﺔﺷﺎﺷ ﺭﻬﻅﺗ
.E ﻰﻠﻋ ﻁﻐﺿﺍ ﻡﺛ (ﻕﻓﺍﻭﻣ) OK ﺩﺩﺣ ،ﻙﻟﺫ
◄
ﺕﺎﻧﻳﺳﺣﺗ ﻰﻠﻋ ﻝﻭﺻﺣﻠﻟ ﺞﺗﻧﻣﻟﺍ ﺞﻣﺍﺭﺑ ﺔﻳﻗﺭﺗ ﺞﻣﺎﻧﺭﺑﻟﺍ ﺙﻳﺩﺣﺗ ﺔﻣﺋﺎﻗ ﻙﻟ ﺢﻳﺗﺗ
◄
◄
ﺔﻳﻠﻣﻋ ءﺎﻧﺛﺃ ﺎًﻳﻭﺩﻳ ﻪﻠﻳﻐﺷﺗ ﺓﺩﺎﻋﺇ ﻭﺃ ﺞﺗﻧﻣﻟﺍ ﻝﻳﻐﺷﺗ ﻑﺎﻘﻳﺈﺑ ﺍًﺩﺑﺃ ﻡﻘﺗ ﻻ
.(IP ﻥﺍﻭﻧﻋ) Address
.ﻑﻠﺧﻠﻟﻭ ﻝﻔﺳﻷﻭ ﻰﻠﻋﻷ
.ﻩﻼﻋﺃ ﺢﺿﻭﻣ ﻭﻫ ﺎﻣﻛ ﻡﺎﻗﺭﻷﺍ
.ﺔﻘﺑﺎﺳﻟﺍﺔﺷﺎﺷﻟﺎﯩﻟﺇﺓﺩﻭﻌﻠﻟ
ﺞﻣﺎﻧﺭﺑﻟﺍ ﺙﻳﺩﺣﺗ
.ﺔﻳﻓﺎﺿﻹﺍ ﺕﺎﻣﺩﺧﻟﺍ ﻭﺃ ءﺍﺩﻷﺍ
Return
❏
ﻱﻭﺩﻳ
١ .
٢ .
٣ .
٤ .
٥ .
٦ .
٧ .
٨ .
.ﺩﻌُﺑ
٩ .
١٠ .
١١ .
•
.ﺙﻳﺩﺣﺗﻟﺍ
|
٢١ ﺔﻳﺑﺭﻌﻟﺍ
Page 58

ﺕﺍﺩﺍﺩﻋﻹﺍ
| ﺔﻅﺣﻼﻣ |
.ﻪﻠﻳﻐﺷﺗ ﺓﺩﺎﻋﺇ ﺩﻌﺑ ﺞﺗﻧﻣﻟﺍ ﻝﻳﻐﺷﺗ ﻑﺎﻘﻳﺇ ﻡﺗﻳ ﺎﻣﺩﻧﻋ ﺙﻳﺩﺣﺗﻟﺍ ﻝﻣﺗﻛﻳ
ﻪﺛﻳﺩﺣﺗ ﻡﺗ ﻱﺫﻟﺍ ﺞﺗﻧﻣﻟﺍ ﻝﻳﻐﺷﺗﻟ (ﻝﻳﻐﺷﺗ) POWER ﺭﺯﻟﺍ ﻰﻠﻋ ﻁﻐﺿﺍ
ﺔﻳﻠﻣﻋ ءﺎﻧﺛﺃ ﺎًﻳﻭﺩﻳ ﻪﻠﻳﻐﺷﺗ ﻑﺎﻘﻳﺇ ﻭﺃ ﺞﺗﻧﻣﻟﺍ ﻝﻳﻐﺷﺗﺑ ﺍًﺩﺑﺃ ﻡﻘﺗ ﻻ .ﻙﻣﺍﺩﺧﺗﺳﻻ
ﺔﻳﻧﻭﻧﺎﻗ ﺔﻳﻟﻭﺋﺳﻣ ﻱﺃ Samsung Electronics ﺔﻛﺭﺷ ﻝﻣﺣﺗﺗ ﻻ
ﻝﺎﻣﻫﺇ ﻭﺃ ﺕﻧﺭﺗﻧﻹﺍ ﻝﺎﺻﺗﺍ ﺭﺍﺭﻘﺗﺳﺍ ﻡﺩﻋ ﺏﺑﺳﺑ ﺞﺗﻧﻣﻟﺎﺑ ﻝﻁﻋ ﺩﻭﺟﻭ ﻥﻋ
.ﺞﻣﺎﻧﺭﺑﻟﺍ ﺔﻳﻗﺭﺗ ءﺎﻧﺛﺃ ﻡﺩﺧﺗﺳﻣﻟﺍ
.ﺙﻳﺩﺣﺗﻟﺍ
DLNA ﺩﺍﺩﻋﺇ
ﺭﻭﺻﻟﺍﻭ ﻭﻳﺩﻳﻔﻟﺍﻭ ﻰﻘﻳﺳﻭﻣﻟﺍ ﺕﺎﻔﻠﻣ ﻝﻳﻐﺷﺗ ﺔﻳﻧﺎﻛﻣﺇ DLNA ﺞﻣﺎﻧﺭﺑ ﻙﻟ ﺢﻳﺗﻳ
ﺞﺗﻧﻣﻟﺍ ﻝﻳﺻﻭﺗ ﺏﺟﻳ ،DLNA ﻡﺍﺩﺧﺗﺳﻻ .ﺞﺗﻧﻣﻟﺍ ﻡﺍﺩﺧﺗﺳﺎﺑ ﺭﺗﻭﻳﺑﻣﻛﻟﺍ ﻲﻓ
PC Share ﺕﻳﺑﺛﺗﺑ ﻡﻗﻭ (14 ﺔﺣﻔﺻ ﺭﻅﻧﺍ) ﺔﻛﺑﺷﻟﺍ ﺭﺑﻋ ﺭﺗﻭﻳﺑﻣﻛﻟﺎﺑ
.SAMSUNG ﻥﻣ Manager
DLNA ﺞﻣﺎﻧﺭﺑ ﻝﻳﺯﻧﺗﻟ
DLNA ﺞﻣﺎﻧﺭﺑ ﺕﻳﺑﺛﺗ ﺏﺟﻳ ،ﺭﺗﻭﻳﺑﻣﻛﻟﺍ ﻊﻣ DLNA ﺞﻣﺎﻧﺭﺑ ﻡﺍﺩﺧﺗﺳﻻ
ﺕﺍﺩﺎﺷﺭﻹﺍ ﻰﻠﻋ ﻝﻭﺻﺣﻟﺍﻭ ﺭﺗﻭﻳﺑﻣﻛﻟﺍ ﺞﻣﺎﻧﺭﺑ ﻝﻳﺯﻧﺗ ﻙﻧﻛﻣﻳ .ﺭﺗﻭﻳﺑﻣﻛﻟﺍ ﻰﻠﻋ
.Samsung.com ﺏﻳﻭﻟﺍ ﻊﻗﻭﻣ ﻥﻣ DLNA ﺞﻣﺎﻧﺭﺑ ﻡﺍﺩﺧﺗﺳﻻ ﺔﻳﻠﻳﺻﻔﺗﻟﺍ
.www.samsung.com ﻊﻗﻭﻣﻟﺍ ﻰﻟﺇ ﻝﻘﺗﻧﺍ
.ﺔﺣﻔﺻﻟﺍ ﻥﻣ ﻱﻭﻠﻌﻟﺍ ءﺯﺟﻟﺍ ﻲﻓ (ﻡﻋﺩﻟﺍ) Support ﻰﻠﻋ ﺭﻘﻧﺍ
،ﺯﺍﺭﻁﻟﺍ ﻡﻗﺭ ﻝﺎﺧﺩﺇ ﺩﺭﺟﻣﺑ.ﺙﺣﺑﻟﺍ ﻝﻘﺣ ﻲﻓ ﺞﺗﻧﻣﻟﺍ ﺯﺍﺭﻁ ﻡﻗﺭ ﻝﺧﺩﺃ
.ﺯﺍﺭﻁﻟﺍ ﻡﻗﺭ ﻊﻣ ﻕﺑﺎﻁﺗﺗ ﻲﺗﻟﺍ ﺕﺎﺟﺗﻧﻣﻟﺎﺑ ﺔﻟﺩﺳﻧﻣ ﺔﻣﺋﺎﻗ ﺽﺭﻋ ﻡﺗﻳﺳ
ﺔﻣﺋﺎﻘﻟﺎﺑ ﺩﻭﺟﻭﻣﻟﺍ ﺞﺗﻧﻣﻟﺍ ﺯﺍﺭﻁ ﻡﻗﺭ ﻰﻠﻋ ﺭﺳﻳﻷﺍ ﺱﻭﺎﻣﻟﺍ ﺭﺯﺑ ﺭﻘﻧﺍ
ﺭﻘﻧﺍ ﻡﺛ ﻝﻔﺳﻷ ﺭﻳﺭﻣﺗﻟﺎﺑ ﻡﻗ ،ﺭﻬﻅﺗ ﻲﺗﻟﺍ ﺔﺣﻔﺻﻟﺍ ﻲﻓ
Firmware Manuals & Downloads ﻕﻭﻓ
.(ﺞﻣﺍﺭﺑﻟﺍ) Software ﺏﻳﻭﺑﺗﻟﺍ ﺔﻣﻼﻋ ﻕﻭﻓ ﺭﻘﻧﺍ
EXEﺯﻣﺭﻟﺎﻗﻭﻓﺭﻘﻧﺍ،(ﺞﻣﺍﺭﺑﻟﺍ) software ﺏﻳﻭﺑﺗﻟﺍ ﺔﻣﻼﻋ ﻲﻓ
ﻕﻭﻓ ﺭﻘﻧﺍ.ﺭﻬﻅﺗ ﺔﻘﺛﺑﻧﻣ ﺔﻣﺋﺎﻗ ﻝﻭﺃ ﻲﻓ (ﻝﺎﺳﺭﺇ) Send ﻕﻭﻓ ﺭﻘﻧﺍ
.ﺔﻳﻧﺎﺛﻟﺍ ﺔﻘﺛﺑﻧﻣﻟﺍ ﺔﻣﺋﺎﻘﻟﺍ ﻲﻓ (ﻑﻠﻣﻟﺍ ﻅﻔﺣ) Save File
ً
ﺍ
ﺭﻘﻧ ﺭﻘﻧﺍ ﻡﺛ ،ﺏﺗﻛﻣﻟﺍ ﺢﻁﺳ ﻰﻠﻋ
ﻊﺑﺗﺍ ﻡﺛ (ﻝﻳﻐﺷﺗ) Run ﻰﻠﻋ ﺭﻘﻧﺍ ،ﺭﻬﻅﺗ ﻲﺗﻟﺍ ﺔﻘﺛﺑﻧﻣﻟﺍ ﺔﻣﺋﺎﻘﻟﺍ ﻲﻓ
ﺎﻬﺗﺍﺫ "ﺞﻣﺍﺭﺑﻟﺍ" ﺏﻳﻭﺑﺗﻟﺍ ﺔﻣﻼﻋ ﻥﻣ DLNA ﺕﻳﺑﺛﺗ/ﺕﺎﻣﻳﻠﻌﺗ ﻝﻳﻟﺩ ﻝﻳﺯﻧﺗﺑ ﻡﻗ
.ﺭﺳﻳﻷﺍ ﺏﻧﺎﺟﻟﺍ ﻲﻓ "ﻑﻠﻣ" ﺩﻭﻣﻌﻟﺍ ﻲﻓ ﺭﻅﺎﻧﻣﻟﺍ PDF ﻑﻠﻣ ﺯﻣﺭ ﻕﻭﻓ ﺭﻘﻧﻟﺎﺑ
/ﻭ ﻑﻠﻣﻟﺍ ﺽﺭﻋ ﻙﻧﻛﻣﻳ .ﻩﺩﺍﺩﻋﺇﻭ DLNA ﺞﻣﺎﻧﺭﺑ ﺕﻳﺑﺛﺗﻟ ﺕﺎﻬﻳﺟﻭﺗﻟﺍ ﻊﺑﺗﺍ
ﻑﺗﺎﻬﻟﺍﻭ ﻙﺯﺎﻬﺟ ﻝﻳﺻﻭﺗ ﺏﺟﻳ ،ﻲﻛﺫﻟﺍ ﻙﻔﺗﺎﻫ ﻊﻣ DLNA ﻡﺍﺩﺧﺗﺳﻻ
.(ﺕﻼﻳﺯﻧﺗﻟﺍﻭﺗﺑﺎﺛﻟﺎﺟﻣﺎﻧﺭﺑﻟﺍﺔﻟﺩﺃ)
.DLNAﻁﺧﻧﻣﻧﻣﻳﻷﺎﺑﻧﺎﺟﻟﺎﻳﻓ
DLNA ﺕﻳﺑﺛﺗ ﻑﻠﻣ ﻥﻋ ﺙﺣﺑﺍ
.ﺔﺷﺎﺷﻟﺍ ﻰﻠﻋ ﺭﻬﻅﺗ ﻲﺗﻟﺍ ﺕﺍﺩﺎﺷﺭﻹﺍ
.ﻑﻠﻣﻟﺍ ﻰﻠﻋ ﺎ
.ﻪ
ﺟﻭﻣﻟﺍ ﺱﻔﻧﺑ ﻲﻛﺫﻟﺍ
ّ
.ﺔﻟﺩﺳﻧﻣﻟﺍ
ً
ﺟﻭﺩﺯﻣ
|
.ﻪﻅﻔﺣ ﻭﺃ
ﺔﻅﺣﻼﻣ |
◄
ﻥﻣ ﺭﺳﻳﻷﺍ ﻱﻭﻠﻌﻟﺍ ءﺯﺟﻟﺍ ﻲﻓ (ﻡﻋﺩﻟﺍ) SUPPORT ﻰﻠﻋ ﺭﻘﻧﺍ
◄
،ﺯﺍﺭﻁﻟﺍ ﻡﻗﺭ ﻝﺎﺧﺩﺇ ﺩﺭﺟﻣﺑ .ﺙﺣﺑﻟﺍ ﻝﻘﺣ ﻲﻓ ﺞﺗﻧﻣﻟﺍ ﺯﺍﺭﻁ ﻡﻗﺭ ﻝﺧﺩﺃ
.ﺯﺍﺭﻁﻟﺍ ﻡﻗﺭ ﻊﻣ ﻕﺑﺎﻁﺗﺗ ﻲﺗﻟﺍ ﺕﺎﺟﺗﻧﻣﻟﺎﺑ ﺔﻟﺩﺳﻧﻣ ﺔﻣﺋﺎﻗ ﺽﺭﻋ ﻡﺗﻳﺳ
ﺔﻣﺋﺎﻘﻟﺎﺑ ﺩﻭﺟﻭﻣﻟﺍ ﺞﺗﻧﻣﻟﺍ ﺯﺍﺭﻁ ﻡﻗﺭ ﻰﻠﻋ ﺭﺳﻳﻷﺍ ﺱﻭﺎﻣﻟﺍ ﺭﺯﺑ ﺭﻘﻧﺍ
ﻥﻣ ﻁﺳﻭﻷﺍ ءﺯﺟﻟﺍ ﻲﻓ (ﺕﺑﺎﺛﻟﺍ ﺞﻣﺎﻧﺭﺑﻟﺍ) Firmware ﻰﻠﻋ ﺭﻘﻧﺍ
ﻲﻓ (ﻑﻠﻣﻟﺍ) File ﺩﻭﻣﻋ ﻲﻓ (ﻁﻭﻐﺿﻣ ﻑﻠﻣ) ZIP ﺔﻧﻭﻘﻳﺃ ﻰﻠﻋ ﺭﻘﻧﺍ
ﻕﻭﻓ ﺭﻘﻧﺍ.ﺭﻬﻅﺗ ﺔﻘﺛﺑﻧﻣ ﺔﻣﺋﺎﻗ ﻝﻭﺃ ﻲﻓ (ﻝﺎﺳﺭﺇ) Send ﻕﻭﻓ ﺭﻘﻧﺍ
ﺕﺑﺎﺛﻟﺍ ﺞﻣﺎﻧﺭﺑﻟﺍ ﻑﻠﻣ ﻝﻳﺯﻧﺗﻟ ﺔﻳﻧﺎﺛﻟﺍ ﺔﻘﺛﺑﻧﻣﻟﺍ ﺔﻣﺋﺎﻘﻟﺍ ﻲﻓ (ﻕﻓﺍﻭﻣ) OK
ﻙﻳﺩﻟ ﻥﻭﻛﻳ ﻥﺃ ﺏﺟﻳ .ﺭﺗﻭﻳﺑﻣﻛﻟﺍ ﻰﻠﻋ ﻁﻭﻐﺿﻣﻟﺍ ﻑﻠﻣﻟﺍ ﻁﻐﺿ ﻙﻔﺑ ﻡﻗ
١ .
٢ .
ﺹﺍﺭﻗﺃ ﻙﺭﺣﻣ ﻝﺧﺩﺃ ﻡﺛ ،ﺞﺗﻧﻣﻟﺍ ﻲﻓ ﺹﺍﺭﻗﺃ ﺩﻭﺟﻭ ﻡﺩﻋ ﻥﻣ ﺩﻛﺄﺗ
٣ .
.ﺞﻣﺍﺭﺑﻟﺍ ﺔﻳﻗﺭﺗ < ﻡﻋﺩﻟﺍ < ﺕﺍﺩﺍﺩﻋﻹﺍ ﻰﻟﺇ ﻝﻘﺗﻧﺍ ،ﺞﺗﻧﻣﻟﺍ ﺔﻣﺋﺎﻗ ﻲﻓ
٤ .
٥ .
ﺞﻣﺎﻧﺭﺑﻟﺍ ﺔﻳﻗﺭﺗﺑ ﻡﻭﻘﺗ ﺎﻣﺩﻧﻋ ﺞﺗﻧﻣﻟﺍ ﻲﻓ ﺹﺍﺭﻗﺃ ﺔﻳﺃ ﻙﺎﻧﻫ ﻥﻭﻛﺗ ﻻﺃ ﺏﺟﻳ
.ﺙﻳﺩﺣﺗﻟﺍ ﺔﻳﻠﻣﻋ ءﺎﻧﺛﺃ ﺎًﻳﻭﺩﻳ ﻪﻠﻳﻐﺷﺗ ﻭﺃ ﺞﺗﻧﻣﻟﺍ ﻝﻳﻐﺷﺗ ﻑﺎﻘﻳﺈﺑ ﺍًﺩﺑﺃ ﻡﻘﺗ ﻻ
٦ .
ﺔﻣﺋﺎﻘﻟﺍ ﻲﻓ ﺞﻣﺎﻧﺭﺑﻟﺍ ﻝﻳﺻﺎﻔﺗ ﻥﻣ ﻕﻘﺣﺗ ،ﺞﻣﺎﻧﺭﺑﻟﺍ ﺔﻳﻗﺭﺗ ﻥﻣ ءﺎﻬﺗﻧﻻﺍ ﺩﻧﻋ
٧ .
٨ .
٩ .
١٠ .
◄
Auto Upgrade ﻁﺑﺿﺑ ﺕﻣﻗﻭ ﺔﻛﺑﺷﻟﺎﺑ ًﻼﺻﺗﻣ ﺞﺗﻧﻣﻟﺍ ﻥﺎﻛ ﺍﺫﺇ
ﺞﺗﻧﻣﻟﺍ ﻙﺭﻁﺧﻳﺳﻓ ،ﻝﻳﻐﺷﺗ ﻰﻠﻋ (ﺔﻳﺋﺎﻘﻠﺗﻟﺍ ﺔﻳﻗﺭﺗﻟﺍ ﺭﺎﻁﺧﺇ) Notification
.ﺔﻘﺛﺑﻧﻣ ﺔﻟﺎﺳﺭ ﻊﻣ ﺍًﺭﻓﻭﺗﻣ ﺞﻣﺎﻧﺭﺑﻠﻟ ﺩﻳﺩﺟ ﺭﺍﺩﺻﺇ ﻙﺎﻧﻫ ﻥﺎﻛ ﺍﺫﺇ ﺎﻣﺑ
Auto ﻁﺑﺿﺍ ،(ﺞﻣﺎﻧﺭﺑﻟﺍ ﺙﻳﺩﺣﺗ) Software Update ﺔﻣﺋﺎﻗ ﻲﻓ
ﻰﻠﻋ (ﺔﻳﺋﺎﻘﻠﺗﻟﺍ ﺔﻳﻗﺭﺗﻟﺍ ﺭﺎﻁﺧﺇ) Upgrade Notification
ﺔﻟﺎﺳﺭﺑ ﺞﺗﻧﻣﻟﺍ ﻙﺭﻁﺧﻳﺳ ،ﺞﻣﺎﻧﺭﺑﻠﻟ ﺩﻳﺩﺟ ﺭﺍﺩﺻﺇ ﺭﻓﻭﺗ ﺔﻟﺎﺣ ﻲﻓ
ﺞﺗﻧﻣﻟﺍ ﻝﻳﻐﺷﺗ ﻑﺎﻘﻳﺇ ﻡﺗﻳ .(ﻡﻌﻧ) Yes ﺩﺩﺣ ،ﺕﺑﺎﺛﻟﺍ ﺞﻣﺎﻧﺭﺑﻟﺍ ﺔﻳﻗﺭﺗﻟ
ﻑﺎﻘﻳﺇ ﻡﺗﻳ ،ﺙﻳﺩﺣﺗﻟﺍ ﻝﺎﻣﺗﻛﺍ ﺩﻧﻋ .ﻕﺛﺑﻧﻣﻟﺍ ﺙﻳﺩﺣﺗﻟﺍ ﻡﺩﻘﺗ ﺭﺎﻁﺇ ﺭﻬﻅﻳﺳ
.www.samsung.com ﺓﺭﺎﻳﺯﺑ ﻝﺿﻔﺗ
ﺭﻘﻧﺍ ﻡﺛ ﻝﻔﺳﻷ ﺭﻳﺭﻣﺗﻟﺎﺑ ﻡﻗ ،ﺭﻬﻅﺗ ﻲﺗﻟﺍ ﺔﺣﻔﺻﻟﺍ ﻲﻓ
Firmware Manuals & Downloads ﻕﻭﻓ
.(ﺕﻼﻳﺯﻧﺗﻟﺍﻭﺗﺑﺎﺛﻟﺎﺟﻣﺎﻧﺭﺑﻟﺍﺔﻟﺩﺃ)
.ﺔﺣﻔﺻﻟﺍ ﻥﻣ ﻥﻣﻳﻷﺍ ءﺯﺟﻟﺍ
.ﺭﺗﻭﻳﺑﻣﻛﻟﺍ ﺯﺎﻬﺟﺑ ﻪﻅﻔﺣﻭ
.ﻁﻭﻐﺿﻣﻟﺍ ﻑﻠﻣﻟﺍ ﻡﺳﺍ ﺱﻔﻧﺑ ﺍ
.USB ﺵﻼﻓ ﺯﺎﻬﺟ ﻰﻟﺇ ﺩﻠﺟﻣﻟﺍ ﺦﺳﻧﺑ ﻡﻗ
.ﺞﺗﻧﻣﻟﺍ ﻲﻓ USB ﺫﻔﻧﻣ ﻲﻓ ﻝﻭﻣﺣﻣ USB
.USB ﻑﻳﺿﻣ ﺱﺑﺎﻗ ﻡﺍﺩﺧﺗﺳﺎﺑ
Auto Upgrade Notification
(ﺔﻳﺋﺎﻘﻠﺗﻟﺍ ﺔﻳﻗﺭﺗﻟﺍ ﺭﺎﻁﺧﺇ)
.ﺔﻳﻗﺭﺗﻟﺍ ﺃﺩﺑﺗ ﻡﺛ ،ﻪﻠﻳﻐﺷﺗﻭ ﺎًﻳﺋﺎﻘﻠﺗ
.ﻯﺭﺧﺃ ﺓﺭﻣ ﺎًﻳﺋﺎﻘﻠﺗ ﻝﻳﻐﺷﺗﻟﺍ
.ﺞﺗﻧﻣﻟﺍ ﻝﻳﻐﺷﺗﻟ (ﻝﻳﻐﺷﺗ) POWER ﺭﺯﻟﺍ ﻰﻠﻋ ﻁﻐﺿﺍ
(USB ﻡﺍﺩﺧﺗﺳﺎﺑ) By USB
.ﺔﺣﻔﺻﻟﺍ
.ﺔﻟﺩﺳﻧﻣﻟﺍ
.ﺔﺣﻔﺻﻟﺍ
ً
ﺩﺣﺍﻭ ﺍًﺩﻠﺟﻣ
.By USB ﺩﺩﺣ
|
.ﺞﻣﺍﺭﺑﻟﺍ ﺔﻳﻗﺭﺗ
.ﺞﺗﻧﻣﻟﺍ ﻝﻳﻐﺷﺗﺑ ﻡﻗ
.(ﻝﻳﻐﺷﺗ) On
.ﺔﻘﺛﺑﻧﻣ
ﺔﻳﺑﺭﻌﻟﺍ ٢٢
١ .
٢ .
٣ .
٤ .
٥ .
٦ .
٧ .
٨ .
٩ .
١٠ .
١١ .
١٢ .
١٣ .
ﺔﻅﺣﻼﻣ |
◄
◄
◄
١ .
٢ .
٣ .
٤ .
٥ .
|
Page 59

ﻁﺋﺎﺳﻭﻟﺍ ﻝﻳﻐﺷﺗ
ﻭﺃ (ﻭﻳﺩﻳﻔﻟﺍ ﺕﺎﻔﻠﻣ) Videos ﺩﻳﺩﺣﺗﻟ ▼▲ ﻥﻳﺭﺯﻟﺍ ﻰﻠﻋ ﻁﻐﺿﺍ .۱-٦
ﺭﺯﻟﺍ ﻰﻠﻋ ﻁﻐﺿﺍ ﻡﺛ ،(ﺭﻭﺻﻟﺍ) Photos ﻭﺃ (ﻰﻘﻳﺳﻭﻣﻟﺍ) Music
۰٥ﻁﺋﺎﺳﻭﻟﺍ ﻝﻳﻐﺷﺗ
ﺕﺭﻬﻅ ﺍﺫﺇﻭ .
۱-
۸ ﺓﻭﻁﺧﻟﺍ ﻰﻟﺇ ﻝﻘﺗﻧﺎﻓ ﺔﺷﺎﺷﻟﺍ ﻰﻠﻋ ﺕﺎﻔﻠﻣﻟﺍ ﺕﺭﻬﻅ ﺍﺫﺇ .۱-۷
،ﺩﻠﺟﻣ ﺩﻳﺩﺣﺗﻟ ◄►▼▲ ﻥﻳﺭﺯﻟﺍ ﻡﺩﺧﺗﺳﺎﻓ ،ﺔﺷﺎﺷﻟﺍ ﻰﻠﻋ ﺕﺍﺩﻠﺟﻣﻟﺍ
.۱-۸ ﺓﻭﻁﺧﻟﺍ ﻰﻟﺇ ﻝﻘﺗﻧﺍ ﻡﺛ E ﻰﻠﻋ ﻁﻐﺿﺍﻭ
ﻡﺛ ،ﻪﺿﺭﻋ ﻭﺃ ﻪﻠﻳﻐﺷﺗﻟ ﻑﻠﻣ ﺩﻳﺩﺣﺗﻟ ◄►▼▲ ﻥﻳﺭﺯﻟﺍ ﻡﺩﺧﺗﺳﺍ .
.ﻡﻭﻋﺩﻣ ﺭﻳﻏ 3D ﺕﺎﻔﻠﻣ ﻝﻳﻐﺷﺗ
USB ﻥﻳﺯﺧﺗ ﺯﺎﻬﺟ ﺔﻟﺍﺯﺇ ﺏﺟﻳ ،USB ﺓﺭﻛﺍﺫﻟ ﻝﻣﺗﺣﻣ ﻑﻠﺗ ﻱﺃ ﻊﻧﻣﻟ
ﻝﺯﻧﻣ ﺭﺯﻟﺍ ﻰﻠﻋ ﻁﻐﺿﺍ ."ﻥﺎﻣﺄﺑ USB ﺔﻟﺍﺯﺇ" ﺔﻔﻳﻅﻭ ﻡﺍﺩﺧﺗﺳﺎﺑ ﻥﺎﻣﺄﺑ
ﻡﺛ ،(ﺝ) ﺭﻔﺻﺃ ﺭﺯﻟﺍ ﻰﻠﻋ ﻁﻐﺿﺍ ﻡﺛ ،ﺔﻳﺳﻳﺋﺭﻟﺍ ﺔﻣﺋﺎﻘﻟﺍ ﻰﻟﺇ ﻝﺎﻘﺗﻧﻼﻟ
ﻥﻣ ﺔﻠﺟﺳﻣ ﺕﺎﻳﻭﺗﺣﻣ ﻰﻠﻋ ﻱﻭﺗﺣﻳ ﺹﺭﻗ ﻝﻳﻐﺷﺗ
ﺹﺍﺭﻗﺃ ﻰﻠﻋ ﺎﻬﻠﻳﺟﺳﺗﺑ ﺕﻣﻗ ﻲﺗﻟﺍ ﺓﺩﺩﻌﺗﻣﻟﺍ ﻁﺋﺎﺳﻭﻟﺍ ﺕﺎﻔﻠﻣ ﻝﻳﻐﺷﺗ ﻙﻧﻛﻣﻳ
.ﻲﻟﺯﻧﻣﻟﺍ ﺡﺭﺳﻣﻟﺍ ﻝﻳﻐﺷﺗﺑ ﻡﻗ
ﺹﺍﺭﻗﻷﺍ ﺝﺭﺩ ﻲﻓ ﻡﺩﺧﺗﺳﻣﻟﺍ ﻪﻠﺟﺳ ﺎ
.ﺝﺭﺩﻟﺍ ﻕﻠﻏﺃ ﻡﺛ ﻰﻠﻋﻷ ﺹﺭﻘﻟﺍ ﻕﺻﻠﻣ ﻪﻳﺟﻭﺗ ﻊﻣ
.(A) (ﺭﻣﺣﺃ) RED ﺭﺯﻟﺍ ﻰﻠﻋ ﻁﻐﺿﺍ ،ﺹﺭﻘﻟﺍ ﻝﻳﻣﺣﺗ ﺩﻌﺑ
ﻭﺃ (ﻁﻭﻐﺿﻣ ﺹﺭﻗ) CD ﺩﻳﺩﺣﺗﻟ ◄►▼▲ ﻥﻳﺭﺯﻟﺍ ﻰﻠﻋ ﻁﻐﺿﺍ
ﻭﺃ (ﻭﻳﺩﻳﻔﻟﺍ ﺕﺎﻔﻠﻣ) Videos ﺩﻳﺩﺣﺗﻟ ▼▲ ﻥﻳﺭﺯﻟﺍ ﻰﻠﻋ ﻁﻐﺿﺍ
ﻰﻠﻋ ﻁﻐﺿﺍ ﻡﺛ ،(ﺭﻭﺻﻟﺍ) Photos ﻭﺃ (ﻰﻘﻳﺳﻭﻣﻟﺍ) Music
.7 ﺓﻭﻁﺧﻟﺍ ﻰﻟﺇ ﻝﻘﺗﻧﺎﻓ ،ﺔﺷﺎﺷﻟﺍ ﻰﻠﻋ ﺕﺎﻔﻠﻣﻟﺍ ﺕﺭﻬﻅ ﺍﺫﺇ
◄►▼▲ ﻥﻳﺭﺯﻟﺍ ﻡﺩﺧﺗﺳﺎﻓ ،ﺔﺷﺎﺷﻟﺍ ﻰﻠﻋ ﺕﺍﺩﻠﺟﻣﻟﺍ ﺕﺭﻬﻅ ﺍﺫﺇ
.7 ﺓﻭﻁﺧﻟﺍ ﻰﻟﺇ ﻝﻘﺗﻧﺍ ﻡﺛ ،E ﻰﻠﻋ ﻁﻐﺿﺍﻭ ﺩﻠﺟﻣ ﺩﻳﺩﺣﺗﻟ
ﻡﺛ ،ﻪﺿﺭﻋ ﻭﺃ ﻪﻠﻳﻐﺷﺗﻟ ﻑﻠﻣ ﺩﻳﺩﺣﺗﻟ ◄►▼▲ ﻥﻳﺭﺯﻟﺍ ﻡﺩﺧﺗﺳﺍ
.(D) (ﻕﺭﺯﺃ) BLUE ﺭﺯﻟﺍ ﻰﻠﻋ ﻁﻐﺿﺍ ،ﺹﺭﻘﻟﺍ ﻝﻳﻣﺣﺗ ﺩﻌﺑ .
،DVD ﻭﺃ (ﻁﻭﻐﺿﻣ ﺹﺭﻗ) CD ﺩﻳﺩﺣﺗﻟ ◄► ﺭﺯﻟﺍ ﻰﻠﻋ ﻁﻐﺿﺍ .
ﻭﺃ (ﻭﻳﺩﻳﻔﻟﺍ ﺕﺎﻔﻠﻣ) Videos ﺩﻳﺩﺣﺗﻟ ▼▲ ﻥﻳﺭﺯﻟﺍ ﻰﻠﻋ ﻁﻐﺿﺍ .
ﺭﺯﻟﺍ ﻰﻠﻋ ﻁﻐﺿﺍ ﻡﺛ ،(ﺭﻭﺻﻟﺍ) Photos ﻭﺃ (ﻰﻘﻳﺳﻭﻣﻟﺍ) Music
۱-
.
۷ ﺓﻭﻁﺧﻟﺍ ﻰﻟﺇ ﻝﻘﺗﻧﺎﻓ ،ﺔﺷﺎﺷﻟﺍ ﻰﻠﻋ ﺕﺎﻔﻠﻣﻟﺍ ﺕﺭﻬﻅ ﺍﺫﺇ .۱-٦
ﻥﻳﺭﺯﻟﺍ ﻡﺩﺧﺗﺳﺎﻓ ،ﺔﺷﺎﺷﻟﺍ ﻰﻠﻋ ﺕﺎﻔﻠﻣﻟﺍ ﺕﺍﺩﻠﺟﻣ ﺕﺭﻬﻅ ﺍﺫﺇ
ﺓﻭﻁﺧﻟﺍ ﻰﻟﺇ ﻝﻘﺗﻧﺍ ﻡﺛ ،E ﻰﻠﻋ ﻁﻐﺿﺍﻭ ﺩﻠﺟﻣ ﺩﻳﺩﺣﺗﻟ ◄►▼▲
ﻡﺛ ،ﻪﺿﺭﻋ ﻭﺃ ﻪﻠﻳﻐﺷﺗﻟ ﻑﻠﻣ ﺩﻳﺩﺣﺗﻟ ◄►▼▲ ﻥﻳﺭﺯﻟﺍ ﻡﺩﺧﺗﺳﺍ .
|
٢٣ ﺔﻳﺑﺭﻌﻟﺍ
ً
ﺻﺭﻗ ﻊﺿﻭ ﺹﺍﺭﻗﻷﺍ ﺝﺭﺩ ﺢﺗﻓﺍ
.E ﺭﺯﻟﺍ ﻰﻠﻋ ﻁﻐﺿﺍ ﻡﺛ ،DVD
.E ﺭﺯﻟﺍ ﻰﻠﻋ ﻁﻐﺿﺍ ﻡﺛ
.
E
.E ﺭﺯﻟﺍ ﻰﻠﻋ ﻁﻐﺿﺍ
| ﺔﻅﺣﻼﻣ |
.E ﺭﺯﻟﺍ ﻰﻠﻋ ﻁﻐﺿﺍ
ﻡﺩﺧﺗﺳﻣﻟﺍ ﻝﺑﻗ
.CD ﻭﺃ DVD
.E ﺭﺯﻟﺍ
.E ﺭﺯﻟﺍ ﻰﻠﻋ ﻁﻐﺿﺍ
.
E
.۱-۷
.E ﺭﺯﻟﺍ ﻰﻠﻋ ﻁﻐﺿﺍ
USB ﺯﺎﻬﺟ ﻰﻠﻋ ﺕﺎﻔﻠﻣ ﻝﻳﻐﺷﺗ
.ﻝﺻﺗﻣ USB ﺯﺎﻬﺟ ﻰﻠﻋ ﺓﺩﻭﺟﻭﻣﻟﺍ ﺓﺩﺩﻌﺗﻣﻟﺍ ﻁﺋﺎﺳﻭﻟﺍ ﺕﺎﻔﻠﻣ ﻝﻳﻐﺷﺗ ﻙﻧﻛﻣﻳ
.(ﺔﻳﺳﻳﺋﺭﻟﺍ) Home ﺔﻣﺋﺎﻘﻟﺍ ﻰﻟﺇ ﻝﻘﺗﻧﺍ
ﺫﻔﻧﻣﺑ USB ﻥﻳﺯﺧﺗ ﺯﺎﻬﺟ ﻝﻳﺻﻭﺗﺑ ﻡﻗ ،(ﻑﺎﻘﻳﻹﺍ) Stop ﻊﺿﻭ ﻲﻓ
۱-
۸
◄
◄
١ .
٢ .
٣ .
٤ .
٥ .
٦ .
٧ .
ﻭﺃ
۱-
۳
۱-
٤
۱-
٥
۱-
۷
ﺔﻟﺎﺳﺭﻟﺍ ﺽﺭﻋ ﻡﺗﻳﺳ .ﺞﺗﻧﻣﻠﻟ ﺔﻳﻣﺎﻣﻷﺍ ﺔﺣﻭﻠﻟﺎﺑ ﺩﻭﺟﻭﻣﻟﺍ USB
ﺩﻳﺭﺗ ﻝﻫ) "?Do you want to access the device"
.(؟ﺯﺎﻬﺟﻟﺍ ﻰﻟﺇ ﻝﻭﺻﻭﻟﺍ
ﺭﺯﻟﺍ ﻰﻠﻋ ﻁﻐﺿﺍ ﻡﺛ ،(ﻡﻌﻧ) Yes ﺩﻳﺩﺣﺗﻟ ◄► ﺭﺯﻟﺍ ﻰﻠﻋ ﻁﻐﺿﺍ
.(A) (ﺭﻣﺣﺃ) RED ﺭﺯﻟﺍ ﻰﻠﻋ ﻁﻐﺿﺍ
Videos Photos Music
CD
USB DISK 2.0
CD a Change Device
App 2 App 3 App 4
d View Devices "
ﺓﺭﻛﺍﺫ) USB Flash Mem ﺩﻳﺩﺣﺗﻟ ▼▲ ﻥﻳﺭﺯﻟﺍ ﻰﻠﻋ ﻁﻐﺿﺍ
.E ﺭﺯﻟﺍ ﻰﻠﻋ ﻁﻐﺿﺍ ﻡﺛ (ﺹﺭﻘﻟﺍ) Disk ﻭﺃ (USB Flash
(ﻭﻳﺩﻳﻔﻟﺍ ﺕﺎﻔﻠﻣ) Videos ﺩﻳﺩﺣﺗﻟ ◄►▼▲ ﻥﻳﺭﺯﻟﺍ ﻰﻠﻋ ﻁﻐﺿﺍ
ﻰﻠﻋ ﻁﻐﺿﺍ ﻡﺛ ،(ﺭﻭﺻﻟﺍ) Photos ﻭﺃ (ﻰﻘﻳﺳﻭﻣﻟﺍ) Music ﻭﺃ
ﺕﺭﻬﻅ ﺍﺫﺇﻭ .8 ﺓﻭﻁﺧﻟﺍ ﻰﻟﺇ ﻝﻘﺗﻧﺎﻓ ،ﺔﺷﺎﺷﻟﺍ ﻰﻠﻋ ﺕﺎﻔﻠﻣﻟﺍ ﺕﺭﻬﻅ ﺍﺫﺇ
ﺩﻳﺩﺣﺗﻟ ◄►▼▲ ﻥﻳﺭﺯﻟﺍ ﻡﺩﺧﺗﺳﺎﻓ ،ﺔﺷﺎﺷﻟﺍ ﻰﻠﻋ ﺕﺎﻔﻠﻣﻟﺍ ﺕﺍﺩﻠﺟﻣ
.8 ﺓﻭﻁﺧﻟﺍ ﻰﻟﺇ ﻝﻘﺗﻧﺍ ﻡﺛ ،E ﻰﻠﻋ ﻁﻐﺿﺍﻭ ،ﺩﻠﺟﻣ
ﻡﺛ ،ﻪﺿﺭﻋ ﻭﺃ ﻪﻠﻳﻐﺷﺗﻟ ﻑﻠﻣ ﺩﻳﺩﺣﺗﻟ ◄►▼▲ ﻥﻳﺭﺯﻟﺍ ﻡﺩﺧﺗﺳﺍ
.E ﺭﺯﻟﺍ ﻰﻠﻋ ﻁﻐﺿﺍ
.(D) (ﻕﺭﺯﺃ) BLUE ﺭﺯﻟﺍ ﻰﻠﻋ ﻁﻐﺿﺍ .
CD
App 1 App 2 App 3 App 4
USB DISK 2.0
d Home "
Settings
ﺓﺭﻛﺍﺫ) USB Flash Mem ﺩﻳﺩﺣﺗﻟ ◄► ﻥﻳﺭﺯﻟﺍ ﻰﻠﻋ ﻁﻐﺿﺍ .۱-٥
.E ﺭﺯﻟﺍ ﻰﻠﻋ ﻁﻐﺿﺍ ﻡﺛ (ﺹﺭﻘﻟﺍ) Disk ﻭﺃ (USB Flash
Settings
.E ﺭﺯﻟﺍ
١ .
٢ .
٣ .
.
E
٤ .
Enter
٥ .
٦ .
٧ .
٨ .
ﻭﺃ
۱-
٤
Enter USB DISK 2.0
Page 60

ﻁﺋﺎﺳﻭﻟﺍ ﻝﻳﻐﺷﺗ
SUBTITLE HOME REPEAT
DISC MENU TITLE MENU
0
POPUP
،ﺔﻘﺛﺑﻧﻣﻟﺍ ﺔﻣﺋﺎﻘﻟﺍﻭ ،ﻥﻳﻭﺎﻧﻌﻟﺍ ﺔﻣﺋﺎﻗﻭ ،ﺹﺍﺭﻗﻷﺍ ﺔﻣﺋﺎﻗ ﻡﺍﺩﺧﺗﺳﺍ
ﺭﺯﻟﺍ ﺍﺫﻫ ﻰﻠﻋ ﻁﻐﺿﺍ ،ﻝﻳﻐﺷﺗﻟﺍ ءﺎﻧﺛﺃ : ﺹﺍﺭﻗﻷﺍ ﺔﻣﺋﺎﻗ
ﺭﺯﻟﺍ ﺍﺫﻫ ﻰﻠﻋ ﻁﻐﺿﺍ ،ﻝﻳﻐﺷﺗﻟﺍ ءﺎﻧﺛﺃ : ﻥﻳﻭﺎﻧﻌﻟﺍ ﺔﻣﺋﺎﻗ
ﺔﻣﺋﺎﻗ ﻰﻟﺇ ﻝﺎﻘﺗﻧﻼﻟ (ﺏ) ﺭﺿﺧﺃ ﺭﺯﻟﺍ ﻰﻠﻋ ﻁﻐﺿﺎﻓ
ﺭﺯﻟﺍ ﺍﺫﻫ ﻰﻠﻋ ﻁﻐﺿﺍ ،ﻝﻳﻐﺷﺗﻟﺍ ءﺎﻧﺛﺃ : ﺔﻘﺛﺑﻧﻣﻟﺍ ﺔﻣﺋﺎﻘﻟﺍ
ﻁﻐﺿﺍ ،ﻝﻳﻐﺷﺗﻟﺍ ءﺎﻧﺛﺃ : ﻥﻳﻭﺎﻧﻌﻟﺍ ﺔﻣﺋﺎﻗ ﻭﺃ ﺹﺍﺭﻗﻷﺍ ﺔﻣﺋﺎﻗ
ﻝﻘﺗﻧﺎﻓ ،ﻥﺍﻭﻧﻋ ﻥﻣ ﺭﺛﻛﺃ ﻭﻳﺩﻳﻔﻠﻟ ﻭﺃ ﻡﻠﻳﻔﻠﻟ ﻥﺎﻛ ﺍﺫﺇ
ﻝﻳﻐﺷﺗﻟﺍ ﺔﻁﻘﻧ ﻰﻟﺇ ﻝﺎﻘﺗﻧﻼﻟ ﺭﺎﻳﺧﻟﺍ ﺍﺫﻫ ﺩﺩﺣ
ﺔﻁﻘﻧ ﻝﺎﺧﺩﻹ ﺔﻳﻣﻗﺭﻟﺍ ﺭﺍﺭﺯﻷﺍ ﻡﺩﺧﺗﺳﺍ .ﺓﺩﺩﺣﻣﻟﺍ
ﺔﺷﺎﺷﻟﺍ ءﻝﻣ ﻡﺟﺣ ﻁﺑﺿﻟ ﺭﺎﻳﺧﻟﺍ ﺍﺫﻫ ﺩﺩﺣ
،(ﺭﻳﺑﻛ) ۱ﻊﺿﻭ ،ﻲﻠﺻﺃ ﺩﻳﺩﺣﺗ ﻙﻧﻛﻣﻳ .ﺏﻭﻠﻁﻣﻟﺍ
ﻉﻭﻁﺳﻟﺍ ﻑﺋﺎﻅﻭ ﻝﻳﺩﻌﺗ ﻙﻟ ﺢﻳﺗﻳ : User ▪
.ﻲﻟﺍﻭﺗﻟﺎﯩﻠﻋ ﺓﺩﺣﻟﺍ ﻭ ﻥﻭﻠﻟﺍ ﻭ ﻥﻳﺎﺑﺗﻟﺍ ﻭ
ﺓﺩﺎﻳﺯﻟ ﺩﺍﺩﻋﻹﺍ ﺍﺫﻫ ﺭﺗﺧﺍ : Dynamic ▪
ﺔﻳﺑﻟﺎﻐﻟ ﺩﺍﺩﻋﻹﺍ ﺍﺫﻫ ﺭﺗﺧﺍ : Normal ▪
ﺓﺩﻫﺎﺷﻣﻟ ﺩﺍﺩﻋﺇ ﻝﺿﻓﺃ ﺍﺫﻫ : Movie ▪
ﻥﻣﺍﺯﺗﻳ ﻰﺗﺣ ﺕﻭﺻﻟﺍ
0 ﻥﻳﺑ ﺭﻳﺧﺄﺗﻟﺍ ﻁﺑﺿ ﻙﻧﻛﻣﻳ.ﻭﻳﺩﻳﻔﻟﺍ ﻊﻣ ﺕﻭﺻﻟﺍ
BD/DVD ﺹﺭﻗ ﻝﻳﻐﺷﺗ ﺩﻧﻋ ﻁﻘﻓ ﺭﻬﻅﺗ ﻲﺗﻟﺍ ﺔﻣﺋﺎﻘﻟﺍ
ﺏﻏﺭﺗ ﻱﺫﻟﺍ ﻝﺻﻔﻟﺍ ﻲﻟﺇ ﻝﺎﻘﺗﻧﻼﻟ ﺭﺎﻳﺧﻟﺍ ﺍﺫﻫ ﺩﺩﺣ
.ﺹﺍﺭﻗﻷﺍ ﺔﻣﺋﺎﻗ ﺽﺭﻌﻟ
.ﻥﻳﻭﺎﻧﻌﻟﺍ ﺔﻣﺋﺎﻗ ﺽﺭﻌﻟ
.ﺔﻘﺛﺑﻧﻣﻟﺍ ﺔﻣﺋﺎﻘﻟﺍ ﺽﺭﻌﻟ
.ﻥﻳﻭﺎﻧﻌﻟﺍ ﺔﻣﺋﺎﻗ ﺽﺭﻌﻟ ﺭﺯﻟﺍ ﺍﺫﻫ ﻰﻠﻋ
.ﺕﺍﻭﺩﺃ ﺭﺯﻟﺍ ﻰﻠﻋ ﻁﻐﺿﺍ ،ﻝﻳﻐﺷﺗﻟﺍ ءﺎﻧﺛﺃ
.ﻩﺩﺩﺣ ﻭﺃ ﺏﻭﻠﻁﻣﻟﺍ ﻥﺍﻭﻧﻌﻟﺍ ﻰﻟﺇ
.ﻝﻳﻐﺷﺗﻟﺍ
.(ﺭﺑﻛﺃ) ۲ ﻊﺿﻭﻭ
ﺓﺭﻭﺻﻟﺍ ﻊﺿﻭ ﻥﻳﻳﻌﺗﻟ ﺭﺎﻳﺧﻟﺍ ﺍﺫﻫ ﺩﺩﺣ
.
.ﺓﺩﺣﻟﺍ ﻯﻭﺗﺳﻣ
.ﺽﺭﻌﻟﺍ ﺕﺎﻘﻳﺑﻁﺗ
.ﻡﻼﻓﻷﺍ
ﺭﻳﺧﺄﺗ ﻁﺑﺿ ﻙﻟ ﺢﻳﺗﻳ
.ﺔﻳﻧﺎﺛ ﻲﻠﻠﻣ 300ﻭ
.ﻪﺗﺩﻫﺎﺷﻣ ﻲﻓ
ﻥﻳﻭﺎﻧﻌﻟﺍ ﺔﺣﺋﻻﻭ
•
•
۲
- ،ﻝﻳﻐﺷﺗ ﺔﻣﺋﺎﻗ ﻰﻠﻋ ﻱﻭﺗﺣﻳ ﻙﺑ ﺹﺎﺧﻟﺍ ﺹﺭﻘﻟﺍ ﻥﺎﻛ ﺍﺫﺇ
.ﻝﻳﻐﺷﺗﻟﺍ
•
•
ﺕﺍﻭﺩﻷﺍ ﺔﻣﺋﺎﻗ ﻡﺍﺩﺧﺗﺳﺍ
ﻥﺍﻭﻧﻌﻟﺍ
ﻝﻳﻐﺷﺗﻟﺍ ﺕﻗﻭ
ﺔﺷﺎﺷﻟﺍ ءﻝﻣ
- ﺓﺭﻭﺻﻟﺍ ﻊﺿﻭ
ﺓﺭﻭﺻﻟﺍ ﻊﺿﻭ
Audio Sync
(ﺕﻭﺻﻟﺍﺔﻧﻣﺍﺯﻣ)
ﻝﺻﻔﻟﺍ
ﺕﻭﺻ.ﺔﺑﻭﻠﻁﻣﻟﺍ ﺕﻭﺻﻟﺍ ﺔﻐﻟ ﻥﻳﻳﻌﺗﻟ ﺭﺎﻳﺧﻟﺍ ﺍﺫﻫ ﺩﺩﺣ
ﺔﻣﺟﺭﺗﻟﺍ.ﺔﺑﻭﻠﻁﻣﻟﺍ ﺔﻣﺟﺭﺗﻟﺍ ﺔﻐﻟ ﻥﻳﻳﻌﺗﻟ ﺭﺎﻳﺧﻟﺍ ﺍﺫﻫ ﺩﺩﺣ
ﺔﻳﺭﺎﺟﺗﻟﺍ ﻭﻳﺩﻳﻔﻟﺍ ﺹﺍﺭﻗﺃ ﻝﻳﻐﺷﺗ
ﺹﺭﻘﻟﺍ ﻰﻠﻋ ﺩﻭﺟﻭﻣﻟﺍ ﻕﺻﻠﻣﻟﺍ ﻥﻭﻛﻳ ﺙﻳﺣﺑ ﺹﺍﺭﻗﻷﺍ ﺝﺭﺩ ﻲﻓ ﺎ
ﻝﻳﻐﺷﺗﻟﺍ ﺃﺩﺑﻳ .ﻲﺋﺎﻘﻠﺗ ﻝﻛﺷﺑ ﻝﻳﻐﺷﺗﻟﺍ ﺃﺩﺑﻳ .ﺝﺭﺩﻟﺍ ﻕﻼﻏﺈﺑ ﻡﻗ ﻡﺛ ،ﻰﻠﻋﻷ ﺎ
ﻲﻓ (ﻭﻳﺩﻳﻔﻟﺍ ﺕﺎﻔﻠﻣ) Videos ﻰﻟﺇ ﻝﻘﺗﻧﺎﻓ ،ﺎ
.E ﺭﺯﻟﺍ ﻰﻠﻋ ﻁﻐﺿﺍﻭ (ﺔﻳﺳﻳﺋﺭﻟﺍ) Home ﺔﻣﺋﺎﻘﻟﺍ
ﻝﻳﻐﺷﺗﻟ .ﺹﺭﻘﻟﺍ ﺔﻣﺋﺎﻗ ﺔﻳﺭﺎﺟﺗﻟﺍ ﻭﻳﺩﻳﻔﻟﺍ
ﻁﻐﺿﺍ ﻡﺛ ﺹﺭﻘﻟﺍ ﺔﻣﺋﺎﻗ ﻰﻠﻋ (ﻝﻳﻐﺷﺗ) Play ﺩﺩﺣ ،ﺹﺭﻘﻟﺍ ﻰﻠﻋ ﻡﻠﻳﻔﻟﺍ
ﻲﻓ ﻡﻛﺣﺗﻟﺍ" ﻰﻟﺇ ﻝﻘﺗﻧﺍ ،ﻭﻳﺩﻳﻔﻟﺍ ﺕﺎﻔﻠﻣ ﻝﻳﻐﺷﺗ ﻝﻭﺣ ﺕﺎﻣﻭﻠﻌﻣﻟﺍ ﻥﻣ ﺩﻳﺯﻣﻟ
ً
ﻳﺋﺎﻘﻠﺗ ﻝﻳﻐﺷﺗﻟﺍ ﻡﺗﻳ ﻡﻟ ﺍﺫﺇ .ﺎًﻳﺋﺎﻘﻠﺗ
ﺕﺎﻔﻠﻣ ﺽﺭﻌﺗ ،ﺕﻻﺎﺣﻟﺍ ﺏﻠﻏﺃ ﻲﻓ
.ﺔﺣﻔﺻﻟﺎﻫﺫﻬﻳﻓ "ﻭﻳﺩﻳﻔﻟﺍ ﻝﻳﻐﺷﺗ
ﺻﺭﻗ ﻊﺿ
.E ﻰﻠﻋ
ﺔﻅﺣﻼﻣ |
|
ﻭﻳﺩﻳﻔﻟﺍ ﻝﻳﻐﺷﺗ ﻲﻓ ﻡﻛﺣﺗﻟﺍ
Blu-ray ﺹﺍﺭﻗﺃ ﻰﻠﻋ ﺓﺩﻭﺟﻭﻣﻟﺍ ﻭﻳﺩﻳﻔﻟﺍ ﺕﺎﻔﻠﻣ ﻝﻳﻐﺷﺗ ﻲﻓ ﻡﻛﺣﺗﻟﺍ ﻙﻧﻛﻣﻳ
ﺽﻌﺑ ﺡﺎﺗﺗ ﻻ ﺩﻗ ،ﺹﺭﻘﻠﻟ ﺎًﻘﻓﻭ .USB ﻥﻳﺯﺧﺗ ﺓﺯﻬﺟﺃﻭ CDﻭ DVDﻭ
.ﻝﻳﻟﺩﻟﺍ ﺍﺫﻫ ﻲﻓ ﺔﺣﺿﻭﻣﻟﺍ ﻑﺋﺎﻅﻭﻟﺍ
ﺩﻌﺑ ﻥﻋ ﻡﻛﺣﺗﻟﺍ ﺓﺩﺣﻭ ﻲﻓ ﺓﺩﻭﺟﻭﻣﻟﺍ ﺭﺍﺭﺯﻷﺍ
ﻭﻳﺩﻳﻔﻟﺍ ﻝﻳﻐﺷﺗﻟ ﺔﻣﺩﺧﺗﺳﻣﻟﺍﻭ
۱
ﻝﻳﻐﺷﺗﻟﺎﺑ ﺔﻠﺻﻟﺍ ﺕﺍﺫ ﺭﺍﺭﺯﻷﺍ
ءﻲﻁﺑﻟﺍ ﻝﻳﻐﺷﺗﻟﺍ ﻭﺃ ﺙﺣﺑﻟﺍ ﻊﺿﻭ ءﺎﻧﺛﺃ ﺎًﺗﻭﺻ ﺞﺗﻧﻣﻟﺍ ﺭﺩﺻُﻳ ﻻ
ﻰﻠﻋ ﻁﻐﺿﺍ ،ﻝﻳﻐﺷﺗﻟﺍ ءﺎﻧﺛﺃ : ﺔﻌﻳﺭﺳﻟﺍ ﺔﻛﺭﺣﻟﺎﺑ ﻝﻳﻐﺷﺗﻟﺍ
ﻭﺃ ﺭﺯﻟﺍ ﻰﻠﻋ ﻁﻐﺿﻟﺍ ﺎﻬﻳﻓ ﻡﺗﻳ ﺓﺭﻣ ﻝﻛ ﻲﻓ
ﺭﻳﻐﺗﺗ
،ﺕﻗﺅﻣﻟﺍ ﻑﺎﻘﻳﻹﺍ ﻊﺿﻭ ﻲﻓ : ﺔﺋﻳﻁﺑﻟﺍ ﺔﻛﺭﺣﻟﺎﺑ ﻝﻳﻐﺷﺗﻟﺍ
ﺔﻋﺭﺳ ﺭﻳﻐﺗﺗ
،ﺕﻗﺅﻣﻟﺍ ﻑﺎﻘﻳﻹﺍ ﻊﺿﻭ ﻲﻓ : ﺔﻳﻠﺣﺭﻣﻟﺍ ﺔﻛﺭﺣﻟﺎﺑ ﻝﻳﻐﺷﺗﻟﺍ
ﺭﺎﻁﺇ ﺭﻬﻅﻳ
ﻁﻐﺿﺍ ،ﻝﻳﻐﺷﺗﻟﺍ ءﺎﻧﺛﺃ : ﺔﺋﻳﻁﺑﻟﺍ ﺔﻛﺭﺣﻟﺎﺑ ﻝﻳﻐﺷﺗﻟﺍ ﻲﻁﺧﺗ
ﻝﻘﺗﻧﻳ
ﺭﺯﻟﺍ ﻰﻠﻋ ﻁﻐﺿﻟﺍ ﺎﻬﻳﻓ ﻡﺗﻳ ﺓﺭﻣ ﻝﻛ ﻲﻓ
ﺭﺯﻟﺍ ﻰﻠﻋ ﻁﻐﺿﻟﺍ ﺎﻬﻳﻓ ﻡﺗﻳ ﺓﺭﻣ ﻝﻛ ﻲﻓ
ﻭﺃ ﺭﺯﻟﺍ ﻰﻠﻋ ﻁﻐﺿﻟﺍ ﺎﻬﻳﻓ ﻡﺗﻳ ﺓﺭﻣ ﻝﻛ ﻲﻓ
.ﻲﻟﺎﺗﻟﺍ ﻭﺃ ﻕﺑﺎﺳﻟﺍ ﻑﻠﻣﻟﺍ ﻭﺃ ﻝﺻﻔﻟﺍ ﻰﻟﺇ ﺹﺭﻘﻟﺍ
.ﺔﻳﻠﺣﺭﻣﻟﺍ ﺔﻛﺭﺣﻟﺍ ﻭﺃ
.ﻝﻳﻐﺷﺗﻟﺍ ءﺩﺑﻟ :
.ﻝﻳﻐﺷﺗﻟﺍ ﻑﺎﻘﻳﻹ :
.ﺎًﺗﻗﺅﻣ ﻝﻳﻐﺷﺗﻟﺍ ﻑﺎﻘﻳﻹ :
ﻭﺃ ﺭﺯﻟﺍ
.
.ﻝﻳﻐﺷﺗﻟﺍ ﺔﻋﺭﺳ
ﺭﺯﻟﺍ ﻰﻠﻋ ﻁﻐﺿﺍ
.
.ﻝﻳﻐﺷﺗﻟﺍ
ﺭﺯﻟﺍ ﻰﻠﻋ ﻁﻐﺿﺍ
.
ﻭﺃ ﺭﺯﻟﺍ ﻰﻠﻋ
.
•
•
•
•
•
•
.ﺩﻳﺩﺟ
•
ً
ً
ﻬﺟﺍﻭﻣ
◄
۲
۱
ﺔﻳﺑﺭﻌﻟﺍ ٢٤
|
Page 61

001
002
ﺩﻌﺑ ﻥﻋ ﻡﻛﺣﺗﻟﺍ ﺓﺩﺣﻭ ﻲﻓ ▼▲ ﻥﻳﺭﺯﻟﺍ ﻡﺩﺧﺗﺳﺍ ،ﻥﻳﻌﻣ ﺭﺎﺳﻣ ﻝﻳﻐﺷﺗﻟ
1
2
3
7
89
DISC MENU TITLE MENU
0
POPUP
4
56
.E ﻰﻠﻋ ﻁﻐﺿﺍ ﻡﺛ ،ﺭﺎﺳﻣﻟﺍ ﺩﻳﺩﺣﺗﻟ
۰٥ﻁﺋﺎﺳﻭﻟﺍ ﻝﻳﻐﺷﺗ
ﻰﻟﺇ ﻝﻘﺗﻧﺍ ،ﻰﻘﻳﺳﻭﻣﻟﺍ ﻝﻳﻐﺷﺗ ﻝﻭﺣ ﺕﺎﻣﻭﻠﻌﻣﻟﺍ ﻥﻣ ﺩﻳﺯﻣ ﻰﻠﻋ ﻝﻭﺻﺣﻠﻟ
.ﺔﺣﻔﺻﻟﺎﻫﺫﻬﻳﻓ "ﻰﻘﻳﺳﻭﻣﻟﺍ ﻝﻳﻐﺷﺗ ﻲﻓ ﻡﻛﺣﺗﻟﺍ"
ﻰﻘﻳﺳﻭﻣﻟﺍ ﻝﻳﻐﺷﺗ ﻲﻓ ﻡﻛﺣﺗﻟﺍ
DVD ﺹﺍﺭﻗﺃ ﻰﻠﻋ ﺩﻭﺟﻭﻣﻟﺍ ﻰﻘﻳﺳﻭﻣﻟﺍ ﻯﻭﺗﺣﻣ ﻝﻳﻐﺷﺗ ﻲﻓ ﻡﻛﺣﺗﻟﺍ ﻙﻧﻛﻣﻳ
.USB ﻥﻳﺯﺧﺗ ﺓﺯﻬﺟﺃﻭ ﺔﻁﻭﻐﺿﻣﻟﺍ ﺹﺍﺭﻗﻷﺍﻭ
ﺩﻌﺑ ﻥﻋ ﻡﻛﺣﺗﻟﺍ ﺓﺩﺣﻭ ﻲﻓ ﺓﺩﻭﺟﻭﻣﻟﺍ ﺭﺍﺭﺯﻷﺍ
ﻰﻘﻳﺳﻭﻣﻟﺍ ﻝﻳﻐﺷﺗﻟ ﺔﻣﺩﺧﺗﺳﻣﻟﺍﻭ
۱
۲
۳
ﺔﻅﺣﻼﻣ |
|
٤
٥
٦
٢ .
ﺭﺎﻳﺧ ﺽﺭﻌﻳ .ﻯﺭﺧﺃ ﺔﻳﻭﺍﺯ ﻥﻣ ﺩﻬﺷﻣ ﺽﺭﻌﻟ
،۱/۱) ﺽﺭﻌﻠﻟ ﺔﺣﺎﺗﻣﻟﺍ ﺎﻳﺍﻭﺯﻟﺍ ﺩﺩﻋ "ﺔﻳﻭﺍﺯﻟﺍ"
.(.ﺦﻟﺇ ،۳/۱ ،۲/۱
◄
.ﻪﻳﻓ ﺏﻭﻏﺭﻣﻟﺍ bonusview ﺭﺎﻳﺧ ﻥﻳﻳﻌﺗﻟ ﺩﺩﺣ
ﻁﻘﻓ ﻑﻠﻣ ﻝﻳﻐﺷﺗ ﺩﻧﻋ ﺭﻬﻅﺗ ﻲﺗﻟﺍ ﺔﻣﺋﺎﻘﻟﺍ
ﻙﻧﻛﻣﻳ.ﺏﻭﻠﻁﻣﻟﺍ ﺔﺷﺎﺷﻟﺍ ءﻝﻣ ﻡﺟﺣ ﻁﺑﺿﻟ ﺩﺩﺣ
ﻊﺿﻭ) Mode1 ﻭ (ﻲﻠﺻﺃ) Original ﺩﻳﺩﺣﺗ
.(ﺭﺑﻛﺃ) (2 ﻊﺿﻭ) Mode2 ﻭ (ﺭﻳﺑﻛ) (1
ﻻ ﺩﻗ ."ﺕﺍﻭﺩﺃ" ﺔﻣﺋﺎﻗ ﻑﻠﺗﺧﺗ ﺩﻗ ،ﻥﻳﺯﺧﺗﻟﺍ ﺯﺎﻬﺟ ﻭﺃ ﺹﺭﻘﻟﺍ ﻉﻭﻧﻟ ﺎًﻘﻓﻭ
.ﺕﺍﺭﺎﻳﺧﻟﺍ ﻝﻛ ﺽﺭﻋ ﻡﺗﻳ
ﻭﻳﺩﻳﻓ ﻝﻳﻐﺷﺗ ﺔﻣﺋﺎﻗ ءﺎﺷﻧﺇ
ءﺎﺷﻧﺇ ﺔﻘﻳﺭﻁﻟ ﺎًﺑﻳﺭﻘﺗ ﺔﻘﺑﺎﻁﻣ ﺔﻘﻳﺭﻁﺑ ﻭﻳﺩﻳﻔﻟﺍ ﺕﺎﻔﻠﻣ ﻝﻳﻐﺷﺗ ﺔﻣﺋﺎﻗ ءﺎﺷﻧﺇ ﻙﻧﻛﻣﻳ
ﺔﻣﺋﺎﻗ ءﺎﺷﻧﺇ" ﻊﺟﺍﺭ ،ﺕﺍﺩﺎﺷﺭﻹﺍ ﺔﻓﺭﻌﻣﻟ .ﻰﻘﻳﺳﻭﻣﻟﺍ ﺕﺎﻔﻠﻣ ﻝﻳﻐﺷﺗ ﺔﻣﺋﺎﻗ
.26 ﺔﺣﻔﺻ "ﻰﻘﻳﺳﻭﻣﻟﺍ ﻝﻳﻐﺷﺗ
ﺔﻳﻭﺍﺯﻟﺍ
ﻭﻳﺩﻳﻓ
/ BONUSVIEW
ﺕﻭﺻ
BONUSVIEW
Full Screen
(ﺔﺷﺎﺷﻟﺍءﻝﻣ)
ﺕﺎﻣﻭﻠﻌﻣ.ﻭﻳﺩﻳﻔﻟﺍ ﻑﻠﻣ ﺕﺎﻣﻭﻠﻌﻣ ﻥﻣ ﻕﻘﺣﺗ
|
ﺔﻅﺣﻼﻣ |
◄
ﻡﻗﺭ ﻰﻠﻋ ﻁﻐﺿﺍ ،ﻝﻳﻐﺷﺗﻟﺍ ﺔﻣﺋﺎﻗ ﻝﻳﻐﺷﺗ ءﺎﻧﺛﺃ : ﻡﺎﻗﺭﻷﺍ ﺭﺍﺭﺯﺃ
ﻭﺃ ﺭﺯﻟﺍ ﻰﻠﻋ ﻁﻐﺿﺍ ،ﻝﻳﻐﺷﺗﻟﺍ ءﺎﻧﺛﺃ : (ﻲﻁﺧﺗ) Skip
(CD-DA) ﺔﻳﺗﻭﺻﻟﺍ ﺔﺟﻣﺩﻣﻟﺍ ﺹﺍﺭﻗﻷﺍ) ﻊﻳﺭﺳﻟﺍ ﻝﻳﻐﺷﺗﻟﺍ
ﺭﻳﻐﺗﺗ ،
|
٢٥ ﺔﻳﺑﺭﻌﻟﺍ
.ﺩﺩﺣﻣﻟﺍ ﺭﺎﺳﻣﻟﺍ ﻝﻳﻐﺷﺗ ﻡﺗﻳ .ﺏﻭﻠﻁﻣﻟﺍ ﺭﺎﺳﻣﻟﺍ
.ﺝﺭﺩﻣﻟﺍ ﻲﻟﺎﺗﻟﺍ ﻭﺃ ﻕﺑﺎﺳﻟﺍ ﻲﻘﻳﺳﻭﻣﻟﺍ ﻑﻠﻣ ﻰﻟﺇ ﻝﺎﻘﺗﻧﻼﻟ
.ﺭﺎﺳﻣ ﻑﺎﻘﻳﻹ : ﺭﺯﻟﺍ
. ﻭﺃ ﺭﺯﻟﺍ ﻰﻠﻋ ﻁﻐﺿﺍ ،ﻝﻳﻐﺷﺗﻟﺍ ءﺎﻧﺛﺃ
ﻭﺃ ﺭﺯﻟﺍ ﻰﻠﻋ ﻁﻐﺿﻟﺍ ﺎﻬﻳﻓ ﻡﺗﻳ ﺓﺭﻣ ﻝﻛ ﻲﻓ
.ﻝﻳﻐﺷﺗﻟﺍ ﺔﻋﺭﺳ
.ﺎًﺗﻗﺅﻣ ﺭﺎﺳﻣﻟﺍ ﻑﺎﻘﻳﺇ : ﺭﺯﻟﺍ
.ﺎًﻳﻟﺎﺣ ﺩﺩﺣﻣﻟﺍ ﺭﺎﺳﻣﻟﺍ ﻝﻳﻐﺷﺗﻟ : ﺭﺯﻟﺍ
(ﻁﻘﻓ
۱
۲
۳
ﺎًﻘﺑﺳﻣ ﻝﺟﺳﻣ ﻱﺭﺎﺟﺗ ﺕﻭﺻ ﺹﺭﻗ ﻝﻳﻐﺷﺗ
ﻲﻓ MP3 ﺹﺭﻗ ﻭﺃ (CD-DA) ﺎًﻁﻭﻐﺿﻣ ﺕﻭﺻ ﺹﺭﻗ ﻝﺧﺩﺃ
.ﺹﺍﺭﻗﻷﺍ ﺝﺭﺩ
ﻝﻳﻐﺷﺗ ﻡﺗﻳﺳ ،(CD-DA) ﻁﻭﻐﺿﻣﻟﺍ ﺕﻭﺻﻟﺍ ﺹﺭﻘﻟ ﺔﺑﺳﻧﻟﺎﺑ
ﻰﻠﻋ ﺔﻠﺟﺳﻣﻟﺍ ﺩﺍﻭﻣﻟﺍ ﻝﻳﻐﺷﺗ ﻡﺗﻳ .ﺎًﻳﺋﺎﻘﻠﺗ ﻰﻟﻭﻷﺍ ﺔﻠﺟﺳﻣﻟﺍ ﺓﺩﺎﻣﻟﺍ
.ﻪﻳﻠﻋ ﺎﻬﻠﻳﺟﺳﺗ ﺏﻳﺗﺭﺗﺑ ﺹﺭﻘﻟﺍ
ﺩﻳﺩﺣﺗﻟ ▼▲ ﻥﻳﺭﺯﻟﺍ ﻰﻠﻋ ﻁﻐﺿﺍ ،MP3 ﺹﺭﻘﻟ ﺔﺑﺳﻧﻟﺎﺑ
١ .
•
•
.E ﺭﺯﻟﺍ ﻰﻠﻋ ﻁﻐﺿﺍ ﻡﺛ ،(ﻰﻘﻳﺳﻭﻣ) Music
٤
TRACK 001
٥
+
٦
00:08 / 05:57
CD
Playlist
laylist
Tools
TRACK 001
Repeat Mode _ One +
< Adjust "
Select '
TRACK 002
RACK
TRACK 003
RACK 003
TRACK 004
TRACK 005
TRACK 006
Pause Tools '
"
Return
1/12
05:57
04:27
04:07
03:41
03:17
03:35
Return
Page 62

ﻁﺋﺎﺳﻭﻟﺍ ﻝﻳﻐﺷﺗ
ﻹ ﺭﻹ
7
ﺭﻭﺻﻟﺍ ﻝﻳﻐﺷﺗ ﻲﻓ ﻡﻛﺣﺗﻟﺍ
ﺹﺍﺭﻗﻷﺍﻭ DVD ﺹﺍﺭﻗﺃ ﻰﻠﻋ ﺓﺩﻭﺟﻭﻣﻟﺍ ﺭﻭﺻﻟﺍ ﻝﻳﻐﺷﺗ ﻲﻓ ﻡﻛﺣﺗﻟﺍ ﻙﻧﻛﻣﻳ
.USB ﻥﻳﺯﺧﺗ ﺓﺯﻬﺟﺃﻭ ﺔﻁﻭﻐﺿﻣﻟﺍ
ﺕﺍﻭﺩﻷﺍ ﺔﻣﺋﺎﻗ ﻡﺍﺩﺧﺗﺳﺍ
.ﺕﺍﻭﺩﺃ ﺭﺯﻟﺍ ﻰﻠﻋ ﻁﻐﺿﺍ ،ﻝﻳﻐﺷﺗﻟﺍ ءﺎﻧﺛﺃ
ﺽﺭﻌﻟ ﺕﻗﺅﻣ ﻑﺎﻘﻳﺇ/ﻝﻳﻐﺷﺗ ءﺍﺭﺟﻹ ﺩﺩﺣ
.ﺢﺋﺍﺭﺷﻟﺍ ﺽﺭﻋ ﺔﻋﺭﺳ ﻁﺑﺿﻟ ﺭﺎﻳﺧﻟﺍ ﺍﺫﻫ ﺩﺩﺣ
ءﺎﻧﺛﺃ ﻰﻘﻳﺳﻭﻣﻟﺍ ﻰﻟﺇ ﻉﺎﻣﺗﺳﻼﻟ ﺭﺎﻳﺧﻟﺍ ﺍﺫﻫ ﺩﺩﺣ
.ﺢﺋﺍﺭﺷﻟﺍ ﺽﺭﻋ ﻝﻳﻐﺷﺗ
ﻡﺗﻳ) .ﺔﻳﻟﺎﺣﻟﺍ ﺓﺭﻭﺻﻟﺍ ﺭﻳﺑﻛﺗﻟ ﺭﺎﻳﺧﻟﺍ ﺍﺫﻫ ﺩﺩﺣ
(ﻑﺎﻌﺿﺃ ٤ ﻰﺗﺡ ﺭﻳﺑﻛﺗﻟﺍ
ﺍﺫﻫ ﻝﻣﻌﻳﺳ) .ﺓﺭﻭﺻﻟﺍ ﺭﻳﻭﺩﺗﻟ ﺭﺎﻳﺧﻟﺍ ﺍﺫﻫ
.ﺢﺋﺍﺭﺷﻟﺍ
ﺩﺩﺣ
ﺽﺭﻋ ﻑﺎﻘﻳﺇ / ءﺩﺑ
ﺢﺋﺍﺭﺷﻟﺍ
ﺽﺭﻋ ﺔﻋﺭﺳ
ﺢﺋﺍﺭﺷﻟﺍ
ﺔﻳﻔﻠﺧﻟﺍ ﻰﻘﻳﺳﻭﻣ
ﺭﻳﺑﻛﺗﻟﺍ/ﺭﻳﻐﺻﺗﻟﺍ
ﻩﺎﺟﺗﺍ ﺱﻔﻧ ﻲﻓ ﺎﻣﺇ ﺓﺭﻭﺻﻟﺍ ﺭﻳﻭﺩﺗ ﻰﻠﻋ ﺭﺎﻳﺧﻟﺍ
(.ﺔﻋﺎﺳﻟﺍ ﺏﺭﺎﻘﻋ ﻩﺎﺟﺗﺍ ﺱﻛﻋ ﻭﺃ ﺔﻋﺎﺳﻟﺍ ﺏﺭﺎﻘﻋ
ﻡﺳﻻﺍ ﻙﻟﺫ ﻲﻓ ﺎﻣﺑ ﺓﺭﻭﺻﻟﺍ ﺕﺎﻣﻭﻠﻌﻣ ﺽﺭﻌﻟ
.ﺎﻫﺭﻳﻏﻭ ﻡﺟﺣﻟﺍﻭ
ﺕﺎﻣﻭﻠﻌﻣ
|
ﺔﻅﺣﻼﻣ |
ﻡﺗﻳ ﻻ ﺩﻗ ."ﺕﺍﻭﺩﺃ" ﺔﻣﺋﺎﻗ ﻑﻠﺗﺧﺗ ﺩﻗ ،ﻥﻳﺯﺧﺗﻟﺍ ﺯﺎﻬﺟ ﻭﺃ ﺹﺭﻘﻟﺍ ﻉﻭﻧﻟ ﺎ
.ﺕﺍﺭﺎﻳﺧﻟﺍ ﻝﻛ ﺽﺭﻋ
ﺱﻔﻧ ﻲﻓ ﺓﺭﻭﺻﻟﺍ ﻑﻠﻣ ﻥﻭﻛﻳ ﻥﺃ ﺏﺟﻳ ،ﺔﻳﻔﻠﺧﻟﺍ ﻰﻘﻳﺳﻭﻣ ﺔﻔﻳﻅﻭ ﻥﻳﻛﻣﺗﻟ
.ﻰﻘﻳﺳﻭﻣﻟﺍ ﻑﻠﻣ ﺎﻬﺑ ﻲﺗﻟﺍ ﻥﻳﺯﺧﺗﻟﺍ ﺔﻁﻳﺳﻭ
MP3 ﻑﻠﻣﺑ ﺹﺎﺧﻟﺍ ﺕﺑﻟﺍ ﻝﺩﻌﻣﺑ ﺕﻭﺻﻟﺍ ﺓﺩﻭﺟ ﺭﺛﺄﺗﺗ ﺩﻗ ،ﻙﻟﺫ ﻊﻣﻭ
.ﺯﻳﻣﺭﺗﻟﺍ ﺔﻘﻳﺭﻁﻭ ﺓﺭﻭﺻﻟﺍ ﻡﺟﺣﻭ
ﺭﻭﺻ ﻝﻳﻐﺷﺗ ﺔﻣﺋﺎﻗ ءﺎﺷﻧﺇ
ءﺎﺷﻧﺇ ﺔﻘﻳﺭﻁﻟ ﺎًﺑﻳﺭﻘﺗ ﺔﻘﺑﺎﻁﻣ ﺔﻘﻳﺭﻁﺑ ﺭﻭﺻﻟﺍ ﻝﻳﻐﺷﺗ ﺔﻣﺋﺎﻗ ءﺎﺷﻧﺇ ﻙﻧﻛﻣﻳ
Creating a" ﻊﺟﺍﺭ ،ﺕﺍﺩﺎﺷﺭﻹﺍ ﺔﻓﺭﻌﻣﻟ .ﻰﻘﻳﺳﻭﻣﻟﺍ ﺕﺎﻔﻠﻣ ﻝﻳﻐﺷﺗ ﺔﻣﺋﺎﻗ
.ﺔﺣﻔﺻﻟﺎﻫﺫﻬﻳﻓ (ﻰﻘﻳﺳﻭﻣﻠﻳﻐﺷﺗﺔﻣﺋﺎﻗءﺎﺷﻧﺇ) "Music Playlist
(ﺔﻠﺟﺳﻣﻟﺍ ﺩﺍﻭﻣﻟﺍ ﺭﺍﺭﻛﺗ) Repeating Tracks
.ﺔﻠﺟﺳﻣﻟﺍ ﺩﺍﻭﻣﻟﺍ ﺭﺍﺭﻛﺗﻟ ﺞﺗﻧﻣﻟﺍ ﻁﺑﺿ ﻙﻧﻛﻣﻳ
.(ﺕﺍﻭﺩﺃ) TOOLS ﺭﺯﻟﺍ ﻰﻠﻋ ﻁﻐﺿﺍ ،ﻰﻘﻳﺳﻭﻣﻟﺍ ﻝﻳﻐﺷﺗ ءﺎﻧﺛﺃ
(ﺔﻠﺟﺳﻣ ﺓﺩﺎﻣ) Track ﻭﺃ (ﻑﺎﻘﻳﺇ) Off ﺩﻳﺩﺣﺗﻟ ◄► ﺭﺯﻟﺍ ﻡﺩﺧﺗﺳﺍ
(ﻲﺋﺍﻭﺷﻋ ﻝﻳﺩﺑﺗ) Shuffle ﻭﺃ (ﻝﻛﻟﺍ) All ﻭﺃ (ﺓﺩﺣﺍﻭ) One ﻭﺃ
.E ﺭﺯﻟﺍ ﻰﻠﻋ ﻁﻐﺿﺍ ﻡﺛ (ﺭﺍﺭﻛﺗﻟﺍ ﻊﺿﻭ) Repeat Mode ﻲﻓ
ﻰﻘﻳﺳﻭﻣ ﻝﻳﻐﺷﺗ ﺔﻣﺋﺎﻗ ءﺎﺷﻧﺇ
DVD ﺹﺭﻗ ﻭﺃ ﻁﻭﻐﺿﻣ ﺹﺭﻗ ﻥﻣ ﻰﻘﻳﺳﻭﻣﻟﺍ ﻝﻳﻐﺷﺗ ﺔﻟﺎﺣ ﻲﻓ
.(') (ﻉﻭﺟﺭ) RETURN ﻭﺃ
ﺔﻣﺋﺎﻗ ءﺎﺷﻧﺇ ﺔﻟﺎﺣ ﻲﻓ .(ﻰﻘﻳﺳﻭﻣﻟﺍ ﺔﻣﺋﺎﻗ) Music List ﺔﺷﺎﺷ ﺭﻬﻅﺗ
ﺯﺎﻬﺟ ﻭﺃ ﻡﺩﺧﺗﺳﻣﻟﺍ ﻪﺋﺎﺷﻧﺈﺑ ﻡﺎﻗ ﺹﺭﻗ ﻰﻠﻋ ﻰﻘﻳﺳﻭﻣﻟﺍ ﻥﻣ ﻝﻳﻐﺷﺗ
ﺎﻣﻛ (ﻰﻘﻳﺳﻭﻣﻟﺍ ﺔﻣﺋﺎﻗ) Music list ﻰﻟﺇ ﻝﻭﺻﻭﻟﺎﺑ ﻡﻘﻓ ،USB
ﻭﺃ 23 ﺔﺣﻔﺻ "USB ﺯﺎﻬﺟ ﻰﻠﻋ ﺕﺎﻔﻠﻣﻟﺍ ﻝﻳﻐﺷﺗ" ﻲﻓ ﺢﺿﻭﻣ ﻭﻫ
.23 ﺔﺣﻔﺻ "ﻡﺩﺧﺗﺳﻣﻟﺍ ﻪﻠﺟﺳ ﻯﻭﺗﺣﻣ ﻰﻠﻋ ﻝﻣﺗﺷﻳ ﺹﺭﻗ ﻝﻳﻐﺷﺗ"
ﻡﺛ ﺏﻭﻠﻁﻣﻟﺍ ﻑﻠﻣﻟﺍ ﻰﻟﺇ ﻝﺎﻘﺗﻧﻼﻟ ◄►▼▲ ﺭﺍﺭﺯﻷﺍ ﻰﻠﻋ ﻁﻐﺿﺍ
ﺭﻳﻭﺩﺗ
ً
ﻘﻓﻭ
ﺍﺫﻫ ﺭﺭﻛ .ﻩﺩﻳﺩﺣﺗﻟ (C) (ﺭﻔﺻﺃ) YELLOW ﺭﺯﻟﺍ ﻰﻠﻋ ﻁﻐﺿﺍ
Music TRACK 002 2 files selected 1/2 Page
TRACK 001
05:57
TRACK 003
04:07
TRACK 005
03:17
TRACK 007
03:47
TRACK 009
◄
03:53
◄
ﺭﺯﻟﺍ ﻰﻠﻋ ﻁﻐﺿﺍ ﻡﺛ ﻑﻠﻣﻟﺍ ﻰﻟﺇ ﻝﻘﺗﻧﺍ ،ﻝﻳﻐﺷﺗﻟﺍ ﺔﻣﺋﺎﻗ ﻥﻣ ﻡﻠﻳﻓ ﺔﻟﺍﺯﻹ
.ﺓﺩﺩﺣﻣﻟﺍ ﺕﺎﻔﻠﻣﻟﺍ ﻝﻳﻐﺷﺗﻟ E ﺭﺯﻟﺍ ﻰﻠﻋ ﻁﻐﺿﺍ
ﻭﺃ ﻰﻠﻋ ﻁﻐﺿﺍ ،(ﻰﻘﻳﺳﻭﻣﻟﺍ ﺔﻣﺋﺎﻗ) Music List ﻰﻟﺇ ﻝﺎﻘﺗﻧﻼﻟ
.E ﺭﺯﻟﺍ ﻰﻠﻋ ﻁﻐﺿﺍ ،(ﻝﻳﻐﺷﺗﻟﺍ ﺔﻣﺋﺎﻗ) Playlist ﻰﻟﺇ ﻉﻭﺟﺭﻠﻟ
ﺔﻠﺟﺳﻣ ﺓﺩﺎﻣ 99 ﻰﻟﺇ ﻝﺻﻳ ﺎﻣ ﻰﻠﻋ ﻱﻭﺗﺣﺗ ﻝﻳﻐﺷﺗ ﺔﻣﺋﺎﻗ ءﺎﺷﻧﺇ ﻙﻧﻛﻣﻳ
Playlist ﻥﻣ (ﻰﻘﻳﺳﻭﻣﻟﺍ ﺔﻣﺋﺎﻗ) Music List ﻰﻟﺇ ﻝﺎﻘﺗﻧﻻﺍ ﺔﻟﺎﺣ ﻲﻓ
ﻝﻳﻐﺷﺗﻟﺍ ﺔﻣﺋﺎﻗ ﻝﻳﻐﺷﺗ ﻡﺗﻳﺳ ،ﻝﻳﻐﺷﺗﻟﺍ ﺔﻣﺋﺎﻗ ﻰﻟﺇ ﻊﺟﺭﺍ ﻡﺛ (ﻝﻳﻐﺷﺗﻟﺍ ﺔﻣﺋﺎﻗ)
.ﺔﻳﻓﺎﺿﻹﺍ ﺕﺎﻔﻠﻣﻟﺍ ﺩﻳﺩﺣﺗﻟ ءﺍﺭﺟﻹﺍ
.(ﻝﻳﻐﺷﺗﻟﺍ ﺔﻣﺋﺎﻗ) Playlist ﺔﺷﺎﺷ ﺭﻬﻅﺗ
.(CD-DA) ﺔﻁﻭﻐﺿﻣﻟﺍ ﺕﻭﺻﻟﺍ ﺹﺍﺭﻗﺃ ﻰﻠﻋ
ﺭﺯﻟﺍ ﻰﻠﻋ ﻁﻐﺿﺍ ،ﻱﺭﺎﺟﺗ
TRACK 002
04:27
4:2
TRACK 004
03:41
TRACK 006
03:35
TRACK 008
03:49
TRACK 010
03:45
.(C) (ﺭﻔﺻﺃ) YELLOW
.(') (ﻉﻭﺟﺭ) RETURN
|
.ﺔﻳﺍﺩﺑﻟﺍ ﻥﻣ ﻯﺭﺧﺃ ﺓﺭﻣ
١ .
٢ .
١ .
٢ .
٣ .
٤ .
٥ .
٦ .
ﺔﻅﺣﻼﻣ |
◄
◄
ﺔﻳﺑﺭﻌﻟﺍ ٢٦
|
Page 63

(ﺯﺎﻔﻠﺗﻟﺎﺗﻭﺻ) TV Sound ﺭﺯ ﻡﺍﺩﺧﺗﺳﺍ
۰٥ﻁﺋﺎﺳﻭﻟﺍ ﻝﻳﻐﺷﺗ
TV Sound
ﺭﺯﻟﺍ ﻥﺈﻓ ،Anynet+ (HDMI-CEC) ﻡﻋﺩﻳ ﺯﺎﻔﻠﺗ ﻙﻳﺩﻟ ﻥﺎﻛ ﺍﺫﺇ
ﺕﺍﺭﺑﻛﻣ ﻰﻟﺇ ﺯﺎﻔﻠﺗﻟﺍ ﺕﻭﺻ ﻪﻳﺟﻭﺗ ﻙﻟ ﺢﻳﺗﻳ (ﺯﺎﻔﻠﺗﻟﺍ ﺕﻭﺻ) TV SOUND
ﻩﺫﻫ ﻊﺑﺗﺍ ،ﻡﺍﺩﺧﺗﺳﻼﻟ. ﺯﺎﻔﻠﺗﻟﺍ ﺕﻭﺻ ﺕﺍﺭﺑﻛﻣ ﻭﺃ ﺔﻳﻟﺯﻧﻣﻟﺍ ﺎﻣﻧﻳﺳﻟﺍ ﺕﻭﺻ
.ﺔﻳﻟﺯﻧﻣﻟﺍ ﺎﻣﻧﻳﺳﻟﺎﺑﻭ ﺯﺎﻔﻠﺗﻟﺎﺑ HDMI ﻝﺑﺎﻛ ﻝﻳﺻﻭﺗﺑ ﻡﻗ
ﻡﻟﺍﺎﻣﻧﻳﺳﻟﺎﻳﻔﻠﻳﻐﺷﺗﻟﺎﻌﺿﻭﯩﻠﻋ Anynet+ (HDMI-CEC) ﻁﺑﺿﺍ
ﻡﻛﺣﺗﻟﺍ ﺯﺎﻬﺟ ﻲﻓ (ﺯﺎﻔﻠﺗﻟﺍ ﺕﻭﺻ) TV SOUND ﺭﺯﻟﺍ ﻕﻭﻓ ﻁﻐﺿﺍ
(ﺯﺎﻔﻠﺗﻟﺍ ﺕﻭﺻ ﻝﻳﻐﺷﺗ) TV SOUND ON ﺭﺯﻟﺍ ﺽﻣﻭﻳ.ﺩﻌُﺑ ﻥﻋ
ﺏﻛﻣﻧﻣﺯﺎﻔﻠﺗﻟﺎﺗﻭﺻﺟﺭﺧﻳ ،(ﺯﺎﻔﻠﺗﻟﺎﺗﻭﺻ) TV SOUND ﻝﻳﻐﺷﺗﺩﻧﻋ
ﺎﻔﻠﺗﻟﺎﺗﻭﺻﺟﺭﺧﻳ،(ﺯﺎﻔﻠﺗﻟﺎﺗﻭﺻ) TV SOUND ﻝﻳﻐﺷﺗ ﻑﺎﻘﻳﺇ ﺩﻧﻋ
.D. IN ﻰﻟﺇ ﺭﻳﻐﺗﻳ ﻡﺛ ،ﺔﻳﻣﺎﻣﻷﺍ ﺔﺣﻭﻠﻟﺍ ﺔﺷﺎﺷ ﻰﻠﻋ
(ﺯﺎﻔﻠﺗﻟﺎﺗﻭﺻ) TV SOUND ﺭﺯﻟﺍ ﻰﻠﻋ ﻁﻐﺿﺍ
.(ﺯﺎﻔﻠﺗﻟﺎﺗﻭﺻ) TV SOUNDﻝﻳﻐﺷﺗﻓﺎﻘﻳﻺﯩﺭﺧﺃﺓﺭﻣ
.ﻝﺻﺗﻣﻟﺍ+Anynetﺯﺎﻔﻠﺗﺗﻭﺻﺗﺍﺭﺑﻛﻣﻧﻣﺯ
:(ﺯﺎﻔﻠﺗﻟﺎﺗﻭﺻ) TV SOUNDﻡﺍﺩﺧﺗﺳﺍ
TV SOUND ON/OFFﻡﻋﺩﺗﺎﻔﺻﺍﻭﻣ
TV Sound
OFF
ﻭﺻﻠﻳﻐﺷﺗﻓﺎﻘﻳﺇ)
(ﺯﺎﻔﻠﺗﻟﺎﺗ
TV
Sound
ON
ﻭﺻﻠﻳﻐﺷﺗ)
(ﺯﺎﻔﻠﺗﻟﺎﺗ
(HDMI-CEC)
(ﻝﻳﻐﺷﺗﻓﺎﻘﻳﺇ) OFFOX
ﺩﻌُﺑﻧﻌﻣﻛﺣﺗﻟﺍﺯﺎﻬﺟﻳﻓ
.(15 ﺔﺣﻔﺻ ﻊﺟﺍﺭ)
.ﺔﻳﻟﺯﻧﻣﻟﺍﺎﻣﻧﻳﺳﻟﺎﺗﻭﺻﺗﺍﺭ
ﺔﻳﻟﺯﻧﻣﻟﺍﺎﻣﻧﻳﺳﻟﺎﺗﻭﺻ
(ﺯﺎﻔﻠﺗﻟﺎﺗﻭﺻﻠﻳﻐﺷﺗﻓﺎﻘﻳﺇ/ﻝﻳﻐﺷﺗ)
ﺩﺍﺩﻋﺇ
Anynet+
(ﻝﻳﻐﺷﺗ) ONOO
ﺔﻳﻠﻣﻋ ﺩﺟﻭﺗ ﻻOX
TV SOUND
:ﺕﺍﻭﻁﺧﻟﺍ
.ﺯﺎﻔﻠﺗﻟﺍﻭﺔﻳﻟﺯﻧ
•
•
1 (.ﺔﻳﻟﺯﻧﻣﻟﺍﺎﻣﻧﻳﺳﻟﺎﺗﻭﺻﺗﺍﺭﺑﻛﻣﻟﻼﺧﺯﺎﻔﻠﺗﻟﺎﺗﻭﺻﯩﻟﺈﻋﺎﻣﺗﺳﻻﺍﺩﻳﺭﺗﺎﻣﺩﻧﻋ
2 (ﺕﺍﺭﺑﻛﻣﻟﻼﺧﺯﺎﻔﻠﺗﻟﺎﺑﻠﺻﺗﻣ USB ﺯﺎﻬﺟﻧﻣﺗﻭﺻﻟﺎﯩﻟﺈﻋﺎﻣﺗﺳﻻﺍﺩﻳﺭﺗﺎﻣﺩﻧﻋ
ﻝﺻﺗﻣﻟﺍ ﺯﺎﻔﻠﺗﻟﺍ
ﺯﺎﻔﻠﺗ
Anynet+
(HDMI-CEC)
ﻡﻭﻋﺩﻣﻟﺍ
ﺯﺎﻔﻠﺗ
Anynet+
(HDMI-CEC)
ﻡﻭﻋﺩﻣﻟﺍﺭﻳﻏ
ﻭﻳﺩﺍﺭﻟﺍ ﻰﻟﺇ ﻉﺎﻣﺗﺳﻻﺍ
ﺩﻌﺑ ﻥﻋ ﻡﻛﺣﺗﻟﺍ ﺓﺩﺣﻭ ﻲﻓ ﺓﺩﻭﺟﻭﻣﻟﺍ ﺭﺍﺭﺯﻷﺍ ﻡﺍﺩﺧﺗﺳﺍ
.FM ﺩﻳﺩﺣﺗﻟ ﺔﻔﻳﻅﻭﻟﺍ ﺭﺯ ﻰﻠﻋ ﻁﻐﺿﺍ
،ﻕﺑﺳﻣ ﺩﺍﺩﻋﺇ ﺩﻳﺩﺣﺗﻟ ﺭﺯﻟﺍ ﻲﻠﻋ ﻁﻐﺿﺍ :۱ ﻕﺏﺳﻣﻟﺍ ﻁﺑﺿﻟﺍ
ﺓﺩﻌﻣﻟﺍ ﺔﻁﺣﻣﻟﺍ ﺩﻳﺩﺣﺗﻟ UP, DOWN ﻁﺑﺿ ﺭﺯﻟﺍ ﻲﻠﻋ ﻁﻐﺿﺍ ﻡﺛ
١ .
ﻁﻐﺿﺍ ﻡﺛ ،ﻱﻭﺩﻳ ﺩﻳﺩﺣﺗﻟ ﺭﺯﻟﺍ ﻲﻠﻋ ﻁﻐﺿﺍ :ﻱﻭﺩﻳﻟﺍ ﻁﺑﺿﻟﺍ
٢ .
ﺭﺑﻛﻷﺍ ﺩﺩﺭﺗﻟﺍ ﺏﺳﺣ ﻁﺑﺿﻠﻟ UP, DOWN ﻁﺑﺿ ﺭﺯﻟﺍ ﻲﻠﻋ
.ﺞﺗﻧﻣﻟﺍ ﺓﺭﻛﺍﺫ ﻰﻟﺇ ﺎًﻘﺑﺳﻣ ﺓﺩﻌﻣ ﺕﺎﻁﺣﻣ
.ﻲﻠﻳ ﺎﻣﻳﻓ ﺕﺎﻁﺣﻣﻠﻟ ﻕﺑﺳﻣﻟﺍ ﻁﺑﺿﻟﺍ ﺭﻅﻧﺍ
٣ .
ﻁﻐﺿﺍ ﻡﺛ ،ﻱﻭﺩﻳ ﺭﺎﻳﺗﺧﻻ ﺭﺯﻟﺍ ﻲﻠﻋ ﻁﻐﺿﺍ :ﻲﺋﺎﻘﻠﺗﻟﺍ ﻁﺑﺿﻟﺍ
ﺎًﻳﺋﺎﻘﻠﺗ ﺙﺣﺑﻠﻟ UP, DOWN ﻁﺑﺿ ﺭﺯﻟﺍ ﻲﻠﻋ ﺭﺍﺭﻣﺗﺳﻻﺍ ﻊﻣ
٤ .
ﻭﻳﺭﺗﺳﺍ ﻥﻳﺑ ﺕﻭﺻﻟﺍ ﻝﻳﺩﺑﺗ ﻡﺗﻳ ،ﺭﺯﻟﺍ ﻰﻠﻋ ﻁﻐﺿﻟﺍ ﺎﻬﻳﻓ ﻡﺗﻳ ﺓﺭﻣ ﻝﻛ ﻲﻓ
ﺢﺿﺍﻭ ﺙﺑ ﻲﻠﻋ ﻝﻭﺻﺣﻠﻟ ﻱﺩﺎﺣﺃ ﺩﺩﺣ ،ﻝﺎﺑﻘﺗﺳﻻﺍ ﺔﻔﻳﻌﺿ ﻕﻁﺎﻧﻣﻟﺍ ﻲﻓ
ﺎًﻘﺑﺳﻣ ﺔﻁﻭﺑﺿﻣﻟﺍ ﺕﺎﻁﺣﻣﻟﺍ
ً
ﻘﺑﺳﻣ FM 89.10 ﺩﺩﺭﺗﻟﺍ ﻁﺑﺿ :ﻝﺎﺛﻣ
.ﺓﺭﻛﺍﺫﻟﺍ ﻲﻓ ﺎ
.FM ﺩﻳﺩﺣﺗﻟ ﺔﻔﻳﻅﻭﻟﺍ ﺭﺯ ﻰﻠﻋ ﻁﻐﺿﺍ
.<89.10> ﺩﻳﺩﺣﺗﻟ UP, DOWN ﻁﺑﺿ ﺭﺯﻟﺍ ﻲﻠﻋ ﻁﻐﺿﺍ
.ﻑﻟﺍﻭﻣﻟﺍ ﺓﺭﻛﺍﺫ ﺭﺯﻟﺍ ﻲﻠﻋ ﻁﻐﺿﺍ
.ﺔﺷﺎﺷﻟﺍ ﻲﻠﻋ "ﻡﻗﺭﻟﺍ" ﺔﻟﺎﺳﺭ ﺽﻣﻭﺗ
ﻥﻣ "ﻡﻗﺭﻟﺍ" ﺔﻟﺎﺳﺭ ءﺎﻔﺗﺧﺍ ﻝﺑﻗ ﻑﻟﺍﻭﻣﻟﺍ ﺓﺭﻛﺍﺫ ﺭﺯﻟﺍ ﻲﻠﻋ ﻁﻐﺿﺍ
"ﻡﻗﺭﻟﺍ" ﺔﻟﺎﺳﺭ ﻲﻔﺗﺧﺗﺳ ،ﻑﻟﺍﻭﻣﻟﺍ ﺓﺭﻛﺍﺫ ﺭﺯﻟﺍ ﻰﻠﻋ ﻁﻐﺿﻟﺍ ﺩﻌﺑ
ﻁﺑﺿ ﺭﺯﻟﺍ ﻲﻠﻋ ﻁﻐﺿﺍ ،ﺎ
.ﻯﺭﺧﺃ ﺓﺭﻣ ﻑﻟﺍﻭﻣﻟﺍ ﺓﺭﻛﺍﺫ ﺭﺯﻟﺍ ﻲﻠﻋ ﻁﻐﺿﺍ
.ﺓﺭﻛﺍﺫﻟﺍ ﻲﻓ ﺔﻁﺣﻣﻟﺍ ﻥﻳﺯﺧﺗ ﻡﺗﻳﻭ ﺔﺷﺎﺷﻟﺍ ﻥﻣ
.٤ ﻰﻟﺇ ۲ ﻥﻣ ﺕﺍﻭﻁﺧﻟﺍ ﺭﺭﻛ ،ﺎًﻘﺑﺳﻣ ﻯﺭﺧﺃ ﺔﻁﺣﻣ ﻁﺑﺿﻟ
ً
ﻘﺑﺳﻣ ﺔﻁﻭﺑﺿﻣ ﺔﻁﺣﻣ ﻰﻠﻋ ﻁﺑﺿﻠﻟ
.ﺔﺑﻭﻠﻁﻣﻟﺍ ﺔﻁﺣﻣﻟﺍ ﻁﺑﺿ
•
.ﺎًﻘﺑﺳﻣ
- ﺔﻓﺎﺿﺇ ﺏﺟﻳ ،ﺎًﻘﺑﺳﻣ ﺓﺩﻌﻣ ﺔﻁﺣﻣ ﻰﻠﻋ ﻁﺑﺿﻟﺍ ﻥﻣ ﻥﻛﻣﺗﺗ ﻥﺃ ﻝﺑﻗ
•
.ﻝﻗﻷﺍ ﻭﺃ
•
.ﻕﺎﻁﻧﻟﺍ ﻲﻓ
ﻭﻳﺭﺗﺳﺍ/ﻱﺩﺎﺣﺃ ﺩﺍﺩﻋﺇ
.MO/ST ﺭﺯﻟﺍ ﻰﻠﻋ ﻁﻐﺿﺍ
.ﻱﺩﺎﺣﺃ ﻭ
.ﺵﻳﻭﺷﺗﻟﺍ ﻥﻣ ﻝﺎﺧﻭ
•
•
.ﺎًﻳﺋﺎﻘﻠﺗ ﺔﺷﺎﺷﻟﺍ
•
•
.UP, DOWN
١ .
٢ .
•
•
١ .
٢ .
٣ .
٤ .
٥ .
|
٢٧ ﺔﻳﺑﺭﻌﻟﺍ
Page 64

ﺔﻛﺑﺷﻟﺍ ﺕﺎﻣﺩﺧ
DLNA ﻡﺍﺩﺧﺗﺳﺍ
ﺭﺗﻭﻳﺑﻣﻛﻟﺍ ﻰﻠﻋ ﺓﺩﻭﺟﻭﻣﻟﺍ ﺕﺎﻔﻠﻣﻟﺍ ﻰﻟﺇ ﻝﻭﺻﻭﻟﺍ DLNA ﺞﻣﺎﻧﺭﺑ ﻙﻟ ﺢﻳﺗﻳ
DLNA ﺞﻣﺎﻧﺭﺑ ﺩﺍﺩﻋﻹ DLNA ﻡﺩﺧﺗﺳﻣ ﻝﻳﻟﺩ ﻲﻓ ﺓﺩﺭﺍﻭﻟﺍ ﺕﺎﻬﻳﺟﻭﺗﻟﺍ ﻊﺑﺗﺍ
ﺩﻳﺭﺗ ﻲﺗﻟﺍ ﺕﺎﻔﻠﻣﻟﺍﻭ ﺕﺍﺩﻠﺟﻣﻟﺍ ﻰﻠﻋ ﺕﺎﻣﻼﻋ ﻊﺿﻭﻭ ﺭﺗﻭﻳﺑﻣﻛﻟﺍ ﻰﻠﻋ
ﺞﻣﺎﻧﺭﺑ ﺩﺍﺩﻋﺇ ﺩﻌﺑ ﺎﻬﻠﻳﻐﺷﺗﻭ ﺭﺗﻭﻳﺑﻣﻛﻟﺍ ﻰﻠﻋ ﺓﺩﻭﺟﻭﻣﻟﺍ ﺕﺎﻔﻠﻣﻟﺍ ﻰﻟﺇ ﻝﻭﺻﻭﻠﻟ
.ﻲﻟﺯﻧﻣﻟﺍ ﺡﺭﺳﻣﻟﺍ ﻡﺎﻅﻧﻭ ﻥﻭﻳﺯﻔﻳﻠﺗﻟﺍﻭ ﺭﺗﻭﻳﺑﻣﻛﻟﺍ ﻝﻳﻐﺷﺗﺑ ﻡﻗ
.ﺭﺗﻭﻳﺑﻣﻛﻟﺍ ﻰﻠﻋ ﻙﺭﺗﺷﻣﻟﺍ DLNA ﻡﺩﺎﺧ ﻝﻳﻐﺷﺗ ﻥﻣ ﺩﻛﺄﺗ
ﺡﺭﺳﻣﻟﺎﺑ (ﺓﺯﻬﺟﻷﺍ ﺽﺭﻋ) (D) (ﻕﺭﺯﺃ) BLUE ﺭﺯﻟﺍ ﻰﻠﻋ ﻁﻐﺿﺍ
ﻲﻓ ﺭﺗﻭﻳﺑﻣﻛﻟﺍ ﺩﻳﺩﺣﺗﻟ ﻥﻣﻳﻷﺍ ﻭﺃ ﺭﺳﻳﻷﺍ ﻡﻬﺳﻟﺍ ◄► ﺭﺯ ﻡﺩﺧﺗﺳﺍ
Videos ﻥﻳﺑ ﻥﻣ ،ﻪﻠﻳﻐﺷﺗ ﻭﺃ ﻪﺿﺭﻋ ﺩﻳﺭﺗ ﻱﺫﻟﺍ ﻑﻠﻣﻟﺍ ﻉﻭﻧ ﺩﺩﺣ
ﻡﺛ ،(ﻰﻘﻳﺳﻭﻣﻟﺍ) Music ﻭﺃ (ﺭﻭﺻﻟﺍ) Photos ﻭﺃ (ﻭﻳﺩﻳﻔﻟﺍ ﺕﺎﻔﻠﻣ)
ﻉﻭﻧ ﻰﻠﻋ ﻱﻭﺗﺣﻳ ﻱﺫﻟﺍ ﺩﻠﺟﻣﻟﺍ ﺩﻳﺩﺣﺗﻟ ◄►▼▲ ﺭﺯﻟﺍ ﻡﺩﺧﺗﺳﺍ
File List ﺽﺭﻋ ﻡﺗﻳ .E ﻰﻠﻋ ﻁﻐﺿﺍ ﻡﺛ ﺎﻬﺗﺩﺩﺣ ﻲﺗﻟﺍ ﺕﺎﻔﻠﻣﻟﺍ
.E ﻰﻠﻋ ﻁﻐﺿﺍ ﻡﺛ ،ﻪﻠﻳﻐﺷﺗ ﻭﺃ ﻪﺿﺭﻋ ﺩﻳﺭﺗ ﻱﺫﻟﺍ ﻑﻠﻣﻟﺍ ﺩﺩﺣ
ﺱﻔﻧﺑ ﺭﺗﻭﻳﺑﻣﻛﻟﺍ ﻰﻠﻋ ﺓﺩﻭﺟﻭﻣﻟﺍ ﺕﺎﻔﻠﻣﻟﺍ ﻥﻣ ﻝﻳﻐﺷﺗ ﻡﺋﺍﻭﻗ ءﺎﺷﻧﺇ ﻙﻧﻛﻣﻳ
ﻰﻠﻋ ﺓﺩﻭﺟﻭﻣﻟﺍ ﺕﺎﻔﻠﻣﻟﺍ ﻥﻣ ﻝﻳﻐﺷﺗ ﻡﺋﺍﻭﻗ ءﺎﺷﻧﻹ ﺎﻬﻌﺑﺗﺗ ﻲﺗﻟﺍ ﺔﻘﻳﺭﻁﻟﺍ
ﺭﺗﻭﻳﺑﻣﻛﻟﺍ ﻰﻠﻋ ﺕﺎﻔﻠﻣﻟﺍ ﻝﻳﻐﺷﺗ ﻲﻓ ﻡﻛﺣﺗﻟﺍ ﻙﻧﻛﻣﻳ ،ﺔﻠﻳﻠﻗ ﺕﺍءﺎﻧﺛﺗﺳﺍ ﻊﻣ
USB ﺓﺯﻬﺟﺃ ﻰﻠﻋ ﺕﺎﻔﻠﻣﻟﺍ ﻝﻳﻐﺷﺗ ﻲﻓ ﻡﻛﺣﺗﻠﻟ ﻊﺑﺗﻣﻟﺍ ﺏﻭﻠﺳﻷﺍ ﺱﻔﻧﺑ
ﻝﻼﺧ ﻥﻣ ﺭﺗﻭﻳﺑﻣﻛﻟﺍ ﻰﻠﻋ ﺓﺩﻭﺟﻭﻣﻟﺍ ﺕﺎﻔﻠﻣﻟﺍ ﻰﻟﺇ ﻝﻭﺻﻭﻟﺍ ﺎًﺿﻳﺃ ﻙﻧﻛﻣﻳ
Music ﻭﺃ (ﺭﻭﺻﻟﺍ) Photos ﻭﺃ (ﻭﻳﺩﻳﻔﻟﺍ ﺕﺎﻔﻠﻣ) Videos ﺩﻳﺩﺣﺗ
ﺭﺗﻭﻳﺑﻣﻛﻟﺍ ﺩﻳﺩﺣﺗ ﻡﺛ ًﻻﻭﺃ (ﺔﻳﺳﻳﺋﺭﻟﺍ) Home ﺔﺷﺎﺷﻟﺍ ﻰﻠﻋ (ﻰﻘﻳﺳﻭﻣﻟﺍ)
.ﻲﻟﺯﻧﻣﻟﺍ ﺡﺭﺳﻣﻟﺍ ﻡﺎﻅﻧ ﻝﻼﺧ ﻥﻣ ﺎﻬﻠﻳﻐﺷﺗﻭ
.ﻲﻟﺯﻧﻣﻟﺍ ﺡﺭﺳﻣﻟﺍ ﻡﺎﻅﻧ ﻊﻣ ﺎﻬﺗﻛﺭﺎﺷﻣ
.ﻲﻟﺯﻧﻣﻟﺍ
.(ﺕﺎﻔﻠﻣﻟﺍ ﺔﻣﺋﺎﻗ)
|
.ﺹﺍﺭﻗﻷﺍﻭ
،DLNA
ﺔﻅﺣﻼﻣ |
:ﺕﺍﻭﻁﺧﻟﺍ ﻩﺫﻫ ﻊﺑﺗﺍ
.(ﺯﺎﻬﺟﻟﺍ ﺔﻣﺋﺎﻗ) Device List
.E ﻰﻠﻋ ﻁﻐﺿﺍ
.ﺹﺍﺭﻗﻷﺍ ﻭﺃ USB ﺓﺯﻬﺟﺃ
.ﺎﻬﺿﺭﻋ ﻡﺗﻳ ﻲﺗﻟﺍ ﺓﺯﻬﺟﻷﺍ ﺔﻣﺋﺎﻗ ﻥﻣ
™BD-LIVE ﻡﺍﺩﺧﺗﺳﺍ
ﺔﻋﻭﻧﺗﻣ ﺕﺎﻣﺩﺧ ﺕﺎﻳﻭﺗﺣﻣﺑ ﻉﺎﺗﻣﺗﺳﻻﺍ ﻙﻧﻛﻣﻳ ،ﺔﻛﺑﺷﻟﺎﺑ ﺞﺗﻧﻣﻟﺍ ﻝﻳﺻﻭﺗ ﺩﺭﺟﻣﺑ
.BD-LIVE ﻊﻣ ﺔﻘﻓﺍﻭﺗﻣﻟﺍ ﺹﺍﺭﻗﻷﺍ ﻰﻠﻋ ﺔﺣﺎﺗﻣﻟﺍ ﻡﻼﻓﻷﺎﺑ ﺔﻠﺻ ﺕﺍﺫ
١ .
ﺔﻳﻣﺎﻣﻷﺍ ﺔﻬﺟﻟﺍ ﻲﻓ USB ﺱﺑﻘﻣﺑ USB ﺓﺭﻛﺍﺫ ﺓﺩﺣﻭ ﻝﻳﺻﻭﺗﺑ ﻡﻗ
ﺕﺎﻧﺎﻳﺑ ﺓﺭﺍﺩﺇ) BD Data Management ﻡﺩﺧﺗﺳﺍ ﻡﺛ ،ﺞﺗﻧﻣﻠﻟ
٢ .
ﺓﺭﻛﺍﺫﻟﺍ ﺯﺎﻬﺟ ﻱﻭﺗﺣﻳ ﻥﺃ ﺏﺟﻳ .ﺔﻳﻘﺑﺗﻣﻟﺍ ﺓﺭﻛﺍﺫﻟﺍ ﻥﻣ ﻕﻘﺣﺗﻠﻟ (BD
ﺕﺍﻡﺩﺧ ﺏﺎﻌﻳﺗﺳﻻ ﺔﻳﻟﺎﺧﻟﺍ ﺔﺣﺎﺳﻣﻟﺍ ﻥﻣ ﻝﻗﻷﺍ ﻰﻠﻋ ﺕﻳﺎﺑ ﺎﺟﻳﺟ ۱ ﻰﻠﻋ
٣ .
ﻰﻠﻋ ﻁﻐﺿﺍ ﻡﺛ ،ﺔﻳﺳﻳﺋﺭﻟﺍ ﺔﺷﺎﺷﻟﺍ ﻲﻓ (ﺕﺍﺩﺍﺩﻋﻹﺍ) Settings ﺩﺩﺣ
٤ .
٥ .
٦ .
٧ .
ﻝﺑﻗ ﻥﻣ ﺓﺭﻓﻭﺗﻣﻟﺍ ﺔﻋﻭﻧﺗﻣﻟﺍ BD-LIVE ﺔﻣﺩﺧ ﺔﻣﺋﺎﻗ ﻥﻣ ﺍ
◄
◄
،ﺓﺭﻓﻭﺗﻣﻟﺍ ﺕﺎﻳﻭﺗﺣﻣﻟﺍﻭ BD-LIVE ﺎﻬﺑ ﻡﺩﺧﺗﺳﺗ ﻲﺗﻟﺍ ﺔﻘﻳﺭﻁﻟﺍ ﻑﻠﺗﺧﺗ ﺩﻗ
◄
.E ﺭﺯﻟﺍ ﻰﻠﻋ ﻁﻐﺿﺍ ﻡﺛ ،(ﻡﺎﻅﻧﻟﺍ) System ﺩﺩﺣ
ﻡﺛ ،(BD ﺕﺎﻧﺎﻳﺑ ﺓﺭﺍﺩﺇ) BD Data Management ﺩﺩﺣ
.E ﺭﺯﻟﺍ ﻰﻠﻋ ﻁﻐﺿﺍ
ﺭﺯﻟﺍ ﻰﻠﻋ ﻁﻐﺿﺍ ﻡﺛ ،(ﺯﺎﻬﺟﻟﺍ ﺭﻳﻳﻐﺗ) Change Device ﺩﺩﺣ
.E ﺭﺯﻟﺍ ﻰﻠﻋ ﻁﻐﺿﺍ ﻡﺛ ،USB ﺩﺩﺣ
.BD-LIVE ﻡﻋﺩﻳ Blu-ray ﺹﺭﻗ ﻝﺧﺩﺃ
.ﺹﺭﻘﻟﺍ ﻊﻧﺻﻣﻟ ﺎًﻘﻓﻭ
.BD-LIVE
.E ﺭﺯﻟﺍ
.
E
ً
ﺭﺻﻧﻋ ﺩﺩﺣ
.ﺹﺭﻘﻟﺍ ﻊﻧﺻﻣ
|
١ . (14 ﺔﺣﻔﺻﻟﺍ ﺭﻅﻧﺍ) .ﺔﻛﺑﺷﻟﺎﺑ ﺞﺗﻧﻣﻟﺍ ﻝﻳﺻﻭﺗﺑ ﻡﻗ
٢ . (21~20 ﻲﺗﺣﻔﺻ ﺭﻅﻧﺍ) .ﺔﻛﺑﺷﻟﺍ ﺕﺍﺩﺍﺩﻋﺇ ﺔﺋﻳﻬﺗﺑ ﻡﻗ
١ .
٢ .
٣ .
٤ .
٥ .
٦ .
٧ .
٨ .
ﺔﻅﺣﻼﻣ |
◄
ﺔﻳﺑﺭﻌﻟﺍ ٢٨
|
Page 65

ﻕﺣﻠﻣﻟﺍ
ﻱﺃ ﻊﻣﺳﺗ ﻥﻠﻓ ﻻﺇﻭ ﺔﺣﻳﺣﺻﻟﺍ ﺔﻳﻣﻗﺭﻟﺍ ﺕﺎﺟﺭﺧﻣﻟﺍ ﺭﺎﻳﺗﺧﺍ ﻥﻣ ﺩﻛﺄﺗ
۰۷ﻕﺣﻠﻣﻟﺍ
(ﺯﺎﻔﻠﺗﻟﺍ ،ﻭﻳﺩﻳﻔﻟﺍﻭ ﺕﻭﺻﻟﺍ ﻝﺎﺑﻘﺗﺳﺍ ﺯﺎﻬﺟ) HDMI ﺯﺎﻬﺟ ﻥﺎﻛ ﺍﺫﺇ
،(Dolby digital، DTS) ﺔﻁﻭﻐﺿﻣﻟﺍ ﺕﺎﻘﻳﺳﻧﺗﻟﺍ ﻊﻣ ﻕﻓﺍﻭﺗﻣ ﺭﻳﻏ
BONUSVIEW ﺕﻭﺻ ﻰﻠﻋ ﺔﻣﻅﺗﻧﻣﻟﺍ DVD ﺹﺍﺭﻗﺃ ﻱﻭﺗﺣﺗ ﻻ
ﻻﻭ BONUSVIEW ﺕﻭﺻ ﺎﻬﺑ ﺱﻳﻟ Blu-ray ﺹﺍﺭﻗﺃ ﺽﻌﺑ
/ﺭﺎﺳﻳ) ﻱﺭﻅﺎﻧﺗﻟﺍ ﺕﻭﺻﻟﺍ ﻰﻠﻋ ﺍﺫﻫ ﻲﻣﻗﺭﻟﺍ ﺝﺍﺭﺧﻹﺍ ﺩﺍﺩﻋﺇ ﺭﺛﺅﻳ ﻻ
ﻝﻳﺻﻭﺗ ﺩﻧﻋ HDMI ﺕﻭﺻﻭ ﻱﺭﺻﺑﻟﺍ ﺝﺍﺭﺧﻹﺍ ﻰﻠﻋ ﺭﺛﺅﻳ ﻭﻬﻓ
ﻡﺗﻳﺳﻓ ،MPEG ﻕﻳﺳﻧﺗﺑ ﺔﻳﺗﻭﺻ ﺕﺍﺭﺎﺳﻣ ﻝﻳﻐﺷﺗﺑ ﻡﻭﻘﺗ ﺕﻧﻛ ﺍﺫﺇ
ﺕﺍﺭﺎﻳﺗﺧﺍ ﻥﻋ ﺭﻅﻧﻟﺍ ﺽﻐﺑ PCM ﻕﻳﺳﻧﺗﺑ ﺕﻭﺻﻟﺍ ﺓﺭﺎﺷﺇ ﺝﺍﺭﺧﺇ
ﺔﻋﺎﻣﺳ ﻰﻟﺇ ﺔﻋﺎﻣﺳﻟﺍ ﺩﻳﺩﺣﺗ ﺭﺎﻳﺗﺧﺍ ﺩﻧﻋ ﻲﻣﻗﺭﻟﺍ ﺝﺭﺧﻟﺍ ﻁﻳﺷﻧﺗ ﻥﻛﻣﻳ
ﺕﺎﻳﻭﺗﺣﻣ ﻡﺍﺩﺧﺗﺳﺍ ءﺎﻧﺛﺃ ﺍًﺭﻭﻅﺣﻣ ﺕﻧﺭﺗﻧﻹﺎﺑ ﻝﺎﺻﺗﻻﺍ ﻥﻭﻛﻳ ﻥﺃ ﻥﻛﻣﻳﻭ
ﺔﻗﺩﻟﺍ ﺕﺎﺟﺭﺩ ﺽﻌﺑ ﻝﻣﻌﺗ ﻻ ﺩﻗ ،ﻙﺑ ﺹﺎﺧﻟﺍ ﺯﺎﻔﻠﺗﻟﺍ ﻉﻭﻧﻟ ﺎًﻘﻓﻭ
ﻡﺩﺧﺗﺳﻣﻟﺍ ﻝﻳﻟﺩ ﻰﻟﺇ ﻉﻭﺟﺭﻟﺍ ﻰﺟﺭﻳ .HDMI ﺕﺎﺟﺭﺧﻣﺑ ﺔﺻﺎﺧﻟﺍ
.CEC ﻡﻋﺩﻳ ﻻ HDMI ﻝﺑﺎﻛ ﻥﺎﻛ ﺍﺫﺇ ﺔﺣﺎﺗﻣ ﺭﻳﻏ ﺔﻔﻳﻅﻭﻟﺍ ﻩﺫﻫ
ﺭﺎﻌﺷ ﻰﻠﻋ ﻱﻭﺗﺣﻳ ﻙﺑ ﺹﺎﺧﻟﺍ Samsung ﺯﺎﻔﻠﺗ ﻥﺎﻛ ﺍﺫﺇ
.+Anynet ﺔﻔﻳﻅﻭ ﻡﻋﺩﻳ ﻪﻧﺃ ﻲﻧﻌﻳ ﺍﺫﻬﻓ ،+Anynet
ﺍﺫﺇ ﺹﺭﻘﻟﺍ ﻝﻳﻐﺷﺗ ﻑﺎﻘﻳﺇ ﻡﺗﻳ ﻥﺃ ﻥﻛﻣﻳ ،ﺔﻳﺟﺭﺎﺧﻟﺍ ﺓﺭﻛﺍﺫﻟﺍ ﻊﺿﻭ ﻲﻓ
ﺩﻠﺟﻣﻟﺍ ﺔﻳﻣﺳﺗ) FAT ﻑﻠﻣ ﻡﺎﻅﻧ ﻲﻓ ﺎﻬﻘﻳﺳﻧﺗ ﻡﺗ ﻲﺗﻟﺍ USB ﺓﺯﻬﺟﺃ
،USB 2.0 ﻝﻭﻛﻭﺗﻭﺭﺑ ﻡﻋﺩﺗ ﻲﺗﻟﺍ USB ﺓﺯﻬﺟﺃ ﻡﺍﺩﺧﺗﺳﺎﺑ ﻲﺻﻭﻧﻭ
.ﻉﺭﺳﺃ ﻭﺃ ﺔﻳﻧﺎﺛ / ﺕﻳﺎﺑ ﺎﺟﻳﻣ 4 ﺔﺑﺎﺗﻛ / ﺓءﺍﺭﻗ ﺔﻋﺭﺳﻭ
.ﻥﻳﺯﺧﺗﻟﺍ ﺯﺎﻬﺟ ﻕﻳﺳﻧﺗ ﺩﻌﺑ ﻝﻳﻐﺷﺗﻟﺍ ﻑﺎﻧﺋﺗﺳﺍ ﺔﻔﻳﻅﻭ ﻝﻣﻌﺗ ﻻ ﺩﻗ
ﻑﻼﺗﺧﺎﺑ BD ﺕﺎﻧﺎﻳﺑ ﺓﺭﺍﺩﻹ ﺔﺣﺎﺗﻣﻟﺍ ﺔﻳﻠﻛﻟﺍ ﺓﺭﻛﺍﺫﻟﺍ ﻑﻠﺗﺧﺗ ﺩﻗ
(ﺏﻠﻁﻟﺍ ﺩﻧﻋ ®DivX ﻭﻳﺩﻳﻓ) DivX® Video On Demand
ﻝﺿﻔﺗ ،DivX(R) VOD ﻝﻭﺣ ﺕﺎﻣﻭﻠﻌﻣﻟﺍ ﻥﻣ ﺩﻳﺯﻣ ﻰﻠﻋ ﻝﻭﺻﺣﻠﻟ
.ﻁﻘﻓ ﺎًﻌﻔﺗﺭﻣ ﺎًﺟﻳﺟﺿ ﻊﻣﺳﺗﺳ ﻭﺃ ﺕﻭﺻ
.PCM ﻕﻳﺳﻧﺗﺑ ﺔﻳﺗﻭﺻﻟﺍ ﺓﺭﺎﺷﻹﺍ ﺝﺍﺭﺧﺇ ﻡﺗﻳ
.ﻙﺯﺎﻔﻠﺗﻟ HDMI ﺕﻭﺻ ﺝﺍﺭﺧﺇ ﻭﺃ (ﻥﻳﻣﻳ
.ﻭﻳﺩﻳﻔﻟﺍﻭ ﺕﻭﺻﻟﺍ ﻝﺎﺑﻘﺗﺳﺍ ﺯﺎﻬﺟﺑ ﺞﺗﻧﻣﻟﺍ
.(ﺕﺑﻟﺍ ﻕﻓﺩﺗ ﻭﺃ PCM) ﺔﻳﻣﻗﺭﻟﺍ ﺕﺎﺟﺭﺧﻣﻟﺍ
BD-LIVE Internet Connection
(BD ﺕﺎﻧﺎﻳﺑ ﺓﺭﺍﺩﺇ) BD Data Management
.ﻝﻳﻐﺷﺗﻟﺍ ﻑﺻﺗﻧﻣ ﻲﻓ USB ﺯﺎﻬﺟ ﻝﺻﻔﺑ ﺕﻣﻗ
.ﺔﻣﻭﻋﺩﻣﻟﺍ ﻁﻘﻓ ﻲﻫ (DOS 8.3
."http://vod.divx.com" ﻊﻗﻭﻣﻟﺍ ﺓﺭﺎﻳﺯﺑ
.ﻝﻘﻧﺗﻟﺍ ﺕﻭﺻ ﺕﺍﺭﻳﺛﺄﺗﻭ
.ﻝﻘﻧﺗﻟﺍ ﺕﻭﺻ ﺕﺍﺭﺛﺅﻣ
.ﺯﺎﻔﻠﺗﻟﺍ
.BD-LIVE
Anynet+(HDMI-CEC)
.ﺯﺎﻔﻠﺗﻟﺎﺑ ﺹﺎﺧﻟﺍ
.ﻑﻭﺭﻅﻟﺍ
ﺔﻋﺎﻣﺳﻟﺍ ﺕﺍﺩﺍﺩﻋﺇ
•
•
ﺕﻼﻳﺻﻭﺗﻟﺍ
•
•
•
•
•
•
•
•
•
•
•
•
•
•
ﺔﻗﺩﻟﺍ ﺕﺎﺟﺭﺩ ﺽﻌﺑ ﻝﻣﻌﺗ ﻻ ﺩﻗ ،ﻙﺑ ﺹﺎﺧﻟﺍ ﺯﺎﻔﻠﺗﻟﺍ ﻉﻭﻧﻟ ﺎًﻘﻓﻭ
ﺔﻳﻧﻘﺗ ﻊﻣ ﻭﻳﺩﻳﻔﻟﺎﺑ ﻉﺎﺗﻣﺗﺳﻼﻟ HDMI ﻝﺎﺻﺗﺍ ﻙﻳﺩﻟ ﺭﻓﺍﻭﺗﻳ ﻥﺃ ﺏﺟﻳ
ﻰﻠﻋ ءﺎﺿﻭﺿ ﺙﻭﺩﺣ ﻲﻓ ﻝﻳﻭﻁﻟﺍ HDMI ﻝﺑﺎﻛ ﺏﺑﺳﺗﻳ ﻥﺃ ﻥﻛﻣﻳ
ﻰﻠﻋ ﻕﻣﺎﻐﻟﺍ HDMI ﻥﻭﻟ ﺭﺎﻳﺧﻟﺍ ﻥﻳﻳﻌﺗﺑ ﻡﻘﻓ ،ﻙﻟﺫ ﺙﺩﺣ ﺍﺫﺇ .ﺔﺷﺎﺷﻟﺍ
ﺕﺍﺩﺍﺩﻋﻹﺍ
(ﺩﺎﻌﺑﻷﺍ ﺔﻳﺛﻼﺛ ﺕﺍﺩﺍﺩﻋﻹﺍ) 3D Settings
ﻝﻳﻐﺷﺗﻟﺍ ءﺎﻧﺛﺃ ﻡﻠﻳﻔﻟﺍ ﻑﺎﻘﻳﻹ ،ﺩﺎﻌﺑﻷﺍ ﺔﻳﺛﻼﺛ ﺹﺍﺭﻗﻷﺍ ﺽﻌﺑﻟ ﺔﺑﺳﻧﻟﺎﺑ
ﻡﺗﻳﻭ ﻡﻠﻳﻔﻟﺍ ﻑﻗﻭﺗﻳ .ﺓﺩﺣﺍﻭ ﺓﺭﻣ
ﻁﻐﺿﺍ ،ﺩﺎﻌﺑﻷﺍ ﻲﺛﻼﺛ ﻡﻠﻳﻓ ﻝﻳﻐﺷﺗ ﺩﻧﻋ ﺩﺎﻌﺑﻷﺍ ﻲﺛﻼﺛ ﺭﺎﻳﺧ ﺭﻳﻳﻐﺗﻟ
ﻰﻠﻋ ﻁﻐﺿﺍ .Blu-ray ﺔﻣﺋﺎﻗ ﺭﻬﻅﺗ .ﺓﺩﺣﺍﻭ ﺓﺭﻣ
ﺔﻣﺋﺎﻗ ﻲﻓ ﺩﺎﻌﺑﻷﺍ ﺔﻳﺛﻼﺛ ﺕﺍﺩﺍﺩﻋﻹﺍ ﺩﺩﺣ ﻡﺛ ،ﻯﺭﺧﺃ ﺓﺭﻣ
ﺓﺩﻣﻋﺃ ﺔﻳﺅﺭ ﻙﻧﻛﻣﻳ ،ﺯﺎﻔﻠﺗﻟﺍ ﺔﺷﺎﺷ ﻲﻓ ﺓﺭﻭﺻﻟﺍ ﻊﺿﻭﻭ ﻯﻭﺗﺣﻣﻟ ﺎ
.ﻥﻳﺑﻧﺎﺟﻟﺍ ﻼﻛ ﻰﻠﻋ ﻭﺃ ،ﻥﻣﻳﻷﺍ ﻭﺃ ،ﺭﺳﻳﻷﺍ ﺏﻧﺎﺟﻟﺍ ﻰﻠﻋ ﺔﻳﺳﺃﺭ ءﺍﺩﻭﺳ
(ﺯﺎﻔﻠﺗﻟﺍ ﻉﺎﻔﺗﺭﺍ ﻰﻟﺇ ﺽﺭﻋ ﺔﺑﺳﻧ) TV Aspect
ﻰﻟﺇ ﺽﺭﻌﻟﺍ ﺏﺳﻧ ﺽﻌﺑ ﻥﻭﻛﺗ ﻻ ﺩﻗ ،ﺹﺭﻘﻟﺍ ﻉﻭﻧ ﻰﻠﻋ ﺍًﺩﺎﻣﺗﻋﺍ
ﺔﺑﺳﻧ ﻥﻋ ﻑﻠﺗﺧﻣ ﺭﺎﻳﺧﻭ ﻉﺎﻔﺗﺭﺍ ﻰﻟﺇ ﺽﺭﻋ ﺔﺑﺳﻧ ﺭﺎﻳﺗﺧﺎﺑ ﺕﻣﻗ ﺍﺫﺇ
ﺭﻬﻅﺗ ﺩﻗ ﺭﻭﺻﻟﺍ ﻥﺈﻓ ،ﻙﺗﺷﺎﺷﺑ ﺔﺻﺎﺧﻟﺍ ﻉﺎﻔﺗﺭﻻﺍ ﻰﻟﺇ ﺽﺭﻌﻟﺍ
ﻊﺑﺭﻣ 4:3 ﺯﺎﻔﻠﺗﻟﺍ ﺽﺭﻌﻳ ﺩﻘﻓ ،ﻲﻠﺻﺃ 16:9 ﺩﻳﺩﺣﺗﺑ ﺕﻣﻗ ﺍﺫﺇ
(ﻁﻘﻓ Samsung ﺔﻛﺭﺷ ﺕﺎﺟﺗﻧﻣ) BD Wise
ﻲﺿﺍﺭﺗﻓﺍ ﻝﻛﺷﺑ ﺔﻗﺩﻟﺍ ﺩﺍﺩﻋﺇ ﻁﺑﺿ ﻡﺗﻳ ،BD Wise ﺓﺯﻳﻣ ﻝﻳﻐﺷﺗ ﺩﻧﻋ
.Resolution ﺔﻣﺋﺎﻗ ﻲﻓ BD Wise ﺭﻬﻅﺗﻭ ،BD Wise ﻰﻠﻋ
ﻊﻳﻁﺗﺳﺗ ﻥﻠﻓ ،BD Wise ﻡﻋﺩﻳ ﻻ ﺯﺎﻬﺟﺑ ًﻼﺻﺗﻣ ﺞﺗﻧﻣﻟﺍ ﻥﺎﻛ ﺍﺫﺇ
BD ﺭﺎﻳﺧ ﻥﻳﻳﻌﺗﺑ ﻡﻗ ،ﺏﺳﺎﻧﻣ ﻝﻛﺷﺑ BD Wise ﺔﻔﻳﻅﻭ ﻝﻳﻐﺷﺗﻟ
.ﻝﻳﻐﺷﺗﻟﺍ ﻊﺿﻭ ﻰﻠﻋ ﺯﺎﻔﻠﺗﻟﺍﻭ ﺞﺗﻧﻣﻟﺍ ﻥﻣ ﻝﻛﻟ Wise
ﺭﺯﻟﺍ ﻰﻠﻋ ﻁﻐﺿﺍ ،ﺩﺎﻌﺑﻷﺍ ﻲﺛﻼﺛ
.(ﺓﺭﻭﺻﻟﺍ ﻲﺑﻧﺎﺟ ﻰﻠﻋ ءﺍﺩﻭﺳ ﺓﺩﻣﻋﺃ) ﻱﺩﻭﻣﻋ
ﺔﻳﻓﺎﺿﻹﺍ ﺕﺎﻣﻭﻠﻌﻣﻟﺍ
HDMI OUT
.HDMI ﺕﺎﺟﺍﺭﺧﺈﺑ ﺔﺻﺎﺧﻟﺍ
.ﺔﻳﺛﻼﺛﻟﺍ ﺩﺎﻌﺑﻷﺍ
.ﺔﻣﺋﺎﻘﻟﺍ ﻲﻓ ﻑﺎﻘﻳﺇ
.ﺩﺎﻌﺑﻷﺍ ﻲﺛﻼﺛ ﻊﺿﻭﻟﺍ ﻝﻳﻁﻌﺗ
ﺭﺯﻟﺍ ﻰﻠﻋ
ﺭﺯﻟﺍ
.Blu-ray
.ﺔﺣﺎﺗﻣ ﻉﺎﻔﺗﺭﻻﺍ
.ﺔﻫﻭﺷﻣ
.BD Wise ﺔﻔﻳﻅﻭ ﻡﺍﺩﺧﺗﺳﺍ
Digital Output
ً
ﻘﻓﻭ
ﻅﺣﻻ
•
•
•
•
•
•
•
•
•
•
•
ﺕﻭﺻﻟﺍ ﺭﺍﺩﺻﺇ ﻡﺗﻳﺳ ،ﻝﻳﻐﺷﺗ ﻰﻠﻋ ﺔﻋﺎﻣﺳﻟﺍ ﺩﻳﺩﺣﺗ ﺭﺎﻳﺧﻟﺍ ﺩﻳﺩﺣﺗ ﺩﻧﻋ
|
٢٩ ﺔﻳﺑﺭﻌﻟﺍ
.ﺯﺎﻔﻠﺗﻟﺍ ﺕﺎﻋﺎﻣﺳ ﻝﻼﺧ ﻥﻣ
•
Page 66

ﻕﺣﻠﻣﻟﺍ
ﻁﺋﺎﺳﻭﻟﺍ ﻝﻳﻐﺷﺗ
ﺭﻭﺻﻟﺍ ﺽﺭﻋ ءﺎﻧﺛﺃ "ﺕﺍﻭﺩﺃ" ﺭﺯﻟﺍ ﻡﺩﺧﺗﺳﺍ
ﻪﻁﺑﺿ ﻡﺗ BD Wise ﺓﺯﻳﻣ ﻊﻣ ﻕﻓﺍﻭﺗﻣ ﺯﺎﻔﻠﺗﺑ ًﻼﺻﺗﻣ ﻡﺎﻅﻧﻟﺍ ﻥﺎﻛ ﺍﺫﺇ
.ﺓﺭﻭﺻﻟﺍ ﺕﺍﺩﺍﺩﻋﺇ ﺔﻣﺋﺎﻗ ﺭﻬﻅﺗ ﻥﻠﻓ ،"ﻝﻳﻐﺷﺗ" ﻊﺿﻭﻟﺍ ﻰﻠﻋ
ﻰﻘﻳﺳﻭﻣﻟﺍ ﻑﻠﻣ ﻥﺎﻛ ﺍﺫﺇ ﻻﺇ "ﺔﻳﻔﻠﺧﻟﺍ ﻰﻘﻳﺳﻭﻣ ﻝﻳﻐﺷﺗ" ﺔﻔﻳﻅﻭ ﻝﻣﻌﺗ ﻥﻟ
ﻰﻟﺇ ﺔﻓﺎﺿﻹﺎﺑ .ﺎﻬﺗﺍﺫ ﻥﻳﺯﺧﺗﻟﺍ ﻁﺋﺎﺳﻭ ﻰﻠﻋ ﻥﻳﺩﻭﺟﻭﻣ ﺭﻭﺻﻟﺍ ﻑﻠﻣﻭ
ﻰﻘﻳﺳﻭﻣ ﻑﻠﻣﺑ ﺹﺎﺧﻟﺍ ﺕﺑﻟﺍ ﻝﺩﻌﻣﺑ ﺕﻭﺻﻟﺍ ﺓﺩﻭﺟ ﺭﺛﺄﺗﺗ ﺩﻗ ،ﻙﻟﺫ
.ﺯﻳﻣﺭﺗﻟﺍ ﺔﻘﻳﺭﻁﻭ ﺭﻭﺻﻟﺍ ﻡﺟﺣﻭ MP3
USB ﻥﻳﺯﺧﺗ ﺯﺎﻬﺟ ﻝﻳﻐﺷﺗ
ﺔﻟﺍﺯﺇ ﺔﻔﻳﻅﻭ ﺫﻳﻔﻧﺗﺑ) ﻥﺎﻣﺄﺑ USB ﻥﻳﺯﺧﺗ ﺯﺎﻬﺟ ﺔﻟﺍﺯﺇ ﻙﻳﻠﻋ ﺏﺟﻳ
ﺭﺯﻟﺍ ﻰﻠﻋ ﻁﻐﺿﺍ .USB ﺓﺭﻛﺍﺫﻟ ﻥﻛﻣﻣ ﻑﻠﺗ ﻱﺃ ﻊﻧﻣﻟ (ﻥﺎﻣﺄﺑ USB
،(ﺝ) ﺭﻔﺻﺃ ﺭﺯﻟﺍ ﻰﻠﻋ ﻁﻐﺿﺍ ﻡﺛ ،ﺔﻳﺳﻳﺋﺭﻟﺍ ﺔﻣﺋﺎﻘﻟﺍ ﻰﻟﺇ ﻝﺎﻘﺗﻧﻼﻟ ﻝﺯﻧﻣ
.E ﺭﺯﻟﺍ ﻰﻠﻋ ﻁﻐﺿﺍ ﻡﺛ
ﺎًﻳﺋﺎﻘﻠﺗ ﻪﻁﻠﺧ ﻡﺗﻳ ،ﺯﺎﻔﻠﺗﻟﺍ ﺔﻋﺎﻣﺳ ﻥﻣ HDMI ﺕﻭﺻ ﺝﺍﺭﺧﺇ ﺩﻧﻋ
•
•
•
ُ
ﺔﻔﻳﻅﻭ ﺡﺎﺗ
ﺗ ﻥﻟ ،Anynet+ (HDMI-CEC) ﻝﻳﻐﺷﺗ ﻑﺎﻘﻳﺇ ﺩﻧﻋ
ﺕﻭﺻﻟﺍ ﻉﺎﺟﺭﺇ ﺓﺎﻧﻗ ﻡﻋﺩﻳ ﻻ HDMI ﻝﺑﻛ ﻡﺍﺩﺧﺗﺳﺍ ﻱﺩﺅﻳ ﺩﻗ
ﺯﺎﻔﻠﺗ ﺯﺎﻬﺟ ﻝﻳﺻﻭﺗ ﻡﺗﻳ ﺎﻣﺩﻧﻋ ﺕﻭﺻﻟﺍ ﻉﺎﺟﺭﺇ ﺓﺎﻧﻗ ﺔﻔﻳﻅﻭ ﻁﻘﻓ ﺡﺎﺗﺗ
.ﺕﻭﺻﻟﺍ ﻉﺎﺟﺭﺇ ﺓﺎﻧﻗ ﺔﻔﻳﻅﻭ ﻊﻣ ﻕﻓﺍﻭﺗﻣ
ﻝﻳﻐﺷﺗﻟﺍ
ﺕﺑ ﺎﺟﻲﻣ ۲۰ ﻰﻟﺇ ﻝﺻﺗ ﻲﺗﻟﺍ ﺔﻳﻟﺎﻌﻟﺍ ﺕﺑﻟﺍ ﺕﻻﺩﻌﻣ ﺕﺍﺫ ﻭﻳﺩﻳﻔﻟﺍ ﺕﺎﻔﻠﻣ
ﻑﺎﻘﻳﺇ ﻰﻟﺇ ﻱﺩﺅﺗ ﺩﻗﻭ ﺞﺗﻧﻣﻟﺍ ﺕﺎﻳﻧﺎﻛﻣﺇ ﻰﻠﻋ ﺭﺛﺅﺗ ﺭﺛﻛﺃ ﻭﺃ ﺔﻳﻧﺎﺛﻟﺍ ﻲﻓ
ﻡﺳﻘﻟﺍ ﻥﺎﻛ ﺍﺫﺇ ﺔﺷﺎﺷﻟﺍ ﻰﻠﻋ ◄► ﺭﺷﺅﻣﻟﺍ ﺽﺭﻋ ﻡﺗﻳ ﻥﻟ
ﺕﻭﺻ ﺕﺍﺩﺍﺩﻋﺇ ﺔﻳﺃ ﻰﻠﻋ ﻱﻭﺗﺣﻳ ﻻ BONUSVIEW
ً
ﺎﻫﺭﻳﻔﺷﺗ ﻡﺗ ﻲﺗﻟﺍ ﺕﺎﻐﻠﻟ ﺎ
.ﺓﺩﺩﺣﻣﻟﺍ ﺕﺎﻐﻠﻟﺍ ﺽﻌﺑ ﻭﺃ ﺔﻔﻳﻅﻭﻟﺍ ﻩﺫﻫ ﺡﺎﺗﺗ ﻻ ﺩﻗ .ﺹﺭﻘﻟﺍ ﻰﻠﻋ
ﺭﺎﺳﻣ ﻭﺃ PCM ﺎﻣﺇ ﺩﻳﺩﺣﺗﺑ Blu-ray ﺹﺍﺭﻗﺃ ﺽﻌﺑ ﻙﻟ ﺢﻣﺳﺗﻭ
ﻘﻓﻭ ﺕﻭﺻﻟﺍ ﺔﻐﻟ ﺔﻔﻳﻅﻭ ﻝﻼﺧ ﻥﻣ ﺕﺎﻐﻠﻟﺍ ﺡﺎﺗﺗ
.ﺔﻳﺯﻳﻠﺟﻧﻹﺍ ﺔﻐﻠﻟﺎﺑ ﻲﻣﻗﺭﻟﺍ Dolby ﺕﻭﺻ
HDMI audio
•
.ﻥﻳﺗﺎﻧﻗ ﻥﻣ ﺝﺭﺧﻳﻟ
ﺕﻭﺻﻟﺍ ﻉﺎﺟﺭﺇ ﺓﺎﻧﻗ
•
.ﺕﻭﺻﻟﺍ ﻉﺎﺟﺭﺇ ﺓﺎﻧﻗ
•
.ﻕﻓﺍﻭﺗ ﺔﻠﻛﺷﻣ (ARC)
•
ﻭﻳﺩﻳﻓ ﺕﺎﻔﻠﻣ ﻝﻳﻐﺷﺗ
•
.ﻝﻳﻐﺷﺗﻟﺍ ءﺎﻧﺛﺃ ﻝﻳﻐﺷﺗﻟﺍ
ﺕﻭﺻﻟﺍ ﺔﻐﻟ ﺩﻳﺩﺣﺗ
•
.BONUSVIEW
•
•
ﺔﻣﺟﺭﺗﻟﺍ ﺔﻐﻟ ﺩﻳﺩﺣﺗ
ﺔﻐﻟ ﺭﻳﻳﻐﺗ ﻙﻧﻛﻣﻳ ﺩﻗ ،Blu-ray Disc / DVD ﺹﺍﺭﻗﻷ ﺎًﻘﻓﻭ
ﺭﺯﻟﺍ ﻰﻠﻋ ﻁﻐﺿﺍ .(ﺹﺍﺭﻗﻷﺍ ﺔﻣﺋﺎﻗ) Disc Menu ﻲﻓ ﺔﻣﺟﺭﺗﻟﺍ
،ﺹﺭﻘﻟﺍ ﻰﻠﻋ ﺓﺭﻔﺷﻣﻟﺍ ﺔﻣﺟﺭﺗﻟﺍ ﺕﺎﻐﻟ ﺩﻳﺩﺣﺗ ﻰﻠﻋ ﺔﻔﻳﻅﻭﻟﺍ ﻩﺫﻫ ﺩﻣﺗﻌﺗ
.Blu-ray Disc/DVD ﺹﺍﺭﻗﺃ ﻝﻛ ﻰﻠﻋ ﺭﻓﻭﺗﺗ ﻻ ﺩﻗﻭ
/ﺔﻳﺳﺎﺳﻷﺍ ﺓﺯﻳﻣﻟﺍ ﻊﺿﻭ ﻝﻭﺣ ﺕﺎﻣﻭﻠﻌﻣ ﺽﺭﻋ ﺎ
ﻡﺳﻗ ﻰﻠﻋ ﻱﻭﺗﺣﻳ Blu-ray ﺹﺭﻗ ﻥﺎﻛ ﺍﺫﺇ BONUSVIEW
.ﺕﻗﻭﻟﺍ ﺱﻔﻧ ﻲﻓ ﺔﻳﻭﻧﺎﺛﻟﺍﻭ ﺔﻳﻟﻭﻷﺍ ﺔﻣﺟﺭﺗﻟﺍ ﺕﺎﻐﻟ ﺔﻔﻳﻅﻭﻟﺍ ﻩﺫﻫ ﺭﻳﻐﺗ
.ﻊﺑﺎﺗﺗﻟﺎﺑ ﺔﻳﻭﻧﺎﺛﻟﺍﻭ ﺔﻳﻟﻭﻷﺍ ﻡﺟﺍﺭﺗﻟﺍ ﻡﻗﺭ ﻲﻟﺎﻣﺟﺇ ﺽﺭﻋ ﻡﺗﻳ
ﺔﺷﺎﺷﻟﺍ ﻊﺿﻭ ﻲﻓ ﺔﻳﻣﻳﺩﻘﺗﻟﺍ ﺽﻭﺭﻌﻟﺍ ﻡﻭﺳﺭﻭ ﺔﻣﺟﺭﺗﻟﺍ ﺭﻳﺑﻛﺗ ﻙﻧﻛﻣﻳ ﻻ
.DISC MENU
ً
ﺿﻳﺃ ﻡﺗﻳ
.BONUSVIEW
JPEG ﺕﺎﻔﻠﻣ ﺽﺭﻋ
.ﺔﻠﻣﺎﻛﻟﺍ
ﺔﻳﺑﺭﻌﻟﺍ ٣٠
•
•
•
•
•
•
|
Page 67

ﺔﻳﻣﻗﺭﻟﺍ ﺕﺎﺟﺭﺧﻣﻟﺍ ﺭﺎﻳﺗﺧﺍ
۰۷ﻕﺣﻠﻣﻟﺍ
ﻕﻓﺩﺗ ﻝﺧﺍﺩ PCM ﺕﻭﺻ
Bitstream
ﺩﺎﻌﻣ Dolby D)
(ﺭﻳﻔﺷﺗﻟﺍ
Dolby Digital
*ﻩﺯﻳﻣﺭﺗ ﺩﺎﻌﻣ
ﺓﺯﻳﻣﻟﺍ ﺕﻭﺻ ﺭﻳﻔﺷﺗ ﻙﻔﻟ
ﺕﻭﺻ ﻕﻓﺩﺗﻭ ﺔﻳﺳﺎﺳﻷﺍ
ﺎًﻌﻣ BONUSVIEW
PCM ﺕﻭﺻ ﻝﺧﺍﺩ
ﺕﻭﺻ ﺕﺍﺭﻳﺛﺄﺗ ﺔﻓﺎﺿﺇﻭ
ﺭﻳﻔﺷﺗ ﺓﺩﺎﻋﺇ ﻡﺛ ،ﻝﻘﻧﺗﻟﺍ
ﻭﺃ Dolby digital ﺕﺑ
.PCM
Bitstream
(ﺭﻳﻔﺷﺗﻟﺍ ﺩﺎﻌﻣ DTS)
ﺎﻫﺯﻳﻣﺭﺗ ﺩﺎﻌﻣ DTS
ﺓﺯﻳﻣﻟﺍ ﺕﻭﺻ ﺭﻳﻔﺷﺗ ﻙﻔﻟ
ﺕﻭﺻ ﻕﻓﺩﺗﻭ ﺔﻳﺳﺎﺳﻷﺍ
ﺎًﻌﻣ BONUSVIEW
PCM ﺕﻭﺻ ﻝﺧﺍﺩ
ﺕﻭﺻ ﺕﺍﺭﻳﺛﺄﺗ ﺔﻓﺎﺿﺇﻭ
ﺭﻳﻔﺷﺗ ﺓﺩﺎﻋﺇ ﻡﺛ ،ﻝﻘﻧﺗﻟﺍ
ﻕﻓﺩﺗ ﻝﺧﺍﺩ PCM ﺕﻭﺻ
.DTS ﺕﺑ
Bitstream
(ﺞﻟﺎﻌﻣ ﺭﻳﻏ)
PCM
Dolby Digital
Dolby Digital Plus
Dolby TrueHD
DTS
ﻲﻟﺎﻋ DTS-HD ﺕﻭﺻ
ﺔﻗﺩﻟﺍ
DTS-HD ﺹﺭﻗ
ﻲﺳﻳﺋﺭﻟﺍ ﺕﻭﺻﻠﻟ
ﻥﺎﺗﺎﻧﻗ PCMﻥﺎﺗﺎﻧﻗ PCMﻥﺎﺗﺎﻧﻗ PCM
Dolby DigitalDolby DigitalDolby Digital
DTSDTSDTS
ﺕﻭﺻ ﻕﻓﺩﺗ ﺝﺍﺭﺧﻹ
ﻁﻘﻓ ﺔﻳﺳﺎﺳﻷﺍ ﺓﺯﻳﻣﻟﺍ
ﺯﺎﻬﺟﻟ ﻥﻛﻣﻳ ﺙﻳﺣﺑ
ﻭﻳﺩﻳﻔﻟﺍﻭ ﺕﻭﺻﻟﺍ ﻝﺎﺑﻘﺗﺳﺍ
ﺭﻳﻔﺷﺗ ﻙﻓ ﻙﺑ ﺹﺎﺧﻟﺍ
.ﺕﺑﻟﺍ ﻕﻓﺩﺗ
ﺕﻭﺻ ﻊﻣﺳﺗ ﻥﻟ
ﻭﺃ BONUSVIEW
.ﻝﻘﻧﺗﻟﺍ ﺕﻭﺻ ﺕﺍﺭﻳﺛﺄﺗ
حتى PCM 7.1 قناة
حتى PCM 5.1 قناة
حتى PCM 5.1 قناة
حتى PCM 5.1 قناة
حتى PCM 5.1 قناة
حتى PCM 7.1 قناة
حتى PCM 7.1 قناة
حتى PCM 2 قناة
حتى PCM 5.1 قناة
حتى PCM 5.1 قناة
ﺓﺯﻳﻣﻟﺍ ﺕﻭﺻ ﺭﻳﻔﺷﺗ ﻙﻔﻟ
ﺕﻭﺻ ﻕﻓﺩﺗﻭ ﺔﻳﺳﺎﺳﻷﺍ
ﺎًﻌﻣ BONUSVIEW
PCM ﺕﻭﺻ ﻝﺧﺍﺩ
ﺕﻭﺻ ﺕﺍﺭﻳﺛﺄﺗ ﺔﻓﺎﺿﺇﻭ
.ﻝﻘﻧﺗﻟﺍ
ﻝﺎﺻﺗﻻﺍHDMI ﻡﻋﺩﻳ ﻭﻳﺩﻳﻓﻭ ﺕﻭﺻ ﻝﺎﺑﻘﺗﺳﺍ ﺯﺎﻬﺟ
PCM
Dolby Digital
Dolby Digital
Plus
Dolby TrueHD
DTS
DTS-HD ﺕﻭﺻ
ﺔﻗﺩﻟﺍ ﻲﻟﺎﻋ
DTS-HD ﺹﺭﻗ
ﻲﺳﻳﺋﺭﻟﺍ ﺕﻭﺻﻠﻟ
PCM
Dolby Digital
DTS
ﺎﻬﻧﻣ ﻱﺃ
ﺩﺍﺩﻋﻹﺍPCM
ﻲﺗﻭﺻﻟﺍ ﻕﻓﺩﺗﻟﺍ
ﺹﺭﻗ ﻲﻓ
Blu-ray
ﻲﺗﻭﺻﻟﺍ ﻕﻓﺩﺗﻟﺍ
DVD ﻲﻓ
ﺹﺭﻘﻟ ﺡﻭﺿﻭﻟﺍ
Blu-ray
|
٣١ ﺔﻳﺑﺭﻌﻟﺍ
:ﺔﻳﺗﻭﺻ ﺕﺎﻘﻓﺩﺗ ﺔﺛﻼﺛ Blu-ray ﺹﺍﺭﻗﺃ ﻥﻣﺿﺗﺗ ﻥﺃ ﻥﻛﻣﻳ
.Blu-ray ﺹﺍﺭﻗﺃ ﻥﻣ
ﻡﺗﻳ ﻼﻓ ،ﻥﻳﺗﺎﻧﻗ ﻭﺃ ﺎًﻳﺩﺎﺣﺃ ﺭﺩﺻﻣﻟﺍ ﻕﻓﺩﺗ ﻥﺎﻛ ﺍﺫﺇ
ﺹﺭﻗ ﻝﻛ ﻲﻓ ﻝﻘﻧﺗﻠﻟ ﺔﻳﺗﻭﺻﻟﺍ ﺕﺍﺭﻳﺛﺄﺗﻟﺍ ﻑﻠﺗﺧﺗ
.ﻥﺎﺗﺎﻧﻗ PCM ﺝﺍﺭﺧﻹﺍ ﻥﻭﻛﺗﻭ ."ﻩﺯﻳﻣﺭﺗ ﺩﺎﻌﻣ Dolby D" ﺩﺍﺩﻋﺇ ﻕﻳﺑﻁﺗ
-.ﺔﻳﺳﺎﺳﻷﺍ ﺓﺯﻳﻣﻠﻟ ﺕﻭﺻﻟﺍ ﺭﺎﺳﻣ :ﺔﻳﺳﺎﺳﻷﺍ ﺓﺯﻳﻣﻟﺍ ﺕﻭﺻ
-.ﻝﺛﻣﻣﻟﺍ ﻭﺃ ﺝﺭﺧﻣﻟﺍ ﺕﺎﻘﻳﻠﻌﺗ ﻝﺛﻣ ،ﻲﻓﺎﺿﻹﺍ ﺕﻭﺻﻟﺍ ﺭﺎﺳﻣ :BONUSVIEW ﺕﻭﺻ
-.ﻡﻠﻳﻔﻟﺍ ﻭﺃ ﺹﺭﻘﻟﺍ ﺔﻣﺋﺎﻗ ﺢﻔﺻﺗ ﺩﻧﻋ ﺭﻬﻅﺗ ﻲﺗﻟﺍ ﺔﻳﺗﻭﺻﻟﺍ ﺕﺍﺭﻳﺛﺄﺗﻟﺍ :(ﻝﻘﻧﺗﻠﻟ ﺔﻳﺗﻭﺻﻟﺍ ﺕﺍﺭﻳﺛﺄﺗﻟﺍ) Navigation Sound Effects
Page 68

ﻕﺣﻠﻣﻟﺍ
ﺕﺎﺟﺭﺧﻣﻟﺍ ﻊﺿﻭﻟ ﺎًﻘﺑﻁ ﺔﻗﺩﻟﺍ
ﺔﻳﻣﻗﺭﻟﺍ ﺕﺎﻳﻭﺗﺣﻣﻟﺍ / ﺔﻳﻧﻭﺭﺗﻛﻟﻹﺍ ﺕﺎﻳﻭﺗﺣﻣﻟﺍ / Blu-ray ﺹﺍﺭﻗﺃ ﻝﻳﻐﺷﺗDVD ﺹﺍﺭﻗﺃ ﻝﻳﻐﺷﺗ
HDMI ﻊﺿﻭ
/ﺔﻳﻧﻭﺭﺗﻛﻟﻹﺍ ﺕﺎﻳﻭﺗﺣﻣﻟﺍ
ﺔﻳﻣﻗﺭﻟﺍ ﺕﺎﻳﻭﺗﺣﻣﻟﺍ
HDMI ﻊﺿﻭ
Blu-ray ﺹﺭﻗ
ﺕﺎﺟﺭﺧﻣﻟﺍ
ﺩﺍﺩﻋﻹﺍ
BD WiseBlu-ray ﺹﺍﺭﻗﺃ ﺔﻗﺩﺍًﺭﺎﻁﺇ 60 ﺩﻧﻋ 1080p480i
ﻲﺋﺎﻘﻠﺗﺯﺎﻔﻠﺗﻟﺍ ﺕﻼﺧﺩﻣﻟ ﺔﻗﺩ ﻰﺻﻗﺃﺯﺎﻔﻠﺗﻟﺍ ﺕﻼﺧﺩﻣﻟ ﺔﻗﺩ ﻰﺻﻗﺃ
ﺍًﺭﺎﻁﺇ 60 ﺩﻧﻋ 1080pﺍًﺭﺎﻁﺇ 60 ﺩﻧﻋ 1080p-
1080p-1080p
(ﺍًﺭﺎﻁﺇ 24) ﻲﺋﺎﻘﻠﺗ :ﻡﻠﻳﻔﻟﺍ ﺭﺎﻁﺇﺍًﺭﺎﻁﺇ 24 ﺩﻧﻋ 1080p-
1080i1080i1080i
720p720p720p
576p/480p576p/480p576p/480p
ﺎﻬﺣﻼﺻﺇﻭ ءﺎﻁﺧﻷﺍ ﻑﺎﺷﻛﺗﺳﺍ
ﻝﺣ ﻲﻓ ﻩﺎﻧﺩﺃ ﺓﺭﻭﻛﺫﻣﻟﺍ ﺕﺎﻣﻳﻠﻌﺗﻟﺍ ﻙﺩﻋﺎﺳﺗ ﻡﻟ ﺍﺫﺇ ﻭﺃ ﻩﺎﻧﺩﺃ ﺔﻧﻳﺑﻣ ﺭﻳﻏ ﻙﻬﺟﺍﻭﺗ ﻲﺗﻟﺍ ﺔﻠﻛﺷﻣﻟﺍ ﺕﻧﺎﻛ ﺍﺫﺇ .ﺩﻳﺟ ﻝﻛﺷﺑ ﻝﻣﻌﻳ ﻻ ﺞﺗﻧﻣﻟﺍ ﻥﺎﻛ ﺍﺫﺇ ﻩﺎﻧﺩﺃ ﺩﺭﺍﻭﻟﺍ ﻝﻭﺩﺟﻟﺍ ﻊﺟﺍﺭ
.Samsung Electronics ءﻼﻣﻋ ﺔﻣﺩﺧ ﺯﻛﺭﻣ ﻭﺃ ﺩﻣﺗﻌﻣ ﻉﺯﻭﻣ ﺏﺭﻗﺄﺑ ﻝﺻﺗﺍﻭ ﺔﻗﺎﻁﻟﺍ ﻙﻠﺳ ﻝﺻﻓﻭ ﺞﺗﻧﻣﻟﺍ ﻝﻳﻐﺷﺗ ﻑﺎﻘﻳﺈﺑ ﻡﻘﻓ ،ﻙﺗﻠﻛﺷﻣ
ﺽﺍﺭﻋﻷﺍﺝﻼﻌﻟﺍ/ﺹﺣﻔﻟﺍ
؟ﻥﺎﻣﺄﺑ ﺔﻗﺎﻁﻟﺍ ﺫﻔﻧﻣﺑ ﻝﺻﺗﻣ ﺔﻗﺎﻁﻟﺍ ﻙﻠﺳ ﻝﻫ
.ﻯﺭﺧﺃ ﺓﺭﻣ ﻪﻠﻳﻐﺷﺗ ﺩﻋﺃ ﻡﺛ ،ﺞﺗﻧﻣﻟﺍ ﻝﻳﻐﺷﺗ ﻑﺎﻘﻳﺈﺑ ﻡﻗ
•
•
.ﺹﺭﻘﻟﺍ ﺝﺍﺭﺧﺇ ﻊﻳﻁﺗﺳﺃ ﻻ
.ﺝﺭﺎﺧﻟﺍ ﻥﻣ ﻩﺅﺍﺭﺷ ﻡﺗ ﻱﺫﻟﺍ Blu-ray/DVD ﺹﺭﻗ ﻝﻳﻐﺷﺗ ﻥﻛﻣﻳ ﻻ ﺩﻗ
.ﺞﺗﻧﻣﻟﺍ ﺍﺫﻫ ﻲﻓ ﺔﻳﻣﻗﺭﻟﺍ ﻭﻳﺩﻳﻔﻟﺍ ﺹﺍﺭﻗﺃﻭ ﺔﻁﻭﻐﺿﻣﻟﺍ ﺹﺍﺭﻗﻷﺍ ﻝﻳﻐﺷﺗ ﻥﻛﻣﻳ ﻻ
ﺔﻛﺭﺣﻟﺍ ﻝﻳﻐﺷﺗﻭ ءﻲﻁﺑﻟﺍ ﻝﻳﻐﺷﺗﻟﺍﻭ ﻊﻳﺭﺳﻟﺍ ﻝﻳﻐﺷﺗﻟﺍ ءﺎﻧﺛﺃ ﺎ
؟ﺔﺣﻳﺣﺻ ﺔﻘﻳﺭﻁﺑ ﺔﻋﺎﻣﺳﻟﺍ ﺩﺍﺩﻋﺇ ﺹﻳﺻﺧﺗ ﻡﺗ ﻝﻫ ؟ﺔﺣﻳﺣﺻ ﺔﻘﻳﺭﻁﺑ ﺕﺎﻋﺎﻣﺳﻟﺍ ﻝﻳﺻﻭﺗ ﻡﺗ ﻝﻫ
.Blu-ray/DVD ﺹﺭﻘﺑ ﺹﺎﺧﻟﺍ ﺔﻘﻁﻧﻣﻟﺍ ﻡﻗﺭ ﻥﻣ ﻕﻘﺣﺗ
.ﻑﻳﻧﺻﺗﻟﺍ ﻯﻭﺗﺳﻣ ﺔﺣﺻ ﻥﻣ ﺩﻛﺄﺗ
؟ﺢﻁﺳﻟﺍ ﻰﻠﻋ ﺵﻭﺩﺧ ﻪﺑ ﺎًﺻﺭﻗ ﻭﺃ ﺎًﻫﻭﺷﻣ ﺎًﺻﺭﻗ ﻡﺩﺧﺗﺳﺗ ﻝﻫ
ً
ﺗﻭﺻ ﺔﻳﻟﺯﻧﻣﻟﺍ ﺎﻣﻧﻳﺳﻟﺍ ﺽﺭﻋ ﺔﺷﺎﺷ ﺭﺩﺻﺗ ﻻ
.ﻪﻔﻳﻅﻧﺗﻟ ﺹﺭﻘﻟﺍ ﺢﺳﻣﺍ
؟ﺓﺩﺷﺑ ﻑﻟﺎﺗ ﺹﺭﻘﻟﺍ ﻝﻫ
.ﺔﻳﻠﺣﺭﻣﻟﺍ
•
•
•
•
ﻁﻐﺿﻟﺍ ﺩﻧﻋ ﺭﻭﻔﻟﺍ ﻰﻠﻋ ﻝﻳﻐﺷﺗﻟﺍ ﺃﺩﺑﻳ ﻻ
•
•
•
•
.ﺕﻗﺅﻣ ﻑﺎﻘﻳﺇ/ﻝﻳﻐﺷﺗ ﺭﺯﻟﺍ ﻰﻠﻋ
.ﺕﻭﺻ ﺭﺍﺩﺻﺇ ﻡﺗﻳ ﻻ
ﺔﻳﺑﺭﻌﻟﺍ ٣٢
.ﻝﻳﻐﺷﺗﻟﺍ ﺃﺩﺑﻳ ﻻ
|
Page 69

ﺽﺍﺭﻋﻷﺍﺝﻼﻌﻟﺍ/ﺹﺣﻔﻟﺍ
۰۷ﻕﺣﻠﻣﻟﺍ
.ﻁﻘﻓ ﺔﻳﻣﺎﻣﻷﺍ ﺕﺎﻋﺎﻣﺳﻟﺍ ﻥﻣ ﺕﻭﺻﻟﺍ ﺭﺩﺻﻳ ،ﺯﺎﻔﻠﺗ ﻭﺃ ﻭﻳﺩﺍﺭ ﻭﺃ ﻁﻭﻐﺿﻣ ﺹﺭﻗ ﻰﻟﺇ ﻉﺎﻣﺗﺳﻻﺍ ﺩﻧﻋ
Dolby Digital ﻲﻁﻳﺣﻣﻟﺍ ﺕﻭﺻﻟﺍ ﺭﺩﺻﻳ ؟ﺹﺭﻘﻟﺍ ﻰﻠﻋ "Dolby Digital 5.1 CH" ﺔﻣﻼﻋ ﺩﺟﻭﺗ ﻝﻫ
؟ﺕﺎﻣﻭﻠﻌﻣﻟﺍ ﺽﺭﻋ ﺔﺷﺎﺷ ﻲﻓ Dolby Digital 5.1-CH ﻰﻠﻋ ﺢﻳﺣﺻ ﻝﻛﺷﺑ ﺕﻭﺻﻟﺍ ﺔﻐﻟ ﻥﻳﻳﻌﺗ ﻡﺗ ﻝﻫ
ﻲﻓ ﻭﺃ ﻝﻣﺎﻛ 16:9 ﻊﺿﻭ ﻲﻓ 16:9 ﻉﺎﻔﺗﺭﺍ ﻰﻟﺇ ﺽﺭﻋ ﺔﺑﺳﻧﺑ Blu-ray/DVD ﺹﺍﺭﻗﺃ ﻝﻳﻐﺷﺗ ﻙﻧﻛﻣﻳ
ﺔﺑﺳﻧﺑ 4:3 ﻉﺎﻔﺗﺭﺍ ﻰﻟﺇ ﺽﺭﻋ ﺔﺑﺳﻧﺑ Blu-ray/DVD ﺹﺍﺭﻗﺃ ﻝﻳﻐﺷﺗ ﻡﺗﻳﻭ ،ﺔﻳﺩﺎﻋ ﺔﺷﺎﺷ 4:3 ﻊﺿﻭ
ﺭﻬﻅﺗ .
ﻥﺍﻭﺛ
ٍ
.ﺔﻧﻳﻌﻣ Blu-ray/DVD ﺹﺍﺭﻗﺃ ﻲﻓ ﻁﻘﻓ ﺔﻳﻣﺎﻣﻷﺍ ﺕﺎﻋﺎﻣﺳﻟﺍ ﻥﻣ ﺕﻭﺻﻟﺍ ﺝﺭﺧﻳ
؟ﺭﻌﺷﺗﺳﻣﻟﺍ ﻥﻣ ﺔﺑﻳﺭﻗ ﺔﺑﺳﺎﻧﻣ ﺔﻳﻭﺍﺯﺑﻭ ﺎﻬﻠﻳﻐﺷﺗ ﻕﺎﻁﻧ ﻲﻓ ﺩﻌﺑ ﻥﻋ ﻡﻛﺣﺗﻟﺍ ﺓﺩﺣﻭ ﻝﻳﻐﺷﺗﺑ ﻡﻭﻘﺗ ﻝﻫ
.ﺎﻣﻬﻳﻠﻋ ﺹﺭﻘﻟﺍ ﻭﺗﺣﻳ ﻡﻟ ﺍﺫﺇ ﺔﻣﺟﺭﺗﻟﺍ ﺕﺎﻐﻟﻭ ﺕﻭﺻﻟﺍ ﺔﻐﻟ ﻝﻣﻌﺗ ﻥﻟ
.ﺔﺑﺳﺎﻧﻣﻟﺍ ﺔﻔﻳﻅﻭﻟﺍ ﺩﺩﺣ ﻡﺛ ،Blu-ray ﺹﺍﺭﻗﺃ ﺔﺑﻳﻘﺣ ﻊﺟﺍﺭ .ﻁﻘﻓ 4:3 ﻉﺎﻔﺗﺭﺍ ﻰﻟﺇ ﺽﺭﻋ
.ﺹﺭﻗ ﺩﺟﻭﻳ ﻻ ﻊﺿﻭ ﻲﻓ ٍﻥﺍﻭﺛ ٥ ﺓﺩﻣﻝ ﻡﻛﺣﺗﻟﺍ ﺓﺩﺣﻭ ﺭﺯ ﻰﻠﻋ ﺭﺍﺭﻣﺗﺳﻻﺍ ﻊﻣ ﻁﻐﺿﺍ
٥ ﻥﻡ ﺭﺛﻛﻷ
.ﺔﻧﺯﺧﻣﻟﺍ ﺕﺍﺩﺍﺩﻋﻹﺍ ﻊﻳﻣﺟ ﺢﺳﻣ ﻰﻟﺇ "ﻥﻳﻳﻌﺗ ﺓﺩﺎﻋﺇ" ﺔﻔﻳﻅﻭ ﻡﺍﺩﺧﺗﺳﺍ ﻱﺩﺅﻳ -
ﺞﺗﻧﻣﻟﺍ ﺭﺯ ﻰﻠﻋ ﺭﺍﺭﻣﺗﺳﻻﺍ ﻊﻣ ﻁﻐﺿﺍ ،ﺞﺗﻧﻣﻟﺎﺑ ﺹﺭﻗ ﺩﻭﺟﻭ ﻡﺩﻋ ﺔﻟﺎﺣ ﻲﻓ
.ﺔﻳﺿﺍﺭﺗﻓﻻﺍ ﻡﻳﻘﻟﺍ ﻰﻟﺇ ﺕﺍﺩﺍﺩﻋﻹﺍ ﻊﻳﻣﺟ ﺩﻭﻌﺗﻭ ﺔﺷﺎﺷﻟﺍ ﻰﻠﻋ INIT
.ﺔﻧﺯﺧﻣﻟﺍ ﺕﺍﺩﺍﺩﻋﻹﺍ ﻊﻳﻣﺟ ﺢﺳﻣ ﻰﻟﺇ "ﻥﻳﻳﻌﺗ ﺓﺩﺎﻋﺇ" ﺔﻔﻳﻅﻭ ﻡﺍﺩﺧﺗﺳﺍ ﻱﺩﺅﻳ -
.ﺔﺣﻳﺣﺻ ﺔﻘﻳﺭﻁﺑ ﺕﺎﻋﺎﻣﺳﻟﺍ ﻝﻳﺻﻭﺗ ﻥﻣ ﺩﻛﺄﺗ
.5.1 ﺓﺎﻧﻗ ﺕﻭﺻﺑ ﺹﺭﻘﻟﺍ ﻝﻳﺟﺳﺗ ﻡﺗ ﺍﺫﺇ ﻁﻘﻓ 5.1 CH
؟ﺔﺣﻳﺣﺻ ﺔﻘﻳﺭﻁﺑ ﻭﻳﺩﻳﻔﻟﺍ ﺕﻼﺑﻛ ﻝﻳﺻﻭﺗ ﻡﺗ ﻝﻫ
.ﻊﻧﺻﻟﺍ ﺔﺋﻳﺩﺭ ﺹﺍﺭﻗﻷﺍ ﻝﻣﻌﺗ ﻻ ﺩﻗ
؟ﻡﺋﺍﻭﻗ ﻰﻠﻋ ﻱﻭﺗﺣﻳ ﻻ ﺎًﺻﺭﻗ ﻡﺩﺧﺗﺳﺗ ﻝﻫ
ﻭﺃ ﺔﻳﺿﺭﻋ ﺔﺷﺎﺷ 4:3 ﻊﺿﻭ
.ﺔﺟﺎﺣﻟﺍ ﺩﻧﻋ ﻻﺇ ﺔﻔﻳﻅﻭﻟﺍ ﻩﺫﻫ ﻡﺩﺧﺗﺳﺗ ﻻ
.ﺔﺟﺎﺣﻟﺍ ﺩﻧﻋ ﻻﺇ ﺔﻔﻳﻅﻭﻟﺍ ﻩﺫﻫ ﻡﺩﺧﺗﺳﺗ ﻻ
.ﺕﻭﺻﻟﺍ ﻯﻭﺗﺳﻣ ﻁﺑﺿﺑ ﻡﻗ
؟ﺓﺩﻔﻧﺗﺳﻣ ﺕﺎﻳﺭﺎﻁﺑﻟﺍ ﻝﻫ
؟ﺯﺎﻔﻠﺗﻟﺍ ﻝﻳﻐﺷﺗ ﻡﺗ ﻝﻫ
؟ﻑﻟﺎﺗ ﻭﺃ ﺦﺳﺗﻣ ﺹﺭﻘﻟﺍ ﻝﻫ
.ﻝﻳﻐﺷﺗﻟﺍ ﺭﺯ ﻰﻠﻋ ﻁﻐﺿﺍ ،ﻡﺛ
•
ﻝﻼﺧ ﻥﻣ ﻁﻘﻓ ﺕﻭﺻﻟﺍ ﻉﺎﻣﺳ ﻥﻛﻣﻳ
ﻝﻼﺧ ﻥﻣ ﺱﻳﻟﻭ ﻁﻘﻓ ﺔﻠﻳﻠﻗ ﺕﺎﻋﺎﻣﺳ
•
•
•
Dolby ﻲﻁﻳﺣﻣﻟﺍ ﺕﻭﺻﻟﺍ ﺭﺩﺻﻳ ﻻ
•
•
•
•
•
•
•
•
•
•
•
•
.ﻑﻳﻧﺻﺗﻟﺍ ﻯﻭﺗﺳﻣ ﺭﻭﺭﻣ ﺔﻣﻠﻛ ﻥﺎﻳﺳﻧ
•
.Digital 5.1 CH
.ﺩﻌﺑ ﻥﻋ ﻡﻛﺣﺗﻟﺍ ﺓﺩﺣﻭ ﻝﻣﻌﺗ ﻻ
ﻥﻛﻟﻭ ﺹﺭﻘﻟﺍ ﺭﻭﺩﻳ •
.ﺓﺭﻭﺻﻟﺍ ﺽﺭﻋ ﻡﺗﻳ ﻻ
ﻭ ﺔﺋﻳﺩﺭ ﺓﺭﻭﺻﻟﺍ ﺓﺩﻭﺟ •
.ﺓﺯﻭﺯﻬﻣ ﺓﺭﻭﺻﻟﺍﻭ
ﺕﺎﻐﻟ ﻻﻭ ﺕﻭﺻﻟﺍ ﺔﻐﻟ ﻝﻣﻌﺗ ﻻ
ﺩﻧﻋ ﻰﺗﺣ ﺔﻣﺋﺎﻘﻟﺍ ﺔﺷﺎﺷ ﺭﻬﻅﺗ ﻻ
.ﺔﻣﺋﺎﻘﻟﺍ ﺔﻔﻳﻅﻭ ﺩﻳﺩﺣﺗ
ﻰﻟﺇ ﺽﺭﻌﻟﺍ ﺔﺑﺳﻧ ﺭﻳﻳﻐﺗ ﻥﻛﻣﻳ ﻻ
.6 ﺕﺎﻋﺎﻣﺳﻟﺍ
.ﺔﻣﺟﺭﺗﻟﺍ
.ﻉﺎﻔﺗﺭﻻﺍ
.ﻝﻣﻌﻳ ﻻ ﺞﺗﻧﻣﻟﺍ •
.ﻝﺎﺑﻘﺗﺳﻻﺍ ﺩﻳﺟ ﻥﺎﻛﻣ ﻲﻓ ﻲﺟﺭﺎﺧ FM ﻲﺋﺍﻭﻫ ﺕﻳﺑﺛﺗﺑ ﻡﻘﻓ ،ﺔﻔﻳﻌﺿ ﻲﺋﺍﻭﻬﻟﺍ ﻝﺧﺩ ﺓﺭﺎﺷﺇ ﺕﻧﺎﻛ ﺍﺫﺇ
ﻭﺃ D. IN ﻑﺋﺎﻅﻭ ﻡﺍﺩﺧﺗﺳﺎﺑ ﺯﺎﻔﻠﺗﻟﺍ ﺕﻭﺻ ﻰﻟﺇ ﻉﺎﻣﺗﺳﻻﺍ ءﺎﻧﺛﺃ ^ ﻕﻼﻏﺇ/ﺢﺗﻓ ﺭﺯﻟﺍ ﻰﻠﻋ ﻁﻐﺿﻟﺍ ﻡﺗ ﺍﺫﺇ
|
٣٣ ﺔﻳﺑﺭﻌﻟﺍ
.ﺯﺎﻔﻠﺗﻟﺍ ﺕﻭﺻ ﻡﺗﻛ ﻡﺗﻳﻭ Blu-ray/DVDﺹﺍﺭﻗﺃ ﻑﺋﺎﻅﻭ ﻝﻳﻐﺷﺗ ﻡﺗﻳ ،AUX
:ﺏﺑﺳﺑ ﺕﻗﻭﻟﺍ ﺍﺫﻫ ﻲﻓ ءﺍﺭﺟﻹﺍ ﻭﺃ ﺕﺍﺯﻳﻣﻟﺍ ﻝﺎﻣﻛﺇ ﻥﻛﻣﻳ ﻻ
.(ﺎﻳﺍﻭﺯﻟﺍ ،ﻝﺎﺛﻣﻟﺍ ﻝﻳﺑﺳ ﻰﻠﻋ) ﺓﺯﻳﻣﻟﺍ Blu-ray/DVD ﺹﺍﺭﻗﺃ ﺞﻣﺎﻧﺭﺑ ﻡﻋﺩﻳ ﻻ .۲
.ﻕﺎﻁﻧﻟﺍ ﺝﺭﺎﺧ ﺙﺣﺑ ﺕﻗﻭ ﻭﺃ ﻝﺻﻓ ﻡﻗﺭ ﻭﺃ ﻥﺍﻭﻧﻋ ﺏﻠﻁﺑ ﺕﻣﻗ ﺩﻗ .٤
؟ﺔﺣﻳﺣﺻ ﺔﻘﻳﺭﻁﺑ ﻲﺋﺍﻭﻬﻟﺍ ﻝﻳﺻﻭﺗ ﻡﺗ ﻝﻫ
.ﻙﻟﺫ Blu-ray/DVD ﺹﺍﺭﻗﺃ ﺞﻣﺎﻧﺭﺑ ﺭﻅﺣ .۱
.ﺕﻗﻭﻟﺍ ﺍﺫﻫ ﻲﻓ ﺓﺭﻓﻭﺗﻣ ﺕﺳﻳﻟ ﺓﺯﻳﻣﻟﺍ .۳
.ﻭﻳﺩﺍﺭﻟﺍ ﺙﺑ ﺕﺎﻳﻠﻣﻋ ﻝﺎﺑﻘﺗﺳﺍ ﻥﻛﻣﻳ ﻻ
•
•
•
ﻰﻟﺇ ﻉﺎﻣﺗﺳﻻﺍ ﺩﻧﻋ ﺕﻭﺻ ﺭﺩﺻﻳ ﻻ
.ﺞﺗﻧﻣﻟﺍ ﺭﺑﻋ ﺯﺎﻔﻠﺗﻟﺍ ﺕﻭﺻ
ﻰﻠﻋ "ﺭﻓﻭﺗﻣ ﺭﻳﻏ" ﺓﺭﺎﺑﻋ ﺭﻭﻬﻅ
•
.ﺔﺷﺎﺷﻟﺍ
Page 70

ﻲﻓ ﺹﺭﻗ ﺩﻭﺟﻭ ﻡﺩﻋ ﻊﻣ ٍﻥﺍﻭﺛ 5 ﻥﻋ ﺩﻳﺯﺗ ﺓﺩﻣﻟ ﺔﻳﻣﺎﻣﻷﺍ ﺔﺣﻭﻠﻟﺎﺑ ﺭﺯﻟﺍ ﻰﻠﻋ ﺭﺍﺭﻣﺗﺳﻻﺍ ﻊﻣ ﻁﻐﺿﺍ
.ﻊﻧﺻﻣﻟﺍ ﺕﺍﺩﺍﺩﻋﺇ ﻊﻳﻣﺟ ﺓﺩﺎﻌﺗﺳﺍ ﻡﺗﺗﺳ .ﺞﺗﻧﻣﻟﺍ
.ﺞﺗﻧﻣﻟﺍ ﻲﻓ HDMI ﺱﺑﻘﻣﻭ ﺯﺎﻔﻠﺗﻟﺍ ﻥﻳﺑ ﻝﺎﺻﺗﻻﺍ ﻥﻣ ﻕﻘﺣﺗ
.HDMI 576p /480p /720p /1080i /1080p ﻝﺎﺧﺩﺇ ﺔﻗﺩﻟ ﺯﺎﻔﻠﺗﻟﺍ ﻡﻋﺩ ﻥﻣ ﻕﻘﺣﺗ
ﺽﺍﺭﻋﻷﺍﺝﻼﻌﻟﺍ/ﺹﺣﻔﻟﺍ
ﺔﻁﻭﺑﺿﻣ HDMI ﺕﺎﺟﺭﺧﻣ ﺕﻧﺎﻛ ﺍﺫﺇ
•
ﺯﺎﻬﺟ ﺎﻬﻣﻋﺩﻳ ﻻ ﺔﻗﺩ ﺔﺟﺭﺩ ﻰﻠﻋ
،ﻝﺎﺛﻣﻟﺍ ﻝﻳﺑﺳ ﻰﻠﻋ) ﻙﺑ ﺹﺎﺧﻟﺍ ﺯﺎﻔﻠﺗﻟﺍ
ﺔﻳﺅﺭ ﻙﻧﻛﻣﻳ ﻻ ﺩﻘﻓ ،(1080p
.ﺯﺎﻔﻠﺗﻟﺍ ﻰﻠﻋ ﺓﺭﻭﺻﻟﺍ
•
•
.HDMI ﺕﺎﺟﺭﺧﻣ ﺩﺟﻭﺗ ﻻ
ﻕﺣﻠﻣﻟﺍ
ﺕﺎﻳﻭﺗﺣﻣﻟﺍ ﺔﻳﺎﻣﺣ) HDCP ﺔﻳﺎﻣﺣ ﻡﻋﺩﻳ ﻻ ﺯﺎﻔﻠﺗﻟﺍ ﻥﺃ ﻲﻧﻌﻳ ﺍﺫﻬﻓ ،ﺔﺷﺎﺷﻟﺍ ﻰﻠﻋ ﺔﻳﺋﺍﻭﺷﻋ ءﺎﺿﻭﺿ ﺕﺭﻬﻅ ﺍﺫﺇ
(ﻲﻟﺎﻌﻟﺍ ﺽﻳﺭﻌﻟﺍ ﻕﺎﻁﻧﻟﺍ ﺕﺍﺫ ﺔﻳﻣﻗﺭﻟﺍ
ﺕﺎﻔﻠﻣﻟﺍ ﺽﺭﻋ ﻡﺗﻳ ﻻ ﺩﻗﻭ .ﻁﻘﻓ ﻡﻼﻓﻷﺍﻭ ﻰﻘﻳﺳﻭﻣﻟﺍﻭ ﺭﻭﺻﻟﺍ ﺕﺎﺋﻔﻟ ﺔﻘﺑﺎﻁﻣﻟﺍ ﺕﺎﻔﻠﻣﻟﺍ DLNA Play ﺽﺭﻌﻳ
.ﺕﺎﺋﻔﻟﺍ ﻩﺫﻫ ﻊﻣ ﻕﺑﺎﻁﺗﺗ ﻻ ﻲﺗﻟﺍ
.ﺔﻛﺑﺷﻟﺍ ﺭﺍﺭﻘﺗﺳﺍ ﻥﻣ ﻕﻘﺣﺗ
.ﺍًﺩﺋﺍﺯ ﺱﻳﻟ ﺔﻛﺑﺷﻟﺍ ﻝﻣﺣ ﻥﺃﻭ ﺍًﺩﻳﺟ ﺔﻛﺑﺷﻟﺍ ﻝﺑﻛ ﻝﻳﺻﻭﺗ ﻥﻣ ﻕﻘﺣﺗ
ﺎﻣﻣ IP ﻥﻳﻭﺎﻧﻋ ﻲﻓ ﺽﺭﺎﻌﺗ ﻙﻟﺫ ﻥﻋ ﻡﺟﻧﻳ ﺩﻘﻓ ﻻﺇﻭ ،ﺍًﺩﻳﺭﻓ ﺔﻳﻋﺭﻔﻟﺍ ﺔﻛﺑﺷﻟﺍ ﺱﻔﻧ ﻲﻓ IP ﻥﺍﻭﻧﻋ ﻥﻭﻛﻳ ﻥﺃ ﺏﺟﻳ
.ﺓﺭﻫﺎﻅﻟﺍ ﻩﺫﻫ ﺭﻭﻬﻅ ﻰﻟﺇ ﻱﺩﺅﻳ
.ﺔﻳﺎﻣﺣ ﺭﺍﺩﺟ ﻥﻳﻛﻣﺗ ﻥﻣ ﻕﻘﺣﺗ
.ﺔﻳﺎﻣﺣﻟﺍ ﺭﺍﺩﺟ ﺔﻔﻳﻅﻭ ﻝﻳﻁﻌﺗﺑ ﻡﻘﻓ ،ﻙﻟﺫﻛ ﺭﻣﻷﺍ ﻥﺎﻛ ﺍﺫﺇﻭ
.ﺔﻛﺑﺷﻟﺍ ﺔﻟﺎﺣ ﺔﻔﻳﻅﻭ ﻡﺍﺩﺧﺗﺳﺎﺑ ﻻ ﻡﺃ ﺔﻛﺑﺷﻟﺍ ﻝﺎﺻﺗﺍ ﺢﺟﻧ ﻝﻫ ﺩﻳﺩﺣﺗﻟ ﺭﺎﺑﺗﺧﺎﺑ ﻡﻗ
.ﻻ ﻡﺃ ﺞﺗﻧﻣﻟﺎﺑ USB ﺓﺭﻛﺍﺫ ﺯﺎﻬﺟ ﻝﻳﺻﻭﺗ ﻥﻣ ﻕﻘﺣﺗ
BD- ﺕﺎﻣﺩﺧ ﺏﺎﻌﻳﺗﺳﻻ ﺔﻳﻟﺎﺧﻟﺍ ﺔﺣﺎﺳﻣﻟﺍ ﻥﻣ ﻝﻗﻷﺍ ﻰﻠﻋ ﺕﻱﺎﺑ ﺎﺟﻳﺟ ۱ ﻰﻠﻋ ﺓﺭﻛﺍﺫﻟﺍ ﺯﺍﻪﺟ ﻱﻭﺗﺣﻳ ﻥﺃ ﺏﺟﻳ
.LIVE
(29 ﺔﺣﻔﺻﻟﺍ ﺭﻅﻧﺍ) .BD ﺕﺎﻧﺎﻳﺑ ﺓﺭﺍﺩﺇ ﻲﻓ ﺭﻓﻭﺗﻣﻟﺍ ﻡﺟﺣﻟﺍ ﻥﻣ ﻕﻘﺣﺗﻟﺍ ﻙﻧﻛﻣﻳ
ﻰﻠﻋ (BD-LIVE ﺕﻧﺭﺗﻧﺇ ﻝﺎﺻﺗﺍ) BD-LIVE Internet Connection ﺭﺎﻳﺧ ﺩﺍﺩﻋﺇ ﻥﻣ ﻕﻘﺣﺗﻟﺍ ﻰﺟﺭﻳ
.((ﻝﻛﻟﺍ) ﺡﺎﻣﺳﻟﺍ) Allow (All)
.ﺔﺗﺑﺎﺛﻟﺍ ﺞﻣﺍﺭﺑﻟﺍ ﺙﺩﺣﺃ ﻰﻟﺇ ﺙﻳﺩﺣﺗﻟﺎﺑ ﻡﻗ ﻭﺃ ﺕﺎﻳﻭﺗﺣﻣﻟﺍ ﺭﻓﻭﻣﺑ ﻝﺻﺗﺎﻓ ،ﺔﻘﺑﺎﺳﻟﺍ ﺕﺍءﺍﺭﺟﻹﺍ ﻊﻳﻣﺟ ﺕﻠﺷﻓ ﺫﺇ
BD- ﺕﺎﻣﺩﺧ ﺏﺎﻌﻳﺗﺳﻻ ﺔﻳﻟﺎﺧﻟﺍ ﺔﺣﺎﺳﻣﻟﺍ ﻥﻣ ﻝﻗﻷﺍ ﻰﻠﻋ ﺕﻳﺎﺑ ﺎﺟﻳﺟ 1 ﻰﻠﻋ ﺓﺭﻛﺍﺫﻟﺍ ﺯﺎﻬﺟ ﻱﻭﺗﺣﻳ ﻥﺃ ﺏﺟﻳ
.LIVE
(29 ﺔﺣﻔﺻﻟﺍ ﺭﻅﻧﺍ) .BD ﺕﺎﻧﺎﻳﺑ ﺓﺭﺍﺩﺇ ﻲﻓ ﺭﻓﻭﺗﻣﻟﺍ ﻡﺟﺣﻟﺍ ﻥﻣ ﻕﻘﺣﺗﻟﺍ ﻙﻧﻛﻣﻳ
.ﻡﺩﺧﺗﺳﻣﻟﺎﺑ ﺔﺻﺎﺧﻟﺍ ﺔﻧﺯﺧﻣﻟﺍ BD ﺕﺎﻧﺎﻳﺑ ﻊﻳﻣﺟ ﻑﺫﺣ ﻡﺗﻳ ،ﺔﻳﺿﺍﺭﺗﻓﻻﺍ ﻊﻧﺻﻣﻟﺍ ﺕﺍﺩﺍﺩﻋﺇ ﺓﺩﺎﻌﺗﺳﺍ ﺩﻧﻋ
•
.ﺔﻳﻌﻳﺑﻁ ﺭﻳﻏ HDMI ﺕﺎﺟﺭﺧﻣ ﺔﺷﺎﺷ
DLNA Play ﺔﻔﻳﻅﻭ
ﺭﺑﻋ ﺔﻛﺭﺗﺷﻣﻟﺍ ﺕﺍﺩﻠﺟﻣﻟﺍ ﺔﻳﺅﺭ ﻲﻧﻧﻛﻣﻳ
•
ﻲﻧﻧﻛﻣﻳ ﻻ ﻥﻛﻟﻭ ،DLNA Play
•
.ﻊﻁﻘﺗﻣ ﻝﻛﺷﺑ ﻭﻳﺩﻳﻔﻟﺍ ﺽﺭﻋ ﻡﺗﻳ
•
ﺯﺎﻔﻠﺗﻟﺍ ﻥﻳﺑ DLNA Play ﻝﺎﺻﺗﺍ
•
•
•
•
•
•
•
•
.ﺭﻘﺗﺳﻣ ﺭﻳﻏ ﺭﺗﻭﻳﺑﻣﻛﻟﺍ ﺯﺎﻬﺟﻭ
BD- ﻡﺩﺎﺧﺑ ﻝﺎﺻﺗﻻﺍ ﻲﻧﻧﻛﻣﻳ ﻻ
،BD-LIVE ﺔﻣﺩﺧ ﻡﺍﺩﺧﺗﺳﺍ ﺩﻧﻋ
HT-F4550/HT-F4500
.ﺕﺎﻔﻠﻣﻟﺍ ﺔﻳﺅﺭ
BD-LIVE
.LIVE
.ﺄﻁﺧ ﺙﺩﺣﻳ
| ﺔﻅﺣﻼﻣ |
◄
ﺔﻴﺳﺎﺳﻷﺍ ﺕﺎﺒﻠﻄﺘﳌﺍ ﻊﻣ ﻖﻓﺍﻮﺘﻣ ﺯﺎﻬﳉﺍ ﺍﺬﻫ ﻥﺃ Samsung Electronics ﺔﻛﺮﺷ ﻦﻠﻌﺗ ،ﺔﻘﻴﺛﻮﻟﺍ ﻩﺬﻫ ﺐﺟﻮﲟ
.EC/5/1999 ﺕﺎﻬﻴﺟﻮﺘﺑ ﺔﻠﺼﻟﺍ ﺕﺍﺫ ﻯﺮﺧﻷﺍ ﻡﺎﻜﺣﻷﺍﻭ
Support ﻰﻟﺇ ﻞﻘﺘﻧﺍ ،http://www.samsung.com ﻊﻗﻮﳌﺍ ﻰﻠﻋ ﻲﻠﺻﻷﺍ ﺔﻘﺑﺎﻄﳌﺍ ﻥﻼﻋﺇ ﻰﻠﻋ ﻉﻼﻃﻻﺍ ﻦﻜﳝﻭ
.ﺯﺍﺮﻄﻟﺍ ﻢﺳﺍ ﻞﺧﺩﺃ ﻢﺛ (ﺞﺘﻨﳌﺍ ﻢﻋﺩ ﻦﻋ ﺚﺤﺒﻟﺍ) Search Product Support < (ﻢﻋﺩ)
.ﻥﺩﺭﻷﺍ ﻲﻓ ﺯﺎﻬﳉﺍ ﺍﺬﻫ ﻞﻴﻐﺸﺗ ﺯﻮﺠﻳ
ﺔﻳﺑﺭﻌﻟﺍ ۳٤
|
Page 71

ﺕﺎﻔﺻﺍﻭﻣﻟﺍ
۰۷ﻕﺣﻠﻣﻟﺍ
ﺯﺗﺭﻫ ۱٦۰ ﻰﻟﺇ ﺯﺗﺭﻫ ٤۰
|
٣٥ ﺔﻳﺑﺭﻌﻟﺍ
PCM ﺕﻭﺻ ،ﺕﺑﻟﺍ ﻕﻓﺩﺗ ﺕﻭﺻ ،ﺕﺍﻭﻧﻘﻟﺍ ﺩﺩﻌﺗﻣ PCM ﺕﻭﺻ
(ﻝﺑﻳﺳﻳﺩ ±3) ﺯﺗﺭﻫ ﻭﻠﻳﻛ 20 ﻰﻟﺇ ﺯﺗﺭﻫ 20 : ﻱﺭﻅﺎﻧﺗﻟﺍ ﻝﺎﺧﺩﻹﺍ
(ﻝﺑﻳﺳﻳﺩ ±4) ﺯﺗﺭﻫ ﻭﻠﻳﻛ 40 ﻰﻟﺇ ﺯﺗﺭﻫ 20 : ﻲﻣﻗﺭﻟﺍ ﻝﺧﺩﻟﺍ
5.1 ﺓﺎﻧﻗ ﺔﻋﺎﻣﺳ ﻡﺎﻅﻧ
ﺕﻭﺻﻟﺍ ﺔﻋﺎﻣﺳ
ﻲﻁﻳﺣﻣﻟﺍ
Ω
۲۰ ﻰﻟﺇ ﺯﺗﺭﻫ ۱٤۰
ﺯﺗﺭﻫ ﻭﻠﻳﻛ
ﻲﻠﻠﻣ/ﻁﺍﻭ/ﻝﺑﻳﺳﻳﺩ ۸۷ﻲﻠﻠﻣ/ﻁﺍﻭ/ﻝﺑﻳﺳﻳﺩ ۸۷ﻲﻠﻠﻣ/ﻁﺍﻭ/ﻝﺑﻳﺳﻳﺩ ۸۸
ﻁﺍﻭ ۱٦۰ﻁﺍﻭ ۱٦۰ﻁﺍﻭ ۲۰۰
۹٥ x ۱۱۱۲ x ۷٤٫٥
(ﻝﻣﺎﺣﻟﺍ ﺓﺩﻋﺎﻗ)
۲۷٦ x ۱۸۹
.ﺭﺎﻌﺷﺇ ﻥﻭﺩ ﺕﺎﻔﺻﺍﻭﻣﻟﺍ ﺭﻳﻳﻐﺗ ﻲﻓ ﻕﺣﻟﺎﺑ Samsung Electronics Co., Ltd ﺔﻛﺭﺷ ﻅﻔﺗﺣﺗ
3
Ω
ﻰﻁﺳﻭﻟﺍﺕﻭﺻﻟﺍ ﻡﺧﺿﻣ
3
۲۰ ﻰﻟﺇ ﺯﺗﺭﻫ ۱٤۰
ﺯﺗﺭﻫ ﻭﻠﻳﻛ
HT-F4500
HT-F4550
۷٤ x ۹٥ x ۲۲۷۲۸٥٫٥ x ۳۰۰ x ۱٥٥
HT-F4500
HT-F4550
ﻥﺯﻭﻟﺍ
ﺩﺎﻌﺑﻷﺍﻡﻣ (ﻕﻣﻌﻟﺍ) 250× (ﻉﺎﻔﺗﺭﻻﺍ) 55 × (ﺽﺭﻌﻟﺍ) 430
ﻡﺍﺩﺧﺗﺳﻻﺍ ﺔﻳﺳﺎﺳﺣ
ﻭﻳﺩﻳﻔﻟﺍ1080p، 1080i، 720p، 576p/480p
ﺕﻭﺻﻟﺍ
ﺩﺩﺭﺗﻟﺍ ﺔﺑﺎﺟﺗﺳﺍ
S/N ﺔﺑﺳﻧﻝﺑﻳﺳﻳﺩ 70
ﺓﺎﻧﻘﻟﺍ ﻝﺻﻓ
ﻝﺎﺧﺩﻹﺍ ﺔﻳﺳﺎﺳﺣﺕﻟﻭﻓ ﻲﻠﻠﻣ 500(ﺩﻋﺎﺳﻣﻟﺍ)
ﺔﻋﺎﻣﺳﻟﺍ ﻡﺎﻅﻧ
ﺔﻳﺭﻫﺎﻅﻟﺍ ﺔﻣﻭﺎﻘﻣﻟﺍ3
ﻱﺩﺩﺭﺗﻟﺍ ﻕﺎﻁﻧﻟﺍ
ﻝﺧﺩﻟﺍ ﺭﺍﺩﻘﻣ
ﻝﺎﺧﺩﻺﻟ ﺩﺣ ﻰﺻﻗﺃ
ﻡﺎﻋ
FM ﻑﻟﻭﻣ
HDMI
ﻡﺧﺿﻣ
ﺕﻭﺻﻟﺍ
+35°C ﻰﻟﺇ C°+5
% 75 ﻰﻟﺇ % 10
(ﻡﻭﺃ3)
3
Ω
۲۰ ﻰﻟﺇ ﺯﺗﺭﻫ ۱٤۰
ﻲﻠﻠﻣ/ﻁﺍﻭ/ﻝﺑﻳﺳﻳﺩ ۸۷
ﻡﺟﻛ 2.3
ﻝﺑﻳﺳﻳﺩ 12
% 0.5
2 ﻁﺍﻭ 80
ﻝﺑﻳﺳﻳﺩ 60
ﺔﻳﻣﺎﻣﻷﺍ
ﺯﺗﺭﻫ ﻭﻠﻳﻛ
ﻁﺍﻭ ۸۰ﻁﺍﻭ ۸۰ﻁﺍﻭ ۸۰ﻁﺍﻭ ۱۰۰
ﻁﺍﻭ ۱٦۰
ﻝﻳﻐﺷﺗﻟﺍ ﺓﺭﺍﺭﺣ ﺔﺟﺭﺩ ﻯﺩﻣ
ﻝﻳﻐﺷﺗﻠﻟ ﺔﺑﻭﻁﺭﻟﺍ ﺔﺟﺭﺩ ﻯﺩﻣ
ﺵﻳﻭﺷﺗﻟﺍ/ﺓﺭﺎﺷﻹﺍ ﺔﺑﺳﻧﻝﺑﻳﺳﻳﺩ 55
ﻲﻘﻓﺍﻭﺗﻟﺍ ﻪﻳﻭﺷﺗﻟﺍ ﻲﻟﺎﻣﺟﺇ
ﺔﻳﻣﺎﻣﻷﺍ ﺔﻋﺎﻣﺳﻟﺍ ﺝﺭﺧ(ﻡﻭﺃ3) 2 ﻁﺍﻭ 80
ﻰﻁﺳﻭﻟﺍ ﺔﻋﺎﻣﺳﻟﺍ ﺝﺭﺧ(ﻡﻭﺃ3Ω) ﻁﺍﻭ 80
ﻲﻁﻳﺣﻣﻟﺍ ﺕﻭﺻﻟﺍ ﺔﻋﺎﻣﺳ ﺝﺭﺧ
ﺕﻭﺻﻟﺍ ﻡﺧﺿﻣ ﺔﻋﺎﻣﺳ ﺝﺭﺧ(ﻡﻭﺃ3Ω) ﻁﺍﻭ 100
Ω
ﺝﺭﺎﺧﻟﺍ ﺕﻭﺻﻟﺍ ﻁﻐﺿ ﻯﻭﺗﺳﻣ
ﺔﻋﺎﻣﺳﻟﺍ
۹٥ x ۱۱٦ x ۷٤۹٥ x ۱۱٦ x ۷٤۹٥ x ۱۱٦ x ۷٤۱٥٥ x ۳۰۰ x ۲۸٥٫٥
(ﻕﻣﻌﻟﺍ × ﻉﺎﻔﺗﺭﻻﺍ × ﺽﺭﻌﻟﺍ)
۹٥ x ۱۱۱۲ x ۷٤٫٥
(ﻝﻣﺎﺣﻟﺍ ﺓﺩﻋﺎﻗ)
۲۷٦ x ۱۸۹
۰٫۳٤۷۰٫۳٤۷۰٫۳٤۷۳٫۷٦۳
۲٫۷۰٫٥۱۳٫۷٦۳
.ﺔﻣﻭﻋﺩﻣ ﺔﻳﻧﺎﺛﻟﺍ ﻱﻑ ﺕﺑ ﺎﺟﻳﻣ ۱۰ ﻥﻋ ﻝﻘﺗ ﻭﺃ ﻱﻭﺎﺳﺗ ﻲﺗﻟﺍ ﺔﻛﺑﺷﻟﺍ ﺕﺎﻋﺭﺳ ﻥﻭﻛﺗ ﻻ
.ﺞﺗﻧﻣﻟﺍ ﻰﻠﻋ ﺩﻭﺟﻭﻣﻟﺍ ﻕﺻﻠﻣﻟﺍ ﻊﺟﺍﺭ ،ﺔﻗﺎﻁﻟﺍ ﻙﻼﻬﺗﺳﺍﻭ ﺔﻗﺎﻁﻟﺍ ﺭﺩﺻﻣ ﻰﻟﺇ ﺔﺑﺳﻧﻟﺎﺑ
۲٫۷
.ﺭﺎﻌﺷﺇ ﻕﺑﺎﺳ ﻥﻭﺩ ﺭﻳﻳﻐﺗﻠﻟ ﺔﺿﺭﻋ ﺕﺎﻔﺻﺍﻭﻣﻟﺍﻭ ﻡﻳﻣﺻﺗﻟﺍ
ﺩﺎﻌﺑﻷﺍ
(Unit : mm)
ﻥﺯﻭﻟﺍ
(Unit : kg)
.ﺔﻳﺑﻳﺭﻘﺗ ﻡﻳﻗ ﺩﺎﻌﺑﻷﺍﻭ ﻥﺯﻭﻟﺍ
•
•
•
•
•
Page 72

ﻡﻟﺎﻌﻟﺍ ﻝﻭﺣ ﺞﻧﻭﺳﻣﺎﺳﺑ ﻝﺎﺻﺗﻻﺍ
.ﺞﻧﻭﺳﻣﺎﺳﻟ ﻊﺑﺎﺗﻟﺍ ءﻼﻣﻌﻟﺍﺔﻣﺩﺧﺯﻛﺭﻣﺑ ﻝﺎﺻﺗﻻﺍ ﻰﺟﺭﻳ ،ﺞﻧﻭﺳﻣﺎﺳ ﺕﺎﺟﺗﻧﻣﺑ ﻕﻠﻌﺗﺗ ﺕﺎﻅﺣﻼﻣ ﻭﺃ ﺕﺍﺭﺎﺳﻔﺗﺳﺍﺔﻳﺃ ﻙﻳﺩﻟ ﻥﺎﻛ ﺍﺫﺇ
Area
`
Asia Pacific
AUSTRALIA 1300 362 603 www.samsung.com/au/support
NEW ZEALAND 0800 SAMSUNG (0800 726 786) www.samsung.com/nz/support
CHINA 400-810-5858 www.samsung.com/cn/support
HONG KONG (852) 3698 4698
INDIA
INDONESIA
JAPAN 0120-327-527 www.samsung.com/jp/support
MALAYSIA 1800-88-9999 www.samsung.com/my/support
PHILIPPINES
SINGAPORE 1800-SAMSUNG (726-7864) www.samsung.com/sg/support
THAILAND
TAIWAN 0800-32-9999 www.samsung.com/tw/support
VIETNAM 1800 588 889 www.samsung.com/vn/support
MENA
`
U.A.E 800-SAMSUNG (726-7864)
OMAN 800-SAMSUNG (726-7864)
KUWAIT 183-2255 (183-CALL)
BAHRAIN 8000-4726
QATAR 800-2255 (800-CALL)
EGYPT
ALGERIA 021 36 11 00 www.samsung.com/n_africa/support
PAKISTAN 0800-Samsung (72678) www.samsung.com/pk/support
TUNISIA 80-1000-12 www.samsung.com/n_africa/support
JORDAN
SYRIA 18252273 www.samsung.com/Levant/support (English)
IRAN 021-8255 www.samsung.com/iran/support
MOROCCO 080 100 2255 www.samsung.com/n_africa/support
SAUDI ARABIA 920021230
TURKEY 444 77 11 www.samsung.com/tr/support
Africa
`
NIGERIA 0800-726-7864
Ghana
Cote D’ Ivoire 8000 0077
CAMEROON 7095- 0077
KENYA 0800 545 545
UGANDA 0800 300 300
TANZANIA 0685 88 99 00
RWANDA 9999
BURUNDI 200
DRC 499999
SUDAN 1969
SOUTH AFRICA 0860 SAMSUNG (726 7864)
BOTSWANA 8007260000
NAMIBIA 08 197 267 864
ZAMBIA 0211 350370
MOZAMBIQUE 847267864 / 827267864
1800 3000 8282 - Toll Free
1800 266 8282 - Toll Free
30308282 - Non Toll Free
0800112888
021-56997777
1-800-10-7267864 [PLDT]
1-800-8-7267864 [Globe landline and Mobile]
02-4222111 [Other landline]
0-2689-3232,
1800-29-3232
08000-726786
16580
0800-22273
06 5777444
0800-10077
0302-200077
Contact Centre
www.samsung.com/hk/support (Chinese)
www.samsung.com/hk_en/support (English)
www.samsung.com/in/support
www.samsung.com/id/support
www.samsung.com/ph/support
www.samsung.com/th/support
www.samsung.com/ae/support (English)
www.samsung.com/ae_ar/support (Arabic)
www.samsung.com/eg/support
www.samsung.com/Levant/support (English)
www.samsung.com/sa/support
www.samsung.com/sa_en/support (English)
www.samsung.com/africa_en/support
www.samsung.com/africa_fr/support SENEGAL 800-00-0077
www.samsung.com/support
www.samsung.com/support
Web Site
Page 73

Cinéma maison
5.1CH Blu-ray™
guide d’utilisation
HT-F4500
HT-F4550
imaginez les possibilités
Merci d'avoir acheté ce produit Samsung.
Pour obtenir notre service complet,
veuillez enregistrer votre produit sur
www.samsung.com/register
Page 74

Consignes de sécurité
Avertissement
POUR LIMITER LES RISQUES D'ÉLECTROCUTION, NE RETIREZ PAS LE CACHE (OU LE CACHE ARRIÈRE).
AUCUNE PIÈCE INTERNE N'EST RÉPARABLE PAR L'UTILISATEUR. CONFIEZ L’ENTRETIEN DE CET APPAREIL À
UNE PERSONNE QUALIFIÉE.
MISE EN GARDE
RISQUE DE DÉCHARGE ÉLECTRIQUE
NE PAS OUVRIR
La flèche représentant la foudre à
l'intérieur du triangle vous avertit
que la tension du produit est
dangereuse.
ATTENTION : AFIN DE RÉDUIRE LES RISQUES
DE CHOC ÉLECTRIQUE, NE RETIREZ PAS LE
COUVERCLE (NI LE PANNEAU ARRIÈRE). AUCUNE
PIÈCE INTERNE NE PEUT ÊTRE RÉPARÉE PAR
L'UTILISATEUR. TOUTE RÉPARATION DOIT ÊTRE
CONFIÉE À DU PERSONNEL QUALIFIÉ.
Le point d'exclamation à l'intérieur du
triangle vous avertit que des instructions
importantes accompagnent le produit.
AVERTISSEMENT
• Pour diminuer les risques d’incendie ou d’électrocution,
n’exposez pas cet appareil à la pluie ou à l’humidité.
PRODUIT LASER DE CLASSE 1
Ce lecteur de disques compacts est un produit LASER
DE CLASSE 1. L’utilisation des commandes, des
réglages ou l’observation de procédures autres que ceux
spécifiés dans ce manuel peut entraîner une exposition à
des rayonnements dangereux.
Cet appareil est conforme à la norme américaine 21CFR
1040.10, sauf en ce qui concerne les exceptions citées
dans le document « Laser Notice No. 50 » du 24 juin
2007.
DANGER :
• DES RAYONNEMENTS LASER VISIBLES ET
INVISIBLES SONT ÉMIS LORSQUE LE PRODUIT EST
OUVERT. ÉVITEZ TOUTE EXPOSITION DIRECTE AU
FAISCEAU. (FDA 21 CFR)
ATTENTION :
• DES RAYONNEMENTS LASER VISIBLES ET
INVISIBLES DE CLASSE 3B SONT ÉMIS LORSQUE LE
PRODUIT EST OUVERT. ÉVITEZ TOUTE EXPOSITION
AU FAISCEAU (IEC 60825-1).
• CE PRODUIT UTILISE UN LASER. L'UTILISATION DES
COMMANDES, LES RÉGLAGES OU L'EXÉCUTION DE
PROCÉDURES AUTRES QUE CELLES SPÉCIFIÉES
DANS CE DOCUMENT PEUVENT ENTRAÎNER UNE
EXPOSITION AUX RADIATIONS DANGEREUSES.
N'OUVREZ PAS LE COUVERCLE ET NE RÉPAREZ
PAS LE PRODUIT VOUS-MÊME. TOUTE RÉPARATION
DOIT ÊTRE CONFIÉE À DU PERSONNEL QUALIFIÉ.
CLASS 1 LASER PRODUCT
KLASSE 1 LASER PRODUKT
LUOKAN 1 LASER LAITE
KLASS 1 LASER APPARAT
PRODUCTO LÁSER CLASE 1
|
2 French
Page 75

Rangement et gestion des disques
• Comment tenir les disques
- Des traces de doigts ou des rayures
sur la surface du disque peuvent
altérer la qualité du son et de l’image
ou provoquer des sauts.
- Évitez de toucher la surface du disque sur laquelle
les données ont été enregistrées.
- Tenez le disque par les bords afin de ne pas laisser
d’empreintes sur sa surface.
- Ne collez pas de papier ou d’adhésif sur le disque.
• Nettoyage des disques
- Enlevez les traces de doigts ou la saleté qui s’est
déposée sur le disque avec un chiffon
doux humecté de détergent doux dilué
dans de l’eau.
- Lors du nettoyage, essuyez le disque
du centre vers le bord.
- Rangement des disques
N’exposez pas les disques à la lumière directe du
soleil.
Entreposez-les dans un endroit frais et aéré.
Rangez-les dans une jaquette propre,
verticalement.
Précautions de manipulation
• N’exposez pas cet appareil aux égouttements ou aux
éclaboussures. Ne placez pas d'objet contenant des
liquides, comme des vases, sur l’appareil.
• Pour éteindre complètement cet appareil, vous devez
retirer la fiche d'alimentation électrique de la prise
murale. Par conséquent, la fiche doit être aisément
accessible en tout temps.
• Ne touchez pas la fiche d’alimentation électrique avec
les mains mouillées, car cela pourrait entraîner un choc
électrique.
• Ne branchez pas plusieurs appareils électriques dans
la même prise murale. La surcharge d’une prise peut
causer une surchauffe qui pourrait entraîner un feu.
• Entretien du meuble
- Avant de brancher un composant sur ce produit,
assurez-vous que celui-ci est hors tension.
- Si vous déplacez soudainement le produit d'un
endroit froid à un endroit chaud, de la condensation
pourrait se former sur les pièces et la lentille et
occasionner des problèmes de lecture. Dans pareil
cas, débranchez le produit et patientez deux heures
avant de le rebrancher dans la prise de courant.
Ensuite, insérez le disque et essayez de relancer la
lecture.
• Si vous percevez un bruit anormal ou une odeur de
brûlé ou si vous apercevez de la fumée, éteignez
immédiatement le produit et débranchez la fiche
d’alimentation électrique de la prise murale. Ensuite,
communiquez avec le service après-vente le plus
proche pour obtenir de l’aide. N'utilisez pas l'appareil.
Continuer d'utiliser l'appareil risque de provoquer un
incendie ou une décharge électrique.
• Pour éteindre complètement cet appareil, vous devez
retirer la fiche d'alimentation électrique de la prise
murale. Par conséquent, la fiche doit être aisément
accessible en tout temps.
Licence
Fabriqué sous licence par les
laboratoires Dolby Digital.
Dolby et le symbole du double D
sont des marques déposées de
Dolby Laboratories.
Fabriqué sous licence sous les brevets américains
Nº : 5,956,674; 5,974,380; 6,226,616; 6,487,535;
7,392,195; 7,272,567; 7,333,929; 7,212,872 et
d’autres brevets américains et internationaux accordés
et en attente. DTS-HD, le symbole, et DTS-HD et
le symbole qui lui est associé sont des marques
déposées, et DTS-HD Master Audio | Essential est une
marque déposée de DTS, Inc. Ce produit comporte
des logiciels. © DTS, Inc. Tous droits réservés.
À PROPOS DE VIDÉO DIVX :
DivX® est un format de
vidéo numérique créé par
DivX, LLC, une filiale de Rovi
Corporation. Cet appareil est officiellement certifié
DivX Certified® pour la lecture des vidéos DivX. Pour
obtenir de plus amples renseignements et prendre
connaissance des outils logiciels requis pour convertir
vos fichiers en format vidéo DivX, consultez www.divx.
com. À PROPOS DE LA VIDÉO SUR DEMANDE DIVX
: Cet appareil DivX Certified® doit être enregistré pour
lire les films vidéo sur demande (VOD) de format DivX
achetés dans le commerce. Pour obtenir votre code
d’enregistrement, repérez la section DivX VOD dans le
menu de configuration de votre appareil. Pour obtenir
de plus amples renseignements sur la procédure
d’enregistrement, consultez vod.divx.com.
DivX Certified® pour lire la vidéo DivX® jusqu'à 1080p
HD, y compris le contenu de haute qualité.
DivX®, DivX Certified® et les logos associés sont des
marques de commerce de Rovi Corporation ou de ses
filiales et sont utilisés sous licence.
Couvert par l'un ou plusieurs des brevets américains
suivants : 7,295,673; 7,460,668; 7,515,710; 7,519,274
French 3
01 Consignes de sécurité
|
Page 76

Consignes de sécurité
HDMI, High-Definition
Multimedia Interface et
marques de commerce ou des marques déposées de
HDMI Licensing LLC aux États-Unis et dans d'autres
pays.
marques de service ou des marques de certification
de Digital Living Network Alliance.
Oracle et Java sont des marques
déposées d'Oracle et/ou de ses filiales.
D'autres noms pourraient être des
marques de commerce appartenant à
leurs propriétaires respectifs.
Ce produit intègre la technologie de protection contre
la copie; cette technologie est protégée par les brevets
américains ainsi que par d’autres droits de propriété
intellectuelle de Rovi Corporation. Le désossement et le
désassemblage sont interdits.
Blu-ray Disc™, Blu-ray™ et les logos sont des marques
de commerce de Blu-ray Disc Association.
Ce produit utilise la technologie Cinavia pour limiter
l’utilisation de copies illégales de certains films et
vidéos disponibles dans le commerce et de leur piste
sonore. Lorsque l'utilisation interdite d'une copie illégale
est détectée, un message s'affiche et la lecture ou la
copie est interrompue. D'autres renseignements sur
la technologie Cinavia sont fournis au Centre Cinavia
d'information en ligne pour les consommateurs à
l'adresse http://www.cinavia.com. Pour demander
de l'information additionnelle sur Cinavia par courrier,
envoyez une carte à l'adresse postale suivante : Cinavia
Consumer Information Center, P.O. Box 86851, San
Diego, CA, 92138, USA.
Ce produit intègre une technologie sous licence de
Verance Corporation qui est protégée par le brevet
américain 7 369 677 et par d'autres brevets américains
et internationaux déposés ou en attente, ainsi que par
le droit d'auteur; certains aspects de cette technologie
sont également protégés par le secret industriel. Cinavia
est une marque de commerce de Verance Corporation.
Tous droits réservés 2004-2010 Verance Corporation.
Tous droits réservés par Verance. Le désossement et le
désassemblage sont interdits.
- Avis de licence de code source ouvert
Si vous utilisez un logiciel a code source ouvert,
des licences de logiciel en code source ouvert sont
proposees dans le menu du produit.
|
4 French
le logo HDMI sont des
DLNA®, DLNA Logo et
DLNA CERTIFIED® sont
des marques déposées, des
Utilisation de la fonction 3D
CONSIGNES IMPORTANTES RELATIVES À LA SANTÉ ET
À LA SÉCURITÉ CONCERNANT LES IMAGES 3D.
Lisez attentivement les consignes de sécurité avant
d'utiliser la fonction 3D.
• Lorsqu'ils regardent la télévision 3D, certains
téléspectateurs pourraient ressentir certains troubles,
tels que des vertiges, des nausées ou des maux de tête.
Si de tels symptômes se manifestent, arrêtez de
regarder la télévision 3D, enlevez les lunettes 3D actives
et reposez-vous.
• Le visionnement d'images 3D pendant une période
prolongée pourrait vous fatiguer les yeux. En cas de
fatigue oculaire, arrêtez de regarder la télévision 3D,
enlevez les lunettes 3D actives et reposez-vous.
• Les enfants utilisant la fonction 3D doivent être
constamment surveillés par un adulte responsable.
En cas de fatigue des yeux, de maux de tête, de
vertiges ou de nausées, l'enfant doit arrêter de regarder
la télévision en 3D et se reposer.
• N'utilisez pas les lunettes actives 3D à d'autres fins
(comme lunettes de vue, de soleil ou de protection, par
exemple).
• N'utilisez pas la fonction 3D ou les lunettes actives
3D tout en marchant ou en bougeant. L’utilisation de
la fonction 3D ou le port des lunettes actives lorsque
vous vous déplacez peut entraîner des blessures car
vous pouvez vous heurter à des objets, trébucher et/ou
tomber et vous blesser sérieusement.
• Si vous souhaitez visionner du contenu 3D, connectez
un appareil 3D (récepteur A/V ou téléviseur compatible
3D) au port de sortie HDMI OUT du produit à l'aide d'un
câble HDMI haute vitesse. Veillez à mettre les lunettes
3D avant de visionner le contenu 3D.
• Le produit émet des signaux 3D uniquement par le
câble HDMI connecté au port de sortie HDMI OUT.
• La résolution de la vidéo en mode de lecture 3D étant
définie en fonction de la résolution de la vidéo 3D
originale, vous ne pouvez pas choisir la résolution de
l'image selon vos préférences.
• Des fonctions telles que BD Wise, l'adaptation de la
taille de l'écran ou le réglage de la résolution peuvent ne
pas fonctionner correctement en mode de lecture 3D.
• Vous devez utiliser un câble HDMI haute vitesse pour
assurer une émission correcte du signal 3D.
• Lorsque vous visionnez des images en 3D, assurezvous de vous tenir éloigné du téléviseur à une distance
équivalente à au moins trois fois la taille de l'écran. Par
exemple, si votre écran est de 46 po, tenez-vous à 3,5
m de l'écran.
- Positionnez l'écran à hauteur des yeux pour mieux
apprécier l'image en 3D.
• Lorsque le produit est connecté à plusieurs appareils
3D, l'effet 3D pourrait ne pas fonctionner correctement.
• Ce produit ne convertit pas le contenu 2D en 3D.
• « Blu-ray 3D » et le logo « Blu-ray 3D » sont des
marques de commerce de Blu-ray Disc Association.
C
Page 77

Tous droits réservés
© 2012 Samsung Electronics Co., Ltd.
Tous droits réservés; ce manuel d'utilisation ne peut être
reproduit ou copié, partiellement ou totalement, sans
l'accord préalable écrit de Samsung Electronics Co., Ltd.
Table des matières
CONSIGNES DE SÉCURITÉ
2 Avertissement
3 Rangement et gestion des disques
3 Précautions de manipulation
3 Licence
4 Utilisation de la fonction 3D
5 Tous droits réservés
MISE EN ROUTE
6 Compatibilité du disque et du format
7 Logos des disques que le produit peut lire
9 Accessoires
10 Face avant
10 Face arrière
11 Télécommande
CONNEXIONS
12 Connexion des enceintes
14 Connexion à un routeur réseau
15 Connexion du lecteur à un téléviseur/ périphériques
externes
PARAMÈTRES
16 Procédure de paramètre initial
17 Écran Accueil
17 Accès à l'écran Paramètres
18 Fonctions du menu Paramètres
20 Réseaux et Internet
21 Mise à jour du logiciel
22 Configuration d'DLNA
MEDIA PLAY
23 Lecture des fichiers stockés sur un périphérique
USB
23 Lecture d'un disque à contenu enregistré par
l'utilisateur
24 Lecture de disques vidéo offerts dans le commerce
24 Commande de la lecture de vidéo
25 Lecture d'un disque audio préenregistré de type
commercial
25 Commande de l'écoute de musique
26 Commande de la lecture photo
27 Écoute de la radio
27
Utilisation du bouton TV Sound de la télécommande
SERVICES RÉSEAU
28 Utilisation de BD-LIVE™
28 Utilisation de la fonction DLNA
ANNEXES
29 Information complémentaire
32 Dépannage
35 Caractéristiques techniques
Les chiffres et les illustrations contenus dans
ce Manuel d'utilisation sont fournis à titre de
référence uniquement et pourraient ne pas
représenter exactement le produit.
Des frais d’administration pourraient être
facturés dans les cas suivants :
a. un technicien se rend à votre domicile à
votre demande et détermine que le produit
n'est pas défaillant (p. ex., vous n’avez pas
lu le présent Guide d’utilisation);
b. vous apportez l'appareil à un centre de
réparation qui détermine que le produit n'est
pas défaillant (p.ex., vous n’avez pas lu le
présent Guide d’utilisation).
Le montant de ces frais administration vous
sera communiqué avant qu’un quelconque
travail ne soit entrepris ou avant toute visite à
domicile.
01 Table des matières
French 5
|
Page 78

Mise en route
Mise en route
Compatibilité du disque et du format
Types de disque et contenus que votre produit peut lire
Assistance Type de disque Détails
Disque Blu-ray
Disque Blu-ray 3D
VIDÉO
MUSIQUE
PHOTO
|
REMARQUE |
Selon le type de disque ou les conditions d'enregistrement, il se peut que certains disques CD-RW/-R et DVD-R ne
puissent pas être lus sur cet appareil.
Si un disque DVD-RW/-R n'a pas été enregistré correctement dans le format vidéo DVD, il ne pourra pas être lu.
Le produit ne lit pas les contenus qui ont été enregistrés sur un disque DVD-R selon un débit binaire de plus de
10 Mbps.
Le produit ne lit pas les contenus qui ont été enregistrés sur un disque BD-R ou un périphérique USB selon un débit
binaire de plus de 30 Mbps.
La lecture et/ou l’enregistrement peuvent être impossibles avec certains types de disque ou lorsque vous exécutez
des commandes spécifiques, comme les changements d'angle et le réglage du format d'image. Des renseignements
détaillés concernant le disque sont inscrites sur le boîtier. Consultez-les au besoin.
Lors de la lecture d'un titre BD-J, il se peut que le chargement prenne plus de temps que pour un titre normal et que
certaines fonctions s'exécutent plus lentement que d'habitude.
DVD-VIDÉO, DVD-RW,
DVD-R, DVD+RW,
DVD+R
CD-RW/-R, DVD-RW/-R,
BD-RE/-R
CD-RW/-R, DVD-RW/-R,
BD-RE/-R
Le disque BD-ROM ou BD-RE/-R est enregistré dans le format BD-RE.
DVD-VIDÉO, disques DVD+RW/DVD-RW(V)/DVDR/+R qui ont été
enregistrés et finalisés ou périphérique USB comprenant du contenu
DivX, MKV ou MP4.
Photos enregistrées sur un disque CD-RW/-R, DVD-RW/-R ou BD-RE/-R
ou sur un périphérique USB comprenant du contenu MP3 ou WMA.
Photos enregistrées sur des disques CD-RW/-R, DVD-RW/-R ou BDRE/-R ou sur un périphérique USB comprenant du contenu JPEG.
Types de disques que votre produit ne peut pas lire
• DVD HD
• Disque DVD-ROM/PD/MV,
etc.
| REMARQUE |
Ce produit peut ne pas répondre à toutes les commandes car certains disques Blu-ray, DVD et CD ne permettent
qu'un fonctionnement spécifique ou limité et autorisent uniquement l'utilisation de certaines fonctionnalités en cours
de lecture.
Veuillez noter que ceci n'est pas une défaillance du produit.
Samsung ne peut pas garantir que ce produit pourra lire tous les disques comportant le logo Blu-ray Disc, DVD
ou CD parce que les formats de disque évoluent et des problèmes ou des erreurs peuvent se produire pendant la
création des logiciels pour disques Blu-ray, DVD et CD ou pendant la fabrication des disques.
Veuillez communiquer avec le Centre de service à la clientèle SAMSUNG pour toute question ou tout problème
concernant la lecture des disques Blu-ray, DVD ou CD sur ce produit. Vous pouvez également vous reporter au
manuel d'utilisation pour obtenir plus de renseignements sur les restrictions en matière de lecture.
Il se peut que certains disques et DVD commerciaux achetés en dehors de votre zone ne puissent pas être lus sur ce
produit.
• DVD-RAM
• Super Audio CD
(à l'exception de la couche
CD)
• DVD-RW (mode VR)
• CVD/CD-ROM/CDV/
CD-G/CD-I/LD
(Les CD-G lisent
des données audio
uniquement et non les
données graphiques.)
• Disque DVD-R 3,9 Go
pour la création.
|
6 French
Page 79

Code régional
Les lecteurs et les disques Blu-ray sont codés par région.
Ces codes régionaux doivent correspondre pour que
le disque puisse être lu. Si les codes ne correspondent
pas, le disque ne pourra pas être lu. Le code régional est
affiché sur la face arrière du produit.
Logos des disques que le produit
peut lire
02 Mise en route
Type de
disque
Disque Blu-
ray
DVD VIDÉO
| REMARQUE |
Si le numéro de région d’un disque Blu-ray/DVD ne
correspond pas au numéro de région de ce produit,
celui-ci ne peut pas lire le disque.
Code
régional
A
B
C
1
2
3
4
5
6
Pays
Amérique du Nord, Amérique
centrale, Amérique du Sud,
Corée, Japon, Taïwan, Hong
Kong et Sud-Est asiatique.
Europe, Groenland, Territoires
d'outre-mer, Moyen-Orient,
Afrique, Australie et NouvelleZélande.
Inde, Chine, Russie, Asie
centrale et Asie du Sud.
États-Unis, Territoires des É.U. et Canada
Europe, Japon, Moyen-Orient,
Égypte, Afrique, Groenland
Taïwan, Corée, Philippines,
Indonésie, Hong Kong
Mexique, Amérique du Sud,
Amérique centrale, Australie,
Nouvelle-Zélande, Îles du
Pacifique, Caraïbes
Russie, Europe de l’Est, Inde,
Corée du Nord, Mongolie
Chine
Disque Blu-ray BD-LIVE
Dolby DTS
Disque Blu-ray 3D DivX
Norme de télédiffusion PAL au
R.-U., en France, en
Allemagne, etc.
Java
Formats pris en charge
Prise en charge des fichiers musicaux
Extension
de fichier
*.mp3
*.wma
Conteneur
WMA
MP3
Codec
Plage de prise en
audio
MP3 -
* Taux
d'échantillonnage
(en kHz) - 8, 11, 16,
22, 32, 44,1, 48
WMA
* Débits binaires
- Tous les débits
binaires compris
entre 5 kbps et
384 kbps
charge
French 7
|
Page 80

Mise en route
Prise en charge de fichier image
Extension de fichier Type Résolution
*.jpg
*.jpeg
*.jpe
*.png
Prise en charge des fichiers vidéo
Extension de
fichier
*.avi
*.mkv
*.wmv
*.mp4
*.mpg
*.mpeg
Conteneur Codec vidéo Codec audio Résolution
AVI
MKV
WMV
(wmv9)
MP4
PS
JPEG
PNG
DivX 3.11/4/5/6
MP4v3
H.264 BP/MP/HP
VC-1 AP
DivX 5/6
H.264 BP/MP/HP
VC-1 AP
VC-1 SM
MP4 (mp4v)
H.264 BP/MP/HP
MPEG1
MPEG2
H.264 BP/MP/HP
MP3, Dolby Digital, DTS,
WMA, PCM
MP3, Dolby Digital, DTS
WMA
AAC
MP1, 2
Dolby Digital, DTS
15360x8640
1920x1080
Restrictions
- Même un fichier encodé au moyen d’un codec pris en charge mentionné ci-dessus pourrait ne pas être lu en cas
de problème de contenu.
- La lecture normale ne sera pas garantie si les renseignements sur le conteneur du fichier sont erronées ou si le
fichier lui-même est corrompu.
- La lecture audio/vidéo des fichiers dont le débit binaire ou la fréquence d'image sont supérieurs à la normale
pourrait être saccadée.
- La fonction de recherche (sauter) n’est pas disponible si la table d’index du fichier est endommagée.
Décodeur vidéo
- Prend en charge le niveau 4.1 de la norme H.264 ainsi que le format AVCHD
- Ne prend pas en charge les normes H.264 FMO/ASO/RS et VC1 SP/MP/AP L4
- MPEG4 SP, ASP :
Résolution inférieure à 1280 x 720 : 60 images max
Résolution supérieure à 1280 x 720 : 30 images max
- Ne prend pas en charge le format GMC 2 ou supérieur.
Décodeur audio
- Prend en charge les formats WMA 7, 8, 9 et STD
- Ne prend pas en charge le taux d’échantillonnage WMA de 22050 Hz mono.
- AAC : Taux d'échantillonnage maxi. : 96 Khz (8, 11, 12, 16, 22, 24, 32, 44.1, 48, 64, 88.2, 96) Débit binaire maxi. :
320 kbps
Formats des fichiers de sous-titrage DivX pris en charge
*.ttxt, *.smi, *.srt, *.sub, *.txt
|
8 French
Page 81

AVCHD (Codec vidéo avancé haute définition)
• Ce produit peut lire les disques en format AVCHD. Ces disques sont normalement enregistrés et lus sur des
caméscopes.
• Le format AVCHD est un format vidéo numérique haute définition.
• Le format MPEG-4 AVC/H.264 compresse les images de façon plus efficace que le format de compression d'image
traditionnel.
• Certains disques AVCHD utilisent le format « x.v.Colour ». Ce produit peut lire les disques AVCHD de format « x.v.Colour ».
• « x.v.Colour » est une marque de commerce de Sony Corporation.
• « AVCHD » et le logo AVCHD sont des marques de commerce de Matsushita Electronic Industrial Co., Ltd. et de Sony
Corporation.
| REMARQUE |
Dépendamment des conditions d’enregistrement, il est possible que certains disques de format AVCHD ne puissent
pas être lus.
Les disques de format AVCHD doivent être finalisés.
Le format « x.v.Colour » offre une plus vaste gamme de couleurs qu’un DVD de caméscope normal.
Il est possible que certains disques de format MKV ou MP4 ne puissent pas être lus, en raison de la résolution et de la
fréquence de l’image vidéo.
Prise en charge des fichiers musicaux
• Votre produit prend en charge les périphériques USB, les lecteurs MP3, les appareils photo numériques et les lecteurs
de cartes USB.
• Ce produit ne prend pas en charge les noms de dossiers ou de fichiers qui comportent plus de 128 caractères.
• Certains périphériques USB, disques durs ou appareils photo numériques pourraient ne pas être compatibles avec ce
lecteur.
• Votre produit prend en charge les systèmes de fichiers FAT 16, FAT 32 et NTFS.
• Connectez les périphériques USB directement au port USB du produit. La connexion par câble USB peut causer des
problèmes d'incompatibilité.
• L’insertion de plusieurs unités de stockage dans un lecteur multicarte peut entraîner le dysfonctionnement de celui-ci.
• Ce produit ne prend pas en charge le protocole PTP.
• Ne déconnectez pas le périphérique USB durant le processus de « chargement ».
• Plus la résolution de l’image est élevée, plus l'affichage de l'image prend du temps.
• Ce produit ne peut pas lire les fichiers MP3 lorsque la technologie DRM (gestion des droits numériques) a été
téléchargée depuis des sites commerciaux.
• Votre produit ne prend en charge que la vidéo inférieure à 30 images/seconde (fréquence d'images).
• Vous devez retirer le périphérique USB avec précaution (en utilisant la fonction « Retirer périph. USB ») pour éviter
d'endommager la mémoire USB. Appuyez sur la touche ACCUEIL pour aller au menu d'accueil, appuyez sur le
bouton JAUNE (C), puis sur a touche E.
• SAMSUNG décline toutes responsabilités relatives à la corruption de fichiers de données ou à la perte de données.
Accessoires
Vérifiez que les accessoires ci-dessous sont fournis.
02 Mise en route
Câble HDMI Câble d'alimentation Antenne FM Manuel d'utilisation
FUNCTION
VOLUME
MUTE
-
+
123
4
56
89
7
DISC MENU TITLE MENU
POPUP
0
SUBTITLE HOME REPEAT
INFO
TOOLS
RETURN
EXIT
TUNER
MO/ST
MEMORY
ABCD
TUNING
DSP/EQTV SOUND
UP
DOWN
Télécommande/
Piles (AAA size)
French 9
|
Page 82

Mise en route
5V 500mA
HDMI OUT
LAN
POWER
SPEAKERS OUT
CENTER
SUBWOOFER
FRONT
L
SURROUND
L
FRONT
R
SURROUND
R
SPEAKER IMPEDANCE : 3
AUX
IN
FM ANT
OPTICAL
DIGITAL
AUDIO IN
L
R
Face avant
LECTURE/PAUSE ENTRÉE
ARRÊT OUVRIR/FERMER
FONCTION
COMMANDES DU VOLUME
TIROIR DISQUE
AFFICHAGE
HÔTE USB
CAPTEUR DE LA
TÉLÉCOMMANDE
|
REMARQUE
Pour effectuer des mises à niveau du logiciel du produit en utilisant la prise Hôte USB, vous devez utiliser une clé
|
USB.
Lorsque le produit affiche le menu du disque Blu-ray, vous ne pouvez pas commencer à visionner le film en appuyant
sur le bouton 6 du produit ou sur la touche de la télécommande. Pour lire la vidéo, sélectionnez Lire le film ou
Démarrer dans le menu du disque puis appuyez sur la touche E.
Jika Anda menggunakan layanan Internet atau memutar konten perangkat USB di TV, Anda tidak dapat memilih
mode BD/DVD dengan tombol FUNCTION (FUNGSI). Berhenti memutar konten di TV terlebih dahulu untuk memilih
Mode BD/DVD.
Face arrière
VENTILATEUR
ENTRÉE
SORTIE DES ENCEINTES
* Connexion de l’antenne FM
Connectez l’antenne FM fournie à la prise ANTENNE FM.
1.
Déplacez progressivement le fil de l’antenne jusqu’à ce que vous trouviez l'endroit où la réception est bonne, puis
2.
fixez-le solidement à un mur ou sur une autre surface solide.
|
REMARQUE
Veillez à prévoir un minimum d'espace libre de 10 cm sur tous les côtés du Home cinéma dans le but de garantir une
|
ventilation appropriée. Veuillez à ne pas obstruer le ventilateur ou les orifices d’aération.
Ce produit ne reçoit pas la fréquence de diffusion AM.
|
10 French
*ANTENNE FMSORTIE HDMI
AUX
CONNEXION DE
CARTE TX (SANS FIL)
BORNE RLCONNECTEURS DE
MARCHE/
ARRÊT
Page 83

Télécommande
Présentation de la télécommande
02 Mise en route
Pour allumer et éteindre le
produit.
Pour régler le volume.
Appuyez sur les touches numériques
pour commander les options.
Pour afficher le menu Disque.
Appuyez sur ces touches pour
effectuer un saut vers l'arrière ou
l'avant.
Appuyez pour lire un disque.
Appuyez pour arrêter un disque.
Pour sélectionner la langue des
sous-titres du disque.
Pour accéder au menu Accueil.
Pour utiliser le menu Outils.
Pour sélectionner les éléments du
menu à l’écran et en changer les
valeurs.
Pour revenir au menu précédent.
Ces touches permettent d'utiliser les
menus du produit ainsi que plusieurs
fonctions liées au disque Blu-ray.
Le signal audio peut émettre
jusqu'aux enceintes du Home cinéma
ou aux enceintes du téléviseur.
(Reportez-vous en page 27)
Sélectionnez le mode audio DSP/EQ
souhaité.
FUNCTION
VOLUME
-
1
4
7
DISC MENU TITLE MENU
SUBTITLE HOME REPEAT
TOOLS
RETURN
ABCD
DSP/EQTV SOUND
MUTE
+
2
3
56
89
POPUP
0
INFO
EXIT
TUNER
MO/ST
MEMORY
TUNING
UP
DOWN
Pour sélectionner le mode de Bluray.
Pour ouvrir et fermer le tiroir
disque.
Pour couper le son provisoirement.
Pour accéder au menu contextuel/
menu Titres.
Pour effectuer une recherche
vers l'arrière ou l'avant.
Pour interrompre la lecture d’un
disque.
Permet de répéter la lecture d’un
titre, d’un chapitre, d’une piste ou
d’un disque.
Pour afficher les données de lecture
pendant la lecture d’un disque Bluray/DVD.
Pour quitter le menu.
Pour régler une fréquence radio
préréglée.
Sélectionnez la fréquence de diffusion
radio MONO ou STÉRÉO.
Pour rechercher les stations FM
actives et changer les chaînes.
Insertion des piles dans la télécommande
Veillez à faire correspondre les extrémités + et - des piles au
diagramme situé à l’intérieur du compartiment.
Sur la base d’un usage normal du téléviseur, la durée de vie des
piles est d’environ un an.
La télécommande peut être utilisée à une distance du produit
pouvant aller jusqu’à 7 mètres (23 pi), en ligne droite.
Ne vous débarrassez pas des piles en les faisant brûler.
Les piles ne doivent pas être court-circuitées, démontées ou subir
de surchauffe. Le remplacement incorrect des piles peut entraîner
un danger d'explosion. Remplacez-les uniquement par des produits similaires ou équivalents.
Type de piles : AAA
French 11
|
Page 84

Connexions
Cette section couvre différentes méthodes pour connecter le produit à d’autres périphériques.
Avant de déplacer ou d'installer le produit, assurez-vous de le mettre hors tension et débranchez le
cordon d’alimentation.
Connexion des enceintes
Mise en place du produit
Placez-le sur un pied, une étagère ou
sous le pied du téléviseur.
Caisson des basses
Avant (G)
Ambiophonique (G)
Enceintes avant
Enceinte centrale
Enceintes
ambiophoniques
Caisson des basses
Centrale
Avant (D)
Produit
Placez ces enceintes devant votre position d’écoute, tournées vers vous (à environ 45°).
Placez les enceintes avant de façon à ce que leurs haut-parleurs d’aigus se trouvent à la
hauteur de votre oreille. Alignez la face avant des enceintes avant avec la face avant de
l’enceinte centrale ou placez-les légèrement devant l’enceinte centrale.
Il est préférable d’installer l’enceinte centrale à la même hauteur que les enceintes avant.
Vous pouvez aussi l’installer directement sur ou sous le téléviseur.
Placez ces enceintes de chaque côté de votre position d’écoute. S’il n’y a pas assez
d’espace, placez-les de sorte qu’elles soient face à face. Placez-les à environ 60 à 90 cm (2
à 3 pi) au-dessus de votre oreille, légèrement dirigées vers le bas.
* Contrairement aux enceintes avant et centrale, les enceintes ambiophoniques sont
essentiellement utilisées pour les effets sonores. Elles ne produisent pas de son en
permanence.
La position du caisson des basses n’est pas aussi importante. Placez-le à l’endroit de votre
choix.
Ambiophonique (D)
Sélection de la position d’écoute
La position d’écoute devrait être de 2,5
à 3 fois la taille de l’écran du téléviseur.
Par exemple, si vous avez un écran de
46 po, placez la position d’écoute à une
distance de 2,92 à 3,50 mètresde l’écran.
|
12 French
Page 85

Composants des enceintes
HT-F4500
03 Connexions
(G) (D)
AVANT
(G) (D)
AMBIOPHONIQUES
CENTRALE CAISSON DES BASSES
HT-F4550
(G) (G)(D) (D)
AVANT / AMBIOPHONIQUES
PIED
CÂBLE D’ENCEINTE
BASE DU PIED
Installation des enceintes sur le pied Tallboy
* HT-F4550 seulement – Enceintes avant/ambiophoniques
1. Retournez le pied de la base et connectez-le à la base.
2. Utilisez un tournevis pour insérer les vis dans les 3 orifices
marqués.
3. Étirez le câble d’enceinte fourni et faites-le passer par le trou au
centre de la base du pied.
4. Connectez l’enceinte supérieure au pied assemblé.
5. Insérez la vis dans le sens des aiguilles d’une montre dans l’orifice
à l’arrière de l’enceinte à l’aide d’un tournevis.
Branchez ensuite un câble d’enceinte.
6. Voici comment se présente l'enceinte une fois installée.
Suivez ces étapes pour installer l’autre enceinte.
CÂBLE D’ENCEINTE
VIS (5 X 20) : 16EA
CENTRALE
Base du pied
1
Pied
3 4
Enceinte
CAISSON DES
BASSES
2
Pied
5 6
French 13
|
Page 86

Connexions
SPEAKERS OUT
CENTER
SUBWOOFER
FRONT
L
SURROUND
L
FRONT
R
SURROUND
R
SPEAKER IMPEDANCE : 3
AUX
IN
FM ANT
OPTICAL
DIGITAL
AUDIO IN
L
R
SPEAKERS OUT
CENTER
SUBWOOFER
FRONT
L
SURROUND
L
FRONT
R
SURROUND
R
SPEAKER IMPEDANCE : 3
HDMI OUT
LAN
POWER
AUX
IN
FM ANT
OPTICAL
DIGITAL
AUDIO IN
L
R
SPEAKERS OUT
CENTER
SUBWOOFER
FRONT
L
SURROUND
L
FRONT
R
SURROUND
R
SPEAKER IMPEDANCE : 3
Connexion des enceintes
1. Accouplez chaque faisceau de câbles avec l’enceinte appropriée en appariant la
fiche codée par couleur de chaque faisceau avec l’étiquette de couleur apposée sur
chaque enceinte.
2. Pour fixer le câble d’enceinte à chaque enceinte :
a. Appuyez sur la languette rouge située à l’arrière de l’enceinte, insérez le fil rouge
et relâchez la languette.
b. Appuyez sur la languette noire située à l’arrière de l’enceinte, insérez le fil noir et
relâchez la languette.
3. Branchez les fiches de contact d'enceinte situées à l’arrière du produit en faisant
concorder les couleurs des fiches et des prises d’enceinte.
Dans le cas du modèle HT-F4500
Noir
Rouge
Enceinte ambiophonique (D)
Enceinte avant (D)
Enceinte ambiophonique (G)
Enceinte avant (G)
Enceinte centrale
Caisson des basses
| MISE EN GARDE |
Si vous souhaitez installer l'appareil au mur, fixez les vis ou les clous fermement au mur et utilisez pour l'installation
les orifices situés à l'arrière de l'enceinte. Cependant, lorsque vous installez l'appareil au mur, les accessoires (clous
ou vis) et l'installation ne sont pas fournis par notre entreprise.
Ne laissez pas les enfants jouer avec ou à proximité des enceintes. Ils risqueraient d’être blessés en cas de chute
des enceintes.
Lors du branchement des fils aux enceintes, assurez-vous de respecter le sens de la polarité (+/-).
Maintenez le caisson des basses hors de la portée des enfants pour éviter qu’ils insèrent leurs mains ou des matières
étrangères dans le conduit (orifice) du caisson.
N’accrochez pas le caisson des basses au mur par le conduit (orifice).
| REMARQUE |
Une enceinte placée près de votre téléviseur pourrait altérer la couleur de l’écran en raison du champ magnétique.
Connexion à un routeur réseau
Modem
large bande
Service
large bande
Routeur
|
14 French
Ou
Modem large bande (avec routeur intégré)
Service
large bande
Page 87

|
REMARQUE
L'accès Internet au serveur Mise à jour logicielle de Samsung peut vous être refusé en fonction du routeur que vous
utilisez ou des règlements de votre fournisseur de services Internet. Pour de plus amples renseignements, contactez
votre fournisseur d'accès Internet.
Les utilisateurs de ligne DSL doivent utiliser un routeur pour établir une connexion au réseau.
Pour utiliser la fonction DLNA, vous devez connecter un ordinateur au réseau, tel qu’indiqué dans la figure.
La connexion peut être câblée ou sans fil.
|
Connexion du lecteur à un téléviseur/ périphériques externes
AUX
FM ANT
IN
03 Connexions
AUX
FM ANT
IN
L
R
SURROUND
POWER
SURROUND
L
FRONT
FRONT
R
L
SPEAKER IMPEDANCE : 3
CENTER
SUBWOOFER
OPTICAL
R
SPEAKERS OUT
DIGITAL
HDMI OUT
LAN
AUDIO IN
L
OPTICAL
R
DIGITAL
AUDIO IN
HDMI OUT
LAN
Méthode 1 Méthode 2
Rouge
R
Blanc
W
External Devices
OPTICAL OUT
HDMI IN
Connexion du lecteur à un téléviseur
À l’aide du câble HDMI, raccordez la prise HDMI OUT (SORTIE HDMI) située à l'arrière de l'appareil à la prise HDMI IN
(ENTRÉE HDMI) de votre téléviseur. Si le téléviseur prend en charge la fonctionnalité ARC, vous pourrez écouter le son à
partir du cinéma maison en reliant uniquement ce câble. Consultez la page 19 de ce manuel et la section sur l'ARC du
manuel d'utilisation de votre téléviseur pour obtenir plus de détails.
Connexion à des périphériques externes
Pour sélectionner le mode approprié à un périphérique, appuyez sur la touche FONCTION. Chaque fois que vous appuyez
sur cette touche, le mode change dans l’ordre suivant : BD/DVD D. IN AUX FM
Deux méthodes de connexion des périphériques externes à votre Home cinéma sont décrites ci-dessous.
Méthode 1 AUX IN : Connexion d’un composant périphérique analogique
À l’aide d’un câble audio RCA (non fourni), connectez la prise d’entrée AUDIO In du produit à la prise de sortie AUDIO Out
du périphérique analogique. Sélectionnez le mode AUX.
• Assurez-vous d’apparier les couleurs des fiches du câble avec les couleurs des prises d’entrée et de sortie.
Méthode 2 OPTIQUE : Connexion à un composant audio de périphérique
Pour connecter la sortie audio numérique des composants à signal numérique tels que les boîtes de jonction de câbles et
les récepteurs satellites (Décodeurs).
Audio In (Entrée audio optique numérique) du produit à la prise Digital Optical Out (Sortie optique numérique) du
périphérique. Sélectionnez le mode D. IN.
REMARQUE
|
Pour regarder la vidéo depuis votre récepteur à boîte de jonction/satellite, vous devez connecter sa sortie vidéo
directement à votre téléviseur.
Ce système prend en charge les fréquences d’échantillonnage numériques de 32 kHz et plus des composants de
périphériques numériques.
Ce système prend uniquement en charge l’audio DTS et Dolby Digital. L’audio MPEG, qui a un format de flux binaire, n’est
pas prise en charge.
|
À l’aide d’un câble optique numérique (non fourni), connectez la prise Optical Digital
French 15
|
Page 88

Paramètres
fonction.
Paramètres
Procédure de paramètre initial
• Le menu Accueil n'apparaîtra pas si vous ne
configurez pas les paramètre initial.
• L'affichage à l'écran (OSD) peut changer sur ce
produit après la mise à niveau de la version du
logiciel.
• Les étapes d'accès peuvent varier selon le menu
sélectionné.
Allumez votre téléviseur après avoir connecté le
1.
produit, puis allumez le produit. Lorsque vous
allumez le produit pour la première fois, il affiche
automatiquement l’écran Langue des paramètre
initial.
Initial Settings I On-Screen Language
Select a language for the on-screen displays.
English
Français
Deutsch
Español
Italiano
Nederlands
>
Appuyez sur les touches ▲▼pour sélectionner la
2 .
langue souhaitée, puis appuyez sur la touche E.
Appuyez sur la touche E pour démarrer la
3 .
configuration de la fonction.
L'écran TV Aspect (Format écran) apparaît. Appuyez
4 .
sur les touches ▲▼ pour sélectionner l'option TV
de la
Paramètre initial
Les paramètres d'aspect TV et de réseau vont être définis. Chaque paramètre peut être
ensuite modifié sous le menu "Paramètres".
Démarrage
a Précédent
Aspect ratio (Format d'image télé) souhaitée, puis
appuyez sur la touche E.
Vous disposez de quatre choix :
16:9 Original – Pour les téléviseurs grand écran.
Affiche les images grand écran dans leur format
original 16:9 ainsi que les images 4:3 (l’ancien format
standard), dans le format Pillarbox 4:3 avec les
barres noires à gauche et à droite.
16:9 Entier – Pour les téléviseurs grand écran.
Affiche les images grand écran dans leur format
original 16:9 et agrandit les images dans le format 4:3
pour remplir l’écran 16:9.
|
16 French
Move "
" Sélectionner
Select
4:3 Letter Box – Pour les anciens téléviseurs
analogiques à écran standard. Affiche les images 4:3
en format plein écran et les images 16:9 en format
panoramique qui maintient le format d’image 16:9,
mais remet les barres au-dessus et au-dessous de
l’image.
4:3 Pan-Scan – Pour les anciens téléviseurs
analogiques à écran standard. Affiche les images 4:3
en format plein écran et les images 16:9 en format
Pan-Scan qui remplit l’écran, mais coupe l’image
sur la droite et sur la gauche et élargit le centre
verticalement.
L'écran Network - Wired (Réseau - Câblé) apparaît.
5 .
- Si vous disposez d'un réseau doté d'adresses IP
dynamiques, ce qui est le cas de la plupart des
utilisateurs, E sélectionnez Auto, appuyez sur la
touche Enter (Entrer), puis passez à l'étape 6.
- Si vous disposez d'un réseau doté d'adresses IP
fixes, nous vous conseillons de sélectionner Skip
(Passer) en appuyant sur la touche BLUE (BLEUE)
(D), puis de passer à la section « Configuration
de la connexion réseau », en page 20, une fois
la configuration initiale effectuée. La section «
Configuration de la connexion réseau » vous
fournit une explication complète sur les modalités
de configurer manuellement votre réseau.
- Si vous n'avez pas de réseau, sélectionnez Skip
(Passer) en appuyant sur la touche BLUE (BLEUE)
(D). L'écran Paramètre initial Complete (Paramètres
initiaux définis) apparaît, suivi de l'écran Home
(Accueil).
| REMARQUE |
Si vous n'effectuez pas la configuration réseau à ce
stade ou si celle-ci ne se fait pas correctement, vous
pourrez accéder à la section « Configuration de la
connexion réseau » en page 20 afin de configurer la
connexion réseau ultérieurement.
Paramètre initial I Réseau - Câblé
Choisissez la méthode pour configurer le protocole Internet (IP).
Vérif. câble est connecté.
Auto : Configurer IP automatiquement.
Manuel
Auto
a Précédent d Ignorer
Le produit vérifie la connexion réseau puis se
6 .
< Déplacer "
Sélectionner
connecte au réseau. À la fin de l'opération,
appuyez sur la touche E. L'écran Paramètre initial
Complete (Paramètres initiaux définis) apparaît, suivi
de l'écran Accueil.
Page 89

Paramètre initial | Réseau - Câblé
TOOLS
RETURN
EXIT
INFO
SUBTITLE HOME REPEAT
MAC adresse (d0:66:7b:dc:28:fc)
Adresse IP,Masque sous-réseau,Passerelle, Serveur DNS
Ping passerelle
Test service internet
Votre réseau fonctionne correctement. Si vous rencontrez encore des problèmes
réseau, contactez votre fournisseur de services réseau.
OK
" Sélectionner
| REMARQUE |
Si vous souhaitez afficher de nouveau l'écran
Paramètres initiaux pour apporter des changements,
sélectionnez l'option Réinitialiser. (Voir page 20)
Si vous utilisez le câble HDMI pour connecter le
produit à un téléviseur Samsung conforme à la norme
Anynet+(HDMI-CEC) et si 1.) Vous avez défini la
fonction Anynet+(HDMI-CEC) à Activ. sur le téléviseur
et sur le produit 2.) Vous avez réglé le téléviseur à
une langue prise en charge par le produit, le produit
sélectionne automatiquement cette langue comme
langue préférée.
Écran Accueil
Pour sélectionner une option sur l'écran Accueil,
1 .
déplacez le curseur à l'aide des touches
jusqu'à la mise en surbrillance de l'option de votre
choix, puis appuyez sur le bouton E.
| REMARQUE |
Pour lire ou afficher des fichiers de vidéos, de musique
ou de photos sur l'ordinateur, vous devez connecter
le cinéma maison et l'ordinateur à un réseau
domestique, puis télécharger, installer et configurer le
logiciel DLNA sur l'ordinateur. (Voir page 23.)
Accès à l'écran Paramètres
Sélectionnez Paramètres à l'écran Accueil, puis
1 .
appuyez sur la touche E. L'écran Paramètres
apparaît.
Paramètres
Affichage Paramètres 3D
Audio Format TV : 16:9 Original
Réseau
Système Résolution : Auto
Langue
Sécurité Format couleur HDMI : Auto
Général Couleur intense HDMI : Arrêt
Assistance Mode progressif : Auto
BD Wise : Arrêt
Trame vidéo (24Fs) : Arrêt
13
Vidéos
2
Pas de Disque a Changer périph.
1
2
Photos Musique Paramètres
App 1 App 2 App 3 App 4
d Afficher périph. "
Permet de sélectionner les Photos.
Permet de sélectionner les Vidéos.
Entrer
4
de l'écran Paramètres, veuillez vous reporter à
Pour accéder aux menus, sous-menus et options
2 .
l'illustration de la télécommande ci-dessous.
| REMARQUE |
5
Si le produit demeure inutilisé en mode d'arrêt
pendant plus de 5 minutes, un économiseur d’écran
6
s’affiche sur le téléviseur. Si le produit demeure en
mode d’économiseur d’écran pendant plus de 20
minutes, il s'éteint automatiquement.
Touches de la télécommande utilisées
pour naviguer dans le menu Paramètres
▲▼◄►
►
04 Paramètres
3
4
5
6
Permet de sélectionner des Musiques.
Permet de sélectionner des Paramètres.
Permet de sélectionner des applications.
Permet d'afficher les boutons que vous
pouvez utiliser sur la télécommande pour
accéder aux fonctions.
1
3
24
Touche ACCUEIL : Appuyez sur cette touche
1
pour passer à l'écran Accueil.
French 17
|
Page 90

Paramètres
Touche RETOUR (') : Pour revenir au menu
2
précédent.
Touche E (Entrée) / DIRECTION :
• Appuyez sur
ou sélectionner un élément.
3
• Appuyez sur la touche E pour activer
l'élément actuellement sélectionné ou
confirmer un paramètre.
Touche EXIT (QUITTER) : Pour quitter le menu
4
actuellement sélectionné.
| REMARQUE |
Le bouton E qui se trouve sur la face avant du
produit peut être utilisé aux mêmes fins que la touche
E
de la télécommande.
pour déplacer le curseur
▲▼◄►
Information détaillée sur les fonctions
Chaque fonction de paramètre, élément de menu et
option individuelle est expliqué(e) en détail à l’écran. Pour
voir une explication, utilisez les touches ▲▼◄► pour
sélectionner la fonction, l'élément ou l'option.
Pour utiliser DLNA sur votre smartphone, vous devez
connecter votre installation et votre smartphone sur le
même routeur. Une brève description de chaque fonction
du menu Paramètres commence à la page suivante.
De l’information complémentaire sur certaines fonctions
est également fournie dans l’annexe de ce guide.
Fonctions du menu Paramètres
Affichage
Pour configurer les fonctions liées à
l’option 3D.
Mode Lecture Blu-ray 3D :
Sélectionnez pour visionner un
disque Blu-ray avec du contenu
3D en mode 3D . Si vous passez
Paramètres
3D
Format
d'image télé
|
18 French
au menu Accueil ou Accueil
Smart Hub en mode 3D, le
produit passe automatiquement
en mode 2D.
Taille écran : Entrez la taille
du téléviseur connecté au
produit. Le produit adaptera
automatiquement la sortie 3D à
la taille de l’écran du téléviseur.
Vous permet de régler la sortie du
produit en fonction de la taille de
l’écran de votre téléviseur.
Voir page 16
BD Wise
Résolution
Trame vidéo
(24Fs)
Format
couleur HDMI
Couleur
intense HDMI
Mode
progressif
Paramètre
haut-parleur
BD Wise est la plus récente fonction
d'interconnectivité de Samsung.
Lorsque vous interconnectez un
produit Samsung et un téléviseur
Samsung avec BD Wise au moyen
d'un câble HDMI, si la fonction BD
Wise est activée sur le produit et
sur le téléviseur, le produit diffuse la
vidéo à la résolution et à la fréquence
d'images vidéo du disque Blu-ray/
DVD.
Vous permet de définir la résolution
de sortie du signal vidéo HDMI
à Auto, 1080p, 1080i, 720p,
576p/480p. Ces valeurs indiquent
le nombre de lignes vidéo par
image. Les lettres i et p signifient
respectivement balayage entrelacé
(i) et balayage progressif (p). Plus il y
a de lignes, plus la qualité de l'image
est supérieure.
Le réglage de la fonction Trame vidéo
(24Fs) à Auto autorise le produit à
régler automatiquement sa sortie
HDMI à 24 images par seconde pour
améliorer la qualité de l’image si le
produit est connecté à un téléviseur
compatible avec la fréquence 24 ips.
• La fonction Trame vidéo (24Fs)
n'est disponible que sur un
téléviseur compatible avec cette
fréquence d'image.
• La fonction Trame vidéo est
seulement disponible lorsque le
produit est en mode résolution
HDMI 1080i ou 1080p.
Vous permet de régler le format
de l'espace couleur pour la sortie
HDMI en fonction des fonctionnalités
de l'appareil connecté (téléviseur,
moniteur, etc.).
Vous permet de définir le produit de
façon à diffuser la vidéo avec des
Couleur intense depuis la prise de
sortie HDMI OUT. L'option Couleur
intense permet une reproduction
plus fidèle des couleurs, notamment
en termes d'intensité.
Cette option permet d'améliorer la
qualité de l'image lors de la lecture
d'un DVD.
Audio
Vous permet de régler les paramètre
haut-parleur suivantes et d'activer
et désactiver la tonalité d'essai afin
de tester les enceintes.
Page 91

Sélect. haut-
parleur
Fonct. Retour
Audio
Sortie
numérique
Contrôle de
la dynamique
Niveau : vous permet de régler
le niveau sonore relatif de chaque
enceinte de 6 db à -6 db. Par
exemple, si vous aimez les basses
puissantes, vous pouvez augmenter
le niveau sonore du caisson de graves
de 6 db.
Distance : vous permet de régler la
distance relative de chaque enceinte
à partir de la position d'écoute jusqu'à
9 mètres. Plus la distance est grande,
plus le son de l'enceinte sera fort.
Tonalité d'essai : vous permet
d'exécuter la fonction de tonalité
d'essai afin que vous puissiez tester
vos réglages. Le réglage de la Tonalité
d'essai sur Marche permet d'activer
la tonalité d'essai. Le réglage sur Arrêt
permet de la désactiver.
Vous permet de sélectionner les
enceintes que vous souhaitez activer,
soit les enceintes du téléviseur ou celles
du cinéma maison.
Vous permet de diriger le son du
téléviseur vers les enceintes du cinéma
maison. Requiert une connexion
HDMI et un Fonct. Retour Audio (ARC)
compatible avec le téléviseur.
•
Lorsque l'option Fonct. Retour Audio
est réglée sur Auto (Auto), le cinéma
maison sélectionne automatiquement
ARC ou l'entrée optique comme
source audio, selon vos connexions.
Si l'option Fonct. Retour Audio
est activée, l'entrée optique sera
inopérante.
Vous permet de définir la sortie
numérique selon les fonctionnalités du
récepteur A/V que vous avez connecté
au produit. Pour plus de détails, veuillez
vous reporter au tableau de sélection
des sorties numériques. (Voir page 31)
Vous permet d'appliquer la contrôle de
la dynamique à l'audio Dolby Digital,
Dolby Digital Plus et Dolby TrueHD.
Auto : Commande automatiquement
la portée dynamique de l'audio Dolby
TrueHD en fonction de l'information
fournie par la piste sonore Dolby
TrueHD. Active aussi la contrôle de
la dynamique pour les formats Dolby
Digital et Dolby Digital Plus.
Arrêt : Laisse la portée dynamique
non compressée, vous laisse
entendre le son original.
Activé : Active la contrôle de la
dynamique pour les trois formats
Dolby. Le volume des sons feutrés
est augmenté et le volume des sons
bruyants est diminué.
Sync. audio
Mode sous-
mixage
Paramètres
réseau câblé
Test réseau
État du
réseau
Connexion
Internet BD-
Live
Paramètre
initial
Anynet+
(HDMI-CEC)
Gestion
données BD
Vous permet, lorsque le produit
est connecté à un téléviseur
numérique, de régler le décalage du
son de façon à ce que l’audio soit
synchronisée avec la vidéo. Vous
pouvez régler le décalage entre 0 et
300 millisecondes.
Permet de sélectionner la méthode
du sous-mixage multicanal
compatible avec le système stéréo
utilisé. Vous pouvez alors choisir
de spécifier le sous-mixage de
l'appareil sur l'option stéréo normal
ou stéréo compatible surround.
Réseau
Pour de plus amples renseignements
sur les paramètres réseau et les
fonctions réseau, voir le chapitre
« Réseaux et Internet » qui
commence à la page 20.
Permet de tester la configuration du
protocole Internet pour vérifier si ce
dernier fonctionne correctement.
Permet de vérifier si la connexion au
réseau et à Internet a été établie.
Permet d'autoriser ou d'interdire une
connexion Internet lors de l'utilisation
du service BD-Live.
Système
Pour recommencer l'exécution de la
procédure Paramètre initial. Voir les
détails page 16.
Anynet+ est une fonction pratique
qui autorise l’interfonctionnement
avec d’autres produits Samsung
dotés de la fonction Anynet+ et
vous permet de commander ces
produits avec une télécommande
de téléviseur Samsung. Pour utiliser
cette fonction, vous devez connecter
ce produit à un téléviseur Samsung
Anynet+ à l’aide d’un câble HDMI.
Permet de gérer les contenus
téléchargés auxquels vous avez
accédé au moyen d'un disque Bluray prenant en charge le service
BD-Live. Vous pouvez afficher les
informations relatives au périphérique
USB que vous utilisez pour le
stockage des données BD-Live,
y compris l'espace de stockage
disponible. Vous avez également
la possibilité de supprimer les
données BD-Live et de changer de
périphérique.
04 Paramètres
French 19
|
Page 92

Paramètres
DivX® Vidéo
à la demande
Affichez les codes d'enregistrement
DivX® VOD pour acheter et lire des
contenus DivX® VOD.
Langue
Vous pouvez sélectionner votre langue préférée pour les
options On-Screen menu (Menu à l'écran), etc.
• La langue sélectionnée ne s'affiche que lorsqu'elle est
prise en charge par le disque.
Sécurité
Le NIP par défaut est 0000. Si vous n'avez pas créé
votre propre NIP, saisissez le NIP par défaut pour
accéder à la fonction de sécurité.
Empêche la lecture de disques Blu-
Contrôle
parent. BD
ray comportant un classement égal
ou supérieur à une tranche d'âge
spécifique à moins de saisir le NIP.
Empêche la lecture de DVD
Contrôle
parent. DVD
comportant un classement
numérique spécifique à moins de
saisir le NIP.
Permet de modifier le NIP à 4
Modifier PIN
chiffres autorisant l'accès aux
fonctions de sécurité.
Général
Fuseau
horaire
Vous pouvez spécifier le fuseau
horaire qui s'applique à votre région.
Assistance
Pour de plus amples renseignements
Mise à jour
du logiciel
sur la fonction Mise à jour du logiciel,
voir la section « Mise à jour logicielle »
de la page 21.
Contacter
Samsung
Conditions
contrat de
service
Fournit les coordonnées afin
d'obtenir de l'aide avec le produit.
Permet d'afficher la dénégation
générale de responsabilité
concernant les contenus et services
de tiers.
Tous les paramètres sont rétablis
Réinitialisation
sur leur valeur par défaut, sauf les
paramètres réseau. Le mot de passe
de sécurité par défaut est 0000.
|
20 French
Réseaux et Internet
Lorsque vous connectez ce produit à un réseau, vous
pouvez utiliser les applications et les fonctions basées
sur le réseau, telles que BD-LIVE, pour mettre à jour les
logiciels du produit via la connexion réseau.
Configuration de votre connexion réseau
Avant de commencer, contactez votre fournisseur de
services Internet pour savoir si votre adresse IP est fixe
ou dynamique. Si l'adresse est dynamique, nous vous
conseillons d'utiliser la procédure automatique décrite cidessous. Si l'adresse est fixe, vous devrez recourir à la
procédure manuelle détaillée ci-après.
• Avant de commencer, vérifiez que le produit est
connecté au routeur à l'aide d'un câble réseau.
❑
Automatique
Pour démarrer le processus de configuration, exécutez
les étapes suivantes :
À l'écran Accueil, sélectionnez Paramètres, puis
1 .
appuyez sur la touche E.
Sélectionnez Réseau, puis appuyez sur la touche
2 .
.
E
Sélectionnez Paramètres réseau câblé, puis
3 .
appuyez sur la touche E. L'écran Paramètres
réseau câblé apparaît.
Appuyez sur la touche ► dans le menu
4 .
Configuration du protocole Internet. Servez-vous de
la touche ▲▼ pour sélectionner Auto puis appuyez
sur la touche E.
Paramètres
Affichage
Audio
Réseau
Système
Langue
Sécurité
Général
Assistance
La fonction Network (Réseau) acquiert et renseigne
5 .
automatiquement les valeurs des options IP
Address (Adresse IP), Subnet Mask (Masque s.réseau), etc.
Une fois que la fonction Network (Réseau) a acquis
6 .
les valeurs réseau, appuyez sur la touche RETURN
(RETOUR) (').
Sélectionnez Network Test (Test réseau), puis
7 .
appuyez sur E. Le cinéma maison valide la
connexion réseau. À la fin de l'opération, appuyez
sur la touche RETURN (RETOUR) (').
Paramètres réseau câblé
Config. prot. Internet : Auto
Adresse IP : 0 0 0 0
Masque sous-réseau :
Passerelle :
DNS : Auto
Serveur DNS : 0 0 0 0
>
0
0 0 0
0
0 0 0
Déplacer " Sélectionner
Retour
'
Page 93

❑
réseau manuellement.
Manuel
Si vous avez une adresse IP fixe ou si la procédure
automatique est inopérante, vous devrez définir les valeurs
Paramètres réseau manuellement.
1 .
Paramètres
Affichage
Audio
Réseau
Système
Langue
Sécurité
Général
Assistance
Paramètres réseau câblé
Config. prot. Internet : Manuel
Adresse IP : 0 0 0 0
Masque sous-réseau :
Passerelle :
DNS : Manuel
Serveur DNS :
>
255
255 255 0
0
0 0 0
0
0 0 0
Déplacer " Sélectionner
Retour
'
Exécutez les quatre premières étapes de la
procédure automatique, mais sélectionnez Manual
(Manuel) à la place d'Auto à l'étape 4.
Appuyez sur la touche de direction ▼ pour accéder
2 .
au premier champ de saisie (IP Address (Adresse IP)).
Utilisez les touches numériques de votre
3 .
télécommande pour saisir les chiffres.
Lorsque vous avez effectué l'opération dans un
4 .
champ donné, servez-vous de la touche ► pour
passer au champ suivant.
Vous pouvez également utiliser les autres touches de
direction pour vous déplacer vers le haut et le bas ou
retourner en arrière.
Saisissez les valeurs des options IP Address
5 .
(Adresse IP), Subnet Mask (Masque s.-réseau) et
Gateway (Passerelle).
Appuyez sur la touche ▼ pour accéder à DNS.
6 .
Appuyez sur la touche ▼ pour accéder au premier
7 .
champ d'entrée DNS. Saisissez les chiffres, tel
qu'indiqué ci-dessus.
Appuyez sur la touche RETURN (RETOUR) (') de la
8 .
télécommande.
Sélectionnez Network Test (Test réseau), puis
9 .
appuyez sur E. Lorsque le test est terminé,
appuyez sur le bouton RETURN (RETOUR) (') pour
revenir à l'écran précédent.
Sélectionnez Network Status (État du réseau), puis
10 .
appuyez sur E.
L'écran Network Status (État du réseau) apparaît. Le
11 .
produit vérifie la connexion réseau puis se connecte
au réseau. Une fois l'opération effectuée, mettez en
surbrillance OK, puis appuyez sur E.
Mise à jour du logiciel
Le menu Mise à jour du logiciel vous permet de mettre à
niveau le logiciel du produit pour améliorer la performance
ou obtenir des services additionnels.
• Évitez d’éteindre et de rallumer le produit
manuellement durant le processus de mise à jour.
Dans le menu Accueil, sélectionnez Paramètres,
1.
puis appuyez sur la touche E.
Sélectionnez Assistance, puis appuyez sur la touche
2.
.
E
Sélectionnez Mise à jour du logiciel, puis appuyez
3.
sur la touche E.
Sélectionnez l’une des méthodes suivantes :
4.
• En ligne
• USB
• Notif. mise à jour auto
Appuyez sur la touche E.
5.
Les procédures à suivre pour chaque méthode sont
indiquées ci-dessous.
| REMARQUE |
La mise à jour est terminée lorsque le produit s'éteint
après avoir redémarré. Appuyez sur la touche POWER
(MARCHE/ARRÊT) pour allumer le produit en vue de
l'utiliser. N'éteignez ou ne rallumez jamais le produit
manuellement durant le processus de mise à jour.
Samsung Electronics n'assume aucune responsabilité
légale en cas de défaillance du produit provoquée par
une connexion Internet instable ou une négligence du
consommateur pendant la mise à jour du logiciel.
Si vous souhaitez annuler la mise à niveau en cours de
téléchargement du logiciel de mise à niveau, appuyez
sur la touche E.
En ligne
Pour utiliser la fonction By Online (En ligne), vous devez
préalablement connecter le produit à Internet. Avant de
commencer, retirez tous les disques insérés dans l'appareil.
Sélectionnez En ligne, puis appuyez sur la touche
1.
. Le message Connexion au serveur en cours
E
apparaît.
Si une mise à jour est indisponible, un message
2.
contextuel apparaîtra pour vous demander si vous
souhaitez effectuer une mise à niveau. Si vous
sélectionnez Yes (Oui), le produit s'éteindra puis se
rallumera automatiquement et la mise à niveau sera
lancée.
| IMPORTANT |
N'éteignez ou ne rallumez jamais le cinéma maison
manuellement durant la mise à jour du logiciel.
Une fenêtre contextuelle apparaît pour indiquer l'état
3.
d'avancement de la mise à jour. Lorsque la mise à
jour est terminée, le produit s'éteint automatiquement
à nouveau.
Appuyez sur la touche POWER (MARCHE/ARRÊT)
4.
pour allumer le produit.
| REMARQUE |
La mise à jour est terminée lorsque le produit s'éteint
après avoir redémarré. Appuyez sur la touche POWER
(MARCHE/ARRÊT) pour allumer le produit en vue de
l'utiliser.
N'éteignez ou ne rallumez jamais le produit
manuellement durant le processus de mise à jour.
Samsung Electronics n'assume aucune responsabilité
légale en cas de défaillance du produit provoquée par
une connexion Internet instable ou une négligence du
consommateur pendant la mise à jour du logiciel.
French 21
04 Paramètres
|
Page 94

Paramètres
USB
Visitez www.samsung.com.
1.
Cliquez sur ASSISTANCE dans la partie supérieure
2.
droite de la page.
Entrez le numéro de modèle du produit dans le
3.
champ de recherche. Une fois que vous avez entré
le numéro du modèle, une liste déroulante affiche les
produits correspondant aux numéros de modèle.
Effectuez un clic gauche sur le numéro de modèle du
4.
produit dans la liste déroulante.
Une page s'affiche, faites défiler puis cliquez
5.
sur Firmware Manuals & Downloads
(Téléchargements et manuels des micrologiciels).
Cliquez sur Micrologiciel au centre de la page.
6.
Cliquez sur l'icône ZIP dans la colonne Fichier sur la
7.
partie droite de la page.
Cliquez sur Send (Envoyer) dans la première fenêtre
8.
contextuelle qui apparaît. Cliquez sur OK dans la
seconde fenêtre contextuelle qui apparaît pour le
téléchargement puis enregistrez le fichier micrologiciel
sur votre PC.
Dézippez le dossier compressé sur l'ordinateur.
9.
Vous devriez avoir un seul dossier dézippé portant le
même nom que le fichier compressé.
Copiez le dossier sur une clé USB.
10.
Assurez-vous que le produit ne contient pas de
11.
disque, puis insérez la clé USB dans le port USB du
produit.
Dans le menu du produit, allez à Paramètres >
12.
Assistance > Mise à jour du logiciel.
Sélectionnez USB.
13.
| REMARQUE |
Aucun disque ne devrait se trouver dans le produit
lorsque vous mettez le logiciel à niveau au moyen de la
prise USB Hôte.
N'éteignez ou ne rallumez jamais le produit
manuellement durant le processus de mise à jour.
Une fois la mise à jour du logiciel, consultez les détails
sur le logiciel dans le menu Mise à jour du logiciel.
Notif. mise à jour auto
Si votre produit est connecté au réseau et que vous
activez la fonction Auto Upgrade Notification (Notif. mise à
jour auto), le produit vous notifiera de la disponibilité d'une
nouvelle version de logiciel par un message contextuel.
Allumez le produit.
1.
Dans le menu Mise à jour du logiciel, réglez l'option
2.
Auto Upgrade Notification (Notif. mise à jour
auto) sur On. Si une nouvelle version du logiciel est
disponible, le produit vous le notifiera par un message
contextuel.
Pour mettre à niveau le micrologiciel, sélectionnez
3.
Yes (Oui). Le produit s'éteint puis se rallume
automatiquement et la mise à niveau est lancée.
Une fenêtre contextuelle apparaît pour indiquer l'état
4.
d'avancement de la mise à jour. Lorsque la mise à jour
est terminée, le produit s'éteint automatiquement.
Appuyez sur la touche POWER (MARCHE/ARRÊT)
5.
pour allumer le produit.
| REMARQUE |
|
22 French
La mise à jour est terminée lorsque le produit s'éteint
après avoir redémarré. Appuyez sur la touche POWER
(MARCHE/ARRÊT) pour allumer le produit en vue de
l'utiliser. N'éteignez ou ne rallumez jamais le produit
manuellement durant le processus de mise à jour.
Samsung Electronics n'assume aucune responsabilité
légale en cas de défaillance du produit provoquée par
une connexion Internet instable ou une négligence du
consommateur pendant la mise à jour du logiciel.
Configuration d'DLNA
DLNA vous permet d'utiliser le produit pour lire des fichiers
de musique, de vidéos ou de photos stockés sur votre
ordinateur. Pour utiliser DLNA, vous devez préalablement
connecter le produit à votre ordinateur via le réseau (voir
page 14) et installer le gestionnaire SAMSUNG PC Share
Manager sur l'ordinateur.
Téléchargement du logiciel DLNA
Pour utiliser la fonction DLNA sur votre ordinateur, vous
devez préalablement y installer le logiciel DLNA. Vous
pouvez télécharger le logiciel sur votre ordinateur et obtenir
les instructions détaillées sur l'utilisation d'DLNA depuis le
site Web Samsung.com.
Allez à www.samsung.com.
1.
Cliquez sur Assistance dans le haut de la page.
2.
Entrez le numéro de modèle du produit dans le
3.
champ de recherche. Une fois que vous avez entré
le numéro du modèle, une liste déroulante affiche les
produits correspondant aux numéros de modèle.
Effectuez un clic gauche sur le numéro de modèle du
4.
produit dans la liste déroulante.
Une page s'affiche, faites défiler puis cliquez
5.
sur Firmware Manuals & Downloads
(Téléchargements et manuels des micrologiciels).
Cliquez sur l’onglet Software (Logiciel).
6.
Dans l'onglet Logiciel, cliquez sur l'icône EXE, située
7.
à droite de la ligne DLNA.
Cliquez sur Send (Envoyer) dans la première fenêtre
8.
contextuelle qui apparaît. Dans la seconde fenêtre
contextuelle qui s'affiche, cliquez sur Save File
(Enregistrer fichier).
Rechercher le fichier d’installation DLNA sur votre
9.
disque, puis double-cliquez sur le fichier.
Dans la fenêtre contextuelle qui apparaît, cliquez sur
10.
Exécuter, puis suivez les instructions qui s'affichent
à l'écran.
Téléchargez le guide d'installation et d'utilisation DLNA
depuis le même onglet Logiciel en cliquant sur l'icône
de fichier PDF dans la colonne Fichier à droite. Le fichier
au format PDF sera téléchargé et ouvert. Suivez les
instructions fournies pour installer et configurer DLNA.
Vous pouvez afficher et/ou sauvegarder le fichier.
| REMARQUE |
Pour utiliser DLNA sur votre smartphone, vous devez
connecter votre installation et votre smartphone sur le
même routeur.
Page 95

Media Play
Lecture des fichiers stockés sur un
périphérique USB
Il est possible de lire les fichiers multimédias stockés sur
un périphérique USB connecté.
Accédez au menu Home (Accueil).
1.
En mode Stop (Arrêt), connectez le périphérique de
2.
stockage USB au port USB situé sur le panneau
avant du produit. Le message « Do you want to
access the device? » (Changer de périphérique ?)
s'affiche.
Appuyez sur la touche ◄► pour sélectionner Yes
3.
(Oui), puis appuyez sur la touche E.
Appuyez sur la touche RED (ROUGE) (A).
4.
Vidéos Photos Musique
CD
USB DISK 2.0
CD a Changer périph.
Appuyez sur les touches ▲▼ pour sélectionner USB
5.
Flash Mem (Mém Flash USB), puis appuyez sur la
App 2 App 3 App 4
d Afficher périph. "
touche E.
Appuyez sur les touches ▲▼◄► pour sélectionner
6.
Videos (Vidéos), Music (Musique) ou Photos
(Photos), puis appuyez sur la touche E.
Si des fichiers apparaissent à l'écran, passez à
7.
l'étape 8. Par contre, si des dossiers de fichiers
s'affichent, servez-vous des touches ▲▼◄► pour
sélectionner un dossier, appuyez sur E, puis allez à
l'étape 8.
Servez-vous des touches ▲▼◄► pour sélectionner
8.
un fichier à lire ou à afficher, puis appuyez sur la
touche E.
OU
-1
. Appuyez sur la touche BLUE (BLEUE) (D).
4
CD
App 1 App 2 App 3 App 4
USB DISK 2.0
d Accueil "
5-1. Appuyez sur les touches ◄► pour sélectionner Mém
Flash USB, puis appuyez sur la touche E.
Paramètres
Entrer
Paramètres
Entrer USB DISK 2.0
6-1. Appuyez sur les touches ▲▼ pour sélectionner
Videos (Vidéos), Music (Musique) ou Photos
(Photos), puis appuyez sur la touche E.
-1
. Si des fichiers apparaissent à l'écran, passez à l'étape
7
-1
. Par contre, si des dossiers de fichiers s'affichent,
8
servez-vous des touches ▲▼◄► pour sélectionner
un dossier, appuyez sur E, puis allez à l'étape 8
-1
8
. Servez-vous des touches ▲▼◄► pour sélectionner
un fichier à lire ou à afficher, puis appuyez sur la
touche E.
| REMARQUE |
La lecture de fichiers 3D n'est pas prise en charge.
Vous devez retirer le périphérique USB en utilisant la
fonction « Retirer péri. USB » pour éviter d'endommager
le périphérique USB. Appuyez sur la touche HOME
(ACCUEIL) pour aller au menu Accueil, sélectionnez le
bouton JAUNE (C), puis appuyez sur la touche E.
Lecture d'un disque à contenu
enregistré par l'utilisateur
Vous pouvez lire les fichiers multimédia que vous avez
enregistrés sur des DVD ou des CD.
Allumez le cinéma maison.
1.
Ouvrez le tiroir disque, placez un disque enregistré
2.
par l'utilisateur dans le tiroir, face imprimée dirigée
vers le haut, puis fermez le tiroir.
Une fois le disque chargé, appuyez sur la touche
3.
RED (ROUGE) (A).
Appuyez sur les touches ▲▼◄► pour sélectionner
4.
CD ou DVD, puis appuyez sur la touche E.
Appuyez sur les touches ▲▼ pour sélectionner
5.
Videos (Vidéos), Music (Musique) ou Photos
(Photos), puis appuyez sur la touche E.
Si des fichiers apparaissent à l'écran, passez à
6.
l'étape 7. Par contre, si des dossiers de fichiers
s'affichent, servez-vous des touches ▲▼◄► pour
sélectionner un dossier, appuyez sur E, puis allez à
l'étape 7.
Servez-vous des touches ▲▼◄► pour sélectionner
7.
un fichier à lire ou à afficher, puis appuyez sur la
touche E.
OU
-1
. Une fois le disqu e chargé, appuyez sur la touche
3
BLUE (BLEUE) (D).
-1
. Appuyez sur les touches ◄► pour sélectionner CD
4
ou DVD, puis appuyez sur la touche E.
-1
. Appuyez sur les touches ▲▼ pour sélectionner
5
Videos (Vidéos), Music (Musique) ou Photos
(Photos), puis appuyez sur la touche E.
6-1. Si des fichiers apparaissent à l'écran, passez à
-1
. Servez-vous des touches ▲▼◄► pour sélectionner
7
-1
. Par contre, si des dossiers de fichiers
l'étape 7
s'affichent, servez-vous des touches ▲▼◄► pour
sélectionner un dossier, appuyez sur E, puis allez à
-1
.
l'étape 7
un fichier à lire ou à afficher, puis appuyez sur la
touche E.
French 23
05 Media Play
-1
.
|
Page 96

Media Play
SUBTITLE HOME REPEAT
DISC MENU TITLE MENU
0
POPUP
Lecture de disques vidéo offerts
dans le commerce
Placez un disque dans le tiroir disque avec l’étiquette sur le
dessus, puis fermez le tiroir disque. La lecture commence
automatiquement.Si tel n'est pas le cas, accédez à
l'élément Videos (Vidéos) dans le menu Accueil, puis
appuyez sur la touche E.
La plupart des vidéos disponibles dans le commerce
affichent un menu de disque. Pour lire le film stocké sur
le disque, sélectionnez Lecture dans le menu du disque,
puis appuyez sur
REMARQUE
|
Pour obtenir de plus amples informations sur la lecture
vidéo, consultez la section relative au "Contrôle de la
lecture vidéo" sur cette page.
.
E
|
Commande de la lecture de vidéo
Vous pouvez commander la lecture des fichiers de vidéo
stockés sur un disque Blu-ray, DVD et CD et sur un
périphérique USB. Selon le disque, certaines des fonctions
décrites dans ce manuel pourraient ne pas être offertes.
Touches de la télécommande utilisées
pour la lecture des vidéos
1
Touches liées à la lecture
Le produit n'émet aucun son en mode
Recherche, Ralenti ou Image par image.
• 6 : Lance la lecture.
• 5 : Arrête la lecture.
• 7 : Interrompt la lecture.
• Lecture rapide : Pendant la lecture, appuyez
sur les touches 3 ou .
Chaque fois que vous appuyez sur la touche
3
ou , la vitesse de lecture change.
• Lecture au ralenti : En mode Pause, appuyez
1
sur la touche . Chaque fois que vous
appuyez sur la touche , la vitesse de la
lecture change.
• Lecture par image : En mode Pause, appuyez
sur la touche 7. Chaque fois que vous
appuyez sur la touche 7, une nouvelle image
apparaît.
• Lecture par saut : Pendant la lecture, appuyez
sur la touche 1 ou 2.
Chaque fois que vous appuyez sur la touche
1
ou 2, le disque passe au chapitre ou au
fichier précédent ou suivant.
|
24 French
2
Utilisation des menus du disque et des titres,
du menu contextuel et de la liste des titres.
• MENU DISQUE : Pendant la lecture, appuyez
sur cette touche pour afficher le menu Disque.
• MENU TITRES :Pendant la lecture, appuyez
sur cette touche pour afficher le menu Titres.
- Si votre disque comprend une liste
2
d'écoute, appuyez sur la touche VERTE (B)
pour aller à la liste d'écoute.
• MENU CONTEXTUEL : Pendant la lecture,
appuyez sur cette touche pour afficher le
menu Contextuel.
• MENU DISQUE ou MENU TITRES : Pendant
la lecture, appuyez sur cette touche pour
afficher la liste des titres.
Utilisation du menu OUTILS
Pendant la lecture, appuyez sur la touche TOOLS
(OUTILS).
Titre
Durée de
lecture
Plein écran
Paramètres
d'image
Sync. audio
Menu qui apparaît uniquement pendant la
lecture d’un disque BD/DVD
Chapitre
Audio
Si le film ou la vidéo propose plusieurs
titres, sélectionnez le titre souhaité.
Sélectionnez cette option pour accéder
à un point de lecture spécifique. Servezvous des touches numériques pour
saisir le point de lecture.
Sélectionnez pour définir la taille de
plein écran souhaitée. Vous pouvez
sélectionner Original, Mode1 (plus
grand) et Mode2 (le plus grand).
Sélectionnez pour régler le mode image.
- Mode image
▪ User (Utilisateur) : Vous permet
de régler respectivement les
fonctions Brightness (Luminosité),
Contrast (Contraste), Color
(Couleur) et Sharpness (Netteté).
▪ Dynamic (Dynamique) :
Choisissez cette option pour
accentuer la Netteté de l'image.
▪ Normal : choisissez ce réglage
pour la plupart des applications
d'affichage.
▪ Movie (Film) : Ceci est le réglage le
mieux adapté au visionnage de films.
Vous permet de régler le temps de
retard audio afin que l'audio synchronise
avec la vidéo. Vous pouvez régler le
retard entre 0 et 300 millisecondes.
Sélectionnez pour effectuer la lecture
du film depuis le début.
Sélectionnez pour régler la langue audio
souhaitée.
Page 97

Sous-titres
001
7
27
3
07
e
1
2
3
7
89
DISC MENU TITLE MENU
0
POPUP
4
56
Sélectionnez pour régler la langue
souhaitée pour les sous-titres.
Pour visionner une scène sous un autre
Angle
angle. L’option Angle affiche le nombre
d’angles sous lesquels il est possible de
visionner (1/1, 1/2, 1/3, etc.).
Vidéo
BONUSVIEW/
Audio
BONUSVIEW
Sélectionnez pour régler l'option
Bonusview de votre choix.
Menu qui s’affiche uniquement lors de la lecture
d’un fichier
Permet de régler la taille de plein écran
Plein écran
souhaitée. Vous pouvez sélectionner
Original, Mode1 (plus grand) et
Mode2 (le plus grand).
Infos
Permet de vérifier les informations liées
au fichier vidéo.
| REMARQUE |
En fonction du disque ou du support d'enregistrement,
le menu Outils peut varier. Toutes les options pourraient
ne pas s’afficher.
Création d'une liste de lecture vidéo
Vous pouvez créer une liste de lecture de fichiers vidéo
de la même manière que vous le feriez pour une liste
de lecture de fichiers musicaux. Pour les instructions,
reportez-vous à la section « Création d'une liste de lecture
musicale », en page 26.
Pour lire une piste en particulier, utilisez les touches
2.
▲▼ de la télécommande pour sélectionner la piste,
puis appuyez sur la touche E.
|
REMARQUE |
Pour de plus amples renseignements sur la lecture
de la musique, voir "Création d'une liste de lecture
musicale" sur cette page.
Commande de l'écoute de musique
Vous pouvez commander la lecture du contenu musical
stocké sur un DVD, un CD ou un périphérique USB.
Touches de la télécommande utilisées
pour la lecture de la musique
1
4
2
5
3
Touches NUMÉRIQUES : Pendant la lecture de
la liste d'écoute, appuyez sur le numéro de piste
1
souhaité. La piste sélectionnée est alors lue.
6
05 Media Play
Lecture d'un disque audio
préenregistré de type commercial
1.
Insérez un CD audio (CD-DA) ou un disque MP3
dans le tiroir disque.
• Dans le cas d'un CD Audio (CD-DA), la première
piste est lue automatiquement. Les pistes d'un
disque sont lues par ordre d'enregistrement.
• Dans le cas d'un disque MP3, appuyez sur les
touches ▲▼ pour sélectionner Music (Musique),
puis appuyez sur la touche E.
Liste de lecture
Liste de lectur
Outils
TRACK 001
Mode Répétition _ Une +
< Régler "
TRACK 002
TRACK 002
TRACK 003
TRACK 00
TRACK 004
TRACK 005
TRACK 006
Pause Outils '
"
Sélectionner '
Retour
Retour
05:57
5:5
04:27
:
04:07
4:
03:41
03:17
03:35
+
CD
TRACK 001
00:08 / 05:57
Saut : Pendant la lecture, appuyez sur la
touche 1 ou 2 pour passer au fichier musical
2
précédent ou suivant dans la liste.
5
3
Touche
: Arrête la lecture d'une piste.
Lecture rapide (CD (CD-DA) audio seulement)
Pendant la lecture, appuyez sur les touches
4
ou . Chaque fois que vous appuyez sur la
3
touche 3 ou , la vitesse de lecture change.
7
Touche
1/12
5
6
Touche
sélectionnée.
: Interrompre la lecture d'une piste.
6
: Lit la piste actuellement
French 25
|
Page 98

Media Play
p
002
27
Répétition de piste
Vous pouvez régler le produit de manière à répéter
certaines pistes.
Pendant la lecture musicale, appuyez sur la touche
1.
TOOLS (OUTILS).
Servez-vous de la touche ◄► pour sélectionner Off,
2.
Track (Piste) ou One (Une), All (Tout) ou Shuffle
(Aléatoire) en Repeat Mode (Mode de répétition),
puis appuyez sur la touche E.
Création d'une liste de lecture musicale
Si la lecture musicale est effectuée à partir du
1.
contenu d'un CD ou d'un DVD commercial, appuyez
sur la touche 5 ou RETURN (RETOUR) (') .
L'écran Music List (Liste des fichiers musicaux)
apparaît. Si vous créez une liste de lecture à partir
de contenus musicaux stockés sur un disque créé
par l'utilisateur ou sur un périphérique de stockage
USB, accédez à la Liste des fichiers musicaux tel
qu'indiqué dans la section "Lecture des fichiers
stockés sur un périphérique USB", en page 23 ou
"Lecture d'un disque comportant des contenus
enregistrés par l'utilisateur", en page 23.
Appuyez sur les touches ▲▼◄► pour accéder au
2.
fichier souhaité, puis appuyez sur la touche YELLOW
(JAUNE) (C) afin de le sélectionner. Répétez la
procédure pour sélectionner d'autres fichiers.
Musique TRACK 002 2 Fich. sél. 1/2 Page
TRACK 001
05:57
TRACK 003
04:07
TRACK 005
03:17
TRACK 007
03:47
TRACK 009
03:53
CD
Pour retirer un fichier de la liste de lecture, accédez
3.
au fichier concerné, puis appuyez sur la touche
YELLOW (JAUNE) (C).
Appuyez sur la touche E pour lire les fichiers
4.
sélectionnés. L'écran Playlist (Liste d'écoute)
apparaît.
Pour accéder à la Liste des fichiers musicaux, 5
5.
appuyez sur la touche RETURN (RETOUR) (').
Pour revenir à la liste de lecture, appuyez sur la
6.
touche
E
.
| REMARQUE |
Vous pouvez créer une Liste d'écoute comportant
jusqu'à 99 pistes sur des CD audio (CD-DA).
Si vous quittez la Liste des fichiers musicaux pour
passer à la liste de lecture et que vous retournez
ensuite sur la Liste des fichiers musicaux, celle-ci
s'exécutera à nouveau depuis le début.
Sélectionner
TRACK 002
04:27
:
TRACK 004
03:41
TRACK 006
03:35
TRACK 008
03:49
TRACK 010
03:45
◄◄►►
Acc à page '
Retour
Commande de la lecture photo
Vous pouvez commander la lecture de photos
stockées sur des DVD, des CD ou des périphériques
de stockage.
Utilisation du menu OUTILS
Pendant la lecture, appuyez sur la touche TOOLS
(OUTILS).
Lancer /
Arrêter le
diaporama
Vit. diaporama
Sélectionnez cette option pour lire
ou mettre en pause le diaporama.
Sélectionnez cette option pour
régler la vitesse du diaporama.
Sélectionnez pour écouter de la
Fond musical
musique tout en visionnant un
diaporama.
Sélectionnez cette option pour
Zoom
agrandir l'image actuellement
sélectionnée. (Agrandit jusqu'à 4
fois)
Sélectionnez cette option pour
faire tourner l'image.
Pivoter
(Fera pivoter l'image dans le sens
des aiguilles d'une montre ou
dans le sens inverse.)
Affiche les informations relatives
Information
aux images, y compris le nom, la
taille, etc.
| REMARQUE |
En fonction du disque ou du support
d'enregistrement, le menu Outils peut varier.
Toutes les options pourraient ne pas s’afficher.
Pour activer la fonction de fond musical, le fichier
de photos doit se trouver dans même support
d'enregistrement que le fichier de musique.
Toutefois, la qualité du son pourrait être affectée
par le débit binaire du fichier MP3, par la taille de
la photo et par la méthode d'encodage.
Création d'une liste de lecture photo
Vous pouvez créer une liste de lecture de photos de
la même manière que vous le feriez pour une liste de
lecture de fichiers musicaux. Pour les instructions,
reportez-vous à la section « Création d'une liste de
lecture musicale » sur cette page.
|
26 French
Page 99

Écoute de la radio
En utilisant les touches de la
télécommande
Appuyez sur la touche FONCTION pour
1.
sélectionner FM.
Réglez sur la station souhaitée.
2.
• Pour prérégler la syntonisation 1 : Appuyez sur la
touche 5 pour sélectionner PRÉRÉGLER, puis
sur la touche SYNTONISATION UP, DOWN pour
sélectionner la station préréglée.
- Avant de sélectionner les stations préréglées,
vous devez les ajouter à la mémoire du produit.
Consultez la section Préréglage des stations cidessous.
• Syntonisation manuelle : Appuyez sur la touche
5
pour sélectionner MANUEL, puis sur la touche
SYNTONISATION UP, DOWN pour sélectionner
une fréquence inférieure ou supérieure.
• Syntonisation automatique : Appuyez sur la
touche 5 pour sélectionner MANUEL, puis
appuyez sur la touche SYNTONISATION UP,
DOWN et maintenez-la enfoncée pour rechercher
la bande.
Définition de la fréquence Mono/Stéréo
Appuyez sur la touche MO/ST.
• Chaque fois que la touche est pressée, le son permute
entre STÉRÉO et MONO.
• Dans un endroit où la réception est mauvaise,
sélectionnez MONO pour obtenir une diffusion claire,
sans interférences.
Préréglage des stations
Exemple : Préréglage de la station FM 89.10 dans la
mémoire.
Appuyez sur la touche FONCTION pour
1.
sélectionner FM.
Appuyez sur la touche SYNTONISATION UP,
2.
DOWN pour sélectionner <89.10>.
Appuyez sur la touche MÉMOIRE SYNTONISEUR.
3.
• NUMÉRO clignote sur l’affichage.
Appuyez de nouveau sur la touche MÉMOIRE
4.
SYNTONISEUR.
• Appuyez sur la touche MÉMOIRE
SYNTONISEUR avant que NUMÉRO disparaisse
automatiquement de l’affichage.
• Dès que vous avez appuyé sur la touche
MÉMOIRE SYNTONISEUR, NUMÉRO disparaît
de l’affichage et la station est mise en mémoire.
Pour prérégler une autre station, répétez les étapes
5.
2 à 4.
• Pour écouter une station préréglée, appuyez sur
la touche SYNTONISATION UP, DOWN.
Utilisation du bouton TV Sound
de la télécommande
TV Sound
Si votre téléviseur prend en charge la fonction Anynet+
(HDMI-CEC), le bouton TV SOUND (SON TV) vous
permet de diriger le son du téléviseur vers les enceintes
du Home cinéma ou les enceintes du téléviseur.
Pour utiliser, suivez ces étapes :
Connectez un câble HDMI au téléviseur et au Home
1.
cinéma. (Reportez-vous à la page 15.)
Activez la fonction Anynet+ (HDMI-CEC) sur le
2.
Home cinéma et le téléviseur.
Appuyez sur le bouton TV SOUND (SON TV) de la
3.
télécommande. TV SOUND ON (ACTIVATION DU SON
TV) clignote à l'écran en façade, puis passe à D. IN.
• Lorsque que le TV SOUND (SON TV) est activé,
le son du téléviseur émet à travers les enceintes
du Home cinéma.
Appuyez à nouveau sur le bouton TV SOUND (SON
4.
TV) pour le désactiver.
• Lorsque le TV SOUND (SON TV) est désactivé, le
son du téléviseur émet à travers les enceintes du
téléviseur Anynet+ connecté.
Utilisez TV SOUND (SON TV) :
1) lorsque vous voulez écouter le son du téléviseur à
travers les enceintes du Home cinéma.
2) lorsque vous voulez écouter le son d'une clé USB
branchée dans le téléviseur à travers les enceintes
du Home cinéma.
Spécification de prise en charge TV SOUND
ON/OFF (SON TV ACTIVÉ/DÉSACTIVÉ)
Téléviseur
connecté
Téléviseur prenant en
charge le paramètre
Anynet+ (HDMI-CEC)
Téléviseur ne prenant
pas en charge le
paramètre Anynet+
(HDMI-CEC)
Paramètre
Anynet+
(HDMI-CEC)
MARCHE O O
ARRÊT O X
Aucune
opération
TV SOUND
SON TV
ACTIVÉ
SON TV
DÉSACTIVÉ
OX
French 27
05 Media Play
|
Page 100

Services réseau
Utilisation de BD-LIVE™
Connectez le produit au réseau.
1.
(Voir page 14.)
Configurez les paramètres réseau.
2.
(Voir pages 20~21.)
Après avoir connecté le produit au réseau, vous
pouvez apprécier plusieurs contenus de services
cinématographiques offerts sur des disques compatibles
avec la technologie BD-LIVE.
Insérez une clé USB dans la prise USB située à
1.
l'avant du produit et vérifiez l'espace mémoire
disponible via Gestion données BD. Le périphérique
de mémoire doit avoir au moins 1 Go d'espace libre
pour satisfaire aux exigences des services BD-LIVE.
À l'écran Accueil, sélectionnez Paramètres, puis
2.
appuyez sur la touche E.
Sélectionnez Système, puis appuyez sur la touche
3.
.
E
Sélectionnez Gestion données BD, puis appuyez
4.
sur la touche E.
Sélectionnez Changer périph., puis appuyez sur la
5.
touche E.
Sélectionnez USB DISK, puis appuyez sur la touche
6.
.
E
Insérez un disque Blu-ray prenant en charge la
7.
technologie BD-LIVE.
Sélectionnez un élément dans les contenus de
8.
service BD-LIVE fournis par le fabricant de disque.
| REMARQUE |
L’utilisation du service BD-LIVE ainsi que des contenus
fournis peut varier selon le fabricant du disque.
Utilisation de la fonction DLNA
DLNA vous permet d'accéder aux fichiers stockés sur
votre ordinateur et de les lire via votre cinéma maison.
Suivez les instructions figurant dans le guide d'utilisation
d'DLNA pour configurer DLNA sur votre ordinateur, et
pour repérer les dossiers et fichiers que vous souhaitez
partager avec le cinéma maison.
Pour accéder aux fichiers situés sur l'ordinateur et les
lire après avoir configuré DLNA, exécutez les étapes
suivantes :
Allumez l'ordinateur, le téléviseur et le cinéma
1.
maison.
Assurez-vous que le serveur partagé d'DLNA
2.
s'exécute sur l'ordinateur.
Sur le cinéma maison, appuyez sur la touche BLUE
3.
(BLEUE) (D) (View Devices (Afficher les appareils)).
Servez-vous de la touche ◄► de direction vers la
4.
gauche ou la droite pour sélectionner l'ordinateur
sous Device List (Liste d'appareils).
Sélectionnez le type de fichier que vous souhaitez
5.
afficher ou lire parmi les options Videos (Vidéos),
Photos (Photos) ou Music (Musique), puis appuyez
sur E.
Servez-vous de la touche ▲%◄► pour sélectionner
6.
le dossier contenant le type de fichier que vous
avez sélectionné, puis appuyez sur E. La liste des
fichiers s'affiche.
Sélectionnez le fichier que vous souhaitez afficher
7.
ou lire, puis appuyez sur E.
| REMARQUE |
Vous pouvez créer des listes de lecture à partir des
fichiers stockés sur l'ordinateur de la même manière
que vous le feriez pour créer des listes de lecture
depuis des fichiers stockés sur les périphériques USB
et les disques.
À part quelques rares exceptions, vous pouvez
commander la lecture des fichiers stockés sur
l'ordinateur de la même façon que vous le feriez pour
la lecture de fichiers contenus sur des périphériques
USB ou des disques.
Vous pouvez également accéder aux fichiers stockés
sur votre ordinateur en sélectionnant d'abord Videos
(Vidéos), Photos (Photos) ou Music (Musique) dans
l'écran Home (Accueil), puis votre ordinateur dans la
liste de périphériques qui apparaît.
|
28 French
 Loading...