How it Works
Log In / Sign Up
Buy Points
How it Works
FAQ
Contact Us
Questions and Suggestions
Users
Samsung
Loading...
H
HG32NC690
HG32NC693
HG32ND460S
2
HG32ND470
3
HG32ND470S
3
HG32ND477
3
HG32ND477S
4
HG32ND478
2
HG32ND690 Series
HG32NE460
HG32NE460S
2
HG32NE470S
HG32NE473
HG32NE477S
HG32NE478B
HG32NE595
HG37EA570LW
2
HG37NA590LFXZA
HG39AB460
HG39EB460
HG39EB460HW
HG39EC470
HG39NA570CFXZA
HG39NA578CF
2
HG39NB460
HG40AA570LW
2
HG40AA690
2
HG40AB670
HG40AB670FJXXZ
HG40AB690Q
HG40AC670
HG40AC690
HG40AD690
HG40AE460
HG40AE570
HG40AE570SW
HG40EA570LW
2
HG40EA590
2
HG40EA790
3
HG40EA790MS
HG40EB690QB
HG40EC690
4
HG40EC890
HG40ED590
HG40ED590BB
HG40ED690
HG40ED890U
HG40EE460
HG40EE470
HG40EE590
HG40EE590SKXXU
HG40EE670
HG40EE690DB
HG40EJ470MKXXU
HG40NA570
3
HG40NA570LF
HG40NA570LFXZA
HG40NA577
2
HG40NA577LF
HG40NA577LFXZA
HG40NA578
2
HG40NA578LF
2
HG40NA578LFXZA
HG40NA590
3
HG40NA590LFXZA
HG40NA593
HG40NA790
4
HG40NA790MFXZA
HG40NB670
2
HG40NB670FFXZA
HG40NB677
2
HG40NB677FFXZA
2
HG40NB678
HG40NB678FF
HG40NB690
2
HG40NB690QF
2
HG40NB690QFXZA
HG40NC460
3
HG40NC460KFXZA
HG40NC670
2
HG40NC677
2
HG40NC678
4
HG40NC67X
HG40NC690
HG40NC690DFXZA
HG40NC693
HG40ND460
2
HG40ND470
2
HG40ND470S
2
HG40ND477
2
HG40ND477S
2
HG40ND478
HG40ND478S
2
HG40ND670
2
HG40ND677
2
HG40ND678
2
HG40ND690 Series
HG40NE460
HG40NE460S
2
HG40NE470S
Loading...
Loading...
Nothing found
HG40EE590SKXXU
User Manual
71 pgs
9.78 Mb
0
Table of contents
Loading...
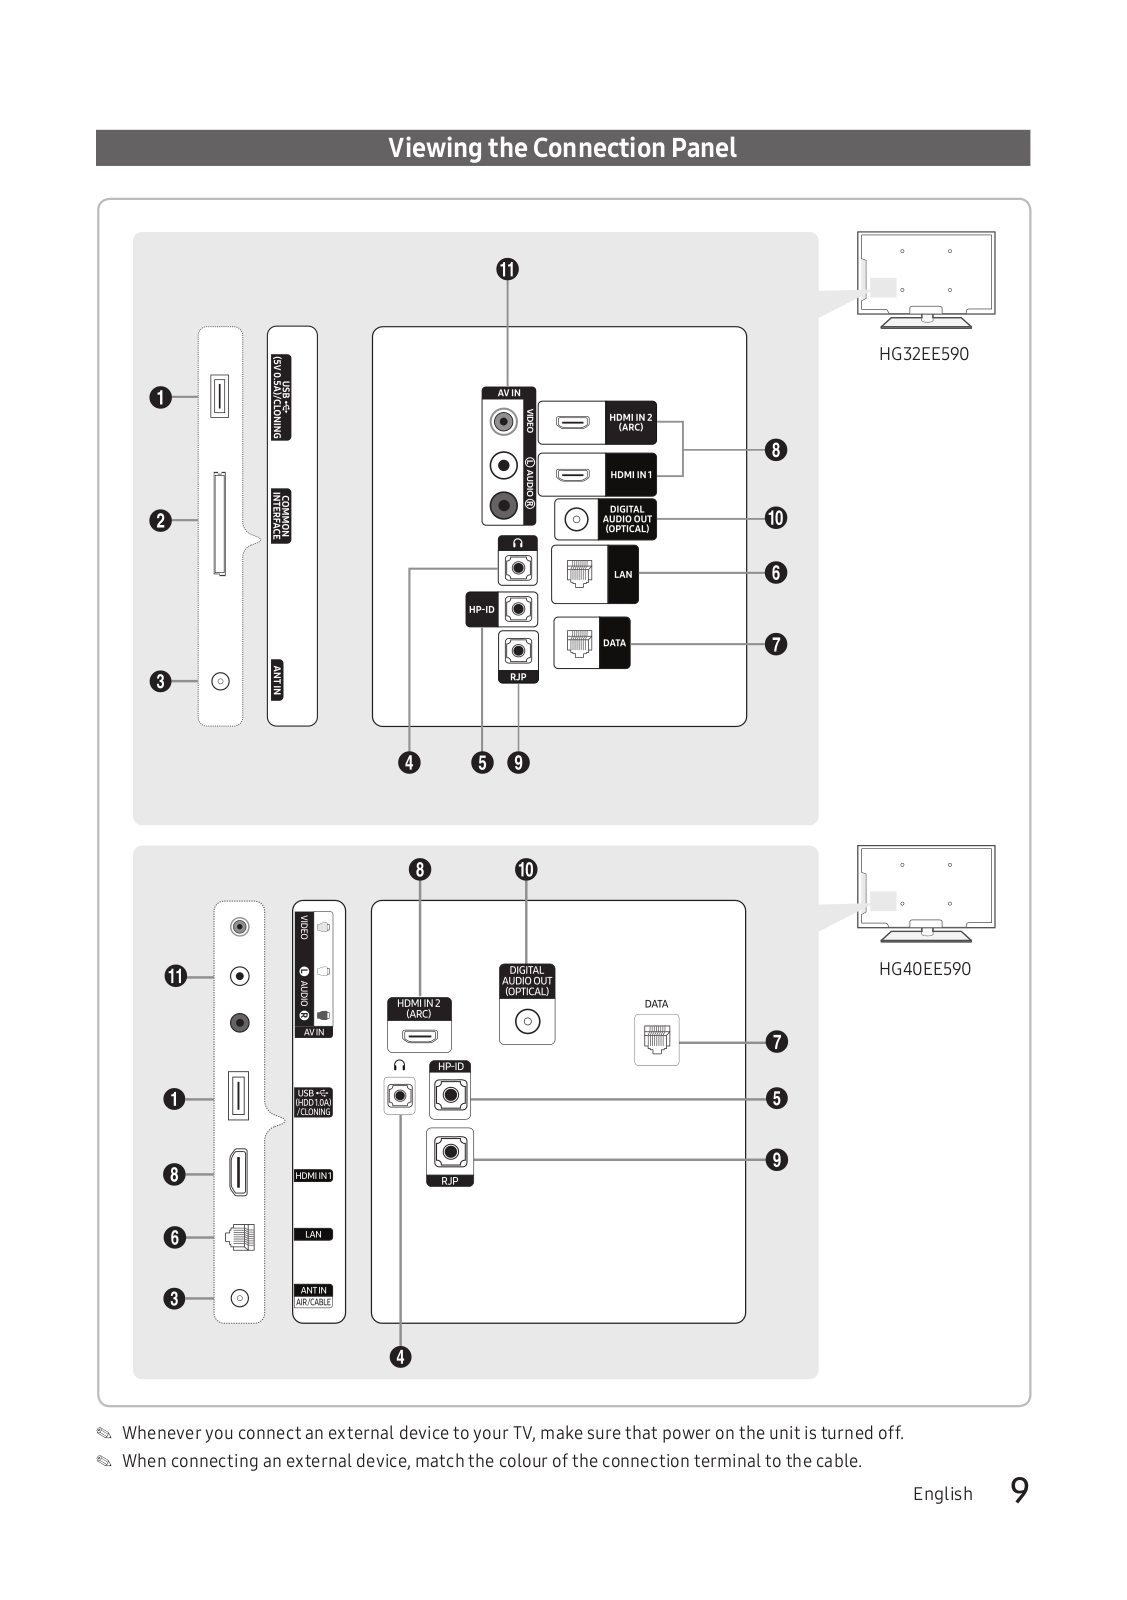
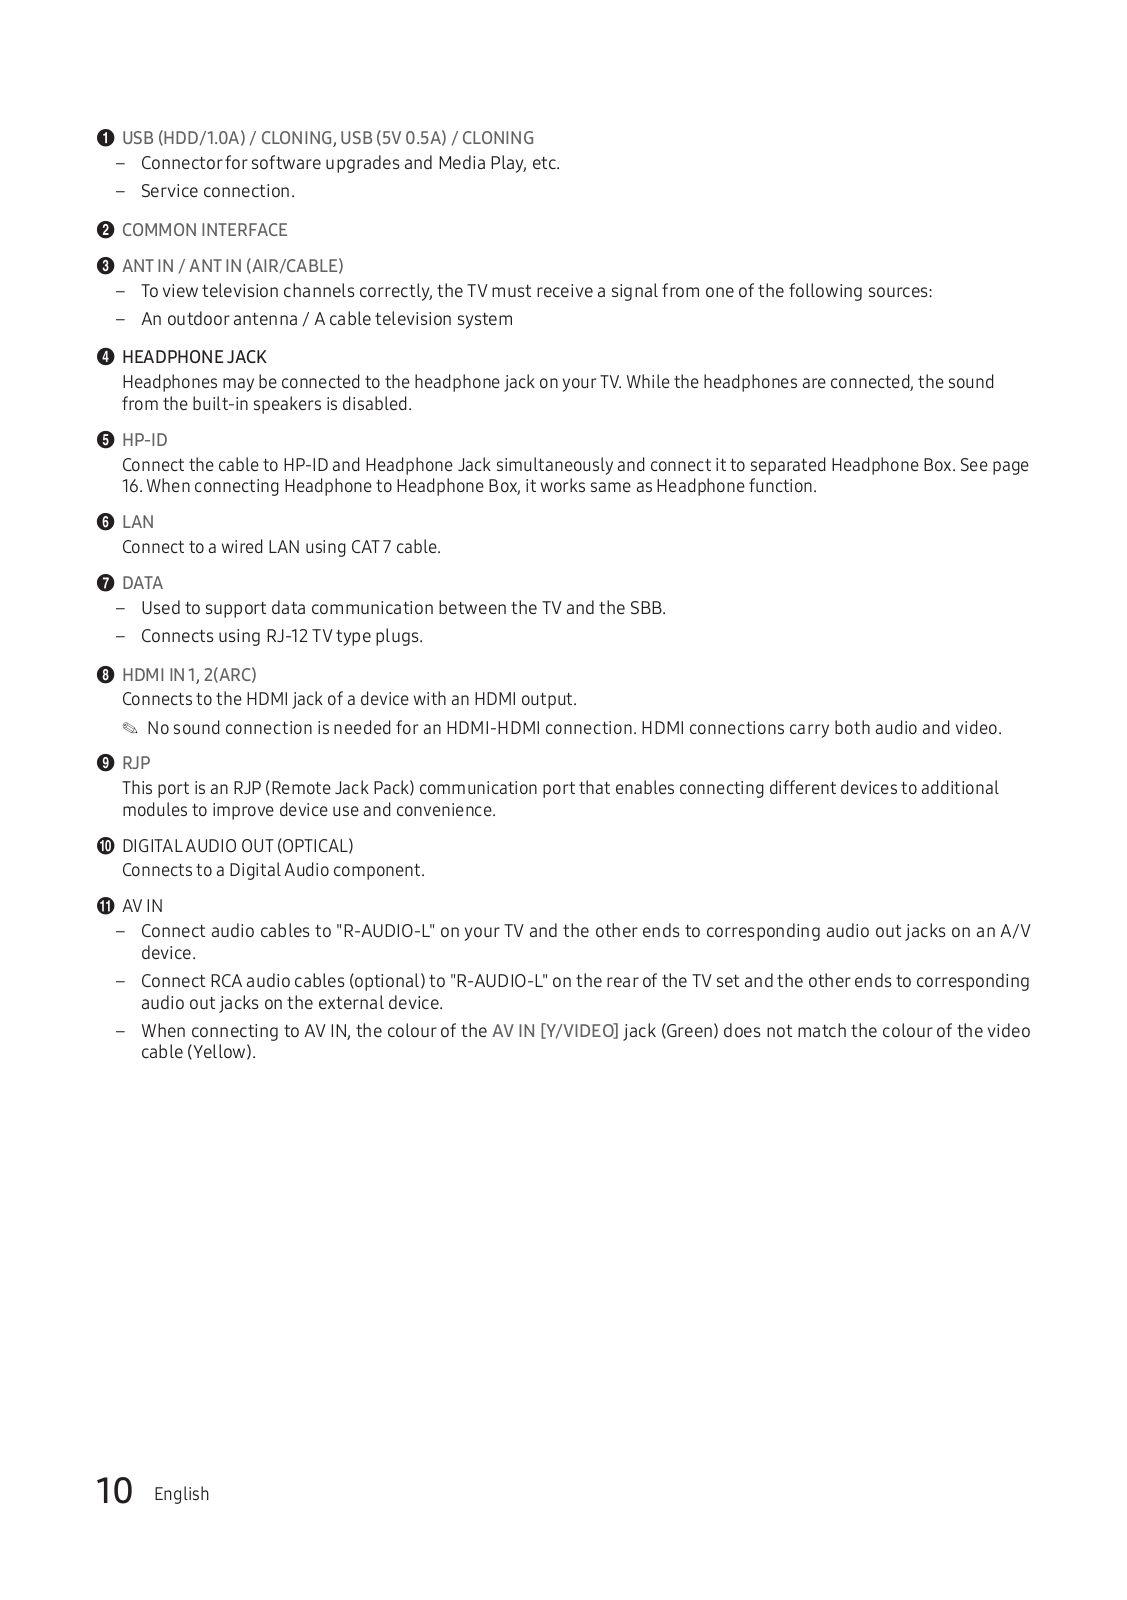
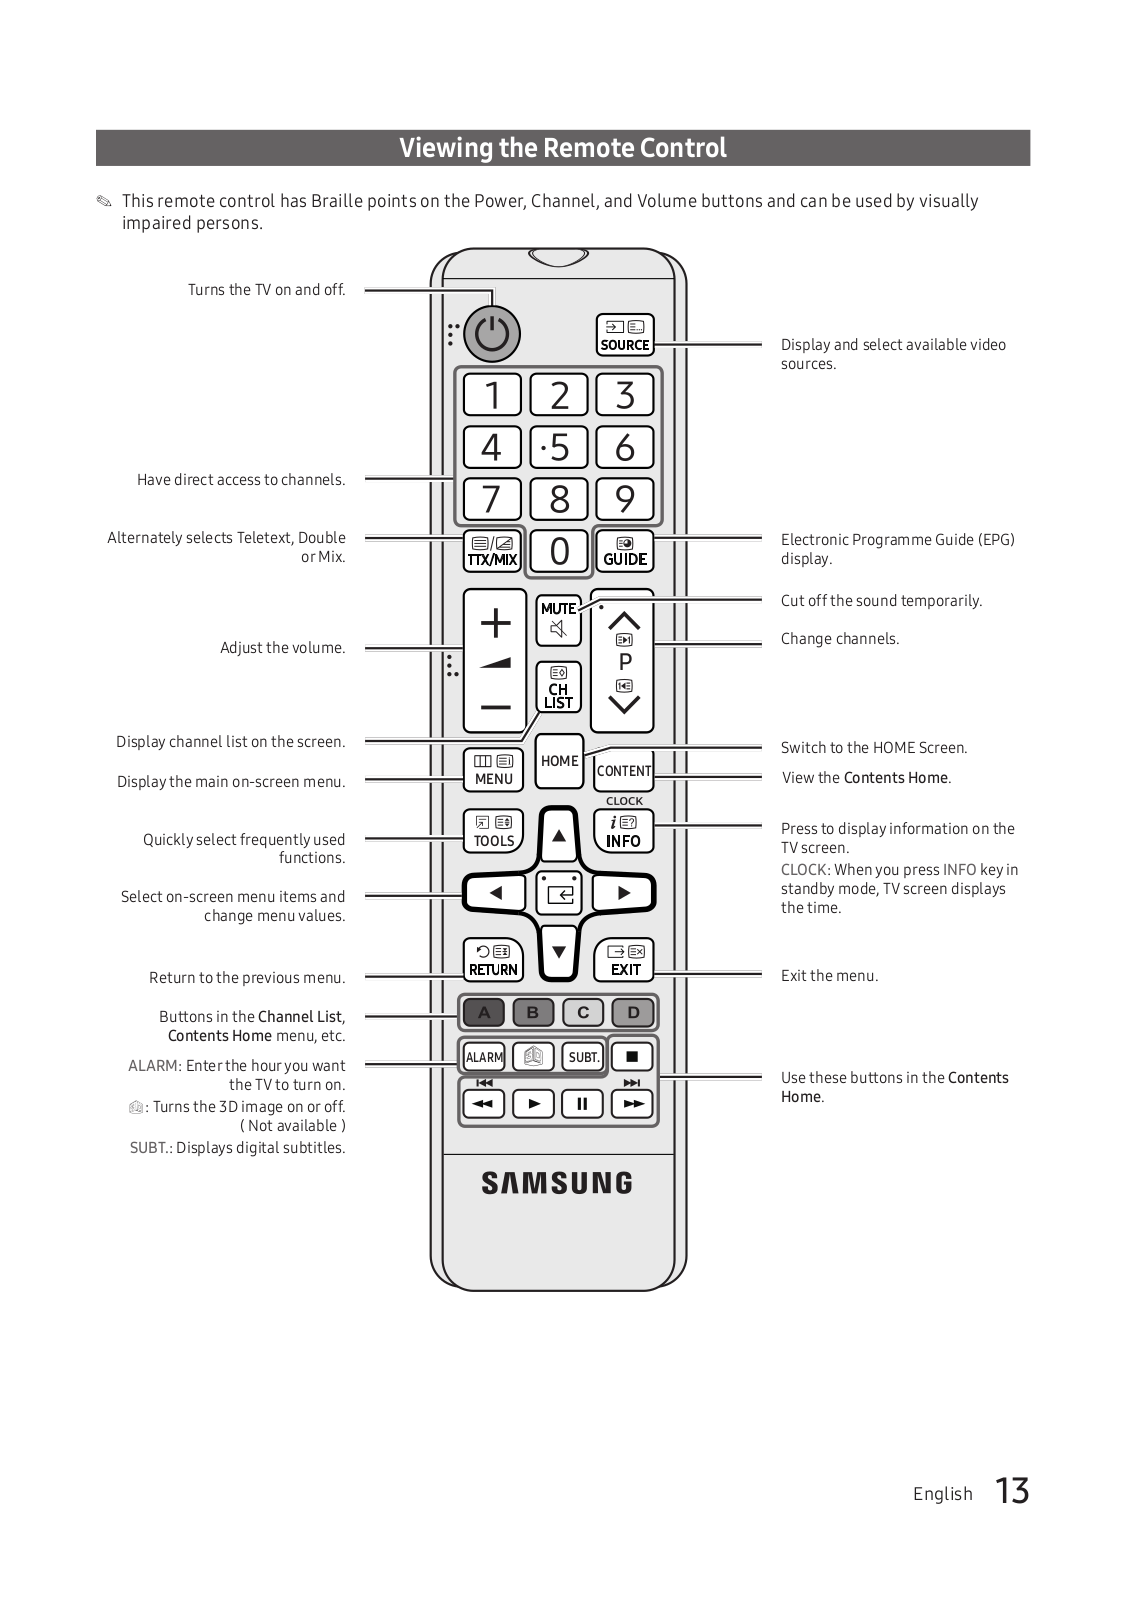
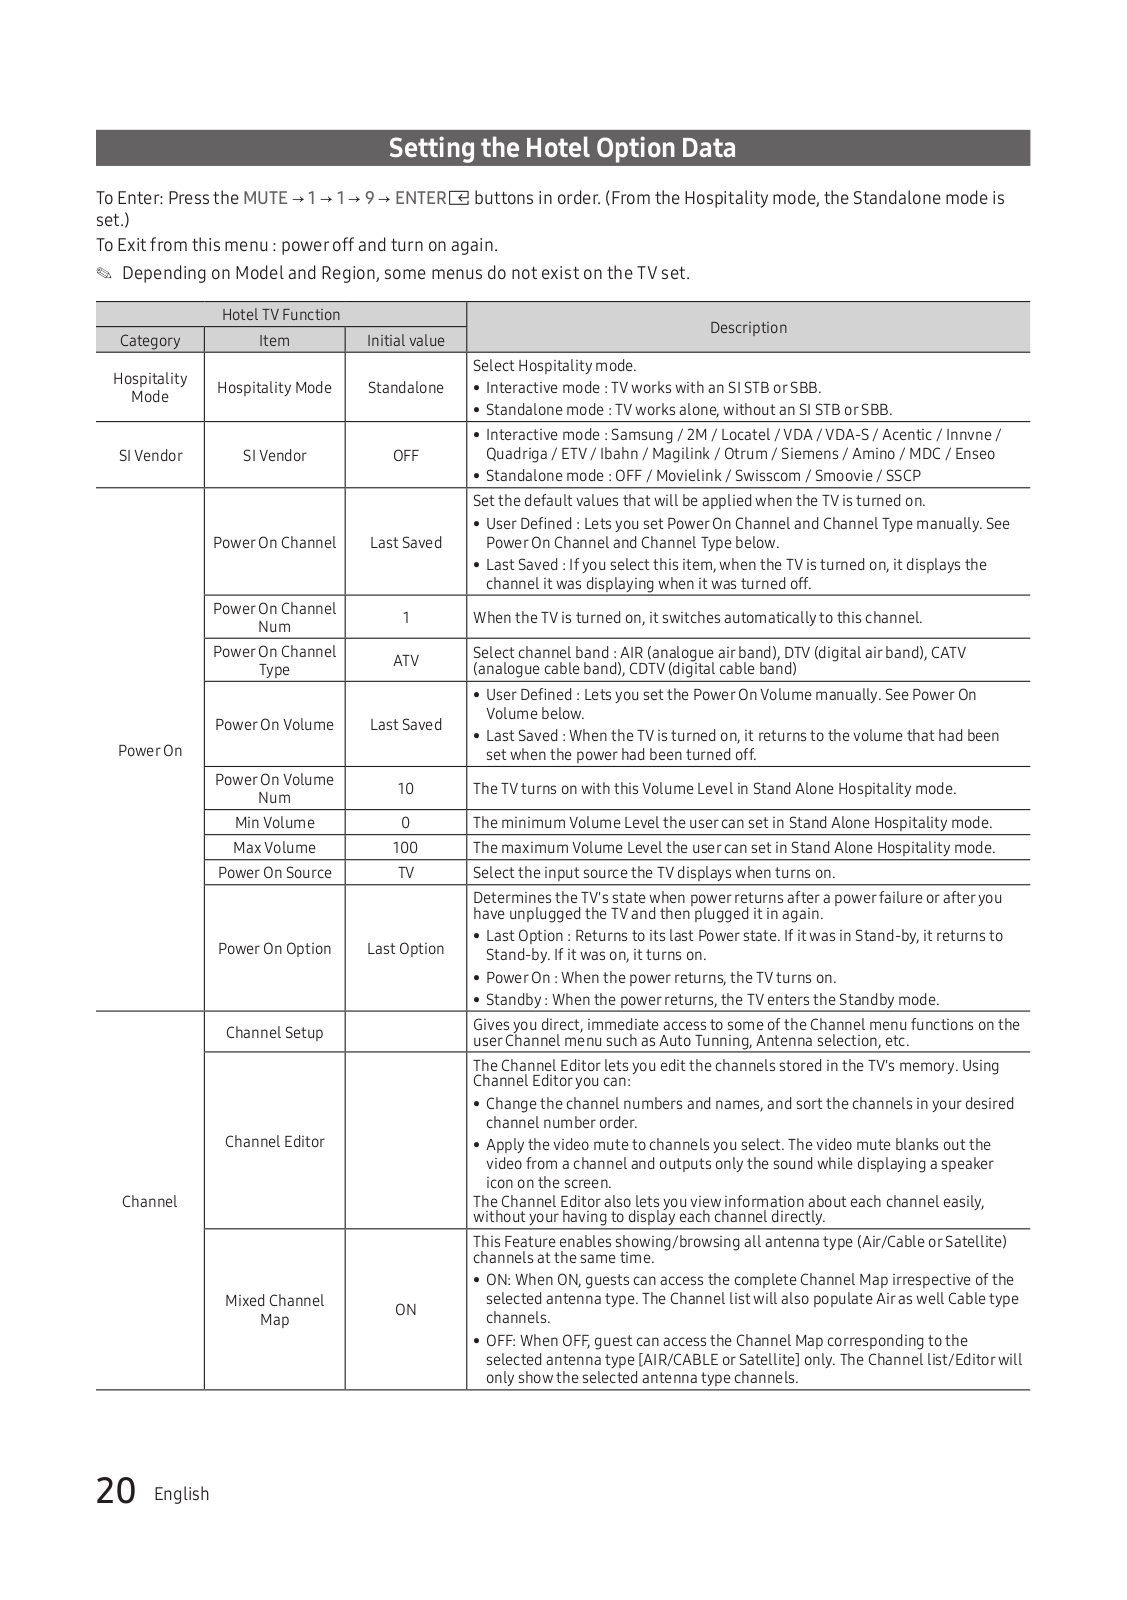
Samsung HG40EE590SKXXU User Manual
...
Samsung User Manual
Download
Specifications and Main Features
Frequently Asked Questions
User Manual
Download
Loading...
+
49
hidden pages
Unhide
You need points to download manuals.
1 point = 1 manual.
You can buy points or you can get point for every manual you upload.
Buy points
Upload your manuals
 Loading...