

Page 1
Level
7.
Disassembly and Assembly Instructions
7-1.
Repair
2
7-1-1.
1)
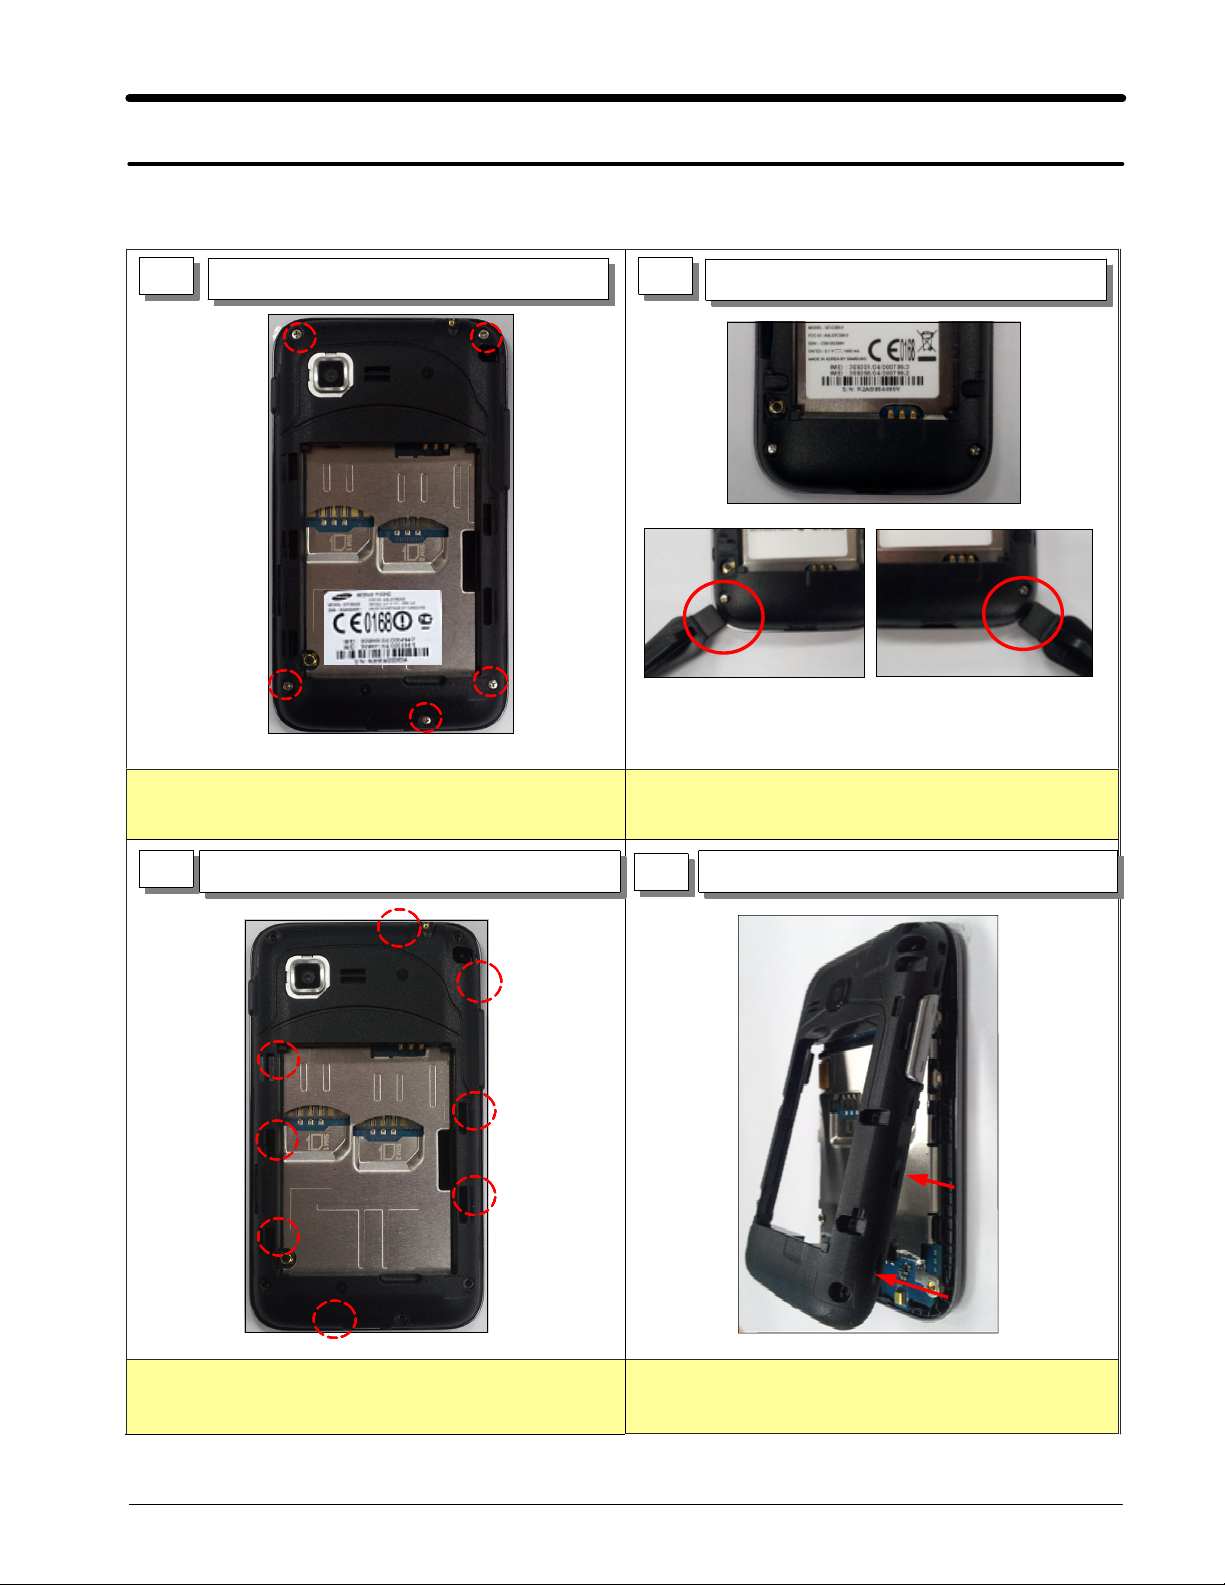
Disassembly
1 2
Be careful not to make scratch and molding damage!
Release Screw5Point at REAR
Disjoint Hook on the bottom of the REAR
Be careful not to make scratch and molding damage!
1)
3
Disjoint hook on the both side of the REAR
Push out REAR to both side.
1)
Be careful nottoscratch LCD FPCB
2)
Disassemble REAR
4
Hold up REAR from bottom.
1)
7-1
SAMSUNG Proprietary-Contents may change without notice
This Document can not be used without Samsung's authorization
Page 2
Level2Repair
7.
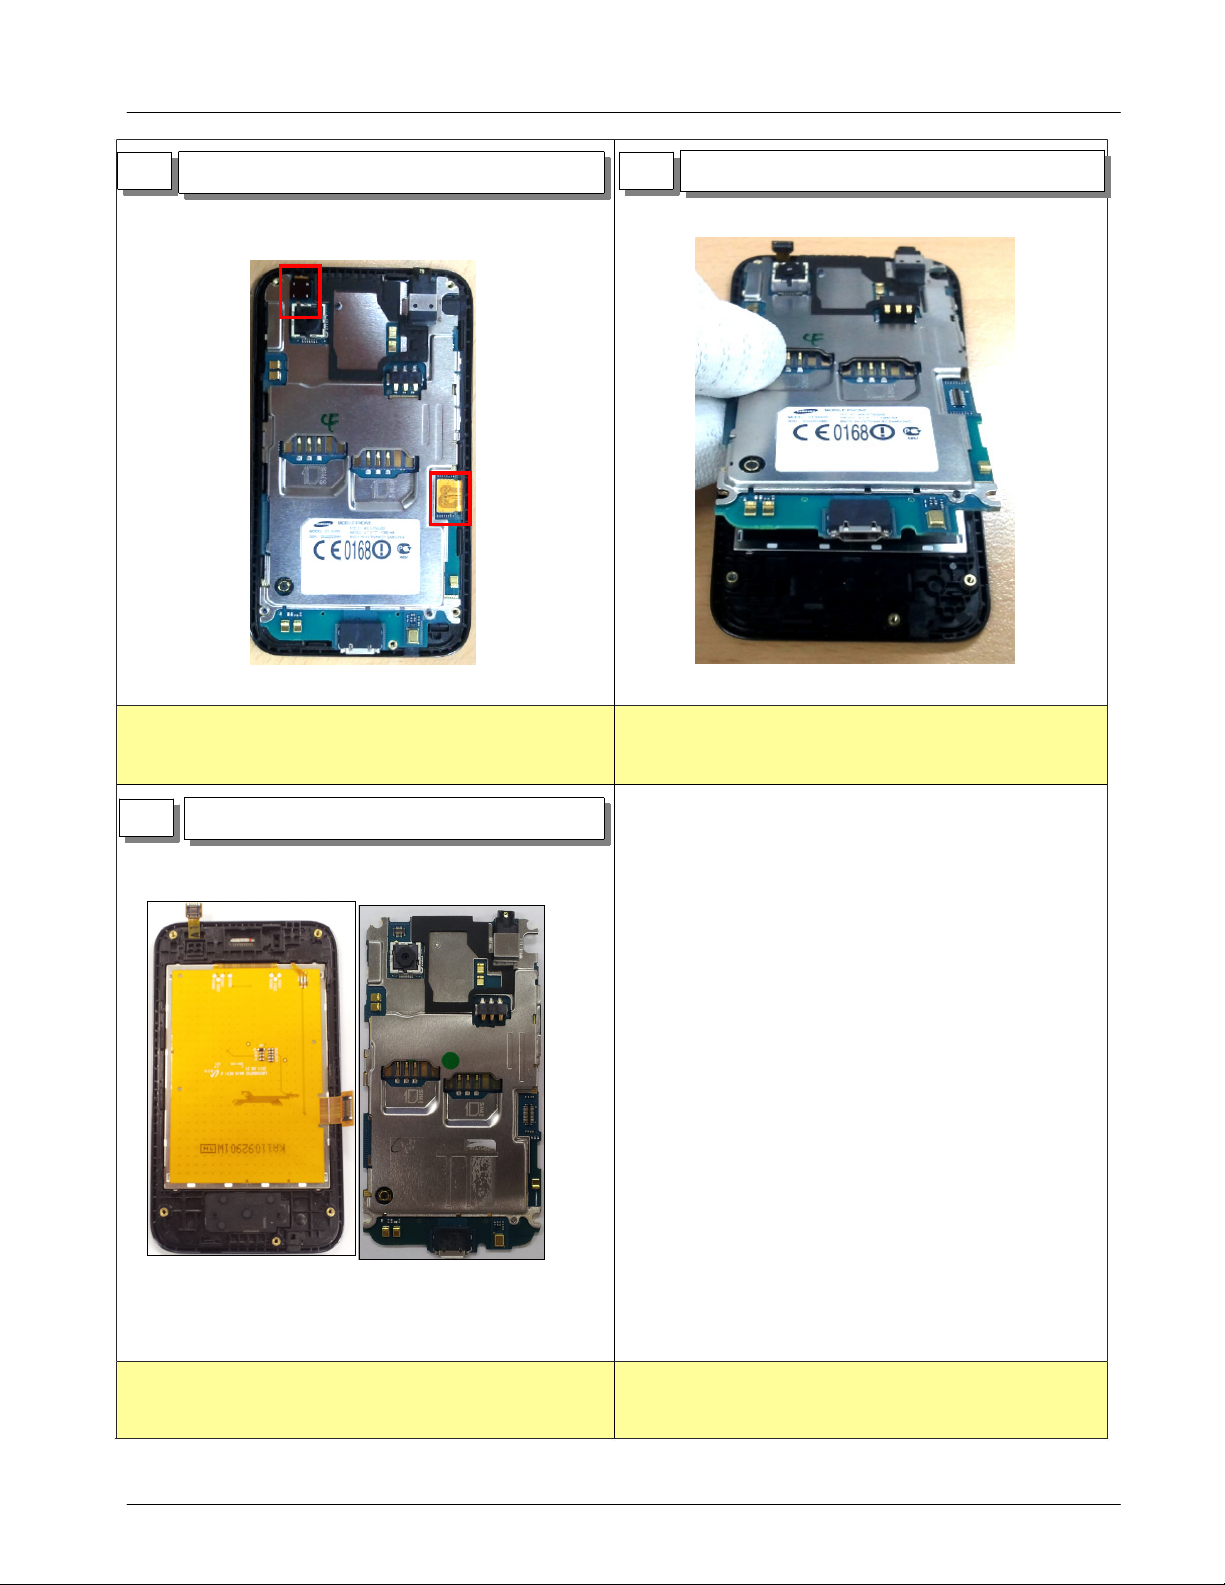
5
Disassemble FPCB
6
Disassemble Main PBA from the FRONT Ass'y
Detach LCD FPCB
1)
Detach TSP FPCB.
2)
7
Complete disassembly.
Hold up Main PBA from bottom.
1)
7-2
SAMSUNG Proprietary-Contents may change without notice
This Document can not be used without Samsung's authorization
Page 3

Level2Repair
7.
7-1-2.
1
Assembly
SetaPBA and FRONT Ass'y.
2
Assemble PBA on FRONT Ass'y.
3
Assemble FPCB
Assemble PBA on FRONT Ass'y
1)
4
Assemble FRONT Ass'y on REAR.
Assemble LCD and TSP FPCB.
1)
This Document can not be used without Samsung's authorization
Assemble matching location from earjack of rear
1)
upper
7-3
SAMSUNG Proprietary-Contents may change without notice
Page 4

Level2Repair
7.
5
Assemble FRONT Ass'y on REAR.
6
Drive Screws at5points
Assemble matching location from earjack of rear
1)
upper
Drive Screws at4points with torque
1)
1.1 +/- 0.1
Kgf/
㎠
7-4
SAMSUNG Proprietary-Contents may change without notice
This Document can not be used without Samsung's authorization
 Loading...