

Samsung GT-S5150 Disassembly & Reassembly
Disassembly and Assembly Instructions
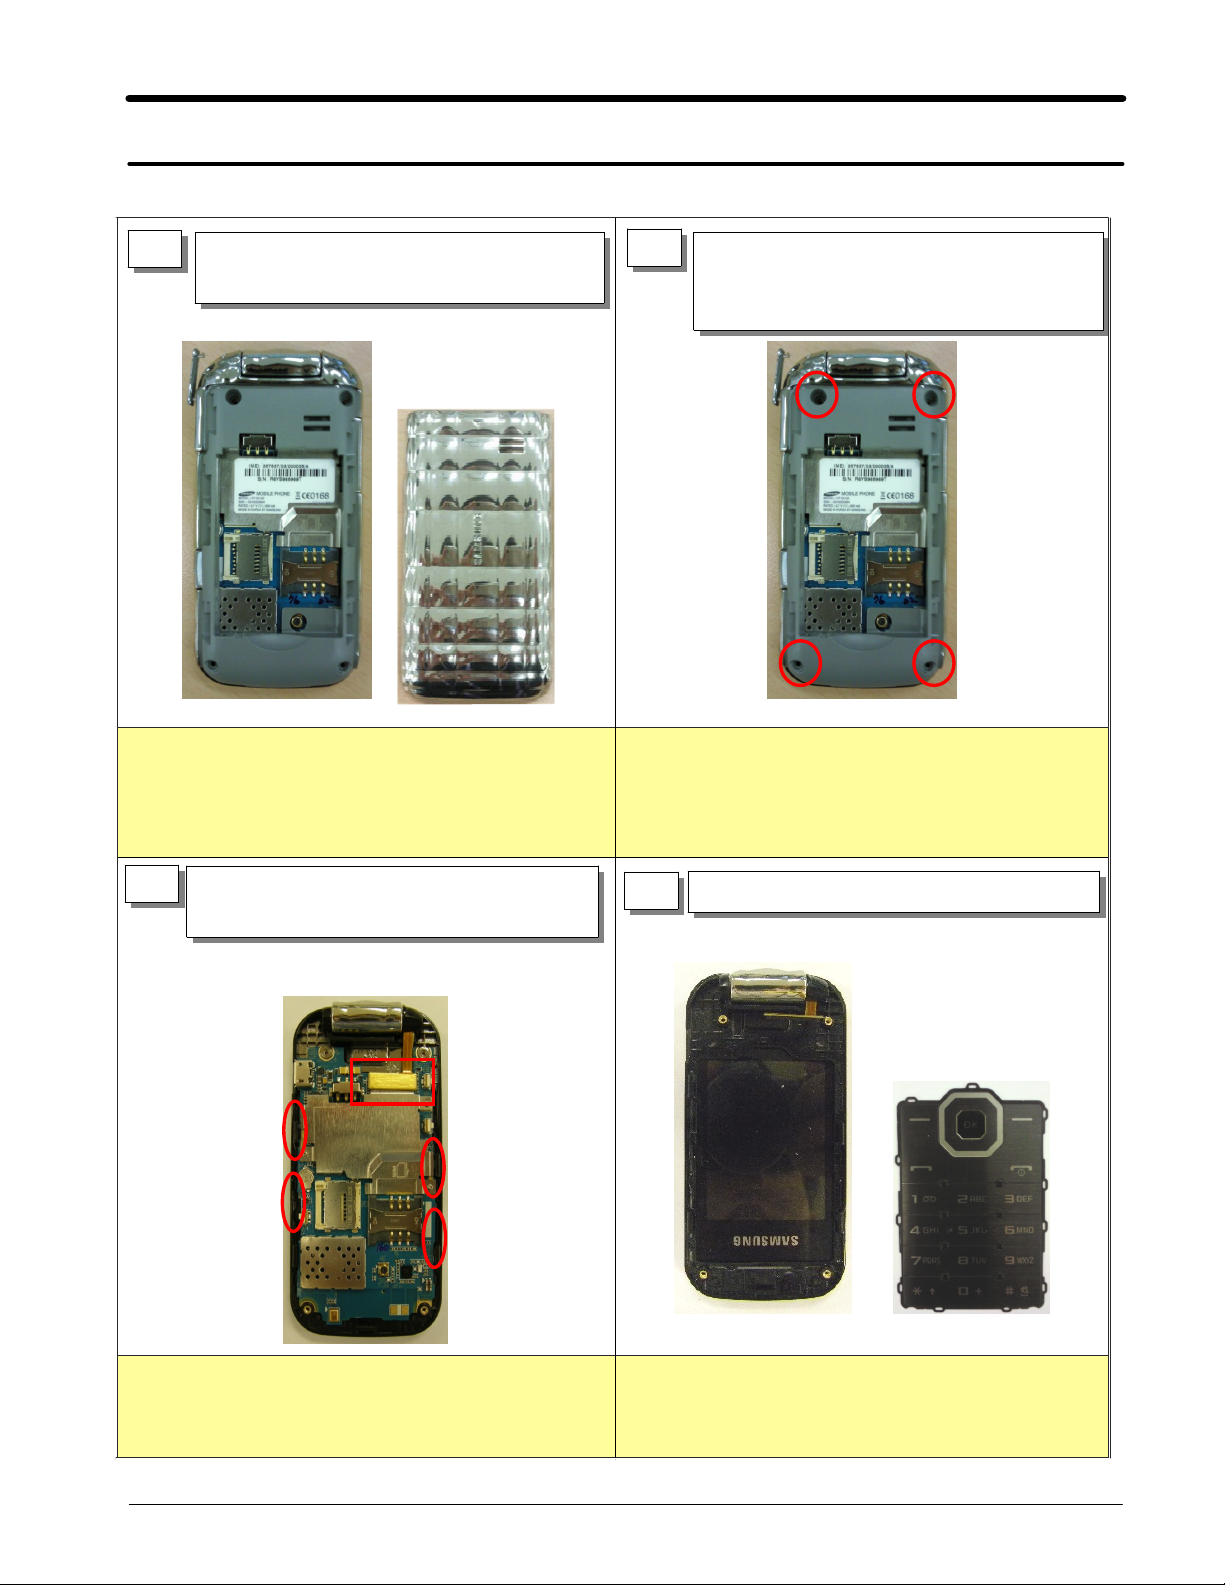
11.
11-1.
Disassembly
1 1)
Handle with care not to have scratches and not to be
1)
damaged.
Put out BATTERY COVER and BATTERY
1)
From the phone.
1)
of the phone.
2)
dissembling.
2
Please be careful not to scratch and to be damaged
Handle with care not to damage REAR when
Unscrew at4points.
Separate the REAR from the FRONT.
2)
Use disasseble stick when seperating frist
from Volume key under.
3
Handle with care the LCD F-PCB not to be torn or
1)
damaged.
Detach LCD Connector from PBA.
1)
Detach main board from Folder ass'y.
2)
4
Please not to be damaged and scratched to phone
1)
and Folder ass'y.
Seperate the Key pad from Folder ass'y.
1)
11-1
SAMSUNG Proprietary-Contents may change without notice
This Document can not be used without Samsung's authorization
Disassembly and Assembly Instructions
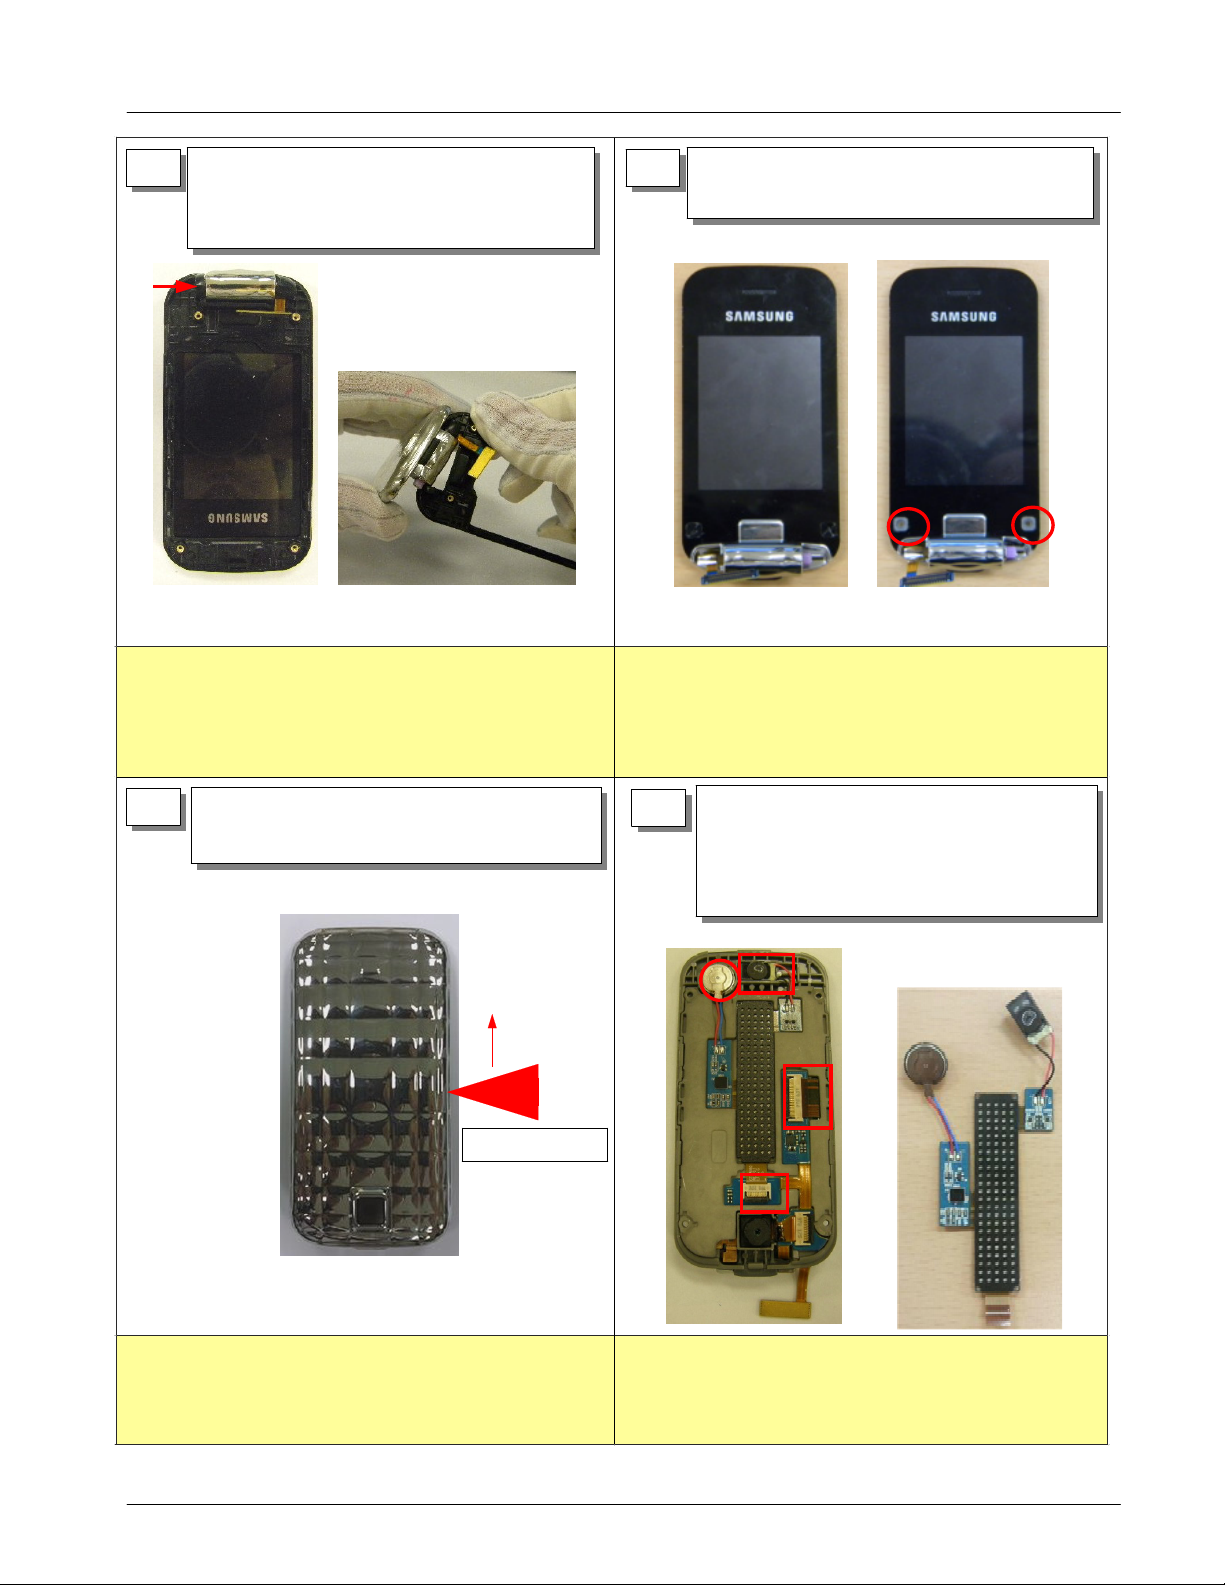
5
Press the Hinge to separate the FRONT
1)
from the Folder ass'y.
Detach the FRONT like the picture below.
2)
Please be careful not to scratch and to be damaged
1)
of the phone
Handle with care not to damage LOWER and F-PCB
2)
when dissembling.
6
Please be careful not to scratch and to be damaged
1)
Detach the screw caps.
1)
Unscrew at2points.
2)
of the phone
7
Use disasseble stick when seperating frist
-
Separate the UPPER from the LOWER.
1)
from the side of the UPPER.
Starting Point
Please be careful not to scratch and to be damaged
1)
of the phone
1) Detach the Receiver and Motor from the Bracket.
8
Seperate Slide F-PCB and LED F-PCB
2)
From the SUB F-PCB.
Detach the LED PCB from the Bracket.
3)
Put out the F-PCB using smooth tweezers.
1)
Please be careful not to scratch and to be damaged
2)
of the phone
11-2
SAMSUNG Proprietary-Contents may change without notice
This Document can not be used without Samsung's authorization
 Loading...