How it Works
Log In / Sign Up
Buy Points
How it Works
FAQ
Contact Us
Questions and Suggestions
Users
Samsung
Loading...
G
Galaxy S10
6
Galaxy S10 128GB Black
Galaxy S10e 128GB Black
Galaxy S10 Plus 128GB White
GALAXY S2
Galaxy S20
5
Galaxy S20 128GB Grijs 5G
Galaxy S20 5G
4
Galaxy S20 FE 5G
3
Galaxy S20 FE 5G UW
Galaxy S20 Ultra 5G
Galaxy S21 5G
Galaxy S21 Ultra 5G
GALAXY S3
GALAXY S3 MINI
2
Galaxy S3 Neo
Galaxy S4 Active
2
GALAXY S4 ACTIVE 4G
Galaxy S4 LTE-A
GALAXY S4 MED 4G
Galaxy S4 mini
3
GALAXY S4 MINI 4G
Galaxy S4 mini LTE
GALAXY S4 SC-04E
GALAXY S4 ZOOM 3G
GALAXY S4 ZOOM 4G
GALAXY S5 ACTIVE
GALAXY S5 ACTIVE SC-02G
Galaxy S5 LTE
GALAXY S5 MINI
4
Galaxy S5 mini LTE
GALAXY S5 SC-04F
GALAXY S5 SCL23
GALAXY S5 (SORT)
GALAXY S6 128 GB
GALAXY S6 32 GB
GALAXY S6 64GB
Galaxy S6 edge plus
GALAXY S6 EDGE SC-04G
Galaxy S6 G920F
GALAXY S6 SC-05G
Galaxy S9
21
Galaxy S9 64GB Zwart
GALAXY SC-01B
Galaxy S Captivate
GALAXY S DUOS
12
GALAXY S DUOS 2
2
GALAXY S FASCINATE SGH-T959W
GALAXY S GT-I9000
3
GALAXY S I9000
2
Galaxy S II
6
GALAXY S II 4G
Galaxy S II (Boost Mobile)
Galaxy S II Epic 4G Touch
GALAXY S II GT-I9100
2
GALAXY S II GT-I9100M
Galaxy S II HD LTE
GALAXY S III
7
Galaxy S III 4G
2
Galaxy S III (AT&T)
Galaxy S III (Cricket)
Galaxy S III Mini
4
Galaxy S III mini VE
GALAXY S III PROGRE SCL21
GALAXY S III SC-06D
GALAXY S III Α SC-03E
GALAXY S II LTE SC-03D
GALAXY S II PLUS
2
GALAXY S II SC-02C
GALAXY S II WIMAX ISW11SC
Galaxy S Infuse 4G
GALAXY S INFUSE 4G SGH-I997R
GALAXY S INFUSE SGH-I997
GALAXY S INFUSE SGH-I997R
GALAXY S LAFLEUR
Galaxy Sol 2
4
GALAXY SPICA
GALAXY SPICA GT-I5700
Galaxy S Plus
GALAXY S SC-02B
Galaxy S SCL
GALAXY S SCLCD
GALAXY S SCLCD I9003
Galaxy Star
3
Galaxy Star Duos
GALAXY S VIBRANT GT-I9000
Galaxy S wifi 3.6
2
Galaxy S wifi 4.0
Galaxy S wifi 4.2
Galaxy S Wi-Fi 5.0
Galaxy Tab
12
Galaxy Tab 10.1
7
GALAXY TAB 10.1 GT-P7500M
Galaxy Tab 10.1 Wi-Fi
2
Galaxy Tab 2
2
Galaxy Tab 2 10.1
Galaxy Tab 2 - 10.1 - 3G
2
Galaxy Tab 2 - 10.1 - Wi-Fi
3
Galaxy Tab 2 7.0
3
GALAXY Tab 2 7.0 3G
Loading...
Loading...
Nothing found
Galaxy S20 Ultra 5G
User Manual
180 pgs
4.04 Mb
0
Table of contents
Loading...
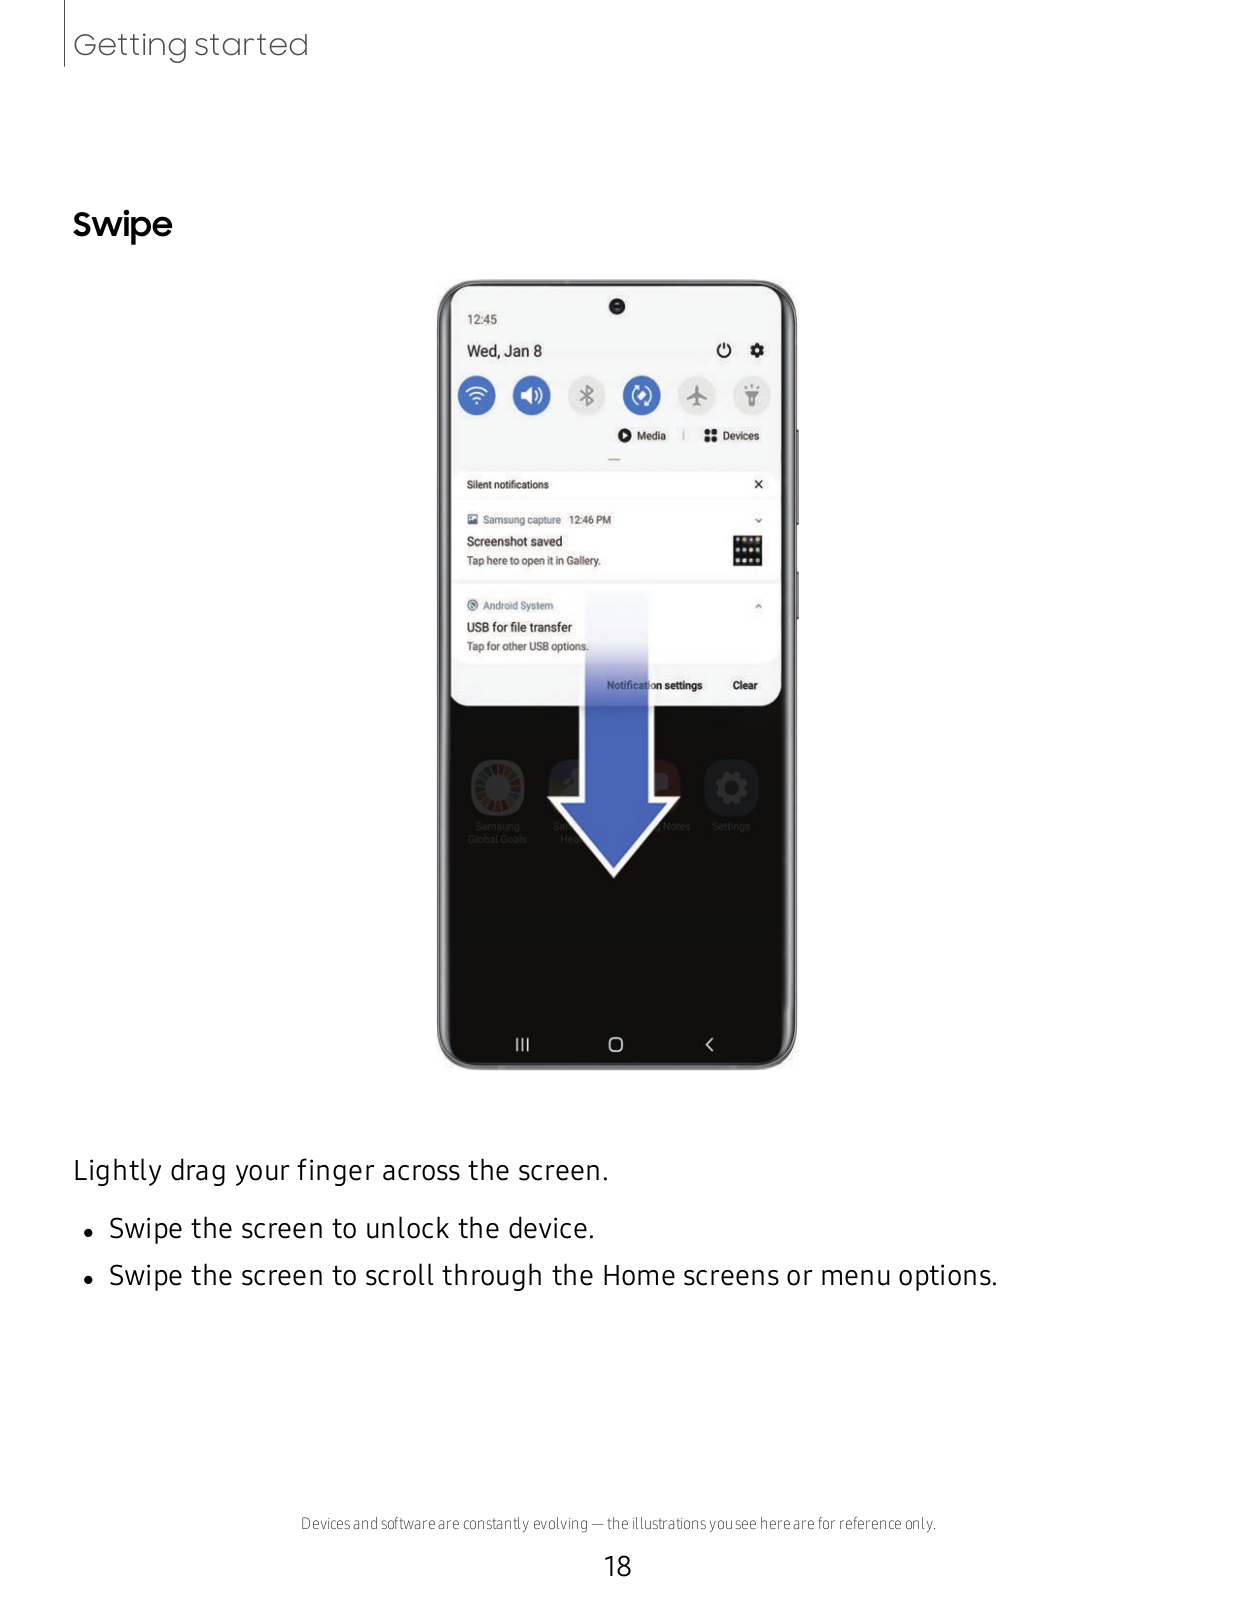
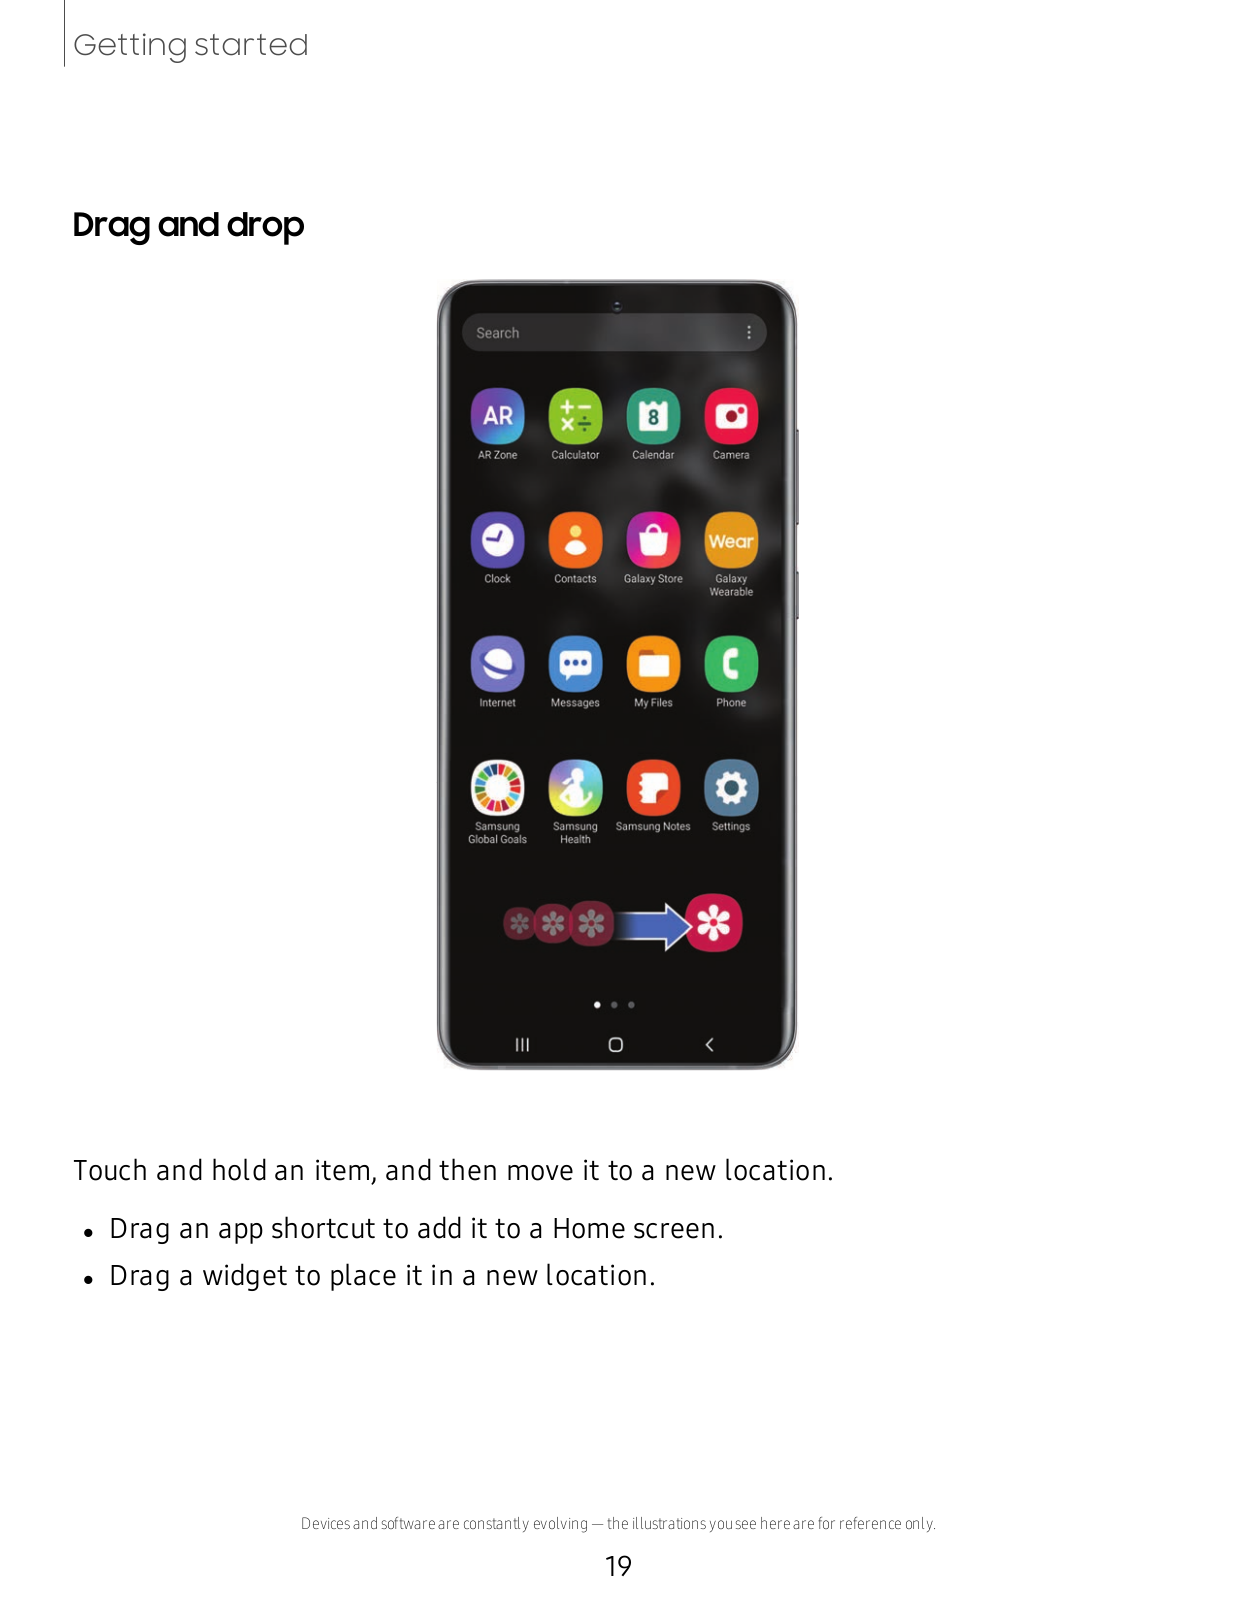
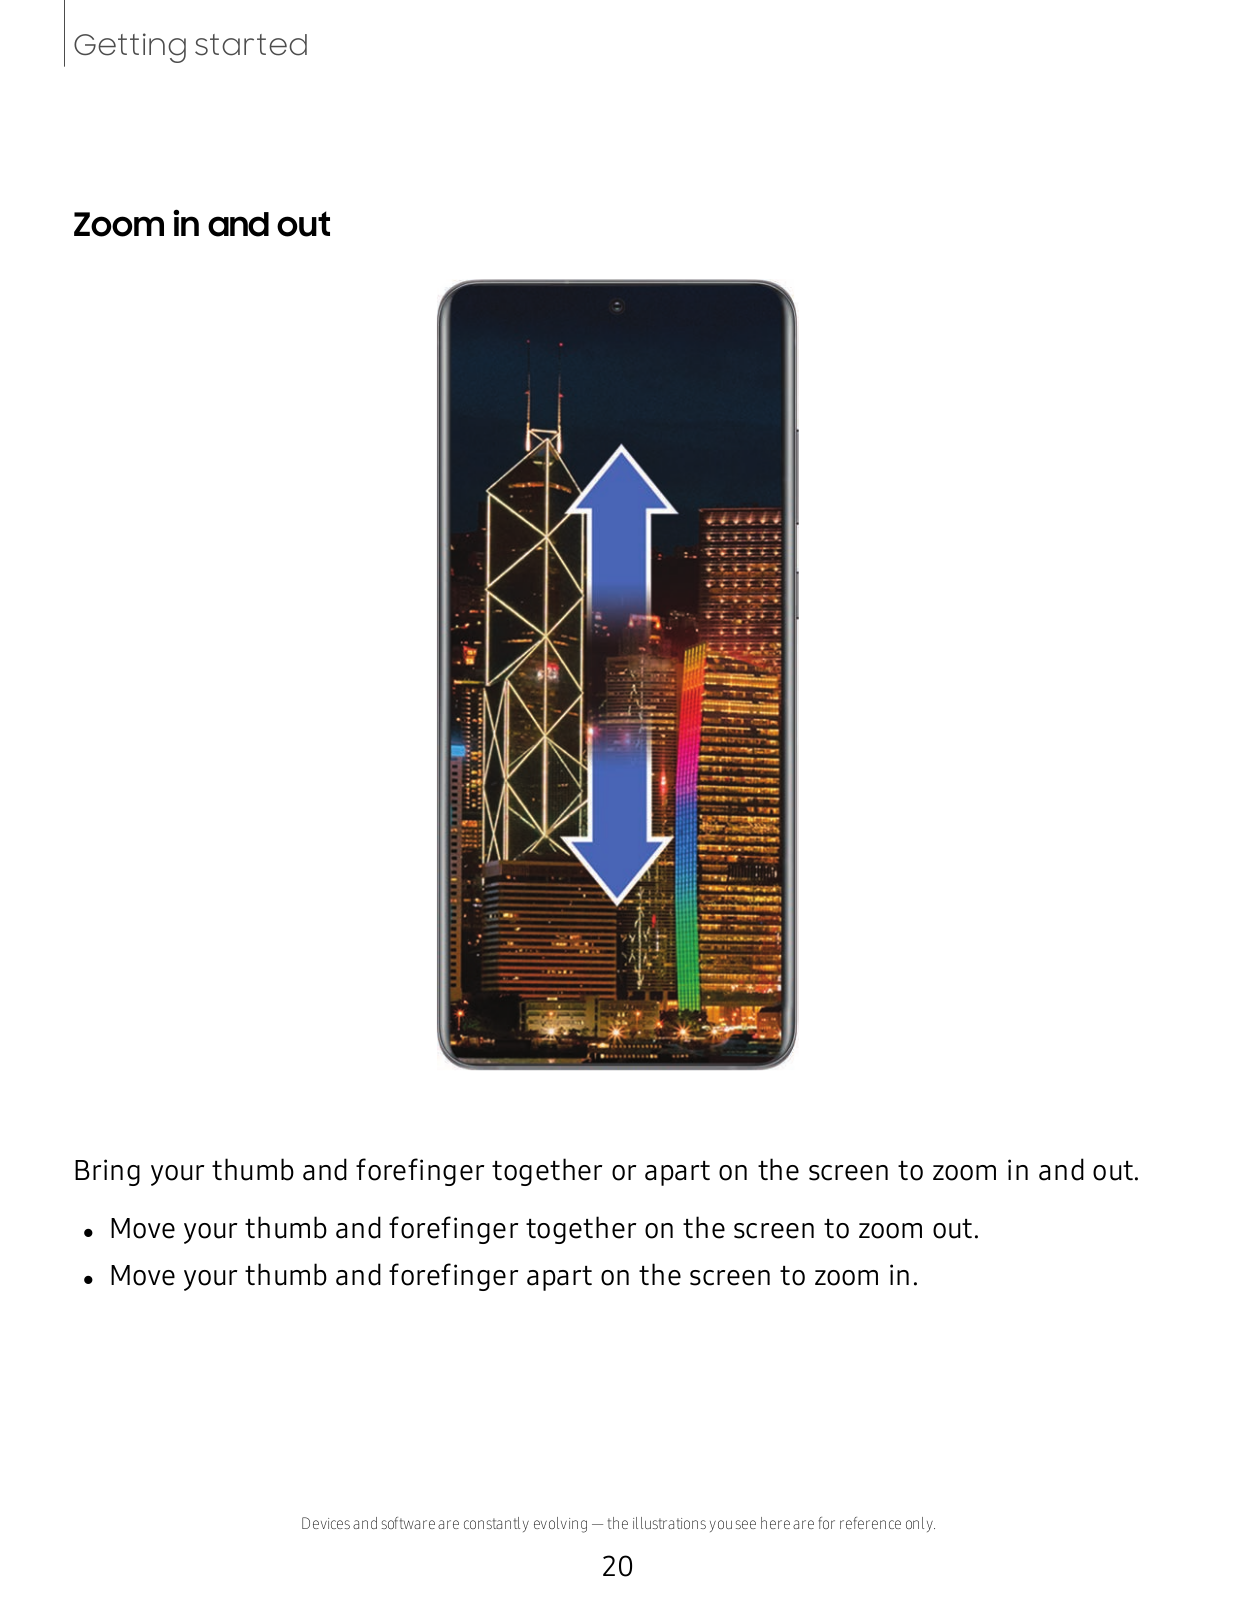
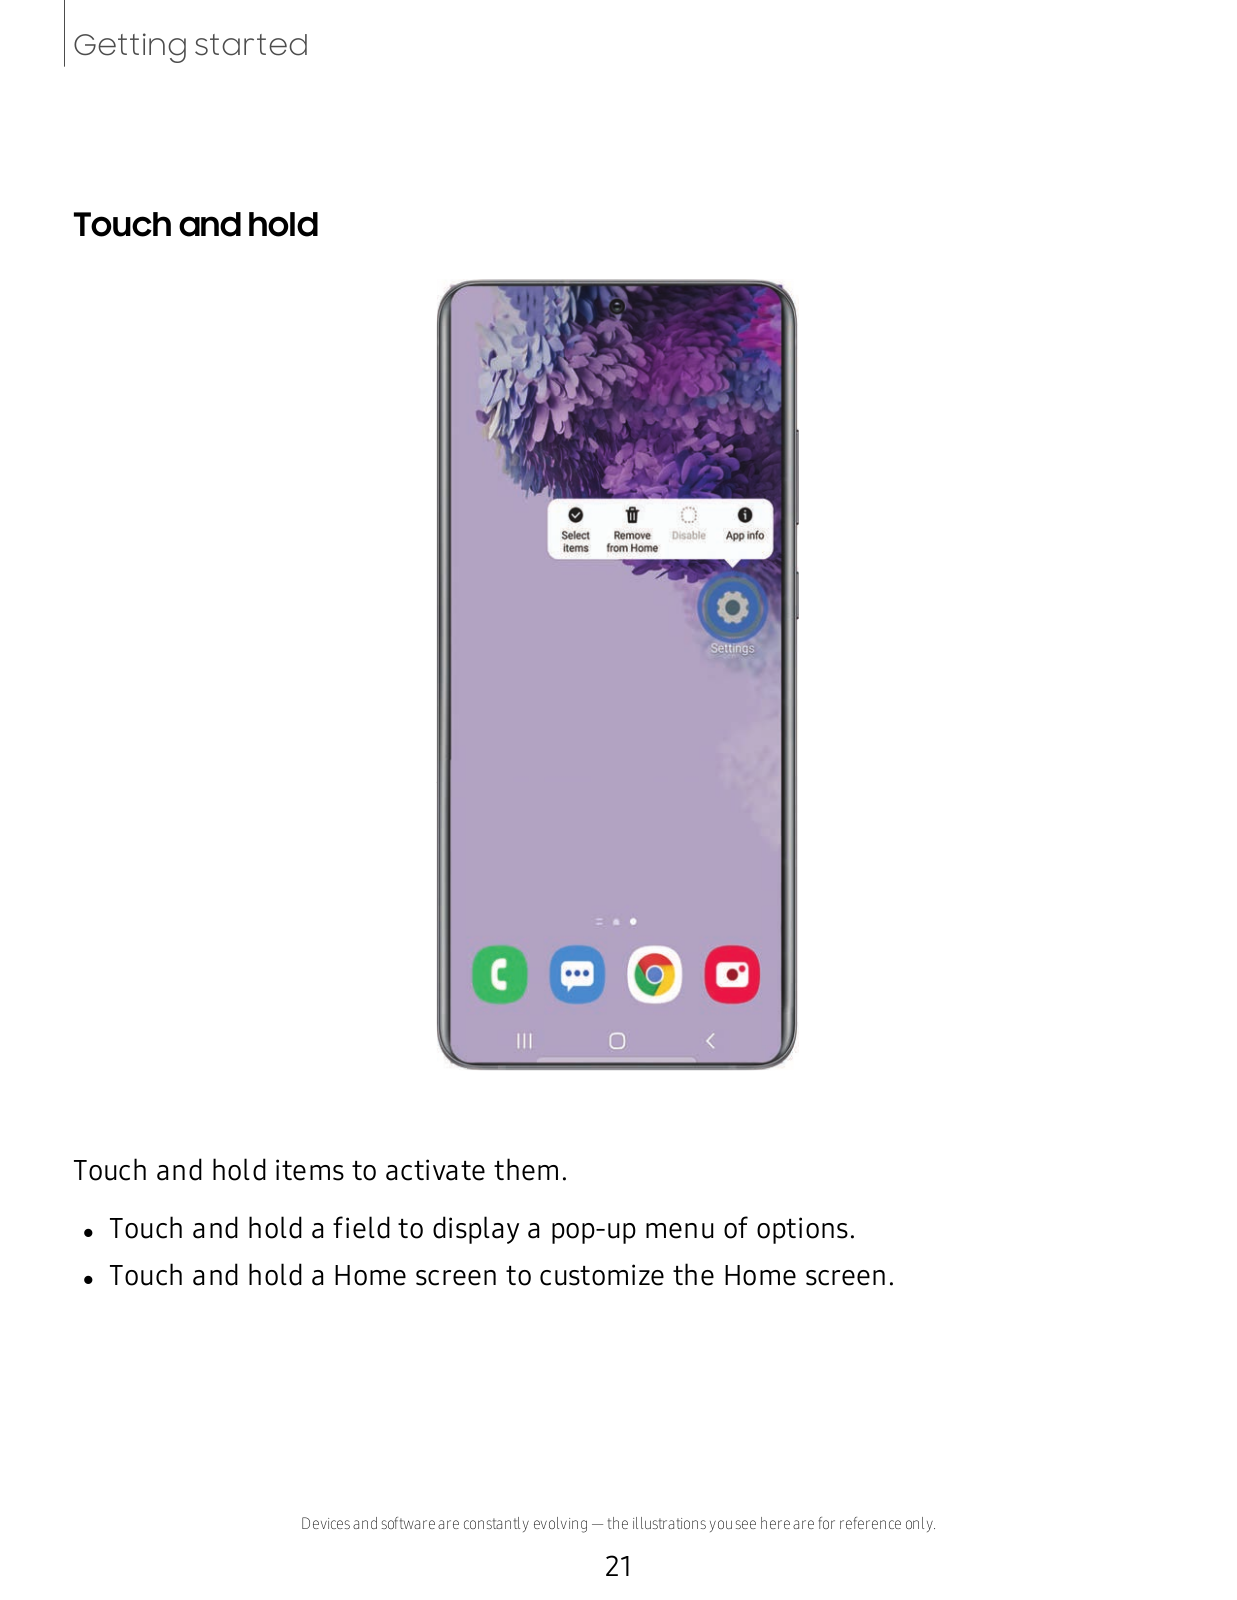
Samsung Galaxy S20 5G, Galaxy S20 Ultra 5G User Manual
...
Samsung User Manual
Download
Specifications and Main Features
Frequently Asked Questions
User Manual
Download
Loading...
+
150
hidden pages
Unhide
You need points to download manuals.
1 point = 1 manual.
You can buy points or you can get point for every manual you upload.
Buy points
Upload your manuals
 Loading...