

Samsung Galaxy S20 FE 5G User Manual


Contents
Features
Mobile continuity | Bixby | Biometric security | Dark mode
Gettingstarted
Device layout: Galaxy S20 FE 5G
Set up your device: Charge the battery | Wireless PowerShare | Accessories
Start using your device: Turn on your device | Use the Setup Wizard | Transfer data from an old device | Lock or unlock your device | Side key settings | Accounts | Set up voicemail | Navigation | Navigation bar | Customize your home screen | Samsung Daily | Bixby | Digital wellbeing and parental controls | Always On Display | Biometric security | Mobile continuity | Multi window | Edge screen | Enter text | Emergency mode
Customize your home screen: App icons | Wallpaper | Themes | Icons | Widgets | Home screen settings | Easy mode | Status bar | Notification panel
CameraandGallery
Camera: Navigate the camera screen | Configure shooting mode | AR Zone | Single take | Live focus | Scene optimizer | Record videos | Live focus video | Super Slow-mo | Super steady | Camera settings
Gallery: View pictures | Edit pictures | Play video | Video enhancer | Edit video | Share pictures and videos | Delete pictures and videos | Group similar images | Create a movie | Take a screenshot | Screen recorder
Mobilecontinuity
Link to Windows | Samsung DeX | Call and text on other devices
2 ATT_G781U_EN_UM_TN_THA_090820_FINAL

Contents
Samsungapps
Galaxy Essentials | AR Zone | Bixby | Galaxy Store | Galaxy Wearable | Game Launcher | Samsung Global Goals | Samsung Members | SmartThings | Tips | Calculator | Calendar | Clock | Contacts | Internet | Messages | My Files | Phone | Samsung Health | Samsung Notes | Samsung Pay
Googleapps
Chrome | Drive | Duo | Gmail | Google | Maps | Photos | Play Movies & TV | Play Store | YouTube | YT Music
Carrierapps
Call Protect | Device Help | myAT&T | Setup & Transfer | Visual Voicemail
Microsoftapps
Outlook | Office | OneDrive
Settings
Connections: Wi-Fi | Bluetooth | NFC and payment | Airplane mode | Mobile networks | Data usage | Mobile hotspot | Tethering | Nearby device scanning | Connect to a printer | Virtual Private Networks | Private DNS | Ethernet
Customization: Display | Notifications | Sounds and vibration
Security: Lock screen and security | Face recognition | Fingerprint scanner
Accounts: Samsung Cloud | Add an account | Account settings | Remove an account | Backup and restore | Google settings
Backup: Samsung account | Google Account | External storage transfer
Accessibility: Screen Reader | Visibility enhancements | Hearing enhancements | Interaction and dexterity | Advanced settings | Installed services | About Accessibility
Other: Tips and help | Dual Messenger | About phone
3

Contents
Learn more Legal information
4

Gettingstarted
GalaxyS20 FE5G
Set up your device
Start using your device
5
Getting started
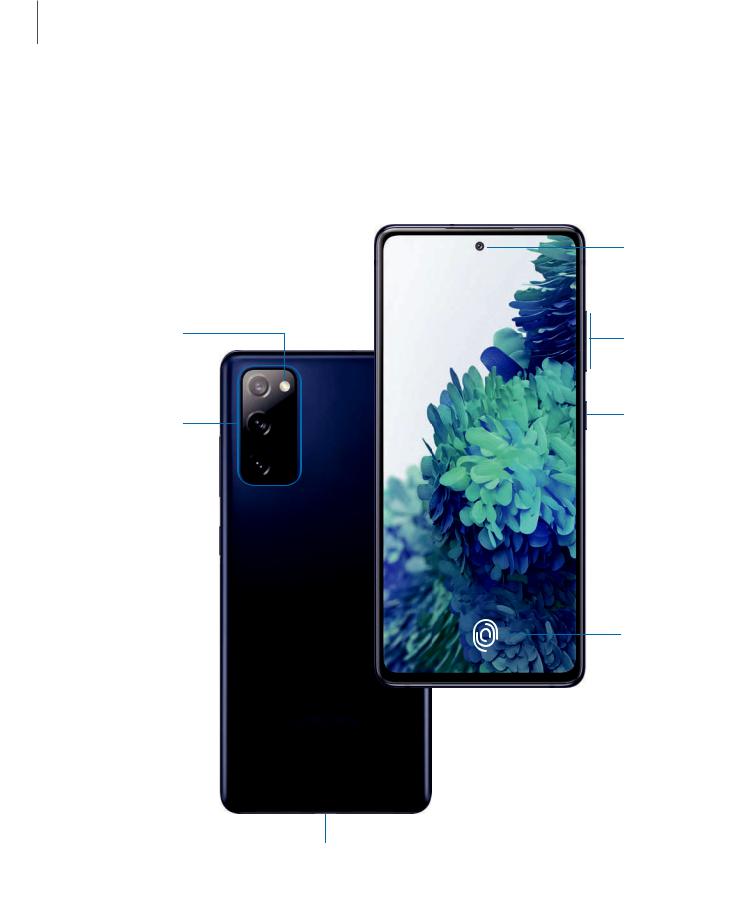
GalaxyS20FE5G
Front camera
Flash |
Volume keys |
|
Side key
Rear cameras
Fingerprint scanner
USB charger/Audio port
6
Getting started
Setupyourdevice
Charge the battery | Wireless PowerShare | Accessories
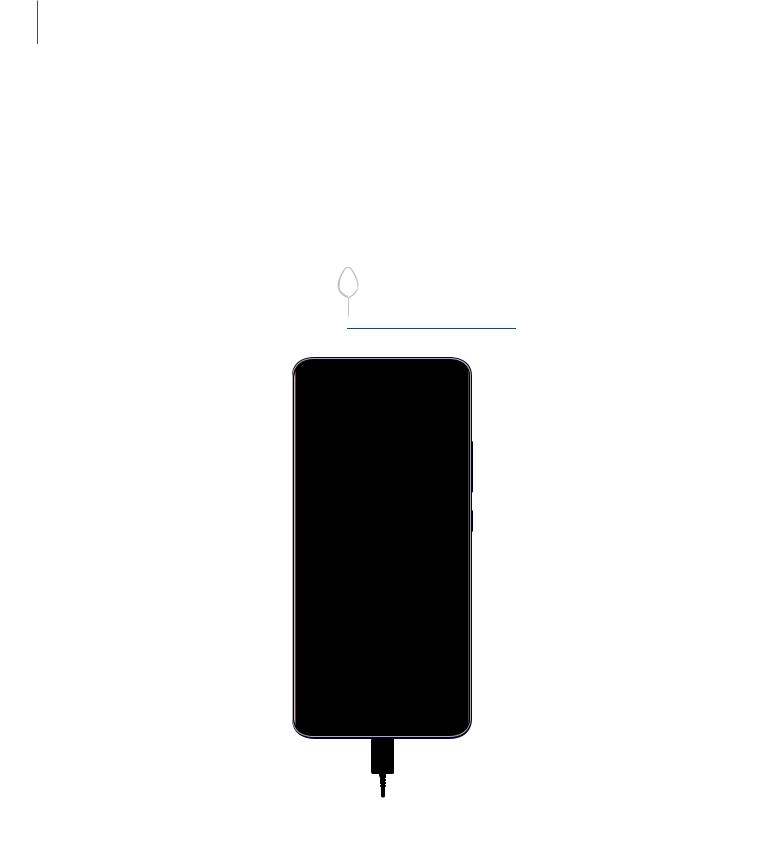
Your device usesa nano-SIM card. A SIM cardmay be preinstalled, or youmay be able to use your previousSIM card. Contact your carrier for more details.
Install SIM/microSD card
Gently press the microSD card into the front of the tray. Flip the tray over and press the SIM card into the back of the tray.
Charge yourdevice
 Before turning on your device, charge it fully.

 NOTE The use of mobile deviceson an aircraft or a shipmay be subject to federal andlocal guidelinesandrestrictions. Check with appropriate authorities andalwaysfollow crew instructionsregarding when andhow youmay use your device.
Devicesandsoftwareareconstantlyevolving— theillustrationsyouseeherearefor referenceonly.
7

Getting started

 NOTE Use only charging devicesandbatteries(if applicable) that are approved by Samsung. Samsung charging devicesandbatteriesare designedfor your device to maximize battery life. Using other charging devicesandbatteriesmay voidyour warranty andmay cause damage.

 NOTE Your device isIP68 ratedfor dust andwater resistance. To maintain the water-resistant anddust-resistant featuresof your device, make sure that the SIM card/Memory cardtray openingsare maintainedfree of dust andwater, and the tray issecurely insertedprior to any exposure to liquids. For more information, see Maintaining water and dust resistance.
Charge the battery
Your device ispoweredby a rechargeable battery. A charger (charging headandUSB Type-C cable) isincludedwith the device for charging the battery from a power outlet.

 TIP Whilecharging,thedeviceandthechargermaybecomehotandstop charging.This usuallydoesnotaffectthedevice’slifespanorperformanceandis inthedevice’snormalrangeofoperation.Disconnectthechargerfromthedevice andwaitforthedevicetocooldown.For moreinformation,visit samsung.com/us/support/answer/ANS00076952.
8
Getting started
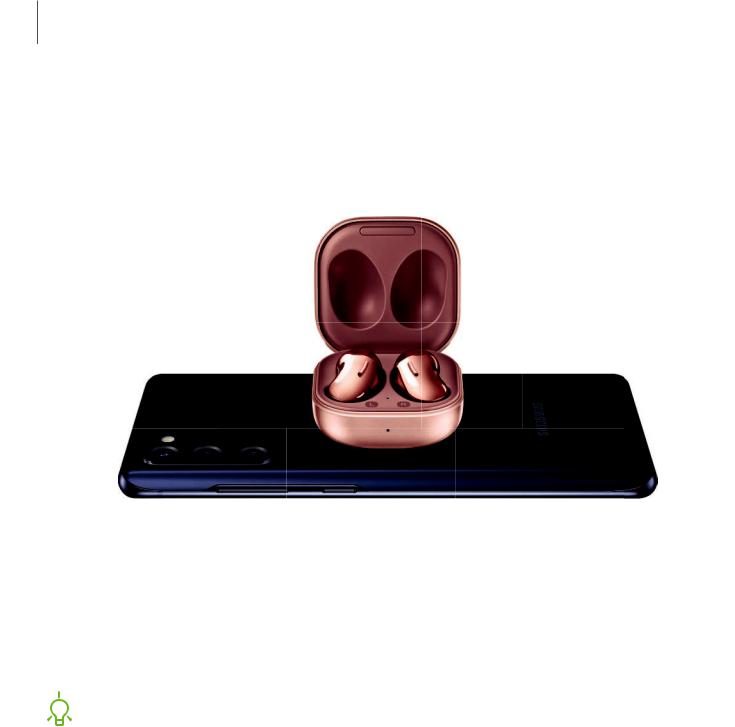
Wireless PowerShare
Wirelessly charge your compatible Samsung devicesusing your phone. Some features are not available while sharing power.
1.From Quick settings, tap WirelessPowerShare to enable thisfeature.
2.With the phone face down, place the compatible device on the back of the phone to charge. A notification soundor vibration occurswhen charging begins.

 NOTE WirelessPowerShare workswith most Qi-Certifieddevices. Requires minimum 30% battery to share. Speedandpower efficiency of charge variesby device. May not work with some accessories, covers, or other manufacturer’s devices. If youhave trouble connecting or charging isslow, remove any cover from each device.
Devicesandsoftwareareconstantlyevolving— theillustrationsyouseeherearefor referenceonly.
9

Getting started
For best resultswhen using WirelessPowerShare, please note:
•Remove any accessoriesor cover before using the feature. Depending on the type of accessory or cover, WirelessPowerShare may not work properly.
•The location of the wirelesscharging coil may vary by device, so youmay needto adjust the placement to make a connection. When charging starts, a notification or vibration will occur, so the notification will helpyouknow you've made a connection.
•Call reception or data servicesmay be affected, depending on your network environment.
•Charging speedor efficiency can vary depending on device condition or surrounding environment.
•Do not use headphoneswhile charging with WirelessPowerShare.
Accessories
Supportedaccessories(soldseparately) can be configuredthrough Settings. This option may only appear after youhave connectedan accessory to your device.
Visit samsung.com/us/mobile/mobile-accessories to learn more.
◌ From Settings, tap Advanced features > Accessories.
10
Getting started
Startusingyourdevice
Turn on your device | Use the Setup Wizard | Transfer data from an old device | Lock or unlock your device | Side key settings | Accounts | Set up voicemail | Navigation | Navigation bar | Customize your home screen | Samsung Daily | Bixby | Digital wellbeing and parental controls | Always On Display | Biometric security | Mobile continuity | Multi window | Edge screen | Enter text | Emergency mode
Turn on yourdevice
Use the Side key to turn your device on. Do not use the device if the body iscrackedor broken. Use the device only after it hasbeen repaired.
◌ Pressandholdthe Side key to turn the device on.
• To turn the device off, open the Notification panel, andtap Power >
 Power off. Confirm when prompted.
• To restart your device, open the Notification panel, andtap Power >
 Restart. Confirm when prompted.

 TIP Youcan also turn your device off by pressing the Side and Volume down keys at the same time. To learn more about powering off your device from Settings, tap
 Advanced features > Side key > How to power off your phone.
Use the Setup Wizard
The first time youturn your device on, the SetupWizardguidesyouthrough the basics of setting upyour device.
Follow the promptsto choose a default language, connect to a Wi-Fi® network, set up accounts, choose location services, learn about your device’sfeatures, andmore.
11

Getting started
Transferdata from an old device
Use Smart Switch™ to transfer contacts, photos, music, videos, messages, notes, calendars, andmore from your olddevice. Smart Switch can transfer your data via USB cable, Wi-Fi, or computer.
Visit samsung.com/us/support/owners/app/smart-switch to learn more.
1.From Settings, tap Accountsand backup > Smart Switch.
2.Follow the promptsandselect the content to transfer.
Visit samsung.com/smartswitch for more information.
12
Getting started
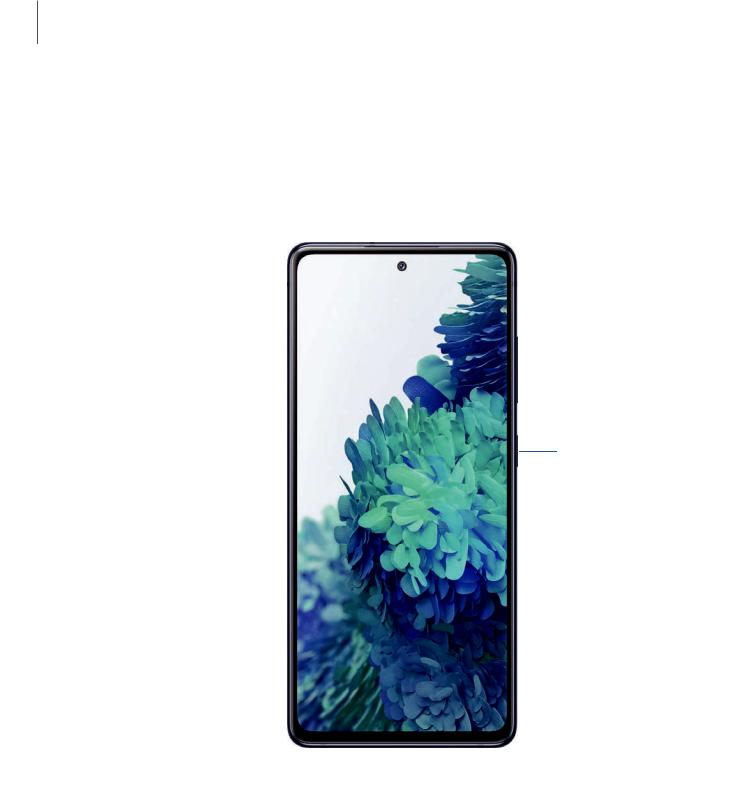
Lock orunlock yourdevice
Use your device’sscreen lock featuresto secure your device. By default, the device locksautomatically when the screen timesout. For more information about screen locks, see Lock screen and security.
Side key
Press to lock. Press to turn on the screen, and then swipe the screen to unlock it.
Devicesandsoftwareareconstantlyevolving— theillustrationsyouseeherearefor referenceonly.
13

Getting started
Side keysettings
Youcan customize the shortcutsassignedto the Side key.
Double press
Choose which feature islaunchedwhen the Side key ispressedtwice.
1.From Settings, tap Advanced features > Side key.
2.Tap Double press to enable thisfeature, andtapan option: • Quick launch camera (default)
• Open Bixby • Open app
Press andhold
Choose which feature islaunchedwhen youpressandholdthe Side key.
1.From Settings, tap Advanced features > Side key.
2.Under the Pressandholdheading, tapan option:
•Wake Bixby (default)
•Power off menu
Accounts
Set upandmanage your accounts.

 TIP Accountsmay support email, calendars, contacts, andother features. See your carrier for more information.
AddaGoogle Account
Sign in to your Google Account to accessyour Google CloudStorage, appsinstalled from your account, andmake full use of your device’sAndroid™ features.
1.From Settings, tap Accountsand backup > Accounts.
2.Tap Add account > Google.
14

Getting started

 NOTE When yousign in to a Google Account, Factory Reset Protection (FRP) is activated. FRP requiresyour Google Account information when resetting to factory settings. For more information, see Factory Reset Protection.
AddaSamsungaccount
Sign in to your Samsung account to accessexclusive Samsung content andmake full use of Samsung apps.
1.From Settings, tap Accountsand backup > Accounts.
2.Tap Add account > Samsung account.

 TIP To quickly accessyour Samsung account, from Settingstap
 Samsung account profile.
AddanOutlook account
Sign in to your Outlook® account to view andmanage email messages.
1.From Settings, tap Accountsand backup > Accounts.
2.Tap Add account > Outlook.
Set up voicemail
Youcan set upyour voicemail service when youaccessit for the first time. Youcan accessvoicemail through the Phone app.
1.From Phone, tap
 Voicemail.
2.Follow the tutorial to create a password, recorda greeting, andrecordyour name.
15

Getting started
Navigation
A touch screen respondsbest to a light touch from the padof your finger or a capacitive stylus. Using excessive force or a metallic object on the touch screen may damage the surface of the screen andthe damage will not be coveredby the warranty.
Tap
Lightly touch itemsto select or launch them.
•Tapan item to select it.
•Double-tapan image to zoom in or out.
Devicesandsoftwareareconstantlyevolving— theillustrationsyouseeherearefor referenceonly.
16
Getting started
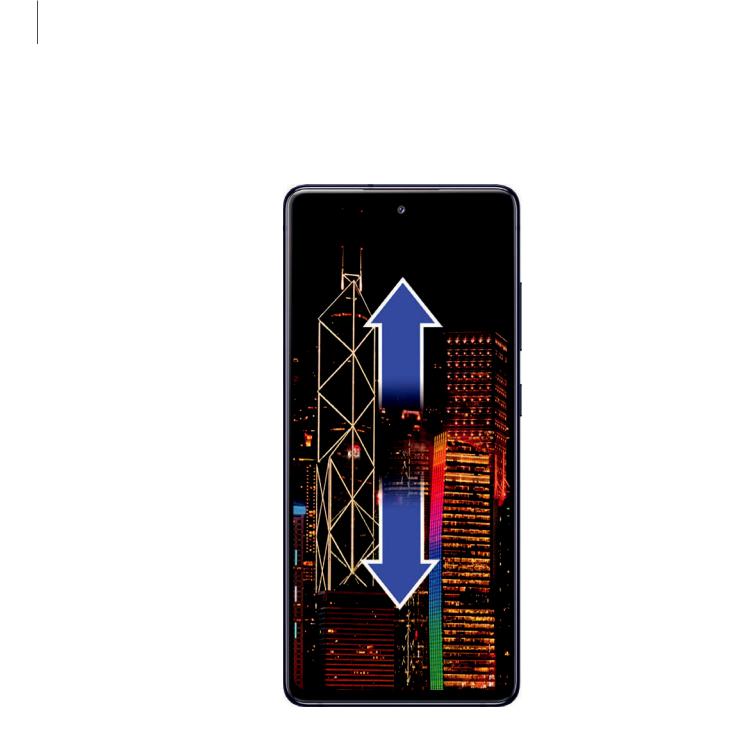
Swipe
Lightly drag your finger acrossthe screen.
•Swipe the screen to unlock the device.
•Swipe the screen to scroll through the Home screensor menuoptions.
Devicesandsoftwareareconstantlyevolving— theillustrationsyouseeherearefor referenceonly.
17
Getting started
Draganddrop
Touch andholdan item, andthen move it to a new location.
•Drag an appshortcut to addit to a Home screen.
•Drag a widget to place it in a new location.
Devicesandsoftwareareconstantlyevolving— theillustrationsyouseeherearefor referenceonly.
18
Getting started
Zoominandout
Bring your thumbandforefinger together or apart on the screen to zoom in andout.
•Move your thumbandforefinger together on the screen to zoom out.
•Move your thumbandforefinger apart on the screen to zoom in.
Devicesandsoftwareareconstantlyevolving— theillustrationsyouseeherearefor referenceonly.
19
Getting started
Touchandhold
Touch andholditemsto activate them.
•Touch andholda fieldto display a pop-upmenuof options.
•Touch andholda Home screen to customize the Home screen.
Devicesandsoftwareareconstantlyevolving— theillustrationsyouseeherearefor referenceonly.
20
Getting started
Navigation bar
Youmay navigate your device by using either the navigation buttonsor full screen gestures.
Recent apps |
Back |
Home
Devicesandsoftwareareconstantlyevolving— theillustrationsyouseeherearefor referenceonly.
21

Getting started
 Navigationbuttons
Use buttonsalong the bottom of the screen for quick navigation.
1.From Settings, tap
 Display > Navigation bar > Navigation buttons.
2.Tapan option under Button order to choose which side of the screen the Back andRecent appsiconsdisplay.
Navigationgestures
Hide the navigation buttonsat the bottom of the screen for an unobstructedscreen experience. Insteadswipe to navigate your device.
1.From Settings, tap
 Display > Navigation bar > Full screen gestures to enable the feature.
2.Tapan option to customize:
•More options: Choose a gesture type andsensitivity.
•Gesture hints: Display linesat the bottom of the screen where each screen gesture islocated.
•Show button to hide keyboard: Show an icon on the bottom right corner of the screen to hide the keyboardwhen the device isin portrait mode.
22

Getting started
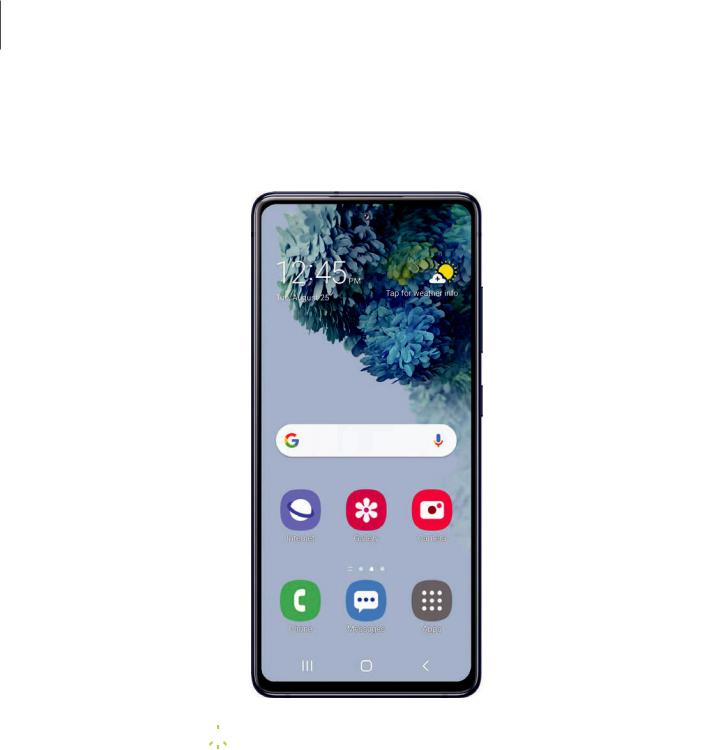
Customize yourhome screen
The Home screen isthe starting point for navigating your device. Youcan place your favorite appsandwidgetshere, in addition to setting upadditional Home screens, removing screens, changing the order of screens, andchoosing a main Home screen.
App icons | Wallpaper | Themes | Icons | Widgets | Home screen settings | Easy mode | Status bar | Notification panel
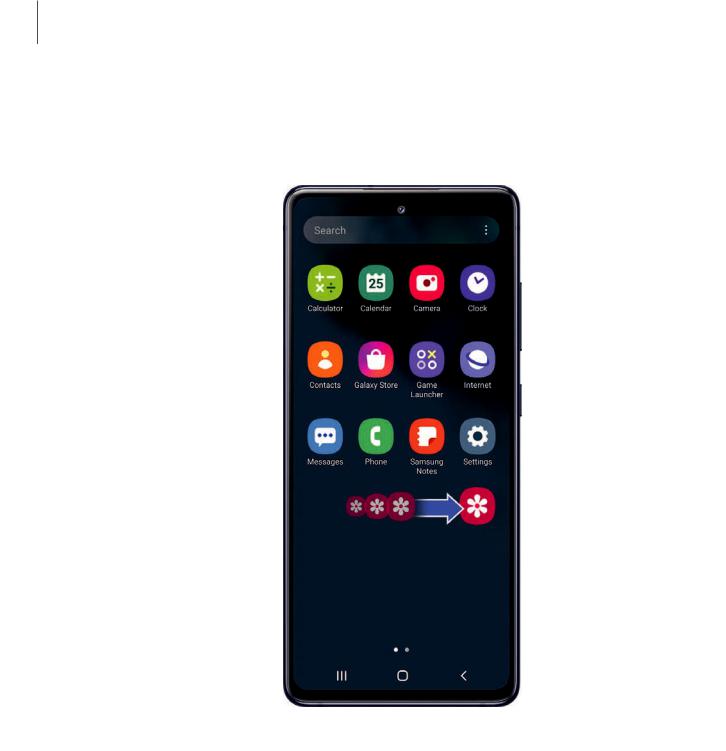
Appicons
Use appiconsto launch an appfrom any Home screen.
◌From Apps, touch andholdan appicon, andtap Add to Home. To remove an icon:
◌From a Home screen, touch andholdan appicon, andthen tap Remove from Home.

 NOTE Removing an icon doesnot delete the app, it just removesthe icon from a Home screen.
Wallpaper
Change the look of the Home andLock screensby choosing a favorite picture, video, or preloadedwallpaper.
1.From a Home screen, touch andholdthe screen, andthen tap Wallpaper.
2.Tapone of the following menusfor available wallpapers:
•Mywallpapers: Choose from featuredanddownloadedwallpapers.
•Gallery: Choose picturesandvideossavedin the Gallery app.
•Wallpaper services: Enable additional featuresincluding guide page and Dynamic Lock screen.
•ApplyDark mode to Wallpaper: Enable to apply Dark mode to your wallpaper.
•Explore more wallpapers: Findanddownloadmore wallpapersfrom Galaxy Themes.
3.Tapa picture or video to choose it. Choose which screen or screensyouwant to apply the wallpaper to.
23

Getting started
•If choosing a single picture, choose which screen or screensyouwant to apply the wallpaper to.
•Videosandmultiple picturescan only be appliedto the Lock screen.
•If choosing videosor picturesfrom the Gallery, tapon one or more items, and then tap Done.
4.Tap Set on Home screen, Set on Lock screen, or Set on Home and Lock screens
(depending on which screensare applicable).
•If applying a wallpaper to both the Home andLock screens, enable Sync my edits if youwant any editsmade to that wallpaper to be appliedto both screens.
Themes
Set a theme to be appliedto your Home andLock screens, wallpapers, andappicons.
1.From a Home screen, touch andholdthe screen.
2.Tap Themes to customize.
3.Tapa theme to preview anddownloadit to My themes.
4.Tap Navigation drawer > Mystuff > Themes to see downloadedthemes.
5.Tapa theme, andthen tap Apply to apply the selectedtheme.
Icons
Apply different icon setsto replace the default icons.
1.From a Home screen, touch andholdthe screen.
2.Tap Themes > Icons to customize.
3.Tapan icon set to preview anddownloadit to My icons.
4.Tap Navigation drawer > Mystuff > Icons to see downloadedicons.
5.Tapan icon, andthen tap Apply to apply the selectedicon set.
24

Getting started
 Widgets
Addwidgetsto your home screensfor quick accessto info or apps.
1.From a Home screen, touch andholdthe screen.
2.Tap Widgets, andthen touch andholda widget, drag it to a Home screen, and release it.
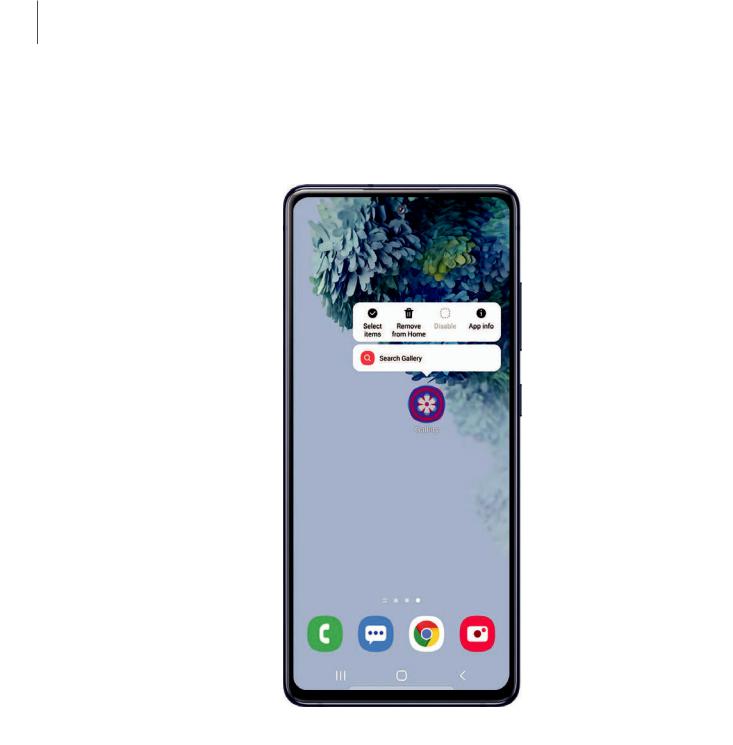
Customize Widgets
Once youhave addeda widget, youcan customize where it'slocatedandhow it functions.
◌From a Home screen, touch andholda widget, andtapan option:
• Remove from Home: Delete a widget from your screen.
• Widget settings: Customize the function or appearance of the widget.
• App info: Review the widget usage, permissions, andmore.
Home screensettings
Customize your Home andAppsscreens.
1.From a Home screen, touch andholdthe screen.
2.Tap Home screen settings to customize:
•Home screen layout: Set your device to have separate Home andApps screens, or only a Home screen where all appsare located.
•Home screen grid: Choose a layout to determine how iconsare arrangedon the Home screen.
•Appsscreen grid: Choose a layout to determine how iconsare arrangedon the Appsscreen.
•Appsbutton: Adda button to the Home screen for easy accessto the Apps screen.
•App icon badges: Enable to show badgeson appswith active notifications. Youcan also choose the badge style.
•Lock Home screen layout: Prevent itemson the Home screen from being removedor repositioned.
25

Getting started
•Add appsto Home screen: Automatically addnewly-downloadedappsto the Home screen.
•Swipe down for notification panel: Enable thisfeature to open the Notification panel by swiping down anywhere on the Home screen.
•Rotate to landscape mode: Rotate the Home screen automatically when your device’sorientation ischangedfrom portrait to landscape.
•Hide apps: Choose appsto hide from the Home andAppscreens. Return to thisscreen to restore hidden apps. Hidden appsare still installedandcan appear asresultsin Finder searches.
•About Home screen: View version information.
26
Getting started
 Easymode
The Easy mode layout haslarger text andicons, making for a more straightforward visual experience. Switch between the default screen layout anda simpler layout.
 Apps list
1.From Settings, tap
 Display > Easymode.
2.Tap to enable thisfeature. The following optionsappear:
•Touch and hold delay: Set how long it takesfor a continuoustouch to be recognizedasa touch andhold.
•High contrast keyboard: Choose a keyboardwith high contrast colors.
Devicesandsoftwareareconstantlyevolving— theillustrationsyouseeherearefor referenceonly.
27
Getting started
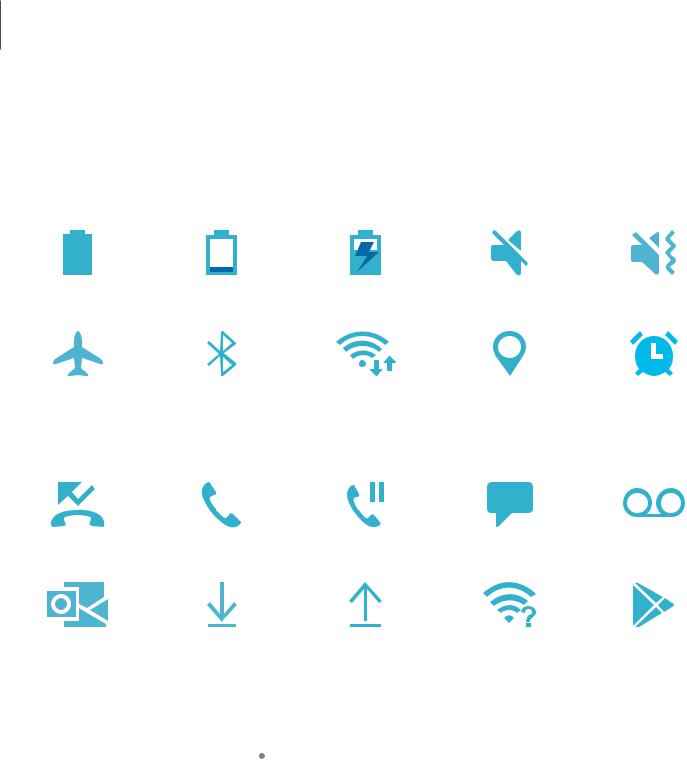
 Statusbar
The Statusbar providesdevice information on the right side andnotification alertson the left.
Status icons
Battery full |
Battery low |
Charging |
Mute |
Vibrate |
Airplane mode Bluetooth active Wi-Fi active |
Location active |
Alarm |
Notificationicons |
|
|
Missedcalls Call in progress Call on hold |
New message |
Voicemail |
New email Download Upload Wi-Fi available Appupdate
Configure display optionsfor the Statusbar.
◌From Quick settings, tap  More options > Statusbar for the following options:
•Show notification icons: Choose how to display notification iconson the Statusbar.
•Show batterypercentage: Display the battery charge percentage next to the battery icon on the Status bar.
28
Getting started
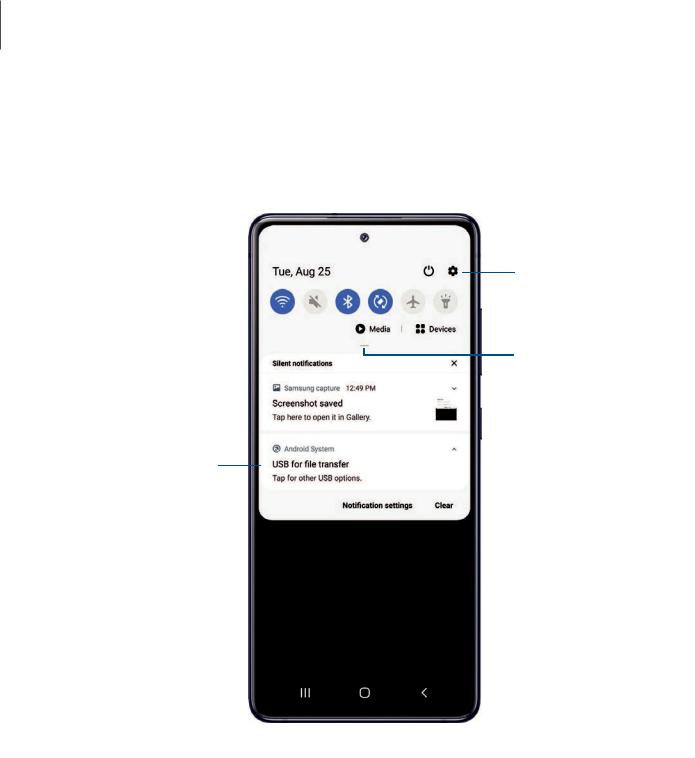
 Notificationpanel
For quick accessto notifications, settings, andmore, simply open the Notification panel.
Device settings
Quick settings
View all
Notification cards
Devicesandsoftwareareconstantlyevolving— theillustrationsyouseeherearefor referenceonly.
29

Getting started
 Viewthe Notificationpanel
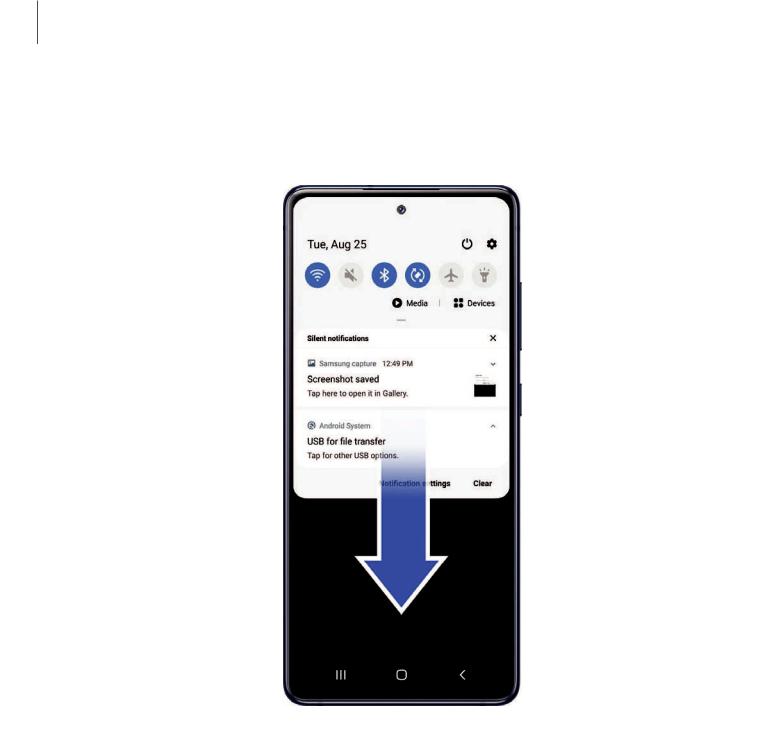
Youcan accessthe Notification panel from any screen.
1.Drag the Statusbar down to display the Notification panel.
2.Swipe down the list to see notification details.
•To open an item, tapit.
•To clear a single notification, drag the notification left or right.
•To clear all notifications, tap Clear.
•To customize notifications, tap Notification settings.
3.Drag upwardfrom the bottom of the screen or tap Back to close the Notification panel.
Quicksettings
The Notification panel providesquick accessto device functionsusing Quick settings.
1.Drag the Statusbar down to display the Notification panel.
2.Drag  View all downward.
•Tapa quick setting icon to turn it on or off.
•Touch andholda quick setting icon to open the setting.
•Tap Finder search to search the device.
•Tap Power off for Power off, Restart, andEmergency mode options.
•Tap  Open settings to quickly accessthe device'ssettingsmenu.
•Tap  More options to reorder Quick settingsor to change the button layout.
•Drag the Brightnessslider to adjust the screen brightness.
3.Drag  View all upwardto close Quick settings.
Samsung Daily
The Samsung Daily page displayscustomizedcontent basedon your interactions.
◌ From a Home screen, swipe right.

 TIP Youcan adda Samsung Daily icon to your Appslist. Tap
  More options >
Settings > Add Samsung Dailyicon.
30
 Loading...