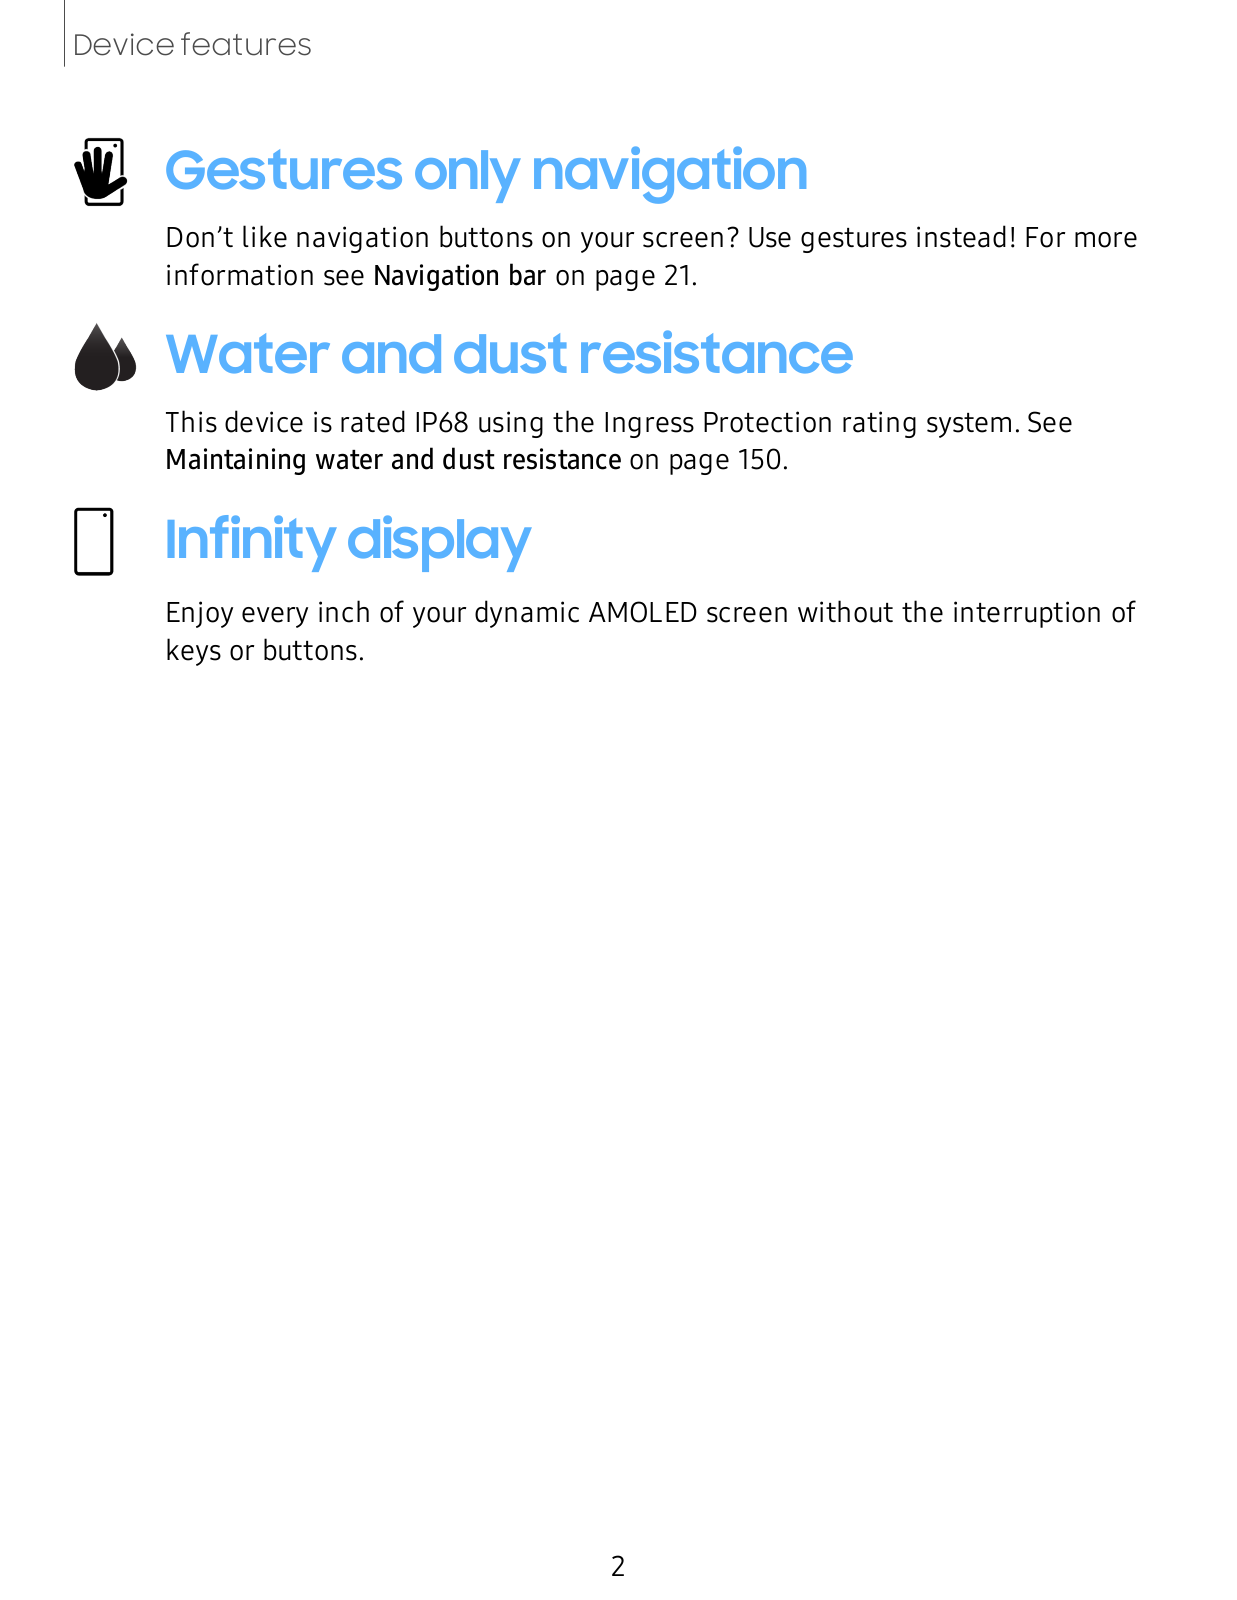
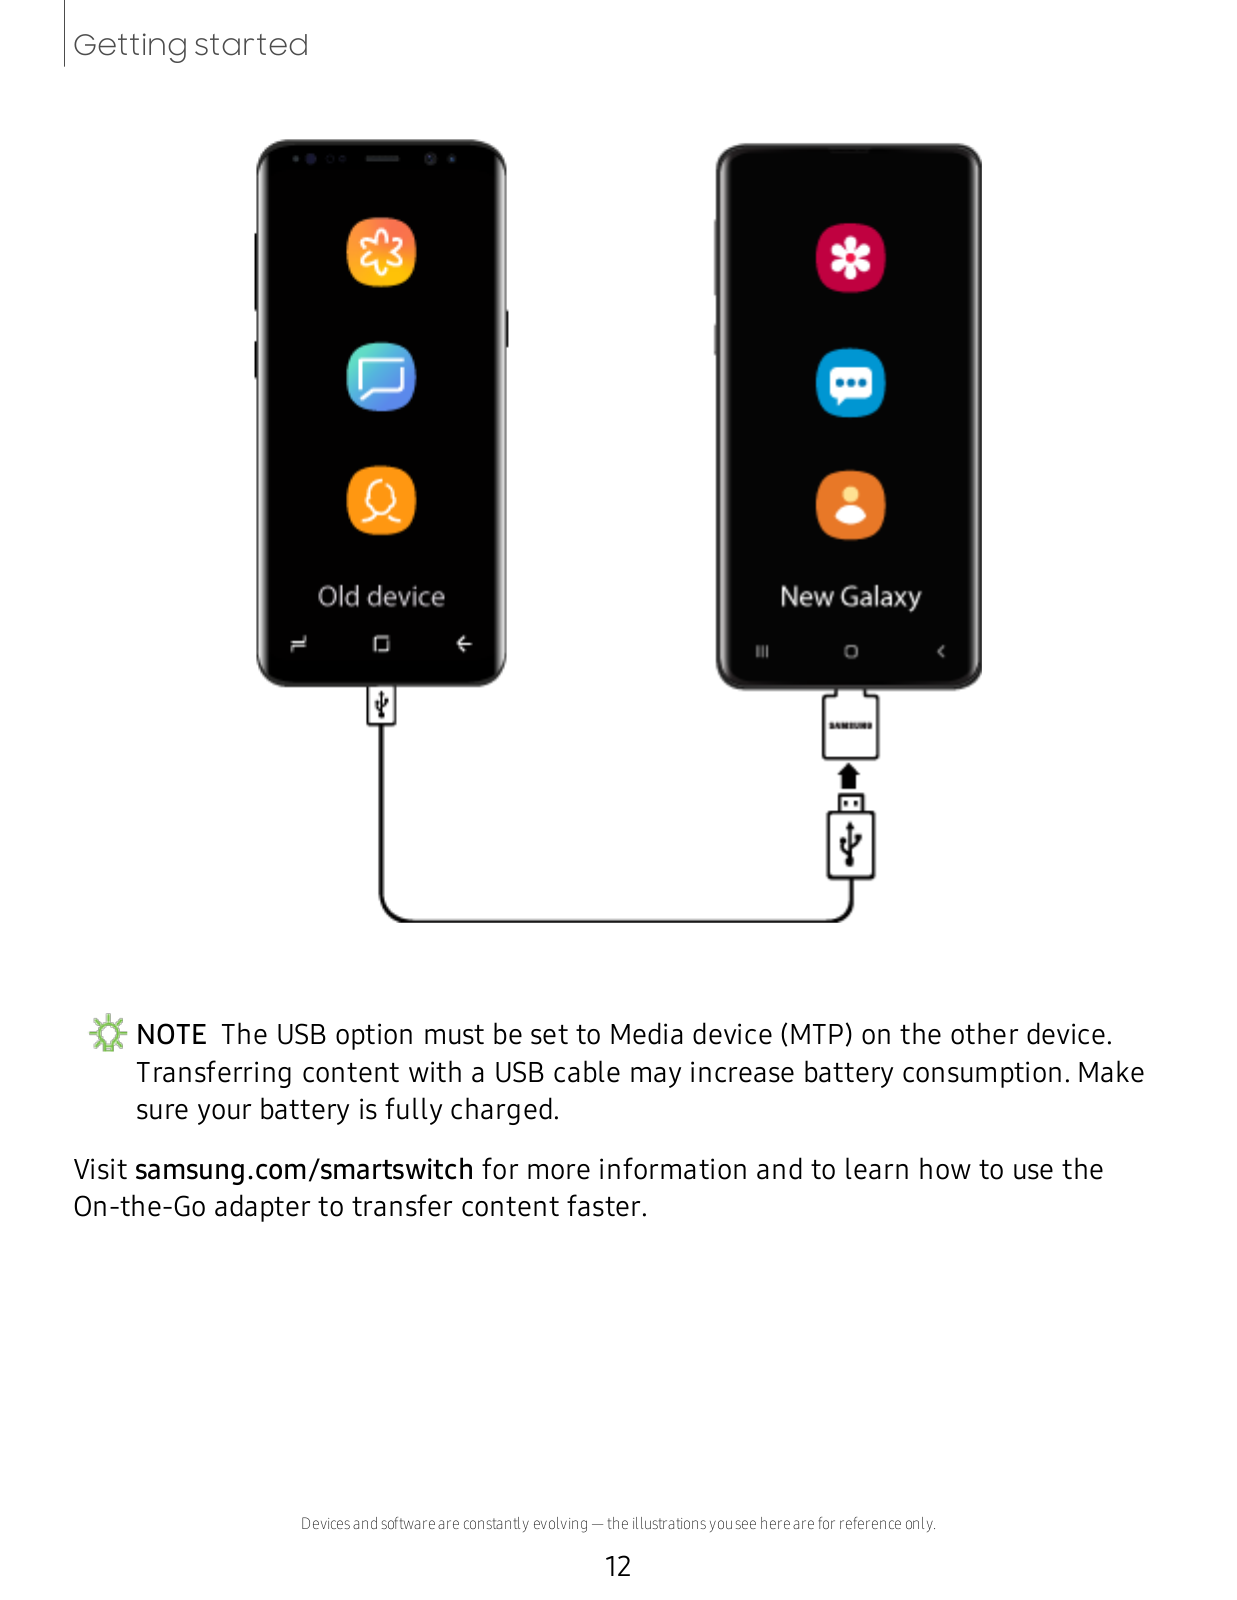
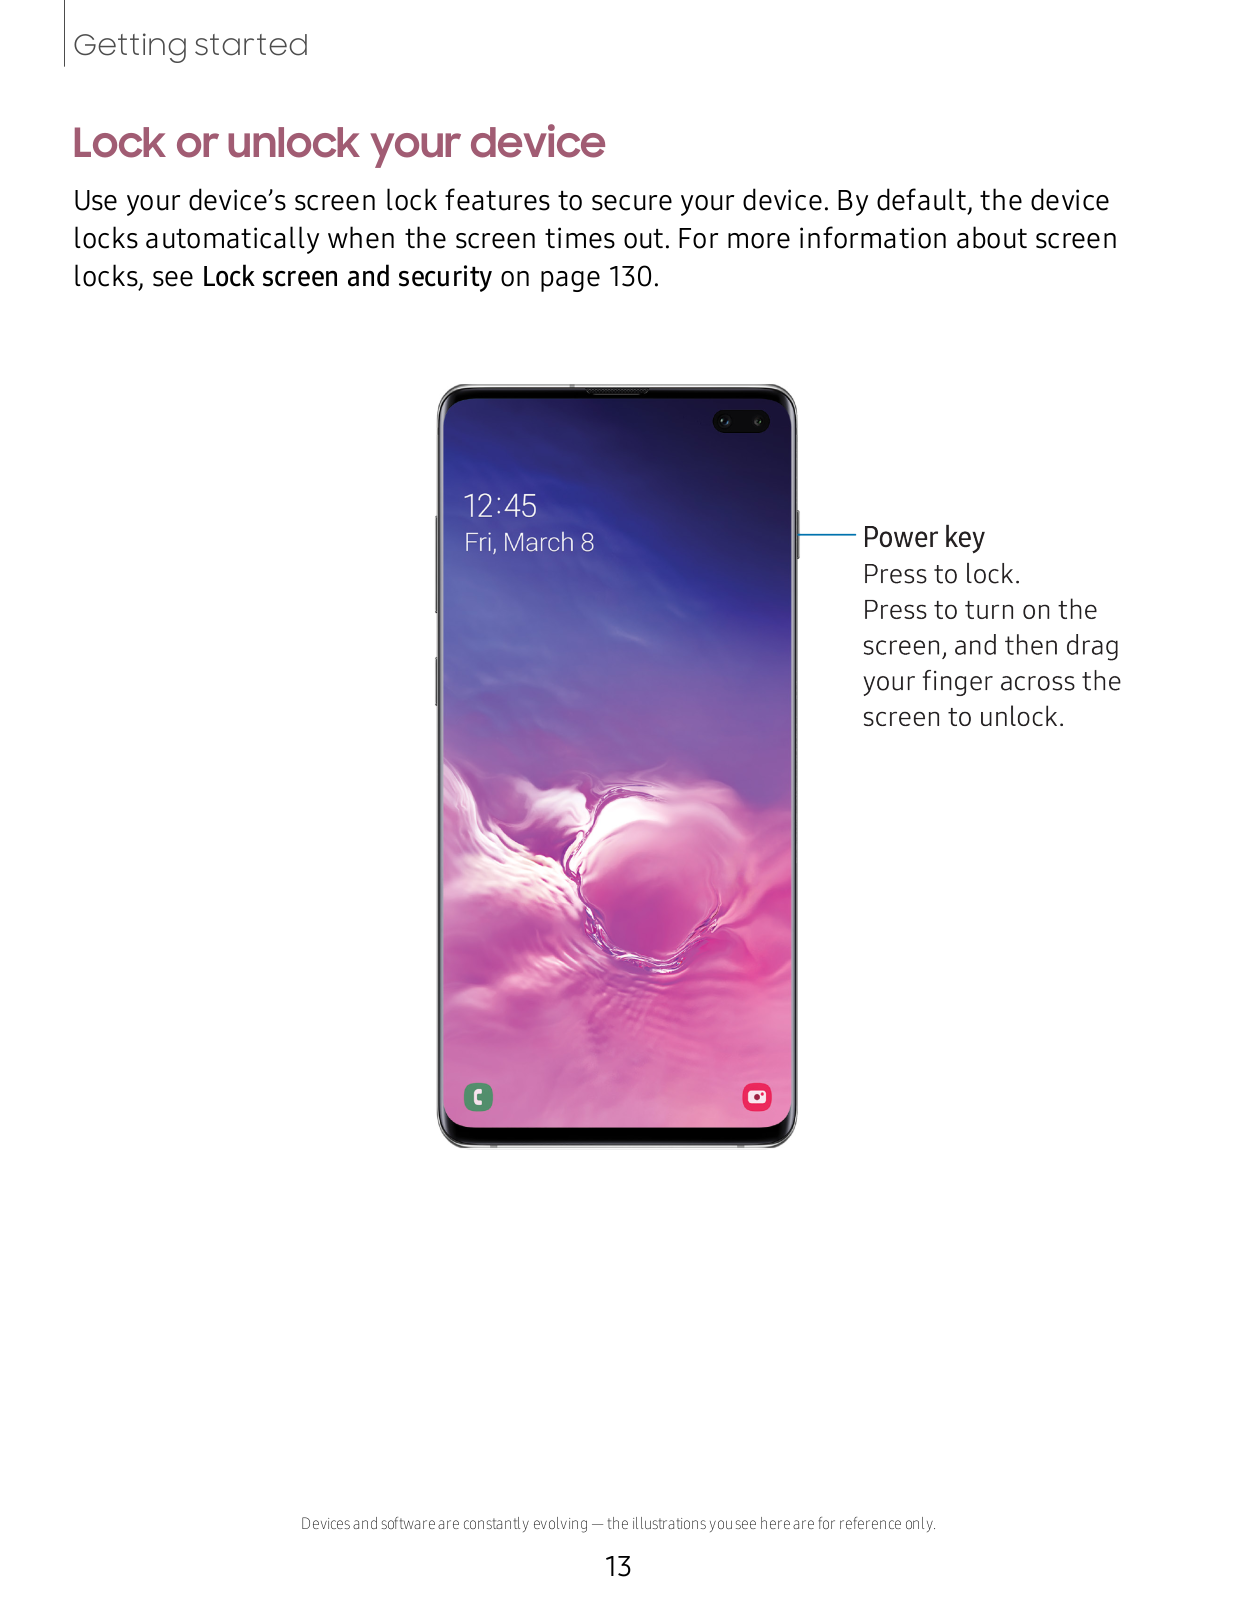
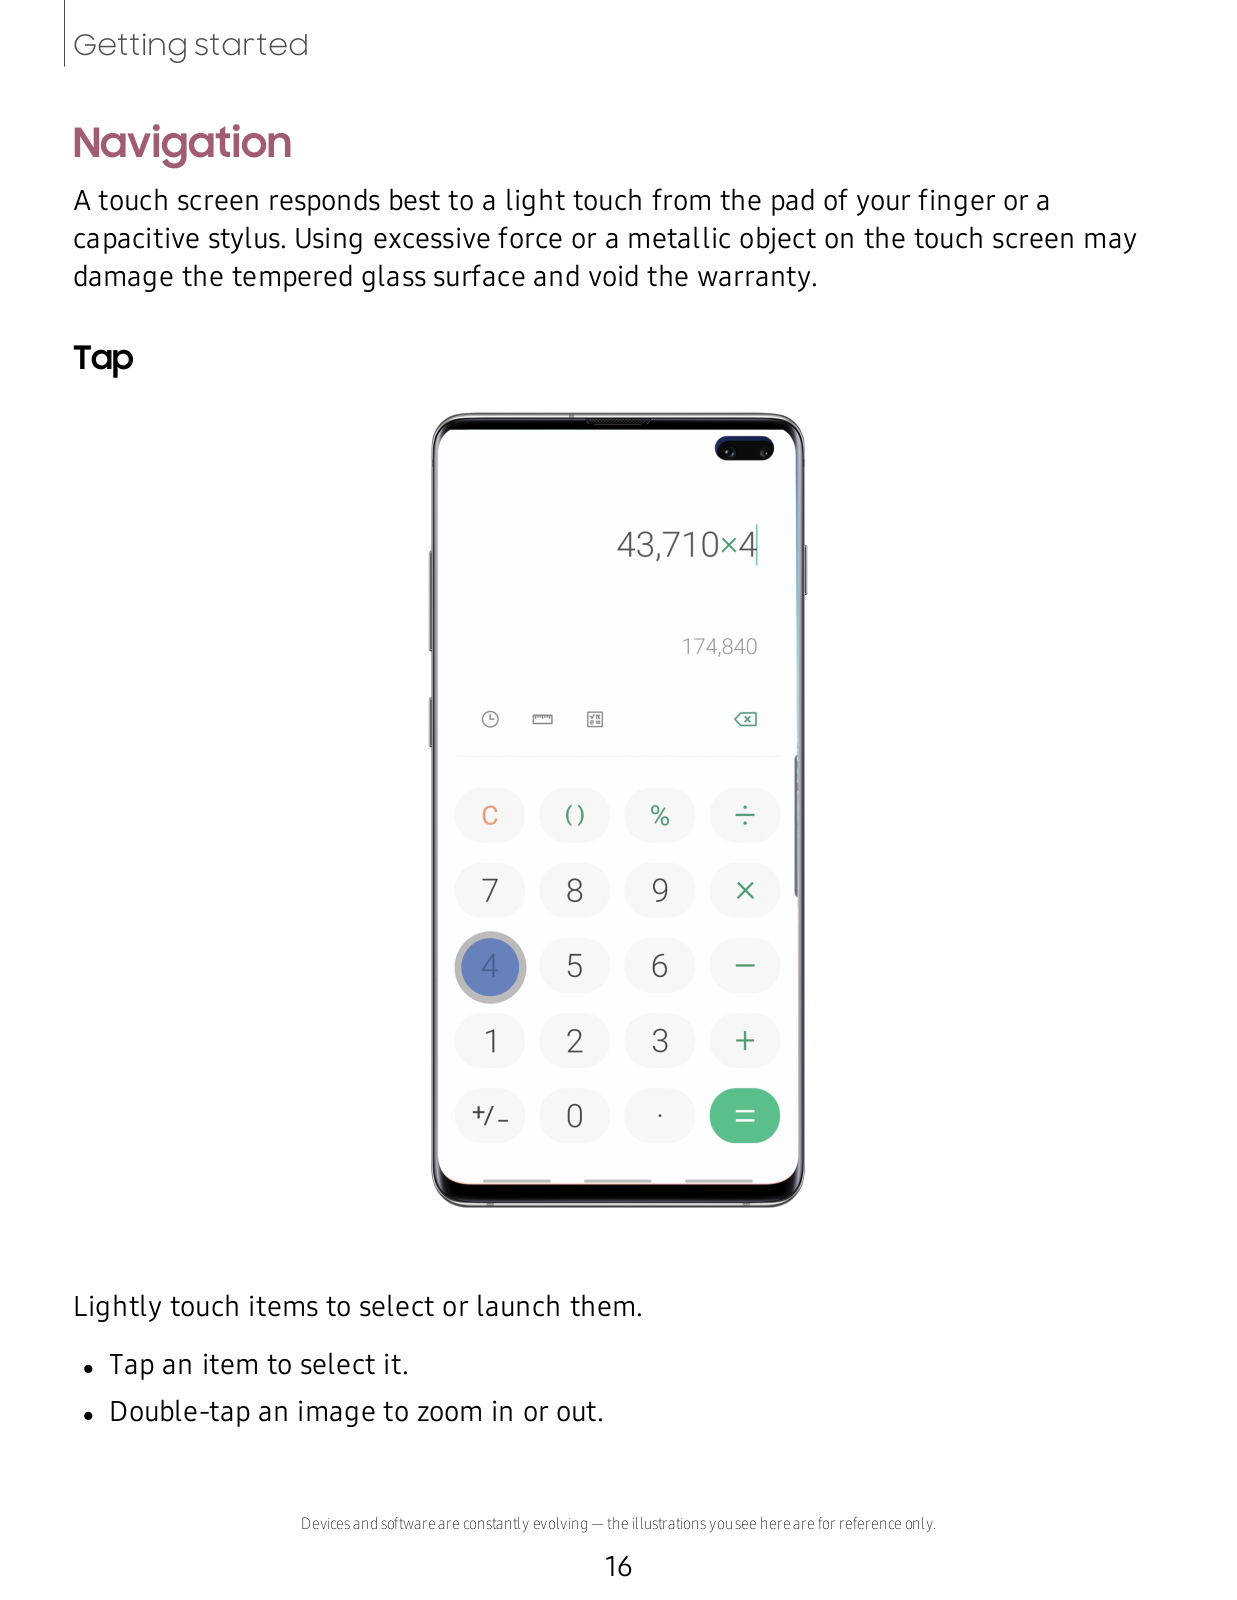
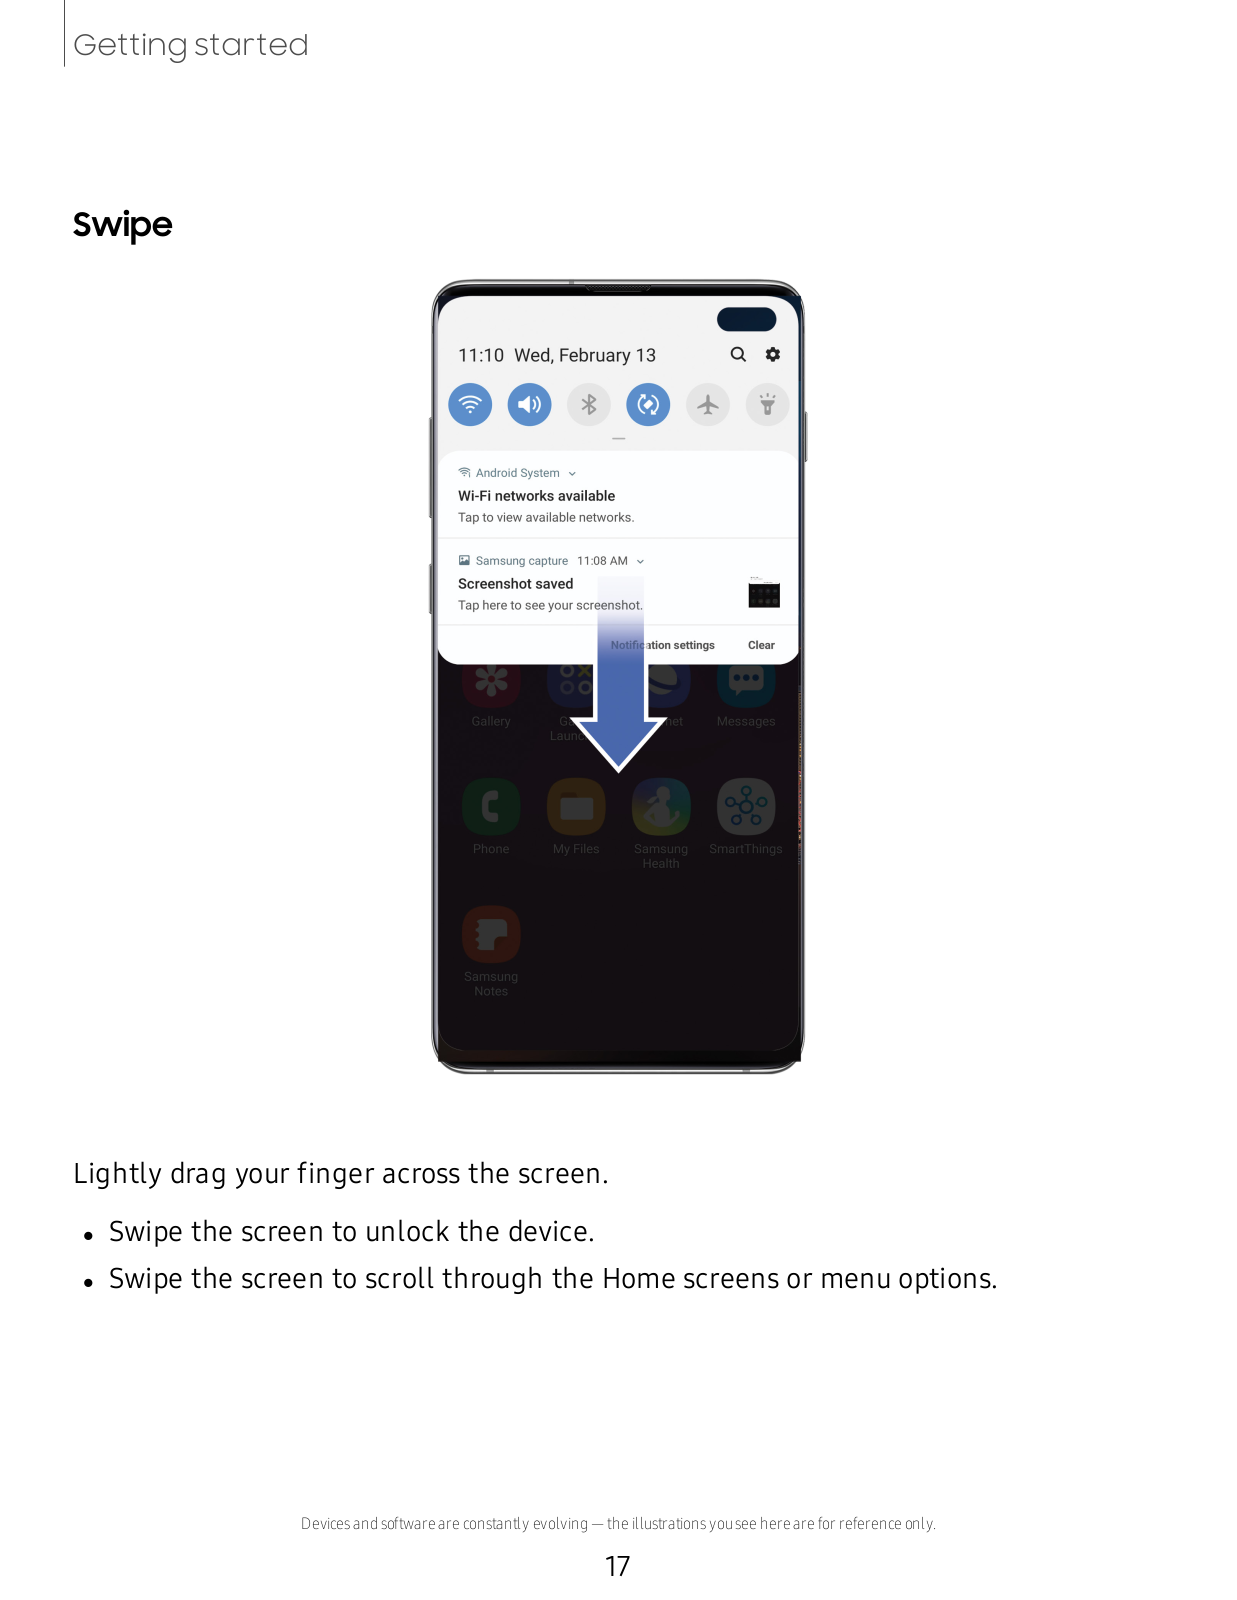
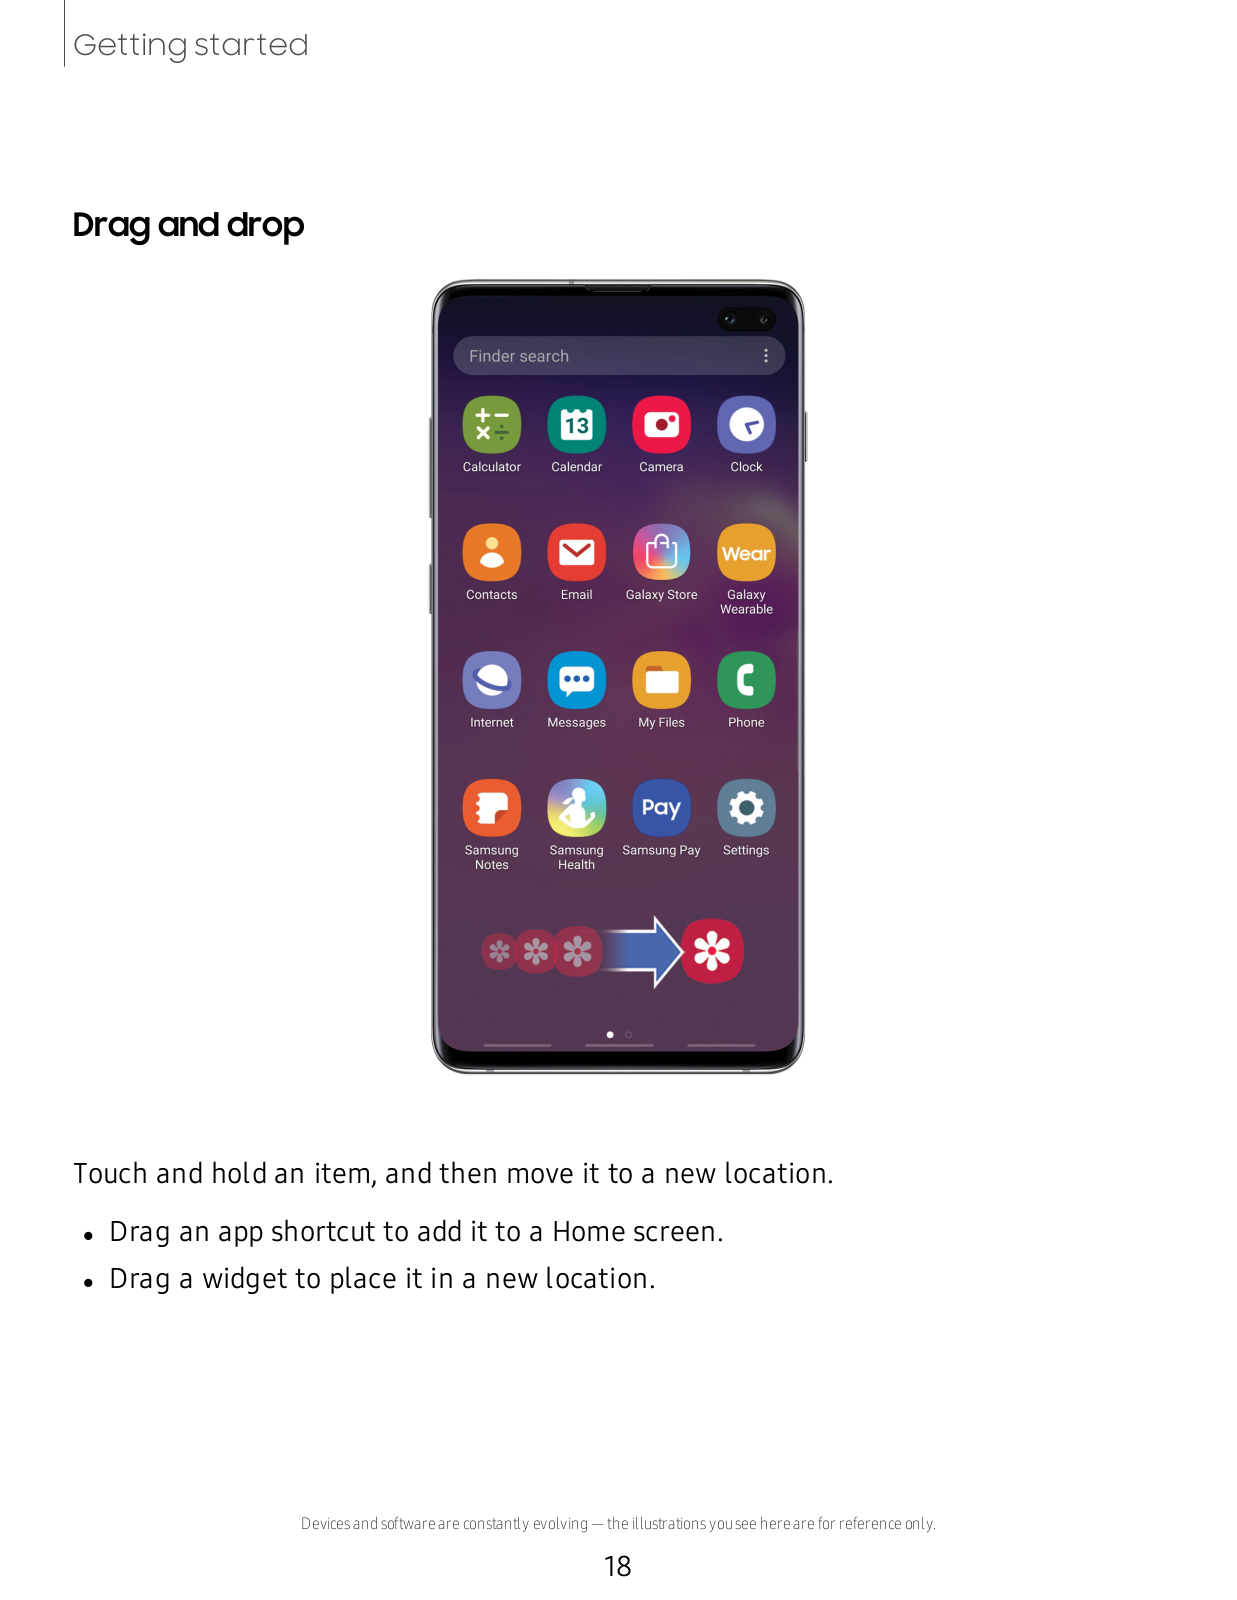
How it Works
Log In / Sign Up
Buy Points
How it Works
FAQ
Contact Us
Questions and Suggestions
Users
Samsung
Loading...
G
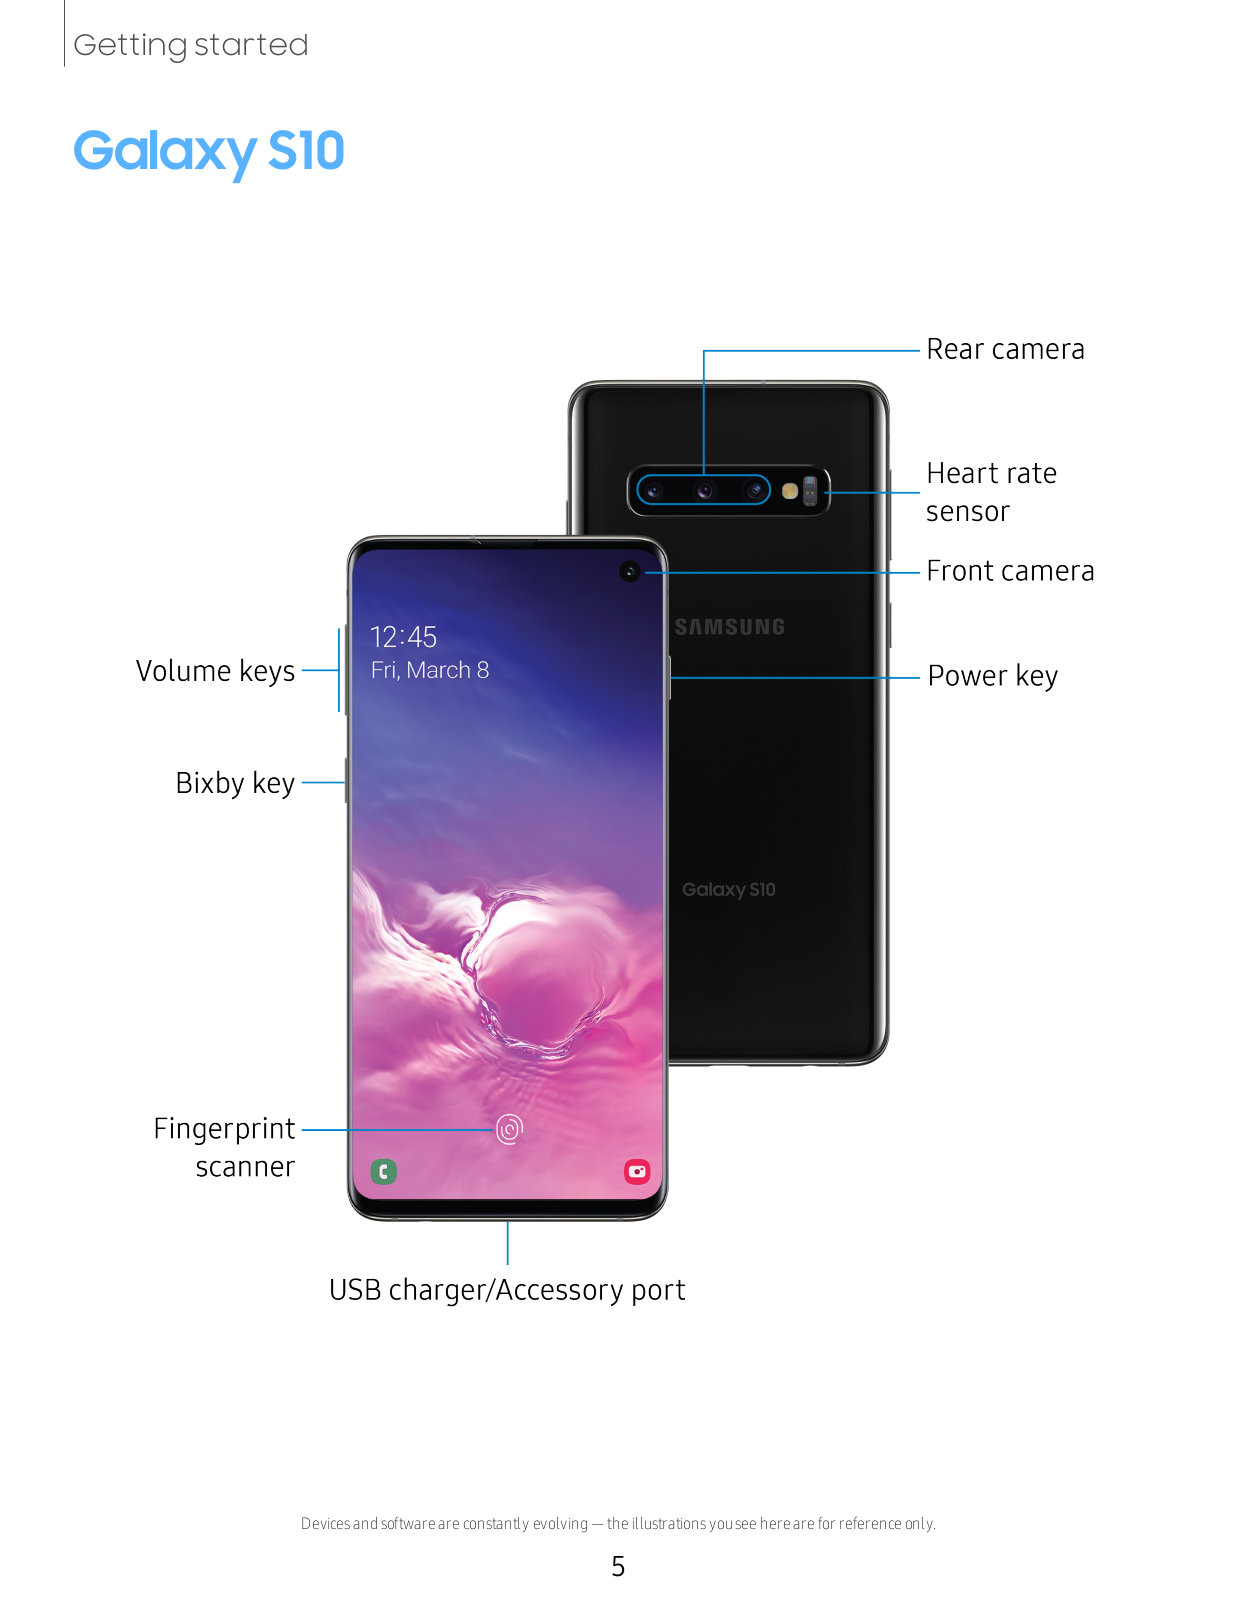
Galaxy S10
6
Galaxy S10 128GB Black
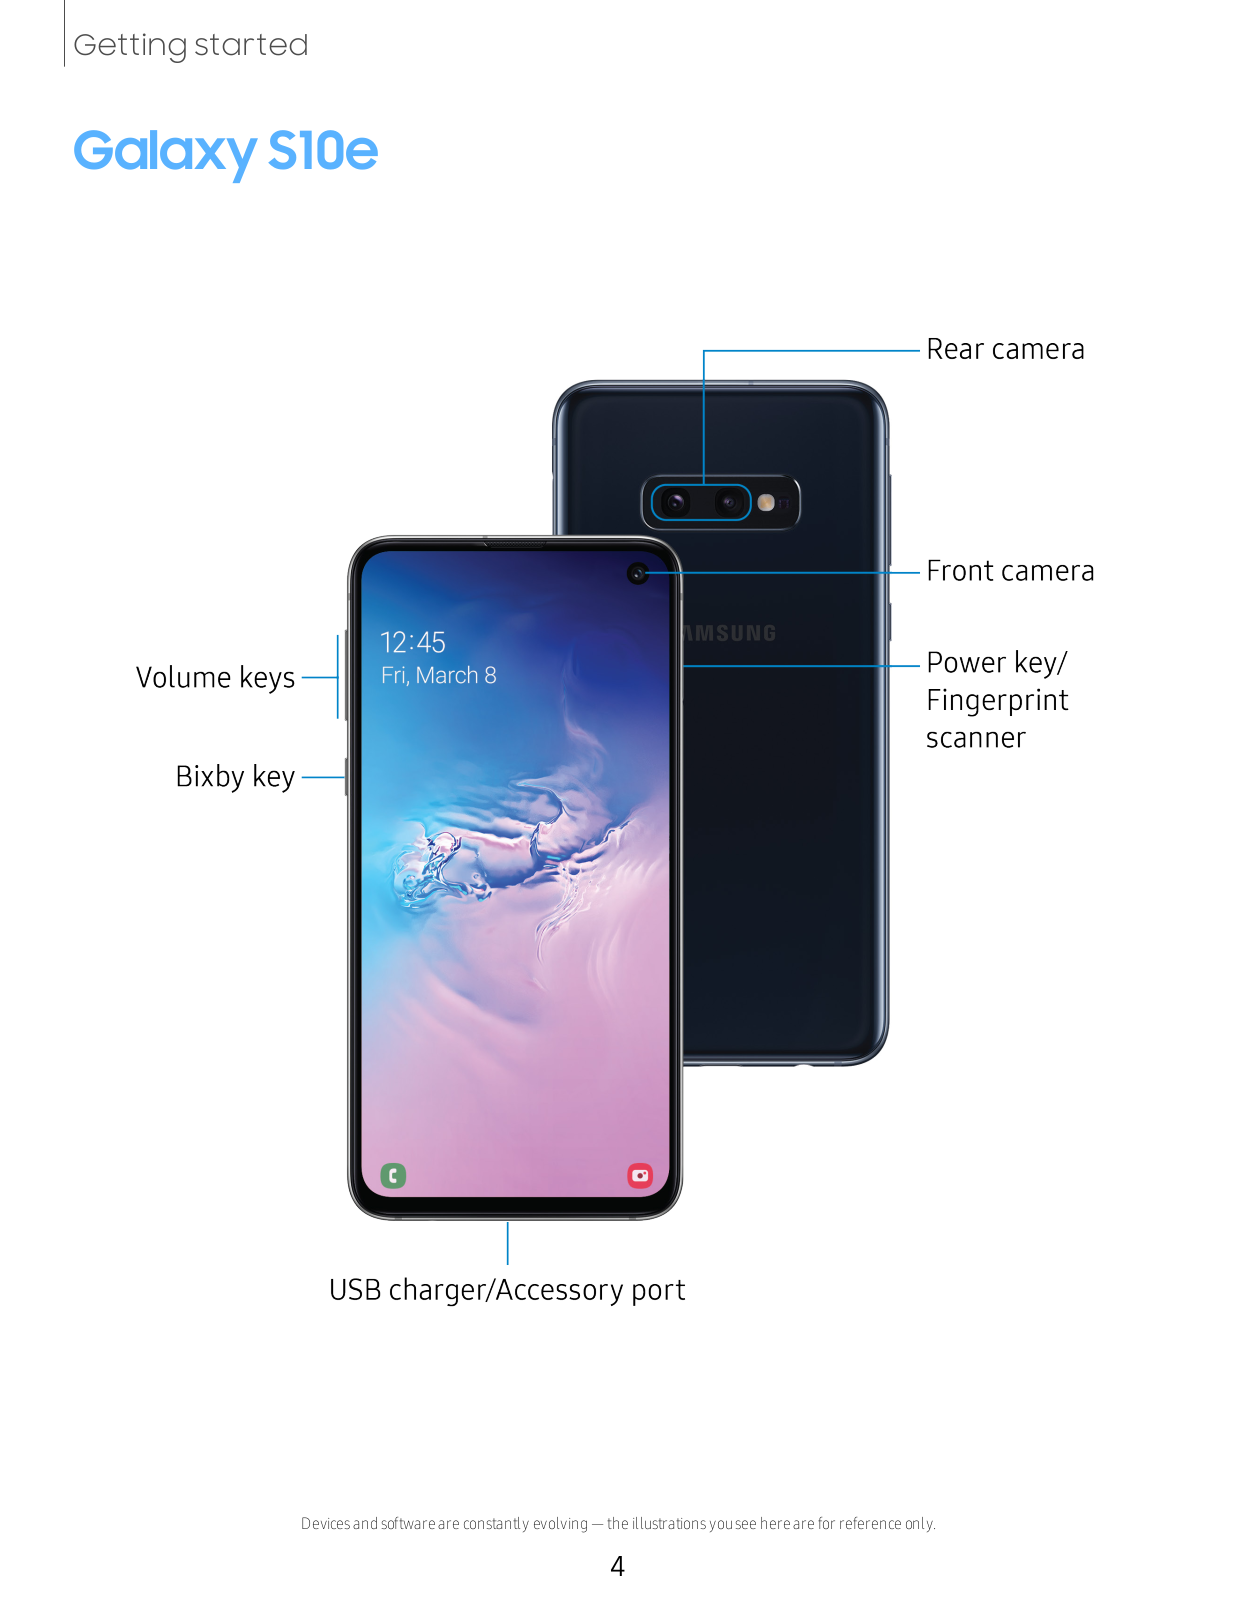
Galaxy S10e 128GB Black
Galaxy S10 Plus 128GB White
GALAXY S2
Galaxy S20
5
Galaxy S20 128GB Grijs 5G
Galaxy S20 5G
4
Galaxy S20 FE 5G
3
Galaxy S20 FE 5G UW
Galaxy S20 Ultra 5G
Galaxy S21 5G
Galaxy S21 Ultra 5G
GALAXY S3
GALAXY S3 MINI
2
Galaxy S3 Neo
Galaxy S4 Active
2
GALAXY S4 ACTIVE 4G
Galaxy S4 LTE-A
GALAXY S4 MED 4G
Galaxy S4 mini
3
GALAXY S4 MINI 4G
Galaxy S4 mini LTE
GALAXY S4 SC-04E
GALAXY S4 ZOOM 3G
GALAXY S4 ZOOM 4G
GALAXY S5 ACTIVE
GALAXY S5 ACTIVE SC-02G
Galaxy S5 LTE
GALAXY S5 MINI
4
Galaxy S5 mini LTE
GALAXY S5 SC-04F
GALAXY S5 SCL23
GALAXY S5 (SORT)
GALAXY S6 128 GB
GALAXY S6 32 GB
GALAXY S6 64GB
Galaxy S 6 Edge +
16
Galaxy S6 edge plus
GALAXY S6 EDGE SC-04G
Galaxy S6 G920F
GALAXY S6 SC-05G
Galaxy S 7
10
Galaxy S 7 Edge
7
Galaxy S 8
22
Galaxy S9
21
Galaxy S9 64GB Zwart
Galaxy S 9 Hybrid SIM
GALAXY S ADVANCE
3
Galaxy S Advance NFC
Galaxy S Aviator
Galaxy S Blaze 4G
GALAXY SC-01B
Galaxy S Captivate
GALAXY S DUOS
12
GALAXY S DUOS 2
2
GALAXY S FASCINATE SGH-T959W
GALAXY S GT-I9000
3
GALAXY S I9000
2
Galaxy S II
6
GALAXY S II 4G
Galaxy S II (Boost Mobile)
Galaxy S II Epic 4G Touch
GALAXY S II GT-I9100
2
GALAXY S II GT-I9100M
Galaxy S II HD LTE
GALAXY S III
7
Galaxy S III 4G
2
Galaxy S III (AT&T)
Galaxy S III (Cricket)
Galaxy S III Mini
4
Galaxy S III mini VE
GALAXY S III PROGRE SCL21
GALAXY S III SC-06D
GALAXY S III Α SC-03E
GALAXY S II LTE SC-03D
GALAXY S II PLUS
2
GALAXY S II SC-02C
GALAXY S II WIMAX ISW11SC
Galaxy S Infuse 4G
GALAXY S INFUSE 4G SGH-I997R
GALAXY S INFUSE SGH-I997
GALAXY S INFUSE SGH-I997R
GALAXY S LAFLEUR
Galaxy Sol 2
4
GALAXY SPICA
GALAXY SPICA GT-I5700
Galaxy S Plus
GALAXY S SC-02B
Galaxy S SCL
GALAXY S SCLCD
GALAXY S SCLCD I9003
Galaxy Star
3
Galaxy Star Duos
GALAXY S VIBRANT GT-I9000
Galaxy S wifi 3.6
2
Galaxy S wifi 4.0
Galaxy S wifi 4.2
Galaxy S Wi-Fi 5.0
Galaxy Tab
12
Loading...
Loading...
Nothing found
Galaxy S10 128GB Black
User manual
164 pgs
9.79 Mb
0
Table of contents
Loading...
Samsung Galaxy S10 128GB Black, Galaxy S10e 128GB Black, Galaxy S10 Plus 128GB White User manual
...
Samsung User manual
Download
Specifications and Main Features
Frequently Asked Questions
User Manual
Download
Loading...
+
134
hidden pages
Unhide
You need points to download manuals.
1 point = 1 manual.
You can buy points or you can get point for every manual you upload.
Buy points
Upload your manuals
 Loading...