

Page 1
Level
7.
Disassembly and Assembly Instructions
7-1.
Repair
2
7-1-1
Disassembly
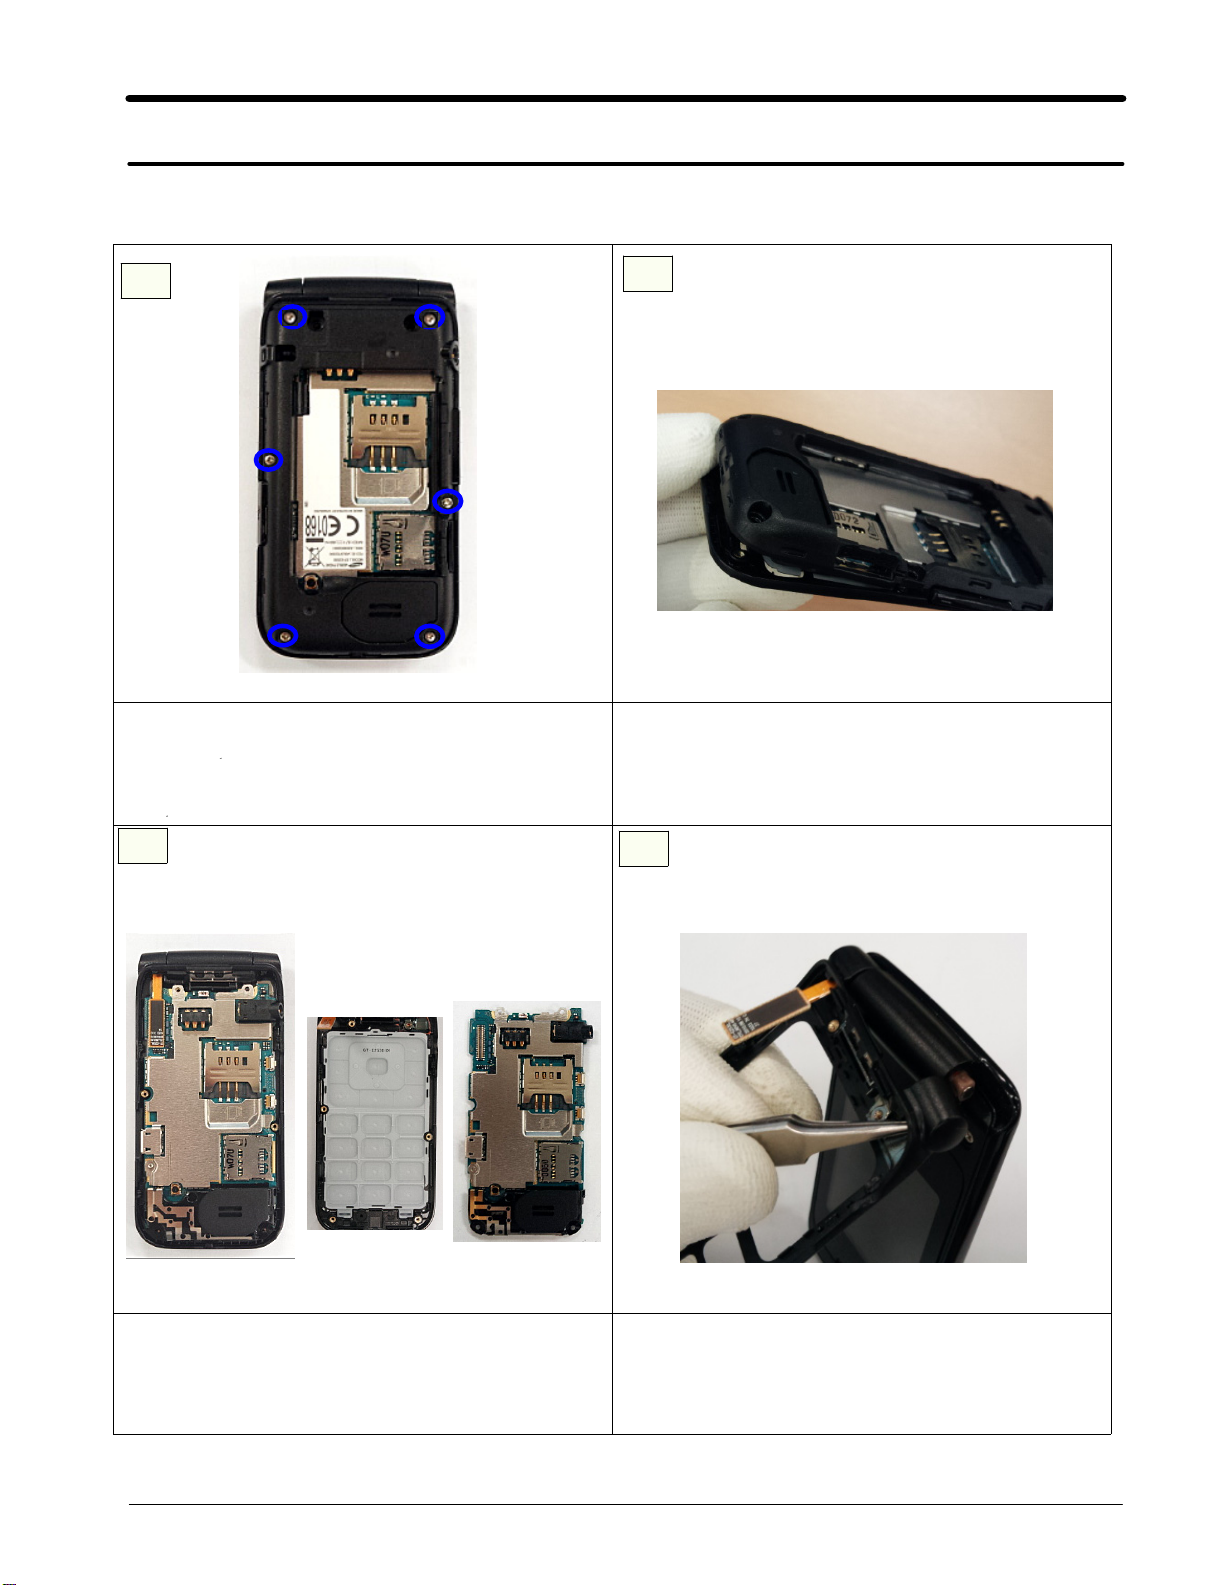
1
Unscrew6points at the REAR case
1)
ٛٛٛٛٛٛ
※
Be careful not to make scratch and molding dama
1)
ge!
2
1)
Disassemble the REAR as below sequence
Caution
(
Be careful not to make scratch and molding damage!
1)
3
detached LCD Connector Separate front and pba
Caution
※
Be careful not to make scratch and molding damage!
1)
4
Disjoint front after removing key pad.
1)
Caution
※
Be careful not to make scratch and molding damage!
1)
7-1
SAMSUNG Proprietary-Contents may change without notice
This Document can not be used without Samsung's authorization
Page 2
Level2Repair
7.
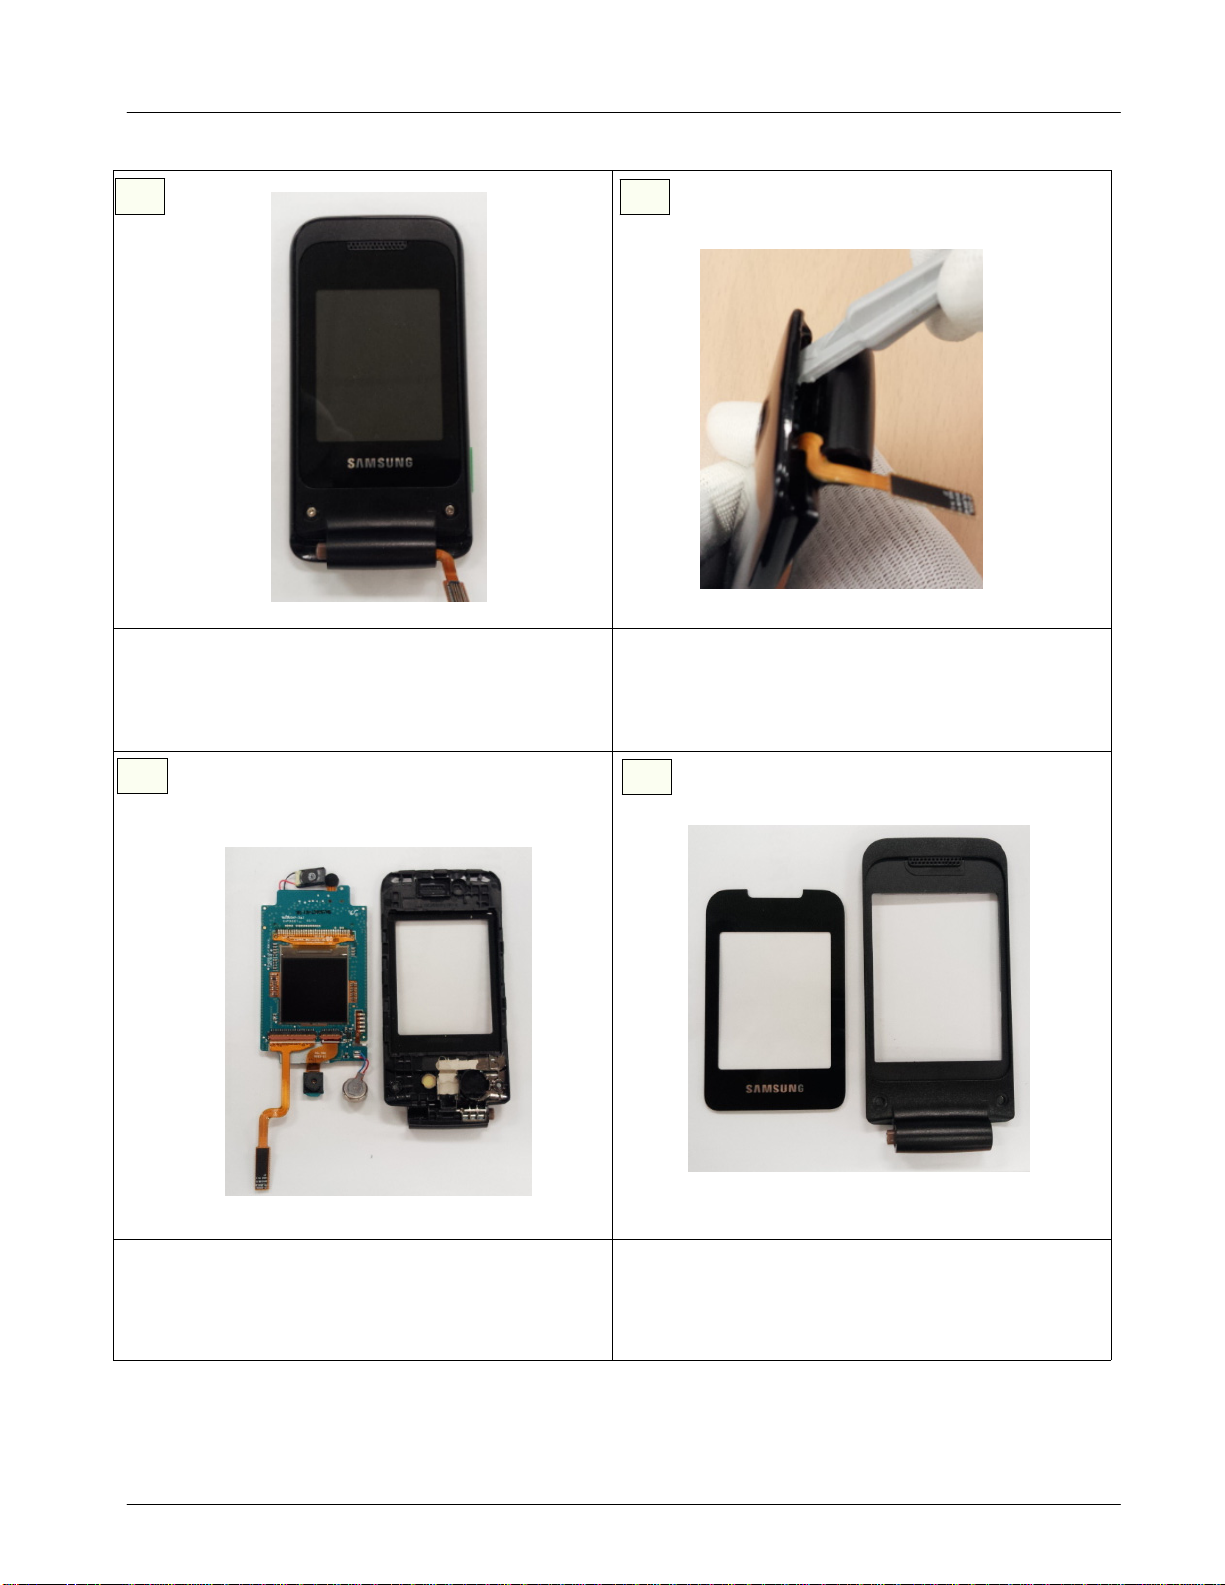
5
Unscrew2POINT at lower
1)
Caution
※
Be careful not to make scratch and molding damage!
1)
7
6
USE Decomposition knife Separate front and pba
1)
Caution
※
Be careful not to make scratch and molding damage!
1)
8
Separate LCD ASS'Y and lower.
1)
Caution
※
Be careful not to make scratch and molding damage!
1)
SAMSUNG Proprietary-Contents may change without notice
This Document can not be used without Samsung's authorization
Separate window and lower
1)
Caution
※
Be careful not to make scratch and molding damage!
1)
7-2
Page 3

Level2Repair
7.
7-1-2
Assembly
1
1) Attach.LCD,Window to Lower
Caution
※
Be careful not to make scratch and molding damage!
1)
2
1) Assembly
Caution
※
Be careful not to make scratch and molding damage!
1)
LCD ASS'Y wih Lower
.
3
1
) Assembly Upper with Lower
Caution
※
Be careful not to make scratch and molding damage!
1)
4
1) Assembly front
Caution
※
Be careful not to make scratch and molding damage!
1)
7-3
SAMSUNG Proprietary-Contents may change without notice
This Document can not be used without Samsung's authorization
Page 4

Level2Repair
7.
5
Assembly Keypad and Place on PBA and LCD LCD
1)
Connector
Caution
※
Be careful not to make scratch and molding damage!
1)
7
6
Place on Volume Key and then Assembly Lower
1)
From upper direction
Caution
※
Be careful not to make scratch and molding damage!
1)
.
Screw6points at the REAR case..
1)
Torque adjust to
2)
Caution
※
Be careful not to make scratch and molding damage!
1)
1.2
kgf/m
SAMSUNG Proprietary-Contents may change without notice
This Document can not be used without Samsung's authorization
7-4
 Loading...