

Page 1
Level
7.
Disassembly and Assembly Instructions
7-1.
Repair
2
7-1-1.
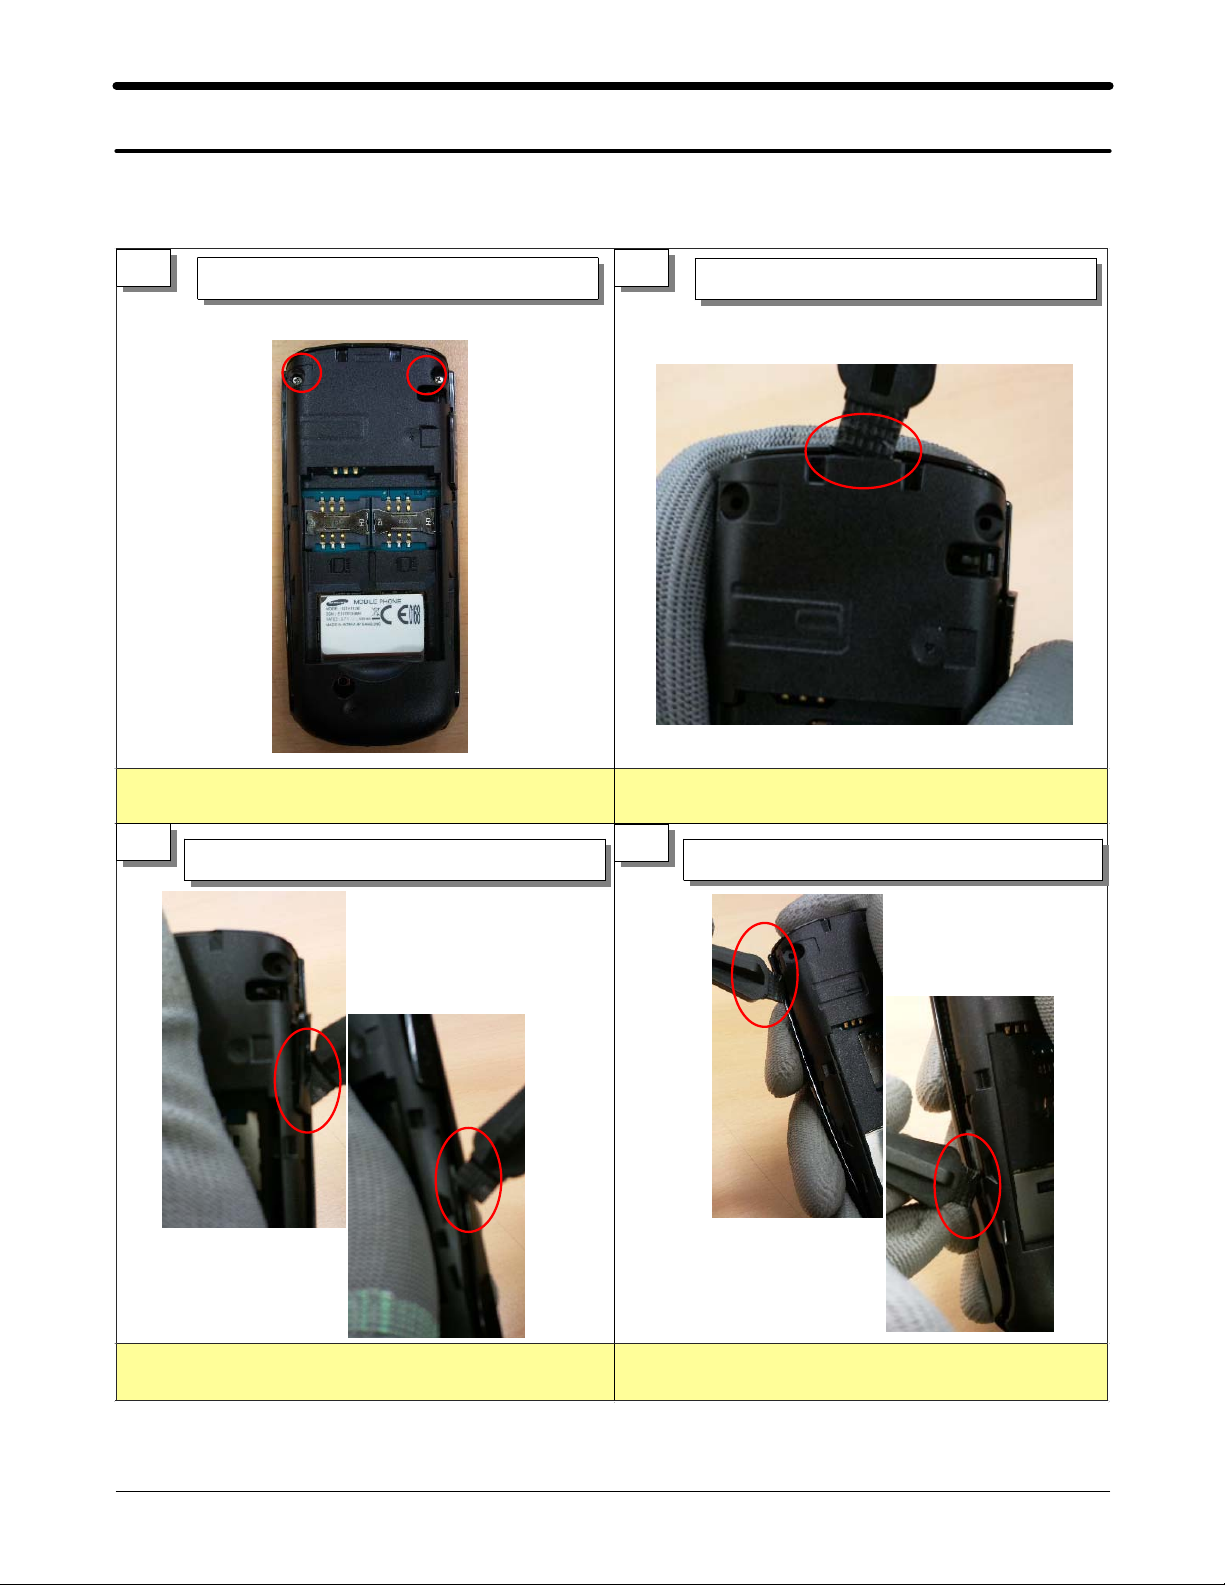
1 2
1) Be careful not to make scratch and molding damage! 1) Be careful not to make scratch and molding damage!
Disassembly
Release Screw 2 Point at rear
Disjoint Hook on the top of the rear
3
Disjoint hook on the right side of the rear
1) Be careful not to make scratch and molding damage! 1) Be careful not to make scratch and molding damage!
4
Disjoint hook on the left side of the rear
7-1
SAMSUNG Proprietary-Contents may change without notice
This Document can not be used without Samsung's authorization
Page 2
Level2Repair
7.
5
6
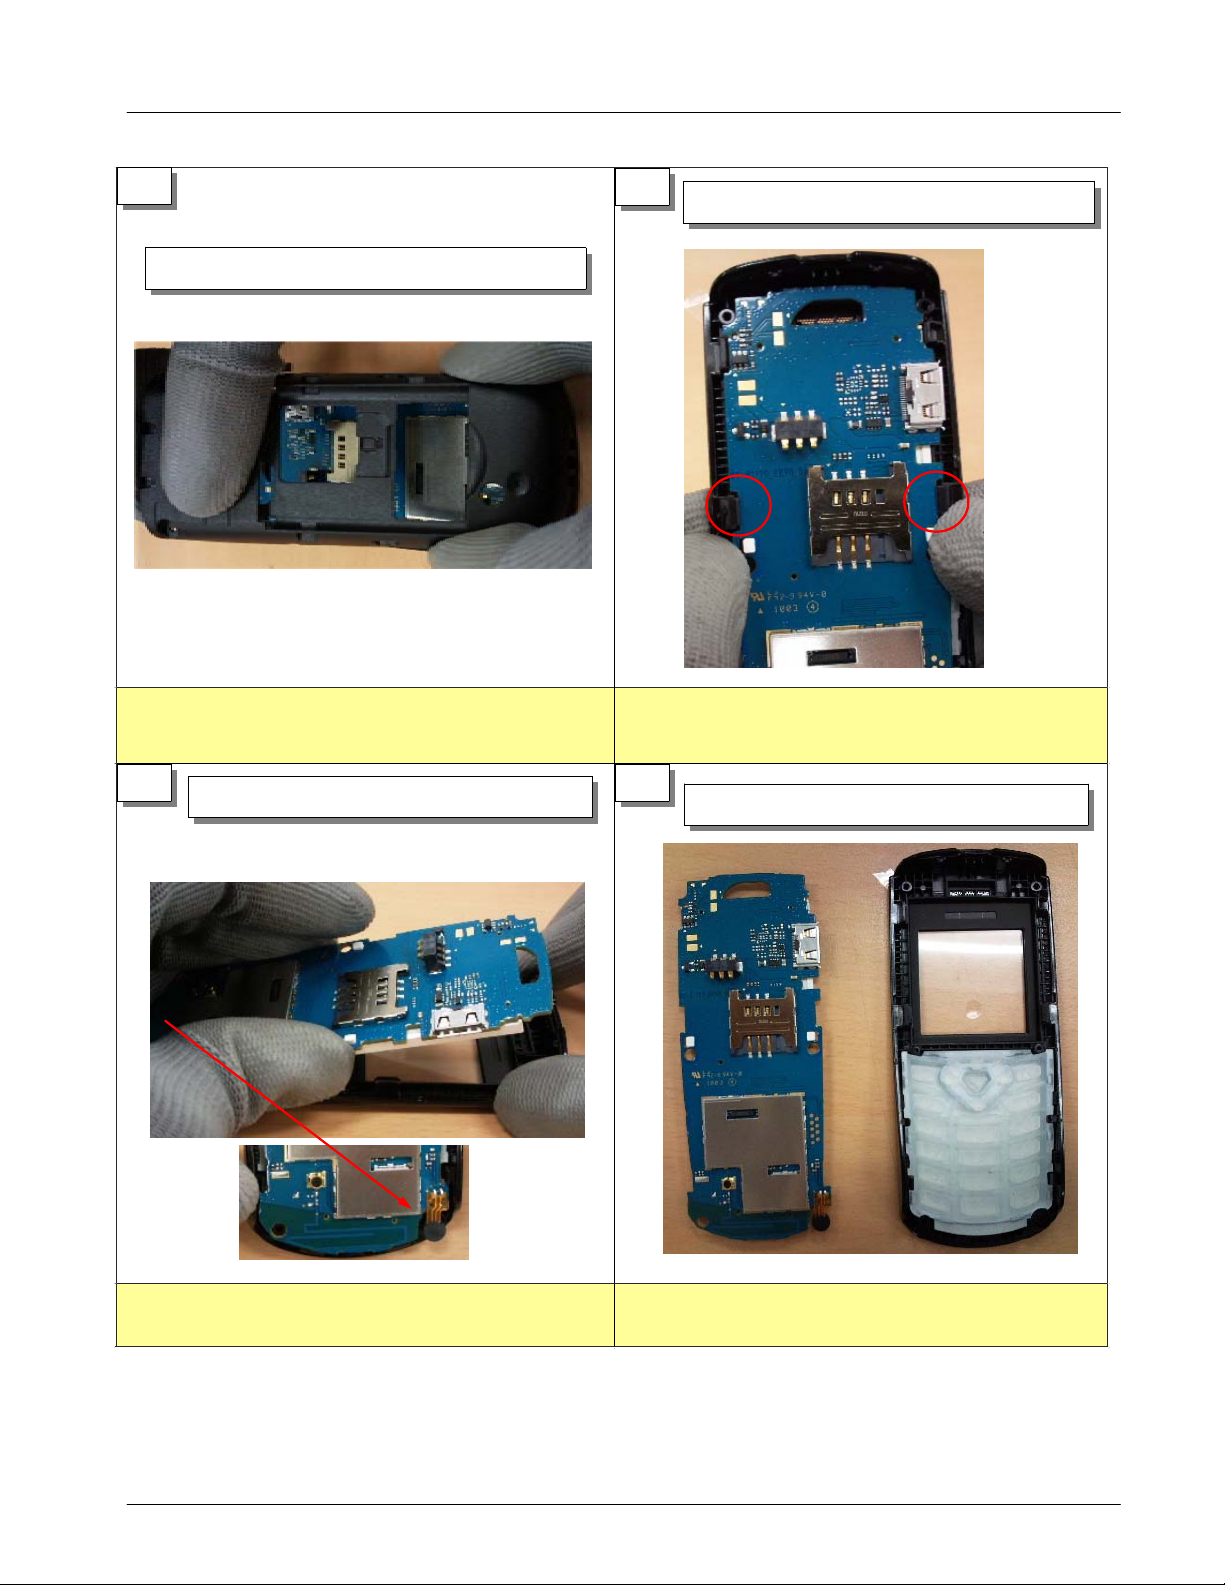
Press front side hook to release Main PBA.
Pull the REAR by lifting it from top to bottom
1)Be careful not to make scratch and molding damage. 1) Be careful not to damage to LCD Module.
7
Disassemble Main PBA from the FRONT.
1) Be careful not to make damage to MIC FPCB
8
Disassemble Main PBA from the FRONT .
7-2
SAMSUNG Proprietary-Contents may change without notice
This Document can not be used without Samsung's authorization
Page 3

Level2Repair
7.
7-1-2.
1
Assembly
Set a PBA and front.
2
Assemble PBA to the front
1) Be careful not to damage to LCD Module.
3
Press front side hook to lock Main PBA.
and insert MIC to front carefully
1) Be careful not to make damage to MIC FPCB 1) Beware that you do not damage MIC F-PCB.
4
Assemble the hooks on the bottom of the rear
7-3
SAMSUNG Proprietary-Contents may change without notice
This Document can not be used without Samsung's authorization
Page 4

Level2Repair
7.
5
Assemble the left, right hook on the
6
Assemble the hooks on the top of the rear
side of the rear
1) Be careful not to make scratch and molding damage! 1) Be careful not to make scratch and molding damage!
7
Drive Screws at2points with torque
Kgf/
0.1
㎠.
1.2 +/-
1) Be careful not to make scratch and molding damage!
7-4
SAMSUNG Proprietary-Contents may change without notice
This Document can not be used without Samsung's authorization
 Loading...