

Samsung DVDVR320A Users Manual

Playing back an Audio
CD (CD-DA)
Each disc has a variety of menu functions available.
Playing an Audio CD(CD-DA)
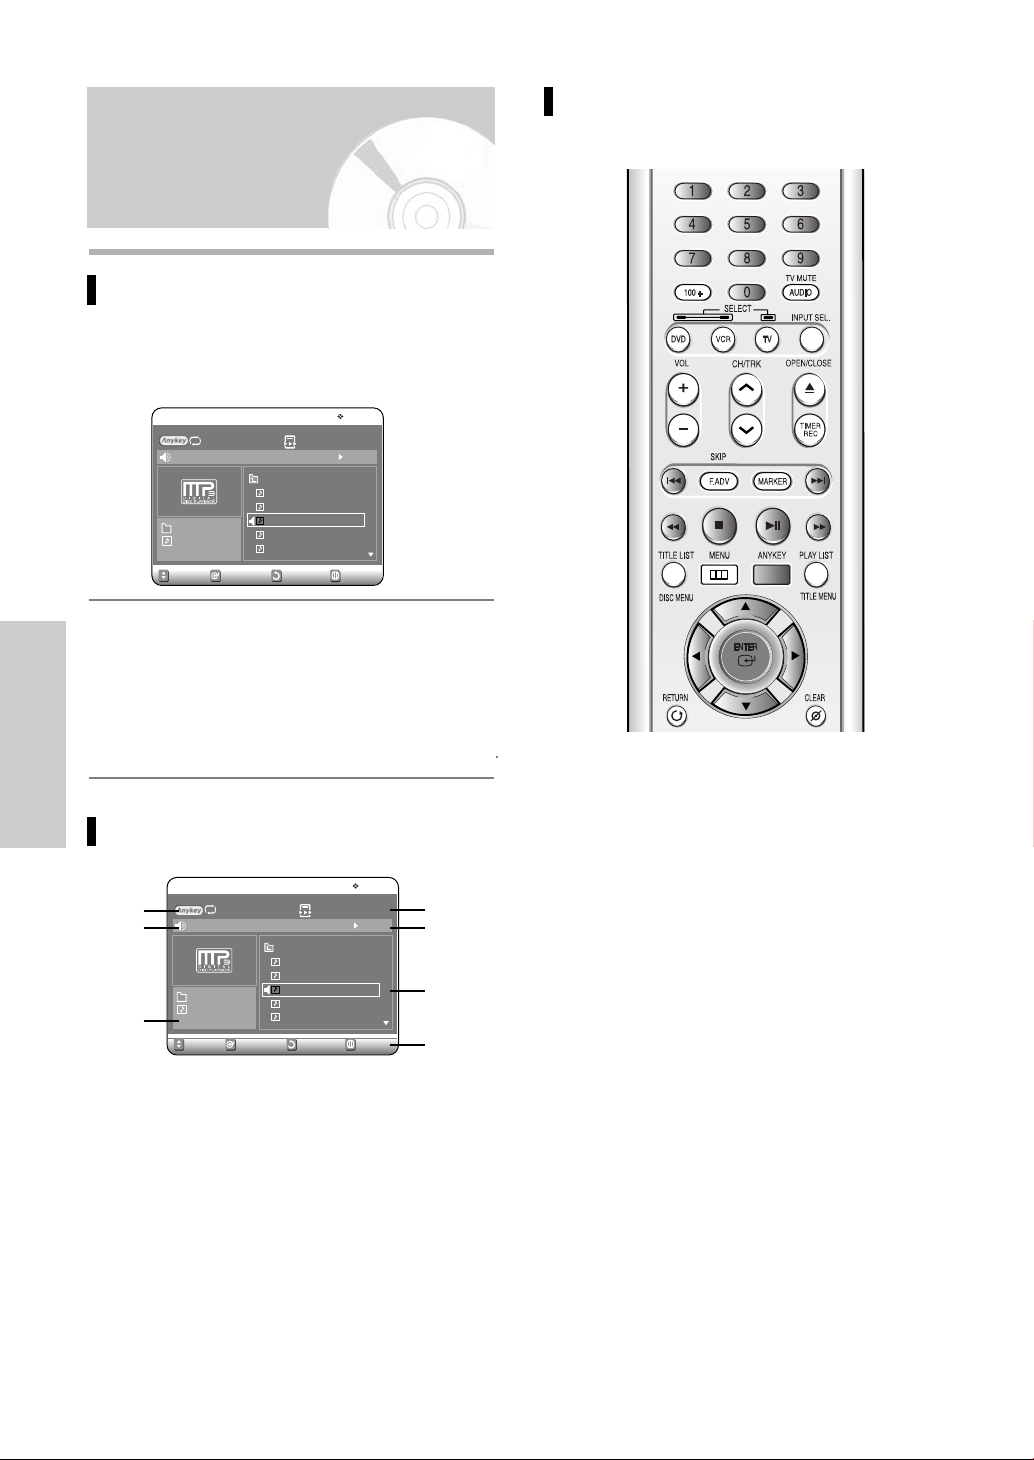
Insert an Audio CD (CD-DA) into the disc tray.
• The Audio CD menu appears and the tracks
1
(songs) are played automatically.
Buttons on the Remote Control used
for CD playback
CD
Repeat : Off Play Option : Normal
01. TRACK 1
02. TRACK 2
03. TRACK 3
01/12
Press the
start playback from, and then press the ENTER
2
04. TRACK 4
05. TRACK 5
06. TRACK 6
SELECT MENUMOVE
……††
buttons to select the track (song) to
Music
00 : 5201. TRACK 1
4:39
4:31
4:30
3:53
4:23
4:24
button.
• You can also select the track (song) by pressing
the number buttons on the remote.
Audio CD(CD-DA) Screen Elements
CD
!
@
#
Repeat : Off Play Option : Normal
01. TRACK 1
02. TRACK 2
03. TRACK 3
SELECTMOVE
04. TRACK 4
05. TRACK 5
06. TRACK 6
01/12
1. Repeat mode: Repeat off/Repeat Track/Repeat Disc.
2. Current track (song): Displays the number of the track
currently being played.
3. Displays the current play index and total track number.
4. This shows the operating state of a disc and a playback
time corresponding to a portion that is currently played.
5. Displays the track list (song list) and the playing time of
each track.
6. Button display.
7. Play Option: Normal, Random, Intro or Playlist
Music
00 : 5201. TRACK 1
4:39
4:31
4:30
3:53
4:23
4:24
MENU
&
$
%
^
……††
1.
, 0~9: Selects a track (song).
√√
2.
: Plays the selected track (song).
3. ENTER button: Plays the selected track (song).
4.
√√l
button: Plays the next track.
5.
lœœ
button: Returns to the beginning of the current
track when pressed during playback. If pressed
again, your DVD Recorder & VCR moves to and
plays the previous track.
If you press this button within three seconds after
playback starts, the previous track will be played.
If you press this button after three seconds, the
current track will be replayed from the beginning.
6. Press the (œœ /√√) button: Fast Play
(FF1/FR1, FF2/FR2, FF3/FR3)
7. ■ : Stops a track(song).
8. √ll : Plays a track(song) or pauses playback.
9. ANYKEY : To select the top menu on screen display
(Repeat or Play Option).
Playback
English - 45
Playing back an MP3 CD
Playing an MP3 Disc
Insert an MP3 CD into the disc tray.
• The MP3 menu is displayed and the tracks
1
(songs) are played automatically.
Buttons on the Remote Control
used for MP3 CD playback
MP3
Repeat : Off Play Option : Normal
ROOT
Bryan Adams
Bryan Adams_2
ROOT
03/06
Press the
want to hear, and then press the ENTER button.
2
……††
• Press the
Straight from the heart
Run to you
Heaven
SELECT RETURNMOVE
buttons to select the folder you
……††
buttons to select the track (song)
Music
00 :22Straight from the heart
MENU
you want to hear, and then press the ENTER
button.
• You can also select the desired track (song) by
pressing the number buttons on the remote.
Playback
MP3 Screen Elements
MP3
!
Repeat : Off Play Option : Normal
@
ROOT
Bryan Adams
Bryan Adams_2
SELECT RETURNMOVE
Straight from the heart
Run to you
Heaven
#
ROOT
03/06
1. Repeat mode: Repeat off, Repeat Track, Repeat
Folder or Repeat Disc
2. Current track (song): Displays the name of the track
being played.
3. Displays the current folder and play index.
4. This shows the operating state of a disc and a playback time corresponding to a portion that is currently
played.
5. Displays the information for the folder and its tracks.
6. Button display.
7. Play Option : Normal, Random, Intro or Playlist
Music
00 :22Straight from the heart
MENU
&
$
%
^
……††
1.
, 0~9:
Selects a track (song).
√√
2.
: Plays the selected track (song).
3. ENTER button: Plays the selected track (song) or
displays the files in the selected folder.
4. RETURN button: Moves to the folder to which the
current song belongs.
5. √√
l
button: Plays the next track.
6.
l
œœ button: Returns to the beginning of the current
track when pressed during playback. If pressed
again, your DVD Recorder & VCR moves to and
plays the previous track.
If you press this button within three seconds after
playback starts, the previous track will be played.
If you press this button after three seconds, the
current track will be replayed from the beginning.
7. ■ : Stops a track(song).
8. √ll : Plays a track(song) or pauses playback.
9. ANYKEY : To select the top menu on screen display
(Repeat
or Play Option).
46 - English
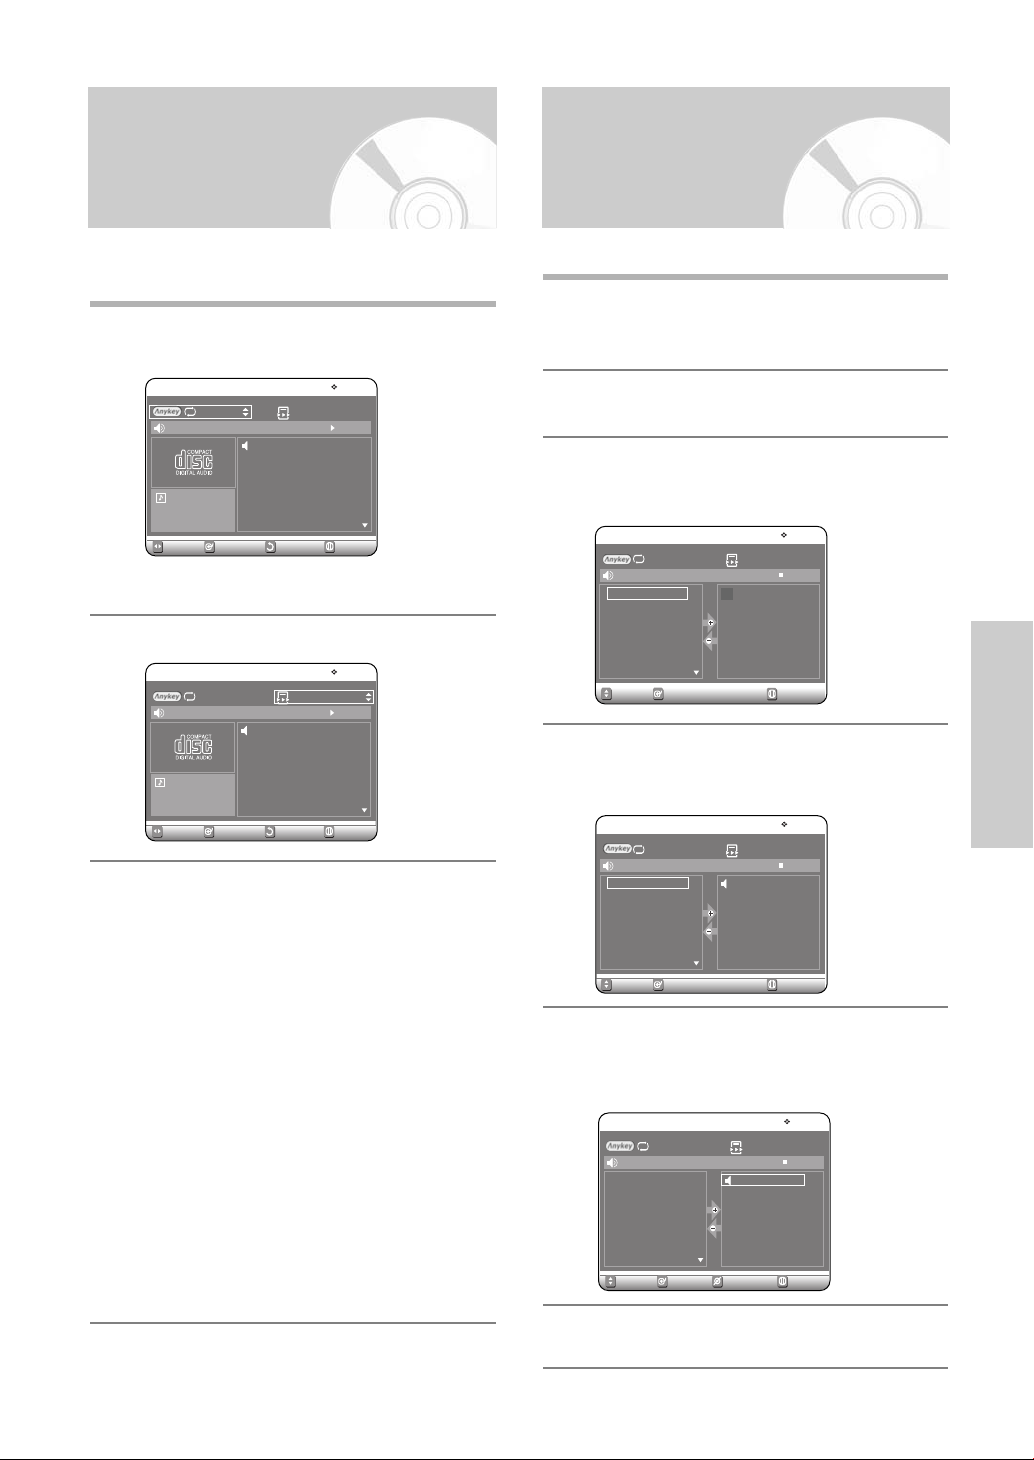
Play Option Mode
To Program Tracks
The Play Option can be used with an Audio CD or MP3
in the Play or Stop mode.
Press the ANYKEY button during playback.
Repeat mode will be highlighted.
1
CD
Repeat : Off Play Option : Normal
01. TRACK 1
02. TRACK 2
03. TRACK 3
01/12
MOVE
04. TRACK 4
05. TRACK 5
06. TRACK 6
SELECT RETURN
Music
00 : 5201. TRACK 1
4:39
4:31
4:30
3:53
4:23
4:24
MENU
• During Stop, Play option will be highlighted.
Press the œ √ buttons to select Play Option.
2
CD
Repeat : Off
01. TRACK 1
02. TRACK 2
03. TRACK 3
SELECTMOVE
04. TRACK 4
05. TRACK 5
06. TRACK 6
RETURN
01/12
Music
Play Option : Normal
00 : 5201. TRACK 1
4:39
4:31
4:30
3:53
4:23
4:24
MENU
Press the …† buttons to select a desired Play
Option, then press the ENTER button.
3
• Normal: Tracks on a disc are played in the
order in which they were recorded on the disc.
• Random: The Random option plays a disc’s
tracks in random order. After a random list is
generated and played completely, another
random list is generated and played.
Random Play is continued until the play option
is changed.
• Intro: The first 10 seconds of each track will be
played.If you want to listen to the music that you
have selected, press the ENTER button or √ll
button. The play option will be changed to
Normal Play. When Intro Play is completed,
Normal Play is performed.
• Playlist: The Playlist playback option allows you
to select the order in which you want tracks to
play.
You can register a maximum 30 tracks in the playlist.
Press the ANYKEY button during playback.
Repeat mode will be highlighted.
1
• During Stop, Play option will be highlighted.
Press the œ √ buttons to select Play Option.
2
Press the …† buttons to select Playlist, then
press the ENTER button.
3
Playlist screen is displayed.
1. P_TRACK 1
2. P_TRACK 2
3. P_TRACK 3
4. P_TRACK 4
1. P_TRACK 1
2. P_TRACK 2
3. P_TRACK 3
Music
00 : 00
Music
00 : 00
MENU
Music
01 : 36P_TRACK 1
MENU
CD
Repeat : Off Play Option : Playlist
01. TRACK 1
02. TRACK 2
03. TRACK 3
04. TRACK 4
05. TRACK 5
06. TRACK 6
SELECT MENUMOVE
Press the …† buttons to select tracks in the order
in which you want them to play, then press the
4
ENTER button.
CD
Repeat : Off Play Option : Playlist
01. TRACK 1
02. TRACK 2
03. TRACK 3
04. TRACK 4
05. TRACK 5
06. TRACK 6
SELECT
MOVE
If you playlisted a wrong track, press the √ button,
then press the …† buttons to select wrong track.
5
Press the CLEAR button. The wrong track will be
removed.
CD
Repeat : Off Play Option : Playlist
01. TRACK 1
02. TRACK 2
03. TRACK 3
04. TRACK 4
05. TRACK 5
06. TRACK 6
SELECT CANCEL
MOVE
Playback
Press the PLAY button to playback the playlist.
6
English - 47

Playing a picture CD
There are two types of Picture CDs. One is a CD
with only JPEG files. The other one is a CD with
JPEG files and MP3 files.(mixed CD)
1. When a mixed CD is played, a menu will be
shown in order to let you choose which contents, either JPEG or MP3, you want to play.
1-1. If you want to play MP3 files on a mixed CD,
choose Music on the menu, then it will take
you to the MP3 play back screen.
1-2. If you want to play JPEG files on a mixed
CD, choose Photo on the menu, then it will
take you
to photo playback screen. See number 3 on
this page.
2. When a Picture CD(CD with only JPEG files) is
played, the recorder will show the Album
screen,with thumbnail images. See number 3
on this page.
Playback
Insert a Picture CD(JPEG only) or Mixed
CD(JPEG + MP3)into the disc tray.
1
Press the …† œ √ buttons to select a picture.
3
JPEG
Index 6 / 73
ROOT / DSC01189
Page 2 / 13
SELECT RETURN MENUMOVE
• To see the next 6 pictures, press the
• To see the previous 6 pictures, press the
-1
If you press the √ll button, the Slide show
screen will appear.
4
Press the œ √ buttons to set the slide show
speed, then press the ENTER button.
Slide Show Speed
DSC01189
-2
Press the œ √ buttons to select a picture file in
Album screen and then press the ENTER
4
button.
Photo
Slide Show
RETURNSELECTMOVE
√√l
button.
l
œœ button.
When playing a Mixed CD, press the …† buttons
to select Photo, then press the ENTER or √ but-
2
ton. (when playing a Picture CD, see number 3 on
this page.)
JPEG+MP3
Setup
Timer Rec.
Press [ENTER] or Right button :
Photo
Photo
Music
RETURNSELECTMOVE EXIT
Photo
48 - English
DSC01189
: Returns to the Album screen.
: The unit enters slide show mode.
Before the slide show can begin, the picture
interval (Slide show speed) must be set.
: Each time the ENTER button is pressed, the
picture rotates 90 degrees clockwise.
: Each time the ENTER button is pressed, the
picture is enlarged up to 4X(four times the
normal size).
Normal
➝
2X ➝4X ➝2X ➝ Normal
• Press the ANYKEY button to display menu bar.
• Press the RETURN button to clear the menu bar.
RETURNSELECTMOVE PHOTO
Playing the VCR
Special VCR Playback
Features
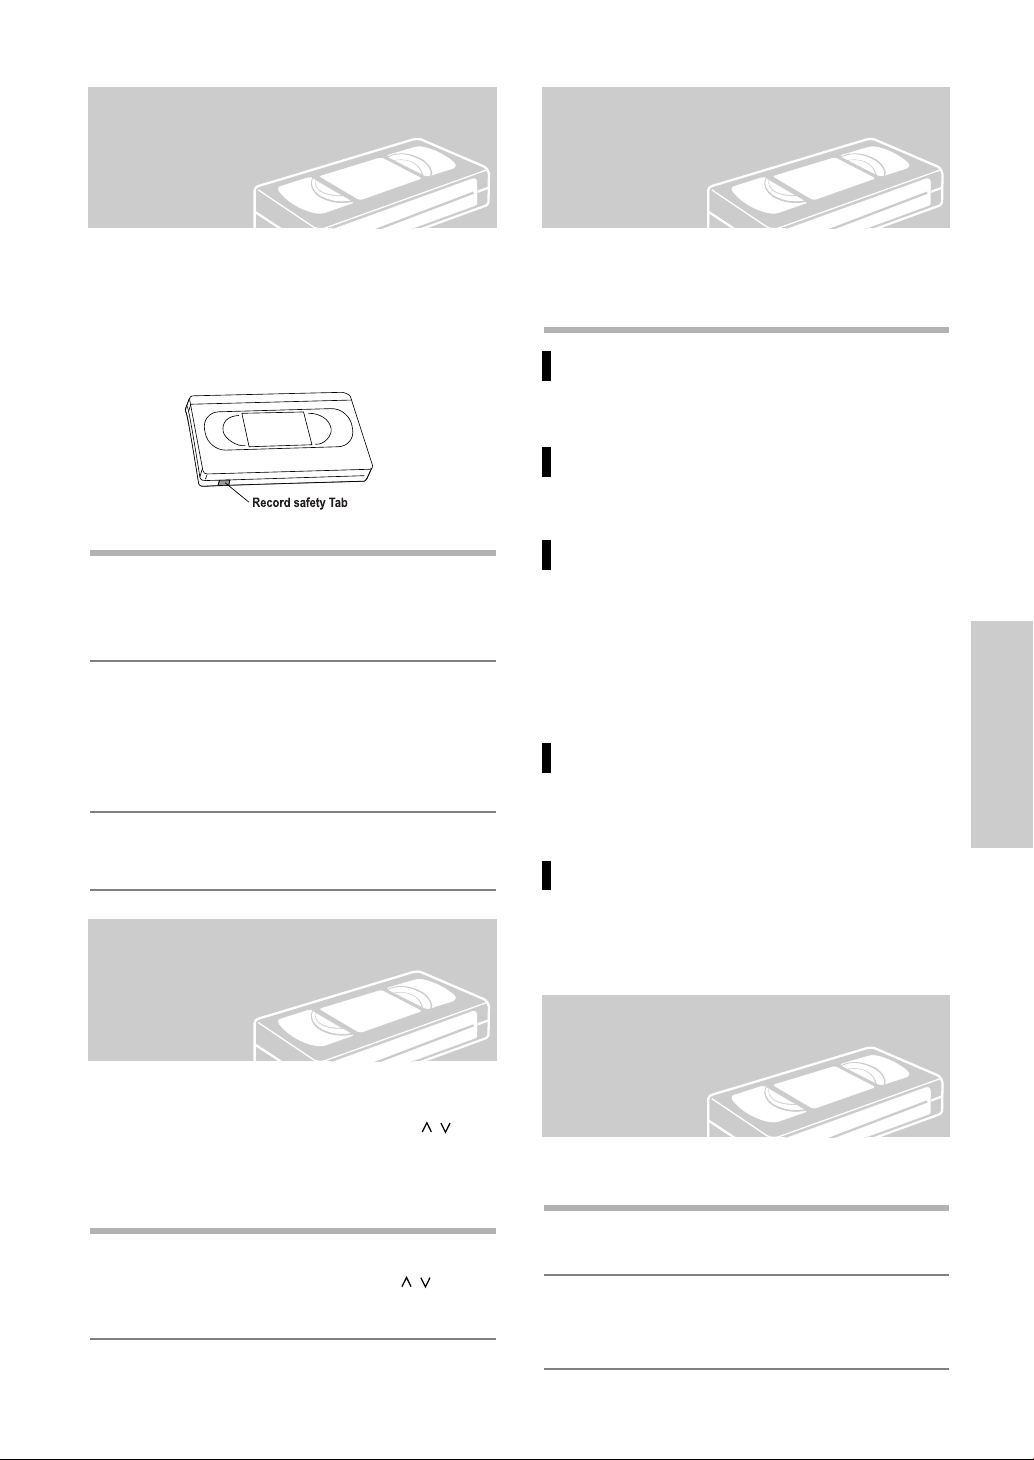
To play a standard VHS tape, just insert it into the VCR
deck and press the PLAY button. You can turn on the
Auto Play to enable the VCR deck to play automatically
when you insert a videotape that is missing the Record
Safety Tab.
Insert a standard VHS tape into the VCR deck.
• When a tape is inserted, power will turn on auto-
1
matically.
Press the √II(PLAY/PAUSE) button on the
remote control or on the front panel of the unit.
2
The videotape will begin to play automatically if
the Record Safety Tab is removed and Auto Play
is turned on.
Press the (STOP) button on the remote control
or on the front panel of the unit.
3
Tracking
While a videotape is playing, you can enjoy a variety of
special playback features, including Still, Frame
Advance, Skip, Slow motion, and more.
Pause
In Play mode, press √II(PLAY/PAUSE)button to still
a single frame.
Frame Advance
In the pause mode, press F.ADV/SKIP button to
advance to the next frame.
Fps/Review
In Play mode, press Forward (√√)button or Rewind
(œœ)button to Cue/review at two speeds:
• Picture Search - Press and release repeatedly to
advance the tape forward or backward at 2,3,5,7
times normal speed.
• Jet Search - Press and hold to advance the tape
forward or backward at 7 times normal speed.
Skip
In Play mode, press F.ADV/SKIP button to cue
ahead exactly 30 seconds. Press F.ADV/SKIP button
repeatedly up to 4 times to cue ahead 2 minutes.
Slow motion
In pause mode, press √√ button for slow motion.
Press the √√ button repeatedly to vary slow motion
speed from 1/5 to 1/30 of normal playback. Press
the PLAY button twice to resume normal viewing.
Playback
The Tracking adjustment removes the white lines that
sometimes appear during playback because of slight
differences in recording decks. The CH/TRK (/
button will automatically align the recorded tracks with
the playback heads to solve this problem. You may also
set tracking manually.
Adjust Tracking Manually
1
During playback, press the CH/TRK (/
buttons to remove white lines from the picture.
)
)
S-VHS Playback
The DVD Recorder & VCR allows you to playback high
quality S-VHS tapes.
Insert an S-VHS tape into the VCR deck.
1
Press √II(PLAY/PAUSE)button on the remote
control or on the front panel to begin playback of
2
the S-VHS tape.
English - 49
Variable Search
System
Each time you record a cassette on this DVD Recorder
& VCR, an “index” is automatically marked on the tape
when recording starts.The Search function allows you to
fast-forward or rewind to a specific index and start playback from that point. Depending on the direction selected, the indexes are numbered as follows
• This DVD Recorder & VCR uses a standard indexing
system (VISS). As a result, it will recognize any indexes marked by other VCRs using the same system and
vice versa.
Go To [0:00:00] Stop
Use this feature when you want to search for the
0:00:00 counter position on a cassette.
Press the CLEAR button at the point on the tape
where you want to set the counter to 0:00:00.
1
While a cassette is stopped, press the ANYKEY
button.
1
VCR
Go To Zero
End Search
Forward Intro Scan
Reverse Intro Scan
SELECTMOVE
Press the …† buttons to select End Search, then
press the ENTER button.
2
The VCR will fast forward, searching for a blank
position, and then automatically stop at that position. If the VCR reaches the end of the tape during
end search, the tape will be ejected.
End Search
√√
0 : 00 : 03
2
Playback
3
End Search
While a cassette is stopped, press the ANYKEY
button.
VCR
Go To Zero
End Search
Forward Intro Scan
Reverse Intro Scan
SELECTMOVE
Press the …† buttons to select Go To Zero, then
press the ENTER button.
The VCR will rewind or fast forward, searching for
the 0:00:00 counter position, and then automatically stop at that position.
Go To Zero
œœ
0 : 00 : 03
Forward/Backward Intro Scan
Use scan and play when you don’t know exactly
where a program is located on a cassette tape.
While a cassette is stopped, press the ANYKEY
button.
1
VCR
Go To Zero
End Search
Forward Intro Scan
Reverse Intro Scan
SELECTMOVE
Press the …† buttons to select Forward Intro
Scan or Reverse Intro Scan, then press the
2
ENTER button. When an Index mark is found, the
DVD Recorder & VCR will playback the tape for 5
seconds, after which it will continue searching for
the next Index mark.
Scan and Play
√√
0 : 00 : 23
Use this feature when you want to search for a blank
position to record a program on a cassette.
50 - English

Recording
Before Recording
This unit can record on various types of discs. Before
recording, read the following instructions and select the
disc type according to your preference.
Recordable discs
This section shows various DVD recording
methods.
DVD Recording
Before Recording ...............................................................51
Recordable discs ...............................................................51
Recording Formats ...........................................................52
Recording Mode................................................................52
Unrecordable video ..........................................................52
Recording the current channel you are watching .............53
Recording From External Devices.....................................54
Recording through a DV Input jack...................................54
Making a One Touch Recording(OTR) ..............................55
Making a Timer Recording ................................................55
Editing the Scheduled Record List.....................................57
Deleting a the Scheduled Record List................................58
VCR Recording
Basic VCR Recording.........................................................59
Check Remaining Time ....................................................59
Special Recording Features ..............................................60
Copy to DVD or VCR........................................................61
This recorder can record on the following discs.
DVD-RAM DVD-RW DVD-R
•DVD-RWs and DVD-RAMs are rewritable.
•DVD-Rs are non-rewritable.
Compatibility between Samsung and
Other Company’s Recorder.
Disc Types Recording Recording Device Finalizing Additional Recording
DVD-RAM
DVD-RW
DVD-R
Note
format in Samsung Recorder
VR Mode
VR Mode
V Mode
V Mode
■
Finalize
- This closes the DVD-RW/-R so no additional
recording can be done.
■
Unfinalize
- This allows additional recording on a DVDRW disc originally recorded on the DVDVR320.
- A DVD-RW disc that has been recorded by
DAO(Disc At Once) in a PC cannot be unfinalized.
- A DVD-RW disc that has been recorded
in Video Mode of a different maker’s
recorder cannot be unfinalized.
- A DVD-R disc cannot be unfinalized.
Samsung
Other Company
Samsung
Other Company
Samsung
Other Company
Samsung
Other Company
not finalized
not finalized
not finalized
not finalized
not finalized
not finalized
X
X
finalized
finalized
finalized
finalized
finalized
finalized
Recordable
Recordable
Not recordable
Recordable
Not recordable
Recordable
Not recordable
Recordable
Not recordable
Not recordable
Not recordable
Recordable
Not recordable
Not recordable
Recording
English - 51

Recording Formats
When you insert an unused disc, the following message
appears. Since available functions differ depending on
the disc type, select a disc that best fits your preferences.
DVD-RAM: Use after formatting the disc.
Unformatted Disc
Do you want to format this disc?
Yes No
Recording Mode
Select one of four recording modes by pressing the
REC SPEED button repeatedly while the unit is in Stop
mode for the desired recording time and picture quality.
In general, picture quality improves as the recording
time decreases.
In AUTO mode, the most suitable record mode is
adjusted automatically, according to remaining time on
the disc and length of the timer recording.
This function is selected only one mode in XP,SP,LP
and EP modes. And you can use this mode for timer
recording.
DVD-RW: When an unused DVD-RW disc is first insert-
ed, the message “Uninitialized Disc/Do you
want to initialize this disc?” will be displayed.
If you select Yes, the disc will be formatted in
VR mode.
Uninitialized Disc
Do you want to initialize this disc?
Yes No
If you want to change the mode, refer to
Formatting a Disc on page 78.
Disc Manager
√√
√√
√√
√√
√√
RETURNSELECTMOVE EXIT
Recording
DVD-RW(VR)
Setup
Disc Name :
Timer Rec.
Disc Protection : Not Protected
Copy
Disc Format
Choose the recording format fot DVD-RW.
Delete All Title Lists
Title List
DVD-VR DVD-V
Cartridge Protect Inf
Playlist
Disc Manager
Mode Characteristic
Recording Times
Data Rates
XP Select when the
(high quality mode)
video quality is
important.
SP Select to record in
(standard quality mode)
LP
(long recording mode)
EP
(extended mode)
standard quality.
Select when a long
recording time is
required.
Select when a long
recording time is
required.
Approx. 1 hours
about 8 Mbps
Approx. 2 hours
about 4 Mbps
Approx. 4 hours
about 2 Mbps
Approx. 6 hours/
about 1.2 Mbps
Approx. 8 hours
/
about 0.8 Mbps
AUTO for timer recording only
see page 56.
Approx 60 to 480 Min
approx 0.8 to 8Mbps
Unrecordable video
Pictures with copy protection cannot be recorded on this
DVD Recorder & VCR.
When the DVD Recorder & VCR receives a copy guard
signal while recording, recording stops and the following
message appears on the screen.
DVD-R: Formatting DVD is unnecessary and only
Video Mode Recording is supported.
DVD-RW(Video mode)/-R
• Chapters will be created automatically when you final-
ize recording on DVD-R/DVD-RW discs in Video
mode.
• Simple editing (erasing titles/changing title name).
DVD-RAM/-RW(VR mode)
• This mode involves multiple editing functions (such as
deletion of the whole title, partial deletion of a title,
etc.).
• Various editing options using a created Playlist.
52 - English
You cannot record copy protected movie.

Concerning Copy Control Signals
TV broadcasts that contain copy control signals may have
one of the following three signal types, Copy-Free, CopyOnce and Copy-Never. If you want to record a copy-once
type program, use DVD-RW with CPRM in VR Mode and
DVD-RAM.
Copy-Free Copy-Once Copy-Never
DVD-RW(Ver.1.1)
DVD-RW(Ver.1.1)
with CPRM
VR mode
Video mode
DVD-R
DVD-RAM(Ver.2.0)
Once “Copy Once” has been recorded, additional recording
cannot be performed.
This * marked parts are compatible with CPRM.
O
OO
O
O
OO
- -
* -
- * -
-
Press the CH/TRK (/ ) buttons or number
buttons to select the channel you want to record.
3
Press the REC SPEED button repeatedly, to select the
4
recording speed (quality).
➝
• XP(High, approx. 1 hour)
approx. 2 hours)
➝
EP(Extended Play, approx. 6 hours/8hours)
RW
Recordable Time 02:08
➝
VR XP CH 11
SP(Standard,
LP(Low, approx. 4 hours)
- Content Protection for Recordable Media (CPRM)
CPRM is a mechanism that ties a recording to the
media on which it is recorded. It is supported by some
DVD recorders, but not by many DVD players. Each
blank recordable DVD has a unique 64-bit media ID
etched in the BCA. When protected content is recorded
onto the disc, it can be encrypted with a 56-bit C2
(Cryptomeria) cipher derived from the media ID.
During playback, the ID is read from the BCA and used
to generate a key to decrypt the contents of the disc.
If the contents of the disc are copied to other media, the
ID will be absent or wrong and the data will not be
decryptable.
Recording the current
channel you are watching
1. Check the antenna cable is connected.
2. Check the remaining time on the disc.
DVD-RAM/DVD-RW discs should be formatted in
advance before beginning recording. Most new discs
are sold unformatted. Make sure to format your unformatted discs before recording.
Press the OPEN/CLOSE button and place a
recordable disc on the disc tray.
1
Press the OPEN/CLOSE button to close the disc
tray.
2
Wait until “LOAD” disappears from the front panel
display.
Press the REC button.
5
• “” is displayed on the screen and recording
begins.
Press the STOP button to stop or finish a recording
6
in progress.
• The message “Updating the information of disc.
Please wait for a moment” is displayed.
Pausing / Resuming
• Press the REC PAUSE button to pause a recording
in progress.
• Press the REC PAUSE button again during pause to
resume recording.
•You can switch channels by pressing the CH/TRK
(/ ) buttons while recording pauses.
You can not change the recording mode and
Note
the channel while recording.
Recording will stop automatically if there is
no free space left for recording.
Up to 99 titles can be recorded onto a disc.
If the power interrupted due to power failure
or other reasons, the title being recorded will
not be saved onto the disc.
Recording will stop automatically if a copy
protected image is selected.
Do not use DVD-R authoring discs with this
unit.
Recording
English - 53

Recording From
Connect the DV output jack of your camcorder to
the DV input jack on the front of your DVD
1
Recorder & VCR using a DV cable.
External Devices
Follow these directions to record onto a disc or a tape
from External Devices.
Connect the AV out jack of your External Devices
to the AV IN jack on the front or rear of your DVD
1
Recorder & VCR using Audio/Video Cable.
Power on your DVD Recorder & VCR and switch
to AV In mode by pressing the INPUT SEL. button
2
on the remote control .
The front panel display changes in the following
sequence depending on the Video input setting in
the menu.
AV1: ➝ Channel Number ➝ AV 1 ➝ AV 2 ➝ DV
S-Video: ➝ Channel Number ➝ SUPER ➝ AV 2 ➝ DV
Press the REC SPEED button repeatedly to select
the recording speed(quality).
3
➝ SP ➝ LP ➝ EP ➝ XP
When your DVD Recorder & VCR is in the stop
mode, set the operation mode of your External
4
Devices to play mode.
Press the REC button on your DVD Recorder &
VCR to start recording when the desired video is
5
displayed from the external device.
Recording
Press the STOP button on your DVD Recorder &
VCR when the recording is finished.
6
Also refer to the user manual for your External
Devices when recording through AV In jacks on
Note
the DVD/VCR using Audio/Video cables.
For more information on changing the Video Input
from AV1 to S-Video, see page 32(Video Input).
Power on your DVD Recorder & VCR and switch
to DV mode by pressing the INPUT SEL. on the
2
remote control.
Press the REC SPEED button repeatedly to select
the recording speed(quality).
3
➝ SP ➝ LP ➝ EP ➝ XP
Press the INPUT SEL. button to select DV.
If the input is set to DV, a playback/record menu that
4
enables camcorder control appears on the top of the
screen.
DV
The DV device is connected
RETURNSELECTMOVE
Select the Play icon on the upper part of the
screen to playback the camcorder and find the
5
starting position to copy.
You can press the PLAY button on the remote
control to playback the camcorder.
To start recording, Press the œ √ button to select
rec(●) icon in the top side of the screen, then
6
press the ENTER button.
You can press the REC button of the remote control to start recording. To display playback related
icons on the screen, press any direction button on
the remote control.
Press the STOP button on your DVD Recorder &
VCR when the recording is finished.
7
Recording through a DV
Input jack
You may control the Camcorder using the IEEE1394
(DV) interface.
Follow these directions to record onto a disc or tape
from a camcorder that has a DV output jack.
54 - English
Some camcorders may not work with your
DVD Recorder & VCR even if they have a DV
Note
output jack.
Also refer to the user manual for your cam-
corder when recording through a DV jack.

Making a One Touch
Making a Timer
Recording (OTR)
One-Touch Recording (OTR) allows you to add recording time in 30-minute increments up to 4 hours by
pressing the REC button.
Press the CH/TRK (/) buttons or number buttons to select the channel to record.
1
If you want to record through a connected external
component, press the INPUT SEL. button to
select an appropriate external input(AV1, AV2 or
DV).
• CATV channel: 1 to 125
• TV channel: 2 to 69
Press the REC button to start recording.
2
While in Record mode, press the REC button
again to activate One-Touch Recording (OTR).
3
• Record length 0:30 appears on the On-Screen
Display and the DVD Recorder & VCR will record
for exactly 30 minutes.
Continue pressing REC to add recording time in
30 minute increments up to 4hours.
4
(see page 52)
• The DVD Recorder & VCR stops recording automatically when the time has elapsed.
To stop recording
Press the STOP () button.
The message “Press Stop button once more to cancel Timer Record” is displayed.
Press the STOP () button again.
The message”Updating the Information of disc.
Please wait for a moment” is displayed.
Recording
The clock (Initial Setup – Clock Set) must be set before
proceeding with a timer recording. (See page 24)
Press the OPEN/CLOSE button, and place a
recordable disc on the disc tray.
1
Press the OPEN/CLOSE button to close the disc
tray.
2
Wait until “LOAD” disappears from the front panel
display.
With the unit in Stop mode, press the MENU
button.
3
Press the …† buttons to select Timer Rec., then
press the ENTER or √ button.
4
DVD-RAM(VR)
Setup
Timer Record
Timer Rec.
Scheduled Record List
Copy
Title List
Playlist
Disc Manager
Press the …† buttons to select Timer Record,
then press the ENTER or √ button.
5
You can also set a timer recording via the TIMER
REC button.
The Timer Recording screen are displayed.
DVD-RAM(VR)
No. Source Date Start End Type Mode Edit
01
---
--/--
To Source Date Start End Mode
DVD CH 01 01/01 12:00 AM 02:00 AM SP
Recordable Time 01:23 SP
Press numeric keys or
Timer Record
RETURNSELECTMOVE EXIT
Scheduled Record List
No. 01
--:---- --:---- -- --
…†
keys.
√√
√√
√√
Recording
Note
The timer counter decreases by the minute
from 4:00 to 0:00, then the DVD Recorder
& VCR stops recording.
RETURNSELECTMOVE EXIT
English - 55

Fill in the items using the …†œ √ buttons.
œ √ : Moves to the previous/next item,
6
…† 0~9 : Sets a value.
• To : Select the media to record DVD or VCR.
• Source : The video input source (AV 1, AV 2 ), or
the broadcasting channel you want to
make a timer recording of.
• Date: Date that the timer recording starts
…
01/31
01/30
:
01/02
Present Date 01/01
MON-FRI
Sun's
Mon's
:
Sat's
†
• Start/End Time : Start and end time of the timer
recording.
•
Recording mode (DVD)
AUTO : Select when you want to set video quality auto-
matically. In AUTO mode, the most suitable
record mode is adjusted automatically, according to remaining time on the disc and length of
the timer recording.
This function is selected only one mode in
XP,SP,LP and EP modes. And you can use this
mode for timer recording.
XP (high quality) : Select when audio and video qualities
Recording
SP (standard quality) : Select to record in standard qual-
LP (low quality) : Select when a long recording time is
EP (extended mode) : Select when a longer recording
are important. (Approx. 1 hour)
ity. (Approx. 2 hours)
required.(Approx. 4 hours)
time is required. (Approx.6 hours
at 1.2 Mbps or Approx.8 hours
at 0.8 Mbps )
•
Recording mode (VCR)
AUTO : Select when you want to set video quality auto-
matically. It depends on remaining time of VCR
tape.
SP : Standard Play, for best picture quality.
SLP : Super Long Play, for maximum recording time (3
times SP).
Press the ENTER button.
• will appear on the front panel. It means that a
7
timer recording is registered.
If the timer settings overlap
The programs are recorded in order of priority.
If timer recording is set for the first program and
then again for the second program and both
programs overlap, the following message will
appear on the screen: “This setting is identical with
1.2” The message shows that the first program has
priority. After recording of the first program is
complete, the second program starts being
recorded.
To exit without saving the current setting
Press the MENU or TIMER REC button.
To return to the previous menu
Press the RETURN button if you don’t want to set a
timer recording.
Turn the power off to finish the timer recording.
• will blink if disc or tape is not inserted.
8
The timer recording time may differ from the set
time depending on disc status and overall timer
Note
recording status (for example, recording times
overlapping, or when the previous recording
ends within 3 minutes before the start time of
the next recording.)
When you are recording at EP mode on a
DVD-RW(V)/R disc, it may not record the full 6
Note
or 8 hours because the unit uses the
VBR(Variable Bit Rate) ENCODING system.
For example, if you record a program with a lot
of action, it uses a higher bit rate which in turn
consumes more disc memory.
56 - English

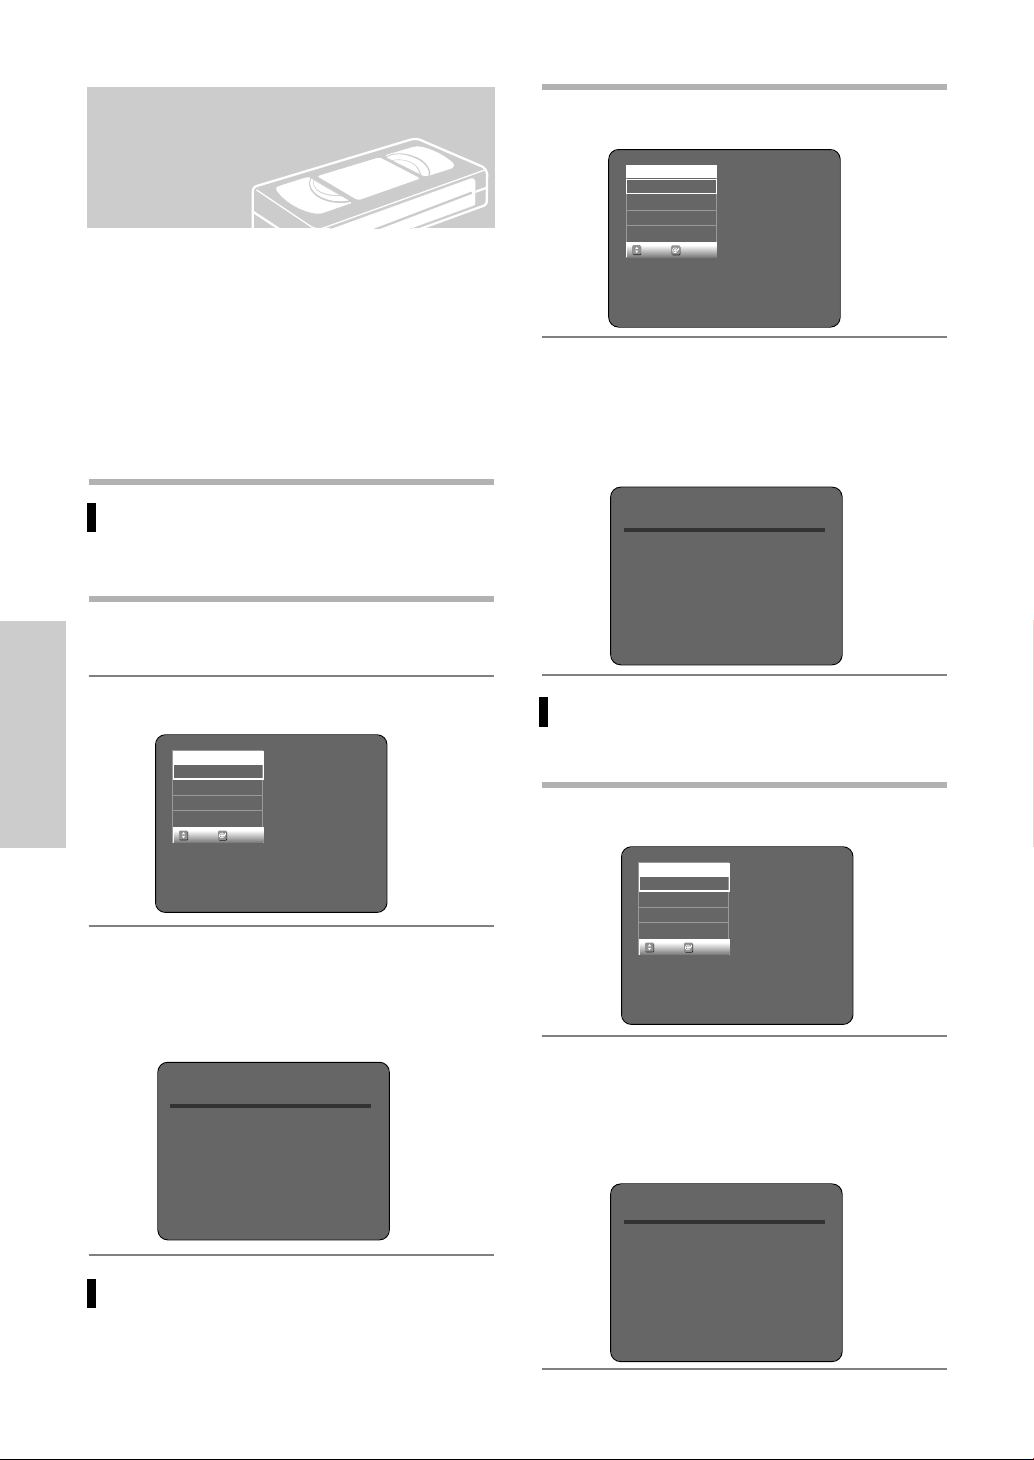
Editing the Scheduled
Press the …† button to select the number of the
scheduled record list you want to edit, then press
4
the ENTER or √ button.
• The Edit and Delete items are displayed.
Record List
Follow these directions to edit the timer record list.
Press the MENU button.
1
Press the …†button to select Timer Rec., then
press the ENTER or √ button.
2
DVD-RAM(VR)
Setup
Timer Record
Timer Rec.
Scheduled Record List
Copy
Title List
Playlist
Disc Manager
Press the …†button to select Scheduled Record
List, then press the ENTER or √ button.
3
DVD-RAM(VR)
Timer Record
√√
√√
RETURNSELECTMOVE EXIT
Scheduled Record List
DVD-RAM(VR)
No. To Source Date Start End Mode Edit
01 DVD CH 09 11/22 09:22AM 10:30AM SP
02 DVD CH 09 12/20 07:30AM 10:30AM SP
03
--
--- --/----:---- --:---- --
Scheduled Record List
Edit
Delete
RETURNSELECTMOVE EXIT
√√
√√
√√
Press the …† button to select Edit, then press
the ENTER button.
5
• The Timer Recording screen is displayed.
Edit the items you want to modify. See the Timer
Recording section for more information on Timer
Recording Input items.(See page 56)
DVD-RAM(VR)
No. To Source Date Start End Mode Edit
01 DVD CH 09 11/22 09:22AM 10:30AM SP
To Source Date Start End Mode
01 DVD CH 09 12/20 07:30AM 10:30AM SP
DVD CH 01 01/01 12:00 AM 02:00 AM SP
03 ----- --/----:---- --:---- --
Recordable Time 01:23 SP
Press numeric keys or
Scheduled Record List
No. 01
…†
RETURNSELECTMOVE EXIT
keys.
√√
√√
√√
Press the ENTER button to confirm the edited setting.
6
Recording
No. To Source Date Start End Mode Edit
01 DVD CH 09 11/22 09:22AM 10:30AM SP
02 DVD CH 09 12/20 07:30AM 10:30AM SP
03 ----- --/----:---- --:---- --
RETURNSELECTMOVE EXIT
√√
√√
√√
Press the MENU button after finishing the operation. The menu screen will disappear.
7
English - 57

Deleting the
Scheduled Record List
Press the …† button to select the number of the
scheduled record list you want to delete, and then
4
press the ENTER button.
• The Edit and Delete items are displayed.
DVD-RAM(VR)
Scheduled Record List
Follow these directions to delete a title from the timer
record list.
Press the MENU button.
1
Press the …† button to select Timer Rec., then
press the ENTER or √ button.
2
Timer Record
√√
√√
RETURNSELECTMOVE EXIT
Timer Record
√√
√√
RETURNSELECTMOVE EXIT
Press the …† button to select Scheduled
Record List, then press the ENTER or √ button.
3
Recording
DVD-RAM(VR)
Setup
Timer Rec.
Copy
Title List
Playlist
Disc Manager
DVD-RAM(VR)
Setup
Timer Rec.
Copy
Title List
Playlist
Disc Manager
Timer Record
Scheduled Record List
Timer Record
Scheduled Record List
No. To Source Date Start End Mode Edit
01 DVD CH 09 11/22 09:22AM 10:30AM SP
01 DVD CH 09 12/20 07:30AM 10:30AM SP
03 -----
--
/----:---- --:---- --
Edit
Delete
RETURNSELECTMOVE EXIT
√√
√√
√√
Press the …† button to select Delete, then press
the ENTER or √ button.
5
• You will be prompted with the delete confirm
message such as ‘Do you want to delete
No.01?’.
DVD-RAM(VR)
No. To Source Date Start End Mode Edit
01 DVD CH 09 11/22 09:22AM 10:30AM SP
01 DVD CH 09 12/20 07:30AM 10:30AM SP
Do you want to delete ‘No. 01’?
03 ----- --/----:---- --:---- --
Scheduled Record List
No. 01
NoYes
RETURNSELECTMOVE EXIT
√√
√√
√√
Press the œ √ buttons to select Yes, then press
the ENTER button.
6
• The selected title will be deleted from the list.
Press the MENU button after finishing the operation. The menu screen will disappear.
7
You can not delete programs that are cur-
Note
rently recording.
DVD-RAM(VR)
No. To Source Date Start End Mode Edit
01 DVD CH 09 11/22 09:22AM 10:30AM SP
01 DVD CH 09 12/20 07:30AM 10:30AM SP
03
--
--- --/----:---- --:---- --
58 - English
Scheduled Record List
RETURNSELECTMOVE EXIT
√√
√√
√√
 Loading...