

Samsung DVDV9500 Users Manual
DVD O
PERATIONS
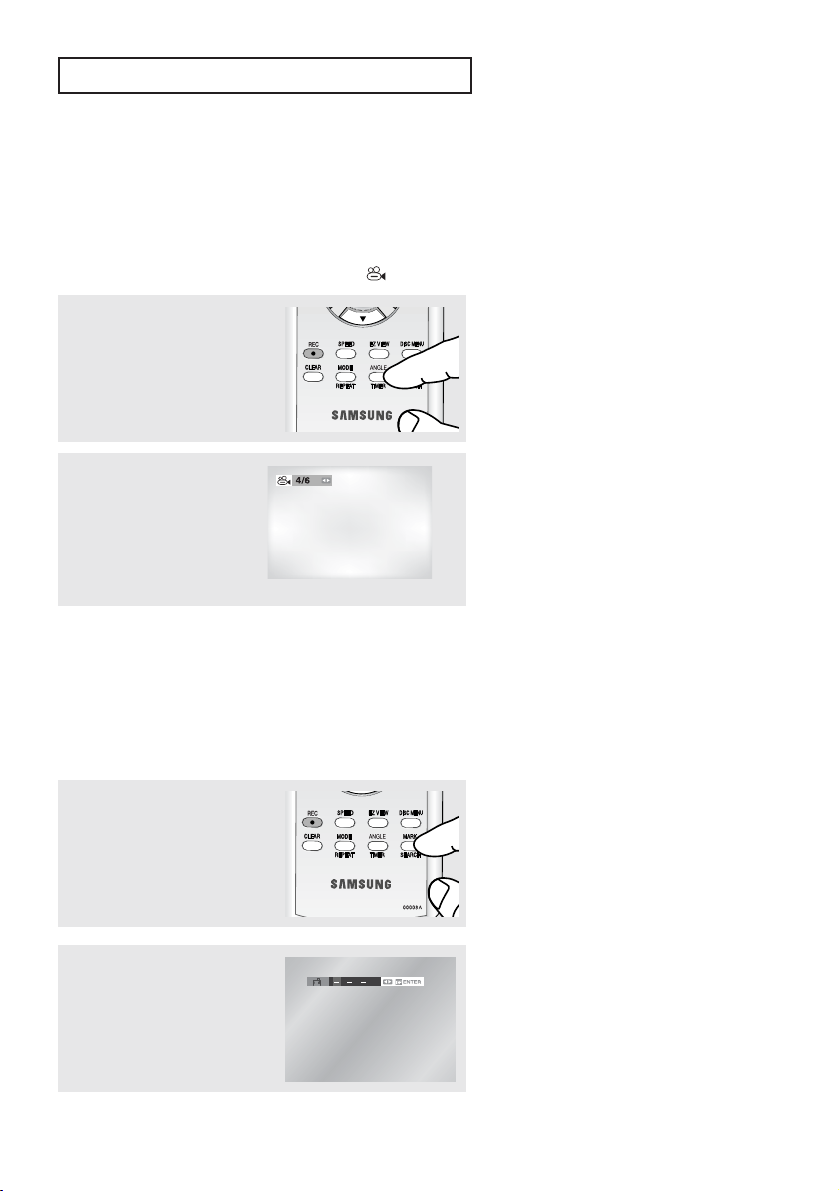
Changing the Camera Angle
When a DVD contains multiple angles of a particular scene, you can use the ANGLE function.
Using the ANGLE button (DVD)
If the disc contains multiple angles, the ANGLE ( ) icon appears on the screen.
1
Press the ANGLE button,
then the ANGLE icon will
appear with the current angle
number and the number of
angles available.
Note
2
Press the œ/√ buttons
repeatedly to select the
desired angle. To remove the
ANGLE icon, press the
CLEAR or RETURN button.
If the disc has only one angle, this feature
won’t work. Currently, very few discs have
this feature.
Using the Bookmark Function
This feature lets you bookmark sections of a DVD so you can quickly find them at a later time.
Using the MARK button (DVD)
1
During play, press the MARK
button on the remote control.
Note
2
When you reach the scene
you want to mark, press the
ENTER button. Up to three
scenes may be marked at a
time.
ENG-45
Depending on a disc, the Bookmark function
may not work.
DVD O
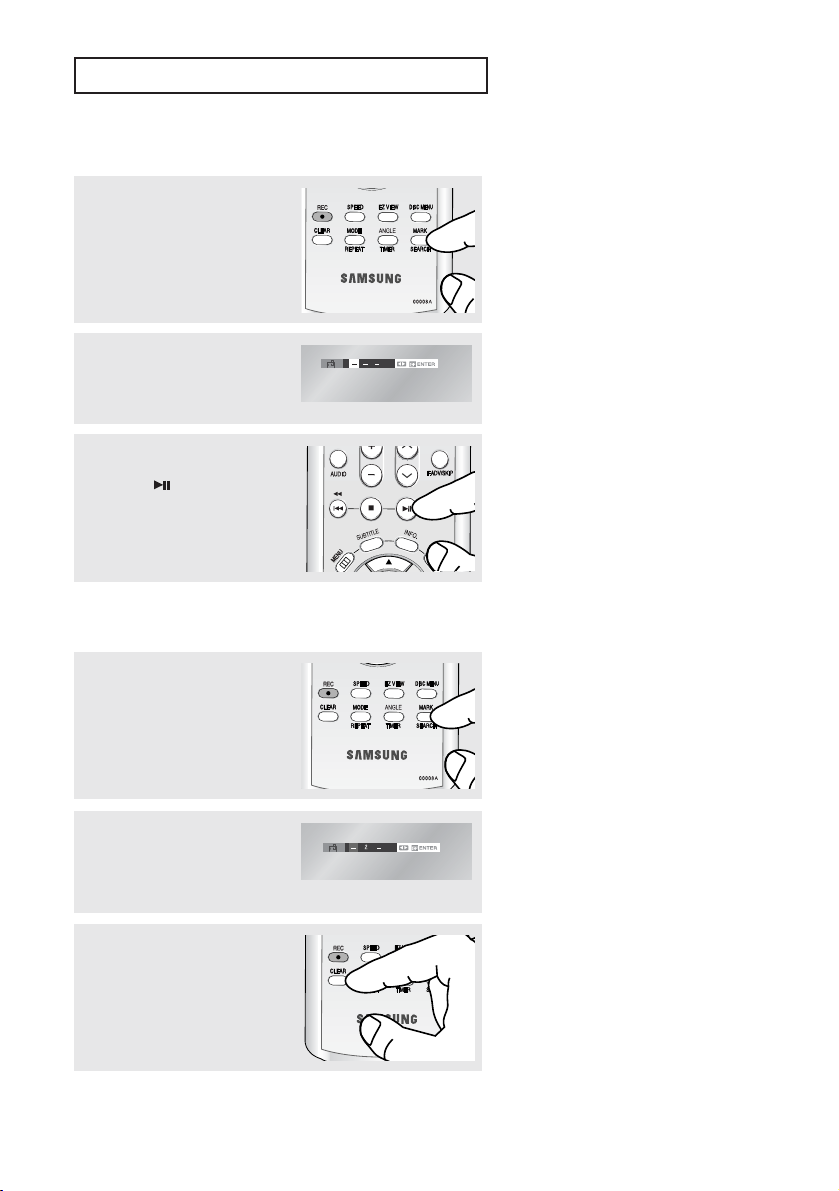
Recalling a Marked Scene
PERATIONS
1
During play, press the MARK
button on the remote control.
2
Press the
select a marked scene.
œ/√
buttons to
3
Press the (Play/Pause)
button to skip to the marked
scene.
Clearing a Bookmark
1
During play, press the MARK
button on the remote control.
2
Press the
select the bookmark
number you want to delete.
œ/√
buttons to
3
Press the CLEAR button to
delete a bookmark number.
ENG-46
DVD O
PERATIONS
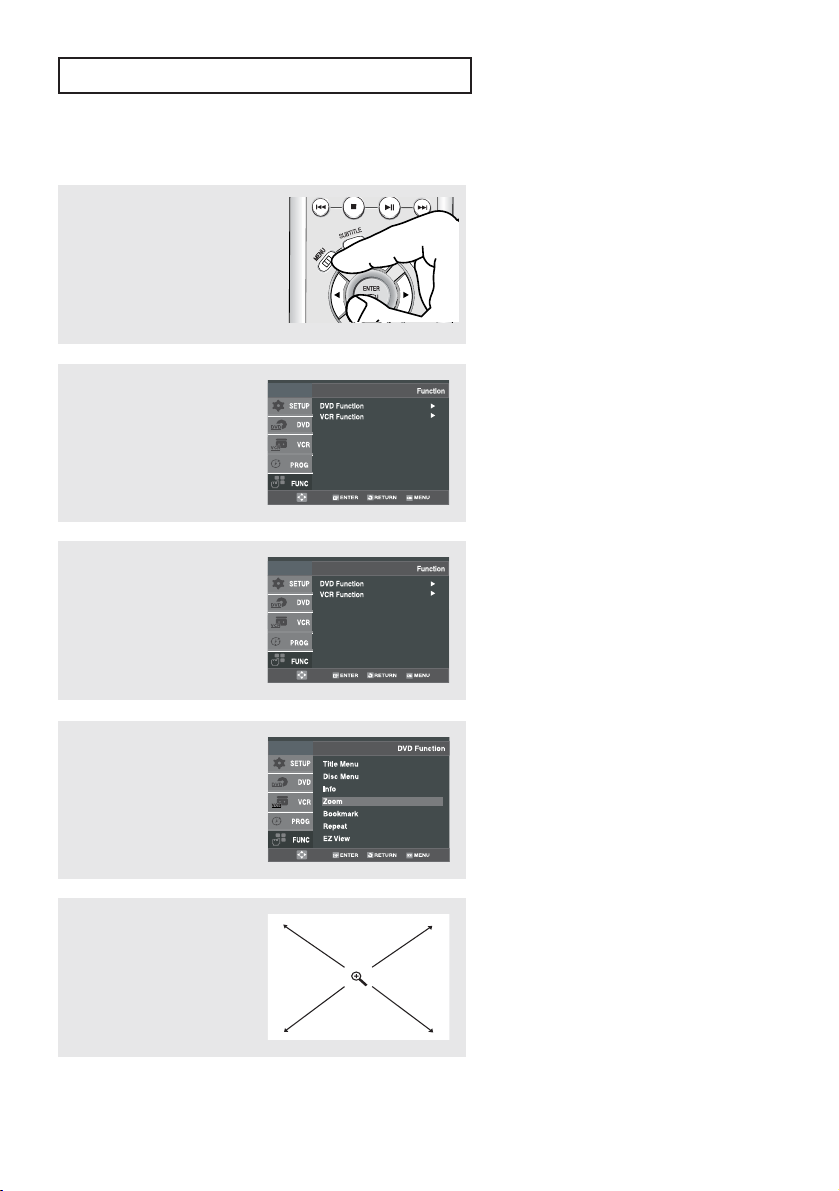
Using the Zoom Function (DVD)
1
During the playback of a DVD
disc, press the MENU button
on the remote control.
2
Press the …/† buttons to
select Function, then press
the √ or ENTER button.
3
Press the …/† buttons to
select DVD Function, then
press the √ or ENTER button.
4
Press the …/† buttons to
select Zoom, then press the √
or ENTER button.
5
Press the …/† or œ/√
buttons to select the part of
the screen you want to
zoom in on.
Press the ENTER button.
ENG-47
▼
During DVD play, press ENTER to
zoom in 2X/4X/2X/Normal in order.
Note
Depending on a disc, the Zoom function may
not be available.
DVD O
PERATIONS
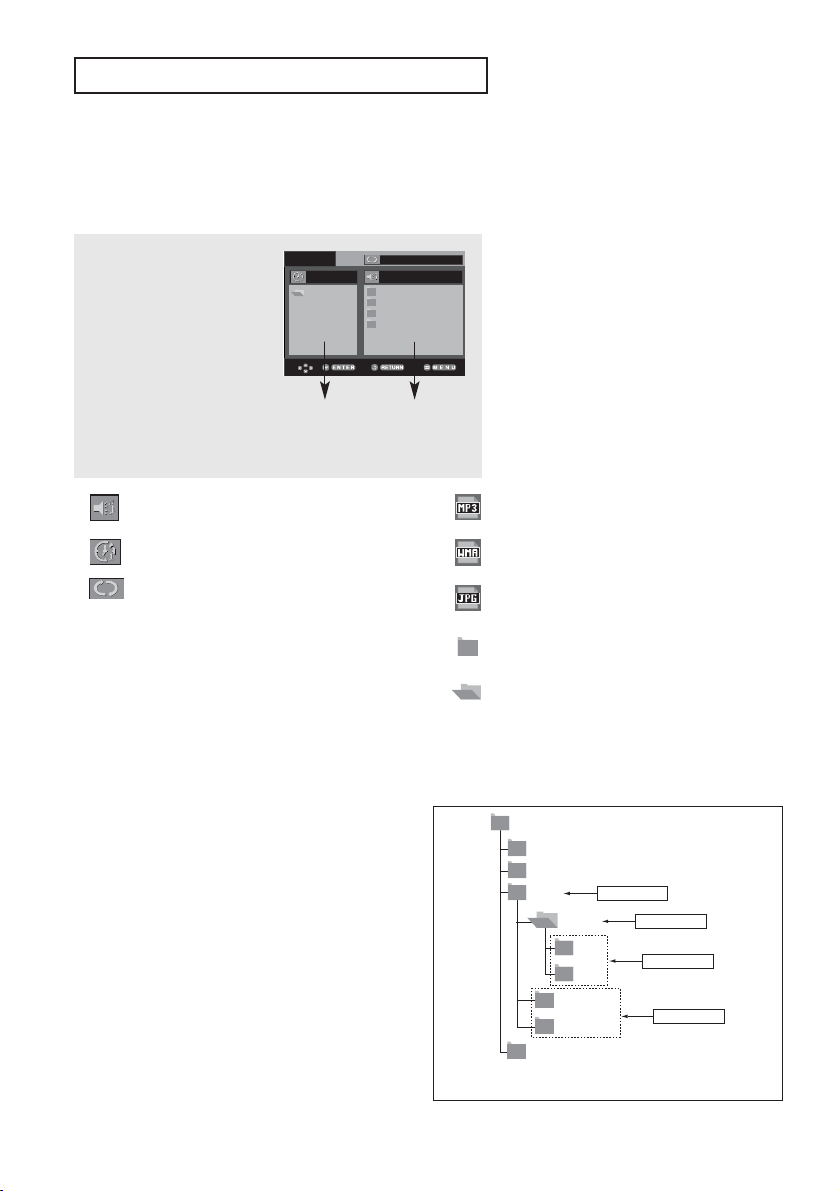
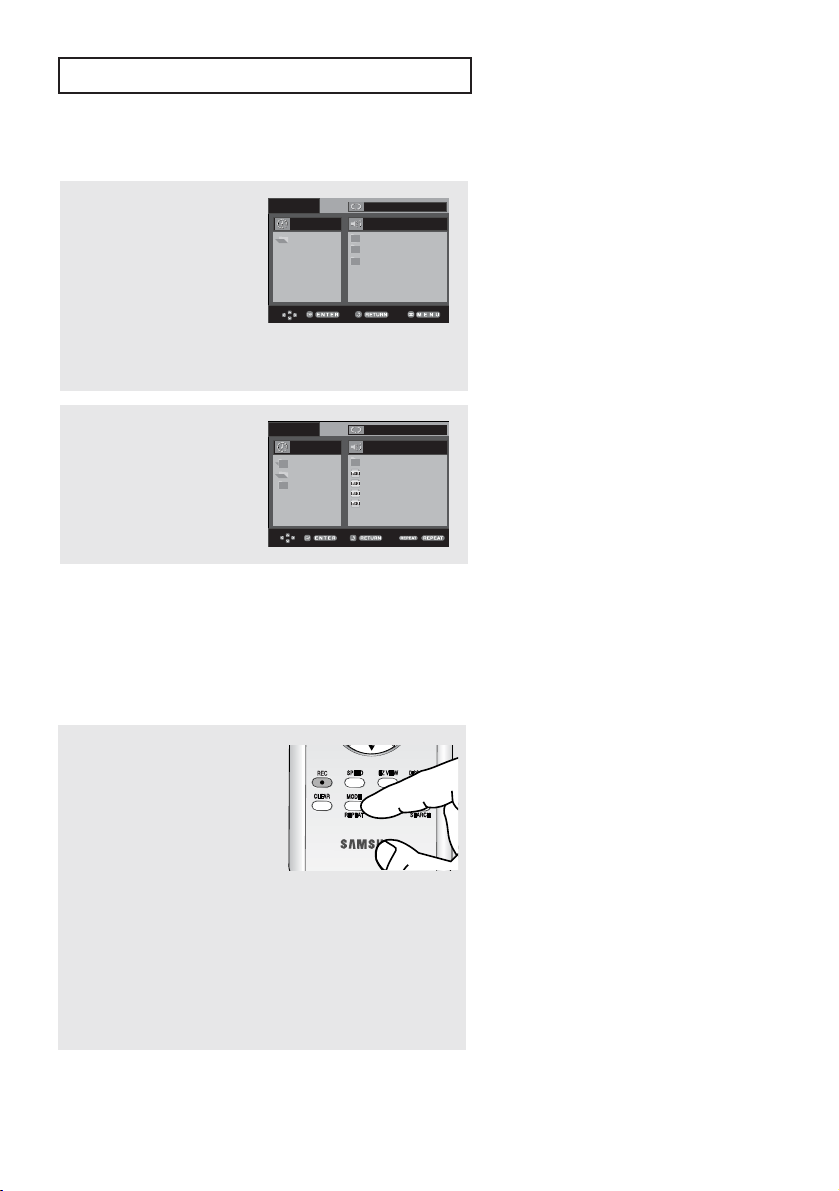
Clips Menu for MP3/WMA/JPEG
Discs with MP3/WMA/JPEG contain individual songs and/or pictures that can be organized into folders as
shown below. They are similar to how you use your computer to put files into different folders.
ROOT
WMA
JPEG
MP3
Off
1
Open the disc tray.
2
ROOT
Place the disc on the tray.
3
Close the tray.
The tray closes and this
Parent Folder,
Current Folder and
Peer Folders
Folders and Files
in Current Folder
screen displays.
- : Name of currently playing file.
- : Current Playback Time.
- : Current Playback Mode : There are four
modes. They can be selected in order by
pressing the REPEAT button.
- Off: Normal Playback
- Track: Repeats the current track.
- Folder: Repeats the current folder.
- Random: Files in the disc will be played
in random order.
Folder Selection
The folder can only be selected in the Stop mode.
- To select the Parent Folder
Press the RETURN button to go the to parent
folder, or press the …/† buttons to select “..” and
press the ENTER button to go to the parent folder.
- To select the Peer Folder
Press the œ/√ buttons to highlight the left window.
Press the …/† buttons to select the desired folder,
then the ENTER button.
- To select the Sub-Folder
Press the œ/√ buttons to highlight the right window.
Press the …/† buttons to select the desired folder,
then press the ENTER button.
- : MP3 file icon.
- : WMA file icon.
- : JPEG file icon.
- : Folder icon.
- : Current Folder icon.
Root
WMA
JPEG
MP3
SONG FILE 3
Parent Folder
MUSIC
1st
2nd
SONG FILE 1
SONG FILE 2
Current Folder
Sub-Folders
Peer Folders
ENG-48
DVD O
PERATIONS
MP3/WMA Playback
Off
ROOT
MP3
WMA
Because You
Cactus
Sad Day
Wonderful
Off
1
Open the disc tray.
2
Place the disc on the tray.
00:00:23 1_mp3
ROOT
3
Close the tray.
▼
4
Press the …/† or œ/√
buttons to select a song file.
Press the ENTER button to
begin playback of the song
file.
00:00:23 Because You
00:00:23 1_mp3
ROOT
MP3
WMA
Off
Off
..
Because You
Cactus
Sad Dayu
Because You
Wonderful
Cactus
Sad Day
Wonderful
Notes
- Depending on the recording method, some MP3 CD-Rs may not be played.
- Only MP3/WMA Format files with the “ .mp3 and .wma” extensions can be played.
When a disc or a folder contains both
MP3 and WMA files, only one type will
be played, not both.
Repeat/Random playback
During play, press the
REPEAT button to change
the playback mode. There
are four modes.
Off, Track, Folder and
Random.
- Off: Normal Playback
- Track: Repeats the current song file.
- Folder: Repeats the song files which have the
same extension in the current folder.
- Random: Song files which have the same
extension will be played in random order.
To resume normal play, press the CLEAR button.
ENG-49

DVD O
PERATIONS
MP3/WMA file
When you record MP3 or WMA files on CD-R, please refer to the following.
- Your MP3 or WMA files should be ISO 9660
or JOLIET format.
ISO 9660 format and Joliet MP3 or WMA files
are compatible with Microsoft's DOS and
Windows, and with Apple's Mac. This format is
the most widely used.
- When naming your MP3 or WMA files, do not
exceed 8 characters, and enter “.mp3, .wma”
as the file extension.
General name format : Title.mp3. or Title.wma.
When composing your title, make sure that you
use 8 characters or less, have no spaces in the
name, and avoid the use of special characters
including: (.,/,\,=,+).
- Use a decompression transfer rate of at least
128 Kbps when recording MP3 files.
Sound quality with MP3 files basically depends
on the rate of compression/decompression you
choose. Getting CD audio sound requires an
analog/digital sampling rate, that is conversion
to MP3 format, of at least 128 Kbps and up to
160 Kbps. However, choosing higher rates, like
192
Kbps or more, only rarely give better sound
quality. Conversely, files with decompression
rates below 128 Kbps will not be played
properly.
- Use a decompression transfer rate of at least
64Kbps when recording WMA files.
Sound quality with WMA files basically depends
on the rate of compression/decompression you
choose.
Getting CD audio sound requires an
analog/digital sampling rate, that is conversion
to WMA format, of at least 64Kbps and up to
192Kbps.
Conversely, files with decompression rates
below 64Kbps or over 192Kbps will not be
played properly.
- Do not try recording copyright protected
MP3 files.
Certain "secured" files are encrypted and code
protected to prevent illegal copying. These files
are of the following types: Windows MediaTM
(registered trade mark of Microsoft Inc) and
SDMITM (registered trade mark of The SDMI
Foundation). You cannot copy such files.
- Important:
The above recommendations cannot be taken
as a guarantee that the DVD-VCR will play MP3
recordings, or as an assurance of sound quality.
You should note that certain technologies and
methods for MP3 file recording on CD-Rs
prevent optimal playback of these files on your
DVD-VCR (degraded sound quality and in some
cases, inability of the player to read the files).
- This unit can play a maximum of 3000 files and
300 folders per disc.
ENG-50
DVD O
PERATIONS
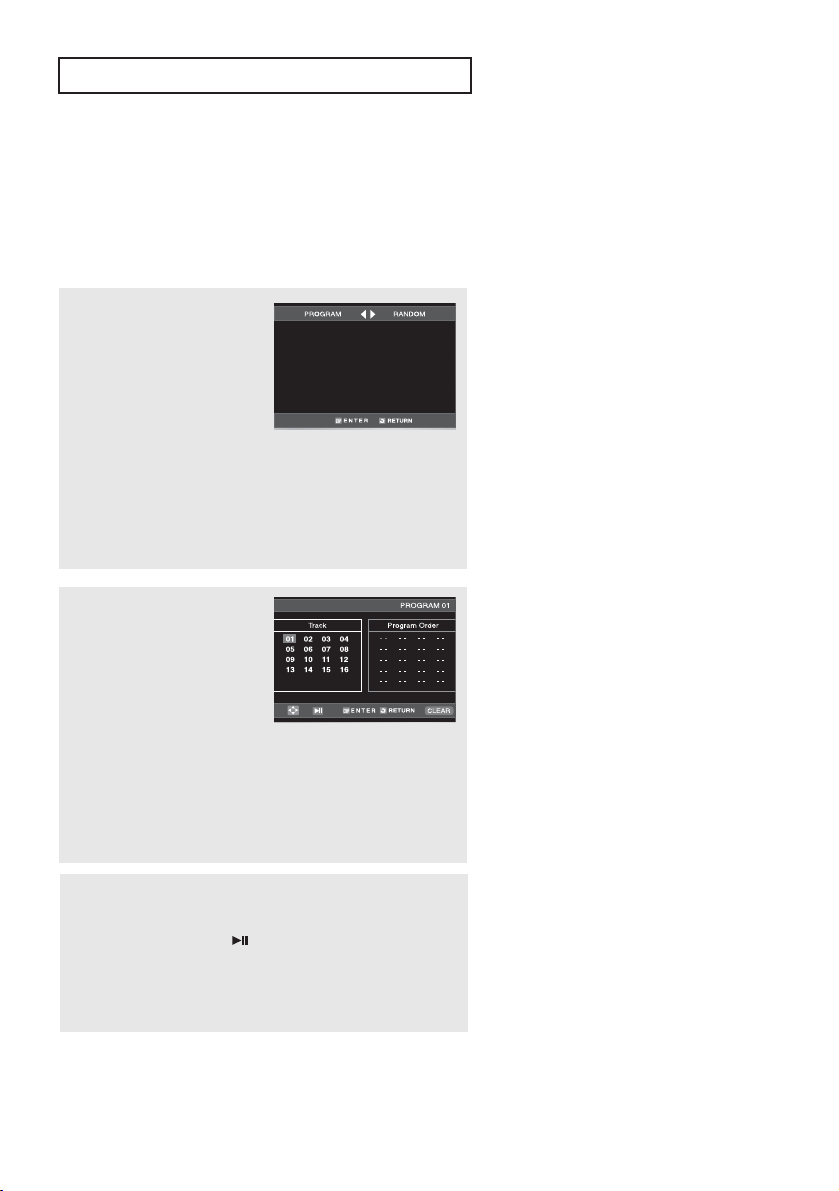
Program Play & Random Play
You can listen to songs randomly or in the desired sequence.
Up to 20 tracks can be programmed.
This function is available only with Audio CDs.
Program Play
1
With the unit in stop mode,
press the REPEAT button.
- The play mode menu will
appear.
2
Press the œ or √ buttons to
select PROGRAM, then
press the ENTER button.
- The program play screen
will appear.
3
Press the …/† or œ/√
buttons to select the desired
track, then press the ENTER
button.
- The selected track will be
added to the Program order.
- If you delete the track,
press the CLEAR button.
The track added last will be
deleted from the Program
order.
4
To finish programming and
start playback, press the
button.
The disc will be played in
programmed order.
Note
Random Play
• With the unit in stop mode, press the
REPEAT button.
- The play mode menu will appear.
• Press the
Random, then press the ENTER button.
-The disc will be played in random order.
Note
If the disc tray is opened during
programming, program play will be canceled.
• To Cancel Programming
- Press the REPEAT button.
The program will not be saved and the
• To Cancel Program Play
- During playback or in Stop mode, press
œ or √
buttons to select
program screen will disappear.
the CLEAR button.
ENG-51
DVD O
…/†
TIMER:
PERATIONS
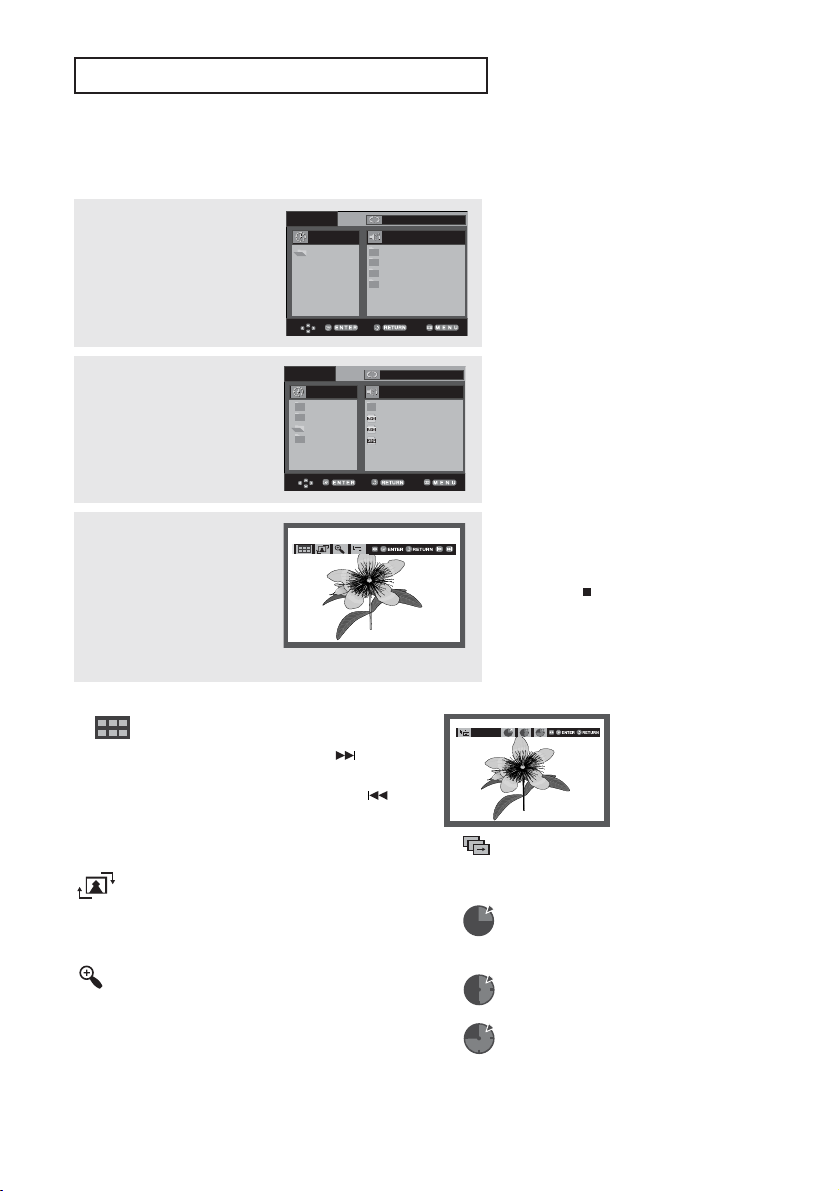
Picture CD Playback
1
Select the desired folder,
then press the ENTER
button.
2
Press the …/† buttons to
select a Picture file in the
clips menu, then press the
ENTER button.
3
Press the INFO. button to
display the menu.
Press the œ/√ buttons to
select the menu you want to
view, then press the ENTER
button.
Album Screen
- : Returns to the Album Screen.
- To see the next six pictures, press the (Skip)
button.
- To see the previous six pictures, press the
(Skip) button.
Rotation
: Each time the ENTER button is pressed,
the picture rotates 90 degrees clockwise.
Zoom
: Press the
part of the screen you want to zoom in on.
Press the ENTER button. Each time the
ENTER button is pressed, the picture is
enlarged up to 4X. (2X ➝ 4X ➝ 2X ➝ Normal)
or œ/√ buttons to select the
ROOT
WMA
JPEG
MP3
ROOT
Off
ROOT
WMA
JPEG
MP3
Off
..
1
2
3
ENG-52
Notes
- If no buttons on the remote control are
pressed for 10 seconds, the menu will
disappear.
- Press the
(Stop)
button to return to the
clips menu.
- When playing a Kodak Picture CD, the
unit displays the Photo directly, not the
clips menu.
Slide Show
- : The unit enters slide show mode.
- Before beginning the Slide Show, the picture
interval must be set.
- : When this icon is selected and ENTER is
pressed, the pictures change automatically
with about a 6 second interval.
- : The pictures change automatically with
about a 12 second interval.
- : The pictures change automatically with
Notes
- Depending on a file size, the amount of time between each
- If you don’t press any button, the slide show will start
about a 18 second interval.
picture may be different from the set interval time.
automatically in about 10 seconds by default.

DVD O
PERATIONS
JPEG Discs
When playing a CD-R/Picture CD
- Only files with the “.jpg” and “.JPG” extensions can be played.
- If the disc is not closed, it will take longer to start playing and not all of the recorded files may be played.
- Only CD-R discs with JPEG files in ISO 9660 or Joliet format can be played.
- The name of the JPEG file may not be longer than 8 characters and should contain no blank spaces or
special characters (. / = +).
- Only a consecutively written multi-session disc can be played. If there is a blank segment in the multisession disc, the disc can be played only up to the blank segment.
- A maximum of 3000 images can be stored on a single CD.
- Kodak Picture CDs are recommended.
- When playing a Kodak Picture CD, only the JPEG files in the pictures folder can be played.
- Kodak Picture CD: The JPEG files in the pictures folder can be played automatically.
- Konica Picture CD: If you want to see the Picture, select the JPEG files in the clips menu.
- Fuji Picture CD: If you want to see the Picture, select the JPEG files in the clips menu.
- QSS Picture CD: The unit may not play QSS Picture CD.
- If the number of files in 1 Disc is over 3000, only the first 3000 JPEG files can be played.
- If the number of folders in 1 Disc is over 300, only JPEG files in the first 300 folders can be played.
ENG-53

DVD O
PERATIONS
Using the Setup Menu
The Setup menu lets you customize your DVD-VCR by allowing you to select various language preferences,
set up a parental level, even adjust the player to the type of television screen you have.
1
With the unit in Stop mode,
press the MENU button on the
remote control.
2
Press the …/† buttons to
select DVD, then press the √
or ENTER button.
ŒLanguage: Setup of the Language.
´Audio: Setup of the Audio Options.
ˇDisplay: Setup of the Display Options. Used to select which type of screen you want to watch and several
¨Parental: Setup of the Parental Level. Allows users to set the level necessary to prevent children from
display options.
viewing unsuitable movies such as those with violence, adult subject matter, etc.
3
Press the …/† buttons to
access the different
features. Press the √ or
ENTER button to access the
sub features.
4
To make the DVD setup screen
disappear after setting up,
press the MENU button again.
Note
Depending on the disc, some DVD Setup
menu selections may not be available.
ENG-54
DVD O
PERATIONS
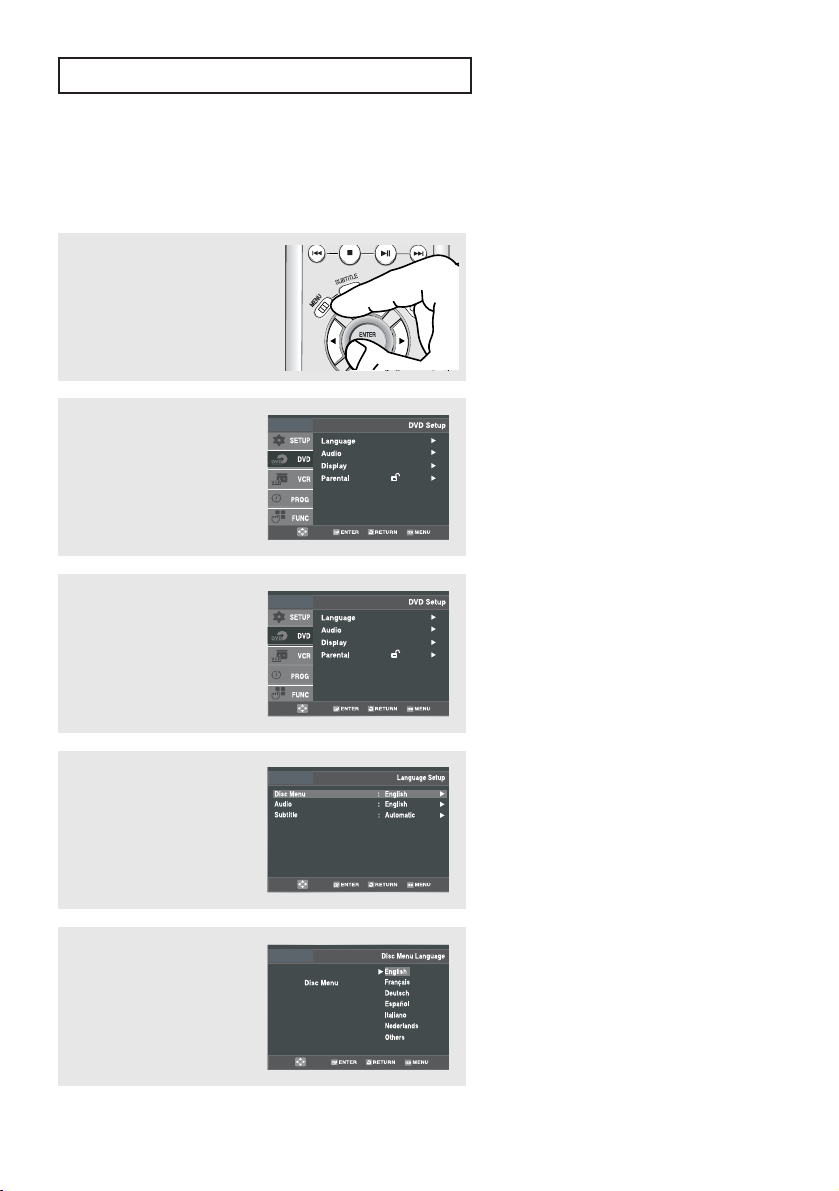
Setting Up the Language Features
If you set the audio and subtitle language in advance, they will come up automatically every time you watch
a movie.
1
With the unit in Stop mode,
press the MENU button on the
remote control.
2
Press the …/† buttons to
select DVD, then press the √
or ENTER button.
3
Press the …/† buttons to
select Language, then press
the √ or ENTER button.
4
Press the …/† buttons to
select the desired item, then
press the √ or ENTER
button.
5
Press the …/† buttons to
select the desired language,
then press the √ or ENTER
button.
ENG-55
▼
- The language is selected and the
screen returns to Language Setup
menu.
- To make the DVD Setup menu
disappear, press the MENU button.
DVD O
Subtitle
Subtitle Language
Automatic
PERATIONS
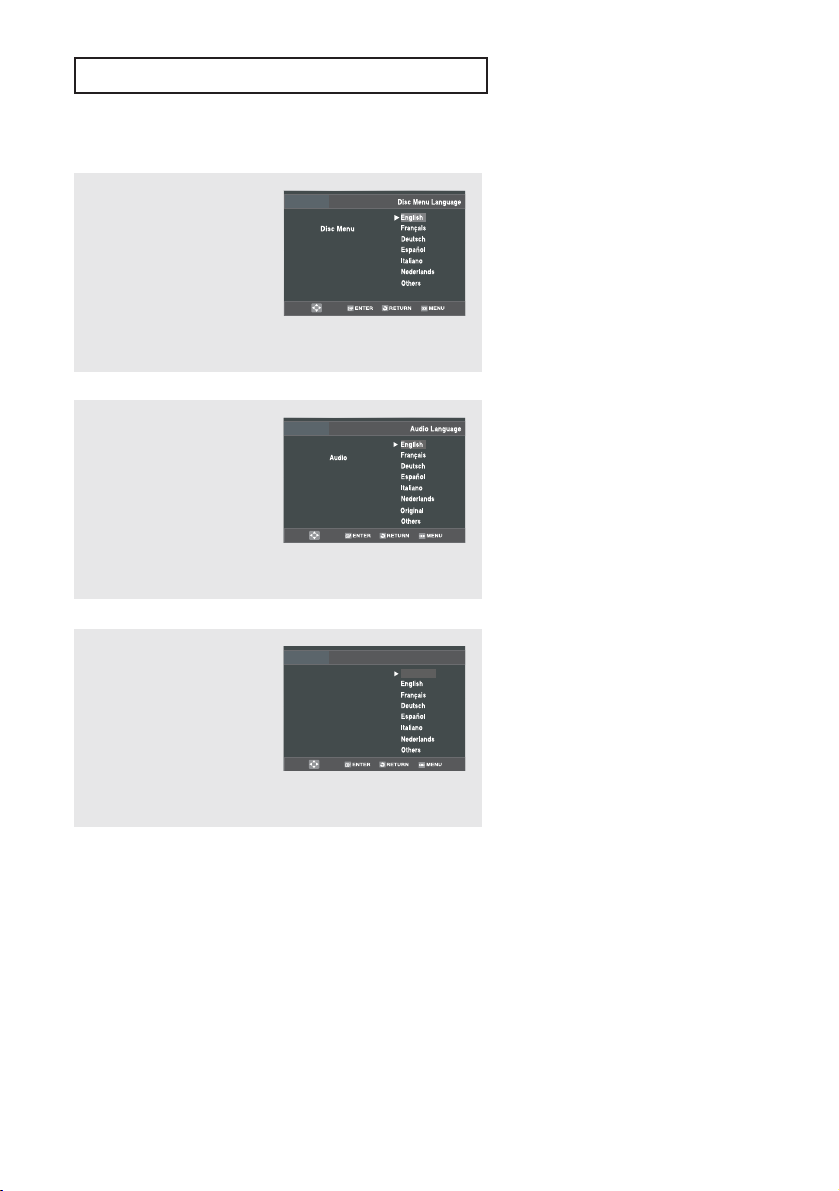
Language Function
Disc Menu
To set the Disc Menu
Language to your preferred
language, follow these steps.
If your preferred language is
available on a DVD, your
Disc Menu Language will
automatically be set to the
language you choose.
Audio
To set the Audio Language to
your preferred language,
follow these steps. If your
preferred language is
available on a DVD, your
Audio Language will
automatically be set to the
language you choose.
Subtitle
To set the Subtitle Language
to your preferred language,
follow these steps. If your
preferred language is
available on a DVD, your
Subtitle Language will
automatically be set to the
language you choose.
▼
- Select “Others” if the language you
want is not listed.
- If the selected language is not
recorded on the disc, the original prerecorded language is selected.
▼
- Select “Original” if you want the
default soundtrack language to be
the original language the disc is
recorded in.
- Select “Others” if the language you
want is not listed.
- If the selected language is not
recorded on the disc, the original prerecorded language is selected.
▼
- Select “Automatic” if you want the
subtitle language to be the same as
the language selected as the audio
language.
- Select “Others” if the language you
want is not listed. Some discs may
not contain the language you select
as your initial language; in that case
the disc will use its original
language setting.
ENG-56
DVD O
PERATIONS
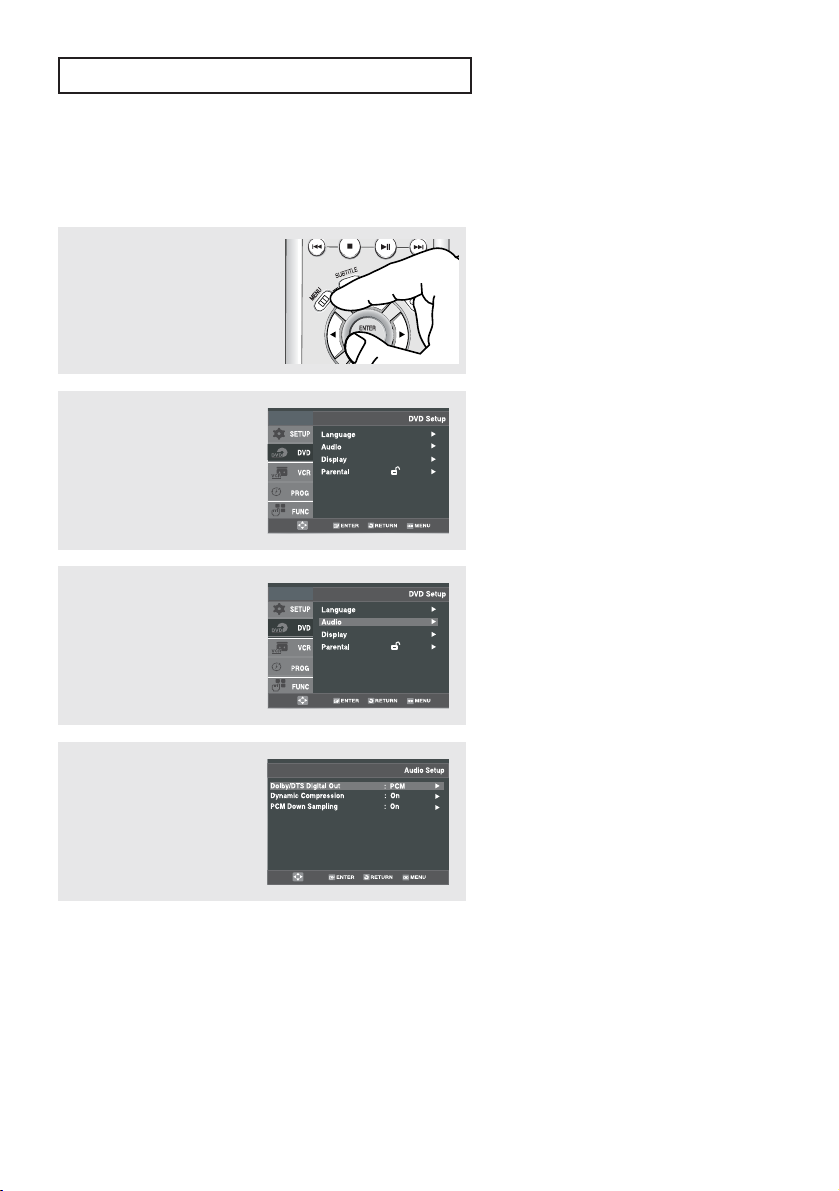
Setting Up the Audio Options
Audio Options allows you to set up sound for use with your external audio system.
1
With the DVD in Stop mode,
press the MENU button on the
remote control.
2
Press the …/† buttons to
select DVD, then press the √
or ENTER button.
3
Press the …/† buttons to
select Audio, then press the
√ or ENTER button.
4
Press the …/† buttons to
select the desired item, then
press the √ or ENTER
button.
ENG-57
▼
- To make the DVD Setup menu
disappear, press the MENU button.
DVD O
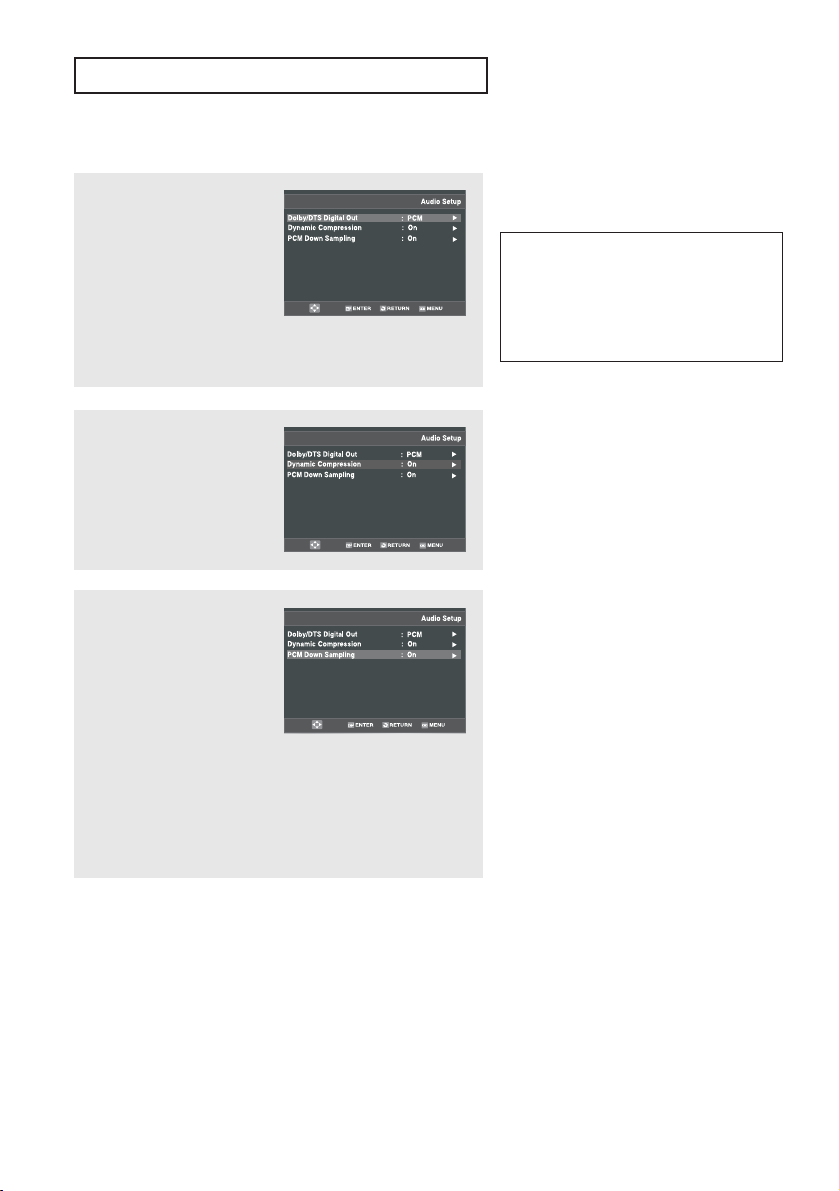
Audio Options
Dolby/DTS Digital Out
- PCM: Converts to
PCM(2CH) audio.
- Bitstream: Outputs
Dolby/DTS Digital via the
digital output. Select
Bitstream when connecting
to a Dolby/DTS Digital
Decoder.
Dynamic Compression
- On: To select dynamic
compression.
- Off : To select the standard
range.
PERATIONS
Note
There is no analog audio output when you
play a DTS disc.
Manufactured under license from Dolby
Laboratories. “Dolby” and the double-D
symbol are trademarks of Dolby
Laboratories.
“DTS” and “DTS Digital Out” are trademarks
of Digital Theater Systems, Inc.
▼
-
Dynamic compression restrains the
dynamic range of the sound, i.e. the
difference between the loud and
quiet passages of a DVD audio track.
This is useful when watching a DVD
late at night.
PCM Down Sampling
- On: Select this when the
Amplifier connected to the
player is not 96KHz
compatible. In this case, the
96KHz signals will be down
converted to 48KHZ.
- Off: Select this when the
Amplifier connected to the
player is 96KHz compatible.
In this case, all signals will
be output without any
changes.
Note
Even when PCM Down sampling is Off,
some discs will still output down sampled
(48KHZ) audio through the digital outputs.
ENG-58
 Loading...