

Samsung DVD-K105, DVD-K115 User Manual
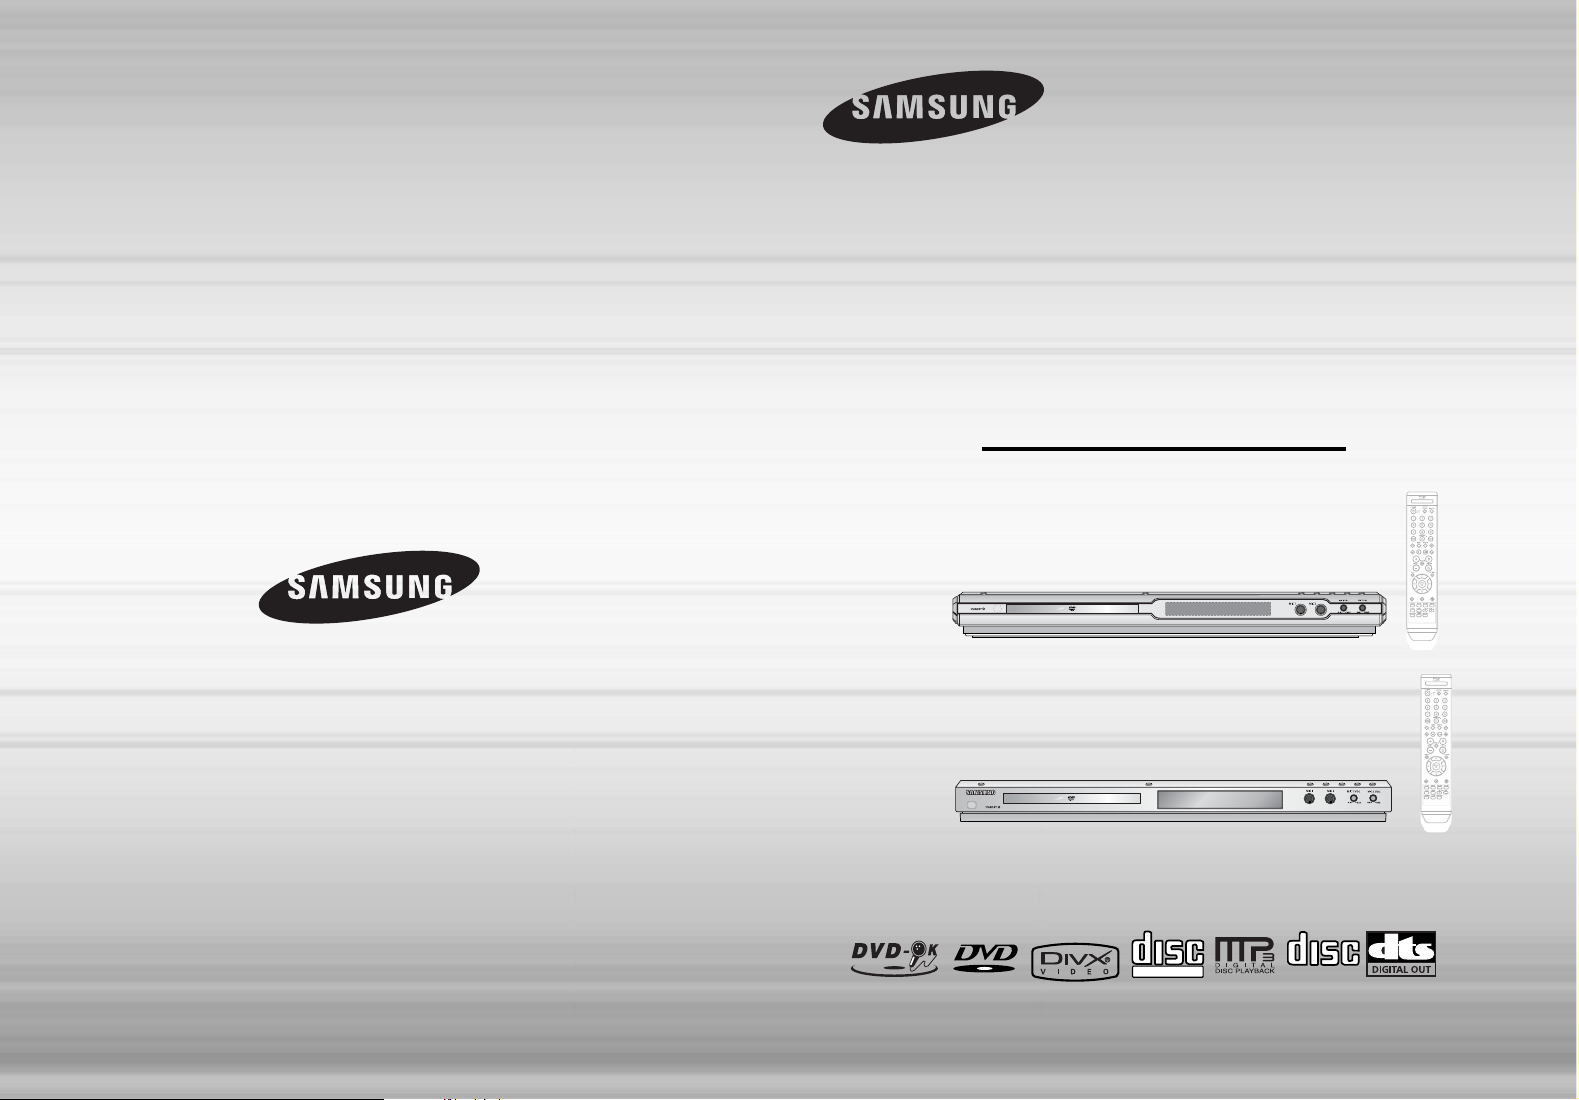
Instruction Manual
ULTRA SLIM DVD
KARAOKE SYSTEM
DVD-K105
DVD-K115
AH68-01918A
THIS APPLIANCE IS MANUFACTURED BY:
V I D E O
COMPACT
DIGITAL VIDEO
COMPACT
DIGITAL AUDIO
DVD-K105
DVD-K115

2
PREPARATION
Ensure that the AC power supply in your house complies with the identification sticker located on the back of your player. Install your
player horizontally, on a suitable base (furniture), with enough space around it for ventilation (7.5~10cm). Make sure the ventilation
slots are not covered. Do not stack anything on top of the player. Do not place the player on amplifiers or other equipment which may
become hot. Before moving the player, ensure the disc tray is empty. This player is designed for continuous use. Switching off the DVD
player to the stand-by mode does not disconnect the electrical supply. In order to disconnect the player completely from the power supply, remove the main plug from the wall outlet, especially when left unused for a long period of time.
Protect the player from moisture(i.e. vases) , and excess heat(e.g.fireplace) or equipment creating strong magnetic or electric fields (i.e.speakers...). Disconnect the power cable from the AC supply if the player malfunctions. Your player is not intended for industrial use.
Use of this product is for personal use only.
Condensation may occur if your player or disc have been stored in cold
temperatures.
If transporting the player during the winter, wait approximately 2 hours
until the unit has reached room temperature before using.
During thunderstorms, disconnect AC main plug from the
wall outlet.
Voltage peaks due to lightning could damage the unit.
Do not expose the unit to direct sunlight or other heat
sources.
This could lead to overheating and malfunction of the unit.
The battery used with this product contain chemicals that
are harmful to the environment.
Do not dispose of batteries in the general household
trash.
Precautions
1
Safety Warnings
CLASS 1 LASER PRODUCT
This Compact Disc player is classified as a CLASS 1
LASER product.
Use of controls, adjustments or performance of
procedures other than those specified herein may result
in hazardous radiation exposure.
CAUTION-INVISIBLE LASER RADIATION WHEN OPEN
AND INTERLOCKS DEFEATED, AVOID
EXPOSURE TO BEAM.
This symbol indicates that dangerous voltage which can cause electric shock is present inside
this unit.
This symbol alerts you to important operating and maintenance instructions accompanying
the unit.
WARNING : To reduce the risk of fire or electric shock, do not expose this appliance to rain or moisture.
CLASS 1 LASER PRODUCT
KLASSE 1 LASER PRODUKT
LUOKAN 1 LASER LAITE
KLASS 1 LASER APPARAT
PRODUCTO LASER CLASE 1
RISK OF ELECTRIC SHOCK.
DO NOT OPEN
CAUTION:
TO REDUCE THE RISK OF ELECTRIC
SHOCK, DO NOT REMOVE REAR COVER.
NO USER SERVICEABLE PARTS INSIDE.
REFER SERVICING TO QUALIFIED
SERVICE PERSONNEL.
CAUTION
This marking shown on the product or its literature, indicates that it should not
be disposed with other household wastes at the end of its working life.
To prevent possible harm to the environment or human health from uncontrolled
waste disposal, please separate this from other types of wastes and recycle it
responsibly to promote the sustainable reuse of material resources.
Household users should contact either the retailer where they purchased this
product, or their local government office, for details of where and how they
can take this item for environmentally safe recycling.
Business users should contact their supplier and check the terms and
conditions of the purchase contract.
This product should not be mixed with other commercial wastes for disposal.
Phones
4
PREPARATION
Safety Warnings ..............................................................1
Precautions .....................................................................2
Notes on Discs................................................................3
Description ......................................................................5
CONNECTIONS
Connecting your System to the Power Supply ................8
Connection of the TV monitor
.............................................9
Connection for better sound
...............................................10
OPERATION
Disc Playback ..................................................................11
DivX Playback.................................................................13
Displaying Disc Information .............................................15
Checking the Remaining Time.........................................15
Fast/Slow Playback.........................................................16
Skipping Scenes/Songs...................................................17
Angle Function ................................................................18
Repeat Playback .............................................................19
Zoom (Screen Enlarge) Function ....................................20
EZ VIEW Function...........................................................20
Selecting Audio/Subtitle Language..................................21
Moving Directly to a Scene/Song ....................................22
JPEG File Playback.........................................................23
Using Disc Menu.............................................................25
Using the Title Menu .......................................................26
SETUP
Setting the DRC (Dynamic Range Compression)............27
AV SYNC Setup ..............................................................28
Setting the Language......................................................29
Setting TV Screen type ...................................................31
Setting Parental Controls (Rating Level).........................33
Setting the Password ......................................................34
Setting the Wallpaper ......................................................35
Playing DVD-OK Discs ....................................................37
Connecting Microphone...................................................38
Reserving Accompaniment Music....................................39
Priority Playing Accompaniment Music............................40
Favorite Song Function ...................................................41
Search Song Function.....................................................43
Key Control / Tempo Control ...........................................48
Male-Female Key Control................................................49
Setting the Chorus...........................................................50
Setting the Fanfare..........................................................51
Setting the Average Score...............................................52
Setting the Shadow.........................................................53
DIMMER Function...........................................................54
MISCELLANEOUS
Trouble Shooting Guide...................................................55
Specifications..................................................................56
PREPARATION
Contents
3
DVD (Digital Versatile Disc) offers fantastic audio and video, thanks to Dolby Digital sur-
round sound and MPEG-2 video compression technology. Now you can enjoy these realistic
effects in the home, as if you were in a movie theater or concert hall.
V I D E O
DVD players and the discs are coded by region. These regional codes must match in order
for the disc to play. If the codes do not match, the disc will not play.
The Region Number for this player is given on the rear panel of the player.
(Your DVD player will only play DVDs that are labeled with identical region codes.)
1 6
~
•
LD, CD-G, CD-I, CD-ROM and DVD-ROM cannot be played on this player.
If such discs are played, a "WRONG DISC FORMAT" message appears on the TV screen.
•
DVD discs purchased abroad may not play on this player.
If such discs are played, a "CAN'T PLAY THIS DISC PLEASE, CHECK REGION CODE"
message appears on the TV screen.
Do not use the following types of disc!
•
Many DVD discs are encoded with copy protection. Because of this, you should only connect
your DVD player directly to your TV, not to a VCR. Connecting to a VCR results in a distorted
picture from copy-protected DVD discs.
•
This product incorporates copyright protection technology that is protected by methods claims of certain
U.S. patents and other intellectual property rights owned by Macrovision Corporation and other rights
owners. Use of this copyright protection technology must be authorized by Macrovision Corporation, and
is intended for home and other limited viewing uses only unless otherwise authorized by Macrovision
Corporation. Reverse engineering or disassembly is prohibited.
Copy Protection
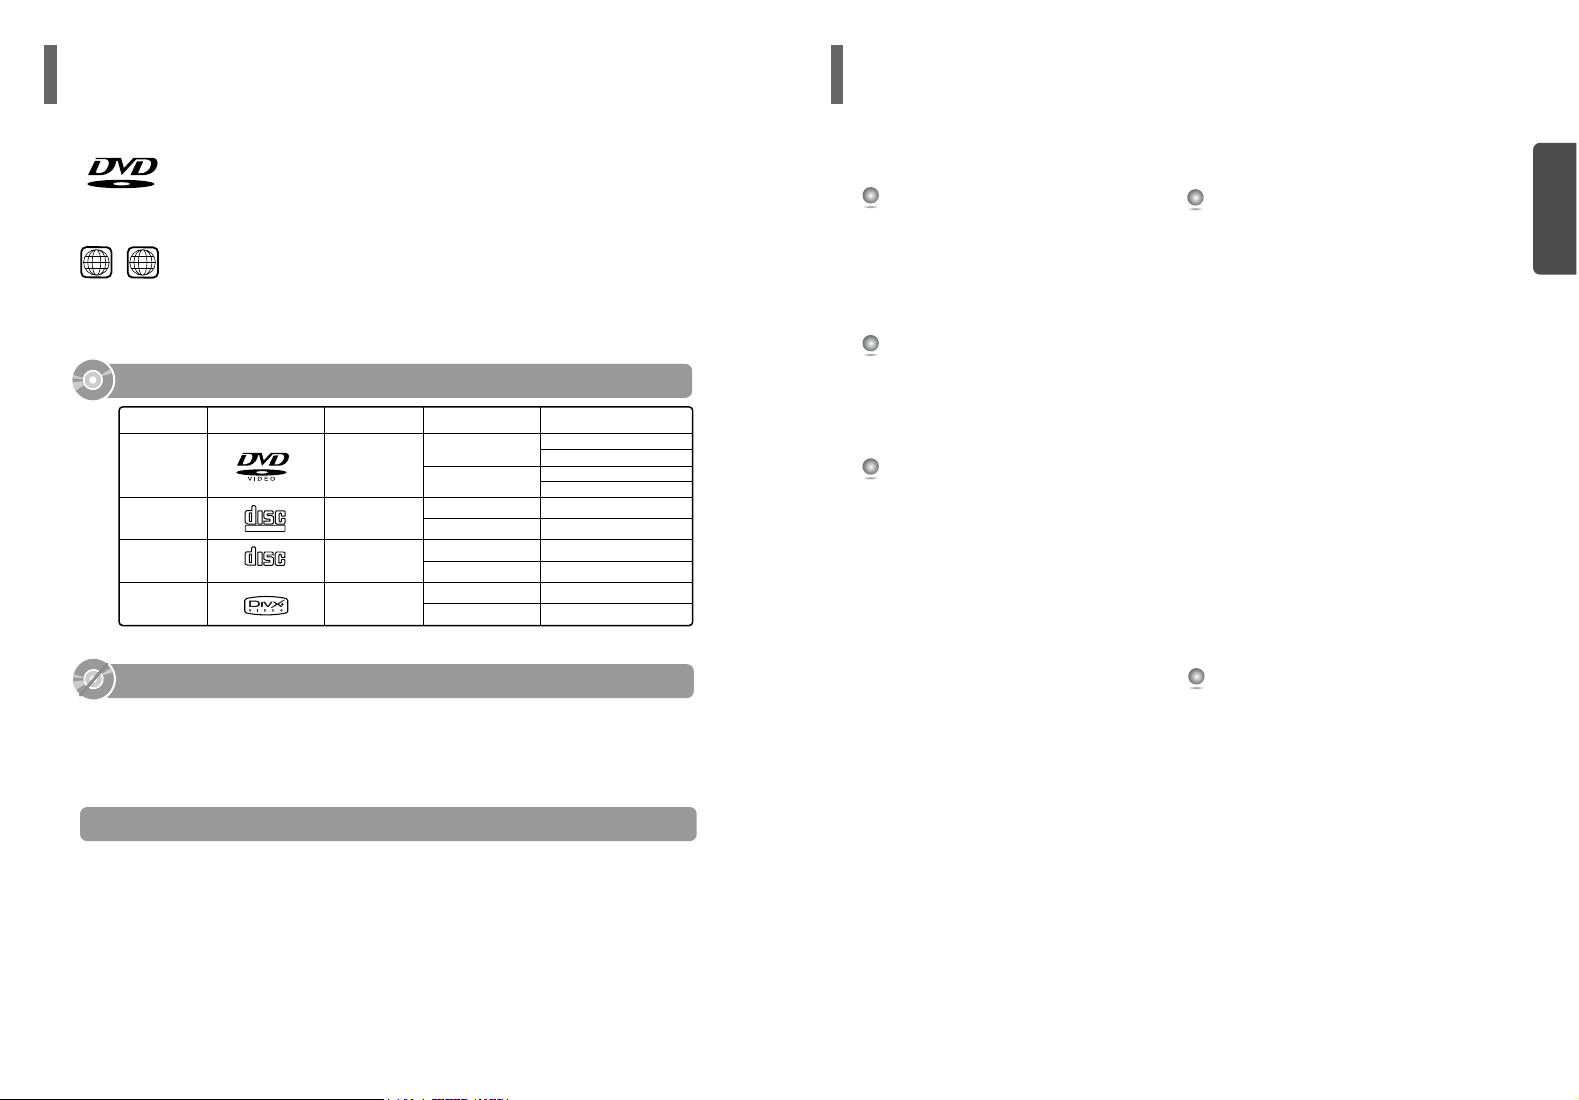
Notes on Discs
Playable Discs
COMPACT
DIGITAL AUDIO
Mark (Logo)
Audio + Video
Audio + Video
DVD-VIDEO
AUDIO-CD
VIDEO-CD
DivX
12cm
Approx. 240 min. (single-sided)
Approx. 480 min. (double-sided)
Approx. 80 min. (single-sided)
Approx. 160 min. (double-sided)
74 min.
20 min.
74 min.
20 min.
74 min.
20 min.
8cm
12cm
8cm
12cm
8cm
12cm
8cm
Audio
MPEG4
MP3
Recorded Signals
Disc Type Disc Size Max. Playing Time
COMPACT
DIGITAL VIDEO
Disc Playback
PREPARATION
6
5
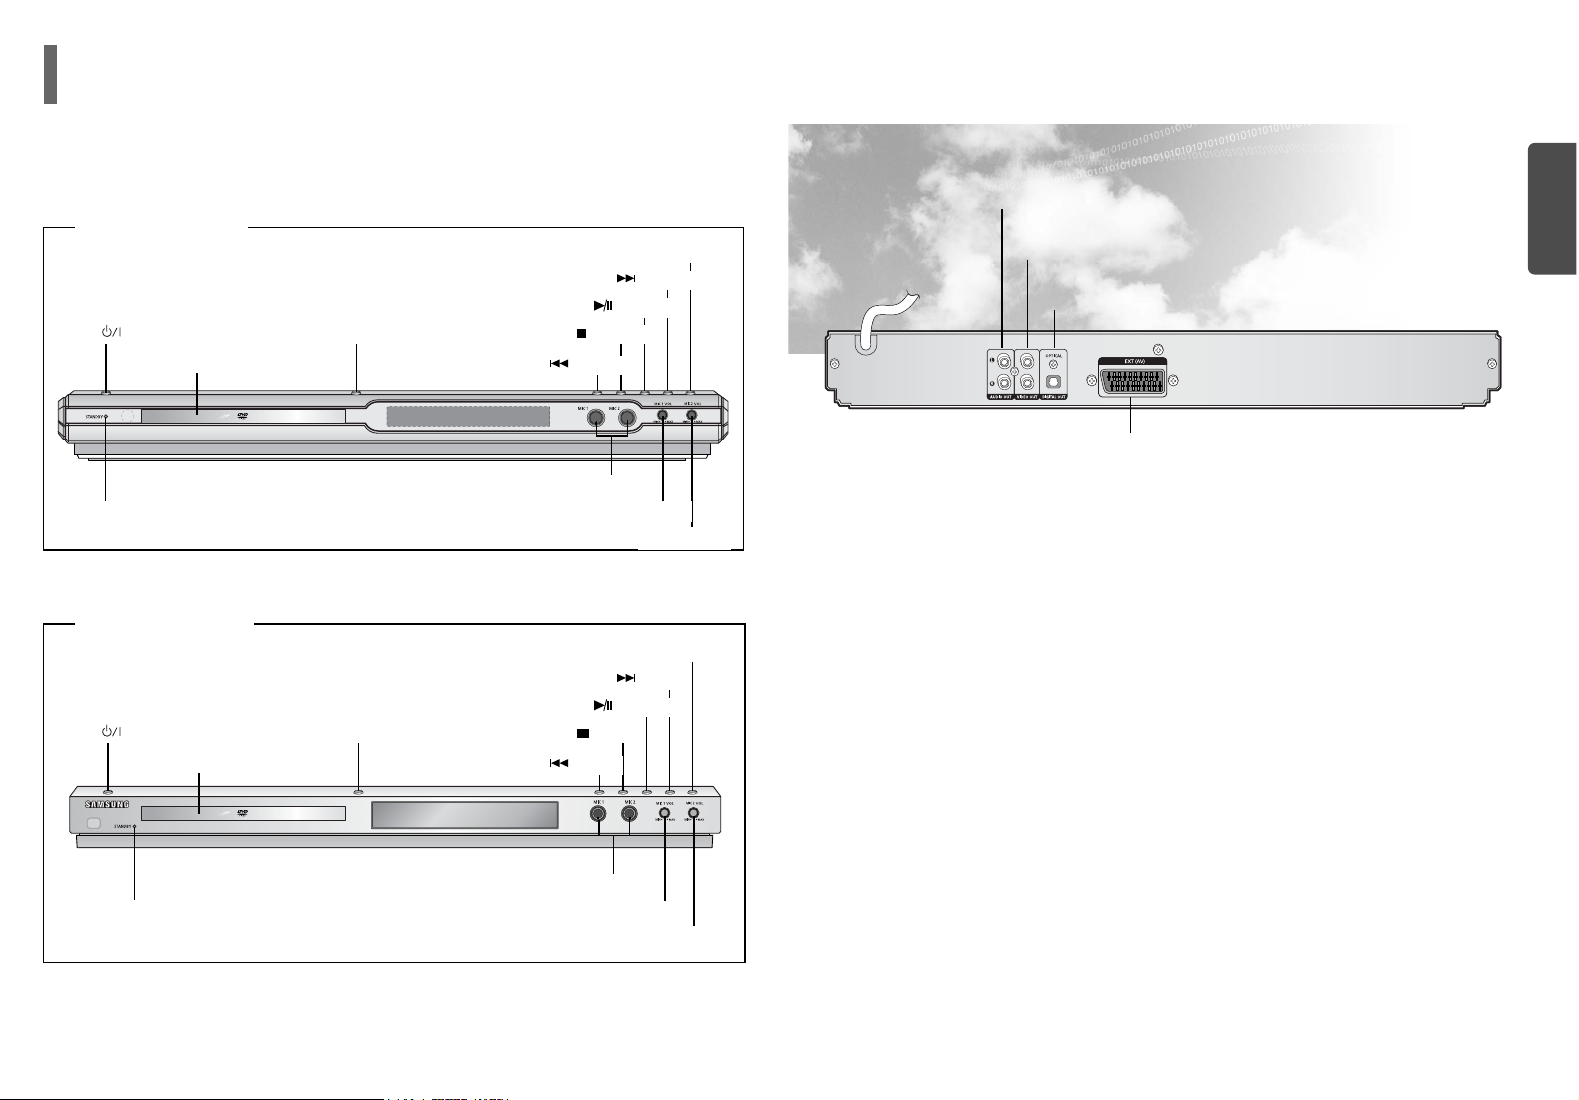
Description
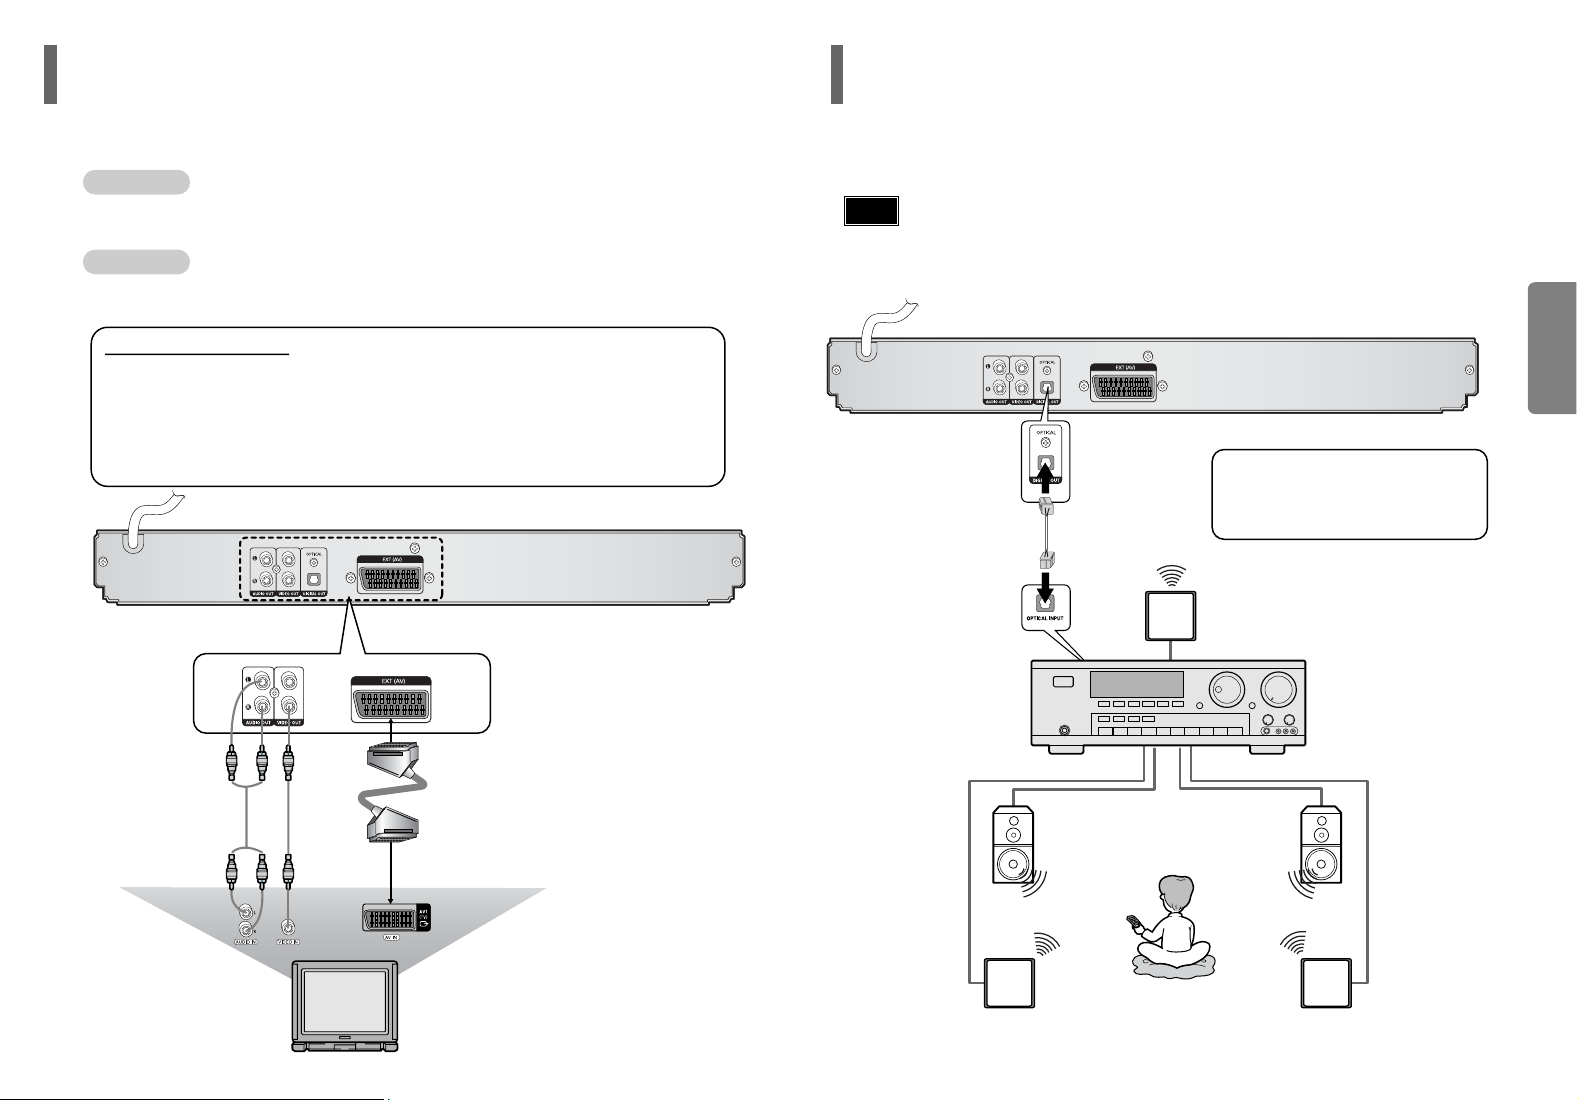
—Rear Panel—
Video Output Connector
Connect the TV's video input jacks (VIDEO IN) to the VIDEO OUT connector.
Audio Output Connector
SCART JACK
Connect to a TV with scart input jack.
External Digital Optical Input Connector
Use this to connect external equipment capable of digital output.
—Front Panel—
< DVD-K105 >
< DVD-K115 >
Power ( ) button
DIMMER button
Disc Tray
MIC1 LEVEL
MIC 1, MIC 2
Play/Pause ( ) button
Skip/Search ( ) button
Skip/Search ( ) button
Stop ( ) button
Open/Close button
Standby indicator
MIC2 LEVEL
Power ( ) button
DIMMER button
Disc Tray
MIC1 LEVEL
MIC 1, MIC 2
Play/Pause ( ) button
Skip/Search ( ) button
Skip/Search ( ) button
Stop ( ) button
Open/Close button
Standby indicator
MIC2 LEVEL
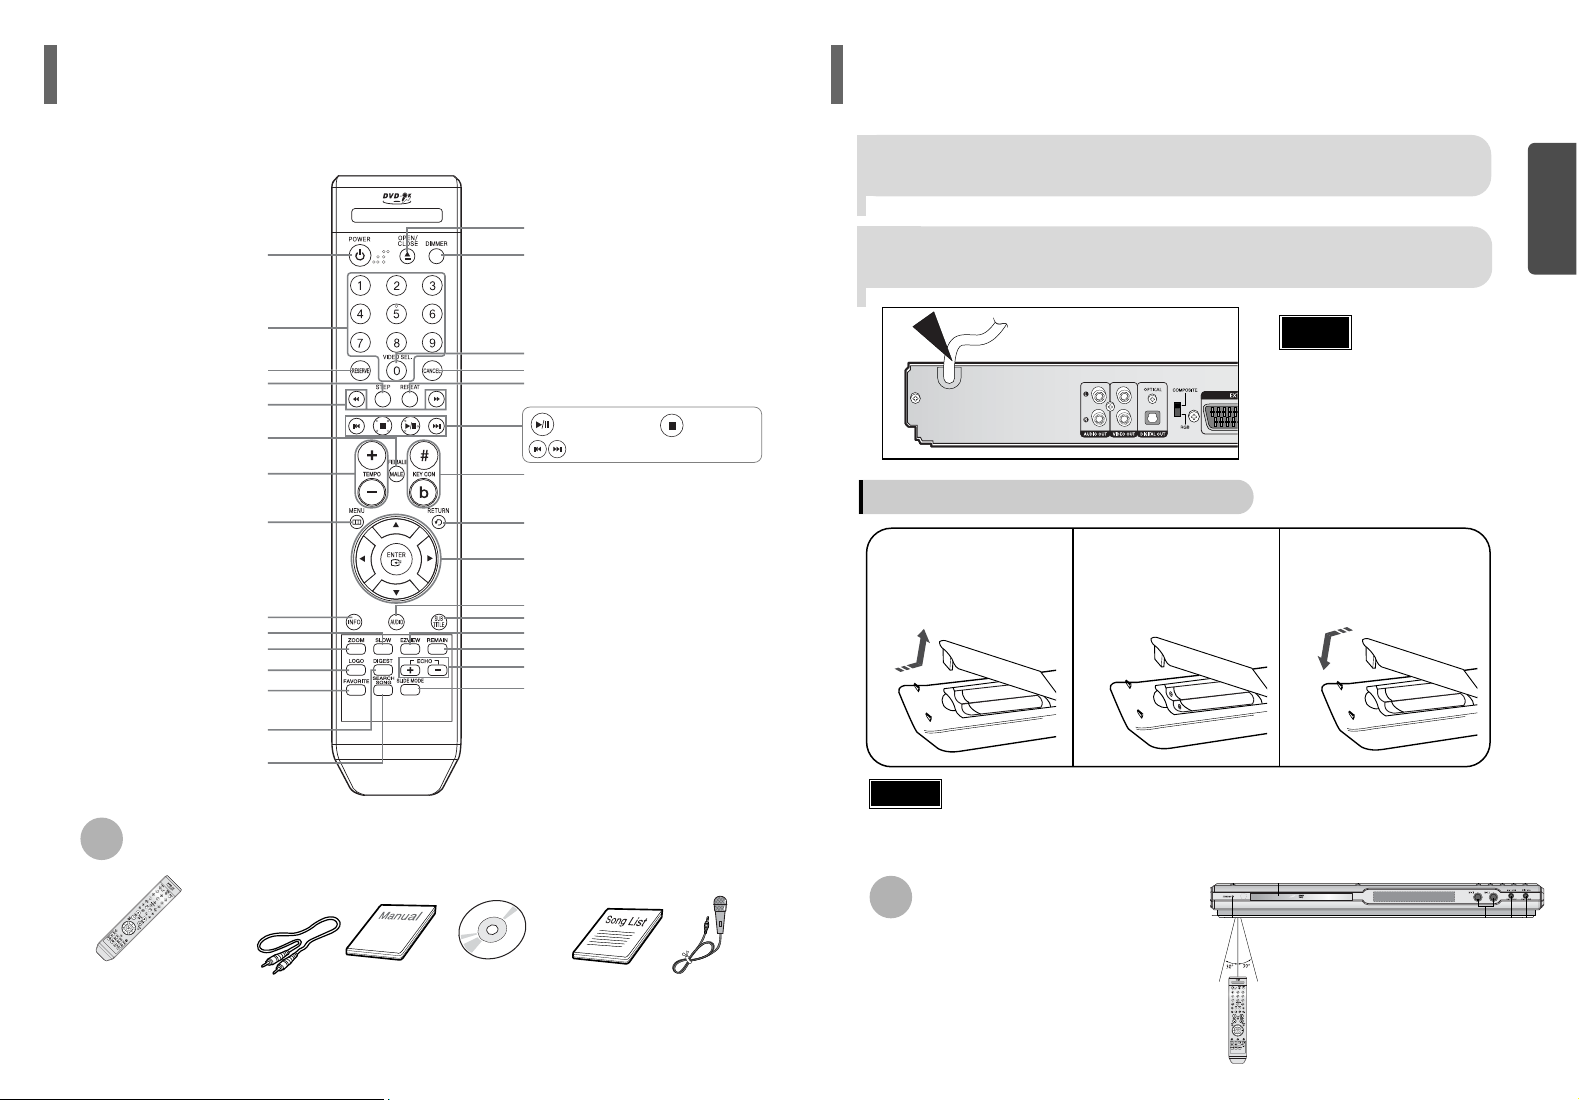
The main lead must be plugged into an appropriate socket.
Connecting your System to the Power Supply
•
Before plugging your system into a
main socket, you must check the
voltage.
Note
1
Plug the main lead (marked AC Cord on the rear of the system)
into an appropriate socket.
2
Press the Standby/On button to switch your DVD Karaoke
System on.
Insert Remote Batteries
Caution
Remove the battery
cover in the direction
of the arrow.
1
Insert two 1.5V AAA
batteries, paying attention to the correct
polarities (+ and –).
2
Replace the battery
cover.
3
Follow these precautions to avoid leaking or cracking cells:
•
Place batteries in the remote control so they match the polarity:(+) to (+) and (–) to (–).
•
Use the correct type of batteries. Batteries that look similar may differ in voltage.
•
Always replace both batteries at the same time.
•
Do not expose batteries to heat or flame.
The remote control can be used up to approximately
23 feet/7 meters in a straight line. It can also be operated at a horizontal angle of up to 30° from the remote
control sensor.
Range of Operation of the Remote Control
8
PREPARATION
POWER button
Number(0~9) buttons
RESERVE button
STEP button
SEARCH buttons
FEMALE, MALE button
TEMPO button
MENU button
INFO button
ZOOM button
LOGO button
FAVORITE button
DIGEST button
SLOW button
SEARCH SONG button
OPEN/CLOSE button
DIMMER button
VIDEO SELECT button
CANCEL button
REPEAT button
KEY CONTROL button
RETURN button
Cursor/Enter button
AUDIO button
SUB TITLE button
REMAIN button
ECHO button
EZ VIEW button
SLIDE MODE button
—Remote Control—
Play/Pause button
CD Skip button
Stop button
Accessories
REMOTE CONTROL VIDEO CABLE
MANUAL
DVD KARAOKE DISC
SONG LIST BOOK
MIC
7
Description
(Con’t)
10
CONNECTIONS
9
Connection of the TV monitor Connection for better sound
The following show examples of connections commonly used to connect the
DVD player with a External Source.
Connecting to an amplifier with Dolby Pro Logic support.
TV monitor
What is Dolby Pro Logic?
Using five speakers, it recreates the original sound of
the music or audio and provides the sense of presence, as if you were in a movie theater or concert hall.
AMPLIFIER
•
When playing a DTS disc, no sound is produced. In such case, use an amplifier equipped with a DTS
decoder.
•
When playing back a 5.1 channel encoded DVD, sound is output from the center and rear speakers only.
•
When playing back a 2 channel encoded DVD, CD, tape, or tuner, no sound is output from the center and
rear speakers.
Note
METHOD 2 Scart
...............
Better Quality
If you television is equipped with an SCART input, connect an Scart Jack (not supplied) from the
AV OUT jack on the back panel of the system to the SCART IN jack on your television.
METHOD 1 Composite Video
...............
Good Quality
Connect the supplied video cable from the VIDEO OUT jack on the back panel of the system to the VIDEO IN jack on your television.
VIDEO SELECT Function
Press and hold VIDEO SEL. button on the remote control for over 5 seconds.
•
"COMPOSITE" or "RGB" will appear in the display.
At this time, press the VIDEO SEL. button shortly to select between "COMPOSITE" and "RGB".
•
If Scart (RGB Input) is equipped for your TV, press VIDEO SEL. button to select RGB mode.
You can get a better picture quality by using Scart setting.
•
If Scart (RGB Input) is not equipped for your TV, press VIDEO SEL. button to select COMPOSITE mode.
12
OPERATION
•
In this manual, the instructions marked with "DVD ( )" are applicable
to DVD-VIDEO and DVD-R/RW discs.
Where a particular DVD type is mentioned, it is indicated separately.
•
Depending on the content of the disc, the initial screen may appear different.
•
Cyrillic symbols in file names will not be displayed.
•
There may be noise when playing media files with microphone connected.
Disconnect the microphone when the Karaoke function is not used.
DVD
Note
Titles and chapters (DVD-VIDEO)
•
DVD-video is divided into several large sections called "titles" and smaller sections called
"chapters". Numbers are allotted to these sections.
These numbers are called "title numbers" and "chapter numbers".
TITLE 1 TITLE 2
CHAPTER 1 CHAPTER 2 CHAPTER 1 CHAPTER 2CHAPTER 3
Tracks (Video and music CDs)
•
Video and music CDs are divided into sections called "tracks".
Numbers are allotted to these sections. These numbers are called "track numbers".
TRACK 1 TRACK 2 TRACK 4 TRACK 5TRACK 3
Files (DivX)
•
DivX is divided into sections called "files".
Numbers are allotted to these sections. These numbers are called "file numbers".
FILE 1 FILE 2
Disc terminology
•
Depending on the content of the disc, the initial screen may
appear different.
•
To resume playback, press PLAY/PAUSE ( )
button again.
1
Press OPEN/CLOSE button to
open the disc tray.
2
Load a disc.
3
Press OPEN/CLOSE button
to close the disc tray.
To temporarily pause playback,
press PLAY/PAUSE during play-
back.
DVD VCD CD
•
Playback starts automatically.
•
Place a disc gently into the tray with the
disc’s label facing up.
•
If pressed once, “PRESS PLAY” is displayed and the
stop position will be stored in memory. If PLAY/PAUSE
( ) button or ENTER button is pressed, playback
resumes from the stop position. (This function works
only with DVDs.)
•
If pressed twice, “STOP” is displayed, and if
PLAY/PAUSE ( ) button is pressed, playback
starts from the beginning.
To stop playback,
press STOP during playback.
Note
11
Disc Playback
14
OPERATION
•
" " is displayed when there is one supported language in the disc.
Note
Press the SUBTITLE button.
•
Each time you press the button, your selection will toggle between “SUBTITLE(1/8, 2/8 ...)” and
“SUBTITLE OFF”.
•
If the disc has only one subtitle file, it will be played automatically.
•
See number 2 (Caption Function) below for more details concerning Subtitle usage with DIVX discs.
Subtitle Display
Press the AUDIO button.
•
If there are multiple audio tracks on a disc, you can toggle between them.
•
Each time you press the button, your selection will toggle between “AUDIO(1/8, 2/8 ...)” and
“”.
Audio Display
DivX(Digital internet video eXpress)
DivX is a video file format developed by Microsoft and is based on MPEG4 compression technology
to provide audio and video data over the Internet in real-time.
MPEG4 is used for video encoding and MP3 for audio encoding so that the users can watch a movie
at near DVD-quality video and audio.
1. Supported Formats
•
This product only supports the following media formats. If both video and audio formats are not supported, the user may experience problems such as broken images or no sound.
2. Caption Function
•
You must have some experience with video extraction and editing in order to use this feature properly.
•
To use the caption function, save the caption file (*.smi) in the same file name as that of the DivX
media file (*.avi) within the same folder.
Example. Root Samsung_007CD1.avi
Samsung_007CD1.smi
•
Up to 60 alphanumeric characters or 30 East Asian characters (2 byte characters such as Korean and
Chinese) for the file name.
●
Supported Video Formats
Format MP3 WMA AC3 DTS
Bit Rate 80~384kbps 56~128kbps 128~384kbps 1.5Mbps
Sampling Frequency
44.1khz 44.1/48khz 44.1khz
•
DivX files, including audio and video files, created in the DTS format can only support up to 6Mbps.
•
Aspect Ratio: Although default DivX resolution is 640*480 pixels (4:3), this product supports up to
720*480 pixels (16:9). TV screen resolutions higher than 800 will not be supported.
•
When you play a disc whose sampling frequency is higher than 48khz or 320kbps, you may experience shaking on the screen during playback.
•
QPEL and GMC formats are not supported.
●
Supported Audio Formats
13
Fast playback
Skip Forward/Back
During playback, press the button.
•
Goes to the next file whenever you press button, if there are over
2 files in the disk.
•
Goes to the previous file whenever you press button, if there are over
2 files in the disk.
To play back the disc at a faster speed,
press or during playback.
•
Each time you press either button, the playback speed will change as
follows:
2x ➞ 4x ➞ 8x ➞ 32x ➞ Normal.
•
DivX file can be zoomed only in ZOOM X2 mode.
•
DivX files have .Avi file extensions, however, not all .Avi files are DivX
and may not be playable in this unit.
Note
Zoom Function
2
Press Cursor , ,
, buttons to
move to the area
you want to enlarge.
1
Press ZOOM
button.
•
Each time you press the button,
your selection will toggle between
“ZOOM X2” and “ZOOM OFF”.
DivX Playback
5 Minute Skip function
During playback, press the , button.
•
Playback skips 5 minutes forward whenever you press button.
•
Playback skips 5 minutes back whenever you press button.
The functions on this page apply to DivX disc playback.
Format AVI WMV
Supported Versions DivX3.11 ~ 5.1 V1/V2/V3/V7
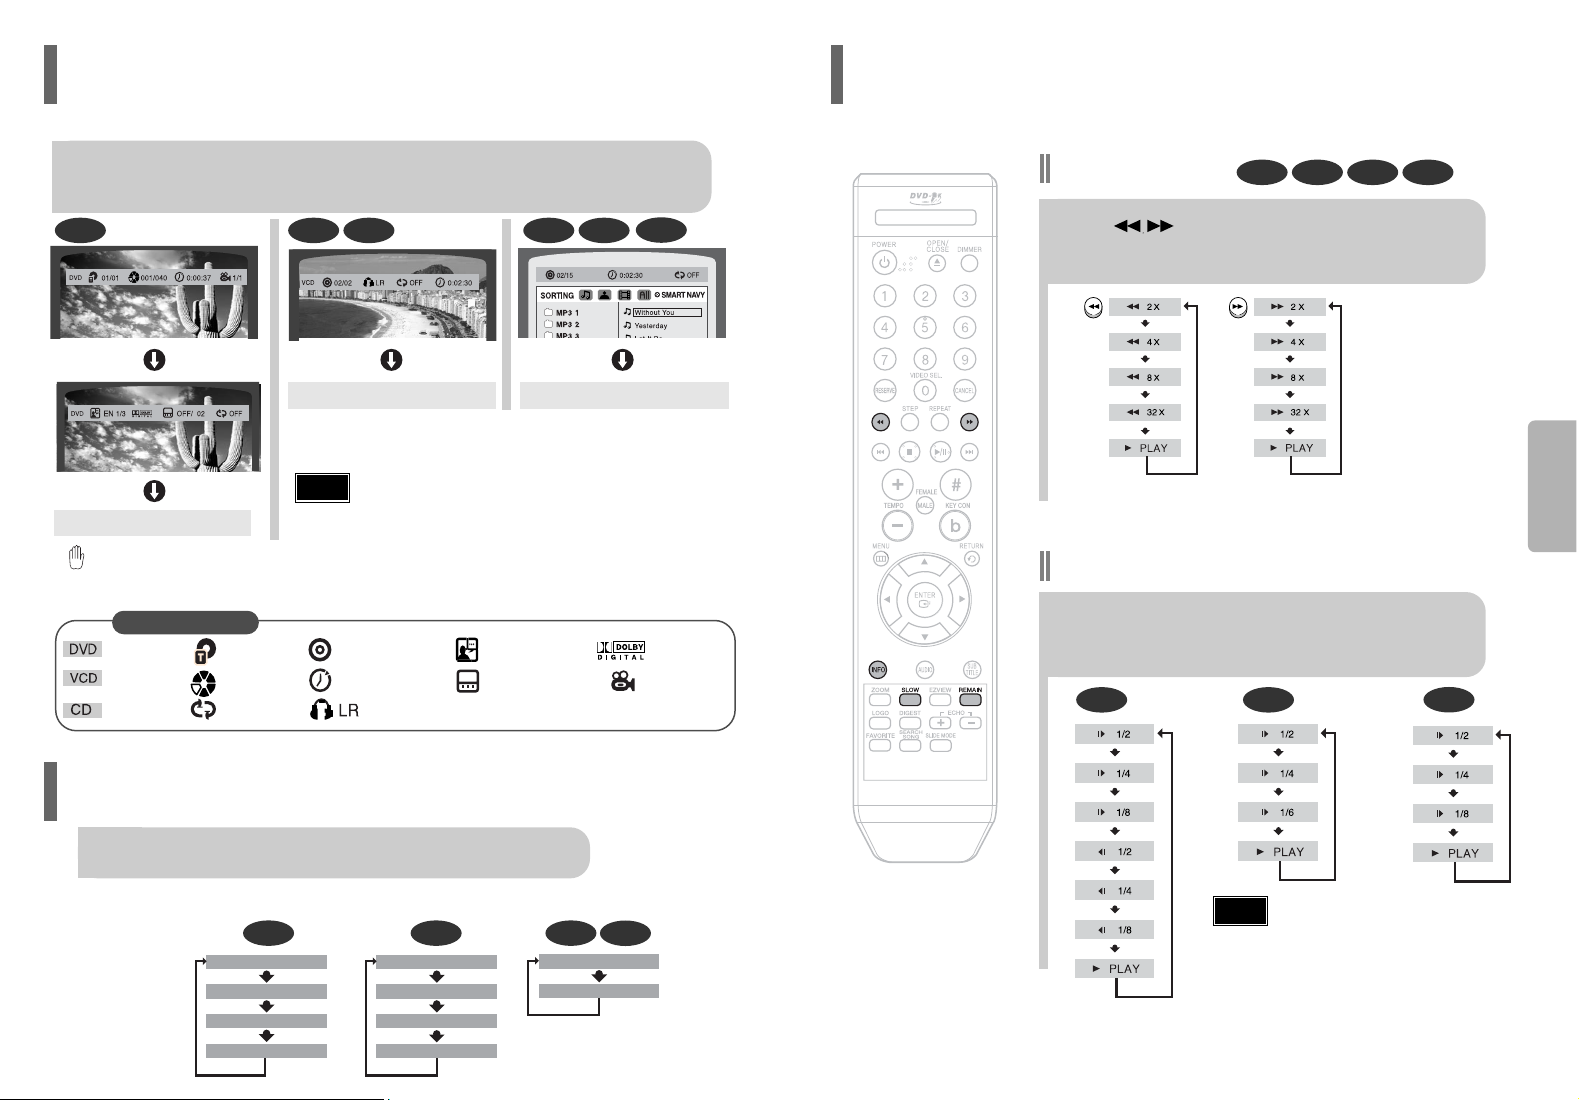
Fast Playback
DVD VCD CD MP3
Press SLOW button.
•
Each time the button is pressed during playback,
the playback speed changes as follows:
Slow Playback
DVD VCD
DivX
16
•
Reverse slow playback does not work with VCDs and DivX.
•
During fast playback of a CD or MP3-CD, sound is heard only at 2x
speed, and not at 4x, 8x, and 32x speeds.
•
No sound is heard during slow playback and step motion playback.
Note
OPERATION
Fast/Slow Playback
Press .
•
Each time the button is pressed during playback,
the playback speed changes as follows:
15
Press INFO button.
•
Each time the button is pressed, the display changes as follows:
DVD
Display disappears
Display disappears Display disappears
VCD CD MP3 JPEG
•
appears on the TV screen!
If this symbol appears on the TV screen while buttons are being operated, that operation is not possible with the disc currently
being played.
Screen Display
CD display
VCD display
DVD display
CHAPTER display
TITLE display
REPEAT PLAYBACK display
ELAPSED TIME display
TRACK (FILE) display
STEREO (L/R) display
SUBTITLE display
AUDIO LANGUAGE display
ANGLE display
DOLBY DIGITAL display
•
Depending on the disc, the disc information display may appear different.
Note
DivX
You can view playback information on the disc on the TV screen.
Displaying Disc Information
CD VCDDVD
TRACK REMAIN
TOTAL ELAPSED
TOTAL REMAIN
TRACK ELAPSED
MP3
TRACK ELAPSED
TRACK REMAIN
Press the REMAIN button.
•
For checking the total and remaining time of a title or chapter being played.
Each time the REMAIN button is pressed
Checking the Remaining Time
TITLE ELAPSED
TITLE REMAIN
CHAPTER ELAPSED
CHAPTER REMAIN
DVD
2
Press Cursor
button to move to
ANGLE display.
1
Press INFO button.
1/3
•
Each time the button is pressed, the angle changes as follows:
3
Press Cursor , buttons or numeric buttons to select the desired angle.
2/3
3/3
1/3
1/3
•
The Angle function works only with discs on which multiple angles
have been recorded.
Note
18
OPERATION
This function allows you to view the same scene in different angles.
Angle Function
17
DVD VCD MP3
DVD
DVD VCD MP3
press .
•
Each time the button is pressed during playback, the previous or next chapter, track,
or directory (file) will be played.
•
But, you cannot skip chapters consecutively.
•
The picture moves forward one frame each time the
button is pressed during playback.
Playing Frame by Frame
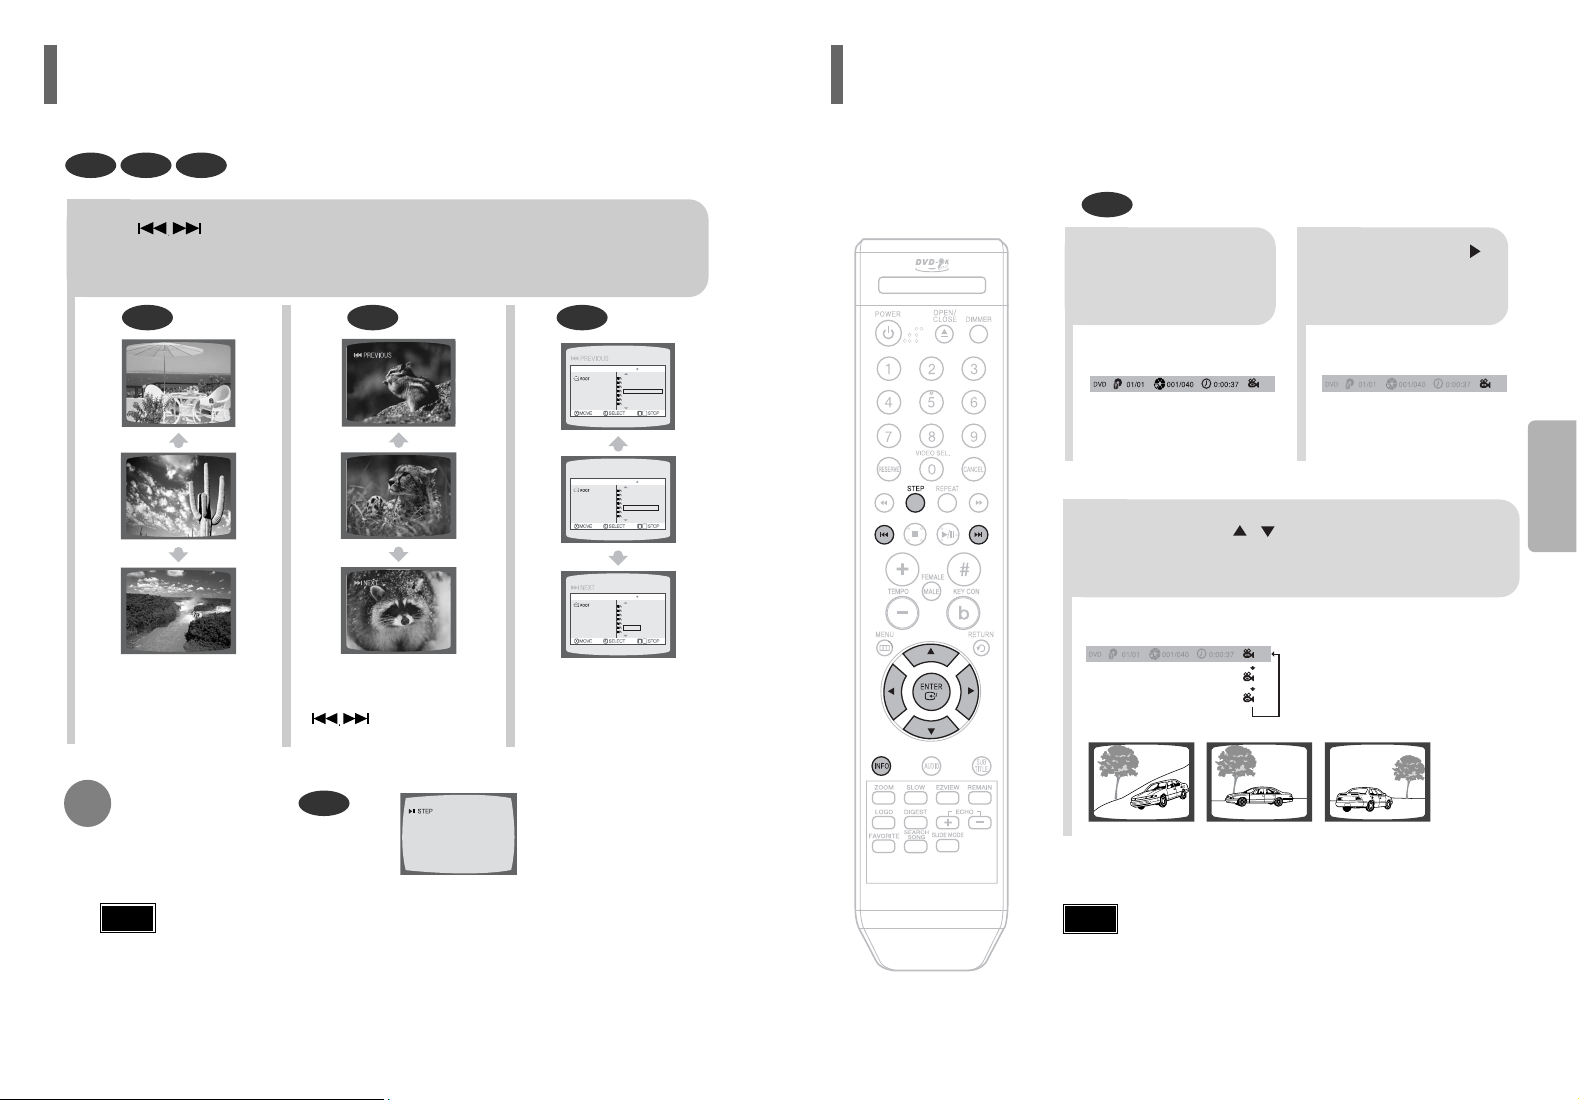
Press STEP button.
•
When watching a VCD with a track
longer than 15 minutes, each time
is pressed, playback
will skip back or forward 5 minutes.
TITLE 01/05 CHAPTER 002/040
TITLE 01/05 CHAPTER 004/040
Something like you
Back for good
Love of my life
More than words
I need you
My love
Uptown girl
DVD RECEIVER SMART NAVI
Something like you
Back for good
Love of my life
More than words
I need you
My love
Uptown girl
DVD RECEIVER SMART NAVI
Something like you
Back for good
Love of my life
More than words
I need you
My love
Uptown girl
DVD RECEIVER SMART NAVI
Skipping Scenes/Songs
•
No sound is heard during slow playback and step motion playback.
Notes
 Loading...