

Samsung DMR77LHW-XAC User Manual

Dishwasher
installation guide
DMR78 Series
DMR77 Series
DMR57 Series
STOP
These installation instructions are intended
for use by qualified installers.
If you are having problems installing this dishwasher
Please call : 1-800-SAMSUNG (726-7864)
for assistance : www.samsung.com
imagine the possibilities
Thank you for purchasing this Samsung
product. To receive more complete service,
please register your product at
www.samsung.com/global/register
safety instructions
Throughout this manual, you’ll see Warning and Caution notes. These warnings,
cautions, and the important safety instructions that follow do not cover all
possible conditions and situations that may occur. It’s your responsibility to use
common sense, caution, and care when installing, maintaining, and operating the
dishwasher. Samsung is not liable for damages resulting from improper use.
IMPORTANT SAFETY INSTRUCTIONS
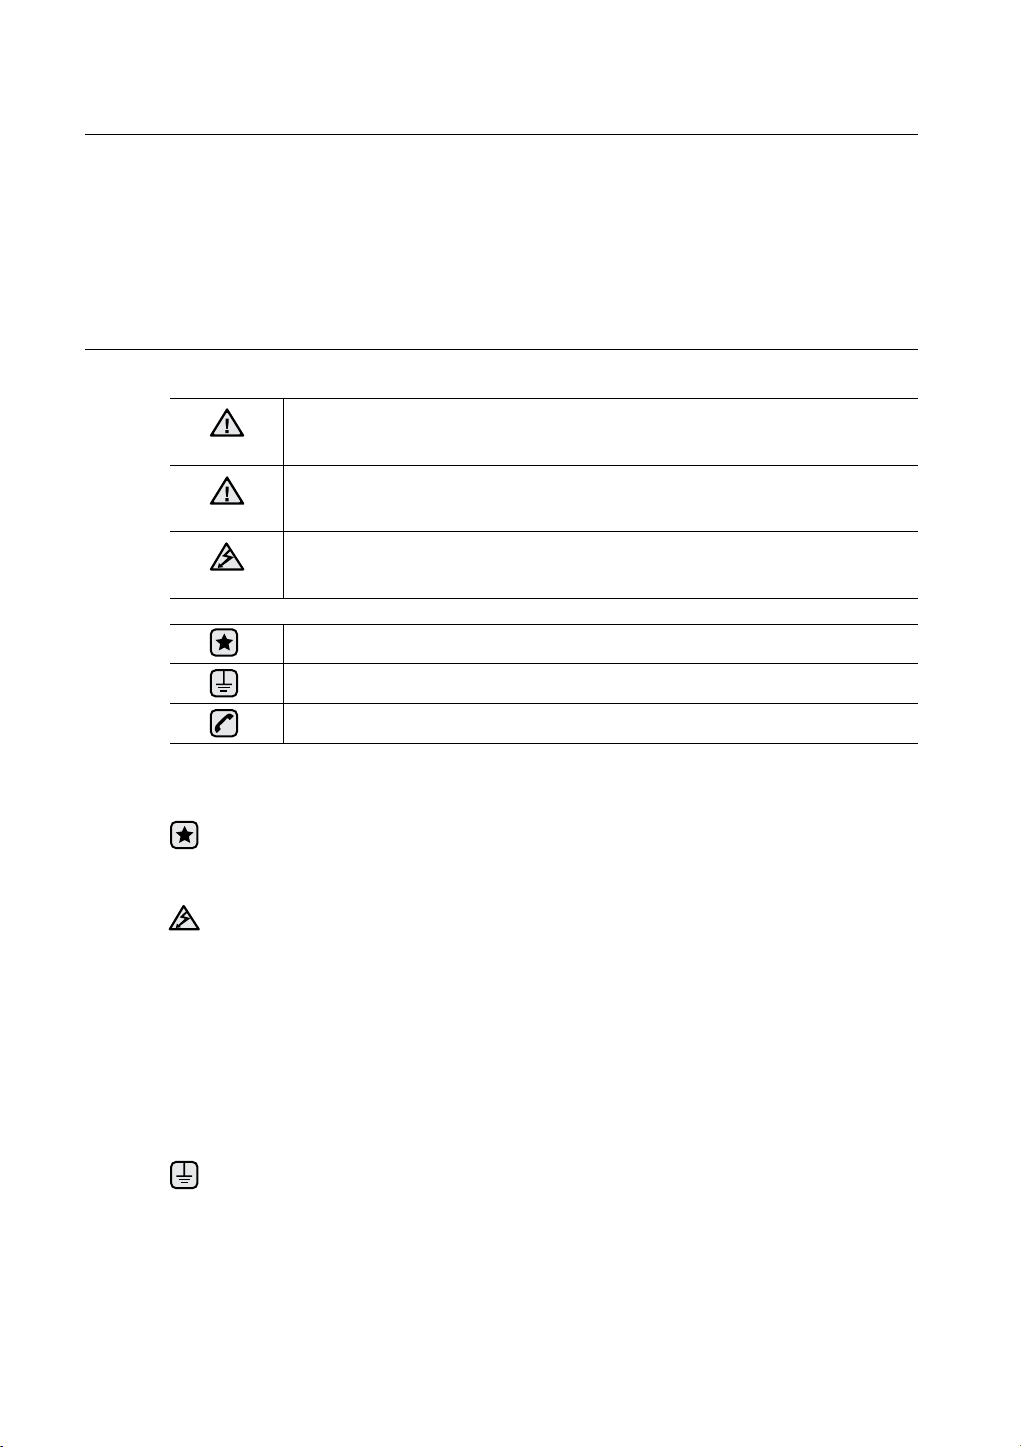
What the icons and signs in this installation guide mean:
Hazards or unsafe practices that may result in severe personal injury or
WARNING
CAUTION
CAUTION
death.
Hazards or unsafe practices that may result in personal injury or property
damage.
To reduce the risk of fire, explosion, electric shock, or personal injury when
using the dishwasher, follow these basic safety precautions:
Follow directions explicitly.
Make sure the machine is grounded to prevent electric shock.
Call the service center for help.
These warning signs are here to prevent injury to you and others.
Please follow them explicitly.
After reading this section, keep it in a safe place for future reference.
Read all instructions before using the appliance.
Install and store the dishwasher inside, away from exposure to weather.
Do not install the dishwasher near electrical components. Keep the dishwasher away from
open flames.
CAUTION
Do NOT install the dishwasher on a carpet as this is a fire hazard.
Do NOT install the dishwasher in a location where the water may freeze (where the
temperature falls below 32 ˚F (0 ˚C)). Frozen water in the hoses or pipes may damage the
dishwasher.
As with all any equipment using electricity, water and moving parts, potential hazards exist.
To safely operate this appliance, become familiar with its operation and exercise care when
using it.
The dishwasher must be properly grounded. Never connect it to an ungrounded outlet.
Prior to removal of original dishwasher and the installation of your new unit, make sure to
switch off your circuit breaker. Do not connect the dishwasher until you have completed the
installation. Connecting the power cable is the last step when installing the dishwasher.
All wiring and grounding must be done in accordance with the electrical code applicable to
the region.
2_ safety instructions

GROUNDING INSTRUCTIONS
For a permanently connected appliance:
This appliance must be connected to grounded metal, a permanent wiring system, or an
equipment-grounding conductor must be run with the circuit conductors and connected to
the equipment-grounding terminal or lead on the appliance.
The dishwasher is very heavy. Do not attempt to move or carry a dishwasher alone. Two or
more people are needed to move a dishwasher and avoid potential injuries.
If the power cable is damaged, it must be replaced by the manufacturer, a service agent or
similarly qualified person in order to avoid a hazard.
CAUTION
Do not touch the power cable with wet hands.
CAUTION
Do not connect another appliance to the same power outlet as the dishwasher.
CAUTION
Make sure to use a new water supply line. Old lines are susceptible to breakage because
they become hardened and may cause property damage due to a water leakage.
If the temperature of the water supplied to the dishwasher is higher than 149 ˚F (65 ˚C),
control the heater so that it drops below 149 ˚F (65 ˚C). If it does not drop below 149 ˚F
(65 ˚C), connect the water supply line to a cold water supply.
Ensure that the water supplied to the dishwasher does not freeze. Frozen water can
damage the hoses, valves, pump, or other components.
Certified residential dishwashers are not intended for licensed food establishments.
(NSF/ANSI Standard 184 for Residential Dishwashers)
For a full list of safety information, please refer to the User Manual.
safety instructions _3

contents
PREPARING THE DISHWASHER
ENCLOSURE
5
INSTALLING THE DISHWASHER
6
5 Product dimensions
5 Cutout dimensions
6 STEP 1 Checking the parts and tools
8 STEP 2 Selecting the best location for the
dishwasher
9 STEP 3 Water supply requirements
10 STEP 4 Electrical requirements
11 STEP 5 Preparing the dishwasher
12 STEP 6 Placing the dishwasher and
connecting water supply line
13 STEP 7 Leveling the dishwasher
14 STEP 8 Securing the dishwasher
15 STEP 9 Connecting the drain hose
17 STEP 10 Wiring connections
18 STEP 11 Completing the installation
4_ contents
SPECIFICATIONS
19
preparing the dishwasher enclosure
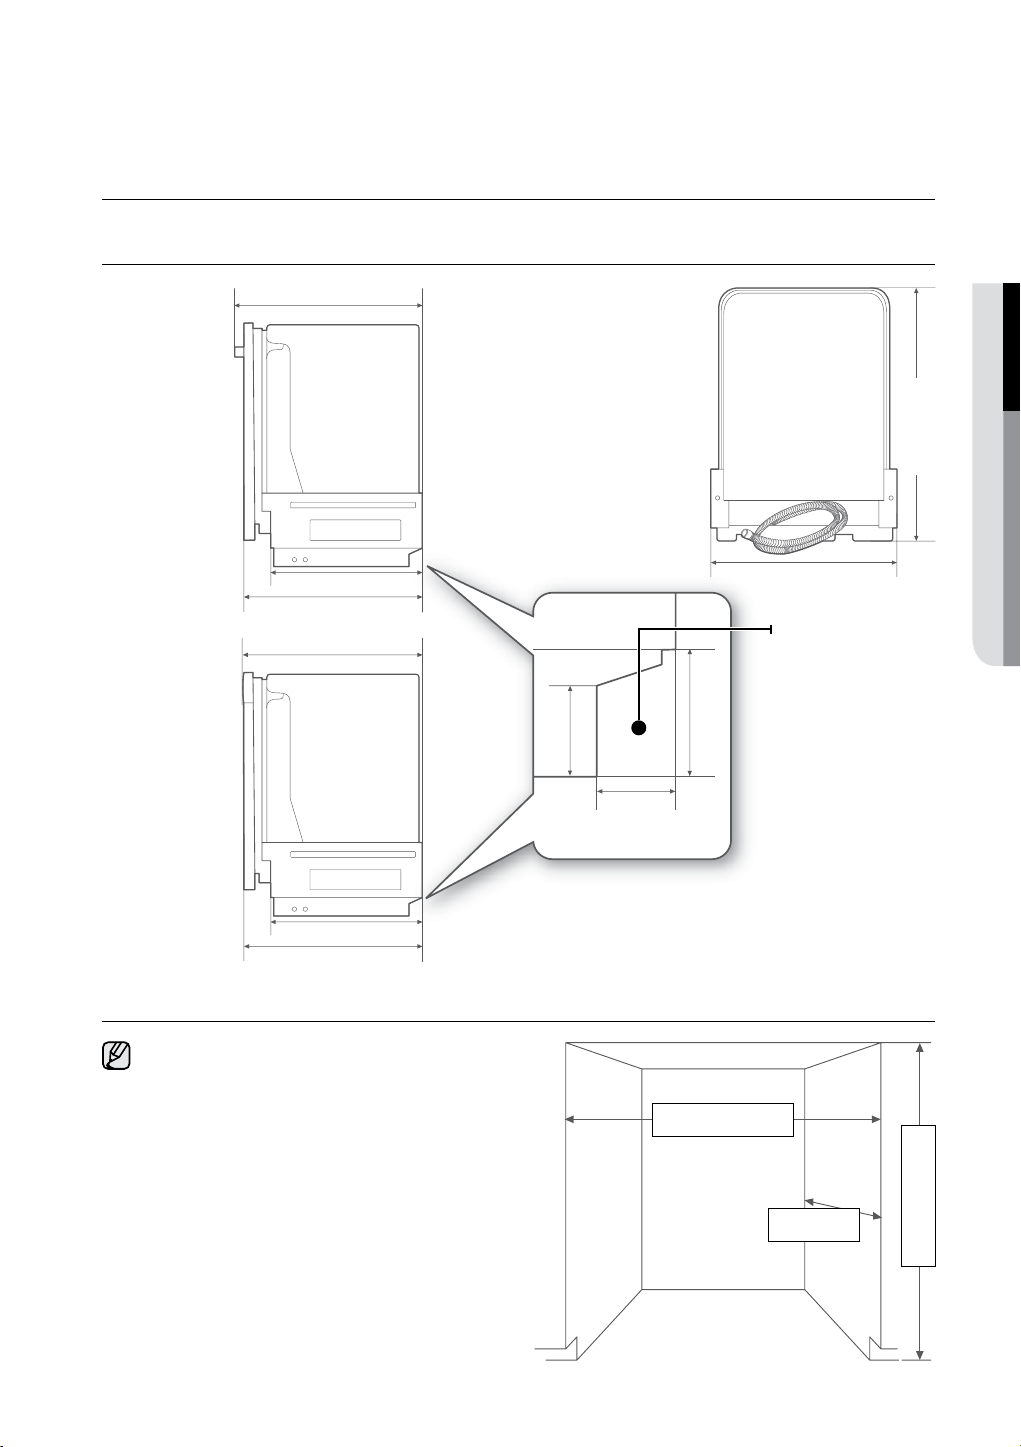
PRODUCT DIMENSIONS
Side view
(DMR78 series/
DMR77 series)
Side view
(DMR57 series)
27” (686 mm)
20 ½” (520 mm)
24 ½” (622 mm)
24 ¾” (629 mm)
Rear view
(DMR78 series
DMR77 Series/
DMR57 Series)
1 ¾” (44 mm)
2” (50 mm)
2 ½” (64 mm)
01 PREPARING THE DISHWASHER
33 ¾” (857 mm)
23 7⁄8” (606 mm)
The water supply
line, power cable
and drain hose
should go through
this part.
20 ½” (520 mm)
24 ½” (622 mm)
CUTOUT DIMENSIONS
This dishwasher is designed to be enclosed on
top and on both sides by a standard residential
kitchen unit.
24” (610 mm)
minimum
minimum
24” (610 mm)
minimum
preparing the dishwasher enclosure _5
34 ¹⁄
8
” (867 mm)
installing the dishwasher
Be sure that you or your installer follow these instructions closely so that the new
dishwasher works properly and that you’re not at risk of injury when washing
dishes.
STEP 1 CHECKING THE PARTS AND TOOLS
Before starting on the installation, prepare all the necessary tools and parts required to install the
dishwasher. This will save installation time and simplify the installation process.
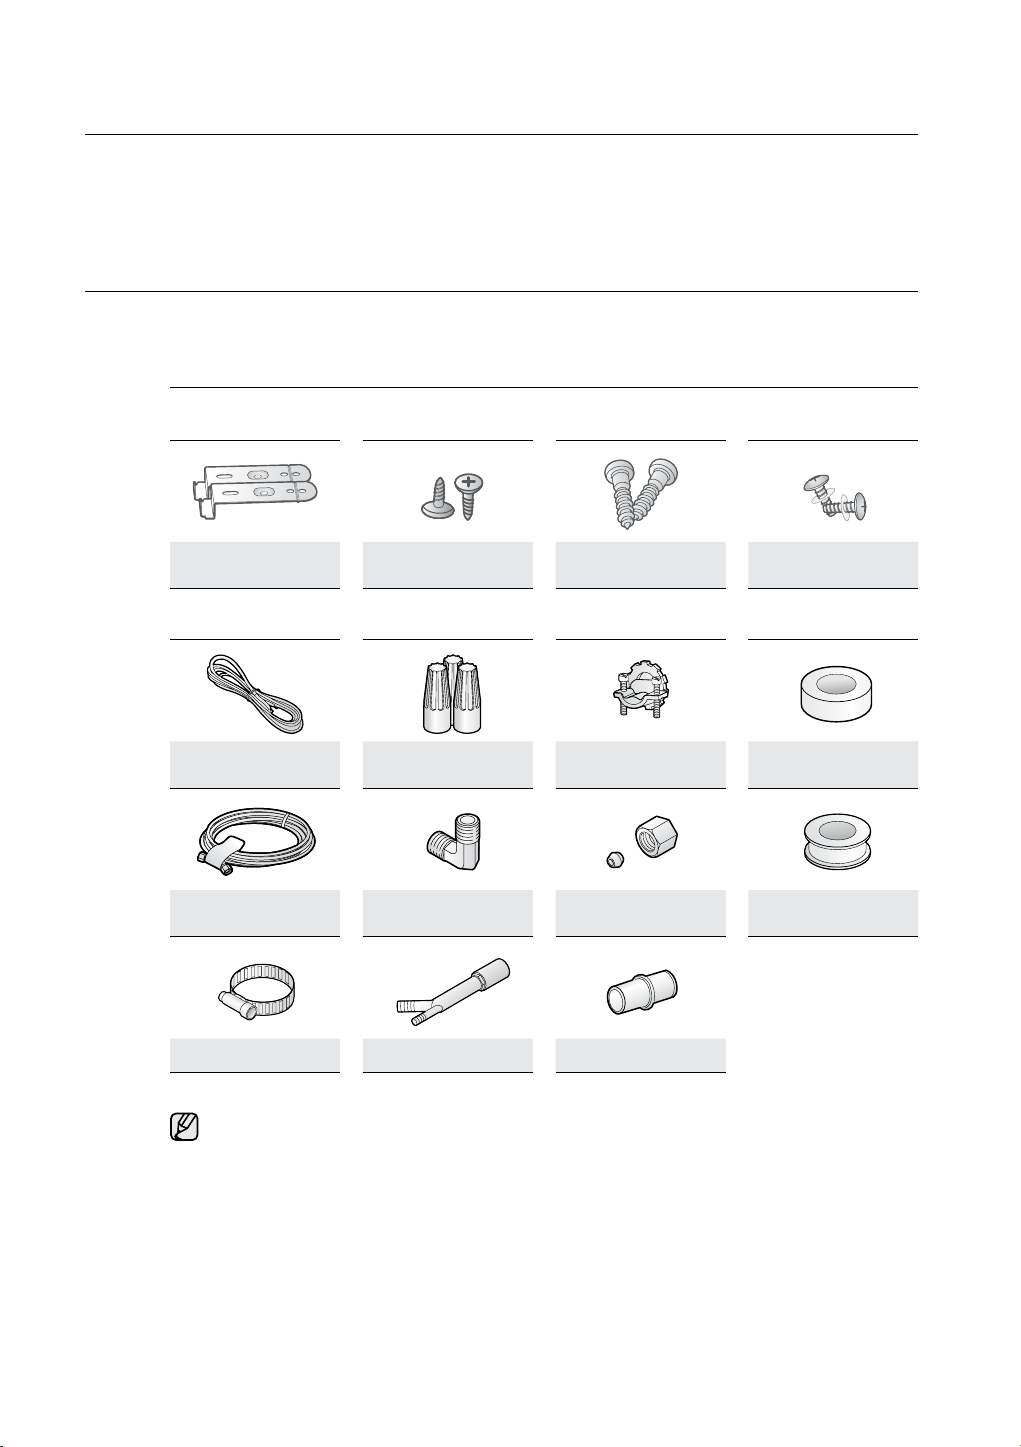
Parts required
Provided
Brackets
2 Screws
(for the Brackets)
2 Screws
(for the side walls)
2 Screws
(for the kick plate)
Not provided
Power cable
Water supply line 90° Elbow(3/8”) Tube fittings
Hose clamp Air gap Rubber connector
For the water supply line - Flexible stainless steel braided supply line or Minimum 3/8” O.D.
copper tubing with compression fitting. (Plastic tubing is not recommended)
Twist on wire
connector
Strain relief
Electrical tape &
Standard duct tape
Teflon® tape or sealing
compound
A 90° elbow with 3/8” N.P.T. external pipe threads on one end, and sized to fit your water
supply line (copper tubing/compression fitting, or braided hose) on the other
6_ installing the dishwasher
 Loading...