

Page 1
Samsung Electronics
3-1
3. Alignment and Adjustment
3-1 Preparing Setup
3-1-1 Before you start
1) Adjustment is done through PC
2) After entering the adjustment mode, the communication between a PC and a camera begins.
Hereinafter, all camera related operations can be selected and adjusted only by the PC.
3) Once the adjustment is done, the adjustment data must be written into EEPROM before reboot, in order to
take effect.
4) The adjustment result will be displayed in the log window at the bottom of the program screen; therefore, if
problem occurs or needs to analyze input data, then check the log for more information.
5) Once problem occurs, must save the log data.
3-1-2 Adjustment Mode Setup
1) Be aware that once entering the adjustment mode, all operations can be done by PC only.
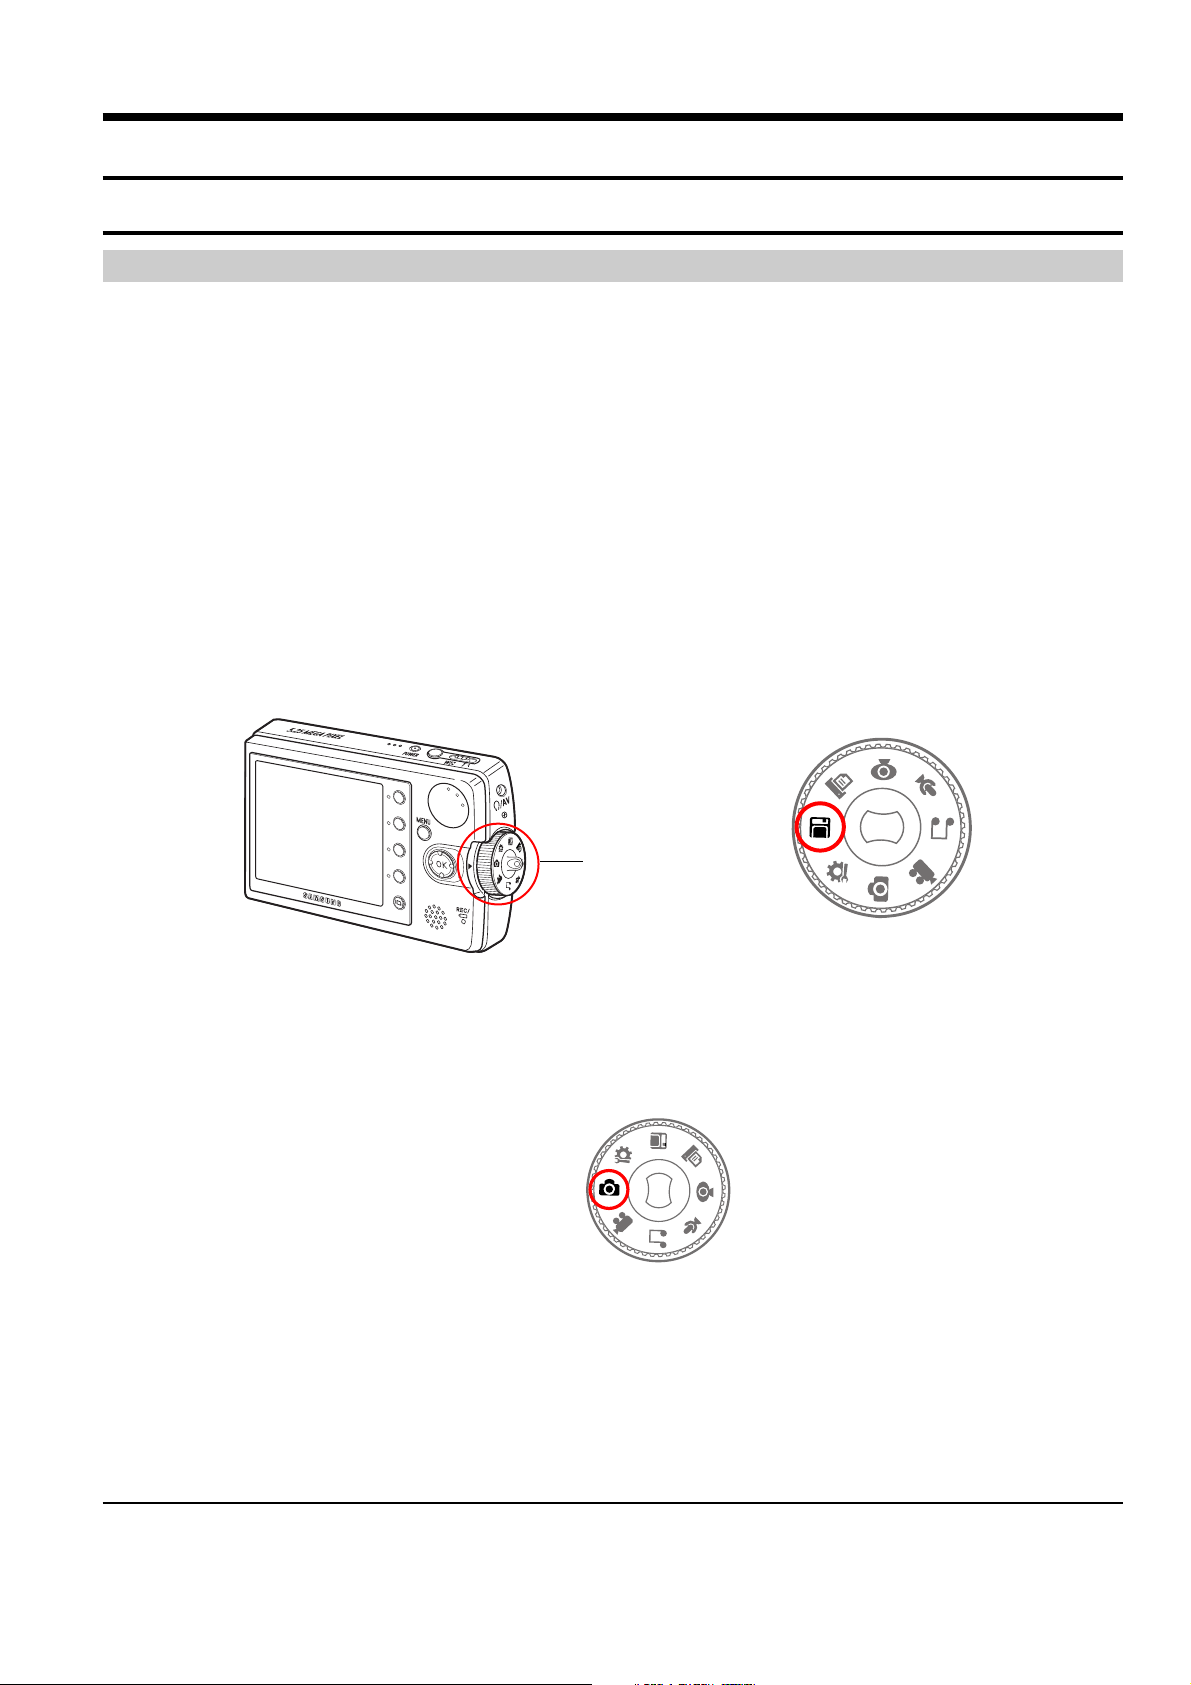
2) Set Mode Dial to "Storage" Mode.
Note : Do "Auto Pint" Adjustment Only
3) Connect to a PC via USB cable
4) Once connected to a PC via USB, Miniket Photo will be recognized as "Removable Disk" by the PC. Make a file
and name it "sam_adj.adj", then save the file into the root directory of the Internal NandFlash Memory.
5) After reboot, turn the Mode Dial to "Photo" mode.
Fig. 3-1
Fig. 3-2
6) Once in "Photo" Mode, "Storage" Mode will not be entered when USB connection occurs.
* Once the adjustment mode is entered, the communication between the PC and Miniket Photo begins.
Hereinafter, all camera related operations can be selected and adjusted only by the PC.
Mode Dial
Storage Mode
Photo Mode
Page 2
3-2
Alignment and Adjustments
Samsung Electronics
3-1-3 Run PC Program
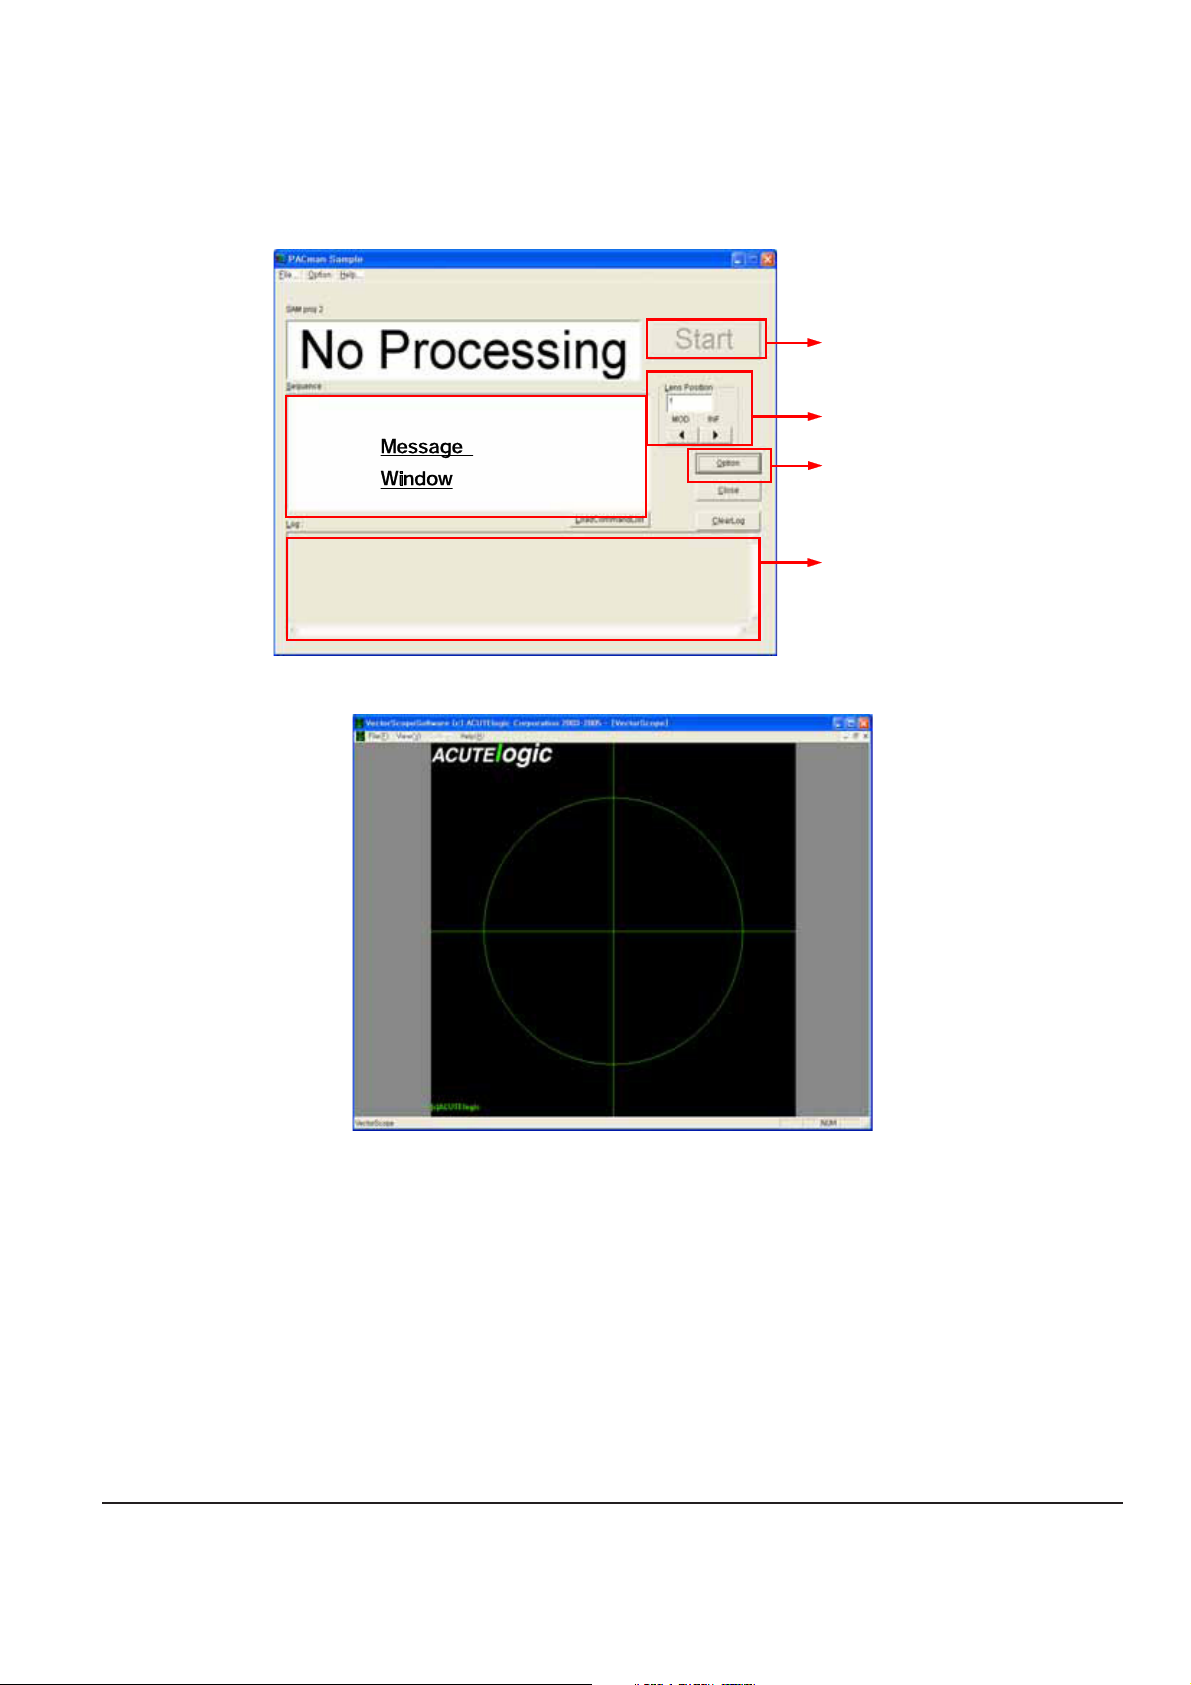
1) Run "PACMAN.exe" in "Bin" folder under "PACMAN" folder.
2) Once "PACMAN" starts, Miniket Photo is ready for the adjustment.
Fig. 3-3
Fig. 3-4
Start Button
Focus Adjustment
Option
Log W indow
Page 3

Alignment and Adjustments
3-3
Samsung Electronics
Note : Whenever Ass'y Lens and/or PCB Board are/is replaced, all the adjustment must be re-performed.
Re-adjustment is needed because the adjustment data is written into EEPROM; however, the data is different for
each Ass'y Lens.
* Do Auto Pint Adjustment Only
3-2 Camera Adjustment
3-2-1 Initial Adjustment Setup
1) Connect Miniket Photo (in the Adjustment Mode) to a PC via a USB cable.
2) Connect Miniket Photo to a TV via A/V cable.
3) Turn Miniket Photo on, then go to "Photo" Mode.
4) Miniket Photo is in the Adjustment Mode; however, in "Photo" Mode, all its functions are working since
the communication has not been started.
5) Zoom Out.
3-2-2 Starting the USB Connection between PC and Miniket Photo
1) Run "PACMAN.exe", then load "LoadCommandList"
2) Go to the parent folder of "...\BIN" folder where "PACMAN.exe" is located. Here, "...\CmdSeq" folder can
be found. In "CmdSeq" folder, there exist files that relate to various sequences. Amongst the files,
select "CLy_RegMode.csv", then run.
3) Press "Start". "OK" will be displayed when communication is ready.
* List to check in the event of "NG"
- Check whether Miniket Photo is in the Adjustment mode.
- Check cable connection.
- Check whether "sam_adj.adj" file is in the internal memory.
3-2-3 Auto Pint Adjustment (Zoom Track Adjustment)
1) Take a picture of Focus Chart in "Photo" Mode.
2) Place Miniket Photo approximately 10 ft. from Focus Chart, and keep it leveled. Focus chart
should be placed on either a white or gray colored wall.
Fig. 3-5
Must keep 10 ft. distance
Page 4

3-4
Alignment and Adjustments
Samsung Electronics
3) Connect Miniket Photo to PC via USB cable
4) If not in Adjustment Mode, select "LoadCommandList", then select "CLy_RegMode.csv" from the list.
Press "Start".
5) Select "LoadCommandList", then run "CLl_ZoomTele.csv" to place Zoom at TELE
6) Run "CLl_AutoFocus.csv" to focus
7) Select "LoadCommandList", then select "CLl_pint.csv". Press "Start".
8) When "Waiting" message is displayed, Spot Window will appear on screen. Adjust Miniket Photo's
location to fit Collimator's Center into the Spot Window.
9) While facing Collimator, make sure that patterns of Collimator are all shown. Then press "Start".
10) At this point, DSP will adjust Zoom Track, and find focus position accordingly.
11) Once the adjustment is done, "OK" will be displayed.
12) Once the adjustment is done, go on to EEPROM UPDATE.
3-2-4 EEPROM Update
1) Once the adjustment is done, the Adjustment result must be stored in to EEPROM.
2) Select "LoadCommandList", then select "CLz_EEPROM Write.csv". Press "Start".
3) "OK" will be displayed upon the completion of write operation.
4) Remove Power completely from Miniket Photo. Then put power back on, and Miniket Photo will be in
Normal Mode.
5) Remove "sam_adj.adj" file from internal memory.
* Things to do in the event of "NG"
• Save the log.
• Redo the adjustment from the beginning. Compare the saved Log with the new Log to see whether "NG"
occurred at the same point.
Page 5

Alignment and Adjustments
3-5
Samsung Electronics
3-3 Flash Update
3-3-1 UPDATE Procedure
1) Copy an update image on to a Mini-SD card from a PC.
- Copy an update image into the root directory of a Mini-SD card. Make sure to name the file, "flash.bin".
- Insert the Mini-SD card into the slot.
2) Update Method
- Turn the power on.
- Go to "PictBridge" Mode.
- Press "OK" button and Hotkey #5 simultaneously for 3 seconds.
Fig. 3-6
- Select "Flash Write" using 5-direction Key, then press "OK"
- Update will run for approximately 5 minutes. Upon the completion of Flash Write, AF LED will turn off.
- Turn the power off, then turn back on.
3) Troubleshooting for Update
- Mini-SD card was not correctly recognized by the system.
• While Power is off, insert Mini-SD card. Turn the power on.
• Go to "Setting" Mode. Check to see whether "Memory Type" is set to External Memory.
• Redo the Update.
- File was not copied correctly.
• Check whether the file name is "flash.bin".
Page 6

3-6
Alignment and Adjustments
Samsung Electronics
MEMO
 Loading...