

Page 1
ENGLISH ESPAÑOL
ELECTRONICS
Digital Video Camcorder
SCD33/D34/D39
AF Auto Focus
CCD Charge Coupled Device
LCD Liquid Crystal Display
Owner’s Instruction Book
Before operating the unit, please read this
instruction book thoroughly, and retain it for
future reference.
Videocámara digital
SCD33/D34/D39
AF Autofoco
S
T
A
R
T
/
S
T
O
P
P
H
O
T
O
D
I
S
P
L
A
Y
S
E
L
F
T
Z
IM
E
R
E
O
R
M
E
D
M
A
T
O
E
R
/
Y
T
I
M
E
P
H
O
T
O
S
E
A
R
C
H
A
.D
U
B
S
L
O
W
X
2
F
.A
D
V
CCD Dispositivo acoplado por carga
LCD Visualización en cristal líquido
Manual de instrucciones
Antes de emplear la cámara, lea
detenidamente este manual de instrucciones
y consérvelo para consultas posteriores.
AD68-00654D
Page 2

ENGLISH ESPAÑOL
ÍndiceContents
Notes and Safety Instructions .................................... 6
Getting to Know Your Camcorder ........................... 11
Features ........................................................................................................ 11
Accessories Supplied with camcorder ......................................................... 12
Front & Left View .......................................................................................... 13
Left side View ............................................................................................... 14
Right & Top View .......................................................................................... 15
Rear & Bottom View ..................................................................................... 16
Remote control ............................................................................................. 17
OSD (On Screen Display in CAM and PLAYER modes) ............................ 18
OSD (On Screen Display in M.REC and M.PLAY modes).......................... 19
Turning the OSD on/off (On Screen Display) ........................................ 19
Preparation .............................................................. 20
How to use the Remote Control ................................................................. 20
Battery Installation for the Remote Control ........................................... 20
Self Record using the Remote Control .................................................. 20
Lithium Battery Installation.............................................................................21
Adjusting the Hand Strap ............................................................................ 22
Hand strap .............................................................................................. 22
Shoulder strap ..........................................................................................22
Connecting a Power Source ........................................................................ 23
To use the AC Power adapter and DC Cable ...................................... 23
To select the CAMCORDER mode..........................................................23
Using the Lithium Ion Battery Pack ............................................................ 24
Charging the Lithium Ion Battery Pack .................................................. 24
Table of continuous recording time based on model and
battery type ............................................................................................ 25
Battery level display ............................................................................... 26
Inserting and Ejecting a Cassette ............................................................... 27
BASIC Recording ..................................................... 28
Making your First Recording ........................................................................ 28
Record Search (REC SEARCH) .......................................................... 29
Hints for Stable Image Recording ................................................................ 30
Recording with the LCD monitor ............................................................ 30
Recording with the Viewfinder .............................................................. 30
Adjusting the LCD ....................................................................................... 31
Using the VIEWFINDER ............................................................................. 32
Adjusting the Focus ................................................................................ 32
22
Notas e instrucciones de seguridad.............................6
Introducción a la videocámara..................................11
Características..............................................................................................11
Accesorios incluidos con la videocámara....................................................12
Vistas frontal y lateral izquierda...................................................................13
Vista lateral izquierda...................................................................................14
Vistas superior y lateral derecha .................................................................15
Vistas posterior e inferior..............................................................................16
Mando a distancia........................................................................................17
OSD: presentación en pantalla en las modalidades de cámara (CAM) y
reproductor de vídeo (PLAYER)....................................................................18
OSD: presentación en pantalla en las modalidades M.REC y M.PLAY.....19
Encendido y apagado de la OSD (presentación en pantalla) ............19
Preparación ...............................................................20
Uso del mando a distancia........................................................................... 20
Instalación de la pila del mando a distancia........................................20
Autograbación empleando el mando a distancia ................................ 20
Instalación de la pila de litio.........................................................................21
Ajuste de la empuñadura.............................................................................22
Empuñadura.........................................................................................22
Correa para el hombro.........................................................................22
Conexión a una fuente de energía ..............................................................23
Utilización del adaptador de CA y del cable de CC ............................23
Selección de la modalidad de videocámara .......................................23
Utilización de la batería de ion de litio.........................................................24
Carga de la batería de ion de litio ........................................................24
Tabla de tiempos de grabación continuada según el modelo
y el tipo de batería................................................................................25
Indicador de carga de la batería..........................................................26
Introducción y expulsión del casete.............................................................27
Grabación BÁSICA ....................................................28
Primera grabación........................................................................................28
Búsqueda de grabación (REC SEARCH)............................................29
Consejos para la grabación estable de imágenes ......................................30
Grabación utilizando la pantalla LCD...................................................30
Grabación empleando el visor .............................................................30
Ajuste de la pantalla LCD ............................................................................31
Utilización del VISOR................................................................................... 32
Ajuste del foco .....................................................................................32
Page 3

ENGLISH ESPAÑOL
ÍndiceContents
Playing back a tape you have recorded on the LCD .................................. 33
Adjusting the LCD during PLAY ............................................................. 34
Controlling Sound from the Speaker .......................................................... 34
Advanced Recording ............................................... 35
Use of various Functions .............................................................................. 35
Setting menu items ................................................................................. 35
Set the camcorder to CAM or PLAYER mode and
M.REC or M.PLAYmode ........................................................................ 35
Availability of functions in each mode .................................................... 36
CLOCK SET ..........................................................................................37
WL. REMOTE ........................................................................................ 38
BEEP SOUND ....................................................................................... 39
SHUTTER SOUND................................................................................. 40
DEMONSTRATION ............................................................................... 41
PROGRAM AE ...................................................................................... 42
Setting the PROGRAM AE .................................................................... 43
WHT. BALANCE (WHITE BALANCE) ................................................... 44
Zooming In and Out with DIGITALZOOM ............................................ 45
Zooming In and Out ............................................................................... 45
Digital Zoom .......................................................................................... 46
DIS (Digital Image Stabilizer) ................................................................. 47
DSE (Digital Special Effects) SELECT .................................................. 48
Selecting an effect .................................................................................. 49
REC MODE ........................................................................................... 50
AUDIO MODE ....................................................................................... 51
WIND CUT ............................................................................................. 52
DATE/TIME ............................................................................................ 53
TV DISPLAY .......................................................................................... 54
Using Quick Menu ....................................................................................... 55
Setting the Quick menu .......................................................................... 56
SHUTTER SPEED & EXPOSURE ...................................................... 57
SLOW SHUTTER(Low Shutter Speed) ..................................................... 58
EASY Mode (for Beginners) ......................................................................... 59
MF/AF (Manual Focus/Auto Focus) ............................................................. 60
Auto Focusing ......................................................................................... 60
Manual Focusing .................................................................................... 60
BLC (Back Light Compensation) ................................................................. 61
Fade In and Out ........................................................................................... 62
To Start Recording .................................................................................. 62
To Stop Recording (use FADE IN / FADE OUT) ................................... 62
Audio dubbing .............................................................................................. 63
Dubbing sound. ....................................................................................... 63
Reproducción en la pantalla LCD de una cinta grabada ............................33
Ajuste de la pantalla LCD durante la REPRODUCCIÓN .................... 34
Control de sonido desde el altavoz..............................................................34
Grabación avanzada ..................................................35
Utilización de las distintas funciones ...........................................................35
Ajustes del menú.................................................................................. 35
Ajuste de la videocámara en la modalidad CAMERA o PLAYER y en la
modalidad M.REC o M.PLAY.......................................................................35
Disponibilidad de funciones en cada modalidad .................................36
Ajuste del reloj......................................................................................37
MANDO A DISTANCIA.........................................................................38
Señal acústica (BEEP SOUND)...........................................................39
Sonido del obturador (SHUTTER SOUND) ......................................... 40
Demostración........................................................................................41
Programa AE (PROGRAM AE)............................................................42
Ajustes del programa AE (PROGRAM AE).........................................43
Equilibrio del blanco (WHT. BALANCE)...............................................44
Acercamiento o alejamiento de la imagen mediante el zoom digital . 45
Acercamiento y alejamiento de las imágenes.....................................45
Zoom digital..........................................................................................46
DIS (Estabilizador digital de la imagen)...............................................47
Selección de DSE (Efectos especiales digitales)................................48
Selección de un efecto.........................................................................49
Modalidad de grabación (REC MODE) ...............................................50
Modalidad de audio (AUDIO MODE)...................................................51
Eliminación del ruido del viento (WIND CUT) .................................... 52
Fecha y hora (DATE/TIME)..................................................................53
Monitor de TV (TV DISPLAY)...............................................................54
Uso del menú rápido....................................................................................55
Ajustes del menú rápido.......................................................................56
Velocidad del obturador y exposición (SHUTTER SPEED & EXPOSURE).57
Velocidad del obturador baja (SLOW SHUTTER).......................................58
Modalidad sencilla (para principiantes)........................................................59
Enfoque manual / enfoque automático (MF/AF) .........................................60
Enfoque automático.............................................................................. 60
Enfoque manual ...................................................................................60
Compensación de la luz de fondo (BLC)..................................................... 61
Aparición y desaparición gradual de la imagen (fundido)...........................62
Comienzo de la grabación ...................................................................62
Detención de la grabación (utilizando FADE IN / FADE OUT)...........62
Mezcla de audio ...........................................................................................63
Grabación de sonido adicional.............................................................63
33
Page 4

ENGLISH ESPAÑOL
Contents
Dubbed Audio Playback ....................................................................... 64
PHOTO Image Recording ............................................................................ 65
Searching for a PHOTO picture ............................................................. 65
NITE PIX (0 lux recording).............................................................................66
POWER NITE PIX ..........................................................................................67
Various Recording Techniques .................................................................... 68
Playback .................................................................. 69
Tape Playback .............................................................................................. 69
Playback on the LCD ............................................................................. 69
Playback on a TV monitor ...................................................................... 69
Connecting to a TV which has Audio/Video input jacks ....................... 69
Connecting to a TV which has no Audio and Video input jacks ........... 70
Playback ................................................................................................. 70
Various Functions while in PLAYER mode .................................................. 71
Playback pause ...................................................................................... 71
Picture search (Forward/Reverse) ......................................................... 71
Slow playback (Forward/Reverse) ......................................................... 71
Frame advance (To play back frame by frame) .................................... 72
X2 Playback (Forward/Reverse ) ........................................................... 72
ZERO MEMORY .........................................................................................73
PB DSE (Playback Digital Special Effects) ................................................ 74
PB ZOOM .................................................................................................... 75
Recording in PLAYER mode (SCD34/D39 only).............. 76
IEEE 1394 Data Transfer .......................................... 77
Transferring IEEE1394 (i.LINK)-DV standard data connections ................ 77
Connecting to a DV device .................................................................... 77
Connecting to a PC ................................................................................ 77
System requirements ............................................................................. 78
Recording with a DV connection cable................................................... 78
USB interface............................................................ 79
Transferring a Digital Image through a USB Connection ........................... 79
System Requirements .................................................................................. 79
Installing DVC Media 5.0 Program............................................................... 80
Connecting to a PC ...................................................................................... 81
Digital Still Camera mode
MEMORY STICK........................................................................................... 82
Memory Stick Functions.......................................................................... 82
Inserting and ejecting the Memory Stick .............................................. 83
44
........................................... 82
Índice
Reproducción de una cinta con audio mezclado.................................64
Grabación de imágenes fotográficas........................................................... 65
Búsqueda de una fotografía .................................................................65
Grabación nocturna (grabación con 0 lux) ..................................................66
Grabación nocturna incrementada...............................................................67
Técnicas diversas de grabación .................................................................. 68
Reproducción de cintas .............................................69
Reproducción de una cinta ..........................................................................69
Reproducción en la pantalla LCD........................................................69
Reproducción en un monitor de televisión .........................................69
Conexión a un televisor que dispone de conectores de Audio/Vídeo..69
Conexión a un televisor que no dispone de conectores de Audio y Vídeo.70
Reproducción........................................................................................70
Diferentes funciones en la modalidad PLAYER..........................................71
Pausa en la reproducción ....................................................................71
Búsqueda de imágenes (hacia delante/hacia atrás)...........................71
Reproducción a cámara lenta (hacia delante/hacia atrás)..................71
Avance cuadro a cuadro (reproducción cuadro a cuadro)..................72
Reproducción a doble velocidad (hacia delante/hacia atrás)..............72
Memoria cero................................................................................................73
Selección de DSE (Efectos especiales digitales)........................................74
Ampliación de imágenes (PB ZOOM) ......................................................... 75
Grabación en la modalidad PLAYER
Transferencia de datos IEEE 1394..............................77
Conexiones para la transferencia de datos estándar IEEE1394 (i.LINK)-DV ..77
Conexión a un aparato DV...................................................................77
Conexión a un ordenador ....................................................................77
Requisitos del sistema .........................................................................78
Grabación con un cable de conexión DV............................................78
Interfaz USB ..............................................................79
Transferencia de imágenes digitales mediante una conexión USB ...........79
Requisitos del sistema ................................................................................. 79
Instalación del programa DVC Media 5.0....................................................80
Conexión a un ordenador ............................................................................81
Modo de cámara fotográfica digital...........................82
MEMORY STICK ......................................................................................... 82
Funciones del Memory Stick................................................................82
(sólo modelos SCD34/D39) ....76
Page 5

ENGLISH ESPAÑOL
Contents
Índice
Structure of folders and files on the Memory Stick ............................... 84
Image Format ......................................................................................... 84
Selecting the CAMCORDER mode ............................................................. 84
Selecting the image quality .......................................................................... 85
Select the image quality ........................................................................ 85
Number of images on the Memory Stick ............................................... 85
Recording Still images to a Memory Stick in M.REC Mode ....................... 86
Recording images to a Memory Stick .....................................................86
Recording an image from a cassette as a still image .......................... 87
Viewing Still images ...................................................................................... 88
To view a Single image........................................................................... 88
To view a slide show............................................................................... 88
To view the Multi Display......................................................................... 89
Copying still images from a cassette to Memory Stick................................ 90
Marking images for printing .......................................................................... 91
Protection from accidental erasure............................................................... 92
Deleting Still images ..................................................................................... 93
Formatting the Memory Stick ....................................................................... 94
Attention .................................................................................................. 94
MPEG RECORDING .................................................................................... 95
Selecting the moving picture sizes .............................................................. 97
MPEG Playback ........................................................................................... 98
Maintenance............................................................. 99
After finishing a recording ............................................................................ 99
Cleaning and Maintaining the Camcorder .................................................. 100
Cleaning the Video Heads ................................................................... 100
Using Y our Camcorder Abroad .................................................................. 101
Power sources ...................................................................................... 101
Color system ......................................................................................... 101
Troubleshooting...................................................... 102
Troubleshooting .......................................................................................... 102
Self Diagnosis Display ......................................................................... 102
Moisture Condensation ........................................................................ 102
Self Diagnosis Display in M.REC, M.PLAY mode ............................... 103
Specifications...........................................................105
INDEX..................................................................... 106
Introducción y extracción del Memory Stick ........................................83
Estructura de carpetas y archivos del Memory Stick ..........................84
Formato de la imagen .......................................................................... 84
Selección de la modalidad de cámara fotográfica ......................................84
Selección de la calidad de imagen..............................................................85
Cómo seleccionar la calidad de imagen..............................................85
Número de imágenes del Memory Stick..............................................85
Grabación de imágenes fijas en un Memory Stick en la modalidad M.REC..86
Grabación de imágenes en un Memory Stick .....................................86
Grabación de una imagen de un casete como imagen fija.................87
Visionado de imágenes fijas ........................................................................88
Visionado de imágenes una a una ......................................................88
Visionado de una proyección de diapositivas..................................... 88
Visionado simultáneo de varias imágenes ..........................................89
Copia de imágenes fijas de un casete en el Memory Stick........................90
Marcado de imágenes para imprimir...........................................................91
Protección contra el borrado accidenta.......................................................92
Borrado de imágenes fijas ........................................................................... 93
Formateado del Memory Stick.....................................................................94
Atención................................................................................................94
Grabación MPEG (MPEG REC)..................................................................95
Selección del tamaño del vídeo.................................................................... 97
Reproducción MPEG (MPEG PB)...............................................................98
Mantenimiento ..........................................................99
Después de haber finalizado una grabación............................................... 99
Limpieza y mantenimiento de la videocámara..........................................100
Limpieza de los cabezales de vídeo ..................................................100
Utilización de la videocámara en el extranjero ..........................................101
Fuentes de potencia...........................................................................101
Sistemas de color...............................................................................101
Problemas y soluciones............................................102
Problemas y soluciones.............................................................................102
Pantalla de autodiagnósticos .............................................................102
Condensación de humedad...............................................................102
Pantalla de autodiagnósticos en las modalidades M.REC y M.PLAY....103
Especificaciones técnicas .........................................105
ÍNDICE ALFABÉTICO..............................................106
55
Page 6
ENGLISH ESPAÑOL
Notas e instrucciones de seguridadNotes and Safety Instructions
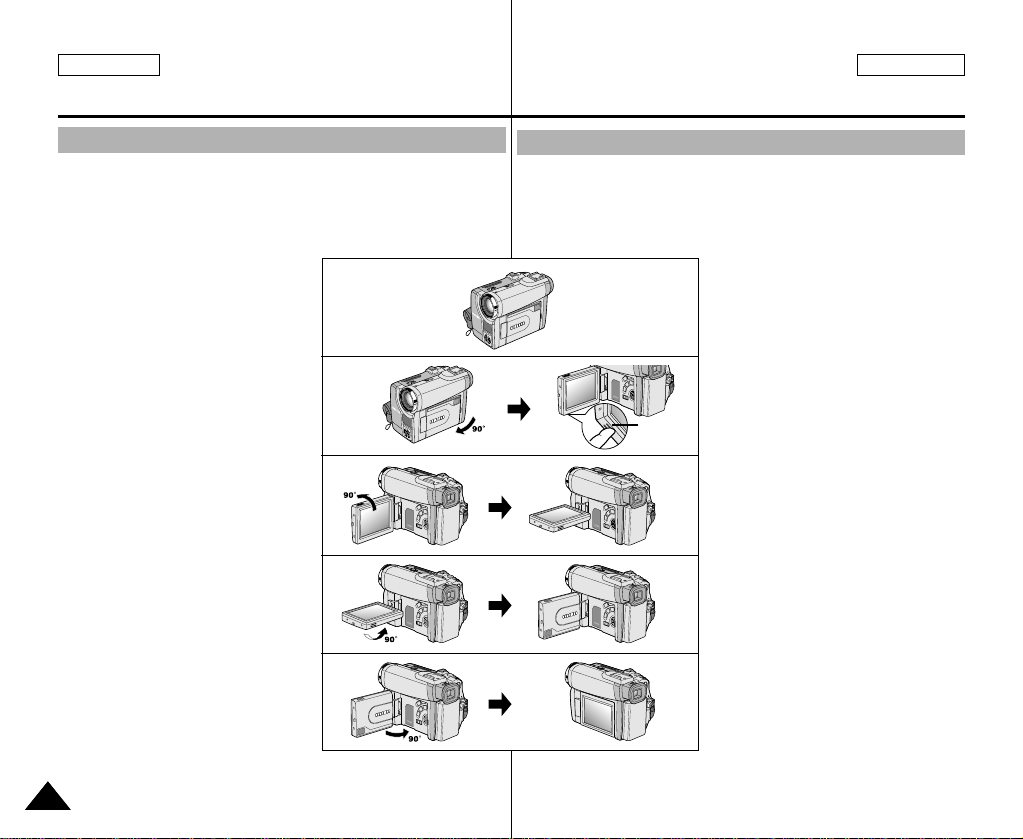
Notes regarding the rotation of the LCD screen
Please rotate the LCD screen carefully as illustrated.
Over rotation may cause damage to the inside of the hinge that
connects the LCD screen to the Camcorder.
1. LCD screen closed.
2. Standard recording using the LCD
screen.
■
A LCD Monitor is opened
applying a finger to LCD open
knob.
3. Recording when looking at the
LCD screen from the top.
4. Recording when looking at the
LCD screen from the front.
5. Recording with the LCD screen
closed.
1
2
3
4
5
Notas referentes a la rotación de la pantalla LCD
Gire cuidadosamente la pantalla como se indica en la figura.Si se gira
demasiado se puede estropear la bisagra interior que la une a la
videocámara.
1. Pantalla LCD cerrada.
2. Grabación estándar empleando
la pantalla LCD.
■
El monitor LCD se abre
LCD
open knob
pulsando con un dedo el
botón de apertura del LCD.
3. Grabación mirando la pantalla
LCD desde arriba.
4. Grabación mirando la pantalla
LCD desde el frente.
5. Grabación con la pantalla
LCD cerrada.
66
Page 7

ENGLISH ESPAÑOL
Notes and Safety Instructions
Notas e instrucciones de seguridad
Notices regarding COPYRIGHT
Television programs, video tapes, DVD titles, films, and other program
materials may be copyrighted.
Unauthorized copying of copyrighted material may be against the law.
Notes regarding moisture condensation
1. A sudden rise in atmospheric temperature may cause
condensation to form inside the camcorder.
for example:
- When you move the camcorder from a cold location to a warm
location (e.g. from outside to inside during winter.)
- When you move the camcorder from a cool location to a hot
location (e.g. from inside to outside during the summer.)
2. If the (DEW) protection feature is activated, leave the
camcorder for at least two hours in a dry, warm room with the
cassette compartment opened and the battery pack removed.
Notes regarding CAMCORDER
1. Do not leave the camcorder exposed to high temperature
(above 60°C or 140°F).
For example, in a parked car in the sun or exposed to direct
sunlight.
2. Do not let the camcorder get wet.
Keep the camcorder away from rain, sea water, and any other form
of moisture. If the camcorder gets wet, it may get damaged.
Sometimes a malfunction due to exposure to liquids cannot be
repaired.
Notas referentes a los DERECHOS DE REPRODUCCIÓN
Es probable que los programas de televisión, las cintas de vídeo, los
DVD, las películas y otros materiales audiovisuales tengan registrados
sus derechos de reproducción.La copia no autorizada de material
protegido por dichos derechos puede quebrantar la ley
Notas referentes a la condensación de humedad
1. Una subida repentina de la temperatura puede producir
Por ejemplo:
- Cuando se traslada la videocámara de un sitio frío a uno más
- Cuando se traslada la videocámara de un sitio templado a uno
2. Si el dispositivo de protección contra humedad (DEW) está
Notas referentes a la VIDEOCÁMARA
1. No deje la videocámara expuesta a temperaturas altas
2. No permita que la videocámara se moje.
condensación en el interior de la videocámara.
cálido (por ejemplo, de un espacio exterior a uno interior en
invierno).
caliente (por ejemplo, de un espacio interior a uno exterior en
verano).
activado, abra el compartimento para el casete, retire la batería y
deje la videocámara durante al menos dos horas en un lugar seco
y templado.
(más de 60°C o 140°F).
Por ejemplo, en un coche aparcado al sol o expuesta directamente
a la luz del sol.
Mantenga la videocámara alejada de la lluvia, del agua de mar y
de cualquier otro tipo de humedad.
Si la videocámara se moja puede estropearse.
En algunas ocasiones, los daños causados por líquidos no
pueden repararse.
77
Page 8
ENGLISH ESPAÑOL
Notas e instrucciones de seguridadNotes and Safety Instructions
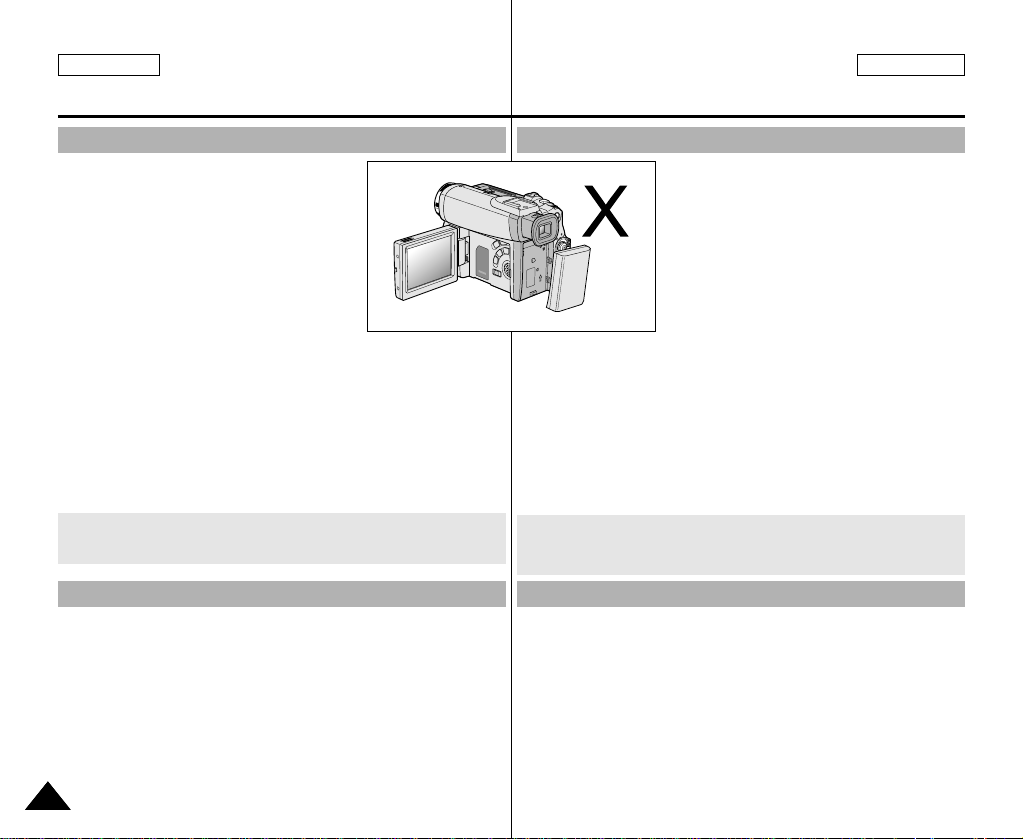
Notes regarding the battery pack
- Make sure that the battery pack is fully
charged before starting to record.
- To preserve battery power, keep your
camcorder turned off when you are not
operating it.
- If your camcorder is in CAM mode, and it is
left in STBY mode without being operated
for more than 5 minutes with a tape
installed, it will automatically turn itself off to
protect against unnecessary battery discharge.
- Make sure that the battery pack is fitted firmly into place.
Dropping the battery pack may damage it.
- A brand new battery pack is not charged.
Before using the battery pack, you need to charge it completely.
- It is a good idea to use the viewfinder rather than the LCD when
making a long recordings, because the LCD uses up more battery
power.
* When the battery reaches the end of its life, please contact your
local dealer. The batteries have to be dealt with as chemical waste.
Notes regarding the Video Head Cleaning
- To ensure normal recording and a clear picture, clean the video
heads regularly. If a square block-shape distorts playback,
or only a blue screen is displayed, the video heads may be dirty.
If this happens, clean the video heads with a dry type cleaning
cassette.
- Do not use a wet-type cleaning cassette. It may damage the video
heads.
Notas referentes a la batería
- Asegúrese de que la batería esté colocada correctamente en su
- Las baterías nuevas no vienen cargadas.Antes de utilizar la
- Cuando se graba durante mucho tiempo, es mejor mirar por el
Notas referentes a la limpieza de los cabezales de vídeo
- Para asegurarse de que obtendrá una grabación normal y una
- No utilice un casete de limpieza de tipo húmedo, pues los
- Asegúrese de que la batería esté
completamente cargada antes de empezar
a grabar.
- Para ahorrar energía de la batería,
mantenga la videocámara apagada cuando
no la esté usando.
- Si la videocámara está en la modalidad
CAMERA con una cinta puesta y se deja
en la modalidad de STBY (espera) sin
hacerla funcionar durante más de cinco
minutos, se apagará automáticamente
para ahorrar energía de la batería.
sitio. Si se llegara a caer se podría estropear.
batería es necesario cargarla por completo.
visor que a través de la pantalla LCD, ya que ésta consume más
energía.
* Cuando se termine la vida útil de la batería, póngase en contacto
con su proveedor habitual. Para desechar las baterías gastadas,
éstas deben tratarse como residuos químicos.
imagen clara es necesario limpiar regularmente los cabezales de
vídeo. Si durante la reproducción hay un cuadrado que deforma la
imagen o si sólo se ve una pantalla azul, es posible que los
cabezales de vídeo estén sucios. En caso de ser así, límpielos
con un casete de limpieza de tipo seco.
cabezales se podrían estropear.
88
Page 9
ENGLISH ESPAÑOL
Notas e instrucciones de seguridadNotes and Safety Instructions
Note regarding the LENS
- Do not film with the camera lens pointing directly at the sun.
Direct sunlight can damage the CCD(Charge Coupled Device).
- No grabe con el objetivo de la cámara dirigido directamente hacia
Notes regarding electronic viewfinder
1. Do not position the camcorder such that the viewfinder is pointing
towards the sun.
Direct sunlight can damage the inside of the viewfinder. Be careful
when placing the camcorder under sunlight or near a window
exposed to sunlight.
2. Do not pick up the camcorder from the viewfinder.
3. Over pulling of the viewfinder may damage it.
1. No ponga la videocámara de manera que el sol incida
2. No sujete la videocámara por el visor.
3. No tire en exceso del visor; podría estropearse.
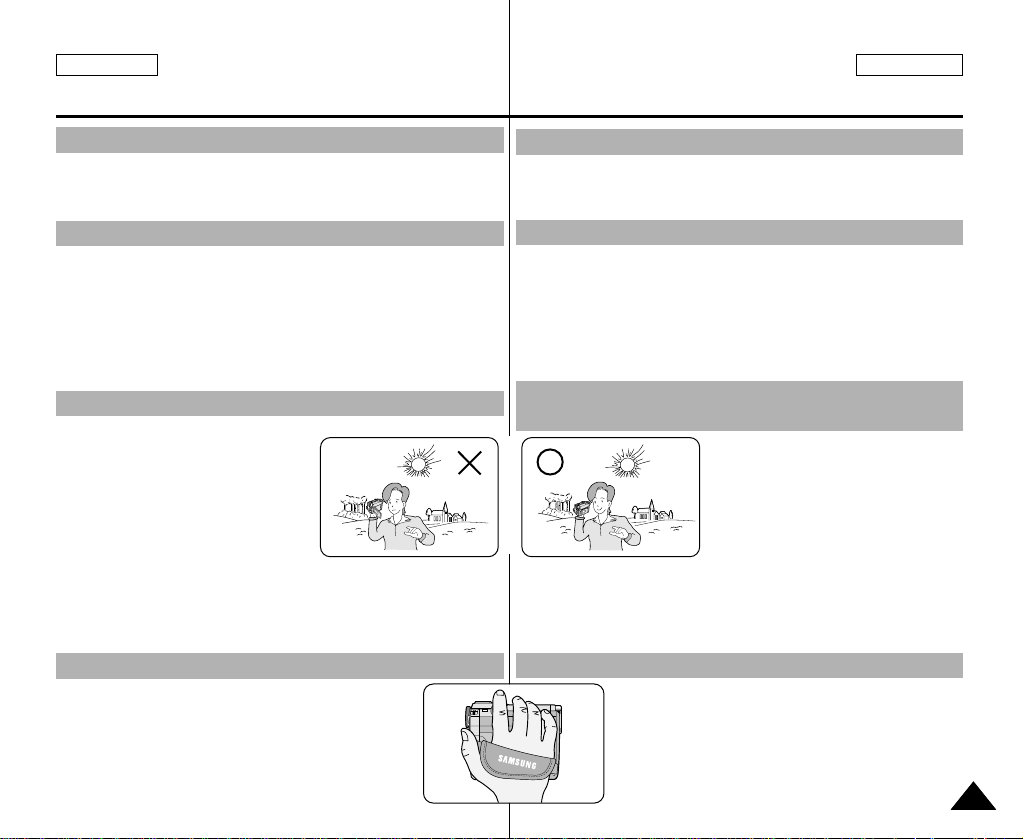
Notes regarding ‘Record’ or ‘Playback’ using the LCD
1. The LCD display has been
manufactured using high precision
technology. However, there may be
tiny dots (red, blue or green in color)
that appear on the LCD display.
These dots are normal and do not
affect the recorded picture in any
way.
2. When you use the LCD display under direct sunlight or outdoors,
it maybe difficult to see the picture clearly.
If this occurs, we recommend using the viewfinder.
3. Direct sunlight can damage the LCD monitor.
2. Si se emplea el visor LCD bajo la acción directa del sol o en
3. La acción directa del sol puede estropear la pantalla LCD.
Notes regarding the hand strap
- To ensure a steady picture during filming, check that
the hand strap is properly adjusted.
- Do not force your hand into the hand strap as you
could damage it.
Nota referente al OBJETIVO
el sol. La acción de la luz directa del sol podría estropear el CCD
(dispositivo acoplado por carga)
Notas referentes al visor electrónico
directamente en el visor.
La acción directa del sol sobre el visor podría estropear su interior.
Tenga cuidado cuando ponga la videocámara bajo el sol o cerca
de una ventana expuesta a la acción del sol.
Notas referentes a la grabación o a la
reproducción utilizando la pantalla LCD
1. Para la fabricación de la pantalla
LCD se ha empleado tecnología
de alta precisión.
Sin embargo, pueden aparecer
en ella puntitos rojos, azules o
verdes.
Esta situación es normal y no afecta
en modo alguno la grabación.
exteriores, es probable que resulte difícil ver la imagen con claridad.
Si esto sucede, es recomendable utilizar el visor normal.
Notas referentes a la empuñadura
- Para obtener una imagen estable durante la
grabación, asegúrese de que la empuñadura
está debidamente ajustada.
- Al introducir la mano tenga cuidado de no forzar
la empuñadura, pues podría estropearse.
99
Page 10

ENGLISH ESPAÑOL
Notas e instrucciones de seguridadNotes and Safety Instructions
Precautions regarding the Lithium battery
1. The lithium battery maintains the clock function and user settings;
even if the battery pack or AC adapter is removed.
2. The lithium battery for the camcorder lasts about 6 months under
normal operation from time of installation.
3. When the lithium battery becomes weak or dead, the date/time
indicator will display “---” when you set the DATE/TIME to ON.
In this case, replace the lithium battery with a new one(type
CR2025).
4. Danger of explosion if battery is incorrectly replaced.
Replace only with the same or equivalent type.
Warning: Keep the LITHIUM BATTERY out of reach of children.
Should a battery be swallowed, consult a doctor
immediately.
1. La pila de litio de la videocámara mantiene en funcionamiento el
2. La pila de litio de la videocámara dura aproximadamente seis
3. Cuando se descargue o agote la pila de litio, en el indicador de fecha
4. Si la pila no se reemplaza correctamente se corre el riesgo de
Precaución: mantenga la PILA DE LITIO fuera del alcance
Precauciones referentes a la pila de litio
reloj y los ajustes programados aun cuando se haya quitado la
batería o el adaptador de CA.
meses bajo condiciones normales de funcionamiento.
y hora aparecerá "---" al ajustar DATE/TIME en la posición ON.
En ese caso, reemplácela por una nueva del tipo CR2025.
una explosión.
Reemplace la pila sólo por una igual o de especificaciones
equivalentes.
de los niños.
En caso de que, por accidente, alguien se tragara
una, avise inmediatamente a un médico.
1010
Page 11

ENGLISH ESPAÑOL
Introducción a la videocámaraGetting to Know Your Camcorder
Features
• Digital data transfer function with IEEE1394
By incorporating the IEEE 1394 (i.LINK™ : i.LINK is a serial data
transfer protocol and interconnectivity system, used to transmit DV
data) high speed data transport port, both moving and still images
can be transferred to a PC, making it possible to produce or edit
various images.
• USB interface for digital image data transfer
You can transfer still images to a PC using the USB interface
without an add-on card.
• PHOTO
The PHOTO function lets you capture an object as a still along
with sound, while in Camera mode.
• 800x Digital zoom
Allows you to magnify an image up to 800 times its original size.
• Color TFT LCD
A high-resolution color TFT LCD gives you clean, sharp images as
well as the ability to review your recordings immediately.
• Digital Image Stabilizer (DIS)
The DIS compensates for any handshake, reducing unstable
images particularly at high magnification.
• Various digital effects
The DSE (Digital Special Effects) allows you to give your films a
special look by adding various special effects.
• Back Light Compensation (BLC)
The BLC function compensates for the bright background behind a
subject you're recording.
• Program AE
The Program AE enables you to alter the shutter speed and
aperture to suit the type of scene/action to be filmed.
• NITE PIX
The NITE PIX function enables you to record a subject in a dark
place.
• Digital Still Camera function
■
Using Memory Stick, you can easily record and playback
standard still images.
■
You can transfer standard still images on the Memory Stick to
your PC using the USB interface.
• MPEG Recording
MPEG recording makes it possible to record video onto a Memory
Stick.
Características
• Función de transferencia digital de datos mediante IEEE1394
Con la incorporación del puerto de transferencia de datos a alta velocidad
IEEE 1394 (i.LINK™: el i.LINK es un sistema de protocolo de transferencia
de datos en serie e intercomunicación empleado para transmitir datos DV),
se pueden transferir imágenes de vídeo o fijas al ordenador. De este modo,
es posible producir o editar imágenes.
• Interfaz USB para la transferencia de datos de imagen digital
Es posible transferir imágenes fijas al ordenador por medio de la interfaz
USB sin necesidad de una tarjeta adicional.
• FOTOGRAFÍA
La función de fotografía (PHOTO) permite tomar fotografías de objetos
con sonido cuando la videocámara está en la modalidad CAMERA.
• Zoom digital 800x
Permite ampliar la imagen hasta 800 veces su tamaño original.
• TFT LCD en color
El sistema de color de alta resolución TFT de la pantalla LCD proporciona
imágenes limpias y nítidas a la vez que permite ver las grabaciones
inmediatamente.
• Estabilizador digital de la imagen (DIS)
El DIS compensa los movimientos de la mano reduciendo la inestabilidad
de las imágenes, especialmente cuando éstas últimas se graban con una
gran ampliación.
• Efectos digitales diversos
Gracias al sistema DSE (efectos especiales digitales) se puede dar a la
grabación un aire especial al permitir añadir diversos efectos especiales.
• Compensación de la luz de fondo (BLC)
La función BLC compensa el brillo que puede aparecer detrás del objeto
que se graba.
• Programa AE
El programa AE permite modificar la velocidad y la apertura del obturador
para que se ajuste a la escena que se vaya a filmar.
• GRABACIÓN NOCTURNA
Esta función permite grabar objetos que se encuentren en lugares oscuros.
• Modo de cámara fotogáfica digital
■
Con un Memory Stick puede grabar y reproducir con facilidad
imágenes fijas estándar.
■
Puede transferir imágenes fijas estándar del Memory Stick al PC
mediante la interfaz USB.
• MPEG REC
La función MPEG REC permite guardar imágenes de cámara
en el Memory Stick.
1111
Page 12
ENGLISH ESPAÑOL
Getting to Know Your Camcorder
Introducción a la videocámara
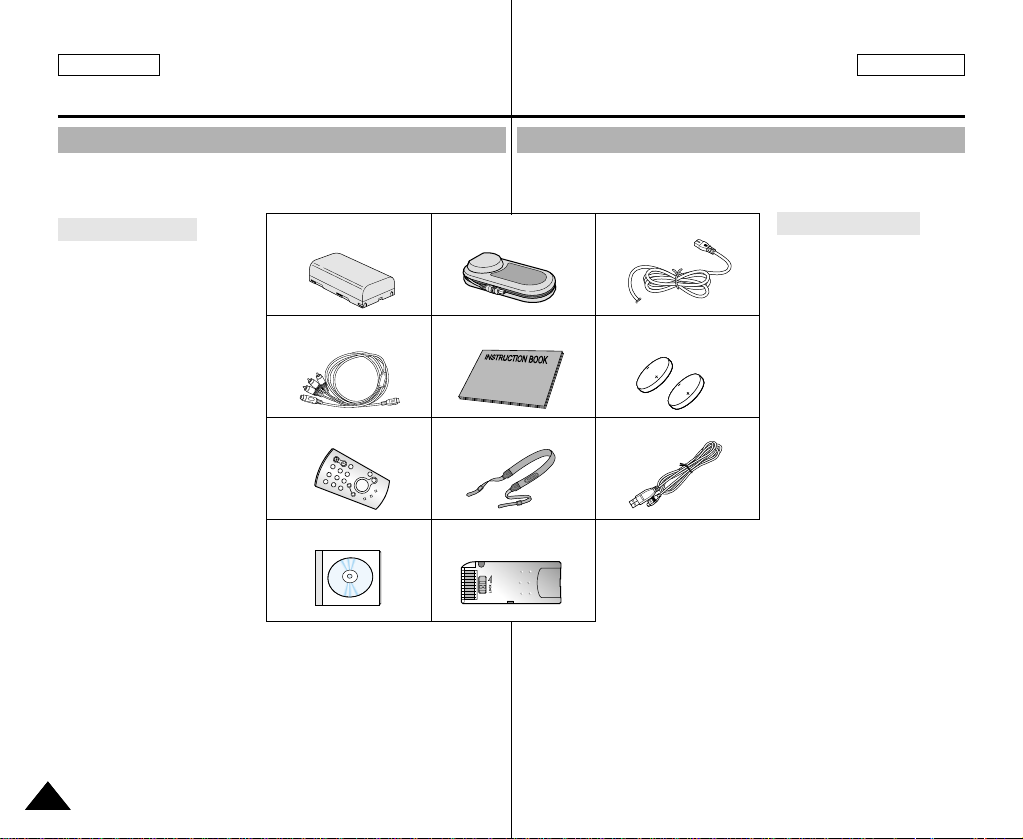
Accessories Supplied with camcorder
Make sure that the following basic accessories are supplied with your
digital video camera.
Basic Accessories
1. Lithium Ion Battery pack
2. AC Power Adapter
Accesorios incluidos con la videocámara
Asegúrese de que los siguientes accesorios básicos le hayan sido
entregados junto con la videocámara digital.
1. Lithium Ion Battery pack
2. AC Power Adapter
3. AC Cord
4. Multi-AV Cable
(AUDIO/VIDEO/S-VIDEO)
4.
(AUDIO/VIDEO/S-VIDEO)
5. Instruction Book
Multi-AV Cable
5. Instruction Book
6. Lithium batteries for
Remote Control and Clock.
(TYPE: CR2025, 2 EA)
7. Remote Control
8. Shoulder strap
7. Remote Control
8. Shoulder strap
9. USB cable
10.Software CD
10. Software CD
11. Memory Stick
11.Memory Stick
(SCD34/D39 only)
3. AC cord
6. Lithium batteries (2EA)
(CR2025, 2 EA)
9. USB cable
Accesorios básicos
1. Batería de ion de litio
2. Adaptador de CA
3. Cable de CA
4. Cable Multi-AV
(AUDIO/VIDEO/S-VIDEO)
5. Manual de instrucciones
6. Pilas de litio para el mando
a distancia y el reloj
(Tipo CR2025, 2 EA)
7. Mando a distancia
8. Correa para el hombro
9. Cable USB
10. CD de software
11. Memory Stick
(sólo el modelos
SCD34/D39)
1212
Page 13
ENGLISH ESPAÑOL
Introducción a la videocámaraGetting to Know Your Camcorder
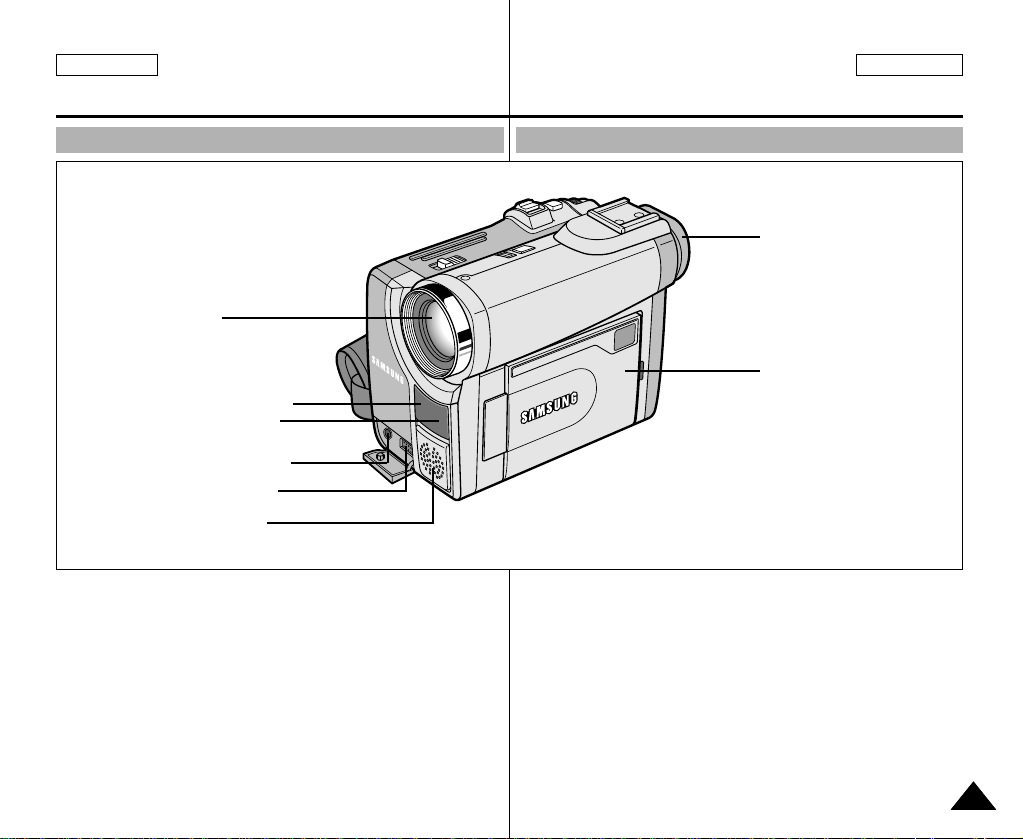
Front & Left View
1. Lens
2. Remote Sensor
3. Infrared Light
4. External MIC in
5. Multi-AV Jack
6. Internal MIC
1. Lens
2. Remote Sensor
3. Infrared Light
(see page 66)
4. External MIC in
5. Multi-AV Jack
(see page 69)
6. Internal MIC
7. View Finder (see page 32)
8. TFT LCD Monitor
(see page 31)
Vistas frontal y lateral izquierda
7. View Finder
8. TFT LCD Monitor
1. Objetivo
2. Sensor para el mando
a distancia
3. Luz infrarroja (IR)
(ver página 66)
4. Connector para micrófono
externo
5. Connector Multi-AV
(ver página 69)
6. Micrófono incorporado
7. Visor (ver página 32)
8. Pantalla LCD TFT
(ver página 31)
1313
Page 14
ENGLISH ESPAÑOL
Introducción a la videocámaraGetting to Know Your Camcorder
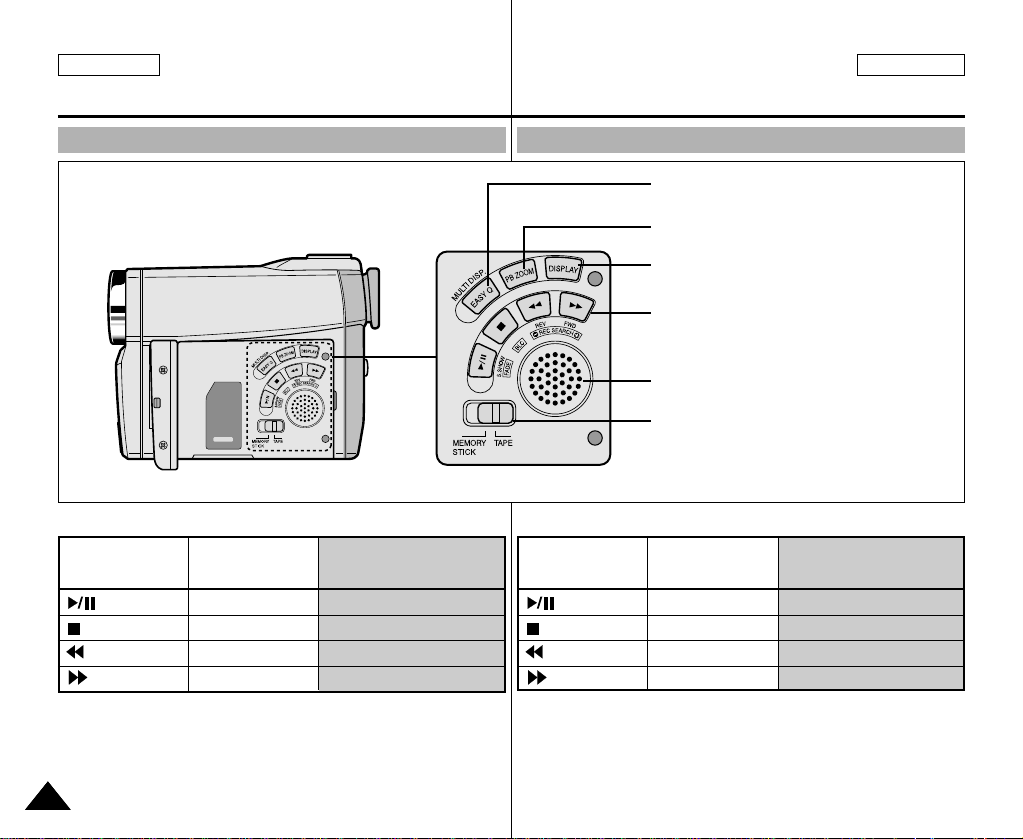
Left Side View
1. Function buttons
PLAYER CAMERA M.PLAY
: (PLAY/STILL) FADE (see page 62) SLIDE SHOW (see page 88)
: (STOP) BLC (see page 61) : (REW) REC SEARCH – REV (see page 88)
: (FF) REC SEARCH + FWD (see page 88)
2. EASY.Q Button (CAM) /
MULTI DISP. (M.PLAY)
3. PB ZOOM
4. DISPLAY
1414
5. Speaker
6. Mode Switch
(TAPE/MEMORY STICK)
Vista lateral izquierda
2. EASY.Q (see page 59)/
MULTI DISP. (see page 89)
3. PB ZOOM (see page 75)
4. DISPLAY (see page 19)
1. Function buttons
5. Speaker
6. Mode Switch (see page 23)
(TAPE/MEMORY STICK)
1. Botones de funciones
PLA YER CAMERA M.PLAY
: (PLAY/STILL) FADE (ver página 62) SLIDE SHOW (ver página 88)
: (STOP) BLC (ver página 61) : (REW) REC SEARCH – REV (ver página 88)
: (FF) REC SEARCH + FWD (ver página 88)
2. Botón EASY.Q (CAM) /
MULTI DISP. (M.PLAY)
3. PB ZOOM (Ampliación
de imágenes)
4. DISPLAY
5. Altavoz
6. Interruptor de modalidad
(TAPE/MEMORY STICK)
Page 15
ENGLISH ESPAÑOL
Introducción a la videocámaraGetting to Know Your Camcorder
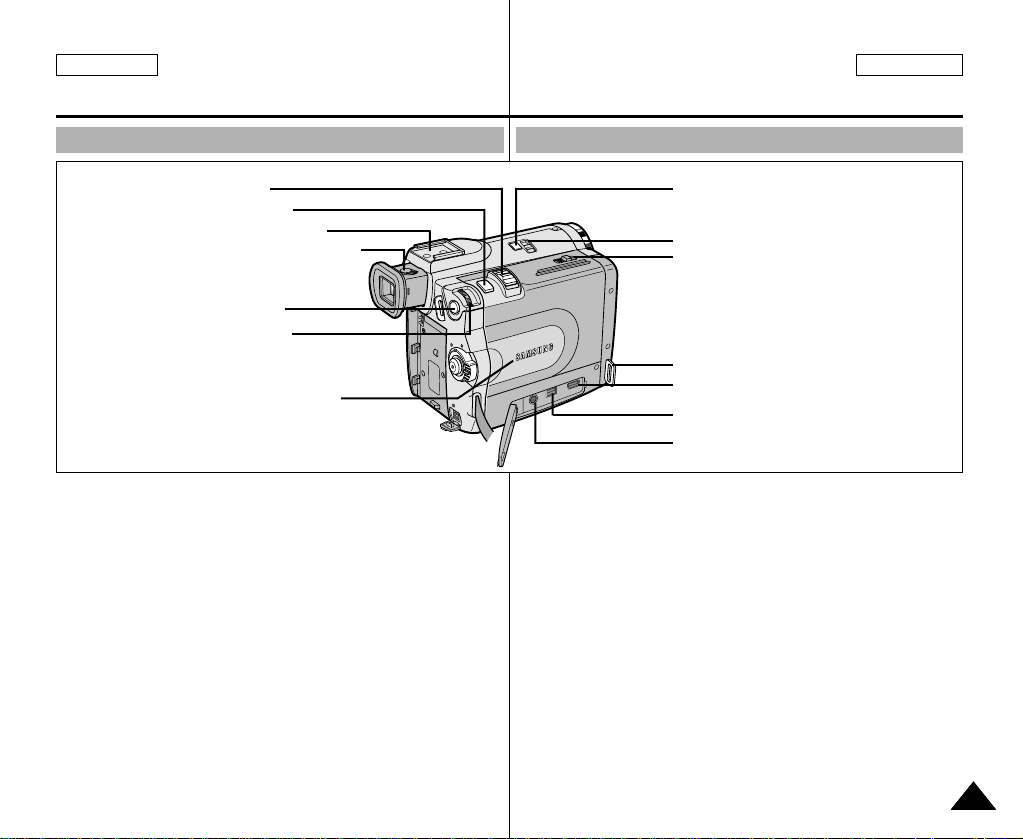
Right & Top View
1. Zoom lever 8. Slow Shutter Button
2. PHOTO Button
3. VIDEO Light holder
4. FOCUS Adjustment knob
5. MENU Button
6. MENU Selector
(MENU/VOLUME/MF)
7. Lithium Battery Cover
1. Zoom lever (see page 45)
2. PHOTO Button
(see page 65)
3. VIDEO Light holder
4. FOCUS Adjustment knob
(see page 32)
5. MENU Button
(see page 35)
6. MENU Selector
(MENU/VOLUME/MF)
(see page 35)
7. Lithium Battery Cover
(see page 21)
8. Slow Shutter Button
(see page 58)
9. NITE PIX Switch
(see page 66)
10. TAPE OPEN/EJECT
11. Hook for hand strap
12. USB Jack (see page 79)
13. DV Jack (see page 77)
14. EARPHONE Jack
Vistas superior y lateral derecha
9. NITE PIX Switch
10. TAPE OPEN/EJECT
11. Hook for hand strap
12. USB Jack
13. DV Jack
14. EARPHONE Jack
1. Botón del zoom
(ver página 45)
2. Botón PHOTO
(ver página 65)
3. Zapata del FOCO
4. Botón de ENFOQUE
(ver página 32)
5. Botón MENÚ (ver página 35)
6. MENU SELECTOR
(selección de
menú/volumen;
ver página 35)
7. Cubierta de la pila de litio
(ver página 21)
8. Botón de obturador lento
9. Interruptor de grabación
10. Expulsión de la cinta
11. Enganche de la
12. Conector USB
13. Conector DV
14. Conector de auriculares
(ver página 58)
nocturna (ver página 66)
empuñadura
(ver página 79)
(ver página 77)
1515
Page 16
ENGLISH ESPAÑOL
Introducción a la videocámaraGetting to Know Your Camcorder
Rear & Bottom View
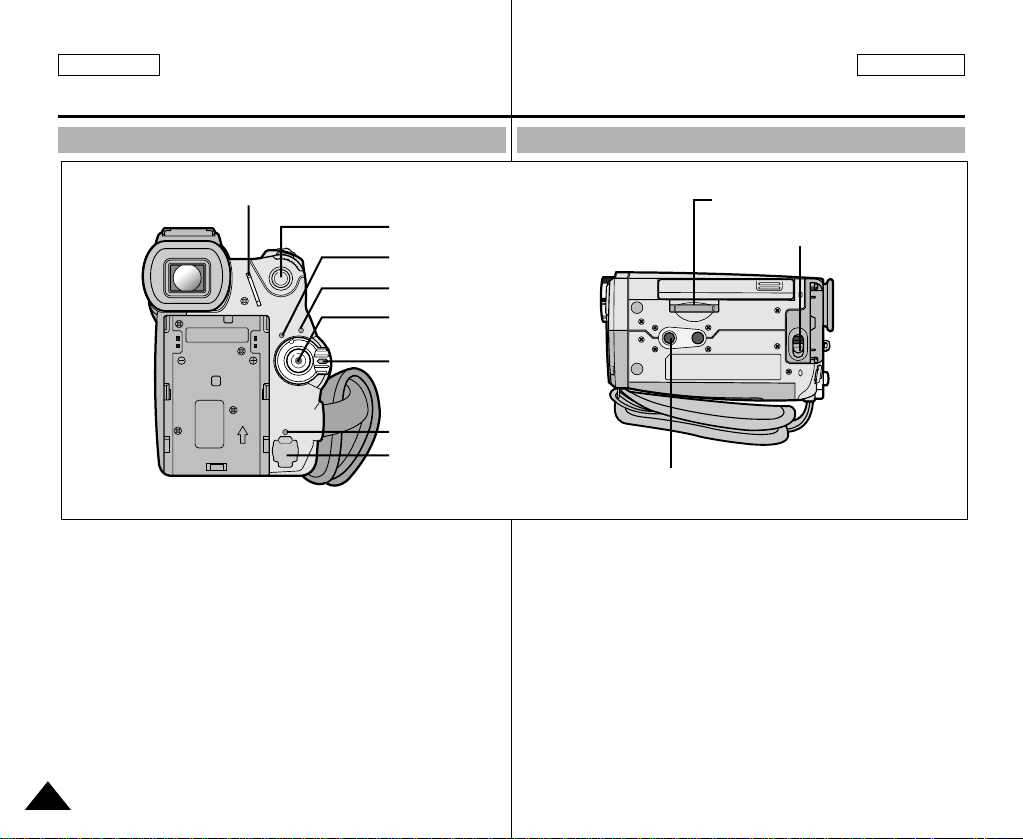
2. Hook for shoulder strap
1. MENU Button
2. Hook for shoulder strap
3. CAM indicator
4. PLAYER indicator
5. START/STOP button
6. Power Switch
(see page 28)
1616
1. MENU Button
3. CAM indicator
4. PLAYER indicator
5. START/STOP button
6. Power Switch
7. Charging indicator
8. DC Jack
7. Charging indicator
8. DC Jack (see page 23)
9. Memory Stick Slot
10. Tripod receptacle
11. Battery Release
Vistas posterior e inferior
9. Memory Stick Slot
11.Battery Release
10. Tripod receptacle
1. Botón MENÚ
2. Enganche de la correa para
el hombro
3. Indicador CAM
4. Indicador PLAYER
5. Botón START/STOP
(inicio/parada)
6. Interruptor de la
videocámara
(ver página 28)
7. Indicador de carga
8. Conector de CC
(ver página 23)
9. Ranura de Memory Stick
10. Agujero para el trípode
11. Botón para liberar la pila
Page 17
ENGLISH ESPAÑOL
Introducción a la videocámaraGetting to Know Your Camcorder
Remote control
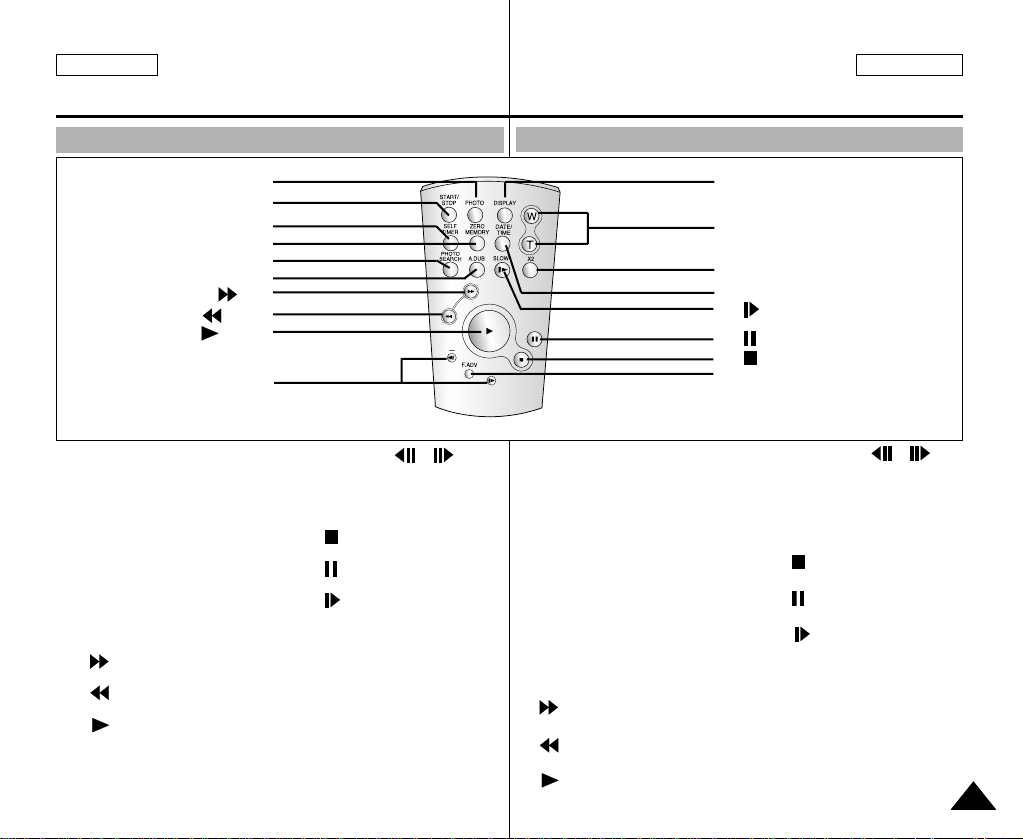
1. PHOTO
2. START/STOP
3. SELF TIMER
4. ZERO MEMORY
5. PHOTO SEARCH
1. PHOTO
2. START/ST OP
3. SELF TIMER (see page 20)
4. ZERO MEMORY
(see page 73)
5. PHOTO Search
6. A.DUB (see page 63)
7. (FF)
8. (REW)
9. (PLA Y)
6. A.DUB
7. (FF)
8. (REW)
9. (PLAY)
10. Direction
10. Direction ( , )
(see page 71)
11. F. ADV (see page 72)
12. (STOP)
13. (STILL)
14. (SLOW)
15. DATE/TIME
16. X2 (see page 72)
17. Zoom
18. Display
Mando a distancia
18. DISPLAY
17. Zoom
16. X2
15. DATE/TIME
14. (SLOW)
13. (STILL)
12. (STOP)
11. F. ADV
1. PHOTO (fotografía)
2. SELF TIMER (temporizador;
ver página 20)
4. ZERO MEMORY (memoria
cero; ver página 73)
5. PHOTO Search
(búsqueda de foto)
6. A.DUB (mezcla de audio;
ver página 63)
7. (FF; avance rápido)
8. (REW; rebobinado)
10. Dirección ( , )
(ver página 71)
11. F.ADV (avance cuadro a
cuadro; ver página 72)
12. (STOP; parada)
13. (STILL; imagen fija)
14. (SLOW; cámara lenta)
15. DATE/TIME (fecha/hora)
16. X2 (ver página 72)
17. Zoom
9. (PL AY; reproducción)
18. DISPLAY (presentación
en pantalla)
1717
Page 18
ENGLISH ESPAÑOL
. . . C
SOUND [ 2 ]
MIRROR
ENTER :
PB ZOOM
1.2x
M - 0 : 0 0 : 0 0
5 5 min
1 6 bit
VOL. [ 1 1 ]
DV
1 2 : 0 0 A M
J A N . 1 0 , 2 0 0 3
Introducción a la videocámaraGetting to Know Your Camcorder
OSD (On Screen Display in CAM and PLAYER modes)
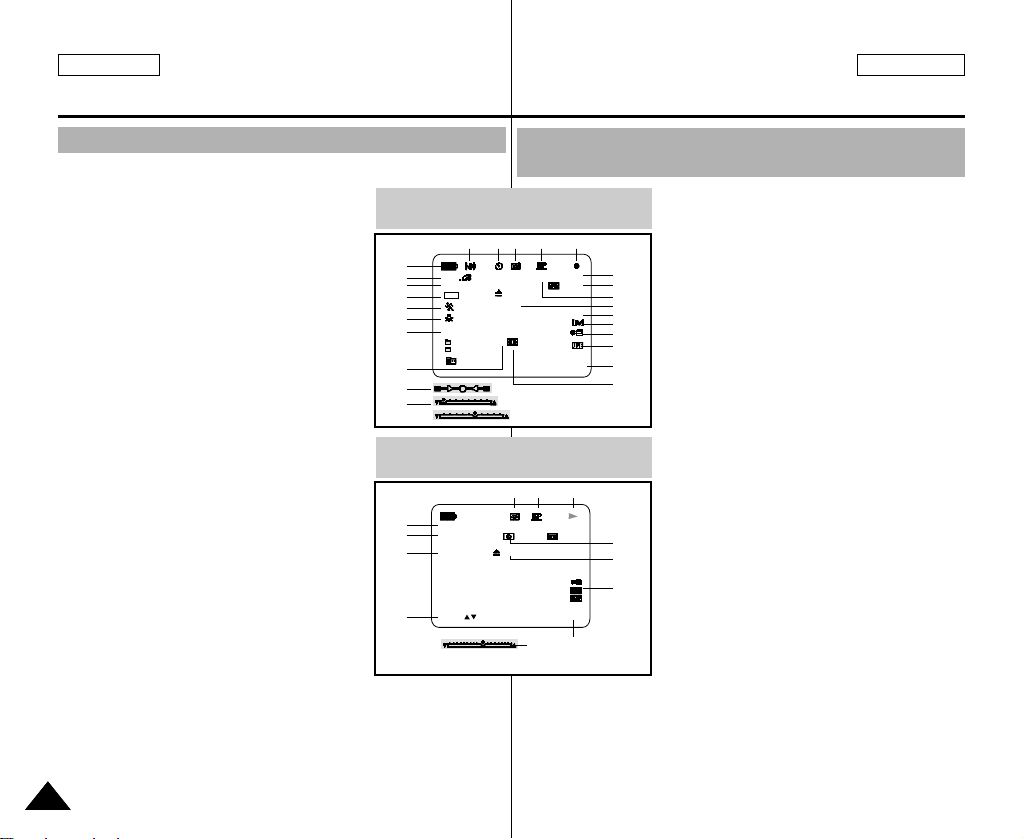
1. Battery level (see page 26)
2. Easy mode (see pages 59)
3. DSE (Digital Special Effects) mode
(see page 48)
4. Program AE (see page 42)
5. White Balance mode (see page 44)
6. BLC (Back Light Compensation)
(see page 61)
7. Manual focus (see page 60)
8. Shutter speed and EXPOSURE
(see page 57)
9. Zoom position (see page 45)
10. NITE PIX (see page 66)
11. DATE/TIME (see page 53)
12. USB
13. WL. REMOTE
14. WIND CUT (see page 52)
15. Audio recording mode (see page 51)
16. Zero memory indicator (see page 73)
17. Remaining Tape (measured in minutes)
18. Tape Counter
19. Operating mode
20. Record speed mode
21. PHOTO mode
22. Self recording and waiting timer
(see page 20)
23. DIS (see page 47)
24. Volume control (see page 34)
25. Audio playback channel
26. DV IN(DV data transfer mode)
(see page 78)
27. DEW (see page 7)
28. Message Line
29. PB DSE (see page 74)
30. PB ZOOM/ENTER (see page 75)
31. POWER NITE PIX (see page 67)
1818
OSD in CAM mode
1
2
3
6
4
5
7
31
9
8
OSD in PLAYER mode
25
30
29
30
23 22 21 20 19
EASY
MIRROR
BLC
TAPE !
NITE PIXMF
SHUTTER
P
EXPOSURE
ZOOM
EXPOSURE
SHUTTER
21 20 19
OSD: presentación en pantalla en las modalidades de
cámara (CAMERA) y reproductor de vídeo (PLAYER)
1. Nivel de carga de la batería (ver página 26)
2. Modalidad sencilla (ver página 59)
3. DSE (efectos especiales digitales;
ver página 48)
REC
M - 0 : 0 0 : 0 0
5 5 min
1 6 bit
1 2 : 0 0 A M
J A N . 1 0 , 2 0 0 3
11
24
25. Canal de reproducción de audio
26. Entrada de DV (Ver página 78)
27. DEW (humedad; ver página 7)
28. Línea de mensajes
29. PB DSE (ver página 74)
30. PB ZOOM/ENTER (ver página 75)
31. Grabación nocturna incrementada (ver página 67)
4. Programa AE (ver página 42)
5. Modalidad de equilibrio del blanco
18
17
16
28
15
14
13
12
11
10
27
28
26
(ver página 44)
6. BLC (compensación de la luz de fondo;
ver página 61)
7. Enfoque manual (ver página 60)
8. Velocidad del obturador y exposición
(ver página 57).
9. Posición del zoom (ver página 45)
10. Grabación nocturna (ver página 66)
11. Fecha y hora (ver página 53)
12. USB
13. Mando a distancia
14. Eliminación del ruido del viento
(ver página 52)
15. Modalidad de grabación de audio
(ver página 51)
16. Indicador de memoria cero (ver página 73)
17. Cantidad de cinta que queda sin grabar
(en minutos)
18 Contador de la cinta
19. Modalidad de funcionamiento
20. Modalidad de velocidad de grabación
21. Modalidad de FOTOGRAFÍA
22. Autograbación y tiempo de espera
(ver página 20)
23. DIS (estabilizador digital de la imagen;
ver página 47)
24. Control de volumen (ver página 34)
Page 19
ENGLISH ESPAÑOL
Introducción a la videocámaraGetting to Know Your Camcorder
OSD (On Screen Display in M.REC/M.PLAY modes)
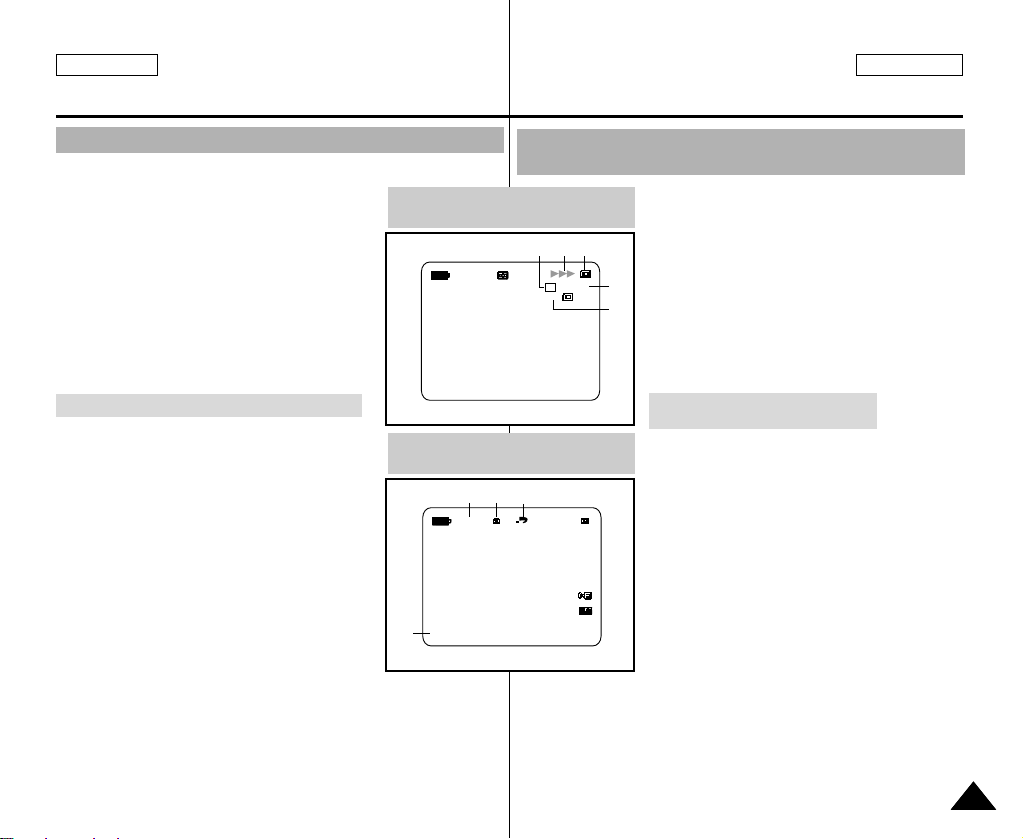
A. Folder number-file number (see page 84)
B. Image counter
- Current still image/Total number of
recordable still images.
C. CARD (MEMORY STICK) indicator
D. Image recording and loading indicator
E. Quality
F. ERASE PROTECTION indicator
(see page 92)
G. Print Mark (see page 91)
H. SLIDE SHOW
I. MPEG4 SCREEN SIZE
Turning the OSD on/off (On Screen Display)
●
Turning OSD on/off
Press the DISPLAYbutton on the left side panel.
- Each press of the button toggles the OSD
function on and off.
- When you turn the OSD off,
In CAM mode: The STBY, REC, EASY.Q
modes are always displayed on the OSD,
even when the OSD is turned OFF and
the key input is displayed for 3 seconds
then turned off.
In PLAYER mode: When you press any
Function button, the function is displayed
on the OSD for 3 seconds before it turns off.
●
Turning the DATE/TIME on/off
- The DATE/TIME is not affected when the OSD function is switched
ON or OFF.
- To turn the DATE/TIME on or off, access the menu and change the
DATE/TIME mode. (see page 53)
- You may also use the Quick Menu to turn the DATE/TIME ON or
OFF. (see page 55)
(only in CAM/M.REC mode)
OSD in M.REC mode
OSD in M.PLAY mode
H
SLIDE
MEMORY STICK !
1 0 0 - 0 0 0 1
A
OSD: presentación en pantalla en las modalidades
M.REC y M.PLAY
A. Número de carpeta y número de archivo
(ver página 84)
B. Contador de imágenes
- Imagen fija actual/número total de imágenes
EBD C
2 2 / 2 4 0
SF
3 2 0 2 min
1 2 : 0 0 A M
J A N . 1 0 , 2 0 0 3
F
G
0 0 1
J A N . 1 0 , 2 0 0 3
- La presentación de fecha y hora no se ve afectada cuando se
- Para encender o apagar la presentación de fecha y hora, acceda
- También se puede emplear el menú rápido para encender o
I
2 2 / 2 4 0
1 2 : 0 0 A M
enciende o apaga la función OSD.
al menú y cambie la modalidad DATE/TIME (fecha y hora).
Vea la página 53.
apagar la presentación de fecha y hora (ver página 55).
Esto sólo es posible en las modalidades CAM/M.REC.
fijas que se pueden grabar.
C. Indicador de tarjeta (Memory Stick)
D. Indicador de carga y de grabación de
imágenes.
E. Calidad
F. Indicador de protección contra el borrado
(ver página 92)
G. Impresión de imágenes (ver página 91)
H. Proyección de diapositivas.
I. TAMANHO DO ECRÃ MPEG4
Encendido y apagado de la OSD
(presentación en pantalla)
●
Encendido y apagado de la OSD
(presentación en pantalla)
Pulse el botón DISPLAY en el panel izquierdo.
- Al pulsar repetidas veces el botón, la función
OSD cambiará alternativamente entre
activada y desactivada (ON/OFF).
- Al desactivar la OSD:
En la modalidad CAM: Las modalidades
de STBY, REC e EASY.Q siempre aparecen
en la pantalla OSD, incluso si ésta se
encuentra apagada y el nombre de la
modalidad aparece durante tres segundos.
Luego se apaga.
En la modalidad PLA YER:si se pulsa algún
botón de función, ésta aparece en la pantalla
OSD durante tres segundos y después se apaga.
●
Encendido y apagado de la fecha y la hora
1919
Page 20
ENGLISH ESPAÑOL
START/
STOP
SELF
TIMER
A.DUB
ZERO
MEMORY
PHOTO DISPLAY
X2
SLOW
F.ADV
PHOTO
SEARCH
DATE/
TIME
Preparation
Preparación
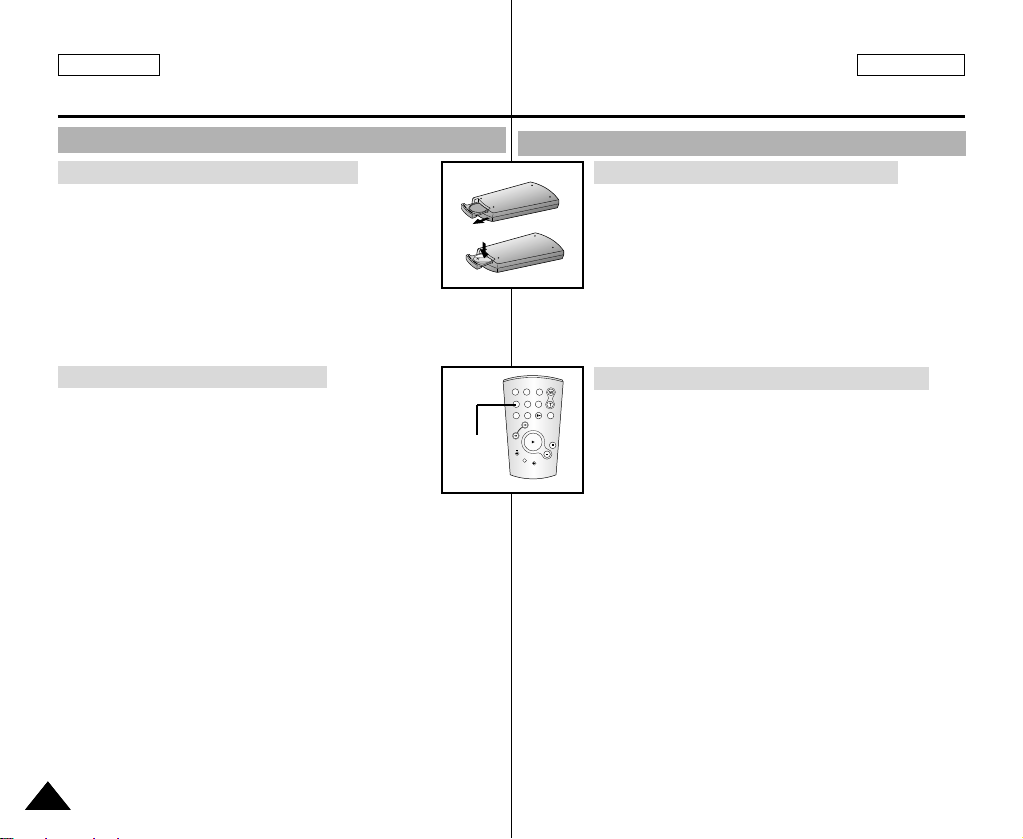
How to use the Remote Control
Battery Installation for the Remote Control
✤ You need to insert or replace the lithium battery
when :
- You purchase the camcorder.
- The remote control doesn’t work.
✤ Ensure that you insert the lithium cell correctly,
following the + and - markings.
✤ Be careful not to reverse the polarity of the battery.
Self Record using the Remote Control
When you use the Self Timer function on the remote
control, the recording begins automatically in 10 seconds.
1. Set the camcorder to CAM mode.
2. Press the SELF TIMER button until the appropriate indicator is
displayed in the viewfinder.
3. Press the START/STOPbutton to start the timer.
- Self Timer starts counting down from 10 with a beep sound.
- In the last one second of the countdown, the beep sound gets
faster, then recording starts automatically.
- If you want to cancel the Self Timer function before recording,
press the SELF TIMER button.
4. Press START/STOPagain when you wish to stop recording.
2020
Self
Timer
Uso del mando a distancia
Instalación de la pila del mando a distancia
✤ Es necesario poner o reemplazar la pila:
- Al comprar la videocámara.
- Cuando el mando a distancia no funciona.
✤ Asegúrese de que coloca la pila de litio
correctamente según las marcas + y -.
✤ Tenga cuidado de no invertir la polaridad de la pila.
Autograbación empleando el mando a distancia
Cuando se emplea la función del temporizador del mando
a distancia, la grabación se pone en marcha
automáticamente al cabo de 10 segundos.
1. Ajuste la videocámara en la modalidad CAM.
2. Pulse el botón SELF TIMER (temporizador) hasta que aparezca en
el visor el indicador correspondiente.
3. Pulse el botón START/STOP (inicio/parada) para poner en marcha
el temporizador.
- El temporizador empieza la cuenta atrás a partir de 10 con una
señal acústica.
- En el último segundo de la cuenta atrás, la señal acústica se
acelera y la grabación comienza automáticamente.
- Si desea cancelar la función de temporizador antes de grabar,
pulse el botón SELF TIMER (temporizador).
4. Pulse nuevamente el botón START/STOPcuando quiera detener la
grabación.
Page 21
ENGLISH ESPAÑOL
Preparation
Preparación
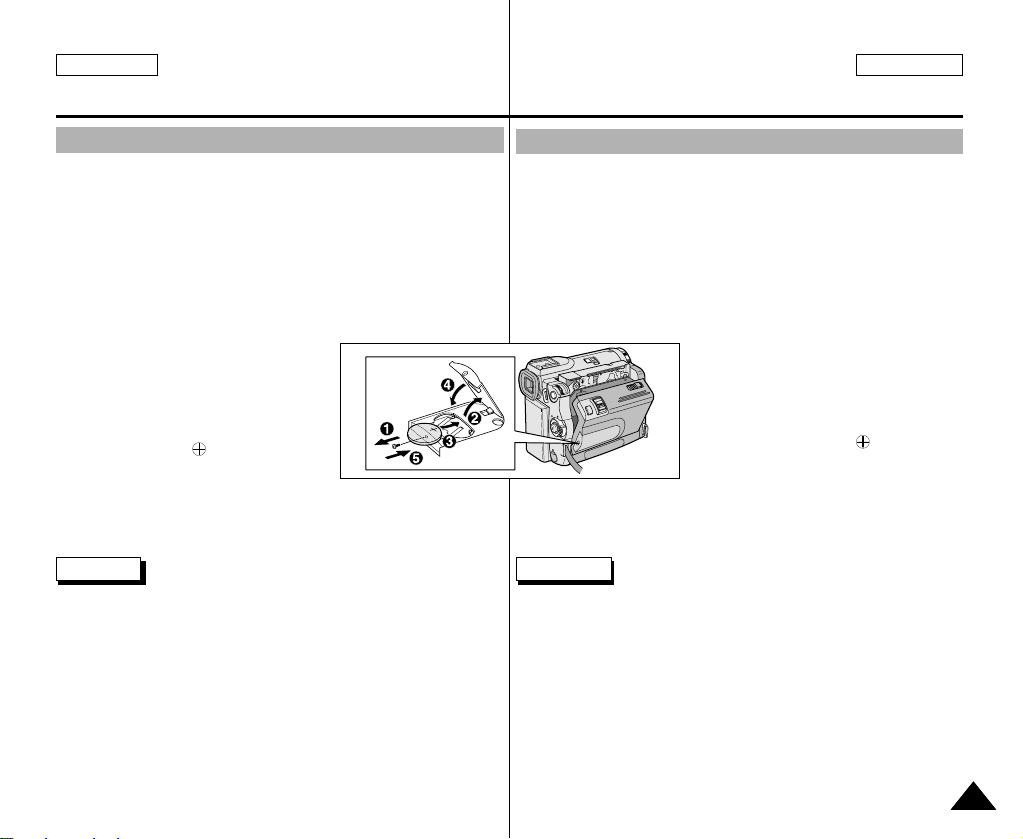
Lithium Battery Installation
✤ The lithium battery maintains the clock function and preset
contents of the memory; even if the battery pack or AC power
adapter is removed.
✤ The lithium battery for the camcorder lasts about 6 months under
normal operation from the time of installation.
✤ When the lithium battery becomes weak or dead, the date/time
indicator will display “---” when you set the DATE/TIME to ON.
When this occurs, replace the lithium battery with CR2025 type.
1. Remove the screw from the Lithium
battery cover.
2. Open the Lithium battery cover from
the camcorder.
3. Position the Lithium cell in the holder,
with the positive ( ) terminal face
outward.
4. Close the lithium battery cover.
5. Put the screw into the Lithium battery cover.
Note The lithium battery must be inserted in the correct
direction.
Warning: Keep the LITHIUM BATTERY out of the reach of the
children.
Should any battery be swallowed, consult a doctor
immediately.
Instalación de la pila de litio
✤ La pila de litio mantiene el funcionamiento del reloj y los ajustes
programados en la memoria incluso cuando se quita la batería o el
adaptador de CC.
✤ La pila de litio de la videocámara dura aproximadamente seis
meses bajo condiciones normales de funcionamiento.
✤ Cuando la pila de litio se descargue o agote, en el indicador de
fecha y hora aparecerá “---” al ajustar DATE/TIME en la posición
ON.En ese caso, reemplace la pila por una nueva del tipo
CR2025.
1. Extraiga el tornillo de la cubierta de la
pila de litio.
2. Abra la cubierta de la pila de litio.
3. Coloque la pila en el compartimento
con el polo positivo ( ) hacia fuera.
4. Cierre la cubierta de la pila.
5. Vuelva a colocar el tornillo de la
cubierta de la pila de litio.
Nota La pila de litio debe colocarse en el sentido correcto.
Precaución: mantenga la PILA DE LITIO fuera del alcance
de los niños.
En caso de que, por accidente, alguien se tragara
una, avise inmediatamente a un médico.
2121
Page 22
ENGLISH ESPAÑOL
Preparation
Preparación
Adjusting the Hand Strap
It is very important to ensure that the Hand strap has been correctly
adjusted before you begin your recording.
The hand strap enables you to :
- Hold the camcorder in a stable, comfortable position.
- Press the Zoom and START/STOP button without having to
change the position of your hand.
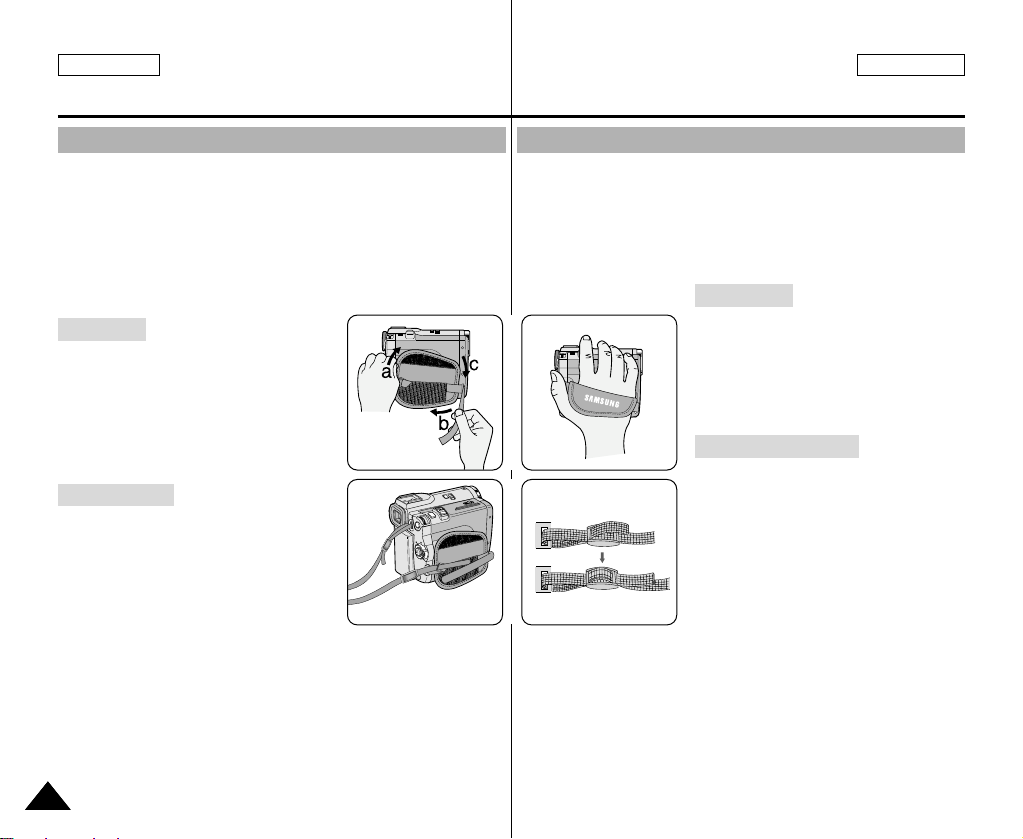
Hand strap
a. Pull open the Hand Strap cover and
release the Hand Strap.
b. Adjust its length and stick it back onto the
Hand Strap cover.
c. Close the Hand Strap cover again.
Shoulder Strap
The Shoulder Strap enables you to carry
your camcorder around in complete
safety.
1. Insert the end of strap into the
Shoulder Strap hook on the
camcorder.
Insert the other end of strap into ring inside hand strap.
2. Thread each end into the buckle, adjust the length of the strap
and then pull it tight in the buckle.
12
Ajuste de la empuñadura
Es muy importante asegurarse de que la empuñadura esté
correctamente ajustada antes de empezar la grabación.La
empuñadura permite:
- Mantener la videocámara en una posición estable y cómoda.
- Pulsar los botones de zoom y START/STOP sin tener que
modificar la posición de la mano.
Empuñadura
a. Abra la cubierta de la empuñadura
y saque la correa.
b. Ajuste la longitud de la correa y
ponga lo que sobra nuevamente
dentro de la cubierta.
c. Cierre de nuevo la cubierta.
Correa para el hombro
La correa para el hombro permite
llevar la videocámara de manera
segura.
1. Introduzca un extremo de la
correa en el enganche apropiado
de la videocámara y el otro
extremo en el aro que hay dentro
de la cubierta de la empuñadura.
2. Pase cada uno de los extremos
de la correa por la hebilla y ajuste
la longitud que desee. Finalmente
tire de los extremos para que
queden bien sujetos a las hebillas.
2222
Page 23
ENGLISH ESPAÑOL
Preparation
Preparación
Connecting a Power Source
There are two types of power source that can be connected to your
camcorder.
- The AC Power Adapter and AC cord : used for indoor recording.
- The Battery Pack : used for outdoor recording.
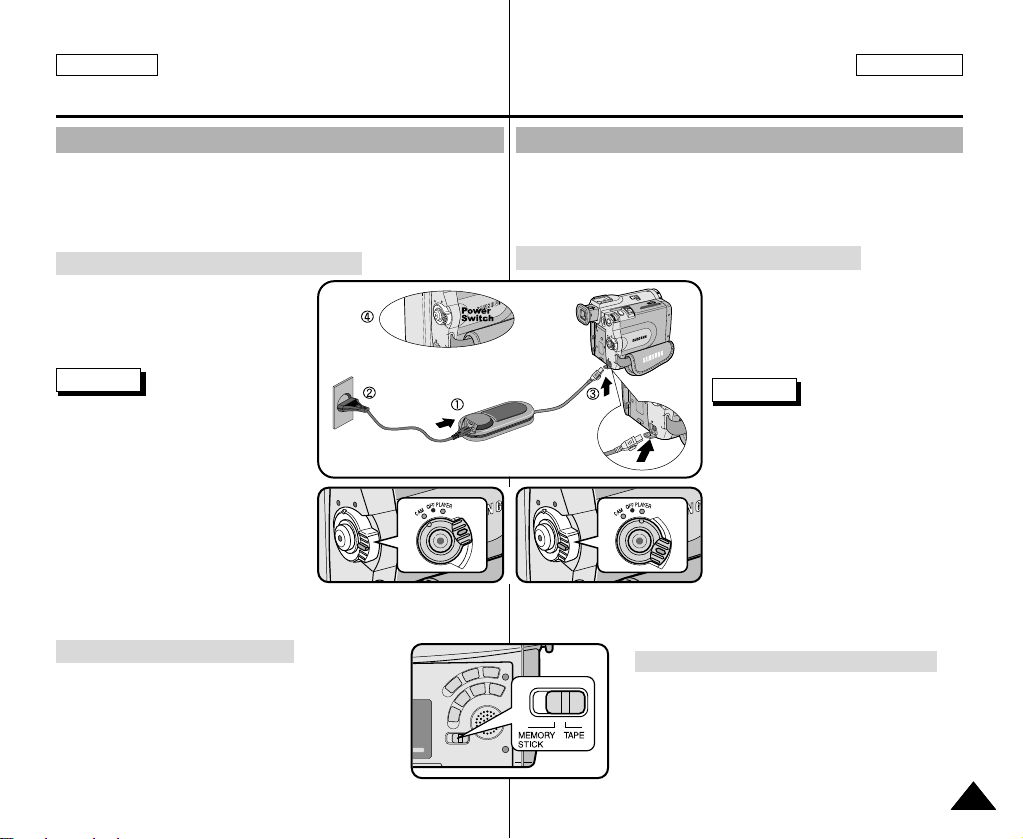
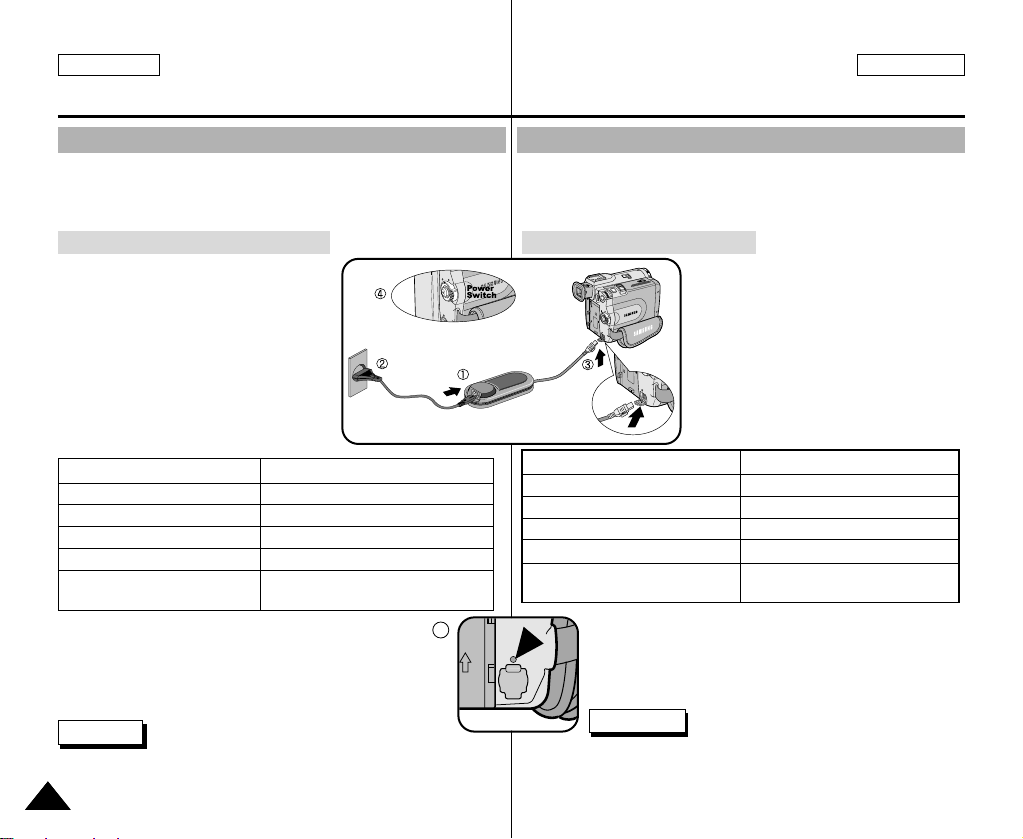
To use the AC Power adapter and DC Cable
1. Connect the AC Power adapter to
the AC cord.
2. Connect the AC cord to a wall
socket.
Note
■
The plug and wall socket type may
differ according to your resident
country.
3. Connect the DC cable to the
DC jack socket of the camcorder.
(When the battery is attached on
the set, you should keep outside
the projection of the DC cable.)
4. Set the camcorder to each mode by
holding down the tab on the power
switch and turning it to the CAM or PLAYER mode.
To select the CAMCORDER mode
✤ If you want to use this unit as a camcorder,
set the mode switch to TAPE position.
✤ If you want to use this unit as a DSC
(Digital Still Camera), set the mode switch to
MEMORY STICK position.
Conexión a una fuente de energía
Hay dos tipos de fuentes de energía a las que se puede conectar la
videocámara.
- El adaptador de CAy el cable de CA: se emplean para
grabaciones en interiores.
- La batería: se emplea para grabaciones en exteriores.
Utilización del adaptador de CA y del cable de CC
1. Conecte el adaptador de CA al
cable de CA.
2. Conecte el cable de CA a una toma
de corriente.
Nota
Es posible que la clavija y la toma de
corriente sean de distinto tipo,
dependiendo de su lugar de residencia.
3. Conecte el cable de CC al conector
de CC de la videocámara.
(Si la batería está conectada al
equipo, debería dejar fuera la
prolongación del cable de CC.)
4. Ajuste la videocámara pulsando la
lengüeta y colocándola en la
modalidad deseada: CAM o
PLAYER.
Selección de la modalidad de videocámara
✤ SI desea utilizar este aparato como
videocámara, ajuste el interruptor de
modalidad en la posición TAPE (cinta).
✤ Si desea utilizar este aparato como cámara
fotográfica digital (DSC), ajuste el
interruptor de modalidad en la posición
MEMORY STICK.
2323
Page 24
ENGLISH ESPAÑOL
PreparaciónPreparation
Using the Lithium Ion Battery Pack
✤
The amount of continuous recording time available depends on:
- The type and capacity of the battery pack you are using.
- How often the Zoom function is used.
It is recommended that you have several batteries available.
Charging the Lithium Ion Battery Pack
1. Attach the battery pack to the
camcorder.
2. Connect the AC Power adapter to an AC
cord and connect the AC cord to a wall
socket.
3. Connect the DC cable to the DC jack
socket on the camcorder.
4. Turn the Camera power switch to off,
and the charging indicator will start to
flash, showing that the battery is
charging.
Blinking time Charging rate
Once per second Less than 50%
Twice per second 50% ~ 75%
Three times per second 75% ~ 90%
Blinking stops and stays on 90 ~ 100%
On for a second and Error - Reset the battery pack and
off for a second the DC cable
5. When the battery is fully charged, disconnect the
battery pack and the AC Power adapter from the
camcorder.
■
Even with the power switched off, the battery pack will
still discharge if it is left connected to the camcorder.
Notes
■
The battery pack may be charged a little at the time of purchase.
■
To prevent reduction in the life and capacity of the battery pack,
2424
always remove it from the camcorder after it is fully charged.
Utilización de la batería de ion de litio
✤
El tiempo disponible de grabación continuada depende de:
- El tipo y la capacidad de la batería que se utilice.
- La frecuencia con que se emplee el zoom.
Es aconsejable disponer de varias baterías.
Carga de la batería de ion de litio
1. Conecte la batería a la videocámara.
2. Conecte el adaptador de CA al cable de
CA y conecte este último a una toma de
corriente.
3. Conecte el cable de CC al conector de
CC de la videocámara.
4. Ajuste el interruptor de la videocámara
en la posición de apagado. El indicador
de carga empezará a parpadear, lo que
indica que la batería se está cargando.
Frecuencia de parpadeo Cantidad de carga
Una vez por segundo Menos del 50%
Dos veces por segundo 50% ~ 75%
Tres veces por segundo 75% ~ 90%
Deja de parpadear y queda encendido 90 ~ 100%
Encendido durante un segundo Error: repita la operación de conexión
y apagado durante un segundo de la batería y el cable de CC
5
■
■
5. Cuando la batería esté completamente cargada,
desconéctela de la videocámara y desconecte también
el adaptador de CA.
■
Incluso en el caso de que se deje apagado el
interruptor de encendido, la batería se seguirá
descargando si se deja conectada a la videocámara.
Notas
Es posible que la batería esté un poco cargada en el momento de la
compra.
Para evitar que la vida útil de la batería y su capacidad se reduzcan,
quítela siempre de la videocámara después de que esté
completamente cargada.
Page 25
ENGLISH ESPAÑOL
PreparaciónPreparation
Using the Lithium Ion Battery Pack
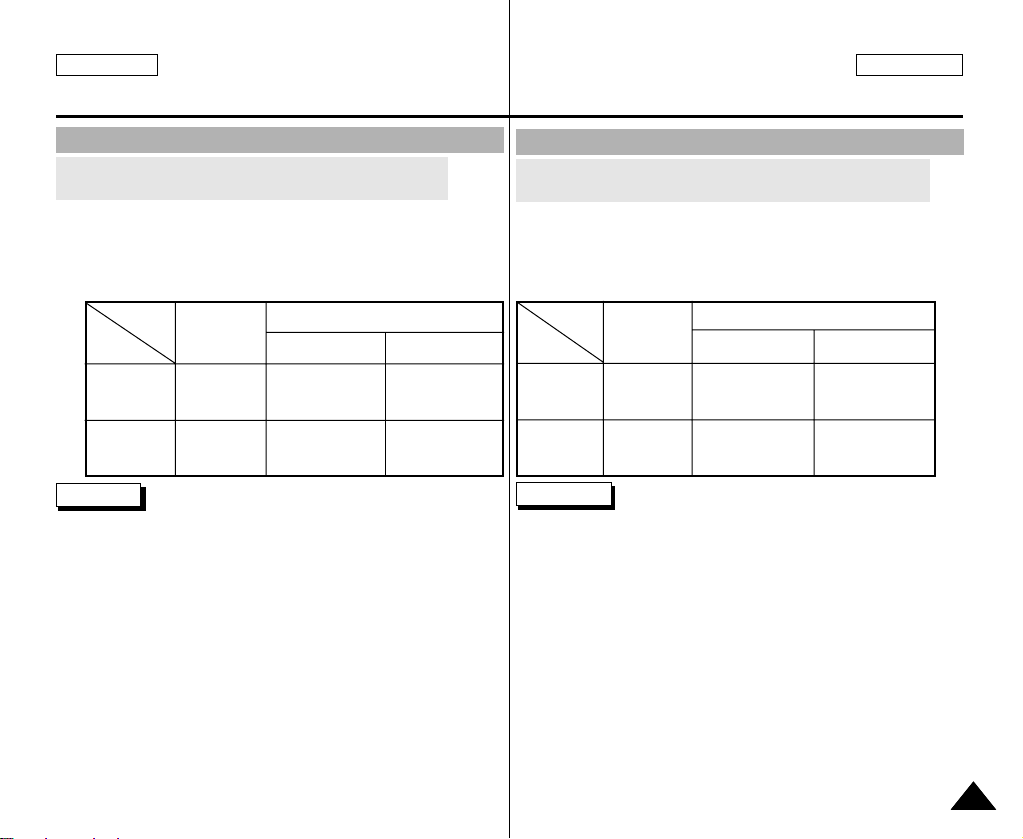
Table of continuous recording time based on model and
battery type.
✤ If you close the LCD screen, it switches off and the viewfinder
switches on automatically.
✤ The continuous recording times given in the table above are
approximations.
Actual recording time depends on usage.
Time
Charging
Battery
SB-L110
SB-L220
time
Approx.
1hr 40min
Approx.
3hr 30min
Notes
■
The battery pack should be recharged in an environment of
between 32°F (0°C) and 104°F (40°C).
■
The battery pack should never be charged in a room temperature
that is below 32°F (0°C).
■
The life and capacity of the battery pack will be reduced if it is used
in temperatures below 32°F (0°C) or left in temperatures above
104°F (40°C) for a long period, even when it is fully recharged.
■
Do not put the battery pack near any heat source (fire or flames,
for example).
■
Do not disassemble, process, pressure, or heat the Battery Pack.
■
Do not allow the + and - terminals of the battery pack to be shortcircuited. It may cause leakage, heat generation, induce fire and
overheating.
■
When using SB-L220 Battery, use of Viewfinder is inconvenience.
use of LCD Monitor is encouraged.
Continuous recording time
LCD ON EVF ON
Approx.
1hr 30min
Approx.
3hr 10min
Approx.
2hr
Approx.
4hr 10min
Utilización de la batería de ion de litio
Tabla de tiempos de grabación continuada según el modelo
y el tipo de batería
✤ Si cierra la pantalla LCD, ésta se apaga y el visor se enciende
automáticamente.
✤ Los tiempos de grabación continuada que se dan en la tabla que
aparece más abajo son aproximados.
El tiempo real de grabación depende del uso de la videocámara.
Tiempo
Batería
SB-L110
SB-L220
Tiempo de
carga
Aprox.
1h 40min
Aprox.
3h 30min
Notas
■
La batería debe recargarse a una temperatura ambiente de entre
0°C (32°F) y 40°C (104°F).
■
La batería nunca debe cargarse cuando la temperatura ambiente
es de menos de 0°C (32°F).
■
La vida útil y la capacidad de la batería se verán reducidas si se
utiliza en ambientes con temperaturas inferiores a 0°C (32°F) o si
se deja durante largos periodos expuesta a temperaturas
superiores a los 40°C (104°F), incluso si está cargada por
completo.
■
No ponga la batería cerca de una fuente de calor (chimeneas,
radiadores, etc.).
■
No desmonte la batería ni la someta a manipulaciones, presiones
ni al calor.
■
No permita que se produzca un cortocircuito entre los polos + y –
de la batería.
Podrían producirse pérdidas o recalentamiento, lo cual podría
ocasionar un incendio.
■
Cuando use la bateria SB-L220, se desaconseja el uso del visor,
use el monitor LCD.
Tiempo de grabación continuada
LCD ACTIVADA
Aprox.
1h 30min
Aprox.
3h 10min
VIEWFINDER
ACTIVADO
Aprox.
2h
Aprox.
4h 10min
2525
Page 26
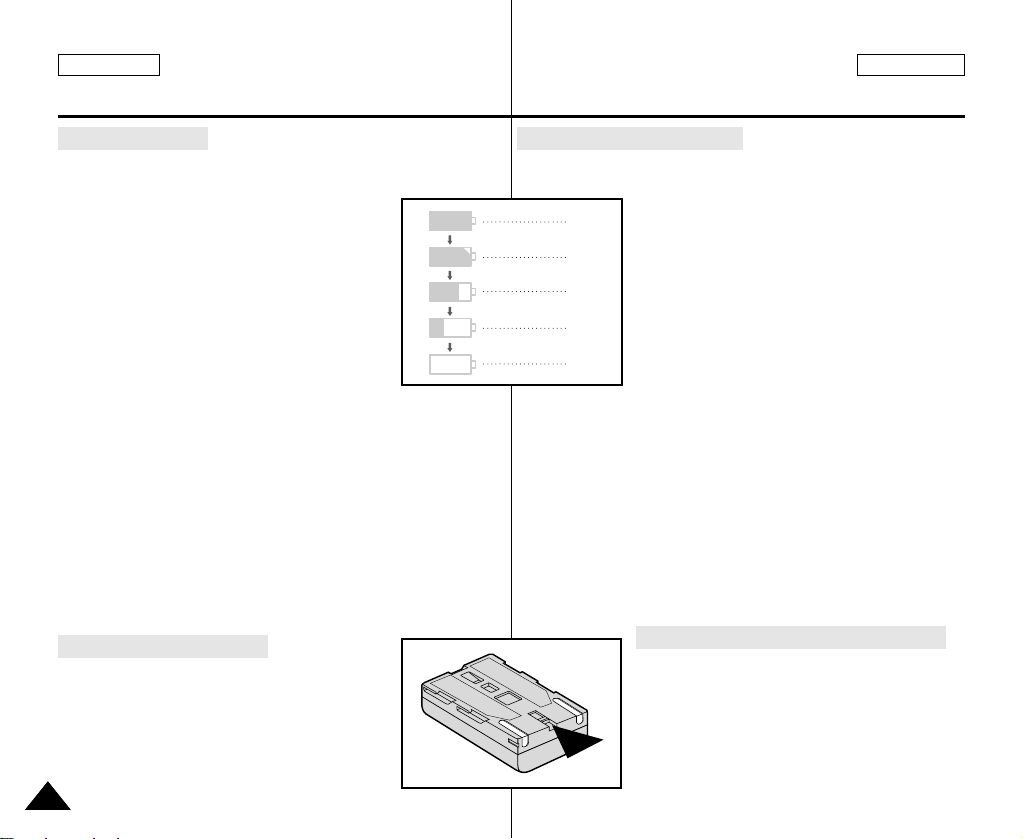
ENGLISH ESPAÑOL
PreparaciónPreparation
Battery level display
•
The battery level display indicates the amount of power
remaining in the battery pack.
a. Fully charged
b. 20~40% used
c. 40~80% used
d. 80~95% used
e. Completely used (flickers)
(The camcorder will turn off soon,
change the battery as soon as possible)
✤ Please refer to the table on page 25 for approximate continuous
recording times.
✤ The recording time is affected by environmental temperature and
conditions.
The recording time becomes very short in a cold environment.
The continuous recording times in the operating instructions are
measured using a fully charged battery pack at 77°F(25°C).
As the environmental temperature and conditions may differ when
you actually use the camcorder, the remaining battery time may
not be the same as the approximate continuous recording times
given in these instructions.
Tips for Battery Identification
A charge mark is provided on the battery pack to help
you remember whether it has been charged or not.
Two colors are provided (red and grey)-you may
choose which one indicates charged and which
indicates discharged.
Indicador de carga de la batería
•
l indicador de la carga de la batería muestra la cantidad de
energía que queda en ésta.
a
b
c
d
e
✤ Consulte la tabla de la página 25 para obtener información sobre
los tiempos aproximados de grabación continuada.
✤ El tiempo de grabación se ve afectado por las condiciones
ambientales y la temperaturay puede reducirse en un ambiente
frío. Los tiempos de grabación continuada que se dan en este
manual de instrucciones están medidos empleando una batería
completamente cargada a 25°C (77°F). Debido a que las
condiciones ambientales pueden ser distintas cuando utilice la
videocámara, el tiempo restante de carga de la batería puede
diferir de los tiempos aproximados que se dan en este manual.
a. Completamente cargada
b. 20% - 40% de uso
c. 40% - 80% de uso
d. 80% - 95% de uso
e. Completamente descargada (parpadea)
La videocámara se apagará muy pronto.
Reemplace la batería lo antes posible.
Consejos para la identificación de la batería
La batería dispone de una marca que permite
saber si ha sidorecargada o no.Hay dos colores,
rojo y gris. Usted deberá decidir cuál indica que la
batería está completamente cargada y cuál que la
batería está descargada.
2626
Page 27
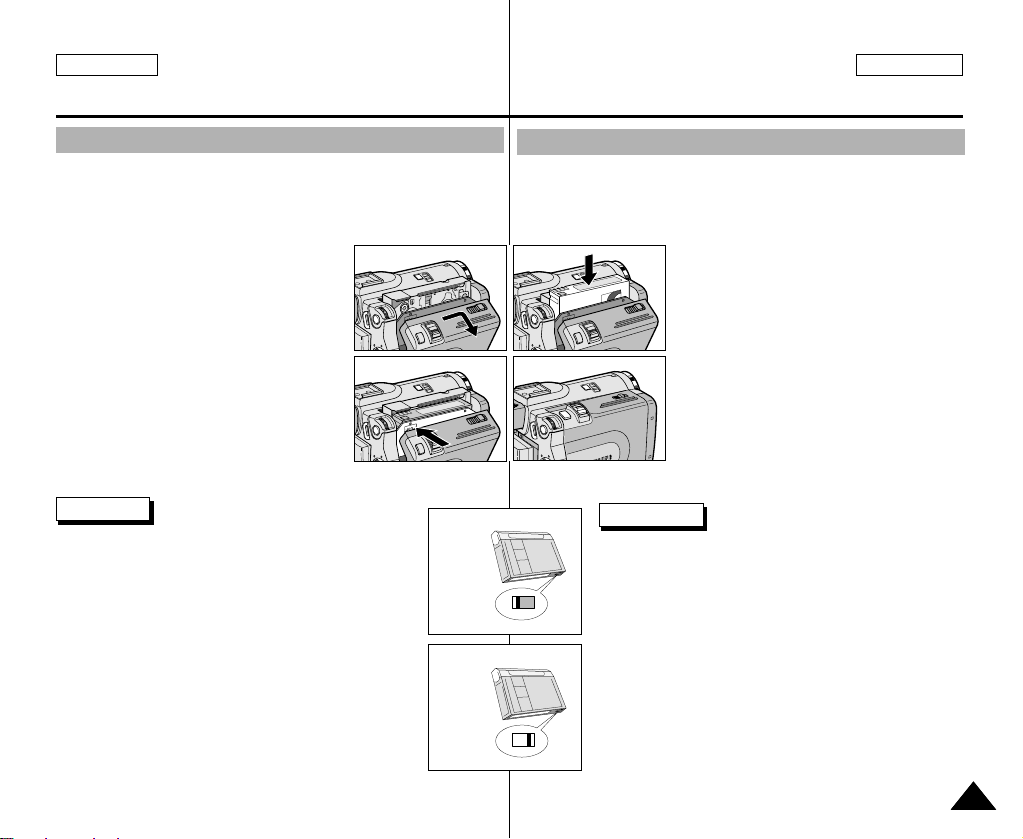
ENGLISH ESPAÑOL
PreparaciónPreparation
Inserting and Ejecting a Cassette
✤ When inserting a tape or closing a cassette holder, do not apply
excessive force.
This may cause a malfunction.
✤ Do not use any tapes other than Mini DV cassettes.
1. Connect a power source and slide the
TAPE OPEN/EJECTswitch and open the
cassette door.
- The cassette holding mechanism rises
automatically.
2. Insert a tape into the cassette holder with
the tape window facing outward and
the protection tab toward the top.
3. Press the area labelled PUSH on the
cassette holding mechanism until it clicks
into place.
- The cassette is loaded automatically.
4. Close the cassette door.
- Close the door completely until you can hear a “click”.
Note
When you have recorded something that you wish to
keep, you can protect it so that it will not be accidentally
erased.
a. Protecting a tape :
Push the safety tab on the cassette so that the hole is
uncovered.
b. Removing the tape protection :
If you no longer wish to keep the recording on the
cassette, push the write-protect tab back so that it
covers the hole.
•
How to store a tape
a. Avoid places with magnets or magnetic interference.
b. Avoid humidity and dust prone places.
c. Keep the tape in an upright position and avoid storing
it in direct sunlight.
d. Avoid dropping or knocking your tapes.
1
3
push
a. SAVE
b. REC
Introducción y expulsión del casete
✤ Cuando introduzca la cinta o cuando cierre el compartimento, no
aplique una fuerza excesiva.Esto podría hacer que la videocámara
no funcionara bien.
✤ No utilice otro tipo de cinta que no sea minicasete DV.
2
4
Cuando haya grabado material que desee conservar,
puede protegerlo de manera que no se borre
accidentalmente.
a. Cómo proteger una cinta:
b. Cómo desactivar la protección de la cinta:
• Cómo guardar las cintas:
a. Evite los lugares donde haya interferencias magnéticas
b. Evite los lugares expuestos a la humedad o al polvo.
c. Guarde las cintas en posición vertical y manténgalas
d. No permita que las cintas se golpeen o se caigan al
1. Para abrir el compartimento del casete,
conecte la videocámara a una fuente de
potencia y deslice el botón T APE
OPEN/EJECT (abrir/expulsar cinta).
- El mecanismo de bloqueo se levanta
automáticamente.
2. Introduzca el casete en el compartimento
con la ventanilla hacia fuera y la pestaña
de protección hacia arriba.
3. Empuje la zona que contiene la palabra
PUSH dentro del compartimento hasta que
el casete se ajuste correctamente en su sitio.
- El casete se carga automáticamente.
4. Cierre la cubierta del compartimento.
- Cierre bien la cubierta. Oirá un clic.
Nota
Empuje la pestaña de protección del casete de manera
que el agujero quede descubierto.
Si no desea conservar la grabación en la cinta, empuje
la pestaña de protección hasta que cubra el agujero.
o que contengan imanes.
alejadas de la acción directa del sol.
suelo.
2727
Page 28
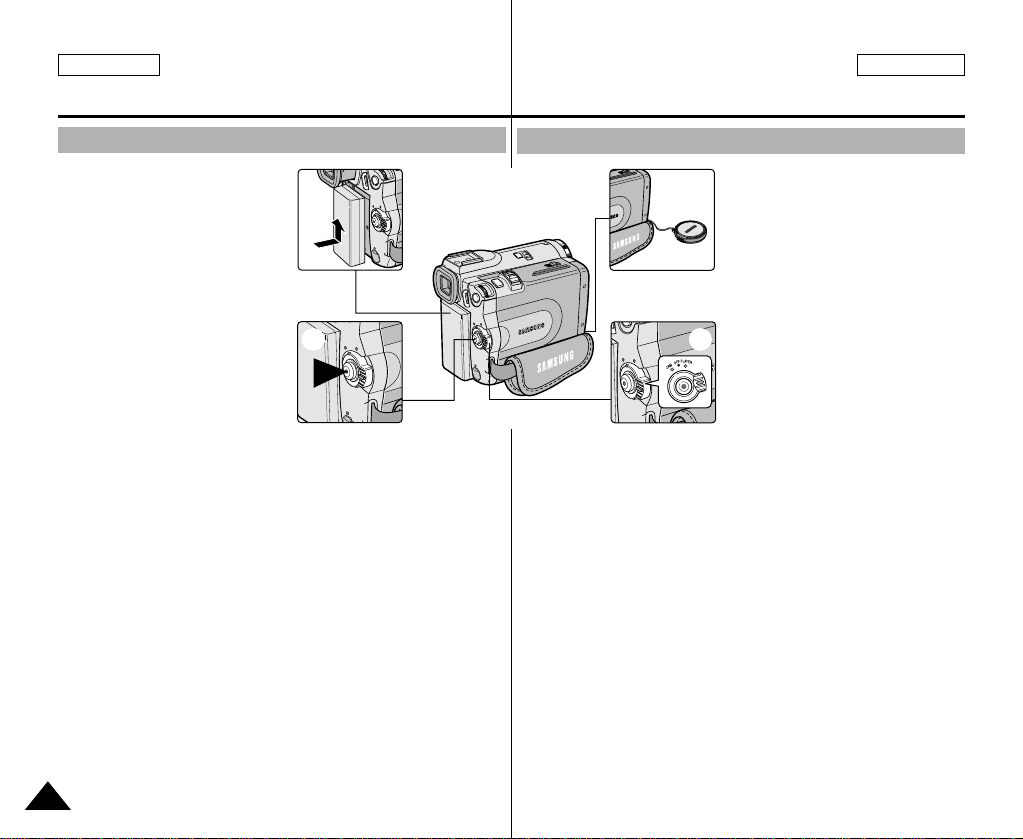
ENGLISH ESPAÑOL
Basic Recording
Grabación básica
Making your First Recording
1. Connect a Power source to the
camcorder. (see page 23)
(A battery pack or a AC power
adapter)
■
Insert a cassette.
(see page 27)
2. Remove the LENS CAP.
3. Set the power switch to the
CAM position.
■
Open the LCD monitor.
■
Set the mode switch to the
TAPE position.
Make sure that STBY is displayed.
■
If the protection tab of the cassette is open, STOP and
PROTECTION! will be displayed.
■
Make sure the image you want to record appears in the LCD
monitor or viewfinder.
■
Make sure the battery level indicates that there is enough
remaining power for your expected recording time.
4. To start recording, press the START/STOP button.
■
REC is displayed in the LCD.
To stop recording, press the START/STOP button again.
■
STBY is displayed in the LCD.
1
4 3
Primera grabación
1. Conecte la videocámara a una
2
■
Si la pestaña de protección del casete está abierta, aparecerán
las señales STOP y PROTECTION!
■
Asegúrese de que la imagen que desea grabar aparezca en la
pantalla LCD o en el visor.
■
Asegúrese de que el nivel de la batería indique que tiene
suficiente energía para grabar durante el tiempo deseado.
4. Pulse el botón START/STOP (inicio/parada) para empezar a
grabar.
■
En la pantalla LCD aparece la señal REC.
Para detener la grabación, pulse de nuevo el botón
STAR T/STOP.
■
En la pantalla LCD aparece la señal STBY.
fuente de electricidad
(ver página 23).
Es decir, una batería o un
adaptador de CA.
■
Introduzca el casete
(ver página 27)
2. Retire el cubreobjetivo.
3. Ajuste el interruptor en la
posición CAM.
■
Abra la pantalla LCD.
■
Ajuste el interruptor de
modalidad en la posición
TAPE.
Asegúrese de que aparece
la señal STBY.
2828
Page 29
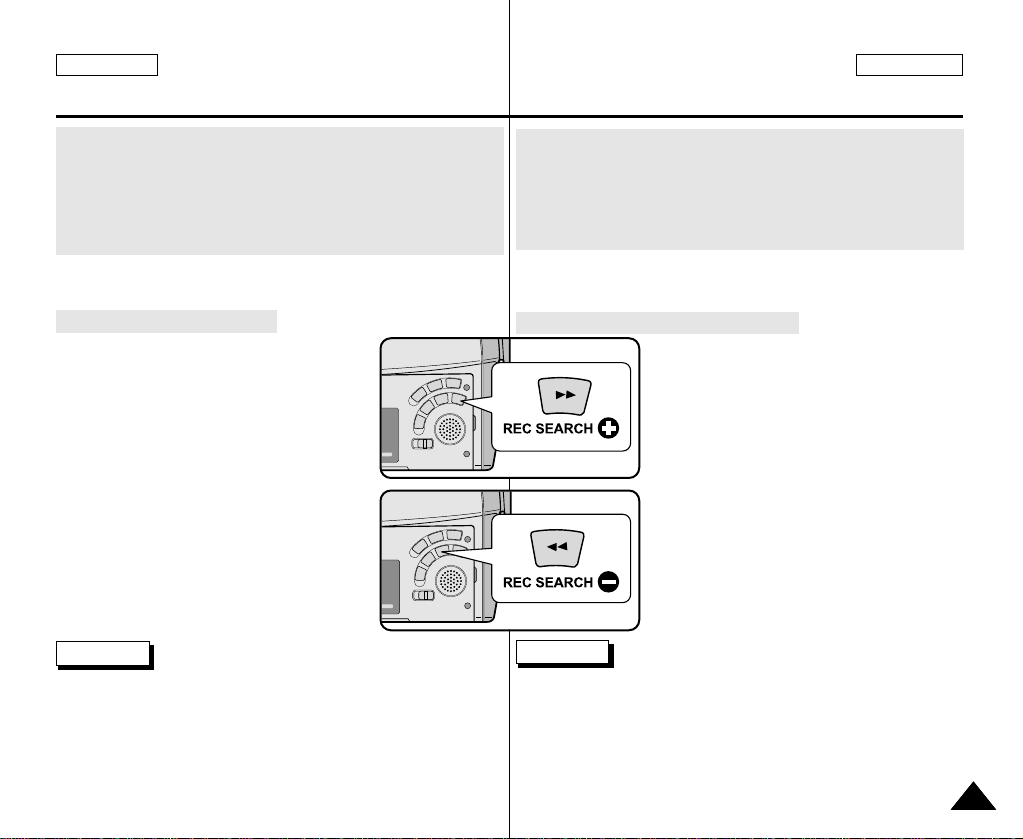
ENGLISH ESPAÑOL
Basic Recording
Grabación básica
When a cassette is loaded and the camcorder is left in the STBY
mode for more than 5 minutes without being used, it will switch off
automatically.
To use it again, push the START/STOP button or set the Power
switch to OFF and then back to CAM.
This Auto Power off feature is designed to save battery power.
Record Search (REC SEARCH)
✤ You can view a recording using the REC
SEARCH +, -- function in STBY mode.
REC SEARCH -- enables you to play the
recording backwards and
REC SEARCH + enables you to play it
forwards, for as long as you keep each
button pressed down.
✤ If you press the REC SEARCH -- button in
STBY mode, your camcorder will play
in reverse for 3 seconds and return to the
original position automatically.
Note
Mosaic shaped distortion may appear on the screen while in Record
Search mode.
Si se carga un casete en la videocámara y ésta se deja en la
posición STBY durante más de cinco minutos sin usarla, se apagará
automáticamente.Para usarla de nuevo, pulse el botón START/STOP
o ajuste el interruptor en la posición OFF y luego en CAM.
Este dispositivo de apagado automático está diseñado para ahorrar
energía de la batería.
Búsqueda de grabación (REC SEARCH)
✤ Con la videocámara en la posición de STBY
es posible utilizar la función de búsqueda de
grabación mediante los botones REC
SEARCH +, --.Al mantener pulsado el botón
REC SEARCH – la grabación se verá hacia
atrás y al mantener pulsado el botón REC
SEARCH + la grabación se verá hacia
delante.
✤ Si se pulsa el botón REC SEARCH – en la
modalidad STBY, la videocámara reproducirá
la grabación hacia atrás durante tres
segundos y volverá a la posición original
automáticamente.
Nota
En la modalidad de búsqueda de grabación es posible que la imagen
se distorsione y forme una especie de mosaico.
2929
Page 30
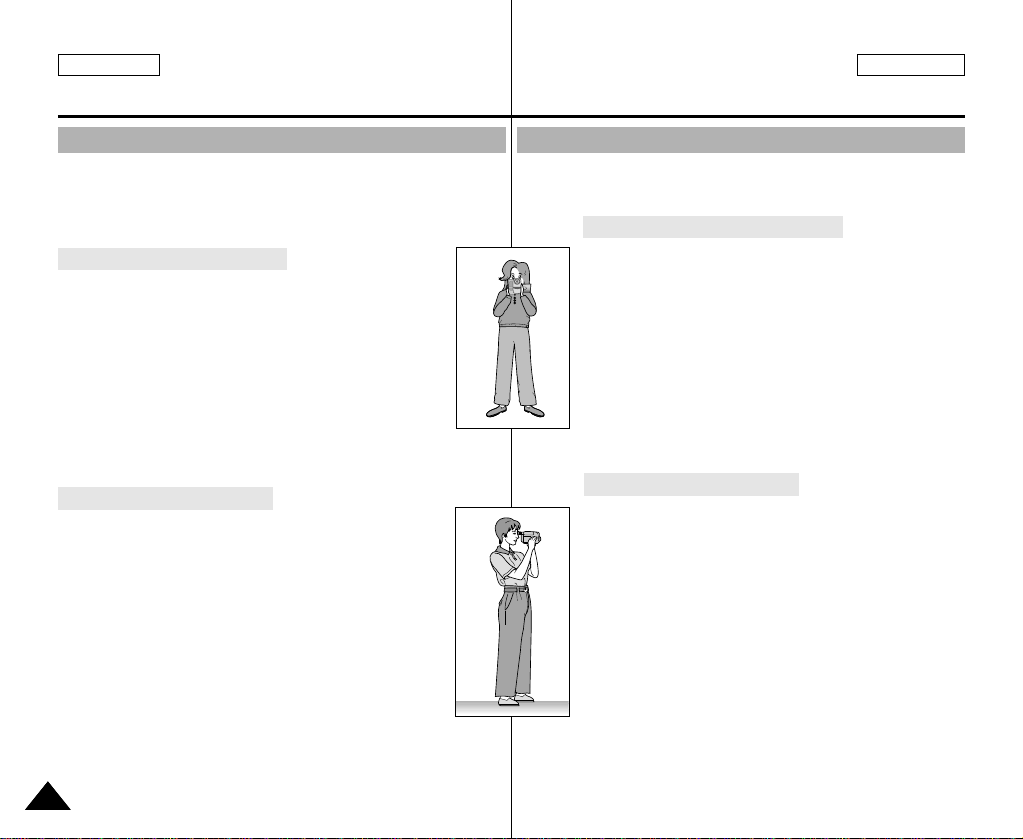
ENGLISH ESPAÑOL
Basic Recording
Grabación básica
Hints for Stable Image Recording
■
While recording, it is very important to hold the camcorder
correctly.
■
Fix the LENS cap firmly by clipping it to the hand strap. (refer to
the figure)
Recording with the LCD monitor
1. Hold the camcorder firmly using the hand strap.
2. Place your right elbow against your side.
3. Place your left hand under or beside the LCD to support
and adjust it.
Do not touch the built-in microphone.
4. Choose a comfortable, stable position for the shots that
you are taking. You can lean against a wall or on a table
for greater stability.
Do not forget to breathe gently.
5. Use the LCD frame as a guide to determine the horizontal plane.
6. Whenever possible, use a tripod.
Recording with the Viewfinder
1. Hold the camcorder firmly using the hand strap.
2. Place your right elbow against your side.
3. Place your left hand under the camcorder to support it.
Be sure not to touch the built-in microphone.
4. Choose a comfortable, stable position for the shots that
you are taking. You can lean against a wall or on a table
for greater stability.
Do not forget to breathe gently.
5. To view an object through the viewfinder, pull it out until
you hear the ‘click’ sound.
Excessive force may cause damage to the viewfinder.
6. Place your eye firmly against the viewfinder eyecup.
7. Use the viewfinder frame as a guide to determine the horizontal
plane.
8. Whenever possible, use a tripod.
3030
Consejos para la grabación estable de imágenes
■
Es muy importante sujetar la videocámara correctamente durante la
grabación.
■
Fije bien el cubreobjetivo a la empuñadura (ver figura).
Grabación utilizando la pantalla LCD
1. Sostenga firmemente la videocámara con la ayuda de la
empuñadura.
2. Apoye el codo derecho contra el cuerpo.
3. Coloque la mano izquierda debajo o al lado de la
pantalla LCD para sujetarla y ajustarla.
Asegúrese de no tocar el micrófono incorporado.
4. Adopte una posición cómoda y estable para grabar.
Para una mayor estabilidad puede apoyarse en una
pared o una mesa. Respire suavemente.
5. Use el marco de la pantalla LCD como guía para
determinar el plano horizontal.
6. Utilice un trípode siempre que sea posible.
Grabación empleando el visor
1. Sostenga firmemente la videocámara con la ayuda de la
empuñadura.
2. Apoye el codo derecho contra el cuerpo.
3. Coloque la mano izquierda debajo de la videocámara
para sujetarla.
Asegúrese de no tocar el micrófono incorporado.
4. Adopte una posición cómoda y estable para grabar.
Para una mayor estabilidad puede apoyarse en una
pared o una mesa. Respire suavemente.
5. Para ver un objeto a través del visor, tire de éste hasta
que oiga un clic.
No haga demasiada fuerza; podría estropear el visor.
6. Coloque el ojo firmemente contra el visor.
7. Use el marco del visor como guía para determinar el
plano horizontal.
8. Utilice un trípode siempre que sea posible.
Page 31
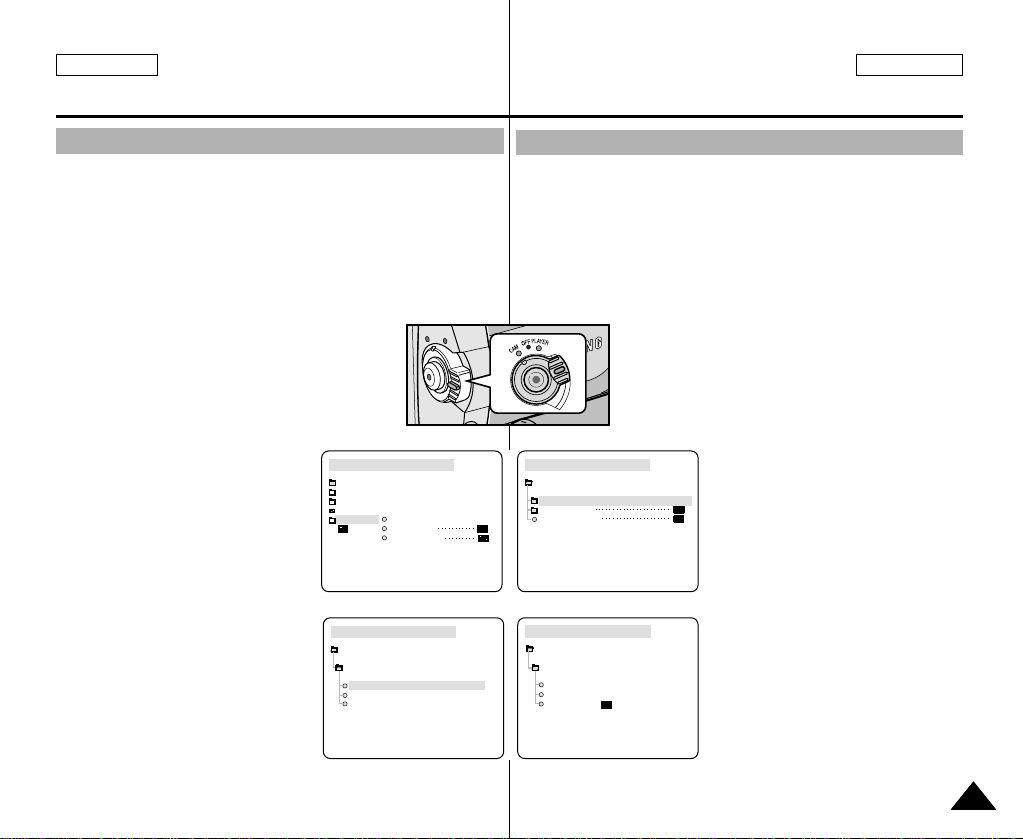
ENGLISH ESPAÑOL
CAM MODE
VIEWER SET
LCD ADJUST
DATE / TIME
TV DISPLAY
CAM MODE
INITIAL
LCD ADJUST
DATE/TIME
TV DISPLAY
CAMERA
A/V
MEMORY
VIEWER
CAM MODE
BRIGHT SELECT
NORMAL
SUPER
BACK LIGHT
LCD ADJUST
CAM MODE
LCD ADJUST
VIEWER SET
BRIGHT SELECT . . . . NORMAL
BRIGHT ADJUST . . . . . . [ 1 8 ]
COLOR ADJUST . . . . . . . [ 1 8 ]
Basic Recording
Grabación básica
Adjusting the LCD
✤ Your camcorder is equipped with a 2.5 inch color Liquid Crystal
Display(LCD) screen, which enables you to view what you are
recording or playing back directly.
✤ Depending on the conditions under which you are using the
camcorder (indoors or outdoors for example), you can adjust ;
■
BRIGHT SELECT
■
BRIGHT ADJUST
■
COLOR ADJUST
1. Set the POWER switch to CAM position.
■
In the PLAYER mode, you may only setup the
LCD while the tape is playing.
2. Open the LCD screen, and the LCD switches on.
3. Press the MENU button.
4. Move the MENU SELECTOR so
that VIEWER is highlighted and then
push the MENU SELECTOR.
5. Move the MENU SELECTOR so
that LCD ADJUST is highlighted.
6. Push the MENU SELECTOR to
enter the submenu.
7. Move the MENU SELECTOR so that
it highlights the menu item you want
to adjust (BRIGHT SELECT,
BRIGHT ADJUST, COLOR
ADJUST).
Ajuste de la pantalla LCD
✤ Esta videocámara dispone de una pantalla de cristal líquido (LCD)
en color de 2,5 pulgadas que permite ver lo que se está grabando
o reproducir directamente imágenes grabadas.
✤ Según las condiciones de grabación (por ejemplo exteriores o
interiores), es posible ajustar:
■
BRIGHT SELECT (selección del brillo)
■
BRIGHT ADJUST (ajuste del brillo)
■
COLOR ADJUST (ajuste del color)
1. Ajuste el interruptor en la posición CAM.
■
En la modalidad PLAYER sólo se debe
ajustar la pantalla LCD mientras se ve una
grabación.
2. Abra la pantalla LCD.
Al hacerlo, ésta se encenderá.
3. Pulse el SELECTOR MENÚ.
4. Desplace el SELECTOR MENÚ
hasta resaltar la opción VIEWER
(visor) y pulse el SELECTOR
MENÚ.
SCD39 only
*
5. Desplace el SELECTOR MENÚ
hasta que quede resaltada la
opción LCD ADJUST.
6. Pulse el SELECTOR MENÚ para
acceder al submenú.
7. Desplace el SELCTOR MENÚ
hasta que quede resaltada la
opción que desee ajustar (BRIGHT
SELECT, BRIGHTADJUST,
COLOR ADJUST).
3131
Page 32
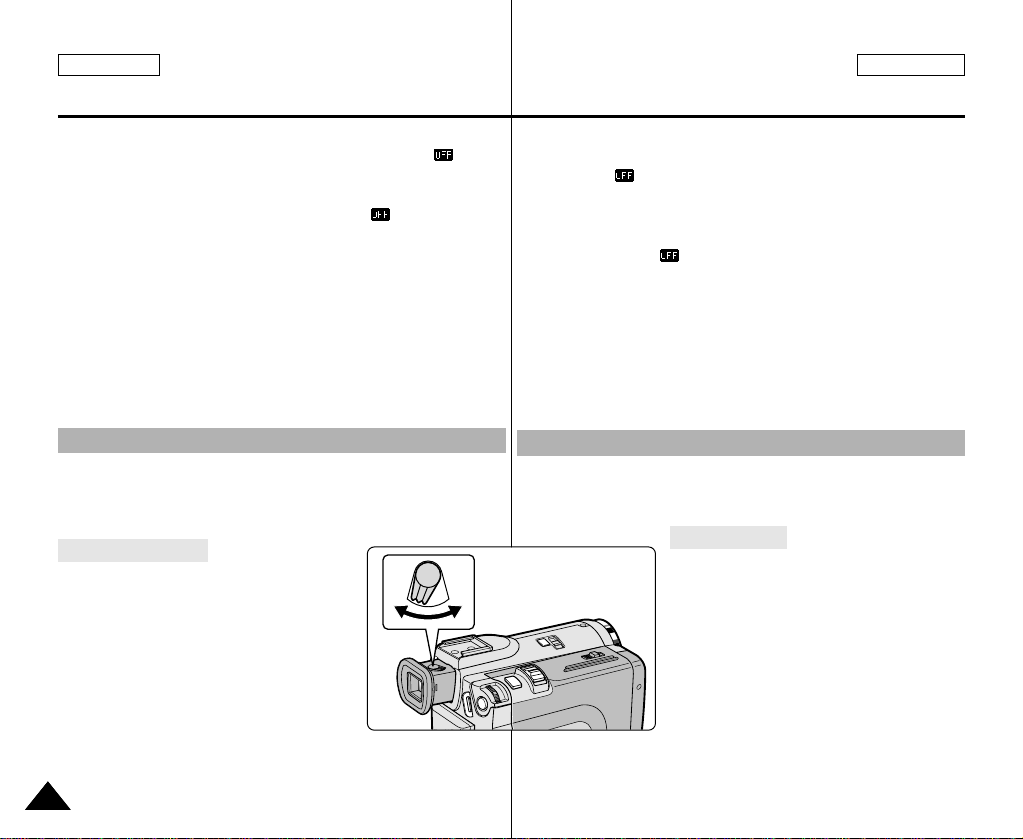
ENGLISH ESPAÑOL
Basic Recording
8. Push the MENU SELECTOR button again.
■
You may select NORMAL, SUPER or BACK LIGHT
(SCD39 only) in the BRIGHT SELECT feature and push the
MENU SELECTOR to save the setting.
- When you use the LCD BACK LIGHT mode in a dark
location or indoors, viewing the image may be difficult.
(SCD39 only).
■
Use the MENU SELECTOR to adjust the value of
BRIGHT ADJUST and COLOR ADJUST.
■
You can set values for BRIGHT ADJUST between 00 ~ 35 and
COLOR ADJUST between 00 ~ 35.
Grabación básica
8. Pulse de nuevo el SELECTOR MENÚ.
■
Seleccione una de las opciones NORMAL, SUPER o BACK
LIGHT (sólo el modelo SCD39) en BRIGHT SELECT y
pulse el SELECTOR MENÚ para guardar el ajuste.
- Si utiliza la modalidad LCD BACK LIGHT en un lugar
oscuro o en interiores, es posible que le resulte difícil ver
la imagen (sólo el modelo SCD39).
■
Ajuste el valor del brillo (BRIGHT ADJUST) y el del color
(COLOR ADJUST) por medio del SELECTOR MENÚ.
■
Es posible ajustar el brillo entre 00 y 35 y el color entre
00 y 35.
9. Press the MENU button to finish the setting.
Using the VIEWFINDER
✤ The VIEWFINDER will not work when the LCD is open.
✤ In order to bring it into focus, pull the viewfinder forward until you
here a click.
Adjusting the Focus
Use the focus adjustment knob of the
VIEWFINDER to focus the picture.
(refer to figure )
3232
9. Pulse el botón MENÚ para finalizar los ajustes.
Utilización del VISOR
✤ El VISOR no funciona cuando la pantalla LCD está abierta.
✤ Para enfocarlo, tire del visor hasta que oiga un clic.
Ajuste del foco
Para enfocar una imagen emplee el botón
de ajuste de foco del VISOR (ver figura).
Page 33
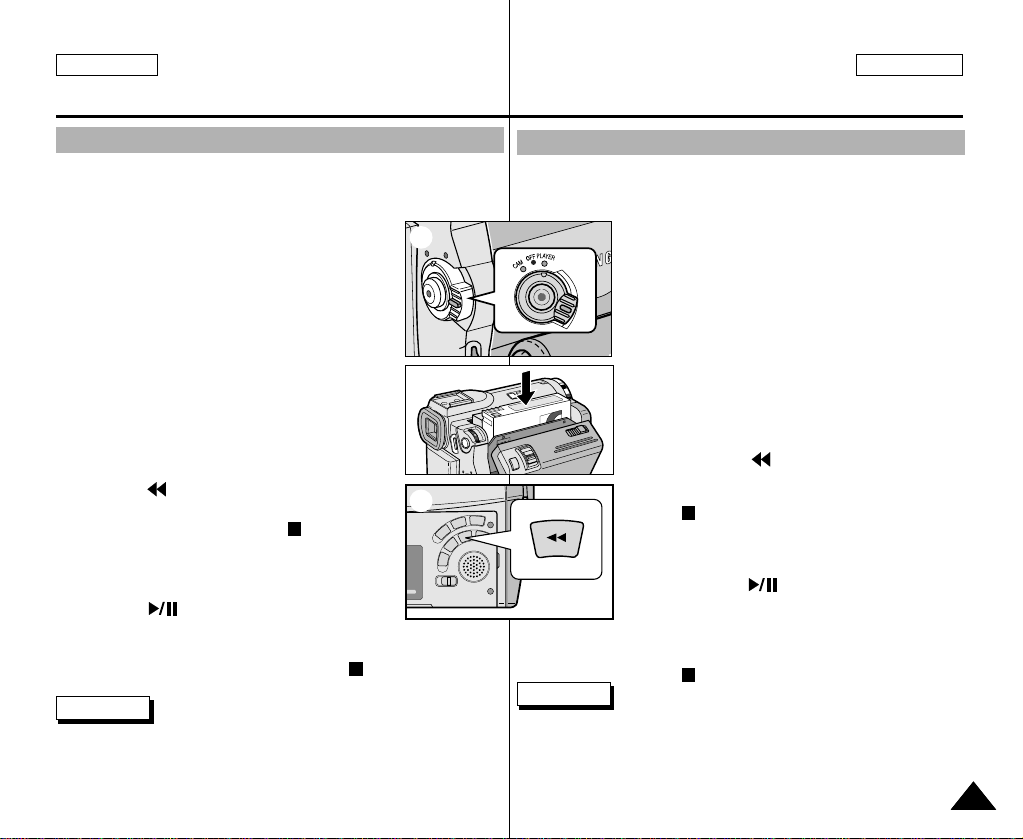
ENGLISH ESPAÑOL
Basic Recording
Grabación básica
Playing back a tape you have recorded on the LCD
✤ You can monitor the playback picture on the LCD monitor.
✤ Make sure that the battery pack is in place.
1. Hold down the power switch tab and turn it to the
PLAYER position.
■
A confirmation sound beeps.
2. Insert the tape you wish to view. (see page 27)
3. Open the LCD screen.
Adjust the angle of the LCD screen and set the
brightness or color if necessary.
4. Press the (REW) button to rewind the tape to
the starting point.
■
To stop rewinding, press the (STOP) button.
■
The camcorder stops automatically after
rewinding is complete.
5. Press the (PLAY/STILL) button to start
playback.
■
You can view the picture you recorded on the LCD.
■
To stop the PLAY operation, press the (STOP) button.
Notes
■
You can also view the picture on a TV screen, after connecting the
camcorder to a TV or VCR. (see page 69)
■
Various functions are available in playback mode. (see page 71)
1
2
4
Reproducción en la pantalla LCD de una cinta grabada
✤ Es posible ver una grabación en la pantalla LCD.
✤ Asegúrese de que la batería esté colocada correctamente en su
sitio.
1. Baje la pestaña del interruptor y gírelo hasta la
posición PLAYER.
■
Se oye la señal acústica de confirmación.
2. Introduzca la cinta que desee ver
(ver página 27).
3. Abra la pantalla LCD.
Ajuste el ángulo de la pantalla y, si es necesario,
el brillo y el color.
4. Pulse el botón (REW) para rebobinar la
cinta hasta el comienzo.
■
Para detener el rebobinado, pulse el botón
(STOP).
■
La videocámara se detiene automáticamente
cuando termina de rebobinar.
5. Pulse el botón (PLAY/STILL) para empezar
la reproducción.
■
Puede ver en la pantalla LCD las imágenes
que ha grabado.
■
Para detener la reproducción, pulse el botón
Notas
■
También se puede ver la grabación en una pantalla de televisión
si la videocámara se conecta a un televisor o a un videograbador
(ver página 69).
■
La modalidad de reproducción dispone de diversas funciones
(ver página 71).
(STOP).
3333
Page 34
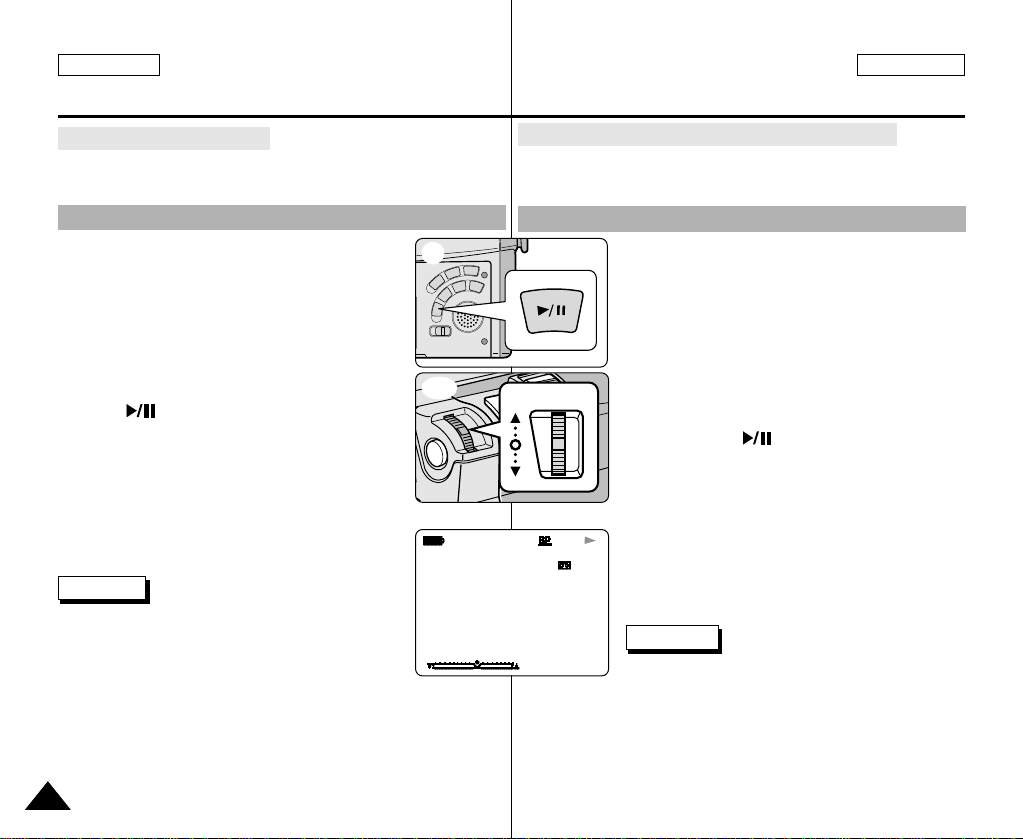
ENGLISH ESPAÑOL
0 : 2 3 : 4 7
5 5 min
1 2 : 0 0 A M
J A N . 1 0 , 2 0 0 3
VOL. [ 1 1 ]
VOL/MF
Basic Recording
Adjusting the LCD during PLAY
✤ You can adjust the LCD during playback.
✤ The adjustment method is the same procedure as used in
CAM mode. (see page 31)
Controlling Sound from the Speaker
The Speaker works in PLAYER mode only.
■
When you use the LCD screen for playback, you can
hear recorded sound from the built-in Speaker.
- Follow the instructions below to decrease or
mute speaker volume in the PLAYER mode.
- Take the following steps to lower the volume or
mute the sound while playing a tape on the
camcorder.
1. Set the power switch to PLAYER mode.
2. Press (PLAY/STILL) to play the tape.
3. When you hear sounds once the tape is in play,
use the MENU SELECTOR to adjust the volume.
■
A volume level display will appear on the LCD.
Levels may be adjusted from anywhere between
00 to 19 and you will not hear any sound when
the volume is set on 00.
■
If you close the LCD while playing, you will not
hear sound from the speaker.
Notes
■
When the cable is connected to the Multi AV jack,
you cannot hear sound from the speaker and
cannot adjust the volume.
■
If a cable is connected to the Multi AV jack,
you can hear sound from the speaker when AV
IN/OUT MODE on MENU is set to AV IN or S-VIDEO IN.
(SCD34/D39 only)
■
You can hear sound from speaker by removing the connected
cable from the Multi AV jack.
■
The speaker turns off when you use headphones.
3434
2
3-1
<3-2>
Grabación básica
Ajuste de la pantalla LCD durante la REPRODUCCIÓN
✤ Es posible hacer ajustes en la pantalla LCD durante la reproducción.
✤ El método de ajustes es el mismo que se emplea en la
modalidad CAM (ver página 31).
Control de sonido desde el altavoz
El altavoz sólo funciona en la modalidad PLAYER.
■
Cuando se usa la pantalla LCD para la
reproducción, se puede oír el sonido a través del
altavoz incorporado.
- Para bajar el volumen o para eliminar el sonido
del altavoz en la modalidad PLAYER, siga las
instrucciones que aparecen a continuación.
- Siga los pasos que se indican a continuación
para disminuir el volumen o eliminar el sonido
al reproducir una cinta en la videocámara.
1. Ajuste la videocámara en la modalidad PLAYER.
2. Pulse el botón (PLAY/STILL) para reproducir
la cinta.
3. Al oír los sonidos una vez que la cinta esté en
marcha, ajuste el volumen mediante el SELECTOR
MENÚ.
■
Aparece el nivel de volumen en la pantalla LCD.
Se puede ajustar el nivel desde 00 a 19. Si el
volumen está ajustado a 00 no se oirá nada.
■
Si cierra la pantalla LCD durante la
reproducción, no se oirá ningún sonido por el
altavoz.
Notas
■
Cuando hay un cable conectado al conector A/V, el
altavoz no emite ningún sonido y no se puede
■
Sin embargo, el altavoz suena cuando la opción A V IN/OUT MODE de
MENU está ajustada en AV IN MODE aunque haya un cable conectado
al conector A/V (sólo en los modelos SCD34/D39).
■
Si desea oír el sonido a través del altavoz, desconecte el cable del
conector A/V .
■
El altavoz se apaga al utilizar auriculares.
ajustar el volumen.
Page 35
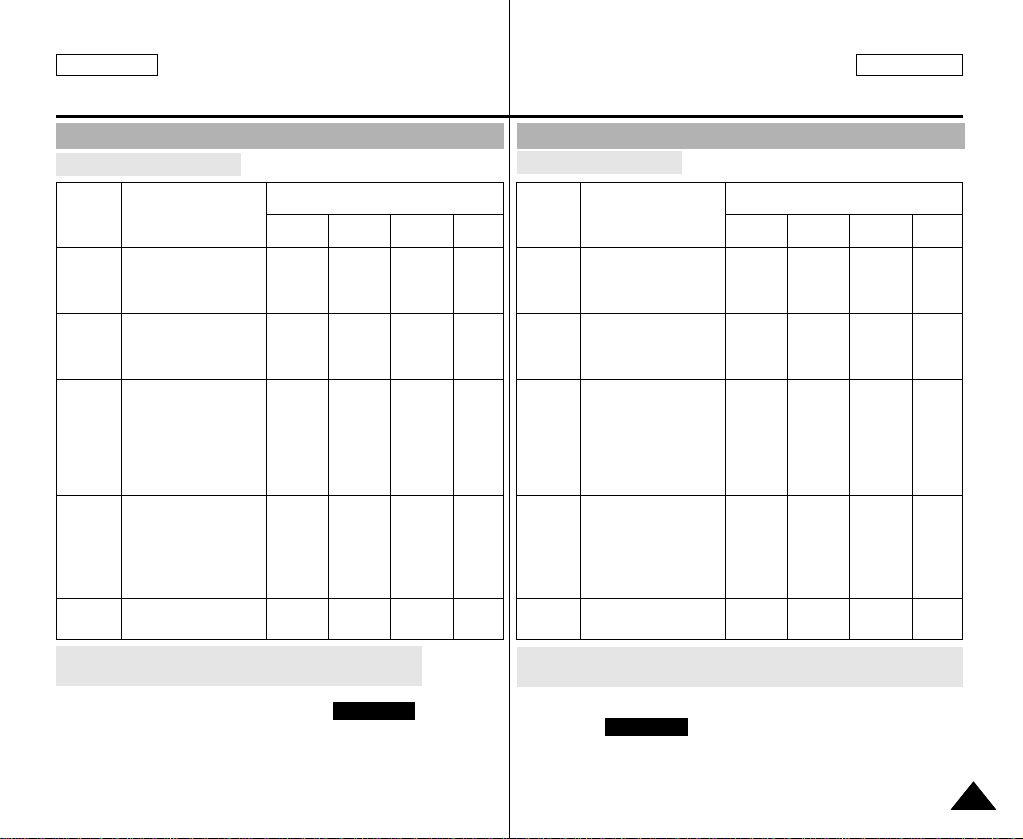
ENGLISH ESPAÑOL
Advanced Recording
Grabación avanzada
Use of various Functions
Setting menu items
●
✔
✔
✔
✔
✔
✔
✔
✔
✔
✔
✔
✔
✔
✔
✔
Available mode
Memory
✔
✔
✔
✔
✔
✔
✔
✔
✔
✔
✔
✔
✔
✔
✔
✔
✔
HIGHLIGHT
REC.
✔
✔
✔
✔
✔
✔
✔
✔
✔
✔
✔
) indicates
Memory
PLAY
✔
✔
✔
✔
✔
✔
✔
✔
✔
✔
✔
✔
MENU
INITIAL
CAMERA
A/V
MEMORY
VIEWER
Set the camcorder to CAM or PLAYER mode and
●
M.REC or M.PLAY mode
SUB MENU
CLOCK SET
WL.REMOTE
BEEP SOUND
SHUTTER SOUND
DEMONSTRATION
PROGRAM AE
WHT. BALANCE
D. ZOOM
DIS
DSE SELECT
REC MODE
PHOTO SEARCH
PHOTO COPY
AUDIO MODE
AUDIO SELECT
WIND CUT
PB DSE
AV IN/OUT
(SCD34/D39 only)
M.PLAYSELECT
PHOTO QUALITY
MPEG4 SIZE
PRINT MARK
PROTECT
FILE NO.
DELETE
FORMAT
LCD ADJUST
DATE/TIME
TV DISPLAY
CAMERA PLAYER
1. Press the MENU button.
The MENU OSD is displayed. The cursor (
the feature you are currently adjusting.
2. Use the MENU SELECTOR and push the MENU SELECTOR on the
left side panel to select and activate the item.
3. You can exit the menu mode by pressing the MENU button.
Utilización de las distintas funciones
Ajustes del menú
●
MENÚ
INITIAL
CAMERA
A/V
MEMORY
VIEWER
●
Ajuste de la videocámara en la modalidad CAM o PLAYER y en la
SUBMENÚ
CLOCK SET
WL.REMOTE
BEEP SOUND
SHUTTER SOUND
DEMONSTRATION
PROGRAM AE
WHT. BALANCE
D. ZOOM
DIS
DSE SELECT
REC MODE
PHOTO SEARCH
PHOTO COPY
AUDIO MODE
AUDIO SELECT
WIND CUT
PB DSE
AV IN/OUT
(sólo modelos SCD34/D39)
M.PLAYSELECT
PHOTO QUALITY
MPEG4 SIZE
PRINT MARK
PROTECT
FILE NO.
DELETE
FORMAT
LCD ADJUST
DATE/TIME
TV DISPLAY
modalidad M.REC o M.PLAY
1. Pulse el botón MENÚ.
Aparece el MENÚ OSD.
El cursor ( RESALTADO ) indica la función que está ajustando en ese
momento.
2. Utilice el SELOCTOR MENÚ y pulse el SELECTOR MENÚ del panel
izquierdo para seleccionar y activar la opción que desee.
3. Para salir del menú, pulse el botón MENÚ.
Modalidad disponible
CAMERA PLAYER
✔
✔
✔
✔
✔
✔
✔
✔
✔
✔
✔
✔
✔
✔
✔
✔
✔
✔
✔
✔
✔
✔
✔
✔
✔
✔
✔
✔
✔
✔
✔
✔
Memory
REC.
✔
✔
✔
✔
✔
✔
✔
✔
✔
✔
✔
Memory
PLAY
✔
✔
✔
✔
✔
✔
✔
✔
✔
✔
✔
✔
3535
Page 36
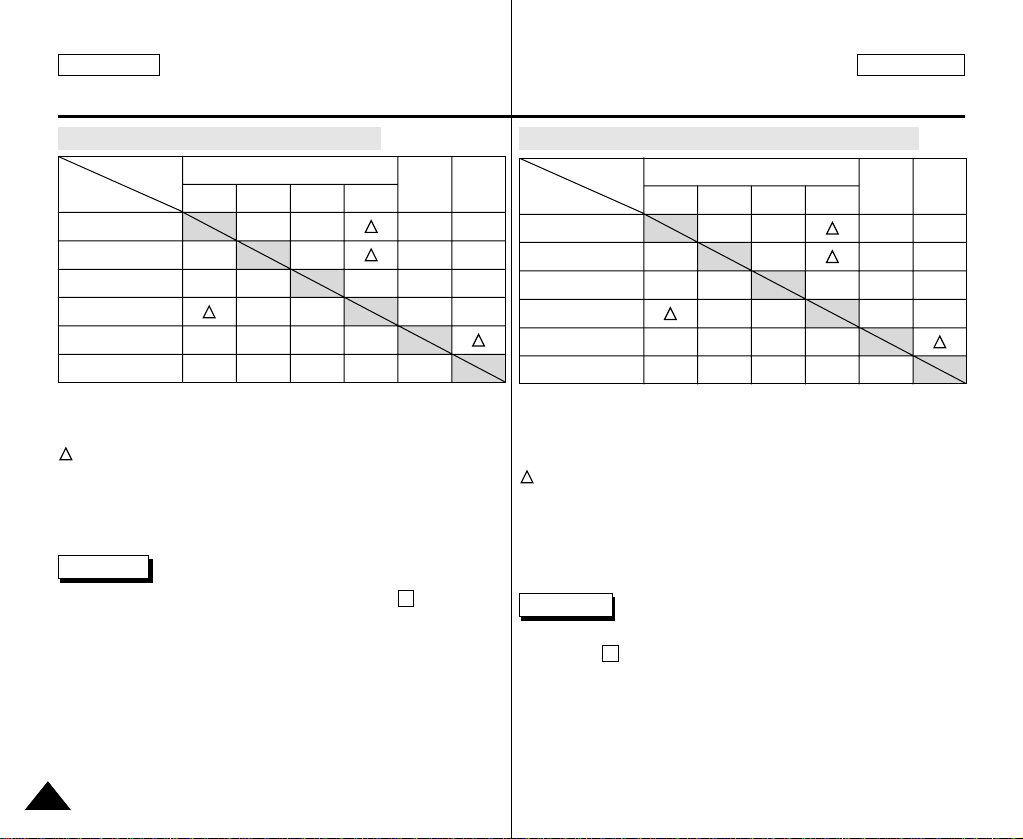
ENGLISH ESPAÑOL
Advanced Recording
Grabación avanzada
●
Availability of functions in each mode
Requested
Operating
Mode
SLOW SHUTTER
Digital Special Effects
Mode
DIS
D.ZOOM
PHOTO
NITE PIX
Digital functions
DIS D.ZOOM
O
O
✕
✕
✕
O
O
O
O
PHOTO
(TAPE)
O
O
O
O
O
SLOW
SHUTTER
*
✕
O
O
Digital
special
effects
O
O
✕
O
✕
NITE PIX
O
O
O
O
O : The requested mode will work in this operating mode.
✕ : You can not change the requested mode.
: The operating mode will be released and the requested mode will
work.
* : The operating mode will be released and the requested mode will
work. (the data during the operating mode will be backed up)
Notes
■
When a menu item on the LCD is marked with an ,
X
that item cannot be activated.
■
When you select an item that cannot be changed,
an error message will be displayed.
●
Disponibilidad de funciones en cada modalidad
Modalidad
Modalidad de
funcionamiento
Efectos especiales digitales
GRABACIÓN NOCTURNA
requerida
DIS
D.ZOOM
FOTO
SLOW SHUTTER
Funciones digitales
DIS D.ZOOM
O
O
✕
✕
✕
O
O
O
O
FOTO
(TAPE)
O
O
O
O
O
SLOW
SHUTTER
*
✕
O
O
Efectos
especiales
digitales
O
O
✕
O
✕
NITE PIX
O : La modalidad requerida estará activa en esta modalidad de
funcionamiento.
✕ : No es posible modificar la modalidad requerida.
: La modalidad de funcionamiento quedará liberada y la
modalidad requerida funcionará.
* : La modalidad de funcionamiento quedará liberada y la
modalidad requerida funcionará.
(se hará una copia de seguridad de los datos durante la
modalidad de funcionamiento)
Notas
■
Cuando una opción del menú aparece marcada en la pantalla LCD
con una , ésta no se puede modificar.
■
Cuando seleccione una opción que no se pueda modificar, un
X
mensaje de error aparecerá en la pantalla.
O
O
O
O
3636
Page 37
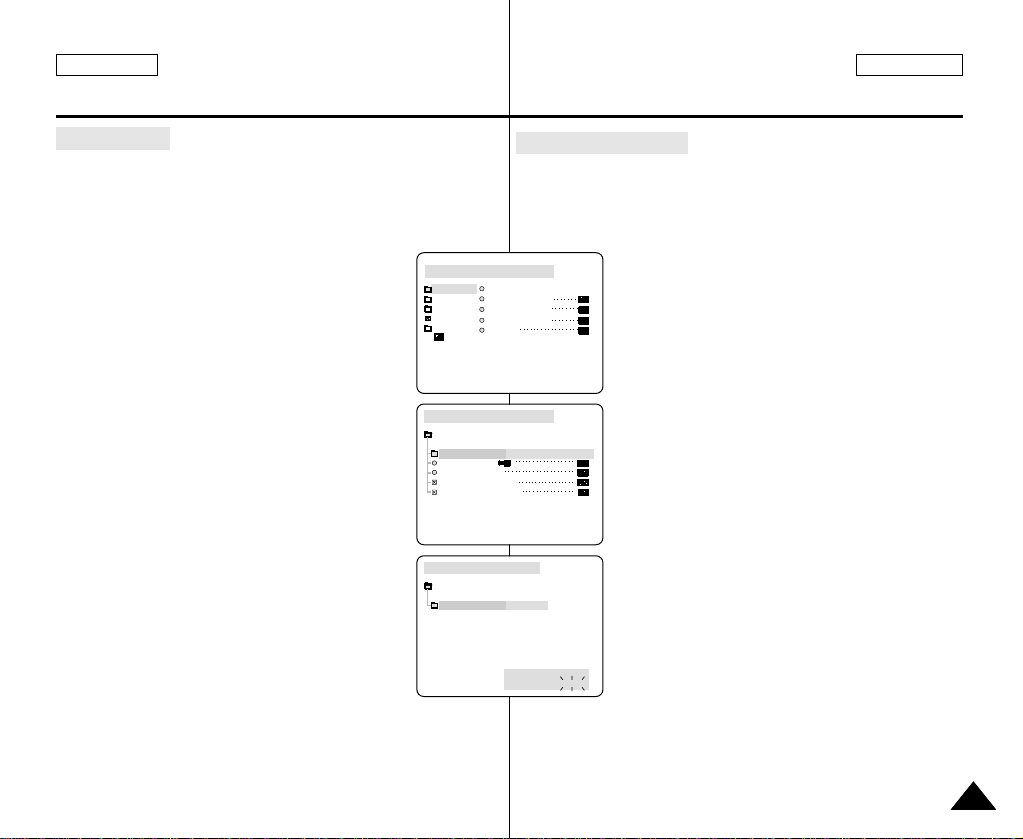
ENGLISH ESPAÑOL
CAM MODE
INITIAL CLOCK SET
WL. REMOTE
BEEP SOUND
SHUT. SOUND
DEMO
CAMERA
A/V
MEMORY
VIEWER
CAM MODE
INITIAL SET
CLOCK SET
WL.REMOTE
DEMONSTRATION
SET TIME!
BEEP SOUND
SHUTTER SOUND
CAM MODE
INITIAL SET
CLOCK SET
1 2 : 0 0 A M
J A N . 10 , 2 0 0 3
Advanced Recording
●
CLOCK SET
✤ CLOCK setup works in CAM, PLAYER, M.REC and M.PLAY
modes.
✤ The DATE/TIME is automatically recorded onto a tape.
Before recording, please set the DATE/TIME.
1. Press the MENU button.
■
The menu list will appear.
2. Move the MENU SELECTOR to highlight INITIAL
and push the MENU SELECTOR.
3. Use the MENU SELECTOR to select CLOCK SET
from the submenu.
4. Push the MENU SELECTOR to enter SETTING
mode.
■
A blinking item indicates the item to be
changed. The year will blink first.
5. Using the MENU SELECTOR, change the year
setting.
6. Push the MENU SELECTOR.
■
The month will blink.
7. Using the MENU SELECTOR, change the month
setting.
8. Push the MENU SELECTOR.
■
The day will blink.
9. You can set the day, hour and minute following the
same procedure for setting the year and month.
10. Push the MENU SELECTOR after setting the
minutes.
■
The word COMPLETE! will appear, and a few seconds later,
11. To exit, pushthe MENU button.
the menu screen will automatically return to the sub menu.
Grabación avanzada
●
AJUSTE DEL RELOJ
✤ El ajuste del reloj (CLOCK SET) funciona en las modalidades
CAMERA , PLAYER, M.REC y M.PLAY.
✤ La fecha y la hora (DATE/TIME) se graban de manera
automática en la cinta.Antes de grabar , ajuste la fecha y la hora.
1. Pulse el botón MENÚ.
■
Aparece la lista del menú.
2. Desplace el SELECTOR MENÚ hasta resaltar
INITIAL (inicial) y después pulse el SELECTOR
MENÚ.
3. Seleccione la opción CLOCK SET en el submenú
mediante el SELECTOR MENÚ.
4 . Pulse el SELECTOR MENÚ para seleccionar la
opción SETTING (ajustes).
■
En la pantalla parpadeará la opción que se va
a cambiar. Primero parpadea el año.
5. Ajuste el año mediante el SELECTOR MENÚ.
6. Pulse el SELECTOR MENÚ.
■
El mes parpadeará.
7. Ajuste el mes mediante el SELECTOR MENÚ.
8. Pulse el SELECTOR MENÚ.
■
El día parpadeará.
9. Ajuste el día, las horas y los minutos siguiendo
el mismo procedimiento.
10. Después de ajustar los minutos, pulse el
SELECTOR MENÚ.
■
Aparece la palabra COMPLETE! (terminado) y
unos segundos más tarde el menú de la
pantalla volverá a automáticamente
al submenú.
11. Para salir, pulse el botón MENÚ.
3737
Page 38
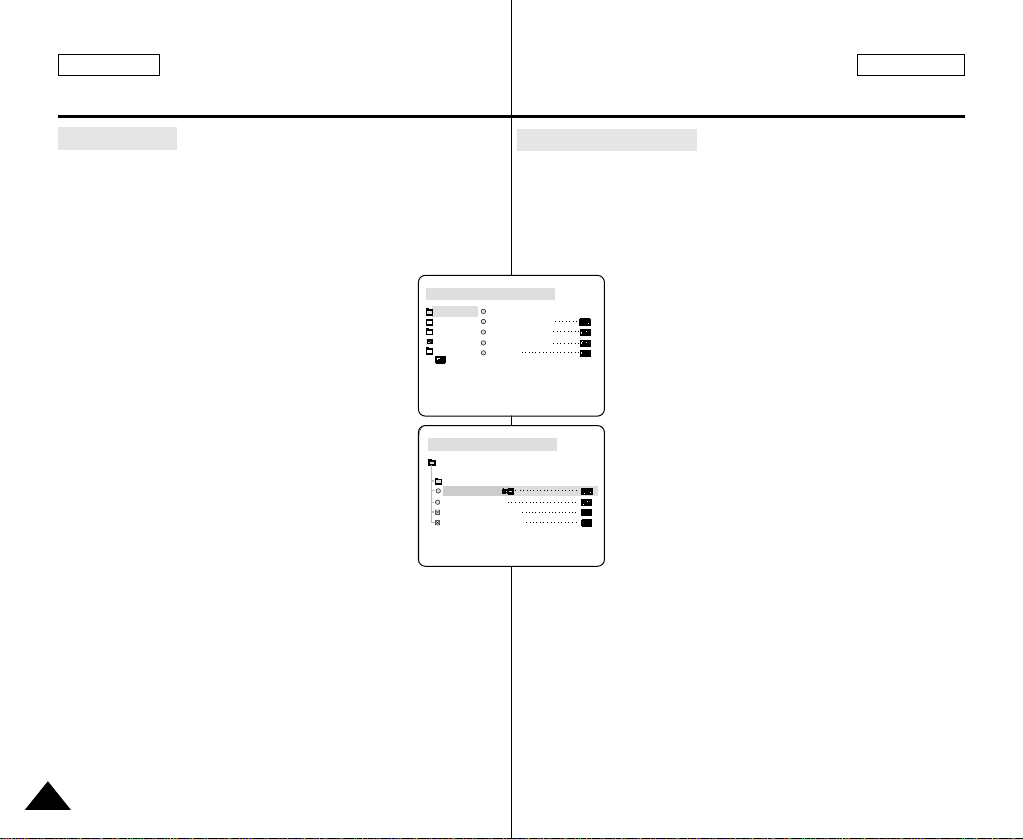
ENGLISH ESPAÑOL
CAM MODE
INITIAL CLOCK SET
WL. REMOTE
BEEP SOUND
SHUT. SOUND
DEMO
CAMERA
A/V
MEMORY
VIEWER
CAM MODE
INITIAL SET
CLOCK SET
WL.REMOTE
DEMONSTRATION
BEEP SOUND
SHUTTER SOUND
Advanced Recording
●
WL. REMOTE
✤ The WL.REMOTE function works in CAM, PLAYER, M.REC,
M.PLAYmodes.
✤ The WL.REMOTE option allows you to enable or disable the
remote control for use with the camcorder.
Grabación avanzada
●
MANDO A DISTANCIA
✤ La función de mando a distancia (REMOCON) opera en las
modalidades CAM, PLAYER, M.REC y M.PLAY.
✤ Esta opción permite activar o desactivar el mando a distancia
para hacer funcionar la videocámara.
1. Press the MENU button.
■
The menu list will appear.
2. Move the MENU SELECTOR to highlight INITIAL
and push the MENU SELECTOR.
3. Use the MENU SELECTOR to select WL.REMOTE
from the submenu.
4. Push the MENU SELECTOR to enable or disable
the remote control.
The setting switches between ON/OFF each time
you push the MENU SELECTOR.
5. To exit, press the MENU button.
■
If you set the remote to OFF in the menu and try to use it, the
remote icon will the remote control icon will blink for 3 seconds
and disappear on the LCD.
3838
1. Pulse el botón MENÚ.
■
Aparece la lista del menú.
2. Desplace el SELECTOR MENÚ hasta resaltar
INITIAL (inicial) y después pulse el SELECTOR
MENÚ.
3. Seleccione la opción WL. REMOTE en el
submenú mediante el SELECTOR MENÚ.
4. Pulse el SELECTOR MENÚ para activar o
desactivar el mando a distancia.
Al pulsar varias veces el SELECTOR MENÚ, la
opción cambiará alternativamente entre activada
y desactivada.
5. Para salir, pulse el botón MENÚ.
■
Si desactiva el mando a distancia (OFF), al
emplearlo, su icono parpadeará durante tres
segundos y desaparecerá de la pantalla
LCD.
Page 39
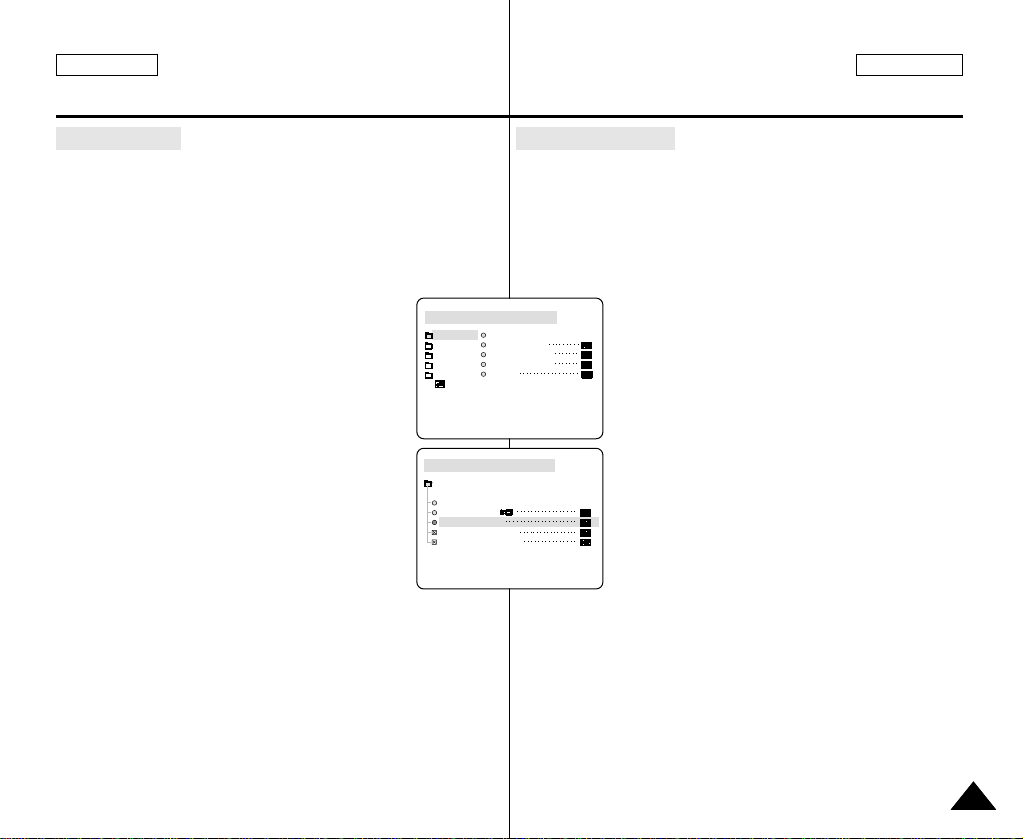
ENGLISH ESPAÑOL
CAM MODE
INITIAL CLOCK SET
WL.REMOTE
BEEP SOUND
SHUT SOUND
DEMO
CAMERA
A/V
MEMORY
VIEWER
CAM MODE
INITIAL SET
CLOCK SET
BEEP SOUND
SHUTTER SOUND
DEMONSTRATION
WL.REMOTE
Advanced Recording
●
BEEP SOUND
✤ The BEEP SOUND function works in CAM, PLAYER, M.REC,
M.PLAYmodes.
✤ Use the MENU to setup the BEEP SOUND function.
Select whether or not you want to hear a beep sound
whenever you change a setup value.
1. Press the MENU button.
■
The menu list will appear.
2. Move the MENU SELECTOR to highlight INITIAL
and push the MENU SELECTOR.
Grabación avanzada
●
SEÑAL ACÚSTICA
✤ La función de señal acústica (BEEP SOUND) opera en las
modalidades CAM, PLAYER, M.REC y M.PLAY.
✤ La señal acústica se ajusta desde el MENÚ y permite
seleccionar si se desea oír o no la señal al modificar los
ajustes.
1. Pulse el SELECTOR MENÚ.
■
Aparece la lista del menú.
2. Desplace el SELECTOR MENÚ hasta resaltar
INITIAL (inicial) y después pulse el SELECTOR
MENÚ.
3. Use the MENU SELECTOR to select BEEP SOUND
from the submenu.
4. Push the MENU SELECTOR to enable or disable
the BEEP SOUND.
The setting switches between ON/OFF each time
you push the MENU SELECTOR.
■
You will hear a Beep Sound when you select the
ON setup.
■
When you press the START/STOP button to start recording,
the BEEP SOUND is automatically set to OFF so you can’t
hear it any longer.
5. To exit, press the MENU button.
3. Seleccione la opción BEEP SOUND en el
submenú mediante el SELECTOR MENÚ.
4. Pulse el SELECTOR MENÚ para activar o
desactivar la señal acústica.
Al pulsar varias veces el SELECTOR MENÚ, la
opción cambiará alternativamente entre
activada y desactivada (ON/OFF).
■
Si selecciona la opción ON, se oirá la señal
acústica.
■
Al pulsar el botón START/STOP (inicio/
parada) para iniciar una grabación, la señal
acústica se desactiva automáticamente.
5. Para salir, pulse el botón MENÚ.
3939
Page 40
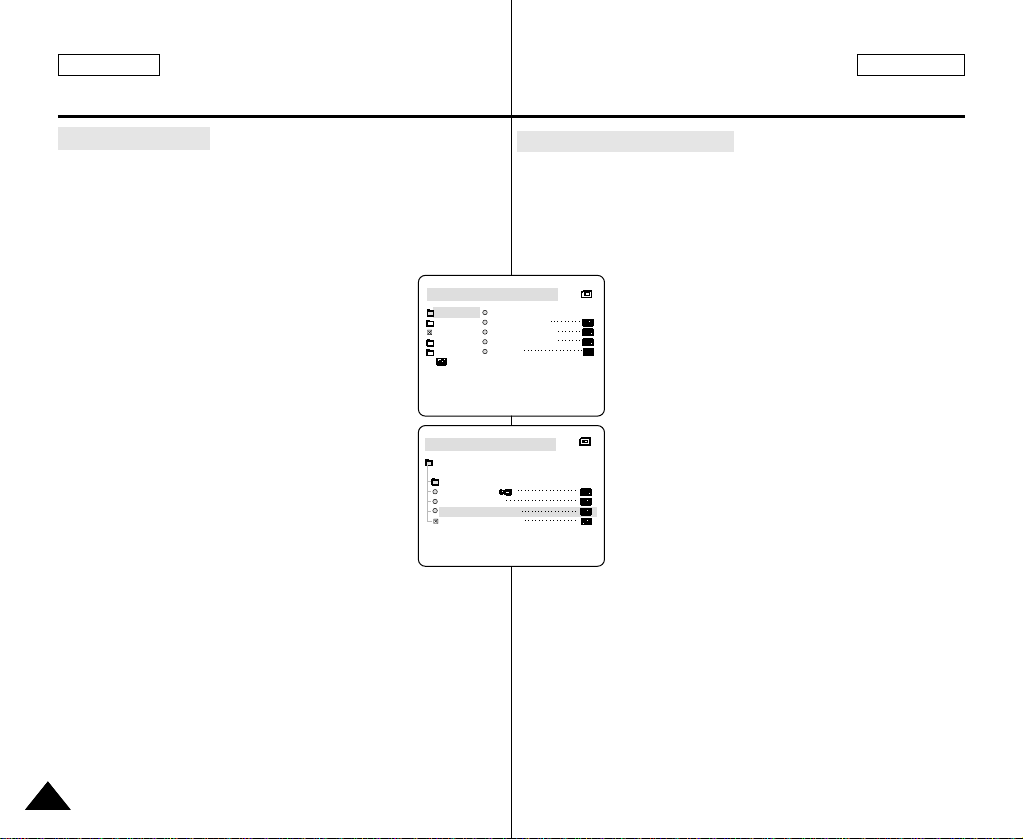
ENGLISH ESPAÑOL
M.REC MODE
INITIAL CLOCK SET
WL.REMOTE
BEEP SOUND
SHUT.SOUND
DEMO
CAMERA
A/V
MEMORY
VIEWER
M.REC MODE
INITIAL SET
CLOCK SET
WL.REMOTE
BEEP SOUND
SHUTTER SOUND
DEMONSTRATION
Advanced Recording
●
SHUTTER SOUND
✤ You can hear SHUTTER SOUND only when the PHOTO
function is working.
✤ Determines whether or not you wish to hear a SHUTTER
SOUND when using the DSC feature.
Grabación avanzada
●
SONIDO DEL OBTURADOR
✤ El sonido del obturador (SHUTTER SOUND) sólo se oye
cuando está activada la función PHOTO (fotografía).
✤ Se puede elegir la opción de oír o no el sonido del obturador
cuando se graban imágenes digitales fijas.
1. Set the mode switch to MEMORY STICK.
2. Set the power switch to CAM mode.
3. Press the MENU button.
■
The menu list will appear.
4. Move the MENU SELECTOR to highlight INITIAL
and push the MENU SELECTOR.
5. Use the MENU SELECTOR to select SHUTTER
SOUND from the submenu.
6. Push MENU SELECTOR to switch between ON
and OFF.
7. To exit, press the MENU button.
4040
1. Ajuste el interruptor de modalidad en la
posición MEMORY STICK.
2. Ajuste el interruptor en la modalidad CAM.
3. Pulse el botón MENÚ.
■
Aparece la lista del menú.
4. Desplace el SELECTOR MENÚ hasta resaltar
INITIAL (inicial) y después pulse el SELECTOR
MENÚ.
5. Seleccione la opción SHUTTER SOUND en el
submenú mediante el SELECTOR MENÚ.
6. Pulse el SELECTOR MENÚ para activar o
desactivar el sonido del obturador.
7. Para salir, pulse el botón MENÚ.
Page 41
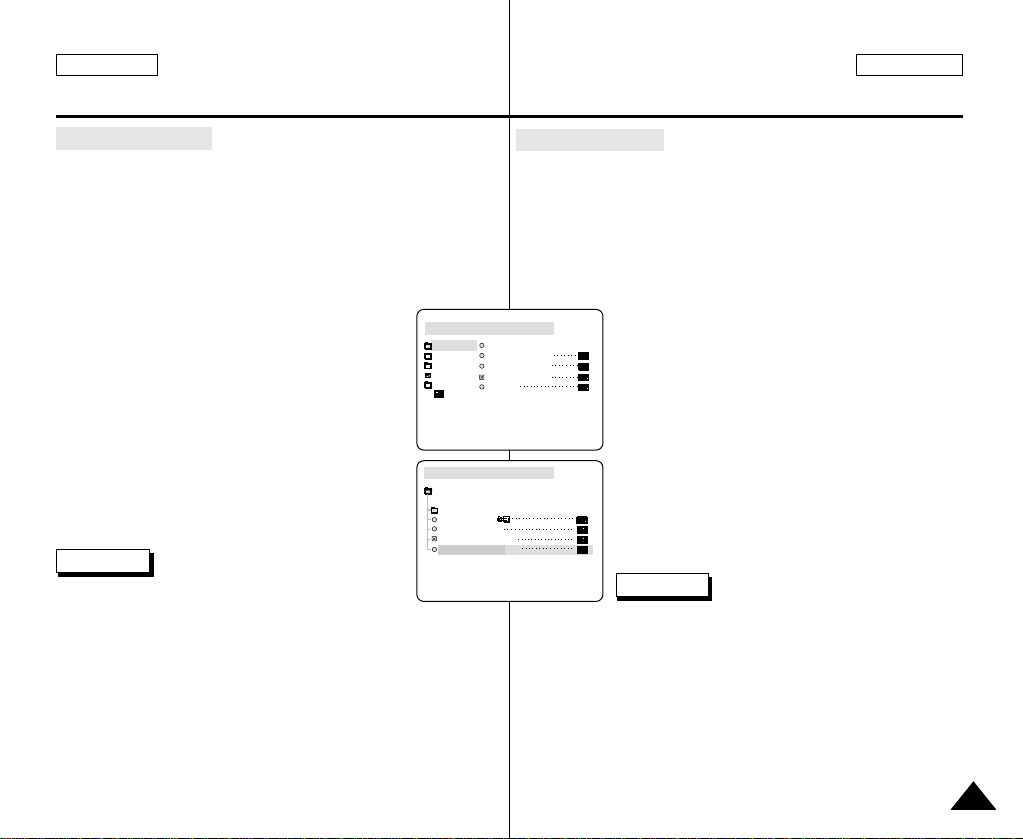
ENGLISH ESPAÑOL
CAM MODE
INITIAL CLOCK SET
WL. REMOTE
BEEP SOUND
SHUT. SOUND
DEMO
CAMERA
A/V
MEMORY
VIEWER
CAM MODE
INITIAL SET
CLOCK SET
WL.REMOTE
DEMONSTRATION
BEEP SOUND
SHUTTER SOUND
Advanced Recording
●
DEMONSTRATION
✤ Demonstration automatically shows you the major functions
that are included with your camcorder so that you may use
them more easily.
✤ The DEMONSTRATION function may only be used in the CAM
mode without a tape inserted in the camcorder.
✤ The demonstration operates repeatedly until the
DEMONSTRATION mode switched OFF.
1. Set the camcorder to CAM mode.
2. Press the MENU button.
■
The menu list will appear.
3. Move the MENU SELECTOR to highlight INITIAL.
4. Select DEMONSTRATION from the submenu and
push the MENU SELECTOR.
5. To activate the DEMONSTRATION, set
DEMONSTRATION ON.
■
Press the menu button to quit the menu.
■
The demonstration will begin.
6. To end the DEMONSTRATION, set the
DEMONSTRATION to OFF.
Notes
■
The DEMONSTRATION function only works without
a TAPE installed.
■
The DEMONSTRATION mode is automatically activated when the
camcorder is left idle for more than 10 minutes after switching to
the CAM mode (no tape is inserted in the camcorder).
■
If you press other buttons (FADE, BLC, PHOTO, EASY) during the
DEMONSTRATION mode, the DEMONSTRATION stops
temporarily and resumes 10 minutes later if you do not operate
any other functions.
■
While setting the NITE PIX to ON, the DEMONSTRATION function
does not work.
Grabación avanzada
●
DEMOSTRACIÓN
✤ Esta función muestra de manera automática las funciones más
importantes de la videocámara. De esta manera, su uso
resulta más sencillo.
✤ La función de demostración (DEMONSTRATION) sólo debe
usarse en la modalidad CAMERA y sin introducir ninguna cinta
en la videocámara.
✤ La demostración continuará repetidamente hasta que se
desactive la función DEMONSTRATION.
1. Ajuste la videocámara en la modalidad
CAM.
2. Pulse el botón MENÚ.
■
Aparece la lista del menú.
3. Deplace el SELECTOR MENÚ hasta resaltar
INITIAL (inicial).
4. Seleccione la opción DEMONSTRATION en el
submenú y pulse el SELECTOR MENÚ.
5. Para activar la demostración, ajuste en ON la
opción DEMONSTRATION.
■
Pulse el botón MENÚ para salir del menú.
■
Comenzará la demostración.
6. Para finalizar la demostración, ajuste en OFF
la opción DEMONSTRATION.
Notas
■
La función de demostración sólo opera cuando no hay ninguna
cinta en la videocámara.
■
La modalidad de demostración se activa automáticamente cuando
la videocámara se deja durante más de 10 minutos sin funcionar,
después de haberla ajustado en la modalidad CAMERA y si no
hay cinta en la videocámara.
■
Si pulsa otros botones (FADE, BLC, PHOTO, EASY) durante la
demostración, ésta se detiene temporalmente y continúa al cabo
de 10 minutos si no se activa ninguna otra función.
■
Si la función NITE PIX está activada, la función
DEMONSTRATION (demostración) no opera.
4141
Page 42
ENGLISH ESPAÑOL
Advanced Recording
Grabación avanzada
●
PROGRAM AE
✤ The PROGRAM AE function works in CAM mode only.
✤ The PROGRAM AE mode allows you to adjust shutter speeds
and apertures to suit different recording conditions.
✤ They give you creative control over the depth of field.
■
AUTO mode
- Auto balance between the subject and the background.
- To be used in normal conditions.
- The shutter speed automatically varies from 1/60 to 1/250 per
second, depending on the scene.
■
SPORTS mode ( )
- For recording people or objects moving quickly.
■
PORTRAIT mode ( )
- For focusing on the background of the subject, when the
background is out of focus.
- The PORTRAIT mode is most effective when used outdoors.
- The shutter speed automatically varies from 1/60 to 1/1000
per second.
■
SPOTLIGHT mode ( )
- For recording correctly when there is only light on the subject
and not the rest of the picture.
■
SAND/SNOW mode ( )
- For recording when people or objects are darker than the
background because of reflected light from sand or snow.
■
High S. SPEED(High Shutter Speed) mode ( )
- For recording fast-moving subjects such as players in golf or
4242
tennis games.
●
PROGRAMA AE
✤ La función PROGRAM AE (programa AE) sólo opera en las
modalidades CAM.
✤ La modalidad PROGRAM AE permite ajustar las velocidades
del obturador y aperturas para adaptarse a distintas
condiciones de grabación.
✤ Con ella se puede controlar de manera creativa la profundidad
de campo.
■
Modalidad AUTO
- Equilibrio automático entre el objeto y el fondo.- Se utiliza en
condiciones normales.
- La velocidad del obturador se ajusta automáticamente entre
1/60 y 1/250 por segundo, según la escena que se esté
grabando.
■
Modalidad SPORTS ( , deportes)
- Se utiliza para grabar a personas u objetos que se mueven
rápidamente.
■
Modalidad PORTRAIT ( , retrato)
- Enfoca el fondo del objeto cuando está desenfocado.
- Esta modalidad es más eficaz cuando se emplea en exteriores.
- La velocidad del obturador se ajusta automáticamente entre
1/60 y 1/1000 por segundo.
■
Modalidad SPOTLIGHT ( , foco)
- Esta modalidad se emplea para grabar correctamente cuando
sólo está iluminado el objeto y el resto de la imagen no lo está.
■
Modalidad SAND/SNOW ( , arena/nieve)
- Esta modalidad se emplea para grabar cuando las personas o
los objetos están menos iluminados que el fondo debido a la
luz reflejada en la arena o en la nieve.
■
Modalidad HIGH S. SPEED ( , gran velocidad)
- Esta modalidad se emplea para grabar escenas en las que el
movimiento es de gran velocidad, por ejemplo, jugadores de
tenis o de golf.
Page 43
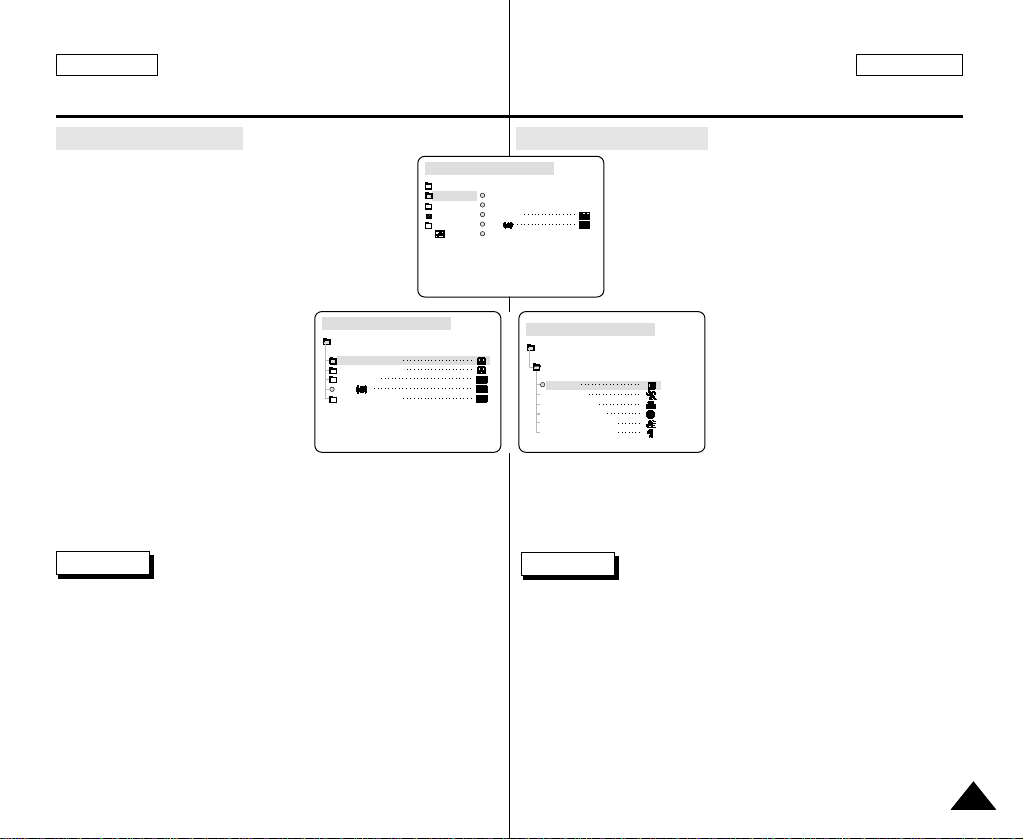
ENGLISH ESPAÑOL
CAM MODE
PROGRAM AE
AUTO
SPORTS
PORTRAIT
SPOTLIGHT
SAND / SNOW
HIGH S. SPEED
CAMERA SET
CAM MODE
PROGRAM AE
WHT. BALANCE
D.ZOOM
DIS
DSE SELECT
CAMERA SET
CAM MODE
INITIAL
PROGRAM AE
WHT. BALANCE
D.ZOOM
DIS
DSE SELECT
CAMERA
A/V
MEMORY
VIEWER
Advanced Recording
Grabación avanzada
Setting the PROGRAM AE
1. Press the MENU button.
■
The menu list will appear.
2. Move the MENU SELECTOR to highlight CAMERA
and push the MENU SELECTOR.
3. Select PROGRAM AE from the submenu.
4. Push the MENU SELECTOR to
enter the submenu.
5. Using the MENU SELECTOR,
select the PROGRAM AE mode.
■
Push the MENU SELECTOR to
confirm the PROGRAM AE
mode.
6. To exit, press the MENU button.
Notes
■
While setting the NITE PIX to ON, the PROGRAM AE function
does not work.
■
The P.AE function will not operate in EASY mode.
Ajustes del PRGRAMA AE
1. Pulse el botón MENÚ.
■
Aparece la lista del menú.
2. Desplace el SELECTOR MENÚ hasta resaltar
CAMERA y pulse el SELECTOR MENÚ.
3. Seleccione la opción
PROGRAM AE en el submenú.
4. Pulse el SELECTOR MENÚ
para acceder al submenú.
5. Seleccione la modalidad
PROGRAM AE mediante el
SELECTOR MENÚ.
■
Pulse el SELECTOR MENÚ
para confirmar la modalidad
PROGRAM AE.
6. Para salir, pulse el botón MENÚ.
Notas
■
Si la función NITE PIX está activada, la función PROGRAM AE no
opera.
■
La función P.AE no opera en la modalidad EASY.
4343
Page 44
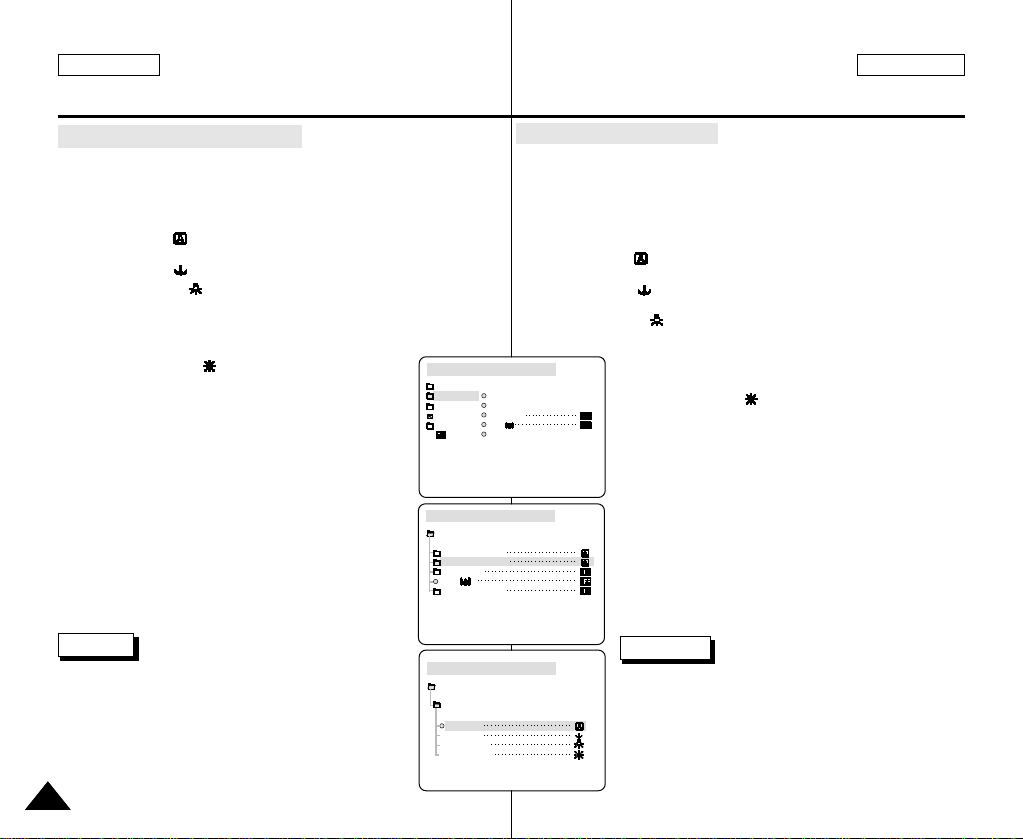
ENGLISH ESPAÑOL
CAM MODE
PROGRAM AE
WHT. BALANCE
D.ZOOM
DIS
DSE SELECT
CAMERA SET
CAM MODE
INITIAL
PROGRAM AE
WHT. BALANCE
D.ZOOM
DIS
DSE SELECT
CAMERA
A/V
MEMORY
VIEWER
CAM MODE
AUTO
HOLD
WHT. BALANCE
INDOOR
OUTDOOR
CAMERA SET
Advanced Recording
●
WHT. BALANCE (WHITE BALANCE)
✤ The WHITE BALANCE function works in CAM or M.REC mode only.
✤ The WHITE BALANCE is a recording function that preserves the
unique image color of the object in any recording condition.
✤ You may select the appropriate WHITE BALANCE mode to obtain good
quality color of the image.
■
AUTO ( ): This mode is generally used to control the WHITE
BALANCE automatically.
■
HOLD ( ):This fixes the current WHITE BALANCE value.
■
INDOOR ( ): This controls the WHITE BALANCE according to
the indoor ambience.
- Under halogen or studio/video lighting
- Subject is of one dominant color
- Close ups
■
OUTDOOR ( ) : This controls the WHITE
BALANCE according to the outdoor ambience.
- In daylight, especially for close ups and where
the subject is of one dominant color.
1. Set the camcorder to CAM mode.
2. Press the MENU button.
■
The menu list will appear.
3. Move the MENU SELECTOR to highlight CAMERAand
push the MENU SELECTOR.
4. Select WHT.BALANCE from the submenu.
5. Push the MENU SELECTOR to enter the submenu.
6. Using the MENU SELECTOR, select the WHITE BALANCE
mode.
■
Push the MENU SELECTOR to confirm the WHITE
BALANCE mode.
7. To exit, press the MENU button.
Notes
■
When NITE PIX is set to ON, the WHT.BALANCE function
does not work.
■
The WHT.BALANCE function will not operate in EASY mode.
■
Turn the digital zoom off (if necessary) to set a more
accurate white balance.
■
Reset the white balance if lighting conditions change.
■
During normal outdoor recording, setting to AUTO may
provide better results.
4444
Grabación avanzada
●
EQUILIBRIO DEL BLANCO
✤ La función de equilibrio del blanco (WHT. BALANCE) sólo opera en
las modalidades CAM o M.REC.
✤ Ésta es una función de grabación que conserva los colores
particulares de los objetos independientemente de las condiciones
de grabación.
✤ Se debe seleccionar la modalidad correcta de equilibrio del blanco
para obtener imágenes con una buena calidad de color.
■
AUTO ( ): ésta es la modalidad que se utiliza por lo general
para controlar de manera automática el equilibrio del blanco.
■
HOLD ( , mantener): mantiene el valor que esté ajustado en
ese momento.
■
INDOOR ( , interiores): controla el equilibrio del blanco según
el ambiente interior.
- Con iluminación halógena o de estudio/vídeo.
- Cuando el objeto es de un color predominante.
- En primeros planos.
■
OUTDOOR ( , exteriores): controla el equilibrio
del blanco según el ambiente exterior.
- Con luz natural, en especial en primeros planos
1. Ajuste la videocámara en la modalidad CAM.
2. Pulse el botón MENÚ.
3. Desplace el SELECTOR MENÚ hasta resaltar
4. Seleccione la opción WHT.BALANCE en el submenú.
5. Pulse el SELECTOR MENÚ para acceder al submenú.
6. Seleccione la modalidad WHT. BALANCE por medio
7. Para salir, pulse el botón MENÚ.
y cuando el objeto es de un color predominante.
■
Aparece la lista del menú.
CAMERA y pulse el SELECTOR MENÚ.
del SELECTOR MENÚ.
■
Pulse el SELECTOR MENÚ para confirmar la
modalidad WHT. BALANCE.
Notas
■
Si la función NITE PIX está activada, la función
WHT. BALANCE no opera.
■
La función WHT. BALANCE no opera en la modalidad EASY .
■
Si es necesario, desactive el zoom digital para
obtener un equilibrio del blanco más preciso.
■
Si ha ajustado el equilibrio del blanco y las
condiciones de la luz cambian, ajústelo nuevamente.
■
Si el equilibrio del blanco se ajusta en AUTO en las
grabaciones normales en exteriores, se pueden
obtener mejores resultados.
Page 45
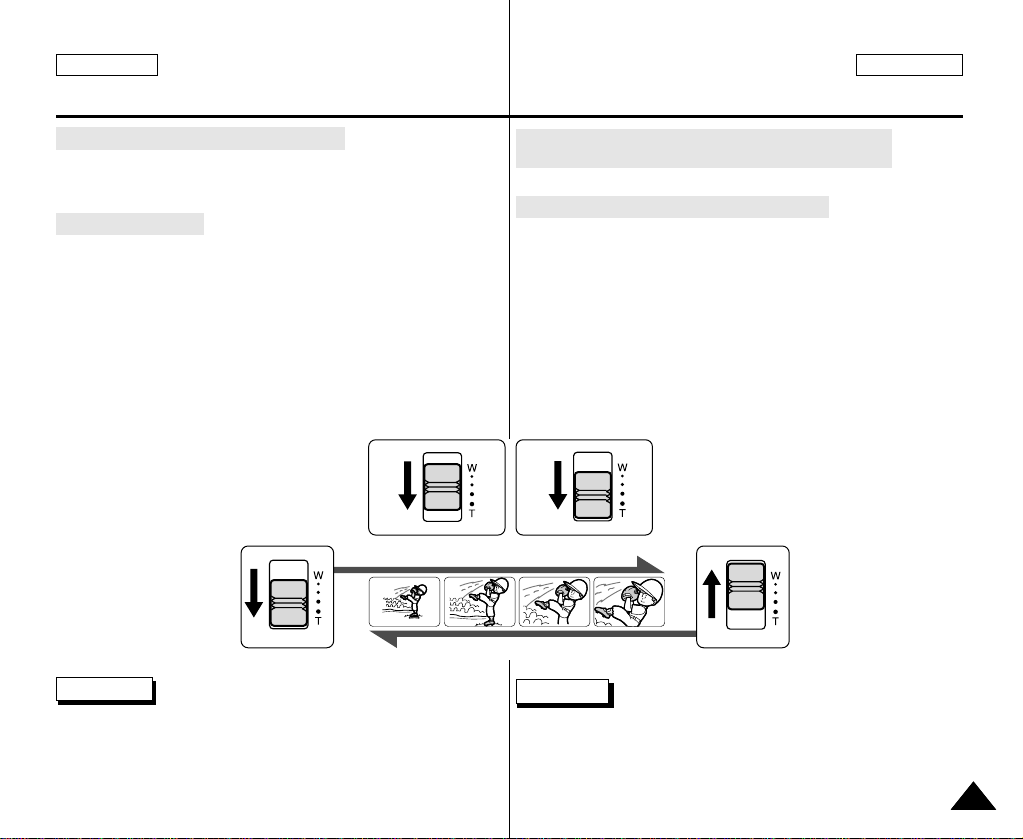
ENGLISH ESPAÑOL
Advanced Recording
Grabación avanzada
Zooming In and Out with DIGITAL ZOOM
✤ Digital Zoom works in CAM mode only.
Zooming In and Out
✤ Zooming is a recording technique that lets you change the size
of the subject in a scene.
For more professional looking recordings, do not use the zoom
function too often.
✤ You can zoom using variable zoom speeds.
✤ Use these features for different shots. Please note that over-
use of the zoom feature can lead to unprofessional looking
results and a reduction of battery usage time.
1. Move the zoom lever slightly for
a gradual zoom, move it further for
a high-speed zoom.
Your zooming is monitored on the OSD.
2. T(Telephoto) side:
Subject appears closer.
3. W(Wide angle) side:
Subject appears
farther away.
Note
You can record a subject that is a minimum of 1 m (about 3.2 feet)
away from the lens surface in the TELE position, or about 10 mm
(about 0.5 inch) away in the WIDE position.
1-1 1-2
Acercamiento o alejamiento de la imagen mediante el
ZOOM DIGITAL
✤ El zoom sólo funciona en las modalidades CAM.
Acercamiento y alejamiento de las imágenes
✤ El uso del zoom es una técnica de grabación que permite
modificar el tamaño del encuadre en las escenas.Para obtener
imágenes más profesionales, no emplee el zoom con mucha
frecuencia.
✤ El zoom se puede emplear con velocidades variables.
✤ Utilice el zoom para obtener imágenes variadas. Si abusa del
zoom el resultado serán imágenes poco profesionales.
Además, el tiempo de uso de la batería se reduce.
1. Mueva el botón del zoom lentamente para
obtener un efecto de zoom gradual.
Muévalo más rápido si desea un efecto
rápido.
El efecto del zoom se puede seguir por la
pantalla OSD.
2. Lado T ( teleobjetivo): el objeto se ve más
TELE
cerca.
WIDE
Nota
En la posición de teleobjetivo no se puede enfocar un objeto que esté
a menos de un metro (2,65 pies del objetivo), mientras que en la
posición de gran angular el objeto puede estar a 10 mm (unas 0,5
pulgadas).
3. Lado W (gran
angular):
el objeto se ve más
lejos.
4545
Page 46
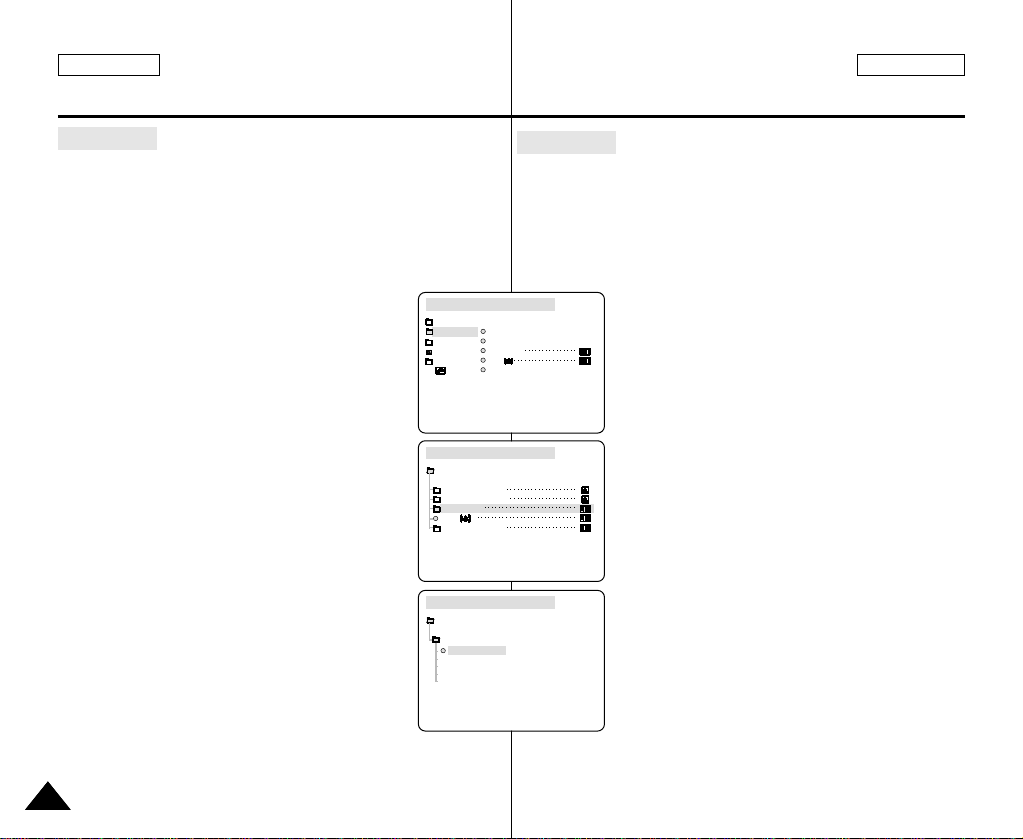
ENGLISH ESPAÑOL
CAM MODE
PROGRAM AE
WHT. BALANCE
D.ZOOM
DIS
DSE SELECT
CAMERA SET
CAM MODE
D . ZOOM
OFF
100x
200x
400x
800x
CAMERA SET
CAM MODE
INITIAL
PROGRAM AE
WHT. BALANCE
D.ZOOM
DIS
DSE SELECT
CAMERA
A/V
MEMORY
VIEWER
Advanced Recording
Grabación avanzada
Digital Zoom
✤ Zooming more than 10x is achieved digitally.
✤ The picture quality may deteriorate depending on how
much you zoom in on the subject.
✤ We recommend that you use the DIS feature with
DIGITALZOOM for picture stability. (see page 47)
1. Set the camcorder to CAM mode.
2. Press the MENU button.
■
The menu list will appear.
3. Move the MENU SELECTOR to CAMERA and
push the MENU SELECTOR.
4. Select D.ZOOM from the submenu.
5. Push the MENU SELECTOR to setup the 100x,
200x, 400x, 800x digital zoom function or
to turn the feature OFF.
6. To exit, press the MENU button.
4646
Zoom digital
✤ Digitalmente se pueden conseguir acercamientos de más de
10x.
✤ La calidad de la imagen puede resultar deteriorada
dependiendo de cuánto se acerca el objeto.
✤ Para una mayor estabilidad de la imagen, cuando se emplee
el ZOOM DIGITALes recomendable utilizar la función DIS
(ver página 47).
1. Ajuste la videocámara en la modalidad CAM.
2. Pulse el botón MENÚ.
■
Aparece la lista del menú.
3. Desplace el SELECTOR MENÚ hasta resaltar
CAMERA y pulse el SELECTOR MENÚ.
4. Seleccione D.ZOOM en el submenú.
5. Pulse el SELECTOR MENÚ para ajustar la
función de zoom digital 100x, 200x, 400x u 800x
o para desactivar esta función.
6. Para salir, pulse el botón MENÚ.
Page 47
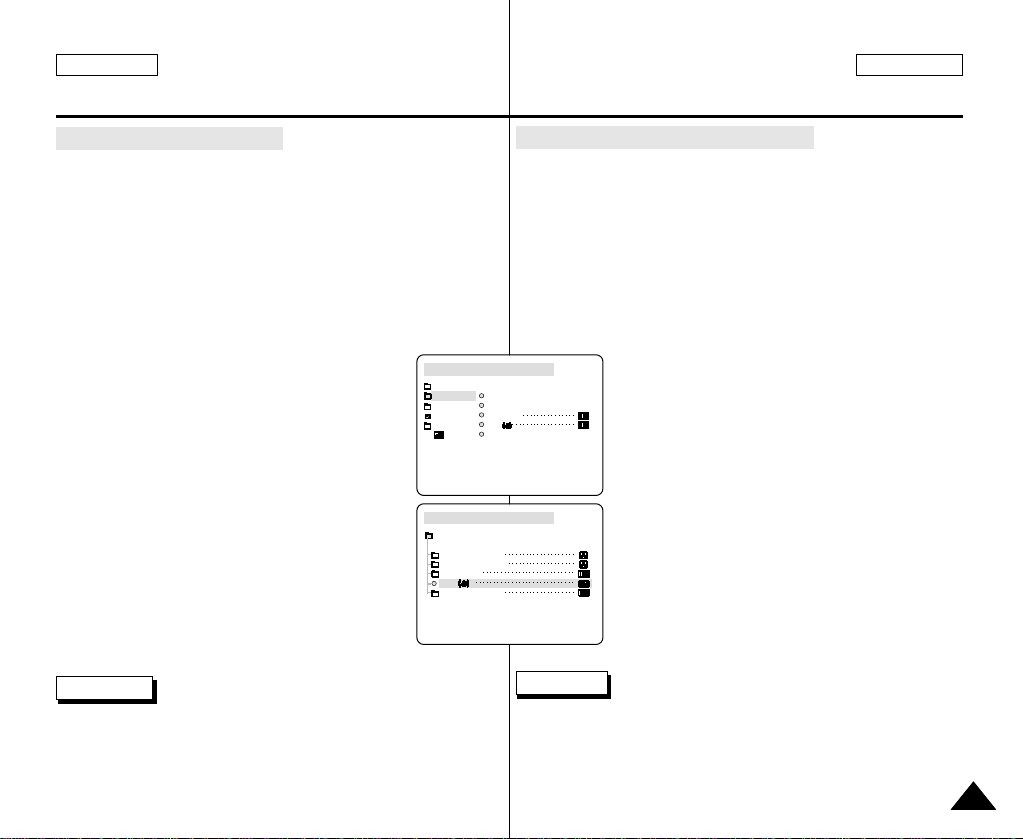
ENGLISH ESPAÑOL
CAM MODE
INITIAL
PROGRAM AE
WHT. BALANCE
D.ZOOM
DIS
DSE SELECT
CAMERA
A/V
MEMORY
VIEWER
CAM MODE
PROGRAM AE
WHT. BALANCE
D.ZOOM
DIS
DSE SELECT
CAMERA SET
Advanced Recording
●
DIS (Digital Image Stabilizer)
✤ The DIS function works in CAM mode only.
✤ DIS (Digital Image Stabilizer) is a function that compensates for
any shaking or hand movement while holding the camcorder
(within reasonable limits).
✤ It provides more stable pictures when:
■
Recording with the zoom
■
Recording a small object close-up
■
Recording and walking at the same time
■
Recording through the window of a vehicle
Grabación avanzada
●
DIS (Estabilizador digital de la imagen)
✤ La función DIS sólo opera en las modalidades CAM.
✤ DIS (Estabilizador digital de la imagen) es una función que
compensa las sacudidas o los movimientos de la mano al
sostener la videocámara, dentro de unos límites razonables.
✤ Proporciona imágenes más estables cuando:
■
Se graba con el zoom
■
Se graba un objeto pequeño muy de cerca
■
Se graba mientras se camina
■
Se graba a través de la ventanilla de un vehículo
1. Set the camcorder to CAM mode.
2. Press the MENU button.
■
The menu list will appear.
3. Move the MENU SELECTOR highlight to CAMERA
and push the MENU SELECTOR.
■
The sub menu list will appear.
4. Move the MENU SELECTOR to activate the
DIS function, push the MENU SELECTOR.
■
The DIS menu is changed to ON.
■
If you do not want to use the DIS function,
set the DIS menu to OFF.
5. To exit, press the MENU button.
Notes
■
It is recommended that you deactivate the shake compensation
function when using a tripod.
■
If you use the DIS function, the picture quality may deteriorate
1. Ajuste la videocámara en la modalidad CAM.
2. Pulse el botón MENÚ.
■
Aparece la lista del menú.
3. Desplace el SELECTOR MENÚ hasta resaltar
CAMERA y pulse el SELECTOR MENÚ.
■
Aparece la lista del submenú.
4. Desplace el SELECTOR MENÚ para activar la
función DIS y pulse el SELECTOR MENÚ.
■
El menú DIS se sitúa en la posición ON.
■
Si no desea utilizar la función DIS, ajústela
en OFF en el menú.
5. Para salir, pulse el botón MENÚ.
Notas
■
Se recomienda desactivar esta función cuando se emplee un
trípode.
■
Si utiliza esta función, puede que la calidad de la imagen se vea
afectada.
4747
Page 48
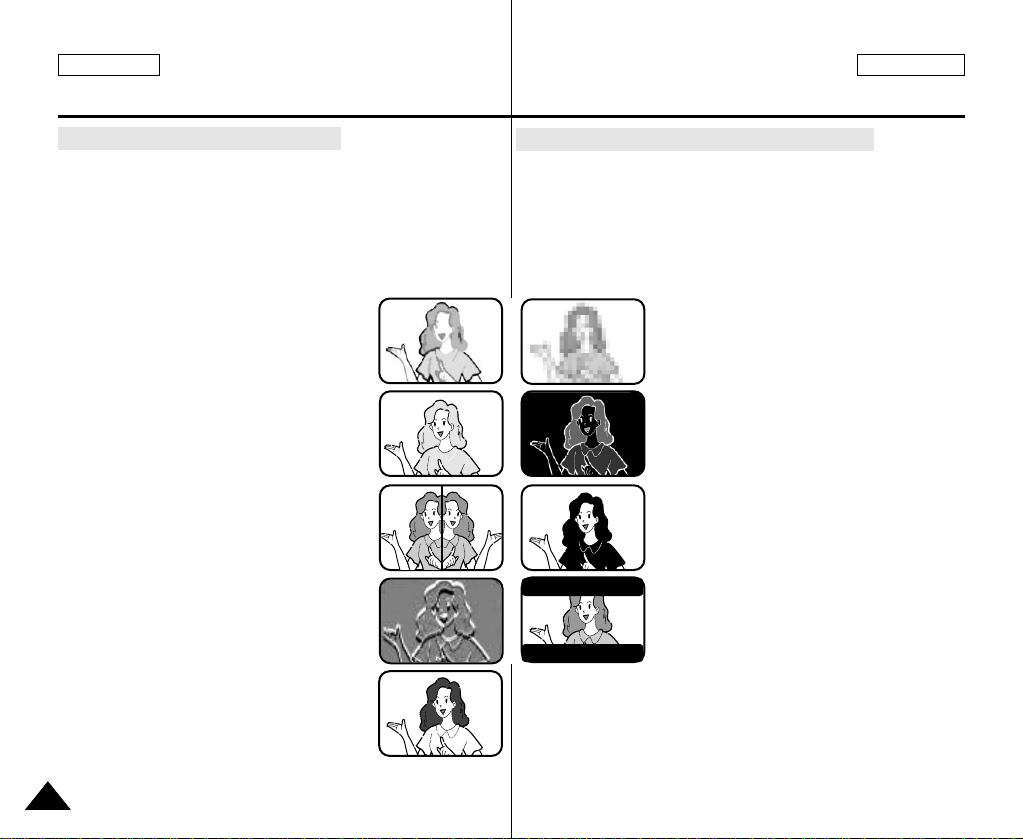
ENGLISH ESPAÑOL
Advanced Recording
Grabación avanzada
●
DSE(Digital Special Effects) SELECT
✤ The DSE function works in CAM mode only.
✤ The digital effects enable you to give a creative look to your
recording by adding various special effects.
✤ Select the appropriate digital effect for the type of picture that
you wish to record and the effect you wish to create.
✤ There are 9 DSE modes.
a. ART mode
This mode gives the images a coarse effect.
b. MOSAIC mode
This mode gives the images a mosaic effect.
c. SEPIAmode
This mode gives the images a reddish-brown
pigment.
d. NEGA mode
This mode reverses the colors of the images,
creating a negative image.
e. MIRROR mode
This mode cuts the picture in half, using a
mirror effect.
f. BLK & WHT mode
This mode changes the images to black and
white.
g. EMBOSS mode
This mode creates a 3D effect (embossing).
h. CINEMA mode
This mode covers the upper/lower portions of
the screen to give a cinematic effect.
i. MAKE - UP mode
This mode allows the images to be selected in
red, green, blue or yellow colors.
4848
a
e f
g
i
●
Selección de DSE (Efectos especiales digitales)
✤ La función DSE sólo opera en las modalidades CAM.
✤ Los efectos digitales le permiten dar un aspecto creativo a la
grabación al añadir diversos efectos especiales.
✤ Seleccione el efecto digital que necesite para el tipo de imagen
que desee grabar y el efecto que desee crear.
✤ Hay nueve modalidades de DSE.
a. Modalidad ART (arte): Esta modalidad le
b
dc
h
da a la imagen un aspecto de grano
grueso.
b. Modalidad MOSAIC (mosaico): Esta
modalidad le da a la imagen un aspecto
de mosaico.
c. Modalidad SEPIA: Esta modalidad le da
a la imagen un color marrón rojizo.
d. Modalidad NEGA (negativo): Esta
modalidad invierte los colores de la
imagen, creando una imagen en
negativo.
e. Modalidad MIRROR (espejo): Esta
modalidad divide la imagen en dos,
empleando un efecto de espejo.
f. Modalidad BLK & WHT (blanco y
negro): Esta modalidad cambia la
imagen a blanco y negro.
g. Modalidad EMBOSS (relieve): Esta
modalidad crea un efecto 3D (relieve).
h. Modalidad CINEMA (cine): Esta
modalidad cubre las partes superior e
inferior de la pantalla para conseguir
una imagen de aspecto cinematográfico.
i. Modalidad MAKE-UP (maquillaje):
Esta modalidad permite colorear las
imágenes con los colores rojo, verde,
azul o amarillo.
Page 49
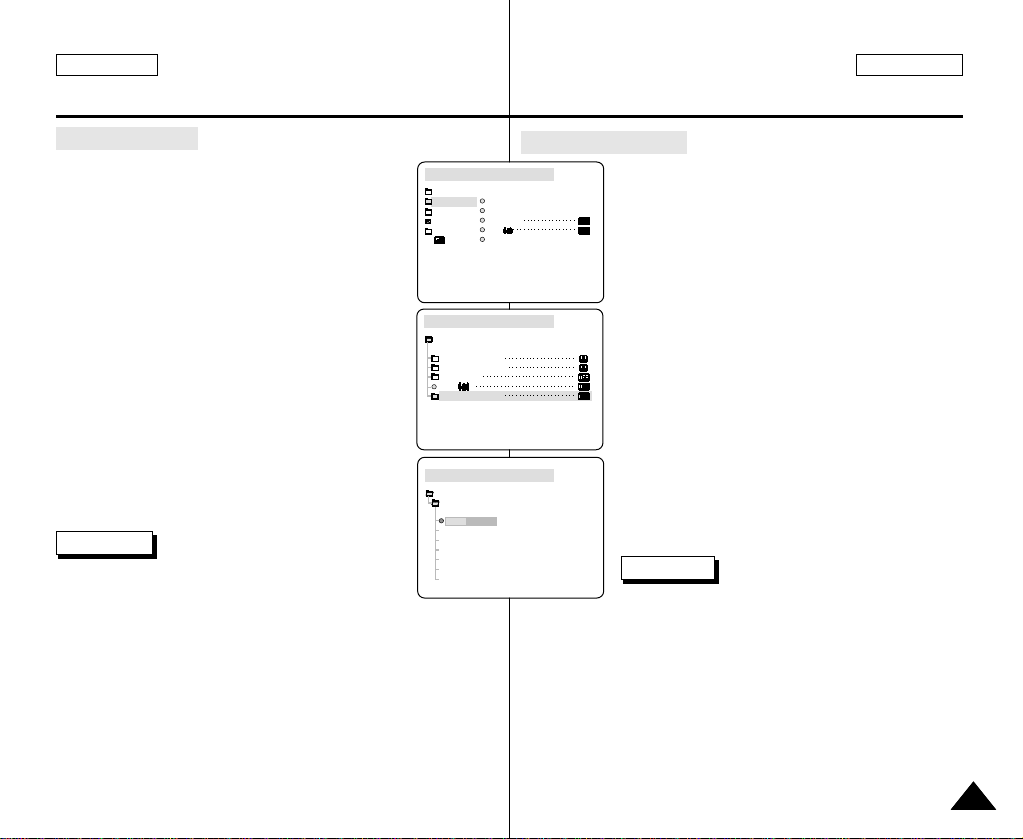
ENGLISH ESPAÑOL
CAM MODE
PROGRAM AE
WHT. BALANCE
D.ZOOM
DIS
DSE SELECT
CAMERA SET
CAM MODE
INITIAL
PROGRAM AE
WHT. BALANCE
D.ZOOM
DIS
DSE SELECT
CAMERA
A/V
MEMORY
VIEWER
CAM MODE
DSE SELECT
OFF
ART
MOSAIC
SEPIA
CAMERA SET
NEGA
MIRROR
BLK&WHT
Advanced Recording
Grabación avanzada
Selecting an effect
1. Set the camcorder to CAM mode.
2. Press the MENU button.
■
The menu list will appear.
3. Move the MENU SELECTOR to highlight CAMERA
and push the MENU SELECTOR.
4. Select DSE SELECT from the submenu.
5. Push the MENU SELECTOR to enter the submenu.
6. Using MENU SELECTOR, select the DSE mode.
■
Push the MENU SELECTOR to confirm the
DSE mode.
7. To exit, press the MENU button.
Notes
■
While setting the NITE PIX to ON, the DSE
function does not work.
■
The DSE function will not operate in EASY mode.
Selección de un efecto
1. Ajuste la videocámara en la modalidad CAM.
2. Pulse el botón MENÚ.
■
Aparece la lista del menú.
3. Desplace el SELECTOR MENÚ hasta resaltar
CAMERA y pulse el SELECTOR MENÚ.
4. Seleccione la opción DSE SELECT (selección
de efectos especiales digitales) en el submenú.
5. Pulse el SELECTOR MENÚ para acceder al
submenú.
6. Seleccione la modalidad DSE mediante el
SELECTOR MENÚ.
■
Pulse el SELECTOR MENÚ para confirmar la
modalidad DSE.
7. Para salir, pulse el botón MENÚ.
Notas
■
Si la función NITE PIX está activada, la función
DSE no opera.
■
La función DSE no opera en la modalidad EASY.
4949
Page 50
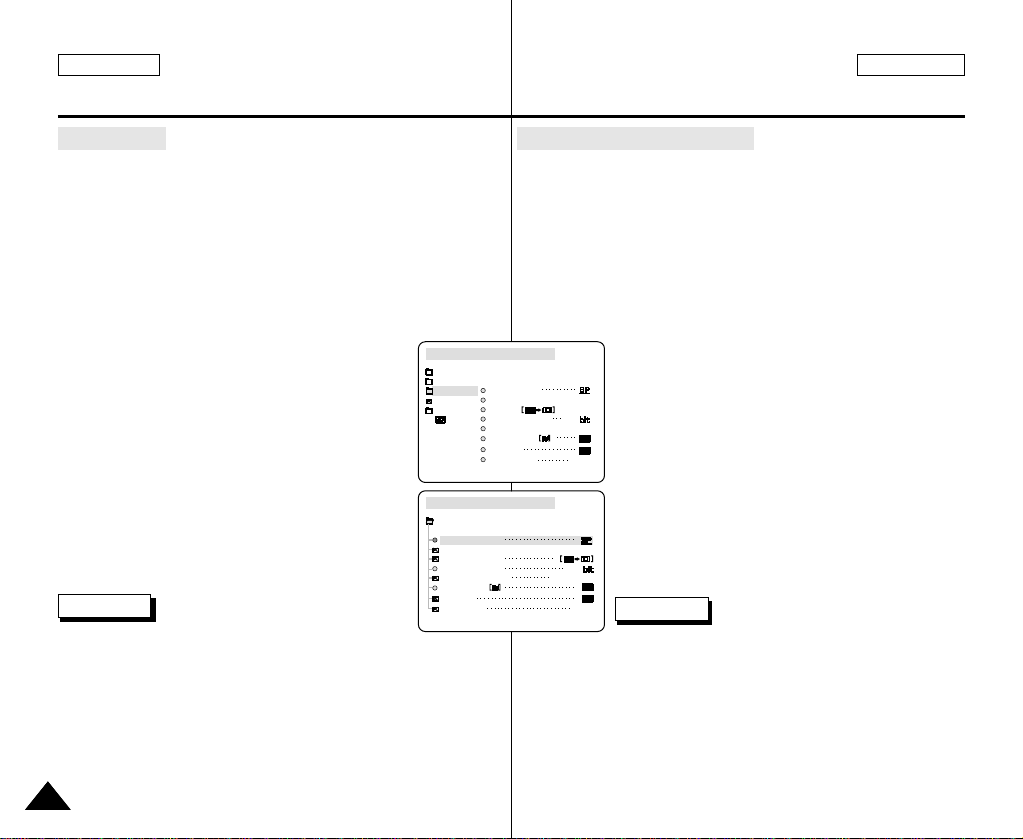
ENGLISH ESPAÑOL
CAM MODE
INITIAL
WIND CUT
PB DSE
AV IN/OUT
REC MODE
PHOTO SEARCH
COPY
AUDIO MODE 12
AUDIO SELECT
CAMERA
A/V
MEMORY
VIEWER
OUT
CAM MODE
REC MODE
PHOTO SEARCH
PHOTO COPY
AUDIO MODE 12
SOUND[1]
AUDIO SELECT
WIND CUT
A / V SET
PB DSE
OUT
AV IN/OUT
Advanced Recording
●
REC MODE
✤ The REC MODE function works in both CAM and PLAYER
(SCD34/D39 only) modes.
✤ This camcorder records and plays back in SP (standard play)
mode and in LP (long play) mode.
■
SP (standard play): This mode permits 60 minutes of
recording time with a DVM60 tape.
■
LP (long play): This mode permits 90 minutes of recording
time with a DVM60 tape.
■
See AV IN/OUT select on page 76.
Grabación avanzada
●
MODALIDAD DE GRABACIÓN
✤ La función de grabación (REC MODE) opera en las modalidades
CAM y PLAYER (sólo en los modelos SCD34/D39).
✤ Esta videocámara graba y reproduce en las modalidades SP
(duración estándar) y LP (larga duración).
■
SP (duración estándar): esta modalidad permite 60 minutos
de grabación con una cinta DVM60.
■
LP (larga duración): esta modalidad permite 90 minutos de
grabación con una cinta DVM60.
■
Ver seleccionar AV IN (ver pág. 76)
1. Set the camcorder to CAM or PLAYER mode.
2. Press the MENU button.
■
The menu list will appear.
3. Move the MENU SELECTOR to highlight A/V and
push the MENU SELECTOR.
4. Select REC MODE from the submenu and push
the MENU SELECTOR.
■
The REC MODE toggles between SP and LP
with each press.
5. To exit, press the MENU button.
Notes
■
We recommend that you use this camcorder to
play back any tapes recorded on this camcorder.
Playing back a tape recorded in other equipment may produce
mosaic shaped distortion.
■
When you record a tape in SP and LP modes, or LP mode only,
the playback picture may be distorted or the time code
may not be written properly between scenes.
■
Record using SP mode for best picture and sound quality.
5050
1. Ajuste la videocámara en la modalidad
CAM o PLAYER.
2. Pulse el botón MENÚ.
■
Aparece la lista del menú.
3. Desplace el SELECTOR MENÚ hasta resaltar
A/V (audio/vídeo) y pulse el SELECTOR MENÚ.
4. Seleccione REC MODE en el submenú y pulse
el SELECTOR MENÚ.
■
Al pulsar varias veces dicho botón, la opción
REC MODE cambiará alternativamente entre
SP y LP.
5. Para salir, pulse el botón MENÚ.
Notas
■
Recomendamos utilizar esta videocámara para reproducir las
cintas grabadas con ella.
Si se reproducen cintas grabadas con otra videocámara, se puede
producir una distorsión en forma de mosaico.
■
Si graba una cinta en las modalidades SP y LP o si sólo graba en
LP, puede que la imagen reproducida aparezca distorsionada o
que los códigos de tiempo no aparezcan escritos correctamente
entre las escenas.
■
Para obtener la mejor calidad de imagen y de sonido, grabe en la
modalidad SP.
Page 51
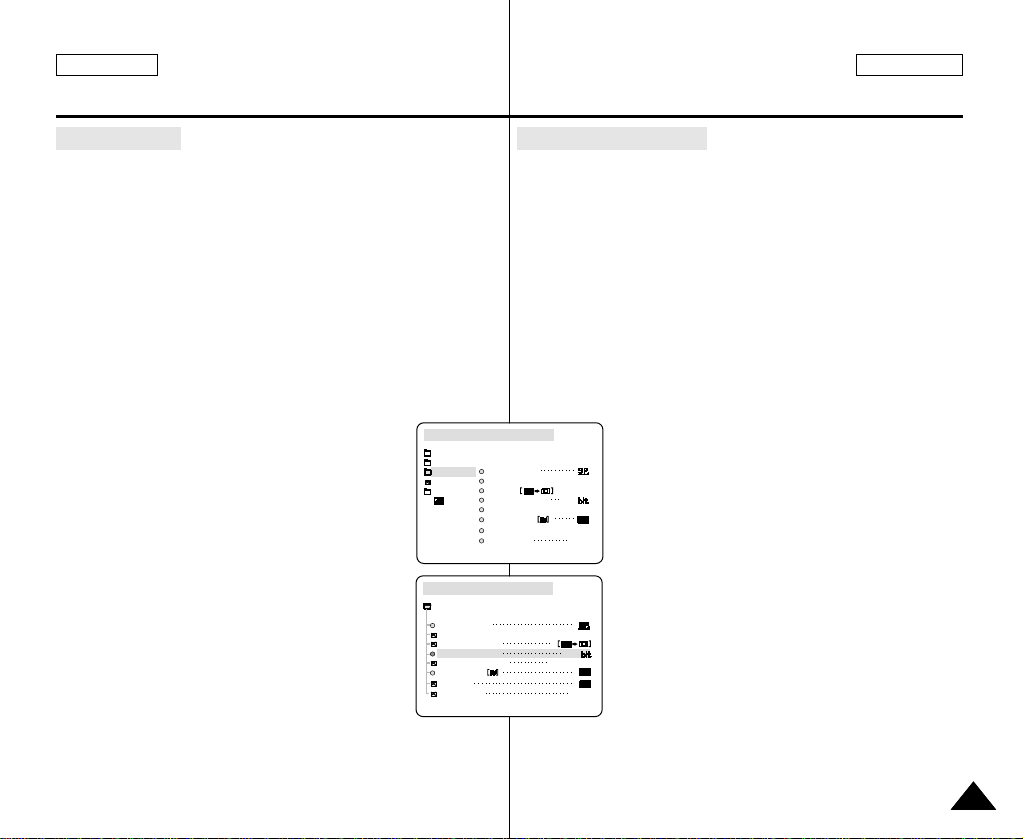
ENGLISH ESPAÑOL
CAM MODE
REC MODE
PHOTO SEARCH
PHOTO COPY
AUDIO MODE 12
SOUND[1]
AUDIO SELECT
WIND CUT
A / V SET
PB DSE
OUT
AV IN/OUT
CAM MODE
INITIAL
WIND CUT
PB DSE
REC MODE
PHOTO SEARCH
COPY
AUDIO MODE 12
AV IN/OUT
OUT
AUDIO SELECT
CAMERA
A/V
MEMORY
VIEWER
Advanced Recording
●
AUDIO MODE
✤ The AUDIO MODE function works in CAM and PLAYER
(SCD34/D39 only) modes.
✤ This camcorder records sound in two ways. (12bit, 16bit)
■
12bit : You can record two 12bit stereo sound tracks.
The original stereo sound can be recorded onto the
MAIN (SOUND1) track.
Additional stereo sound can be dubbed onto the SUB
■
(SOUND2) track.
16bit : You can record one high quality stereo sound using
the 16bit recording mode.
Audio dubbing is not possible when using this mode.
Grabación avanzada
●
MODALIDAD DE AUDIO
✤ La función de audio (AUDIO MODE) opera en las modalidades
CAM y PLAYER (sólo en los modelos SCD34/D39).
✤ Esta videocámara graba sonidos de dos modos distintos
(12 bits y 16 bits).
■
12 bits: es posible grabar dos pistas de sonido de 12 bits en
estéreo. El sonido original estéreo se puede grabar
en la pista principal (SOUND1). Se puede grabar
sonido estéreo adicional de mezcla en la pista
■
secundaria (SOUND2).
16 bits: es posible grabar una pista estéreo de alta calidad
de 16 bits.En esta modalidad no es posible hacer
mezclas.
1. Set the camcorder to CAM mode.
2. Press the MENU button.
■
The menu list will appear.
3. Move the MENU SELECTOR to highlight A/V and
push the MENU SELECTOR.
4. Select the AUDIO MODE from the menu and push
the MENU SELECTOR.
■
The AUDIO MODE toggles between 12bit16bit with each push.
5. To exit, press the MENU button.
1. Ajuste la videocámara en la modalidad CAM.
2. Pulse el botón MENÚ.
■
Aparece la lista del menú.
3. Desplace el SELECTOR MENÚ hasta resaltar
A/V (audio/vídeo) y pulse el SELECTOR MENÚ.
4. Seleccione AUDIO MODE en el submenú y
pulse el SELECTOR MENÚ.
■
Al pulsar varias veces dicho botón, la opción
AUDIO MODE cambiará alternativamente
entre 12 bits y 16 bits.
5. Para salir, pulse el botón MENÚ.
5151
Page 52
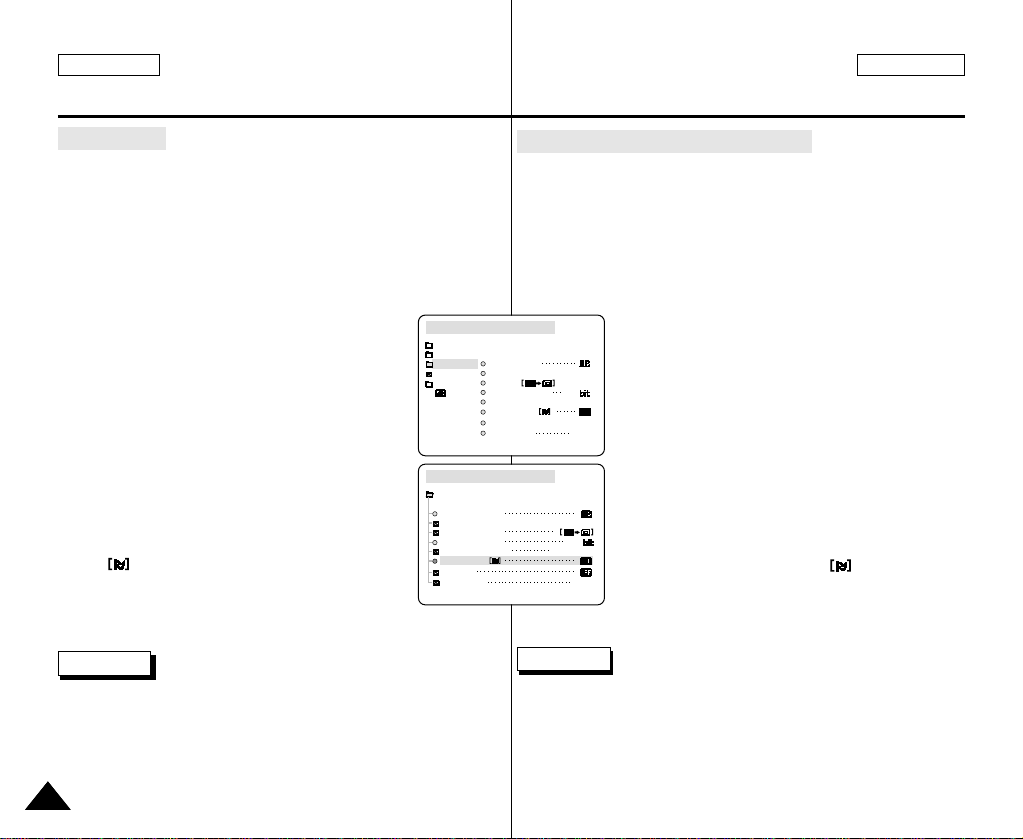
ENGLISH ESPAÑOL
CAM MODE
REC MODE
PHOTO SEARCH
PHOTO COPY
AUDIO MODE 12
SOUND[1]
AUDIO SELECT
WIND CUT
A / V SET
PB DSE
OUT
AV IN/OUT
CAM MODE
INITIAL
WIND CUT
PB DSE
REC MODE
PHOTO SEARCH
COPY
AUDIO MODE 12
AV IN/OUT
OUT
AUDIO SELECT
CAMERA
A/V
MEMORY
VIEWER
Advanced Recording
●
WIND CUT
✤ The WIND CUT function works in CAM and PLAYER
(SCD34/D39 only) modes.
✤ The WIND CUT function minimizes wind noise or other noise
while recording.
- When the wind cut is on, some low sounds are eliminated
along with the sound of the wind.
Grabación avanzada
●
ELIMINACIÓN DEL RUIDO DEL VIENTO
✤ La función de eliminación del ruido del viento (WIND CUT)
opera en las modalidades CAM y PLAYER (sólo en los
modelos SCD34/D39).
✤ Esta función minimiza el ruido del viento y otros ruidos durante
la grabación.
- Cuando esta función está activada, se eliminan algunos
sonidos graves junto con el del viento.
1. Set the camcorder to CAM mode.
2. Press the MENU button.
■
The menu list will appear.
3. Move the MENU SELECTOR to highlight A/V and
push the MENU SELECTOR.
4. Select WIND CUT from submenu.
5. This feature toggles ON/OFF each time you push
the MENU SELECTOR.
■
is shown in the display when you turn the
WIND CUT on.
6. To exit, press the MENU button.
Notes
■
Make sure WIND CUT is set to off when you want the microphone
to be as sensitive as possible.
■
Use the WIND CUT when recording in windy places such as the
beach or near buildings.
5252
1. Ajuste la videocámara en la modalidad CAM.
2. Pulse el botón MENÚ.
■
Aparece la lista del menú.
3. Desplace el SELECTOR MENÚ hasta resaltar
A/V (audio/vídeo) y pulse el SELECTOR MENÚ.
4. Seleccione WIND CUT en el submenú.
5. Al pulsar varias veces el SELECTOR MENÚ, la
opción cambiará alternativamente entre
ON y OFF.
■
En la pantalla aparece al activar la
función de eliminación de ruido del viento.
6. Para salir, pulse el botón MENÚ.
Notas
■
Asegúrese de que la función WIND CUT está desactivada cuando
desee que la sensibilidad del micrófono sea la mayor posible.
■
Use la función WIND CUT cuando grabe en lugares donde sople
el viento, como en la playa o cerca de edificios.
Page 53
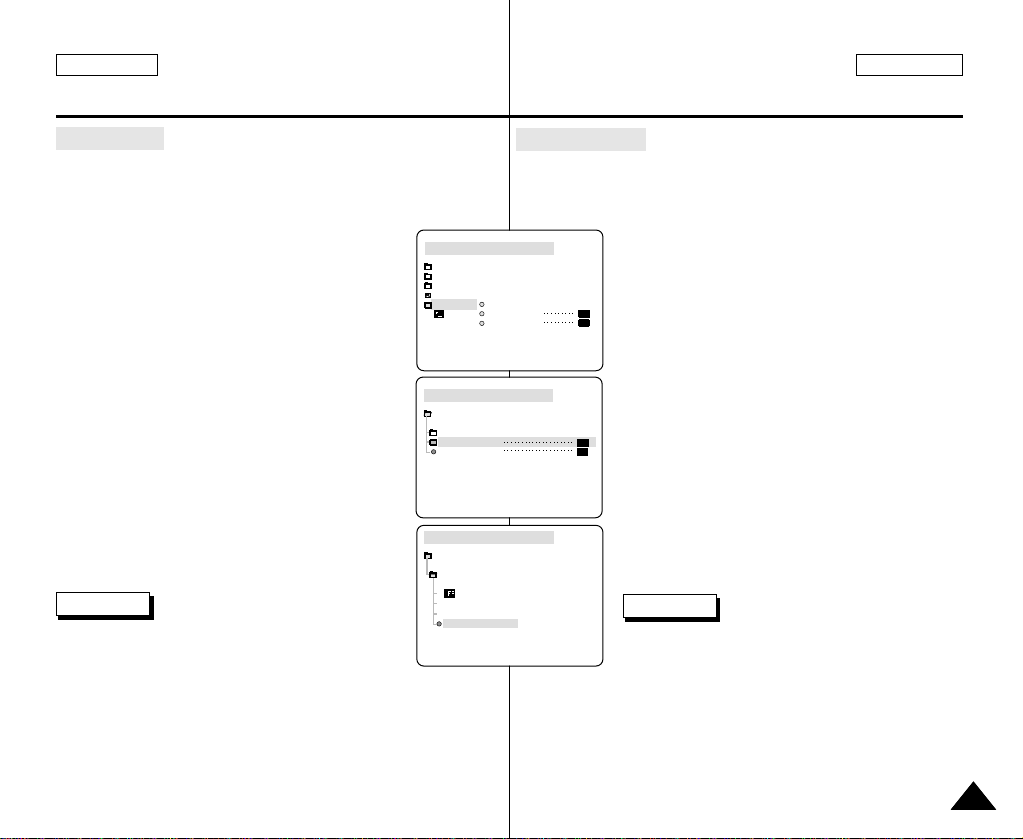
ENGLISH ESPAÑOL
CAM MODE
VIEWER SET
LCD ADJUST
DATE / TIME
TV DISPLAY
CAM MODE
INITIAL
LCD ADJUST
DATE / TIME
TV DISPLAY
CAMERA
A/V
MEMORY
VIEWER
CAM MODE
DATE / TIME
VIEWER SET
DATE
TIME
DATE&TIME
Advanced Recording
●
DATE/TIME
✤ The DATE/TIME function works in CAM, PLAYER, M.REC and
M.PLAYmodes.
✤ The date and time are automatically recorded on a special data
area of the tape.
1. Press the MENU button.
■
The menu list will appear.
2. Move the MENU SELECTOR to highlight VIEWER
and push the MENU SELECTOR.
3. Move the MENU SELECTOR to highlight
DATE/TIME.
4. Push the MENU SELECTOR to select the sub-menu.
5. Using the MENU SELECTOR, select the
DATE/TIME mode.
■
You can choose to display - the OFF, DATE,
TIME, DATE/TIME
- OFF
- DATE only
- TIME only
- DATE & TIME
■
To return to the previous menu, highlight the
DATE/TIME in the middle of the and
push the MENU SELECTOR.
6. To exit, press the MENU button.
Notes
■
The DATE/TIME is not affected by the OSD ON/OFF
(DISPLAY) button.
■
The DATE/TIME will read “- - -” in the following
conditions.
- During playback of a blank section of a tape.
- If the tape was recorded before setting the DATE/TIME in the
Camera’s memory.
- When the lithium battery becomes weak or dead.
■
Before you can use the DATE/TIME function, you must set the
Clock. See CLOCK SET on page 37.
Grabación avanzada
●
FECHA/HORA
✤ La función de fecha y hora (DATE/TIME) opera en las
modalidades CAM, PLAYER, M.REC y M.PLAY.
✤ La fecha y la hora se graban automáticamente en una zona
especial de la cinta.
1. Pulse el botón MENÚ.
■
Aparece la lista del menú.
2. Desplace el SELECTOR MENÚ hasta resaltar
VIEWER (visor) y pulse el SELECTOR MENÚ.
3. Desplace el SELECTOR MENÚ hasta resaltar
DATE/TIME.
4. Pulse el SELECTOR MENÚ para seleccionar el
submenú.
5. Seleccione la modalidad DATE/TIME mediante
el SELECTOR MENÚ.
■
Se puede elegir no mostrar nada (OFF) o
mostrar la fecha (DATE), la hora (TIME) o la
fecha y la hora (DATE/TIME).
- OFF
- sólo fecha (DATE)
- sólo hora (TIME)
- Fecha y hora (DATE & TIME)
■
Para regresar al menú anterior, resalte
DATE/TIME en el centro del menú y pulse
el SELECTOR MENÚ.
6. Para salir, pulse el botón MENÚ.
Notas
■
La función DATE/TIME no se ve afectada por
el menú ON/OFF de la OSD (presentación en
■
En los siguientes casos, la función DATE/TIME se verá así: “- - -”.
- Durante la reproducción de una parte de la cinta que no esté
grabada.
- Si la cinta fue grabada antes de introducir la fecha y la hora en
la memoria de la cámara.
- Cuando la batería de litio está se descargue o se agote.
■
Antes de usar la función DATE/TIME deberá ajustar el reloj.
Consulte la sección AJUSTE DELRELOJ en la página 37.
pantalla).
5353
Page 54
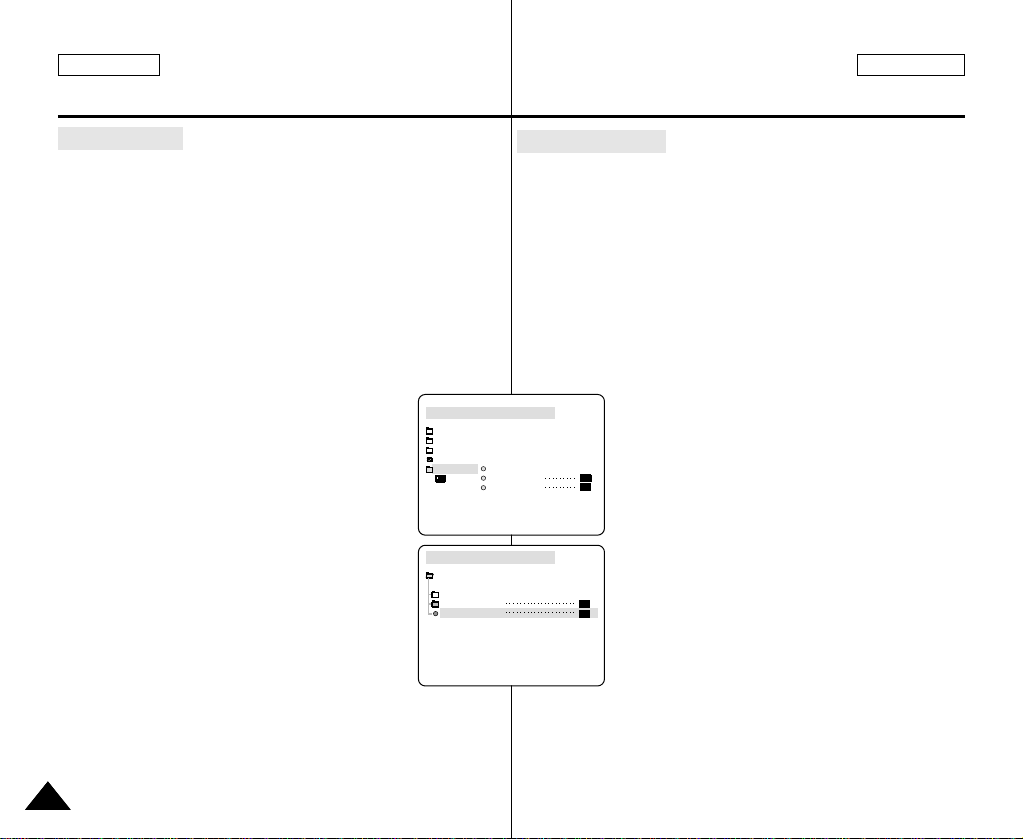
ENGLISH ESPAÑOL
CAM MODE
VIEWER SET
LCD ADJUST
DATE / TIME
TV DISPLAY
CAM MODE
INITIAL
LCD ADJUST
DATE / TIME
TV DISPLAY
CAMERA
A/V
MEMORY
VIEWER
Advanced Recording
●
TV DISPLAY
✤ The TV DISPLAY function works in CAM, PLAYER, M.REC
and M.PLAYmodes.
✤ You can select the output path of the OSD (On Screen
Display).
■
OFF: The OSD appears in the LCD screen only.
■
ON: The OSD appears in the LCD screen, View Finder and
TV .
■
Use the DISPLAYbutton located at the left side of the
camcorder to turn ON/OFF all of the OSD displayed on the
LCD/View Finder/TV.
Grabación avanzada
●
MONITOR DE TV
✤ La función de monitor de TV (TV DISPLAY) opera en las
modalidades CAM, PLAYER, M.REC y M.PLAY.
✤ Puede seleccionar la vía de salida de la OSD (presentación
en pantalla).
■
OFF: la OSD sólo aparece en la pantalla LCD.
■
ON: la OSD aparece en la pantalla LCD, en el
VIEWFINDER y en el monitor de TV.
■
Use el botón DISPLAY, que está en la parte izquierda de la
videocámara, para activar o desactivar la OSD que
aparece en la pantalla LCD, el VIEWFINDER o el monitor
de TV.
1. Set the camcorder to CAM, PLAYER, M.REC and
M.PLAYmode.
2. Press the MENU button.
■
The menu list will appear.
3. Move the MENU SELECTOR to highlight VIEWER
and push the MENU SELECTOR.
4. Select the TV DISPLAY mode in list, push the
MENU SELECTOR.
■
The DISPLAYmode switches between
ON/OFF with each push.
5. To exit, press the MENU button.
5454
1. Ajuste la videocámara en una de las siguientes
modalidades: CAM, PLAYER, M.REC o M.PLAY.
2. Pulse el botón MENÚ.
■
Aparece la lista del menú.
3. Desplace el SELECTOR MENÚ hasta resaltar
VIEWER (visor) y pulse el SELECTOR MENÚ.
4. Seleccione la modalidad TV DISPLAYen la lista
y pulse el SELECTOR MENÚ.
■
Al pulsar varias veces dicho botón, la
modalidad DISPLAYcambiará entre ON
y OFF.
5. Para salir, pulse el botón MENÚ.
Page 55
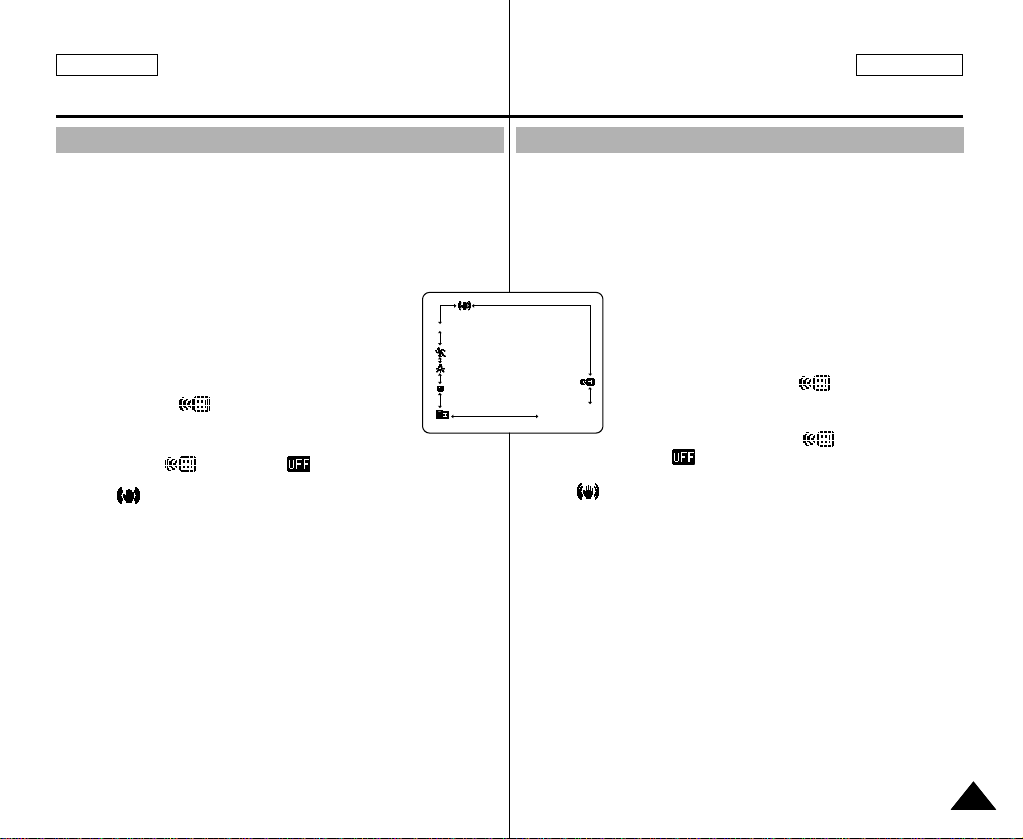
ENGLISH ESPAÑOL
MIRROR
1 2 : 0 0 A M
J A N . 1 0 , 2 0 0 3
Advanced Recording
Grabación avanzada
Using Quick Menu(Navigation Menu)
✤ Quick menu is available only in CAM and M.REC mode.
✤ Quick menu is used to adjust camera functions by simply using the
MENU SELECTOR button.
This feature is useful for when you want to make simple
adjustments without having to access the menus and submenus.
■
DATE/TIME
- Each time you select DATE/TIME and push the
MENU SELECTOR, it will be displayed in the
order of DATE - TIME - DATE/TIME - OFF.
(see page 53)
■
WL.REMOTE ( )
- Each time you select WL.REMOTE and push the
MENU SELECTOR, the WL.REMOTE is switched to either
enabled ( ) or disabled ( ) .
■
DIS ( )
- Each time you select DIS and push the MENU SELECTOR,
the DIS icon is displayed or set to OFF.
■
DSE (Digital Special Effect) (see page 48)
- Each time you select DSE and push the MENU SELECTOR,
the DSE preset values are applied or set to OFF.
DSE values will not switch between On and Off if they have not
been preset in the menu.
■
PROGRAM AE (see page 42)
- Each time you select PROGRAM AE and push the MENU
SELECTOR, you can choose between the preset PROGRAM
AE values and AUTO. You can’t choose between Auto and the
PROGRAM AE values if the values have not been preset in the
regular menu.
Uso del menú rápido (menú de navegación)
✤ El menú rápido sólo está disponible en la modalidad CAM.
✤ Esta función se utiliza para ajustar las funciones de la
videocámara utilizando el botón MENU SELECTOR. Esta función
resulta muy útil cuando hay que hacer ajustes sencillos, ya que no
se tiene que acceder a los menús o submenús.
■
FECHA y HORA
- Cada vez que seleccione DATE/TIME y pulse
el SELECTOR MENÚ, aparecerá la secuencia
DATE - TIME - DATE/TIME - OFF
(ver página 53).
■
MANDO a DISTANCIA( )
- Cada vez que seleccione WL. REMOTE y
pulse el SELECTOR MENÚ, la función
cambiará a activado ( ) o desactivado
().
■
DIS ( )
- Cada vez que seleccione DIS y pulse el SELECTOR MENÚ,
aparecerá el icono DIS o se desactivará la función.
■
DSE (Efectos especiales digitales, ver página 48)
- Cada vez que seleccione DSE y pulse el SELECTOR MENÚ,
se aplicarán los valores de DSE preestablecidos o se
desactivarán.Los valores de DSE no cambian alternativamente
de activado a desactivado si no se han establecido
previamente en el menú.
■
PROGRAMA AE (ver página 42)
- Cada vez que seleccione PROGRAM AE y pulse el
SELECTOR MENÚ, puede elegir entre los valores de
PROGRAM AE preestablecidos y AUTO. No puede seleccionar
entre Auto y los valores de PROGRAM AE si dichos valores
no se han establecido previamente en el menú.
5555
Page 56
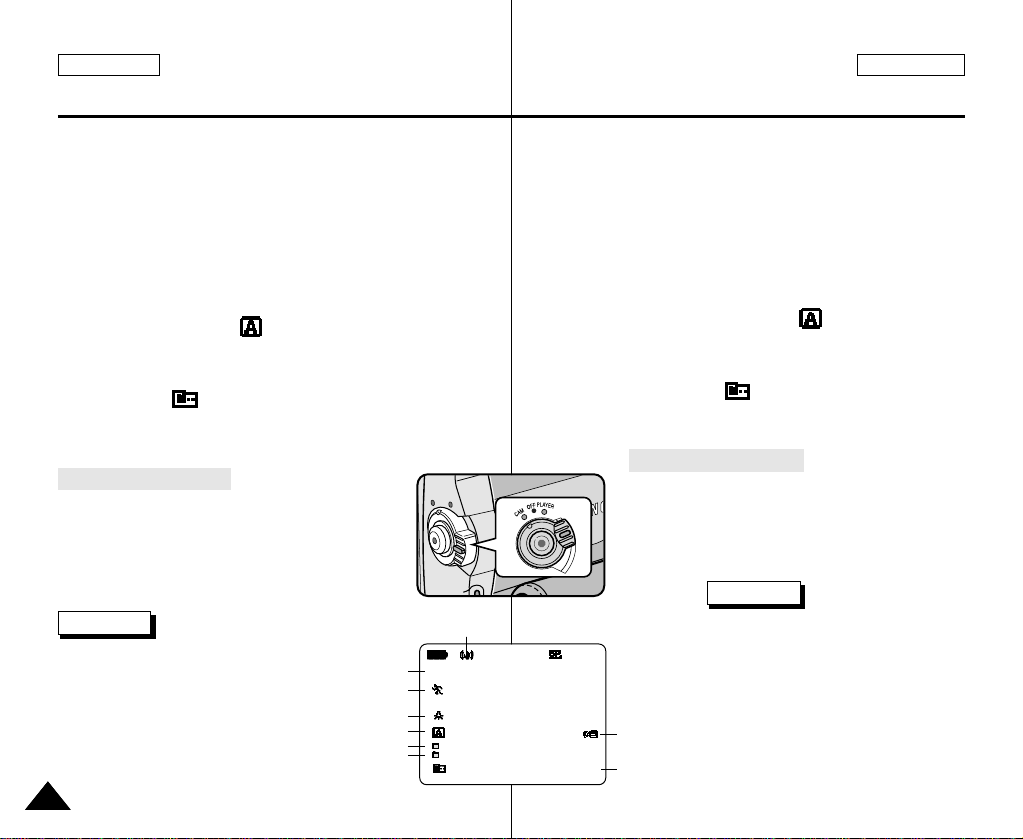
ENGLISH ESPAÑOL
SHUTTER
EXPOSURE
0 : 0 0 : 0 0
1 2 : 0 0 A M
J A N . 1 0 , 2 0 0 3
STBY
MIRROR
Advanced Recording
■ WHT. BALANCE (see page 44)
- Each time you select WHT. BALANCE and push the MENU
SELECTOR, you can choose between preset WHT.BALANCE
values and AUTO. As in PROGRAM AE, you can't choose
between Auto and WHT.BALANCE values it they have not
been preset.
■ FOCUS (Manual Focus/Auto Focus) (see page 60)
- Each time you select FOCUS and push the MENU
SELECTOR, the FOCUS is switched to either Manual Focus
(MF) or Auto Focus ( ).
■ SHUTTER SPEED & EXPOSURE
- You can set values for SHUTTER SPEED and EXPOSURE by
selecting ( ) icon and pushing the MENU SELECTOR.
For more information, see the next chapter.
Grabación avanzada
■ EQUILIBRIO DEL BLANCO (ver página 44)
- Cada vez que seleccione WHT. BALANCE y pulse el
SELECTOR MENÚ, puede elegir entre los valores
preestablecidos de WHT.BALANCE y AUTO. Como ocurre con
PROGRAM AE, no puede elegir entre Auto y los valores de
WHT.BALANCE si no se han establecido previamente.
■ ENFOQUE (enfoque manual/enfoque automático, ver página 60)
- Cada vez que selecciona FOCUS y pulsa el SELECTOR
MENÚ, el enfoque cambia alternativamente entre enfoque
manual (MF) o enfoque automático ( ).
■ VELOCIDAD DEL OBTURADOR Y EXPOSICIÓN
- Puede ajustar los valores de SHUTTER SPEED y EXPOSURE
seleccionando el icono ( ) y pulsando el SELECTOR
MENÚ. En el capítulo siguiente encontrará más información
sobre esta función.
Setting the Quick menu
1. Set the camcorder to CAM mode.
2. Move the MENU SELECTOR to select a function
you want and then push the MENU SELECTOR to
change the values.
Notes
■
Quick menu function will not
operate in EASY mode.
■
If you are using the M.FOCUS(MF)
function, you cannot use the
Quick menu.
If you want to use the Quick menu
function, release the M.FOCUS(MF) mode.
5656
DSE
PROGRAM AE
WHT. BALANCE
FOCUS
SHUTTTER
EXPOSURE
DIS
Ajustes del menú rápido
1. Ajuste la videocámara en la modalidad CAM.
2. Desplace el SELECTOR MENÚ para
seleccionar la función que desee y pulse el
SELECTOR MENÚ para modificar los valores.
Notas
■
La función de menú rápido no
opera en la modalidad EASY.
■
Si está usando la función
M. FOCUS (MF), no se puede
utilizar el menú rápido.
Si desea usar la función de menú
WL.REMOTE
DATE/TIME
rápido, tendrá que salir de la
modalidad M. FOCUS (MF).
Page 57
ENGLISH ESPAÑOL
Advanced Recording
Grabación avanzada
SHUTTER SPEED & EXPOSURE
✤ You can set SHUTTER SPEED and EXPOSURE only in CAM mode.
✤ SHUTTER SPEED and EXPOSURE values can only be set in the
Quick Menu.
✤ SHUTTER SPEED and EXPOSURE are automatically switched
and/or deactivated.
1. Set the power switch to CAM mode.
2. Move the MENU SELECTOR until you see icon ( ) on, and then
push the MENU SELECTOR.
■
You see a screen on which you can select SHUTTER SPEED and
EXPOSURE.
■
Move the MENU SELECTOR to select the item you want and then
push the MENU SELECTOR.
■
SHUTTER SPEED can be set to 1/60, 1/100, 1/250, 1/500, 1/1000,
1/2000, 1/4000 or 1/10000.
■
EXPOSURE can be set between 00 and 29.
3. To exit from the setting screen, select the icon ( ) and push the
MENU SELECTOR.
Recommended Shutter speeds when recording
✤ Outdoor sports such as golf or tennis : 1/2000 or 1/4000.
✤ Moving cars or trains or other rapidly moving vehicles such as
roller coasters : 1/1000, 1/500 or 1/250
✤ Indoor sports such as basketball : 1/100
Notes
■
If you want to use the selected shutter speed and exposure value, you
should begin the recording with the shutter speed and the exposure
adjustment screens displayed on the LCD.
■
If you manually change the shutter speed and the exposure value when
Auto-exposure option is selected, manual changes are applied first.
■
The image may not seem as smooth when a high shutter speed is set.
■
The camcorder returns to the auto shutter setting and auto exposure
setting when you set the NITE PIX to ON, or change to the EASY,
SLOW SHUTTER modes.
■
When recording with a SHUTTER SPEED of 1/1000 or higher, make
sure the sun is not shining into the lens.
VELOCIDAD DEL OBTURADOR Y EXPOSICIÓN
✤ Las funciones de velocidad del obturador (SHUTTER SPEED) y de
exposición (EXPOSURE) sólo se pueden activar en la modalidad CAM.
✤ Los valores de estas funciones sólo se pueden ajustar en el menú rápido.
✤ Las funciones SHUTTER SPEED y EXPOSURE se activan y/o
desactivan automáticamente.
1. Ajuste el interruptor de la videocámara en la modalidad CAM.
2. Ajuste el botón SELECTOR MENÚ hasta que se active el icono
( ) y pulse SELECTOR MENÚ.
■
Aparecerá una pantalla en la que se pueden seleccionar la
velocidad del obturador y la exposición.
■
Gire el botón SELECTOR MENÚ para seleccionar la opción que
desee y pulse SELECTOR MENÚ.
■
Se pueden seleccionar las siguientes velocidades para el obturador:
1/60, 1/100, 1/250, 1/500, 1/1000, 1/2000, 1/4000 o 1/10000.
■
Se pueden seleccionar exposiciones del 00 al 29.
3. Para salir de la pantalla de ajustes, seleccione el icono ( ) y
pulse el botón SELECTOR MENÚ.
Velocidades de obturador recomendadas durante la grabación
✤ Deportes en exteriores, como golf o tenis: 1/2000 o 1/4000.
✤ Automóviles, trenes u otros vehículos en movimiento rápido como,
por ejemplo, una montaña rusa: 1/1000, 1/500 o 1/250
✤ Deportes de interior, como baloncesto: 1/100
Notas
■
Si desea utilizar la velocidad del obturador y la exposición
seleccionadas, deberá empezar la grabación con las pantallas de
ajuste de velocidad del obturador y de exposición en la pantalla LCD.
■
Si modifica manualmente los valores de la velocidad del obturador y la
exposición cuando está seleccionada la modalidad de exposición
automática, se activarán primero los cambios manuales.
■
Es posible que la imagen no resulte homogénea si se selecciona una
elevada velocidad de obturación.
■
La videocámara vuelve a los ajustes de obturador y exposición
automáticos al activar la función de grabación nocturna o al cambiar a
las modalidades EASY o SLOW SHUTTER.
■
Al grabar con una velocidad de obturador de 1/1000 o superior,
asegúrese de que el sol no incide directamente sobre el objetivo.
5757
Page 58
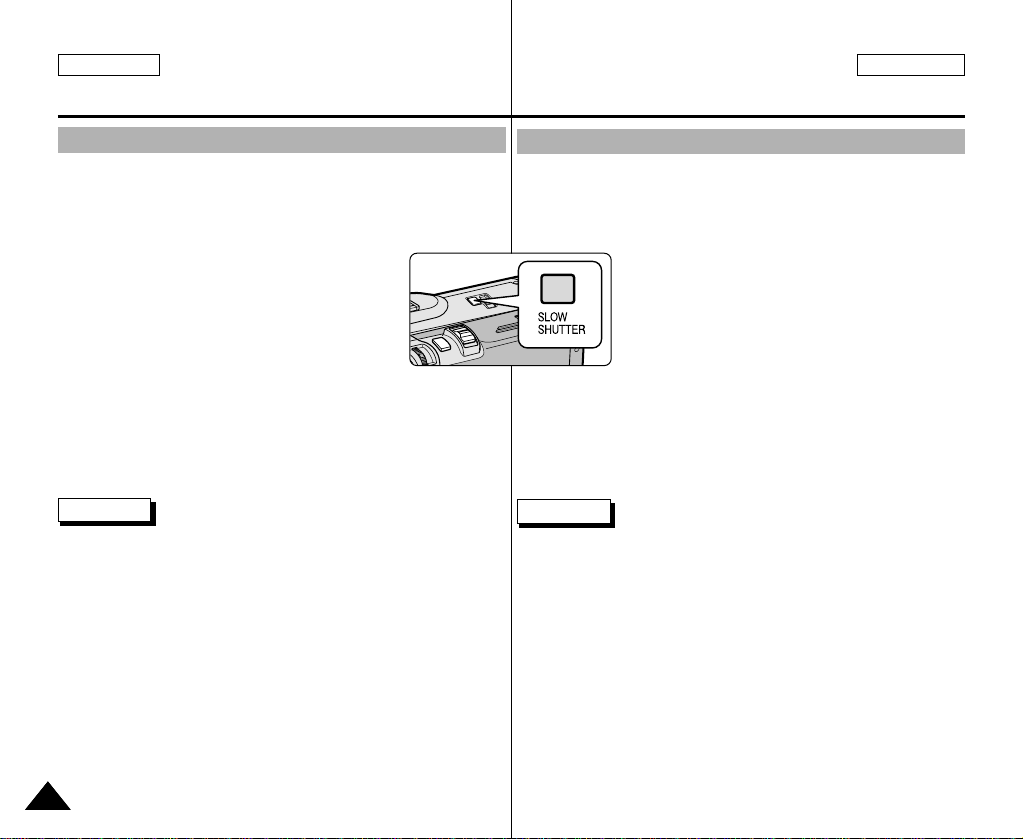
ENGLISH ESPAÑOL
Advanced Recording
Grabación avanzada
SLOW SHUTTER (Low Shutter Speed)
✤ The SLOW SHUTTER function works in CAM mode only.
✤ The shutter speed can be controlled, allowing you to record slow
moving objects.
1. Set the power switch to CAM mode.
2. Press the SLOW SHUTTER button.
3. Each time you press the SLOW SHUTTER button,
SHUTTER SPEED is changed to 1/30, 1/15, 1/8,
off.
4. To exit, press the SLOW SHUTTER button.
Notes
■
When using "SLOW SHUTTER" the image takes on a slow motion
like effect.
■
The SLOW SHUTTER function will not operate in EASY mode.
VELOCIDAD DE OBTURACIÓN BAJA
✤ La función de velocidad del obturador baja (SLOW SHUTTER)
sólo opera en las modalidades CAM.
✤ Puede controlar la velocidad del obturador para grabar objetos que
se mueven lentamente.
1. Ajuste el interruptor en la modalidad CAM.
2. Pulse el botón SLOW SHUTTER.
3. Cada vez que pulse el botón SLOW SHUTTER,
la velocidad cambiará a 1/30, 1/15, 1/8 o se
detendrá.
4. Para salir, pulse el botón SLOW SHUTTER.
Notas
■
Cuando utiliza la función SLOW SHUTTER, la imagen tiene el
aspecto de una imagen a cámara lenta.
■
La función SLOW SHUTTER no opera en la modalidad EASY.
5858
Page 59
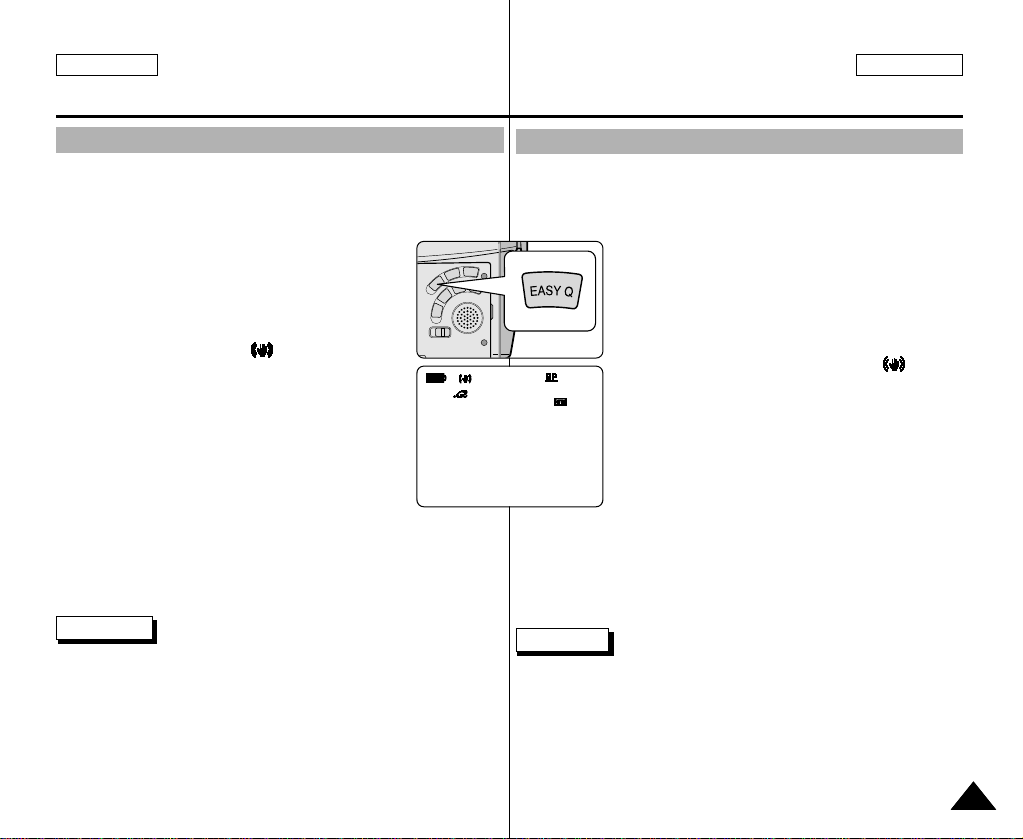
ENGLISH ESPAÑOL
0 : 0 0 : 0 0
1 2 : 0 0 A M
J A N . 1 0 , 2 0 0 3
STBY
EASY
5 5 min
Advanced Recording
Grabación avanzada
EASY Mode (for Beginners)
✤ The EASY mode allows a beginner to easily make good
recordings.
■
The EASY mode only operates in CAM mode.
1. Set the power switch to CAM mode.
2. By pressing the EASY button, all functions on the
camera will be set to off and the recording settings
will be set to the following basic modes:
■
Battery level, recording mode, counter,
DATE/TIME, and DIS ( ) will be displayed.
■
The word “EASY.Q” will appear on the LCD at
the same time.
However, the DATE/TIME will only be seen if it
has been previously set. (see page 53)
3. Press START/STOPto start recording.
■
Recording will begin using the basic automatic
settings.
4. Pressing the EASY button again in the STBY mode
and then turns the EASY mode off.
■
The EASY function will not turn off when you have recording.
■
The camera will return to the settings that were set prior to
activating EASY mode.
Notes
■
In EASY mode, certain functions are not available, such as MENU,
BLC, MF/AF.
- If you want to use these functions, you must first switch the
■
The EASY mode settings are deleted when the battery pack is
uninstalled from the camcorder and therefore, they must be reset
when a battery pack has been replaced.
EASY mode off.
Modalidad SENCILLA (para principiantes)
✤ La modalidad sencilla (EASY) permite a los principiantes obtener
buenas grabaciones con facilidad.
■
La función EASY sólo opera en las modalidades CAM.
1. Ajuste el interruptor en la modalidad CAM.
2. Pulse el botón EASY para que se desactiven
todas las funciones de la videocámara. Los
ajustes de grabación se acomodarán a las
siguientes modalidades básicas:
■
Aparecerán en la pantalla las funciones nivel
de la batería, modalidad de grabación,
contador, FECHA/HORAy DIS ( ).
■
Al mismo tiempo, aparecerá en la pantalla
LCD la palabra “EASY.Q”.
No obstante, la función FECHA/HORA sólo
se verá si se ha ajustado previamente
(ver página 53).
3. Pulse START/STOP para comenzar la
grabación.
■
La grabación empieza con los ajustes
4. Si vuelve a pulsar el botón EASY en la modalidad STBY, se
desactivará la modalidad EASY.
■
La función EASY no se desactivará cuando haya grabado.
■
La videocámara volverá a los ajustes hechos antes de activar
la modalidad EASY.
Notas
■
En la modalidad EASY, no se puede acceder a algunas funciones
como MENU, BLC y MF/AF.
- Si desea usar estas funciones, primero deberá desactivar la
modalidad EASY.
■
Los ajustes de la modalidad EASY se borran cuando se quita la
batería de la videocámara y, por lo tanto, deberán ajustarse de
nuevo al reemplazarla.
automáticos básicos.
5959
Page 60
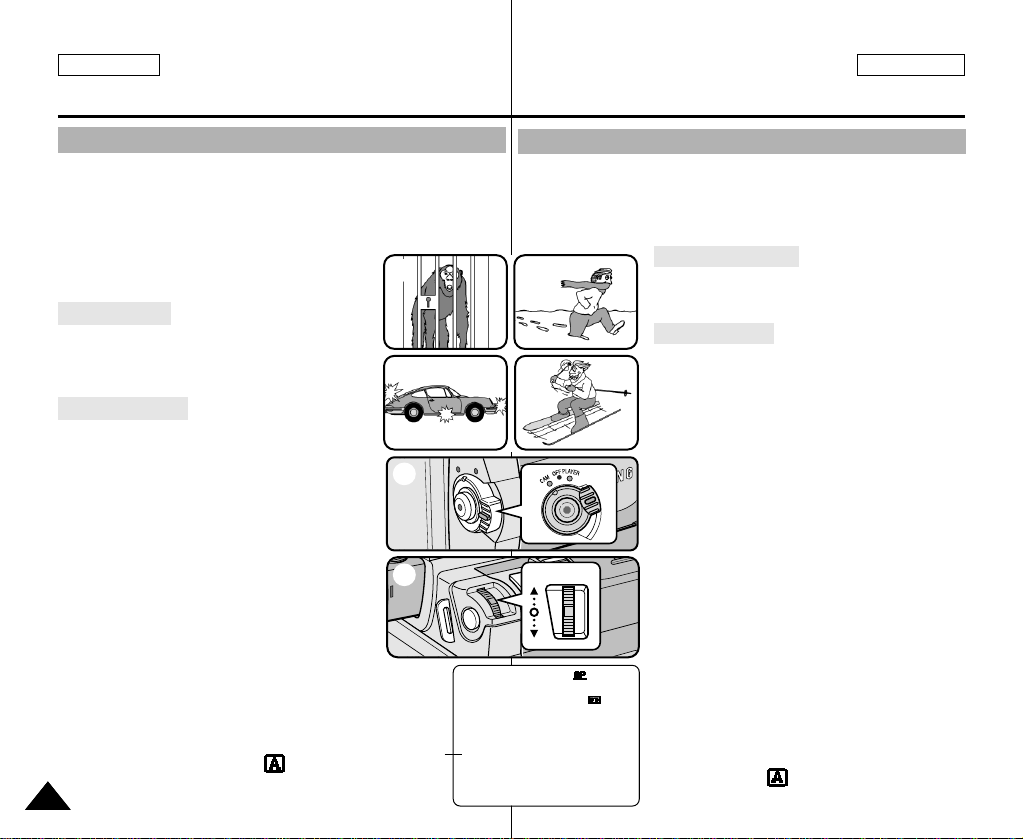
ENGLISH ESPAÑOL
VOL/MF
MF
0 : 0 0 : 0 0
5 3 min
1 2 : 0 0 A M
J A N . 1 0 , 2 0 0 3
STBY
Advanced Recording
Grabación avanzada
MF/AF (Manual Focus/Auto Focus)
✤ The MF/AF function works in CAM, M.REC mode only.
✤ In most situations, it is better to use the automatic focus
feature, as it enables you to concentrate on the creative side of
your recording.
✤ Manual focusing may be necessary under
certain conditions that make automatic
focusing difficult and/or unreliable.
Auto Focusing
✤ If you are inexperienced in the use of
camcorders, we recommend that you
make use of Auto Focus.
Manual Focusing
✤ In the following cases you may obtain
better results by adjusting the focus
manually.
a. A picture containing several objects, some
close to the camcorder, others further away.
b. A person enveloped in fog or surrounded by
snow.
c. Very shiny or glossy surfaces like a car.
d. People or objects moving constantly or quickly
like an athlete or a crowd.
1. Set the power switch to CAM mode.
2. Move the MENU SELECTOR up or down until
the FOCUS is highlighted and then push the
MENU SELECTOR.
■
M. FOCUS(MF) will display.
3. Move the MENU SELECTOR up or down
until the object is in focus.
■
4. To return to AF (Auto Focus: ),
push the MENU SELECTOR again.
6060
Zoom out a little if focusing is difficult.
a
c
1
2
M. FOCUS
Enfoque manual / enfoque automático (MF/AF)
✤ La función MF/AF sólo opera en las modalidades CAM y M.REC.
✤ En la mayoría de casos es mejor usar el enfoque automático, ya
que permite concentrarse en el aspecto creativo de la grabación.
✤ El enfoque manual puede ser necesario bajo ciertas condiciones
que hacen que el enfoque automático resulte difícil o poco fiable.
b
d
3
Enfoque automático
✤ Si no posee experiencia en el uso de
videocámaras, le recomendamos que
use el enfoque automático.
Enfoque manual
✤ En los siguientes casos se pueden
obtener mejores resultados ajustando
el enfoque manualmente:
a. Cuando una imagen contiene varios
objetos, algunos situados cerca de la
videocámara y otros lejos de ella.
b. Cuando hay una persona envuelta en la
niebla o rodeada por la nieve.
c. Cuando se graban superficies muy
brillantes, como un coche.
d. Cuando hay gente u objetos que se
mueven constantemente o con rapidez,
como una multitud o un atleta.
1. Ajuste el interruptor en la modalidad
CAMERA.
2. Suba o baje el botón SELECTOR MENÚ
hasta seleccionar FOCUS y, a
continuación, pulse SELECTOR MENÚ.
■
Aparecerá el mensaje M. FOCUS(MF).
3. Desplace el SELECTOR MENÚ hacia
arriba o hacia abajo hasta que el objeto
esté enfocado.
■
Si el enfoque resulta difícil, aleje un
poco la imagen por medio del zoom.
4. Para regresar a la función AF (enfoque
automático: ), pulse de nuevo el
SELECTOR MENÚ.
Page 61
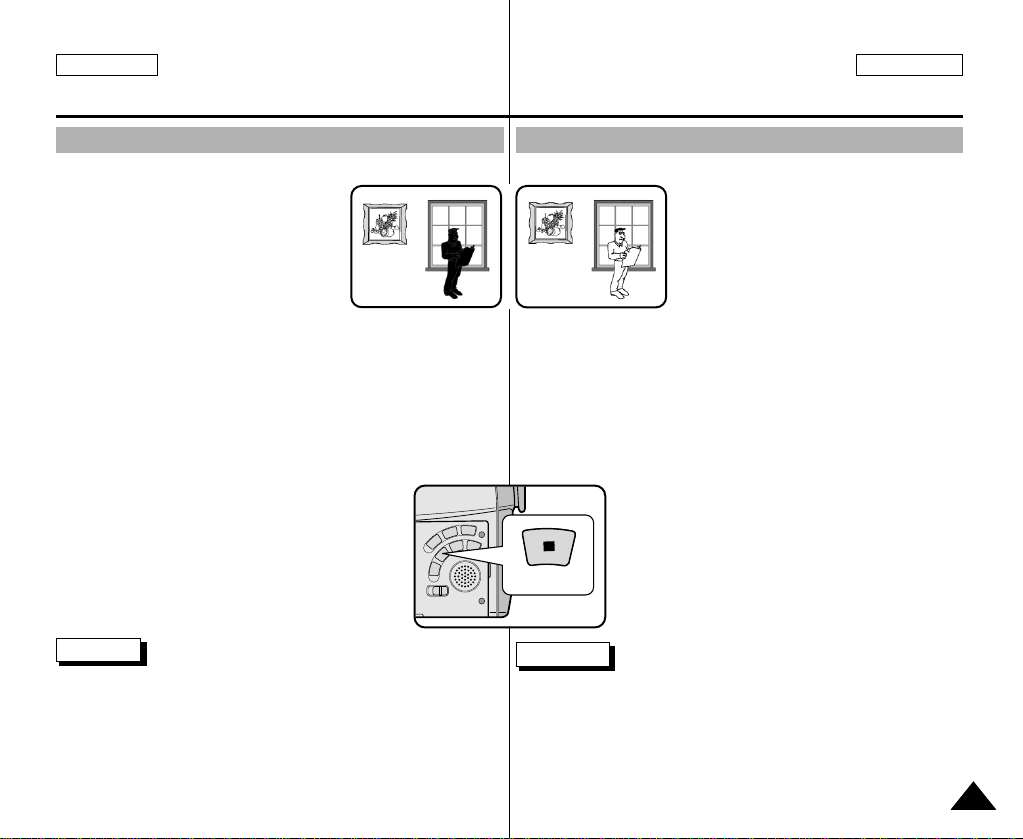
ENGLISH ESPAÑOL
BLC
Grabación avanzadaAdvanced Recording
BLC (Back Light Compensation)
✤ BLC works in CAM/M.REC mode.
✤ Back lighting exists when the subject is
darker than the background:
■
The subject is in front of a window.
■
The person to be recorded is
wearing white or shiny clothes and
is placed against a bright
background; the person’s face is too
dark to distinguish his/her features.
■
The subject is outdoors and the background is overcast.
■
The light sources are too bright.
■
The subject is against a snowy background.
1. Set the power switch to CAM mode.
2. Press the BLC button.
■
Normal - BLC - Normal
■
BLC enhances the subject.
Notes
■
While setting the NITE PIX to ON, the BLC function does not work.
■
The BLC function will not operate in EASY mode.
Compensación de la luz de fondo (BLC)
* BLC on* BLC off
Notas
■
Si la función de grabación nocturna (NITE PIX) está activada, la
función BLC no opera.
■
La función BLC no opera en la modalidad EASY.
✤ La función BLC sólo opera en las
modalidades CAM y M.REC.
✤ Existe luz de fondo cuando el objeto
que se va a grabar es más oscuro que
el fondo:
■
Cuando el objeto está delante de
una ventana.
■
Cuando se va a grabar a una
persona que lleva ropa blanca o
brillante y se encuentra contra un
fondo muy iluminado. En este caso
su cara estará demasiado oscura
para que se distingan sus facciones.
■
Cuando el objeto se encuentra en
el exterior y el fondo está nublado.
■
Cuando la fuente de luz es muy
intensa.
■
Cuando el objeto se encuentra
delante de un fondo nevado.
1. Ajuste el interruptor en la modalidad CAM.
2. Pulse el botón BLC.
■
Normal - BLC - Normal
■
La compensación de la luz de fondo realza
el objeto.
6161
Page 62
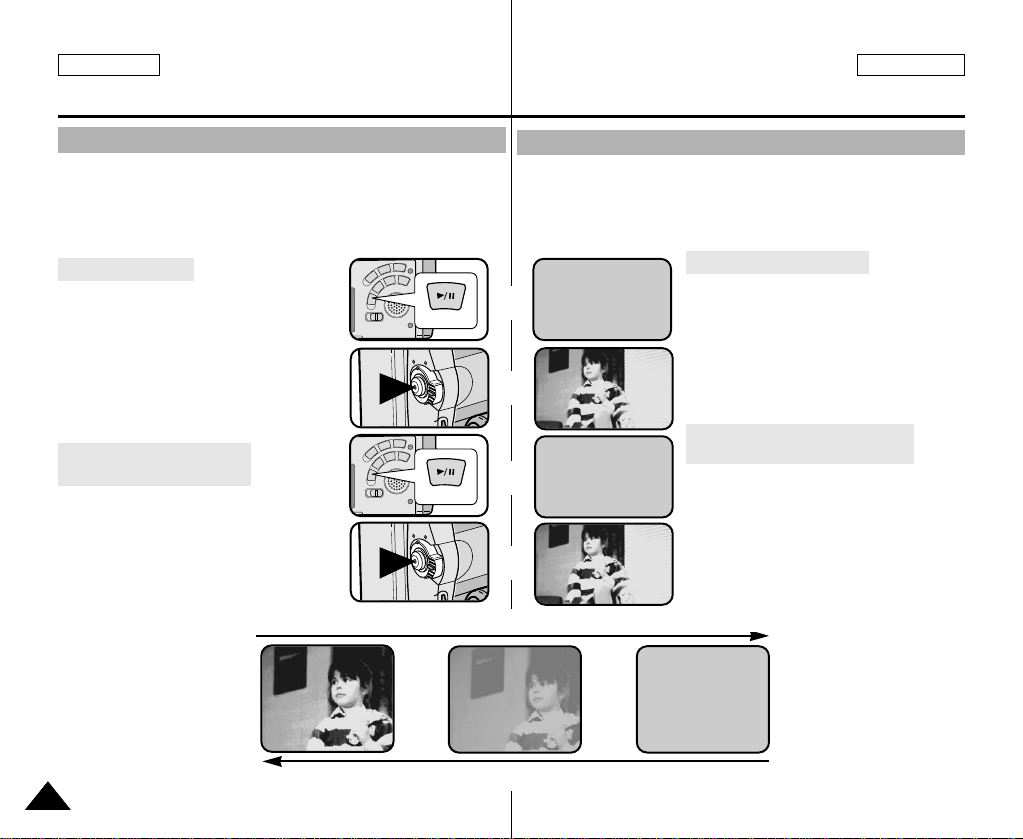
ENGLISH ESPAÑOL
FADE
FADE
Grabación avanzadaAdvanced Recording
Fade In and Out
✤ The FADE function works in CAM mode only.
✤ You can give your recordings a professional look by using special
effects such as fading in at the beginning of a sequence or fading
out at the end of a sequence.
To Start Recording
1. Before recording, hold down the FADE
button. The picture and sound gradually
disappear (fade out).
2. Press the START/STOPbutton and at
the same time release the FADE button.
Recording starts and the picture and
sound gradually appear (fade in).
To Stop Recording
(use FADE IN / FADE OUT)
3. When you wish to stop recording, hold
down the FADE button. The picture and
sound gradually disappear (fade out).
4. When the picture has disappeared,
press the START/STOP button to stop
recording.
a. FADE OUT (Approx. 4
seconds)
b. FADE IN (Approx. 4
seconds)
6262
Press the FADE button a. FADE OUT Gradual disappearance
Gradual appearance b. FADE IN Release the FADE button
Aparición y desaparición gradual de la imagen (fundido)
✤ La función de fundido (FADE) sólo opera en las modalidades CAM.
✤ Puede dar a sus grabaciones un aspecto profesional empleando
efectos especiales como la aparición gradual de la imagen (fade
in) al principio de una secuencia o su desaparición gradual (fade
out) al final de la secuencia.
Comienzo de la grabación
STBY
➔
➔
➔
➔
➔
➔
➔
➔
0:00:00
0:00:15
0:00:15
0:00:20
1. Antes de grabar, mantenga pulsado
el botón FADE.
La imagen y el sonido desaparecen
gradualmente (fade out).
2. Pulse el botón START/STOPy al
REC
REC
STBY
mismo tiempo suelte el botón FADE.
La grabación empieza y la imagen y el
sonido aparecen gradualmente (fade in).
Detención de la grabación
(utilizando FADE IN / FADE OUT)
3. Cuando quiera detener la grabación,
mantenga pulsado el botón FADE.
La imagen y el sonido desaparecen
gradualmente (fade out).
4. Cuando la imagen haya desaparecido,
pulse el botón START/STOP para
detener la grabación.
a. FADE OUT
(aprox. 4 segundos)
b. FADE IN
(aprox. 4 segundos)
Page 63
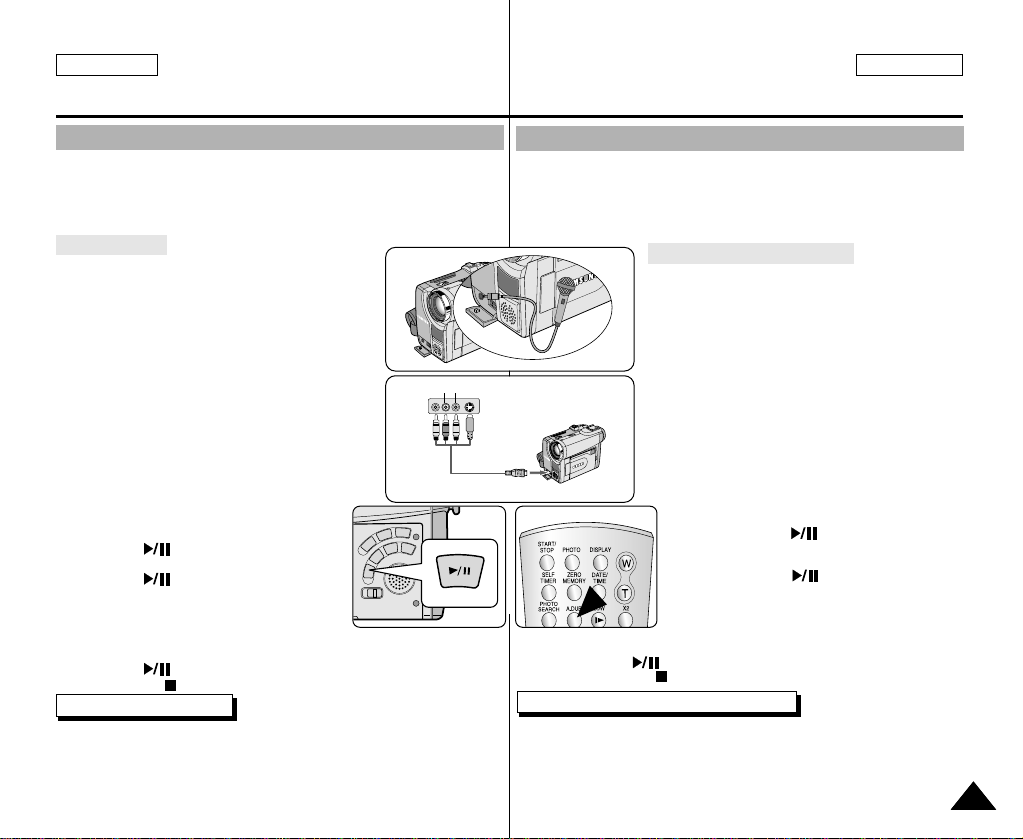
ENGLISH ESPAÑOL
Grabación avanzadaAdvanced Recording
Audio dubbing
✤ The AUDIO DUBBING function only works in PLAYER Mode.
✤ You can add sound to the original sound on a pre-recorded tape,
recorded in SP mode with 12bit sound.
✤ Use the internal and external microphones or other audio equipment.
✤ The original sound will not be erased.
Dubbing sound
1. Set the camcorder to PLAYER mode.
■
If you want to use an external microphone,
connect the microphone to the external MIC
input jack on the camcorder.
■
When you wish to dub using the External A/V
input, connect the Multi-AV cableto the
camcorder by inserting the Multi-AV cableinto
the Multi-AV Jackat the front side of the
camcorder. (SCD34/D39 only)
- Press the MENU button, move the MENU
SELECTOR to highlight A/V and push the
MENU SELECTOR.
- Move the MENU SELECTOR to highlight
AV IN/OUTand push the MENU
SELECTOR to select AV IN/OUT.
- Move the MENU SELECTOR to highlight
AV IN(or S-VIDEO IN) and push the
MENU SELECTOR to select AV IN(or
2. Press the (PLAY/STILL) button and find
3. Press the (PLAY/STILL) button to pause
4. Press the A.DUB button on the Remote
5. Press the (PLAY/STILL) button to start dubbing.
S-VIDEO IN).
the timeframe of the scene to be dubbed.
the scene.
Control.
■
A.DUB will be displayed on the LCD.
■
The camcorder is in a ready-to-dub state for dubbing.
■
Press the (STOP) button to stop the dubbing.
(SCD34/D39 only)
Notes (SCD34/D39 only)
■
You can not use the audio dubbing function while playing a write
protected video tape.
■
When you wish to dub using the External A/V input, you must connect
the Multi-AV cable to the audio system from which you wish to record.
■
Y ou can not dub sound on a pre-recorded tape in LPmode or 16 bit mode.
Audio (L)
Audio (R)
AV IN
Dobragem de áudio
✤ La función de mezcla de audio (AUDIO DUBBING) sólo opera en la
modalidad PLAYER.
✤ Se puede añadir un sonido al sonido original de una cinta grabada en la
modalidad SP de 12 bits de sonido.
✤ Puede usar el micrófono incorporado o uno externo u otro equipo de audio.
✤ El sonido original no se borrará.
Grabación de sonido adicional
1. Ajuste la videocámara en la modalidad PLAYER.
■
Si va a usar un micrófono externo, conéctelo
en el conector MIC de la videocámara.
■
Si desea hacer la mezcla empleando la
entrada de A/V externo, conecte el cable
Multi-AV a la videocámara insertándolo en la
terminal Multi-AV que está en el frontal de la
videocámara (sólo los modelos SCD34/D39).
- Pulse el botón MENU, mueva el botón
SELECTOR MENÚ hasta resaltar A/V
(audio/vídeo) y pulse SELECTOR MENÚ.
- Mueva el botón SELECTOR MENÚ hasta
resaltar AV IN/OUT y pulse SELECTOR
MENÚ para seleccionar AV IN/OUT.
- Mueva el botón SELECTOR MENÚ hasta
resaltar AV IN (o S-VIDEO IN) y pulse
SELECTOR MENÚ para seleccionar AV IN
(o S-VIDEO IN).
2. Pulse el botón (PLAY/STILL) y busque
el principio de la escena en la que desea
hacer la mezcla.
3. Pulse el botón (PLAY/STILL) para
hacer una pausa en la escena.
4. Pulse el botón A.DUB del mando a distancia.
■
En la pantalla LCD aparecerá el mensaje
■
La videocámara estará lista para la mezcla.
5. Pulse el botón (PLAY/STILL) para empezar la mezcla.
■
Pulse el botón (STOP) para detener la mezcla.
Notas (sólo en los modelos SCD34/D39)
■
La función de mezcla de audio no se puede emplear si la cinta está
protegida contra grabación.
■
Si desea hacer una mezcla usando la entrada de A/V externo, debe
conectar el cable Multi-AV al sistema de audio desde el que quiera grabar.
■
No es posible mezclar sonido en una cinta pregrabada en la
modalidad LP o de 16 bits.
A.DUB.
6363
Page 64
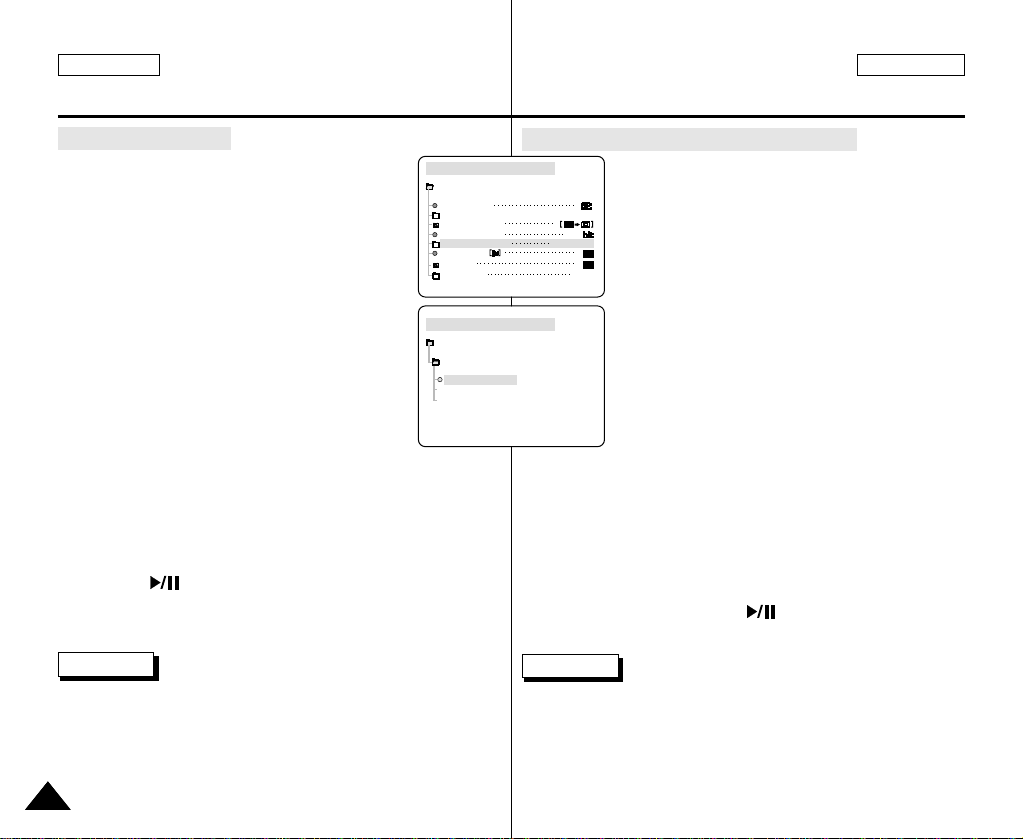
ENGLISH ESPAÑOL
PLAYER MODE
A / V SET
AUDIO SELECT
SOUND [ 1 ]
SOUND [ 2 ]
MIX [ 1 + 2 ]
PLAYER MODE
REC MODE
PHOTO SEARCH
PHOTO COPY
AUDIO MODE 12
SOUND[1]
AUDIO SELECT
WIND CUT
A / V SET
PB DSE
OUT
AV IN/OUT
Grabación avanzadaAdvanced Recording
Dubbed audio Playback
1. Insert the dubbed tape and press MENU button.
2. Move the MENU SELECTOR to highlight A/V.
3. Push the MENU SELECTOR to enter the submenu.
4. Use the MENU SELECTOR to select AUDIO
SELECT from the submenu.
5. Push the MENU SELECTOR to enter the submenu.
6. Using the MENU SELECTOR, select the AUDIO
playback channel.
■
Push the MENU SELECTOR to confirm the
audio playback channel.
- SOUND1 : play the original sound.
- SOUND2 : play the dubbed sound.
- MIX(1+2) : play back SOUND1 and 2 equally mixed.
7. To exit, press the MENU button.
8. Press the (PLAY/STILL) button to playback the dubbed tape.
Note
When you playback added sound (SOUND2 or MIX mode), you may
experience a loss of sound quality.
6464
Reproducción de una cinta con audio mezclado
1. Introduzca la cinta mezclada y pulse el botón MENÚ.
2. Desplace el SELECTOR MENÚ hasta resaltar A/V.
3. Pulse el SELECTOR MENÚ para acceder al
submenú.
4. Seleccione AUDIO SELECT en el submenú
mediante el SELECTOR MENÚ.
5. Pulse el SELECTOR MENÚ para acceder al
submenú.
6. Seleccione el canal de reproducción de audio
mediante el SELECTOR MENÚ.
■
Pulse el SELECTOR MENÚ para confirmar el
canal de reproducción de audio.
- SOUND1: reproducción del sonido original.
- SOUND2: reproducción del sonido de la
mezcla.
- MIX(1+2) : reproducción de la mezcla de
sonidos 1 y 2.
7. Para salir, pulse el botón MENÚ.
8. Pulse el botón (PLAY/STILL) para reproducir
la cinta mezclada.
Nota
Cuando se reproduce el sonido adicional (modalidades SOUND2 o
MIX), es posible que se experimente una pérdida en la calidad del
sonido.
Page 65
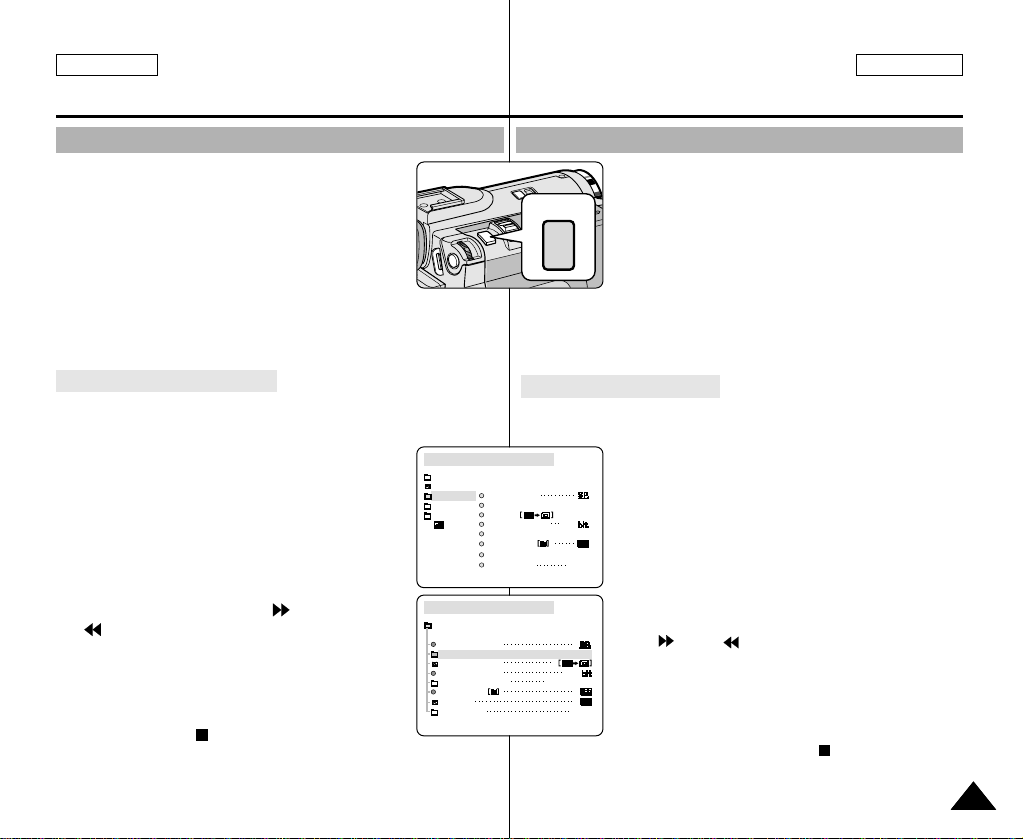
ENGLISH ESPAÑOL
PLAYER MODE
INITIAL
WIND CUT
PB DSE
REC MODE
PHOTO SEARCH
COPY
AUDIO MODE 12
AUDIO SELECT
CAMERA
A/V
MEMORY
VIEWER
AV IN/OUT
OUT
PLAYER MODE
REC MODE
PHOTO SEARCH
PHOTO COPY
AUDIO MODE 12
SOUND[1]
AUDIO SELECT
WIND CUT
A / V SET
PB DSE
OUT
AV IN/OUT
PHOTO
Grabación avanzadaAdvanced Recording
PHOTO Image Recording
1. Press the PHOTO button lightly (about halfway
down) and hold it.
■
The still picture appears on the LCD monitor.
■
If you do not wish to record, release the button.
2. Press the PHOTO button fully down.
■
The still picture is recorded for about 6~7
seconds.
3. After the PHOTO has been recorded, the camcorder returns to
STBY mode.
Searching for a PHOTO picture
✤ The PHOTO SEARCH works in PLAYER mode only.
■
Press the MENU button. (or press the PHOTO
1.
SEARCH button on the remote control.)
■
The MENU list will appear.
2. Move the MENU SELECTOR to highlight A/V.
3. Push the MENU SELECTOR to enter the submenu.
4. Select PHOTO SEARCH from the submenu and
push the MENU SELECTOR.
5. Search the PHOTO using the (FF) and
(REW) buttons.
■
The PHOTO search process appears on the LCD
while you are searching.
■
After completing the search, the camcorder
displays the still image.
6. To exit, press the (STOP) button.
Grabación de imágenes fotográficas
1. Pulse el botón PHOTO (fotografía) ligeramente
(hasta la mitad de su recorrido) y manténgalo
pulsado.
■
Aparece en la pantalla LCD la imagen fija.
■
Si no desea grabarla, simplemente suelte el
botón.
2. Pulse completamente el botón PHOTO.
■
La imagen fija se graba durante unos
6 ó 7 segundos.
3. Tras grabar la fotografía, la videocámara vuelve
a la modalidad de espera (STBY).
Búsqueda de una fotografía
✤ La función de búsqueda de fotografías (PHOTO SEARCH)
sólo opera en las modalidades PLAYER.
1.■Pulse el botón MENÚ (o el botón PHOTO
SEARCH del mando a distancia).
■
Aparece la lista del menú.
2. Desplace el SELECTOR MENÚ hasta resaltar
A/V .
3. Pulse el SELECTOR MENÚ para acceder al
submenú.
4. Seleccione PHOTO SEARCH en el submenú y
pulse el SELECTOR MENÚ.
5. Busque la fotografía mediante los botones
(FF) y (REW).
■
El proceso de búsqueda de fotografías
aparece en la pantalla LCD durante la
búsqueda.
■
Una vez terminada la búsqueda, la
videocámara muestra la imagen fija.
6. Para salir, pulse el botón (STOP).
6565
Page 66
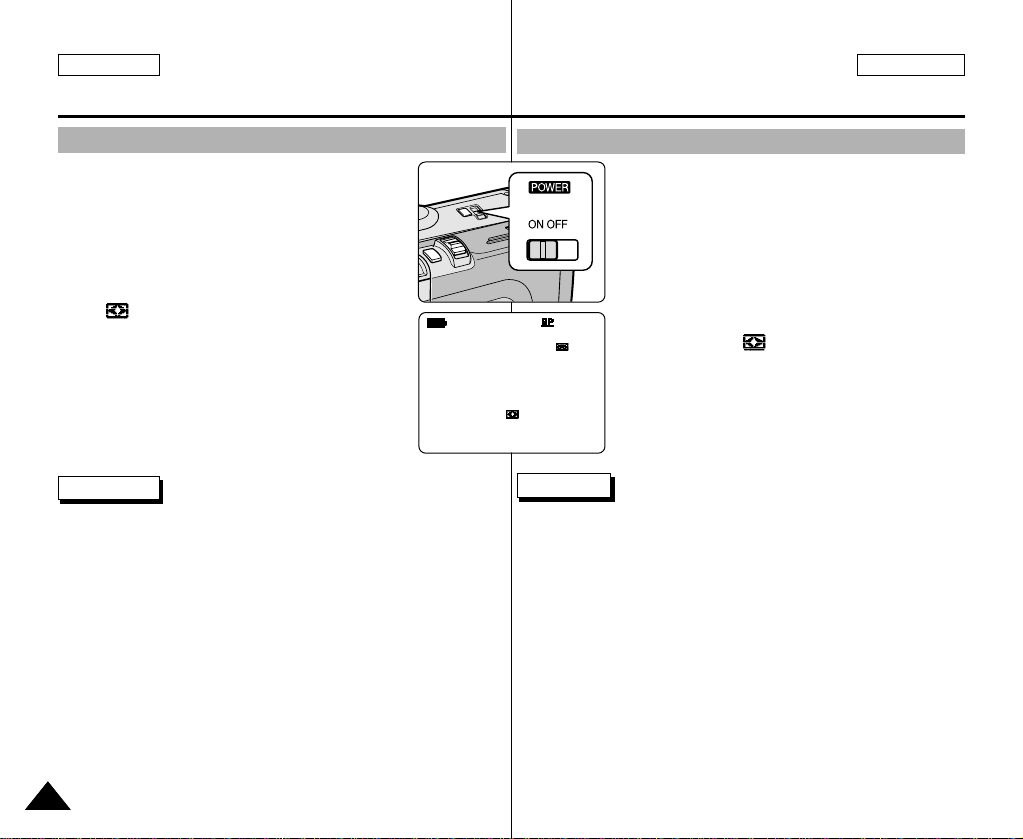
ENGLISH ESPAÑOL
NITE
PIX
NITE PIX
0 : 0 0 : 0 0
6 0 min
STBY
Grabación avanzadaAdvanced Recording
NITE PIX (0 lux recording)
✤ The NITE PIX function works in CAM/M.REC mode.
✤ The NITE PIX function enables you to record a
subject in darkness.
1. Set the camcorder to CAM mode.
2. Slide the NITE PIX switch to ON.
■
(NITE PIX indicator) appears on the LCD
monitor.
■
The infrared(invisible rays) light is turned on
automatically.
3. To cancel the NITE PIX function, slide the NITE PIX
switch to OFF.
Notes
■
The maximum recording distance using the infrared light is
about 3 m (about 10 feet).
■
If you use the NITE PIX function in normal recording situations (ex.
outdoors by day), the recorded picture may be tinted green.
■
In the NITE PIX mode, certain functions are not available, such as
White Balance, Program AE, DSE, BLC.
■
If focusing is difficult with the auto focus mode when using the
NITE PIX function, focus manually.
GRABACIÓN NOCTURNA (grabación con 0 lux)
✤ La función de grabación nocturna (NITE PIX) sólo
opera en las modalidades CAM y M.REC.
✤ Esta función permite grabar objetos que se
encuentren en lugares oscuros.
1. Ajuste la videocámara en la modalidad CAM.
2. Deslice el interruptor NITE PIX hasta
la posición ON.
■
En la pantalla LCD aparece la indicación
NITE PIX .
■
La luz infrarroja (rayos invisibles) se
enciende automáticamente.
3. Para cancelar la función NITE PIX, deslice el
interruptor NITE PIX hasta la posición OFF.
Notas
■
La distancia máxima de grabación usando la luz infrarroja es de
unos 3 m (10 pies).
■
Si usa la función NITE PIX en situaciones normales de grabación
(por ejemplo, exteriores durante el día), es posible que los colores
de la imagen grabada sean poco naturales.
■
En la modalidad NITE PIX, no se puede acceder a algunas
funciones como Equilibrio del blanco, Programa AE, DSE y BLC.
■
Si resulta difícil enfocar con la modalidad de enfoque automático
cuando se utiliza la función de grabación nocturna, realice un
enfoque manual.
6666
Page 67
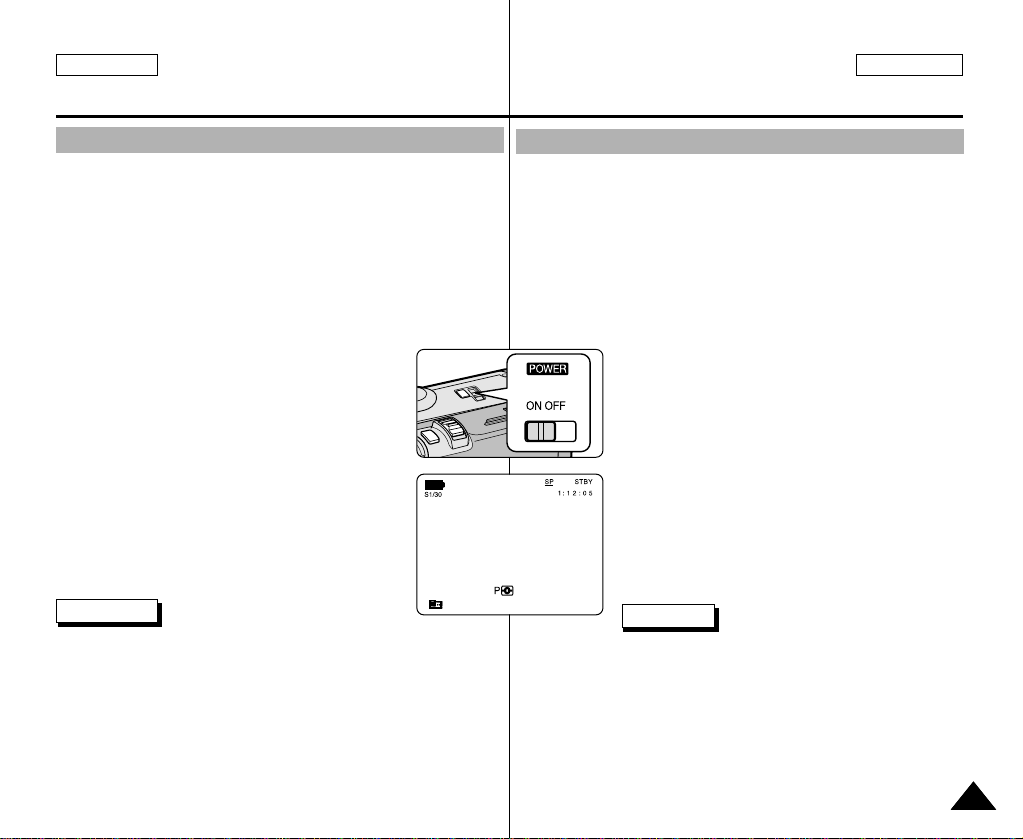
ENGLISH ESPAÑOL
POWER NITE PIX
1 2 : 0 0 A M
J A N . 1 0 , 2 0 0 3
NIGHT
CAPTURE
Grabación avanzadaAdvanced Recording
POWER NITE PIX
✤ The POWER NITE PIX function works in CAM mode.
✤ The POWER NITE PIX function can record a subject more brightly
in darkness than the NITE PIX function.
✤ POWER NITE PIX is displayed for three seconds on the LCD if
you press the SLOW SHUTTER button while the NITE PIX switch
is turned on.
✤ When you work in POWER NITE PIX mode, POWER NITE PIX
GRABACIÓN NOCTURNA INCREMENTADA
✤ La función de grabación nocturna incrementada (POWER NITE
✤ Esta función permite grabar objetos que se encuentren en lugares
✤ Si pulsa el botón SLOW SHUTTER con el interruptor NITE PIX
✤ Si trabaja en la modalidad POWER NITE PIX, el icono POWER
icon appears on the LCD continuously.
1. Set the camcorder to CAM mode.
2. Turn on the NITE PIX switch, and then press the
SLOW SHUTTER button.
3. Press the SLOW SHUTTER button to set shutter
speed. The SLOW SHUTTER function enables
you to record a subject more brightly.
4. When using POWER NITE PIX the image takes
on a slow motion like effect.
5. To cancel the POWER NITE PIX function, press
the SLOW SHUTTER button to set to “off ” and
then turn off the NITE PIX switch.
Notes
■
The maximum recording distance using the infrared light is about 3
m (about 10 feet).
■
If you use the POWER NITE PIX function in normal recording
■
■
situations (ex. outdoors by day), the recorded picture may contain
unnatural colors.
■
In the POWER NITE PIX mode, certain functions are not available,
such as White Balance, Program AE, DSE, BLC.
■
When the subject is too bright, press the SLOW SHUTTER button
(1/8 ➝ 1/30) to obtain better quality recordings.
■
■
PIX) sólo opera en las modalidades CAM.
oscuros con mayor luminosidad que con la función NITE PIX.
encendido, aparecerá la indicación POWER NITE PIX durante
3 segundos en la pantalla LCD.
NITE PIX aparecerá en la pantalla LCD permanentemente.
1. Ajuste la videocámara en la modalidad CAM.
2. Encienda el interruptor NITE PIX y pulse
el botón SLOW SHUTTER.
3. Pulse el botón SLOW SHUTTER para ajustar la
velocidad del obturador. La función SLOW
SHUTTER permite grabar objetos con mayor
luminosidad.
4. Cuando utiliza la función POWER NITE PIX, la
imagen tiene el aspecto de una imagen a cámara
lenta.
5. Para cancelar la función POWER NITE PIX, pulse
el botón SLOW SHUTTER para desactivarlo y, a
continuación, apague el interruptor NITE PIX.
Notas
La distancia máxima de grabación usando la luz infrarroja es de
unos 3 m (10 pies).
Si usa la función POWER NITE PIX en situaciones normales de
grabación (por ejemplo, exteriores durante el día), es posible que
los colores de la imagen grabada sean poco naturales.
En la modalidad POWER NITE PIX, no se puede acceder a algunas
funciones como Equilibrio del blanco, Programa AE, DSE y BLC.
Cuando el objeto es muy brillante, es recomendable pulsar el
botón SLOW SHUTTER (1/8 ➝ 130) para realizar una grabación
de calidad.
6767
Page 68
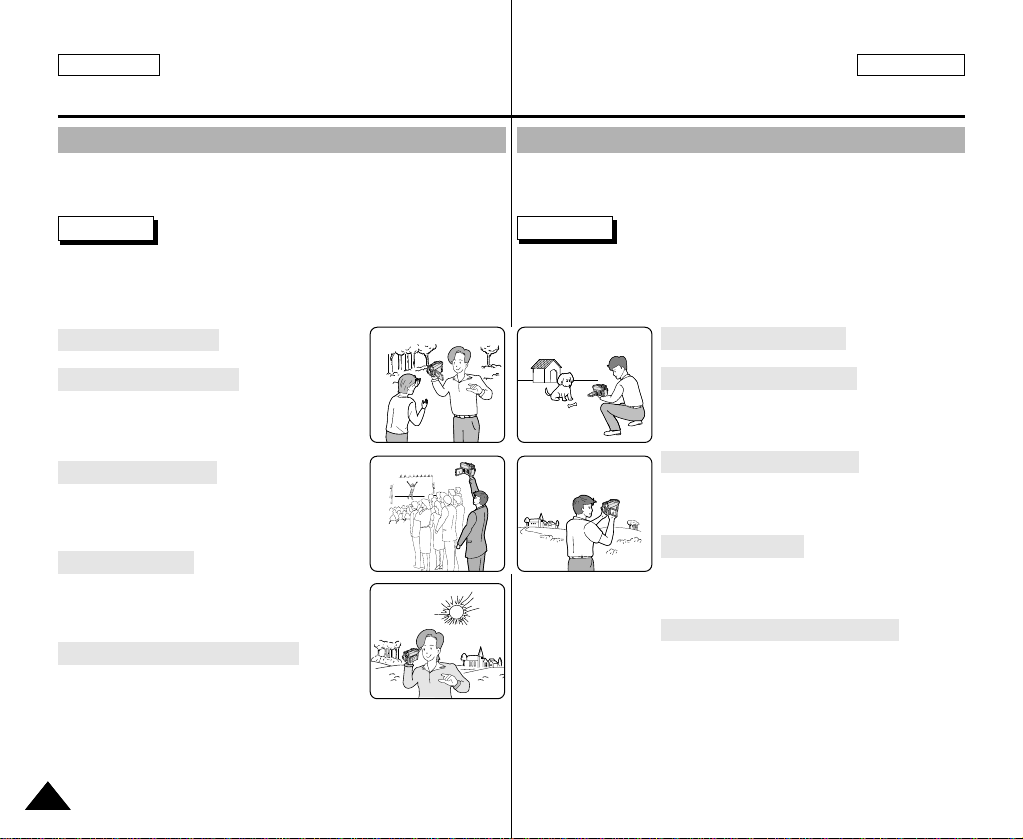
ENGLISH ESPAÑOL
Advanced Recording
Grabación avanzada
Various Recording Techniques
✤ In some situations different recording techniques may be required
for more dramatic results.
Note
Please rotate the LCD screen carefully as excessive rotation may
cause damage to the inside of the hinge that connects the LCD screen
to the Camcorder.
1. General recording.
2. Downward recording.
Making a recording with a top view of the
LCD screen.
3. Upward recording.
Making a recording viewing the LCD screen
from below.
4. Self recording.
Making a recording viewing the LCD screen
from the front.
5. Recording with the Viewfinder.
■
In circumstances where it is difficult to
use the LCD monitor, the viewfinder can
be used as a convenient alternative.
1 2
3
5
Técnicas diversas de grabación
✤ En algunos casos son necesarias distintas técnicas de grabación
Gire la pantalla LCD con cuidado, ya que si la gira demasiado se
puede dañar el interior de la bisagra que une la pantalla LCD a la
videocámara.
4
para obtener mejores resultados.
Nota
1. Grabación en general.
2. Grabación desde abajo.
Grabación mirando la pantalla LCD desde
arriba.
3. Grabación desde arriba.
Grabación mirando la pantalla LCD desde
abajo.
4. Autograbación.
Grabación mirando la pantalla LCD desde
el frente.
5. Grabación empleando el visor
■
En casos en los que sea difícil utilizar
la pantalla LCD, el visor es de gran
utilidad.
6868
Page 69
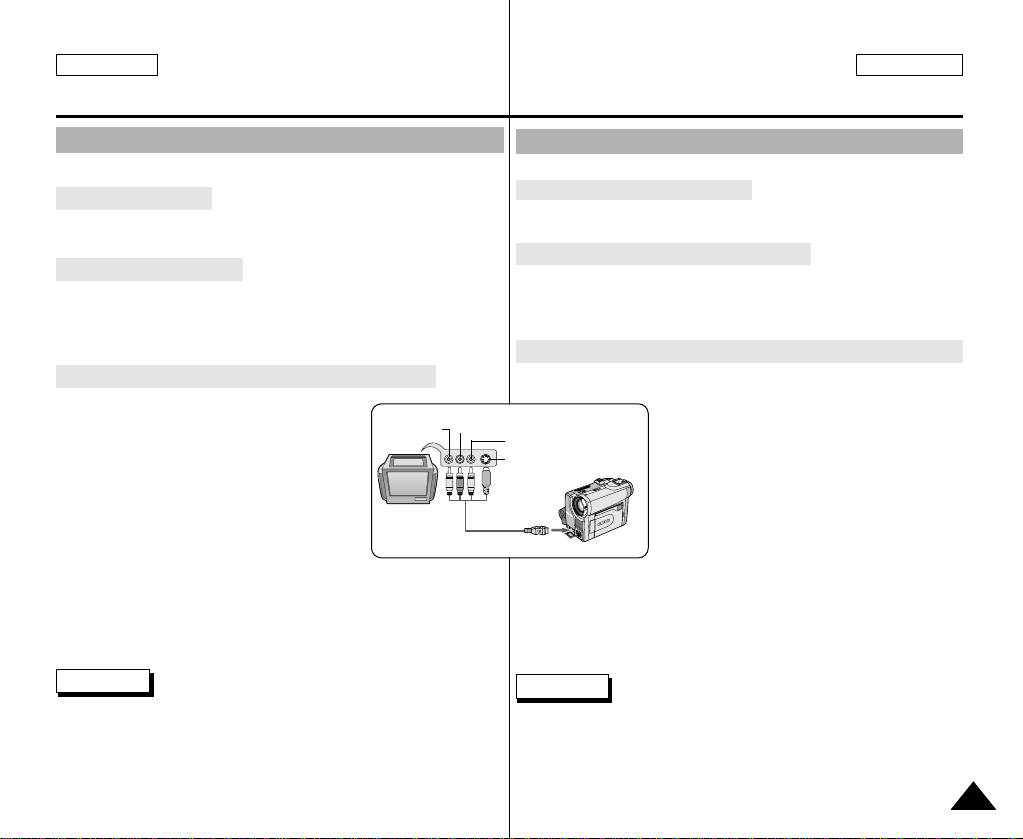
ENGLISH ESPAÑOL
Playback
Reproducción
Tape Playback
✤ The playback function works in PLAYER mode only.
Playback on the LCD
✤ It is practical to view a tape using the LCD when in a car or
outdoors.
Playback on a TV monitor
✤ To play back a tape, the television must have a compatible
color system.
✤ We recommend that you use the AC Power Adapter as the
power source for the camcorder.
Connecting to a TV which has Audio/Video input jacks
1. Connect the camcorder and TV with
the Multi-AV cable.
■
The yellow plug : Video
■
The white plug : Audio(L) - Mono
■
The red plug : Audio(R)
- If you connect to a monaural TV or
VCR, connect the yellow plug (Video)
to the video input of the TV or VCR
and the white plug (Audio L) to the
audio input of the TV or VCR.
✤ You may use the SCART adapter (optional).
2. Set the power switch on the camcorder to PLAYER mode.
3. Turn on the TV and set the TV/VIDEO selector on the TV to VIDEO.
■
Refer to the TV or VCR user’s manual.
4. Play the tape back.
Notes
■
You may use the S-VIDEO plug to obtain better quality pictures if
you have a S-VIDEO connector on your TV.
■
Even if you use a S-VIDEO plug, you need to connect an audio
cable.
■
If you connect the cable to the Multi-AV Jack, you will not hear
sound from the speakers.
Video input-
Yellow
TV
Audio input
(left)-White
Reproducción de una cinta
✤ La función de reproducción sólo opera en la modalidad PLAYER.
Reproducción en la pantalla LCD
✤ Cuando se va en coche o se está en un ambiente exterior,
resulta muy práctico ver una cinta mediante la pantalla LCD.
Reproducción en un monitor de televisión
✤ Para reproducir una cinta, el sistema de color del televisor debe
ser compatible con el de la videocámara.
✤ Recomendamos usar como fuente de energía para la
videocámara el adaptador de CA.
Conexión a un televisor que dispone de conectores de Audio/Vídeo
1. Conecte la videocámara al televisor mediante el cable múltiple de
Audio/Vídeo.
Audio input
(right)-Red
S-VIDEO input
Camcorder
A/V OUT
2. Ajuste el interruptor de la videocámara en la modalidad PLAYER.
3. Encienda el televisor y ajuste el selector TV/VÍDEO del mismo en
VÍDEO.
■
Consulte el manual de instrucciones del televisor o del
videograbador.
4. Reproduzca la cinta.
Notas
■
Para obtener una mejor calidad de las imágenes y si dispone de un
conector S-VÍDEO, puede usar el cable S-VÍDEO.
■
Aunque use el cable S-VÍDEO, necesitará conectar un cable de
audio.
■
Si conecta el cable al conector mútiple de mútiple de A/V, no oirá
el sonido por los altavoces.
■
La clavija amarilla es la de vídeo.
■
La clavija blanca es la de audio(L) - mono
■
La clavija roja es la de audio(R)
- Si se trata de un televisor o de un
videograbador monofónico, conecte la
clavija amarilla (vídeo) a la entrada de
vídeo del televisor o el videograbador y
la blanca (audio L) a la entrada de audio.
✤ Puede utilizar un adaptador SCART (opcional).
6969
Page 70
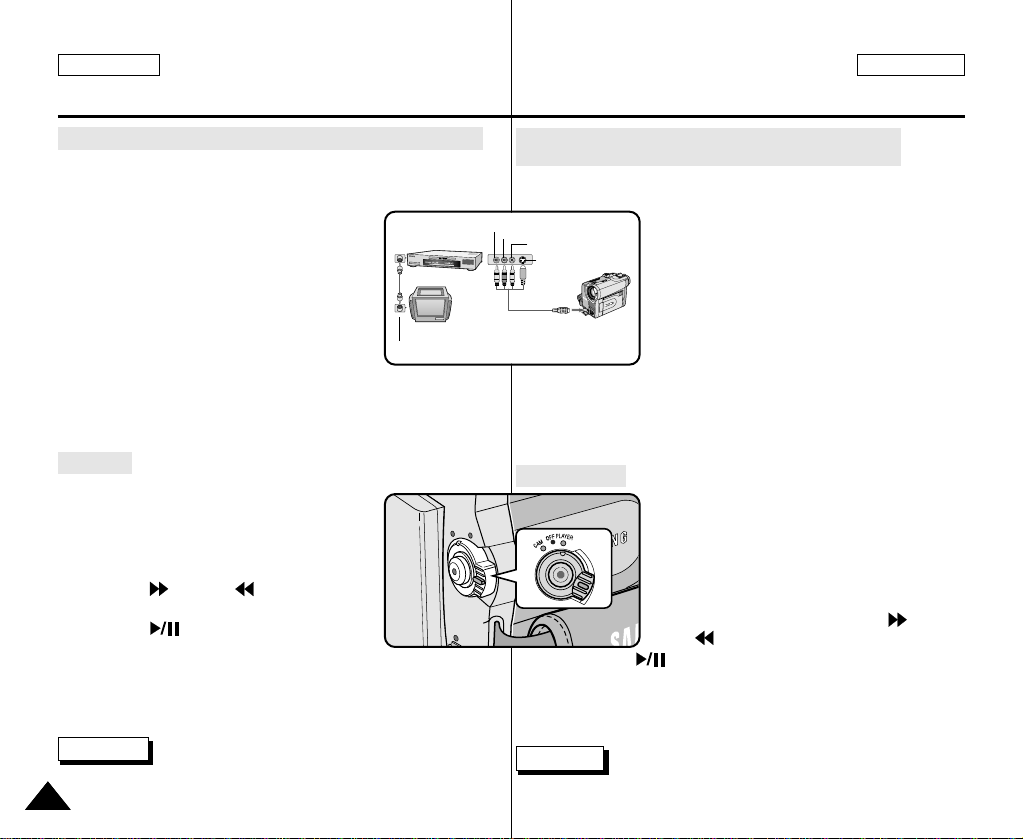
ENGLISH ESPAÑOL
Playback
Reproducción
Connecting to a TV which has no Audio and Video input jacks
✤ You can connect your camcorder to a TV through a VCR.
1. Connect the camcorder and VCR with
the Multi-AV cable.
■
The yellow plug : Video
■
The white plug : Audio(L) - Mono
■
The red plug : Audio(R)
2. Connect a TV to the VCR.
3. Set the power switch on the camcorder to
PLAYER mode.
ANTENNA
4. Turn on both the TV and VCR.
■
Set the input selector on the VCR to LINE.
■
Select the channel reserved for your VCR on the TV set.
5. Play the tape back.
Playback
✤ You can play the recorded tape in PLAYER
mode.
1. Connect a power source and set the power
switch to PLAYER mode.
2. Insert the tape you wish to play back.
3. Using the (FF) and (REW) buttons,
find the first position you wish to play back.
4. Press the (PLAY/STILL) button.
■
The images you recorded will appear on
the TV after a few seconds.
■
If a tape reaches its end while being played back, the tape will
rewind automatically.
Note
■
The playback mode (SP/LP) is selected automatically.
7070
VCR
Conexión a un televisor que no dispone de conectores
de Audio/Vídeo
✤ Es posible conectar la videocámara a un televisor a través
de un videograbador.
VIDEO
AUDIO(L)
AUDIO(R)
S-VIDEO
1. Conecte la videocámara al videograbador
mediante el cable múltiple de Audio/Vídeo.
■
La clavija amarilla es la de vídeo.
■
La clavija blanca es la de audio(L)
- Mono.
■
TV
A/V OUT
CAMCORDER
La clavija roja es la de audio(R)
2. Conecte el televisor al videograbador.
3. Ajuste el interruptor de la videocámara
en la modalidad PLAYER.
4. Encienda el televisor y el videograbador.
■
Ajuste el selector de entrada del videograbador en LINE.
■
Seleccione el canal reservado para el videograbador en el
televisor.
5. Reproduzca la cinta.
Reproducción
✤ Puede reproducir la cinta grabada en la
modalidad PLAYER.
1. Conecte la videocámara a una fuente de
energía y ajuste el interruptor en la posición
PLAYER.
2. Introduzca la cinta que desee ver.
3. Busque el comienzo de la secuencia que
desea ver mediante los botones (FF)
y (REW).
4. Pulse el botón (PLAY/STILL).
■
Pasados unos segundos, las imágenes grabadas aparecerán en
el televisor.
■
Si la cinta llega al final mientras está en la modalidad de
reproducción, se rebobinará automáticamente.
Nota
■
La modalidad de reproducción (SP/LP) se selecciona de manera
automática.
Page 71
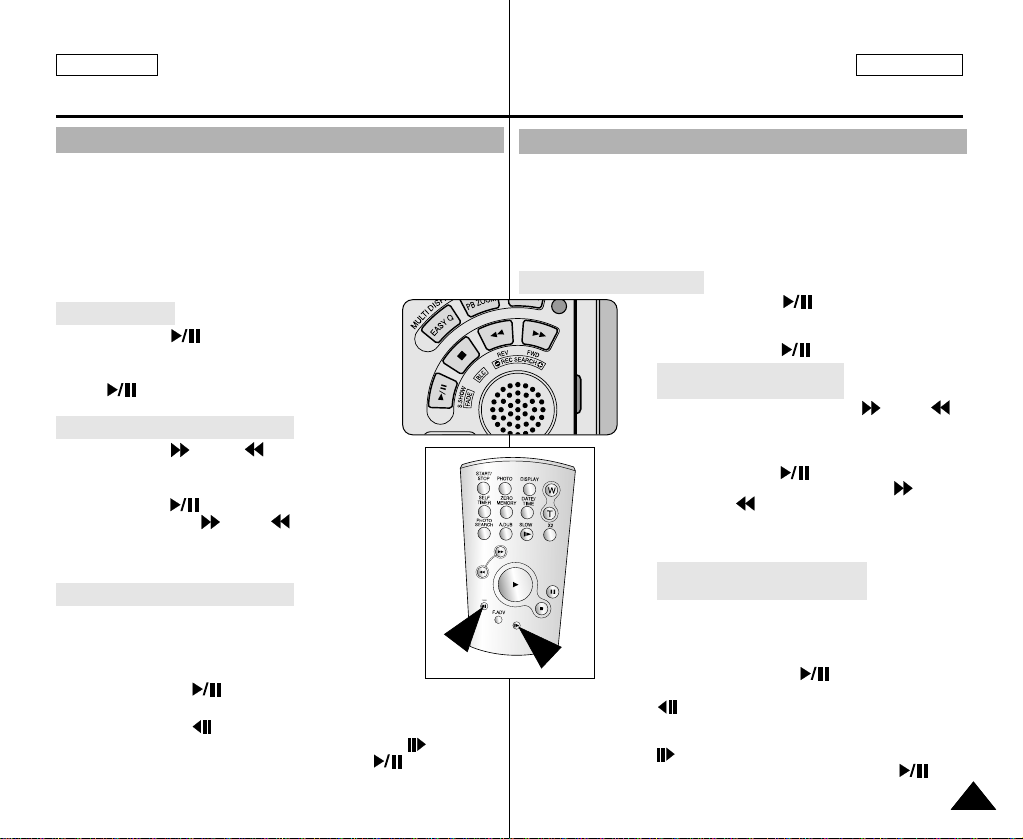
ENGLISH ESPAÑOL
Playback
Reproducción
Various Functions while in PLAYER mode
✤ The PLAY/STILL, STOP, FF, REW buttons are located on the
camcorder and the Remote Control.
✤ The F.ADV(Frame advance), X2, SLOW buttons are located on the
Remote Control only.
✤ To prevent tape and head-drum wear, your camcorder will
Diferentes funciones en la modalidad PLAYER
✤ Los botones PLAY/STILL, STOP, FF y REW se encuentran tanto en
✤ Los botones F.ADV (avance cuadro a cuadro), X2 y SLOW (cámara
✤ Para evitar que se desgasten la cinta y los cabezales, la
automatically stop if it is left in STILL or SLOW modes for more
than 5 minutes.
Pausa en la reproducción
Playback pause
✤ Press the (PLAY/STILL) button during
Playback.
✤ To resume playback, press the
(PLAY/STILL) button.
Picture search (Forward/Reverse)
✤ Press the (FF) or (REW) buttons
once during Playback or Still mode.
To resume normal playback,
press the (PLAY/STILL) button.
✤ Keep pressing (FF) or (REW) buttons
during Playback or Still mode. To resume normal
playback, release the button.
Slow playback (Forward/Reverse)
✤ Forward Slow Playback
■
Press the SLOW button on the remote control
during Playback.
■
To resume normal playback,
press the (PLAY/STILL) button.
✤ Reproducción a cámara lenta hacia atrás
✤ Reverse Slow Playback
■
Press the (_) button during Forward Slow Play back.
■
To resume forward slow playback, press the (+) button.
■
To resume normal playback, press the (PLAY/STILL)
button.
la videocámara como en el mando a distancia.
lenta) sólo se encuentran en el mando a distancia.
videocámara se detendrá automáticamente si se deja en las
modalidades STILL o SLOW durante más de 5 minutos.
✤ Pulse el botón (PLAY/STILL)
durante la reproducción.
✤ Para continuar con la reproducción,
pulse el botón (PLAY/STILL).
Búsqueda de imágenes
(hacia delante/hacia atrás)
✤ Pulse una vez los botones (FF) o
(REW) en las modalidades de reproducción o
imagen fija.
✤ Para regresar a la reproducción normal,
pulse el botón (PLAY/STILL).
✤ Mantenga pulsados los botones
(FF) o (REW) en las modalidades
de reproducción o imagen fija.
Para regresar a la reproducción normal,
suelte el botón.
Reproducción a cámara lenta
(hacia delante/hacia atrás)
✤ Reproducción a cámara lenta hacia delante
■
Pulse el botón SLOW del mando a
distancia durante la reproducción.
■
Para regresar a la reproducción normal,
pulse el botón (PLAY/STILL).
■
Pulse el botón (_) durante la reproducción a cámara lenta
hacia delante.
■
Para regresar a la reproducción a cámara lenta hacia delante,
pulse el botón ( +).
■
Para regresar a la reproducción normal, pulse el botón
(PLAY/STILL).
7171
Page 72
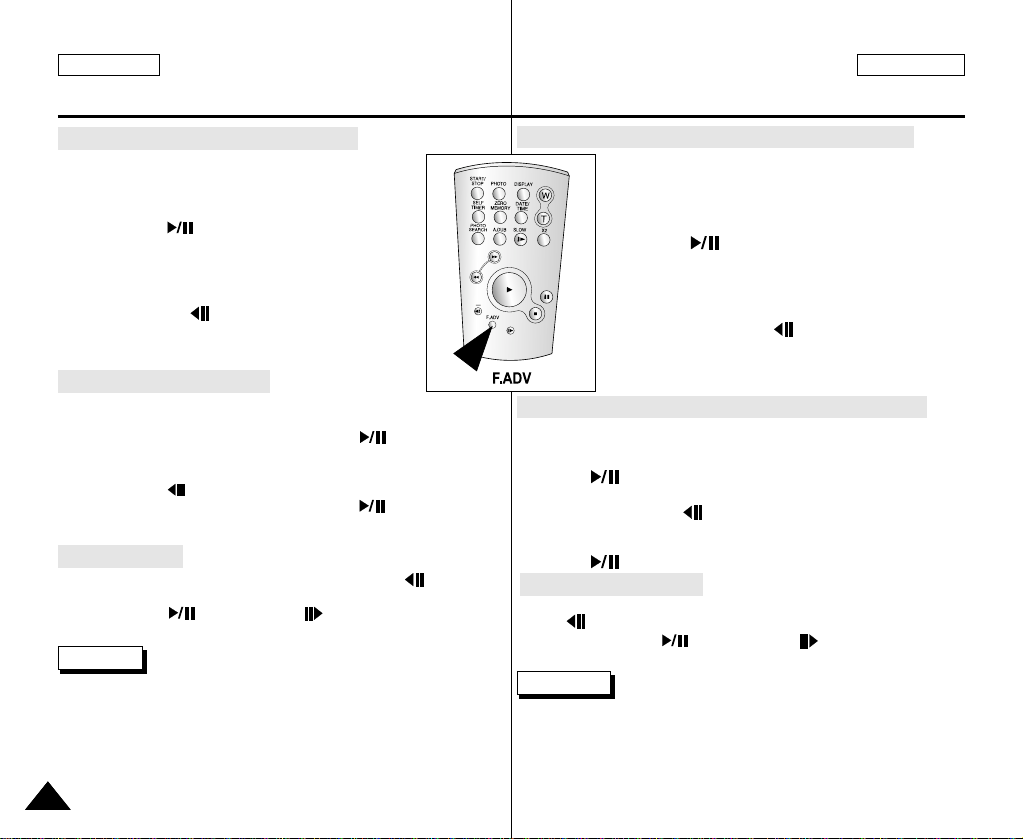
ENGLISH ESPAÑOL
Playback
Reproducción
Frame advance (To play back frame by frame)
●
Press the F.ADV button on the Remote Control while
in Still mode.
The F.ADV function works in still mode only.
●
To resume normal playback,
press the (PLAY/STILL) button.
✤ Forward frame advance
■
Press the F.ADV button on the remote control
in Still mode.
✤ Reverse frame advance
■
Press (_) the button on the remote control
to change the direction in F.ADV mode.
■
Press the F.ADV button on the remote control.
X2 Playback (Forward/Reverse )
✤ Forward X2 Playback
■
Press the X2 button on the Remote Control during Playback.
■
To resume normal playback, press the (PLAY/STILL)
button.
✤ Reverse X2 Playback
■
Press (_) the button during during Forward X2 Playback
■
To resume normal playback, press the (PLAY/STILL)
button.
Reverse playback
✤ To playback in reverse at normal speed, press the (_) button
during normal forward playback.
✤ Press the (PLAY/STILL) or (+) button to return to normal
forward playback.
Notes
■
Mosaic shaped distortion may appear on the screen while in some of
the various playback modes.
- Mosaic shaped distortion or noise may be experienced when you
play back tapes recorded in LP which contain various playback
functions.
■
Sound will only be heard during normal SP or LP playback.
7272
Avance cuadro a cuadro (reproducción cuadro a cuadro)
●
Pulse el botón F.ADV del mando a distancia en
la modalidad de imagen fija.
La función F.ADV sólo opera en la modalidad
de imagen fija.
●
Para regresar a la reproducción normal, pulse
el botón (PLAY/STILL).
✤ Avance cuadro a cuadro hacia delante
■
Pulse el botón F.ADV del mando a
distancia en la modalidad de imagen fija.
✤ Avance cuadro a cuadro hacia atrás
■
Pulse el botón (_) del mando a
distancia para cambiar la dirección
en la modalidad F.ADV.
■
Pulse el botón F.ADV del mando a distancia.
Reproducción a doble velocidad (hacia delante/hacia atrás)
✤ Reproducción a doble velocidad hacia delante
■
Pulse el botón X2 del mando a distancia durante la reproducción.
■
Para regresar a la reproducción normal, pulse el botón
(PLAY/STILL).
✤ Reproducción a doble velocidad hacia atrás
■
Pulse el botón (_) durante la reproducción hacia
delante a doble velocidad.
■
Para regresar a la reproducción normal, pulse el botón
(PLAY/STILL).
Reproducción hacia atrás
✤ Para reproducir hacia atrás a velocidad normal, pulse el botón
(_) durante la reproducción normal hacia adelante.
✤ Pulse el botón (PLAY/STILL) o (+) para empezar la
reproducción hacia adelante.
Notas
■
En algunas de las modalidades de reproducción se puede
producir una distorsión en forma de mosaico.
- También se pueden producir distorsiones en forma de mosaico
si se reproducen cintas grabadas en LP que contengan
distintas funciones de reproducción.
■
El sonido sólo está activo durante la reproducción de cintas
en SP y LP.
Page 73
ENGLISH ESPAÑOL
Playback
Reproducción
ZERO MEMORY
✤ The MEMORY function works in both CAM and PLAYER modes.
MEMORIA CERO
✤ La función de memoria (MEMORY) opera en las modalidades
✤ You can mark a point on a tape that you want to return to following
playback.
1. Press the ZERO MEMORY button on the remote control during
playback or recording at the point you wish to return to.
■
The time code is changed to a tape counter that is set to zero
memory with the 0:00:00(Zero memory indicator)
■
If you want to cancel the zero memory function, press the
M
✤ Esta función permite marcar un punto de la cinta al que quiera
1. Pulse el botón ZERO MEMORY del mando a distancia en el
ZERO MEMORY button again.
2. Finding the zero position.
■
When you have finished playback, fast forward or rewind the
2. Búsqueda de la posición cero.
tape.
- The tape stops automatically when it reaches the zero
position.
■
When you have finished recording, press the power switch on
the PLAYER and press the (REW) button.
- The tape stops automatically when it reaches the zero
position.
3. The tape counter with the (Zero memory indicator) disappears
from the display and the tape counter is changed to the time code.
M
3. El contador de la cinta con el indicador de memoria cero
Notes
■
In the following situations, ZERO MEMORY mode may be
■
canceled automatically:
- At the end of the section marked with the ZERO MEMORY
function.
- When the tape is ejected.
- When you remove the battery pack or power supply.
■
The zero memory may not function correctly where there is a
■
break between recordings on the tape.
CAM y PLAYER.
regresar después para ver la grabación.
punto al que quiera regresar.
■
El código de tiempos se convierte en un indicador de memoria
que se ajusta en 0:00:00.
■
Si desea cancelar la función de memoria cero, pulse de nuevo
M
el botón ZERO MEMORY.
■
Cuando haya acabado de ver la cinta, adelántela o rebobínela.
- La cinta se detiene automáticamente cuando llega a la
posición cero.
■
Cuando haya acabado de grabar, ajuste el interruptor de la
videocámara en la posición PLAYER y pulse el botón
(REW).
- La cinta se detiene automáticamente cuando llega a la
posición cero.
M
desaparece de la pantalla y vuelve a aparecer el código de tiempos.
Notas
La memoria cero se puede cancelar de manera automática en los
siguientes casos:
- Al final de una sección marcada con la función ZERO MEMORY.
- Cuando se extrae la cinta de la videocámara.
- Cuando se desconecta la videocámara o se le quita la batería.
Es posible que la función de memoria cero no funcione de manera
adecuada cuando haya un espacio entre grabaciones de la cinta.
7373
Page 74
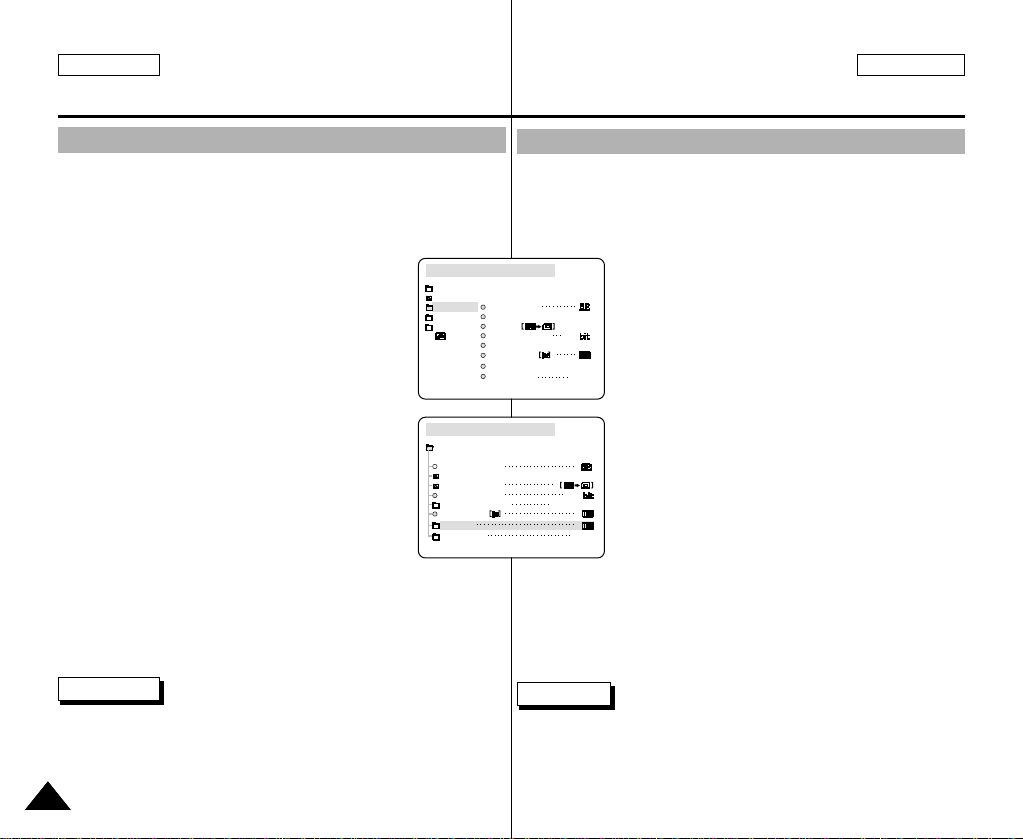
ENGLISH ESPAÑOL
PLAYER MODE
INITIAL
WIND CUT
PB DSE
REC MODE
PHOTO SEARCH
COPY
AUDIO MODE 12
AUDIO SELECT
CAMERA
A/V
MEMORY
VIEWER
AV IN/OUT
OUT
PLAYER MODE
REC MODE
PHOTO SEARCH
PHOTO COPY
AUDIO MODE 12
SOUND[1]
AUDIO SELECT
WIND CUT
A / V SET
PB DSE
OUT
AV IN/OUT
Playback
Reproducción
PB DSE (Playback Digital Special Effects)
✤ The PB DSE function works in PLAYER mode.
✤ The PB DSE function enables you to apply Digital Special Effect
(DSE) to tape playback or still images.
1. Set the camcorder to the PLAYER mode and then
Playback a tape.
2. Press the MENU button and move the MENU
SELECTOR to highlight A/V.
3. Push the MENU SELECTOR to enter the submenu.
4. Select PB DSE from the sub-menu and push the
MENU SELECTOR.
5. Push the MENU SELECTOR to enter the submenu.
6. Select PB DSE item (off, mirror, mosaic) from the
sub-menu and push the MENU SELECTOR.
7. To exit, press the MENU button.
8. To cancel the PB DSE function, set the PB DSE to off or press the
STOP button.
Notes
■
You cannot apply the PB DSE function to the pictures which are
being input from the external.
■
Once you modify an image using the PB DSE function, it cannot
be imported to your PC from the camcorder’s DV jack.
7474
Selección de DSE (Efectos especiales digitales)
✤ La función PB DSE sólo opera en la modalidad PLAYER.
✤ Esta función permite aplicar efectos especiales digitales (DSE) a
una reproducción o imagen fija de la cinta.
1. Ajuste la videocámara en la modalidad PLAYER
y reproduzca una cinta.
2. Pulse el botón MENÚ y desplace el
SELECTOR MENÚ hasta resaltar A/V.
3. Pulse el SELECTOR MENÚ para acceder al
submenú.
4. Seleccione PD DSE en el submenú y pulse el
SELECTOR MENÚ.
5. Pulse el SELECTOR MENÚ para acceder al
submenú.
6. Seleccione la opción de PD DSE (desactivado,
espejo o mosaico) en el submenú y pulse el
SELECTOR MENÚ.
7. Para salir, pulse el botón MENÚ.
8. Para cancelar la función PB DSE, ajuste la
PB DSE a la posición de desactivado o pulse
el botón STOP.
Notas
■
No puede aplicar la función PB DSE a fotografías que se han
cargado de una fuente exterior.
■
Después de modificar una imagen mediante la función PB DSE,
no es posible exportarla al ordenador a través del conector DV
de la videocámara.
Page 75
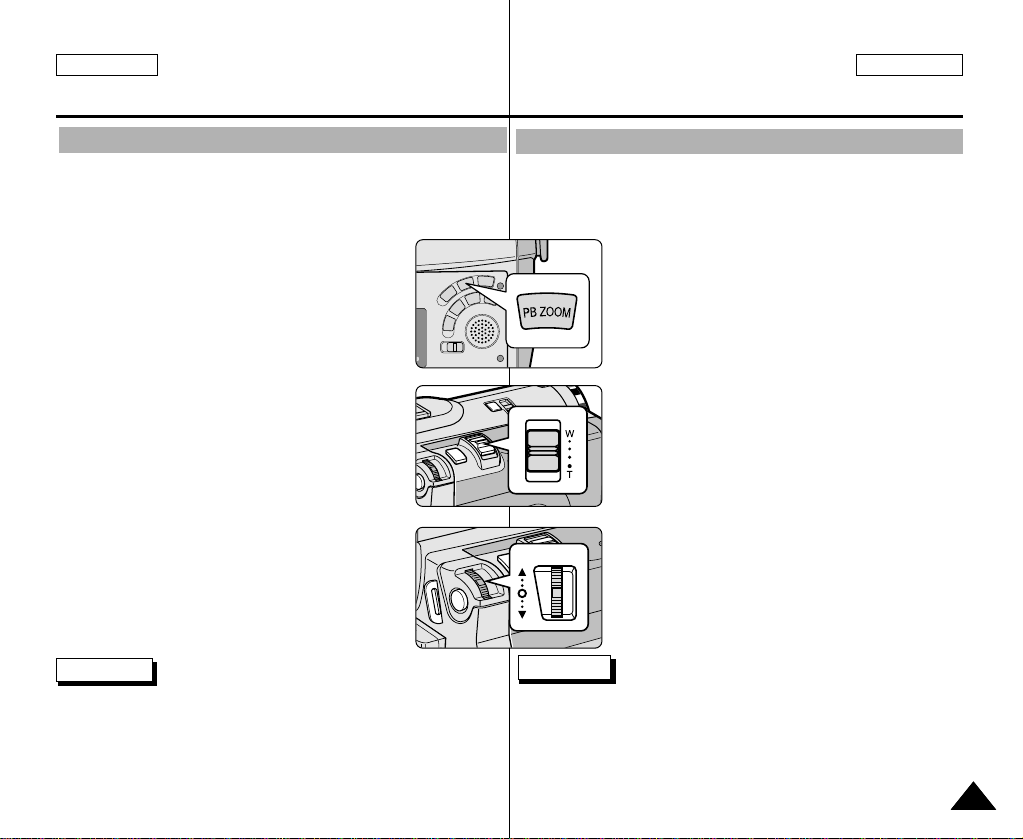
ENGLISH ESPAÑOL
VOL/MF
Playback
Reproducción
PB ZOOM
✤ The PB ZOOM function works in PLAYER mode.
✤ The PB ZOOM function enables you to magnify playback or still
image.
1. Press the PB ZOOM button in playback mode or in
playback still mode
2. The image is magnified starting from the center of
image and the four arrows which
allows you to move the image in the four directions
appear.
3. You can zoom in from 1.2x to 8.0x by moving the
zoom lever.
4. You can move the image in the arrow directions
using the MENU SELECTOR.
5. You can change the arrow direction(vertical,
horizontal) to move the image by pushing the
MENU SELECTOR.
6. To cancel the PB ZOOM function,
press the PB ZOOM or STOP button.
Notes
■
You cannot apply the PB ZOOM function to the pictures which are
being input from an external video source.
■
The PB ZOOM image cannot be imported to your PC from the
camcorder’s DV jack.
Ampliación de imágenes (PB ZOOM)
✤ La función PB ZOOM sólo opera en la modalidad PLAYER.
✤ Esta función permite ampliar la imagen reproducida o fija.
1. Pulse el botón PB ZOOM en las modalidades
de reproducción o imagen fija.
2. La imagen se amplía desde el centro y aparecen
las cuatro flechas que le permiten mover la
imagen en las cuatro direcciones.
3. Puede ampliar el tamaño de la fotografía de
1,2 a 8 veces con la palanca de zoom.
4. Puede mover la imagen en las direcciones de
las flechas mediante el SELECTOR MENÚ.
5. Puede cambiar la dirección de la flecha (vertical,
horizontal) para mover la imagen pulsando el
SELECTOR MENÚ.
6. Para cancelar la función PB ZOOM, pulse el
botón PB ZOOM o STOP.
Notas
■
No puede aplicar la función PB ZOOM a fotografías que se han
cargado de una fuente de vídeo exterior.
■
Las imágenes con PB ZOOM no se pueden importar a un
ordenador a través del conector DV de la videocámara.
7575
Page 76
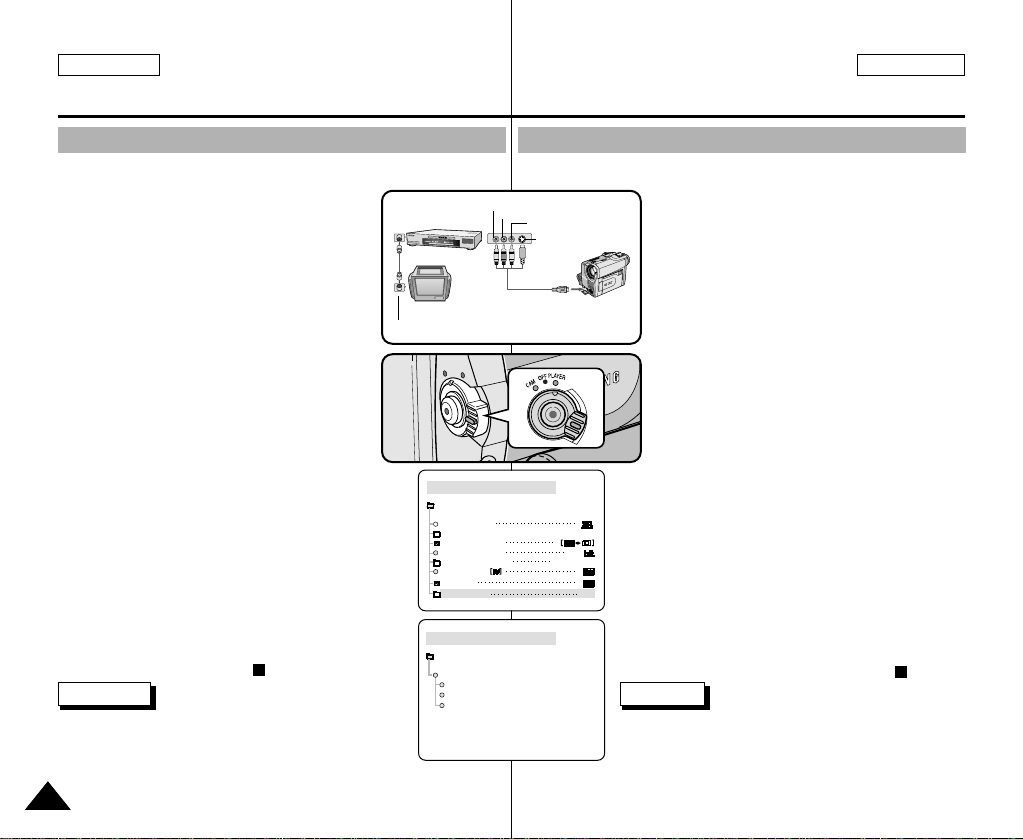
ENGLISH ESPAÑOL
PLAYER MODE
REC MODE
PHOTO SEARCH
PHOTO COPY
AUDIO MODE 12
SOUND[1]
AUDIO SELECT
WIND CUT
A / V SET
PB DSE
AV IN/OUT
OUT
PLAYER MODE
A / V SET
S-VIDEO IN
AV IN/OUT
OUT
AV IN
Recording in PLAYER mode
Grabación en la modalidad PLAYER
Recording in PLAYER mode (SCD34/D39 only)
✤ You can use this camcorder as a recorder.
✤ You can record a tape from VCR or TV.
1. Connect the camcorder and VCR or TV with the
Multi-AV cable.
2. Set the power switch of the camcorder to
PLAYER mode.
3. Turn on the VCR or TV.
4. Insert the blank tape with protection tab closed
into the camcorder.
■
If you want to record from a connected VCR,
insert a recorded VHS tape into the VCR.
5. Push the MENU button, move the
MENU SELECTOR to highlight A/V and push the
MENU SELECTOR.
6. Move the MENU SELECTOR to highlight AV
IN/OUT and push the MENU SELECTOR to
select AV IN/OUT.
7. Move the MENU SELECTOR to highlight AV IN
or S-VIDEO IN and push the MENU SELECTOR.
■
“AV IN ” and picture appear on the LCD monitor.
■
OUT: Releases the INPUT mode
■
AVIN : When signals are received from the
Audio/Video input jacks
■
S-VIDEO IN : When signals are received from the
the S-video (S-Jack plug) and Audio inputs
8. Press the START/STOP button to set the camcorder to
REC PAUSE mode.
■
“PAUSE” on the LCD monitor.
9. Select the TV program or playback the VHS tape.
10. Press START/STOP button to start recording.
■
If you want to pause recording for a while,
press the START/STOP button again.
11. To stop recording, press the (STOP) button.
Notes
■
When you record the images being played back on
analog VCR, if they are not being played back in normal
speed, (for example, more than double speed or slow
playback), only gray image appears on the camcorder.
■
If you want to see the camcorder picture with a TV, set AV IN/OUT
menu to OUT.
7676
ANTENNA
VCR
Grabación en la modalidad PLAYER (sólo modelos SCD34/D39)
✤ Esta videocámara se puede usar como grabador de cintas.
✤ Es posible grabar una cinta desde un videograbador o desde un televisor.
VIDEO
AUDIO(L)
AUDIO(R)
S-VIDEO
TV
A/V OUT
CAMCORDER
1. Conecte la videocámara al videograbador o al
televisor mediante el cable Multi-AV.
2. Ajuste el interruptor de la videocámara en la
modalidad PLAYER.
3. Encienda el videograbador o el televisor.
4. Introduzca en la cámara una cinta virgen con
la pestaña de protección cerrada.
■
Si desea grabar desde el videgrabador
conectado, introduzca una cinta VHS
grabada en el videograbador.
5. Pulse el botón MENÚ, mueva el botón
SELECTOR MENÚ hasta resaltar A/V
(audio/vídeo) y pulse SELECTOR MENÚ.
6. Mueva el botón SELECTOR MENÚ hasta
resaltar AV IN/OUT y pulse SELECTOR
MENÚ para seleccionar AV IN/OUT.
7. Mueva el botón SELECTOR MENÚ hasta
resaltar AV IN o S-VIDEO IN y pulse
SELECTOR MENÚ.
■
En la pantalla LCD aparece la indicación
“AV IN ” y la imagen.
■
OUT: sale de la modalidad INPUT
■
AV IN: cuando hay entrada de la señal de
vídeo (conector amarillo) y audio.
■
S-VIDEO IN: cuando hay entrada de la
8. Pulse el botón START/STOP para ajustar la
videocámara en la modalidad REC PAUSE.
■
9. Seleccione el canal de televisión o ponga
en marcha la cinta VHS.
10. Pulse el botón START/STOP para comenzar la grabación.
■
11. Para detener la grabación, pulse el botón (STOP).
señal de S-vídeo (conector S-Jack) y audio.
Aparecen en la LCD la indicación “PAUSE” y la imagen.
Si desea detener momentáneamente la
grabación, pulse de nuevo el botón START/STOP.
Notas
■
Cuando graba imágenes reproducidas en un
videograbador analógico, si no se han reproducido
a velocidad normal (por ejemplo, a una velocidad
superior a la velocidad doble o a cámara lenta),
sólo aparecerán imágenes en gris en la videocámara.
■
Si desea ver las imágenes de la videocámara en
una televisión, ajuste el menú AV IN/OUTen OUT.
Page 77

ENGLISH ESPAÑOL
IEEE 1394 Data Transfer
Transferencia de datos IEEE 1394
Transferring IEEE1394 (i.LINK)-DV standard data connections
Connecting to a DV device
✤ Connecting with other DV standard products.
■
A standard DV connection is quite simple.
If a product has a DV port, you can transfer data by
connecting to the DV port using the correct cable.
!!! Please be careful since there are two types of DV ports,
(4pin, 6pin). This camcorder has a 4pin terminal.
✤ With a digital connection, video and audio signals are
transmitted in digital format, allowing high quality images
to be transferred.
Connecting to a PC
✤ If you want to transmit data to a PC, you must install a
IEEE 1394 add-on card onto the PC. (not supplied)
✤ The frame rate recorded for video capturing is dependent on
the capacity of the PC.
Notes
■
When you transmit data from the camcorder to another DV device,
some functions may not work.
If this occurs, please reconnect the DV cable or turn the power
OFF and ON again.
■
When you transmit data from the camcorder to PC,
PC function button is not available in M.PLAYmode.
■
Do not use the camcorder and IEEE1394 together as this will
cause IEEE1394 to shut off.
Conexiones para la transferencia de datos estándar IEEE1394 (i.LINK)-DV
Conexión a un aparato DV
✤ Conexión a otros productos DV estándar .
■
Una conexión estándar DV es muy sencilla.Si el aparato
dispone de un puerto DV, es posible transmitir datos
conectando la videocámara al puerto DV del aparato por
medio de un cable apropiado.
!!! Atención: existen dos tipos de puertos DV (de 4 y 6 patillas).
El terminal de esta videocámara es de 4 patillas.
✤ Con una conexión digital, las señales de vídeo y de audio se
transmiten en formato digital, lo que permite transmitir
imágenes de alta calidad.
Conexión a un ordenador
✤ Si desea transmitir datos a un ordenador, deberá instalar en
éste una tarjeta adicional IEEE 1394 (no se suministra con la
cámara).
✤ La velocidad de transferencia de las imágenes de vídeo
depende de la capacidad del ordenador.
Notas
■
Al transmitir datos de la videocámara a otro aparato DV, es
posible que algunas operaciones no funcionen.
En tal caso, vuelva a conectar el cable DV o apague y encienda
de nuevo el aparato.
■
Cuando se transfieren datos desde la videocámara al ordenador,
el botón de función PC no está disponible en la modalidad
M.PLAY.
■
No use simultaneamente PC CAMERA y IEEE1394.
En ese caso cerrara IEEE1394.
7777
Page 78
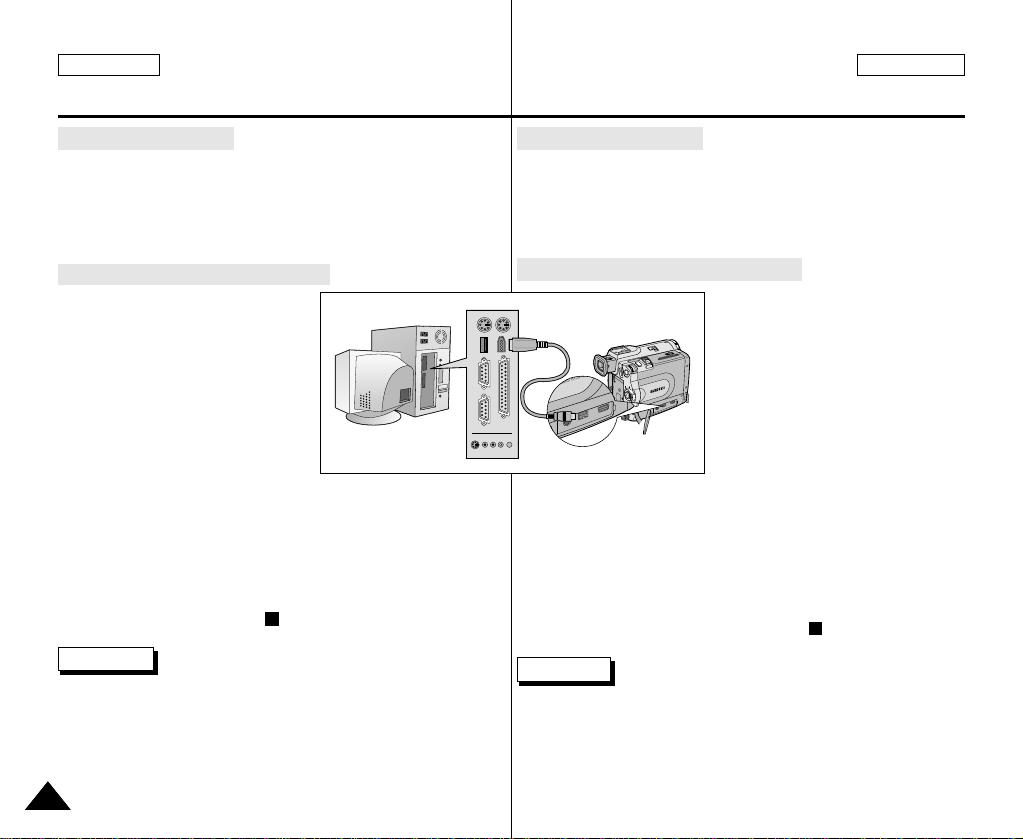
ENGLISH ESPAÑOL
IEEE 1394 Data Transfer
●
System requirements
■
CPU : faster Intel®Pentium III™ 450Mhz compatible.
■
Operating system : Windows®98SE, ME, XP, Mac OS (9.1~10.2)
■
Main memory : more than 64 MB RAM
■
IEEE1394 add-on card or built in IEEE1394 card
Transferencia de datos IEEE 1394
●
Requisitos del sistema
■
Procesador: Intel®Pentium III™ a 450 Mhz compatible.
■
Sistema operativo: Windows®98SE, ME, XP, Mac OS (9.1~10.2).
■
Memoria: más de 64 MB de memoria RAM.
■
Tarjeta IEEE 1394 añadida o incorporada.
Recording with a DV connection cable
1. Set the power switch to PLAYER
mode.
2. Connect the DV cable (not supplied)
from the DV IN/OUT port of the
camcorder to the DV IN/OUT port of
the other DV device.
■
Make sure that DV IN appears on
the screen.
3. Press the START/STOPbutton to
begin REC PAUSE mode.
■
PAUSE is displayed on the OSD.
4. Start playback on the other DV device while you monitor the
picture.
5. Press the START/STOPbutton to start recording.
■
If you want to pause recording momentarily, press the
START/STOP button again.
6. To stop recording, press the (STOP) button.
Notes
■
When using this camcorder as a recorder, the pictures that appear
on a monitor may seem uneven, however recorded pictures will not
be affected.
■
Operation are not guaranteed for all the recommanded computer
environments mentioned above.
7878
Grabación con un cable de conexión DV
1. Ajuste la videocámara en la
modalidad PLAYER.
2. Conecte los puertos de salida/
entrada de la videocámara y del
otro aparato mediante un cable
DV (no incluido).
■
Asegúrese de que la señal
DV IN aparezca en la pantalla.
3. Pulse el botón START/STOP para
activar la modalidad REC PAUSE.
■
Aparecerá la indicación PAUSE en la OSD.
4. Inicie la reproducción en el otro aparato al tiempo que sigue las
imágenes en el monitor.
5. Pulse el botón START/STOP (inicio/parada) para comenzar la
grabación.
■
Si desea detener momentáneamente la grabación, pulse de
nuevo el botón START/STOP.
6. Para detener la grabación, pulse el botón (STOP).
Notas
■
Al utilizar esta cámara como grabador, es posible que las
imágenes que aparecen en el monitor se vean irregulares. No
obstante, esto no afecta a las imágenes que se graban.
■
No se garantiza el funcionamiento en todos los entornos
informáticos recomendados que se indican.
Page 79

ENGLISH ESPAÑOL
USB interface
Interfaz USB
● Transferring a Digital Image through a USB Connection
✤ You can easily transfer a still image from a camera, tape to a
PC without additional add-on cards via a USB connection.
✤ You can transfer an image to a PC via a USB connection.
✤ If you transfer data to a PC, you need to install the software
(Driver, Editing software) supplied with the camcorder.
System Requirements
■
CPU : Intel®Pentium II™ 400 processor
compatible or better
■
Operating system : Windows®98SE/ME/
2000/XP
■
RAM : 64 MB or more
■
CD-ROM: 4x CD-ROM drive
■
VIDEO : 65,000-color or better
video display card
■
Available USB port
■
Hard Disc : 4GB (8GB recommended)
Reference
■
Intel®Pentium II™ is a trademark of the Intel Corporation.
■
Windows®is a registered trademark of the Microsoft®Corporation.
■
All other brands and names are property of their respective
owners.
■
Operations are not guaranteed for all of the recommended
computer environments mentioned above.
● Transferencia de imágenes digitales mediante una conexión USB
✤ Se pueden transferir imágenes fijas de manera sencilla desde
una cámara, una cinta, etc. a un ordenador mediante una
conexión USB, sin necesidad de una tarjeta adicional.
✤ Puede transferir una imagen al ordenador mediante una
conexión USB.
✤ Para transferir datos al ordenador, es necesario instalar el
software (controlador, software de edición) que se proporciona
junto con la videocámara.
Requisitos del sistema
■
Procesador: Intel®Pentium II™ 400
compatible o superior
■
Sistema operativo: Windows®98SE/
ME/2000/XP
■
RAM: 64 MB de memoria RAM o más
■
CD-ROM: unidad de CD-ROM 4x
■
VÍDEO: tarjeta de vídeo de 65.000
colores o superior
■
Puerto USB disponible
■
Disco duro: 4 GB
(se recomiendan 8 GB)
Notas
■
Intel®y Pentium II™ son marcas registradas de Intel Corporation.
■
Windows®es una marca registrada de Microsoft®Corporation.
■
El resto de marcas y nombres pertenecen a sus respectivos
propietarios.
■
No se garantiza el funcionamiento en todos los entornos
informáticos recomendados que se indican.
7979
Page 80
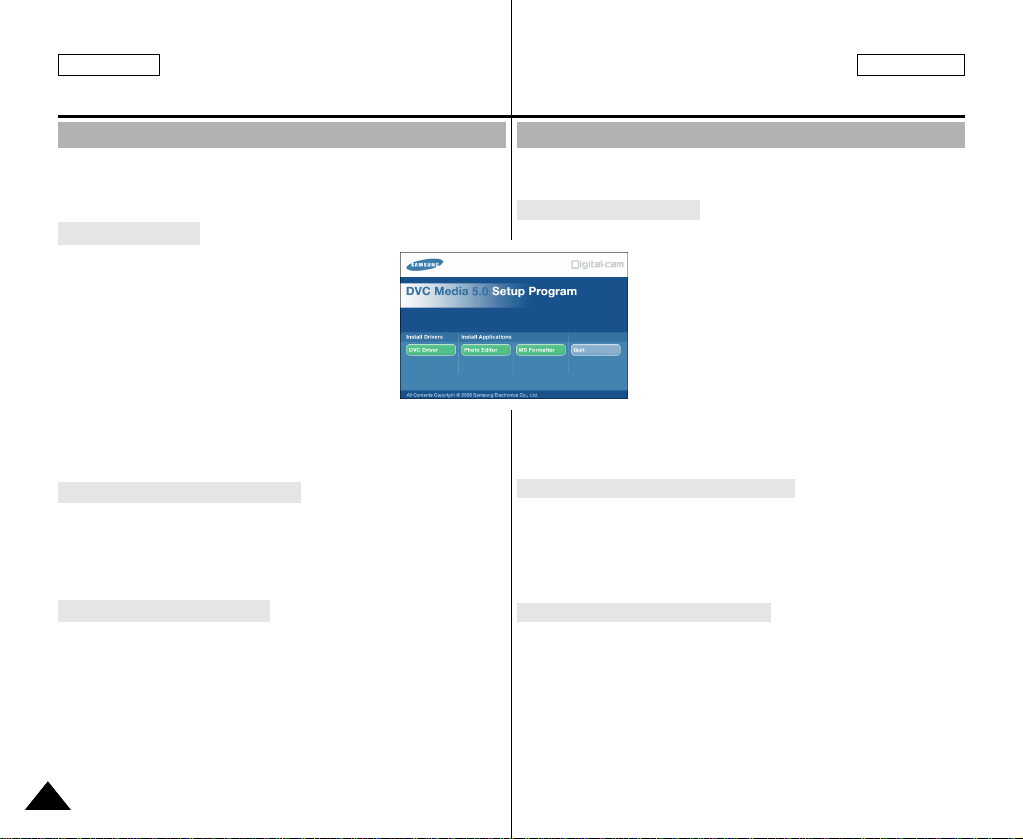
ENGLISH ESPAÑOL
USB interface
Interfaz USB
Installing DVC Media 5.0 Program Instalación del programa DVC Media 5.0
✤ Do not connect the camcorder to PC before installing the program.
✤ If another camera or scanner is connected, please disconnect it in
advance.
✤ This explanation is based on Windows
Program installation
1. Insert the software CD into CD-ROM drive.
-
Installation selection screen appears
in the monitor.
2. If the installation selection screen does not
appear after inserting the CD
click “Run” on the Windows “Start” menu and
execute SETUP.EXE file to begin installation.
-
When CD-ROM drive is set to “D:drive”, type
“D:\setup.exe” and press Enter.
3. Click one of the icons listed below to install the
selected software.
■
The program automatically checks and installs the driver.
■
DVC Driver: USB removable Disk Driver (Windows®98SE only)
■
Editing Software
Using the “removable Disk” function
✤ You can easily transfer data from a memory stick to a PC without
additional add-on cards via a USB connection.
1. Set the mode switch to memory, set the power switch to CAM or
PLAYER.
2. Connect one end of the USB cable to the USB jack on the camcorder
and the other end to the USB connector on your computer.
Using the “PC camera” function
✤ You can use this camcorder as a PC CAMERA.
✤ When you connect to a Web site that can provide video chatting
functions, you can use your camcorder for such functions.
✤ Using the camcorder with PC installed Net-meeting program, you
can conduct video conference.
✤ The PC CAMERA's screen size is 160x120 pixels.
✤ If PC is connected with the USB to the camcorder, the buttons
which excepts the POWER SWITCH, MODE SWITCH, ZOOM
SWITCH, and NIGHT-CAPTURE SWITCH are not operated.
1. Set the mode switch to Tape, set the power switch to CAM.
2. Connect one end of the USB cable to the USB jack on the camcorder
8080
and the other end to the USB connector on your computer.
USB PC CAMERA Driver
®
98SE OS.
3.
✤ No conecte la videocámara al ordenador antes de instalar el programa.
✤ Si tiene conectada otra cámara o un escáner, desconéctelos antes.
✤ Esta explicación está descrita para el sistema operativo Windows
Cómo instalar el programa
1. Introduzca el CD del software en la unidad de CD-ROM.
(El programa comprobará e instalará automáticamente el controlador
que necesite el PC)
■
DVC Driver: Controlador de disco extraíble USB (sólo Windows®98SE)
■
Software de edición
Utilización de la función "Disco extraíble”
✤ Se pueden transferir datos de manera sencilla desde un Memory
Stick a un ordenador mediante una conexión USB, sin necesidad
de una tarjeta adicional.
1. Ajuste el interruptor de modalidad en la posición Memory Stick y el
interruptor de la videocámara en CAM o PLAYER.
2. Conecte un extremo del cable USB al conector USB de la videocámara
y el otro al conector USB del ordenador.
Utilización de la función "Cámara PC"
✤ Esta videocámara se puede usar como una cámara PC.
✤ Si se conecta a un sitio web que ofrezca funciones de chat con
vídeo, puede utilizar la videocámara para este fin.
✤ Puede realizar videoconferencias conectando la videocámara a un
PC que disponga del programa NetMeeting.
✤ El tamaño de pantalla de una cámara PC es de 160 ✕120 píxeles.
✤ Si la videocámara se conecta a un PC a través del puerto USB,
todos los botones se desactivarán excepto los interruptores de la
videocámara, de modalidad, de zoom y de grabación nocturna.
1. Ajuste el interruptor de modalidad en la posición Tape y el interruptor
de la videocámara en CAM.
2. Conecte un extremo del cable USB al conector USB de la videocámara
y el otro al conector USB del ordenador.
- Aparece la pantalla de selección de la
instalación.
2. Si no aparece la pantalla de selección de la
instalación después de introducir el CD, haga clic
en “Ejecutar“ en el menú Inicio de Windows y
ejecute el archivo SETUP.EXE para iniciar la
instalación.
- Si la unidad de CD-ROM corresponde a
la letra “D:”, escriba: “D:\setup.exe” y
pulse la tecla Intro.
3.
Haga clic en uno de los iconos que se indican a
continuación para instalar el software seleccionado.
Controlador de cámara PC USB
®
98SE.
Page 81
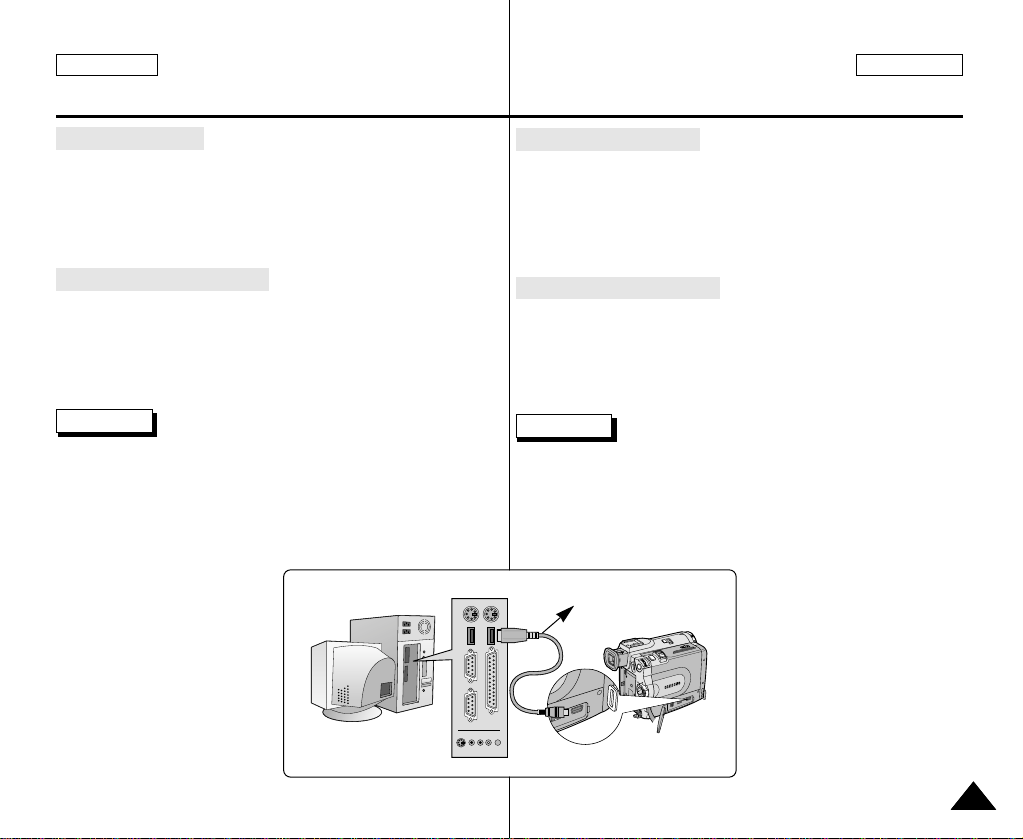
ENGLISH ESPAÑOL
USB interface
Interfaz USB
Connecting to a PC
1. Connect a USB cable to the USB port on the PC.
2. Connect the other end of the USB cable into the proper terminal on
the camcorder. (USB jack)
- If a PC is connected to the camcorder with a USB cable, only
the Power Switch, Zoom Switch, Mode switch and NITE PIX
operate.
Disconnecting the USB cable
✤ After completing the data transmission, you must disconnect
the cable in the following way:
1. Select the removable disc icon and click the right mouse button to
select [Eject].
2. Select [Confirm] and disconnect the USB cable when the Windows
Splash screen appears.
Notes
■
If you disconnect the USB cable from the PC or the camcorder
while transferring, the data transmission will stop and the data may
be damaged.
■
If you connect the USB cable to a PC via a USB HUB or
simultaneously connect the USB cable along with other USB
devices, the camcorder may not work properly.
- If this occurs, remove all USB devices from the PC and
reconnect the camcorder.
Conexión a un ordenador
1. Conecte un extremo del cable USB al puerto USB del ordenador.
2. Conecte el otro extremo del cable al terminal apropiado de la
Desconexión del cable USB
1. Seleccione el icono de disco extraíble y haga clic con el botón
2. Seleccione la opción Confirmar (Confirm) y desconecte el cable
■
■
videocámara (conector USB).
- Si la videocámara está conectada al ordenador mediante el
cable USB, no funcionará ningún botón a excepción de los
interruptores de modalidad, de grabación nocturna y de la
videocámara y el botón del zoom.
✤ Una vez completada la transmisión de datos, se debe
desconectar el cable de la siguiente forma:
derecho del ratón en el botón de expulsión (Eject).
USB cuando aparezca la pantalla de inicio de Windows.
Notas
Si desconecta el cable USB del ordenador o de la videocámara
mientras se están transfiriendo datos, la transmisión se detendrá
y puede que los datos resulten dañados.
Si conecta el cable USB al ordenador a través de un concentrador
(hub) USB o si lo conecta de manera simultánea con otros
aparatos USB, es posible que la videocámara no funcione
correctamente.
USB Cable
- En este caso,
desconecte del
ordenador los otros
aparatos USB y vuelva a
conectar la videocámara.
8181
Page 82
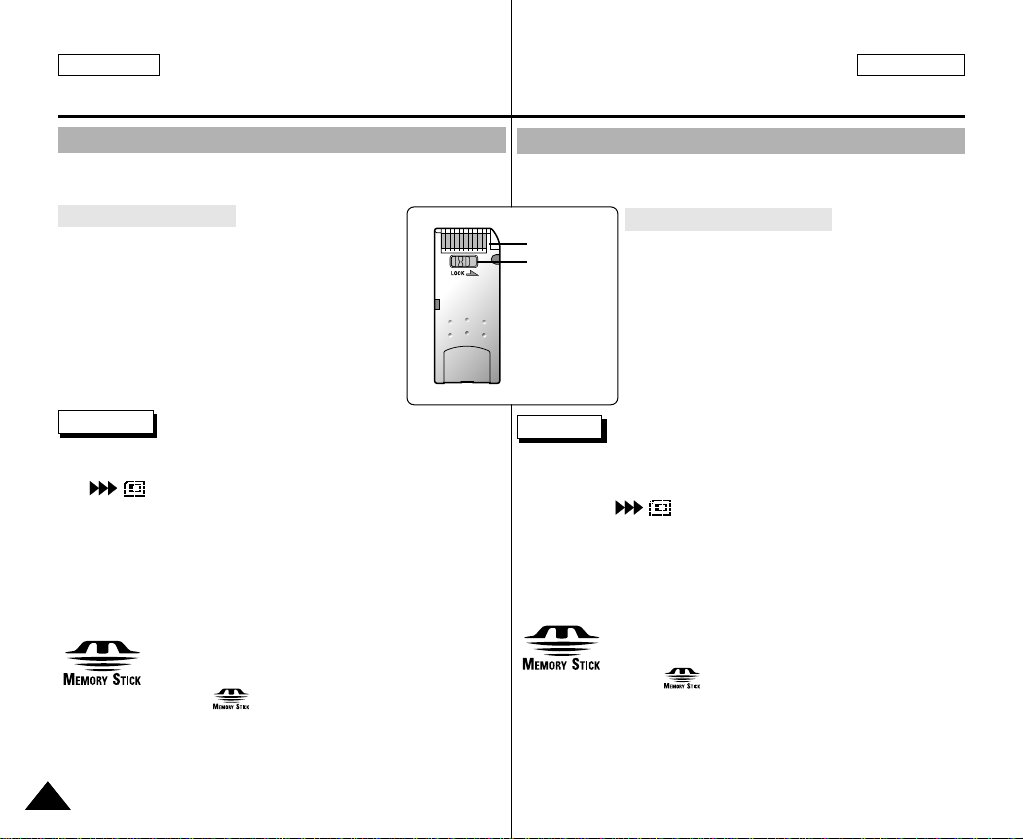
ENGLISH ESPAÑOL
TM
TM
TM
TM
Digital Still Camera mode
Mode appareil photo numérique
MEMORY STICK
✤ The Memory Stick stores and manages still images recorded by
the camera.
Memory Stick Functions
✤ Recording still images and MPEG4 movie
✤ Viewing still images and MPEG4 movie
■
Single
■
Slide show (Still images only)
✤ Multi display
✤ Protecting images against accidental erasure
✤ Deleting images recorded on a Memory Stick
✤ Print marking still images
✤ Formatting a Memory Stick
Notes
■
You can use most of the camera’s functions when recording to the
Memory Stick.
■
“” appears on the screen while recording to the Memory
Stick.
■
While recording or loading an image, do not eject or insert the
Memory Stick.
- Inserting or ejecting a Memory Stick while recording or loading
an image can cause data damage.
■
If you want to save all images on the Memory Stick, set the write
protect tab on the Memory Stick to LOCK.
●
“Memory Stick” and are trademarks of Sony Corporation.
●
All other product names mentioned herein may be the trademarks
or registered trademarks of their respective companies.
Furthermore, “™”and “®” are not mentioned in each case in this
manual.
●
Memory Stick PRO can not be used with this unit.
8282
MEMORY STICK
✤ El Memory Stick guarda y gestiona imágenes fijas grabadas
con la videocámara.
Funciones del Memory Stick
Terminal
Protection
tab
Notas
■
Cuando se graba en un Memory Stick se pueden emplear la
mayoría de las funciones de la cámara.
■
Cuando se graba en un Memory Stick aparece en la pantalla la
indicación “” .
■
No saque ni introduzca un Memory Stick mientras graba o carga
una imagen.
- En este caso es posible que los datos resulten dañados.
■
Si quiere guardar todas las imágenes del Memory Stick, ponga la
pestaña de protección de éste en la posición LOCK.
●
“Memory Stick” y son marcas registradas de Sony
Corporation.
●
Todos los demás productos mencionados son marcas comerciales
o marcas registradas de sus respectivas empresas.Además, las
indicaciones “™” y “®” no aparecen en todos los casos en este
manual.
●
“Memory Stick PRO” no esta preparado.
✤ Grabación de imágenes fijas y películas MPEG4
✤ Visionado de imágenes fijas y películas MPEG4
■
Una a una
■
Proyección de diapositivas (sólo Imágenes fijas)
✤ Visionado simultáneo o de varias imágenes
✤ Protección de imágenes contra el borrado
accidental
✤ Borrado de imágenes grabadas en una tarjeta
✤ Marcado para la impresión de imágenes fijas
✤ Formateado de una tarjeta (MEMORY STICK)
Page 83
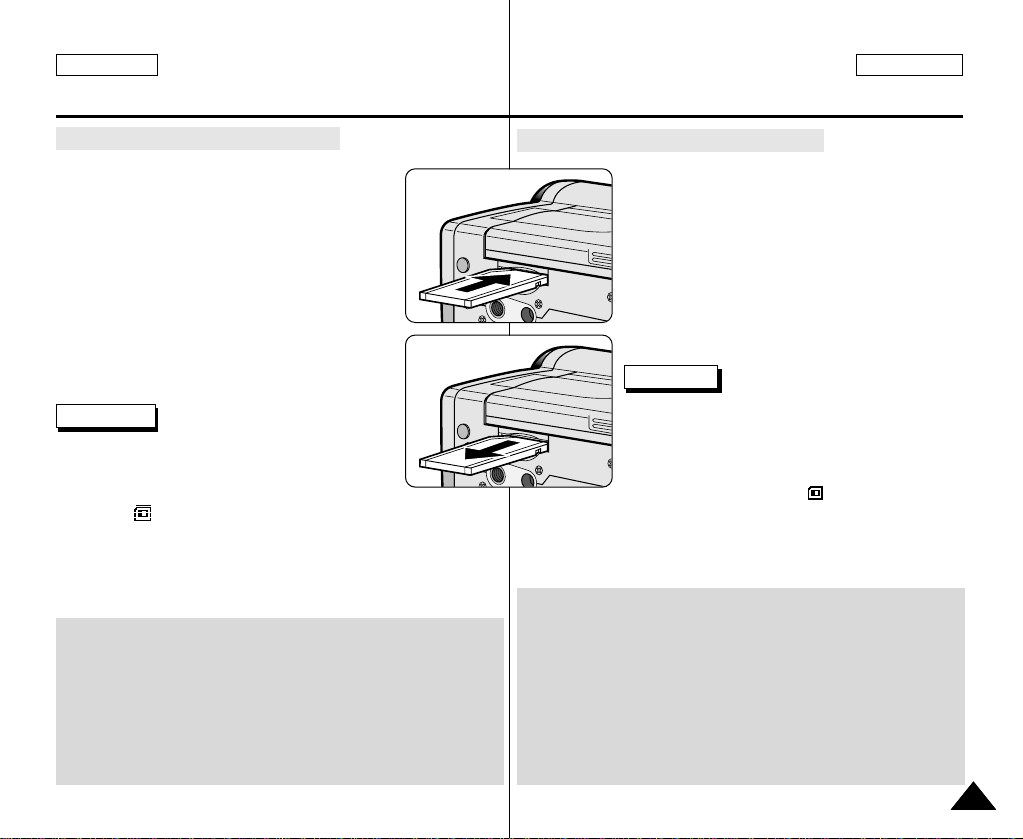
ENGLISH ESPAÑOL
Digital Still Camera mode
Mode appareil photo numérique
Inserting and ejecting the Memory Stick
● Inserting the Memory Stick
1. Turn the Power switch to OFF.
2. Insert the Memory Stick into the Memory Stick
slot located beneath the camcorder,
in the direction of the arrow.
● Ejecting the Memory Stick
1. Turn the Power switch to OFF.
2. Push the Memory Stick, then it comes out of
the camcorder automatically.
3. Pull out the Memory Stick.
✤ Do not attempt to pull the Memory Stick out
without first pushing it in.
Notes
■
If you set the camcorder to M.PLAYmode,
the last recorded still image appears.
- If there are no recorded images on the Memory
Stick, NO STORED PHOTO! or NO STORED MPEG4!
and will display on the screen.
■
While recording, loading, erasing or formatting, do not turn off the
power or change the mode.
■
Please turn the power off before you insert or eject the Memory
Stick.
You could lose data on the Memory Stick.
■
Do not allow metal substances to come in contact with the
terminals of the Memory Stick.
■
Do not bend, drop or apply strong shock to Memory Stick.
■
After pulling the Memory Stick out from the camcorder, please
keep the Memory Stick in a soft case to prevent static shock.
■
The stored contents may be changed or lost as a result of misuse,
static electricity, electric noise or repair.
Save important images separately.
■
Samsung is not responsible for data loss due to misuse.
Introducción y extracción del Memory Stick
● Introducción del Memory Stick
1. Apague la videocámara.
2. Inserte el Memory Stick en la ranura de Memory
Stick situada en la parte inferior de la videocámara
según indica la flecha.
● Extracción del Memory Stick
1. Apague la videocámara.
2. Empuje el Memory Stick y saldrá automáticamente.
3. Saque el Memory Stick.
✤ No intente tirar del Memory Stick sin haberlo
empujado antes.
Notas
■
Si ajusta la videocámara en la modalidad M.PLAY,
aparece la última imagen fija grabada.
- Si no hay ninguna imagen grabada en el
Memory Stick, en la pantalla aparecerá el
mensaje NO STORED PHOTO! o NO STORED
■
No apague la videocámara mientras esté grabando, cargando,
borrando o formateando.
■
Apague la videocámara antes de introducir o de extraer el
MPEG4! y el símbolo .
Memory Stick.
De no ser así se podrían perder datos grabados en la tarjeta.
■
Impida que los terminales del Memory Stick entren en contacto
con objetos metálicos.
■
No doble, deje caer o golpee el Memory Stick.
■
Después de sacar el Memory Stick de la videocámara, guárdelo
en una caja blanda para evitar descargas eléctricas.
■
El contenido del Memory Stick se puede estropear o perder a
causa de un uso incorrecto, de la electricidad estática o del ruido
eléctrico.
Guarde las imágenes importantes aparte.
■
Samsung no se hace responsable de los datos perdidos a causa
del uso incorrecto.
8383
Page 84
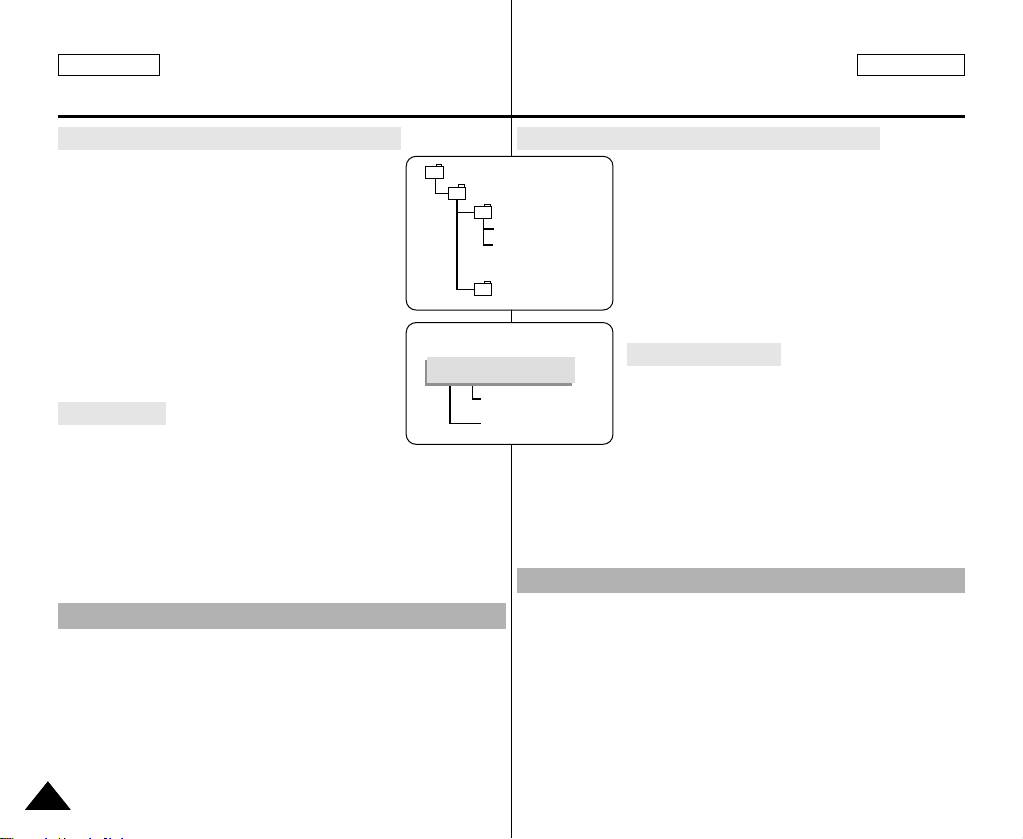
ENGLISH ESPAÑOL
DCIM
100 SSDVC
DCAM 0001
DCAM 0002
101SSDVC
.
.
.
.
File number
Folder number
000-0000
*M. PLAY
Digital Still Camera mode
Mode appareil photo numérique
Structure of folders and files on the Memory Stick
✤ The still images that you recorded are saved in
JPEG file format on the Memory Stick.
✤ The moving images that you recorded are
saved in MPEG4 file format on the Memory
Stick.
✤ Each file has a file number and all files are
assigned to a folder.
■
A file number from DCAM0001 to
DCAM9999 is sequentially assigned to
each recorded image.
■
Each folder is numbered from 100SSDVC
to 999SSDVC and recorded on the
Memory Stick.
Image Format
✤ Still image
■
Images are compressed in JPEG (Joint Photographic
Experts Group) format.
■
The number of pixels are 640✕ 480 in each mode.
■
Amount of still images must be under 1.4MB.
✤ Moving Image
■
Images are compressed in MPEG (Moving Picture Experts
Group) format.
■
The number of pixels are 320✕240, 160✕120 in each mode.
Selecting the CAMCORDER mode
✤ You can use this camcorder as a Digital Still Camera (DSC).
✤ You have to set the mode switch to MEMORY STICK position to
use this camcorder as Digital Still Camera.
■
M.REC mode (Memory RECORD mode)
1. Set the mode switch to MEMORY STICK.
2. Set the power switch to CAM.
8484
■
M.PLAYmode (Memory PLAYBACK mode)
1. Set the mode switch to MEMORY STICK.
2. Set the power switch to PLAYER.
Estructura de carpetas y archivos del Memory Stick
✤ Las imágenes fijas grabadas se guardan en la
tarjeta en formato JPEG.
✤ Los vídeos que grabe se guardan en la tarjeta en
formato MPEG4.
✤ Cada archivo tiene un número y todos los
archivos están asignados a una carpeta.
■
A cada imagen grabada se le asigna un
número de archivo que va desde DCAM0001
a DCAM9999.
■
Todas las carpetas se numeran desde 100SSDVC
a 999SSDVC y se graban en la tarjeta.
Formato de la imagen
✤ Imágenes fijas
■
Estas imágenes se comprimen en formato
JPEG (Joint Photographic Experts Group).
■
El tamaño de la imagen es de 640 ✕ 480 en
cada modalidad.
■
Las imágenes fijas no deben superar un
tamaño de 1,4 MB.
✤ Vídeo
■
Los vídeos se comprimen en formato MPEG (Moving Picture
Experts Group).
■
El tamaño de la imagen es de 320 ✕240, 160 ✕120 en cada
modalidad.
Selección de la modalidad de cámara fotográfica
✤ Esta videocámara se puede usar como cámara fotográfica digital
(DSC).
✤ Para usar esta videocámara como cámara fotográfica digital,
deberá ajustar el interruptor en la posición MEMORY STICK.
■
Modalidad M.REC (Memory RECORD, grabación en la memoria)
1. Ajuste el interruptor de modalidad en la posición
MEMORY STICK.
2. Ajuste el interruptor de la videocámara en la posición CAM.
■
Modalidad M.PLAY(Memory PLAY B ACK, reproducción con
la memoria)
1. Ajuste el interruptor de modalidad en la posición
MEMORY STICK.
2. Ajuste el interruptor de la videocámara en la posición PLAYER.
Page 85
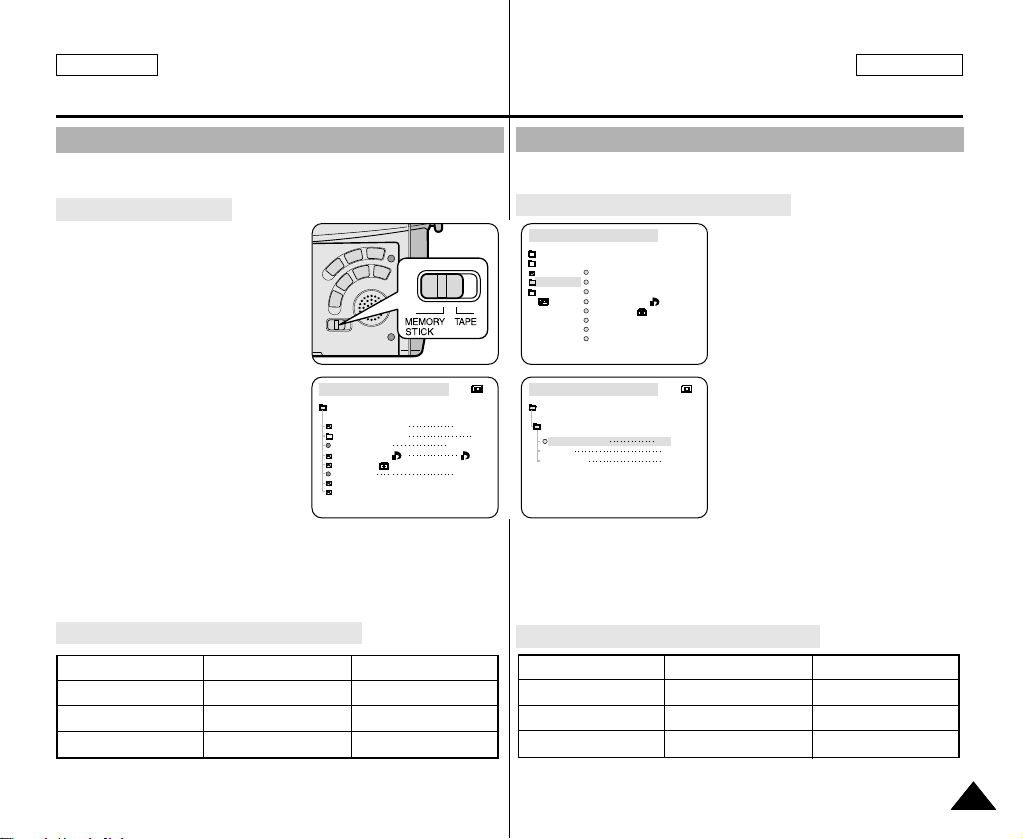
ENGLISH ESPAÑOL
M.REC MODE
INITIAL
PRINT MARK
PROTECT
M.PLAY SELECT
FILE NO.
DELETE
FORMAT
PHOTO QUALITY
MPEG4 SIZE
CAMERA
A/V
MEMORY
VIEWER
M.REC MODE
MEMORY SET
PRINT MARK
PROTECT
M.PLAY SELECT
FILE NO.
DELETE
FORMAT
PHOTO QUALITY
MPEG4 SIZE
PHOTO
SF
320X240
000
SERIES
M.REC MODE
NORMAL
SUPER FINE SF
F
N
FINE
MEMORY SET
PHOTO QUALITY
Digital Still Camera mode
Mode appareil photo numérique
Selecting the image quality
✤ You can select the quality of a still images to be recorded.
Select the image quality
1. Set the mode switch to MEMORY
STICK.
2. Set the power switch to the CAM
mode.
3. Press the MENU button.
■
The menu list will appear.
4. Move the MENU SELECTOR to
highlight MEMORY.
5. Push the MENU SELECTOR to
enter the submenu.
6. Move the MENU SELECTOR to
highlight PHOTO QUALITY in the
submenu.
7. Push the MENU SELECTOR.
8. Using the MENU SELECTOR,
select the image quality.
■
Push the MENU SELECTOR to confirm the image quality.
■
If you exit the sub-menu without pushing the
MENU SELECTOR, the quality mode is not changed.
9. To exit, press the MENU button.
● Number of images on the Memory Stick
QUALITY 8MB 16MB
SUPER FINE Approx. 45 Approx. 90
FINE Approx. 85 Approx. 170
- The actual number that you can record varies depending on the
image size.
NORMAL Approx. 155 Approx. 310
Selección de la calidad de imagen
✤ Se puede seleccionar la calidad de la imagen fija que se va a grabar.
Cómo seleccionar la calidad de imagen
1. Ajuste el interruptor de modalidad
en la posición MEMORY STICK.
2. Ajuste el interruptor de la
videocámara en la modalidad CAM.
3. Pulse el botón MENÚ.
■
Aparece la lista del menú.
4. Desplace el SELECTOR MENÚ
hasta resaltar MEMORY (memoria).
5. Pulse el SELECTOR MENÚ para
acceder al submenú.
6. Desplace el SELECTOR MENÚ
hasta resaltar QUALITY (calidad) en
el submenú.
7. Pulse el SELECTOR MENÚ.
8. Seleccione la calidad de la imagen
■
Pulse el SELECTOR MENÚ para confirmar la calidad de la
imagen.
■
Si sale del submenú sin pulsar el SELECTOR MENÚ, la
modalidad de calidad no cambia.
9. Para salir, pulse el botón MENÚ.
● Número de imágenes del Memory Stick
CALIDAD 8MB 16MB
EXCELENTE Aprox. 45 Aprox. 90
ALTA Aprox. 85 Aprox. 170
NORMAL Aprox. 155 Aprox. 310
- El número real de imágenes que se pueden grabar varía según su
tamaño.
por medio del SELECTOR MENÚ.
8585
Page 86
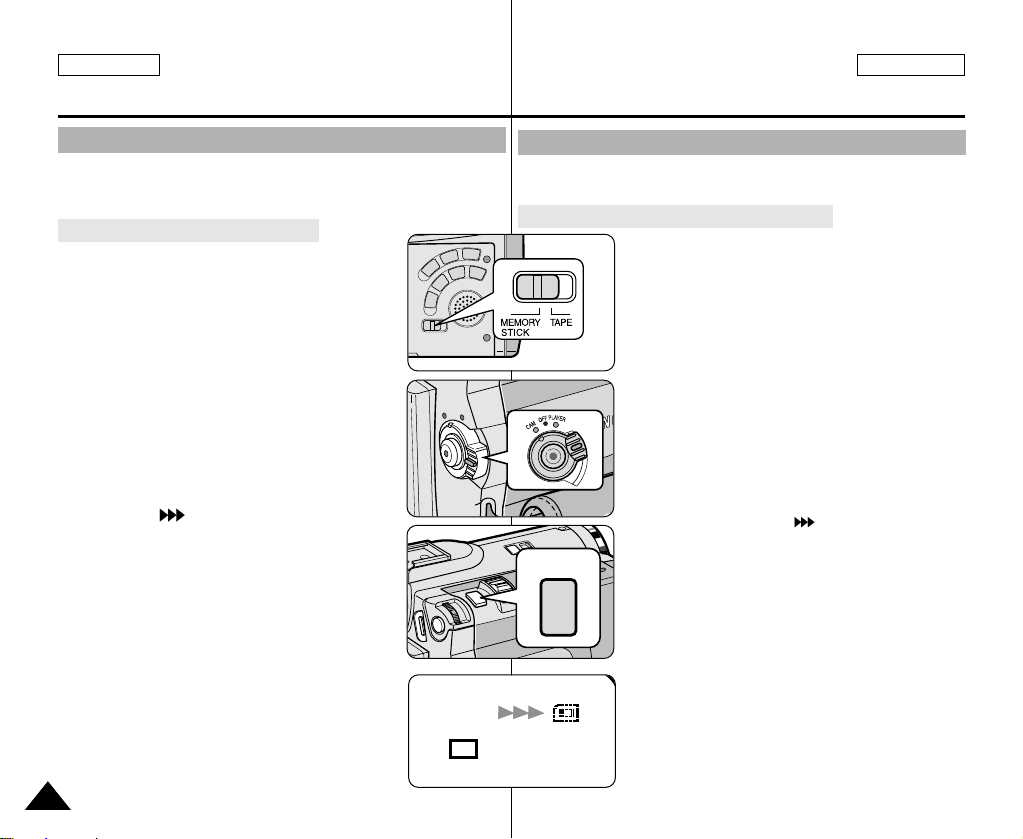
ENGLISH ESPAÑOL
2 2 / 2 4 0
F
PHOTO
Digital Still Camera mode
Mode appareil photo numérique
Recording Still images to a Memory Stick in M.REC Mode.
✤ Audio cannot be recorded with still images onto the Memory Stick.
Recording images to a Memory Stick
1. Set the mode switch to MEMORY STICK.
2. Set the power switch to CAM.
3. Press the PHOTO button lightly (about halfway
down) and hold it.
■
The still picture appears on the LCD monitor.
■
If you do not wish to record, release the
pressure from the button.
4. Press the PHOTO button fully down.
■
The still image is recorded to the Memory Stick.
■
While the camcorder is recording the still
image, “” appears on the screen.
Grabación de imágenes fijas en un Memory Stick en la modalidad M.REC
✤ En un Memory Stick no se pueden grabar imágenes fijas con
Grabación de imágenes en un Memory Stick
sonido.
1. Ajuste el interruptor de modalidad en la
posición MEMORY STICK.
2. Ajuste el interruptor de la videocámara en la
modalidad CAM.
3. Pulse ligeramente el botón PHOTO (hasta la
mitad) y manténgalo así.
■
La imagen fija aparece en la pantalla LCD.
■
Si no quiere grabar suelte el botón.
4. Pulse completamente el botón PHOTO.
■
La imagen fija se graba en le Memory Stick.
■
Mientras se graba la imagen aparece en la
pantalla la señal “”.
8686
Page 87

ENGLISH ESPAÑOL
Digital Still Camera mode
Mode appareil photo numérique
Recording an image from a cassette as a still image.
✤ You can record a still image from a cassette onto a Memory
Stick.
✤ If you want to recorded multiple still images from a cassette to
a Memory Stick, use the COPY function.
1. Set the mode switch to TAPE.
2. Set the power switch to PLAYER mode.
3. Play back the cassette.
4. Press the PHOTO button lightly (about halfway down),
when the image you want to record appears.
■
The camcorder is set to playback pause(STILL) mode.
■
If you do not wish to record, release the PHOTO button,
select the image again.
5. Press the PHOTO button fully down.
■
The still image is recorded to the Memory Stick.
■
While the camcorder is recording the still image,
“” appears on the screen.
Grabación de una imagen de un casete como imagen fija
✤ Es posible grabar imágenes fijas de un casete en un
Memory Stick.
✤ Si desea grabar varias imágenes fijas de un casete en un
Memory Stick, utilice la función COPY (copia).
1. Ajuste el interruptor de modalidad en TAPE.
2. Ajuste el interruptor de la videocámara en la modalidad PLAYER.
3. Reproduzca la cinta.
4. Pulse ligeramente el botón PHOTO (hasta la mitad) y púlselo
completamente cuando aparezca la imagen que desea grabar.
■
La cinta se ajustará en la modalidad de pausa (STILL).
■
Si desea cambiar la imagen sin grabarla, suelte el botón
PHOTO y seleccione otra imagen.
5. Pulse completamente el botón PHOTO.
■
La imagen fija se graba en el Memory Stick.
■
Mientras se graba la imagen aparece en la pantalla la señal
“”.
8787
Page 88
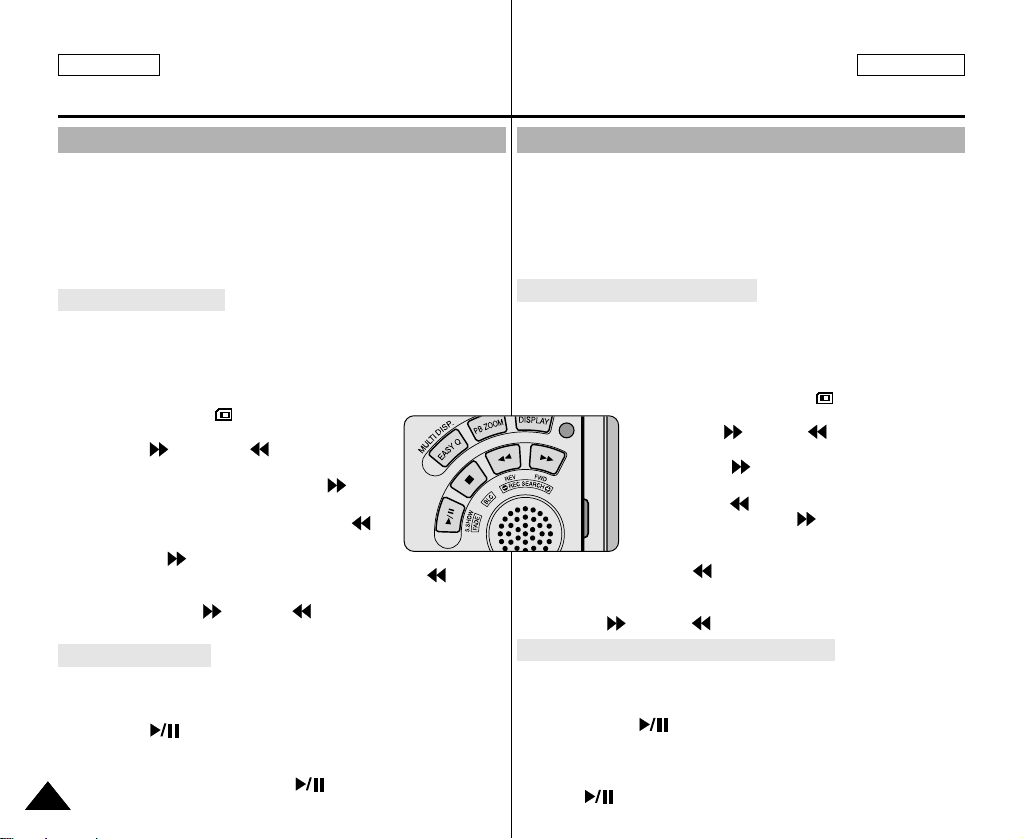
ENGLISH ESPAÑOL
Digital Still Camera mode
Mode appareil photo numérique
Viewing Still images
✤ You can playback and view still images recorded on the Memory
Stick.
✤ There are 3 ways to view recorded images.
■
Single : To view an image frame by frame.
■
Slide show : To view all images automatically and in
consecutive order.
■
Multi display : To view 6 images at once.
To view a Single image
1. Set the mode switch to MEMORY STICK.
2. Set the power switch to PLAYER mode.
■
The last recorded image appears.
- If there are no recorded images on the Memory Stick,
NO STORED PHOTO! or NO STORED
MPEG4! and will display on the
3. Using the (FWD) and (REV) buttons,
To view a slide show
1. Set the mode switch to MEMORY STICK.
2. Set the power switch to PLAYER mode.
3. Press the (S.SHOW) button.
4. To stop the slide show, press the (S.SHOW) button again.
8888
screen.
search for the desired still image.
■
To view the next image : press the (FWD)
button.
■
To view the previous image : press the
(REV) button.
■
Pressing (FWD) when you are on the last
image will take you to the first image and pressing (REV)
when you are on the first image will take you to the last image.
■
Keep pressing (FWD) or (REV) to search for an image
quickly.
■
The last recorded image appears.
■
All images will be played back consecutively for 3~4 seconds
each.
Visionado de imágenes fijas
✤ Es posible ver las imágenes grabadas en el Memory Stick.
✤ Hay dos maneras de ver las imágenes grabadas:
■
Una a una: se ven las imágenes cuadro a cuadro.
■
Proyección de diapositivas: las imágenes se pasan
automáticamente y en orden consecutivo.
■
Visionado simultáneo o de varias imágenes: hasta 6 imágenes
simultáneamente
Visionado de imágenes una a una
1. Ajuste el interruptor de modalidad en la posición MEMORY STICK.
2. Ajuste el interruptor de la videocámara en la modalidad PLAYER.
■
Aparece la última imagen grabada.
- Si no hay ninguna imagen grabada en el Memory Stick, en
la pantalla aparecerá el mensaje NO STORED PHOTO! o
NO STORED MPEG4! y el símbolo .
3. Busque la imagen que desee pulsando los
botones (FWD) y (REV).
■
Para ver la imagen siguiente pulse el
botón (FWD).
■
Para ver la imagen anterior pulse el
botón (REV).
■
Si pulsa el botón (FWD) cuando
haya llegado a la última imagen,
volverá a la primera y si pulsa el botón
(REV) cuando esté en la primera
■
Para buscar una imagen rápidamente, mantenga pulsado el
botón (FWD) o (REV).
Visionado de una proyección de diapositivas
1. Ajuste el interruptor de modalidad en la posición MEMORY STICK.
2. Ajuste el interruptor de la videocámara en la modalidad PLAYER.
■
Aparece la última imagen grabada.
3. Pulse el botón (S. SHOW).
■
Las imágenes pasarán consecutivamente y aparecerán en la
pantalla durante 3 ó 4 segundos cada una.
4. Para detener la proyección de diapositivas, pulse de nuevo el
botón (S. SHOW).
imagen, saltará a la última.
Page 89
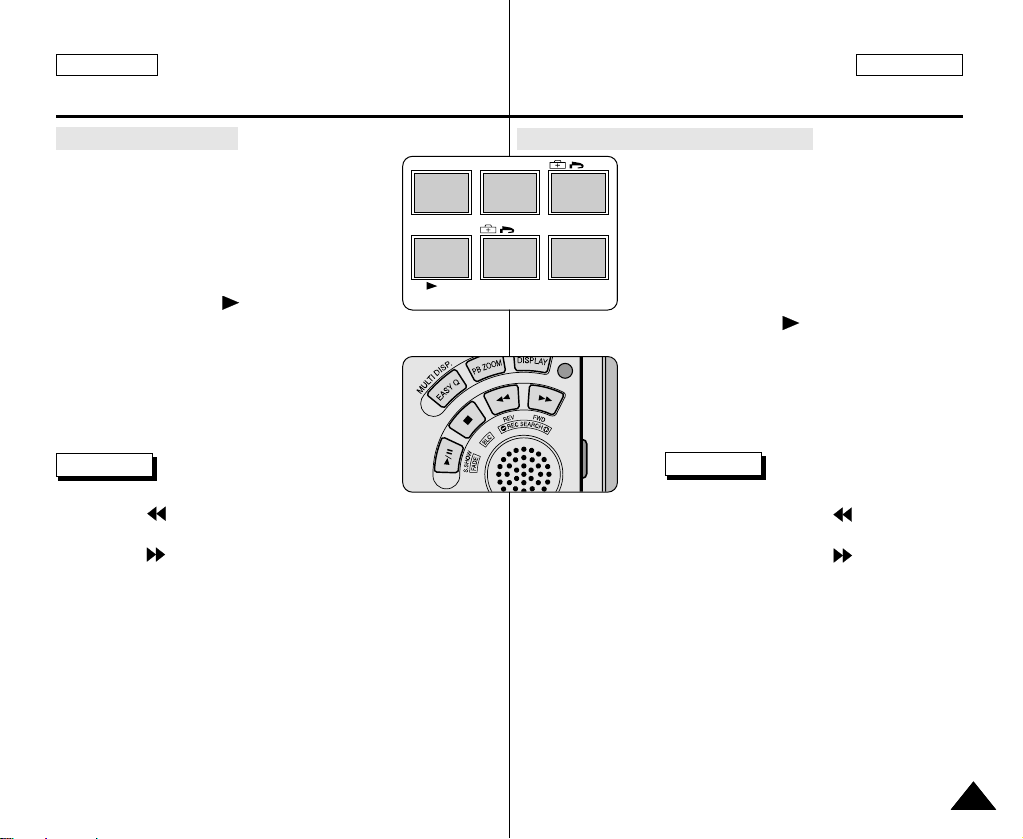
ENGLISH ESPAÑOL
19 20 21
22 23 24
[24/24]100-0025
Digital Still Camera mode
Mode appareil photo numérique
To view the Multi Display
1. Set the mode switch to MEMORY STICK.
2. Set the power switch to PLAYER mode.
■
The last recorded image appears.
3. To view six stored images on single screen,
press the MULTI DISP. button.
■
A selection mark ( ) appears under the
image.
■
Move the MENU SELECTOR to select a image.
4. To return to single playback mode, press the
MULTI DISP. button again.
Notes
■
To display the previous six images,
press the (REV).
■
To display the next six images,
press the (FWD).
Visionado simultáneo de varias imágenes
1. Ajuste el interruptor de modalidad en la
posición MEMORY STICK.
2. Ajuste el interruptor de la videocámara en la
modalidad PLAYER.
■
Aparece la última imagen grabada.
3. Si pulsa el botón MULTI DISP. aparecerán seis
imágenes grabadas en la pantalla.
■
Debajo de la imagen aparece una marca
de selección ( ).
■
Desplace el SELECTOR MENÚ para
seleccionar una imagen.
4. Para regresar a la modalidad de reproducción
una a una, pulse de nuevo el botón MULTI
DISP.
Notas
■
Para que aparezcan las seis imágenes
anteriores, pulse el botón (REV).
■
Para que aparezcan las seis imágenes
siguientes, pulse el botón (FWD).
8989
Page 90
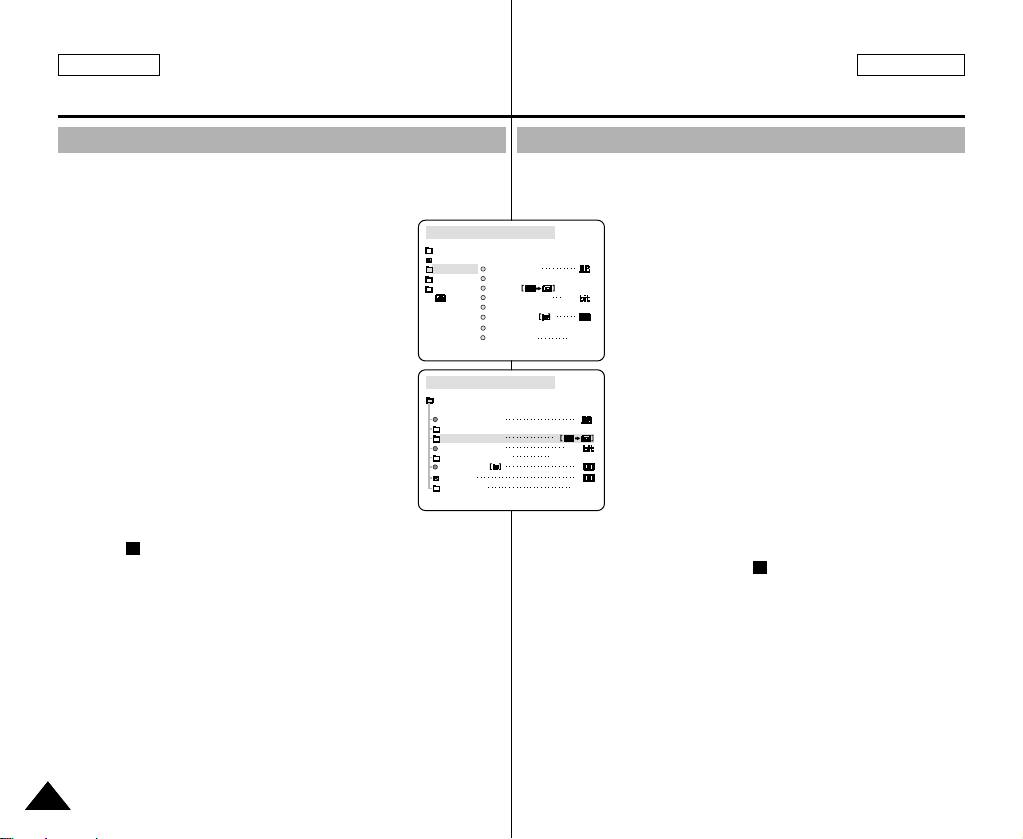
ENGLISH ESPAÑOL
PLAYER MODE
REC MODE
PHOTO SEARCH
PHOTO COPY
AUDIO MODE 12
SOUND[1]
AUDIO SELECT
WIND CUT
A / V SET
PB DSE
OUT
AV IN/OUT
PLAYER MODE
INITIAL
WIND CUT
PB DSE
REC MODE
PHOTO SEARCH
COPY
AUDIO MODE 12
AUDIO SELECT
CAMERA
A/V
MEMORY
VIEWER
AV IN/OUT
OUT
Digital Still Camera mode
Mode appareil photo numérique
Copying still images from a cassette to Memory Stick
✤ You can copy still images recorded with PHOTO function on a
cassette onto a Memory Stick.
1. Set the power switch to the PLAYER mode.
2. Press the MENU button.
3. Move the MENU SELECTOR to highlight A/V and
push the MENU SELECTOR.
■
The submenu will appear.
4. Move the MENU SELECTOR to highlight PHOTO
COPY and push the MENU SELECTOR.
■
All still images that recorded on a cassette
will be copied to a Memory Stick.
5. The camcorder automatically performs the photo
search to find still images and copying starts.
6. Press (STOP) button to stop copying.
■
Copying stops when the cassette is finished or Memory Stick
is full.
9090
Copia de imágenes fijas de un casete en el Memory Stick
✤ Es posible copiar las imágenes fijas de un casete en un Memory
Stick mediante la función PHOTO.
1. Ajuste el interruptor de la videocámara en la
modalidad PLAYER.
2. Pulse el botón MENÚ.
3. Desplace el SELECTOR MENÚ hasta resaltar
A/V (audio/vídeo) y pulse el SELECTOR MENÚ.
■
Aparecerá el submenú.
4. Desplace el SELECTOR MENÚ hasta resaltar
PHOTO COPY y pulse el SELECTOR MENÚ.
■
Todas las imágenes fijas grabadas en el
casete se copiarán en el Memory Stick.
5. La videocámara lleva a cabo de manera
automática la búsqueda de fotos para localizar
las imágenes fijas y comienza a copiarlas.
6. Pulse el botón ( STOP) para detener la
copia.
■
La función de copiado se detiene cuando
se termina el casete o cuando el Memory
Stick está lleno.
Page 91
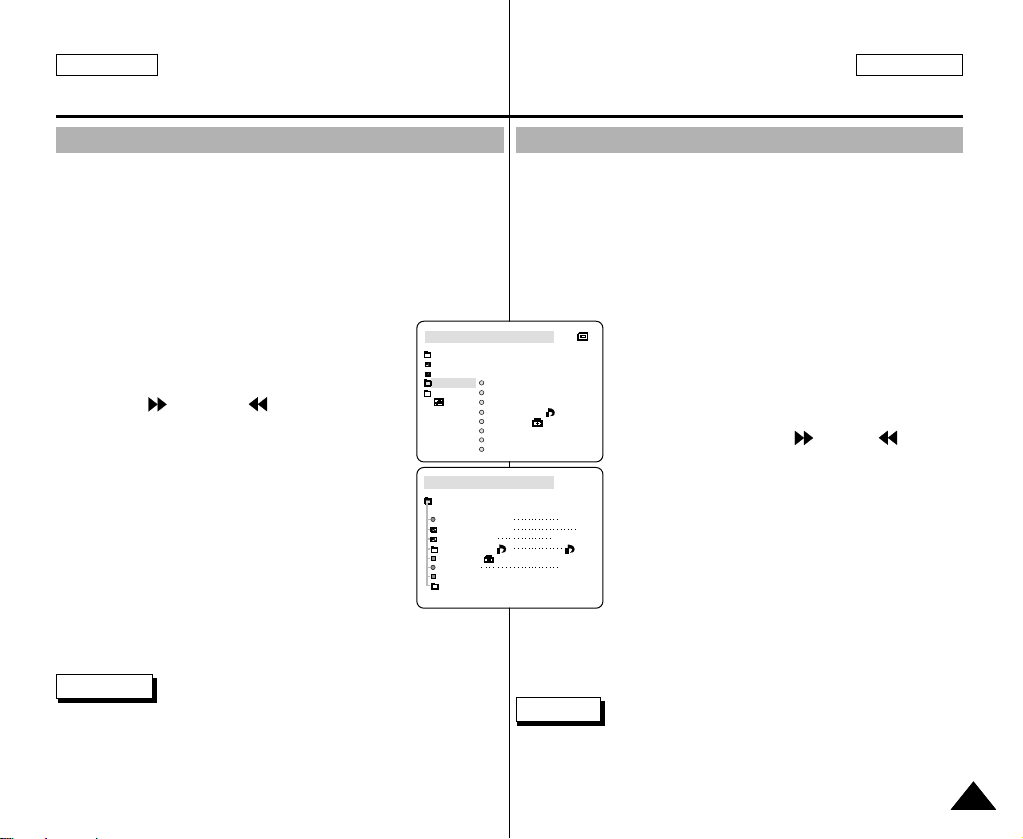
ENGLISH ESPAÑOL
M.PLAY MODE
MEMORY SET
PRINT MARK
PROTECT
M.PLAY SELECT
FILE NO.
DELETE
FORMAT
PHOTO QUALITY
MPEG4 SIZE
PHOTO
SF
320X240
000
SERIES
INITIAL
CAMERA
A/V
MEMORY
VIEWER
M.PLAY MODE
PRINT MARK
PROTECT
M.PLAY SELECT
FILE NO.
DELETE
FORMAT
PHOTO QUALITY
MPEG4 SIZE
Digital Still Camera mode
Mode appareil photo numérique
Marking images for printing
✤ This camcorder supports the DPOF (Digital Print Order Format)
print format.
✤ You can automatically print images recorded on a Memory Stick
with a printer supporting DPOF.
✤ There are 2 ways to make a PRINT MARK.
■
THIS FILE : You can set a print mark on the photo image
displayed on the LCD.
■
ALL FILES : To print 1 copy each of all of the stored images.
1. Set the mode switch to MEMORY STICK.
2. Set the power switch to PLAYER.
■
The last recorded image appears.
3. Using the (FWD) and (REV) buttons,
search for the still image that you want to mark.
4. Press the MENU button.
5. Move the MENU SELECTOR to highlight
MEMORY and push the MENU SELECTOR.
■
The MEMORY SET submenu will appear.
6. Move the MENU SELECTOR to highlight
PRINT MARK, push the MENU SELECTOR.
7. Use the MENU SELECTOR to select either
THIS FILE or ALLFILES and push the MENU
SELECTOR.
8. Use the MENU SELECTOR to select the quantity and push the
MENU SELECTOR.
Notes
■
When you setup the PRINT MARK option to ALLFILES, 999 files
from the current file are set to 1 or 0.
■
The ALLFILES option may require extended operation time
depending on the number of stored images.
Marcado de imágenes para imprimir
✤ Esta videocámara es compatible con el formato de impresión
DPOF (Digital Print Order Format).
✤ Es posible imprimir de manera automática imágenes grabadas en
un Memory Stick con una impresora compatible con DPOF.
✤ Hay dos maneras de hacer una marca de impresión.
■
THIS FILE (este archivo): se puede poner una marca de
impresión en la imagen que aparece en la pantalla LCD.
■
ALL FILES (todos los archivos): se imprime una copia de cada
una de las imágenes guardadas.
1. Ajuste el interruptor de modalidad en la posición
MEMORY STICK.
2. Ajuste el interruptor de la videocámara en la
modalidad PLAYER.
■
Aparece la última imagen grabada.
3. Busque la imagen fija que desee marcar
pulsando los botones (FWD) y (REV).
4. Pulse el botón MENÚ.
5. Desplace el SELECTOR MENÚ hasta resaltar
MEMORY (memoria) y pulse el SELECTOR
MENÚ.
■
Aparecerá el submenú MEMORY SET.
6. Desplace el SELECTOR MENÚ hasta resaltar
PRINT MARK (marca de impresión) y pulse el
SELECTOR MENÚ.
7. Mediante el SELECTOR MENÚ, seleccione THIS FILE o ALL
FILES y después pulse el SELECTOR MENÚ.
8. Desplace el SELECTOR MENÚ para seleccionar la cantidad de
copias que desee realizar y pulse el SELECTOR MENÚ.
Notas
■
Cuando la opción PRINT MARK se ajusta en ALL FILES, 999
archivos del archivo actual se ajustan a 1 ó 0.
■
Es posible que la opción ALLFILES requiera más tiempo de
funcionamiento, dependiendo del número de imágenes guardadas.
9191
Page 92
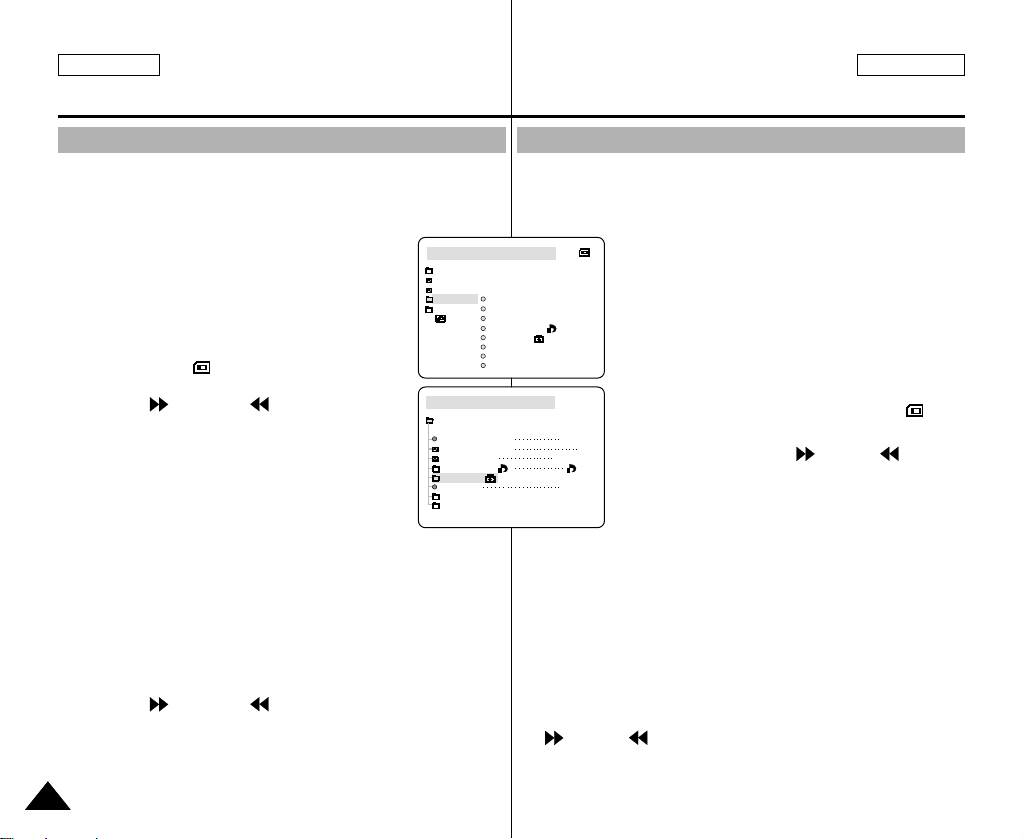
ENGLISH ESPAÑOL
M.PLAY MODE
MEMORY SET
PRINT MARK
PROTECT
M.PLAY SELECT
FILE NO.
DELETE
FORMAT
PHOTO QUALITY
MPEG4 SIZE
PHOTO
SF
320X240
000
SERIES
INITIAL
CAMERA
A/V
MEMORY
VIEWER
M.PLAY MODE
PRINT MARK
PROTECT
M.PLAY SELECT
FILE NO.
DELETE
FORMAT
PHOTO QUALITY
MPEG4 SIZE
Digital Still Camera mode
Mode appareil photo numérique
Protection from accidental erasure
✤ You can protect important images from accidental erasure.
■
If you execute FORMAT, all images including protected images
will be erased.
1. Set the mode switch to MEMORY STICK.
2. Set the power switch to PLAYER.
■
The last recorded image appears.
■
If there are no recorded images on the Memory
Stick, NO STORED PHOTO! or NO STORED
MPEG4! and will display on the screen.
3. Using the (FWD) and (REV) buttons,
search for the still image that you want to protect.
4. Press the MENU button.
5. Move the MENU SELECTOR to highlight MEMORY
and push the MENU SELECTOR.
■
The submenu of MEMORY SET will appear.
6. Move the MENU SELECTOR to highlight PROTECT and push the
MENU SELECTOR.
7. Push the MENU SELECTOR to set PROTECT to ON or OFF.
■
THIS FILE : protects the currently selected file from erasure.
8. Using the (FWD) and (REV) buttons, search for the still
image that you wish to protect.
9. To exit the menu, press the MENU button.
9292
Protección contra el borrado accidental
✤ Las imágenes más importantes se pueden proteger contra el
borrado accidental.
■
Si ejecuta FORMAT, todas las imágenes, incluidas las
protegidas, se borrarán.
1. Ajuste el interruptor de modalidad en la posición
MEMORY STICK.
2. Ajuste el interruptor de la videocámara en la
modalidad PLAYER.
■
Aparece la última imagen grabada.
■
Si no hay ninguna imagen grabada en el
Memory Stick, en la pantalla aparecerá el
mensaje NO STORED PHOTO! o
NO STORED MPEG4! y el símbolo .
3. Busque la imagen fija que desee proteger
pulsando los botones (FWD) y (REV).
4. Pulse el botón MENÚ.
5. Desplace el SELECTOR MENÚ hasta resaltar
MEMORY (memoria) y pulse el SELECTOR
MENÚ.
■
Aparecerá el submenú MEMORY SET.
6. Desplace el SELECTOR MENÚ hasta resaltar PROTECT
(proteger) y pulse el SELECTOR MENÚ.
7. Pulse el SELECTOR MENÚ para activar o desactivar la
protección.
■
THIS FILE : protege el archivo actualmente seleccionado
contra el borrado.
8. Busque la imagen fija que desee proteger pulsando los botones
(FWD) y (REV).
9. Para salir del menú, pulse el botón MENÚ.
Page 93
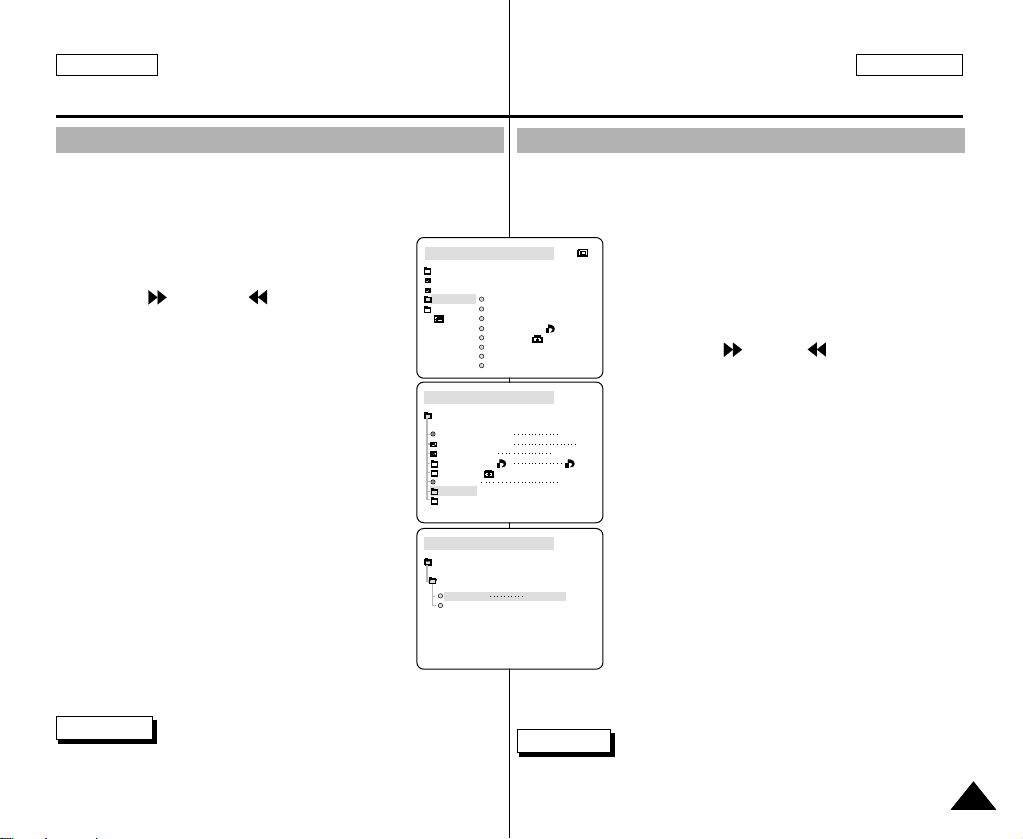
ENGLISH ESPAÑOL
M.PLAY MODE
MEMORY SET
PRINT MARK
PROTECT
M.PLAY SELECT
FILE NO.
DELETE
FORMAT
PHOTO QUALITY
MPEG4 SIZE
PHOTO
SF
320X240
000
SERIES
M.PLAY MODE
THIS FILE CANCLE
ALL FILES
MEMORY SET
DELETE
INITIAL
CAMERA
A/V
MEMORY
VIEWER
M.PLAY MODE
PRINT MARK
PROTECT
M.PLAY SELECT
FILE NO.
DELETE
FORMAT
PHOTO QUALITY
MPEG4 SIZE
Digital Still Camera mode
Mode appareil photo numérique
Deleting Still images
✤ You can erase the still images recorded on the Memory Stick.
✤ If you want to delete protected images, you must first deactivate
the image protection.
✤ An image which has been deleted cannot be recovered.
1. Set the mode switch to MEMORY STICK.
2. Set the power switch to PLAYER.
3. Using the (FWD) and (REV) buttons,
search for the still image that you want to delete.
4. Press the MENU button.
5. Move the MENU SELECTOR to highlight
MEMORY and push the MENU SELECTOR.
■
The MEMORY SET submenu will appear.
6. Move the MENU SELECTOR to highlight
DELETE and push the MENU SELECTOR.
■
Using the MENU SELECTOR, select either
THIS FILE or ALLFILES and push the
MENU SELECTOR.
■
THIS FILE : deletes only the file currently
selected.
■
ALL FILES : deletes all files stored in
the Memory Stick.
7. A box will appear to verify whether you wish to
delete the image(s).
■
Using the MENU SELECTOR, select the item.
■
EXECUTE : deletes the selected image(s).
■
CANCEL : does not delete the selected image(s)
and returns to the previous menu.
Note
■
If you try to delete a protected image, “PROTECT!” appears on the
screen.
Borrado de imágenes fijas
✤ Es posible borrar las imágenes fijas grabadas en el Memory Stick.
✤ Si desea borrar imágenes protegidas, primero tendrá que
desactivar la protección de imágenes.
✤ Una imagen que se ha borrado no se puede recuperar.
1. Ajuste el interruptor de modalidad en la posición
MEMORY STICK.
2. Ajuste el interruptor de la videocámara en la
modalidad PLAYER.
3. Busque la imagen fija que desee borrar pulsando
los botones (FWD) y (REV).
4. Pulse el botón MENÚ.
5. Desplace el SELECTOR MENÚ hasta resaltar
MEMORY (memoria) y pulse el SELECTOR MENÚ.
■
Aparecerá el submenú MEMORY SET.
6. Desplace el SELECTOR MENÚ hasta resaltar
DELETE (borrar) y pulse el SELECTOR MENÚ.
■
Mediante el SELECTOR MENÚ, seleccione
THIS FILE o ALLFILES y después pulse el
SELECTOR MENÚ.
■
THIS FILE : se borra sólo el archivo seleccionado.
■
ALL FILES: se borran todos los archivos
guardados en el Memory Stick.
7. Aparecerá un cuadro en el que podrá verificar si
desea borrar las imágenes.
■
Seleccione el elemento correspondiente
■
EXECUTE (ejecutar): borra las imágenes seleccionadas.
■
CANCEL (cancelar): no borra las imágenes seleccionadas y
vuelve al menú anterior.
Nota
■
Si intenta borrar una imagen protegida, aparecerá en la pantalla
el mensaje “PROTECT!”.
mediante el SELECTOR MENÚ.
9393
Page 94
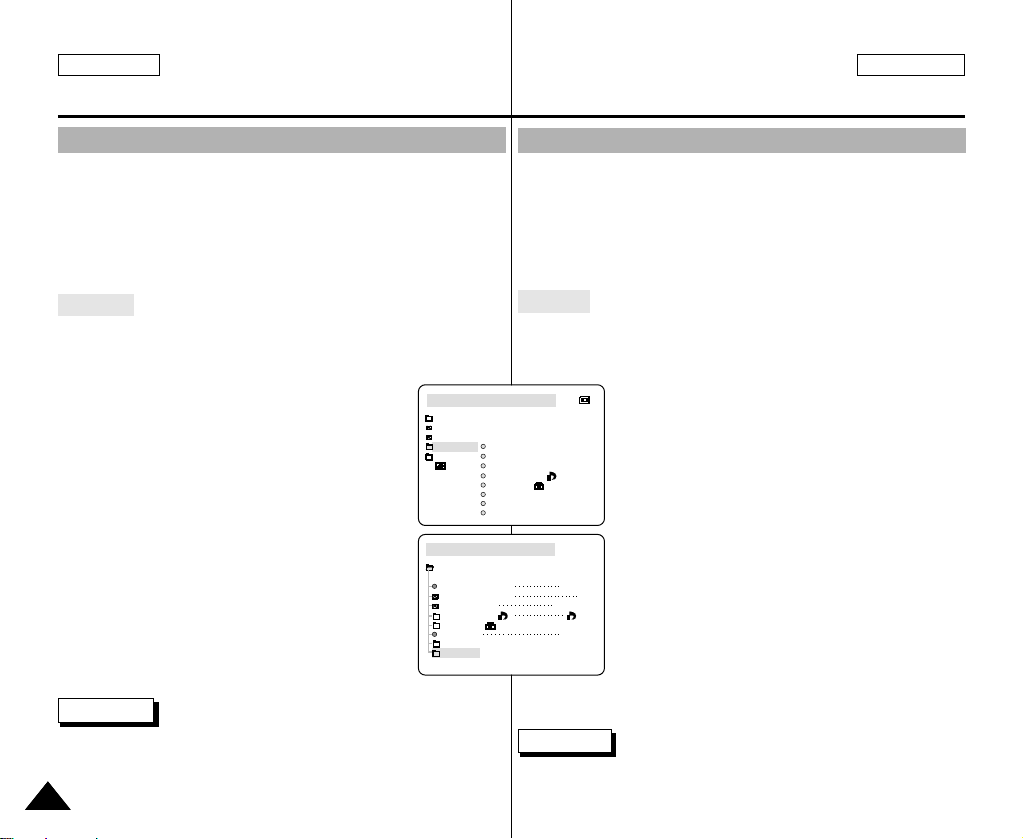
ENGLISH ESPAÑOL
M.PLAY MODE
MEMORY SET
PRINT MARK
PROTECT
M.PLAY SELECT
FILE NO.
DELETE
FORMAT
PHOTO QUALITY
MPEG4 SIZE
PHOTO
SF
320X240
000
SERIES
INITIAL
CAMERA
A/V
MEMORY
VIEWER
M.PLAY MODE
PRINT MARK
PROTECT
M.PLAY SELECT
FILE NO.
DELETE
FORMAT
PHOTO QUALITY
MPEG4 SIZE
Digital Still Camera mode
Mode appareil photo numérique
Formatting the Memory Stick
✤ You can use the MEMORY FORMAT functions to completely
delete all images and options on the Memory Stick, including
protected images.
✤ The format function restores the Memory Stick to its initial state.
✤ The Memory Stick supplied with this camcorder has been
formatted already.
Attention
✤ If you execute the MEMORY FORMAT function, all images will
be erased completely and erased images cannot be recovered.
1. Set the mode switch to MEMORY STICK.
2. Set the power switch to PLAYER mode.
3. Press the MENU button.
4. Move the MENU SELECTOR to highlight MEMORY
and push the MENU SELECTOR.
■
The sub menu will appear.
5. Select FORMAT from the list and push the MENU
SELECTOR.
6. “ALL FILES ARE DELETED! FORMAT REALLY?”
appears on the screen.
7. Using the MENU SELECTOR, select the item.
■
NO : To return to previous menu
■
YES : To start formatting.
8. Push the MENU SELECTOR.
9. To exit the menu, push the MENU button.
Note
■
If you want to format the Memory Stick on your PC, use only the
“Memory Stick formatter” supplied with the software CD.
9494
Formateado del Memory Stick
✤ Para eliminar por completo las imágenes y las opciones del Memory
Stick, incluidas las imágenes protegidas, se pueden emplear las
funciones MEMORY FORMAT (formateado de memoria).
✤ La función de formateado devuelve el Memory Stick a su estado
inicial.
✤ El Memory Stick que se suministra junto con la videocámara ya
está formateado.
Atención
✤ Si ejecuta la función MEMORY FORMAT, todas las imágenes
se borrarán y no se podrán recuperar.
1. Ajuste el interruptor de modalidad en la posición
MEMORY STICK.
2. Ajuste el interruptor de la videocámara en la
modalidad PLAYER.
3. Pulse el SELECTOR MENÚ.
4. Desplace el SELECTOR MENÚ hasta resaltar
MEMORY (memoria) y pulse el SELECTOR MENÚ.
■
Aparecerá el submenú.
5. Seleccione la opción FORMAT de la lista y pulse
el SELECTOR MENÚ.
6. En la pantalla aparecerá el mensaje “ALL FILES
ARE DELETED! FORMATREALLY?” (se
borrarán todos los archivos, seguro que desea
formatear?).
7. Seleccione el elemento correspondiente mediante
el SELECTOR MENÚ.
■
NO : regresa al menú anterior.
■
YES (sí): comienza el formateado.
8. Pulse el SELECTOR MENÚ.
Nota
■
Si desea formatear el Memory Stick en un ordenador, utilice el
“Memory Stick formatter” que se suministra con el CD de software.
9. Para salir, pulse el botón MENÚ.
Page 95
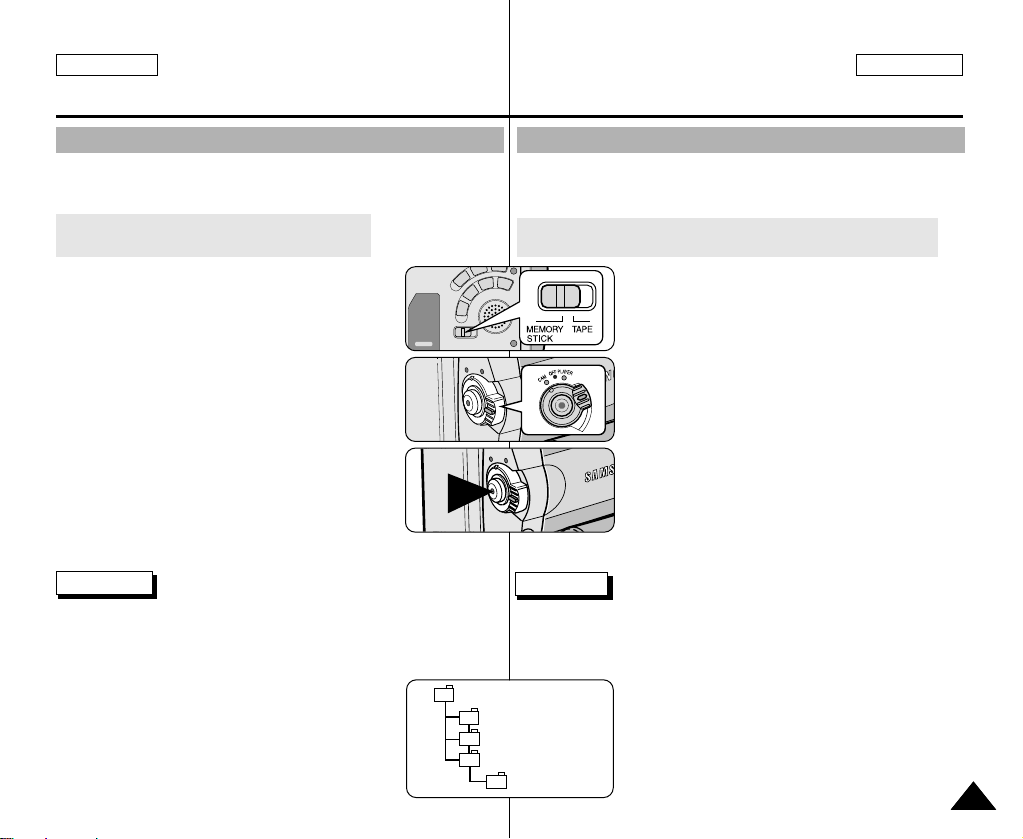
ENGLISH ESPAÑOL
DCIM
MISC
SSMOV
100SMDVC
Digital Still Camera mode
Mode appareil photo numérique
MPEG RECORDING
✤ You can record the moving picture images with an audio on the
Memory Stick.
Saving the pictures captured by a camera as
a moving picture file onto MEMORY STICK
1. Check whether MEMORY STICK is inserted into
the camcorder.
If it is not in the camcorder, insert it onto the slot.
2. Set the mode switch to MEMORY STICK position.
3. Set the power switch to CAM mode.
4. Press the START/STOPbutton, the images are
recorded onto the MEMORYSTICK in MPEG4.
■
You can record 10 ~ 20 seconds continuously.
■
You can record a camera still image onto
memory stick by pressing the Photo button
instead of the START/STOPbutton.
5. Press the START/STOPbutton to stop the
recording.
Notes
■
The moving picture images that you recorded are saved in
*.asf file format on the Memory Stick.
■
You can record the moving picture images as 320 x 240 pixel or
160 x 120 pixel.
■
The file that you recorded are saved in a
following folder.
Grabación MPEG
✤ Mediante la grabación MPEG es posible guardar un archivo de
imágenes en movimiento con sonido en el Memory Stick.
Grabación de las imágenes captadas por la cámara como un
archivo de imágenes en movimiento en el MEMORY STICK
1. Compruebe que haya un MEMORY STICK en la
videocámara. En caso negativo, introduzca uno
en la ranura.
2. Ajuste el interruptor de modalidad en la posición
MEMORY STICK.
3. Ajuste el interruptor de la videocámara en la
modalidad CAM.
4. Pulse el botón START/STOPpara comenzar a
grabar las imágenes captadas como un archivo de
vídeo en formato MPEG4 en el MEMORY STICK
■
Usted puede grabar 10 ~ 20 segundos
continuamente de una sola vez.
■
Puede grabar una imagen fija en el Memory
Stick pulsando el botón Photo (fotografía) en
lugar de START/STOP.
5. Pulse el botón START/STOPpara detener la
grabación.
Notas
■
Las imágenes de vídeo que grabe se guardarán en formato *.asf
en el Memory Stick.
■
Puede grabar las imágenes de vídeo con una resolución de
320x 240 píxeles o de 160 x 120 píxeles.
■
Los archivos que grabe se guardarán en la
siguiente carpeta.
9595
Page 96

ENGLISH ESPAÑOL
Digital Still Camera mode
Mode appareil photo numérique
■
The moving picture images on a Memory Stick are smaller and
have less definition than those recorded on Tape.
■
There may occasionally be broken or mosaic pictures while playing
the MPEG4 moving picture images, but it is not a malfunction.
■
You need Microsoft Windows Media Player Version 9 or higher
version and Sharp G.726 Audio Codec in order to play MPEG4 file
on the Memory Stick on your PC.
(Microsoft Windows Media Player Version 9(Eng) is included in the
CD that is supplied.
■
You can download the Microsoft Windows Media Player applied
each languages on Microsoft Website,
“http://www. microsoft.com/windows/windowsmedia/
download/default.asp”.
■
Sharp G.726 Audio Codec is automatically installed through
Internet when you play the MPEG4 file.
■
If Sharp G.726 Audio Codec is not properly installed on your PC,
it could not play Audio in the MPEG4 file.
■
The sound is recorded in Mono.
■
The following functions will not operate in M.REC Mode.
- DIS (Digital Image Stabilizer), Digital Zoom, Fade, Program AE,
Digital Effect, Slow Shutter
■
During Memory Stick recording, don’t insert or eject the tape,
as noise may be recorded.
■
Do not eject the Memory Stick during recording.
The Memory Stick or its data may be damaged.
■
Moving images recorded on the Memory Stick may not play on
other manufacturer's camcorders.
■
MPEG4 files recorded by another camcorder might not be playable
in this camcorder.
■
Las imágenes de vídeo grabadas en un Memory Stick son de menor
tamaño e inferior resolución que aquéllas grabadas en una cinta.
■
Es posible que, durante la reproducción de las imágenes de vídeo
MPEG4, aparezcan imágenes cortadas o en forma de mosaico.
Esto no se debe a un funcionamiento incorrecto.
■
Para reproducir los archivos MPEG4 del Memory Stick en un PC,
es necesario utilizar el Reproductor de Windows Media de Microsoft,
versión 9 o superior, y el códec de audio Sharp G.726 (en el CD
suministrado se incluye el Reproductor de Windows Media de
Microsoft versión 9 en inglés).
■
En varios idiomas desde el sitio Web de Microsoft,
“http://www.microsoft.com/windows/windowsmedia/
download/default.asp”.
■
El códec de audio Sharp G.726 se instala automáticamente desde
Internet al reproducir un archivo MPEG4.
■
Si el códec de audio Sharp G.726 no se instala correctamente en el
PC, no será posible reproducir el sonido del archivo MPEG4.
■
El sonido se graba en formato mono.
■
Las siguientes funciones no están disponibles en la modalidad
M.REC.
- DIS (estabilizador digital de la imagen), zoom digital, fundido,
programa AE, efectos digitales, obturador lenton No introduzca o
extraiga la cinta mientras graba en el Memory Stick.
■
En caso contrario, podría grabarse ruido.n No extraiga el Memory
Stick mientras esté grabando en él.
■
En caso contrario, podrían resultar dañados los datos o el propio
Memory Stick.
■
Es posible que las imágenes de vídeo grabadas en el Memory Stick
no puedan reproducirse en videocámaras de otras marcas.
■
Es posible que los archivos MPEG4 grabados por otras
videocámaras no puedan reproducirse en ésta.
9696
Page 97
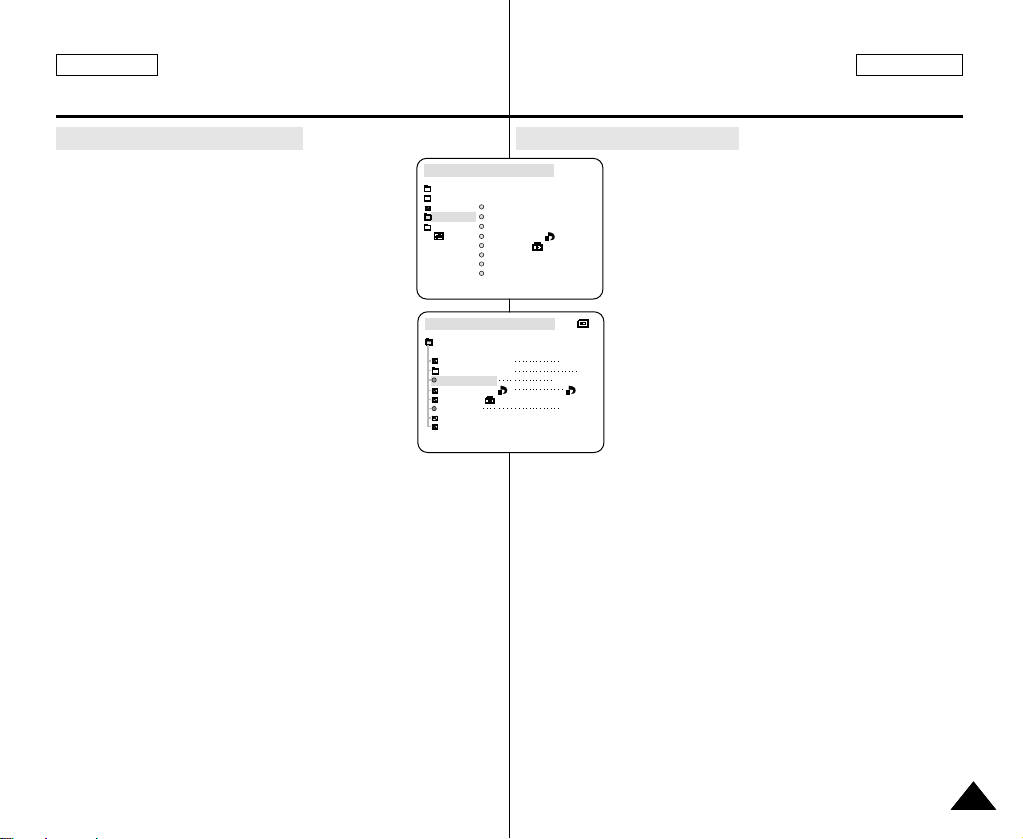
ENGLISH ESPAÑOL
M.REC MODE
INITIAL
PRINT MARK
PROTECT
M.PLAY SELECT
FILE NO.
DELETE
FORMAT
PHOTO QUALITY
MPEG4 SIZE
CAMERA
A/V
MEMORY
VIEWER
M.REC MODE
MEMORY SET
PRINT MARK
PROTECT
M.PLAY SELECT
FILE NO.
DELETE
FORMAT
PHOTO QUALITY
MPEG4 SIZE
PHOTO
SF
320X240
000
SERIES
Digital Still Camera mode
Mode appareil photo numérique
Selecting the moving picture sizes
1. Set the mode switch to MEMORY STICK position.
2. Set the power switch to CAM mode.
3. Press the MENU button.
4. Move the MENU SELECTOR to highlight MEMORY.
5. Push the MENU SELECTOR to enter the submenu.
6. Move the MENU SELECTOR to highlight MPEG4
SIZE.
7. Push the MENU SELECTOR button.
■
The MPEG4 SIZE toggles between 320 ✕240 160 ✕120 with each push.
Selección del tamaño del vídeo
1. Ajuste el interruptor de modalidad en la posición
MEMORY STICK.
2. Ajuste el interruptor de la videocámara en la
modalidad CAM.
3. Pulse el botón MENÚ.
4. Desplace el SELECTOR MENÚ hasta resaltar
MEMORY (memoria).
5. Pulse el SELECTOR MENÚ para acceder
al submenú.
6. Desplace el SELECTOR MENÚ hasta resaltar
MPEG4 SIZE (tamaño de MPEG4).
7. Pulse el SELECTOR MENÚ.
■
La función MPEG4 SIZE cambia
alternativamente entre los tamaños de
320 ✕240 y 160 ✕120 píxeles cada vez que
se pulsa.
9797
Page 98
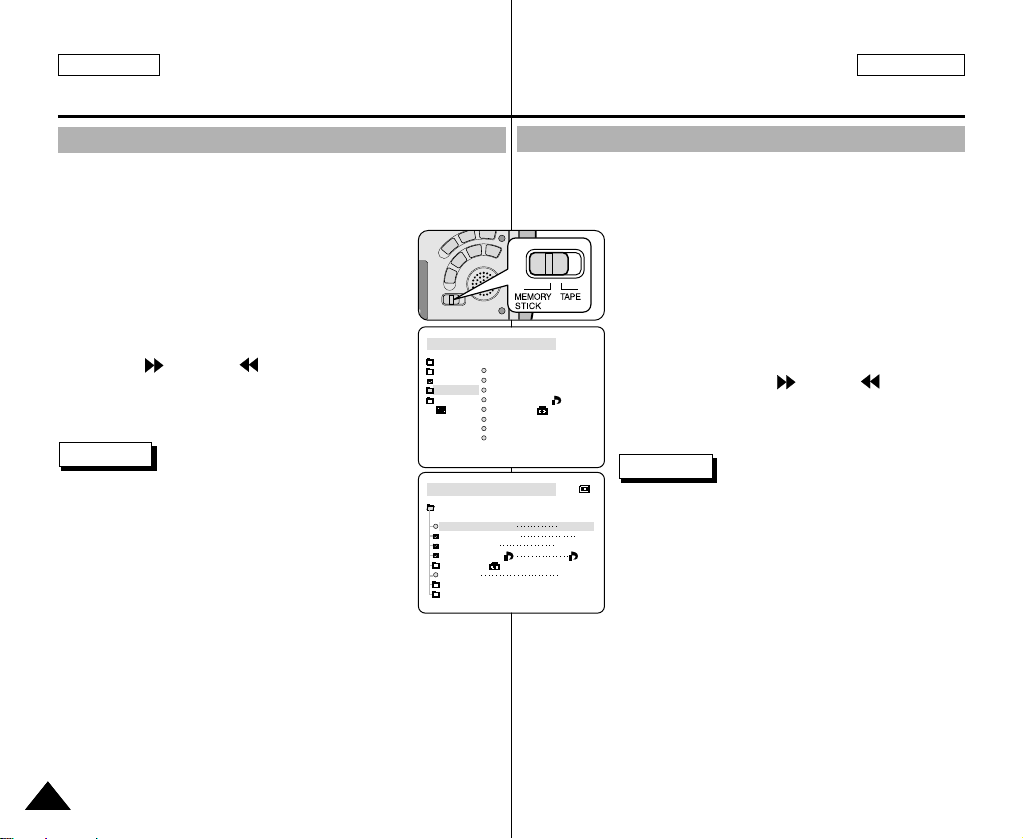
ENGLISH ESPAÑOL
M.PLAY MODE
MPEG4
320X240
MEMORY SET
M.PLAY SELECT
SF
000
SERIES
FILE NO
DELETE
PHOTO QUALITY
MPEG4 SIZE
FORMAT
PRINT MARK
PROTECT
M.PLAY MODE
INITIAL
PHOTO QUALITY
M.PLAY SELECT
MPEG4 SIZE
CAMERA
A/V
MEMORY
VIEWER
FILE NO
DELETE
FORMAT
PRINT MARK
PROTECT
Digital Still Camera mode
Mode appareil photo numérique
MPEG Playback
✤ The MPEG Playback function works in M. PLAY mode only.
✤ You can play the moving picture images on the Memory Stick.
✤ During MPEG4 playback, you can hear sound from the PC speaker only.
(Y ou cannot hear it from the speaker onto a camcorder and TV)
1. Set the mode switch to MEMORY STICK position.
2. Set the power switch to PLAYER mode.
3. Press the MENU button and move the
MENU SELECTOR to highlight MEMORY.
4. Push the MENU SELECTOR to enter sub-menu.
5. Use the MENU SELECTOR to select MPEG4
from the sub-menu. (M. PLAYSELECT)
6. To exit the menu, push the MENU button.
7. Using the (FWD) and (REV) buttons, search
for the moving picture that you want to playback.
8. Press the PLAY/STILL button.
■
The moving pictures recorded onto the
MEMORY STICK are played back.
Notes
■
There may occasionally be broken or mosaic
pictures while playing the MPEG4 moving picture
images, but it is not a malfunction.
■
Sharp G.726 Audio Codec is automatically installed
through Internet when you play the MPEG4 file.
■
If sharp G.726 Audio Codec is not properly
installed on your PC, it could not play Audio in
the MPEG4 file.
■
Moving images recorded on the Memory Stick
may not play on other manufacturer's camcorders.
■
MPEG4 files recorded by another camcorder might not be playable
in this camcorder.
- You need Microsoft Windows Media Player Version 9 or higher
version and Sharp G726 Audio Codec in order to play MPEG4 file
9898
on the Memory Stick on your PC. (Microsoft Windows Media
Player Version 9 (Eng) is included in the CD that is supplied.)
- You can download the Microsoft Windows Media Player on
the Microsoft Website,
“http://www.microsoft.com/windows/windowsmedia/downl
oad/ default.asp”.
Reproducción MPEG
✤ La función de reproducción MPEG sólo opera en la modalidad M.PLAY.
✤ Es posible reproducir las imágenes de vídeo grabadas en el Memory Stick.
✤ Durante la reproduccion MPEG4, solo podra oir audio en el altavoz del
PC. (no podra oir audio en el altavoz de la camara o TV)
1. Ajuste el interruptor de modalidad en la posición
MEMORY STICK.
2. Ajuste el interruptor de la videocámara en la
modalidad PLAYER.
3. Pulse el botón MENÚ y desplace el SELECTOR
MENÚ hasta resaltar MEMORY (memoria).
4. Pulse el SELECTOR MENÚ para acceder al submenú.
5. Desplace el SELECTOR MENÚ, seleccione la
opción MPEG4 en el submenú (M. PLAY SELECT).
6. Para salir del menú, pulse el botón MENÚ.
7. Mediante los botones (FWD) y (REV),
busque el vídeo que desee reproducir.
8. Pulse el botón PLAY/STILL.
■
Se reproducirán los vídeos grabados en el
MEMORY STICK.
Notas
■
Es posible que, durante la reproducción de los
vídeos MPEG4, aparezcan imágenes cortadas
o en forma de mosaico.
Esto no se debe a un funcionamiento incorrecto.
■
El códec de audio Sharp G.726 se instala
automáticamente desde Internet al reproducir
un archivo MPEG4.
■
Si el códec de audio Sharp G.726 no se instala
correctamente en el PC, no será posible reproducir
■
Es posible que las imágenes de vídeo grabadas en el Memory Stick no
puedan reproducirse en videocámaras de otras marcas.
■
Es posible que los archivos MPEG4 grabados por otras videocámaras
no puedan reproducirse en ésta.
- Para reproducir los archivos MPEG4 del Memory Stick en un PC,
es necesario utilizar el Reproductor de Windows Media de
Microsoft, versión 9 o superior, y el códec de audio Sharp G.726
(en el CD suministrado se incluye el Reproductor de Windows
Media de Microsoft versión 9 en inglés).
- Puede descargar el Reproductor de Windows Media de Microsoft
en varios idiomas desde el sitio Web de Microsoft,
http://www.microsoft.com/windows/windowsmedia/download/default.asp
el sonido del archivo MPEG4.
Page 99
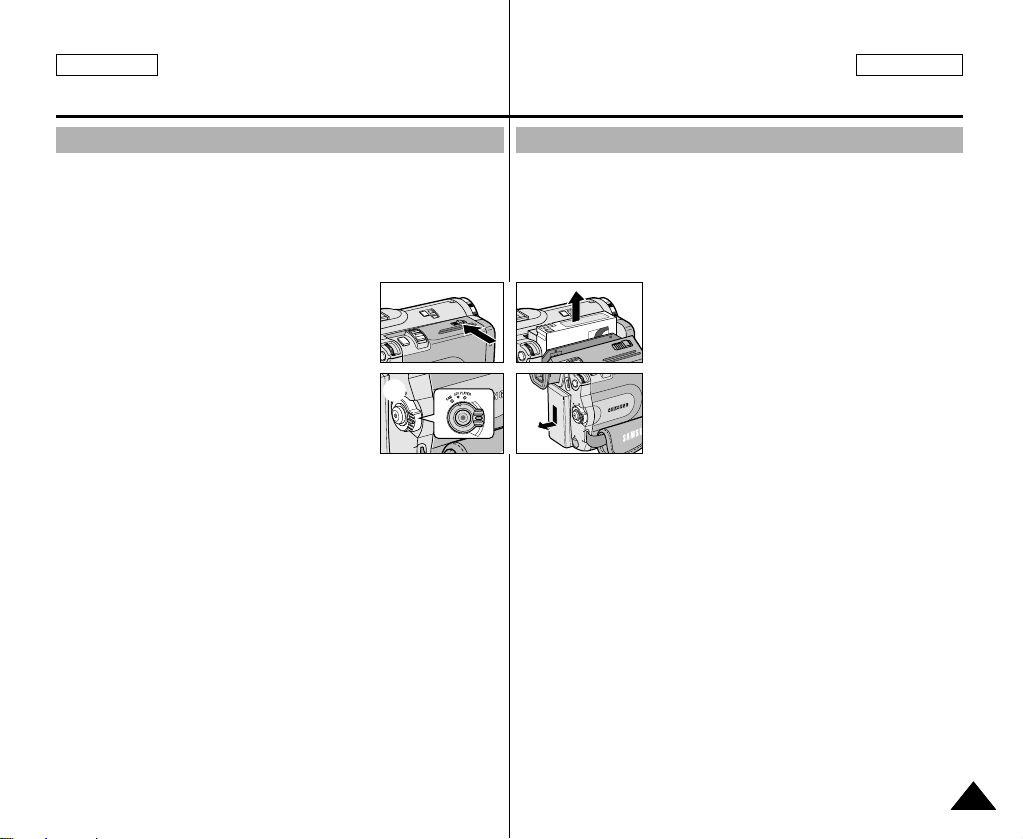
ENGLISH ESPAÑOL
Maintenance
Mantenimiento
After finishing a recording
✤ At the end of a recording you must remove the power source.
✤ When recording with a Lithium Ion Battery Pack, leaving the pack
on the camcorder can reduce the life span of the battery. Hence, it
should be removed from the camcorder.
1. Slide the TAPE OPEN/EJECT switch in the
direction of the arrow.
■
Opening the cassette door ejects the tape
automatically.
■
Please wait while the tape is completely
ejected.
2. After removing the tape, close the door and
store the camcorder in a dust free
environment.
■
Dust and other foreign materials can cause square-shaped
noise or jerky images.
3. Set the power switch to the OFF mode.
4. Disconnect the power source or remove the Lithium Ion Battery
Pack.
■
Hold down the BATTERY RELEASE button and slide the
battery pack in the direction of the arrow.
1
3
✤ Al acabar una grabación, es necesario desconectar la
✤ Cuando se ha grabado con la batería de ion de litio, si ésta se
2. Después de quitar la cinta, cierre la cubierta y guarde la
3. Ajuste el interruptor en la posición OFF.
4. Desconecte la videocámara o retire la batería de ion de litio.
Después de haber finalizado una grabación
videocámara de la fuente de electricidad.
deja en la cámara, se puede reducir su vida útil. Por lo tanto,
debe quitarse de la videocámara.
2
videocámara en un lugar libre de polvo.
■
El polvo u otros materiales extraños pueden causar ruidos o
hacer que las imágenes se vean entrecortadas.
■
Mantenga pulsado el botón BATTERY RELEASE y deslice la
batería en la dirección que indica la flecha.
1. Deslice el botón TAPE OPEN/EJECT
(abrir/expulsar cinta) en la dirección que
indica la flecha.
■
Al abrirse la cubierta del
compartimento, la cinta sale de
manera automática.
■
Espere a que la cinta haya sido
expulsada por completo.
9999
Page 100
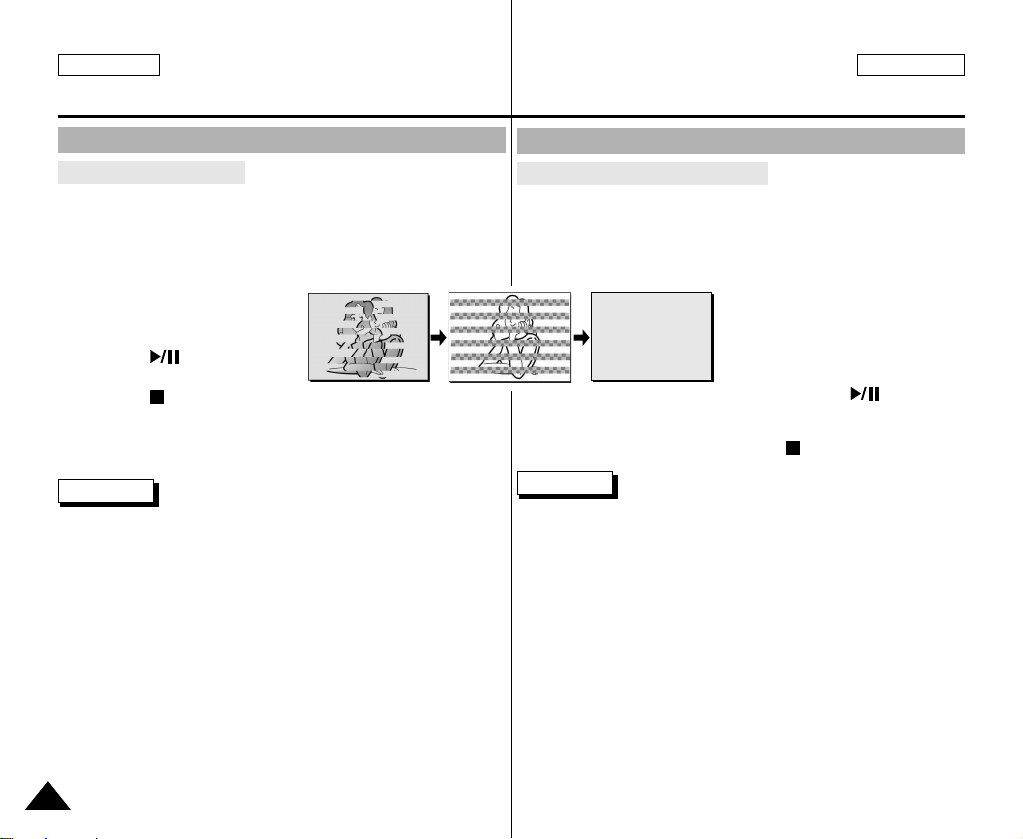
ENGLISH ESPAÑOL
Maintenance
Mantenimiento
Cleaning and Maintaining the Camcorder
Cleaning the Video Heads
To ensure normal recording and clear pictures, clean the video heads
when the playback pictures display square block-shaped noise or
distortion, or a blue screen appears.
1. Set the power switch to PLAYER
mode.
2. Insert the cleaning tape.
3. Press the (PLAY/STILL)
button.
4. Press the (STOP) button after
10 seconds.
Notes
■
Check the quality of the picture using a videocassette.
If the picture quality has not improved, repeat the operation.
If the problem continues, contact your local authorized service
center.
■
Clean the video heads with a dry type cassette cleaner.
Limpieza y mantenimiento de la videocámara
Limpieza de los cabezales de vídeo
Para asegurarse de que las grabaciones resulten normales y las
imágenes sean claras, limpie los cabezales de vídeo cuando, al
reproducir las imágenes, éstas se vean distorsionadas, se oigan
ruidos extraños o aparezca una pantalla azul.
4 . Pasados 10 segundos, pulse el botón (STOP).
■
■
1. Ajuste el interruptor de la
videocámara en la modalidad
PLAYER.
2. Inserte la cinta de limpieza.
3. Pulse el botón
(PLAY/STILL).
Notas
Compruebe la calidad de la imagen empleando un videocasete.
Si no ha mejorado, repita la operación.
Si el problema persiste, póngase en contacto con un centro de
servicio autorizado.
Limpie los cabezales de vídeo con una cinta limpiadora de tipo
seco.
100100
 Loading...