

Samsung chrono 2, U.S. Cellular chrono 2 User Manual

1
TABLE OF CONTENTS
YOUR PHONE 3
Front View Features 3
Closed features 4
Additional Phone Features 5
Battery Installation/Removal 6
Turning Your Phone On or Off 11
PHONE FUNCTIONS 12
Setting Up Voicemail 12
Calling Features 13
Sound Settings 15
Display Settings 17
Contacts 18
Messaging 18
Bluetooth 21
Web Browsing 24
easyedge 26
Camera 29
TABLE OF CONTENTS

TABLE OF CONTENTS
2
NOTES 32
3
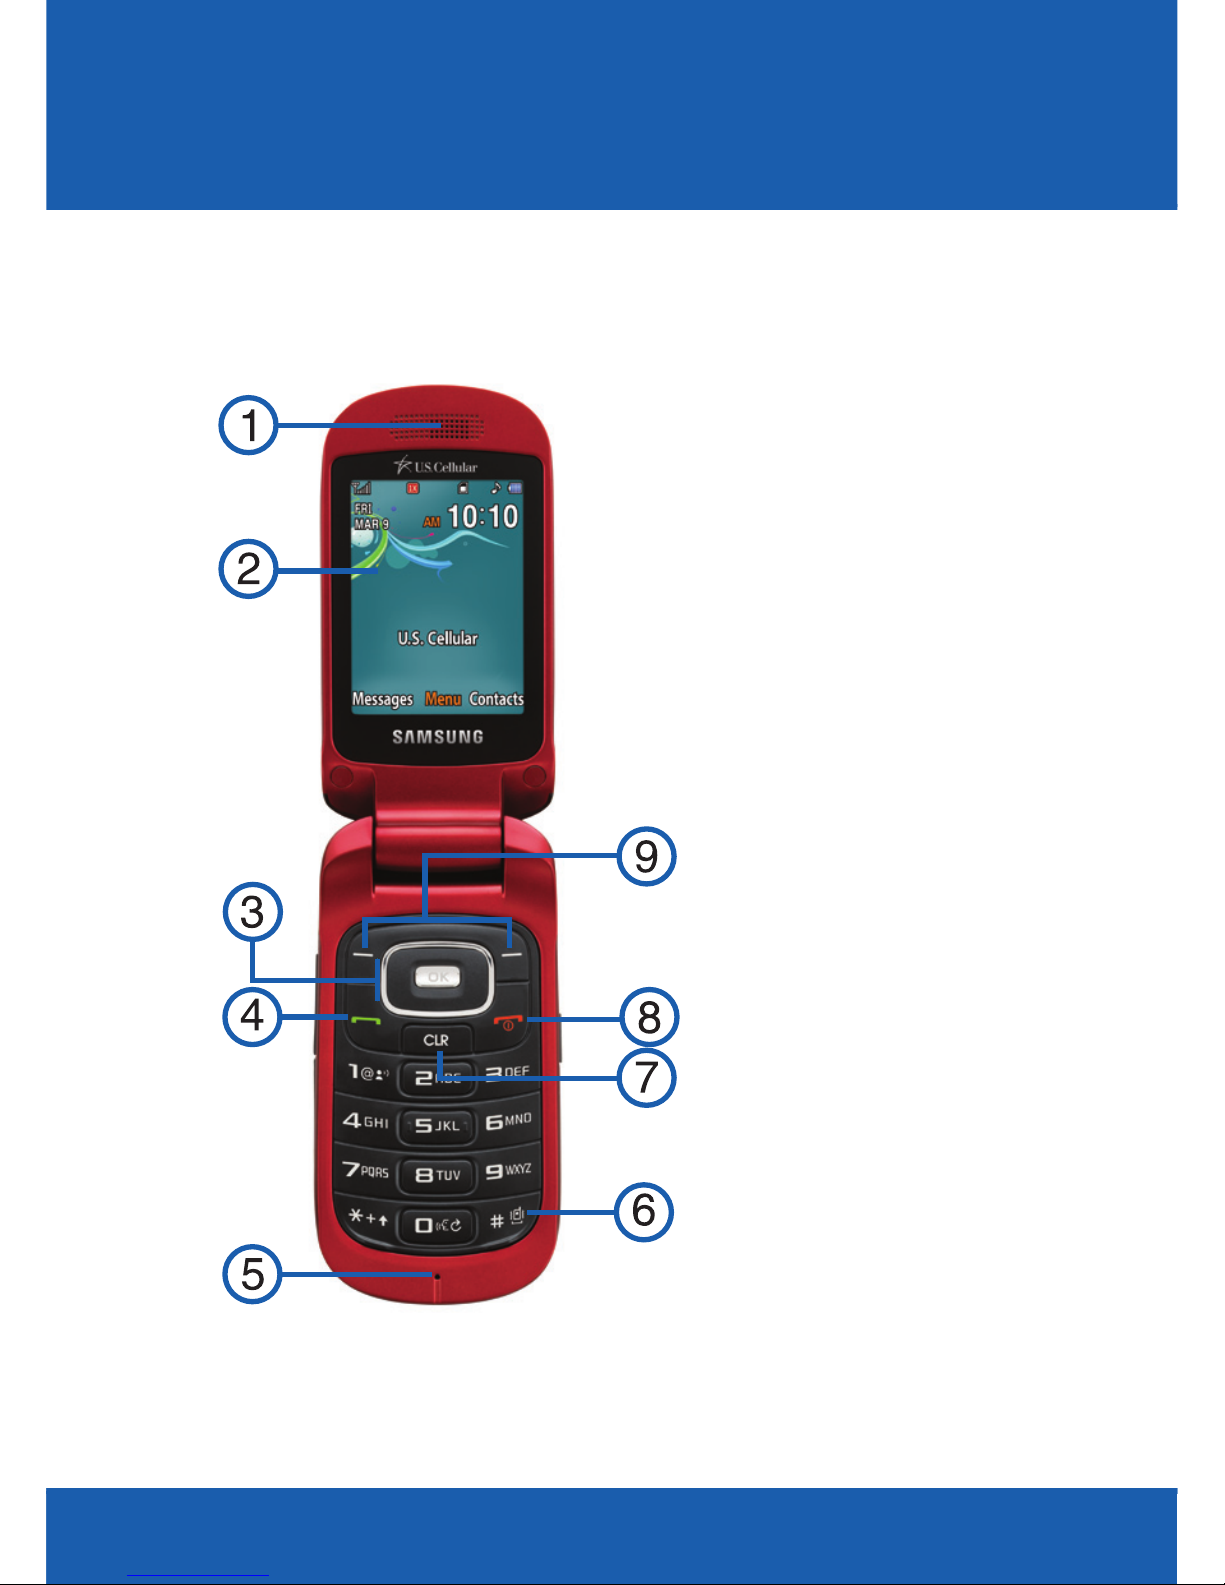
YOUR PHONE
1. EARPIECE
2. DISPLAY
3. NAVIGATION AND
OK KEY
4. SEND KEY
5. MICROPHONE
6. VIBRATION MODE
KEY
7. CLEAR KEY
8. END KEY
9. SOFT KEYS
YOUR PHONE
FRONT VIEW FEATURES
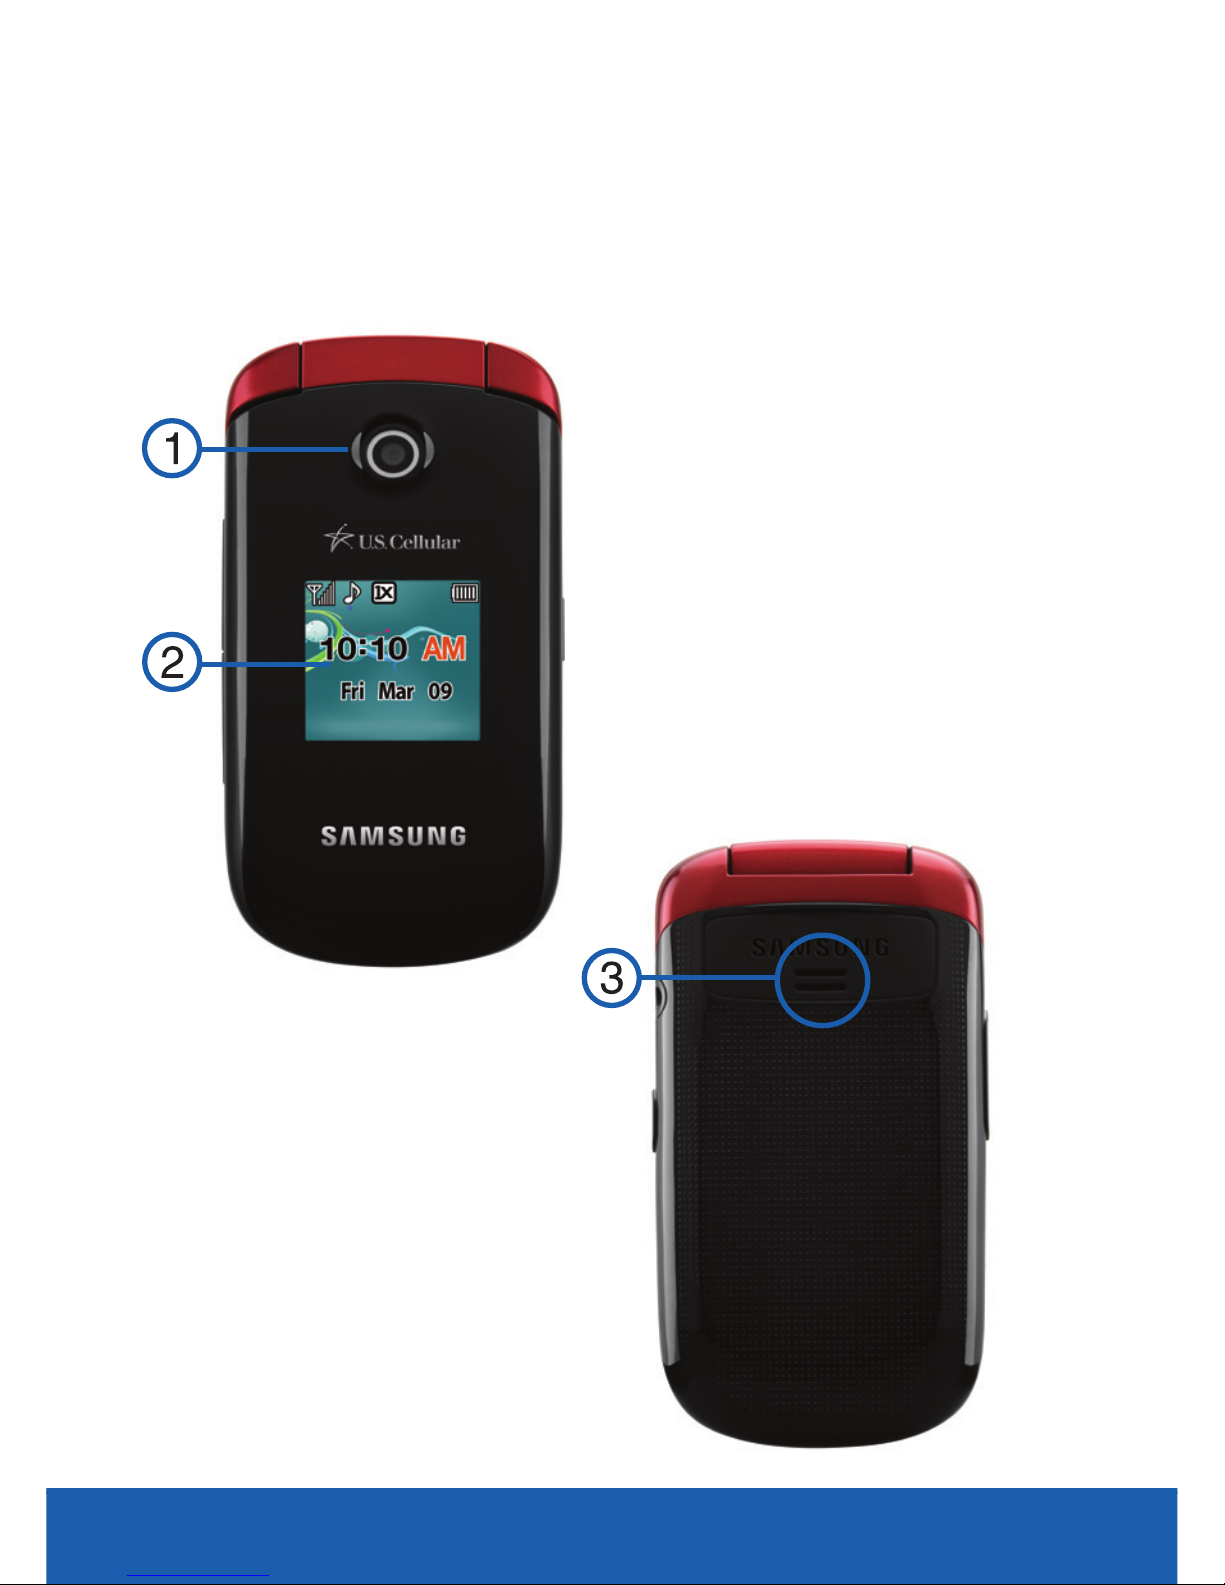
YOUR PHONE
4
1. CAMERA LENS
2. FRONT DISPLAY
3. SPEAKER
CLOSED FEATURES
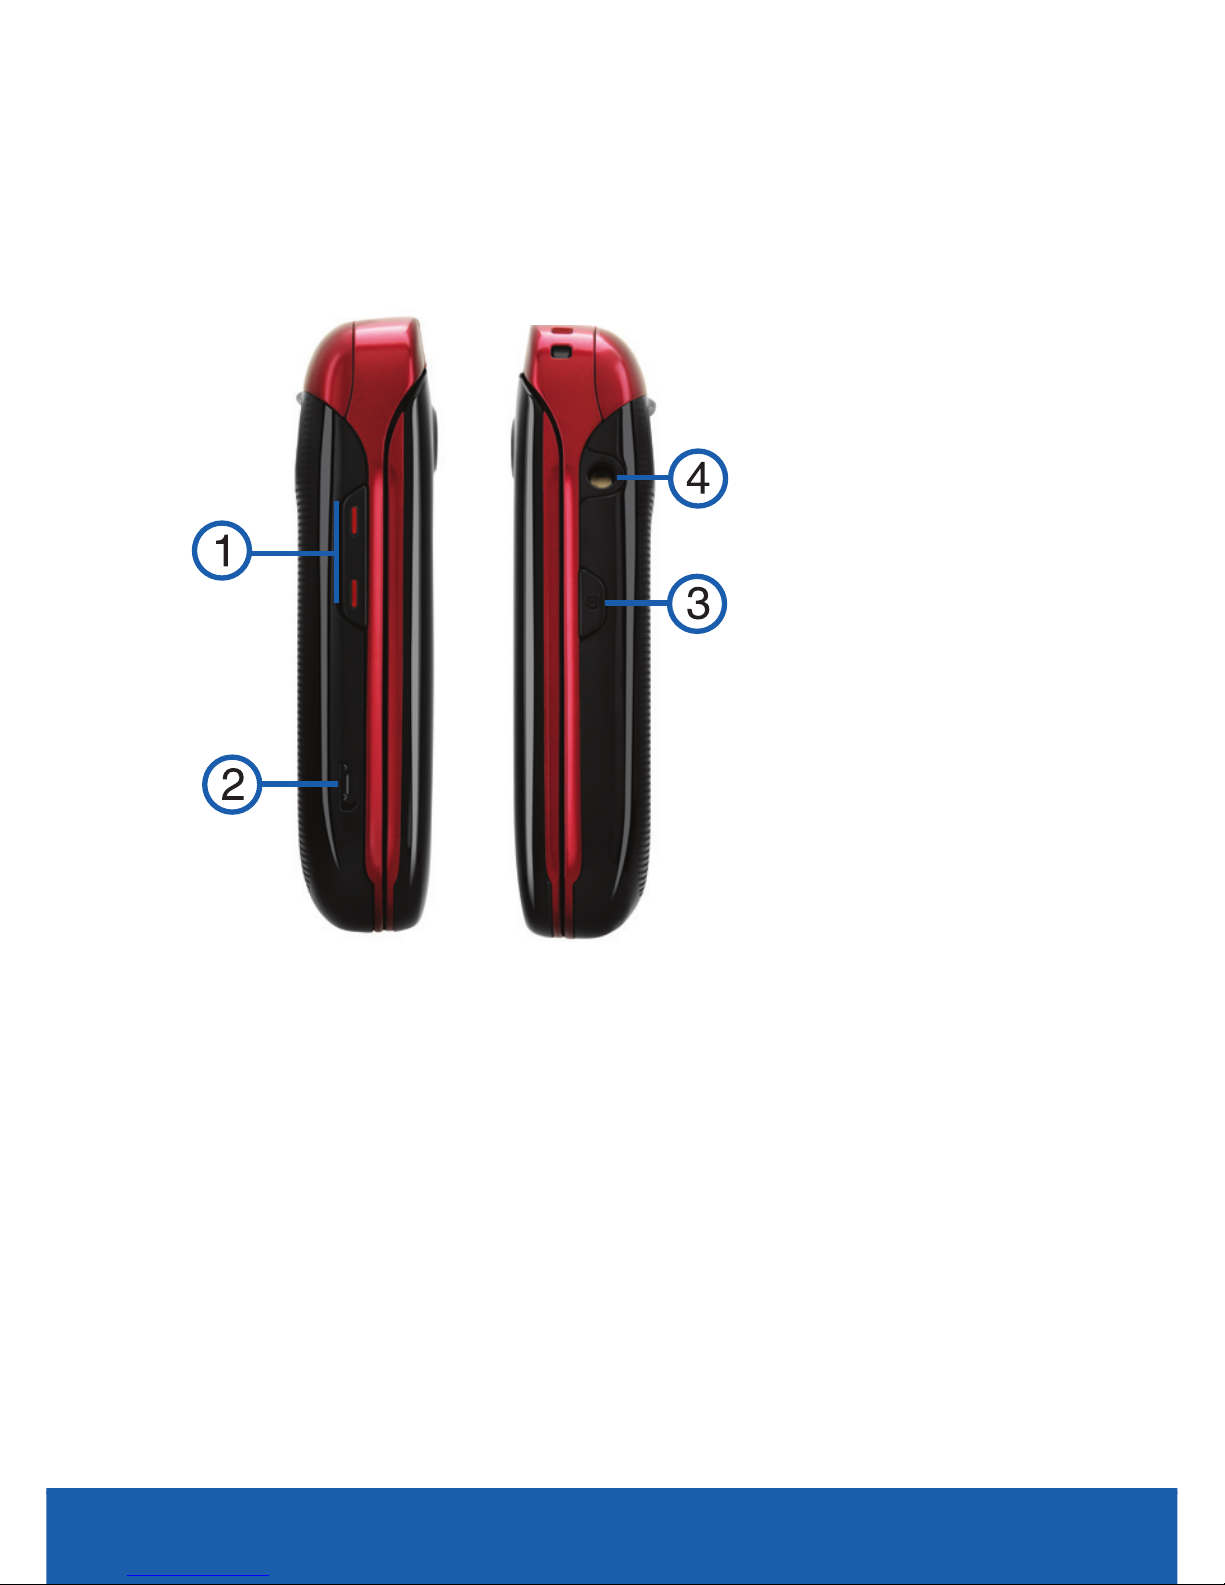
5
YOUR PHONE
1. VOLUME KEY
2. POWER/USB
PORT
3. CAMERA KEY
4. 3.5 MM HEADSET
JACK
ADDITIONAL PHONE FEATURES

YOUR PHONE
6
BATTERY INSTALLATION/REMOVAL
Your phone is powered by a rechargeable, standard
Li-Ion battery. A charger is included with the phone,
for charging the battery.
NOTE: Although the battery comes partially charged, you must fully
charge this battery before using your phone for the first. A fully
discharged battery requires up to 4 hours of charge time.
WARNING: Use only Samsung-approved charging devices and
batteries. Samsung accesories are designed to maximize
battery life. using other accessories may invalidate your
warranty and may cause damage.
Installing the Battery
1. Hold the device firmly and locate the cover
release latch.
2. Place your fingernail in the opening and firmly
“pop” the cover off the device (1).
3. Insert the top end of the battery into the phone
housing (2), aligning the gold contacts on the
battery with those in the battery compartment.
4. Push down on the bottom of the battery down
until it snaps into place (3).
5. Replace the battery cover by sliding it back into
place and snapping the edges securely at all
four corners.
1
Battery Insertion Battery Removal
7
YOUR PHONE

YOUR PHONE
8
Removing the Battery
1. Hold the device firmly and locate the cover
release latch.
2. Place your fingernail in the opening and firmly
“pop” the cover off the device (1).
3. Place your finger into the battery removal slot
(4) and lift the battery out of the compartment.
4. Replace the battery cover by sliding it back into
place and snapping the edges securely at all
four corners.
9
YOUR PHONE
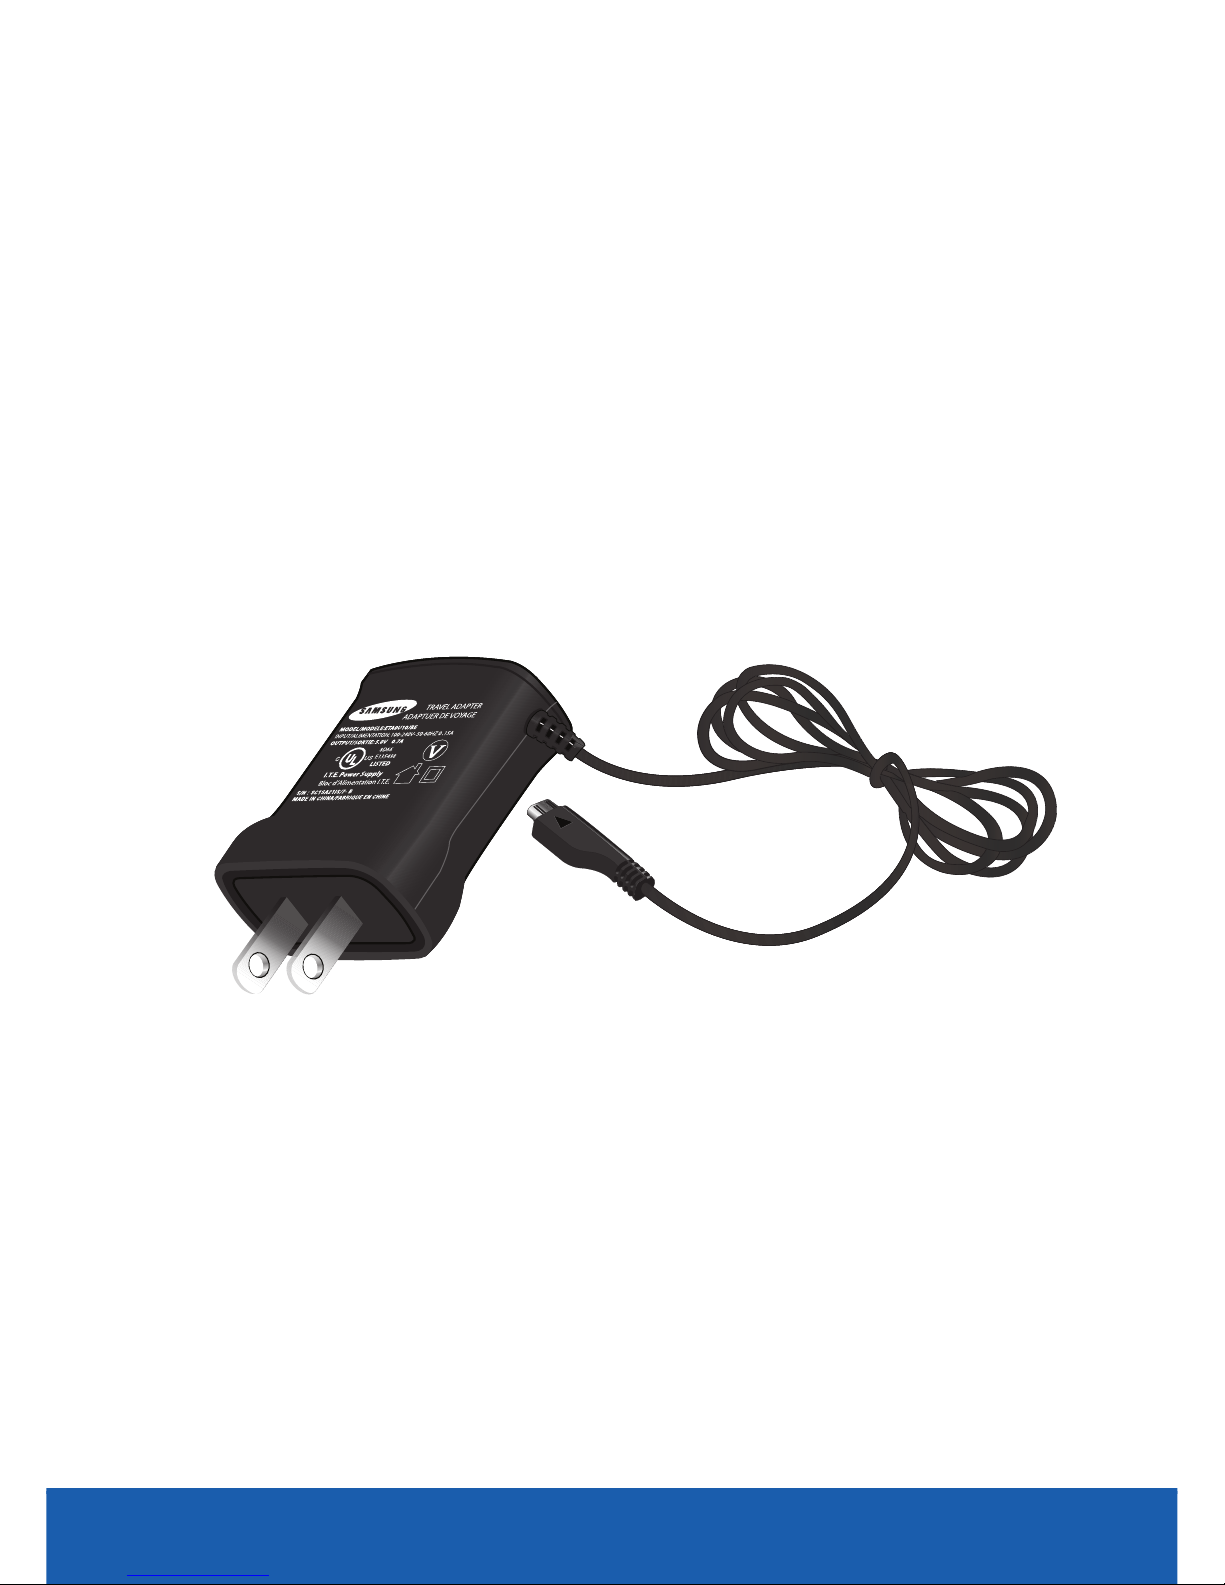
Charging Your Battery
Your phone comes with a charger to rapidly charge
your phone from any 120/220 VAC outlet.
NOTE: Although the battery comes partially charged, you must fully
charge this battery before using your phone for the first.
1. Plug the charging head into a standard AC
power outlet.
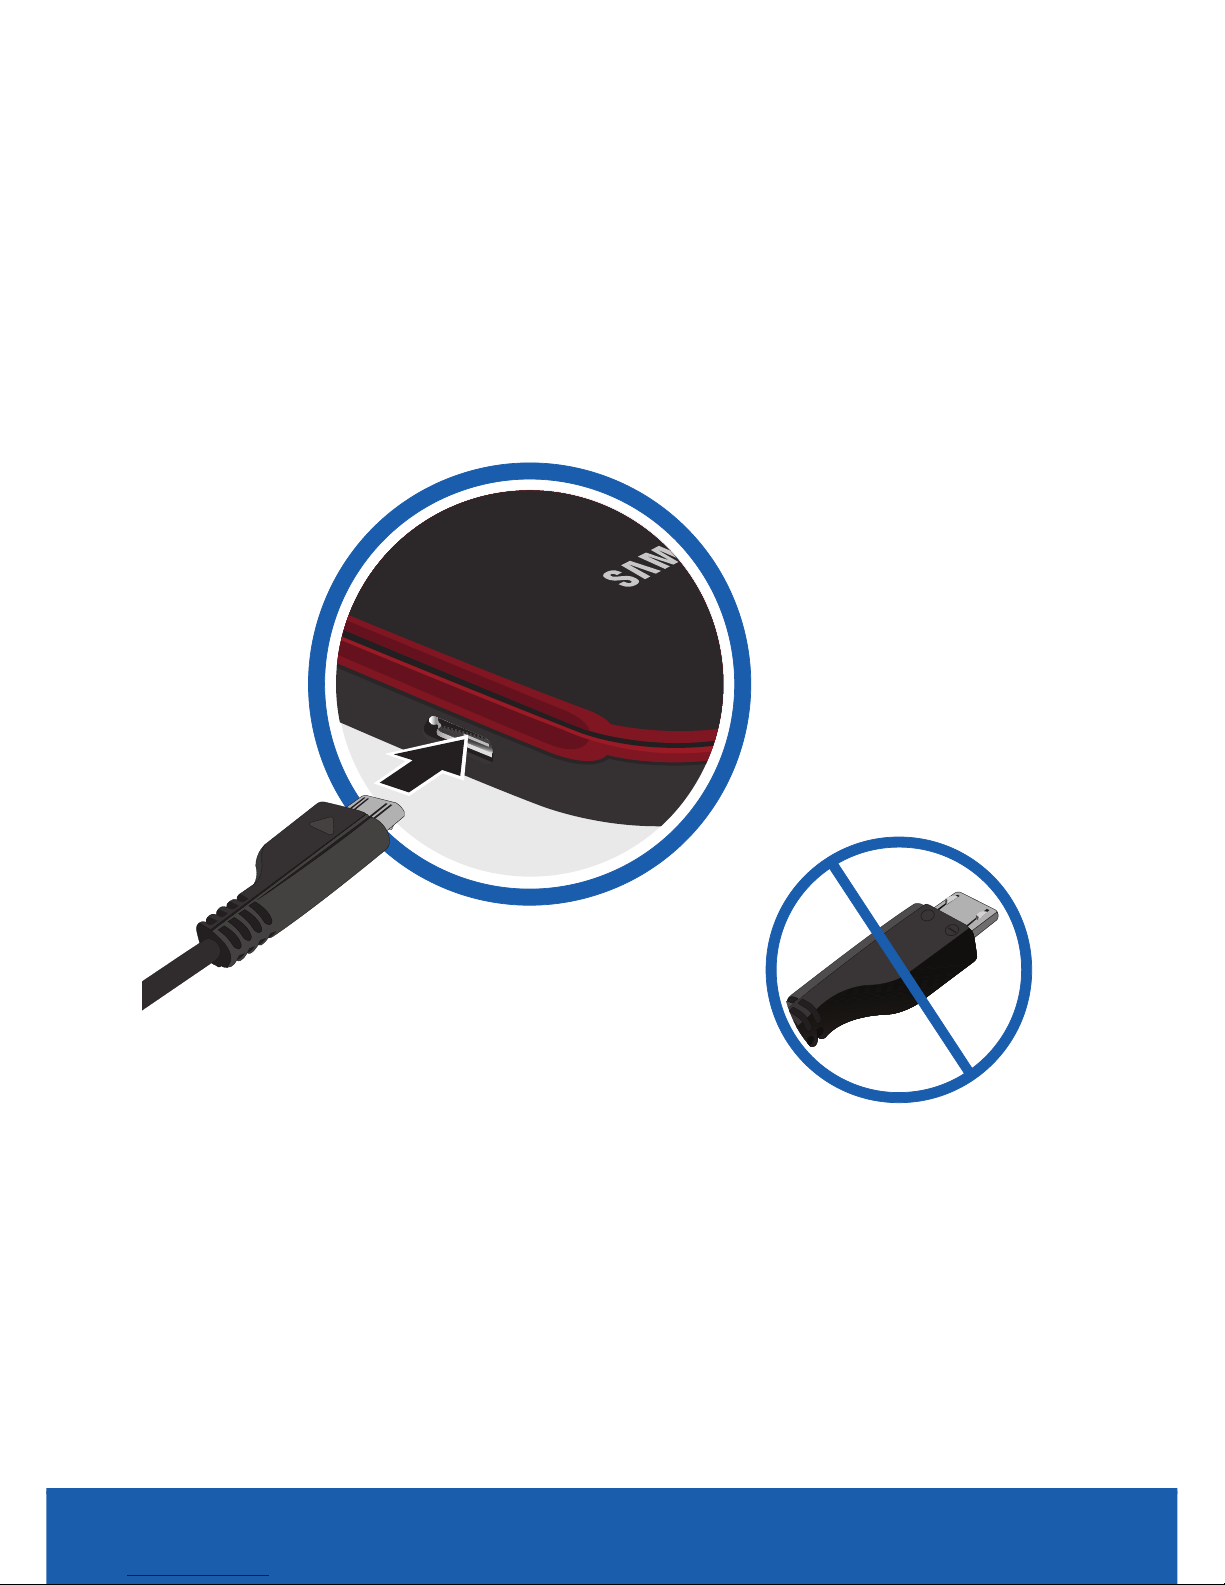
YOUR PHONE
10
2. Insert the USB cable into the port at the base
of the phone.
3. Once complete, unplug the charging head from
the power outlet and remove the USB cable
from the phone.
+
INCORRECT
 Loading...