How it Works
Log In / Sign Up
Buy Points
How it Works
FAQ
Contact Us
Questions and Suggestions
Users
Samsung
Loading...
C
CD173A
2
CD173AP
2
CD173B
CD173BP
CD173DP
CD173G
CD173GP
CD175B
CD175BP
CD175DP
CD175EP
CD175GP
CD175HP
CD177A
CD177DP
CD177FP
CD177GP
CD195A
CD195AG
CD195AP
CD195FPI
CD197AP
CD197API
CD197FPI
CD197G
CD197GP
CD197GPI
CD197HPI
CD210CP
CD3621E
CDI-E090-010
CDI-E207-010
CDMA Series
CDP17BDF
CDP17T
CDR10018
CE10
CE1000
6
CE1000C
5
CE1000C-T
CE1000R
2
CE1000R-TS
CE1000-S
CE1000-T
3
CE1000-TB
2
CE1000TC
5
CE1000-TS
2
CE100V-S
2
CE100V-W
2
CE101
10
CE101K
3
CE101KC
CE101KR
2
CE101KR-SBTW
11
CE102KT
2
CE1031
2
CE1031A
CE1031AT
CE1031L
CE1031LAT
CE1031LATB
2
CE1031LFB
2
CE1031R
CE103FF
CE103KB
2
CE103V
CE103VR
2
CE103VR-B
CE103VR/BWT
CE103VR-S
2
CE1041DFB
CE1041DFB1
CE1041DFB2
CE1041DSB2
CE104CF
10
CE104CFC
ce104vd
CE1050
2
CE1050-S
2
CE1051BR
CE1051FR
CE1051R
CE1051TR
CE1052AT
CE105K
CE1070
3
CE1070B
2
CE1070BR
CE1070F
2
CE1070FR
CE1070L
CE1070R
CE-1070 R-S
CE-1070 R-TS
CE1070T
3
CE 1070T-TS
CE 107MPT
2
CE10-T
CE-1182UB
CE 137NE-X
2
Loading...
Loading...
Nothing found
CE1000C-T
User Manual
32 pgs
2.29 Mb
0
Table of contents
Loading...
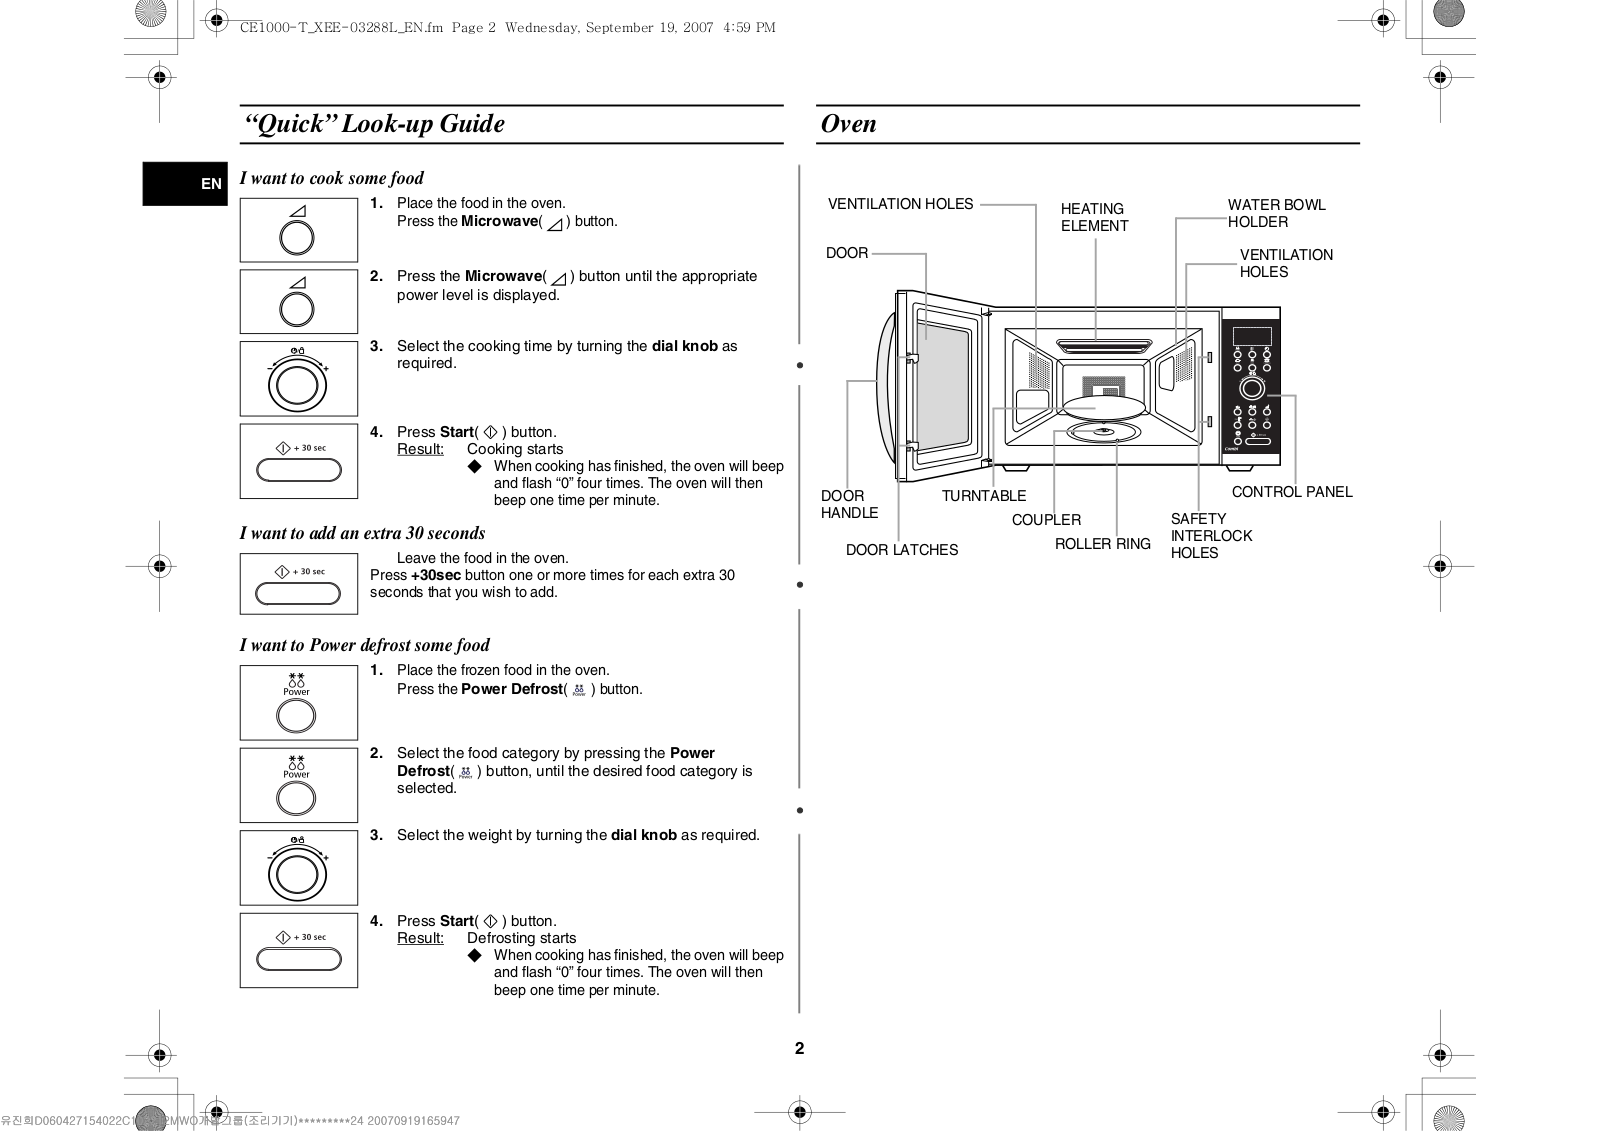
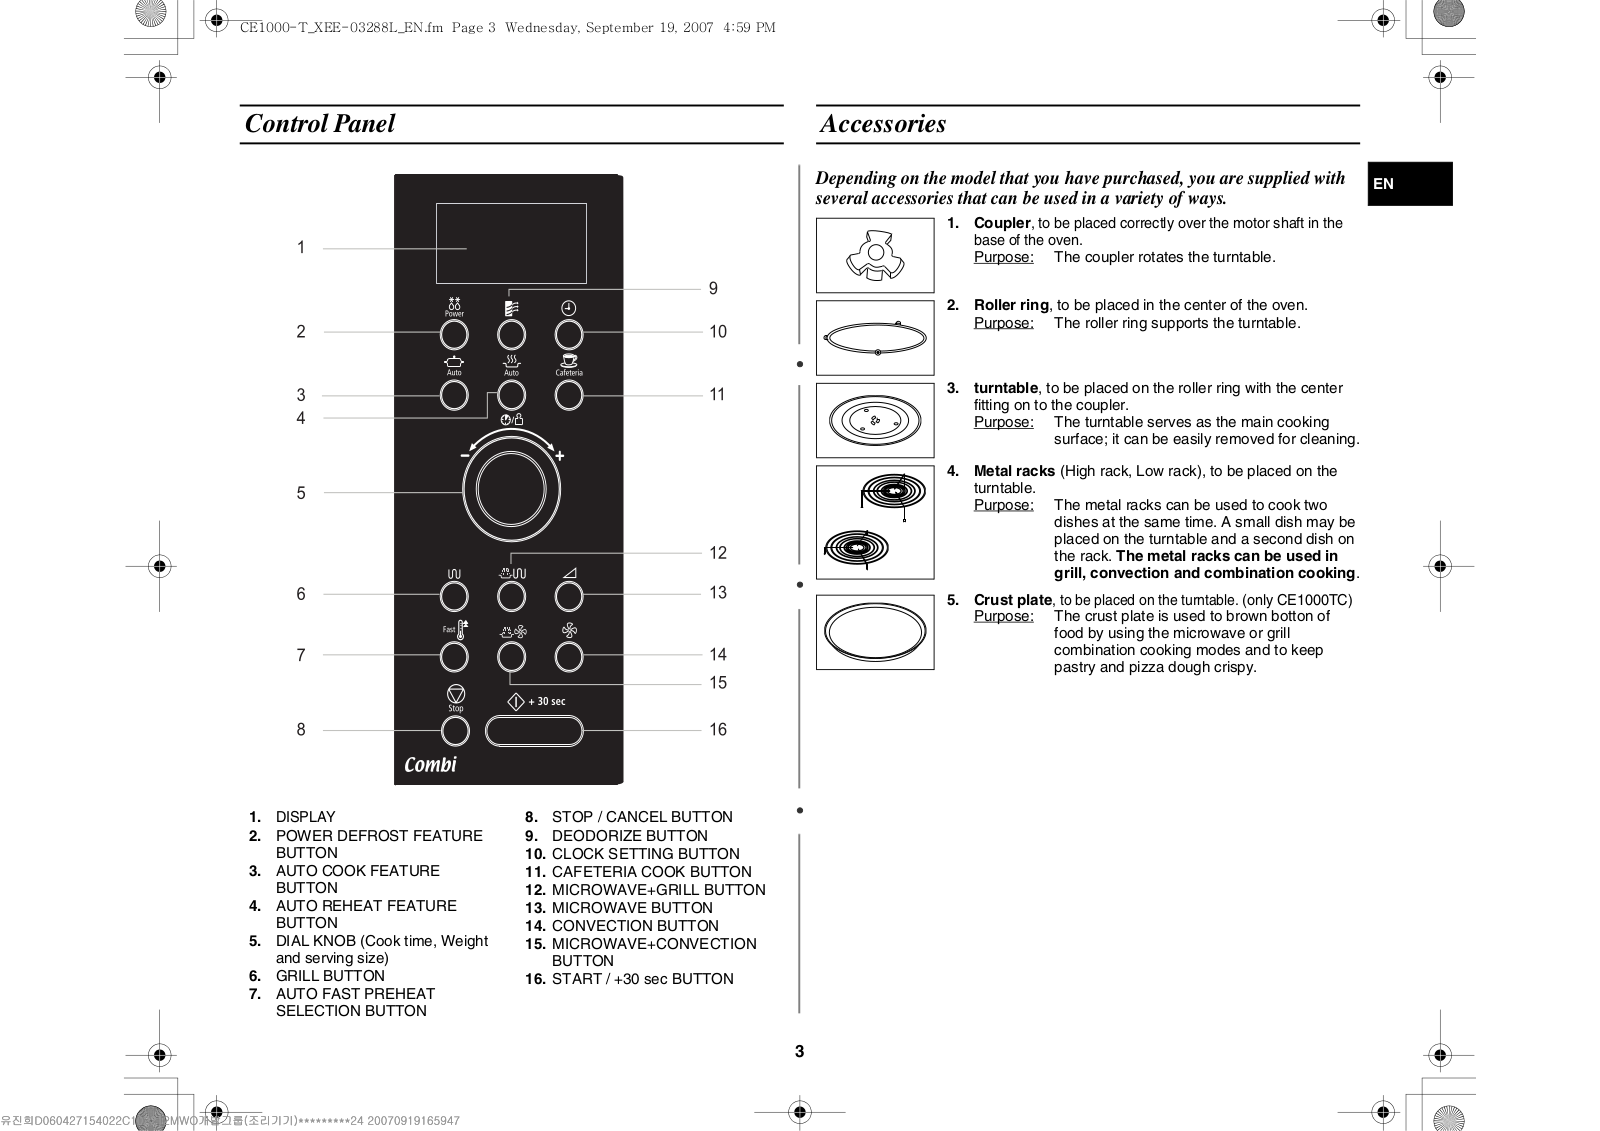
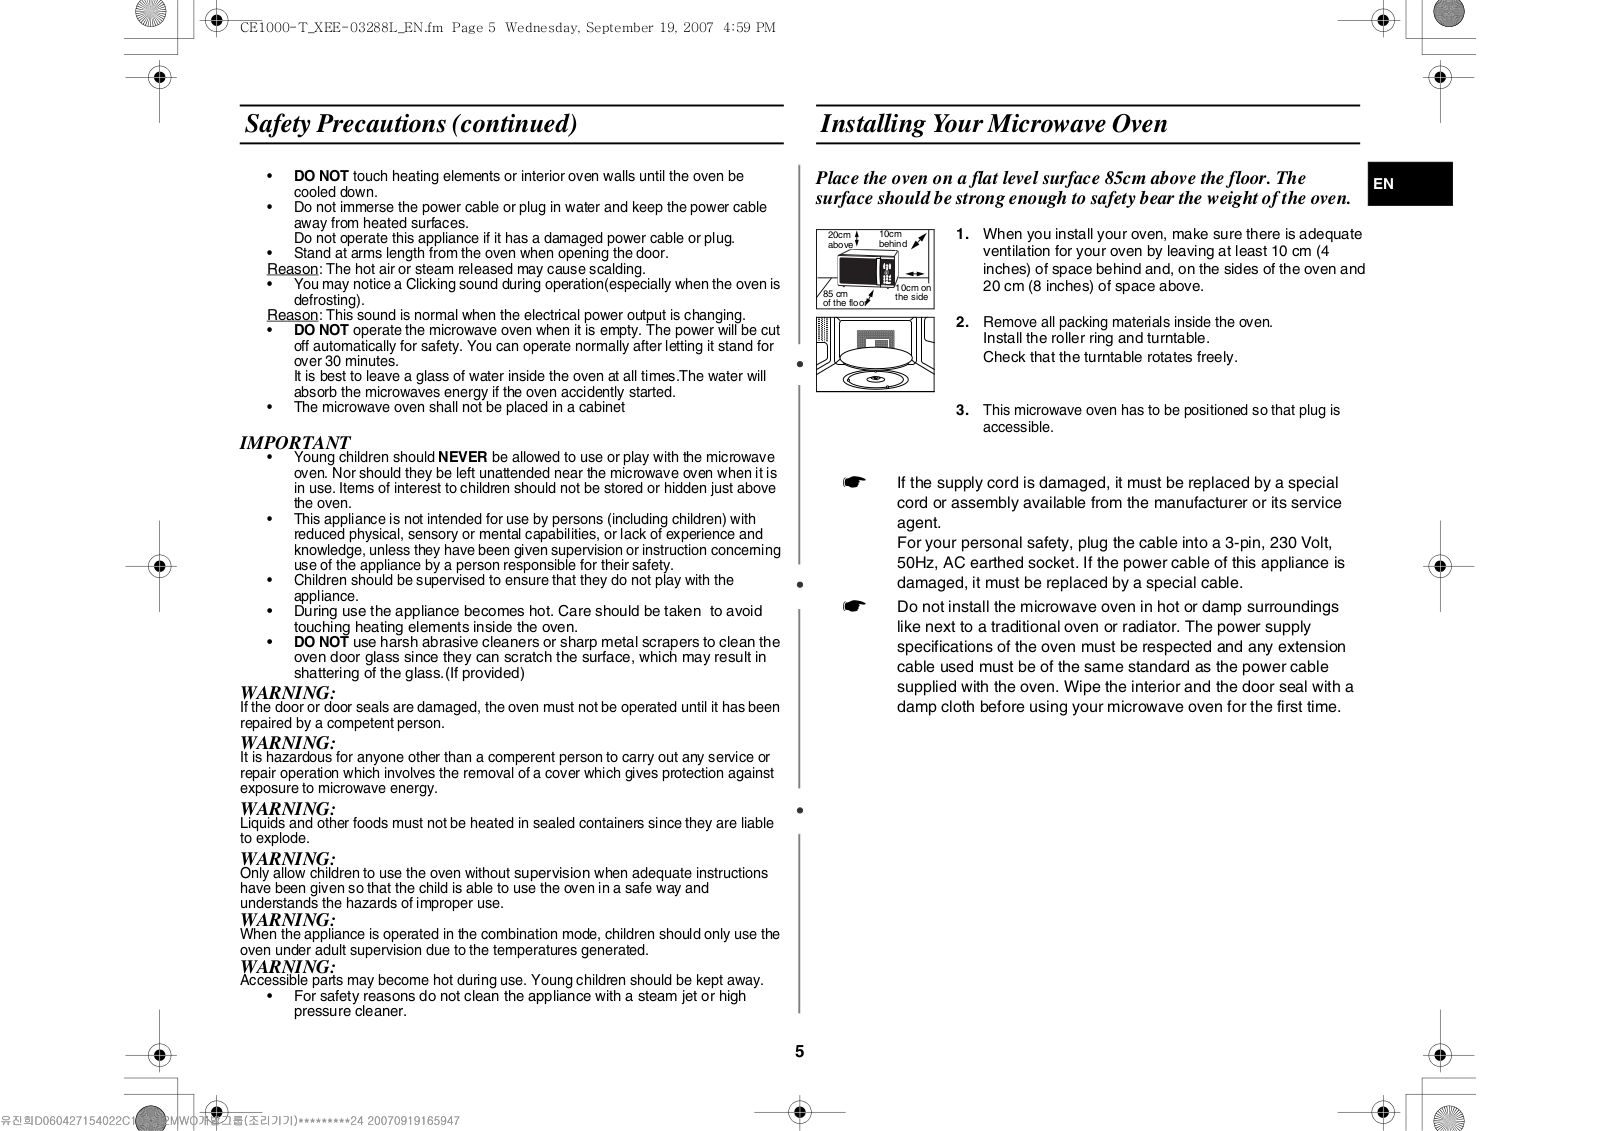
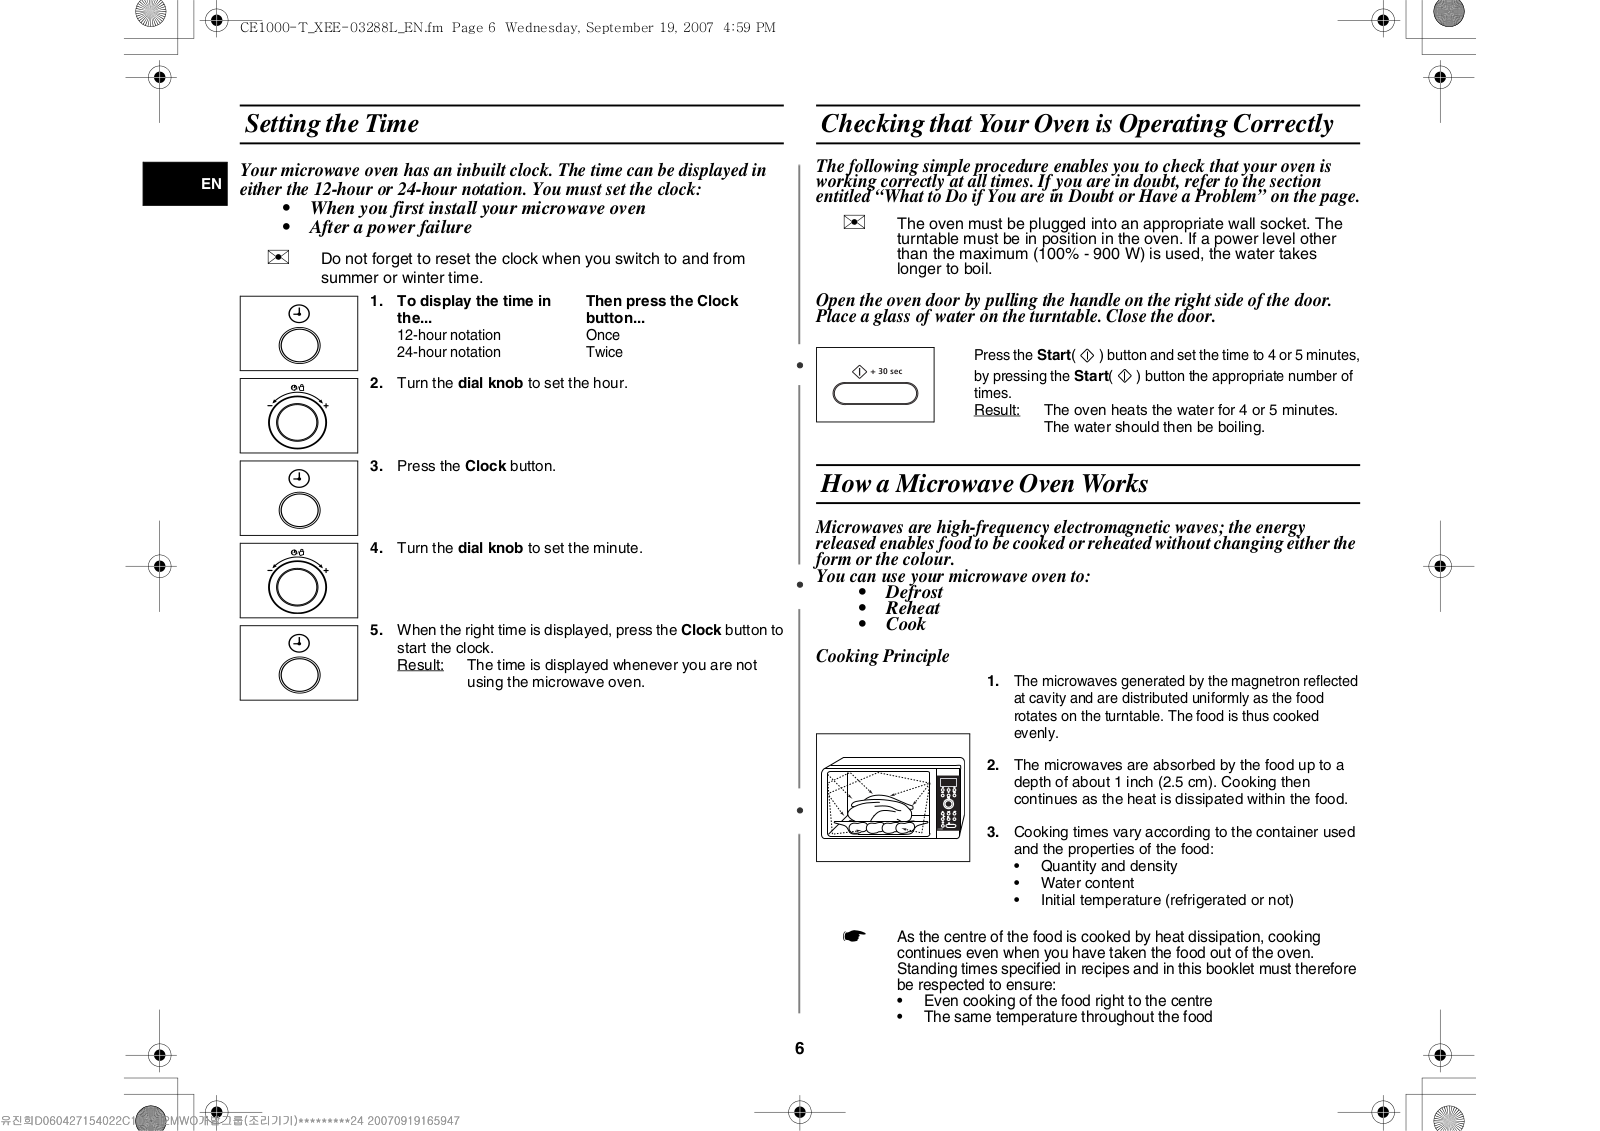
Samsung CE1000C-T User Manual
...
Samsung User Manual
Download
Specifications and Main Features
Frequently Asked Questions
User Manual
Download
Loading...
+
22
hidden pages
Unhide
You need points to download manuals.
1 point = 1 manual.
You can buy points or you can get point for every manual you upload.
Buy points
Upload your manuals
 Loading...