

Page 1

B
T10PS/SPF-105V
Page 2

|
T
Safety Symbols
|
Power
|
Installation
Safety Symbols
Make sure to follow the directions below to prevent accidents and damage to the product.
Failure to follow the accompanying directions may lead to serious injury or death.
Failure to follow the accompanying directions may lead to minor personal injury or property damage.
|
Using and
Cleaning
|
|
Safety Symbols
|
Power
|
Installation
Power
he images here are for reference only, and are not applicable in all cases (or countries).
Insert the power plug correctly until it is firmly in place.
z Failing to do so, may cause fire.
Do not use a damaged power plug, cord or outlet, as this may cause electric shock
or fire.
|
Using and
Cleaning
|
Do not touch the power plug with wet hands, as this may cause electric shock.
Page 3

Do not connect more than one appliance to a single outlet, as an overheated outlet
may cause fire.
Do not use force to pull the power cord. Don't place anything heavy on the power
cord, as this may cause electric shock or fire.
Make sure to turn the power off and disconnect the power plug from the outlet
before moving the product. Make sure to disconnect the connection cables from
other devices as well.
z Moving the product without disconnecting the power cord may damage it while
moving, and may cause electric shock or fire.
Hold and pull out the plug by its body when disconnecting it from the outlet, as
pulling the plug out by the cord may cause it to be damaged.
z Failing to do so, may cause fire, or the product may not turn on normally.
Ensure that the power plug is disconnected before cleaning the product.
z Failing to do so, may cause electric shock or fire.
Keep the product away from places exposed to oil, smoke or moisture; do not
install inside a vehicle.
z This may cause a malfunction, electric shock or fire.
z In particular, avoid operating the monitor near water or outdoors where it could be
exposed to snow or rain.
Do not install the product near any heating appliance.
Installation
|
Safety Symbols
z There is a risk of fire.
|
Power
|
Installation
|
Using and
Cleaning
|
Page 4

When installing the product on a cabinet or shelf, do not let the front end of the
product project beyond its front edge.
z Failing to do so, may cause the product to fall, resulting in a product malfunction or
personal injury.
Do not place the power cord near a heater, as the power cord may melt, causing
electric shock or fire.
Do not install the product in a car or a location exposed to oil, smoke, moisture,
water, or rainwater.
z Any contact of these materials with the product may cause electric shock or fire.
Disconnect the power plug when there is thunder or lightning.
z Failing to do so, may cause electric shock or fire.
Place the product down gently when installing it.
z Failing to do so may cause product damage or personal injury.
Avoid dropping the product when moving, as this may cause product damage or
personal injury.
Do not install the product in a location easily reached by children.
Using and Cleaning
|
Safety Symbols
Do not insert any metal objects such as forks, wire, or gimlets, or flammable items
z As the product may fall and cause personal injury.
|
Power
|
Installation
|
Using and
Cleaning
|
Page 5

such as paper or matches into the ports at the back of the product, as this may
cause electric shock or fire.
z If water or any foreign substance enters the product, make sure to turn the product
off and disconnect the power plug from the outlet, and contact a service center.
Never disassemble, repair, or modify the product yourself.
z If you need to repair your product, contact a service center. An attempt at repairing
this product may cause electric shock or fire.
If you hear a strange sound, smell anything burning, or see smoke, disconnect the
power plug immediately and contact a service center.
z Failing to disconnect the power plug may cause electric shock or fire.
Always remove dust and water from the pins and connections of the power plug.
z Failing to do so may cause electric shock or fire.
When cleaning the product, first disconnect the power plug and clean it with a soft,
dry cloth.
z Do not use any chemicals such as benzene, alcohol, thinners, mosquito repellant,
aromatic, lubricant, detergent or wax.
When not using the product for a long time, make sure to disconnect the power plug.
z Heavy accumulated dust may cause electric shock or fire.
If the product needs to be installed in a location that doesn't satisfy general
conditions, make sure to contact one of our service engineers about the installation
as the product may encounter serious quality problems due to its environment.
z This refers to locations exposed to conditions such as heavy fine dust, chemicals, high or
low temperature, moisture, or when the product needs to be used continually without a
break over a long time.
If the product has been dropped or the product casing is damaged, turn it off and
disconnect the power plug.
z Using the product without verifying that it has not been damaged may cause electric
shock or fire. Please contact a service center.
Correct Disposal of This Product
(Waste Electrical & Electronic Equipment) - Europe only
Page 6

(Applicable in the European Union and other European countries with separate
collection systems)
This marking shown on the product or its literature, indicates that it should not be disposed
with other household waste at the end of its working life. To prevent possible harm to the
environment or damage to health from uncontrolled waste disposal, please separate this from
other types of waste and recycle it responsibly to promote the sustainable reuse of material
resources.
Household users should contact either the retailer where they purchased this product, or their
local government office, for details of where and how they can take this item for
environmentally safe recycling.
Business users should contact their supplier and check the terms and conditions of the
purchase contract. This product should not be mixed with other commercial wastes for
disposal.
Correct disposal of batteries in this product
- alleen voor Europa
(Applicable in the European Union and other European countries with separate
battery return systems.)
This marking on the battery, manual or packaging indicates that the batteries in this product
should not be disposed of with other household waste at the end of their working life. Where
marked, the chemical symbols Hg, Cd or Pb indicate that the battery contains mercury,
cadmium or lead above the reference levels in EC Directive 2006/66. If batteries are not
properly disposed of, these substances can cause harm to human health or the environment.
To protect natural resources and to promote material reuse, please separate batteries from
other types of waste and recycle them through your local, free battery return system.
Page 7

|
A
A
Features|Components
|
Front
|
Back
Features
Expansion of built-in memory using memory cards. Instant view of stored images.
Background music function.
Can be used with the battery for a specific period of time without being connected to a power outlet.
Provides a Mini-Monitor function.
Stylish Design
premium, stylish design that can be used as a decoration on a desk or table.
rotating stand that allows vertical/horizontal placement.
|
Side
|
|
Features|Components
Please check that all components are contained in the delivered package.
If anything is omitted, contact the local distributor where the product was purchased. For optional items, contact a service center.
Never use a power adapter other than the adapter provided with the product.
|
Front
|
Back
|
Side
Components
Digital Photo Frame
(The product color and shape may vary depending on the model.)
Manual
|
Quick Start
Cables
(Not available in all locations)
Warranty
User Manual
Page 8

Power cord
T
T
T
USB cable
(A-mini B type)
Power Adapter
|
Features|Components
|
Front
|
Back
|
Front
he product color and shape may vary depending on the model.
his product is a touch type product. If you lightly touch the button on the right of the product, the button light is turned on.
When the button light is turned on, you can then operate each button's menu.
[MENU] Menu Button Displays the menu window at the bottom left corner of the screen.
[] Up Button
[ ] Left Button
Used for moving up.
Used for moving left.
Side
|
[ ] Right Button
[] Down Button
[ ] Enter Button
[ ] Back Button
[ ] Slideshow Button
Used for moving right.
Used for moving down.
Used for selection.
Return to the previous menu.
Play or pause the Slideshow.
When playing a slideshow by pressing the []button, the photos in the location of the
last played photo are played. If the photos in the location of the last played photo have
been removed, they are automatically searched for and then played in a slideshow.
|
Features|Components
Back
he product color and shape may vary depending on the model.
|
Front
|
Back
|
Side
|
Page 9

DC –In Jack
T
Y
T
T
T
Y
jack
Y
A
Connect the power adapter to this jack.
Connect the power cord to the power terminal of the power adapter.
[ ] Power Button
Stand
Sliding Prevention
Holder
Service terminal
Kensington lock
urns the product on or off.
Hold down the power button for about 2 seconds.
ou can use the product in a vertical or horizontal direction by using the rotating stand.
Supports the product so that it stays firmly in place on slippery surfaces.
his is a terminal for servicing the product only. Do not operate it arbitrarily.
he Kensington lock is a device used to physically secure the system when using it in a public place.
(The locking device has to be purchased separately.)
|
Features|Components
Side
he product color and shape may vary depending on the model.
|
Front
|
Back
|
Side
|
Speaker
Headphone connection
Memory Card Slot
ou can listen to sound without connecting an additional speaker.
ou can listen to sound by connecting headphones or earphones to the product.
llows you to insert an optional memory card. (Only applicable for SD/MS/CF card)
Connect a PC or an external device using a USB cable.
CF
Up stream terminal
Connect your Digital Photo Frame to a PC's USB terminal
with a USB cable.
Page 10

Make sure to use the USB cable (A-mini B type) provided with the product when
connecting your digital photo frame to a PC through the up stream terminal.
Down stream terminal
Connect your Digital Photo Frame to a USB-supported
storage device.
Page 11

|
Connecting the Power
Connect the adapter cable to the power terminal on the back of the product.
Connect the power cord to the power adapter.
Plug the power cord for the product into a nearby outlet.
Press the [ ] button to turn on the power.
Power
|
USB
|
Memory Card
|
Connecting via USB
Up Stream Used to connect your digital photo frame to a PC.
|
Power
|
USB
|
Memory Card
|
Page 12

Terminal When connecting your digital photo frame to a PC through the up stream terminal, make sure to use
T
T
T
T
the USB cable provided with the product.
Down Stream
Terminal
Used to connect an external USB-supporting device to your digital photo frame.
Some USB devices may not support Digital Photo Frame.
his product does not support USB card readers. Only USB storage is supported.
he external devices connected to your Digital Photo Frame are not recognized by your PC.
When connecting an external device to the down stream terminal, use the USB cable provided with
the external device. (For more information on external devices and their cables, contact a relevant
service center.)
Samsung carries no liability for external device malfunctions caused by using any cable except the
standard cables specified for each device.
Some external products provide a cable that does not meet USB standards. Hence, they may cause a
malfunction.
If an external storage device does not work normally when connected to your digital photo frame, try
to connect it to your PC. If it still does not work normally when connected to your PC, contact a service
center for that external device or your PC.
Connect to the upstream jack of your digital photo frame.
Connect the USB terminal of your PC.
Folder Structure
When connecting this product to your PC, it is displayed as a removable disk (E:), as shown in the figure below.
You can save and play all music and movie files in the following folders.
You can also add and delete folders as required. (However, if you delete the following default folders, they are automatically
created when your product is turned on again.)
.rss
.wls
he capacity of this product is 64 MB.
If the capacity is exceeded, no further files can be stored.
Do not turn off the product while saving, playing, or deleting a file.
he volume name of the removable disk (for example, E:, F:, G:) may differ
depending on your computer environment.
Web Photos (photos from the Windows Live Space, or RSS)
can be saved according to the amount of free internal
memory which remains. Even though a user copies photos
from a PC to the .rss or .wls folder, they are not displayed in
the digital photo frame.
|
Power
|
USB
|
Memory Card
|
Connecting a Memory Card
Page 13

Slide the card in the direction marked on the top of the card.
CF
Removing the memory card while playing MP3s, movies, or photos, may
cause the product to operate abnormally. In this case, turn the product off
and on.
Page 14

If no button is pressed for ten (10) minutes, Slideshow or Clock mode is activated. However, if a music file is being played, Clock
T
mode is activated and the filename of that music file is displayed. You can switch to Clock mode even when the movie is paused. In
some cases, you can switch to the Movie List screen.
his product is a touch type product. If you lightly touch the button on the right of the product, the button light is turned on.
When the button light is turned on, you can then operate each button's menu.
User
|
Guide
|
Photo
|
Music
|
Movie
|
Clock & Alarm
|
Settings
User Guide
Buttons
Menu Description
Enters or exits a menu.
MENU
, , ,
Hold the MENU button down for more than five (5) seconds. All the lights of the buttons will blink twice
and the button lock function will be activated. To clear the button lock function, hold the MENU button
down again for more than five (5) seconds.
Moves around the items and adjusts the value.
Selects a function.
Returns to the previous screen.
Hold down this button for two (5) seconds to return to the Main screen.
|
Play or pause a Slideshow.
When playing a slideshow by pressing the [] button, the photos in the location of the last played
photo are played. If the photos in the location of the last played photo have been removed, they are
automatically searched for and then played in a slideshow.
Screen Status Indications
Display Description
This is displayed differently according to the signal strength when connected to a network.
If not connected to a network, is displayed.
Displayed when a PC is connected or there is a PC which can be connected to.
Displayed only when a network is connected and Internet access is available.
You can only view RSS or Live Space photos if this icon is displayed.
Displayed when a USB device is connected.
Displayed when an SD/MS memory card is connected.
Displayed when an CF memory card is connected.
Battery Indicators
Page 15

Display Description
Displayed when the battery is being used with the power cable connected and the battery is being
charged.
Displayed when the battery is fully charged and the power cable is connected.
Displayed when the battery is fully charged.
Displayed when about 25% of the battery is consumed.
Displayed when about 50% of the battery is consumed.
Displayed when about 75% of the battery is consumed.
Displayed when about 95% of the battery is consumed. When this occurs, the screen switches to the
main screen immediately and the discharged battery icon blinks at the center of the screen and the
power is turned off. While the discharged battery icon is blinking, you cannot enter a sub-menu.
It takes about two (2) hours to charge the battery fully when it is completely discharged.
Playing a movie can continue for about thirty (30) minutes and a slideshow for about forty (40) minutes in the default state
(volume 70, brightness 70) when the battery is fully charged.
The battery usage time may differ according to the settings (Brightness, Volume etc.).
If the product is turned off automatically because the battery is fully discharged, the time previously set is erased after one
hour. In this case you should set the time again. If you connect your product to a power outlet within one hour, the time
information is retained.
The battery lifetime decreases as the product usage time increases.
The rechargeable battery incorporated in this product is not user replaceable. For information on its replacement, please
contact your service provider.
User
|
Guide
|
Photos
When selecting a folder
If you press the Menu button, the menu of the selected item is displayed on the screen.
Menu Description
Open Opens the selected folder.
Copy Copies the selected folder.
Delete Deletes the selected folder.
Photo
|
Music
|
Movie
|
Clock & Alarm
|
Settings
|
The menu displayed when selecting a thumbnail.
Page 16

If you press the Menu button, the menu of the selected item is displayed on the screen.
A
A
A
A
Menu
Start Slideshow Play or pause a Slideshow.
Copy
Copy All Files
Delete Deletes the selected file.
Delete All Files Deletes all files.
Set as Background
When copying a photo from an external memory storage device (SD/MS, USB memory) to the Frame Memory, if [Settings][Options]-[Frame Memory Copy] is set to [Resized], the size (screen quality) of the photo is automatically reduced before
saving it, to fit it to the screen of your digital photo frame, and the EXIF (camera related information) saved in the photo is
removed. Therefore, make sure to only use the photos saved on the Frame Memory with the digital photo frame.
It may take a long time if a lot of files are copied at the same time.
Copies the selected file to a different storage device.
t least one storage device must be connected.
Copies all files to a different storage device.
t least one storage device must be connected.
Sets the selected image as the background of the main screen.
At this time the mode for the background is automatically changed to Custom mode.
Sub-Menu
Description
The menu displayed when selecting a thumbnail (PC, Live Space, RSS).
If you press the Menu button, the menu of the selected item is displayed on the screen.
Menu
Start Slideshow Play or pause a Slideshow.
Copy
Copy All Files
Set as Background
Copies the selected file to a different storage device.
t least one storage device must be connected.
Copies all files to a different storage device.
t least one storage device must be connected.
Sets the selected image as the background of the main screen.
At this time the mode for the background is automatically changed to Custom mode.
Sub-Menu
Description
Page 17

All Photos, Folder, Playlist, Tags, Dates, Rating
T
Slideshow Menu
Browsing Mode
Menu
Stop Slideshow Pauses or resumes the slideshow.
Selects the category to arrange the photos by.
[Browsing Mode] is only displayed on a PC.
he sub-menus of a mode are subjected to each mode.
Sub-Menu Detailed Menu
Description
Slideshow Effect
Selects a play effect.
Speed Fast, Normal, Slow
Selects a play speed.
Slideshow Settings
Brightness
Rotation You can rotate the monitor screen to 90°, 180° and 270°.
Screen ratio
Delete
Mode
Selects the play mode.
This cannot be used during a PC, Live Space, or RSS photo slideshow.
Display Clock Off, On
Selects whether to play a slideshow and show the current time at the same time.
0~100
You can adjust the brightness.
Original Fit, Auto Fit, Fit to Width, Fit to Screen
You can select how to adjust the size of the photos when displaying them on the screen.
Original Fit - When the photo size is larger than the screen size, it is displayed to fit the screen size.
Auto Fit - Photos are fit to the screen size. A horizontal or vertical part of a photo may be cut but there is
no distortion.
Fit to Width - Photos are fit to the screen width. A horizontal or vertical part of a photo may be cut but
there is no distortion.
Fit to Screen - Photos are fit to a resolution of 1024*600. (The photo image may be distorted)
Deletes a photo being displayed in the slideshow.
This will not function during a PC, Live Space, or RSS photo slideshow.
No Effect, Fade, Wipe, Slide, Blind, Checker, Box In/Out, Cross Comb, Silk,
Circle, Wheel, Diamond, Plus, UnCover, Stairs, Random
All photos, Photos in Folder, Shuffle all photos, Shuffle photos in Folder, Repeat
one photo
Set as Background Sets the currently selected image as the background of the main screen.
On, Off, Music Settings
Background Music
Select [On] of [Background Music].
Then select [Music Settings] of [Background Music] by pressing the MENU button and select a music file
stored on the Frame Memory or a connected external memory device.
When the product is used for the first time, the built-in music files are used as the background music.
Page 18

Direct Functions
A
A
User
|
Guide
Music
When the next slideshow is performed using the [Slideshow] button, the last played background music file
is played as the background music.
(The location priority of the music files to be played for the background music is: "Location of the last
played background music file ĺ [Frame Memory] ĺ [USB] ĺ [SD/MS]" .
Menu Description
MENU Opens the on-screen menu and exits from the menu.
Plays the next file.
Plays the previous.
Adjusts the volume.
Plays and Pauses a file.
Play or pause a Slideshow.
|
Photo
|
Music
|
Movie
|
Clock & Alarm
|
Settings
|
The menu displayed when selecting a list.
If you press the Menu button, the menu of the selected item is displayed on the screen.
Menu
Play Music Plays a file.
Play Mode
Copy
Copy All Files
Delete Deletes the selected file.
Delete All Files Deletes all files.
All musics, Music in Folder, Shuffle all musics, Shuffle music in Folder, Repeat one music
Selects the play mode.
Copies the selected file to a different storage device.
t least one storage device must be connected.
Copies all files to a different storage device.
t least one storage device must be connected.
Sub-Menu
Description
The menu displayed while playing music.
Page 19

If you press the Menu button, the menu of the selected item is displayed on the screen.
Menu
Sub-Menu
Description
Direct Functions
User
|
Guide
Movies
Play Mode
Menu Description
MENU Opens the on-screen menu and exits from the menu.
|
Photo
All musics, Music in Folder, Shuffle all musics, Shuffle music in Folder, Repeat one music
Selects the play mode.
Plays the next.
If you hold down the button for a long time, the Fast Forward function operates.
Plays the previous.
If you hold down the button for a long time, the Fast Rewind function operates.
Adjusts the volume.
Plays and Pauses a file.
Play or pause a Slideshow.
|
Music
|
Movie
|
Clock & Alarm
|
Settings
|
The menu displayed when selecting a list.
If you press the Menu button, the menu of the selected item is displayed on the screen.
Menu
Sub-Menu
Description
Page 20

Play Movie Plays a file.
A
A
Play Mode
Copy
Copy All Files
Delete Deletes the selected file.
Delete All Files Deletes all files.
All movies, Movies in Folder, Shuffle all movies, Shuffle movies in Folder, Repeat one movie
Selects the play mode.
Copies the selected file to a different storage device.
t least one storage device must be connected.
Copies all files to a different storage device.
t least one storage device must be connected.
The menu displayed while playing a movie.
Direct Function
If you press the Menu button, the menu of the selected item is displayed on the screen.
Menu
Play Mode
Brightness
Menu Description
MENU Opens the on-screen menu and exits from the menu.
All movies, Movies in Folder, Shuffle all movies, Shuffle movies in Folder, Repeat one movie
Selects the play mode.
0~100
You can adjust the brightness.
Plays the previous.
If you hold down the button for a long time, the Fast Forward function operates.
Plays the next.
If you hold down the button for a long time, the Fast Rewind function operates.
Adjusts the volume.
Plays and Pauses a file.
Play or pause a Slideshow.
Sub-Menu
Description
User
|
Guide
|
Photo
|
Music
|
Movie
|
Clock & Alarm
|
Settings
|
Clock & Alarm
Page 21

Menu
Date and Time
Time Zone You can select a time zone.
Sub-Menu Detailed Menu
Month, Day, Year, Hours, Minutes, am/pm (when the Time Format is set to 12 Hours).
Month, Day, Year, Hours, Minutes (when the Time Format is set to 24 Hours).
Sets the date and time.
Description
Daylight Saving Time
Internet Time Update
Time Format
Date Format
Clock Type
Alarm
Off, On
You can enable or disable the daylight saving time.
Auto, Manual, Update Time Now
Select whether to update the system time of your Digital Photo Frame with the time information received
through the Internet.
12 Hours, 24 Hours
For the Time Format, you can select 12 Hours or 24 Hours.
If 24 hours is selected, am/pm cannot be selected.
YYYY/MM/DD, MM/DD/YYYY, DD/MM/YYYY
You can select the format in which the date is displayed.
Analog, Digital, Clock & Calendar
You can select the clock type.
Activation Yes, No
Set time Manual, After 10min, After 20min, After 30min.
Hours 1~12
Minutes 00~59
am/pm am, pm
User
|
Guide
Settings
Settings
Repeat Once, Sat ~Sun, Mon~ Sat, Mon~ Fri, Everyday
Sound Sound 1, Sound 2, Sound 3
Volume 0~100
You can set an alarm.
|
Photo
|
Music
|
Movie
|
Clock & Alarm
|
Settings
|
Page 22

Menu
Sub-Menu Detailed Menu
Description
Network Settings Sets the network. The network information you set is displayed at the bottom.
Network
Options
Proxy Required Yes, No
You can set whether to use a proxy server.
Language
You can select the language for the product.
Brightness 0~100
Adjusts the brightness of the screen.
Auto Rotation Off, On
Off : If you set the frame on its edge during a SlideShow, even if the sensor detects the change, the picture
does not rotate accordingly.
On : If you set the frame on its edge, the sensor detects the change and rotates the picture automatically.
Button Sound Off, Low, Medium, High
You can turn the button operating sound heard when operating the product on or off.
Volume 0~100
Adjusts the volume.
Frame Memory Copy Original Size, Resized
When copying a photo from an external memory storage device (SD/MS, USB memory) to the Frame Memory,
if [Settings]-[Options]-[Frame Memory Copy] is set to [Resized], the size (screen quality) of the photo is
automatically reduced before saving it, so that it can be fit to the screen of your digital photo frame, and the
EXIF (camera related information) saved in the photo is removed. Therefore, make sure to only use the photos
saved on the Frame Memory with the digital photo frame.
English, Deutsch, Español, Français, Italiano, Nederlands, Polski, Português,
ǸțșșȒȐȑ,Svenska, Türkçe, ㅔ闬譄芉, 襲莇蛑,䚐ạ㛨
Preferences
Starting Mode Home, Last Mode, Slideshow
You can select the first screen to be displayed when the power is turned on.
Screen Saver Slideshow, Clock
You can select the screensaver type.
If no button is pressed for ten (10) minutes, the screensaver is activated.
OSD Color Theme Violet Style, Blue Style, Green Style, Orange Style
You can select a color theme for the menu background screen.
The default color theme is Blue Style.
Home Background Default, Custom
You can set the background of the main menu screen.
Auto Picture On/Off Activation, Hours, Minutes, am/pm, Repeat
When the [Off Time] is reached, other operations are stopped and the screen is turned off. When the [On
Time] is reached, the screen is turned on and the previous operating status persists.
If the screen is turned off as the time has reached the [Off Time], press any button except the Power button to
display the screen again.
If the product is being used as a Mini-Monitor or a Mass Storage device connected to your PC via a
USB cable, the screen will not be turned off even if the Off Time is reached.
Page 23
Firmware Update
You can update the product by using a USB memory stick or memory card
(SD/MS).
For the latest firmware file, visit www.samsung.com.
Update/Reset
Web Configuration
Upper Menu
Photo Frame
Reset Settings Yes, No
Initializes the settings to the factory defaults.
Product Information Model, Firmware Version, Copyright
You can check the product information.
Connect to the address (URL) in the [Web Configuration Address] item on the [Settings]-[Network] page of the Digital
Photo Frame using Internet Explorer.
If connected, the Welcome page is displayed.
Enter the password in the [Web Configuration Password] item of the [Settings]-[Network] page of the Digital Photo Frame in
the [Password] item on the Welcome page. Then click the [sign in] button.
Sub Menu
Description
Password
Welcome
Enter the password displayed in Management Password.
Enables case-sensitive mode.
Now Playing
You can monitor the photos which are being displayed in the slide show at the same time.
Web Photos
Storage
Settings
Help Displays the help section for using Samsung Photo Frame Web Configuration.
Photo Feeds, Photos Windows Live Spaces
You can add or remove a website address from which you can receive photos.
Photo Feeds, Photos Windows Live Spaces
You can check the size of the photos in the addresses listed in Web Photos.
Basic, Administrator Password, Date and Time, Network Settings
You can enter and change the product name, administrator password, time, and network proxy server,
etc.
Page 24

Initial Settings
T
Settings for Sharing Photos on your PC - Configuring Your Windows
Settings for Sharing Photos on your PC - Configuring Your Photo Frame
Viewing the Photos from Windows Live Space
Viewing the Photos via RSS
Setting up Rating and Tags (VISTA:Tags, XP:Labels) on a PC
I want to update firmware.
I want to connect to a monitor by using Mini-Monitor program.
Initial Settings
o use the wireless sharing function provided with this product, Windows Vista must be running on your computer and a wireless LAN
access point (AP) must be in your vicinity.
Windows XP
1. Choose Your Language
2. Use Wi-Fi network?
Windows Media Player 11 or later must be installed.
Digital Image Library Starter Edition (DISE)
: This program allows you to change the ratings for the photos on your Digital Photo Frame via
your PC.
Recommendations when using the Digital Photo Frame: Internet Explorer 7.0 or higher
Turn on your Digital Photo Frame and select a language.
You can change the language via Settings -> Language.
Select whether to use a network.
Page 25

3. Choose your Access Point
4. Choose Computer
The AP list is displayed.
Select the SSID you want to connect to in the [Choose your Access
Point] screen. If the SSID you want to connect to is not displayed,
refresh the SSID list by pressing [Refresh] and then select the SSID.
The PC list is displayed. If the PC you want to connect to is not in the
list, refresh the PC list by pressing [Refresh] and then select the PC.
5. Finish
The selected network and PC are displayed.
You can select a menu after completing the operation.
Ensure that the Settings are confi gured as shown below.
Otherwise, your PC may not be displayed in the list or you may not be able to connect to it.
z In Vista, select Control Panel > Network and Sharing Center > Customize. Check whether the Location type is set to Private.
z Select Digital Photo Frame from the Windows Media Player > Library > Media Sharing list. Check whether it is set to Allow.
Settings for Sharing the Photos on your PC - Configuring Your Windows Vista
Adding Photos to the Library
Run Windows Media Player.
Click the [Library] tab at the top.
Page 26

Click [Add To Library] in the [Library] tab.
In the [Add To Library] window, select [My
personal folders] under the [Select the folders to
monitor] section and select the folder containing
photos and click [Add].
Select the folder to share and click [OK] to add
it.
When you click [OK], the [Add To Library]
window is closed and the [Add to Library by
Searching Computer] is displayed. Wait until it
finishes the operation and click [Close] when it is
completed.
Checking Shared Photos
In the Windows Media Player, set the Category,
which is under the [ , ] symbol at the top left,
to [Picture].
Page 27

In the [Library], select Recently added, All
g
Pictures, Keywords, Date Taken, Ratin
Settings and check whether the added photos
exist in the library.
Sharing Settings for Accepting Connections from Your Photo Frame
In the [Library] tab, click on [Media Sharing].
, or Folder
In the [Media Sharing] window, check the
[Share my media] checkbox under [Sharing
Settings].
If no [Available device] is displayed in the
[Media Sharing] window, proceed to steps 4. If
displayed, proceed to step 5.
In the [Media Sharing] window, click
[Networking] and check whether the current
network is set to [Private network]. If not, set it
to [Private Network].
Page 28

If your network is a Private network, the
[Available Device] list and the [Settings] button
are displayed in the [Media Sharing] window.
In the [Media Sharing] window, click [Settings].
The [Media Sharing-Default Settings] window is
displayed.
In the [Media Sharing-Default Settings] window,
set the [Media Type] to [Picture], both [Star
ratings] and [Parental ratings] to [All ratings] or
a required rating under the [Default Settings]
section. If you want to add a device or
computer which tries to connect to the library to
the list automatically, check the [Add new
devices and computers automatically] checkbox.
Only photos can be transmitted via PC sharing.
Settings for Sharing the Photos on Your PC - Configuring Your Photo Frame
Checking Network Connections
Check whether the Network icon is displayed at the
left top of the Main screen.
Page 29

If the Network icon is displayed, proceed to the
V
g
Checking Computer Connections section
described below. If it is not displayed, move to
[Settings]-[Wireless Network(SSID)].
SSID : Service Set Identifier
Select the SSID you want to connect to in the
[Choose your Access Point] screen. If the SSID you
want to connect to is not displayed, refresh the SSID
list by pressing [Refresh] and then select the SSID.
If you select this when the SSID is encrypted, a
password input window is displayed. You can only be
connected to the network if you enter the correct
password.
Checking Computer Connections
The PC list is displayed.
If the PC you want to connect to is not in the list, refresh
the PC list by pressing [Refresh] and then select the PC.
The configured network and computer are displayed. You
can select a menu once the completion window is
displayed.
iewing the Photos from Windows Live Space
Checking Windows Live Space and Uploading Photos
If you have no MSN account (MSN Hotmail, MSN
Messen
er, Passport account), please create one. Go
to and login to Windows Live Space
(http://spaces.live.com/) with your MSN account.
If you do not have a space, create a space and enter
Page 30

g
Setting up the Web Configuration
it.
In your space, change to edit mode. Add albums and
photos by clickin
Connect to the address (URL) in the [Web
Configuration Address] item on the [Settings][Network] page of the Digital Photo Frame using
Internet Explorer.
on Add under the Photos category.
If connected, the welcome page is displayed. Enter
the password in the [Remote Configuration
Password] item of the [Settings]-[Network] page of
the Digital Photo Frame in the [Password] item on
the Welcome! page. Then click the [sign in] button.
You can change the password (default: Admin)
in the Settings of the Samsung Photo Frame
Web Configuration.
On the Samsung Photo Frame Web Configuration
page, click the [Web Photos] tab and add the space
address (for example, if it is
'http://test.space.live.com', you have only to type
'test'.) to the URL input box for the Photos From
Windows Live Spaces list and click [Add].
Checking your Space Photos on your Digital Photo Frame
First check the network connections. (Refer to
Viewing the Photos Shared from Vista Windows on
your Digital Photo Frame - What You Should Do on
Your Digital Photo Frame - Checking Network
Connections.)
Page 31

In the Main screen of your Digital Photo Frame, go to
V
[Photo]-[Windows Live Space]. A list of the spaces
you have added to the Web Configuration will be
displayed.
Select a space. A list of albums in the selected space
will be displayed. Select an album, and thumbnails for
the photos in the selected album will be displayed on
the right.
iewing the Photos via RSS
Web Configuration
Checking the Photos from RSS on Your Digital Photo Frame
Go to the Web Photos page by following the
description in the Settings Web Configuration
section for Windows Live Space. Click [Web
Photo]-[Photo Feeds] for the RSS Input window.
In the RSS Input window, enter the RSS address
and click [Add].
What is an RSS Address?
It is the address that appears in the address box
of the web page (XML) displayed when clicking
the FEED icon on a RSS service site where
photos are uploaded.
In the Main screen of your Digital Photo
Frame, go to [Photo]-[RSS and Web Feeds].
A list of feeds you have added to the Web
Configuration will be displayed.
Select a feed from the list. Thumbnails for
the photos in the selected feed will be
Page 32

displayed to the right.
g
Setting up Rating and Tags (VISTA:Tags, XP:Labels) on a PC
Windows VISTA
Click Start - All Programs - Windows Photo Gallery to
launch the Windows Photo Gallery.
If you select Info at the top of the Windows Photo Gallery
screen, the photo information pane appears on the right.
Select a photo and change the Rating or Tags in the right
information pane.
Windows XP
I want to update firmware.
Preparations
Connect USB
memory card
to PC
Connect USB
Memory Card
to Digital
Photo Frame
Digital Photo Frame
Firmware update file.
USB memory card or external memory devices(SD/MS)
Please visit www.samsung.com for the latest firmware update.
If you are ready, connect the USB memory card to your PC.
Copy the firmware update file you downloaded to the USB memory card.
(Make sure to copy the firmware update file to the root directory.)
Remove the USB memory card from your PC, and connect it to your Digital Photo Frame.
If your Digital Photo Frame is off, turn it on.
Click Start - All Programs - Microsoft Digital Image
Starter Edition 2006 - Microsoft Di
Edition 2006 Library.
The Microsoft Digital Image Starter Edition 2006
Library window appears.
Select a photo and configure the Rating and Labels for the
selected photo at the bottom of the screen.
ital Image Starter
Updating
Select [Firmware Update] on the [Settings]-[Update/Reset] page.
After boot-up, turn your Digital Photo Frame off, remove the USB memory card, and turn your
Digital Photo Frame on again, for maximum safety.
Page 33

Do not remove the USB, memory card during the update operation.
Do not press any key during the update operation.
Do not insert any other card during the update operation.
Do not turn your Digital Photo Frame off during the update operation.
You can identify whether the update operation has finished successfully or not by checking the
firmware version of your Digital Photo Frame is changed to the version of the firmware update.
I want to connect to a monitor by using Mini-Monitor program.
The Digital Photo Frame not only allows you to appreciate photos but also provides an additional
Mini-Monitor function. The Mini-Monitor is a function for using the Digital Photo Frame as an
auxiliary monitor. Its usage is simple as the Digital Photo Frame connects to your PC via a USB cable.
This function allows you to work more efficiently at your PC by using an additional monitor. To use
your digital photo frame as a Mini-Monitor, first install the Frame Manager program. (However,
please note that you can use only one digital photo frame as a Mini-Monitor.)
Installing Frame Manager
Frame Manager User's Manual
Using your digital photo frame as a Mini-Monitor.
Using your digital photo frame as Mass Storage.
Changing the current mode to another mode
Adjusting the brightness
Updating the firmware
System Requirements
z OS : Windows XP SP2, Vista (32bit)
z System Processor Speed : 1.5 GHz
z USB : Extended Host Controller (EHCT) for USB 2.0
z RAM : 256 MB or above
Caution
1. When using Windows XP, Service Pack 2 must be installed.
It might not operate with any operating systems other than Windows XP SP2. We are not liable for problems that may
occur when installing it on an operating system other than Windows XP SP2.
2. We recommend a CPU speed of 2.4 GHz or higher.
Your digital photo frame might not operate normally if the performance specifications of your PC are lower than the
recommendations.
3. Make sure to install it correctly as directed in the Installation Guide.
4. Do not use your Mini-Monitor as a primary monitor.
We are not liable for any problems that may occur if you do not follow the directions. If it is used as a primary monitor,
the screen may be blank.
5. Make sure to use the provided USB cable.
6. If it operates as a Mini-Monitor, none of the buttons will operate except for the power button and the Ÿ/ź buttons.
7. Move the programs displayed and used on the Mini-Monitor to the primary monitor after you have finished using it.
8. For some video cards, the Mini-Monitor may not operate normally. In this case, set Hardware acceleration to None.
To set Hardware acceleration to None: Right-click on the Windows Desktop and select Properties from the displayed
menu. The Display Properties window appears. Click Settings > Advanced > Troubleshoot tab. Move the Hardware
acceleration slide to None.
9. You cannot use the Aero effect of Windows Vista while using the Mini-Monitor.
10. When using Windows Vista, some movies cannot be played using the Mini-Monitor.
Limitation and Recommendation
z Limitation : Hardware graphics acceleration such as DirectX or OpenGL is not supported on the Mini-MonitorDisplay as it
would require the emulation of a graphics processor by your standard CPU which would not be favourable. Media
players which are using DirectX will not work properly on Mini-Monitor Display.
> Example: GOM player,VLC Player
z Recommedation : Do not use/run directX or openGL application on Mini-Monitor display.
Page 34

Page 35

Installation
|
Installation
Install the Application first before connecting the Digital Photo Frame to a PC.
To Install the Frame Manager Software and USB Secondary Display -
|
Installing USB driver
|
1. Click the Frame Manager icon to run the setup file.
2. Click Next.
3. Select I agree to the terms of this license agreement and click Next.
Page 36

4. Click Next.
5. Click Install.
Page 37

6. Click Finish to restart your computer.
The installation is completed.
When the PC is restarted the Frame Manager icon will appear in system tray.
7. To use the Samsung Digital Photo Frame as USB Secondary Display -
Go to Control Panel -> Display -> Settings ->Select Samsung Mini-Monitor Display Card.
Check Button "Extend my windows desktop on to this monitor"
Applicable for Windows XP users only.
Page 38

NOTE : Never make this as primary monitor.
8. Press "Ok" or "Apply".
|
Installation
|
Installing USB driver
Installing USB driver
Now Switch on the device (Samsung Digital Photo Player) and connect the USB cable
(provided in the box with the unit) to the PC.
|
Page 39

1. Connect the larger "standard USB" connector to the USB port of the PC. Connect the smaller "mini-USB" connector to the "PC"
connector of the Samsung Digital Photo Fame.
2. Select "No, not this time" button.
3. Click on "Next" button.
Page 40

4. Click on "Next" button.
5. Select "Install from a list of specific location (Advanced)".
Click on Next button.
Page 41

6. Select "Search for the best driver in these locations" option.
Check "Include this location in the search:"
Now click on "Browse" button to select the directory where the Frame Manager software is
installed.
(Refer to Frame Manager Installation step 3).
7. Now press "Next" button.
Page 42
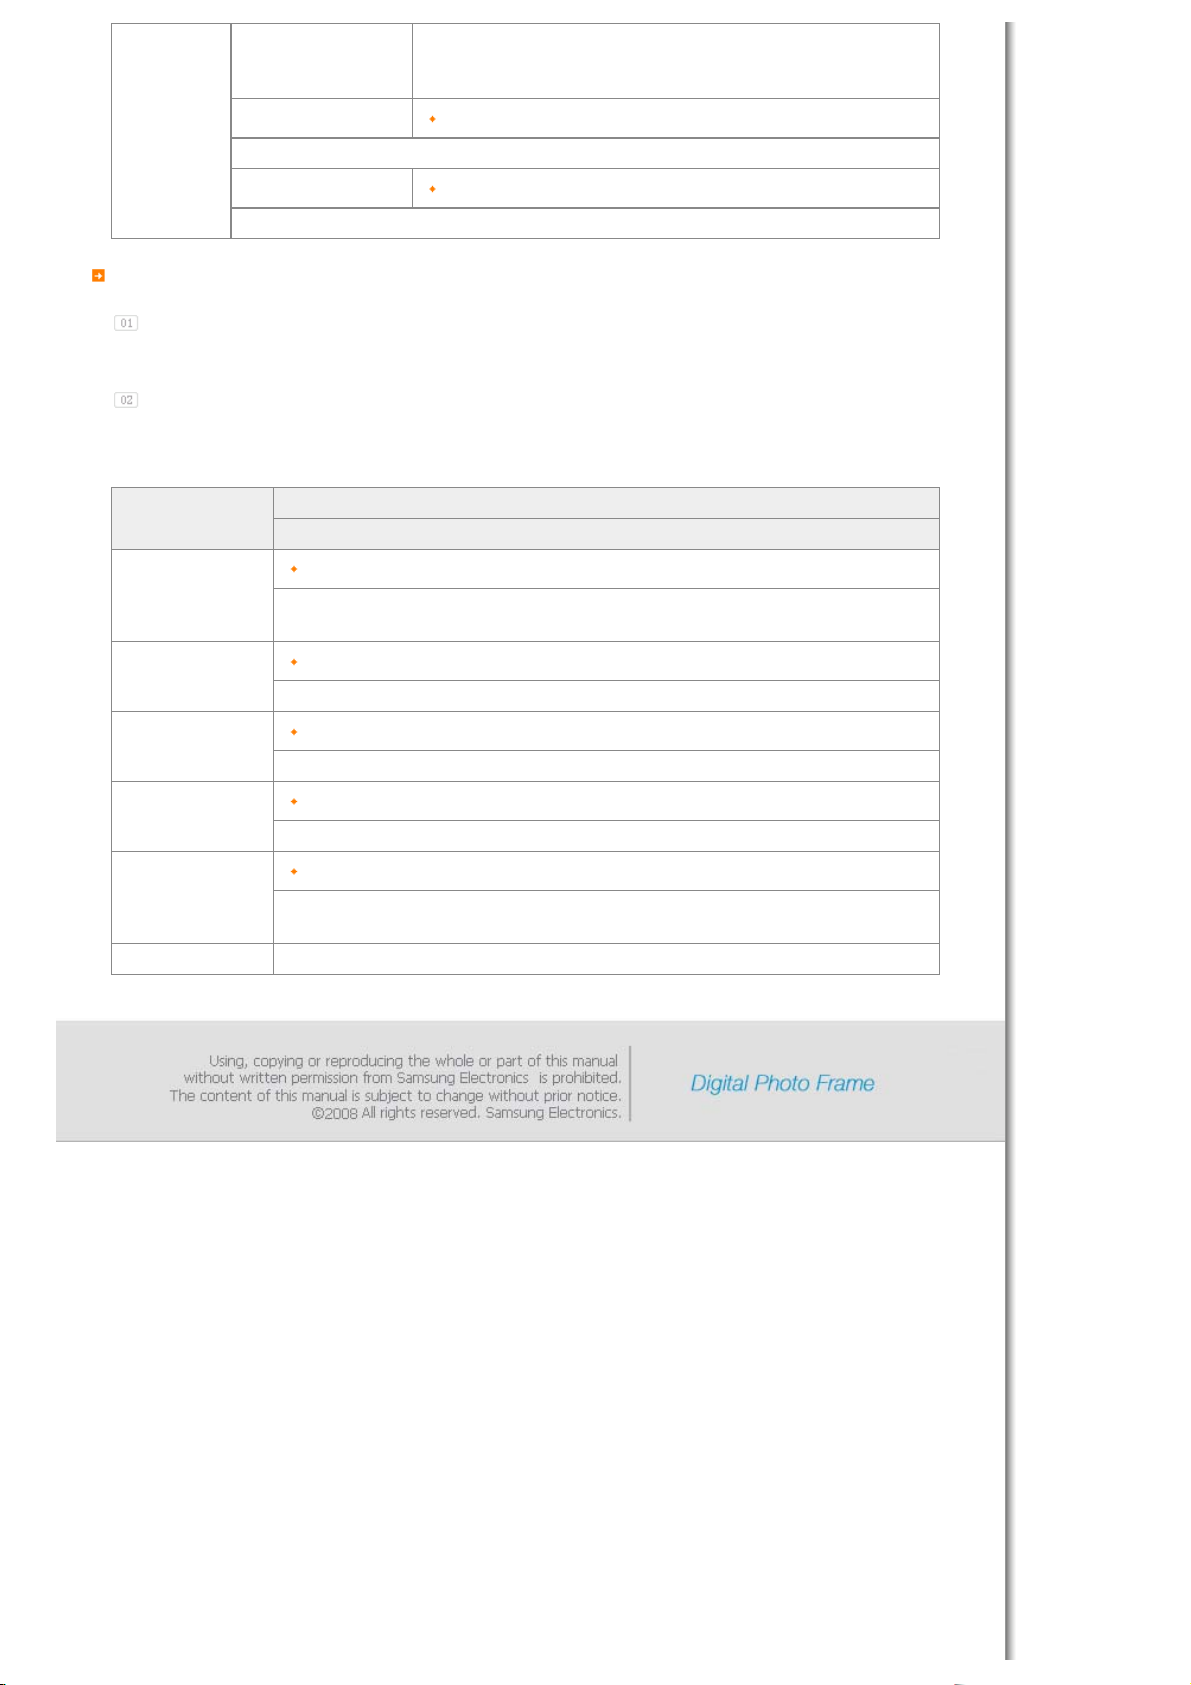
8. Press "Continue Anyway" button.
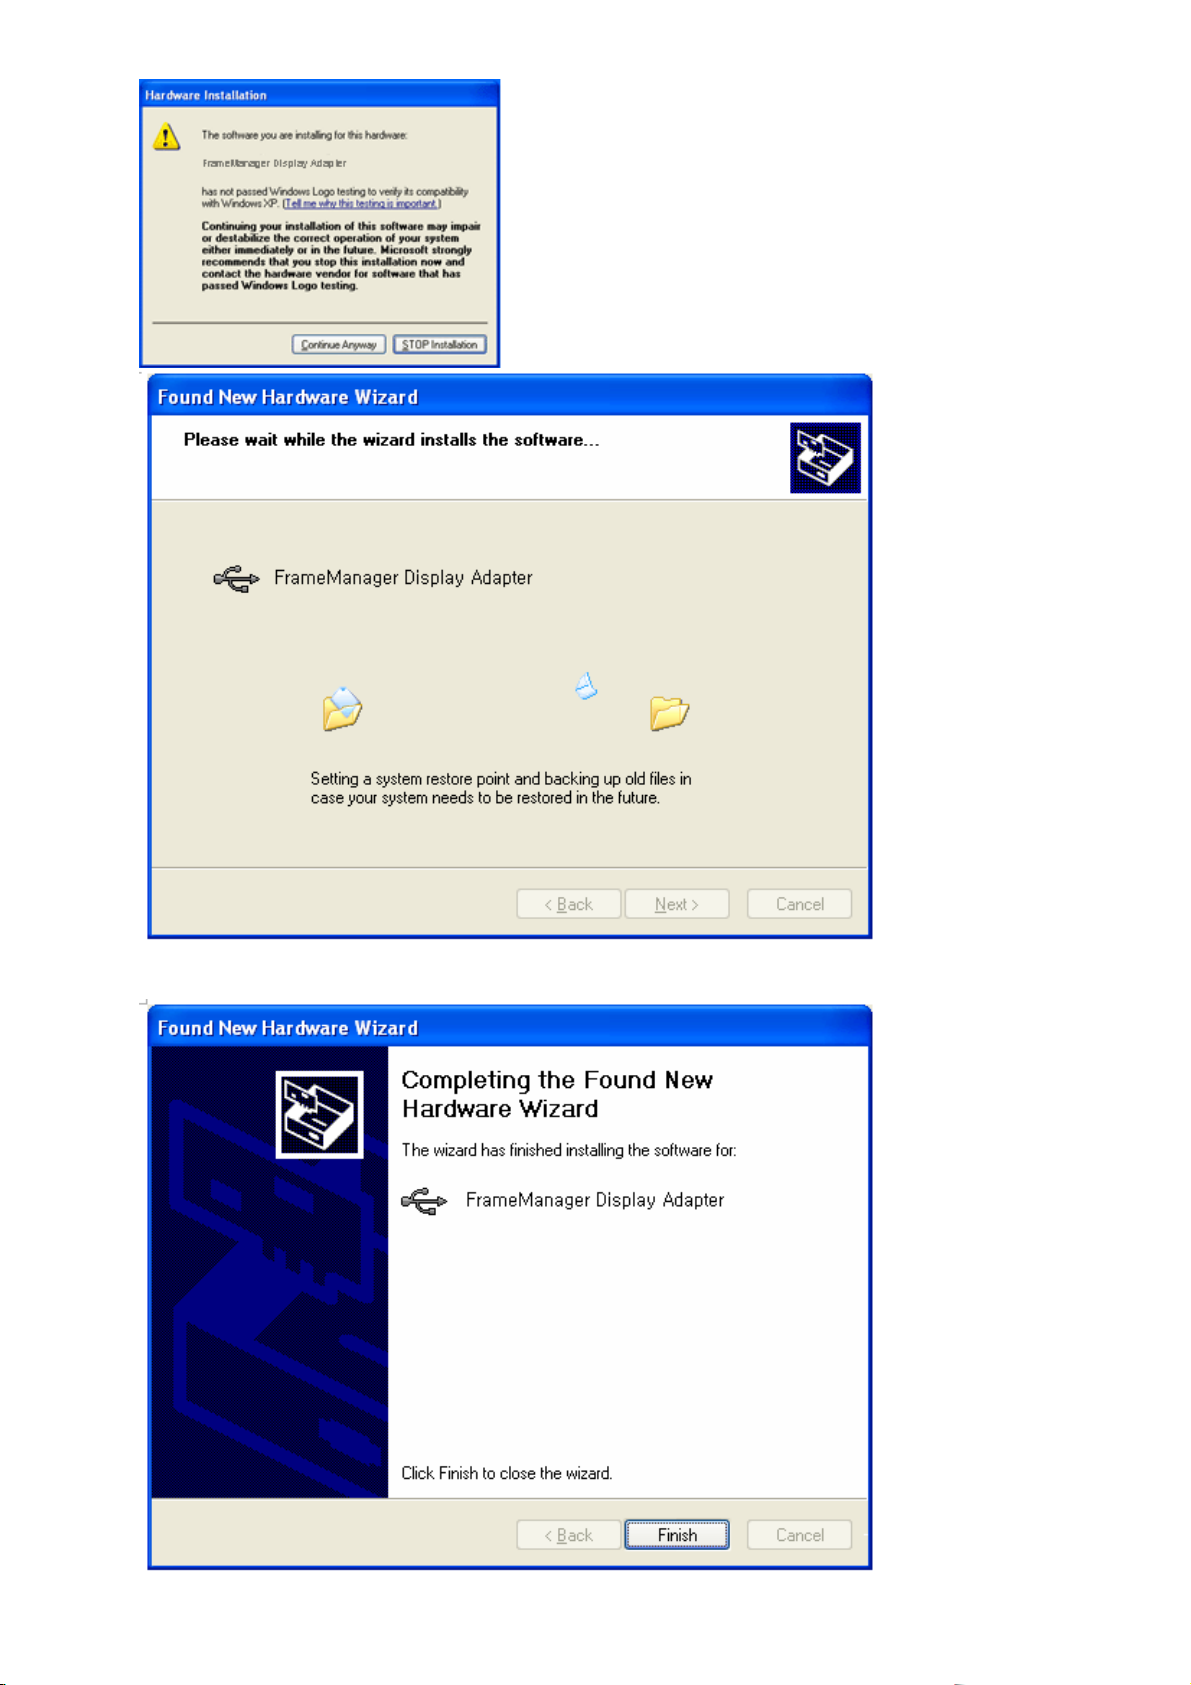
9. Press "Finish" button.
10. Now the system is ready to be used.
Page 43

How To Use Digital Photo Frame As Mini-Monitor
A
If USB cable is not connected and Digital Photo Frame is switched on, it starts working as a Photo Album.
To use the Samsung Digital Photo Frame device as a secondary USB Monitor, first install the frame Manger
on the Windows XP computer. (Follow the Frame Manger Installation Guide for installation).
Use the USB cable to connect the computer’s USB port to the Digital Photo Frame’s USB port.
On Samsung Digital Photo Frame, the following screen will appear:
Select Mini-Monitor option by clicking the button. Use Left / Right button on device for selection and by pressing ENTER
button on device.
On the device desktop will appear.
In Frame Manager System tray menu, Mini-Monitor menu item will appear disabled (i.e. the current mode) and
Mass Storage menu item will appear enabled.
How To Use Digital Photo Frame As Mass Storage
If USB cable is connected to PC, Disconnect and connect again.
Following screen will be shown on Digital Photo Frame.
Select Mass Storage option by clicking the button. Use Left / Right button on device for selection and by pressing
ENTER button on device.
dialog box (Window Default) will appear and you can open the folder.
Page 44

How to switch current mode to another
1. Mini-Monitor To Mass Storage
If the USB Cable is connected and Photo Frame is being used as Monitor,
Right click on the Frame Manager System tray icon.
From the Menu, Click on menu item Mass Storage.
2. Mass Storage To Mini-Monitor
If the USB Cable is connected and Photo Frame is being used as Mass Storage,
Right click on the Frame Manager System tray icon.
From the Menu, Click on menu item Mini-Monitor.
3. Rotate to 90 in Mini-Monitor Mode
When the device is in Mini-Monitor mode 0 Degree, select "Rotate to 90°" to rotate the display by 90 degrees.
4. Rotate to 0 in Mini-Monitor Mode
When the device is in Mini-Monitor mode 90 Degree, select "Landscape" to rotate the display back to normal 0
Page 45

degrees position.
5. Screen Refresh
What is the Screen Refresh function?
This is a function to refresh the screen every thirty (30) minutes to prevent afterimages from burning onto the panel
in Mini-Monitor status. The default is set to "On".
Brightness Control
To control the brightness in Mini-Monitor Mode (i.e. when Digital Photo Frame is being used as USB Secondary Monitor)
Click Left Mouse Button on the Frame Manager Tray Icon.
Brightness slider will appear.
To Increase the brightness
Drag the slider pointer to upward OR
Press Up-Arrow/ Left-Arrow/ PgUp Key on keyboard
To Decrease the brightness
Drag the slider pointer downwards OR
Down-Arrow/ Right-Arrow/ PgDn Key on keyboard
To Maximize the brightness
Press Home Key on keyboard
To Minimize the brightness
Press End Key on keyboard
To Close Frame Manager application -
Click on Exit menu item.
Page 46

Update Firmware
A
To update the firmware from PC through USB cable, please ensure the following :
SAMSUNG Digital Photo Frame must be connected with PC using USB cable
Device Mode must be connected as Mini-Monitor or Mass Storage
Do not disconnect USB cable during UPDATE operation
Do not operate or switch of Digital Photo Frame Device during UPDATE operation
Remove SD or CF card, USB stick, if inserted into device before running UPDATE.
ll the files required for the update must be available on the PC
Browse to the folder containing these files after PROCEED
- Click Right Mouse Button on the Frame Manager Tray Icon.
1. Following tray menu will appear.
2. Click on Update item.
3. Following instruction dialog will appear.
4. If you do not want to update firmware click, click on Cancel button.
5. If you want to update firmware, click on Proceed button.
6. Following dialog will appear.
7. Select the path where the new firmware is available on disk/PC.
8. Select the file and click Open button.
Page 47

9. During the transfer of file/files, following progress bar will appear.
10. Following dialog will appear.
11. Please disconnect USB between PC and Photo Frame to start firmware update.
12. After this please wait for completion of update on device.
Page 48

|
T
Specifications
Specifications
Items Specifications
Model Name SPF-105V
ype 10"(26 cm)TFT
Resolution 1024 x 600
Panel
Contrast Ratio 500 : 1
Interface Digital 8 bit LVDS
JPEG. MPEG4. WMV9
Supported Formats
Built-in Memory 64 MB
Network
JPEG max Image Resolution 3000x2000(8Mb)
(Progressive,CMYK JPEG is not supported.)
Wi-Fi 802.11b/g 2.4GHz 54Mbps
WEP : Open (64bit, 128bit)
WPA-PSK : TKIP, AES
WPA2-PSK : TKIP, AES
|
USB 2.0
USB
Media (Memory Card)
Rating External Power Adapter (12 V, 2 A, 24 W)
Battery 7.4V 770mAH
Power
Consumption
Sound
Dimensions (WxHxD) 288.8 x 66.2 x 198.5 mm / 11.4 x 2.6 x 7.8 inch
Weight 1 Kg / 2.2 lb
(One up stream (device 2.0) and one down stream (host 1.1),
External Memory Reader is not supported)
2 in 1(SD4GB / MS4GB) , CF
SDHC (High-Capacity) cards are not supported.
Normal mode : under 10W (But, 14 W for battery charging)
Power off mode : under 1W (Even if the power is turned off, up to 10W may be
consumed while the battery is being charged.)
1W x 2 Stereo Speaker (8ohm)
10mW Stereo Earphone (16ohm)
Page 49

The product design may differ according to the model, and specifications are subject to change without prior
T
notice for product performance enhancement.
Class B Equipment (Information Communication equipment for residential use)
This product complies with the Electromagnetic Compatibility Directives for residential Use and can be
used in all areas including common residential areas. (Class B equipment radiates less electromagnetic
influences than class A equipment.)
he Digital Photo Frame uses these modules:
WinCE 5.0
For more information, visit the following web sites:
RMI Alchemy Developer Support Site(http://209.254.132.52/RMI/EmbeddedDeveloper.nsf)
Page 50

|
T
T
T
T
T
Adj
T
T
A
A
T
T
T
A
Troubleshooting|Terminology
|
ETC
|
Service Centers
Declaration of
|
Conformity
Troubleshooting
his section lists various problems and solutions encountered by users while using the digital photo frame. When encountering a problem,
first check the list below and follow the suggested action if one matches your problem. If the problem still persists, contact or visit the
nearest service center.
Symptoms Causes and Actions
|
he power does not turn on.
It takes time until an image is displayed
after the power is turned on.
It takes time to move to the next photo.
I connected an external device but it is
not operating.
here is still space on the Frame Memory
but I cannot copy any more photos.
he screen color is too dim or dark.
No slideshow is played automatically. Set [Starting Mode] of [Settings-Preference] to [Slideshow].
When playing a movie, the screen is
displayed but there is no sound.
he movie is played with the sound only.
blank screen is displayed.
uto On and Auto Off do not operate.
Check the connections for the adapter cable and the power terminal of the
product.
If the resolution is high or the file size is large, the photo may be displayed
slowly on the screen.
Check the cable connections connecting the product and the external device.
he USB device must support Linux. Check whether your USB device supports
Linux.
Create a folder in the Frame Memory and copy your photos into the folder.
ust the brightness in the Settings.
he screen is not displayed because the video codec of the file is not
supported.
Supported codecs are MPEG4 and WMV9.
Change the volume.
Check whether the file contains sound information.
If Auto On and Auto Off are set to the same time, they will not operate.
Check the time settings.
he [Button Sound] is set to On but there
is no button operating sound.
My digital photo frame is not accepting a
photo from the Internet.
I've tried to change an image rating in
Windows Media Player but it does not
he button operating sound will not be heard while a [Background Music,
Music, or Movie file] is playing.
Check whether the AP connected to your digital photo frame can connect to
the Internet.
he maximum permitted file size of a web photo is 4.2 Mb.
(The maximum permitted file size is 8.5 Mb.)
Only JPEG files are available on the web or Feed (higher than 400X240 pixels).
fter changing the rating, turn Windows Media Player off and on.
Page 51

change.
A
T
T
A
t
g
A
g
A
I've tried to change the name of my
digital photo frame but it will not change.
I cannot connect my digital photo frame
to Windows Media Player of my PC.
he FrameManager icon is not displayed.
I pressed a button, but it does not
operate.
|
Troubleshooting|Terminology
Terminology
Terms Description
Remove the product from Windows Media Player (Library/Media Sharing) and
reboot your digital photo frame and computer.
Check whether your PC and digital photo frame are connected to the same
ccess Point (AP).
Vista: Check whether [Control Panel/Network and Sharing
Center/Customize/Location Type/Personal] is selected.
Vista/XP: Select the digital photo frame in the [Library/Media Sharing] of
[Windows Media Player] and check whether it is set to [Allow].
Check whether the FrameManager program is installed.
Select Start- Programs - Samsung - FrameManager to restart FrameManager.
Reboot your computer.
Check whether the button lock function is activated.
If you hold down the MENU button for more than five (5) seconds, the button
lock function is activated. If you press a button it will not operate.
o clear the button lock function, hold down MENU button for more than five
(5) seconds again.
|
ETC
|
Service Centers
Declaration of
|
Conformity
|
MPEG4
(Motion Picture Expert Group4)
WMV9
(Window Media Video9)
MP3
(MPEG Audio Layer-3)
JPEG
(Joint Photographic Coding Expert
Group)
SD Card
(Secure Digital Card)
MPEG4 is a movie compression technology for video communications which
enables implementing bi-directional multimedia. It was developed to make it
possible to transmit movies over low speed lines on the Internet or for mobile
communications. It is used widely on PCs, TVs and cell phones. A movie file
formatted in the MPEG4 format is called an MPG or MPEG file.
video codec in the MPEG4 format developed by Microsof
MP3 is a high quality audio compression technology. It provides a 50 times
higher compression than CD. Because it provides high quality and a low size
for its compression ratio, it is commonly used on the Internet and for FM radio
transmissions, etc. An audio file formatted in the MP3 format is called an MP3
file.
JPEG is an image compression technology. It provides the smallest loss of all
image compression technologies. It is used widely to transmit multimedia files
on the Internet and for other uses. An ima
is called a JPEG or JPG file. Usually, a JPEG file is created by taking a picture
with a digital camera, by drawing on a computer, or by a graphic package and
then by compressing the graphics image into the JPEG format.
n SD card is a Flash memory card the size of a postage stamp. It provides
high stability and high capacity. It is widely used in various digital products
such as PDAs, di
appearance is similar to that of MMC, but the number of pins and their
thickness is different. It also has a password setting function for data security.
ital cameras, MP3 players, cell phones, and notebook PCs. Its
e file formatted in the JPEG format
Use the up stream terminal when connecting to a PC. This product supports
USB 2.0. An A-mini B type cable which is used to connect your digital photo
USB Cable
1) A-mini B type
USB Cable
2) Cable for Connecting Other Devices
frame to a PC is provided with the product. The A type is the USB connector
used to connect to a PC. The B type is the USB connector used to connect to
an external device. You can connect your digital photo frame to a PC using an
-mini B type USB cable.
Use this type of cable when using the down stream terminal. This product
supports USB 2.0. When connecting an external device to the down stream
Page 52

A
P
(Access Point)
SSID
(Universal Plug & Play)
terminal, use the USB cable provided with the external device.
When using a cell phone, you will hear frequently about a "repeater." In a
wireless LAN, AP plays the same role as a repeater. That is, it a intermediate
equipment through which wireless LAN cards receive signals. As a cell phone
makes a call through a repeater, a wireless LAN card sends and receives data
through an AP.
SSID is a 32-bit unique identifier which is attached to each header of every
packet being transmitted on a wireless LAN. It is used as a password when a
wireless device connects to a Basic Service Set (BBS). Because SSID allows
differentiating a wireless LAN from other wireless LANS, all APs and wireless
devices that want to access to a wireless LAN must use the same SSID. If a
device does not know the unique SSID of a certain BBS, it cannot connect to
that BBS.
|
Troubleshooting|Terminology
|
ETC
|
Service Centers
ETC
This product uses parts of the software from the Independent JPEG Group.
This product uses parts of the software owned by the Freetype Project (www.freetype.org).
This product uses some software programs which are distributed under the GPL/LGPL license. Accordingly, the following
GPL and LGPL software source codes that have been used in this product can be provided after asking to
vdswmanager@samsung.com.
This product uses some software programs which are distributed under the Qtopia license.
Independent JPEG Group software: libjpeg
GPL software: Linux Kernel, Busybox, Binutils, djmount, FUSE, LIBICONV, Wireless Tools
LGPL software: Glibc
GNU GENERAL PUBLIC LICENSE
Version 2, June 1991
Copyright (C) 1989, 1991 Free Software Foundation,
Inc. 59 Temple Place, Suite 330, Boston, MA 02111-1307 USA
Everyone is permitted to copy and distribute verbatim copies
of this license document, but changing it is not allowed.
Declaration of
|
Conformity
|
Preamble
The licenses for most software are designed to take away your freedom to share and change it. By contrast, the GNU
General Public License is intended to guarantee your freedom to share and change free software--to make sure the
software is free for all its users. This General Public License applies to most of the Free Software Foundation's software
and to any other program whose authors commit to using it. (Some other Free Software Foundation software is covered
by the GNU Library General Public License instead.) You can apply it to your programs, too.
When we speak of free software, we are referring to freedom, not price. Our General Public Licenses are designed to
make sure that you have the freedom to distribute copies of free software (and charge for this service if you wish), that
you receive source code or can get it if you want it, that you can change the software or use pieces of it in new free
programs; and that you know you can do these things.
To protect your rights, we need to make restrictions that forbid anyone to deny you these rights or to ask you to
surrender the rights. These restrictions translate to certain responsibilities for you if you distribute copies of the software,
or if you modify it.
For example, if you distribute copies of such a program, whether gratis or for a fee, you must give the recipients all the
rights that you have. You must make sure that they, too, receive or can get the source code. And you must show them
these terms so they know their rights.
We protect your rights with two steps: (1) copyright the software, and (2) offer you this license which gives you legal
permission to copy, distribute and/or modify the software.
Also, for each author's protection and ours, we want to make certain that everyone understands that there is no warranty
Page 53

for this free software. If the software is modified by someone else and passed on, we want its recipients to know that
g
g
what they have is not the original, so that any problems introduced by others will not reflect on the original authors'
reputations.
Finally, any free program is threatened constantly by software patents. We wish to avoid the danger that redistributors of
a free program will individually obtain patent licenses, in effect making the program proprietary. To prevent this, we have
made it clear that any patent must be licensed for everyone's free use or not licensed at all.
The precise terms and conditions for copying, distribution and modification follow.
TERMS AND CONDITIONS FOR COPYING, DISTRIBUTION AND MODIFICATION
This License applies to any program or other work which contains a notice placed by the copyright holder saying it may be
distributed under the terms of this General Public License. The "Pro
a "work based on the Program" means either the Program or any derivative work under copyright law: that is to say, a
work containing the Program or a portion of it, either verbatim or with modifications and/or translated into another
language. (Hereinafter, translation is included without limitation in the term "modification".) Each licensee is addressed as
"you".
Activities other than copying, distribution and modification are not covered by this License; they are outside its scope. The
act of running the Program is not restricted, and the output from the Program is covered only if its contents constitute a
work based on the Pro
what the Program does.
You may copy and distribute verbatim copies of the Program's source code as you receive it, in any medium, provided that
you conspicuously and appropriately publish on each copy an appropriate copyright notice and disclaimer of warranty;
keep intact all the notices that refer to this License and to the absence of any warranty; and give any other recipients of
the Program a copy of this License along with the Program.
ram (independent of having been made by running the Program). Whether that is true depends on
ram", below, refers to any such program or work, and
You may charge a fee for the physical act of transferring a copy, and you may at your option offer warranty protection in
exchange for a fee.
You may modify your copy or copies of the Program or any portion of it, thus forming a work based on the Program, and
copy and distribute such modifications or work under the terms of Section 1 above, provided that you also meet all of
these conditions:
a) You must cause the modified files to carry prominent notices
stating that you changed the files and the date of any change.
b) You must cause any work that you distribute or publish, that in
whole or in part contains or is derived from the Program or any
part thereof, to be licensed as a whole at no charge to all third
parties under the terms of this License.
c) If the modified program normally reads commands interactively
when run, you must cause it, when started running for such
interactive use in the most ordinary way, to print or display an
announcement including an appropriate copyright notice and a
notice that there is no warranty (or else, saying that you provide
a warranty) and that users may redistribute the program under
these conditions, and telling the user how to view a copy of this
License. (Exception: if the Program itself is interactive but
does not normally print such an announcement, your work based on
the Program is not required to print an announcement.)
These requirements apply to the modified work as a whole. If identifiable sections of that work are not derived from the
Program, and can be reasonably considered independent and separate works in themselves, then this License, and its
terms, do not apply to those sections when you distribute them as separate works. But when you distribute the same
sections as part of a whole which is a work based on the Program, the distribution of the whole must be on the terms of
this License, whose permissions for other licensees extend to the entire whole, and thus to each and every part regardless
of who wrote it.
Thus, it is not the intent of this section to claim rights or contest your rights to work written entirely by you; rather, the
intent is to exercise the right to control the distribution of derivative or collective works based on the Program.
In addition, mere aggregation of another work not based on the Program with the Program (or with a work based on the
Program) on a volume of a storage or distribution medium does not bring the other work under the scope of this License.
You may copy and distribute the Program (or a work based on it, under Section 2) in object code or executable form
under the terms of Sections 1 and 2 above provided that you also do one of the following:
Page 54

a) Accompany it with the complete corresponding machine-readable
g
source code, which must be distributed under the terms of Sections
1 and 2 above on a medium customarily used for software interchange; or,
b) Accompany it with a written offer, valid for at least three
years, to give any third party, for a charge no more than your
cost of physically performing source distribution, a complete
machine-readable copy of the corresponding source code, to be
distributed under the terms of Sections 1 and 2 above on a medium
customarily used for software interchange; or,
c) Accompany it with the information you received as to the offer
to distribute corresponding source code. (This alternative is
allowed only for noncommercial distribution and only if you
received the program in object code or executable form with such
an offer, in accord with Subsection b above.)
The source code for a work means the preferred form of the work for making modifications to it. For an executable work,
complete source code means all the source code for all modules it contains, plus any associated interface definition files,
plus the scripts used to control compilation and installation of the executable. However, as a special exception, the source
code distributed need not include anything that is normally distributed (in either source or binary form) with the major
components (compiler, kernel, and so on) of the operating system on which the executable runs, unless that component
itself accompanies the executable.
If distribution of executable or object code is made by offering access to copy from a designated place, then offering
equivalent access to copy the source code from the same place counts as distribution of the source code, even though
third parties are not compelled to copy the source along with the object code.
You may not copy, modify, sublicense, or distribute the Program except as expressly provided under this License. Any
attempt otherwise to copy, modify, sublicense or distribute the Program is void, and will automatically terminate your
rights under this License. However, parties who have received copies, or rights, from you under this License will not have
their licenses terminated so long as such parties remain in full compliance.
You are not required to accept this License, since you have not signed it. However, nothing else grants you permission to
modify or distribute the Program or its derivative works. These actions are prohibited by law if you do not accept this
License. Therefore, by modifying or distributing the Program (or any work based on the Program), you indicate your
acceptance of this License to do so, and all its terms and conditions for copying, distributing or modifying the Program or
works based on it.
Each time you redistribute the Program (or any work based on the Program), the recipient automatically receives a license
from the original licensor to copy, distribute or modify the Program subject to these terms and conditions. You may not
impose any further restrictions on the recipients' exercise of the rights granted herein. You are not responsible for
enforcing compliance by third parties to this License.
If, as a consequence of a court judgment or allegation of patent infringement or for any other reason (not limited to
patent issues), conditions are imposed on you (whether by court order, agreement or otherwise) that contradict the
conditions of this License, they do not excuse you from the conditions of this License. If you cannot distribute so as to
satisfy simultaneously your obligations under this License and any other pertinent obligations, then as a consequence you
may not distribute the Program at all. For example, if a patent license would not permit royalty-free redistribution of the
Program by all those who receive copies directly or indirectly through you, then the only way you could satisfy both it and
this License would be to refrain entirely from distribution of the Program.
If any portion of this section is held invalid or unenforceable under any particular circumstance, the balance of the section
is intended to apply and the section as a whole is intended to apply in other circumstances.
It is not the purpose of this section to induce you to infringe any patents or other property right claims or to contest
validity of any such claims; this section has the sole purpose of protecting the integrity of the free software distribution
system, which is implemented by public license practices. Many people have made generous contributions to the wide
range of software distributed through that system in reliance on consistent application of that system; it is up to the
author/donor to decide if he or she is willin
that choice.
This section is intended to make thoroughly clear what is believed to be a consequence of the rest of this License.
If the distribution and/or use of the Program is restricted in certain countries either by patents or by copyrighted
interfaces, the original copyright holder who places the Program under this License may add an explicit geographical
distribution limitation excluding those countries, so that distribution is permitted only in or among countries not thus
excluded. In such case, this License incorporates the limitation as if written in the body of this License.
to distribute software through any other system and a licensee cannot impose
Page 55

The Free Software Foundation may publish revised and/or new versions of the General Public License from time to time.
g
Such new versions will be similar in spirit to the present version, but may differ in detail to address new problems or
concerns.
Each version is given a distinguishing version number. If the Program specifies a version number of this License which
applies to it and "any later version", you have the option of following the terms and conditions either of that version or of
any later version published by the Free Software Foundation. If the Program does not specify a version number of this
License, you may choose any version ever published by the Free Software Foundation.
If you wish to incorporate parts of the Program into other free programs whose distribution conditions are different, write
to the author to ask for permission. For software which is copyrighted by the Free Software Foundation, write to the Free
Software Foundation; we sometimes make exceptions for this. Our decision will be guided by the two goals of preserving
the free status of all derivatives of our free software and of promoting the sharing and reuse of software generally.
NO WARRANTY
BECAUSE THE PROGRAM IS LICENSED FREE OF CHARGE, THERE IS NO WARRANTY FOR THE PROGRAM, TO THE
EXTENT PERMITTED BY APPLICABLE LAW. EXCEPT WHEN OTHERWISE STATED IN WRITING THE COPYRIGHT HOLDERS
AND/OR OTHER PARTIES PROVIDE THE PROGRAM "AS IS" WITHOUT WARRANTY OF ANY KIND, EITHER EXPRESSED OR
IMPLIED, INCLUDING, BUT NOT LIMITED TO, THE IMPLIED WARRANTIES OF MERCHANTABILITY AND FITNESS FOR A
PARTICULAR PURPOSE. THE ENTIRE RISK AS TO THE QUALITY AND PERFORMANCE OF THE PROGRAM IS WITH YOU.
SHOULD THE PROGRAM PROVE DEFECTIVE, YOU ASSUME THE COST OF ALL NECESSARY SERVICING, REPAIR OR
CORRECTION.
IN NO EVENT UNLESS REQUIRED BY APPLICABLE LAW OR AGREED TO IN WRITING WILL ANY COPYRIGHT HOLDER, OR
ANY OTHER PARTY WHO MAY MODIFY AND/OR REDISTRIBUTE THE PROGRAM AS PERMITTED ABOVE, BE LIABLE TO
YOU FOR DAMAGES, INCLUDING ANY GENERAL, SPECIAL, INCIDENTAL OR CONSEQUENTIAL DAMAGES ARISING OUT OF
THE USE OR INABILITY TO USE THE PROGRAM (INCLUDING BUT NOT LIMITED TO LOSS OF DATA OR DATA BEING
RENDERED INACCURATE OR LOSSES SUSTAINED BY YOU OR THIRD PARTIES OR A FAILURE OF THE PROGRAM TO
OPERATE WITH ANY OTHER PROGRAMS), EVEN IF SUCH HOLDER OR OTHER PARTY HAS BEEN ADVISED OF THE
POSSIBILITY OF SUCH DAMAGES.
END OF TERMS AND CONDITIONS
Qtopia EVALUATION VERSION LICENSE AGREEMENT
Agreement version 1.3
IMPORTANT-READ CAREFULLY:
This Trolltech End-User License Agreement ("Agreement") is a legal agreement between you (either an individual or a
legal entity) ("Licensee") and Trolltech AS ("Trolltech"), and pertains to the Trolltech software product(s) accompanying
this Agreement, which include(s) computer software and may include "online" or electronic documentation, associated
media, and printed materials, including the source code, example programs and the documentation ("Licensed Software").
The Licensed Software is protected by copyright laws and international copyright treaties, as well as other intellectual
property laws and treaties. Trolltech retains all rights not expressly granted. No title, property rights or copyright in the
Licensed Software or in any modifications to the Licensed Software shall pass to the Licensee under any circumstances.
The Licensed Software is licensed, not sold.
By installing, copying, or otherwise using the Licensed Software, Licensee agrees to be bound by the terms of this
Agreement. If Licensee does not agree to the terms of this Agreement, Licensee should not install, copy, or otherwise use
the Licensed Software.
Upon Licensee's acceptance of the terms and conditions of this Agreement, Trolltech grants Licensee the right to use the
Licensed Software in the manner provided below.
Trolltech grants to Licensee a personal, non-exclusive, non-transferable license to make and use copies of the Licensed
Software for the sole purpose of evaluatin
an unlimited number of computers provided that Licensee is the only individual using the Licensed Software.
Licensee may not loan, rent, lease, or license the Licensed Software or any copy of it. Licensee may not alter or remove
any details of ownership, copyright, trademark or other property right connected with the Licensed Software. Licensee
may not modify or distribute the Licensed Software. Licensee may not distribute any software statically or dynamically
linked with the Licensed Software.
Non-Disclosure of Confidential Information: The parties agree that Confidential Information shall mean information
the Licensed Software. Licensee may install copies of the Licensed Software on
Page 56

covering the following: (i) pricing of the Licensed Software, (ii) the Licensed Software's source code, and (ii) the Licensee's
project and business details, disclosed by either of the parties to the other party under this Agreement. Both parties agree
to maintain Confidential Information in confidence by using a reasonable degree of care in order to ensure that no
unauthorized persons shall have access to the Confidential Information. The parties agree that the terms of this section
shall continue in full force and effect irrespective of the expiration or termination of this Agreement for a period of three
(3) years from the Effective Date (as specified below) of this Agreement unless otherwise specified in a future agreement
between the parties. Trolltech and Licensee further agree that each party shall protect the existence and terms of this
Agreement, including information about the evaluation of the Licensed Software in Licensee's business and terms around
such use, as Confidential Information. Confidential Information shall not include that information which (i) becomes part of
the public domain through no breach by any of the parties; (ii) is independently developed without use of Confidential
Information; or (iii) is rightfully disclosed by a third party.
The right to use the Licensed Software is time-limited. All rights granted to Licensee in this agreement will be void after
the end of the evaluation period, which is no later than 31 days after Licensee received the Licensed Software.
The Licensed Software may provide links to third party libraries, content or code (collectively "Third Party Libraries") to
implement various functions. Third Party Libraries do not comprise part of the Licensed Software. Access to Third Party
Libraries is included along with the Licensed Software delivery as a convenience only. The source code and libraries in
such Third Party Libraries may be listed in the "../src/3rdparty" source tree delivered with the Licensed Software, as may
be amended from time to time, and do not comprise any of the Licensed Software. Licensee acknowledges (1) that some
Third Party Libraries may require additional licensing from the owners or licensors of such, and (2) that use, copying or
distribution of any of the Licensed Software referencing any portion of a Third Party Library may require appropriate
licensing from such third parties.
WARRANTY DISCLAIMER: THE LICENSED SOFTWARE IS LICENSED TO LICENSEE "AS IS". TO THE MAXIMUM EXTENT
PERMITTED BY APPLICABLE LAW, TROLLTECH ON BEHALF OF ITSELF AND ITS SUPPLIERS, DISCLAIMS ALL
WARRANTIES AND CONDITIONS, EITHER EXPRESS OR IMPLIED, INCLUDING, BUT NOT LIMITED TO, IMPLIED
WARRANTIES OF MERCHANTABILITY, FITNESS FOR A PARTICULAR PURPOSE, TITLE AND NON-INFRINGEMENT WITH
REGARD TO THE LICENSED SOFTWARE. TROLLTECH DOES NOT WARRANT THAT THE LICENSED SOFTWARE WILL
SATISFY LICENSEE'S REQUIREMENTS OR THAT IT IS WITHOUT DEFECT OR ERROR OR THAT THE OPERATION THEREOF
WILL BE UNINTERRUPTED. ALL USE OF AND RELIANCE ON THE LICENSED SOFTWARE IS AT THE SOLE RISK OF AND
RESPONSIBILITY OF LICENSEE.
LIMITATION OF LIABILITY: IF, TROLLTECH'S WARRANTY DISCLAIMER NOTWITHSTANDING, TROLLTECH IS HELD
LIABLE TO LICENSEE, BASED ON THE LICENSED SOFTWARE, TROLLTECH'S ENTIRE LIABILITY TO LICENSEE AND
LICENSEE'S EXCLUSIVE REMEDY SHALL BE, AT TROLLTECH'S OPTION, EITHER (A) RETURN OF THE PRICE LICENSEE
PAID FOR THE LICENSED SOFTWARE, OR (B) REPAIR OR REPLACEMENT OF THE LICENSED SOFTWARE, PROVIDED
LICENSEE RETURNS TO TROLLTECH ALL COPIES OF THE LICENSED SOFTWARE AS ORIGINALLY DELIVERED TO
LICENSEE. TROLLTECH SHALL NOT UNDER ANY CIRCUMSTANCES BE LIABLE TO LICENSEE BASED ON FAILURE OF THE
LICENSED SOFTWARE IF THE FAILURE RESULTED FROM ACCIDENT, ABUSE OR MISAPPLICATION, NOR SHALL
TROLLTECH UNDER ANY CIRCUMSTANCES BE LIABLE FOR SPECIAL DAMAGES, PUNITIVE OR EXEMPLARY DAMAGES,
DAMAGES FOR LOSS OF PROFITS OR INTERRUPTION OF BUSINESS OR FOR LOSS OR CORRUPTION OF DATA. ANY
AWARD OF DAMAGES FROM TROLLTECH TO YOU SHALL NOT EXCEED THE TOTAL AMOUNT LICENSEE HAS PAID TO
TROLLTECH IN CONNECTION WITH THIS AGREEMENT.
GENERAL PROVISIONS
This Agreement may only be modified in writing signed by authorized representatives of Licensee and Trolltech. In case of
a conflict between the Agreement and the terms of any purchase order or other ordering document, the Agreement shall
prevail. If any provision of the Agreement is found void or unenforceable, the remainder will remain valid and enforceable
according to its terms. If any remedy provided is determined to have failed for its essential purpose, all limitations of
liability and exclusions of damages set forth in this Agreement shall remain in effect.
This Agreement shall be construed, interpreted and governed by the laws of Norway, the legal venue to be Oslo City
Court. Trolltech reserves all rights not specifically granted in this Agreement
|
Troubleshooting|Terminology
|
ETC
Service Centers
If you need a product service, contact or visit a Samsung service center.
For services for network connection and the Server.
Services Contacts
|
Service Centers
Declaration of
|
Conformity
|
Page 57

Samsung Electronics web site http://www.samsung.com
If you have any questions or comments relating to Samsung products, please contact the
SAMSUNG customer care center.
North America
U.S.A 1-800-SAMSUNG (7267864) http://www.samsung.com/us
CANADA 1-800-SAMSUNG (7267864) http://www.samsung.com/ca
MEXICO 01-800-SAMSUNG (7267864) http://www.samsung.com/mx
Latin America
ARGENTINE 0800-333-3733 http://www.samsung.com/ar
BRAZIL
CHILE 800-SAMSUNG(726-7864) http://www.samsung.com/cl
COLOMBIA 01-8000112112 http://www.samsung.com/co
COSTA RICA 0-800-507-7267 http://www.samsung.com/latin
ECUADOR 1-800-10-7267 http://www.samsung.com/latin
EL SALVADOR 800-6225 http://www.samsung.com/latin
GUATEMALA 1-800-299-0013 http://www.samsung.com/latin
HONDURAS 800-7919267 http://www.samsung.com/latin
JAMAICA 1-800-234-7267 http://www.samsung.com/latin
NICARAGUA 00-1800-5077267 http://www.samsung.com/latin
PANAMA 800-7267 http://www.samsung.com/latin
PUERTO RICO 1-800-682-3180 http://www.samsung.com/latin
REP. DOMINICA 1-800-751-2676 http://www.samsung.com/latin
TRINIDAD & TOBAGO 1-800-SAMSUNG(726-7864) http://www.samsung.com/latin
0800-124-421
4004-0000
http://www.samsung.com
VENEZUELA 0-800-100-5303 http://www.samsung.com/latin
Europe
AUSTRIA 0800-SAMSUNG(726-7864) http://www.samsung.com/at
BELGIUM 02 201 2418 http://www.samsung.com/be
CZECH REPUBLIC 800-726-786 (800 - SAMSUNG) http://www.samsung.com/cz
DENMARK 70 70 19 70 http://www.samsung.com/dk
EIRE 0818 717 100 http://www.samsung.com/ie
FINLAND 030-6227 515 http://www.samsung.com/fi
FRANCE
3260 SAMSUNG (€ 0,15/Min)
http://www.samsung.com/fr
Page 58

08 25 08 65 65 (€ 0,15/Min)
GERMANY
HUNGARY 06-80-SAMSUNG(726-7864) http://www.samsung.com/hu
ITALIA 800-SAMSUNG(726-7864) http://www.samsung.com/it
LUXEMBURG 02 261 03 710 http://www.samsung.com/lu
NETHERLANDS 0900-SAMSUNG (726-7864 € 0,10/Min) http://www.samsung.com/nl
NORWAY 815-56 480 http://www.samsung.com/no
POLAND
PORTUGAL 80820-SAMSUNG(726-7864) http://www.samsung.com/pt
SLOVAKIA 0800-SAMSUNG (7267864) http://www.samsung.com/sk
SPAIN 902-1-SAMSU(72678) http://www.samsung.com/es
SWEDEN 0771-400 200 http://www.samsung.com/se
SWITZERLAND 0800-SAMSUNG(726-7864) http://www.samsung.com/ch
U.K 0845 SAMSUNG (7267864) http://www.samsung.com/uk
01805 -SAMSUNG(726-7864)
(€ 0,14/Min)
0 801 801 881
022-607-93-33
http://www.samsung.de
http://www.samsung.com/pl
CIS
ESTONIA 800-7267 http://www.samsung.ee
LATVIA 8000-7267 http://www.samsung.com/lv
LITHUANIA 8-800-77777 http://www.samsung.lt
KAZAKHSTAN 8-10-800-500-55-500 http://www.samsung.kz
KYRGYZSTAN 00-800-500-55-500
RUSSIA 8-800-555-55-55 http://www.samsung.ru
TADJIKISTAN 8-10-800-500-55-500
UKRAINE 8-800-502-0000 http://www.samsung.ua
UZBEKISTAN 8-10-800-500-55-500 http://www.samsung.com/kz_ru
Asia Pacific
AUSTRALIA 1300 362 603 http://www.samsung.com/au
800-810-5858
CHINA
400-810-5858
010-6475 1880
http://www.samsung.com/cn
HONG KONG : 3698-4698 http://www.samsung.com/hk
3030 8282
INDIA
INDONESIA 0800-112-8888 http://www.samsung.com/id
JAPAN 0120-327-527 http://www.samsung.com/jp
MALAYSIA 1800-88-9999 http://www.samsung.com/my
NEW ZEALAND 0800 SAMSUNG (0800 726 786) http://www.samsung.com/nz
PHILIPPINES 1800-10-SAMSUNG(726-7864) http://www.samsung.com/ph
1800 110011
1-800-3000-8282
http://www.samsung.com/in
Page 59

SINGAPORE 1800-SAMSUNG(726-7864) http://www.samsung.com/sg
O
(
(
o
T
a
A
THAILAND
TAIWAN 0800-329-999 http://www.samsung.com/tw
VIETNAM 1 800 588 889 http://www.samsung.com/vn
SOUTH AFRICA 0860-SAMSUNG(726-7864) http://www.samsung.com/za
TURKEY 444 77 11 http://www.samsung.com/tr
U.A.E 800-SAMSUNG (726-7864)
1800-29-3232
02-689-3232
8000-4726
http://www.samsung.com/th
Middle East & Africa
http://www.samsung.com/ae
peration is subject to the following two conditions:
1) this device may not cause interference, and
2) this device must accept any interference, including interference that may cause undesired
peration of the device.
his digital apparatus does not exceed the Class B limits for radio noise emissions from digital
pparatus as set out in the interference-causing equipment standard entitled ochDigital
pparatus,och ICES-003 of Industry Canada.
Page 60

This equipment has been tested and found to comply with the limits for a class B digital device,
pursuant to part 15 of the FCC Rules. These limits are designed to provide reasonable
protection against harmful interference in a residential installation.
This equipment generates, uses and can radiate radio frequency energy and, if not installed
and used in accordance with the instructions, may cause harmful interference to radio
communications. However, there is no guarantee that interference will not occur in a particular
installation. If this equipment does cause harmful interference to radio or television reception,
which can be determined by turning the equipment off and on, the user is encouraged to try to
correct the interference by one or more of the following measures:
---Reorient or relocate the receiving antenna.
---Increase the separation between the equipment and receiver.
---Connect the equipment into an outlet on a circuit different from that to which the receiver is
connected.
---Consult the dealer or an experienced radio/TV technician for help.
You are cautioned that changes or modifications not expressly approved by the party
responsible for compliance could void your authority to operate the equipment.
FCC RF Radiation Exposure Statement:
1. This Transmitter must not be co-located or operating in conjunction with any other antenna
or transmitter.
2. This equipment complies with FCC RF radiation exposure limits set forth for an uncontrolled
environment. This equipment
should be installed and operated with a minimum distance of 20 centimeters between the
radiator and your body.
Installation and use of this Wireless LAN device must be in strict accordance with the
instructions included in the user documentation provided with the product. Any changes or
modifications (including the antennas) made to this device that are not expressly approved by
the manufacturer may void the user’ s authority to operate the equipment. The manufacturer is
not responsible for any radio or television interference caused by unauthorized modification of
this device, or the substitution of the connecting cables and equipment other than
manufacturer specified. It is the responsibility of the user to correct any interference caused by
such unauthorized modification, substitution or attachment. Manufacturer and its authorized
resellers or distributors will assume no liability for any damage or violation of government
regulations arising from failing to comply with these guidelines.
 Loading...