

Page 1
3 Disassembly and Reassembly
This section of the service manual describes the disassembly and reassembly procedures for the
AV17** monitor.
WARNING: This monitor contains electrostatically sensitive devices. Use caution when handling
these components.
3-1 Disassembly
Cautions : 1. Disconnect the monitor from the power source before disassembly.
2. Follow these directions carefully; never use metal instruments to pry apart the cabinet.
3. R/Cover opening jig : BH81-00001A
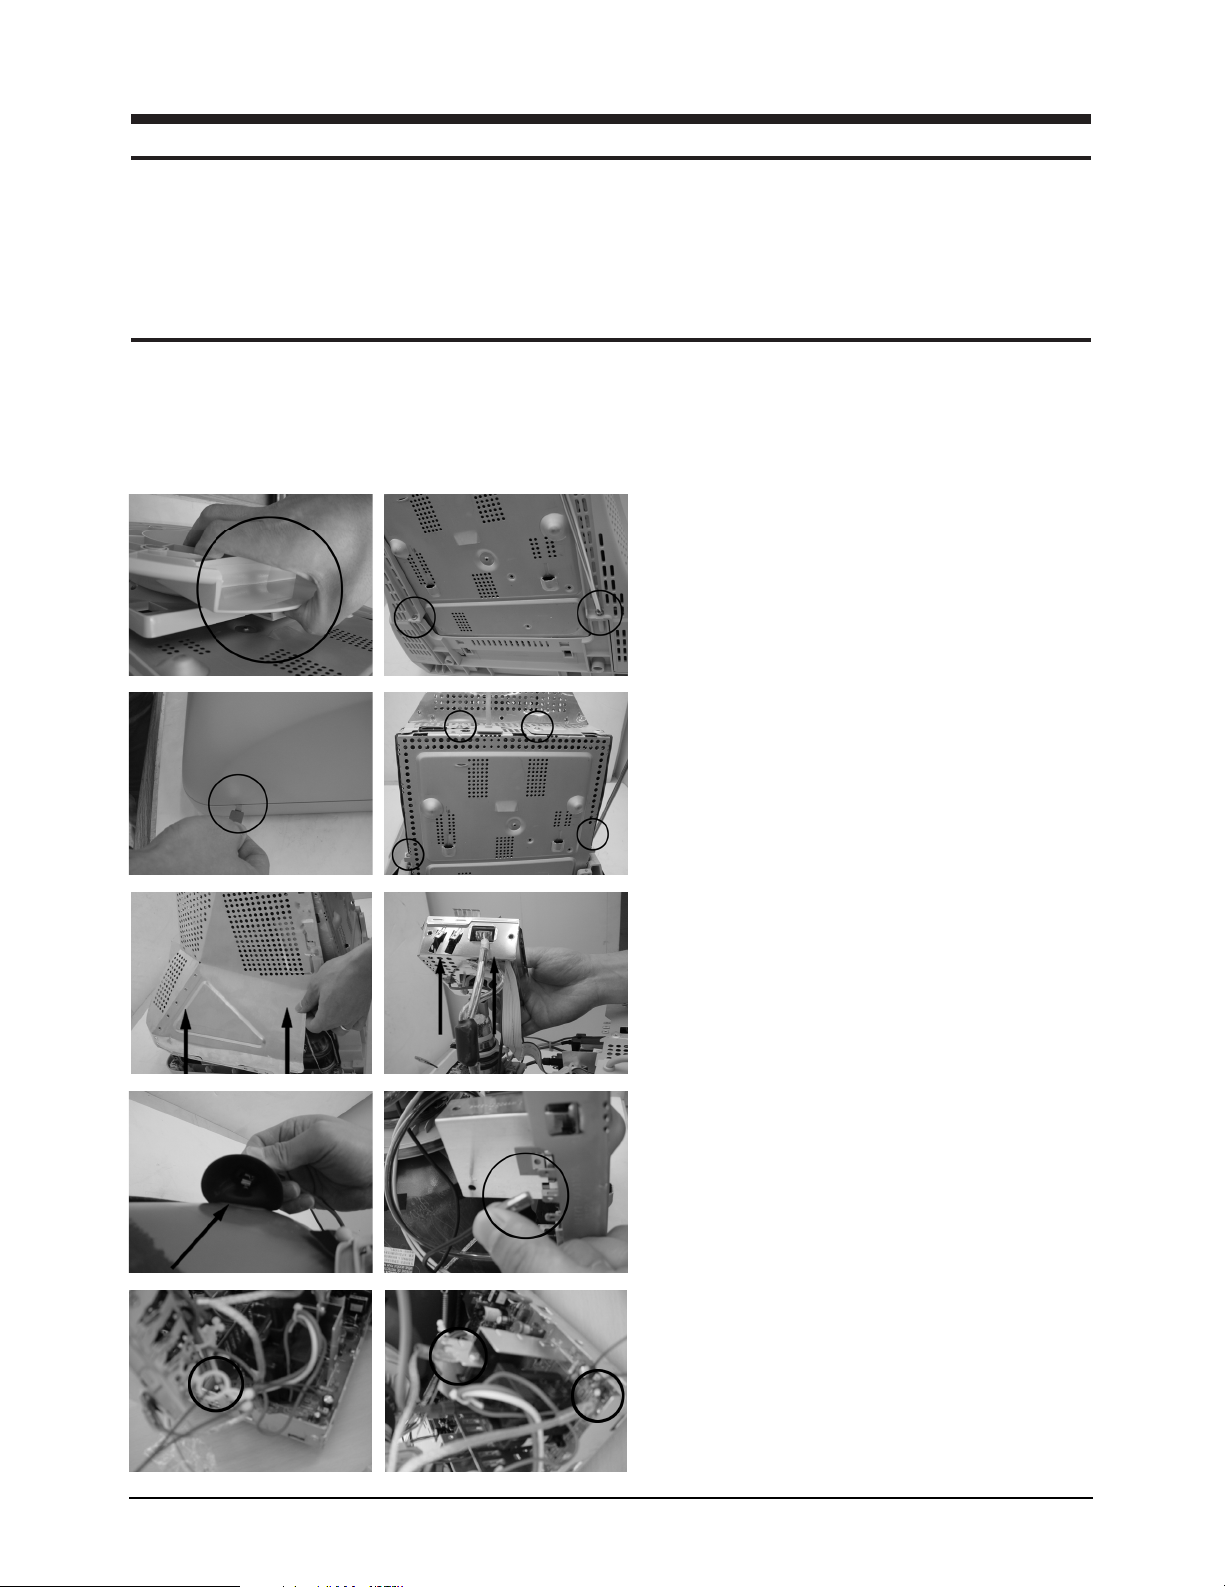
3-1-1 AV17K*
1. Release the snaps on the rear stand and pull
the stand backwards from the monitor.
Insert the opening jig into the grooves at each
side and press until cilcks.
2. When the snaps on the rear cover release, lift
up the rear cover and set aside. Remove 4
screws from the rear top shield.
3. Lift up the top shield, then release the CRT
socket board from the CRT.
4. Remove the higt voltage cap from the CRT.
(CAUTION : High voltage may be present)
Disconnect CRT ground wire from the CRT.
5. Disconnect (-) pulse blue wire and EMI
ground wire from the CRT.
AV17** 3-1
Page 2
3 Disassembly and Reassembly
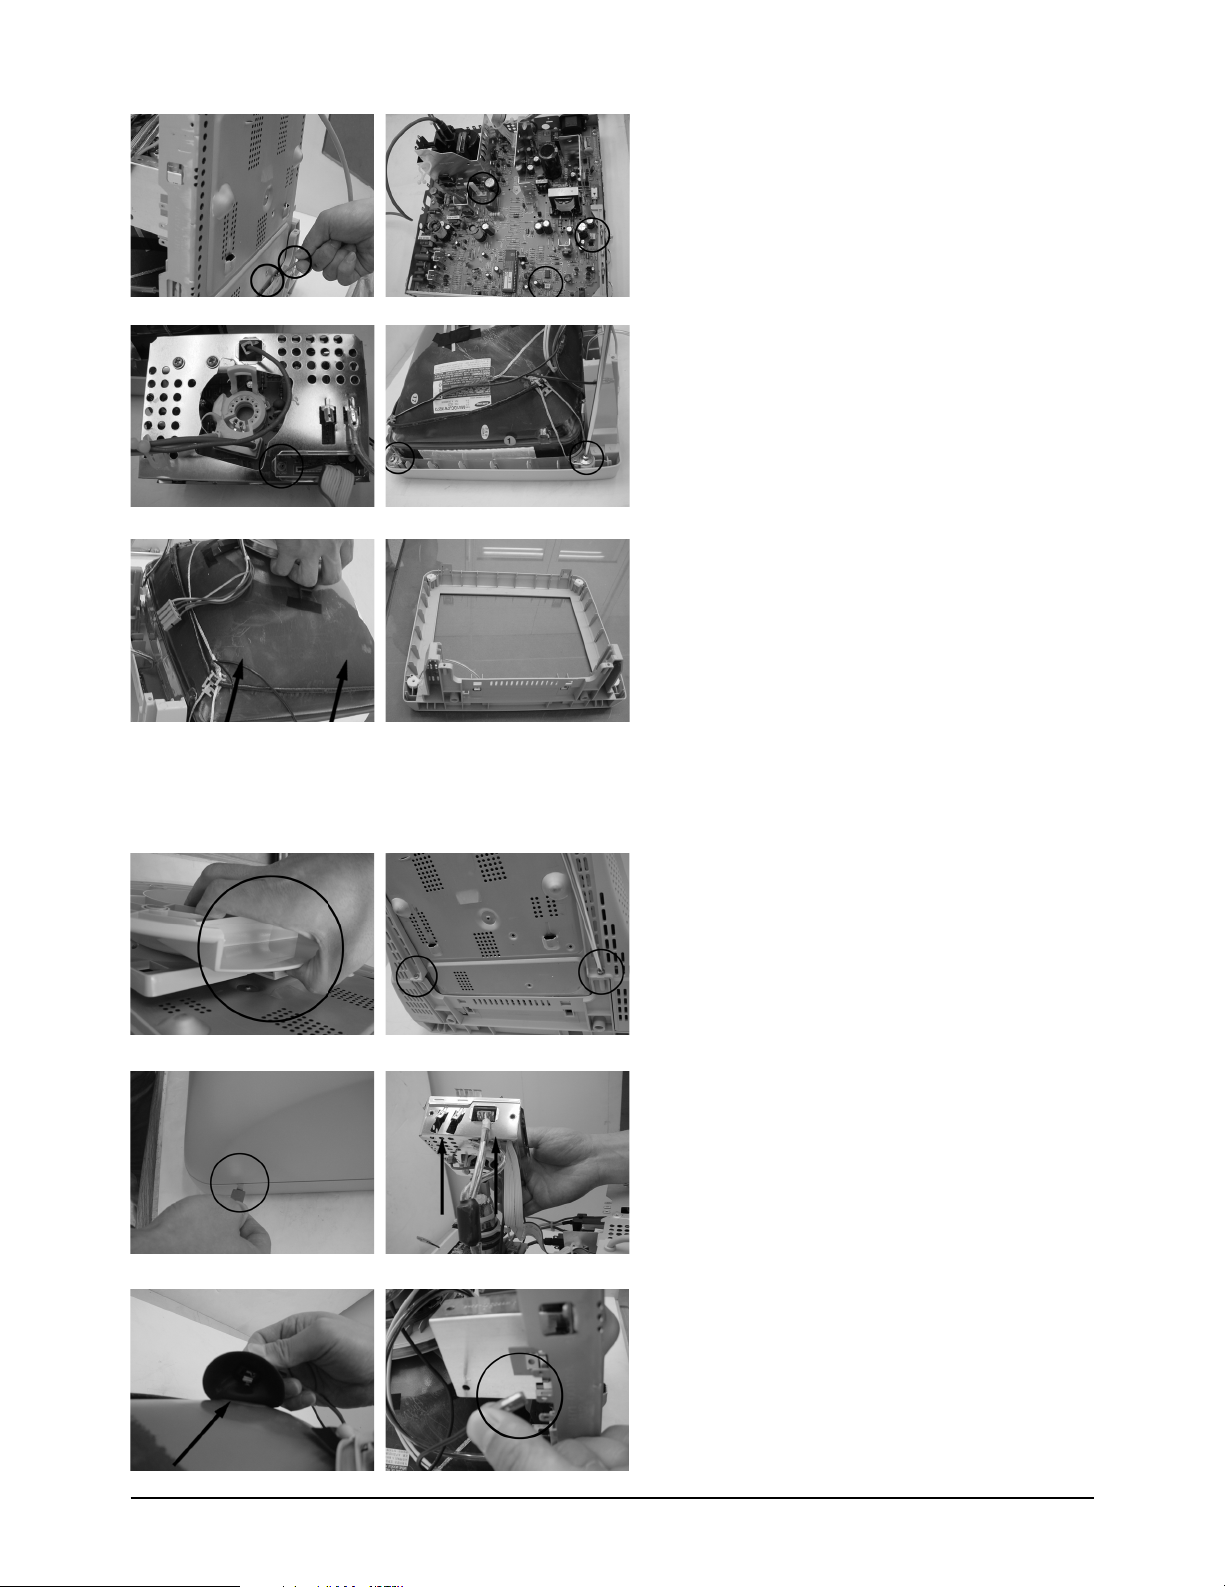
6. Using the jig, release the snaps connecting the
front cover and the PCB. Lift up the bottom
to separate the two sheilds and disconnect
Function wrie, CRT DY connecter cable,
degaussing wire.
7. Remove the CRT ground wire connecter from
CRT soket. Next, remove the 4 screws at CRT
corners.
8. Lift up the CRT from the cover front.
3-1-2 AV17L*
1. Release the snaps on the rear stand and pull
the stand backwards from the monitor.
Insert the opening jig into the grooves at each
side and press until cilcks.
2. When the snaps on the rear cover release, lift
up the rear cover and set aside and release the
CRT socket board from the CRT.
3. Remove the higt voltage cap from the CRT.
(CAUTION : High voltage may be present)
Disconnect CRT ground wire from the CRT.
3-2 AV17**
Page 3
3 Disassembly and Reassembly
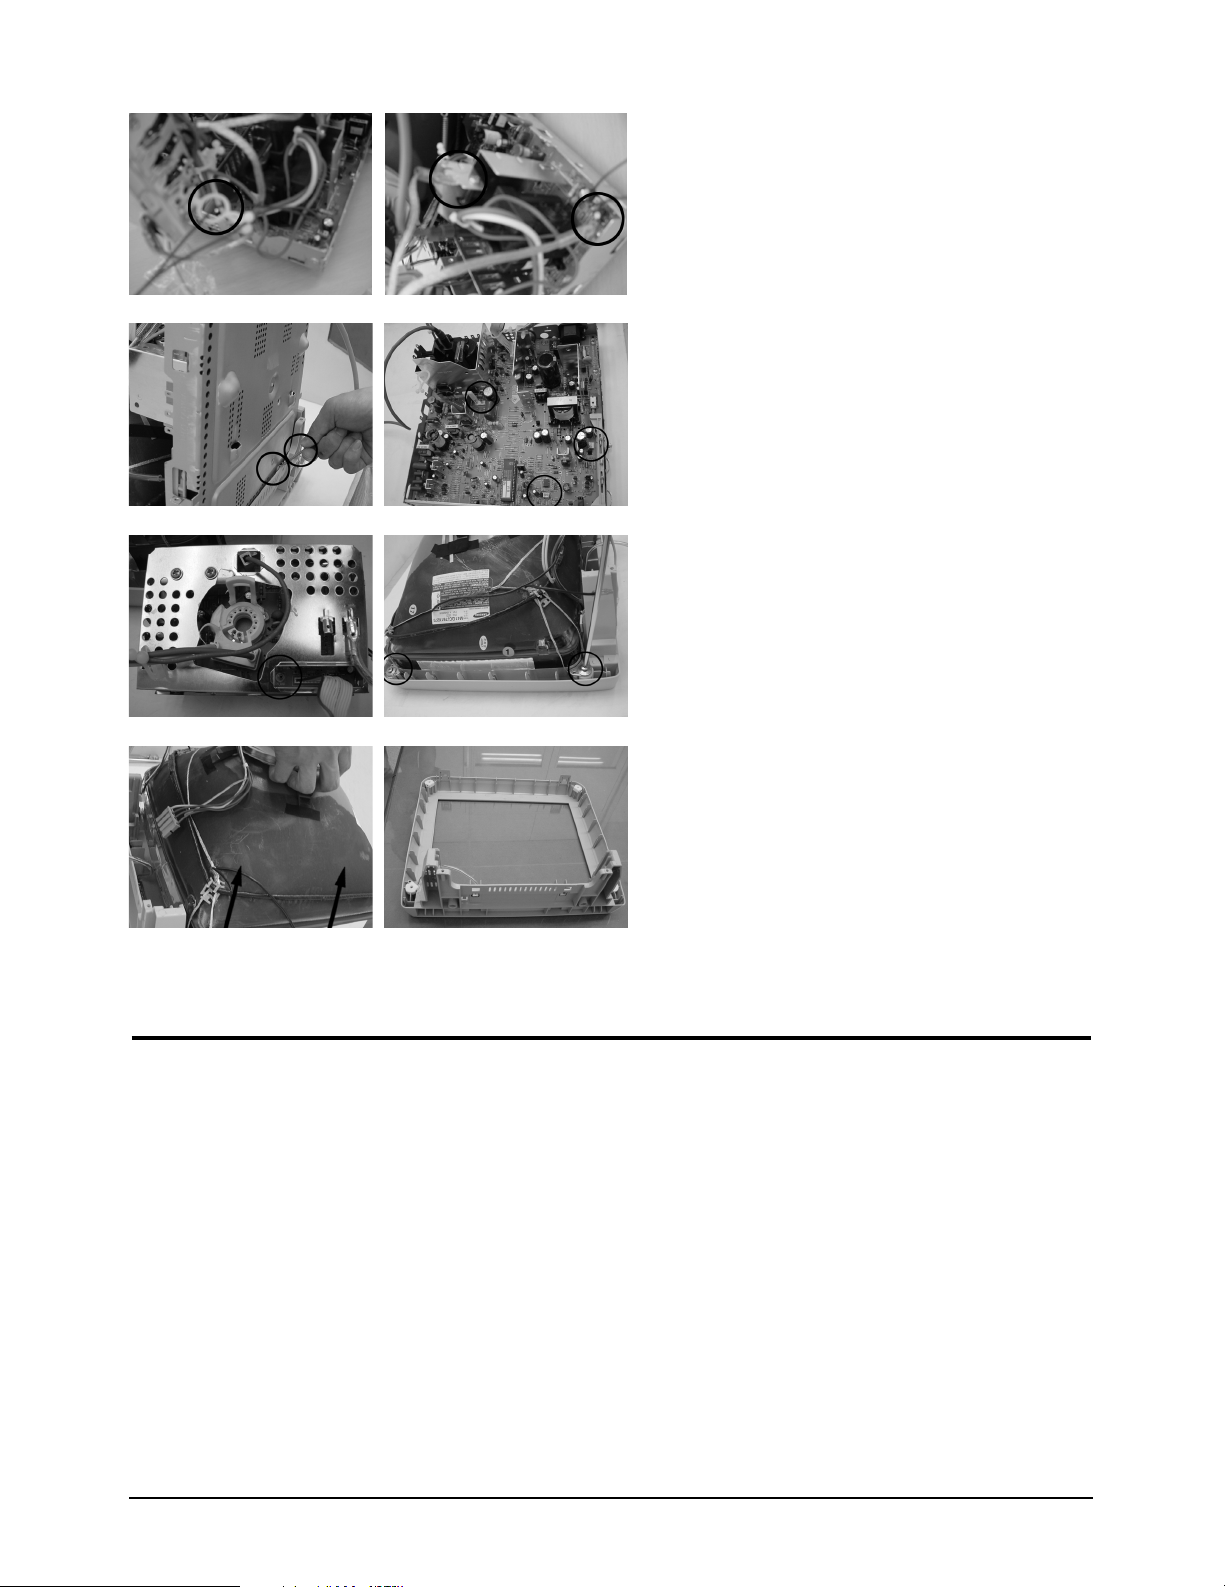
4. Disconnect (-) pulse blue wire and EMI
ground wire from the CRT.
5. Using the jig, release the snaps connecting the
front cover and the PCB. Lift up the bottom
to separate the two sheilds and disconnect
Function wrie, CRT DY connecter cable,
degaussing wire.
6. Remove the CRT ground wire connecter from
CRT soket. Next, remove the 4 screws at CRT
corners.
7. Lift up the CRT from the cover front.
3-2 Reassembly
Reassembly procedures are in the reverse order of dissasembly procedures.
AV17** 3-3
Page 4

3 Disassembly and Reassembly
Memo
3-4 AV17**
 Loading...