

Page 1
OWNER’S MANUAL
Page 2

Important Safety Information
RISQUE DE CHOC ÉLECTRONIQUE -
CAUTION: TO REDUCE THE RISK OF ELECTRIC SHOCK, DO NOT REMOVE COVER (OR BACK). NO
USER-SERVICEABLE PARTS INSIDE. REFER SERVICING TO QUALIFIED SERVICE PERSONNEL.
This lightning flash with arrowhead symbol within an equilateral triangle is intended to alert
the user to the presence of non-insulated “dangerous voltage” within the product’s enclosure
that may be of sufficient magnitude to constitute a risk of electric shock.
The exclamation point within an equilateral triangle is intended to alert the user to the presence of important operating and maintenance instructions in the literature accompanying
the appliance.
1. Read these instructions.
2. Keep these instructions.
3. Heed all warnings.
4. Follow all instructions.
5. This apparatus shall not be exposed to dripping or splashing liquid and no object filled
with liquid, such as a vase, should be placed
on the apparatus.
6. Clean only with a dry cloth.
7. Do not block any of the ventilation openings.
Install in accordance with the manufacturer's
instructions.
8. Do not install near any heat sources such as
radiators, heat registers, stoves, or other apparatuses (including amplifiers) that produce
heat.
9. Only use attachments/accessories specified
by the manufacturer.
10. Unplug this apparatus during lightning
storms or when not in use for long periods
of time.
11. Do not override the intended purpose of the
polarized or grounding-type plug. A polarized
plug has two blades, with one wider than the
other. A grounding-type plug has two blades
and a third grounding prong. The wide blade,
or third prong, is provided for your safety. If
the provided plug does not fit your outlet,
consult an electrician to replace the obsolete
outlet.
12. Protect the power cord from being walked on
or pinched, particularly at the prongs, convenience receptacles, the point where they exit
from the apparatus.
13. Use only with the cart stand, tripod bracket,
or table specified by the manufacture, or
sold with the apparatus.
When a cart is used,
utilize caution when
moving the cart/apparatus combination to avoid
injury from tip-over.
14. Refer all servicing to
qualified service personnel. Servicing is required if the apparatus
has been damaged in any way, such as
power-supply cord or plug breakage, damage
due to liquid or objects falling onto the apparatus, exposure to rain or moisture, or if
the apparatus does not operate normally, or
has been dropped.
15. POWER ON/OFF SWITCH: For products with
a power switch, the power switch DOES NOT
break the connection from the mains.
16. MAINS DISCONNECT: The plug should
remain readily operable. For rack-mount or
installation where plug is not accessible, an
all-pole mains switch with a contact separation of at least 3 mm in each pole shall be
incorporated into the electrical installation of
the rack or building.
17. FOR UNITS EQUIPPED WITH EXTERNALLY
ACCESSIBLE FUSE RECEPTACLE: Replace
fuse with same type and rating only.
18. MULTIPLE-INPUT VOLTAGE: This equipment
may require the use of a different line cord,
attachment plug, or both, depending on the
available power source at installation. Connect this equipment only to the power source
indicated on the equipment rear panel. To
reduce the risk of fire or electric shock, refer
servicing to qualified service personnel or
equivalent.
AVIS
NE PAS OUVRIR
Page 3

Table of Contents
Introduction . . . . . . . . . . . . . . . . . . . . . . . . . . . . 4
Features . . . . . . . . . . . . . . . . . . . . . . . . . . . . . . 5
Front Panel Layout . . . . . . . . . . . . . . . . . . . . . . . . . 6
Rear Panel Layout . . . . . . . . . . . . . . . . . . . . . . . . . 7
Connecting the Resolv Monitors . . . . . . . . . . . . . . . . . . . 8
Connecting an Active Subwoofer . . . . . . . . . . . . . . . . . . 9
Positioning your Studio Monitors . . . . . . . . . . . . . . . . . 10
Specifications . . . . . . . . . . . . . . . . . . . . . . . . . . 12
Resolv SE Series Connections . . . . . . . . . . . . . . . . . . . 14
Copyright 2012, Samson Technologies Corp.
v1.1
Samson Technologies Corp.
45 Gilpin Avenue
Hauppauge, New York 11788-8816
Phone: 1-800-3-SAMSON (1-800-372-6766)
Fax: 631-784-2201
www.samsontech.com
Owner's Manual
Resolv SE Studio Monitors
3
Page 4

Introduction
Thank you for purchasing a Resolv SE series studio reference monitor from Samson Technologies! The Resolv studio monitors are active speakers that incorporate
internal biamplied power and electronic crossovers for optimal tonal balance
and precise performance. Each speaker features a 1.25” neodymium, soft-dome
tweeter with ferrofluid cooling, mounted in a waveguide in the center of the
front baffle. This combination of components provides a precise high frequency
response, and a wide listening area. To deliver an accurate mid-range and tight
low end, our engineers have carefully voiced each model utilizing glass-fiber lowfrequency drivers with butyl surrounds. This ensures even stereo imaging without
hyped frequency response. The cabinets are constructed out of medium density
fiberboard (MDF) with internal bracing to create a rigid enclosure which reduces
vibration and increases performance. The edges of the cabinets are rounded to
reduce cabinet-edge diffraction.
The Resolv SE monitors have been designed as near-field monitors ideal for use in
studios, video post-production suites, fixed installations, or as playback speakers.
They are also well-suited to be part of a multi-channel audio system.
In these pages, you’ll find a detailed description of the features of the Resolv
SE5, SE6, and SE8 models, as well as a guided tour through the control panel,
and instructions for setup and use. You’ll also find a warranty card enclosed—
please don’t forget to fill it out and mail it in so that you can receive online technical support, and so that we can send you updated information about these and
other Samson products, in the future.
We recommend you record your serial number in the space provided below for
future reference.
Serial number:_____________________________________
Date of purchase: ___________________________________
With proper care and maintenance, your Resolv studio monitor will operate
trouble-free for many years. Should your speaker ever require servicing, a Return
Authorization (RA) number must be obtained before shipping your unit to Samson. Without this number, the unit will not be accepted. Please call Samson at
1-800-3SAMSON (1-800-372-6766) for an RA number prior to shipping your
unit. Please retain the original packing materials and, if possible, return the unit
in its original carton. If your Resolv monitor was purchased outside of the United
States, contact your local distributor for warranty details and service information.
Also, be sure to check out our website (www.samsontech.com) for information
about our full product line.
4
Resolv SE Studio Monitors
Page 5
Features
The Samson Resolv SE series reference monitors provide smooth, accurate
response for any mixing or critical listening situation. Here are some of their main
features:
• Two-way, bass-reflex, active studio monitor providing extremely accurate
monitoring for recording studio, post-production or multi-media applications
• 1.25” soft-dome tweeter provides extended, accurate high frequency
response with minimal distortion
• Tweeter waveguide designed to provide accurate, even dispersion of highfrequency content for flat on- and off-axis listening areas
• Powered by an internal amplifier specifically designed for optimal performance and maximum SPL. The SE5 has 70 watts of total power, while the
SE6 and SE8 have 100 watts of total power
• Four-position High Frequency Level control allows the listener to contour the
response curve to custom tailor the response that works best in their mixing
environment
• Active electronic crossover utilizing a multi-pole design for linear frequency
response unaffected by signal level
• Tight and controlled low frequency response produced by magnetically
shielded, woven carbon fiber woofers with butyl surround and heavy-duty
motor structures with large voice coils
• Extremely rigid, MDF (Medium Density Fiberboard) construction, delivering
maximum SPL
Owner's Manual
Resolv SE Studio Monitors
5
Page 6

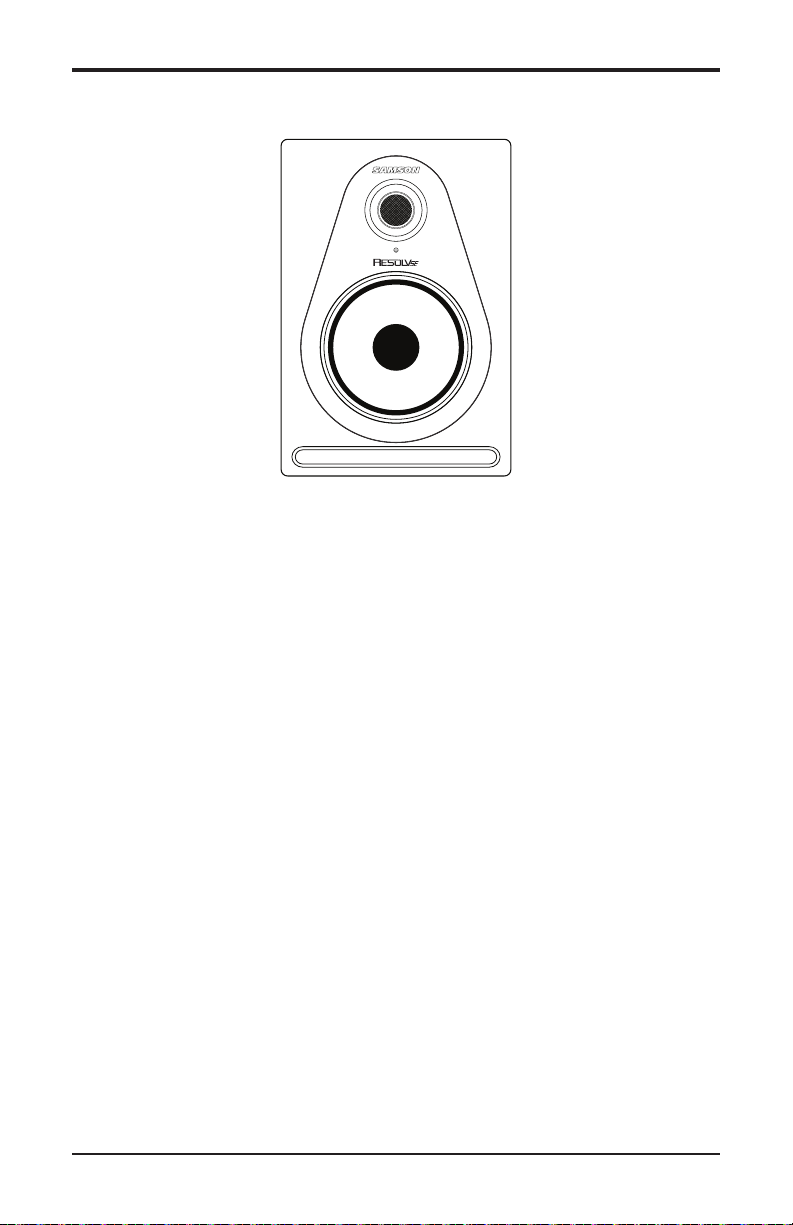
Front Panel Layout
1. Tweeter – 1.25” silk-dome tweeter with ferrofluid-cooled neodymium magnet
provides a natural reproduction of high frequencies while minimizing
distortion resulting in a clear, precise and sweet top end
2. Woofer – Woven carbon fiber, copolymer butyl surround woofers provide each
monitor with tight and controlled mid- and low-frequency response
3. Power Indicator – White LED illuminates indicating the unit is powered on
and ready for operation
4. Enclosure – Solid MDF construction and internal damping maximizes acoustic
efficiency
5. Bass Reflex Port – Front-firing port provides minimal port turbulence and
enhances the linear extended low frequency response
6
Resolv SE Studio Monitors
Page 7

Rear Panel Layout
1. HF LEVEL – Four-position rotary switch used to adjust the high frequency
response. Setting the switch to 0dB (factory setting) produces a flat
response. The -2dB, +2dB and +4dB adjusts a high frequency shelf
above 4kHz. Your room acoustics or listening material will determine the
appropriate setting for your application.
2. VOLUME – Controls the amount of overall output level.
3. XLR Input (SE6 and SE8 only) – Connect a balanced, +4dBu, line level signal
here via standard XLR (microphone) cable.
4. ¼” Input – Connect a balanced, +4dBu, line level signal here via a TRS (Tip,
Ring, Sleeve), or unbalanced TS (Tip, Sleeve) ¼”cable.
5. RCA Input – Used to connect signals from unbalanced, –10dBV devices.
6. POWER Switch – Use this switch to turn the speakers on and off. When
powered on, the front panel LED will light.
7. Voltage Switch – Used to select the operating voltage.
NOTE: Be sure to check that the voltage setting and fuse rating are correct for your country.
8. AC Inlet – Connect the supplied IEC power cable here.
9. Fuse Holder – Holds the mains fuse. To replace the fuse, remove the power
cable and pry the fuse holder open using a flat head screwdriver.
NOTE: Never remove the fuse while the speakers are plugged in.
Owner's Manual 7Resolv SE Studio Monitors
Page 8

Connecting the Resolv Monitors
Control Room Outputs
The Resolv SE series monitors are the perfect addition to any project studio. When
connecting your monitors to a mixer, you should utilize the control room outputs
of your mixer so that you can independently control the level to the speakers
without affecting the main mix output. Follow the simple steps and diagram in
this section to quickly connect your monitors using a standard recording console’s
control room outputs.
1. Lower your mixer’s master outputs until they are completely off.
2. Connect the mixer’s Left Control Room output to the left-side Resolv SE
Series LINE INPUT and the mixer’s Right Control Room output to the rightside Resolv SE Series LINE INPUT. The Resolv SE series connections can be
made via one of the three rear panel Audio Inputs. You can use RCA inputs
for unbalanced, -10dBV level signals, or either the ¼” or XLR (SE6 & SE8
only) inputs for balanced, +4dBu level signals.
Note: Before plugging in and powering on the untis, remember the “last on, first off” rule of
power amplifiers (and powered monitors). When powering up your system, be sure that all
the wires are connected, turn your mixer and any other outboard gear on, and then finally
turn your Resolv SE Series on.
3. Set the Resolv SE Series input Volume control to the 12-o’clock (center
detent) position.
4. Run an audio signal (such as music from a CD) through your mixer and raise
the Control Room level to a comfortable listening volume.
8 Resolv SE Studio Monitors
Page 9

Positioning your Studio Monitors
Positioning the Resolv SE Series
Near field (close to the listener) monitoring has become the choice of many engineers because of the cost and complexities associated with mounting monitors
onto the walls. Positioning your studio monitors correctly is very important. Correct
placement not only creates the proper stereo image, but also minimizes the
effects of your room’s reflections. This is especially important in today’s project
studios since the budget for room acoustics is often close to nothing. By taking
some time and using your ears when setting up your monitors, you can create an
optimal listening environment.
The most important consideration when evaluating room acoustics is the presence
of reflective surfaces near the monitoring area. These can include flat tabletops,
glass mirrors or framed pictures, large open walls and even the surface of your
mixing console. Most reflecting sound will eventually reach the listening position,
but since it is slightly delayed from the direct source, the result is random cancellation of some frequencies, or comb filtering. If possible, remove any and all
reflective surfaces. You may also want to hang some acoustic foam on walls near
the monitors.
When positioning the monitors, you’ll want to set up what is commonly referred
to as the “mix triangle” (shown below). In this ideal configuration, the space
between the left and right monitor is equal to the distance from the listener to
each monitor, forming an equilateral triangle.
Owner's Manual
Resolv SE Studio Monitors
9
Page 10

Positioning your Studio Monitors
Speaker Orientation
A major objective when setting up your studio monitors
is to obtain the best possible
stereo image. The Resolv SE
monitors are designed to be
used in a vertical position,
with the tweeter and woofer
symmetrically in line. Placing
the speaker on its side will cause an offset in sound between the woofer and the
tweeter, limiting your ability to find optimal listening positions.
A Moment of Reflection
When setting the height of your monitor system, be careful to avoid reflections off
the surface of the mixing console. These reflections arrive at the listening position slightly delayed from the original sound, resulting in cancellations and overall
unpredictable response (Figure 1). Visualize straight lines representing the beams
of sound radiating from the monitors and choose a height that reduces the occurrence of reflections that will end up in the prime listening spot. In most cases,
the ideal position is slightly behind and above the mixing console’s meter bridge
(Figure 2). Always use your ears to find the best positioning for your room. Using
monitor stands will assist in placing the speakers in the appropriate position.
10
Figure 1 Figure 2
Resolv SE Studio Monitors
Page 11

Connecting an Active Subwoofer
The Resolv SE monitors are designed to be full-range speakers, but occasionally
you may need to hear the extreme low end. Adding an active subwoofer to extend
the low frequency response of your monitor system can be beneficial when mixing
your music, for example. Typically, it is best to set the subwoofer level to be equal
to that of the Resolv SE main speakers.
Because deep-bass frequencies are non-directional, it is difficult for our ears to
locate the sound source, and the precise placement of the subwoofer is not as
critical as the main speakers. The ideal location is between the two main speakers. If you notice there are frequencies that sound quieter than others, move the
subwoofer slightly to the left or right. If the subwoofer has a polarity switch, try
setting the switch to the opposite phase setting to see if this provides an improved
low frequency response.
To incorporate a subwoofer into your monitor system, connect Left and Right
Control Room outputs of your mixer to the active subwoofer’s line inputs. Then
connect the subwoofer’s line outputs to the Resolv SE series left and right speakers. Run an audio signal (such as music from a CD) through your mixer and raise
the level to a comfortable listening volume. Finally, adjust the crossover frequency
control (if applicable) of the subwoofer to the desired frequency.
Owner's Manual
Resolv SE Studio Monitors
11
Page 12

Specifications
Model SE5
Woofer 5” woven carbon fiber
Tweeter 1.25” Silk Dome
Enclosure Type 2-way Bass Reflex System
Enclosure Vinyl wrapped 3/4” (18mm) MDF
cabinet with painted front baffle
Frequency Response 45Hz - 27kHz +/-3dB
Crossover Frequency 3.19kHz 24dB/oct Linkwitz-Riley
Output Power HF 50 Watts RMS
LF 20 Watts RMS
Input Connectors Unbalanced RCA
Balanced ¼” TRS Phone
Input Impedance 10k ohm
Controls VOLUME Control
HF LEVEL (-2dB, 0dB, +2dB, +4dB)
Power Consumption 125W
Fuse 100V - 120V T1.6AL (slow blow)
220V - 240V T800mAL (slow blow)
Dimensions (L x W x H) 8” x 8.6” x 12.3”
204mm x 218mm x 312mm
Weight 15.25lbs
6.9kg
12
Resolv SE Studio Monitors
Page 13

Specifications
SE6 SE8
6.5” woven carbon fiber 8” woven carbon fiber
1.25” Silk Dome 1.25” Silk Dome
2-way Bass Reflex System 2-way Bass Reflex System
Vinyl wrapped 3/4” (18mm) MDF
cabinet with painted front baffle
40Hz - 27kHz +/-3dB 30Hz - 27kHz +/-3dB
3.19kHz 24dB/oct Linkwitz-Riley 3.19kHz 24dB/oct Linkwitz-Riley
75 Watts RMS 75 Watts RMS
25 Watts RMS 25 Watts RMS
RCA RCA
XLR, ¼” TRS Phone XLR, ¼” TRS Phone
10k ohm 10k ohm
VOLUME Control
HF LEVEL (-2dB, 0dB, +2dB, +4dB)
175W 175W
100V - 120V T2.0AL (slow blow)
220V - 240V T1.0AL (slow blow)
9.3” x 9.9” x 13.6”
236mm x 251mm x 346mm
18lbs
8.2kg
Vinyl wrapped 3/4” (18mm) MDF
cabinet with painted front baffle
VOLUME Control
HF LEVEL (-2dB, 0dB, +2dB, +4dB)
100V - 120V T2.0AL (slow blow)
220V - 240V T1.0AL (slow blow)
11.2” x 12” x 16.25”
285mm x 304mm x 413mm
25lbs
11.4kg
Owner's Manual
Resolv SE Studio Monitors
13
Page 14

Resolv SE Series Connections
Resolv SE Series Wiring Guide
There are several ways to interface the Resolv SE Series, depending on your exact
monitoring set-up. Follow the cable diagrams below for connecting your monitor
system.
RCA to RCA Cable
Unbalanced ¼” to ¼” Cable
Balanced ¼” to ¼” Cable
XLR to XLR Cable
Unbalanced ¼” to RCA
XLR to RCA
14
Resolv SE Studio Monitors
Page 15

If you want to dispose this product, do not mix it with general household waste. There is a
separate collection system for used electronic products in accordance with legislation that
requires proper treatment, recovery and recycling.
Private household in the 27 member states of the EU, in Switzerland and Norway may return their used
electronic products free of charge to designated collection facilities or to a retailer (if you purchase a similar
new one).
For Countries not mentioned above, please contact your local authorities for a correct method of disposal.
By doing so you will ensure that your disposed product undergoes the necessary treatment, recovery and
recycling and thus prevent potential negative effects on the environment and human health.
Page 16

Samson Technologies Corp.
45 Gilpin Avenue
Hauppauge, New York 11788-8816
Phone: 1-800-3-SAMSON (1-800-372-6766)
Fax: 631-784-2201
www.samsontech.com
 Loading...